Wifi Dimmer switch with Tasmota - Tuya Dimmer guide


Dimmer switches have been around for a long time, useful for those situations where you just don’t want a bulb to be at 100% brightness all the time. So what about Wifi dimmer switches that we can add to our smart home?
First of all there are two very obvious questions out the gate:
- Why choose a light switch over a smart bulb?
- Why would you want a dimmer switch?
The first one is easy, a Wifi switch rather than a bulb is great for retaining a physical switch for those who just want to push buttons manually. Sure smart bulbs can have this functionality if you push the light switch twice (assuming its in the on position) you turn it off then back on again, but that’s a pain. Wifi switches are also great for ensuring people can’t turn off your smart lights, since they are always on. Have you ever wondered why your lights didn’t turn on, only to realise someone turned it off at the switch?
The second one is more of a niche situation, my use case for this was so that I could have the bathroom lights turn on in the early hours of the morning and not be blinded, whilst retaining the aforementioned physical switch.
So what products are on the market? Surprisingly if you are in the UK (or perhaps not), there isn’t much choice of Wifi Dimmer switches. All of the ones you will find at the time of writing are based on yet another Tuya product. The US market has more options than we get over here, such as the TP-Link products. We are looking at the Tuya based products today.
This is good for us, by now we know what to expect inside! An ESP8266 of some sort.
Guide:
Hardware:
The only things we need for this is our light dimmer switch and compatible bulb:
- Dimmer switch – make sure if uses the “smart life” or similar Tuya app.
- Dim-able light bulb – light bulbs must be compatible in order to actually dim.
Important note for UK households, make sure your house wiring can support it. You need to have a neutral wire to your light switch.
Preparing the switch
Once you have the switch, it will look like this:
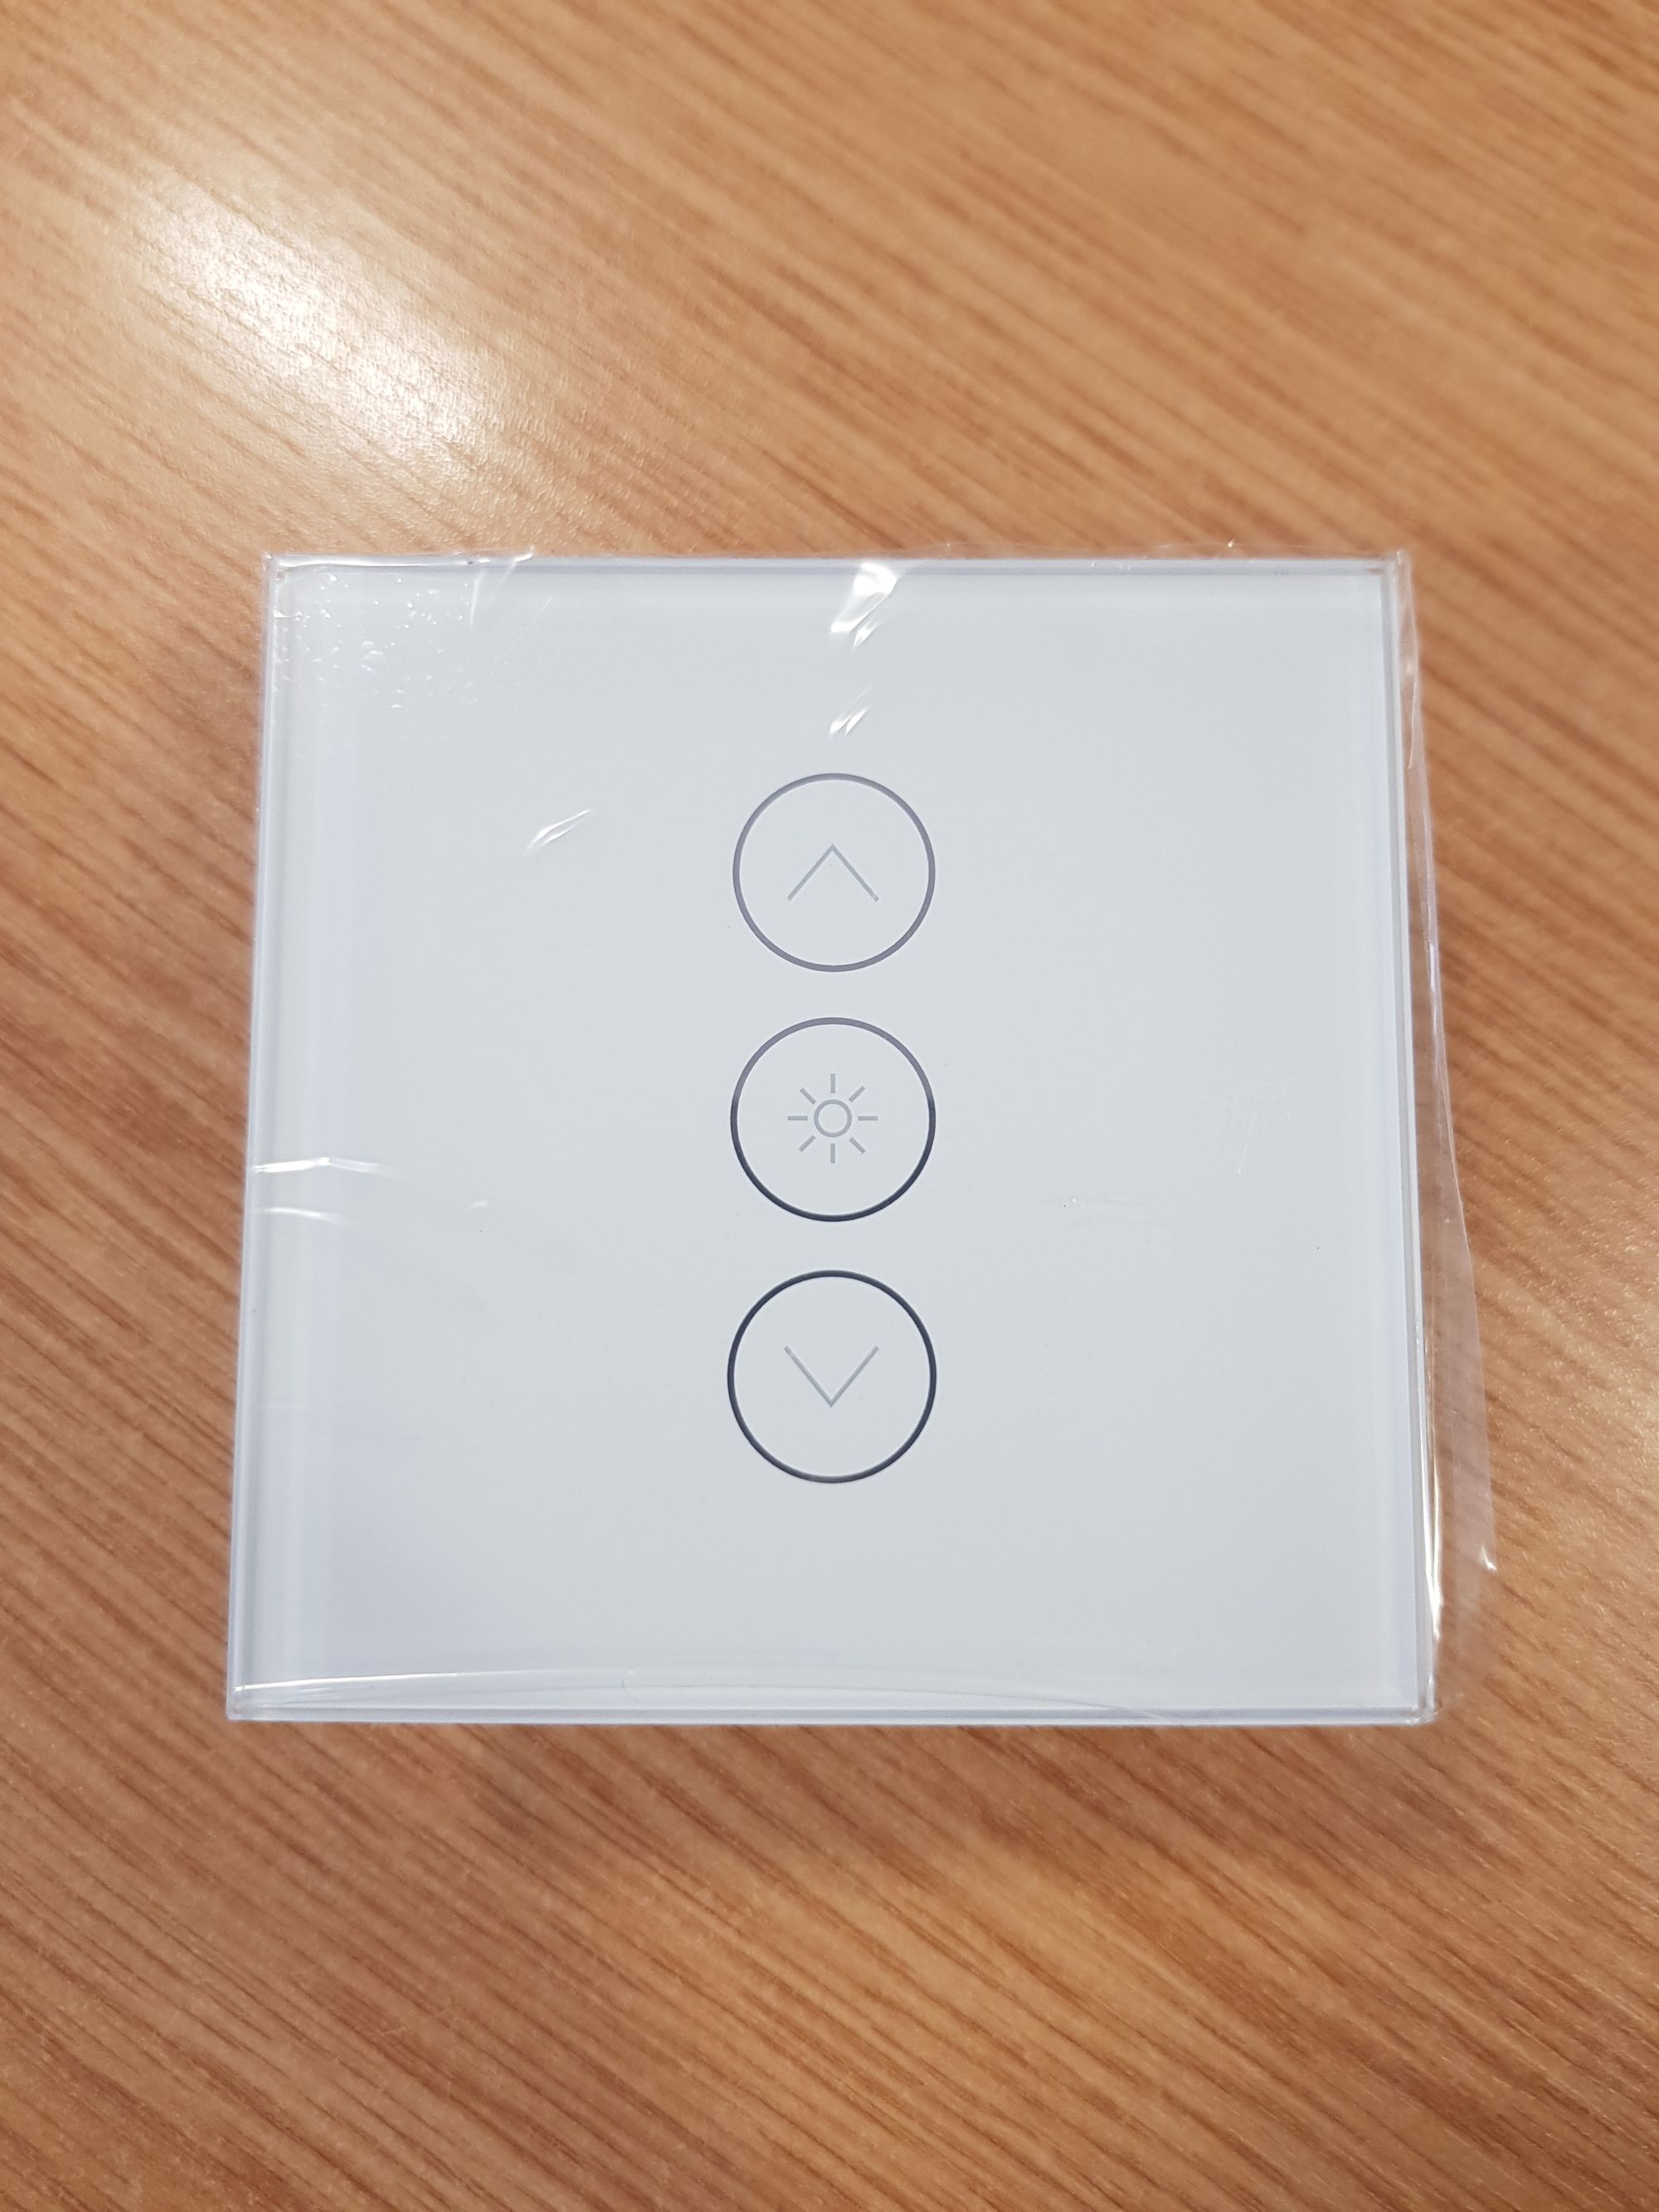
Go ahead and remove the front cover to take a close look at what we are working with. It unhooks very easily:
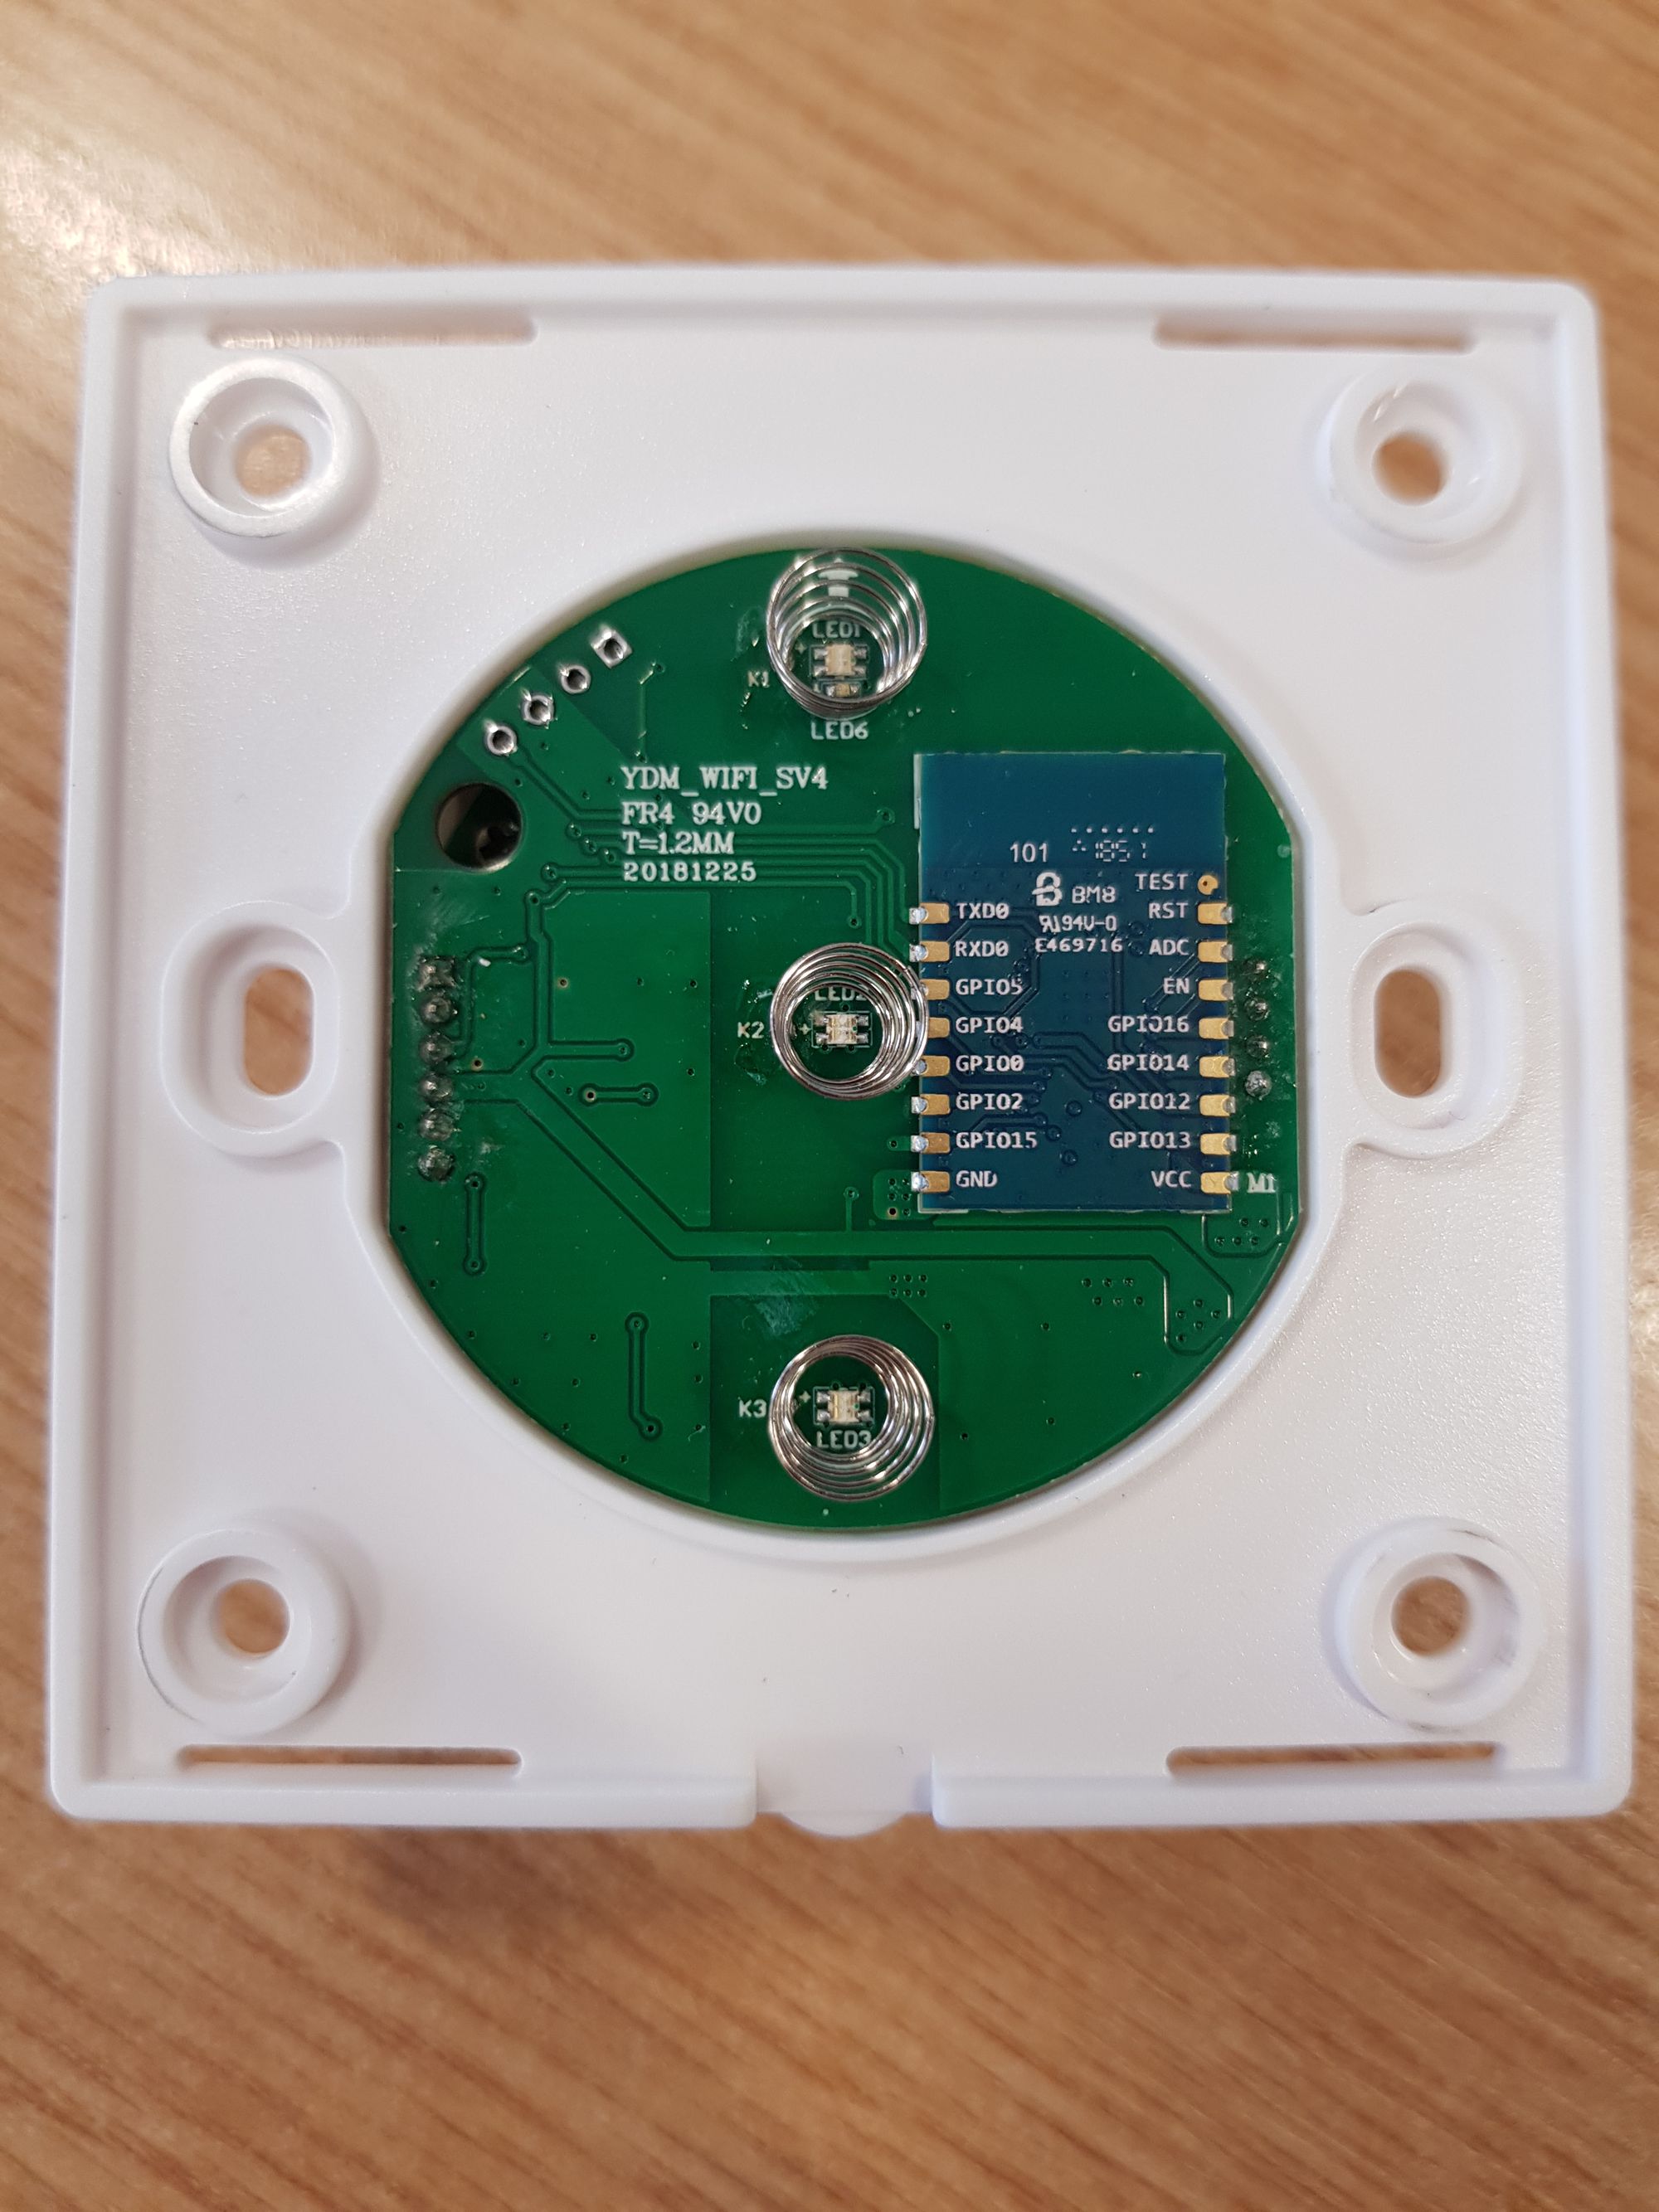
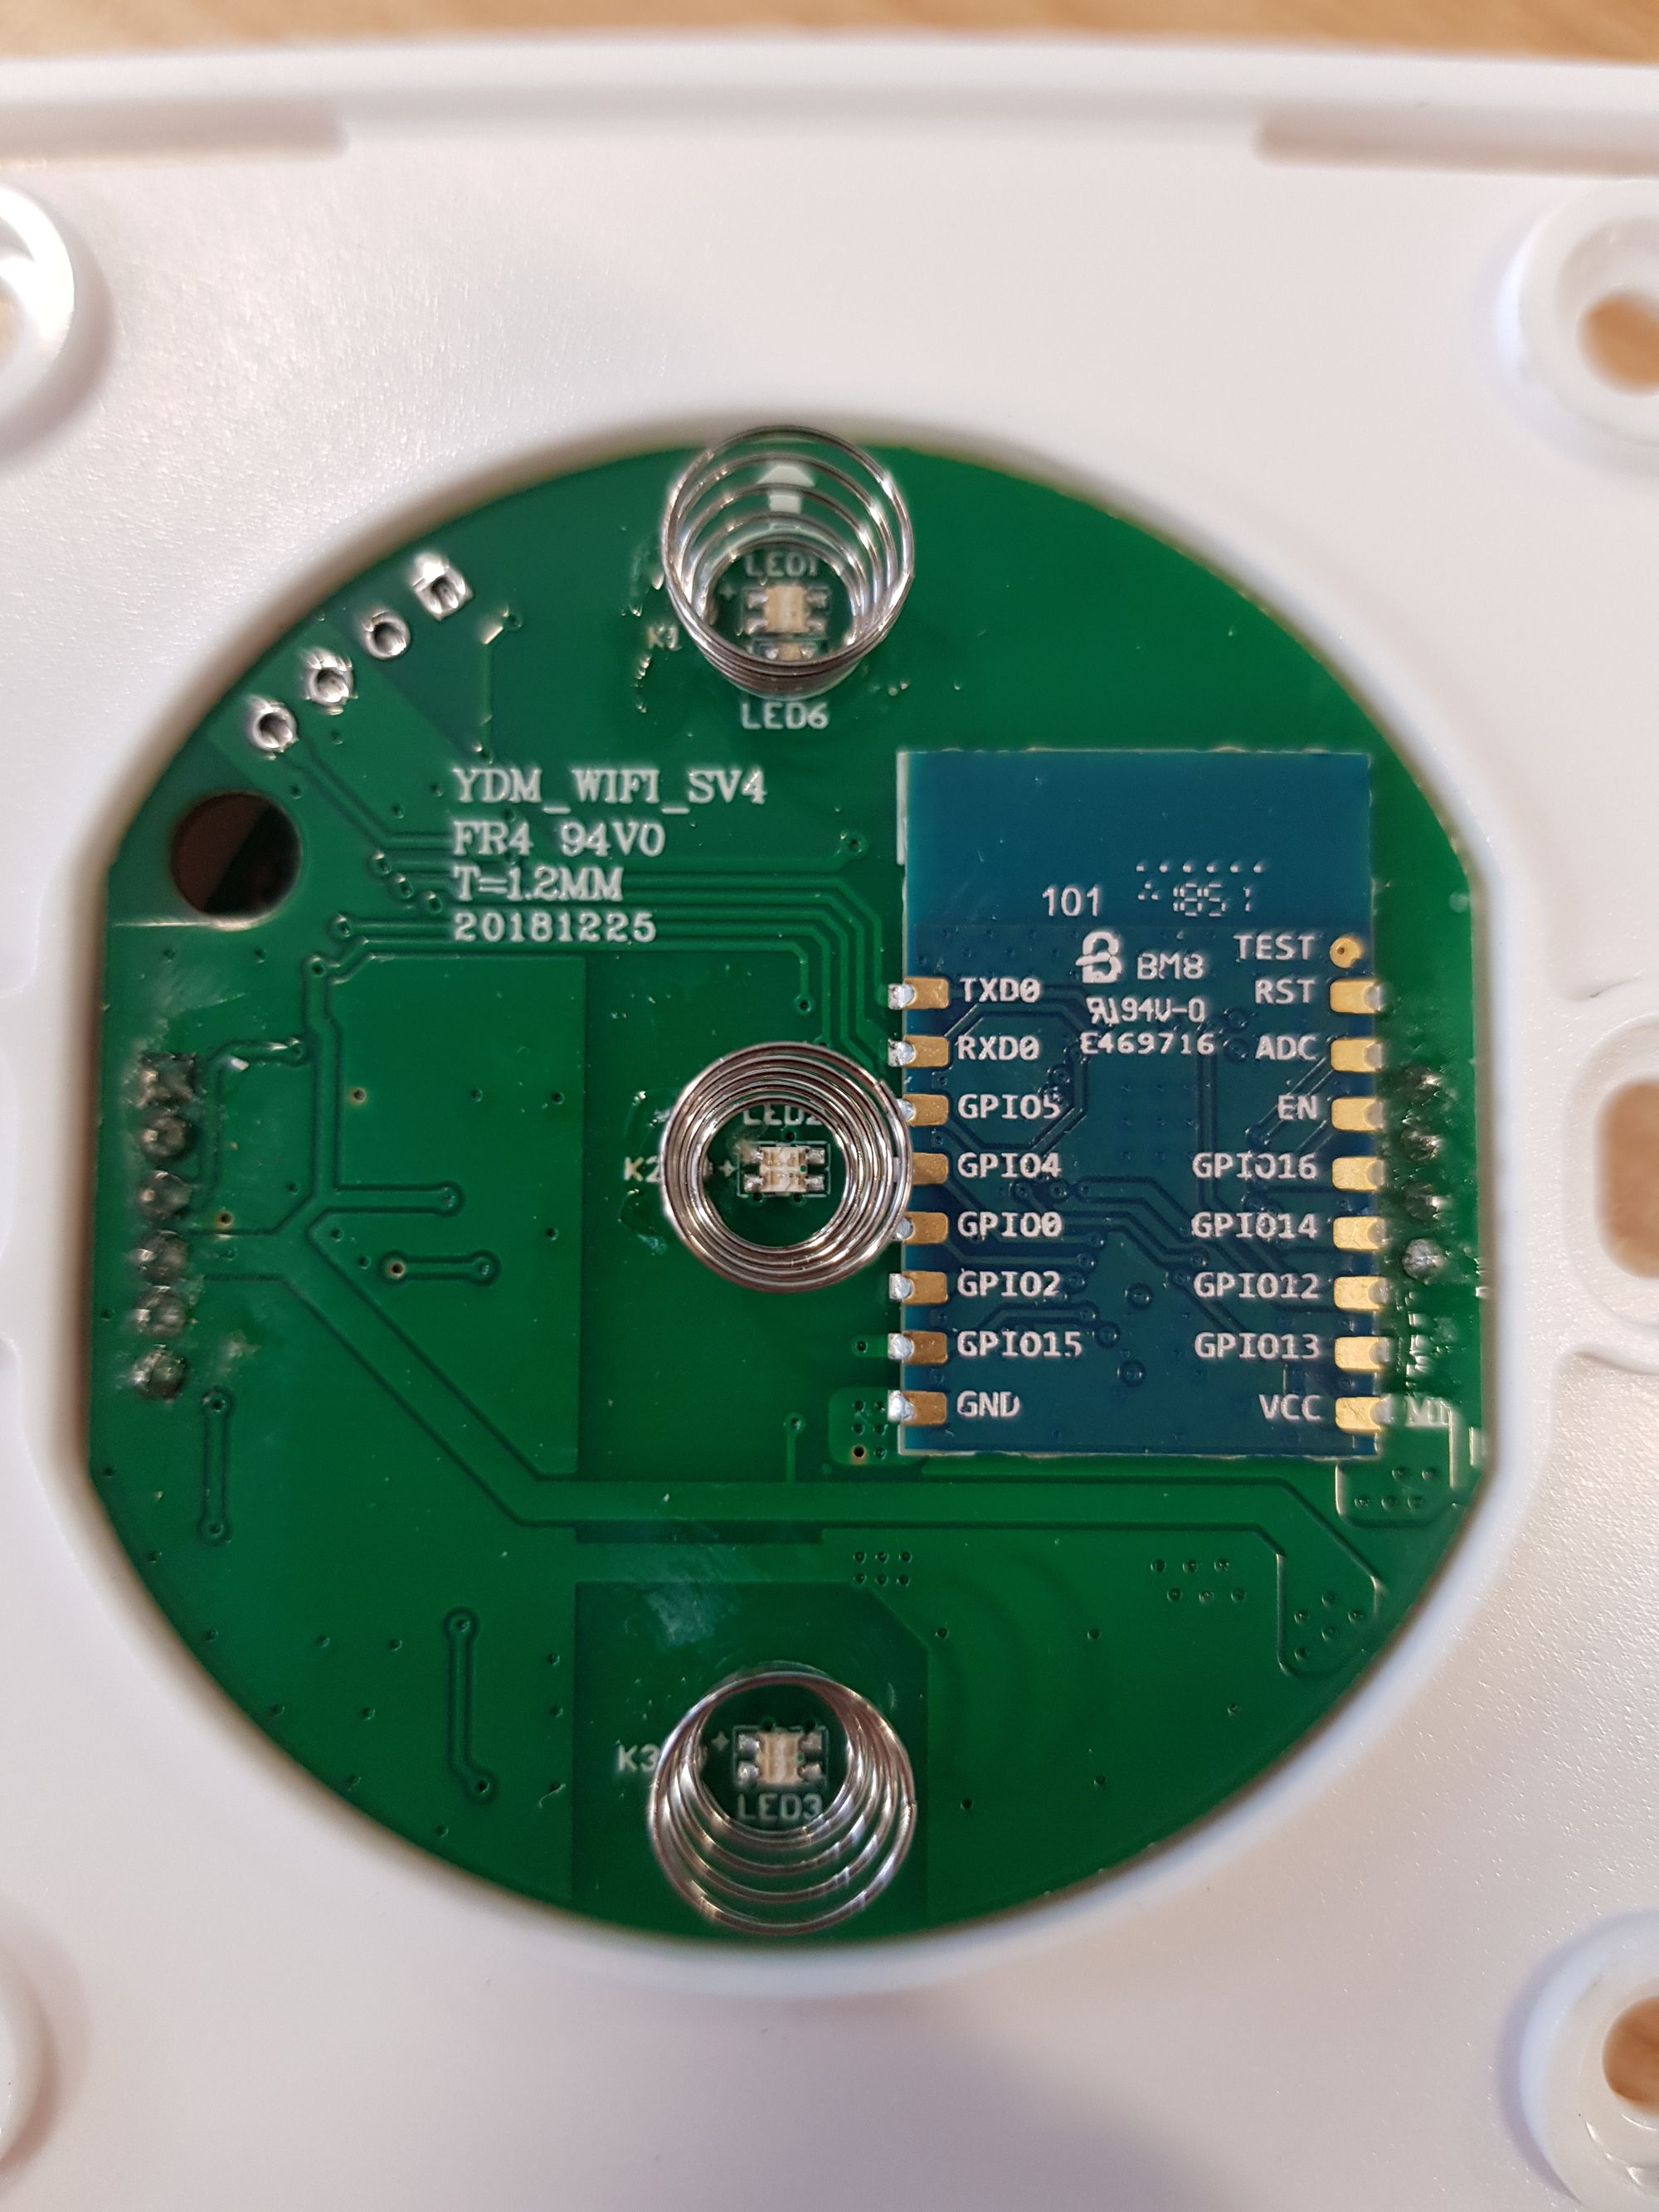
The great things about these devices is that if you need to solder, it is one of the easiest things to solder given that all the connections are on the top and are quite large and well spaced out.
I would go ahead and wire the switch up to your socket and to test that it is functioning. Replace the top cover whilst wiring to make sure nothing gets broken.
Make sure to turn mains power off where you are working! If unsure, contact an electrician!
Wiring is fairly easy, just take your time and follow the instructions.
Turn the power back on and check if it works, my model has some blue LEDs when the device is powered on:
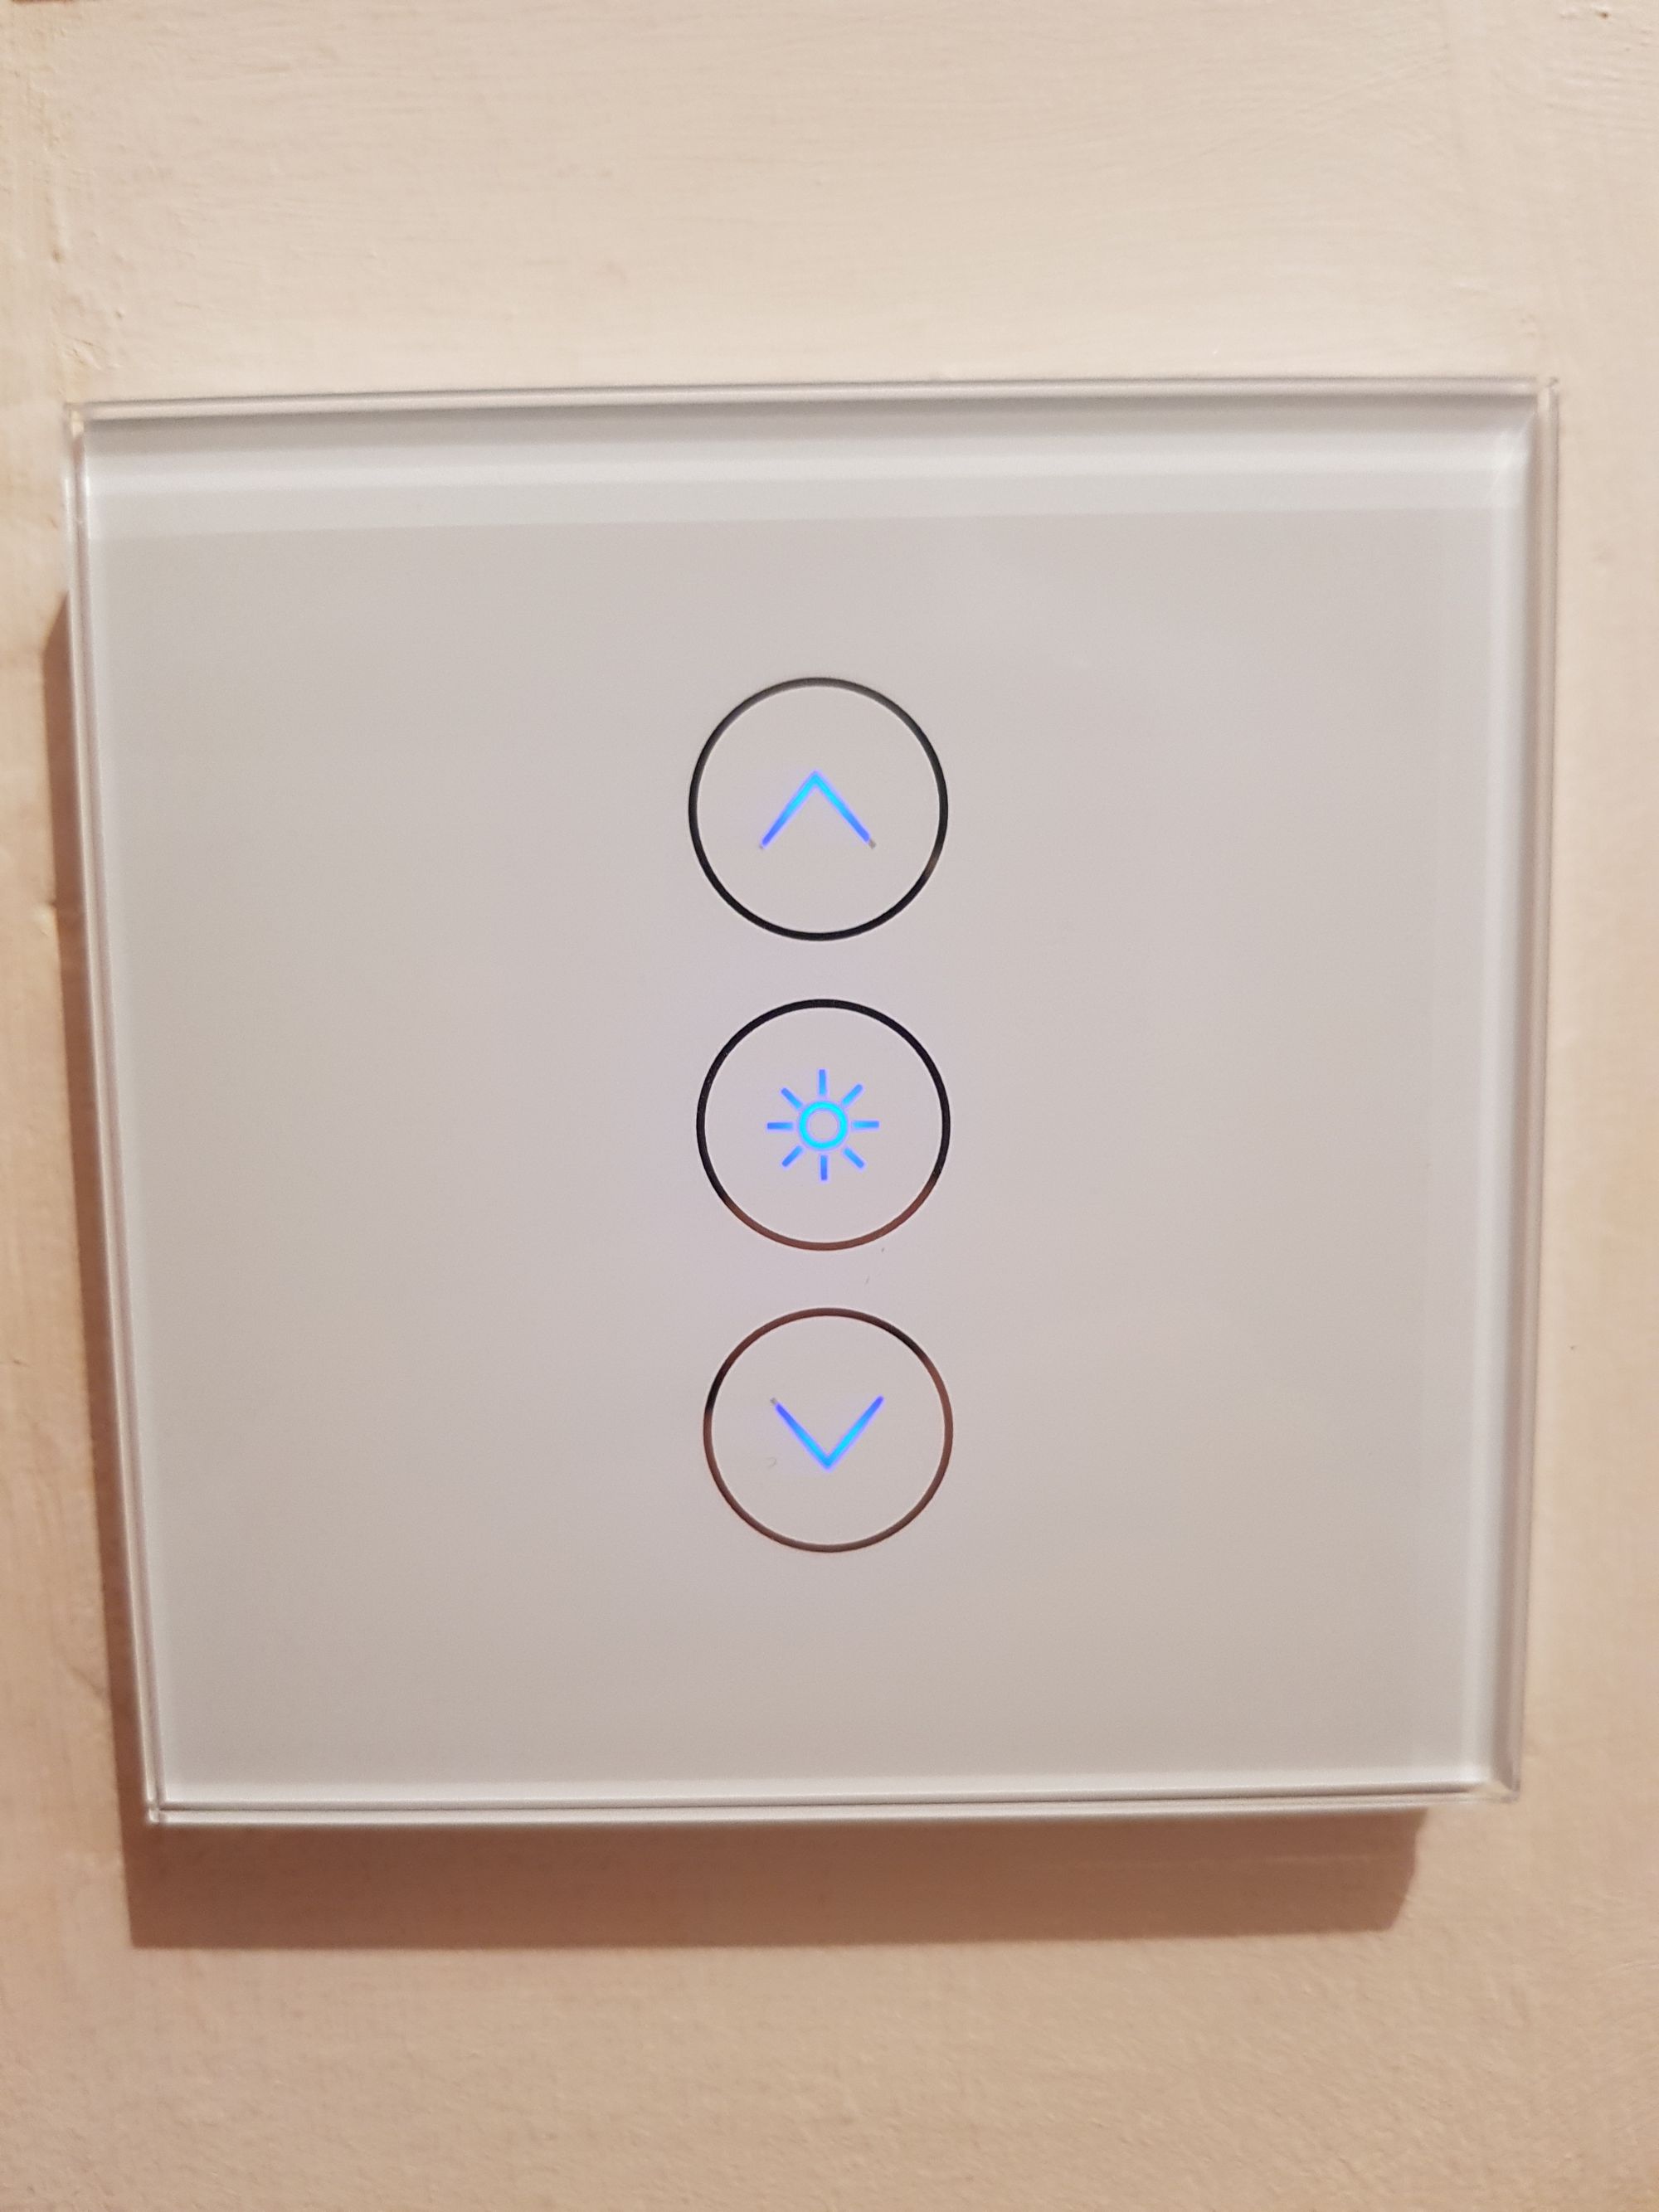
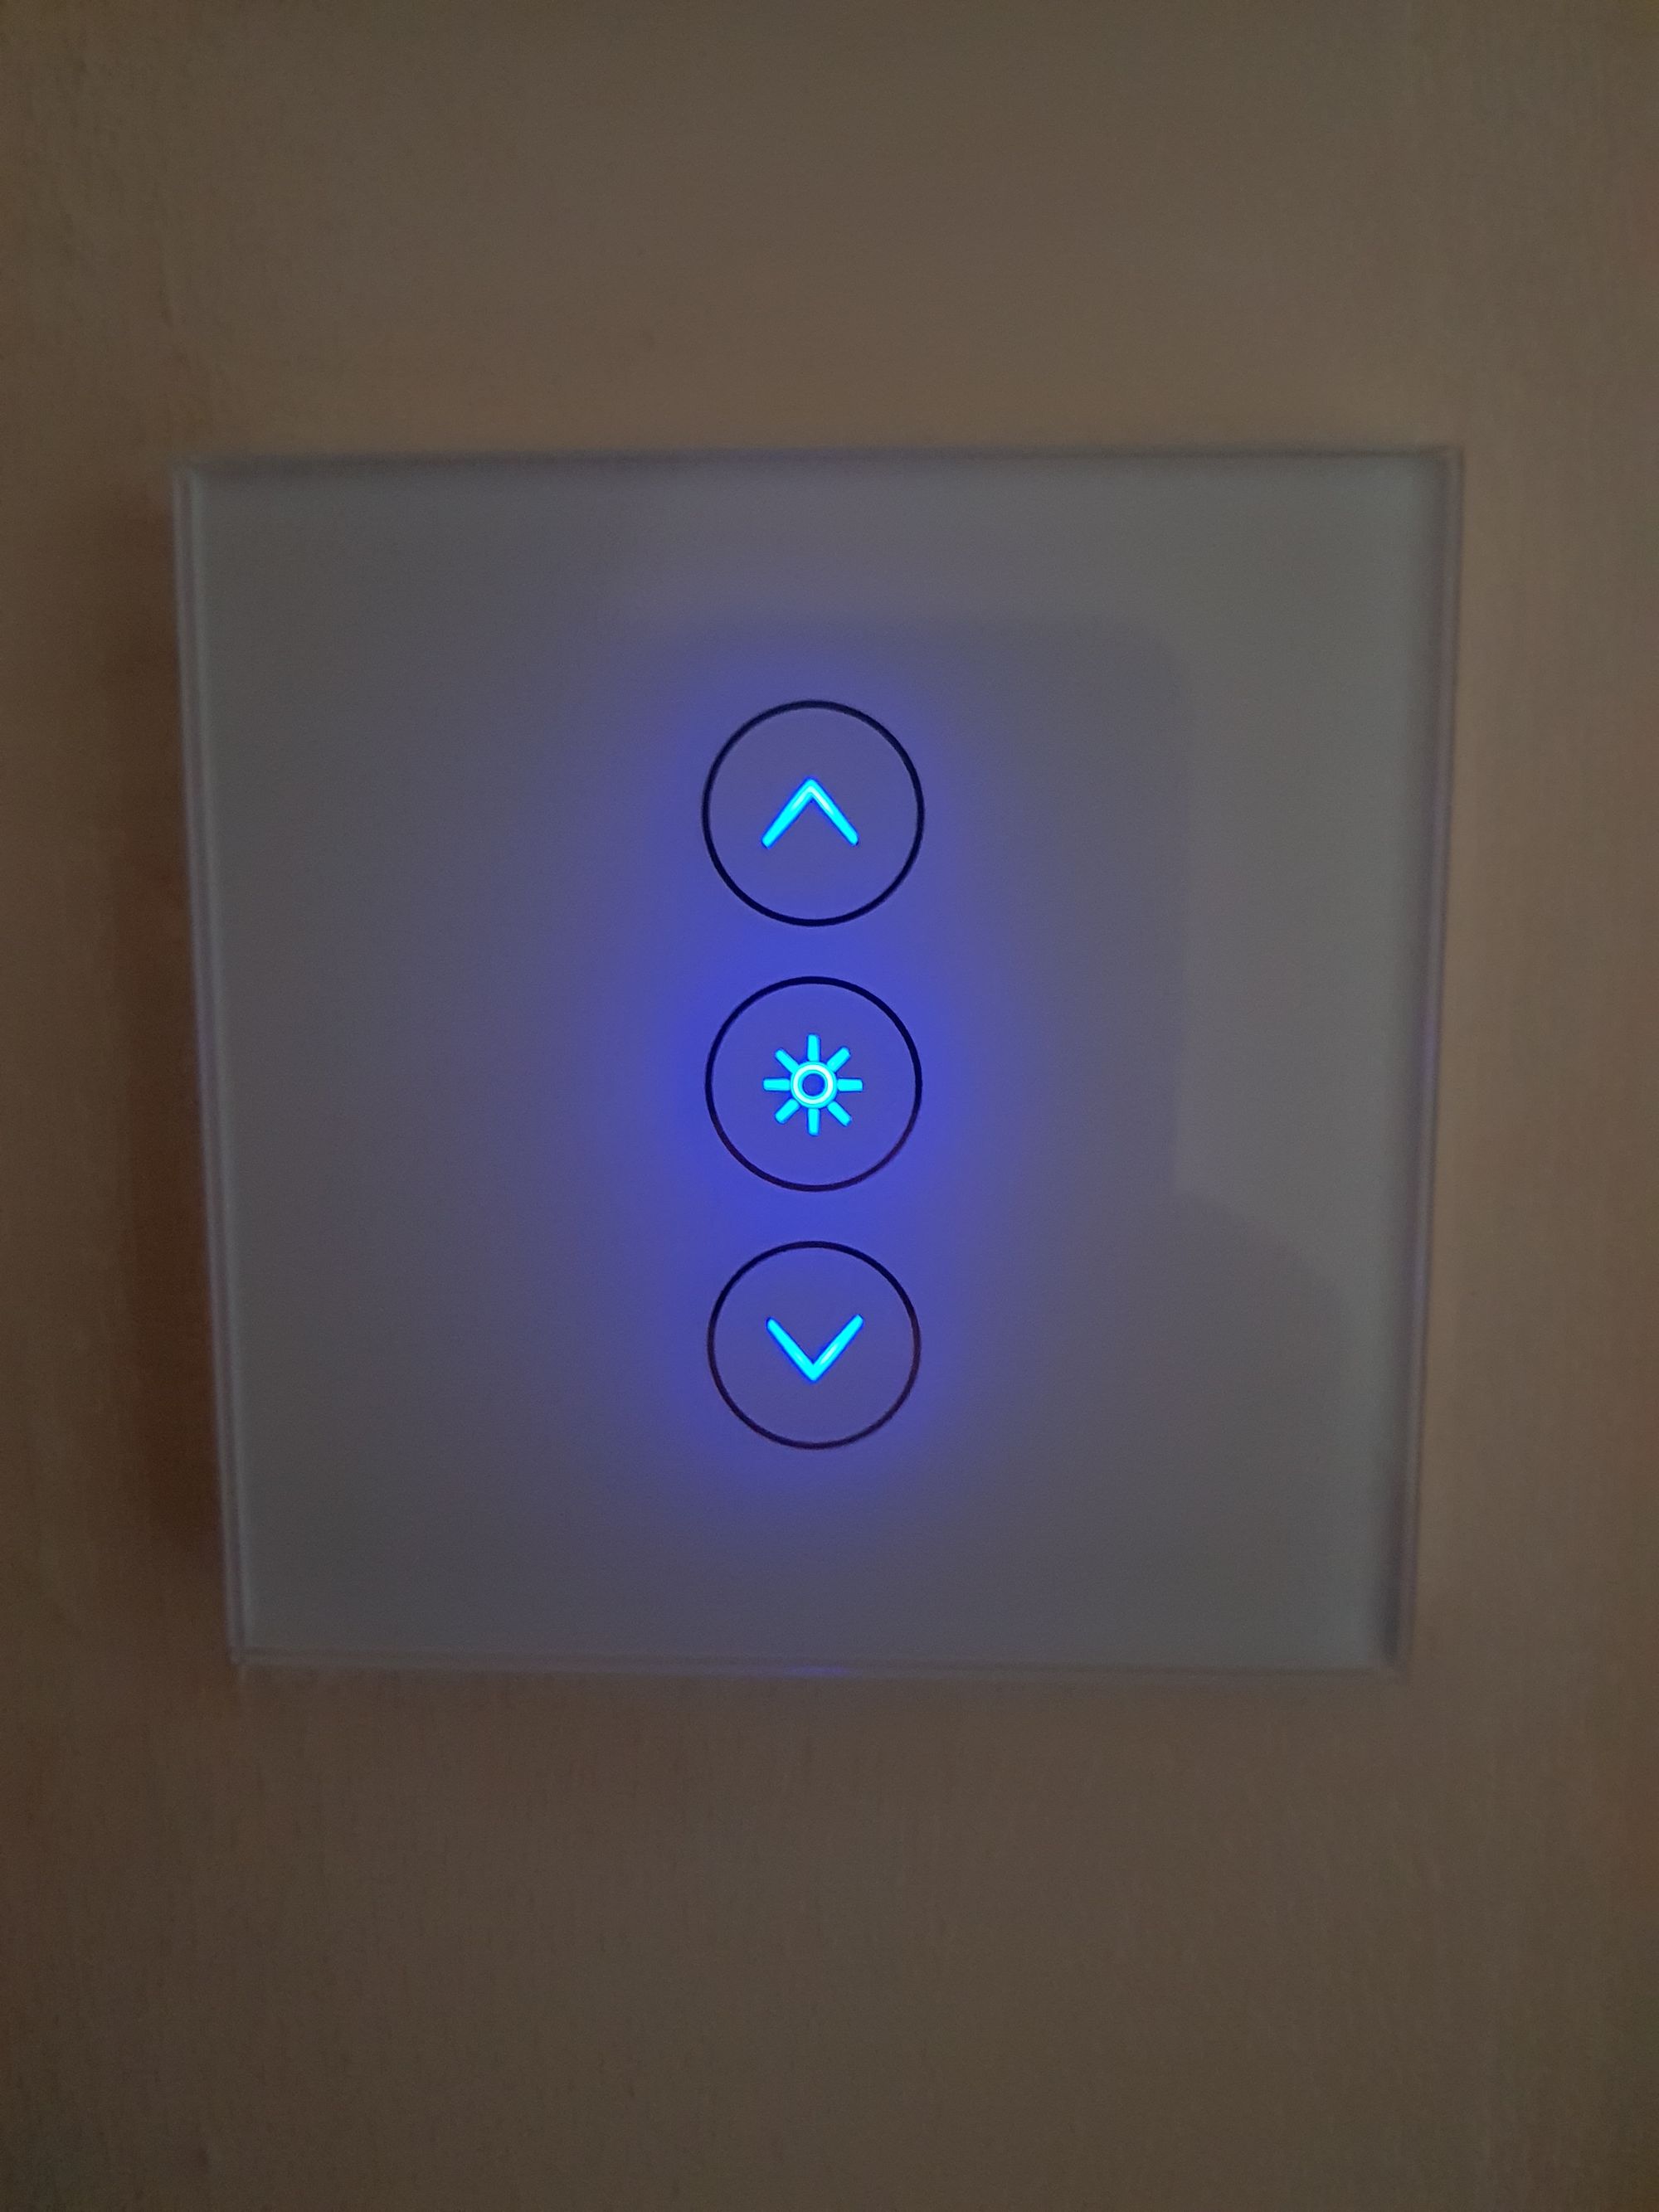
The LED’s might be flashing, this is OK and means the device is in pairing mode.
Once installed, you can now try Tuya-Convert to see if you get the easy road or not. Follow the previous post here for how to use Tuya-Convert.
If you have managed to use Tuya-Convert, great! Skip ahead to the software section.
If Tuya-Convert did not work, we need to solder. As mentioned above, this is a great device for soldering.
Follow this guide here for how to solder. It is a different product but the procedure is the exact same. Follow up to before creating the ESPHome firmware section, we are going to be using Tasmota here instead of ESPHome.
Download the latest Tasmota from here. The standard Sonoff version is suitable for this. After you have backed up the original firmware, run this to flash your module with Tasmota:
Windows:
esptool --port YOUR_COM_PORT write_flash -fs 1MB -fm dout 0x0 sonoff.bin

Linux:
esptool --port /dev/YOUR_COM_PORT write_flash -fs 1MB -fm dout 0x0 sonoff.bin
Tasmota should now be installed on your wifi dimmer switch.
To confirm, power cycle the device and search for wireless networks. You should have a “sonoff-xxx” Wifi network listed.
Software
Now that we have a base install of Tasmota installed, we need to do a little setup.
Search for Wifi networks on your laptop or phone, join the Wifi network called “sonoff-xxx”. Open your browser and navigate to http://192.168.4.1 which should present you with this page:
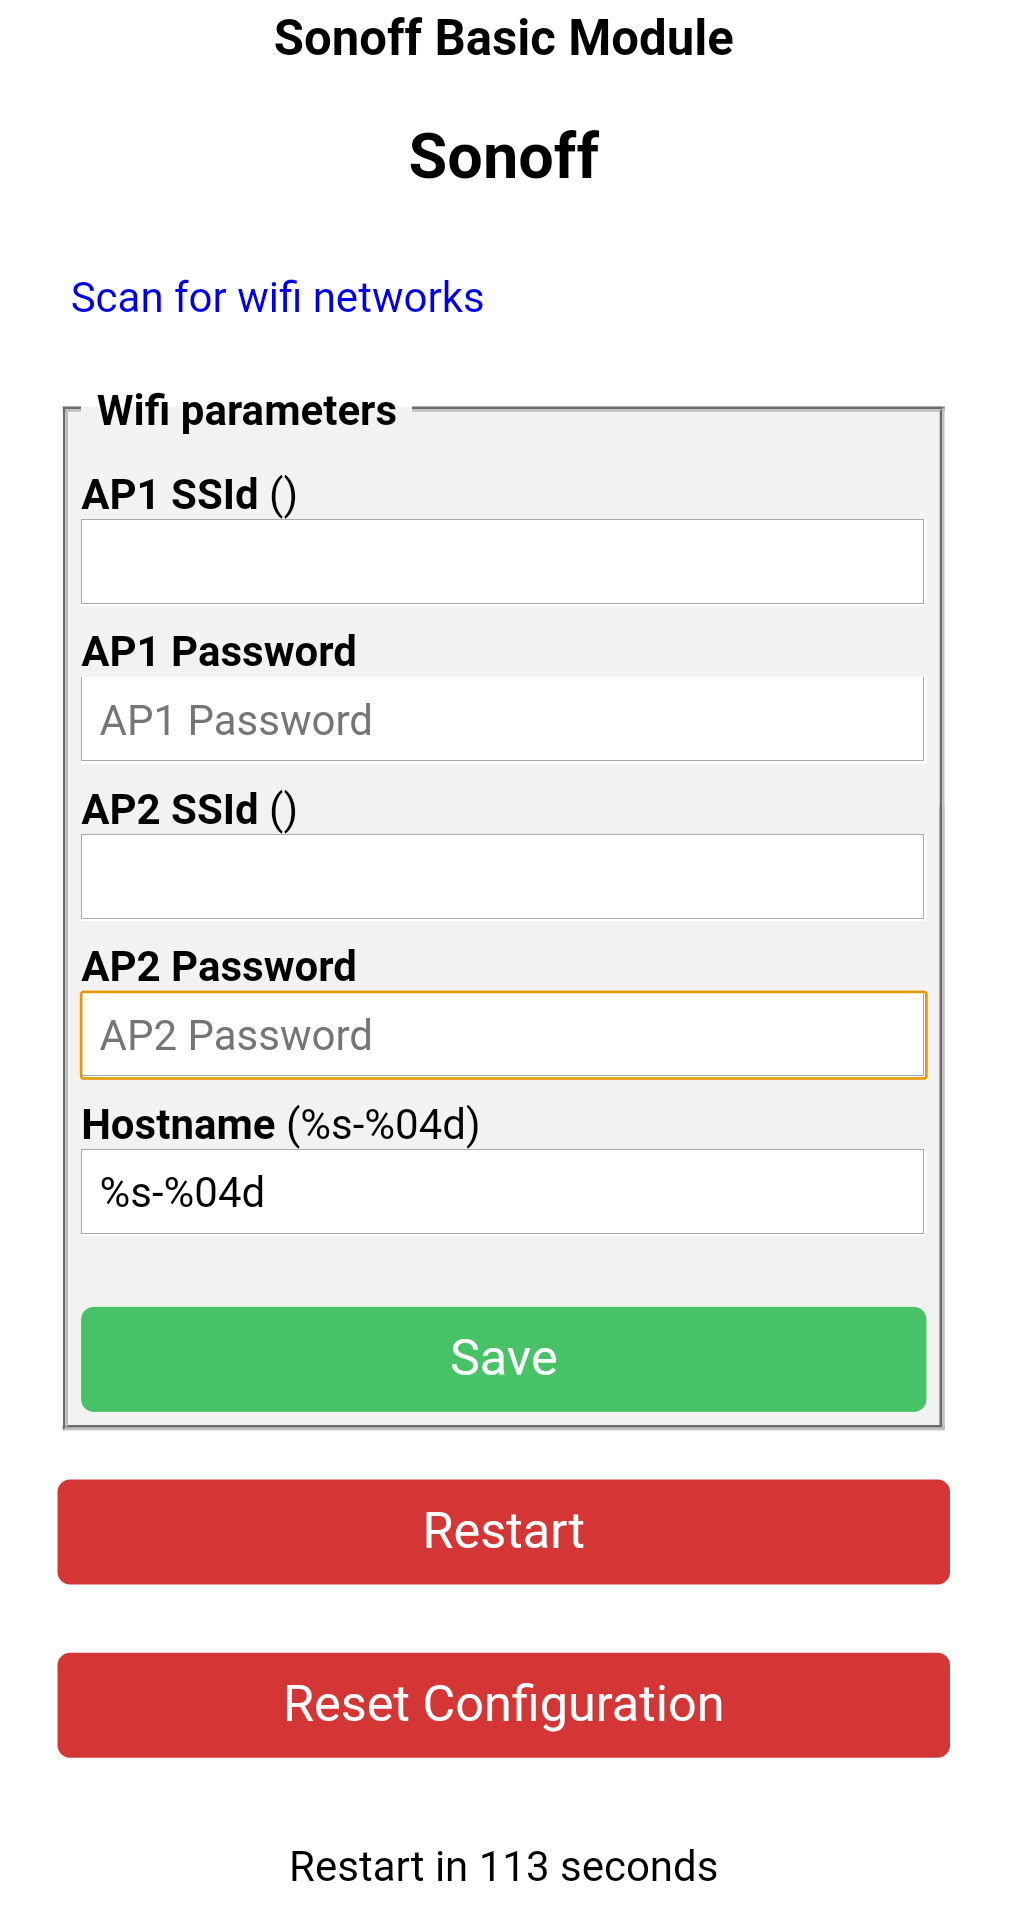
Enter your wifi details and ensure to double check them before saving. If you get them wrong you will need to reflash.
Press save, your module will reboot after a few seconds. You need to rejoin your own Wifi network at this point, then navigate to the new IP address and open the webpage which will look like this:
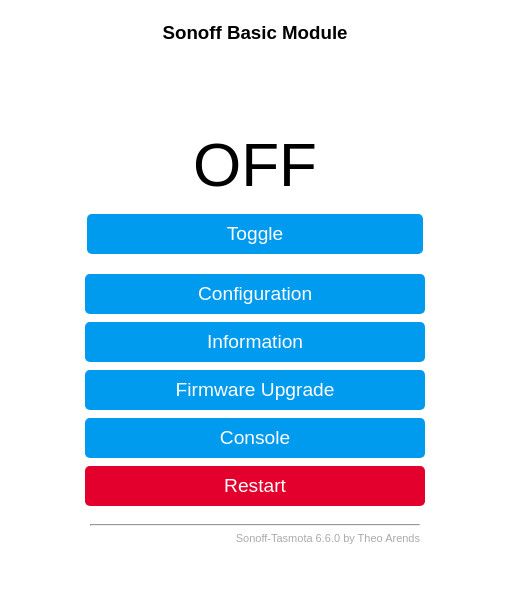
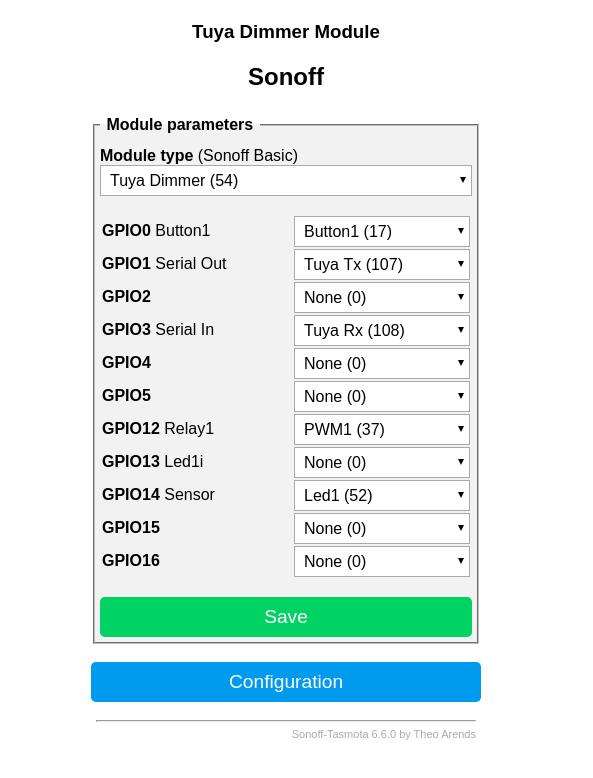
Navigate to the configuration menu, then configure module. Luckily for us, someone else has figured out the pinout for us. From the drop down, choose “Tuya Dimmer (54)” and hit save. The module will restart again, navigate back to Configuration, Configure module and check it looks like this:
Go back to the home/start screen and give it a test, click on the number one. Your light should activate at this point. Go ahead and test the dimming function as well to ensure that works. Make sure your bulb is dim-able!
If the test worked fine, its now time to configure MQTT for Home Assistant to be able to control it.
Go to Configuration, MQTT and fill out your MQTT server details:

You can edit the default topic field to suit your environment, you might want to give this a suitable name for where you are going to place this. This is going to be the bathroom light for me so I’ve given it then name “bathroom” so that its obvious. You can also edit the full topic field if you prefer.
Save and let the module restart. We will now edit our config file for Home Assistant.
Add the following to your configuration.yaml:
light:
  - platform: mqtt
    name: "Bathroom"
    command_topic: "cmnd/bathroom/POWER"
    availability_topic: "tele/bathroom/LWT"
    brightness_command_topic: "cmnd/bathroom/DIMMER"
    brightness_scale: 100
    brightness_state_topic: "stat/bathroom/RESULT"
    brightness_value_template: '{{ value_json.Dimmer }}'
    state_topic: "stat/bathroom/POWER1"
    state_value_template: '{{value_json.POWER1}}'
    payload_available: "Online"
    payload_not_available: "Offline"
    retain: false
    qos: 1
If you changed your topics in the MQTT setup then make sure to change them here.
Save and restart Home Assistant.
Go to Developer tools, states and check that “light.bathroom” (or whatever name you gave it) shows up.
Well done, you have successfully added a wifi dimmer switch to your setup!