Transform Any Room With These DIY Smart LED Strip Lights!
Transform any room in your house with these Smart LED Strip Lights using an SK6812, ESP32 and WLED - allowing you to create your own light show!

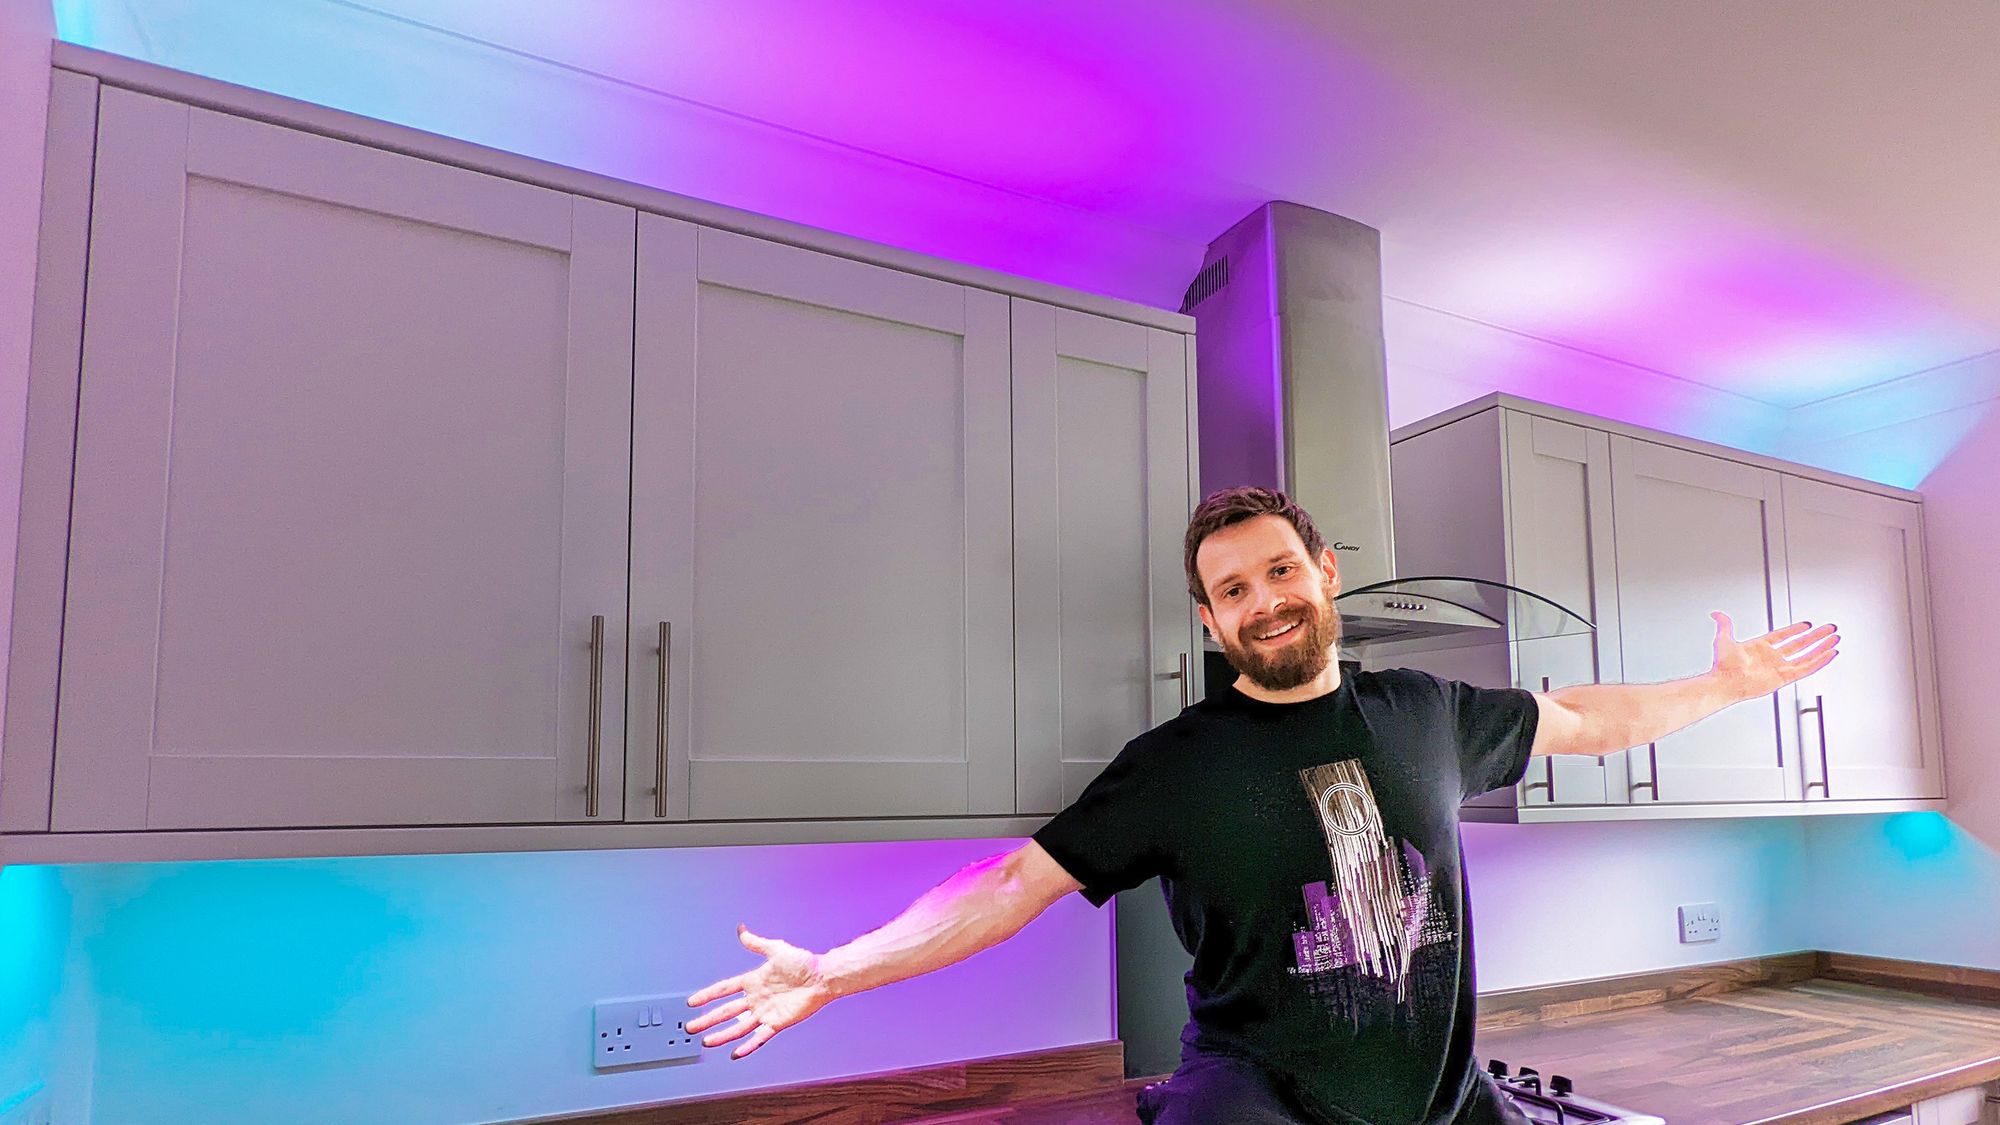
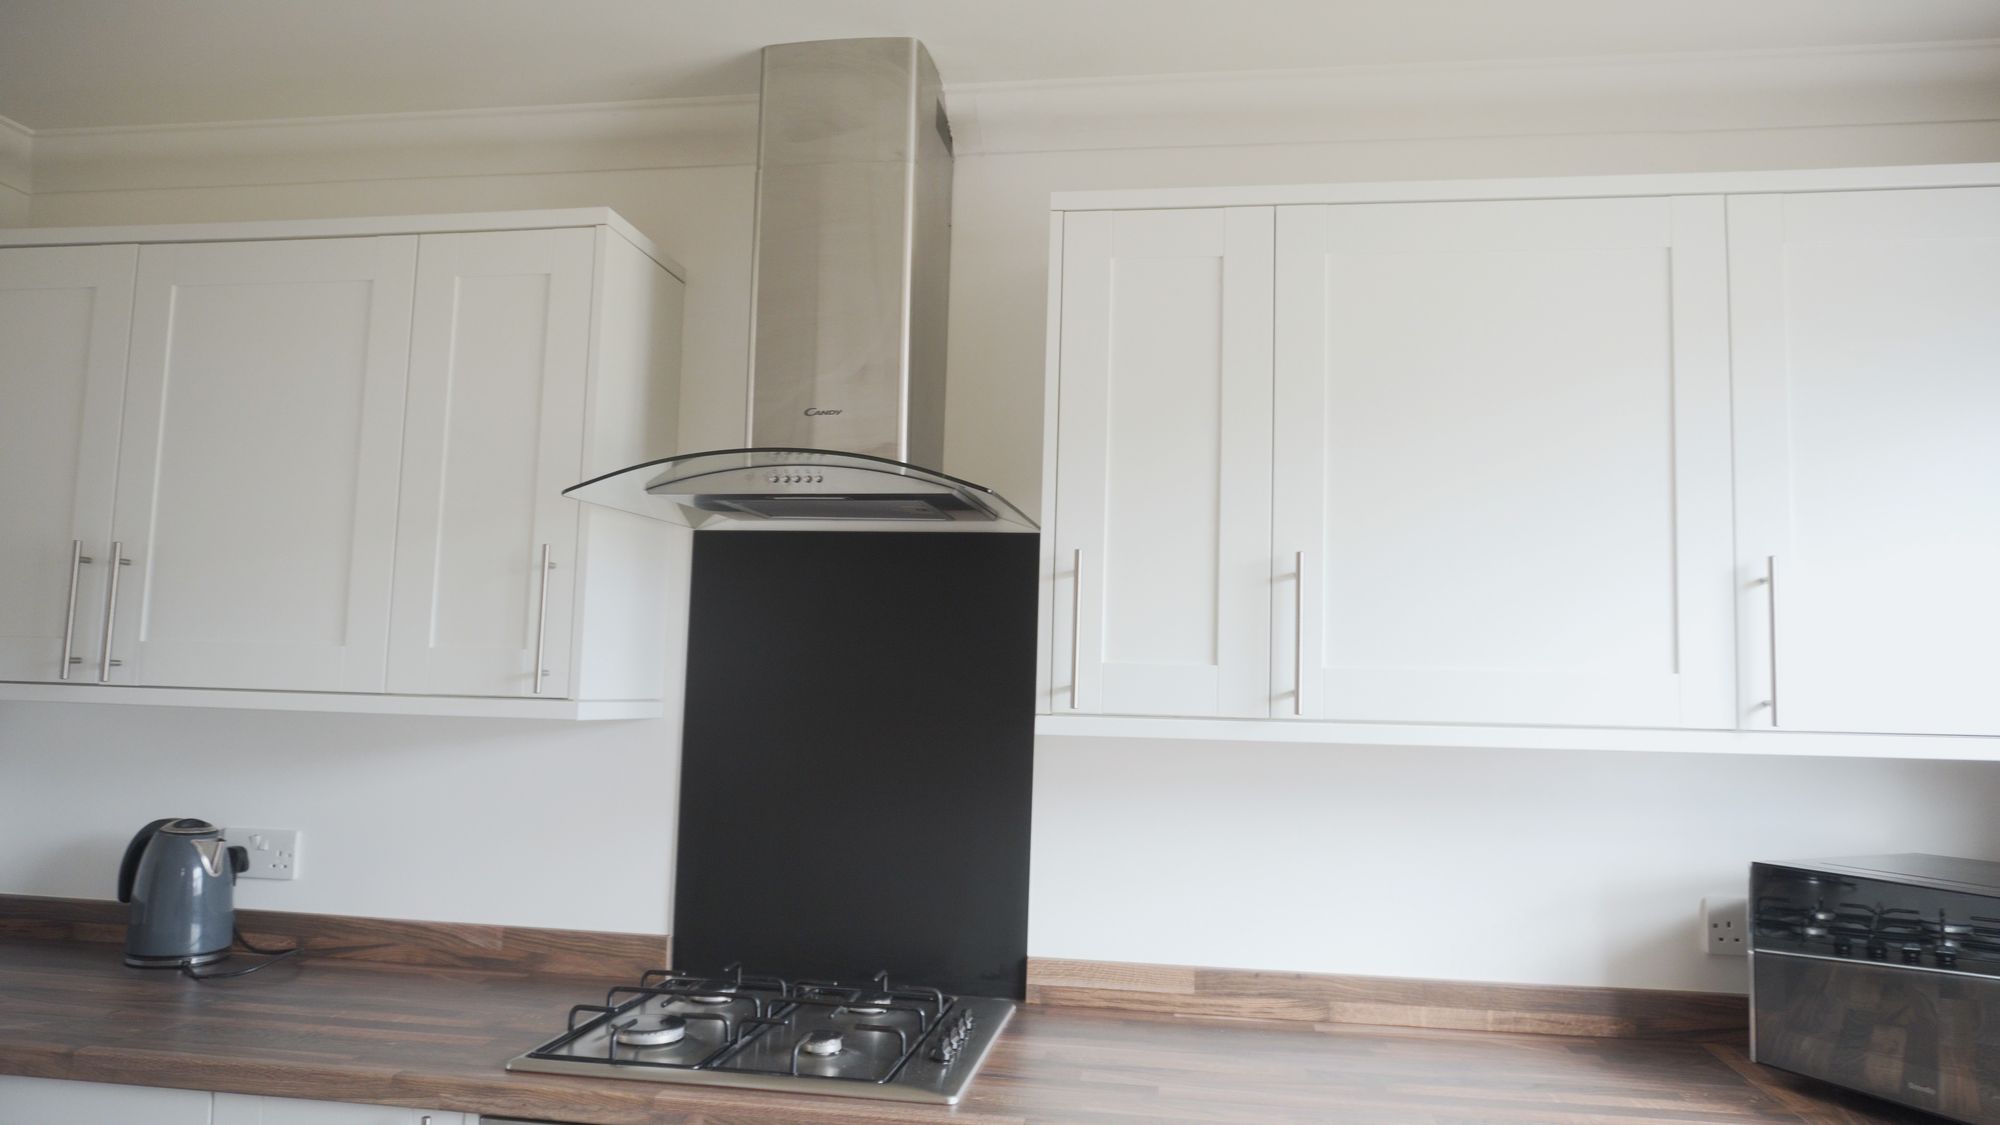
We have just finished having our kitchen renovated and whilst there are a lot of minor things left to complete, there was one key thing missing and one thing I had to do first - smart lighting!
Initially, my plan was to install under counter LED strips only along the 2 separate sections of my kitchen. But, then I thought, why not run them along the top too, allowing me to create some really cool effects?!
Let's go through and I'll show you each step by step I took along the way!
Video
First Thing First: The Parts
The products I used for this entire project and where you can get them from (if you so wish):
-
LED Strips:
-
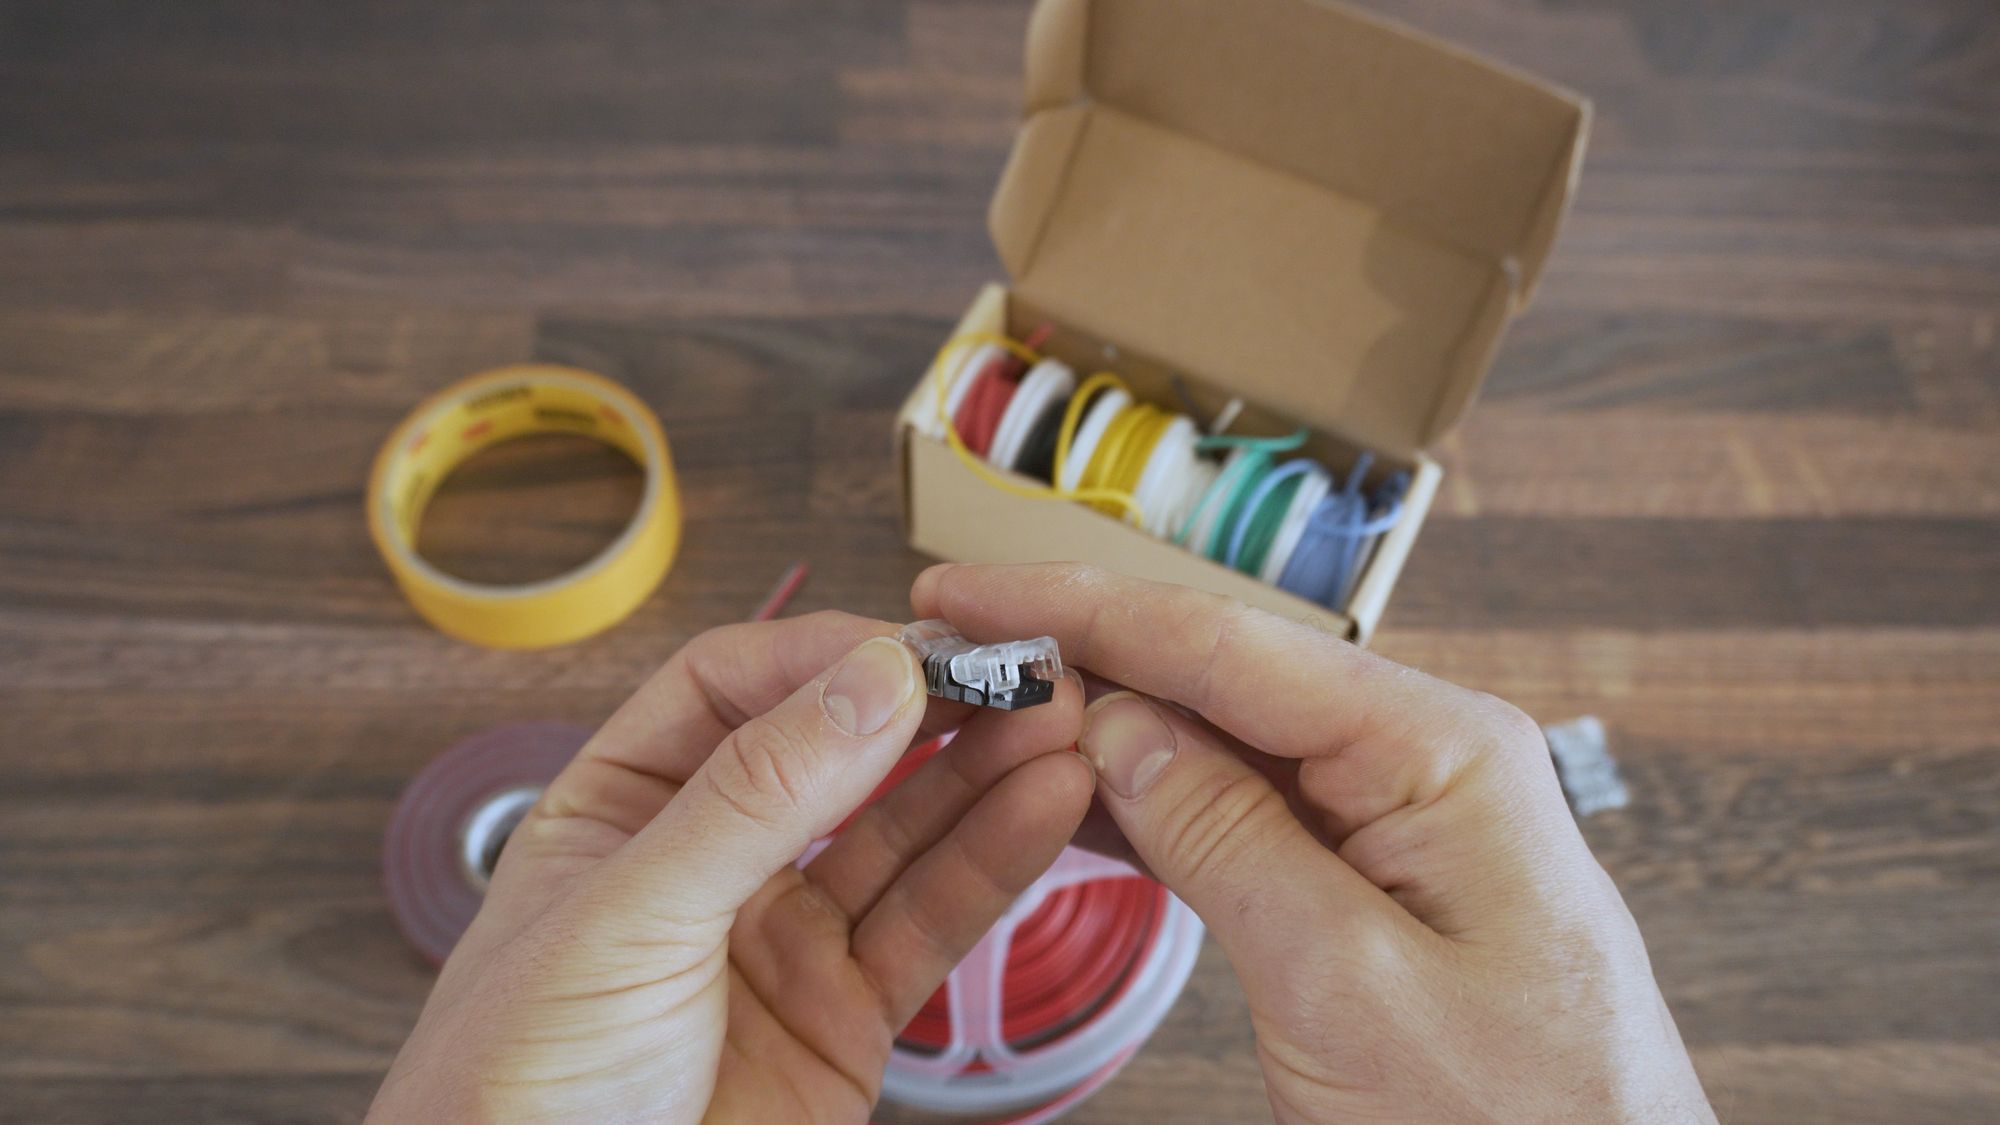
LED Strip Connectors:
-
LED Channels:
-
Power Supplies:
-
Extension Wire:
-
Tape:
-
Soldering Iron:
First Steps
Decisions
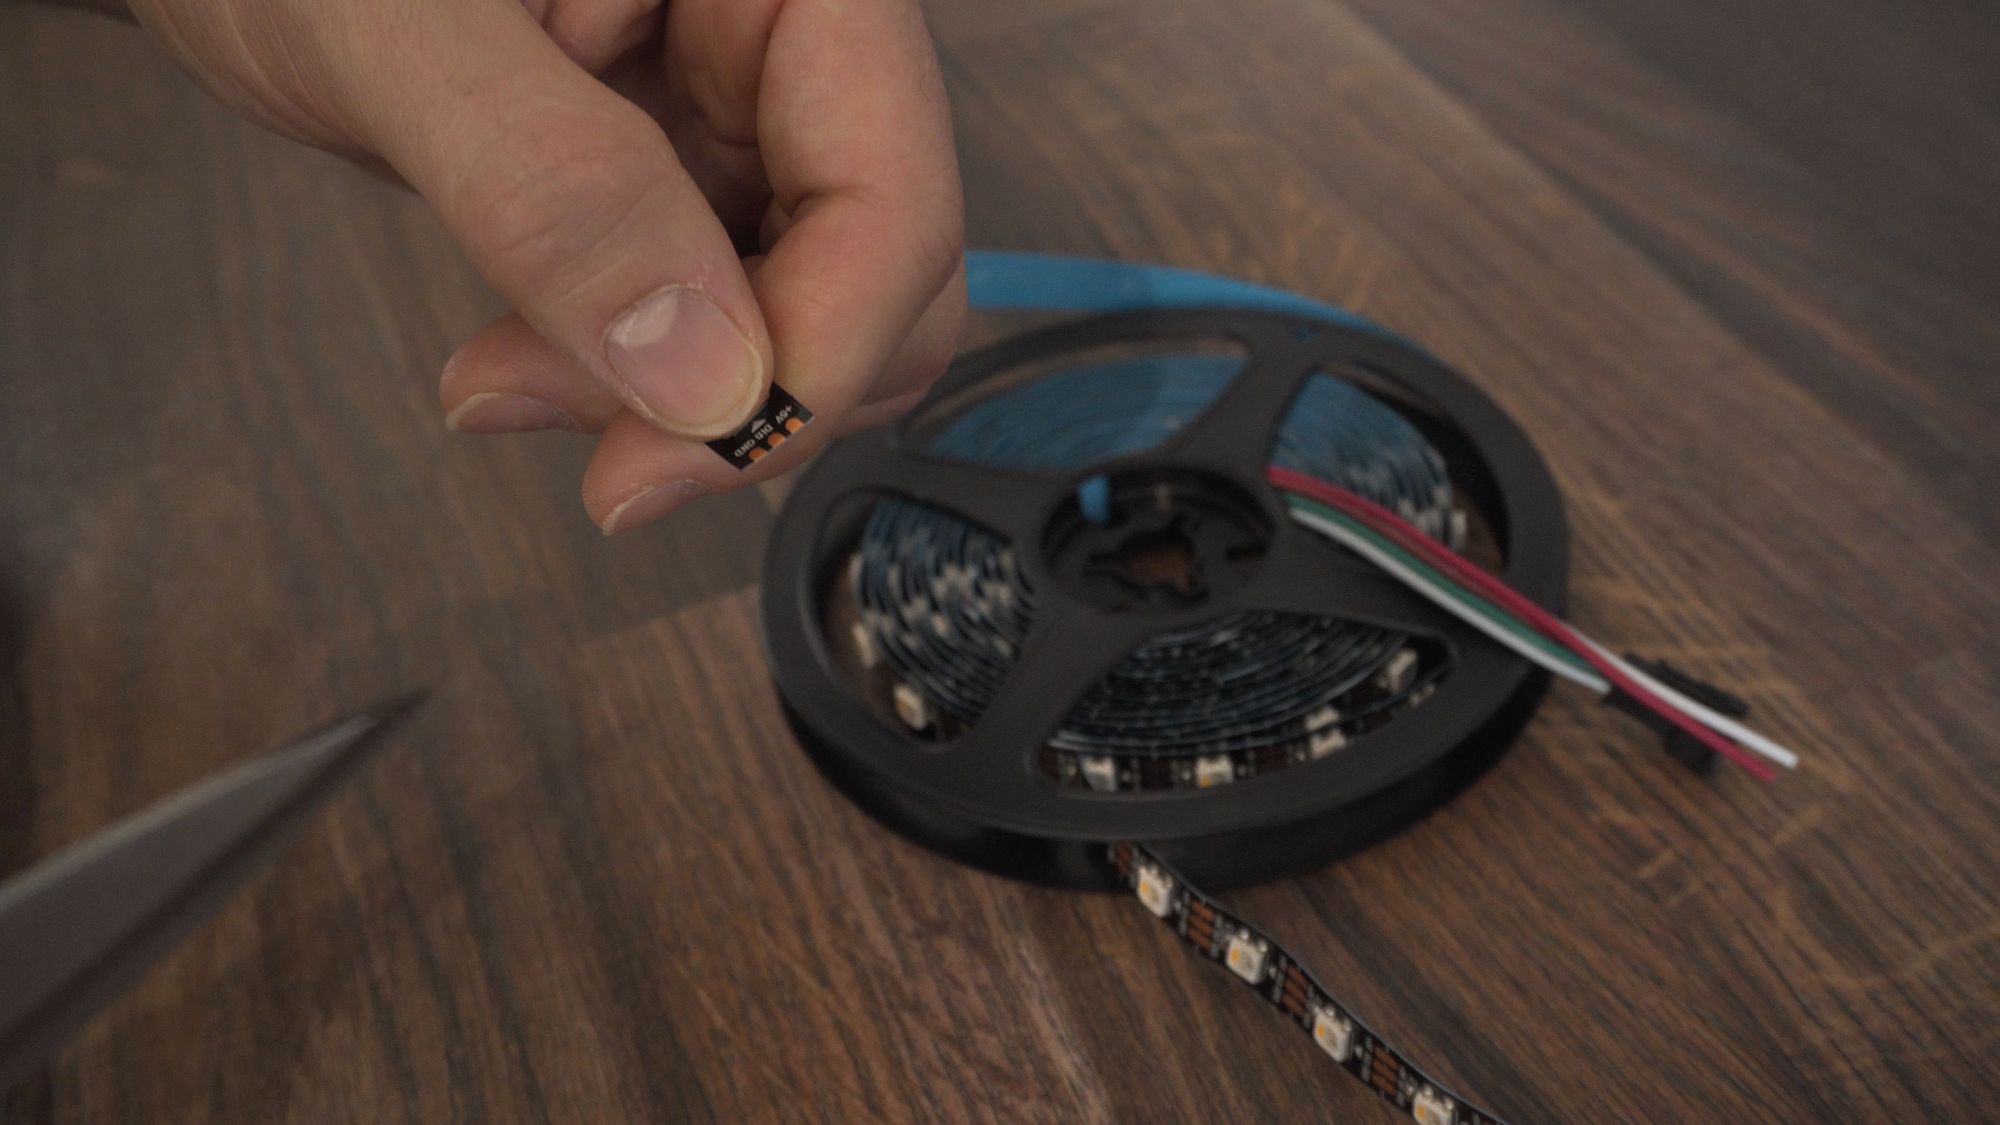
There are a few different versions of LED strips you can purchase, with varying colours, different amounts of LEDs per meter, voltages and addressable vs non addressable.
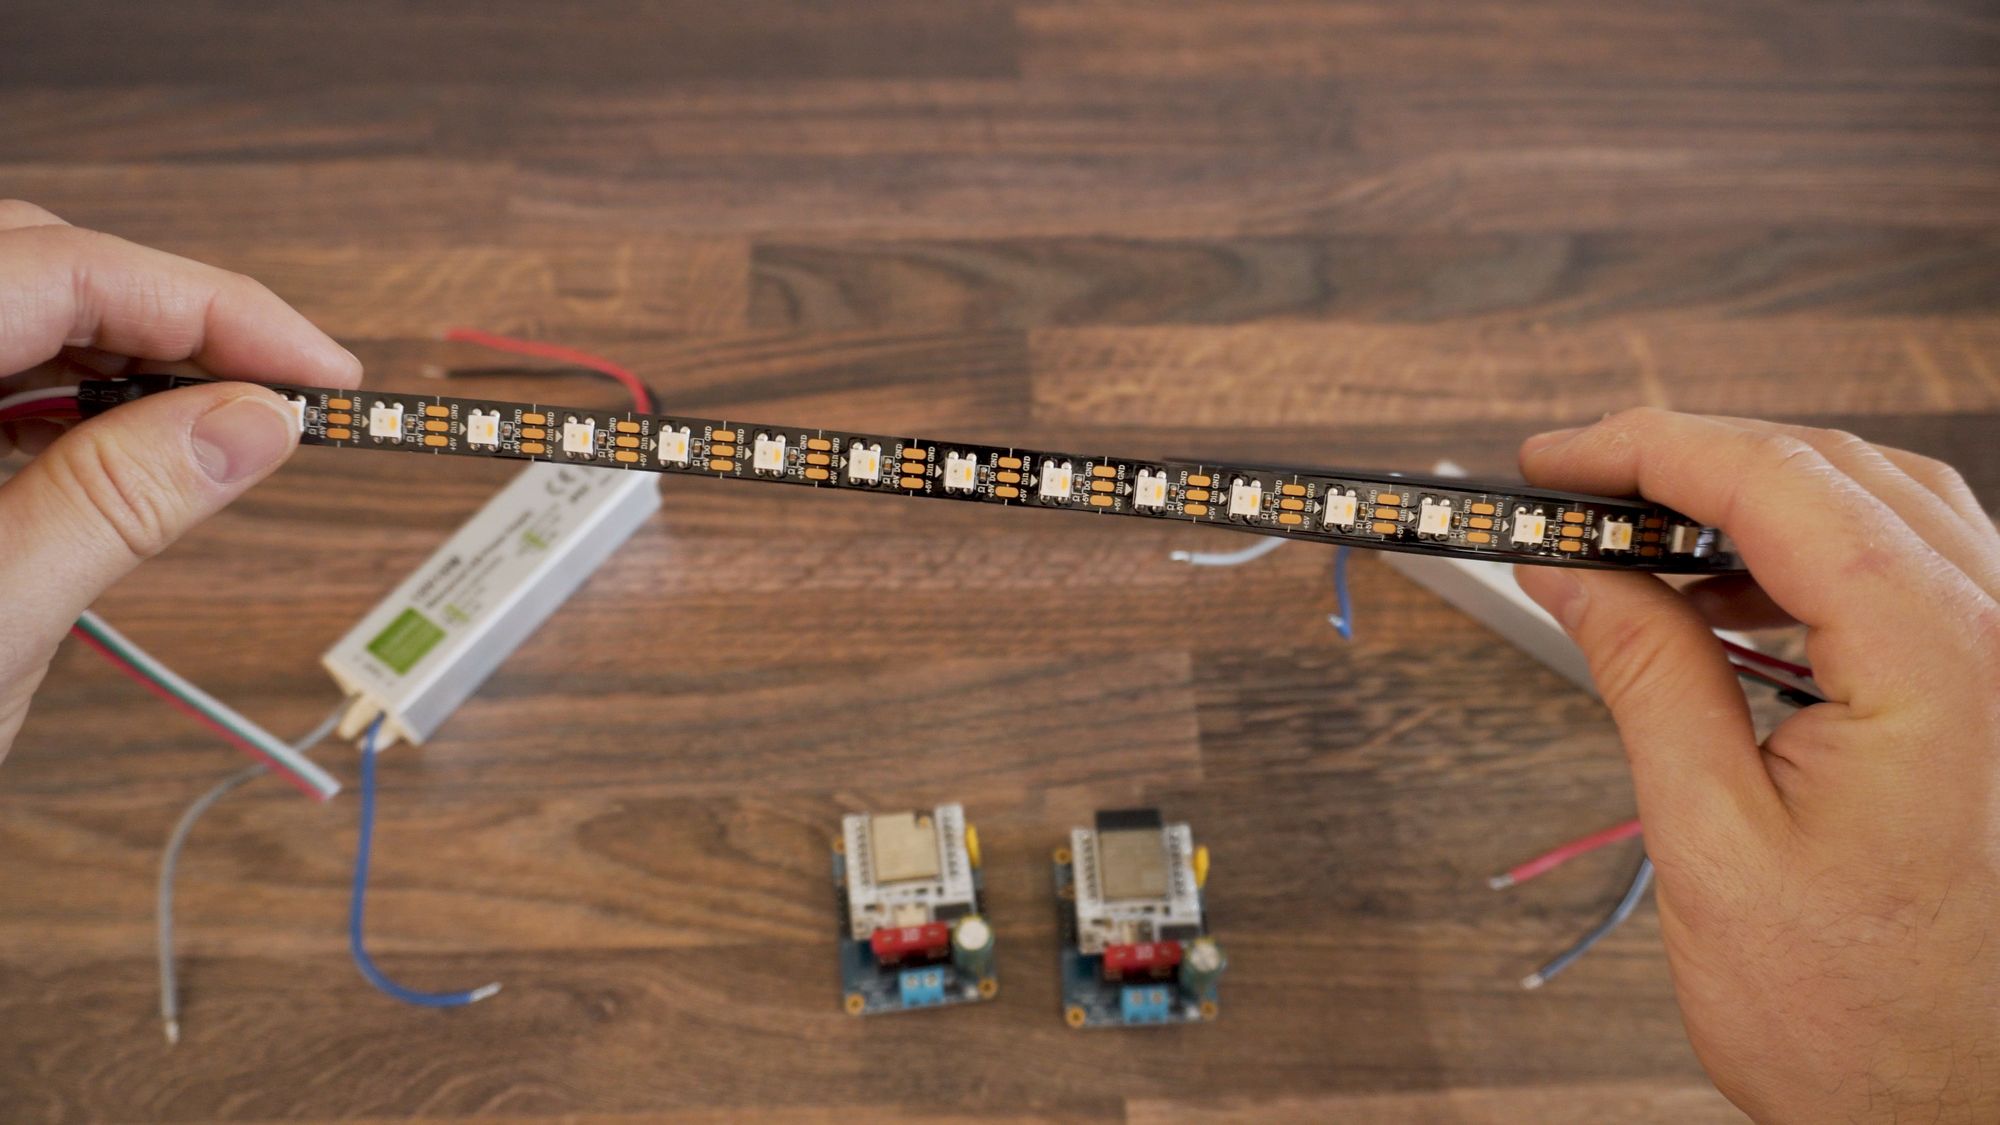
The one I settled on was the SK6812, with a 5v RGBW strip, meaning it has a dedicated white channel along with the regular red, green and blue channels.
It’s also got 60 LEDs per meter, which should provide plenty of light for this space.
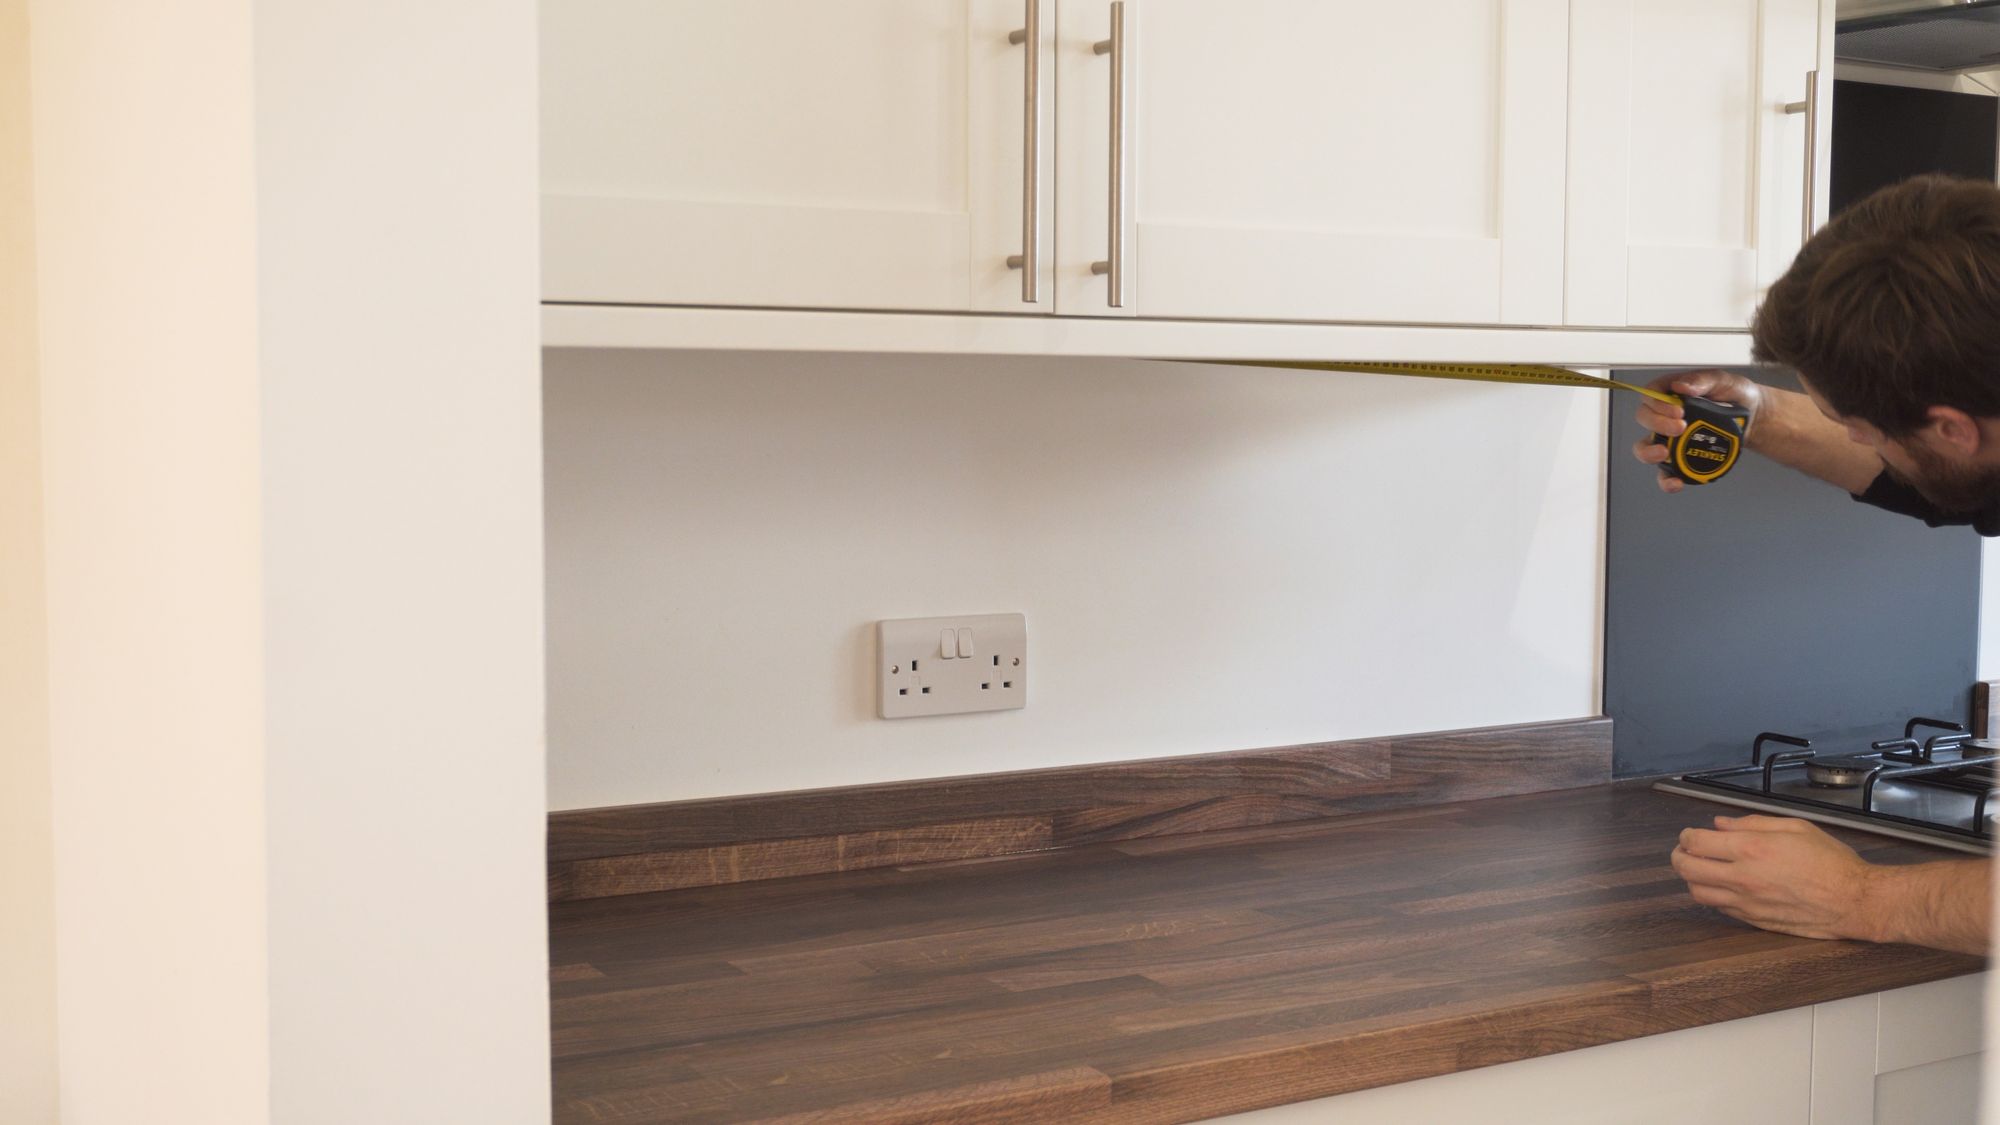
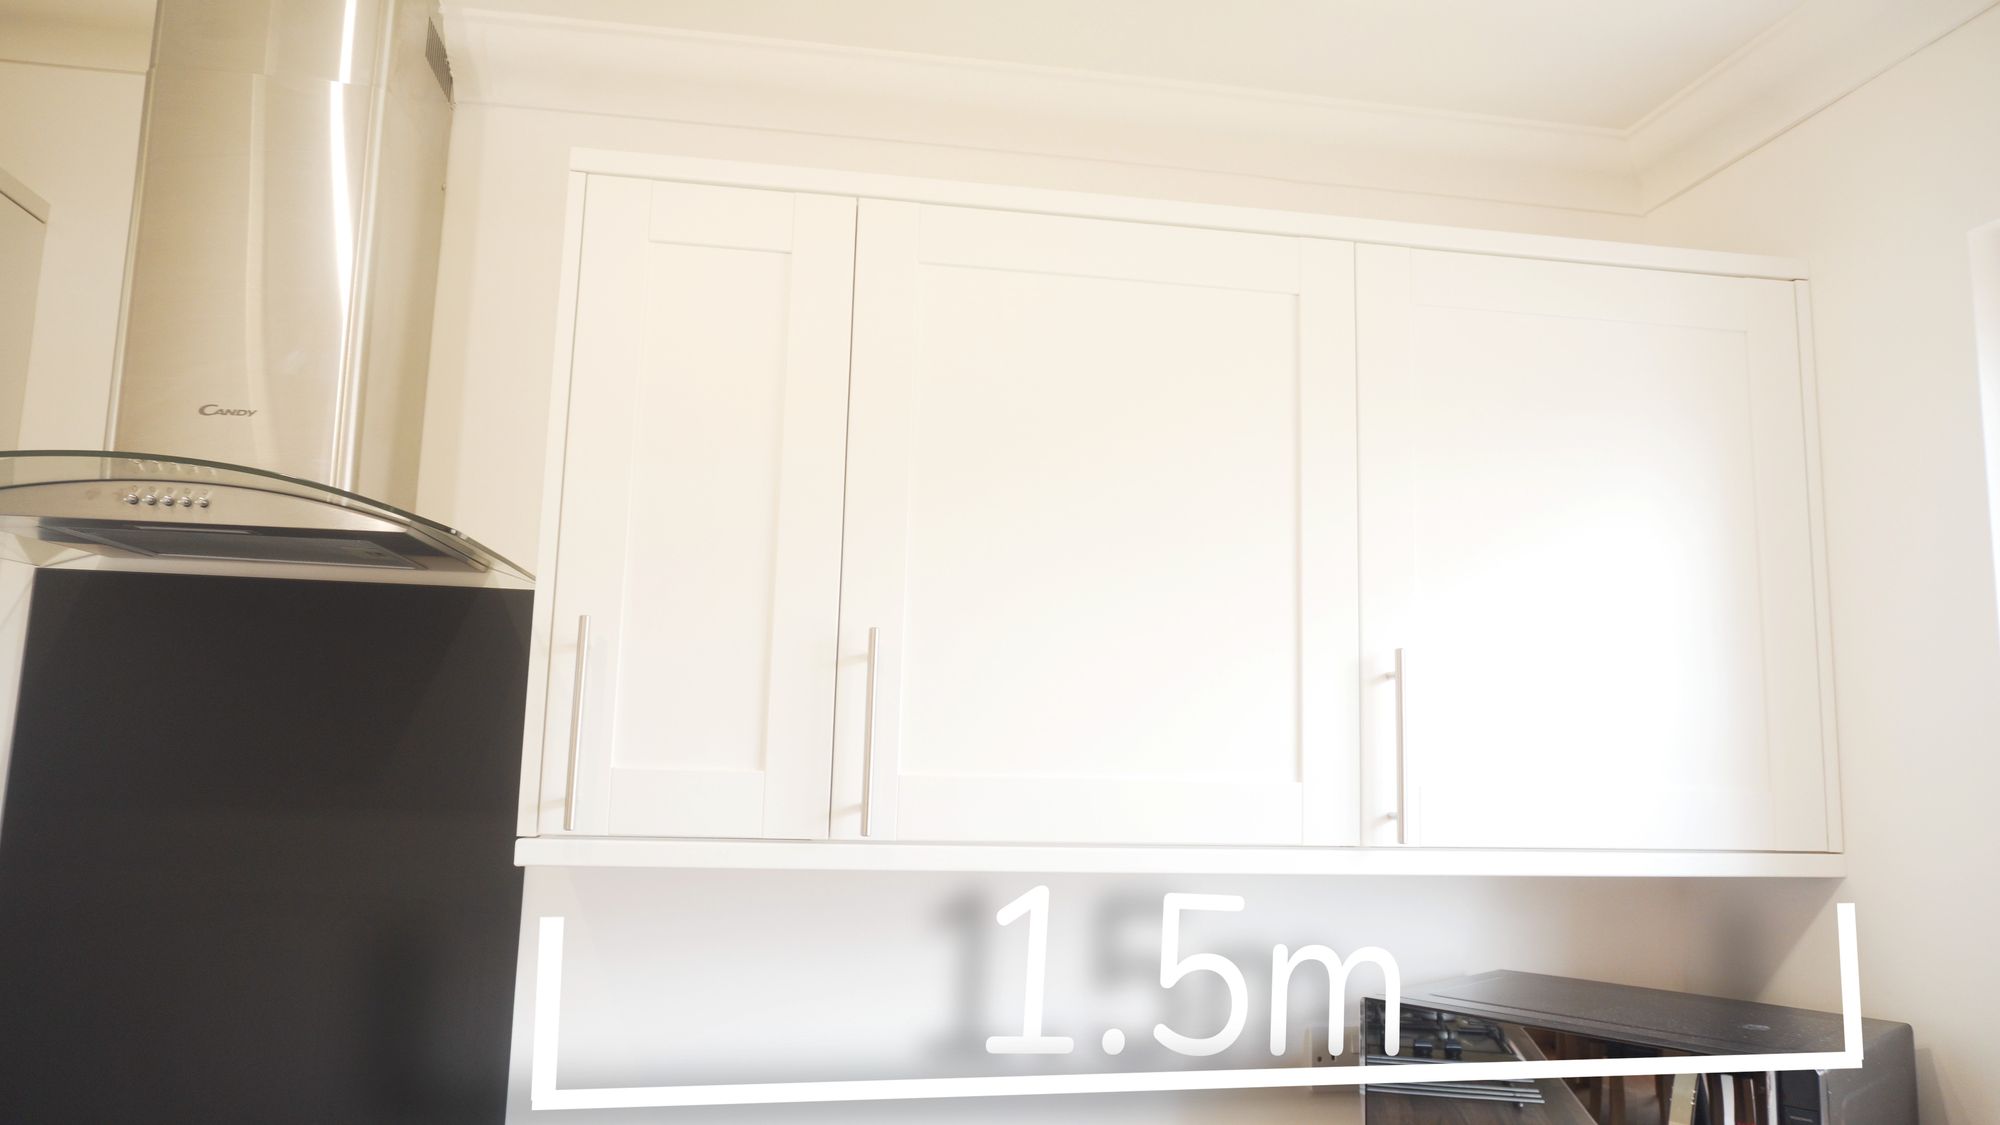
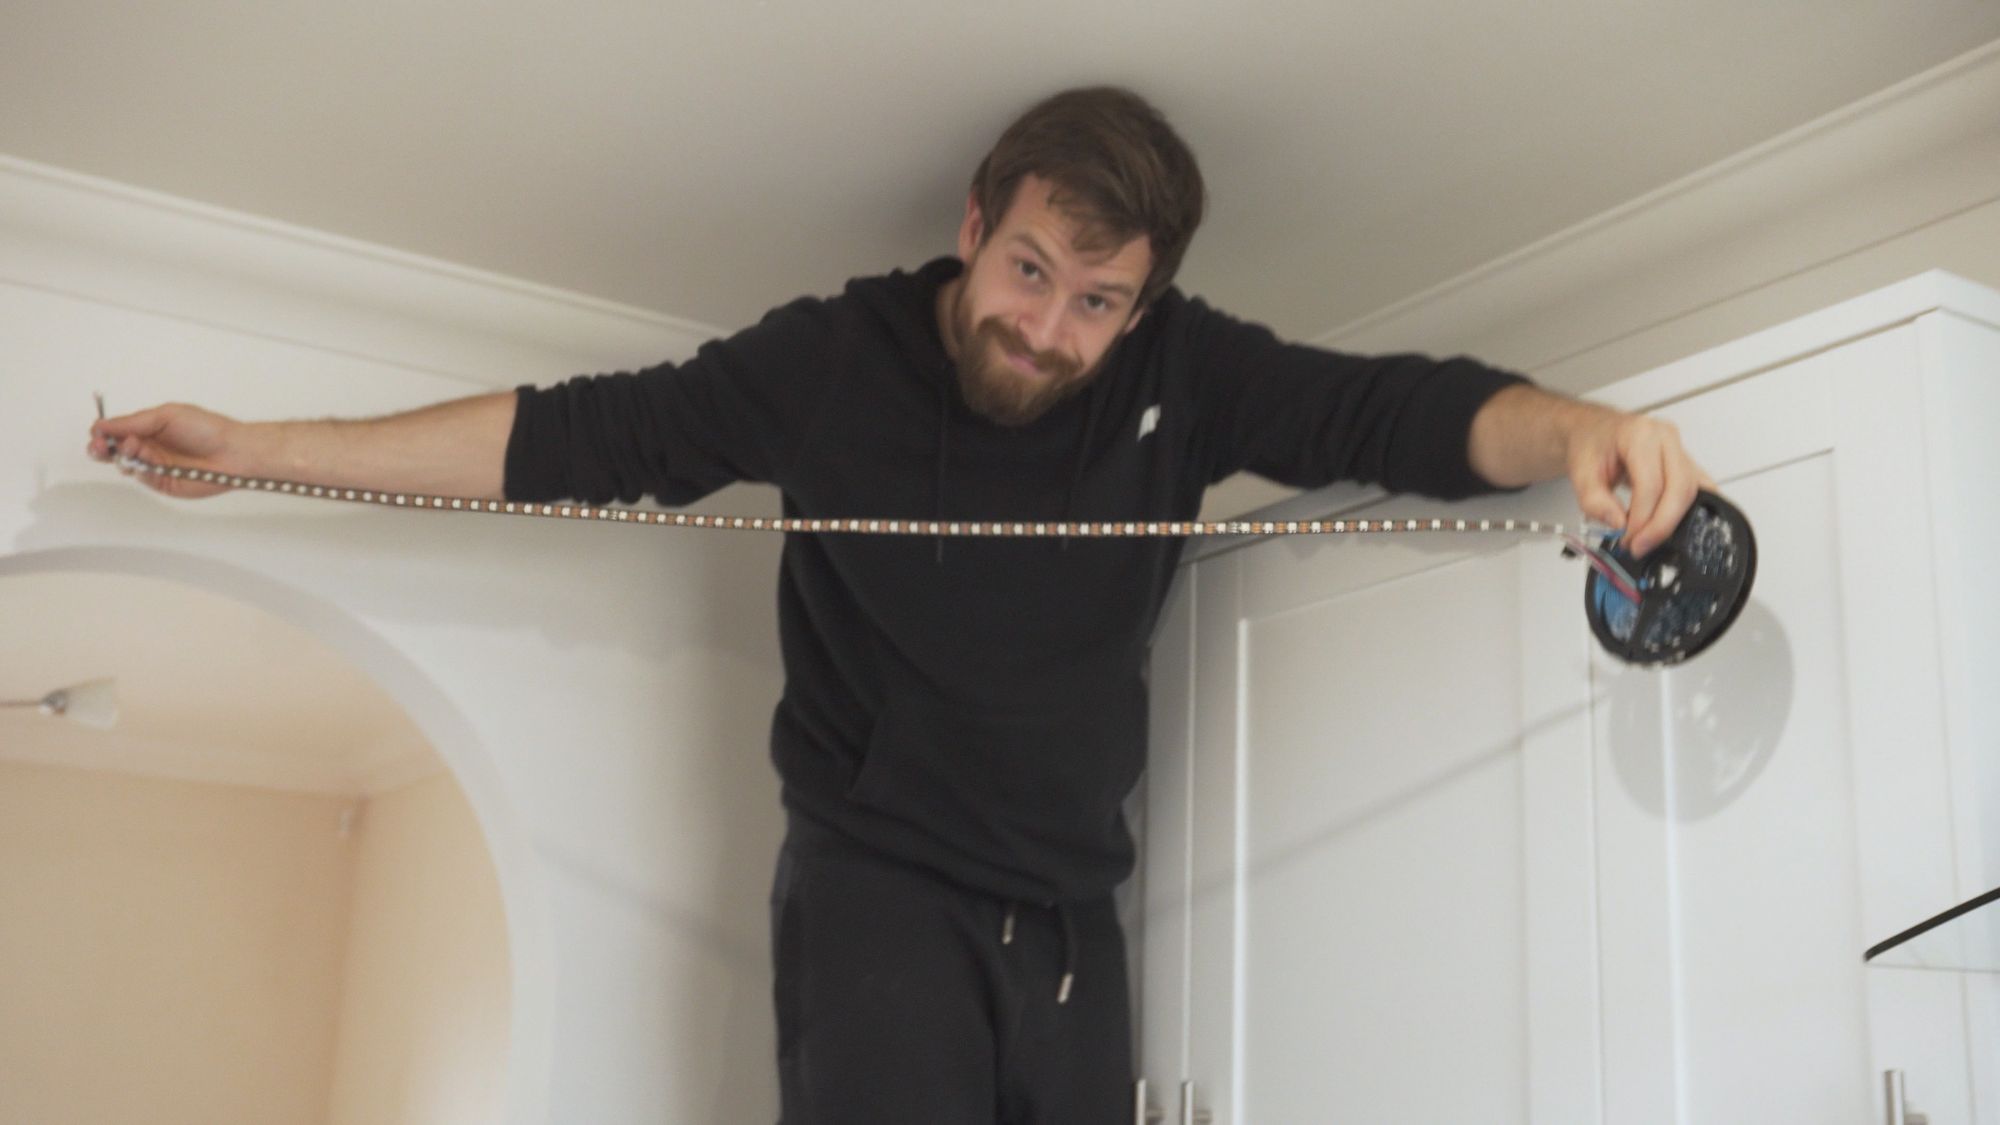
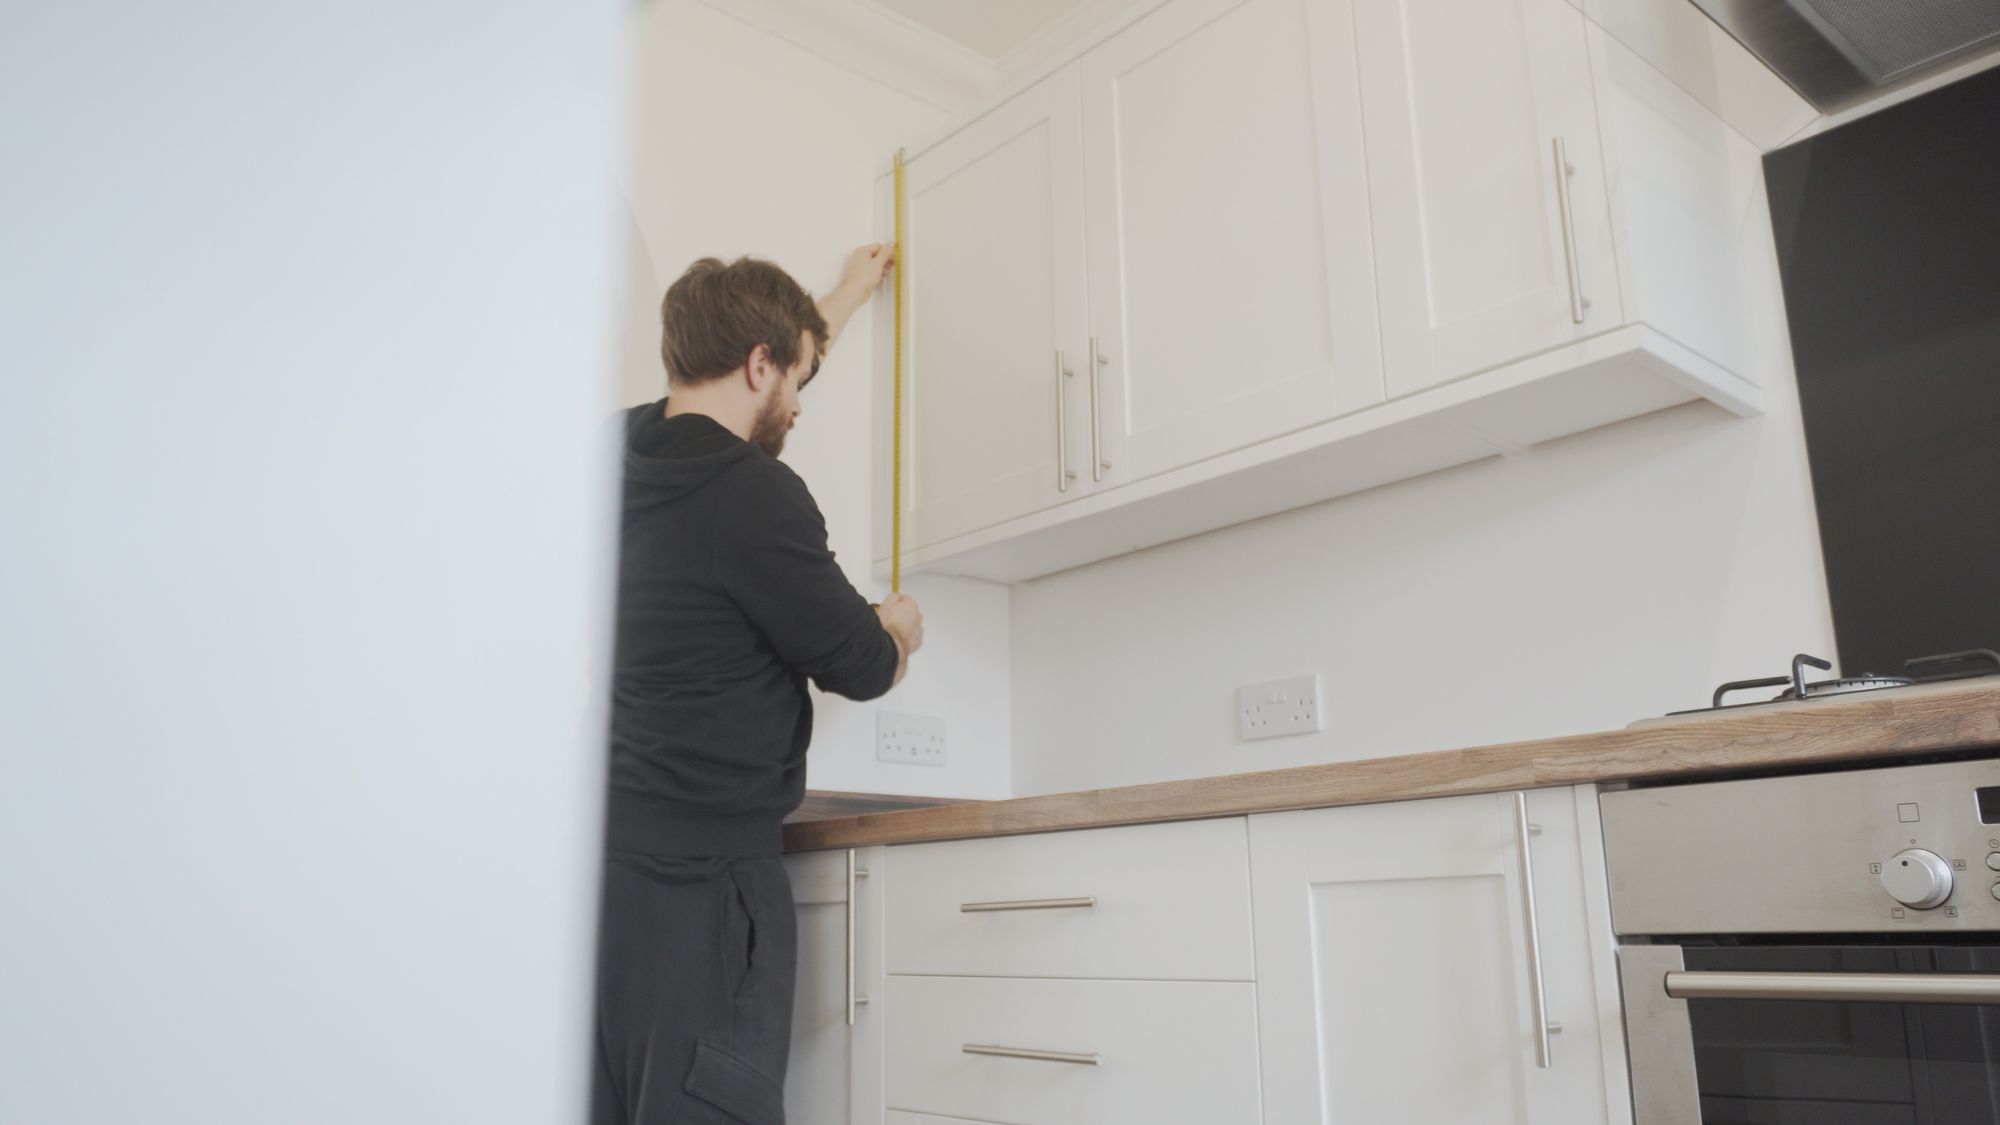
I started by measuring the space under the cabinets so I knew how much LED strip to buy, as well as the length of the aluminium channels to buy.
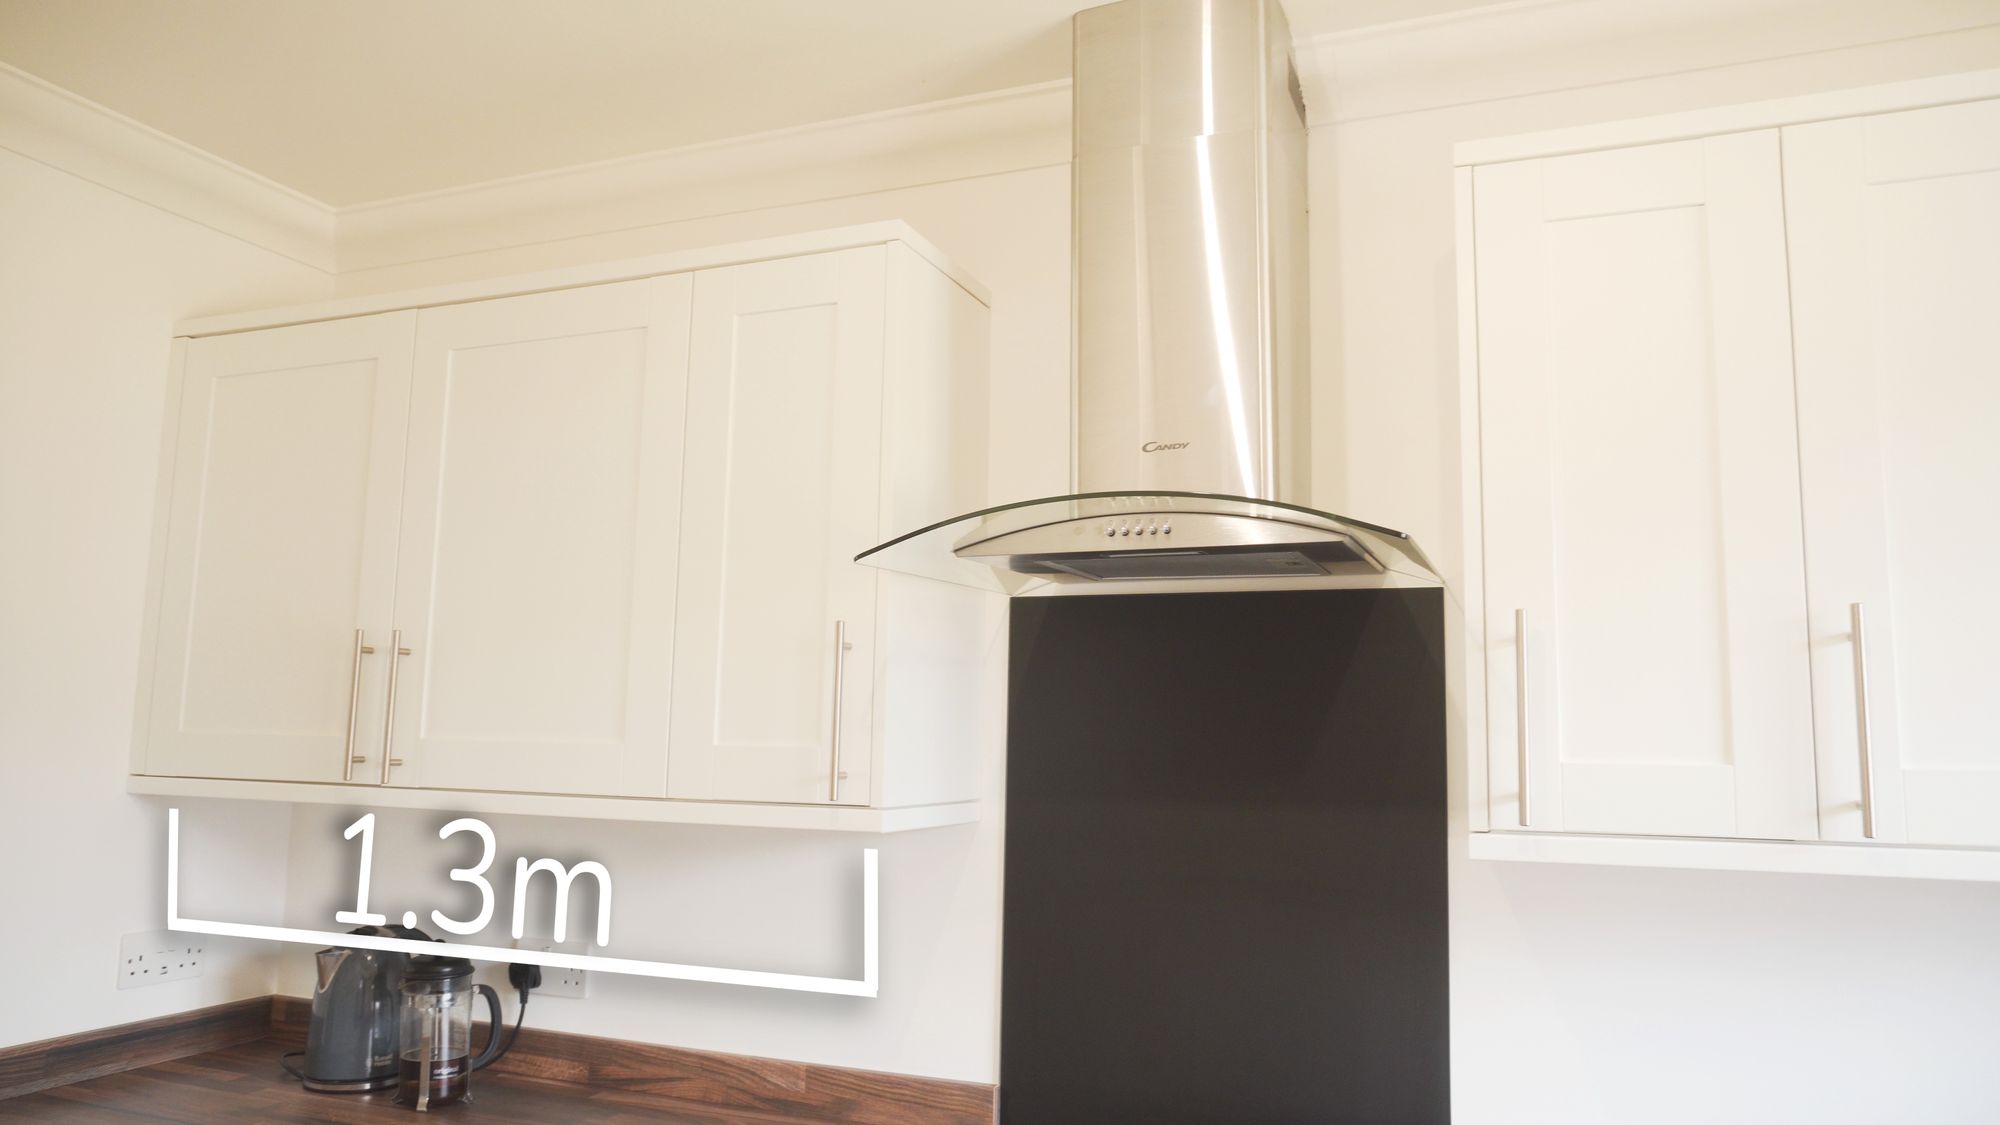
The left hand cabinet measures 1.3m along the bottom, whilst the right hand side is a little longer at 1.5m which is 2.8 meters in total, multiplied by 2 for the top of the cabinets which gives us 5.6m.
LED strips are typically available in 1 or 5 meter lengths, so I ended up with 2x 5 meter lengths, as I have another small section of the kitchen that I’m going to do in the future.
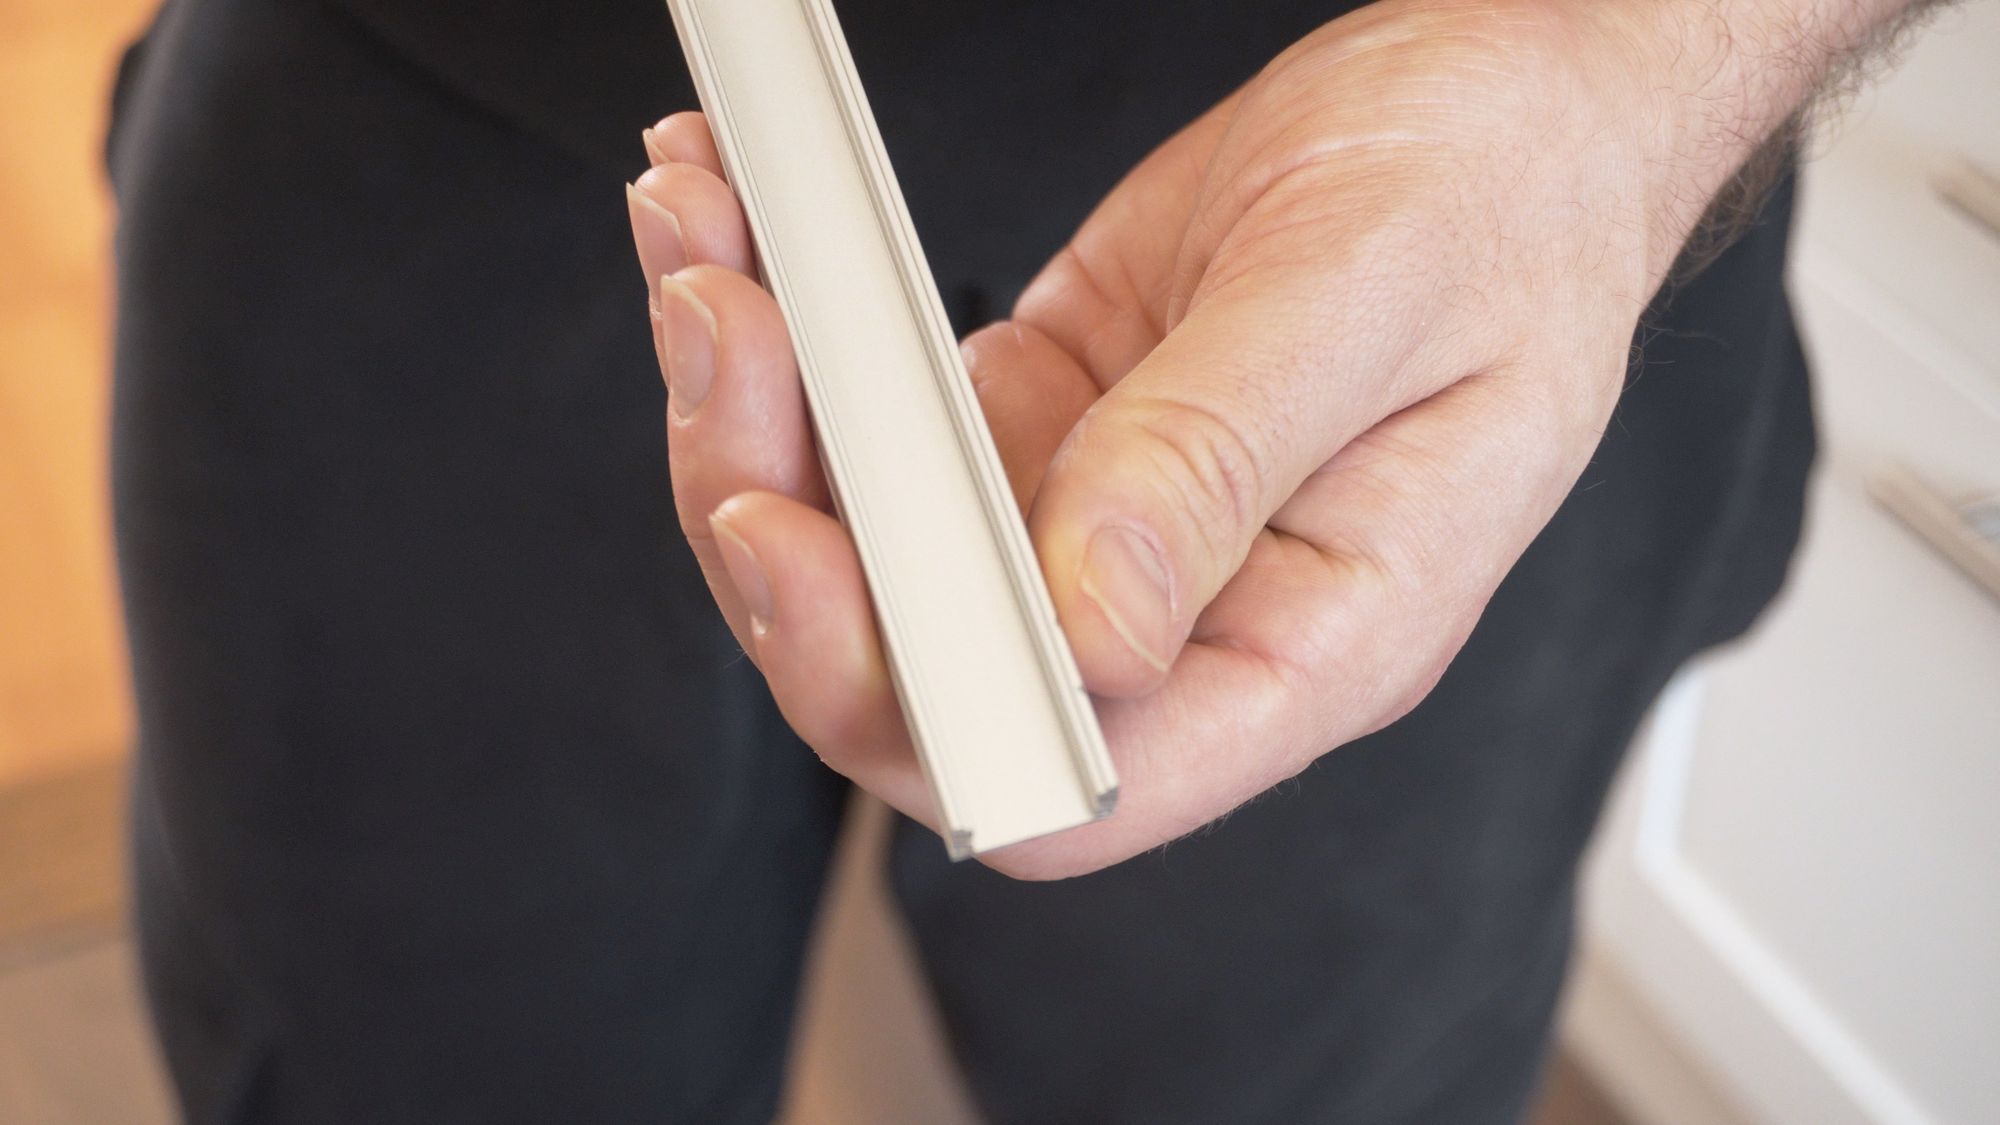
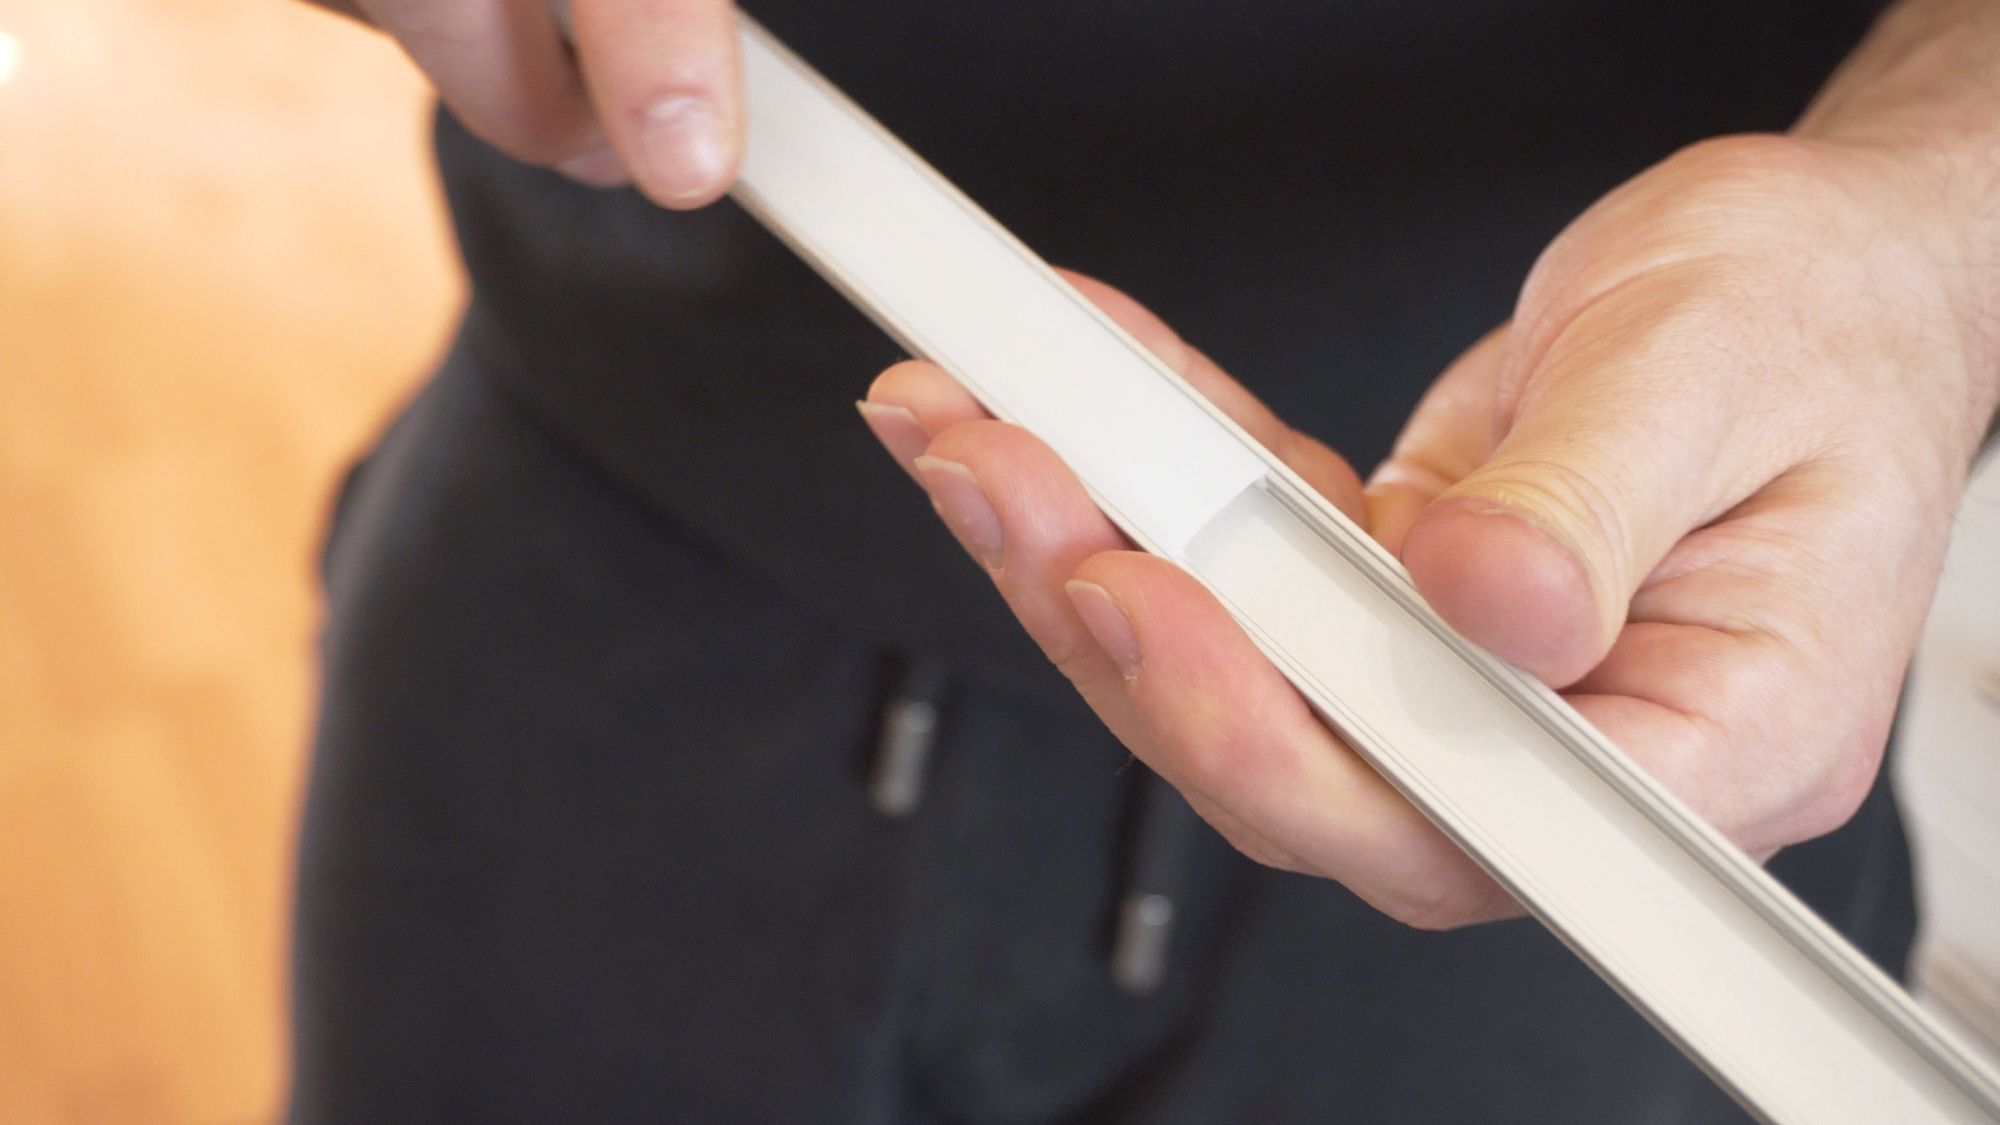
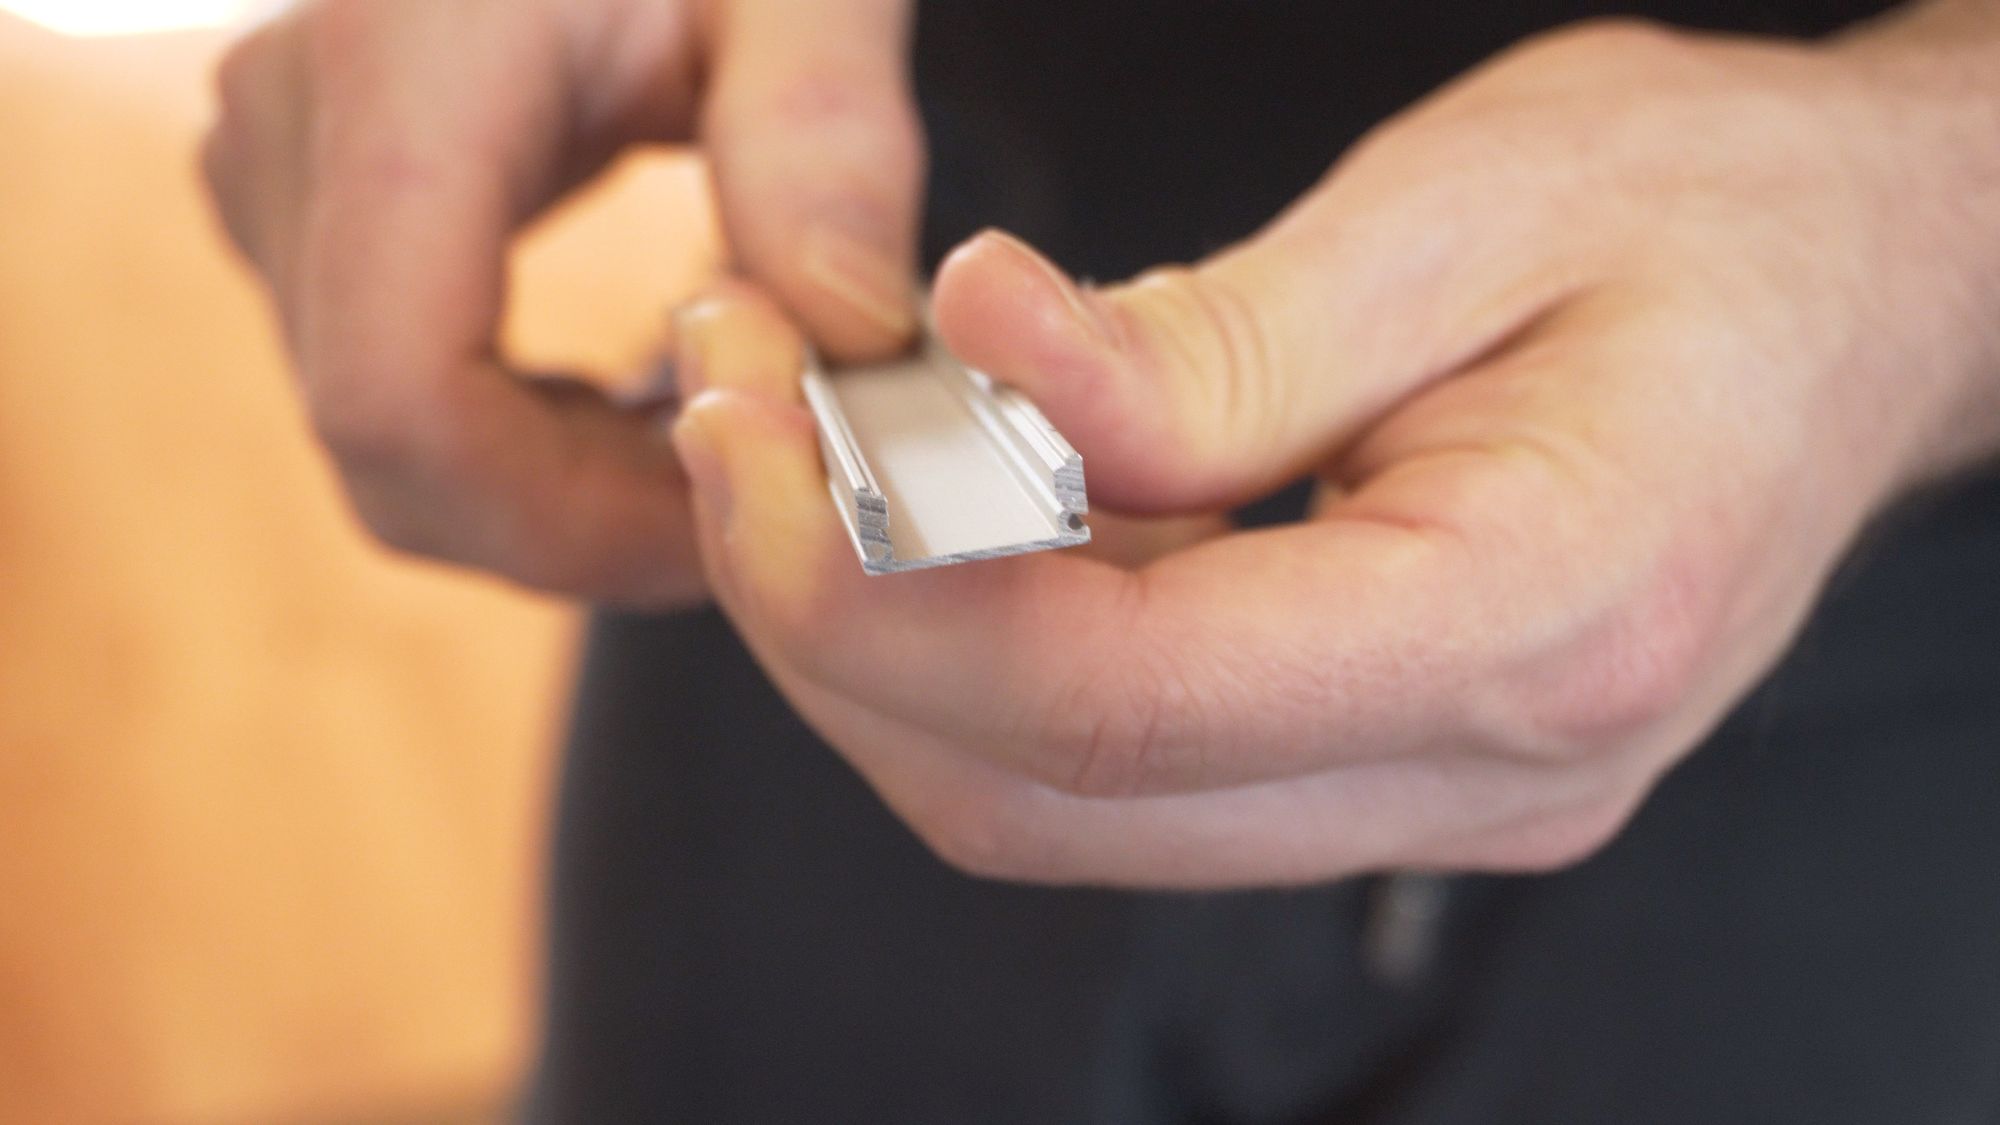
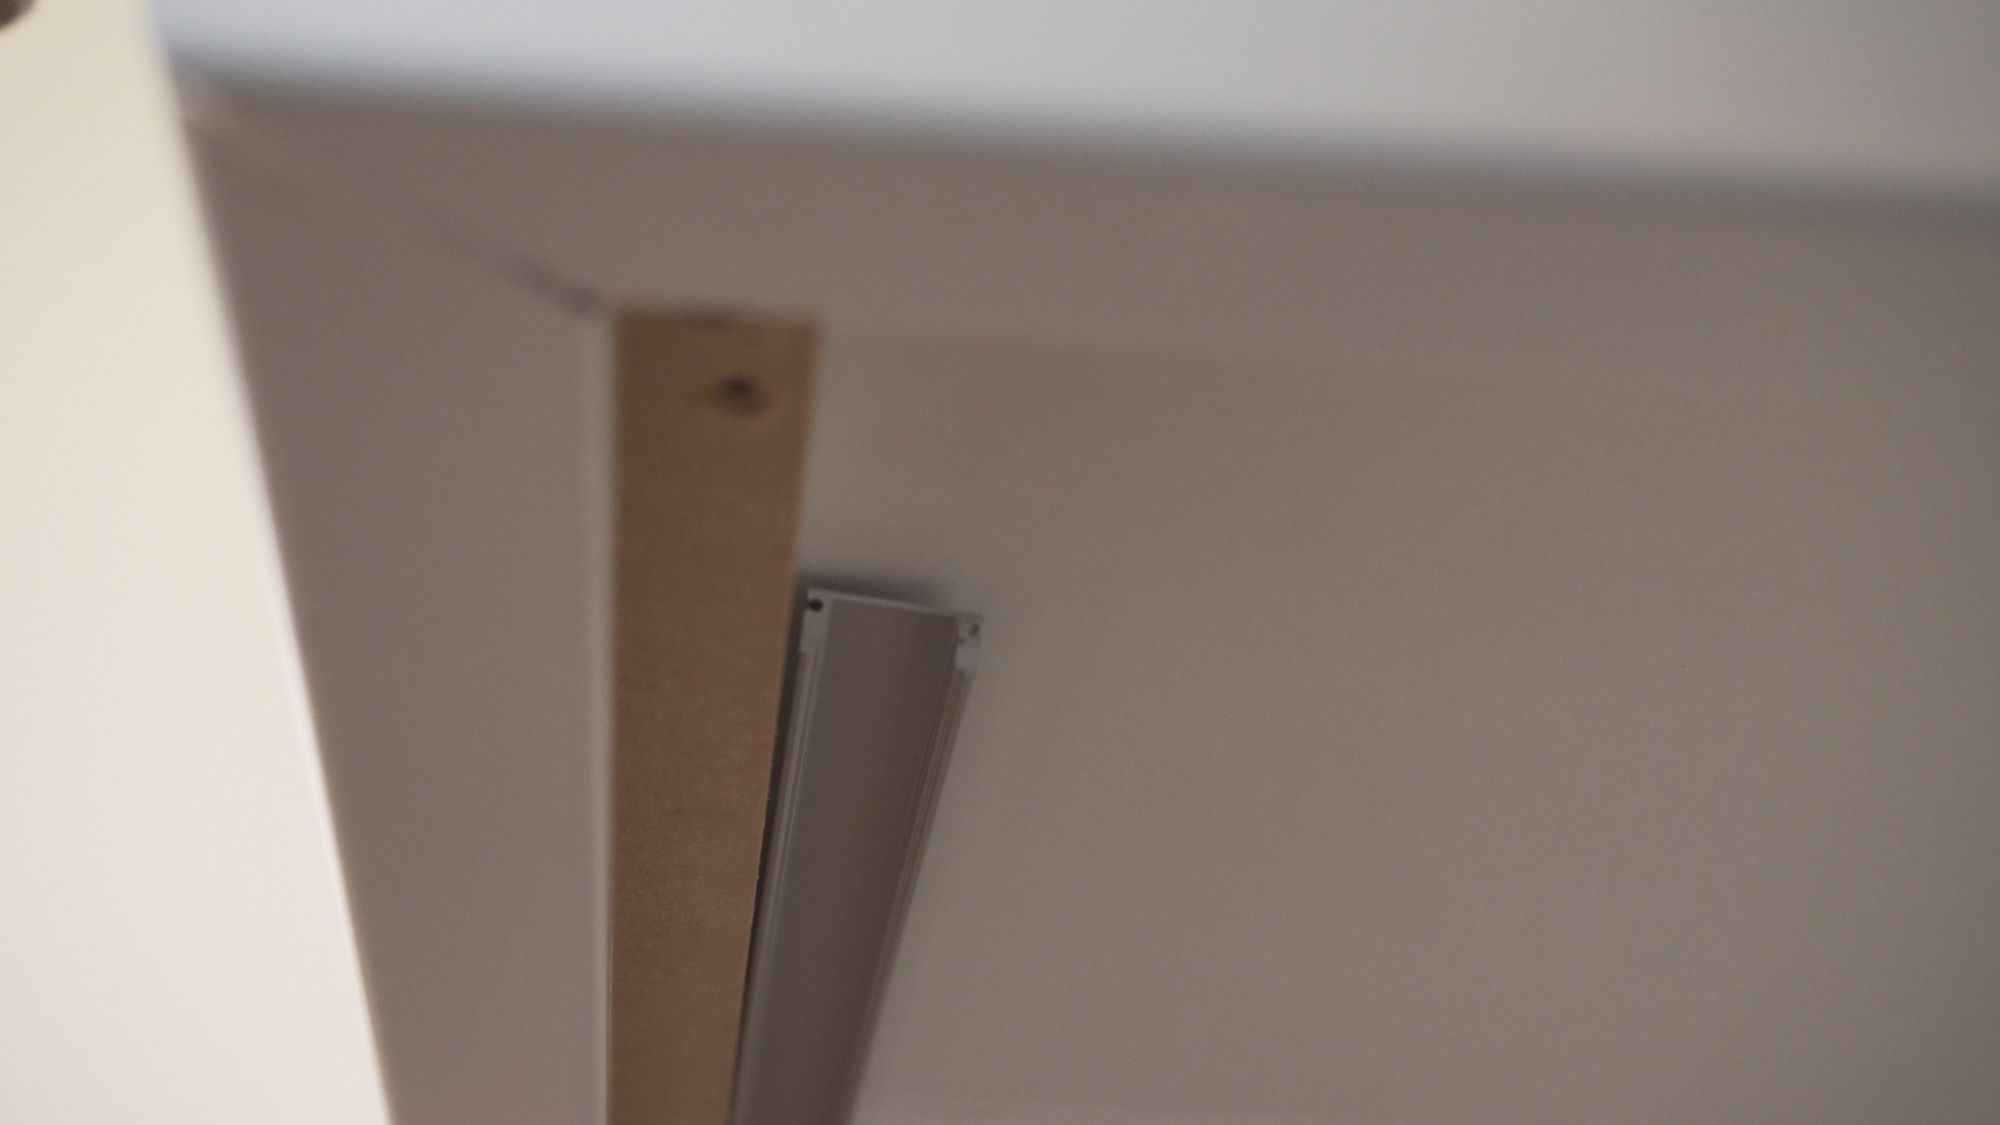
I also ordered these aluminium channels and these provide a nice place for the LED strip to sit inside and make installation a little easier.
Another advantage is they also provide a little bit of diffusion for the light making it a little softer, so you don’t see the hot spots of the LED’s quite as much if they were bare.
I already have power cables above my cabinets which were used for some traditional down-lighters that were in the old kitchen, so I made sure these were left in place so I could re-use them for this setup.
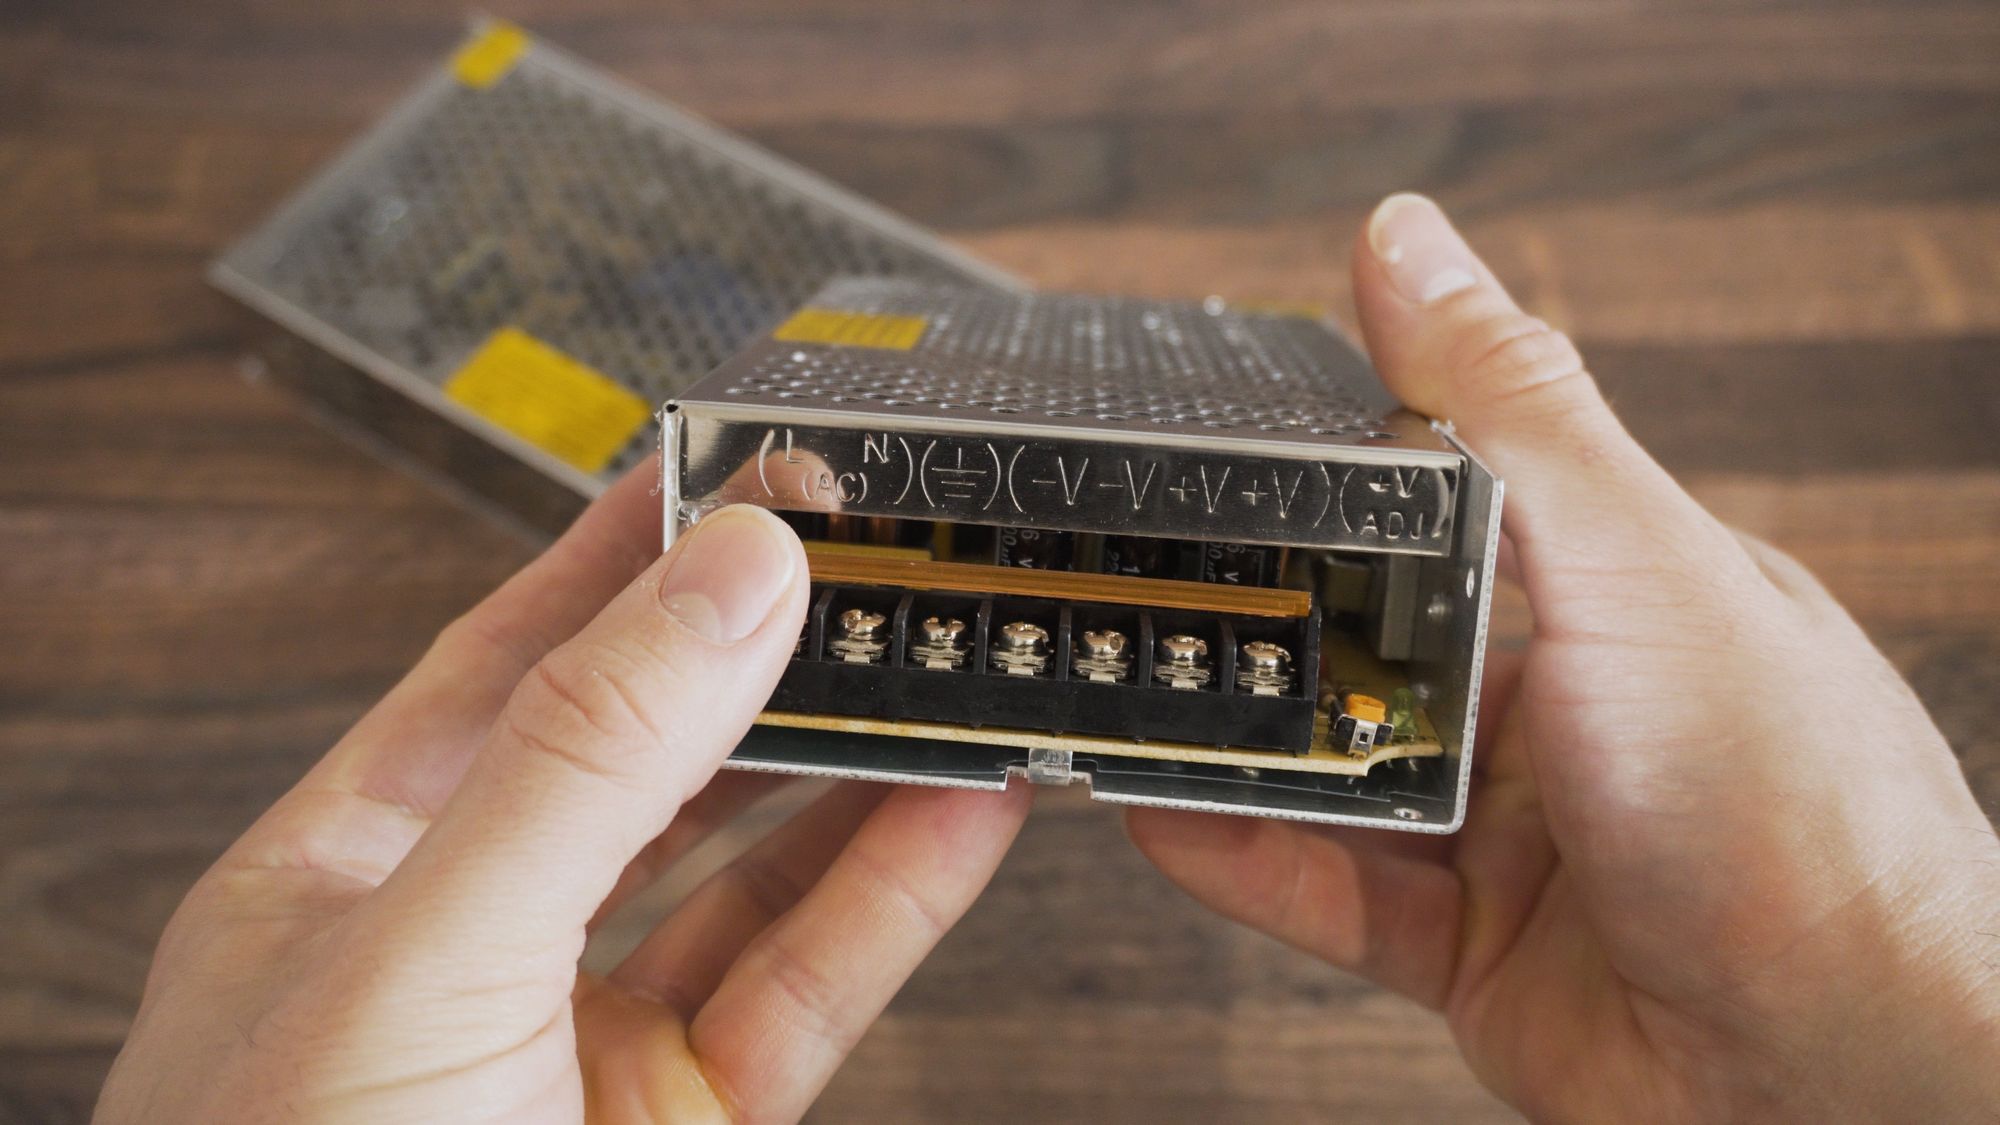
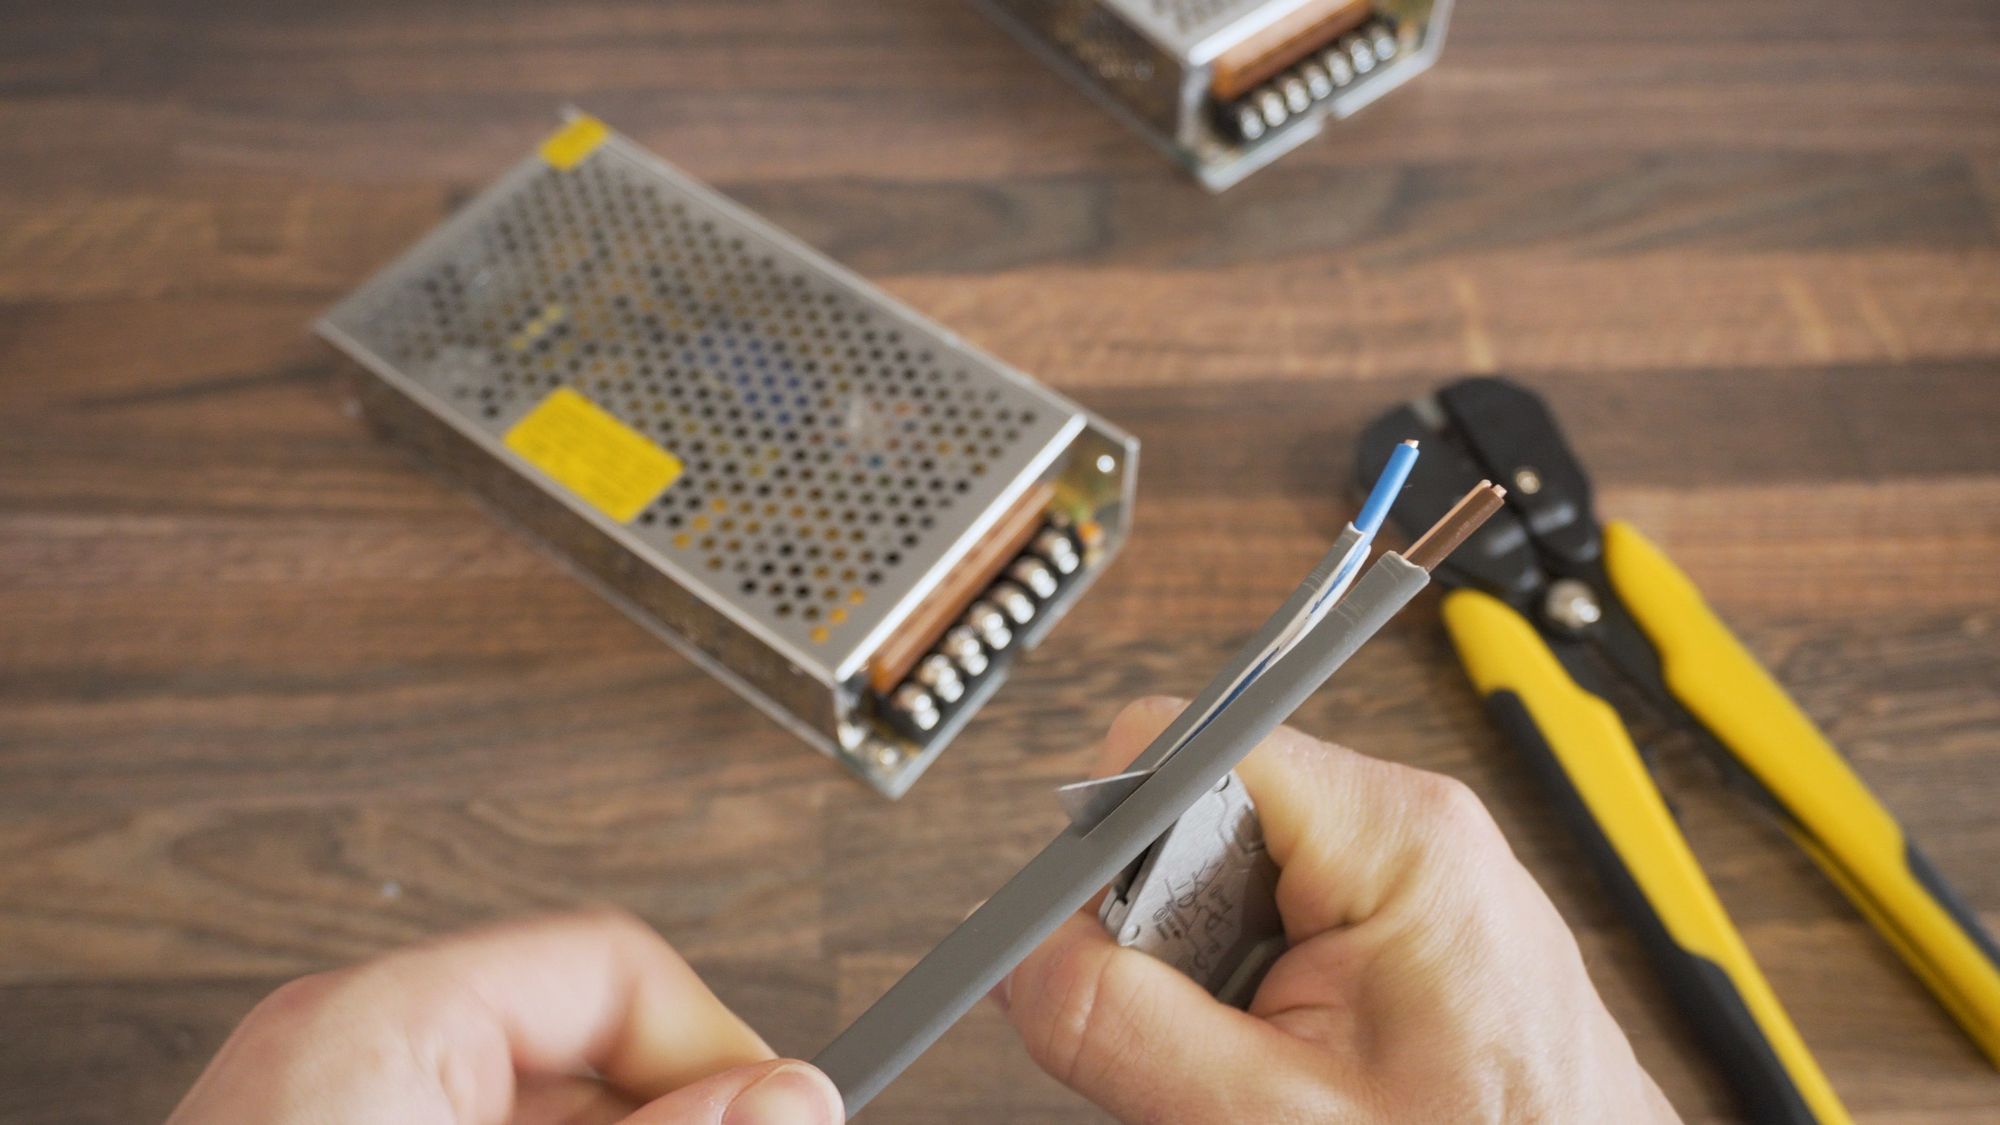
I’m going to be using these 5v, 30 amp power supplies to power the whole thing - 30 amps is overkill for this particular setup, but these were the ones I could get on short notice, plus they will do for any future plans:
Making Them Smart
Some LED strips are simple and you simply provide power to them and they turn on, but of course, this is Everything Smart Home, we’ve gotta integrate them with our smart home!
To do that, we need some sort of controller for the LED strip that will give us all of the colours and cool effects for the lights, but also allow us to integrate them with our Smart Home.
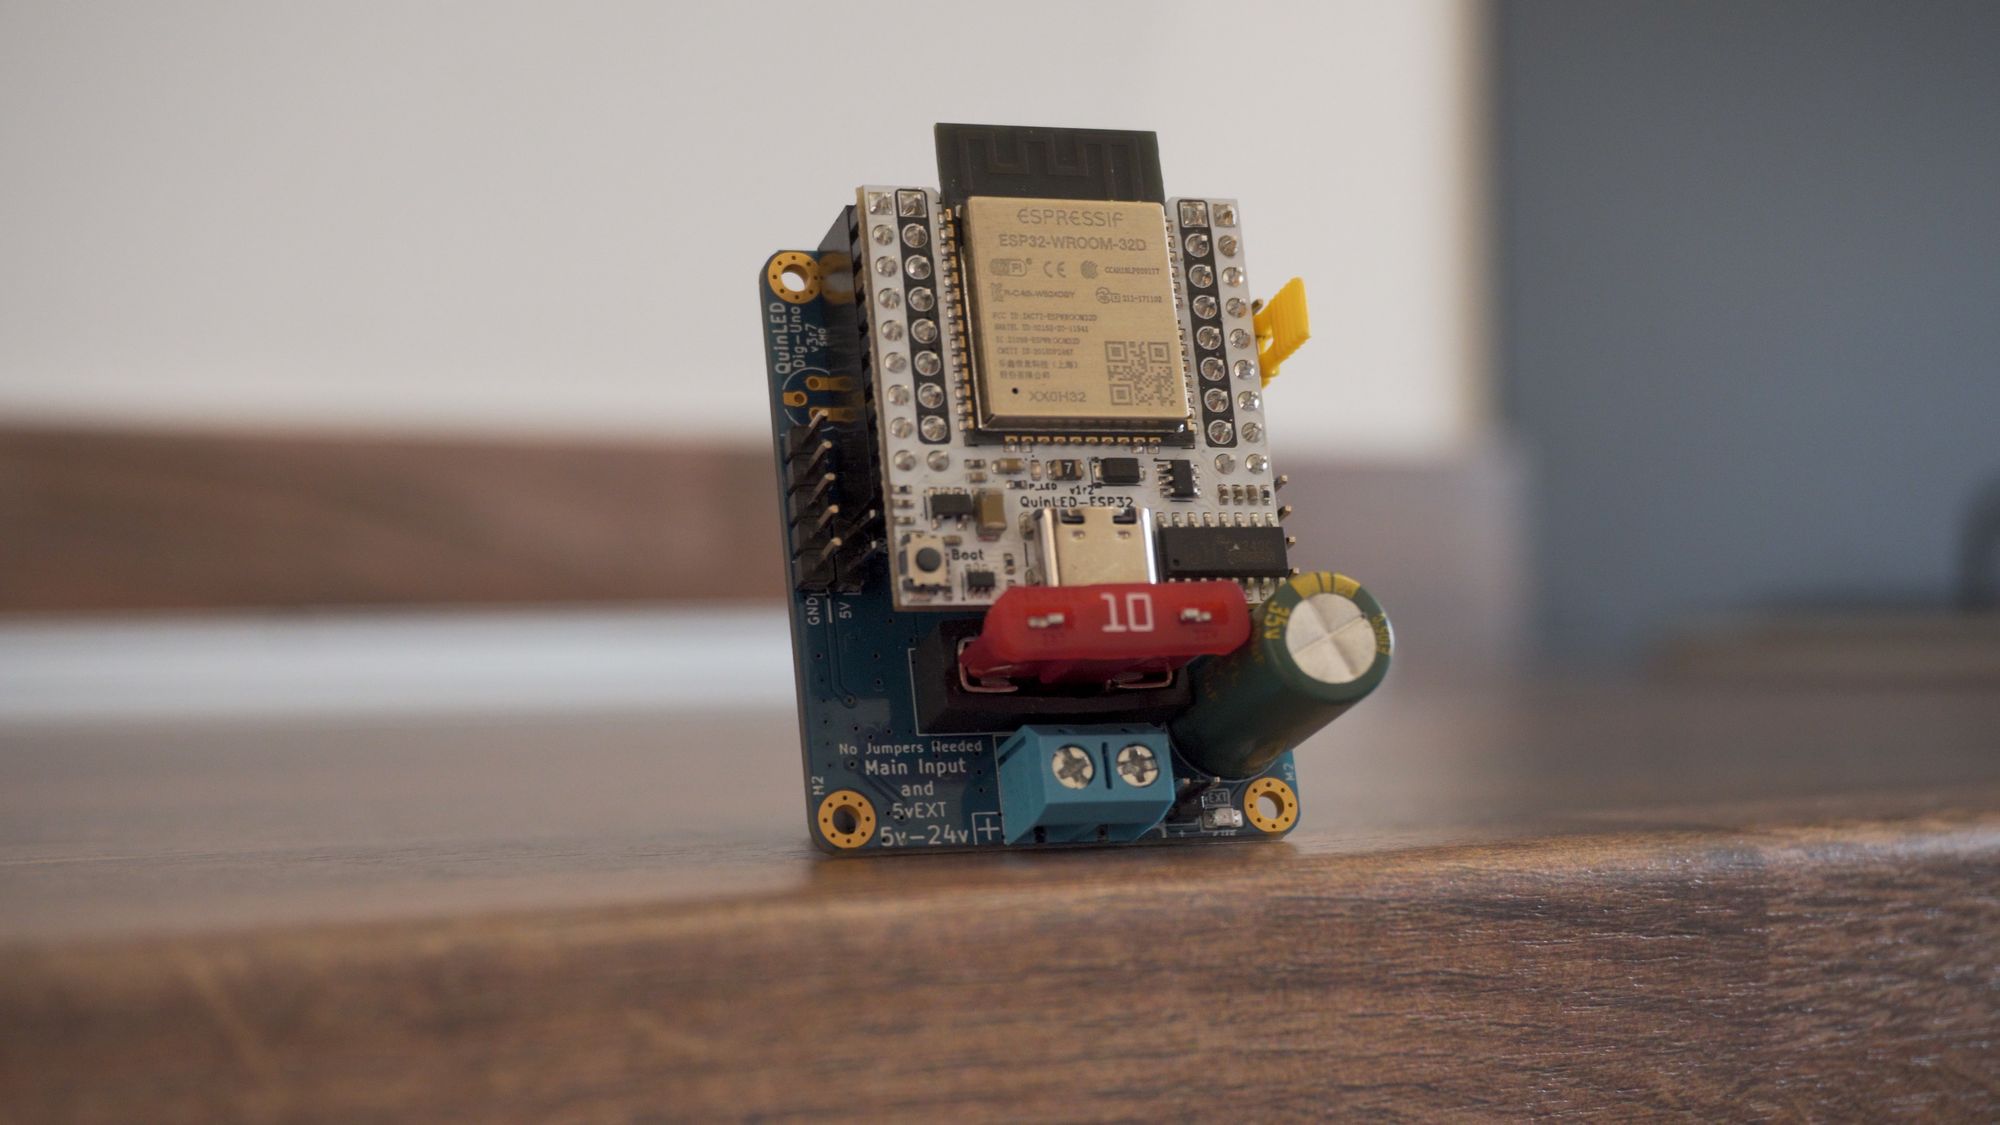
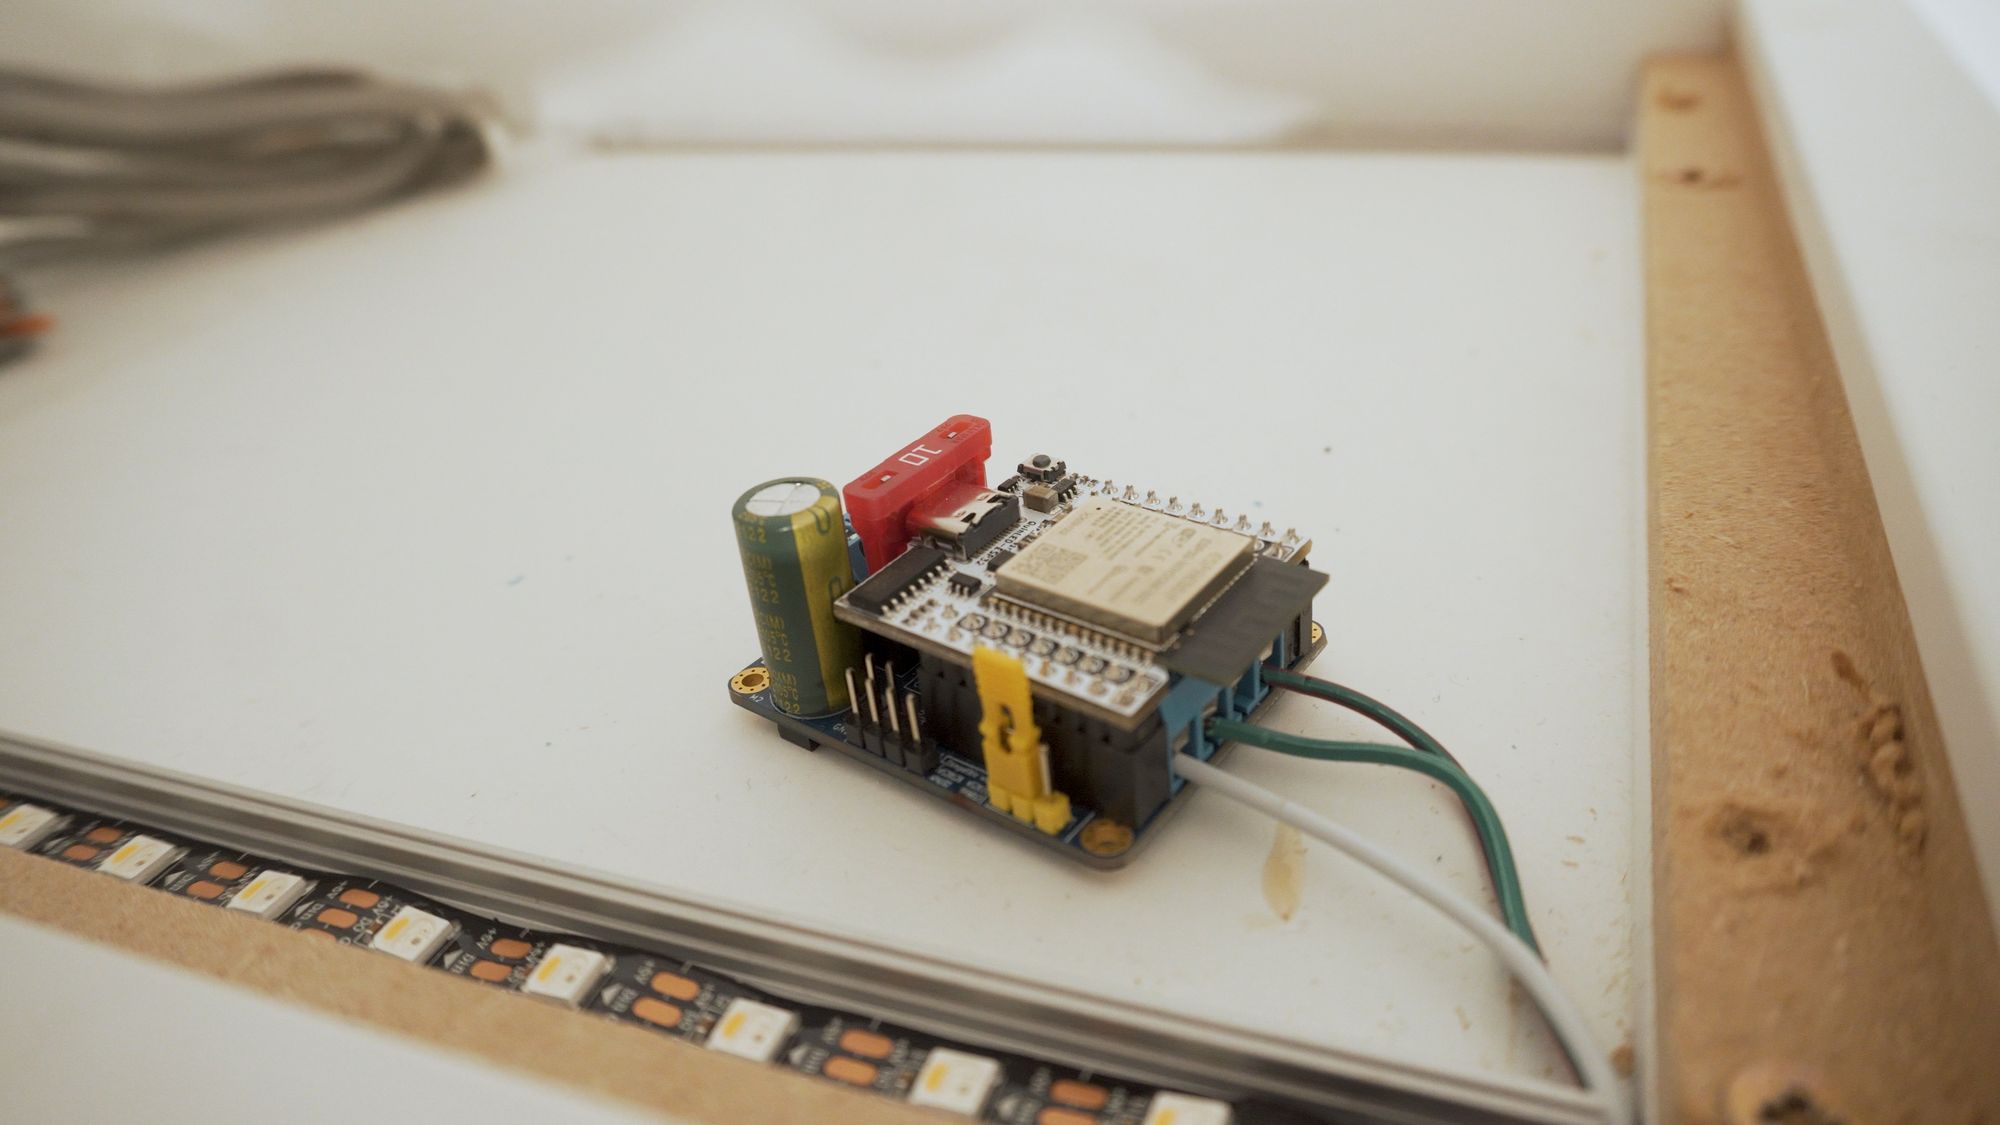
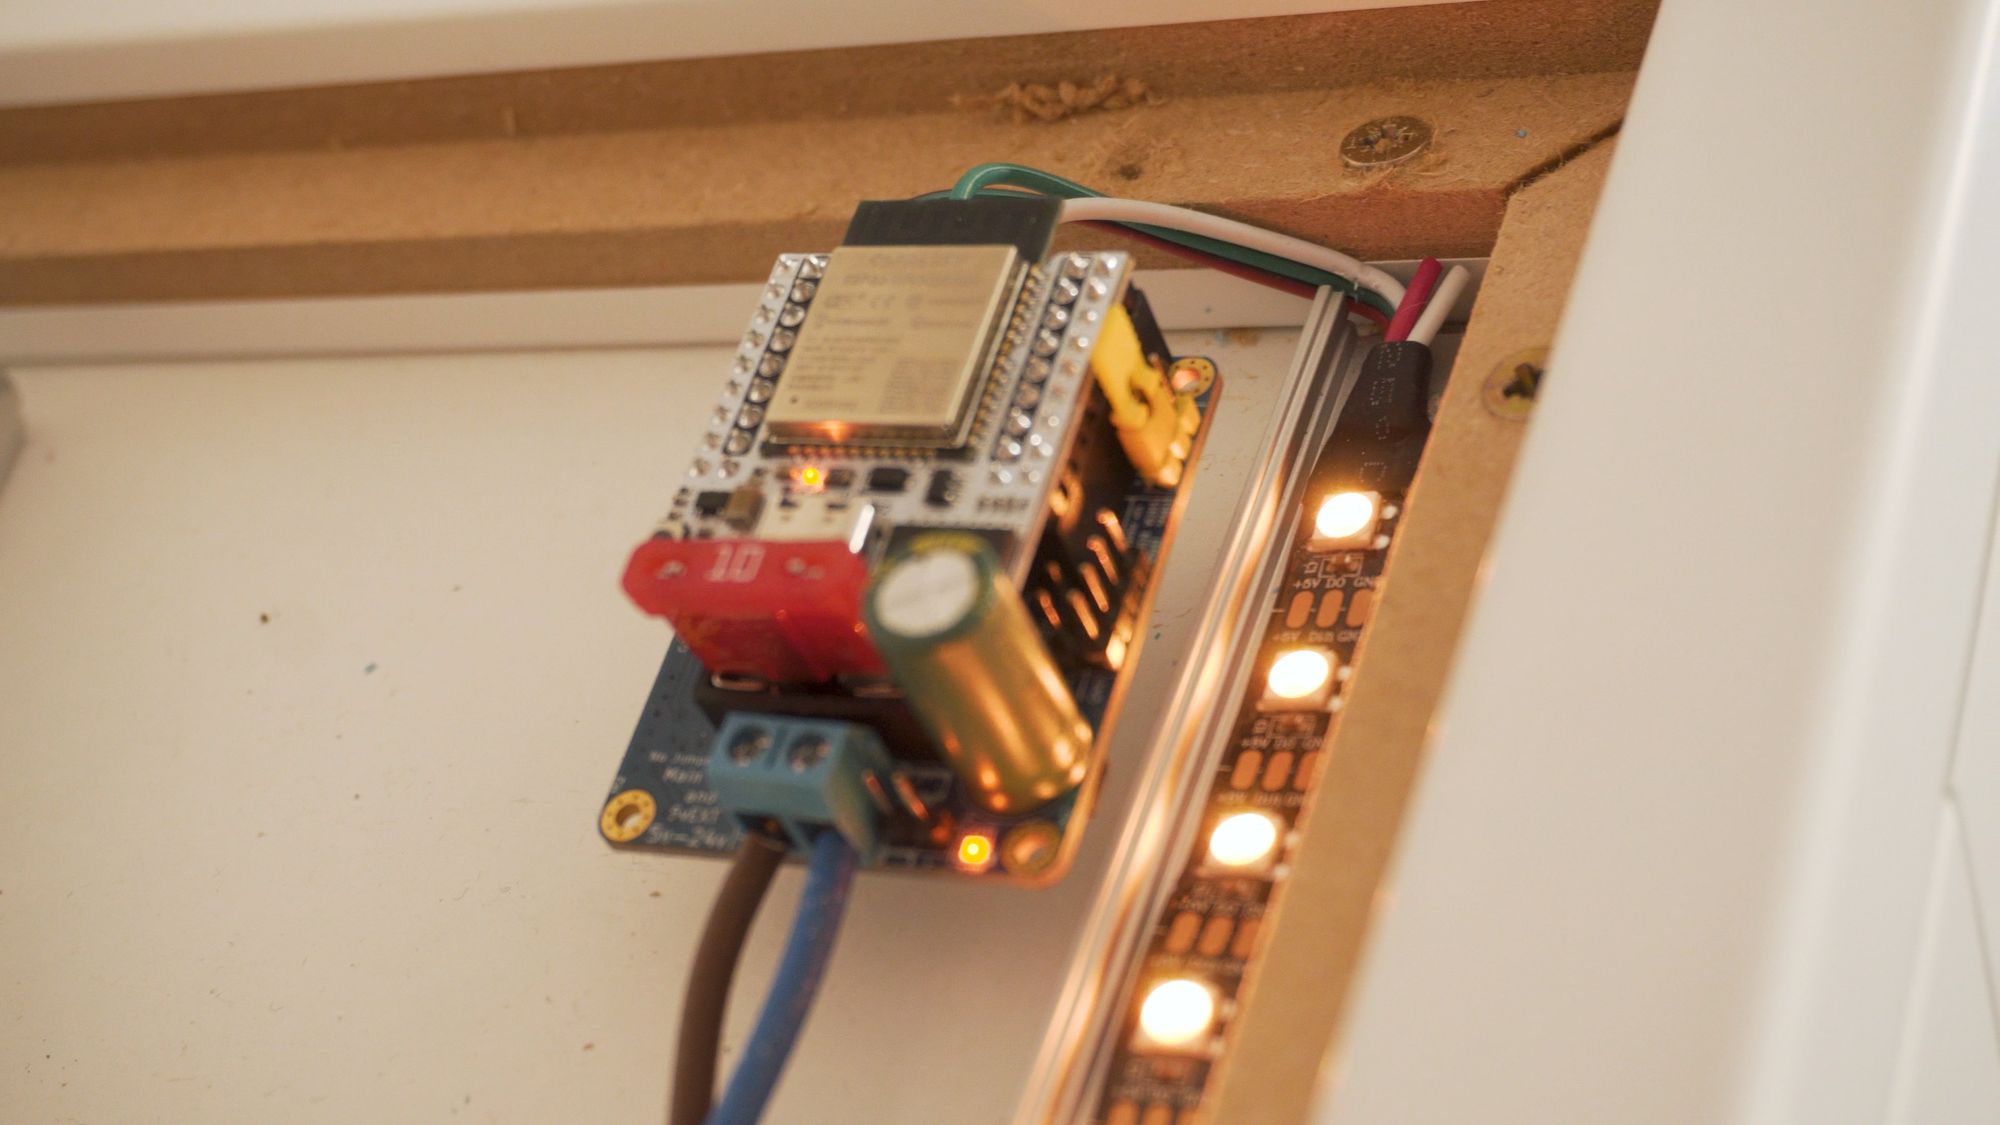
I went for a QuinLED-Dig-Uno which is a pre-assembled controller, featuring an ESP32 at the centre, screw terminals for easy connection and works with 5, 12 or 24v LED strips.
You can use a regular ESP32 and build your own, but I would highly recommend the Dig Uno or Dig Quad instead as they make everything so easy to connect and not to mention, much safer.
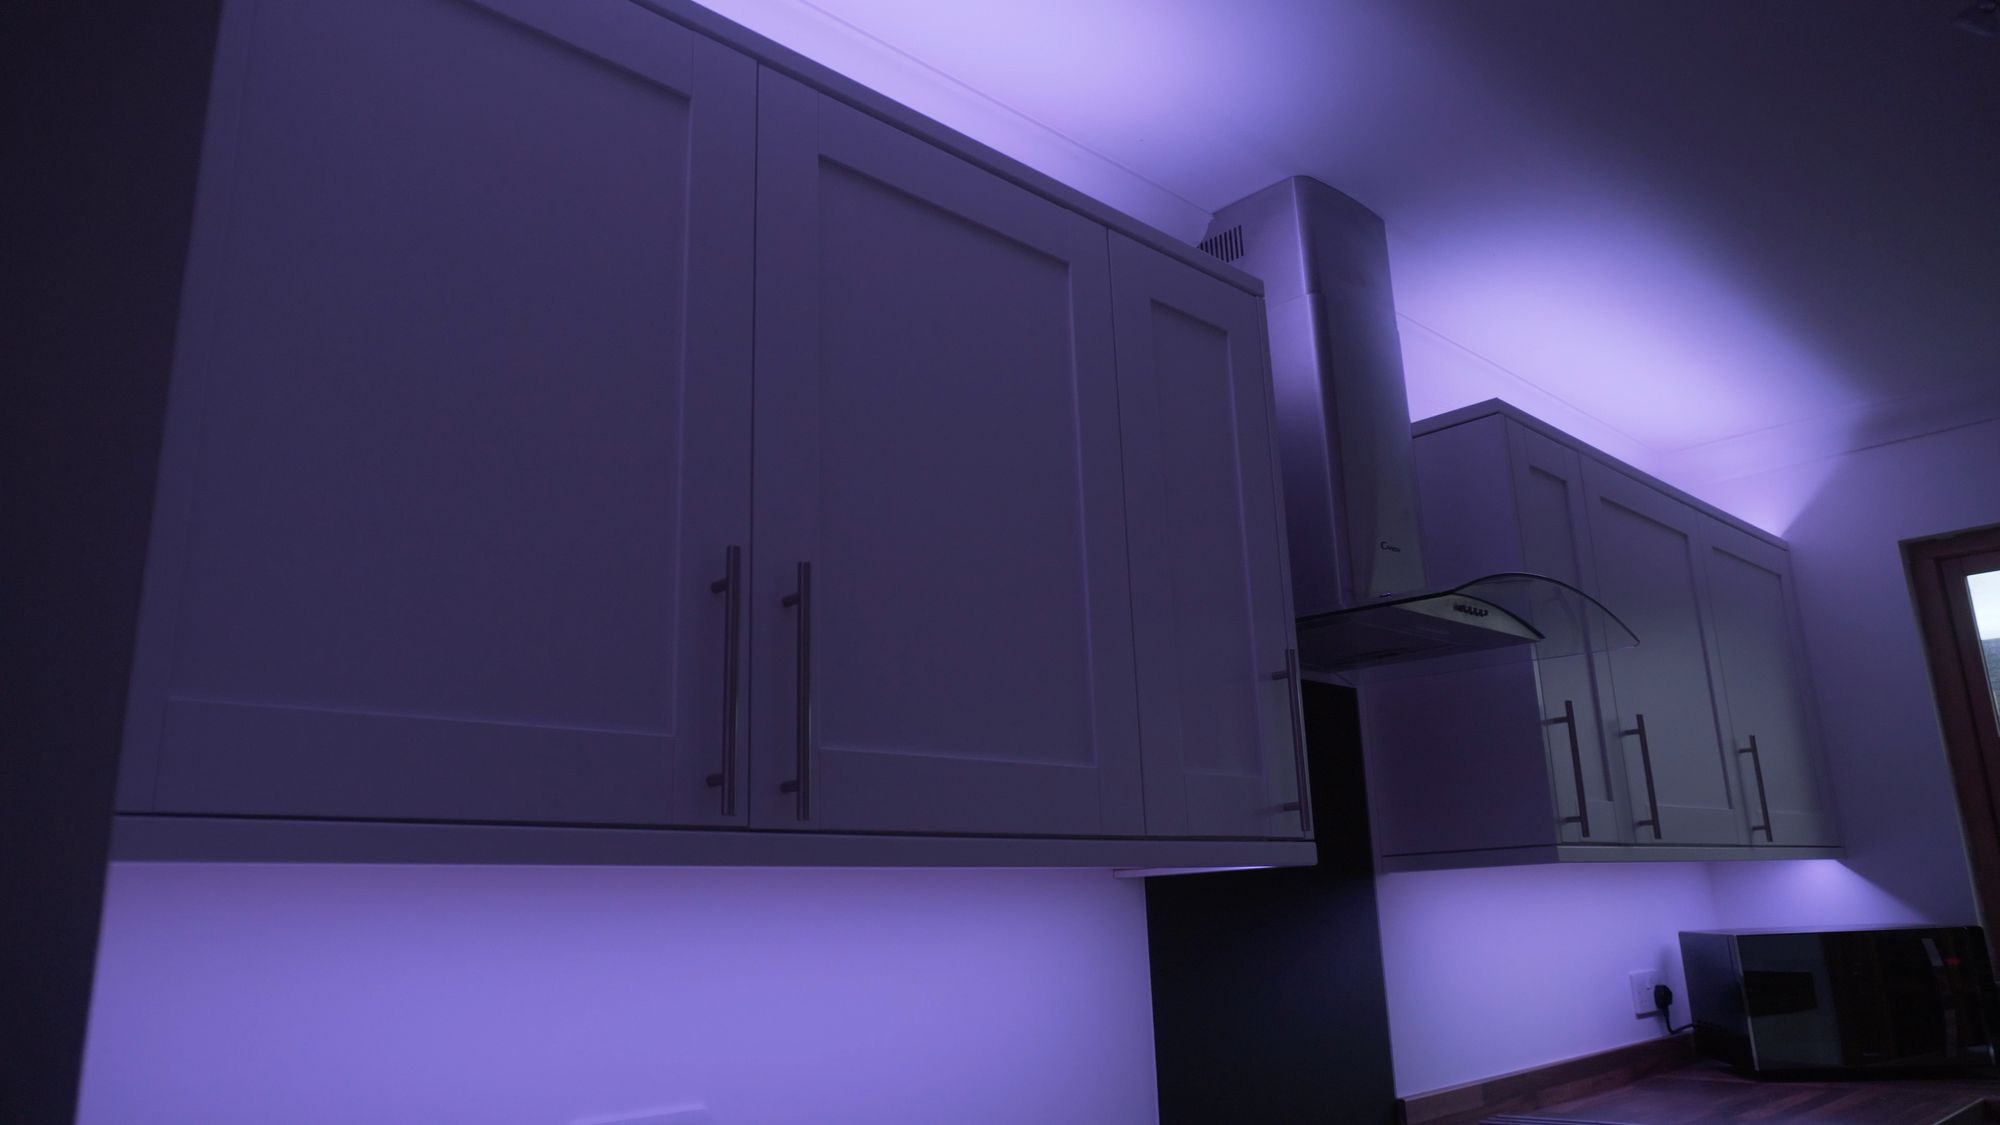
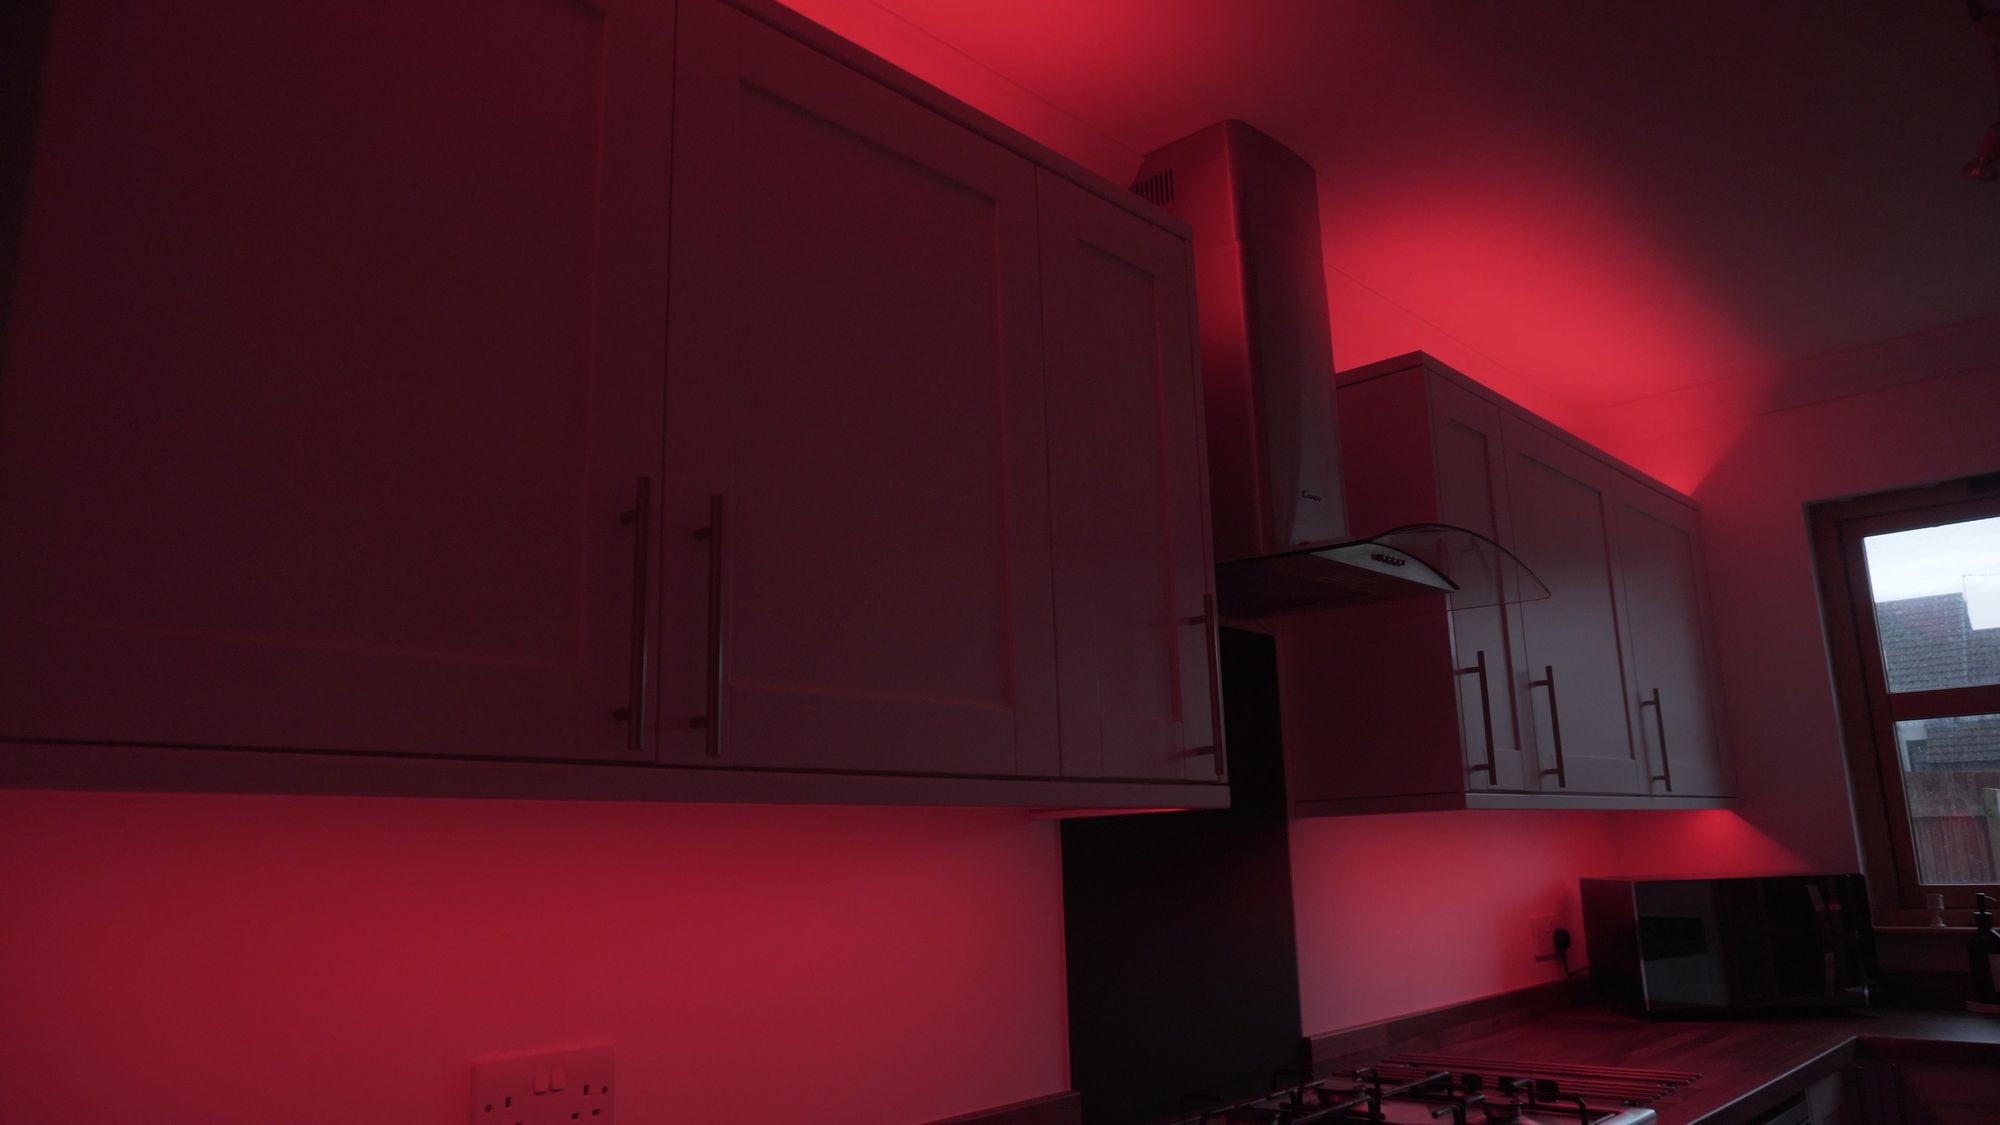
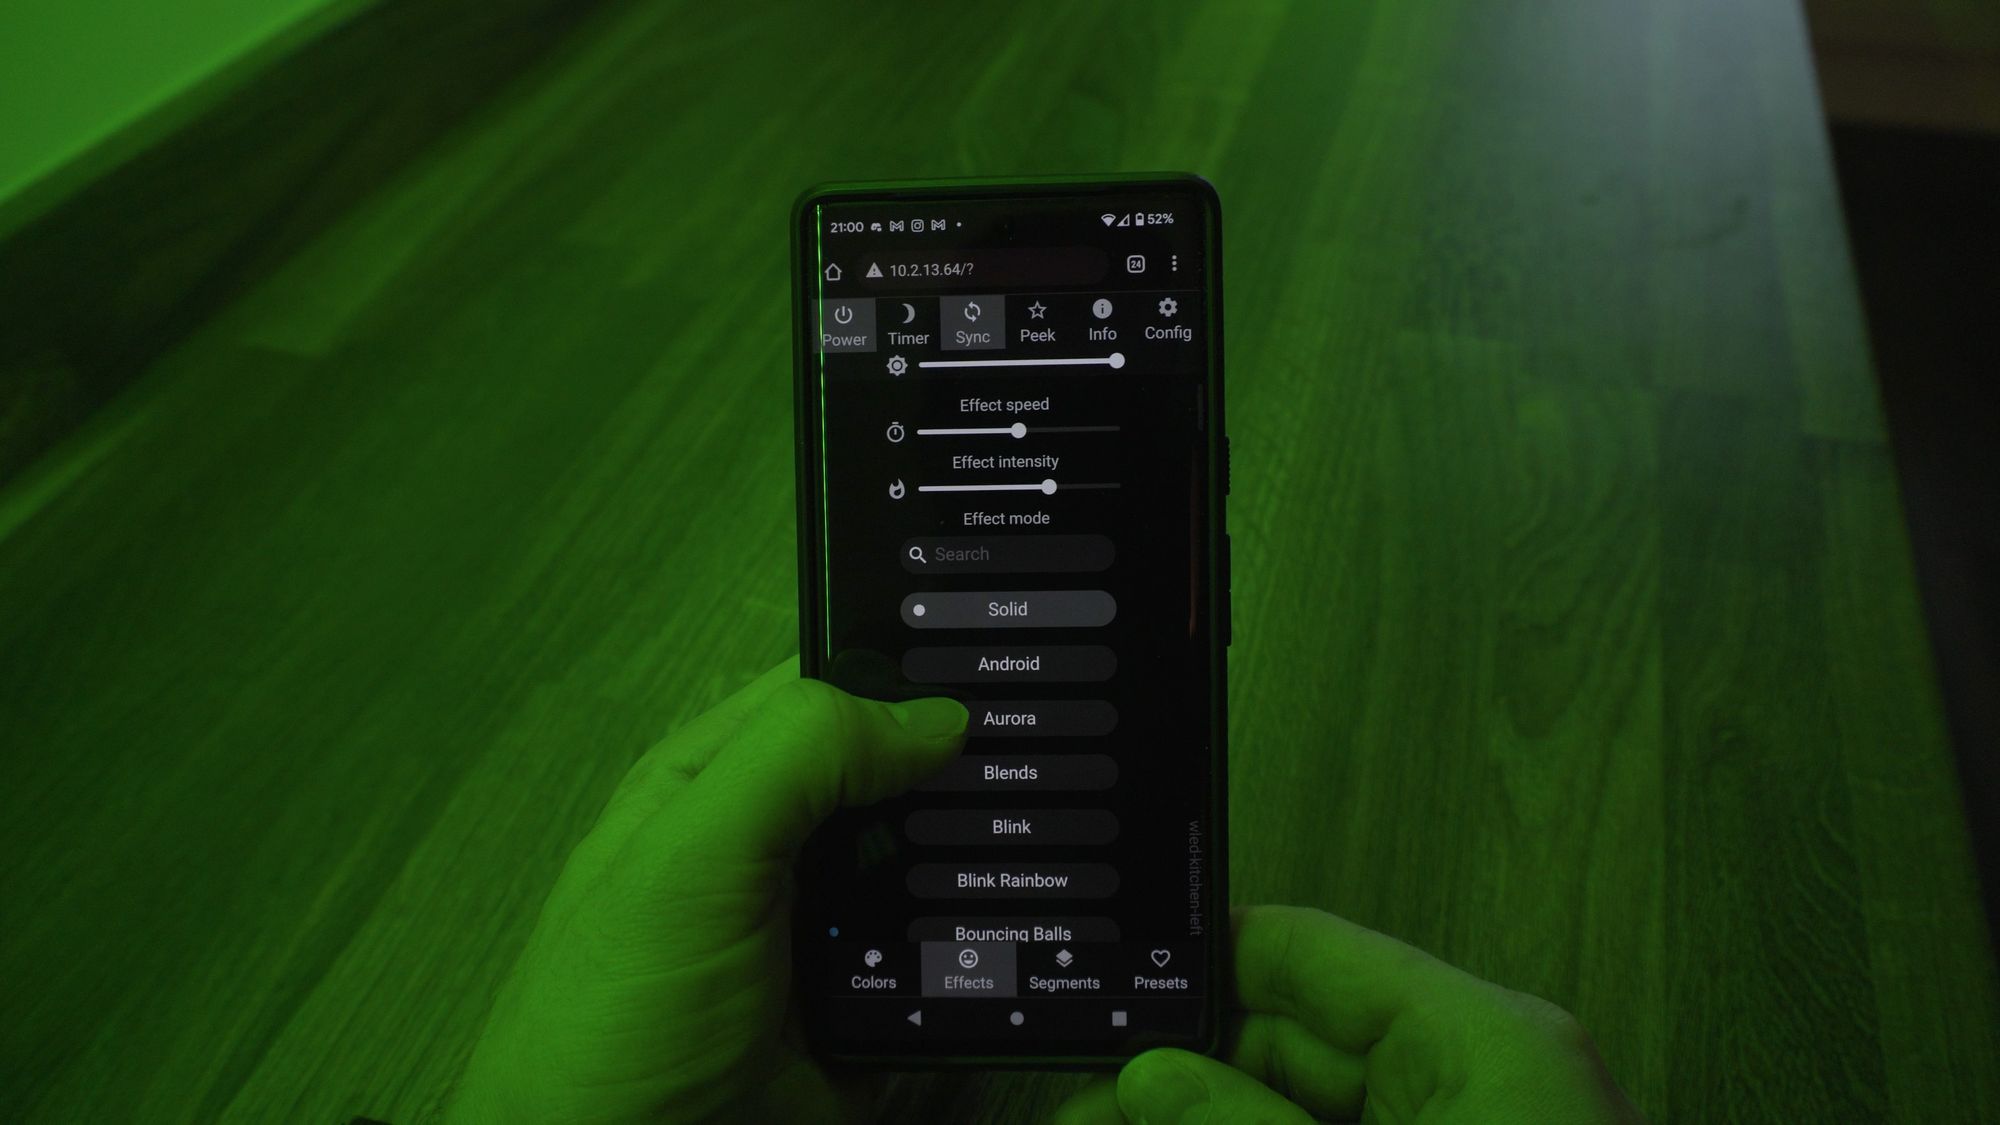
The software we are going to be using is an amazing free Open Source project called WLED started by GitHub user Aircoookie.
WLED features over 100 special effects, is super easy to configure and supports multiple different LED strips.
It is free to use, runs on really inexpensive hardware, is super customizable and you can sync multiple different controllers so they all behave as one - a feature that is useful for my kitchen as I am treating each side of the extractor fan as separate installations rather than trying to keep them all on one controller - mainly because there is no easy way for me to get wires across without it looking ugly, plus with WLED makes it easy to keep things in sync.
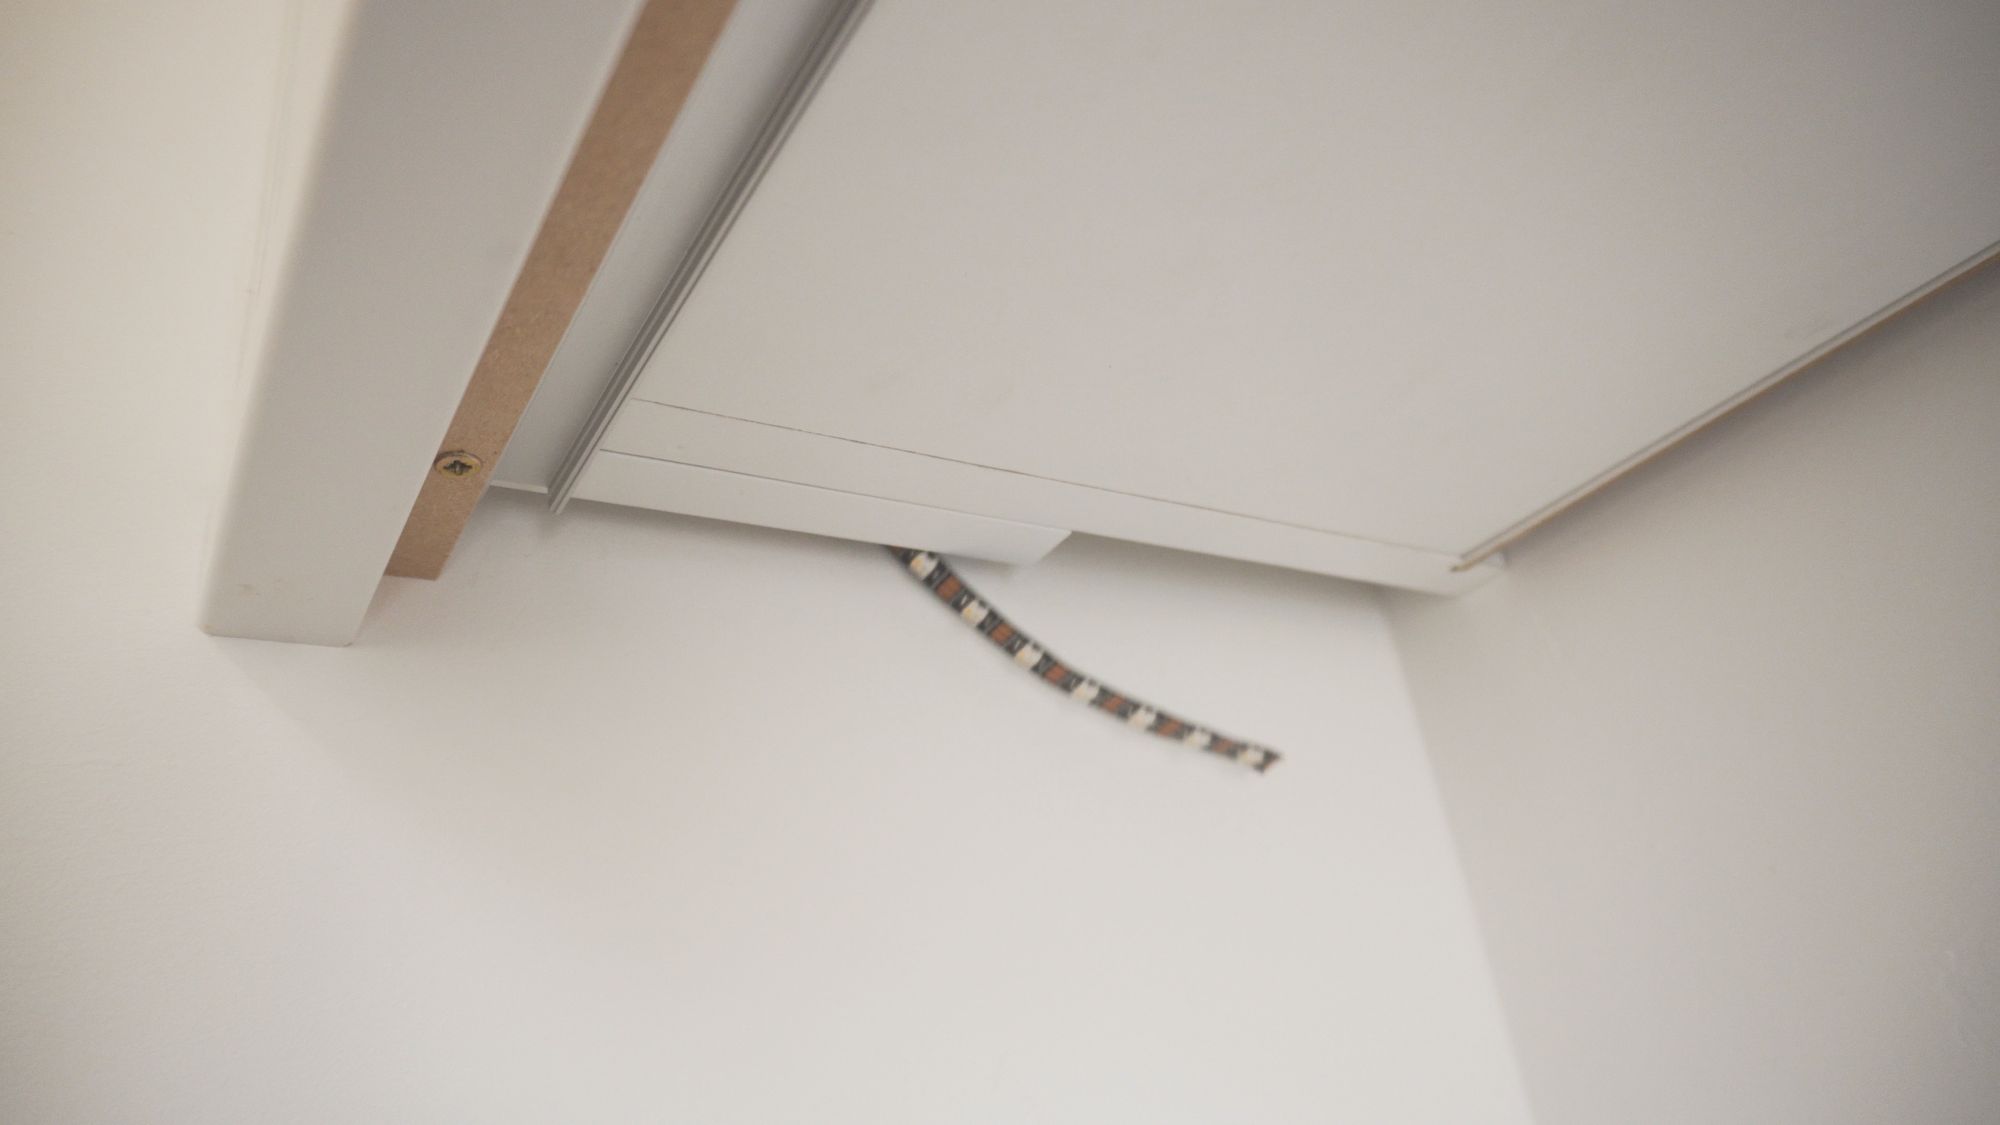
The plan is to start the LED strip at the top and link it to the bottom strip using the service void I have at the side of my cabinet... so what are we waiting for?
Let's Go
Pre-Installation
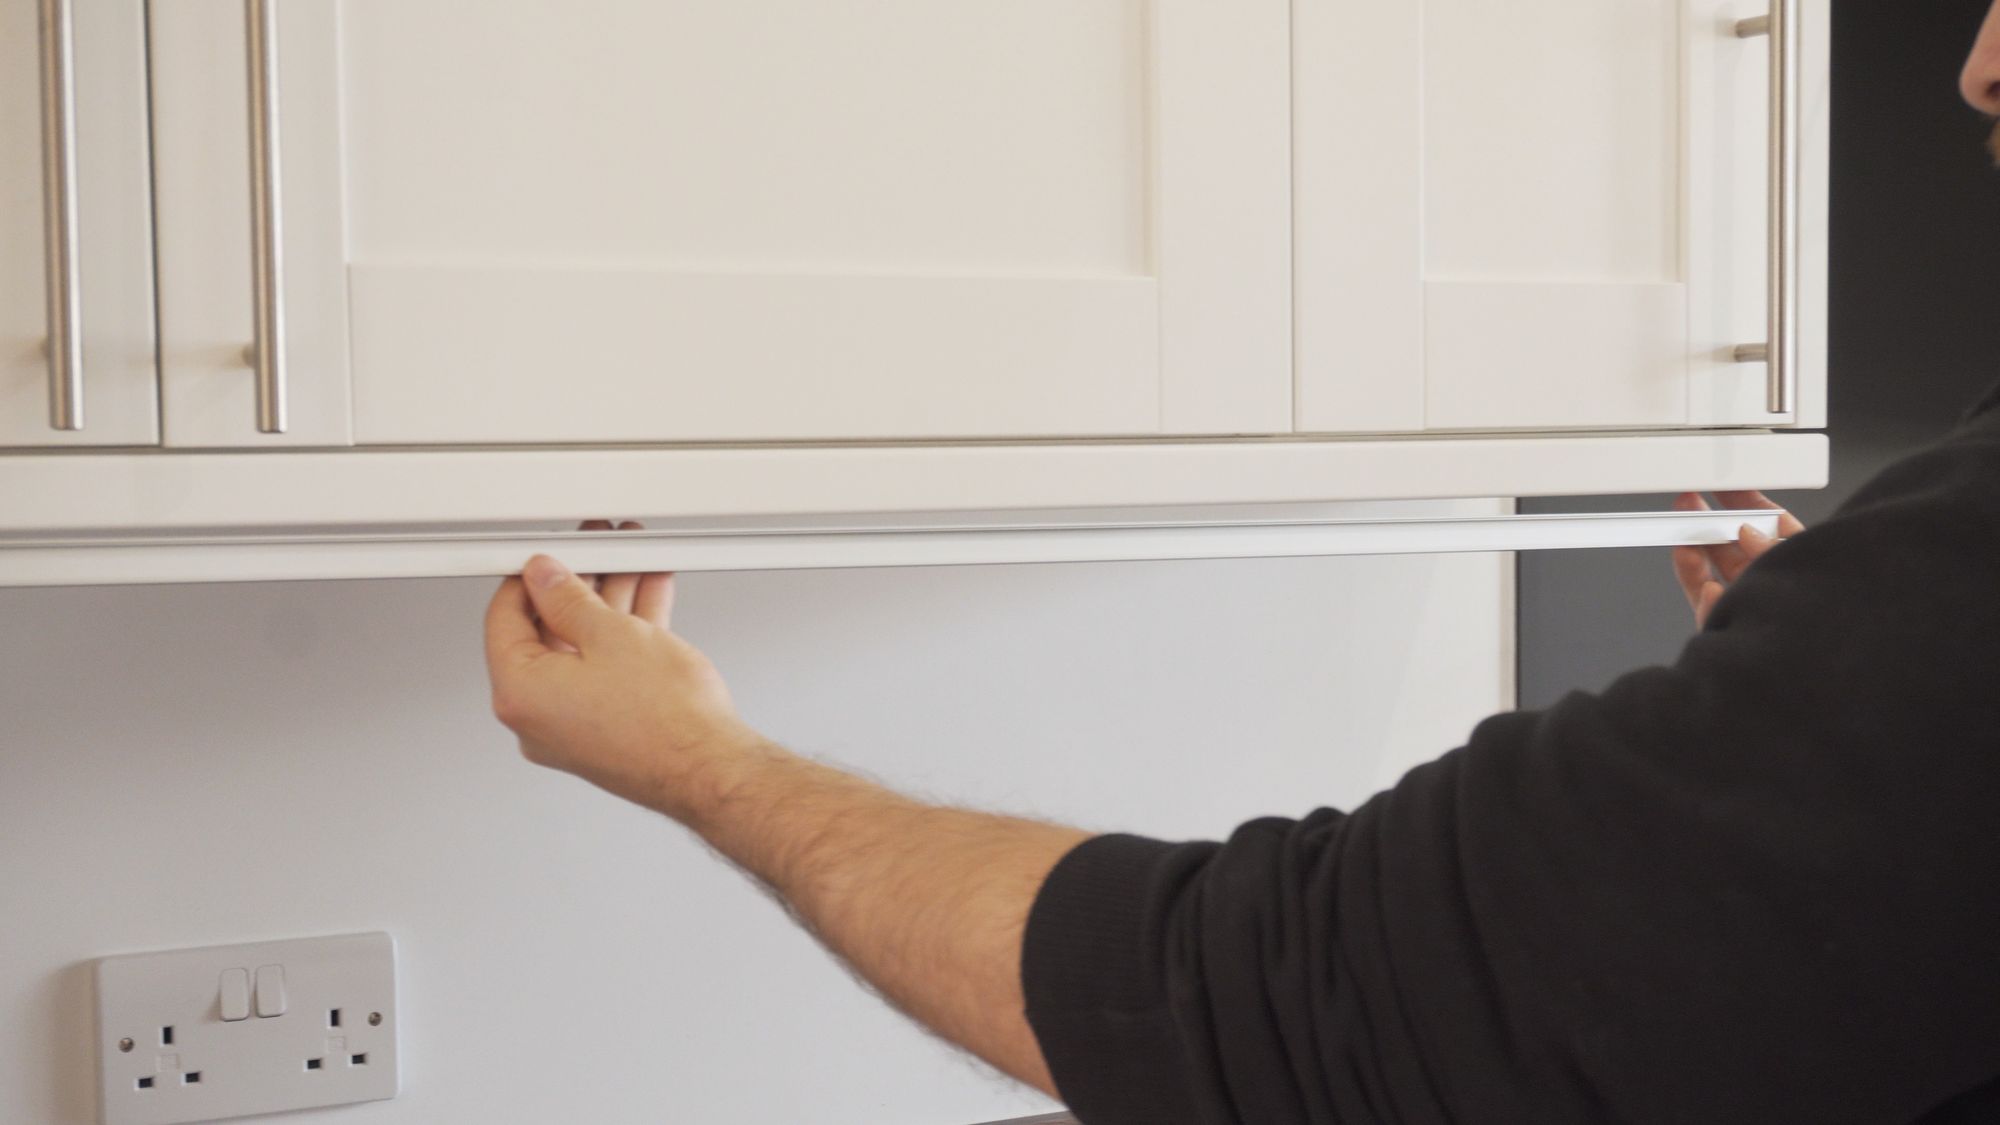
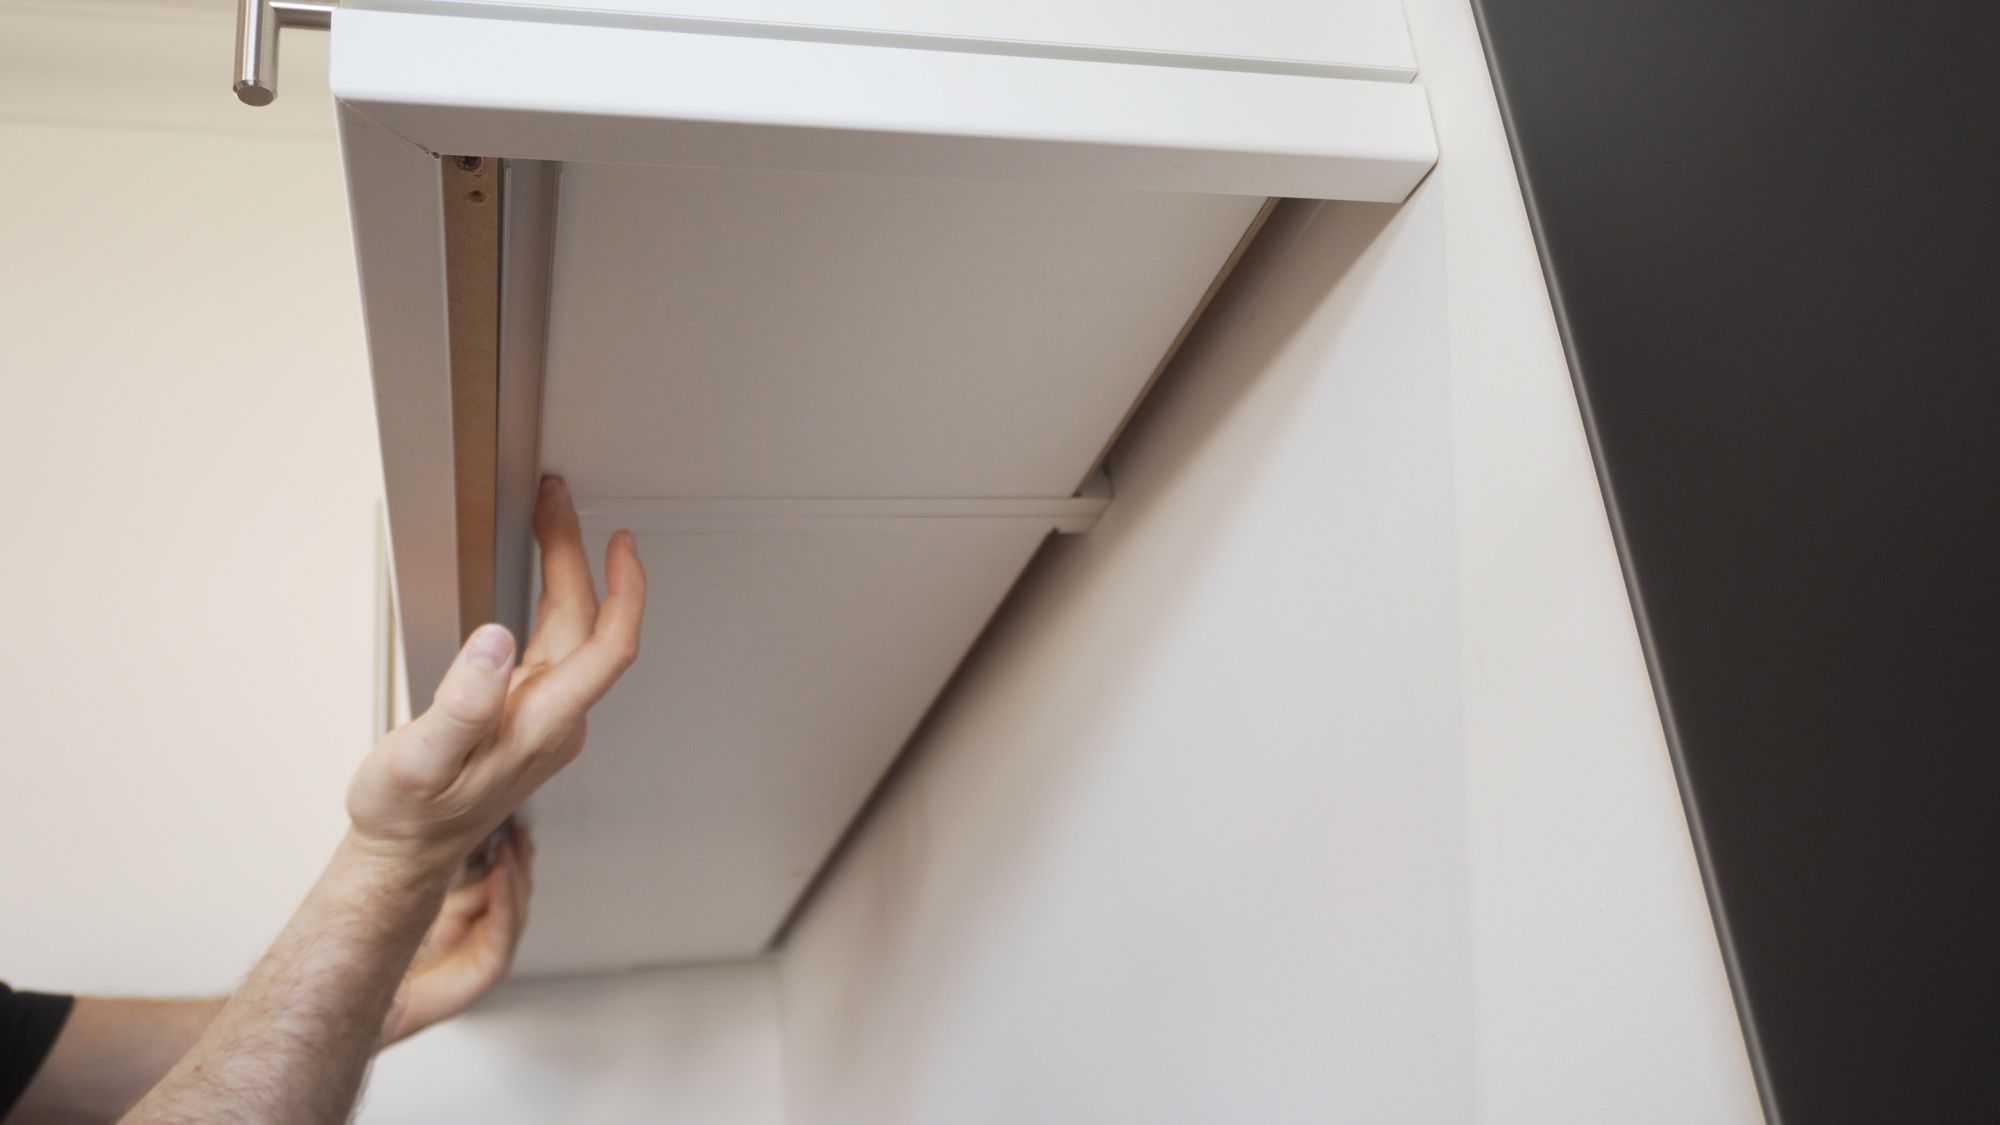
I started by measuring the space under the cabinet so I could cut my aluminium channels to the correct length.
These channels are 1 meter in length so I would be joining two together. Make sure to leave a slight gap at the end as an entry point for the cables to sit neatly inside.
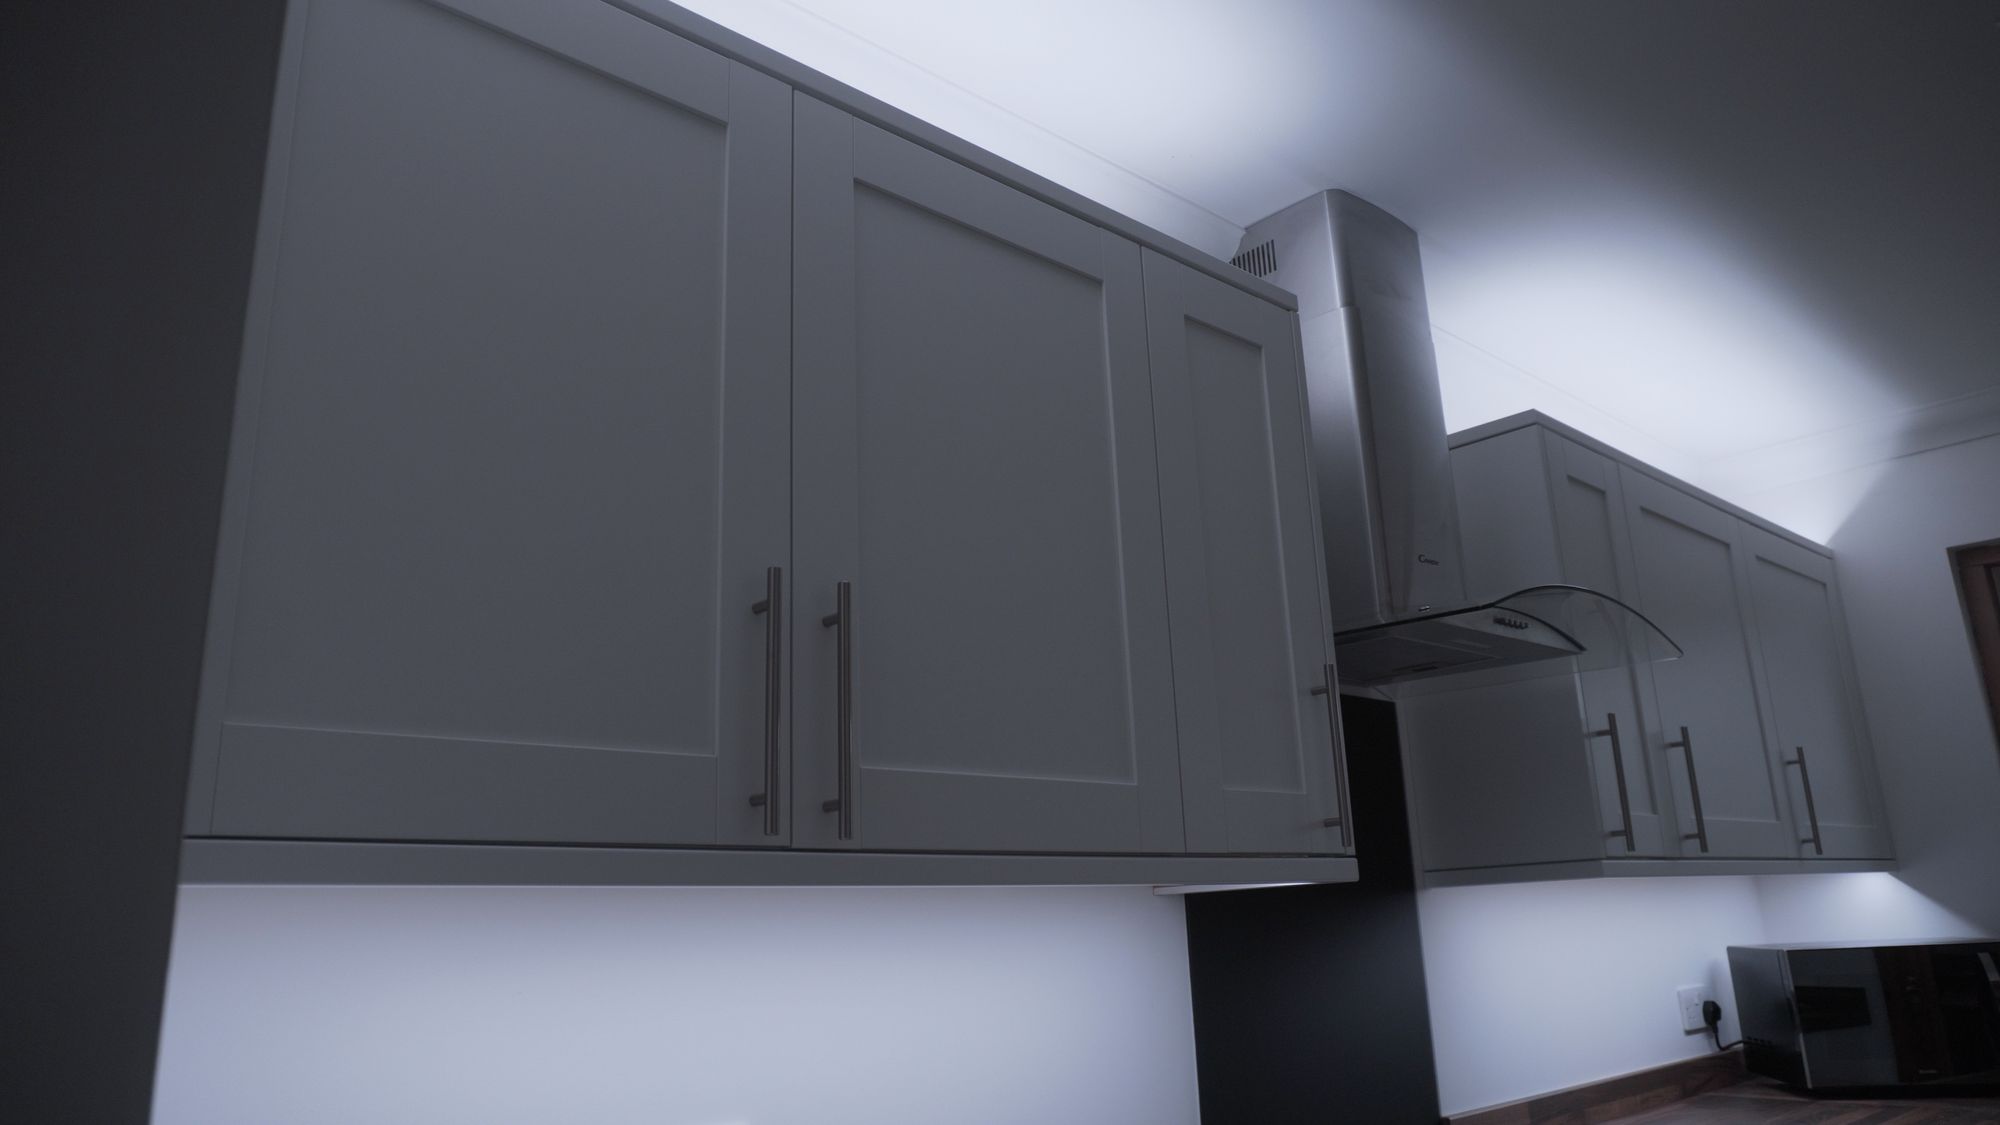
There were a couple of places to position the channels, either at the back pointing down, or the front facing towards the back or the front facing down.
We decided on the front facing down, as placing them near the back may have left some visible hot spots on the wall, plus we felt light distribution would be better at the front.
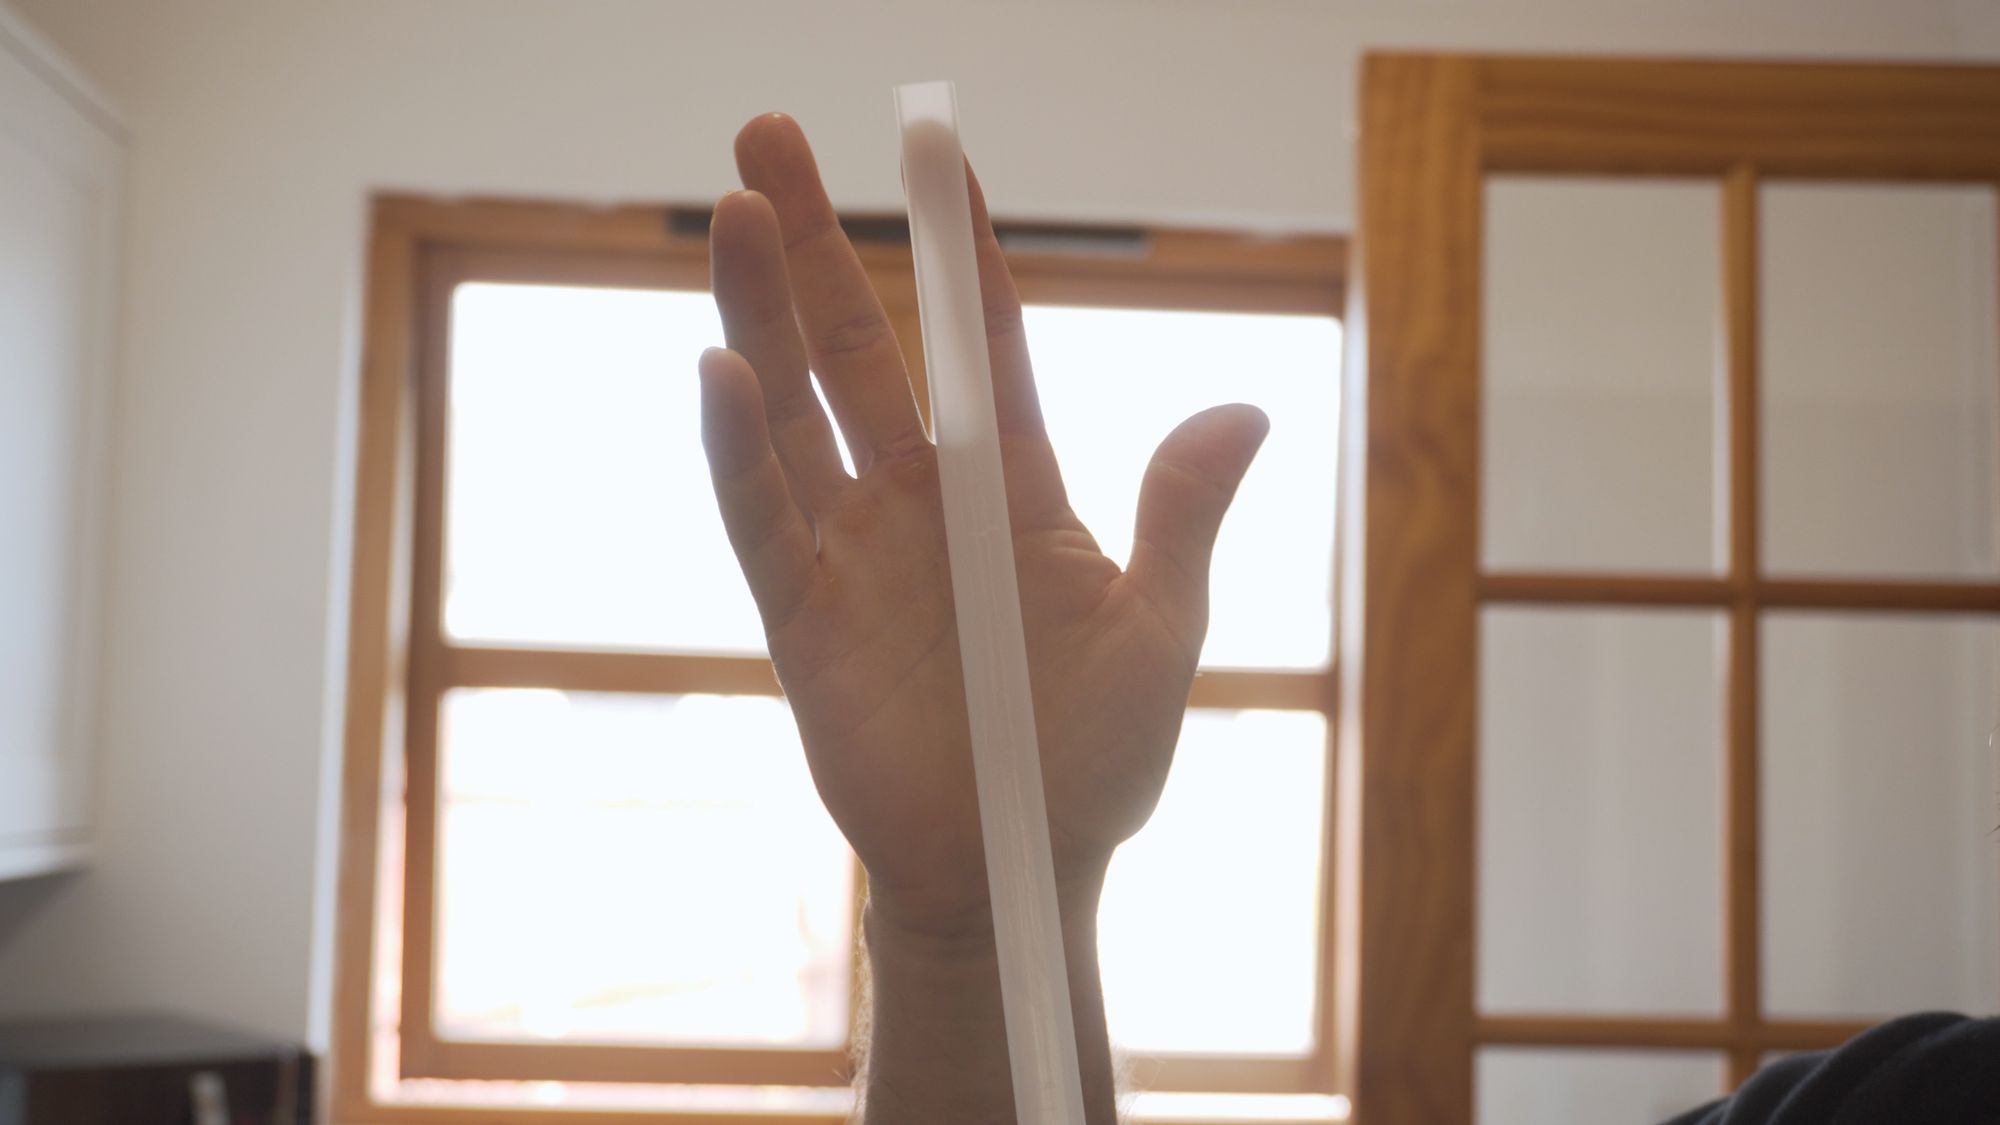
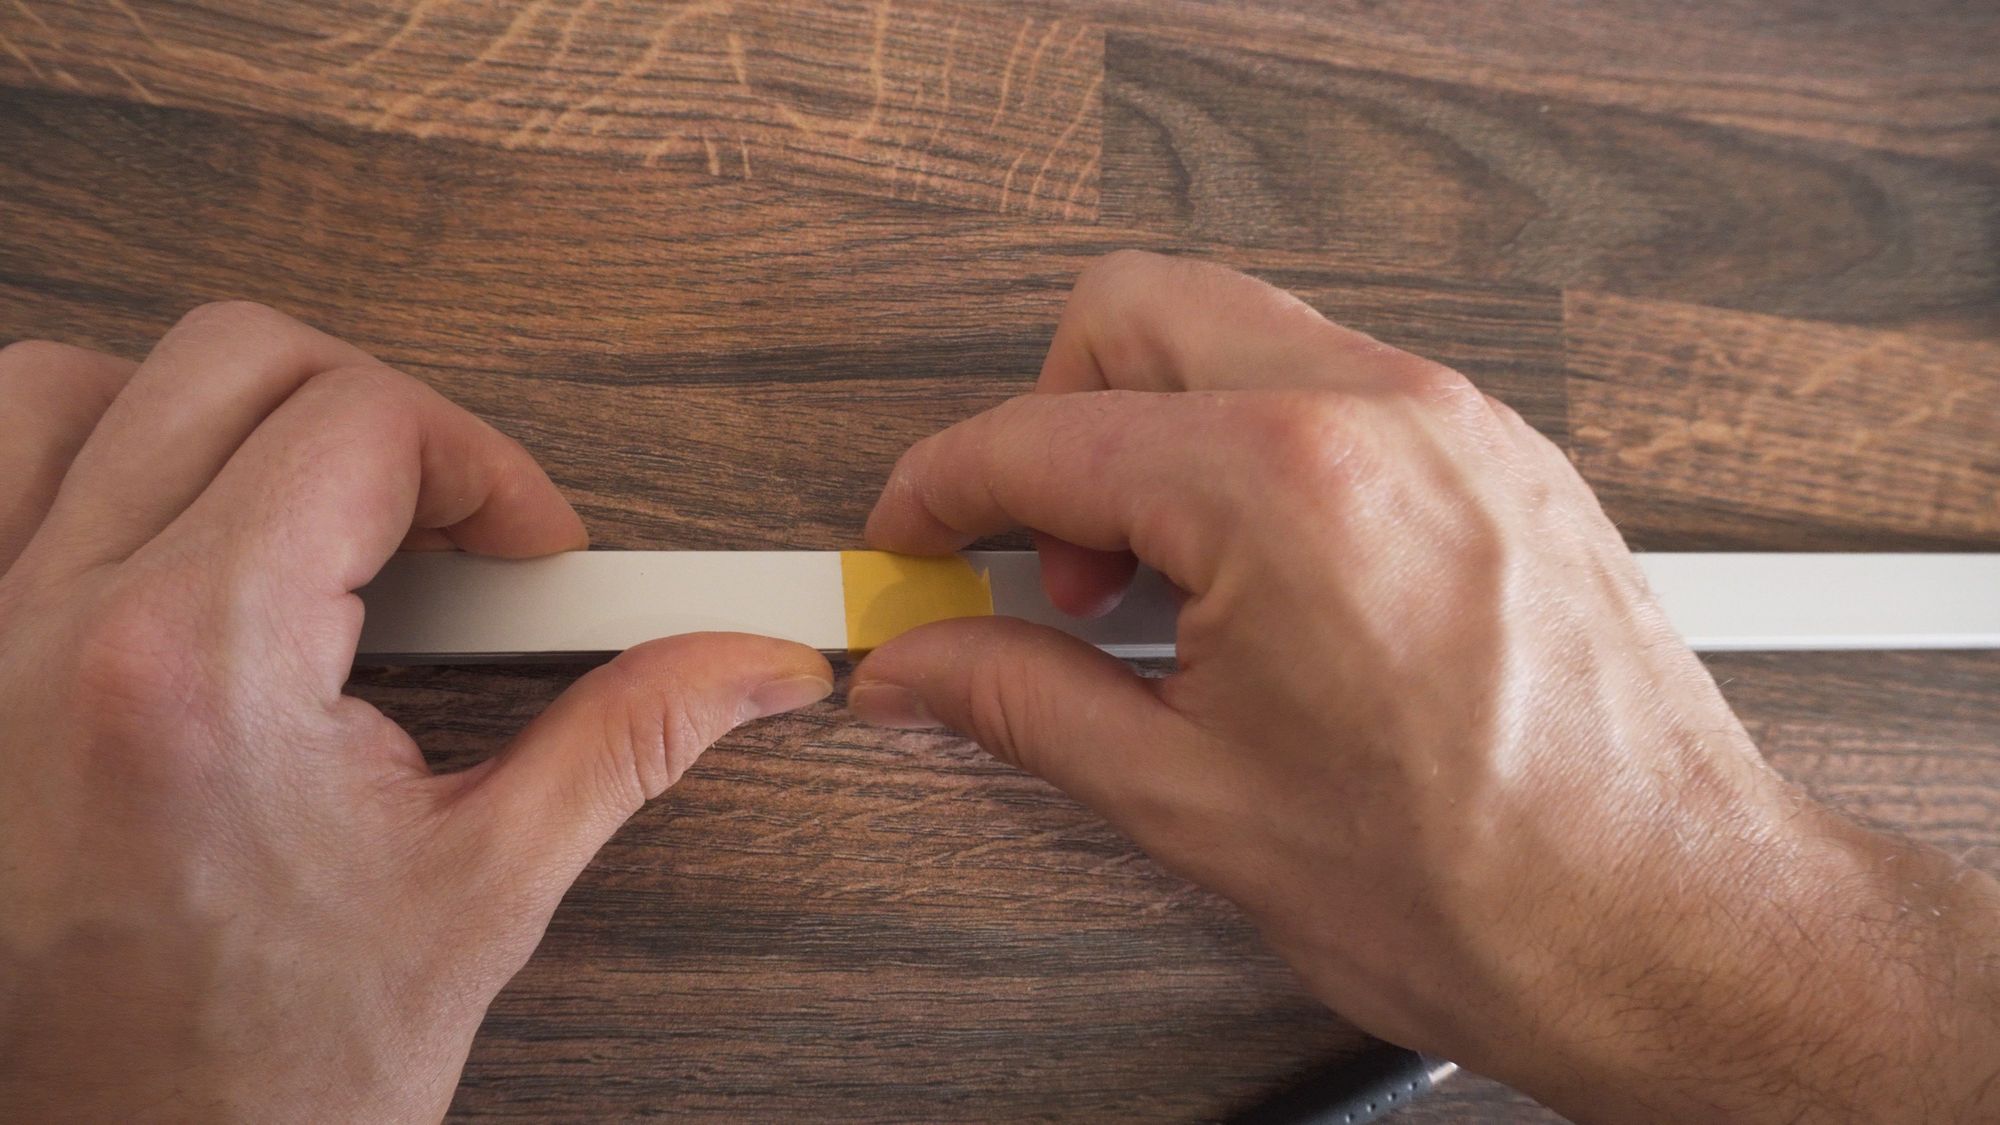
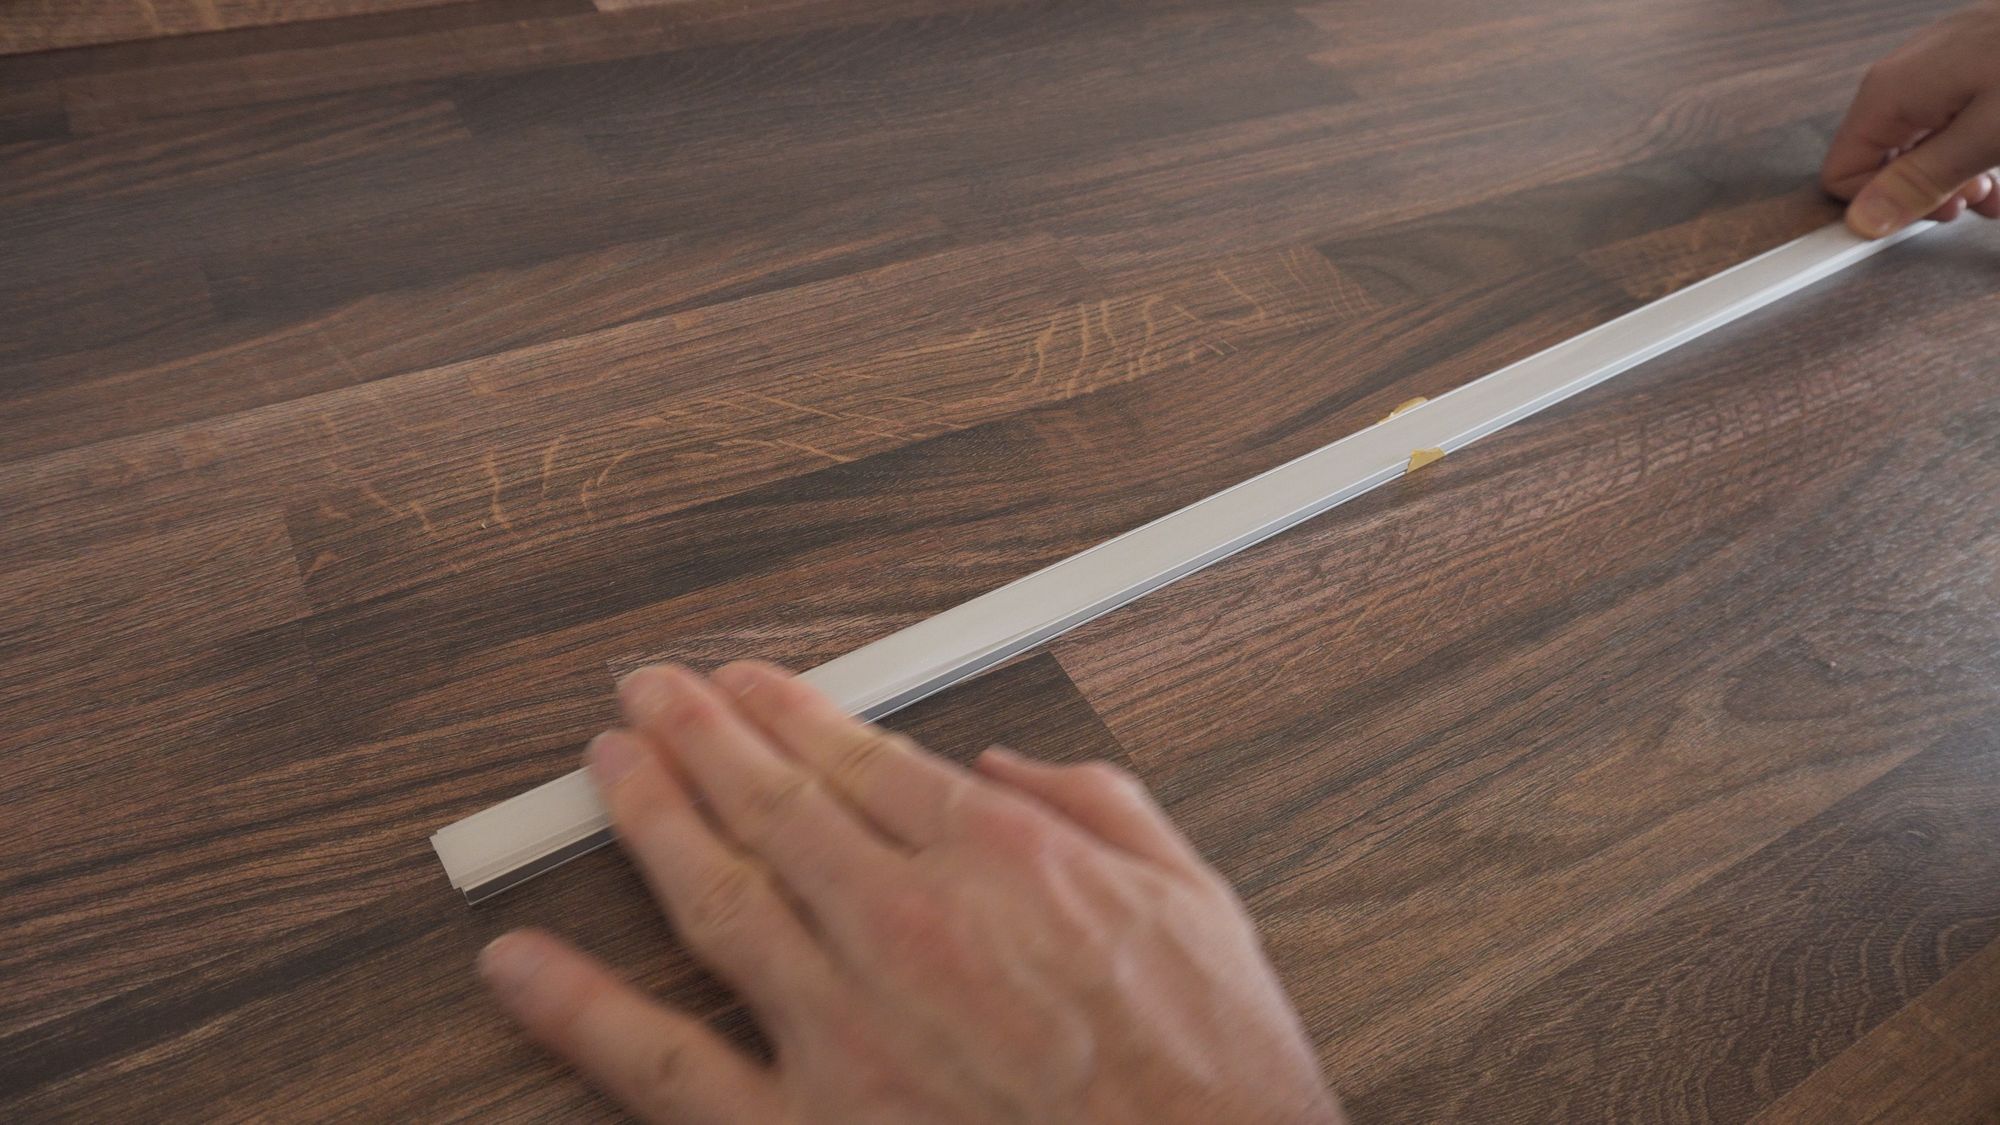
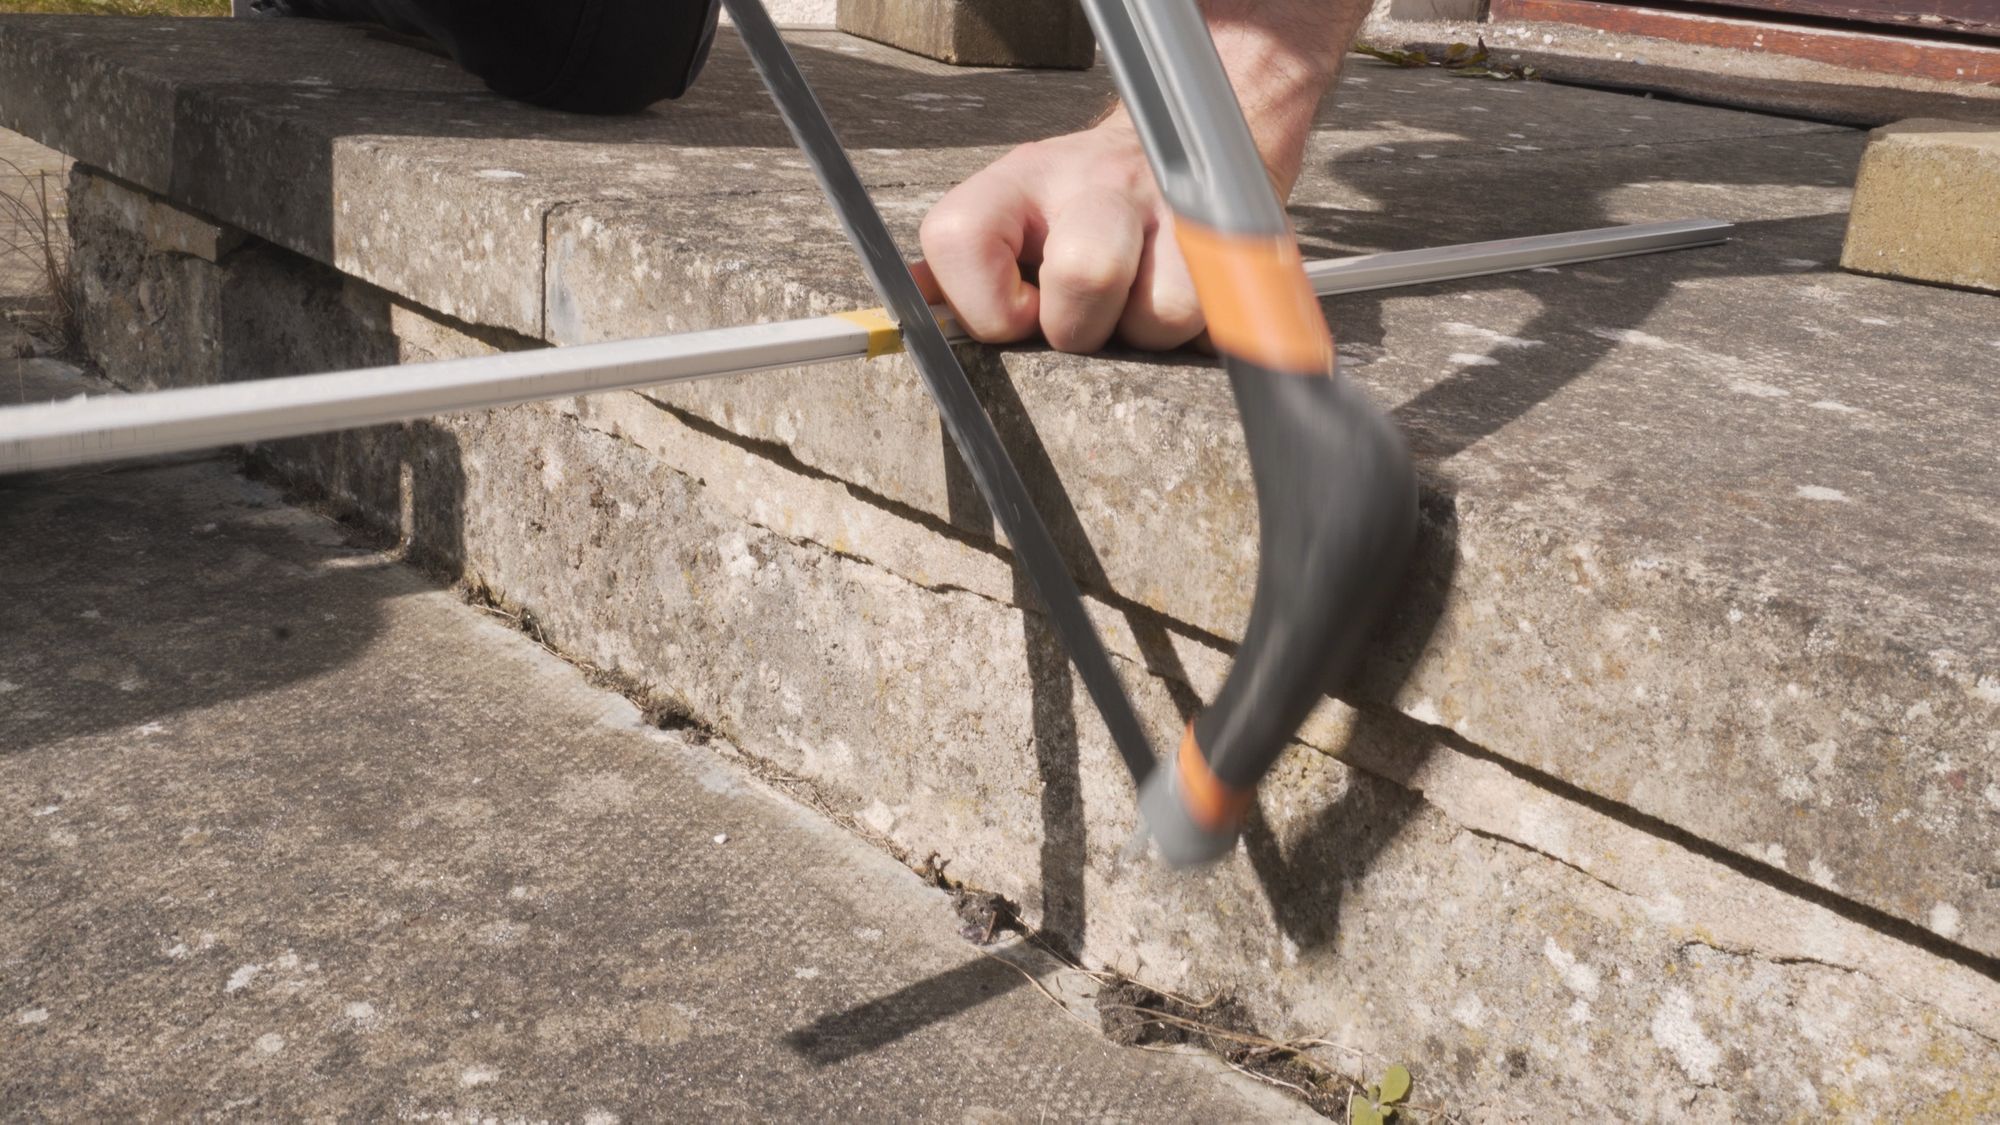
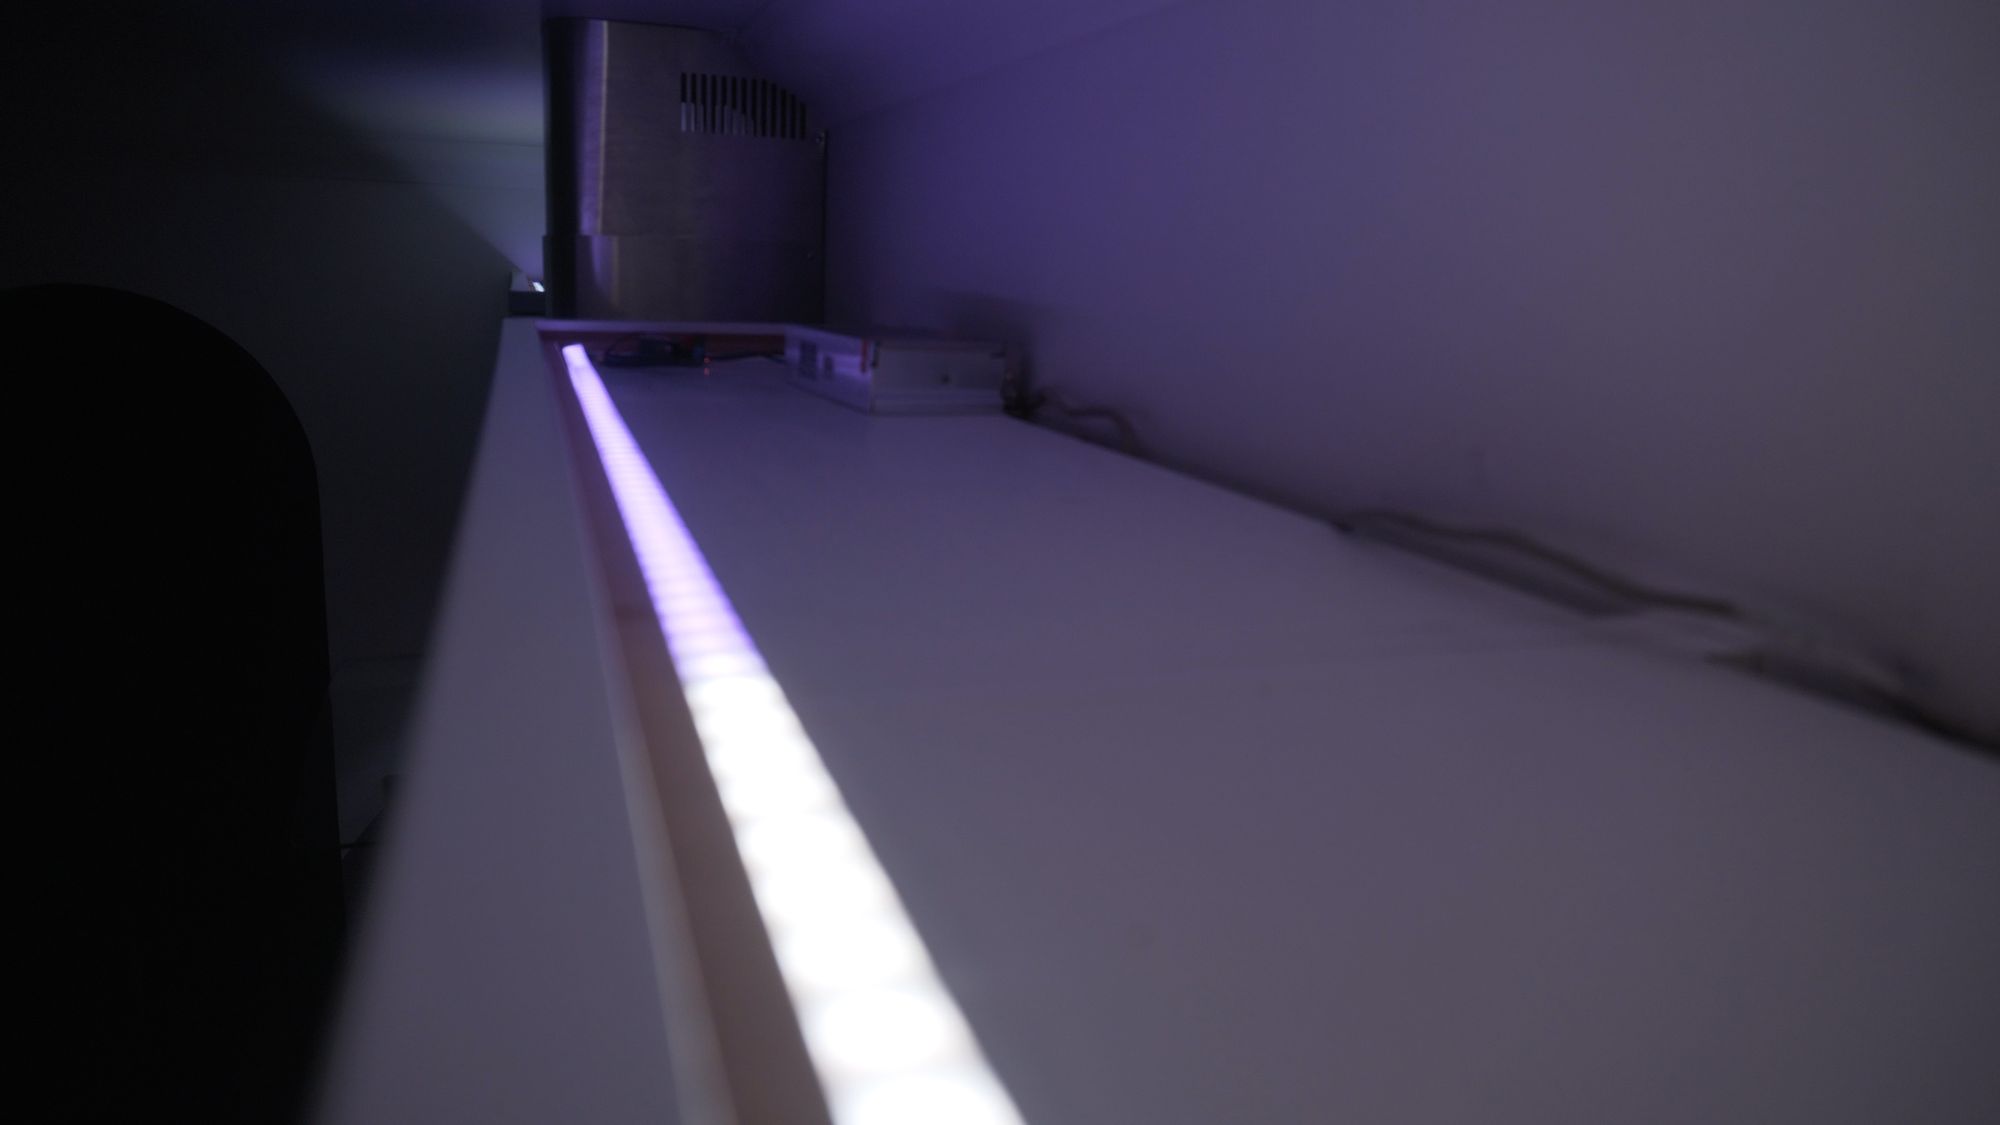
After marking the LED strip with some tape and a pen, I inserted the diffusion strip into the channel and cut with a hacksaw. Inserting the diffusion strip now will make sure that its cuts to the exact same length plus it gives it a neater cut.
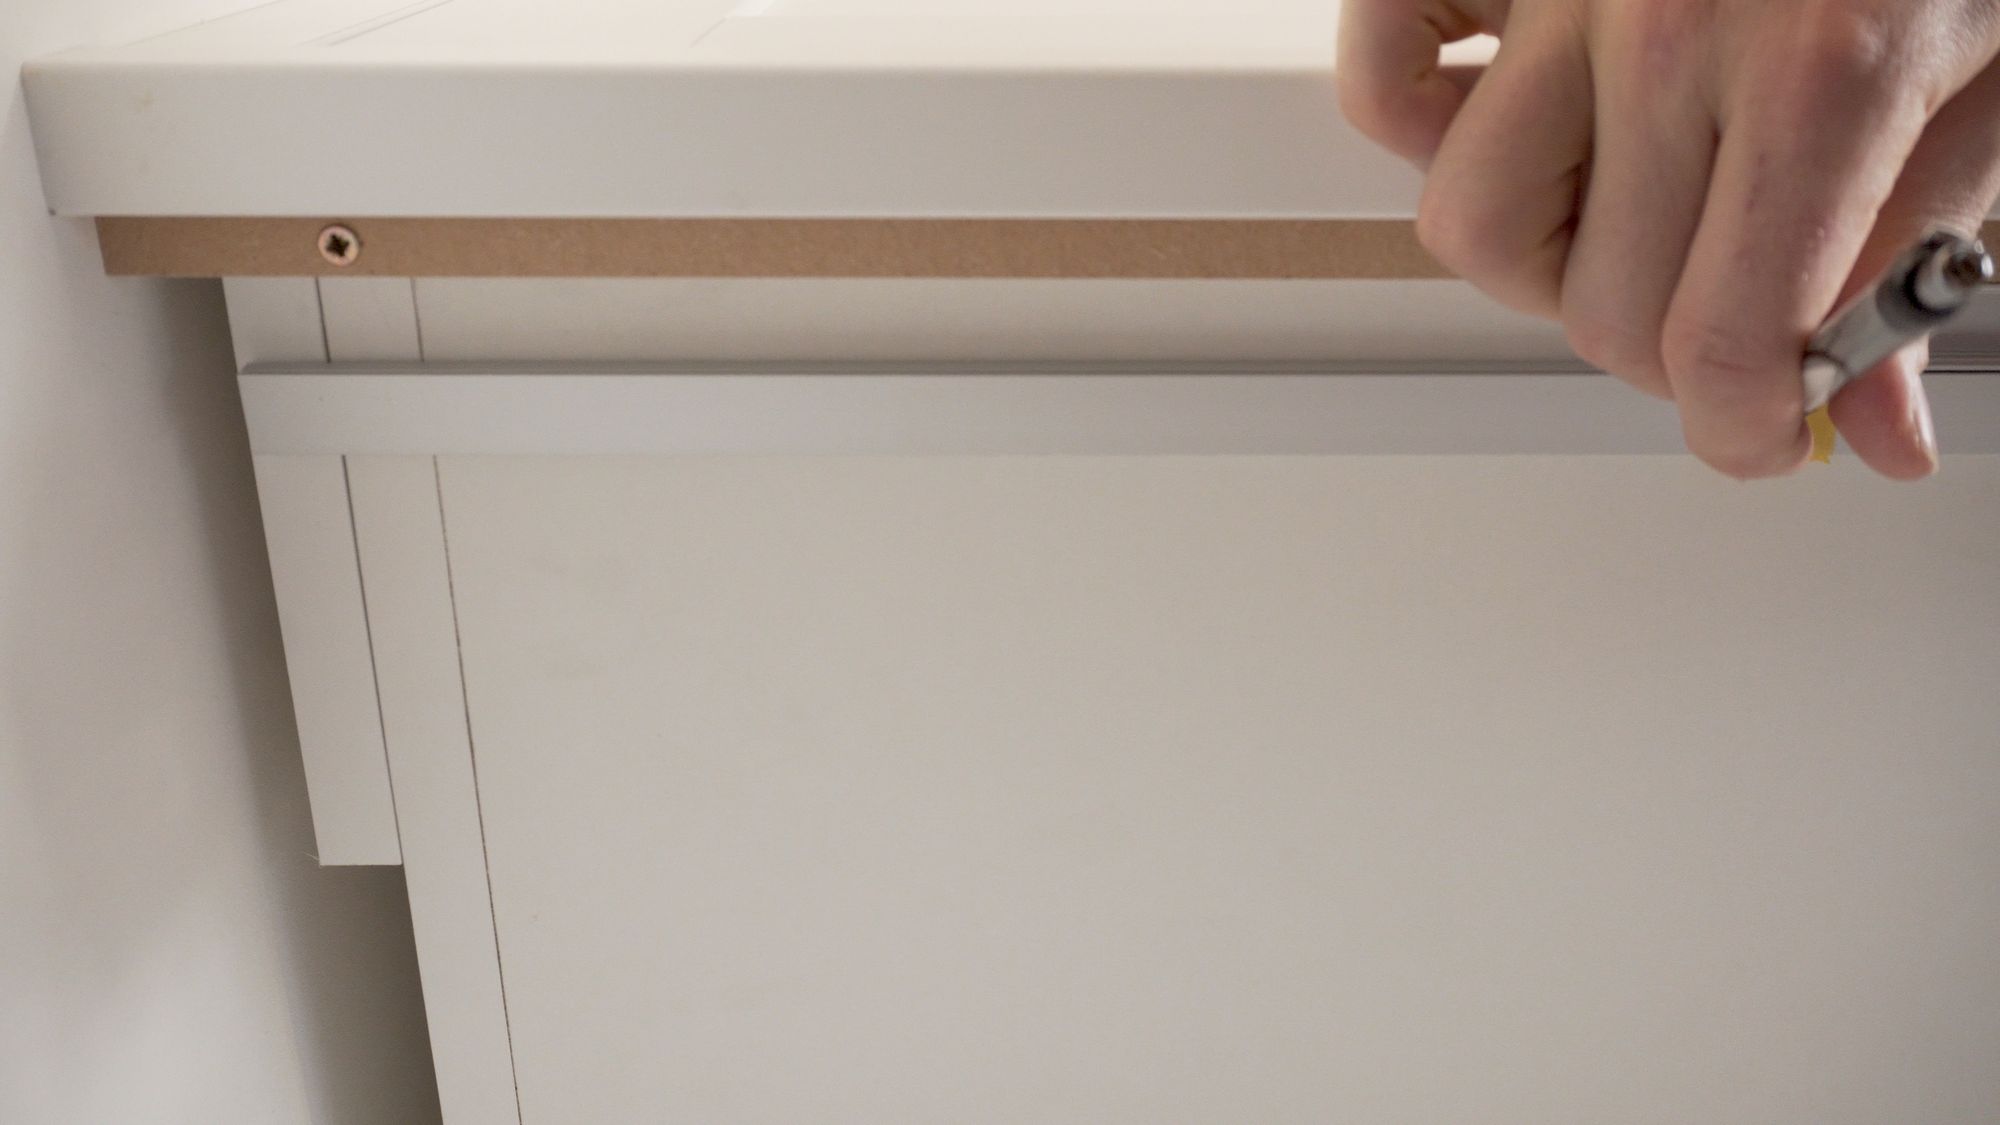
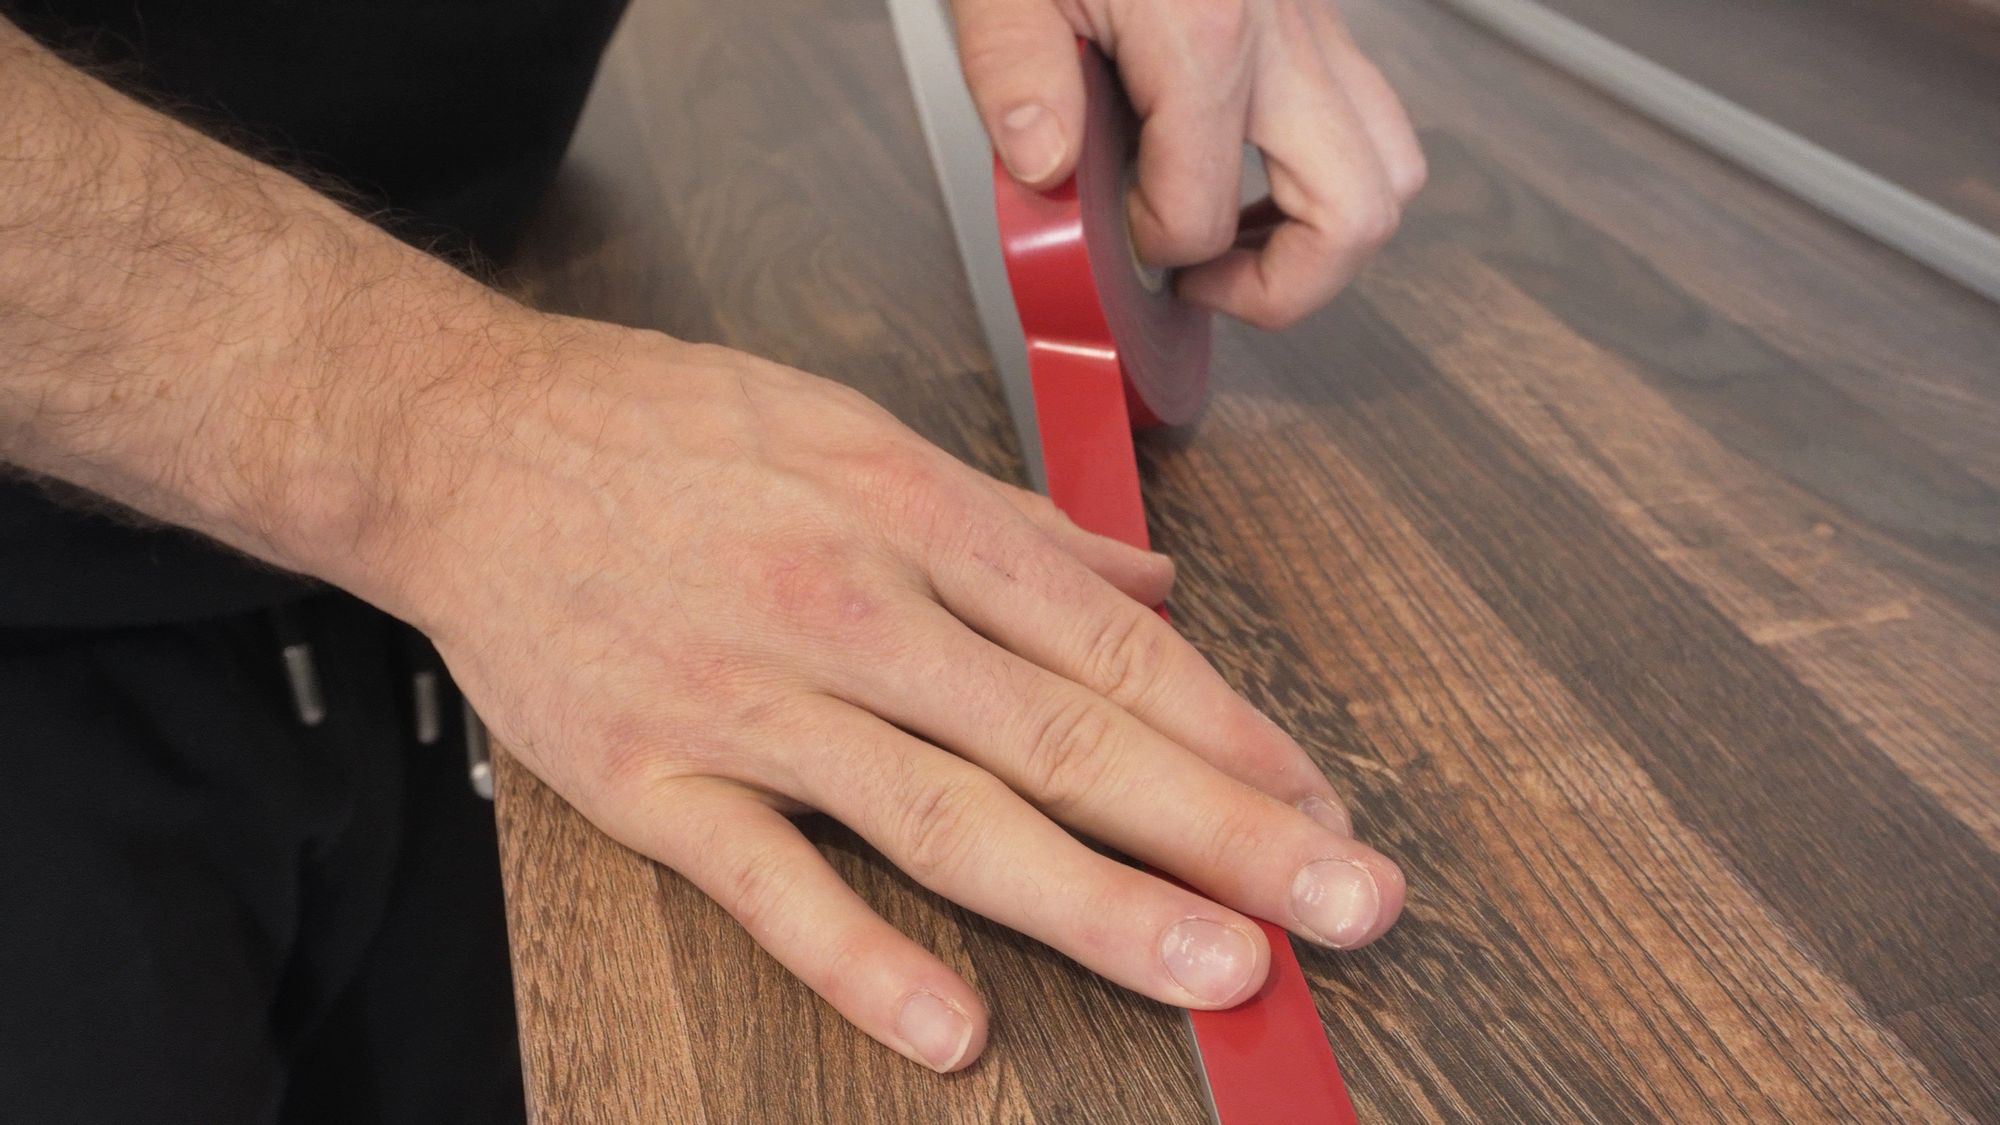
Then I used some VHB tape to attach the channels to the cabinets. I could have used the included screws but I didn’t feel like drilling into my new kitchen just yet (or ever) and the VHB tape is insanely strong and easily holds up these lightweight channels.
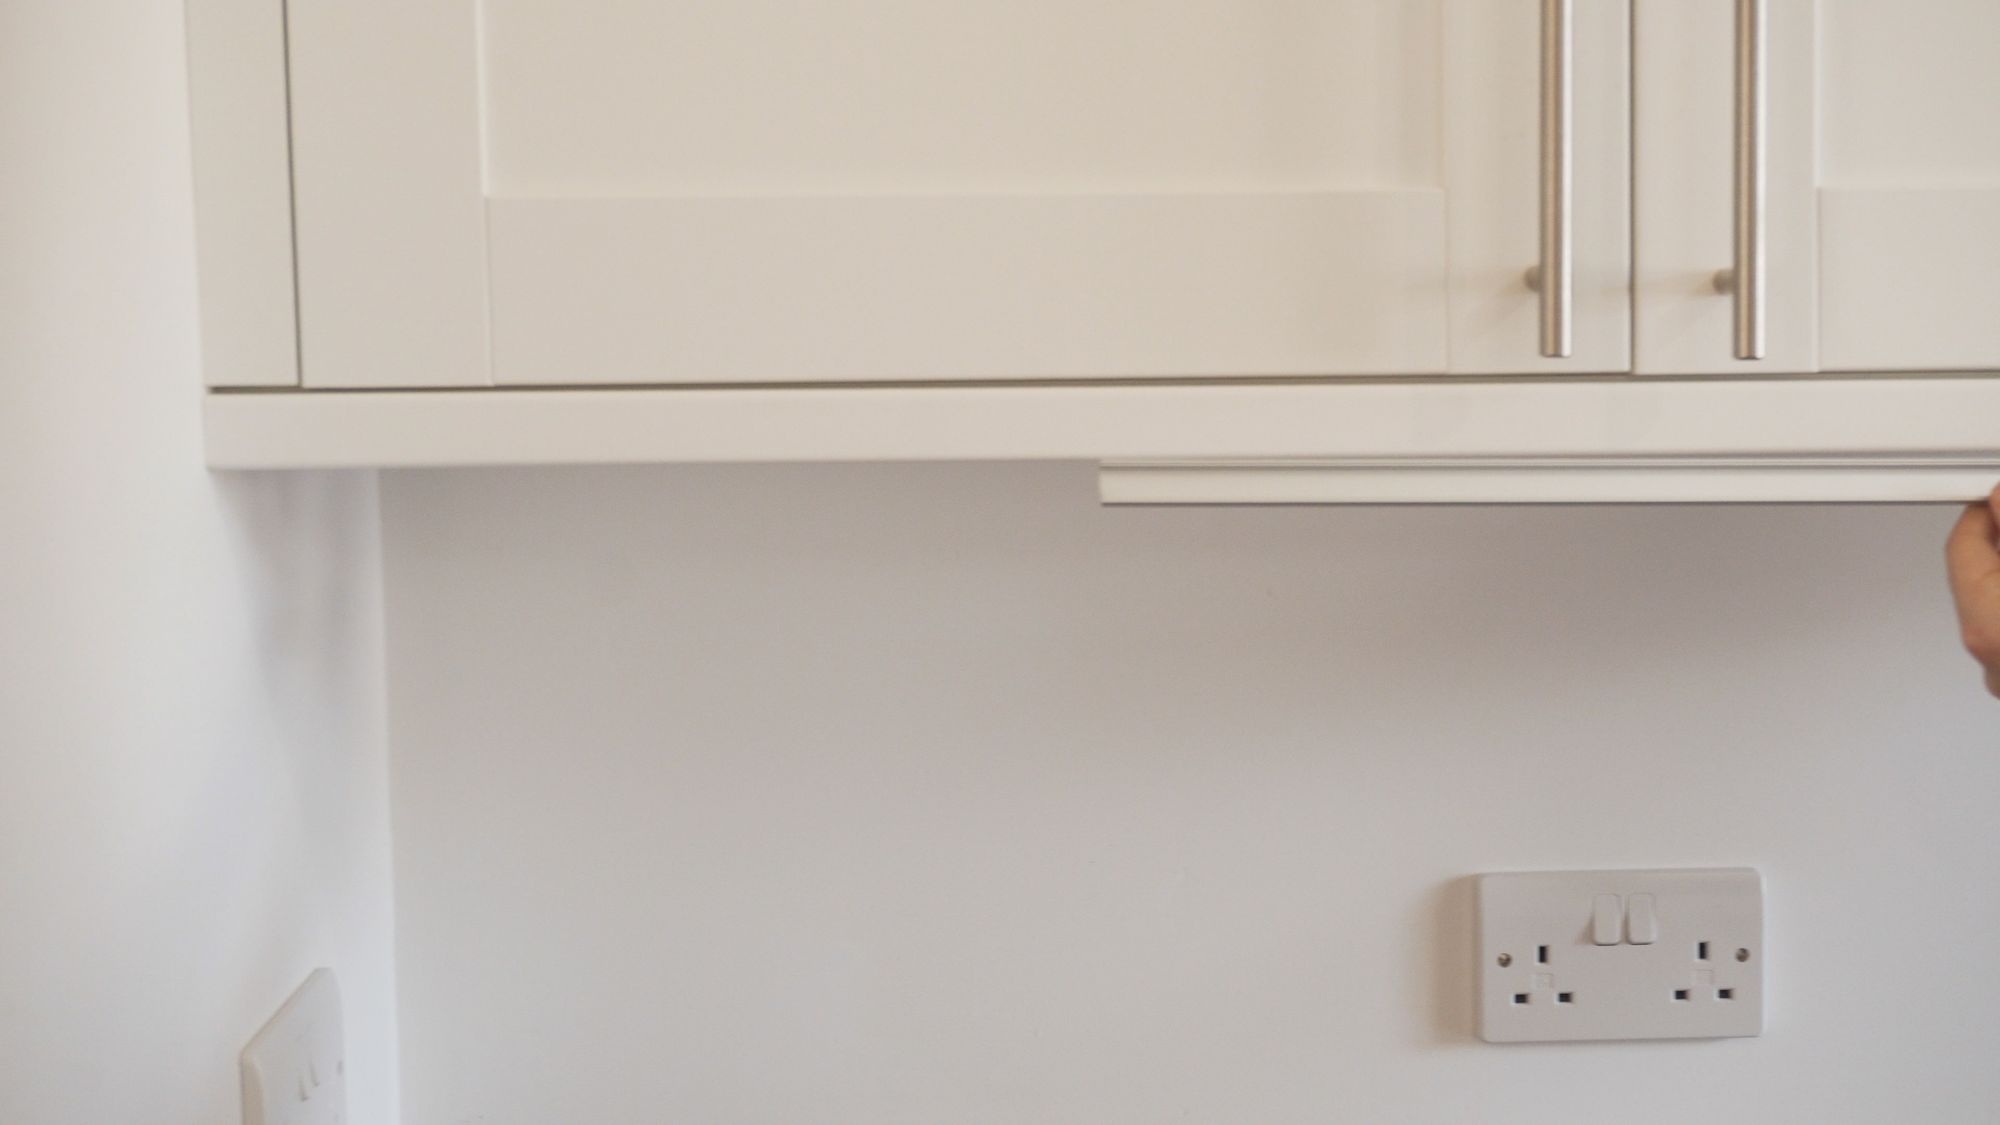
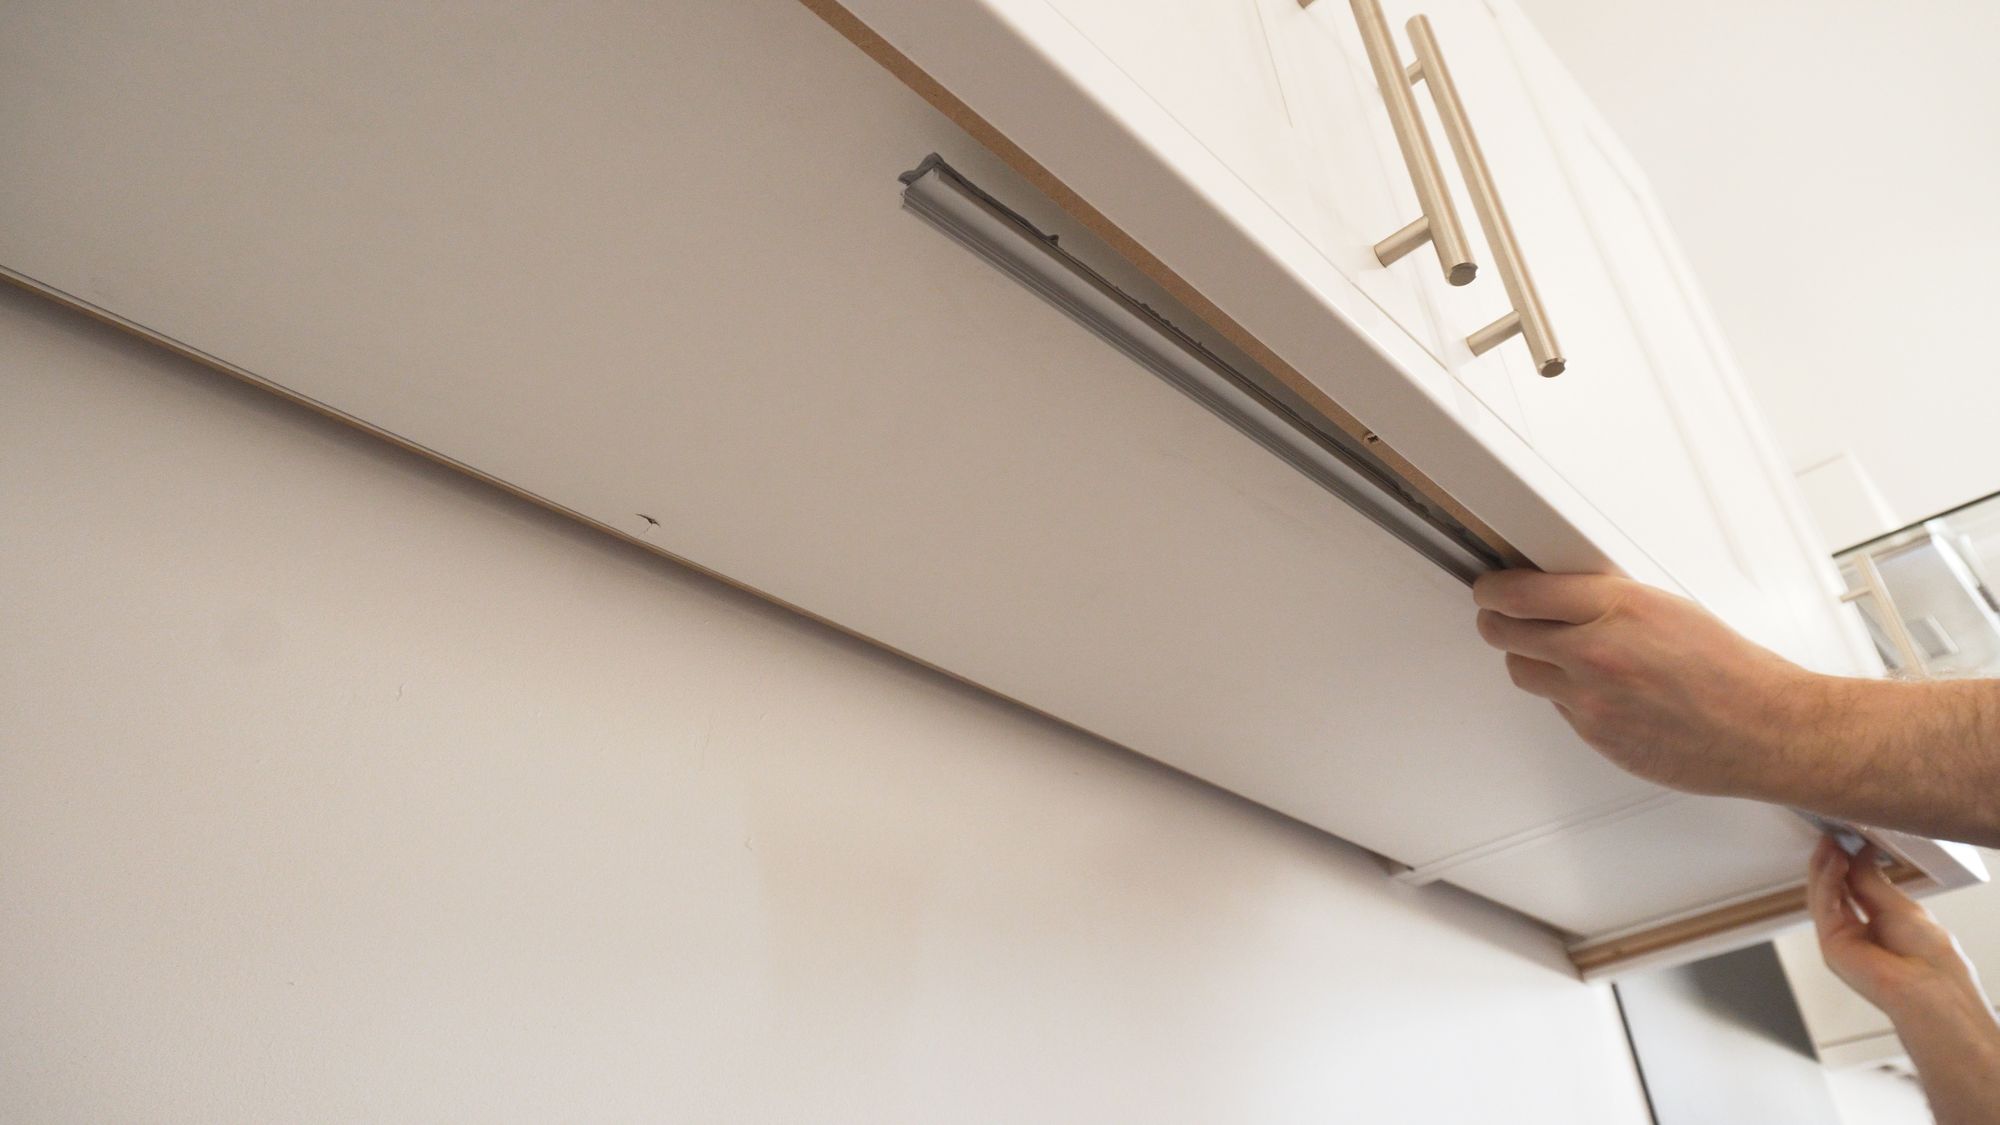
After lining up and sticking down both sections of the channel underneath, I repeated the same process on the top side, ready to accept the LED strip.

Installation
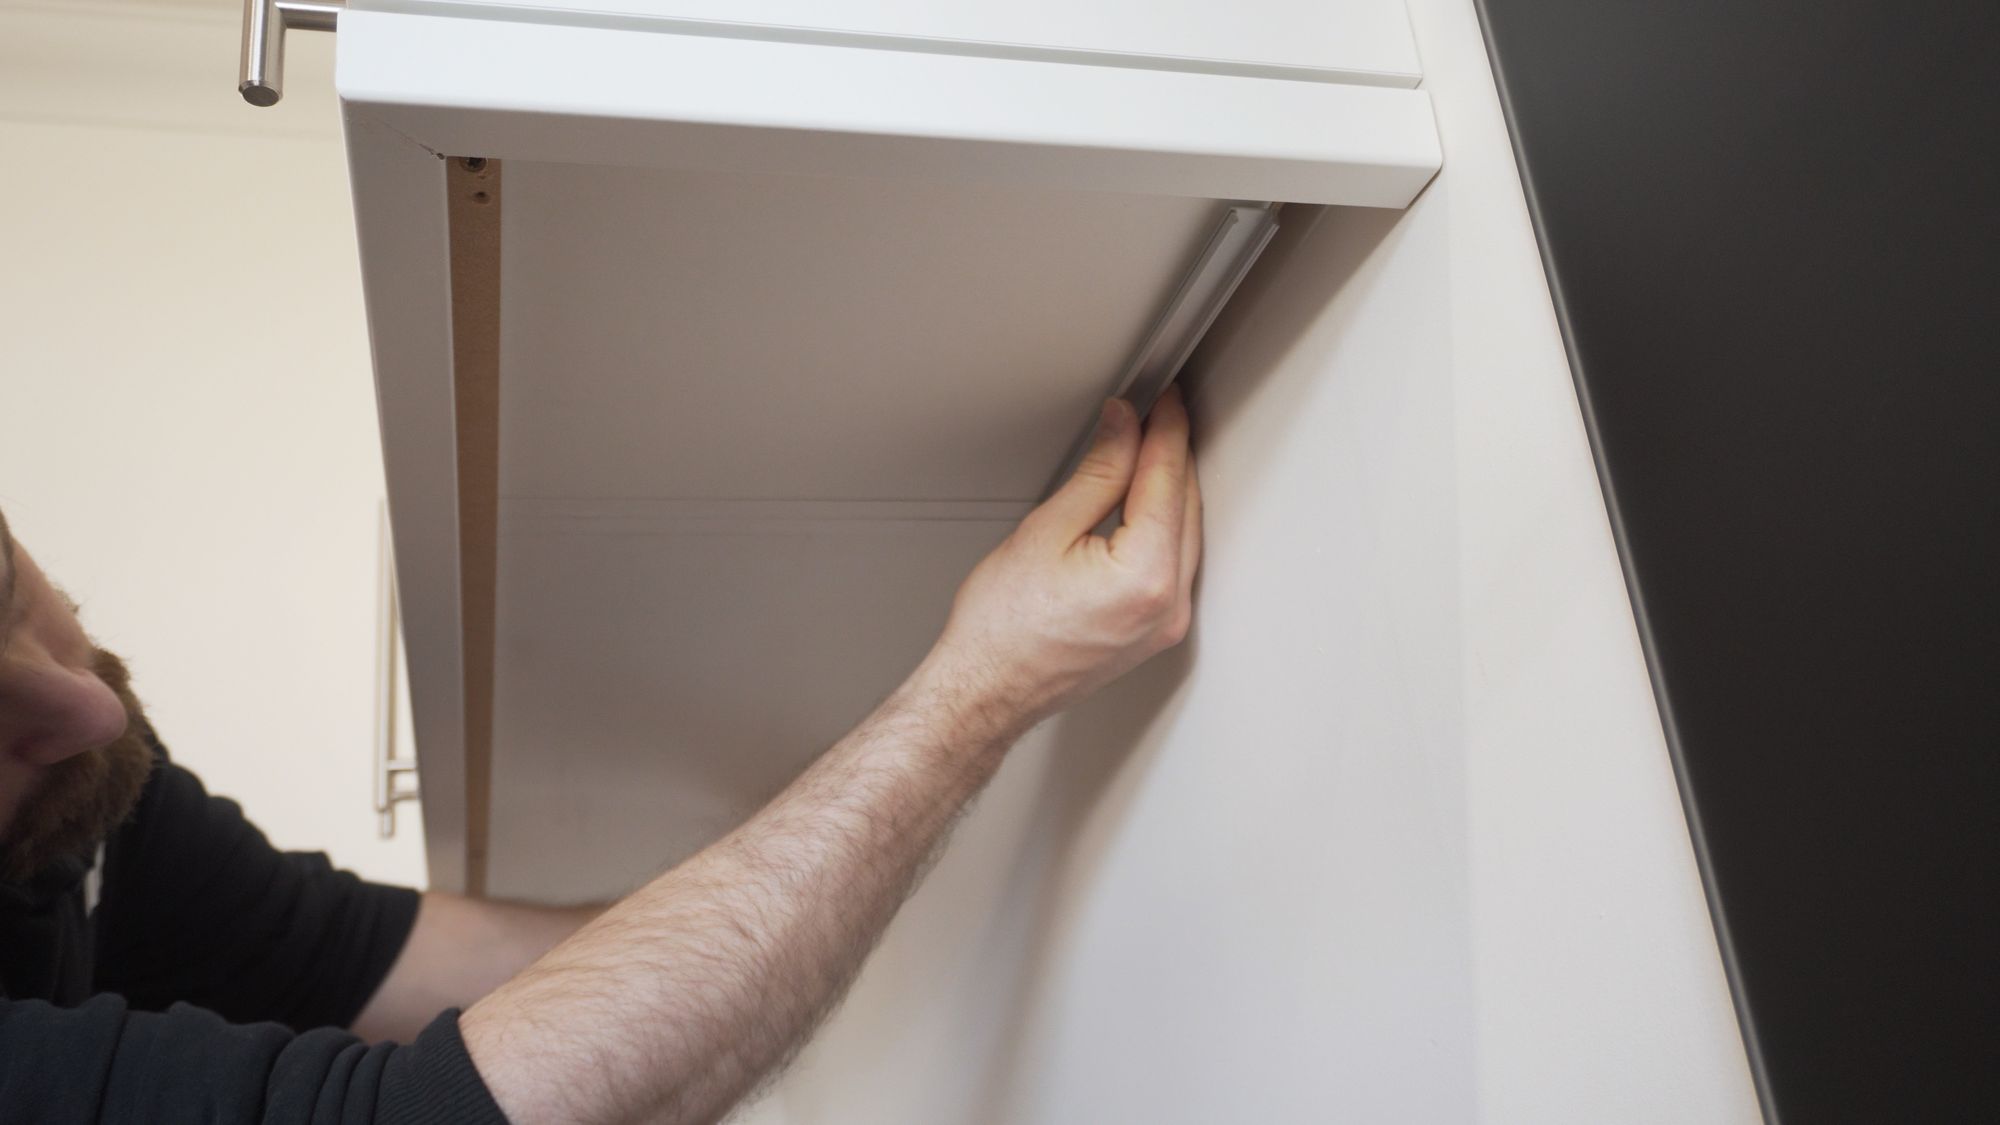
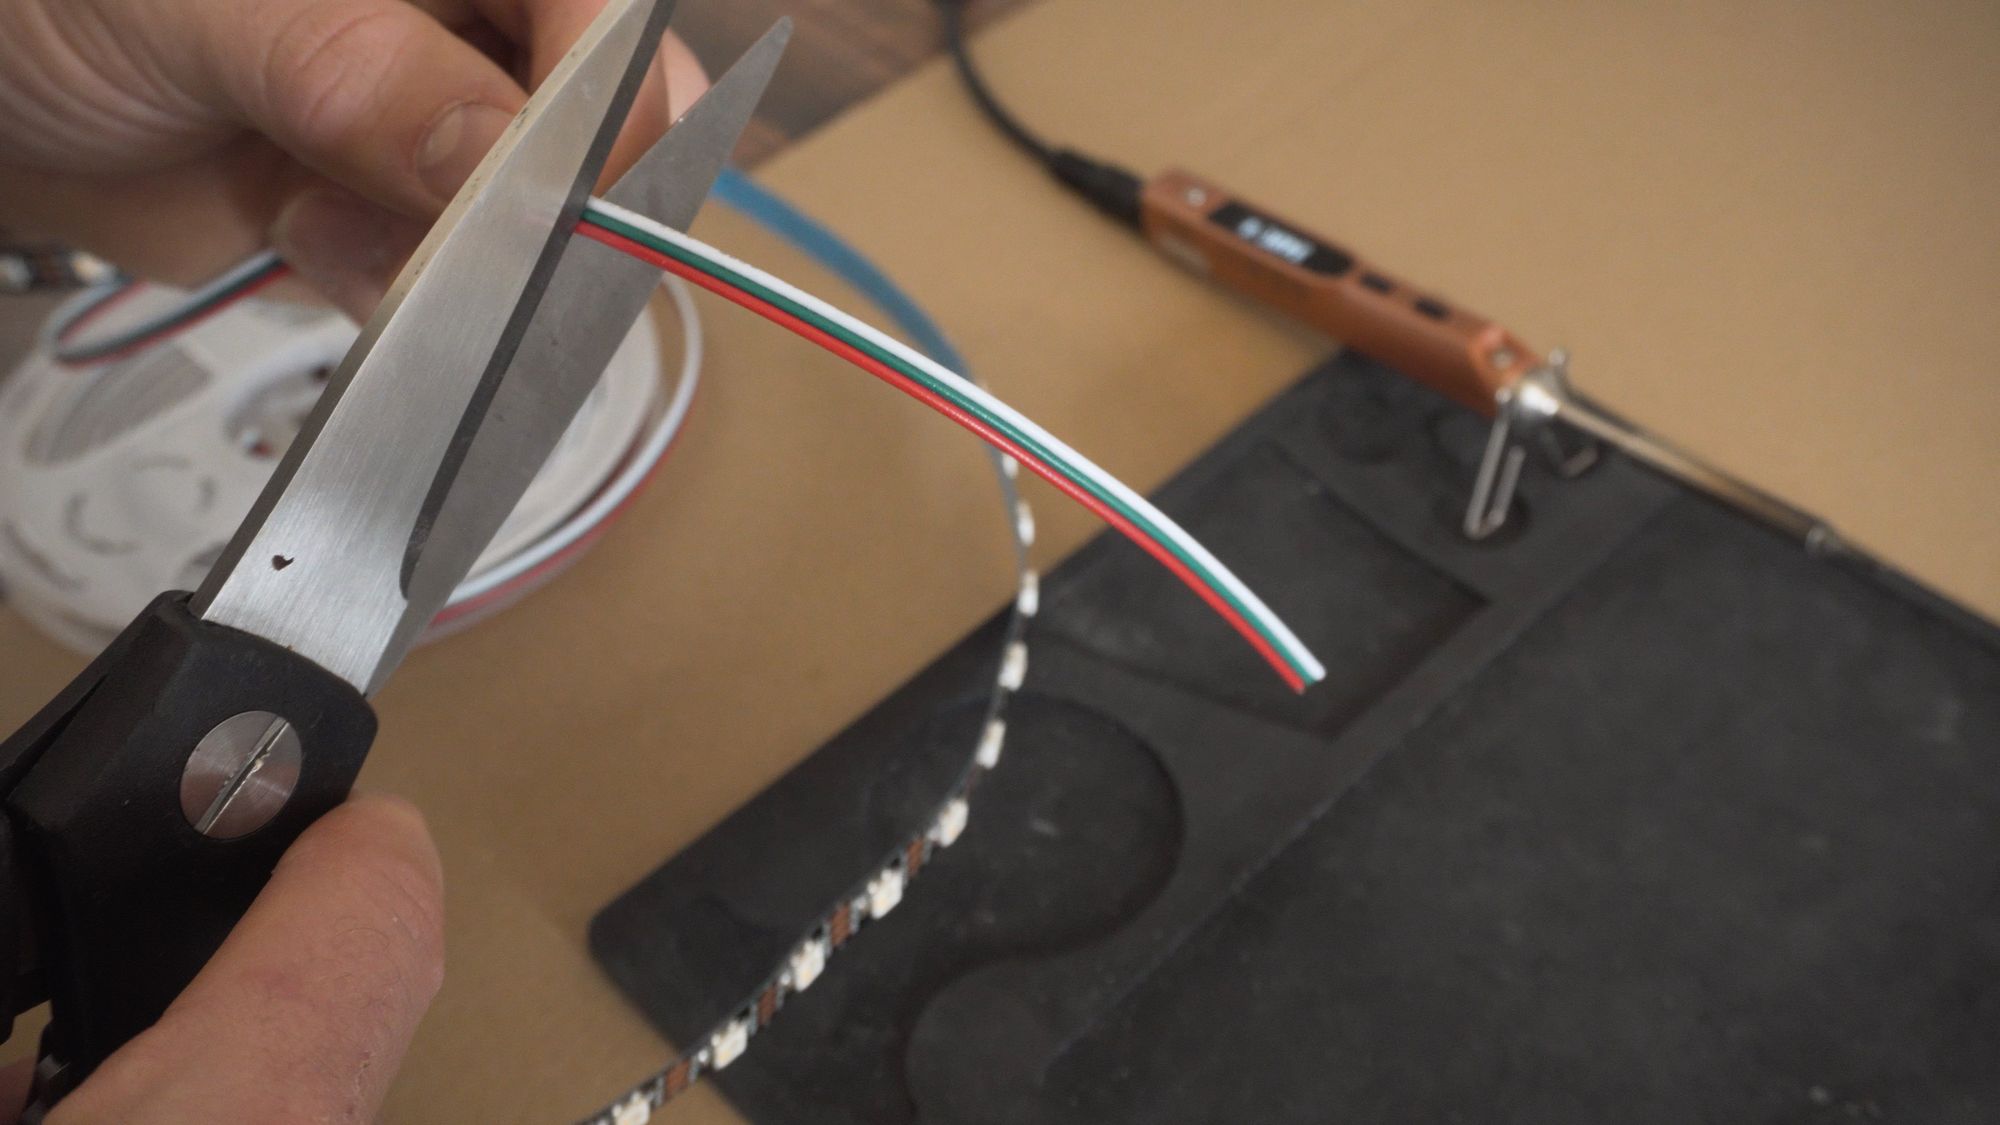
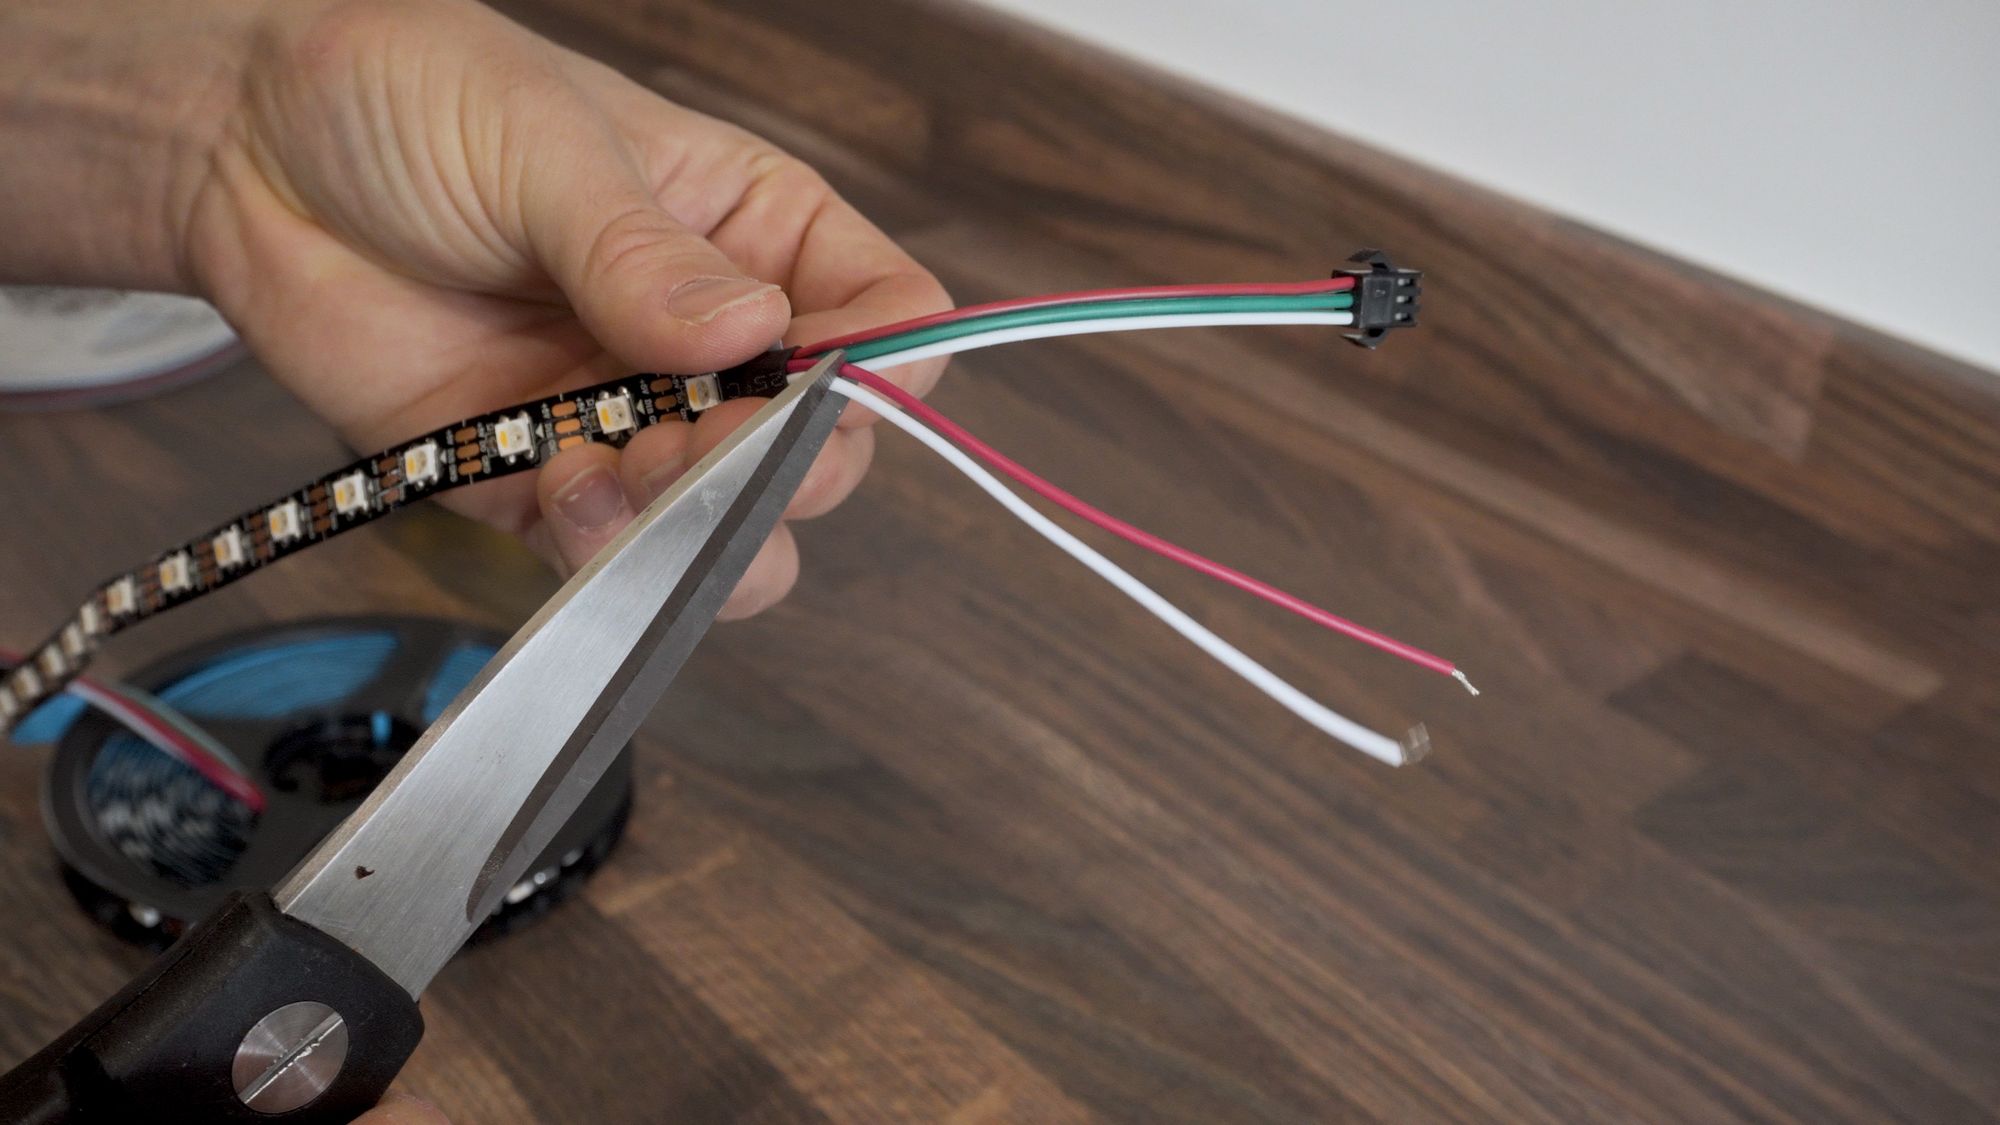
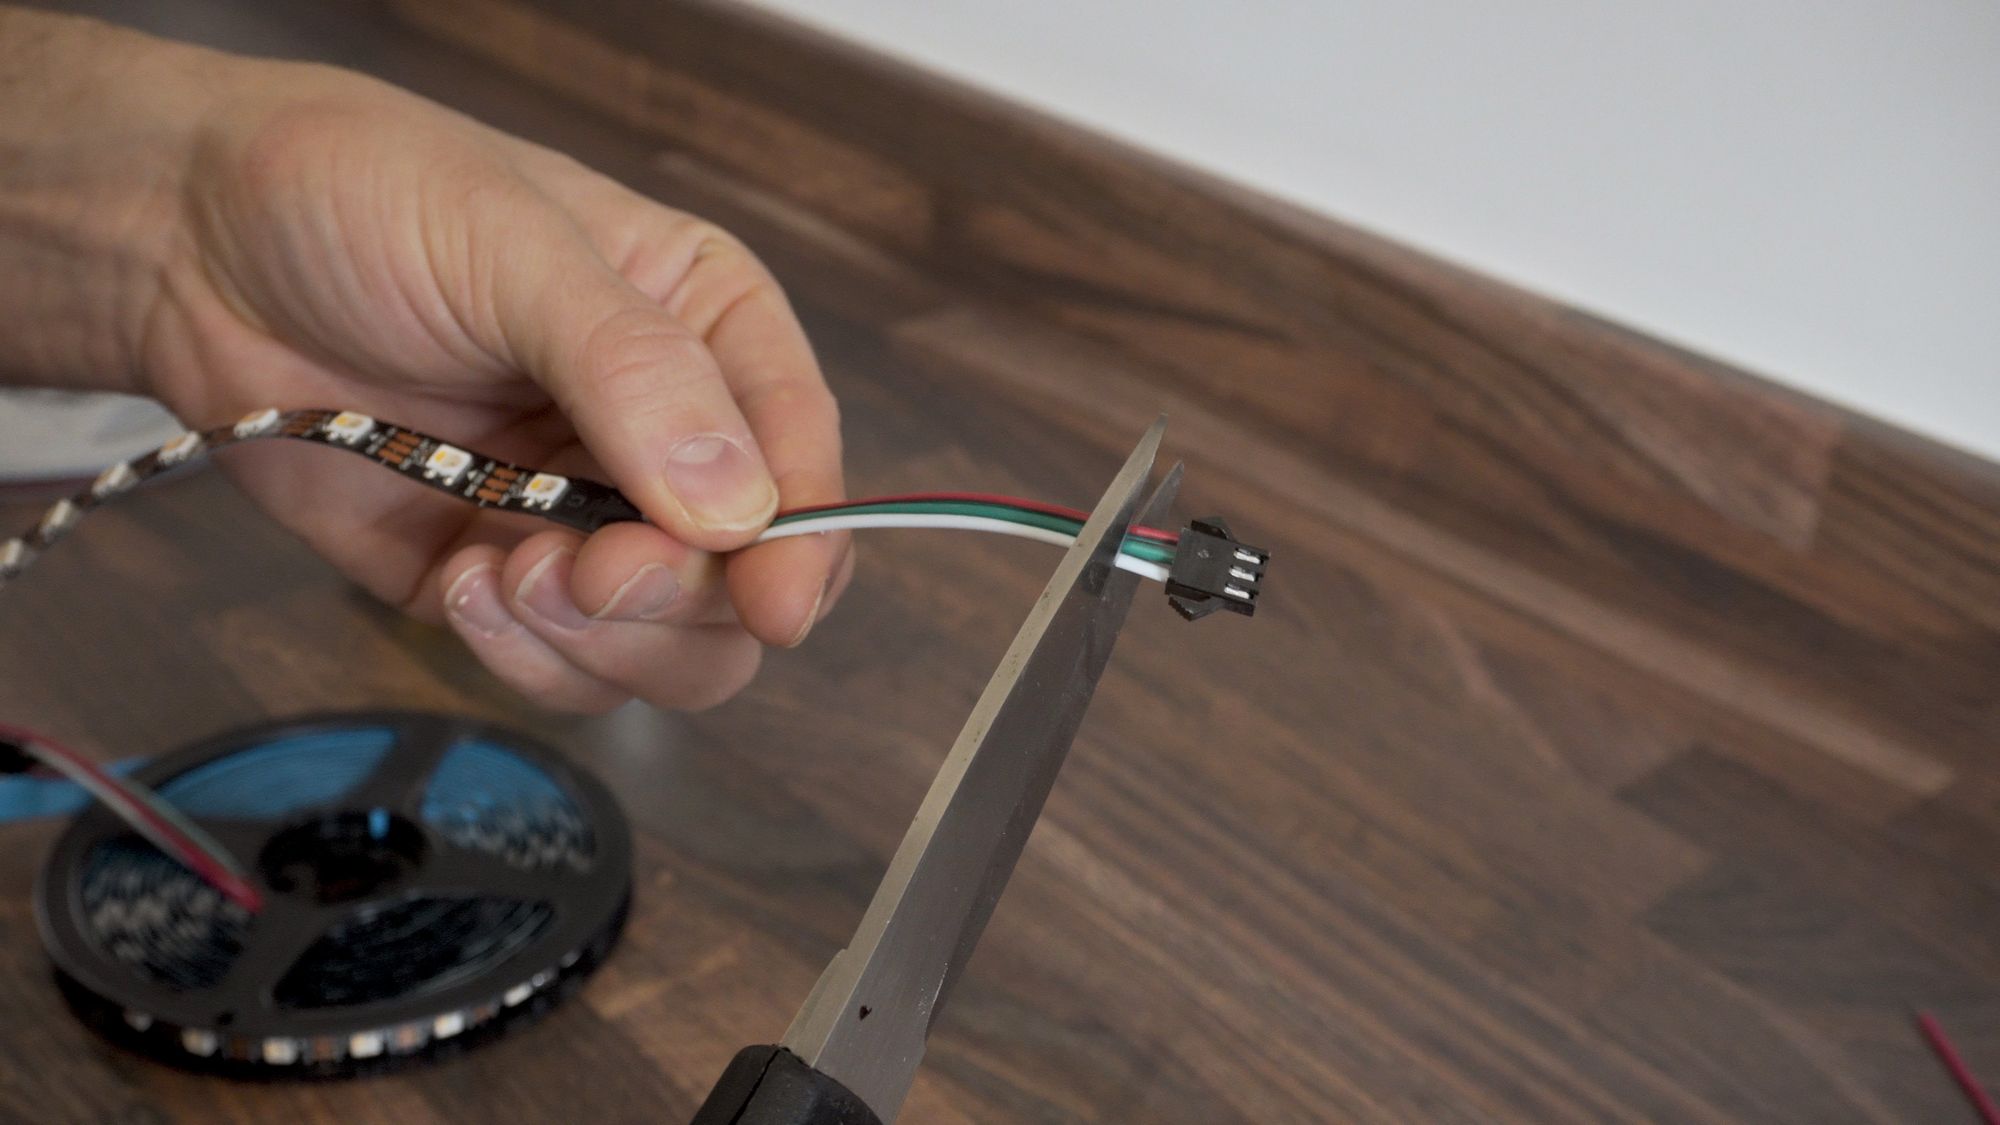
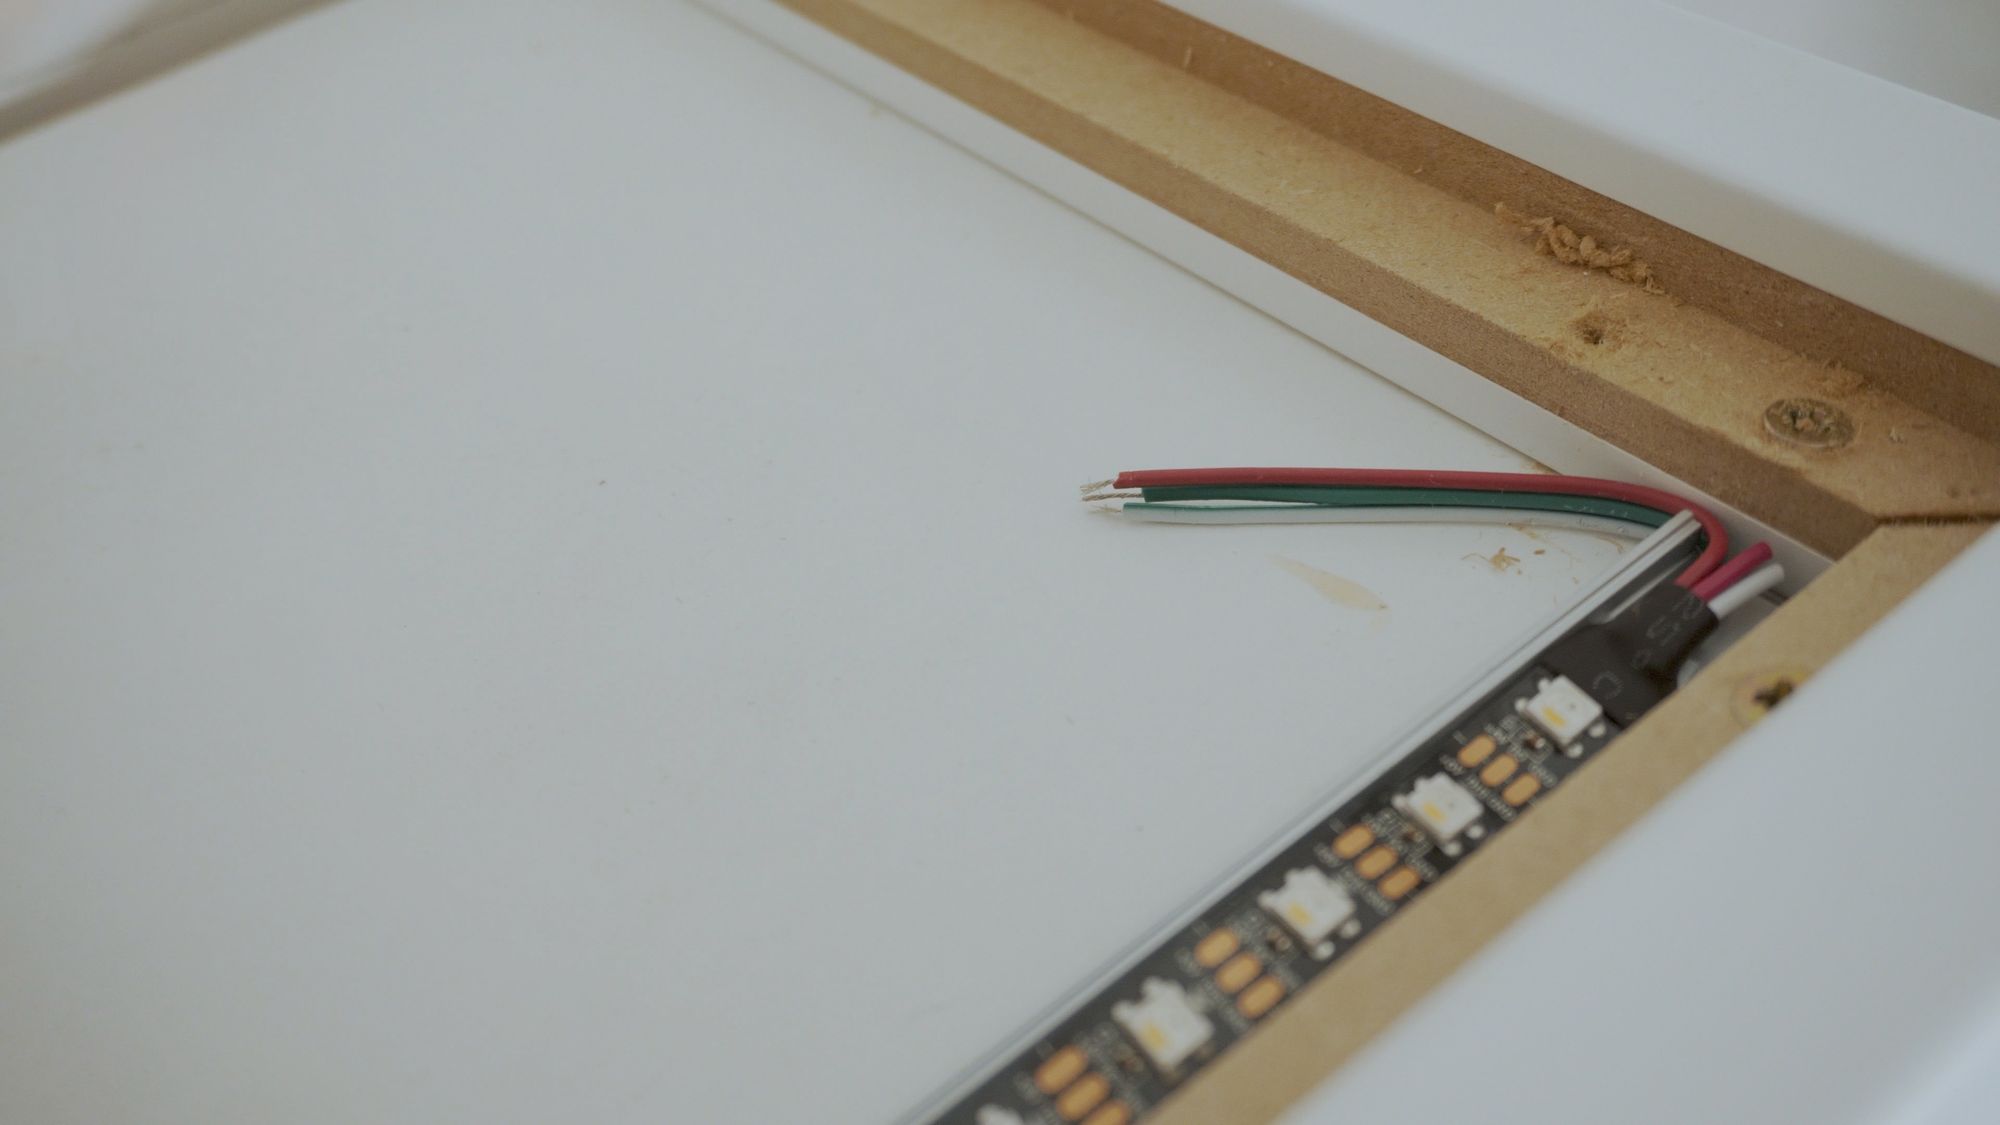
Starting with the top first, I placed the LED strip inside of the channel, so I could get a look at where the best cut point would be on the strip, again making sure to leave some space for the wires to be tucked inside the channel at both the start and end point.
One thing to note here is that the LED strips are directional as indicated by the little arrow on the strip, so take that into account when planning.

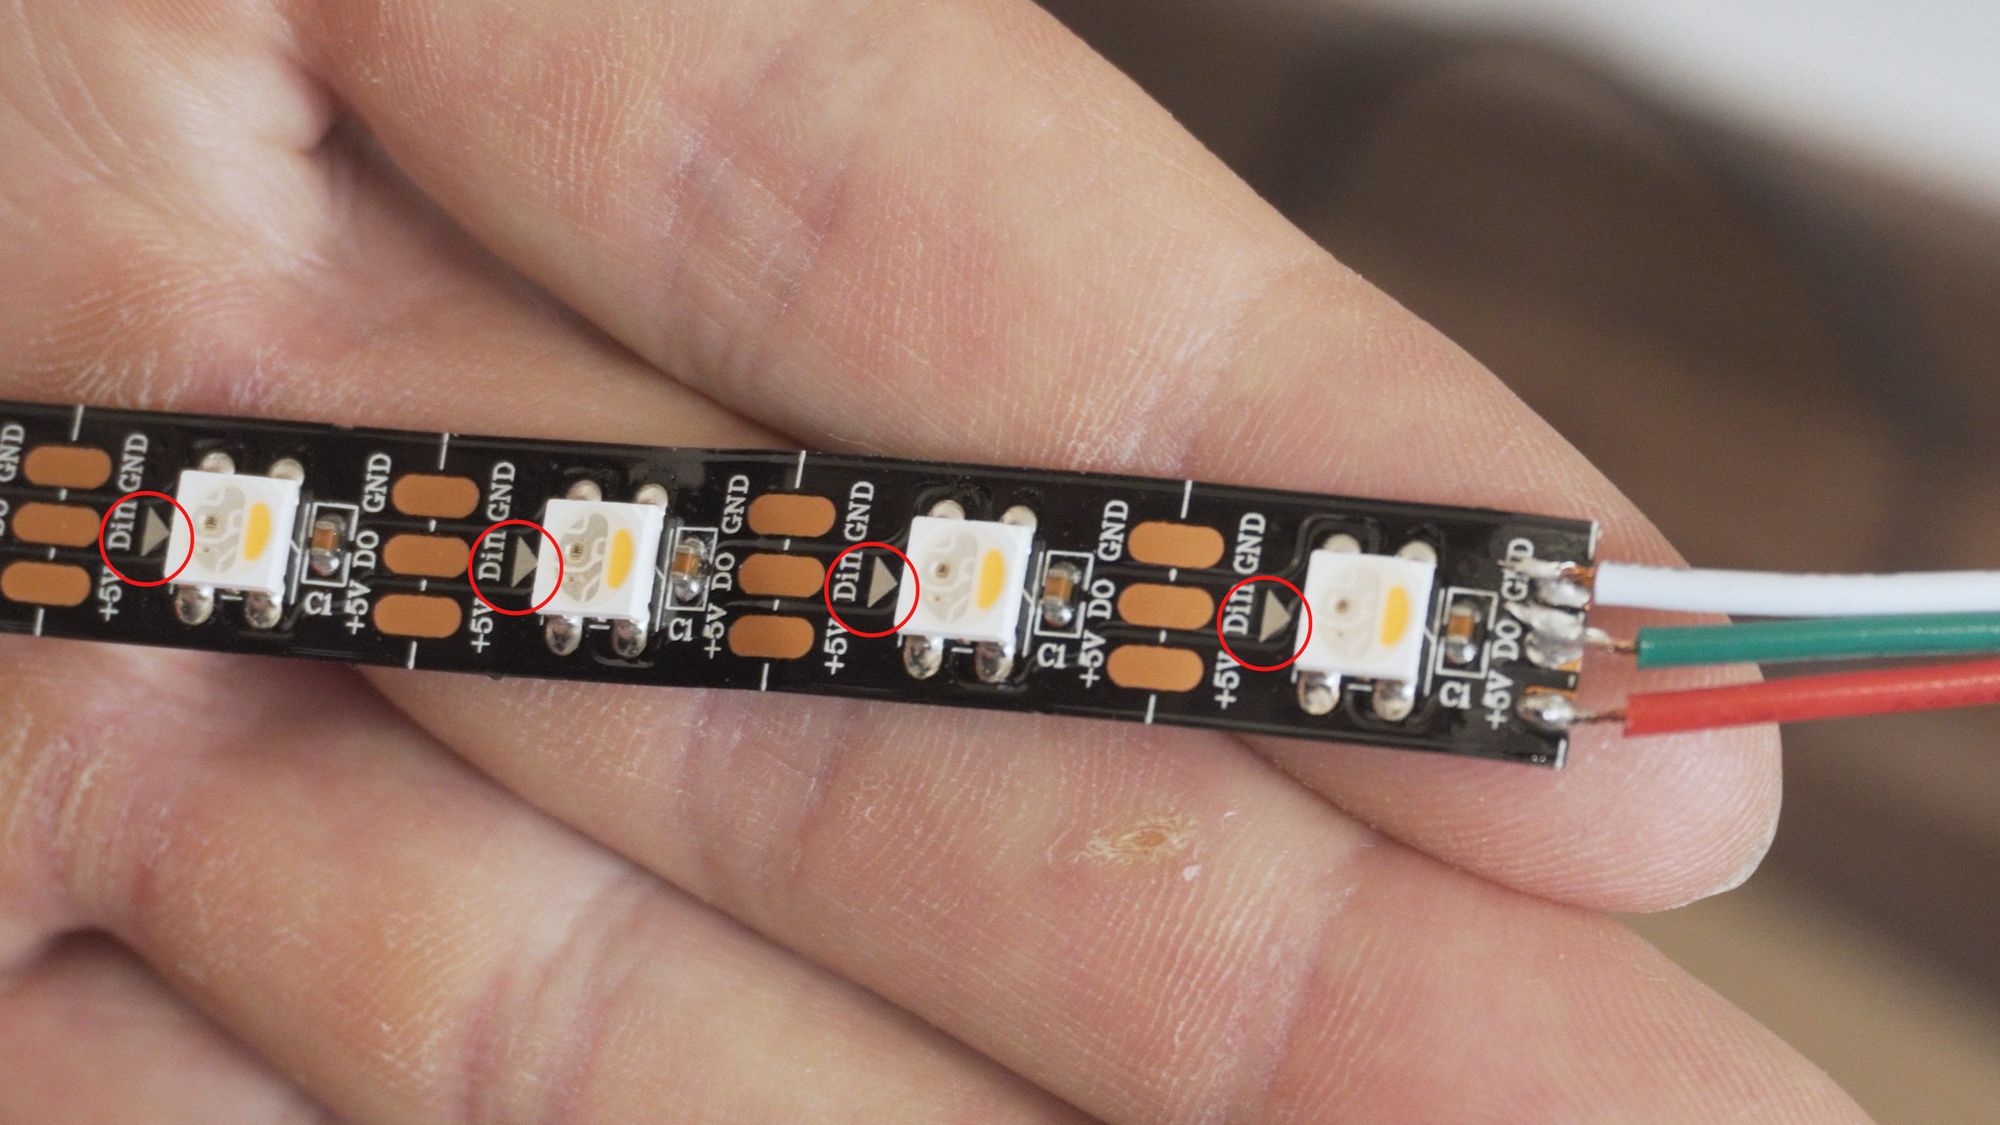
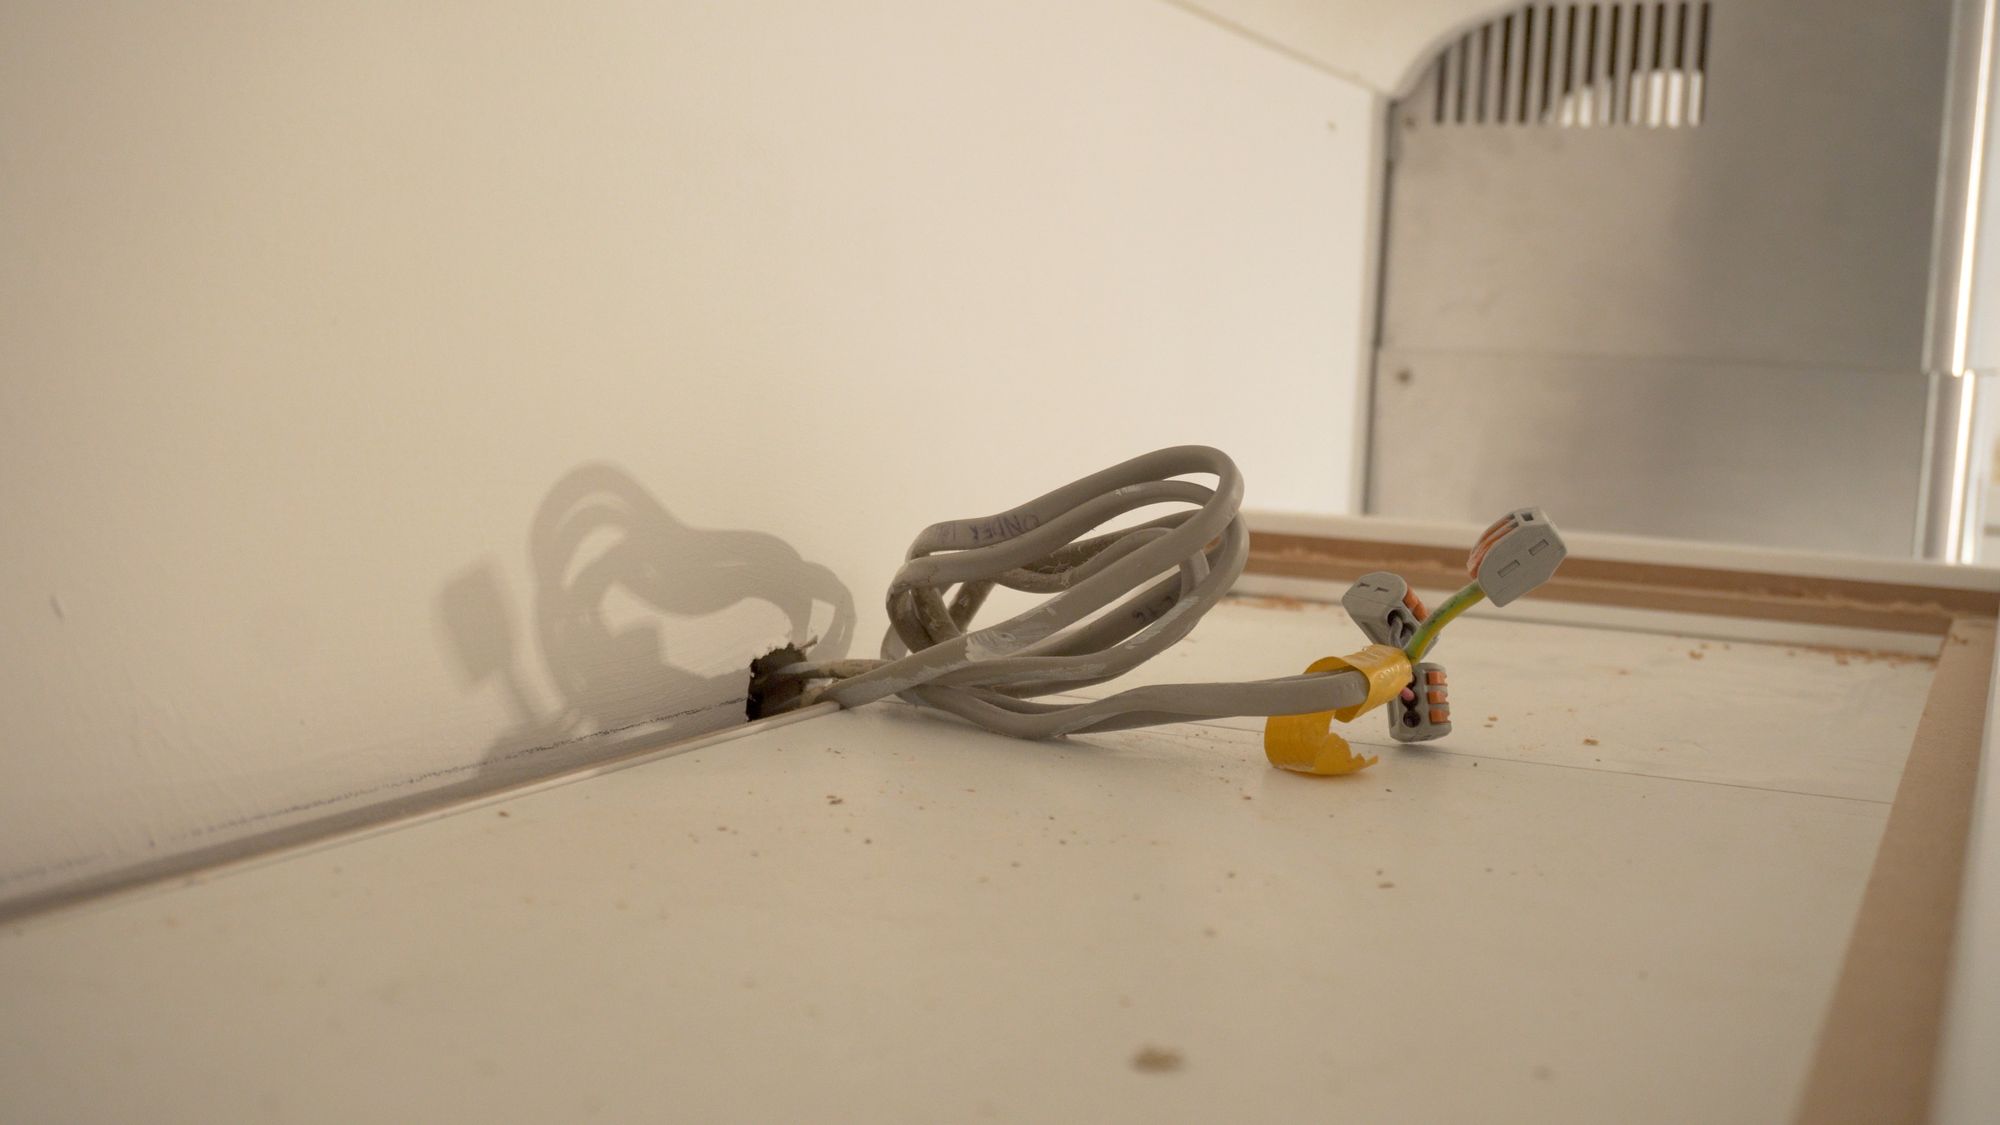
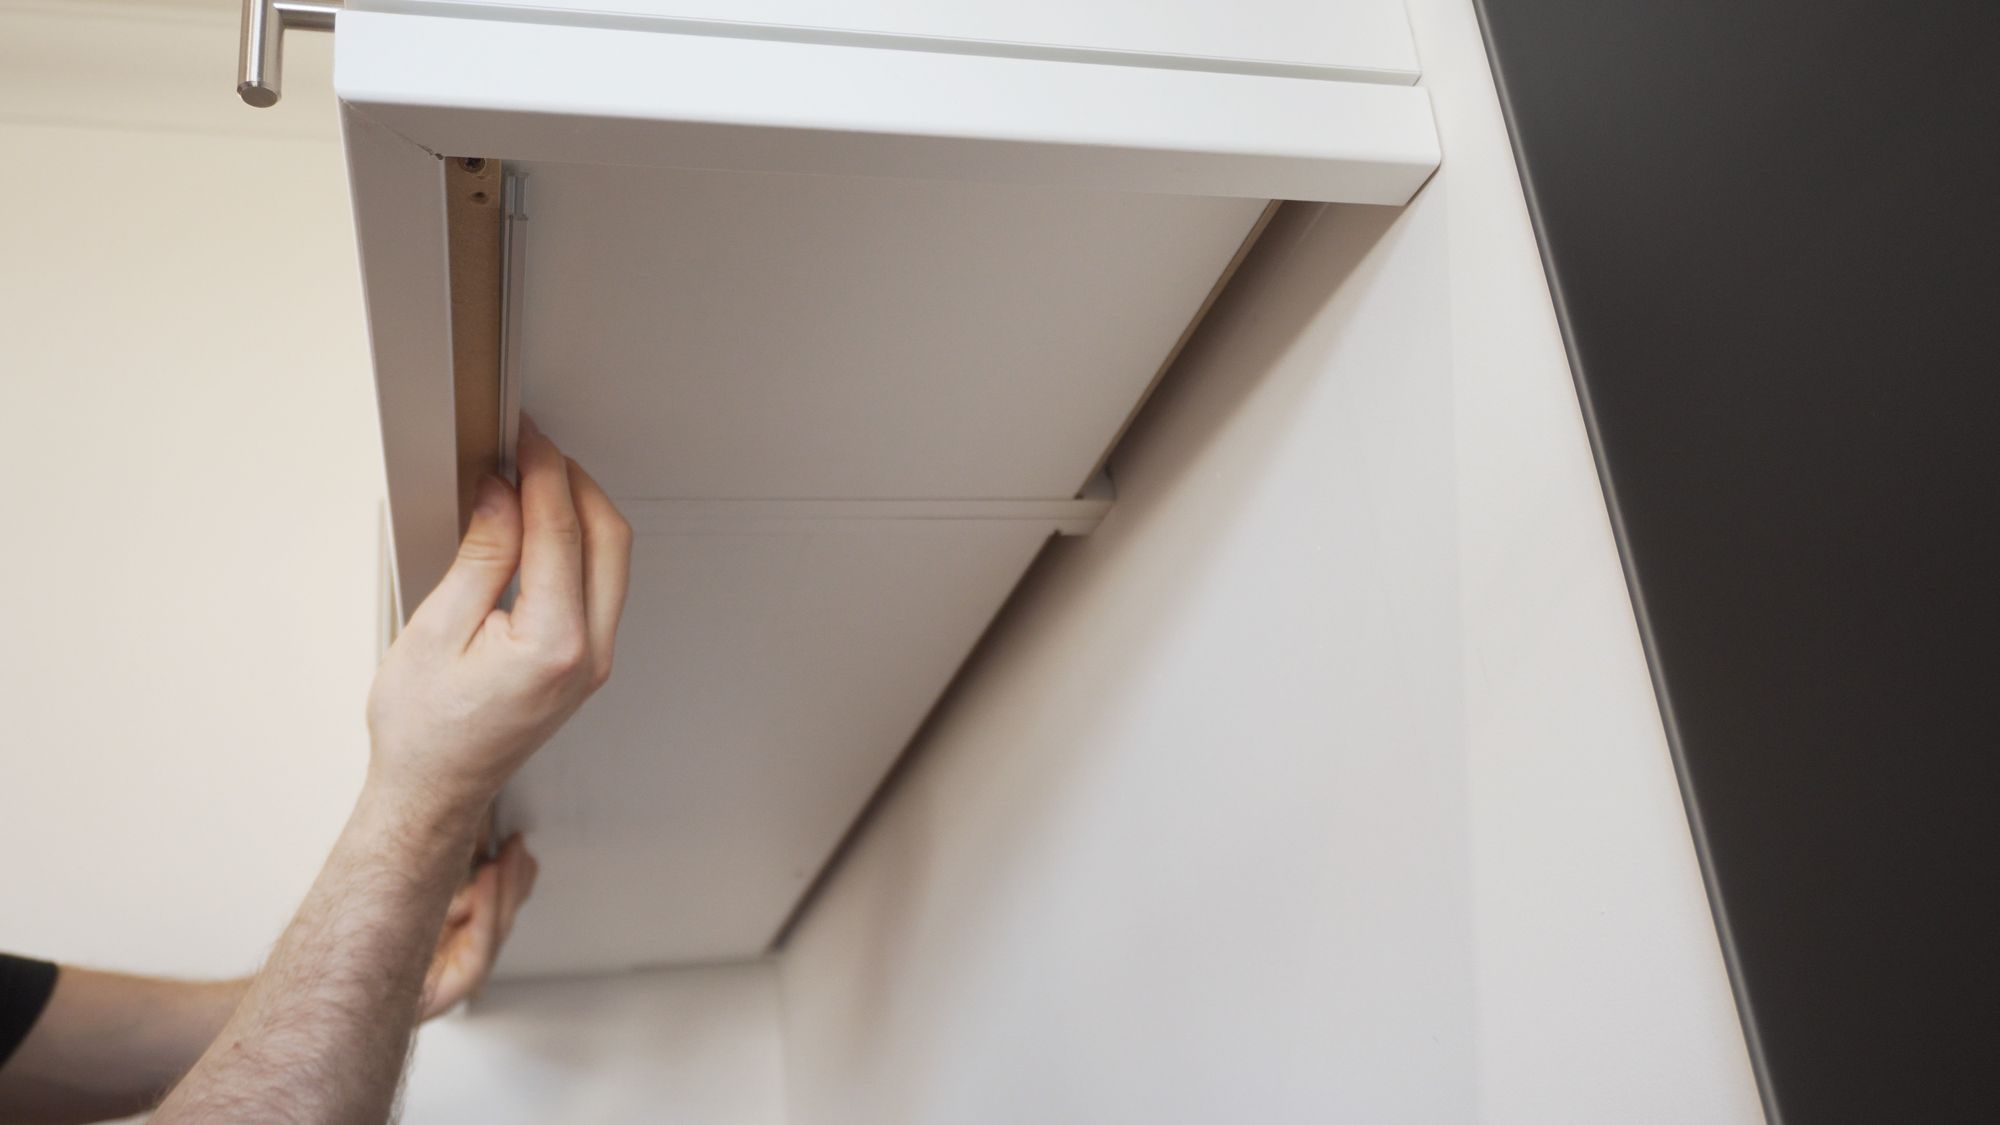
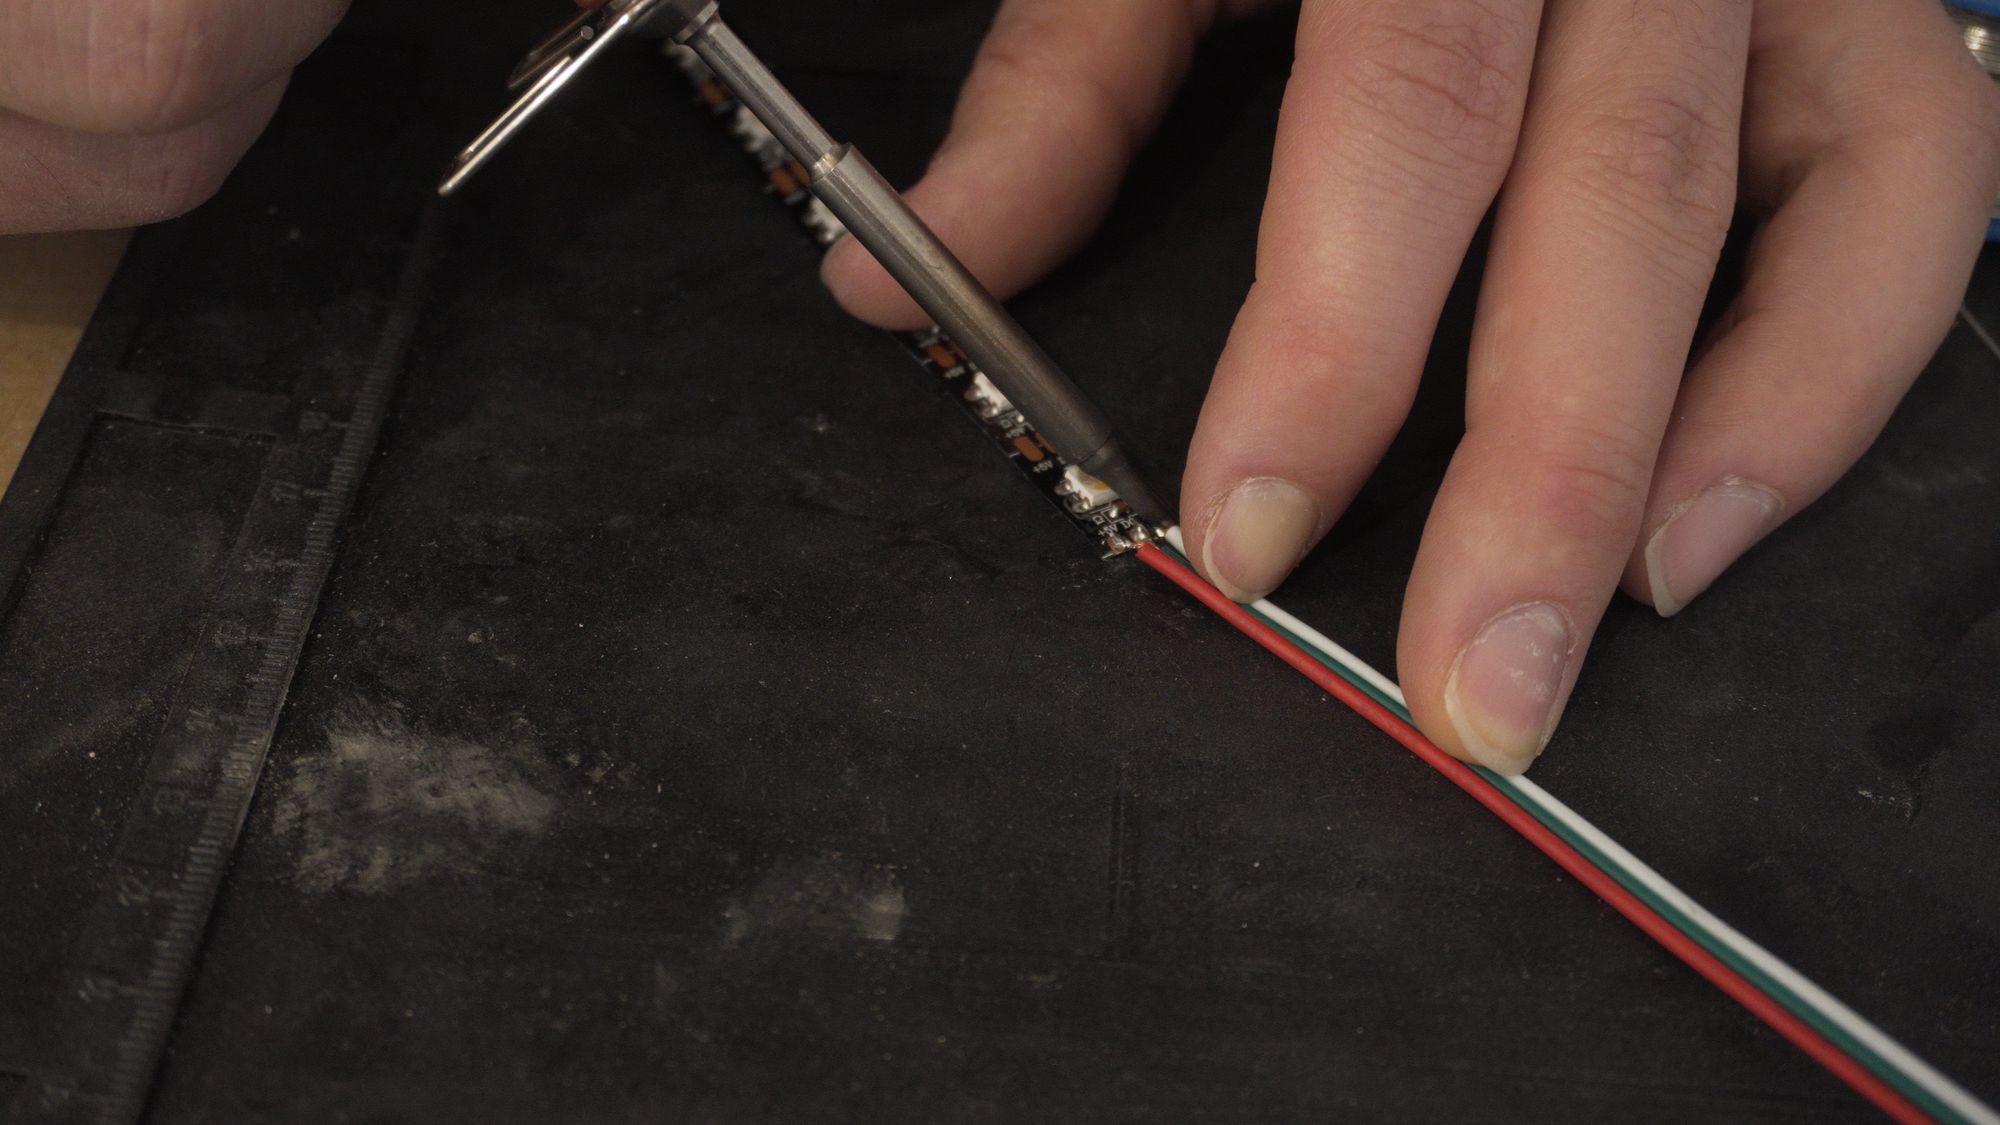
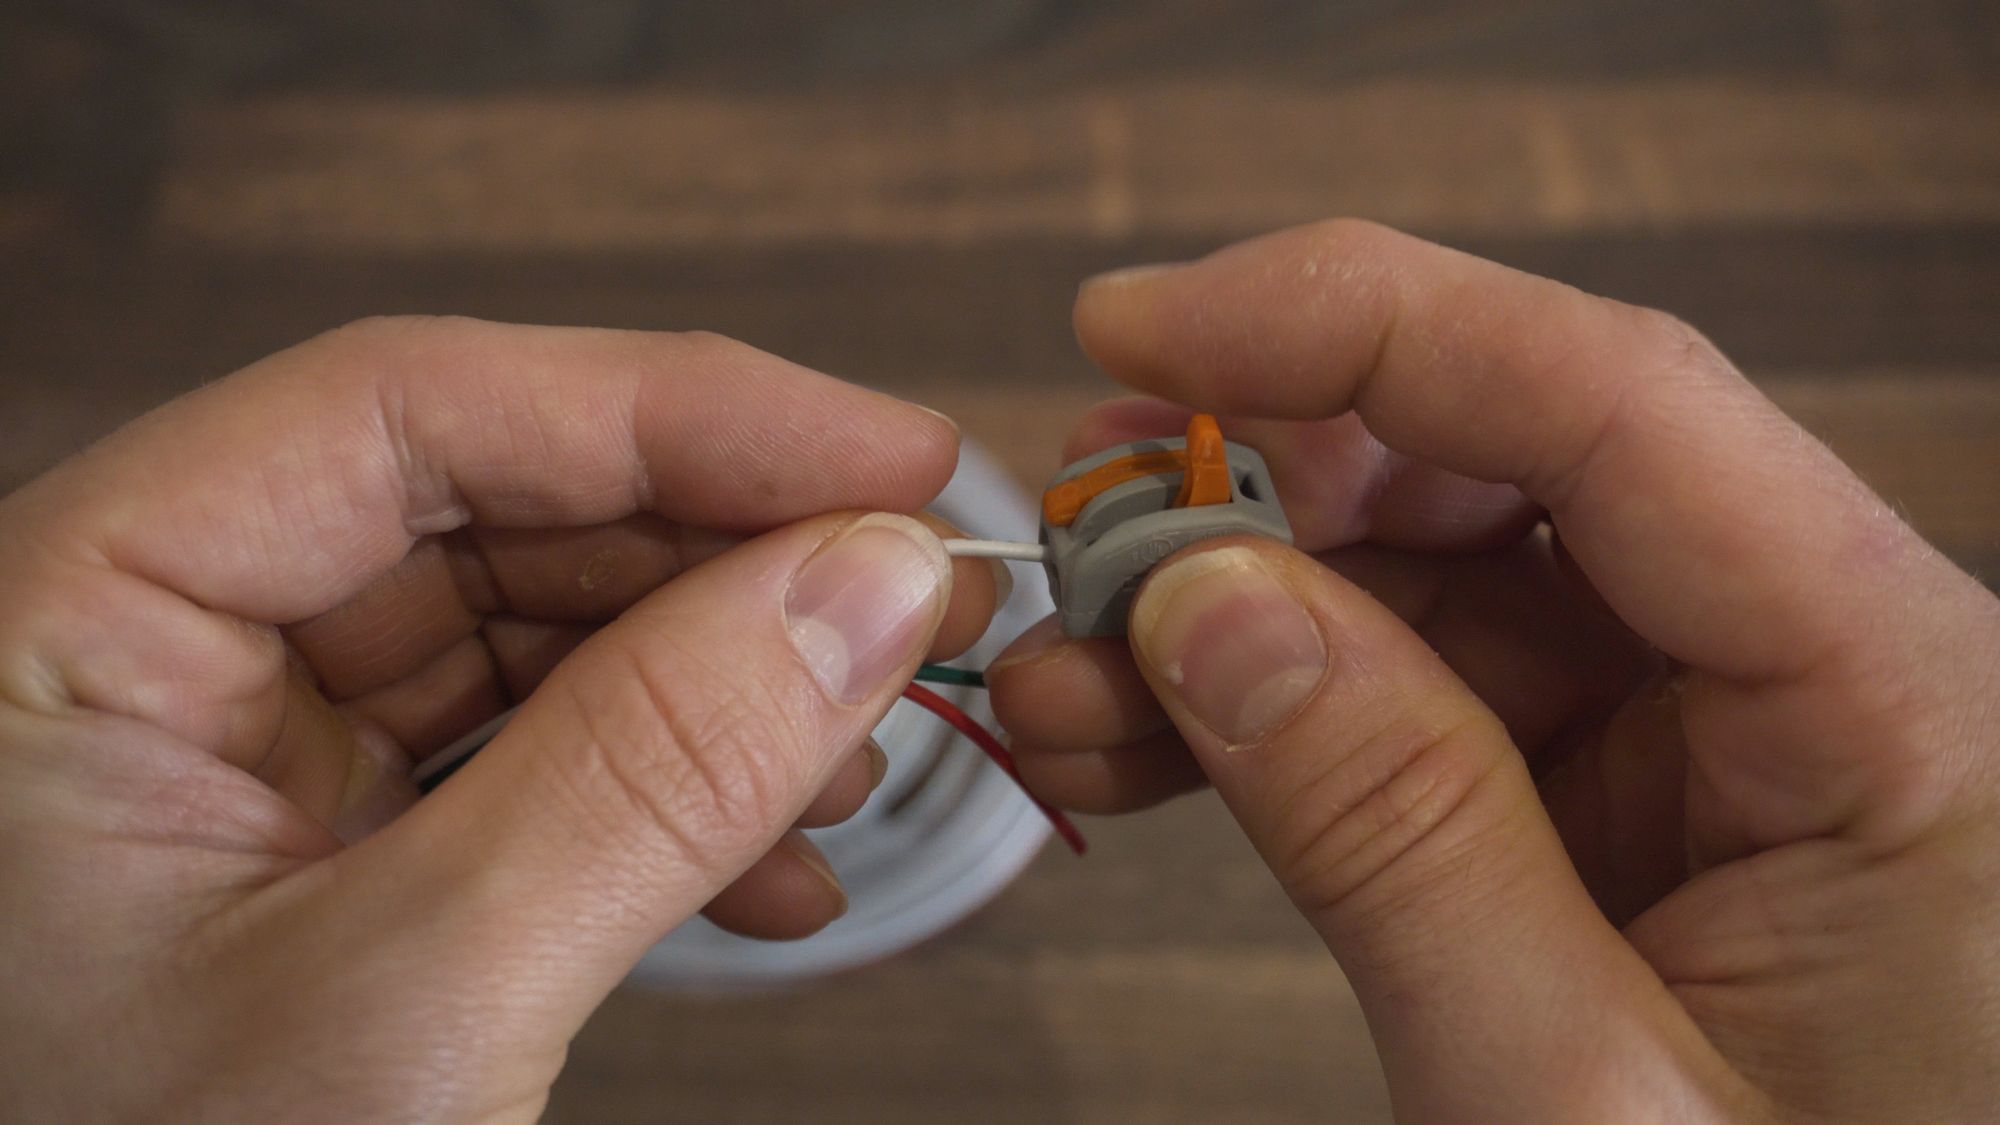
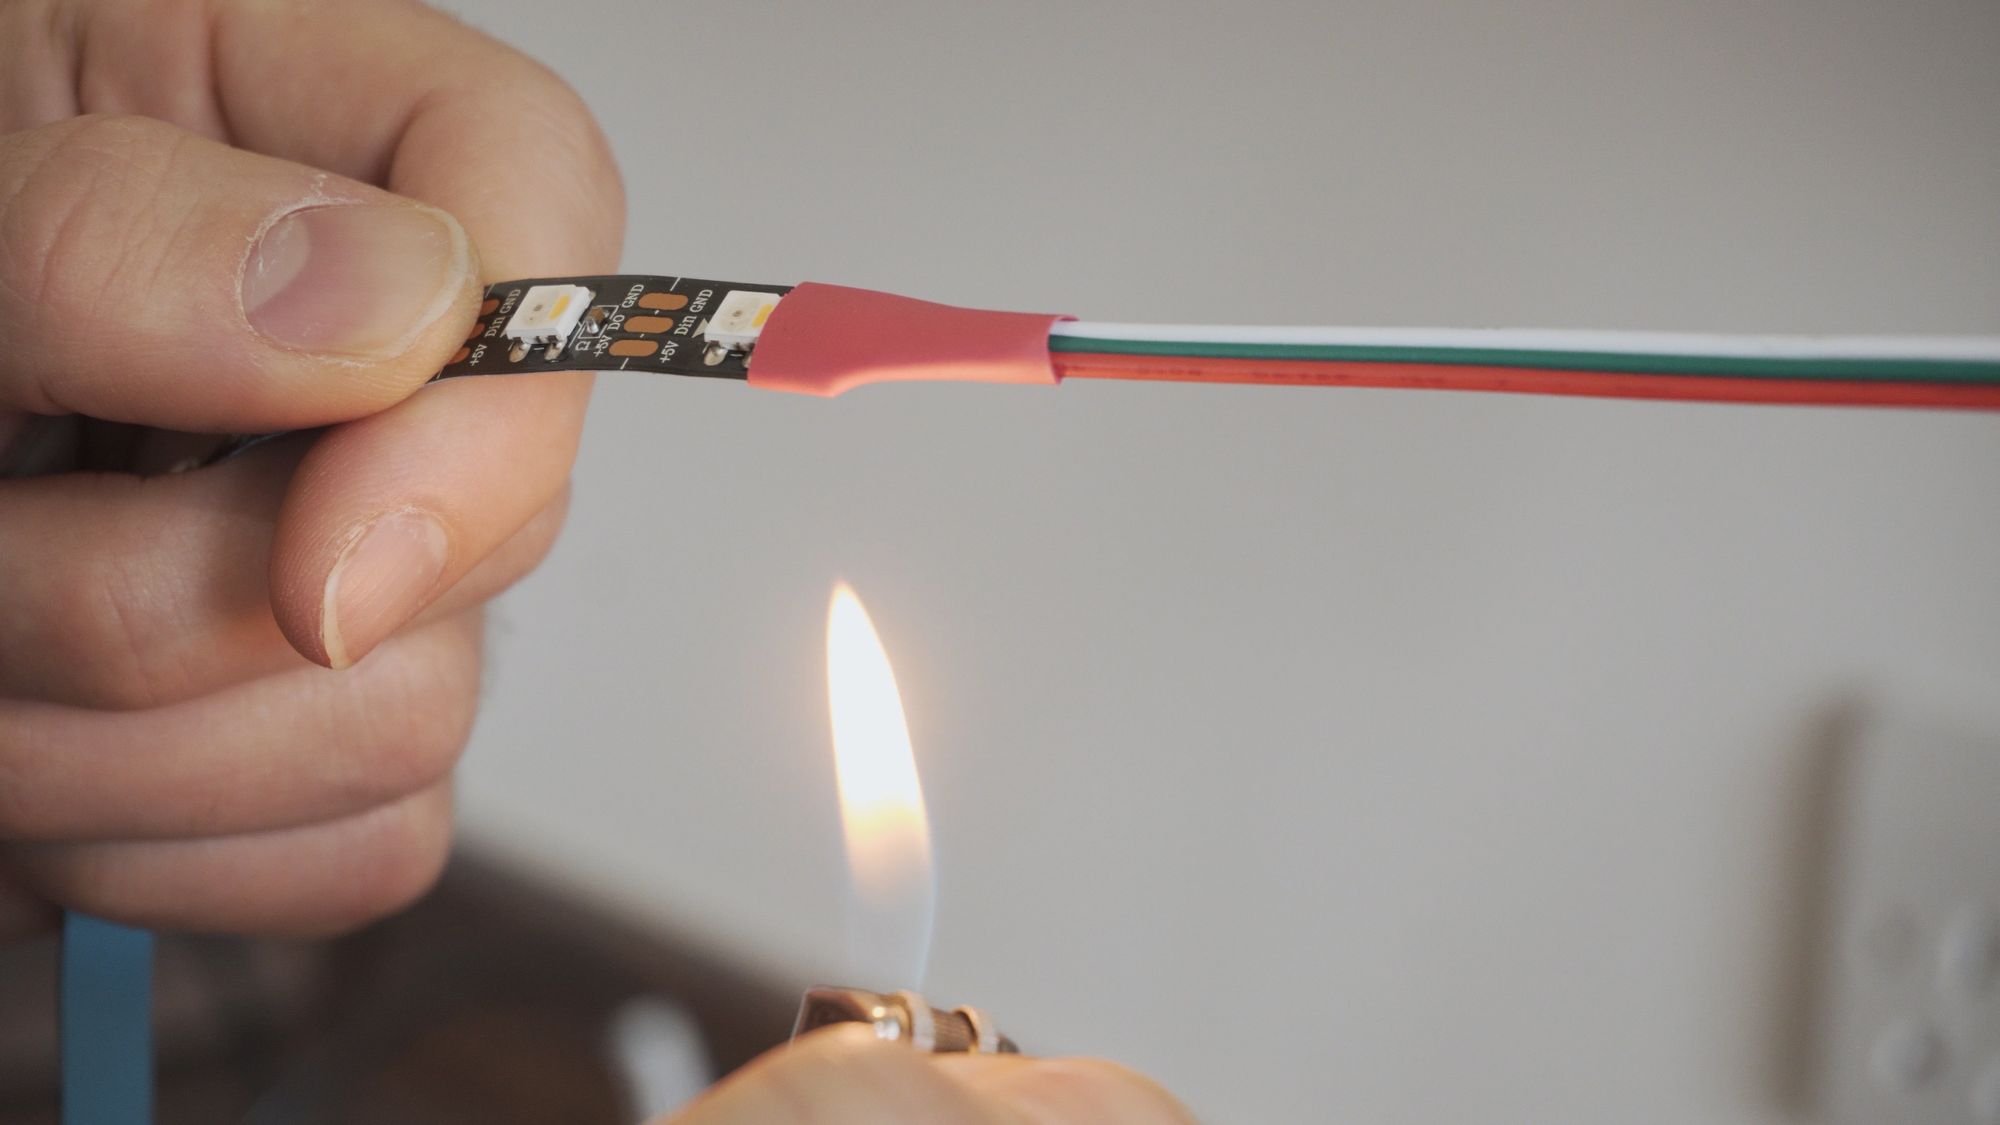
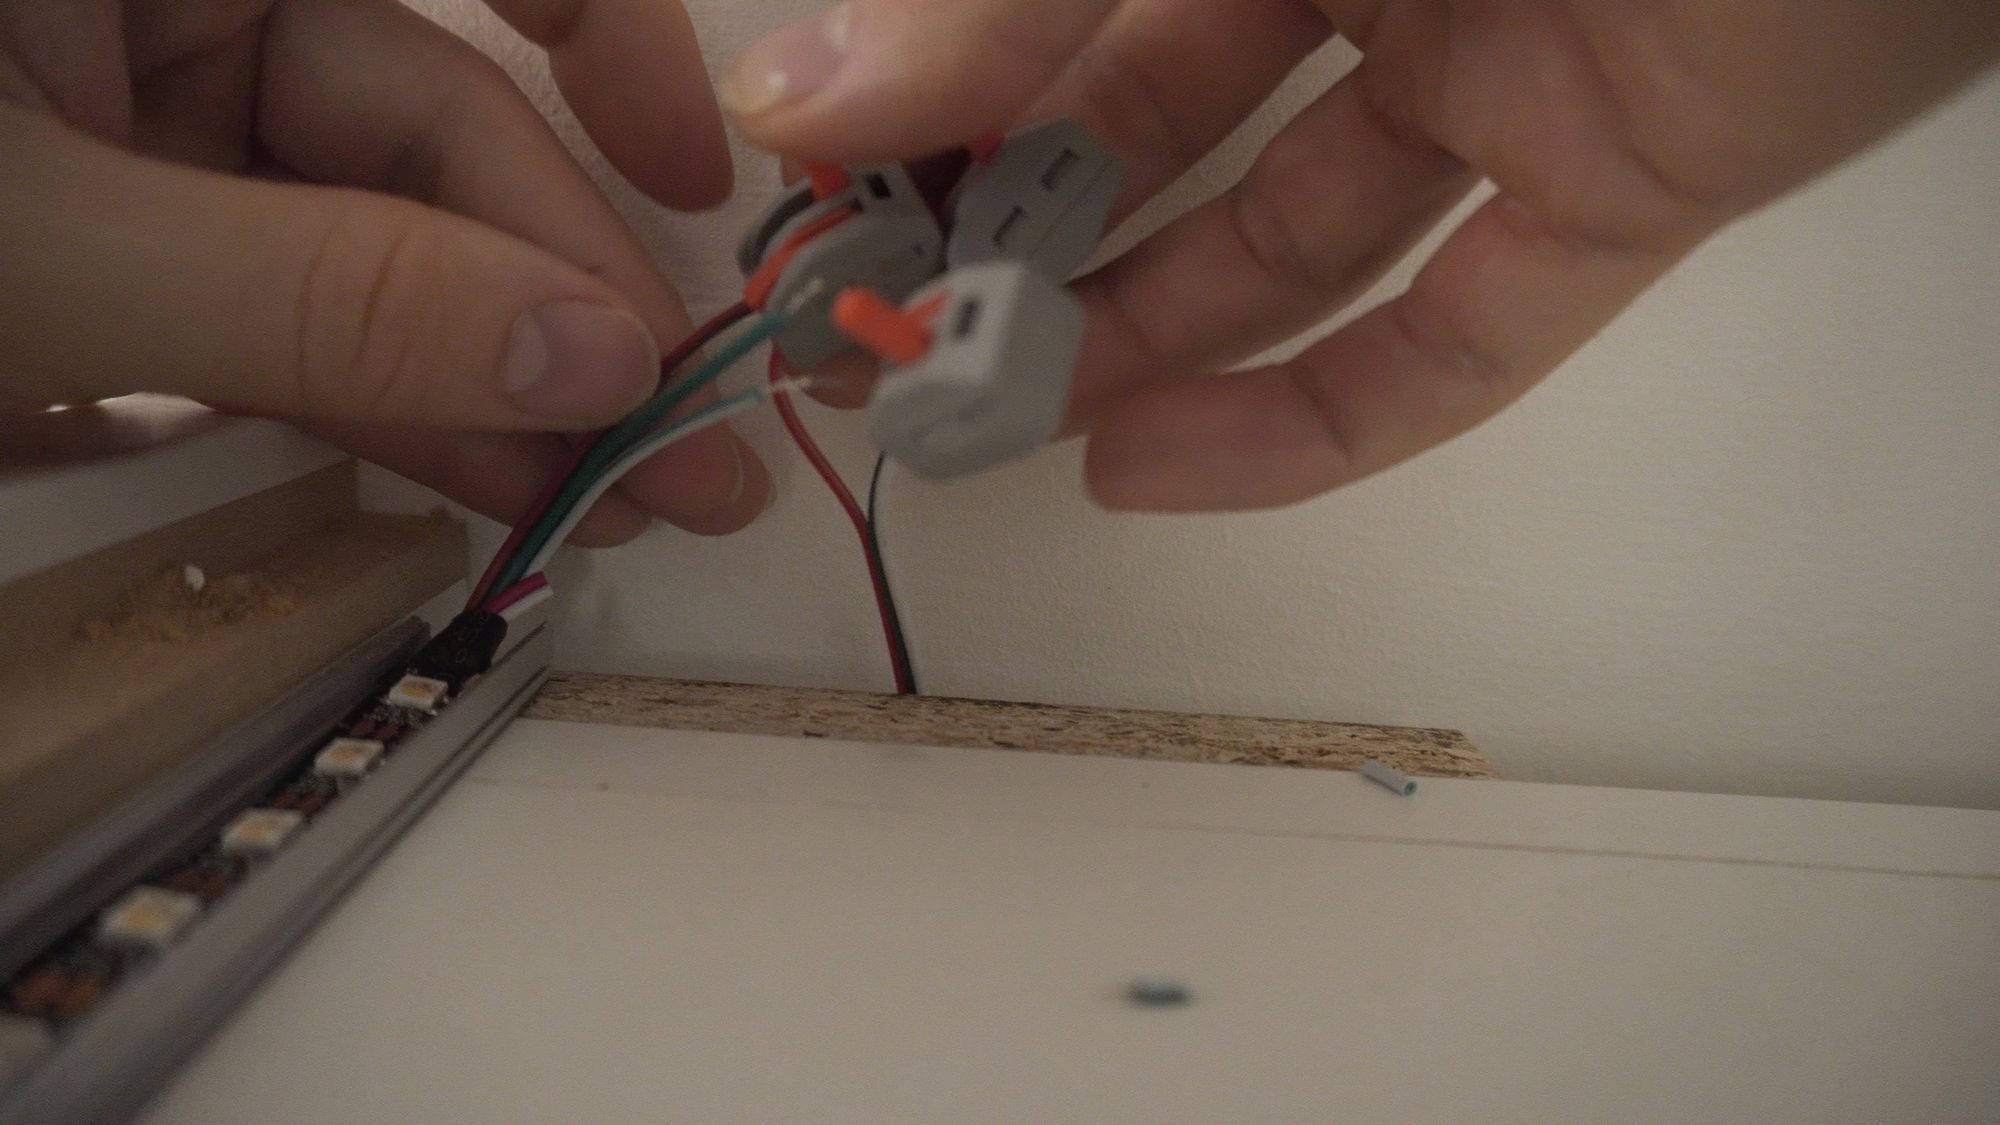
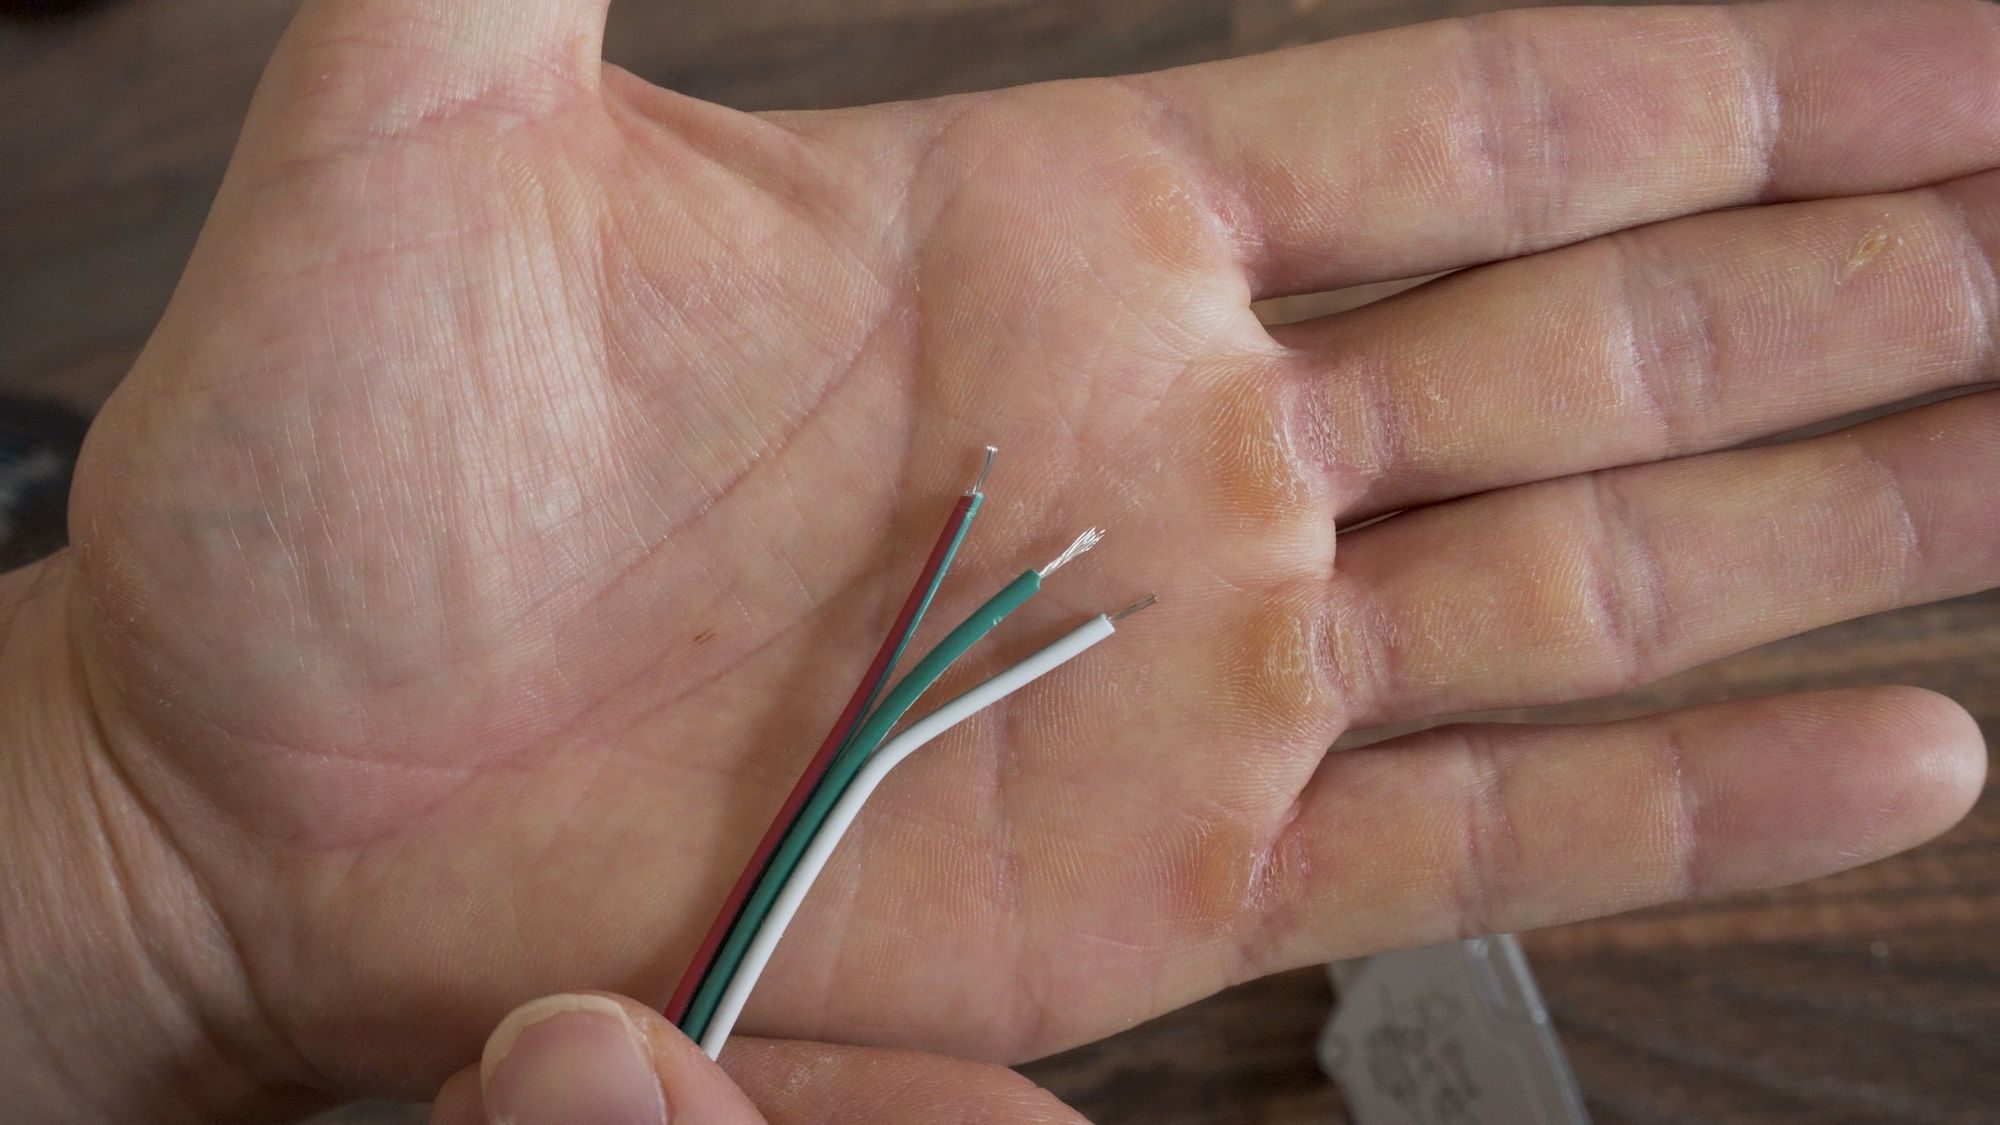
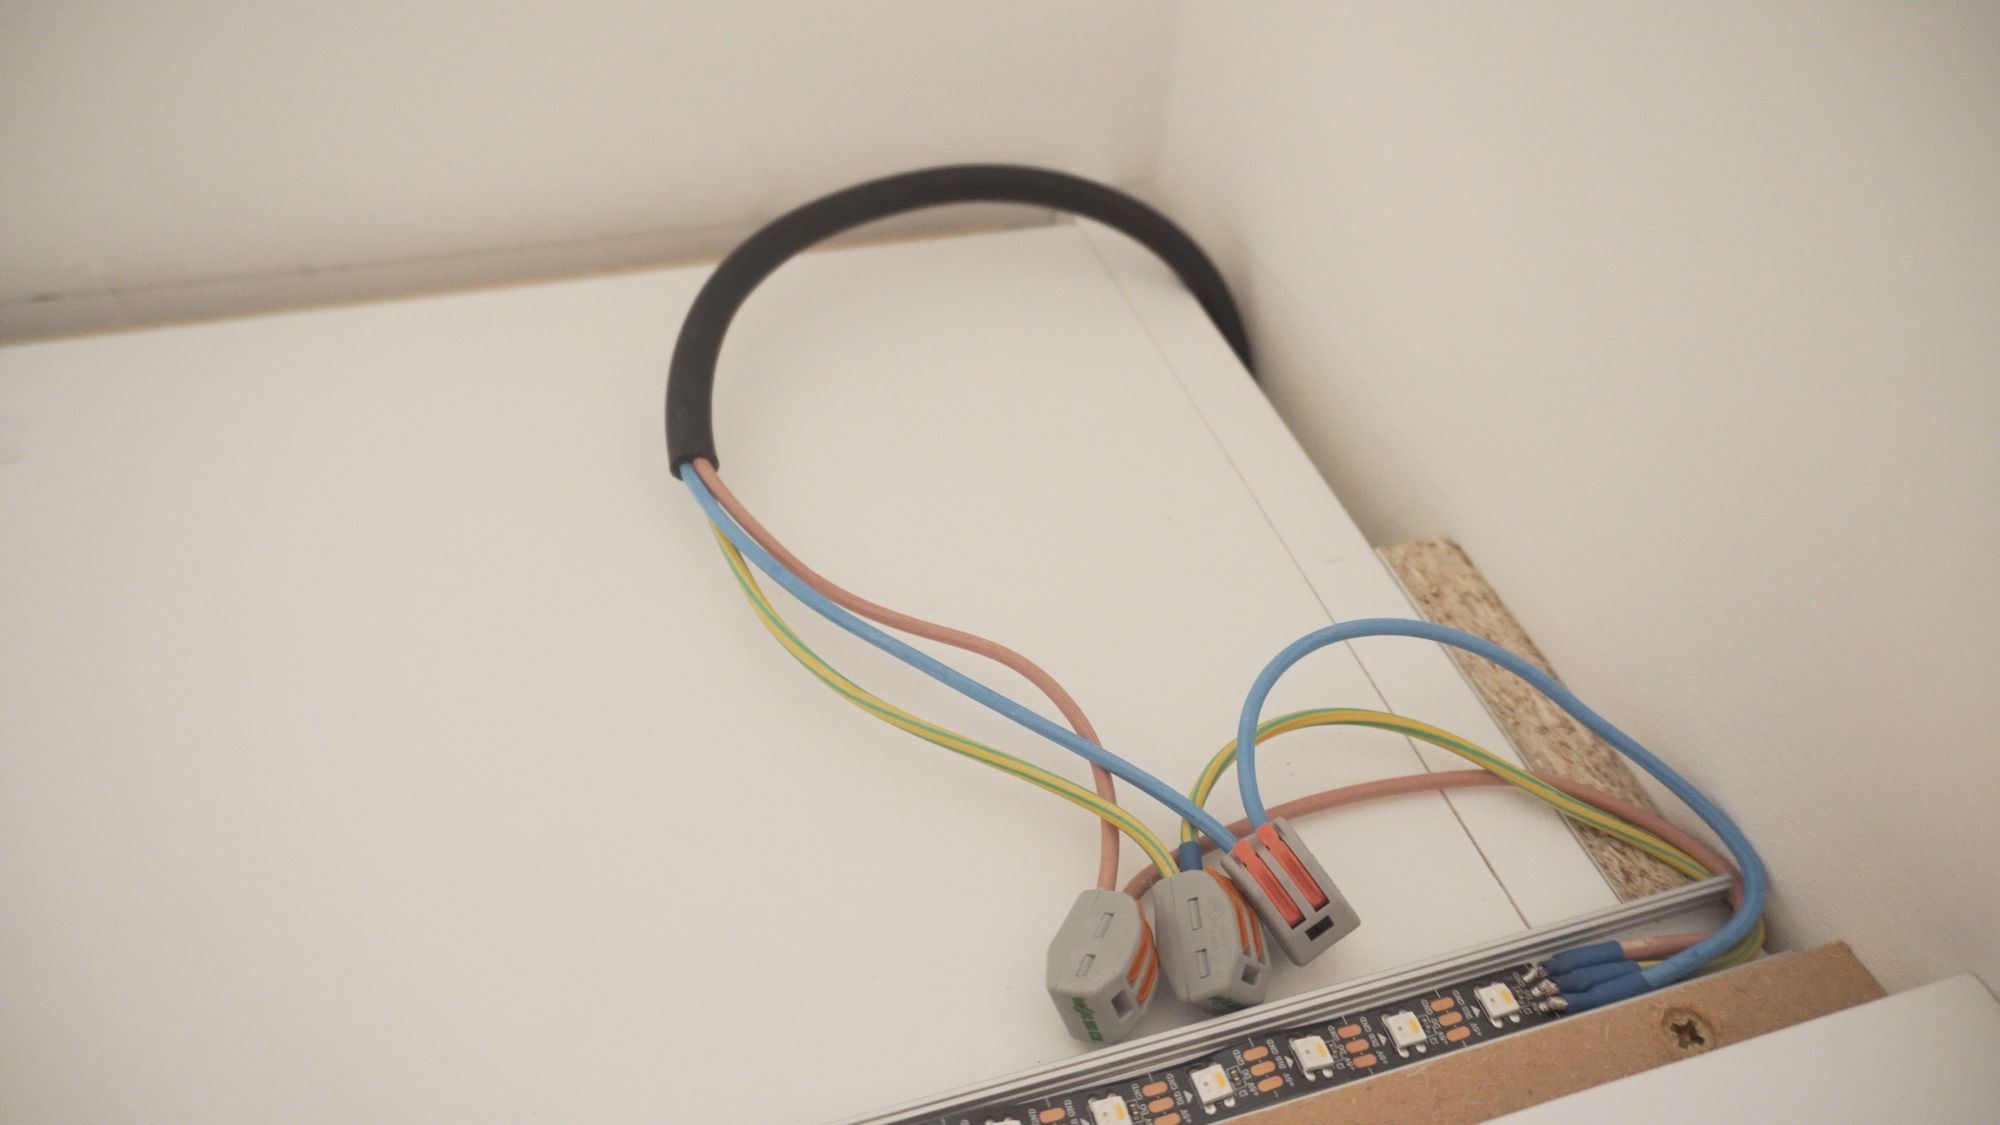
After cutting the top LED strip to size, I soldered on a very short length of wire so I can connect them into some WAGO clips, which will then attach to the corresponding wires from the bottom strip.
The WAGO clips allow me to quickly and easily connect the two ends together without soldering on top of the cabinet, and makes them easy to separate in the future for troubleshooting or for swapping anything out.
Make sure to add some heat shrink to insulate your connections from shorting out.
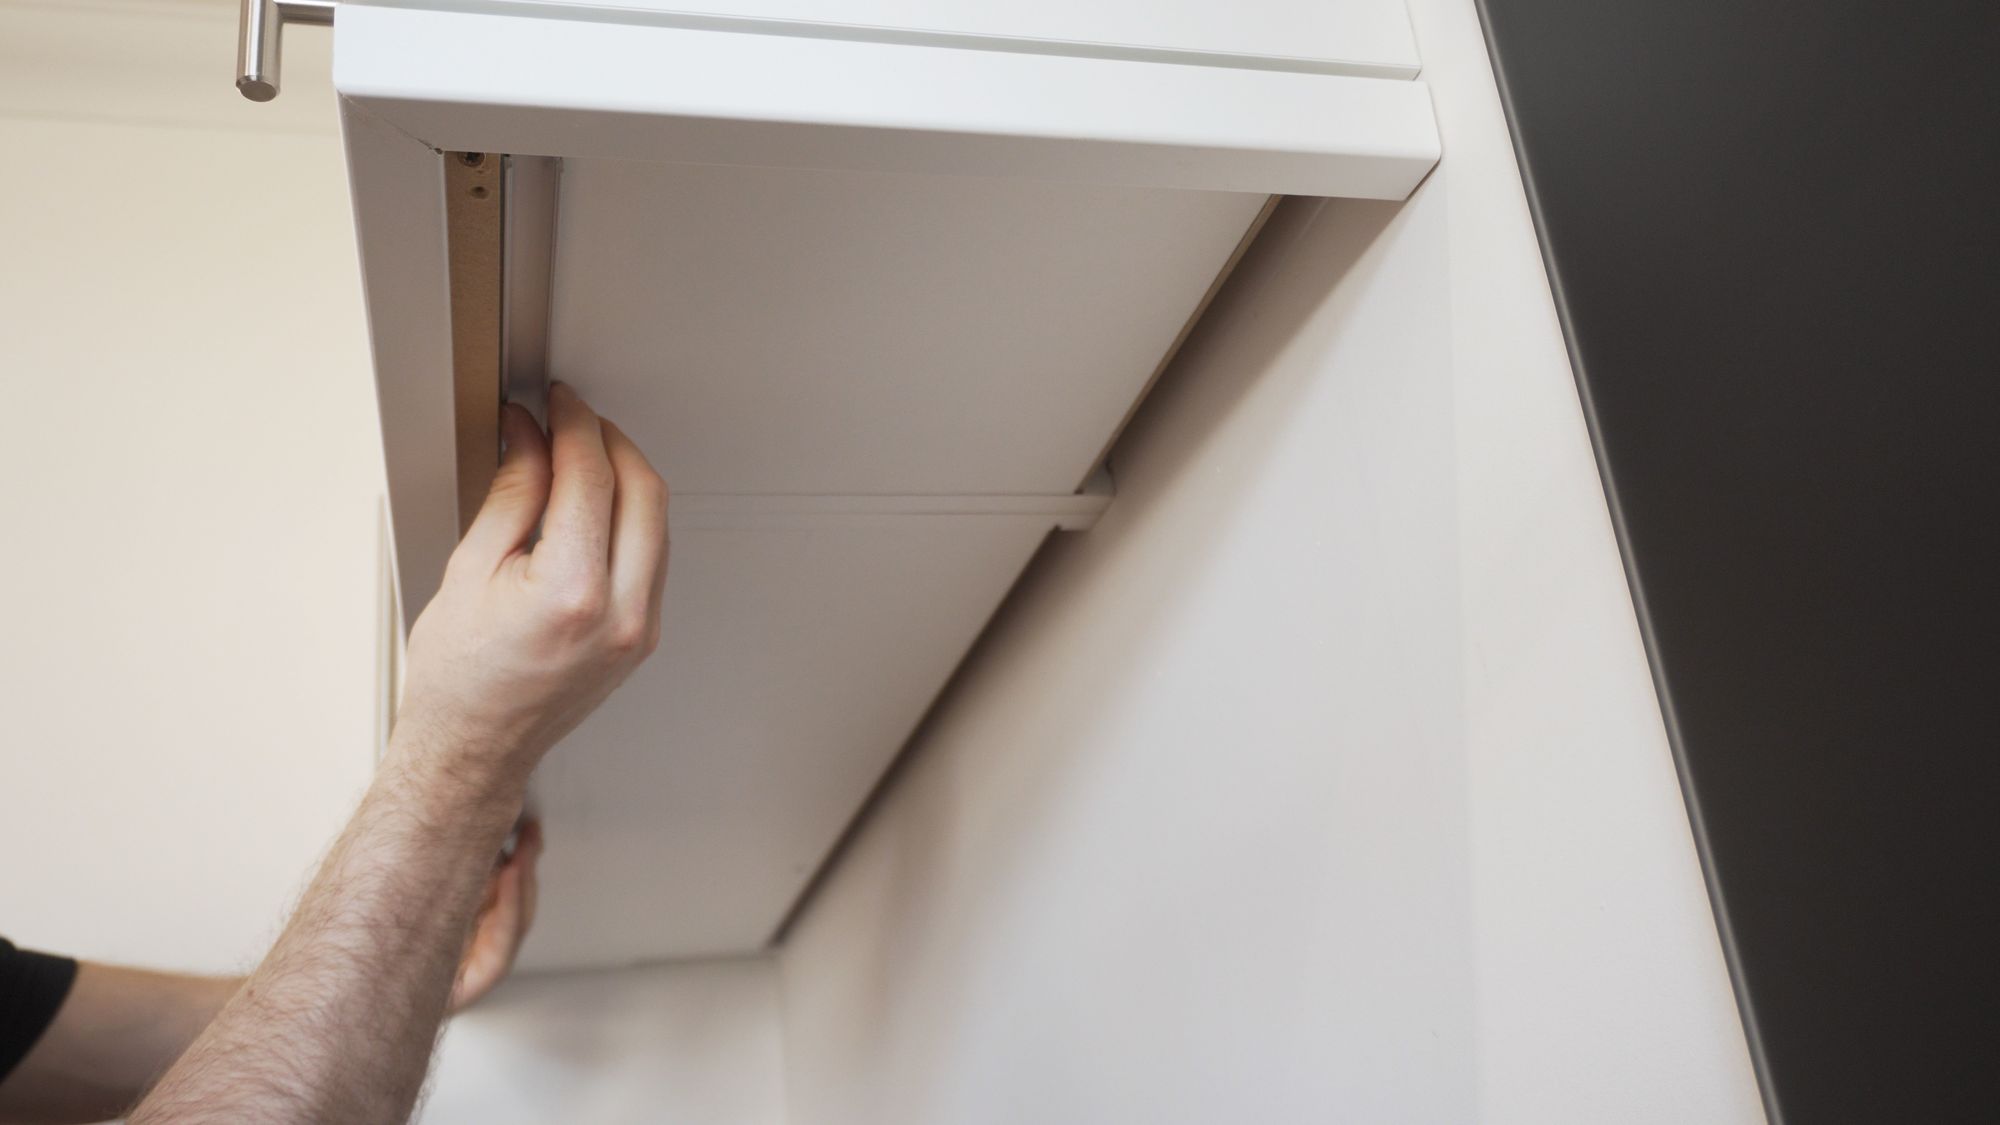
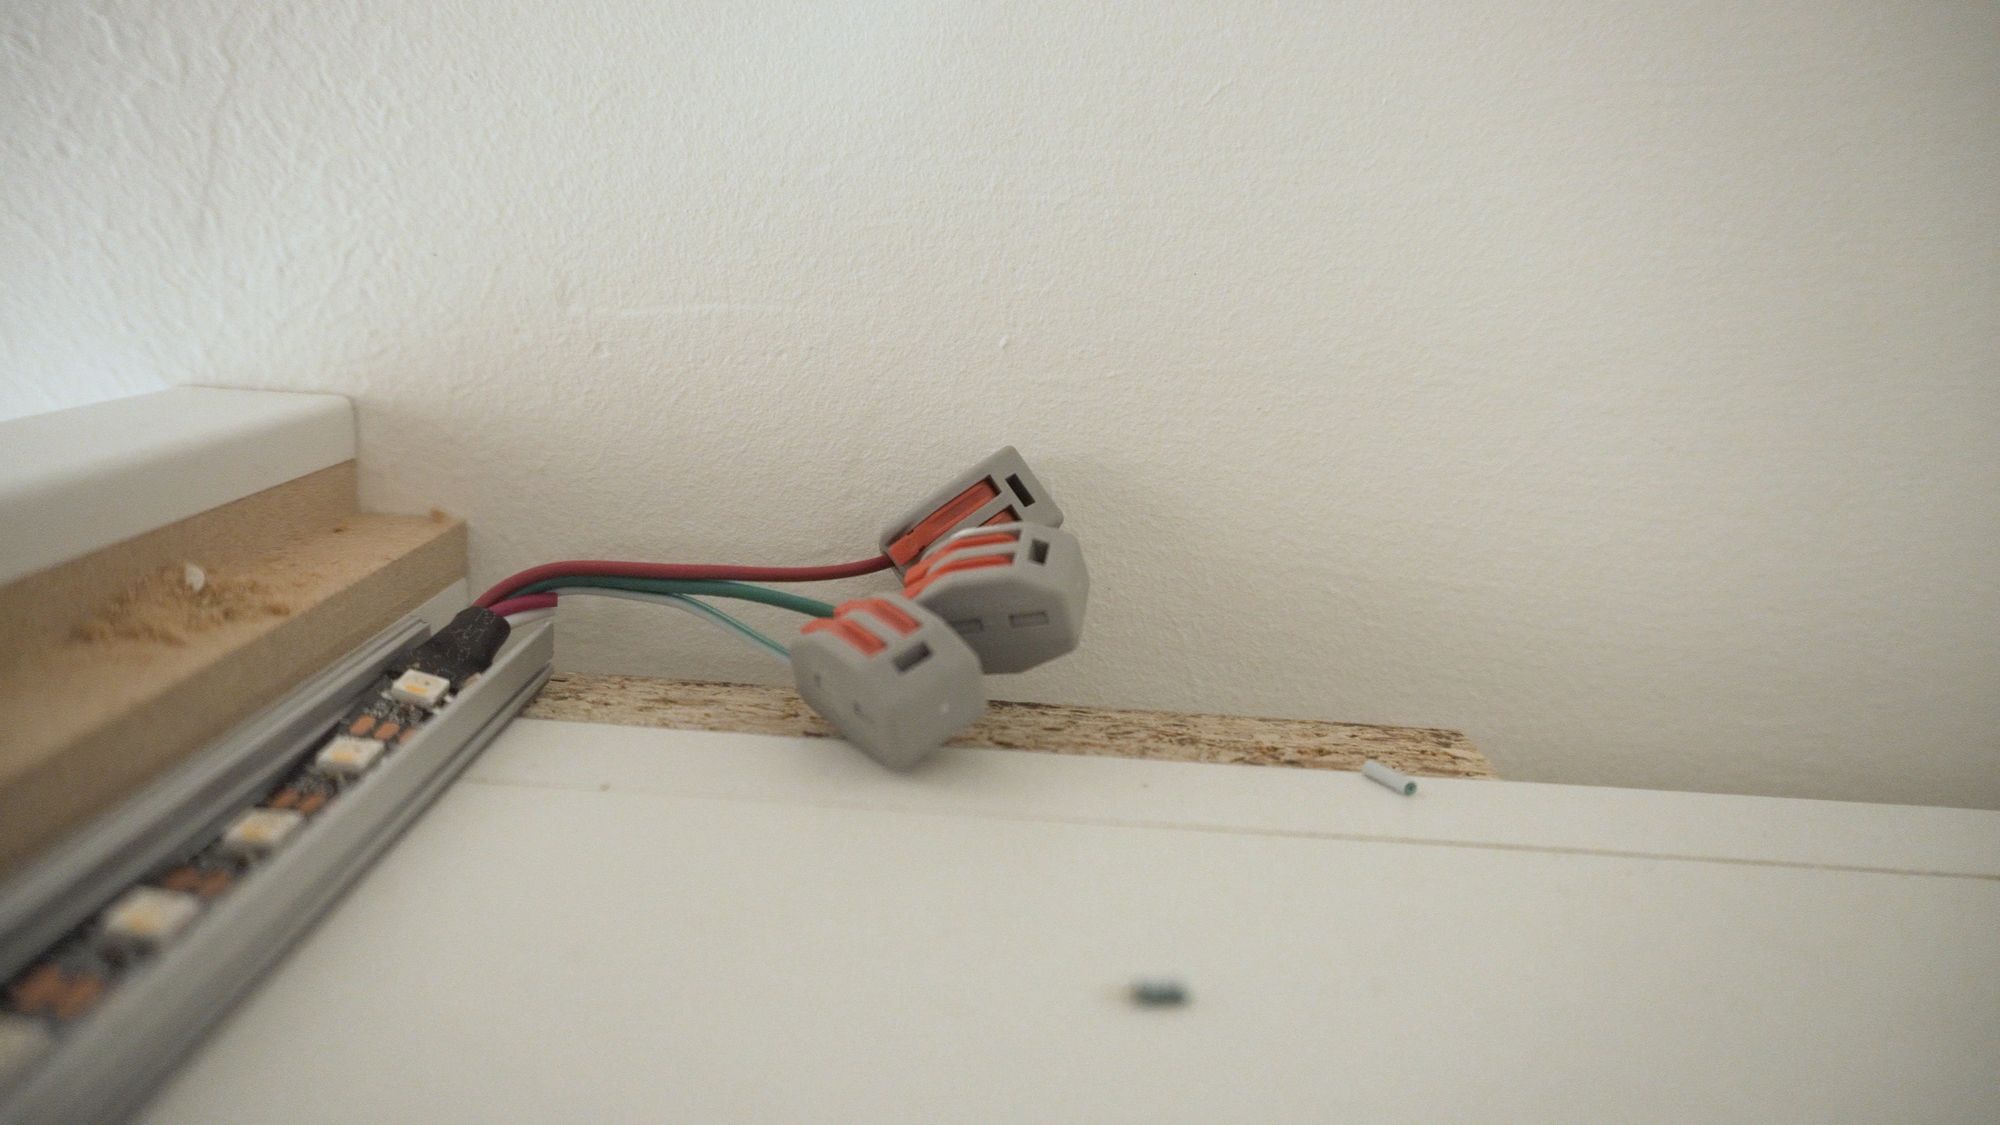
After sticking the first LED strip down into the aluminium channel, I measured the vertical height of the cabinet to cut some wires which will join the bottom strip to the top strip.
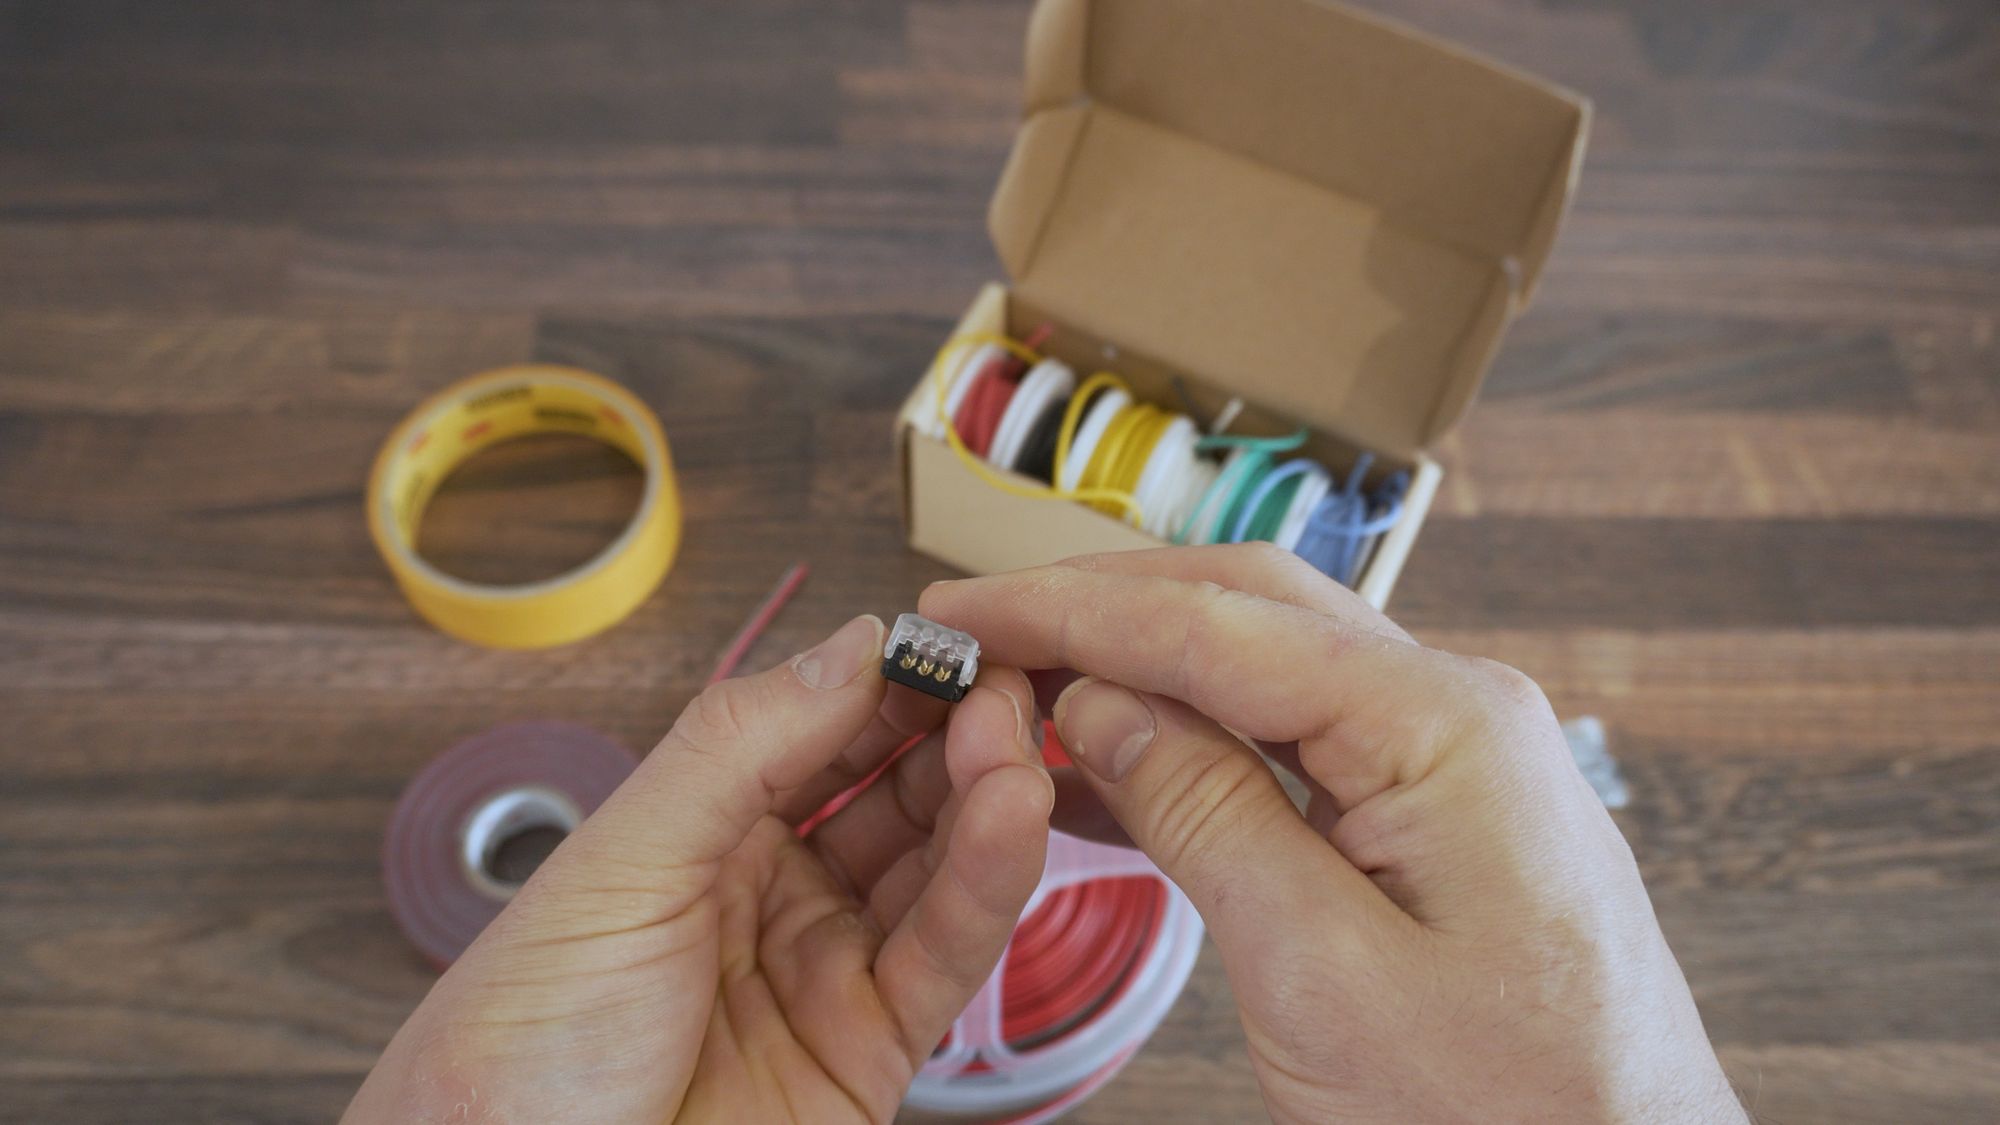
If you don’t want to solder then you can use these extension clips which makes things easy, but they aren’t always the most reliable so I’d recommend soldering if you can.
I’m also soldering the connections down on the ground first before I stick the strip up, just to make things easier for myself.
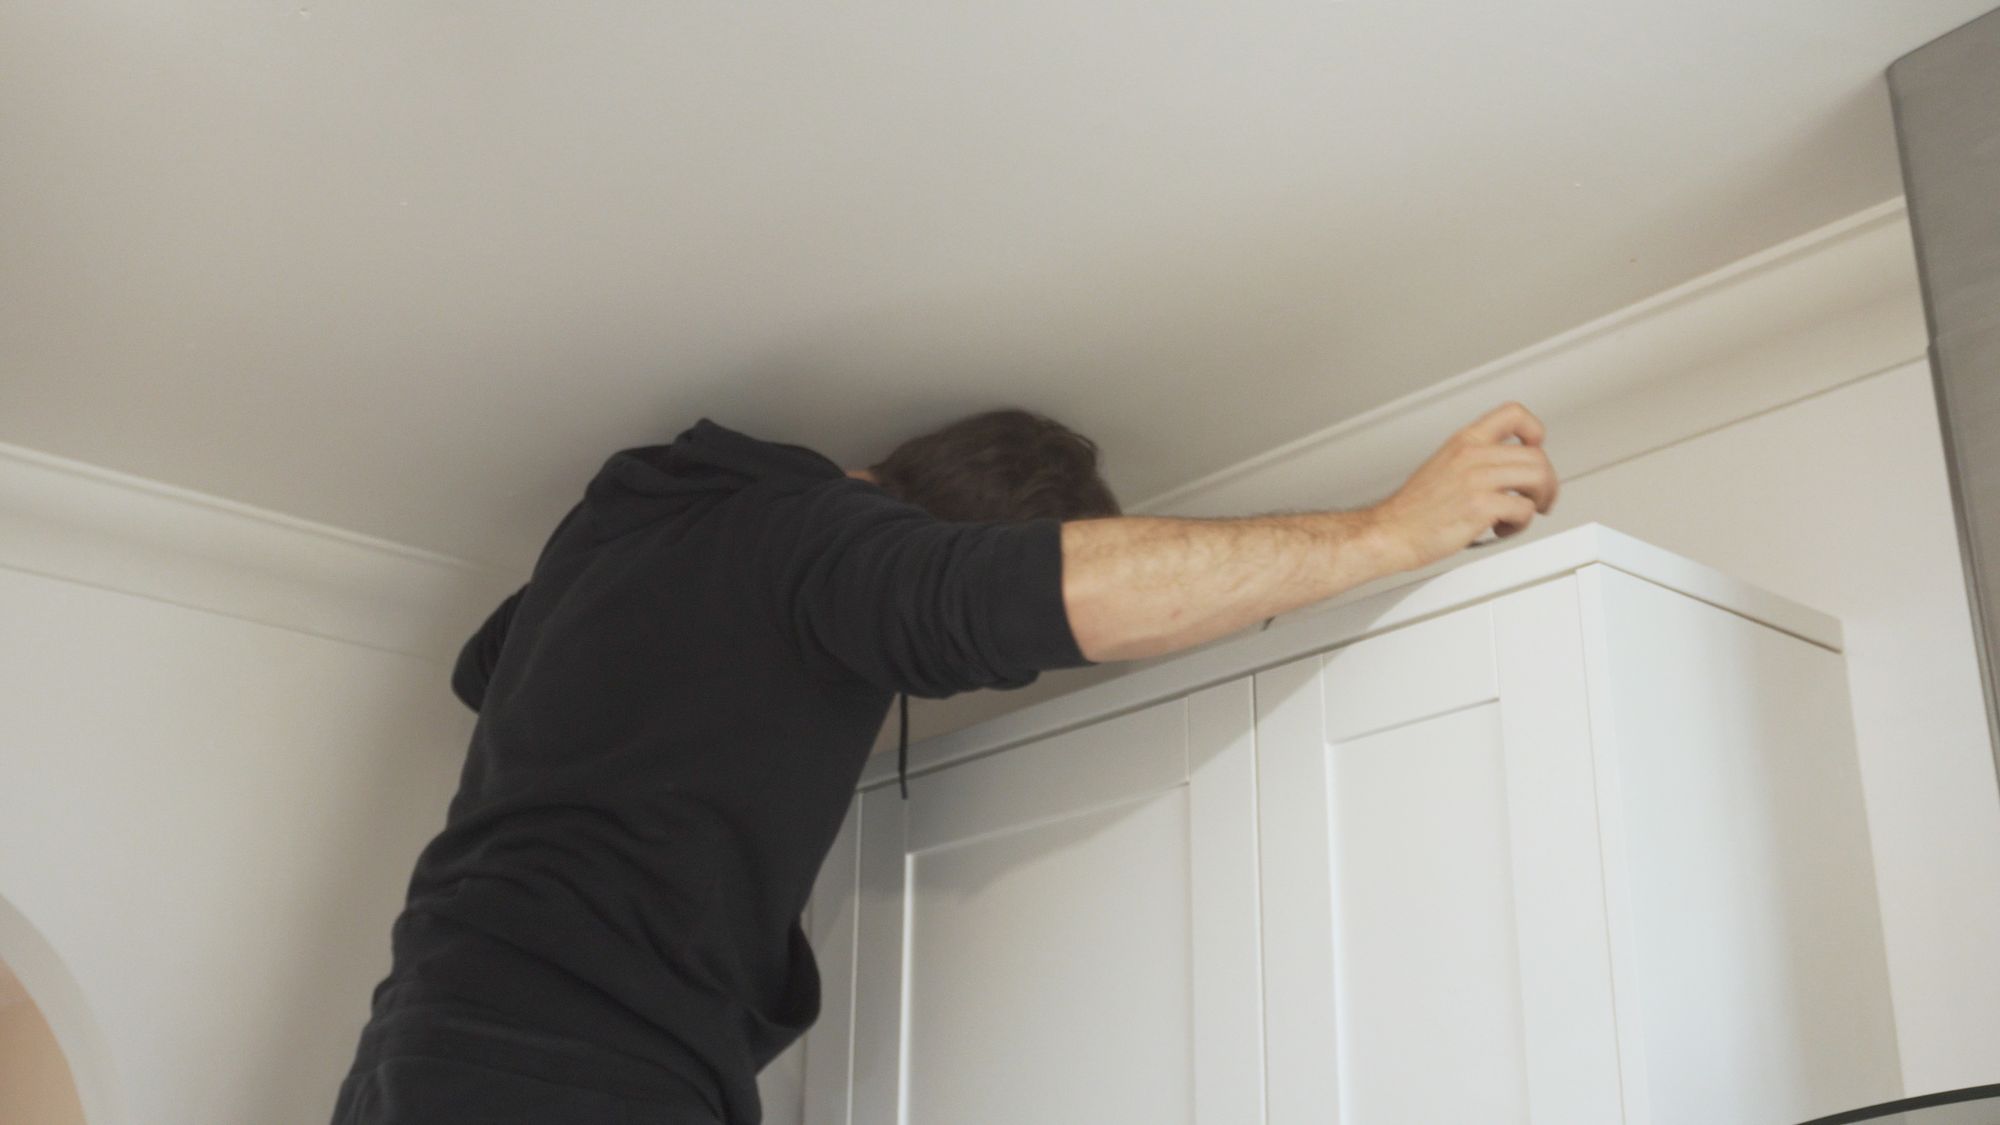
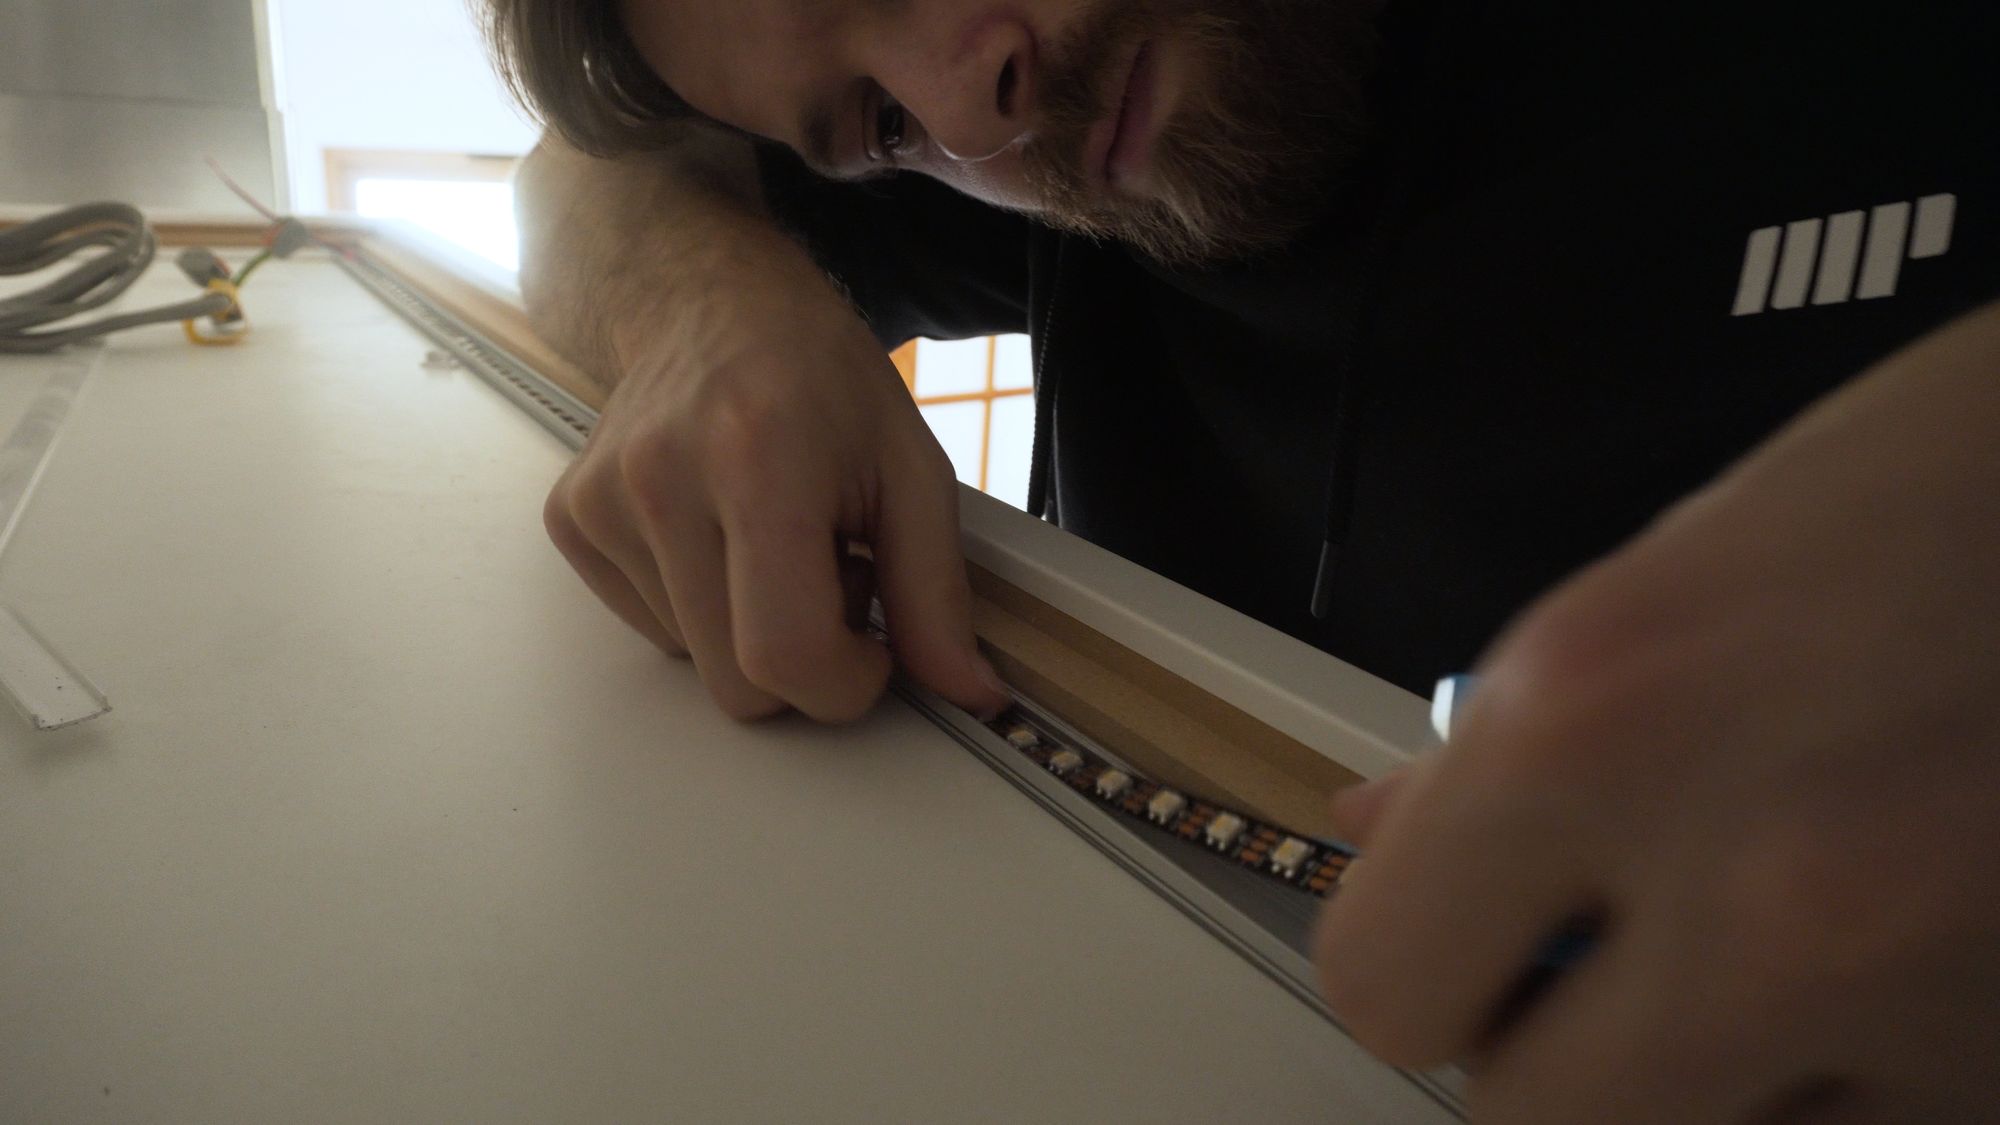
Then, with the connections made, I dropped the strip down from the top side first, and started sticking it down into the LED channel, starting at the very end side first, and everything lined up perfectly.
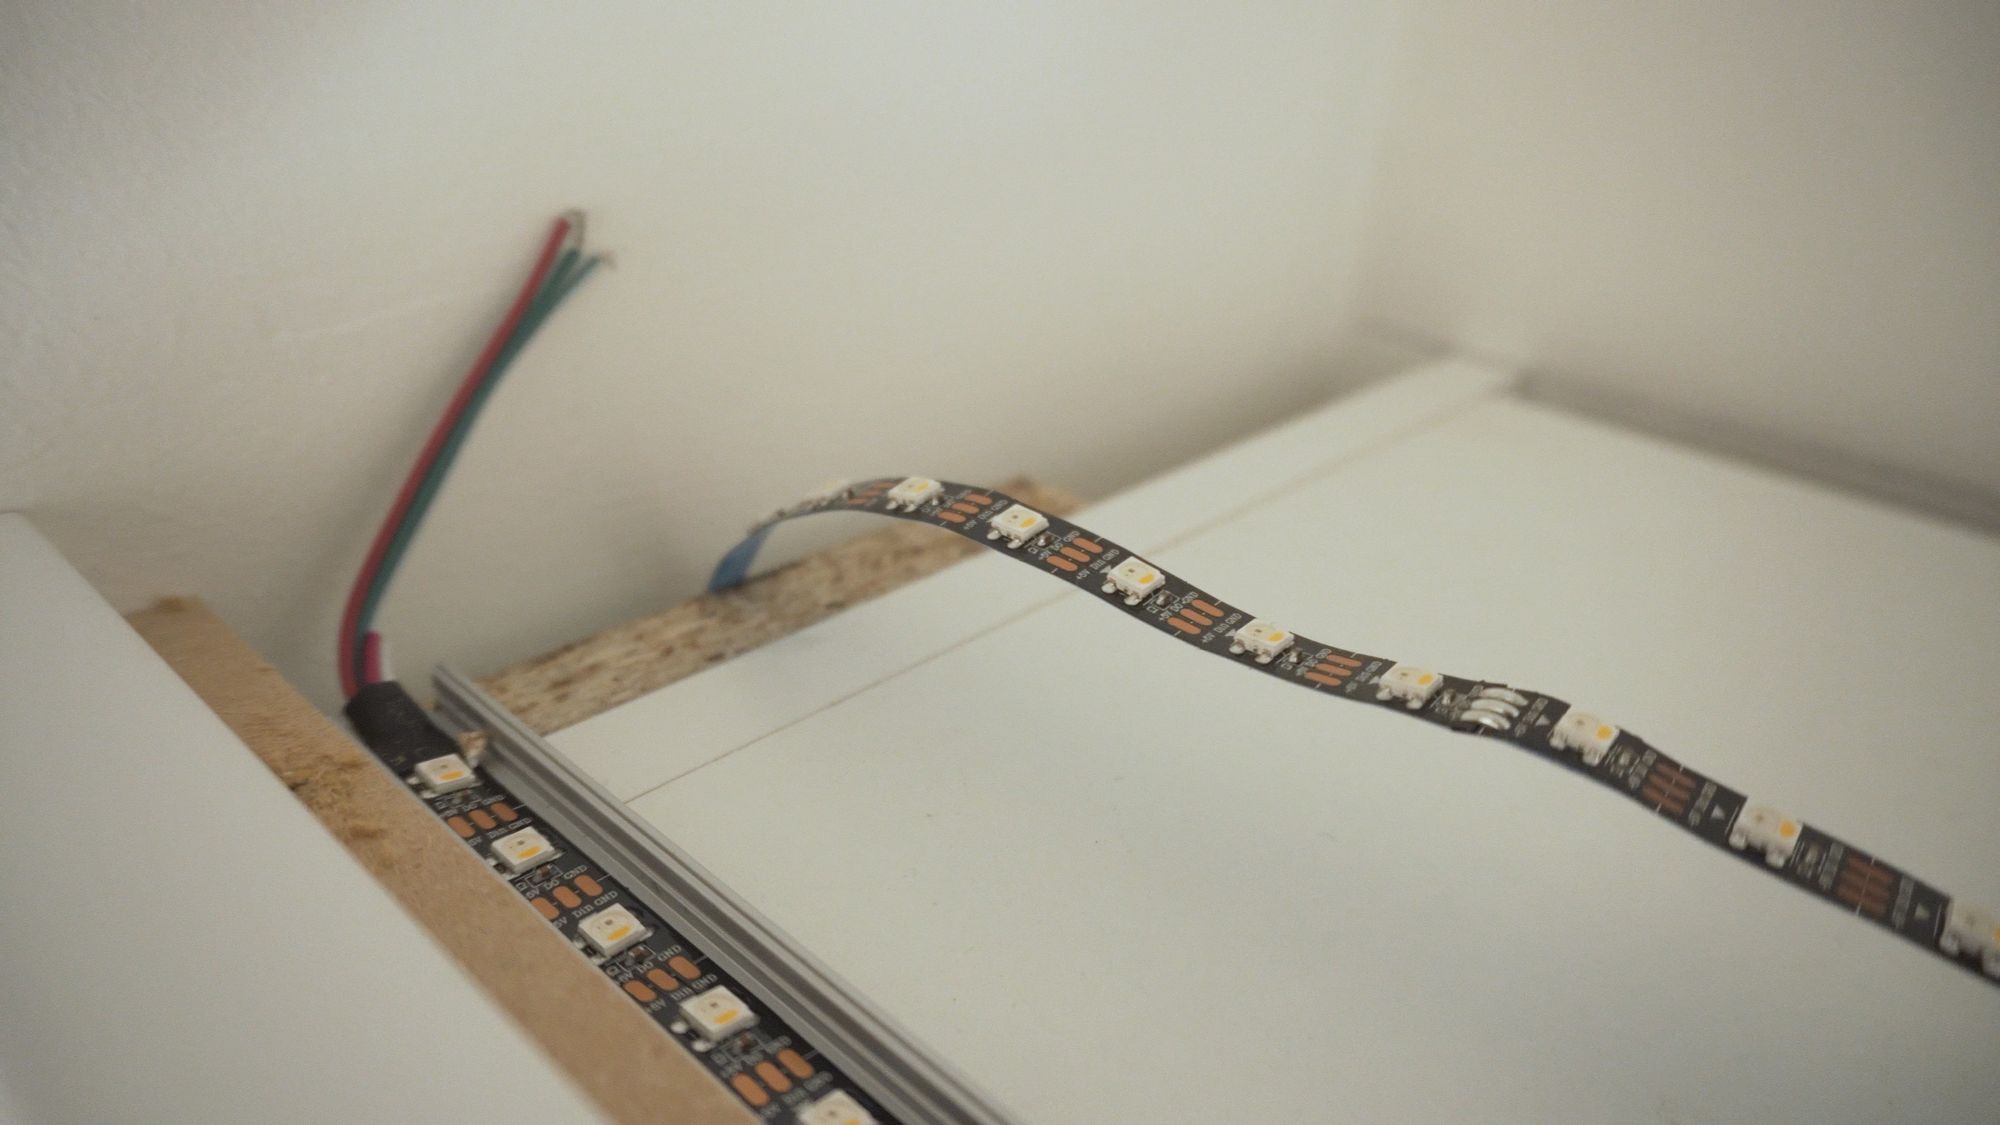
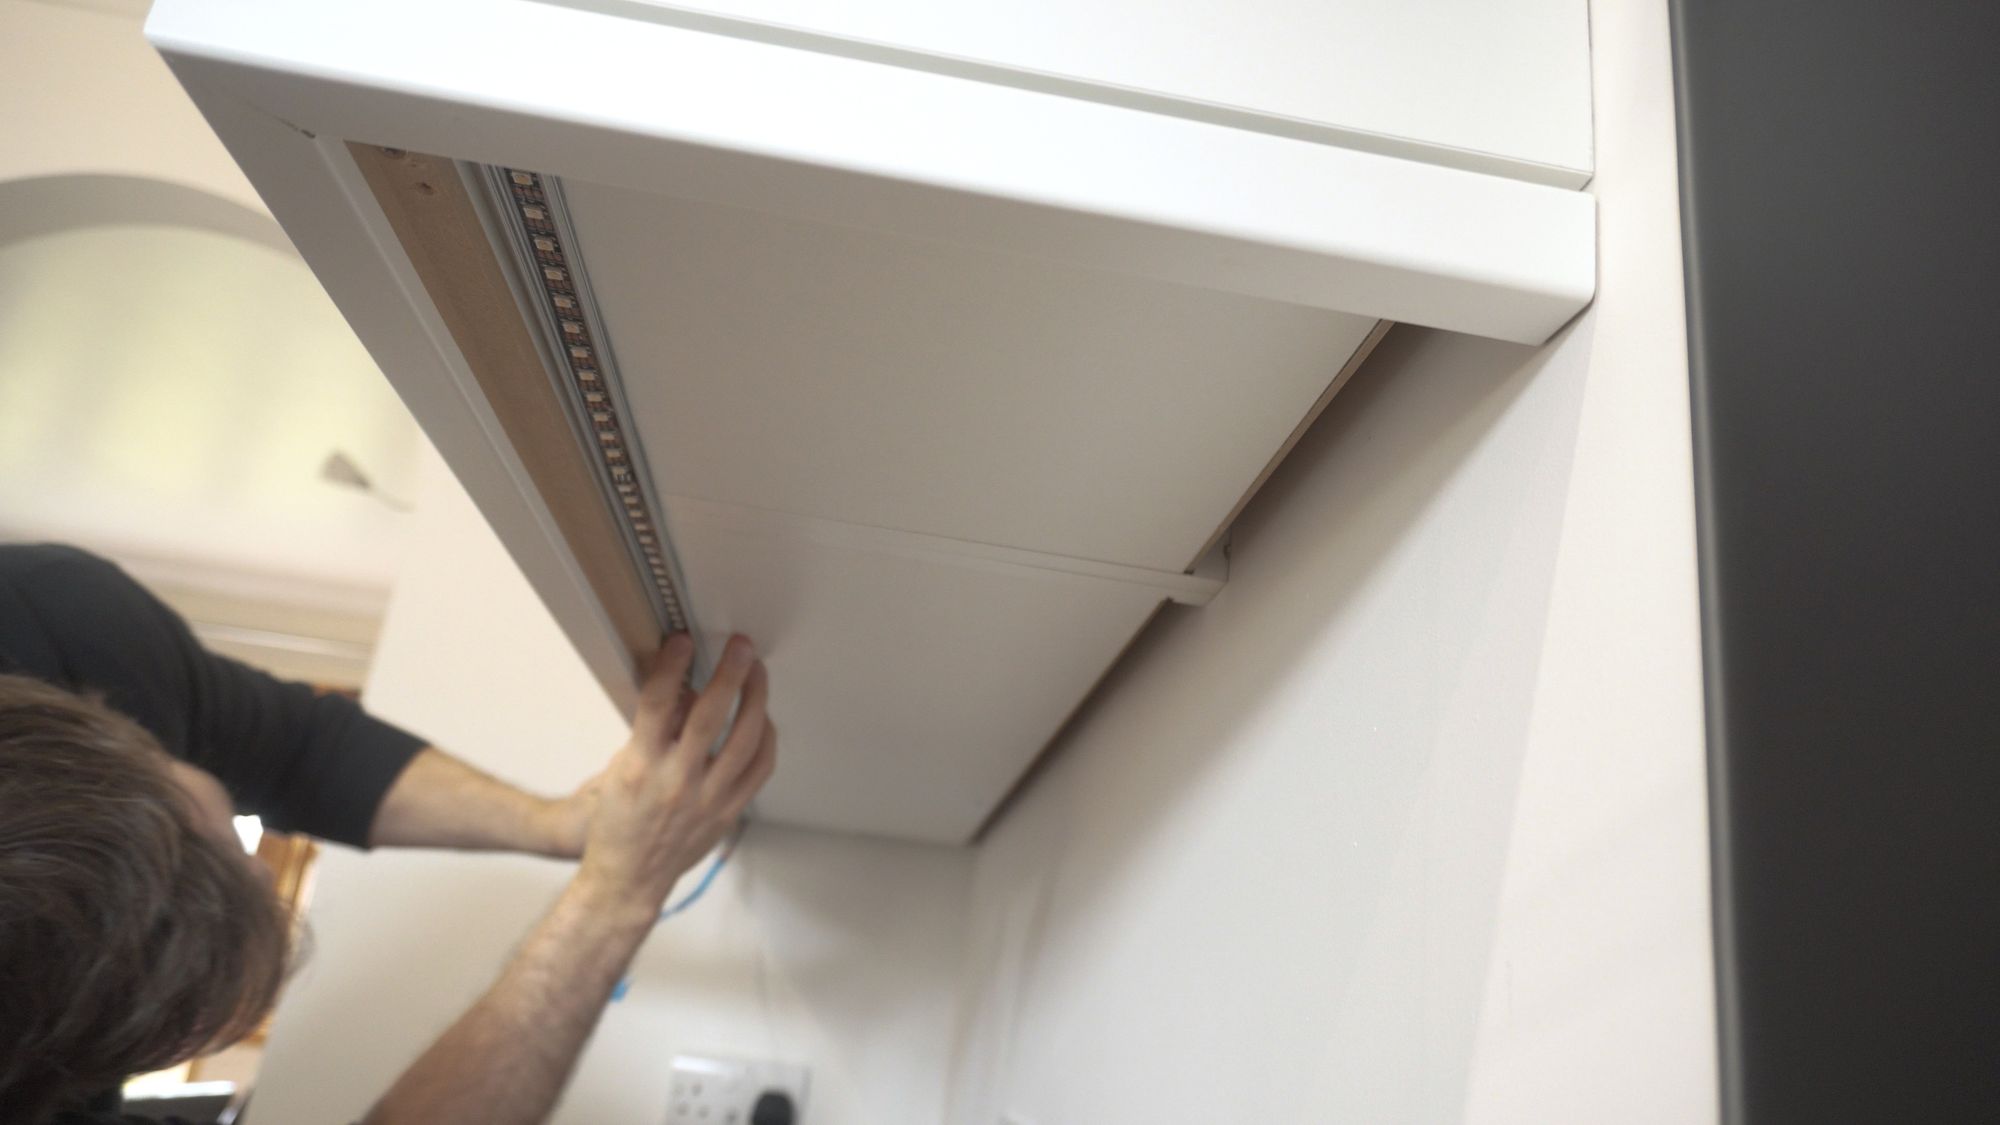
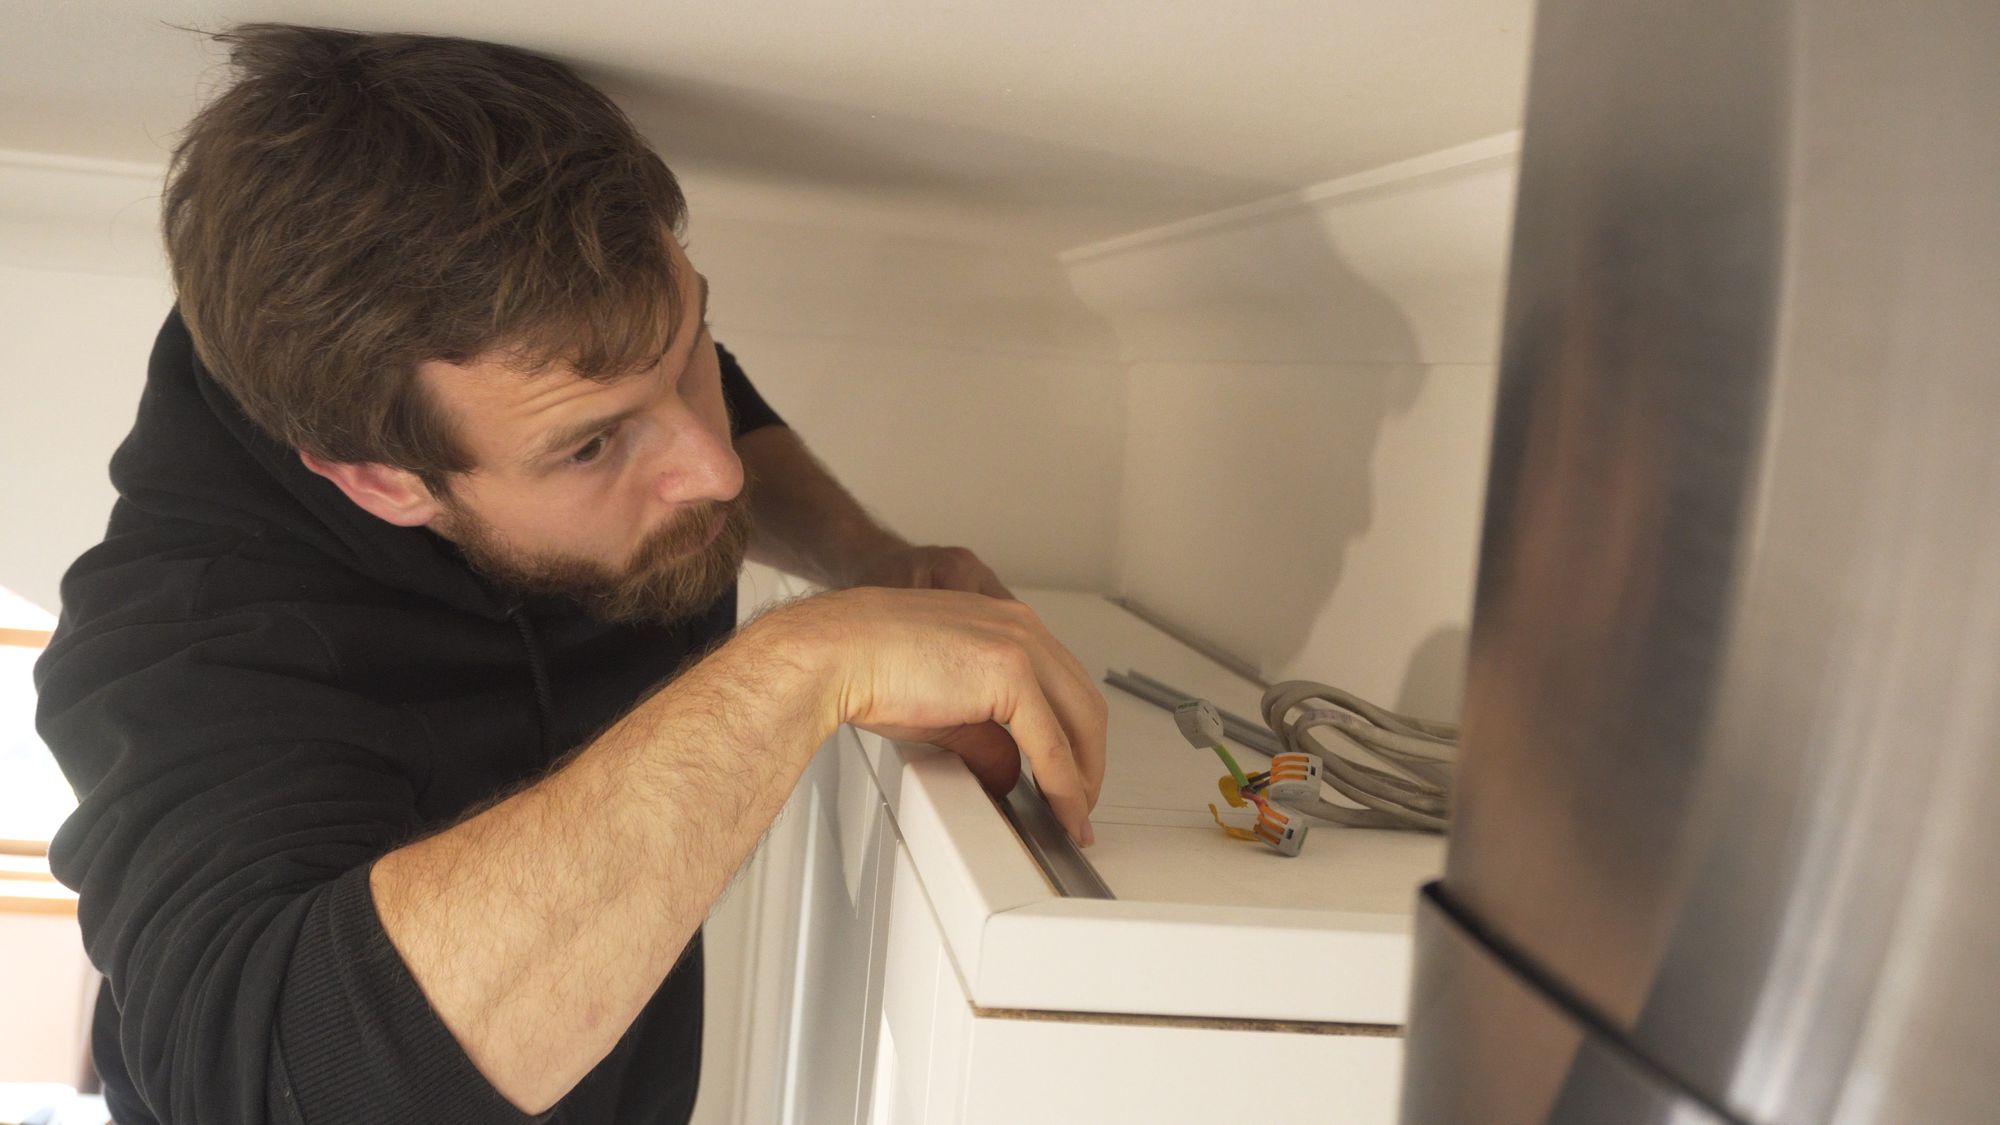
Back up top, I pushed the wires into the WAGO connections to join it to the top strip and both sides are now connected and now we can move onto the controller.
WLED needs to be installed first, which takes less than 2 minutes due to its easy browser based installation, it’s amazing how far this process has come! I simply told WLED what type of LED strip I am using, how many LEDs I have and my GPIO pin, and the controller is ready to be wired in place.
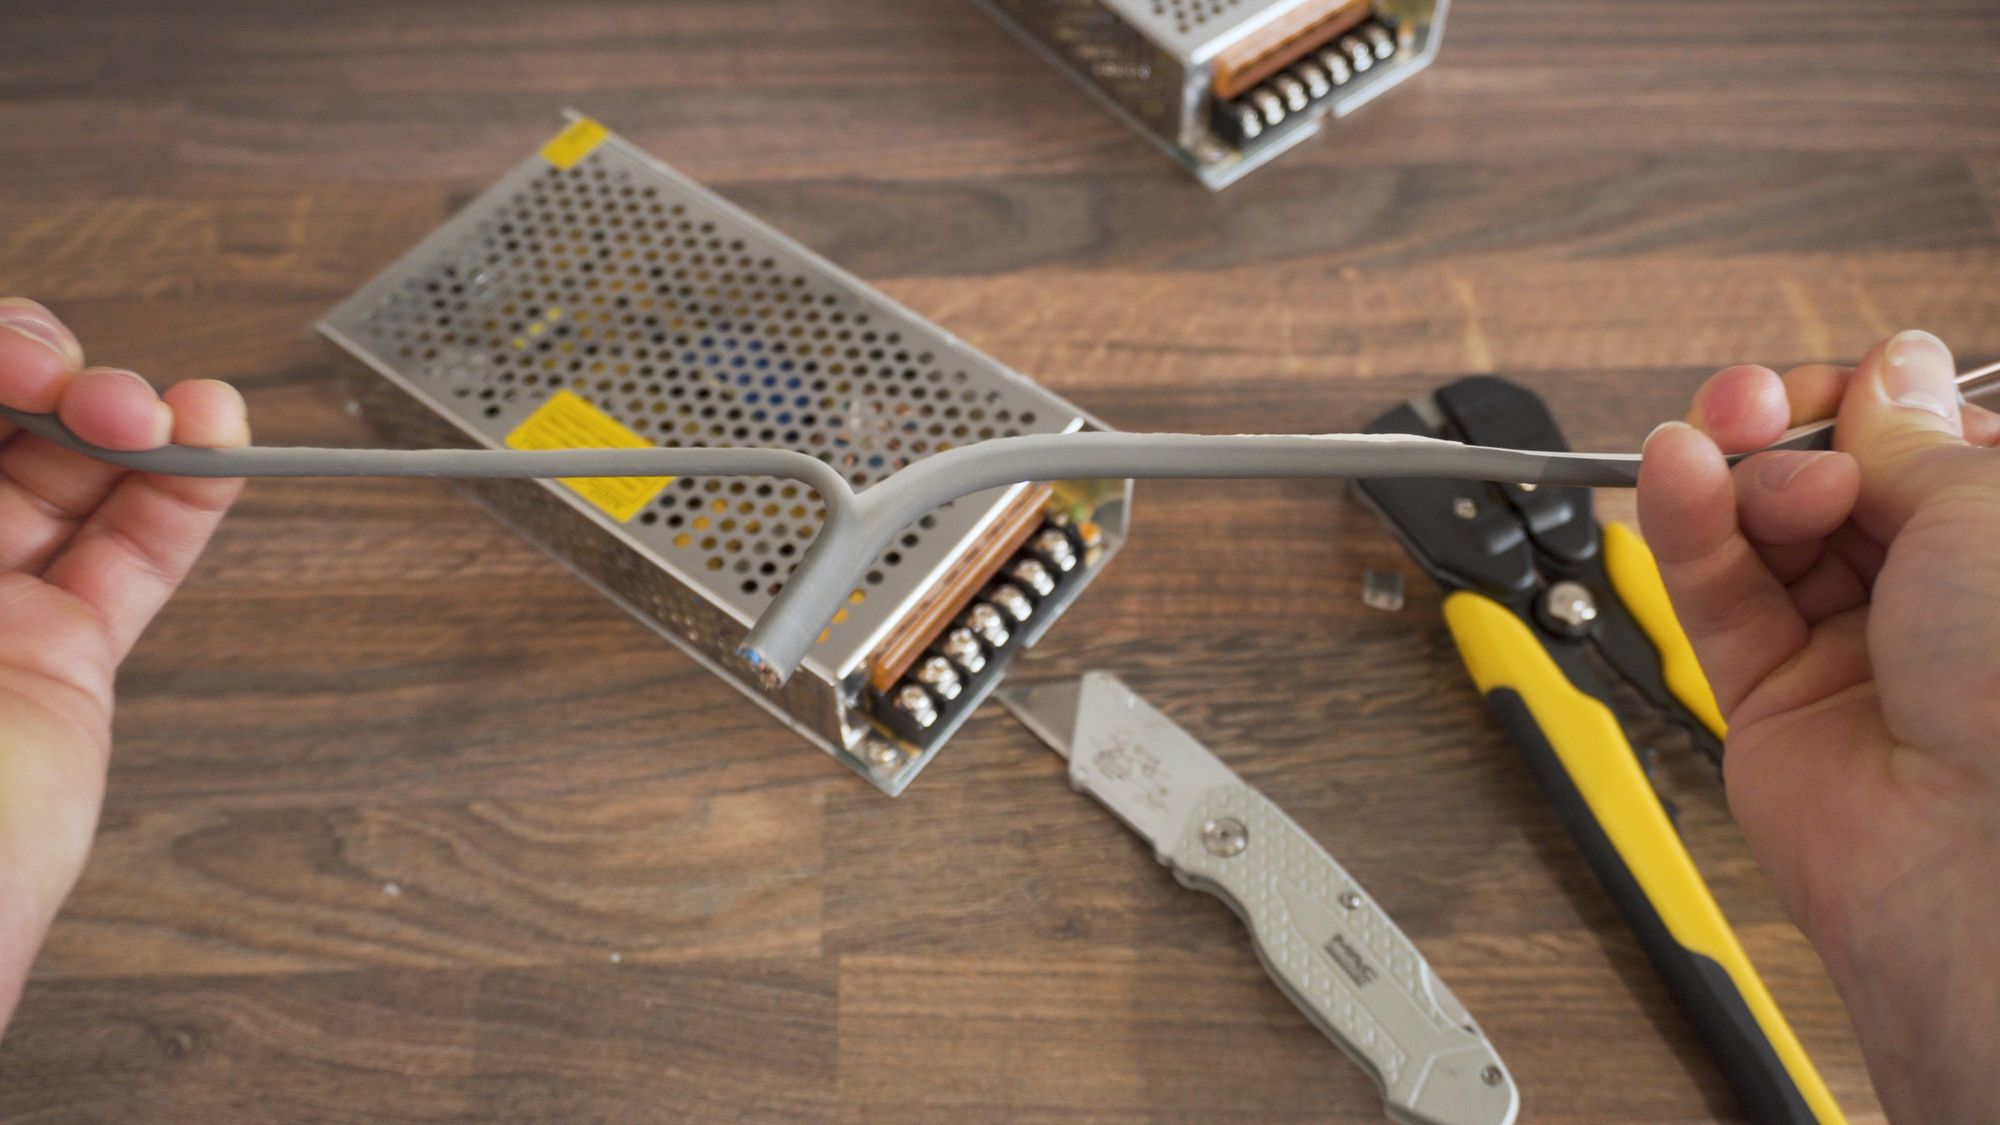
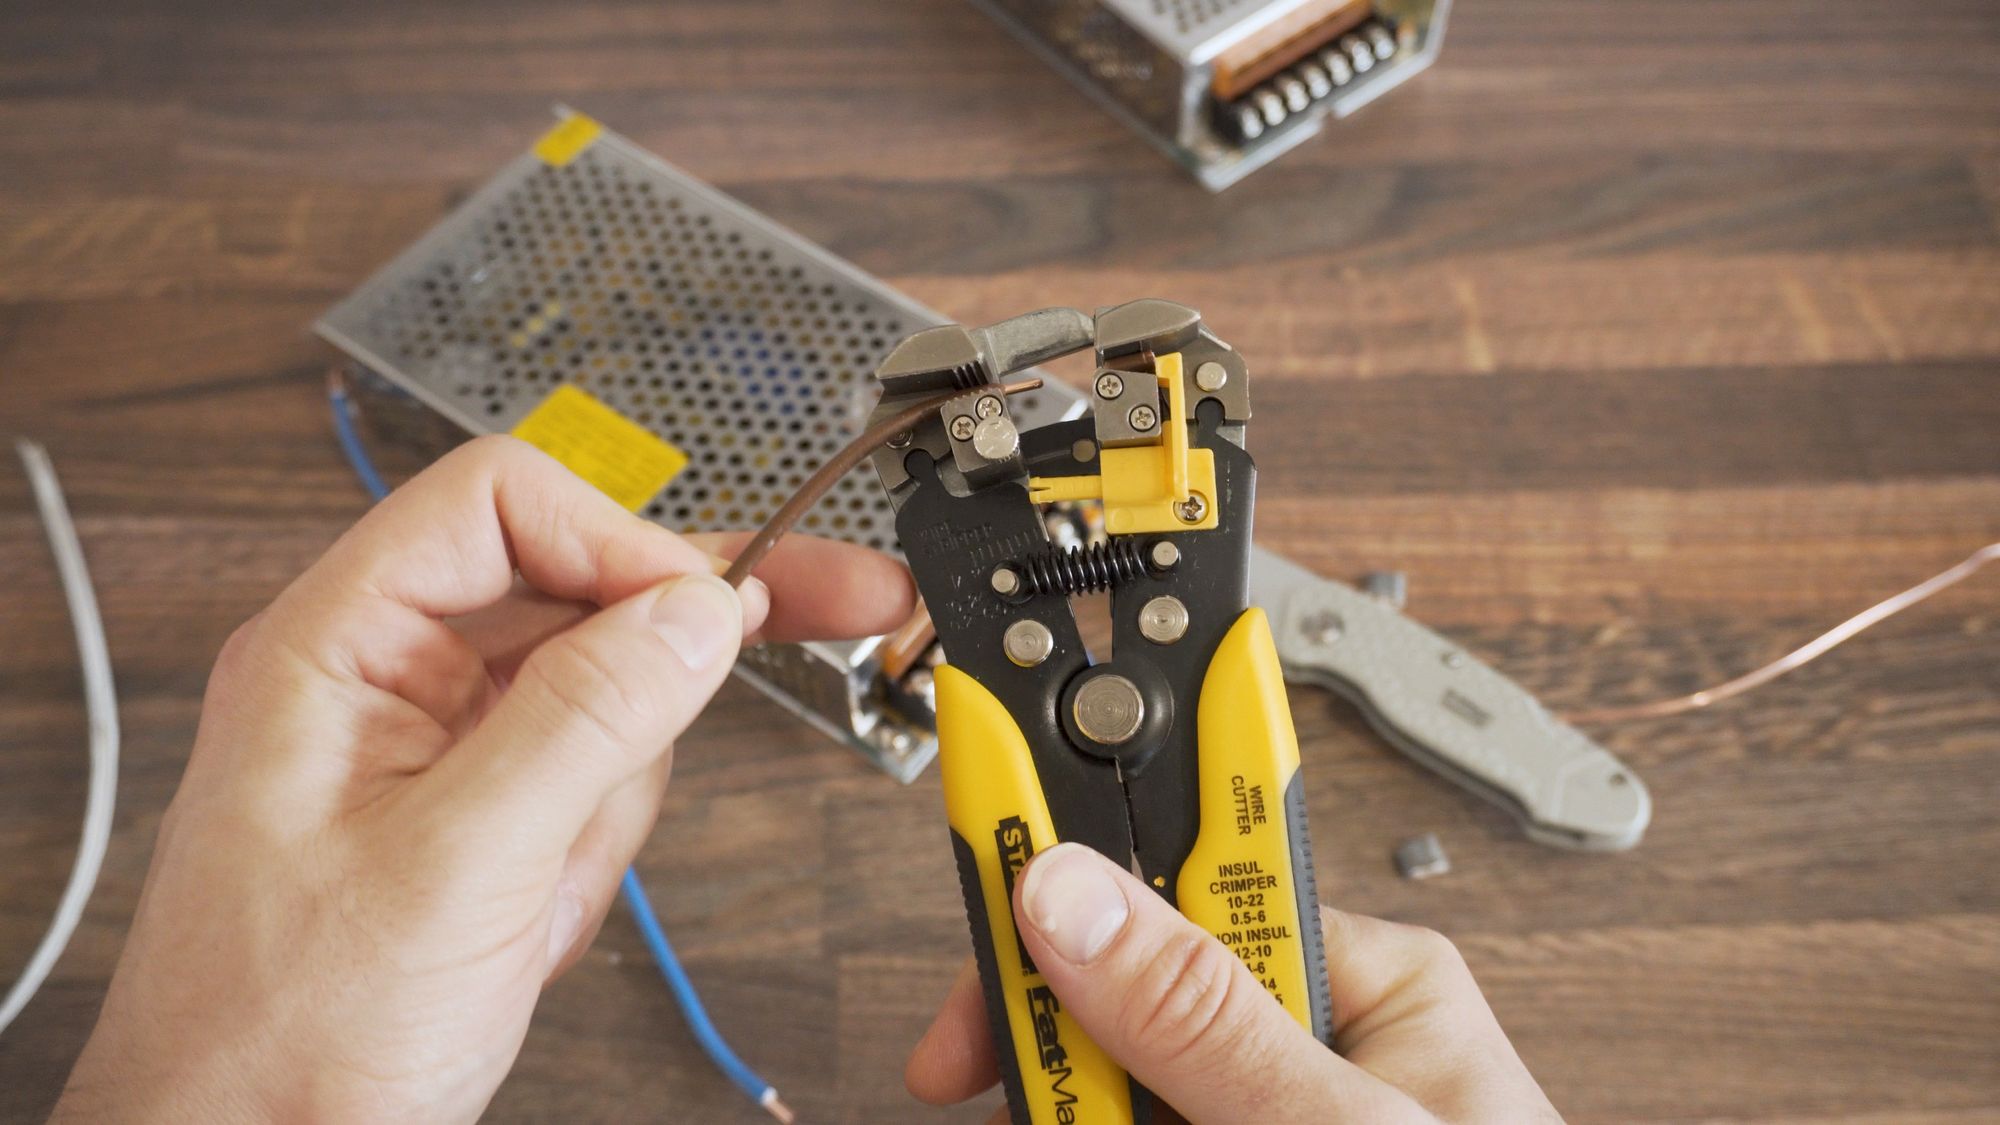
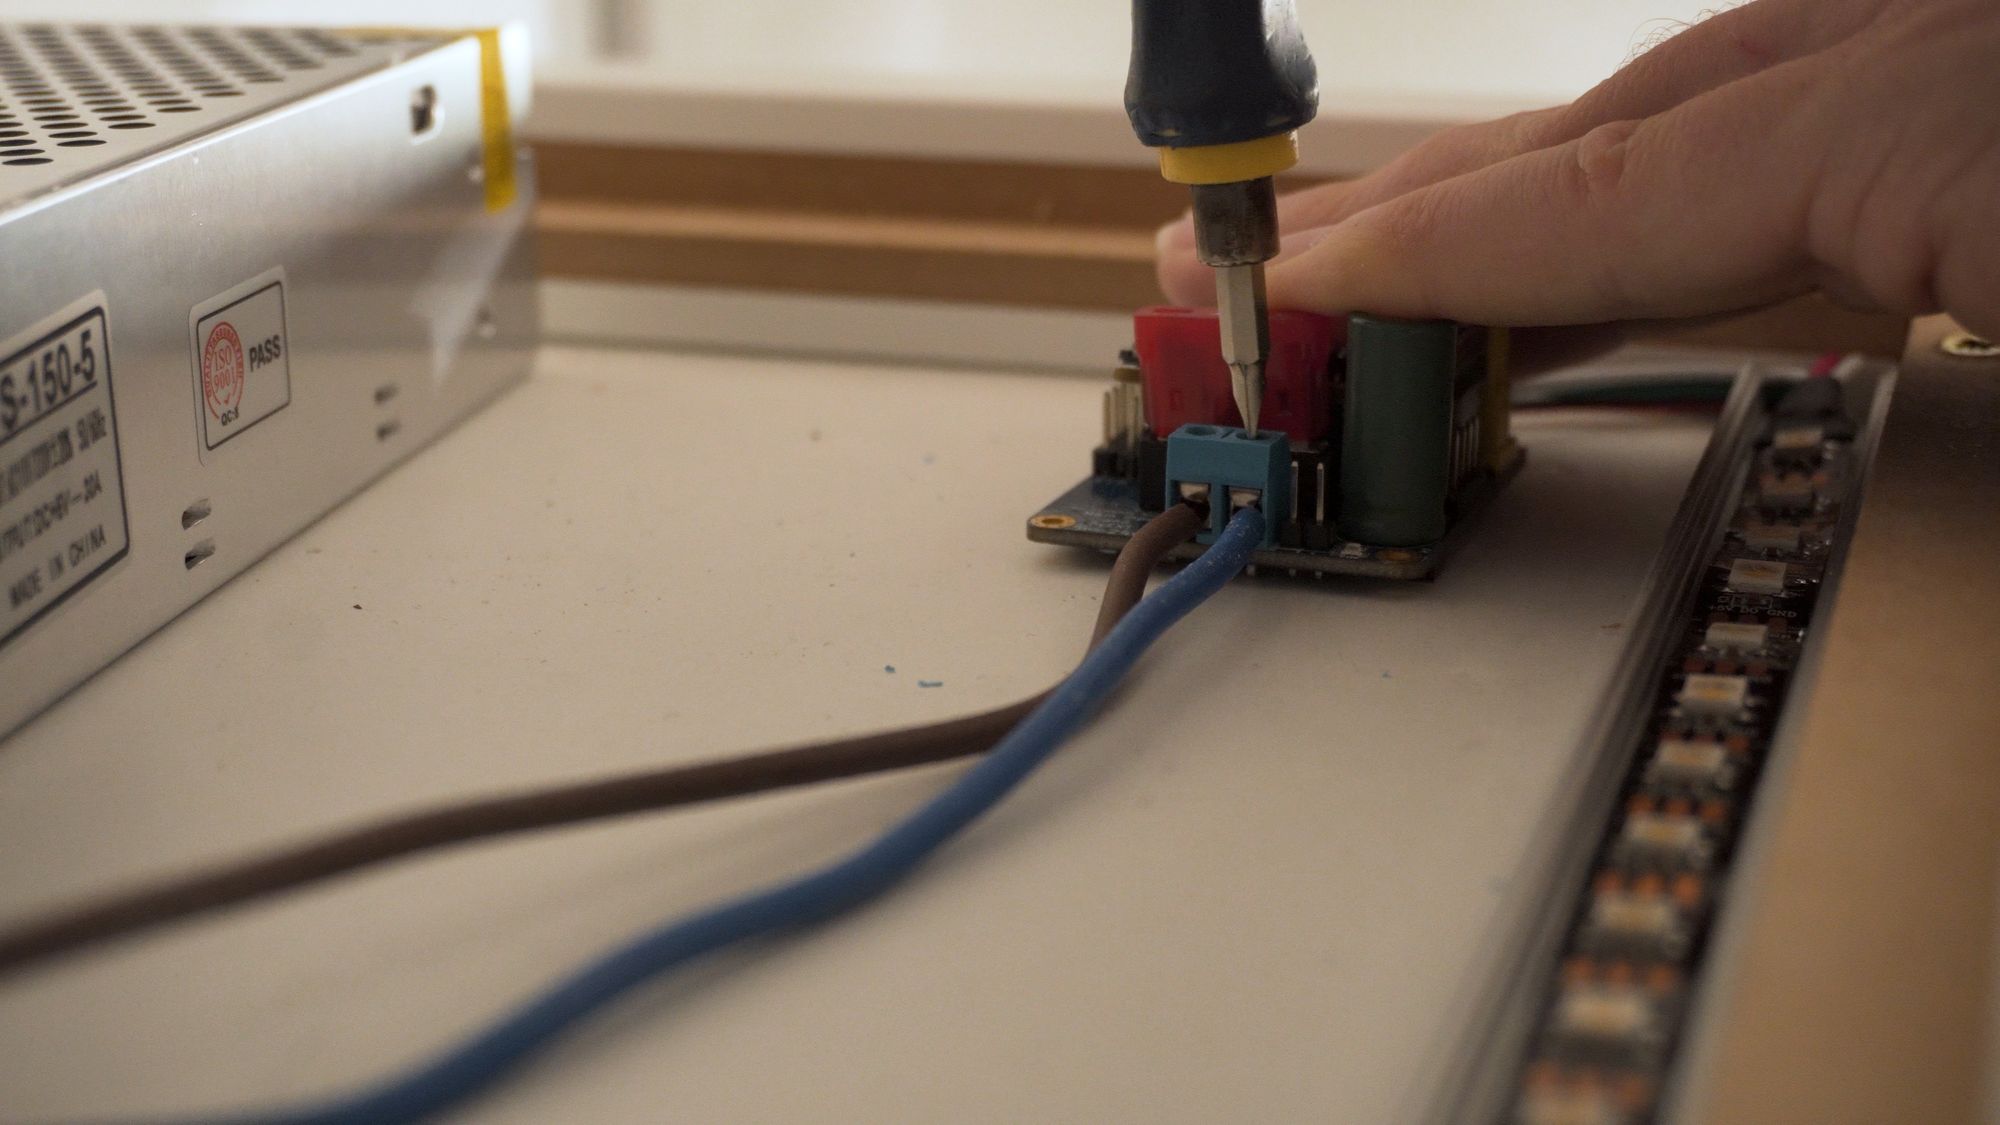
With the mains power turned off, I cut the separated plus and minus wires down so they would fit inside the channel, then cut the clip off the end of the 3 wires so that these can go right into our screw terminals on the Dig Uno.
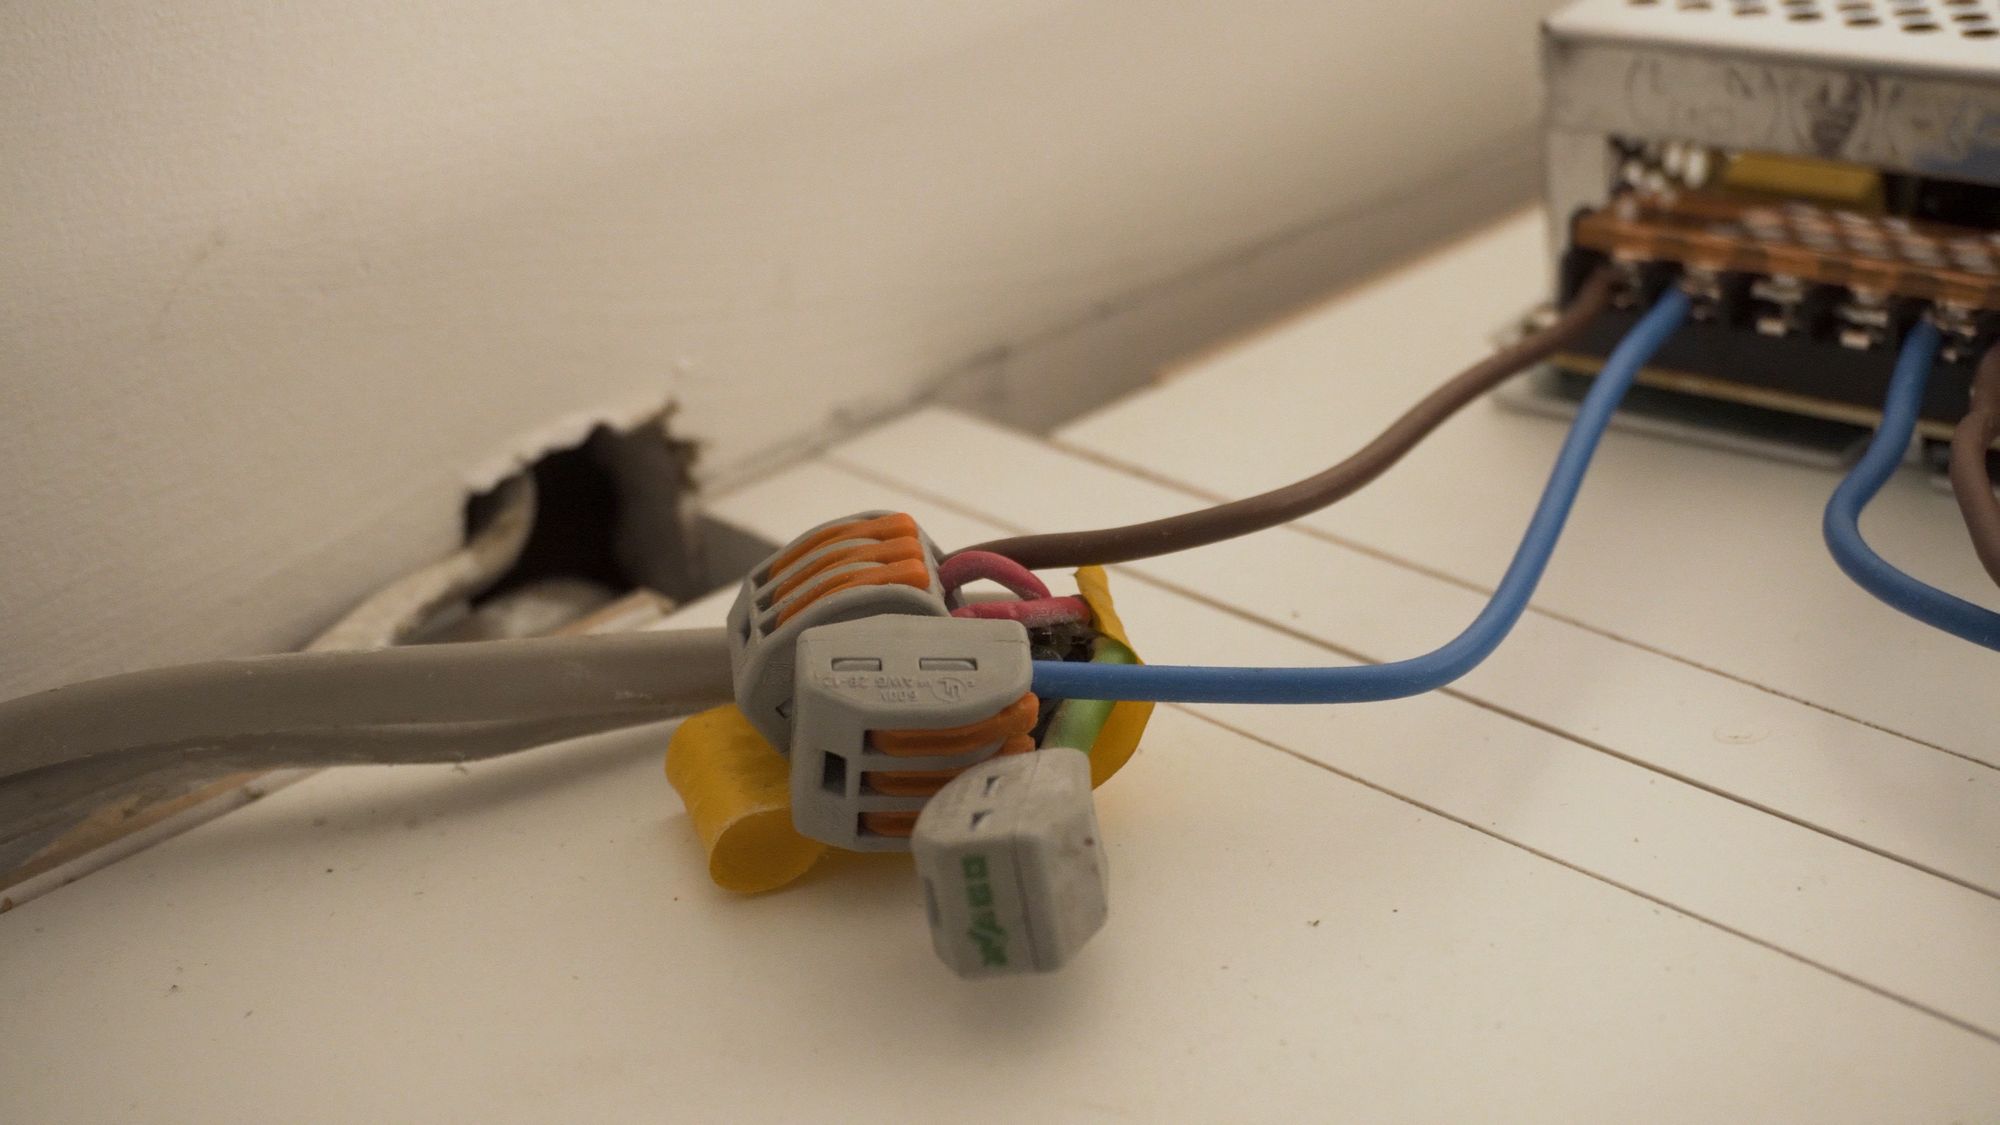
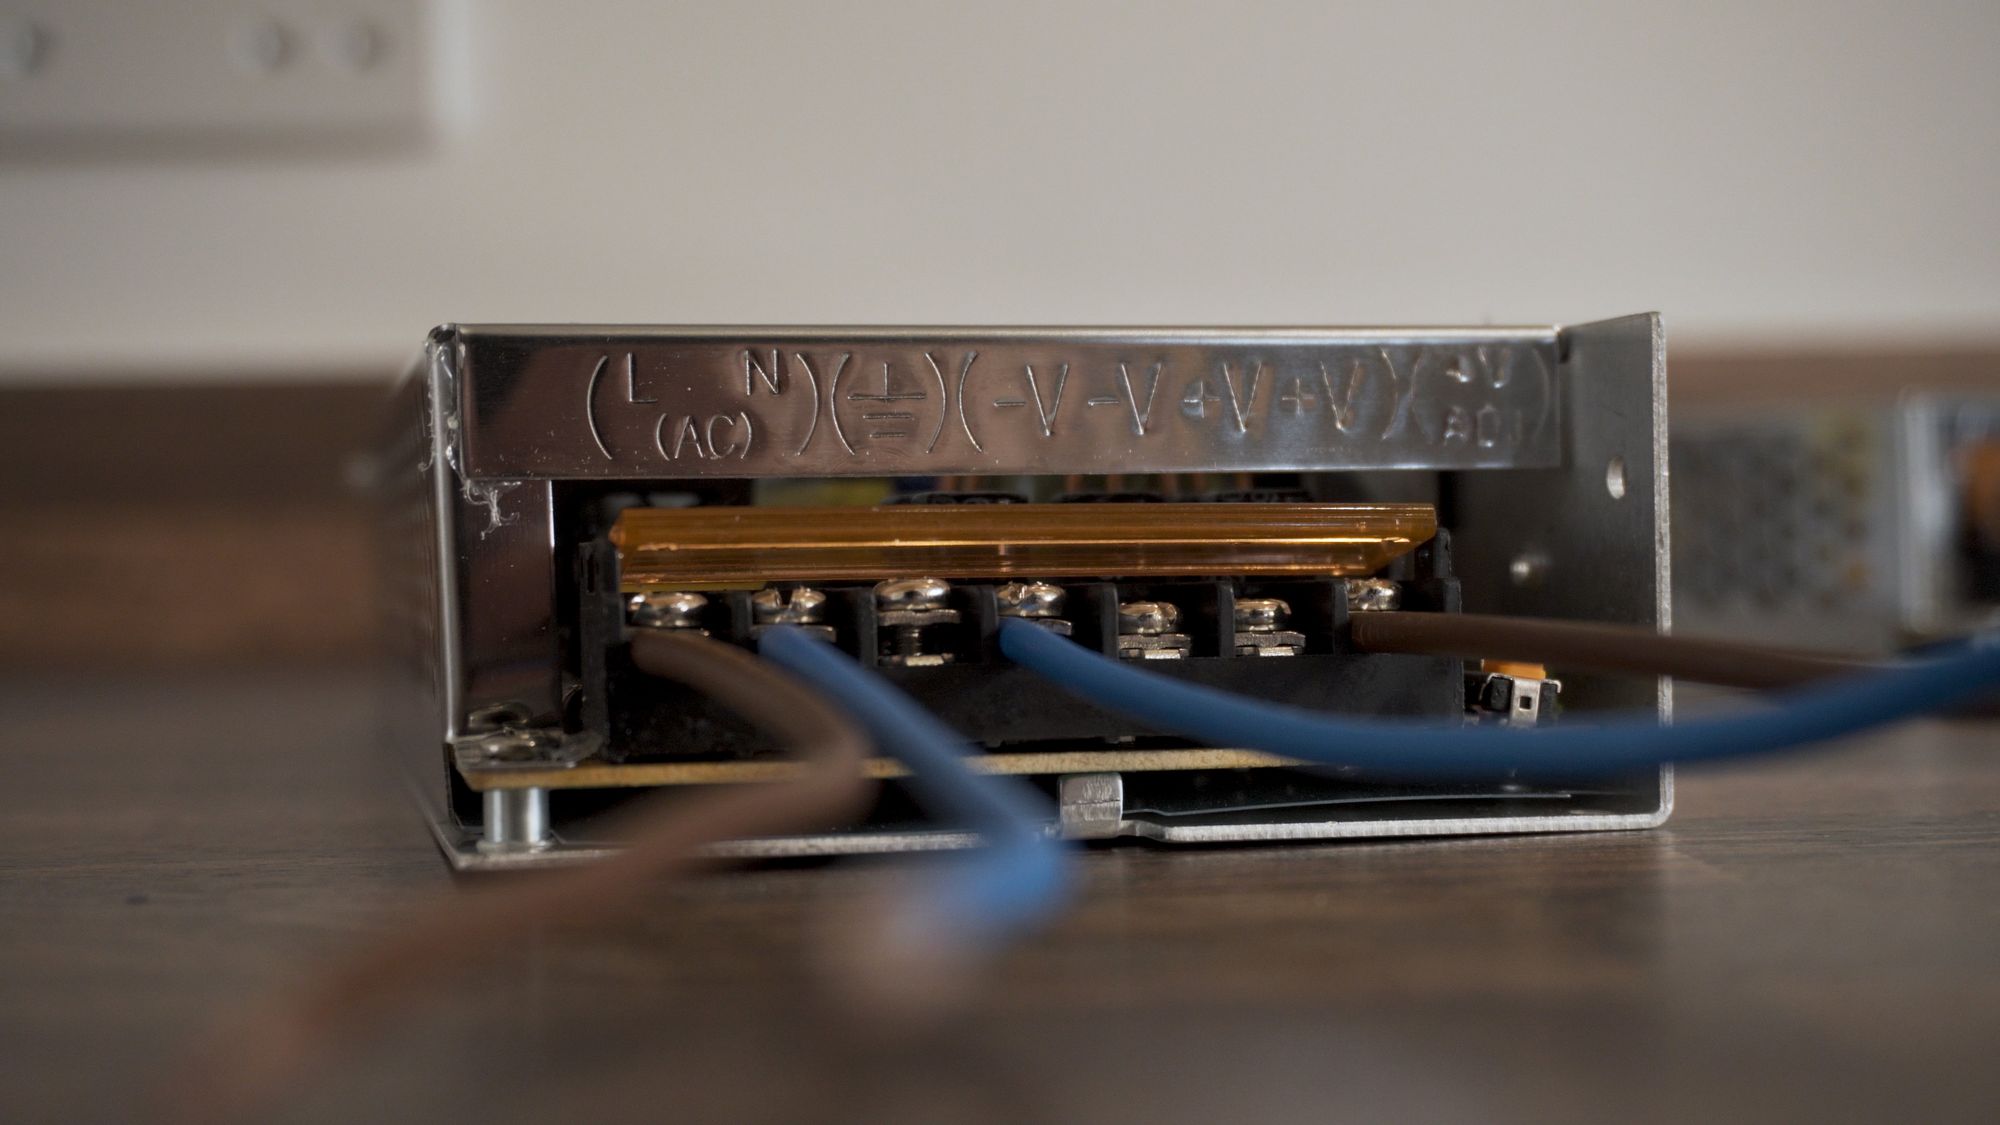
I then stripped and prepared cables for the power supply, and using WAGO connectors connected the 240v mains voltage into the power supply, and then the 5v output connected to the screw terminals of the Dig Uno.
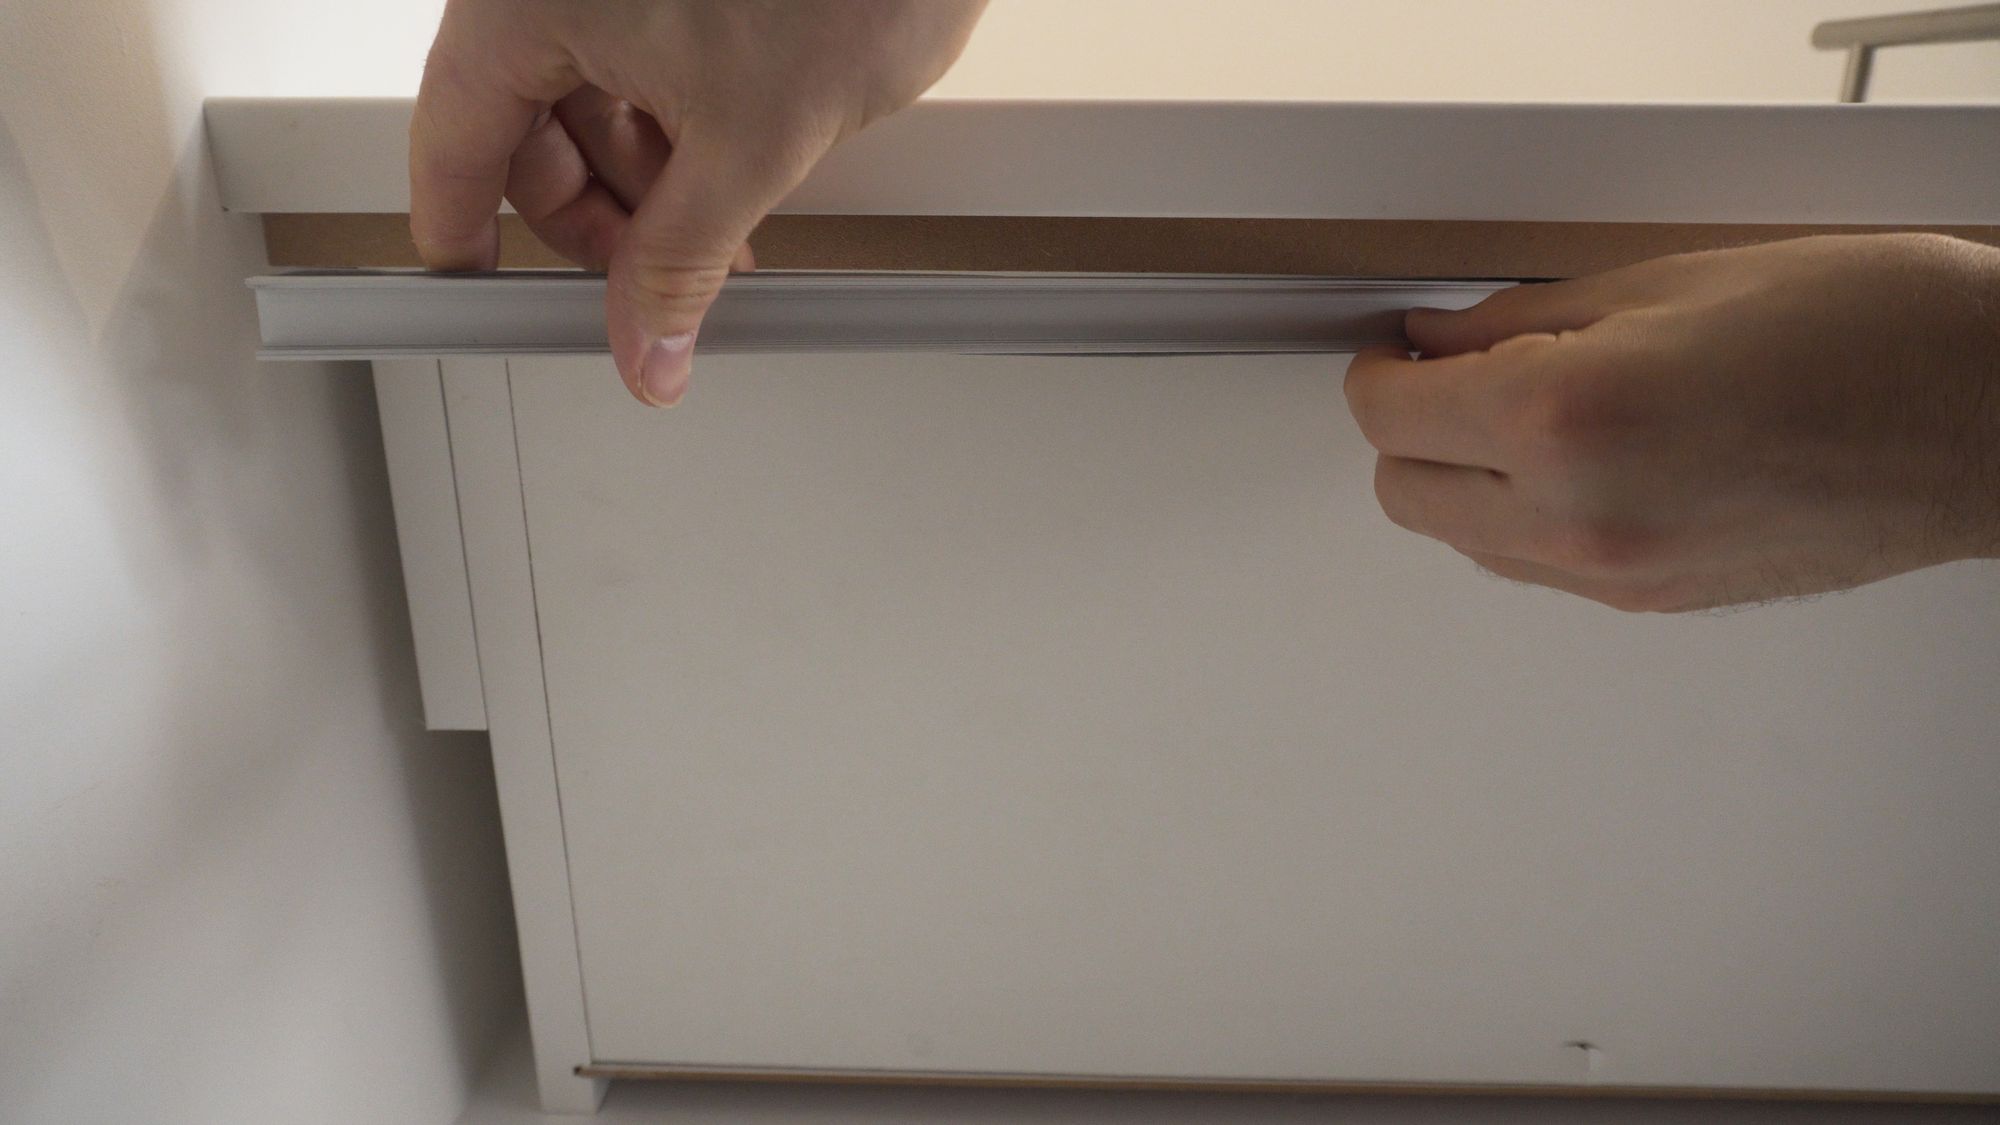
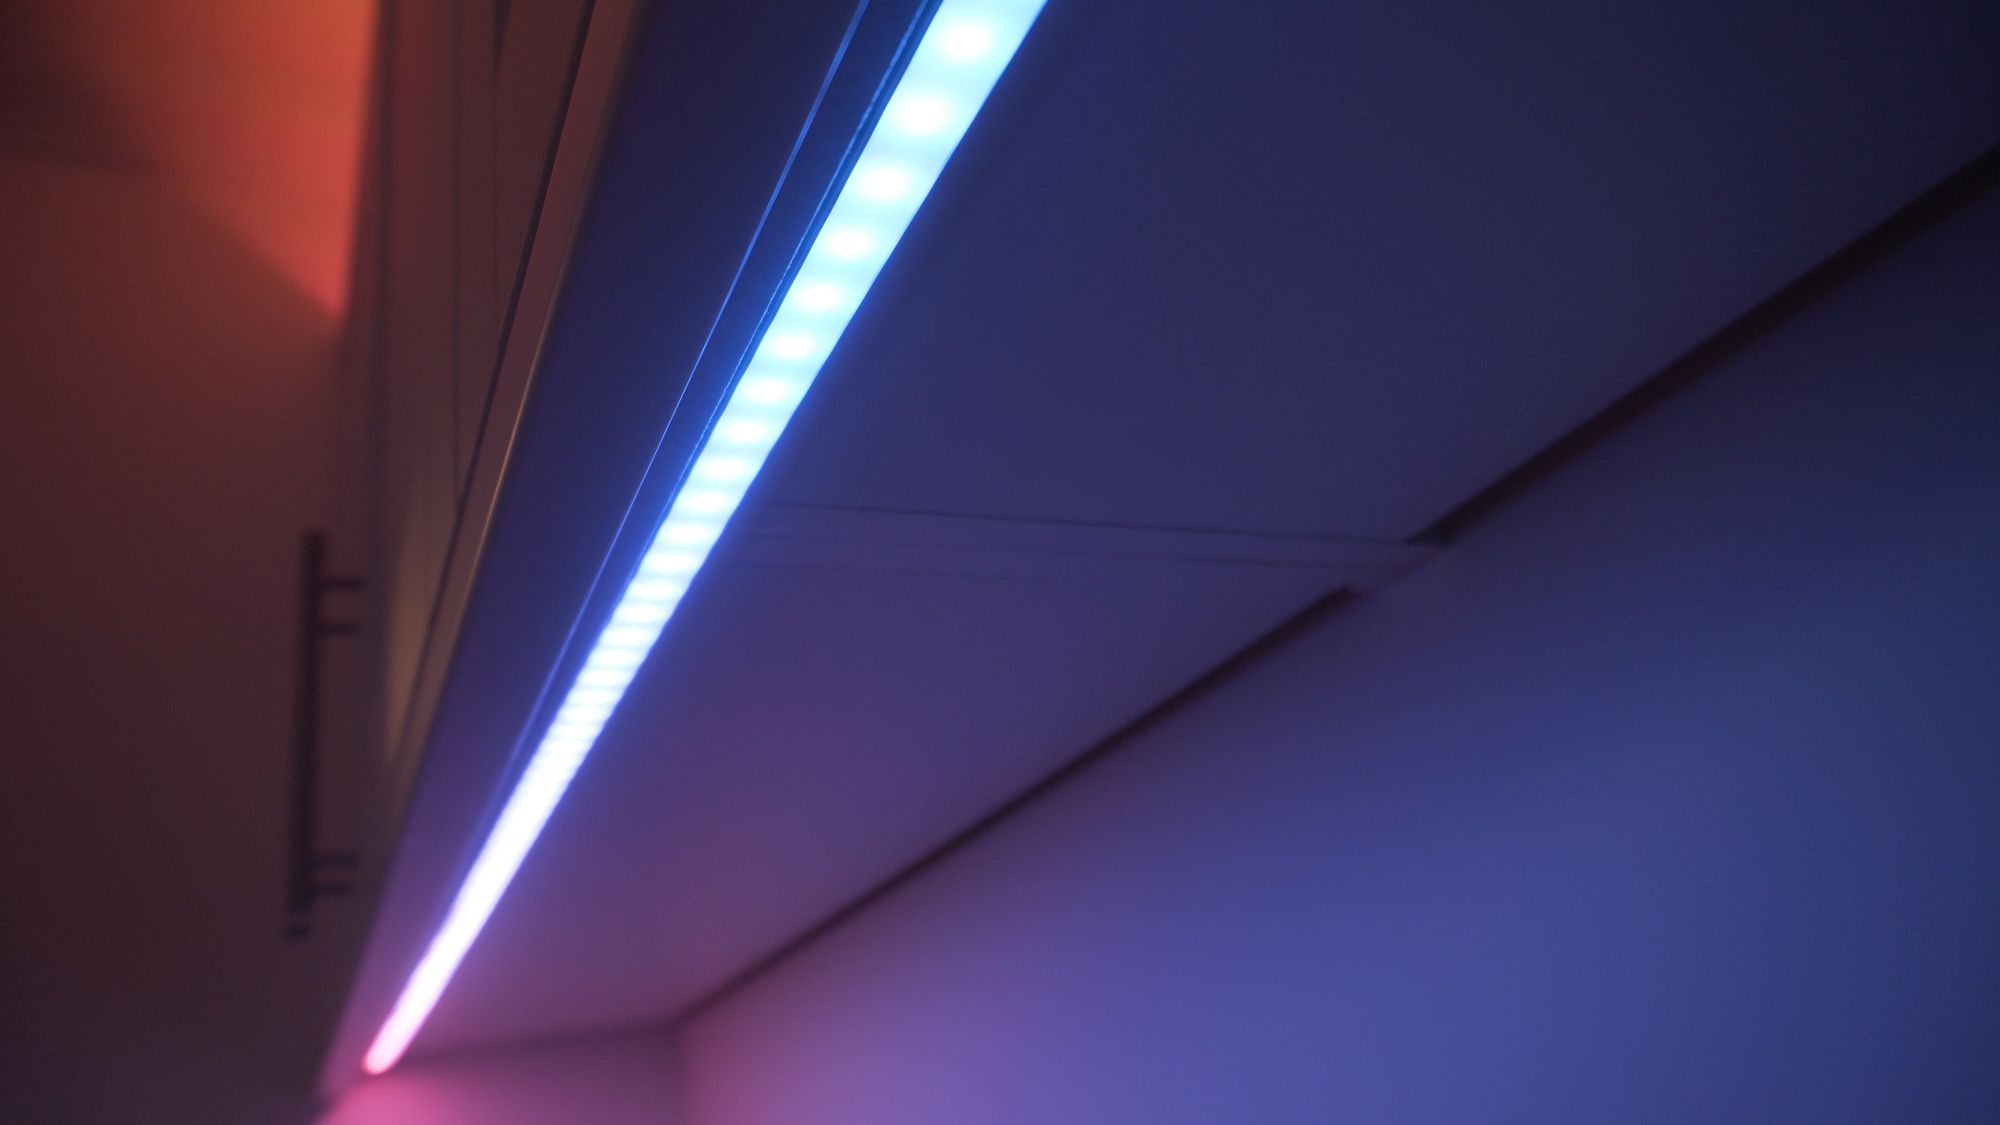
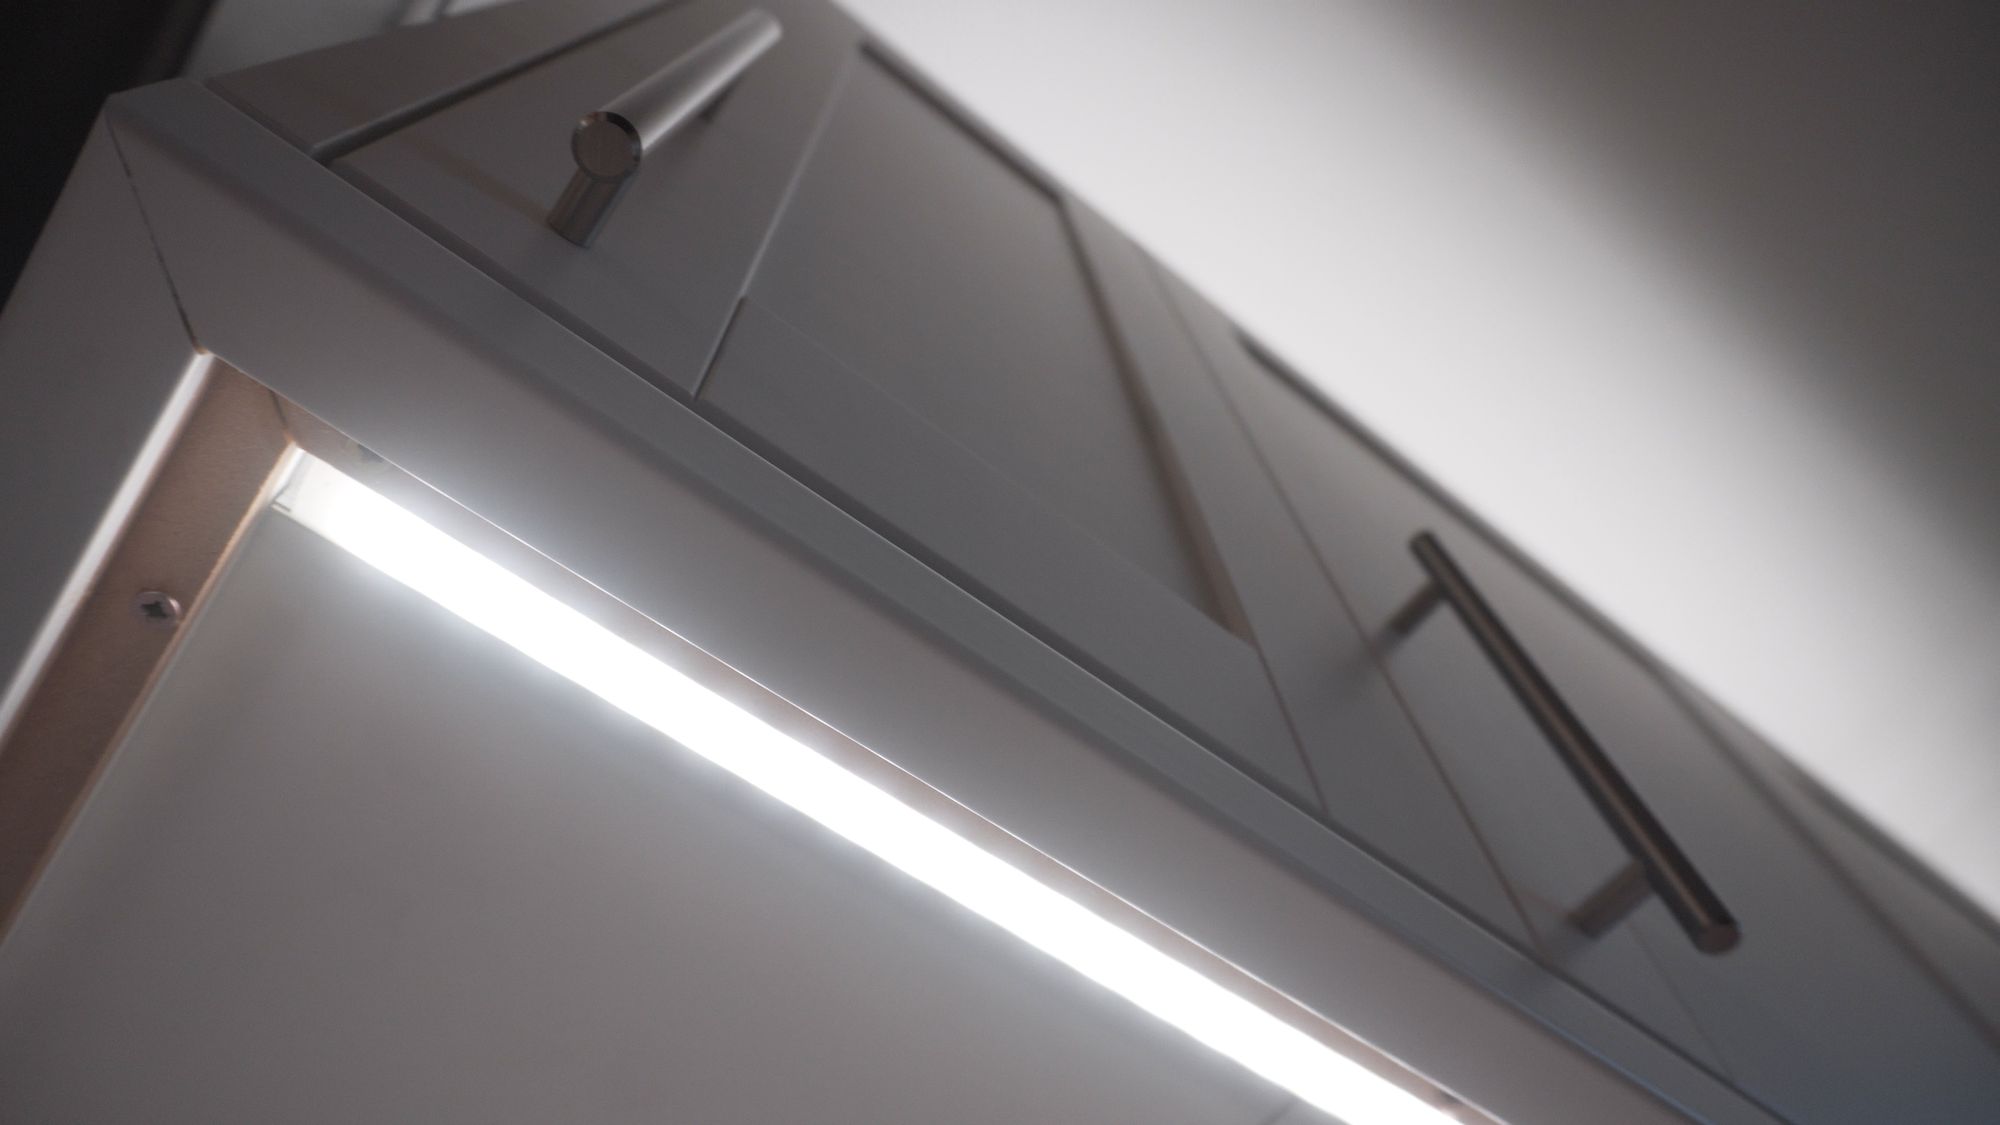
Finally, I clipped the diffusion layer into the aluminium channel. I offset the cut pieces of plastic against the cut pieces of aluminium, to provide a little more of a seamless look, even though the strips themselves should never really be seen.
I then got to work and did the whole thing all over again, repeating the exact same process on the other side.
Then, time for the big switch on!
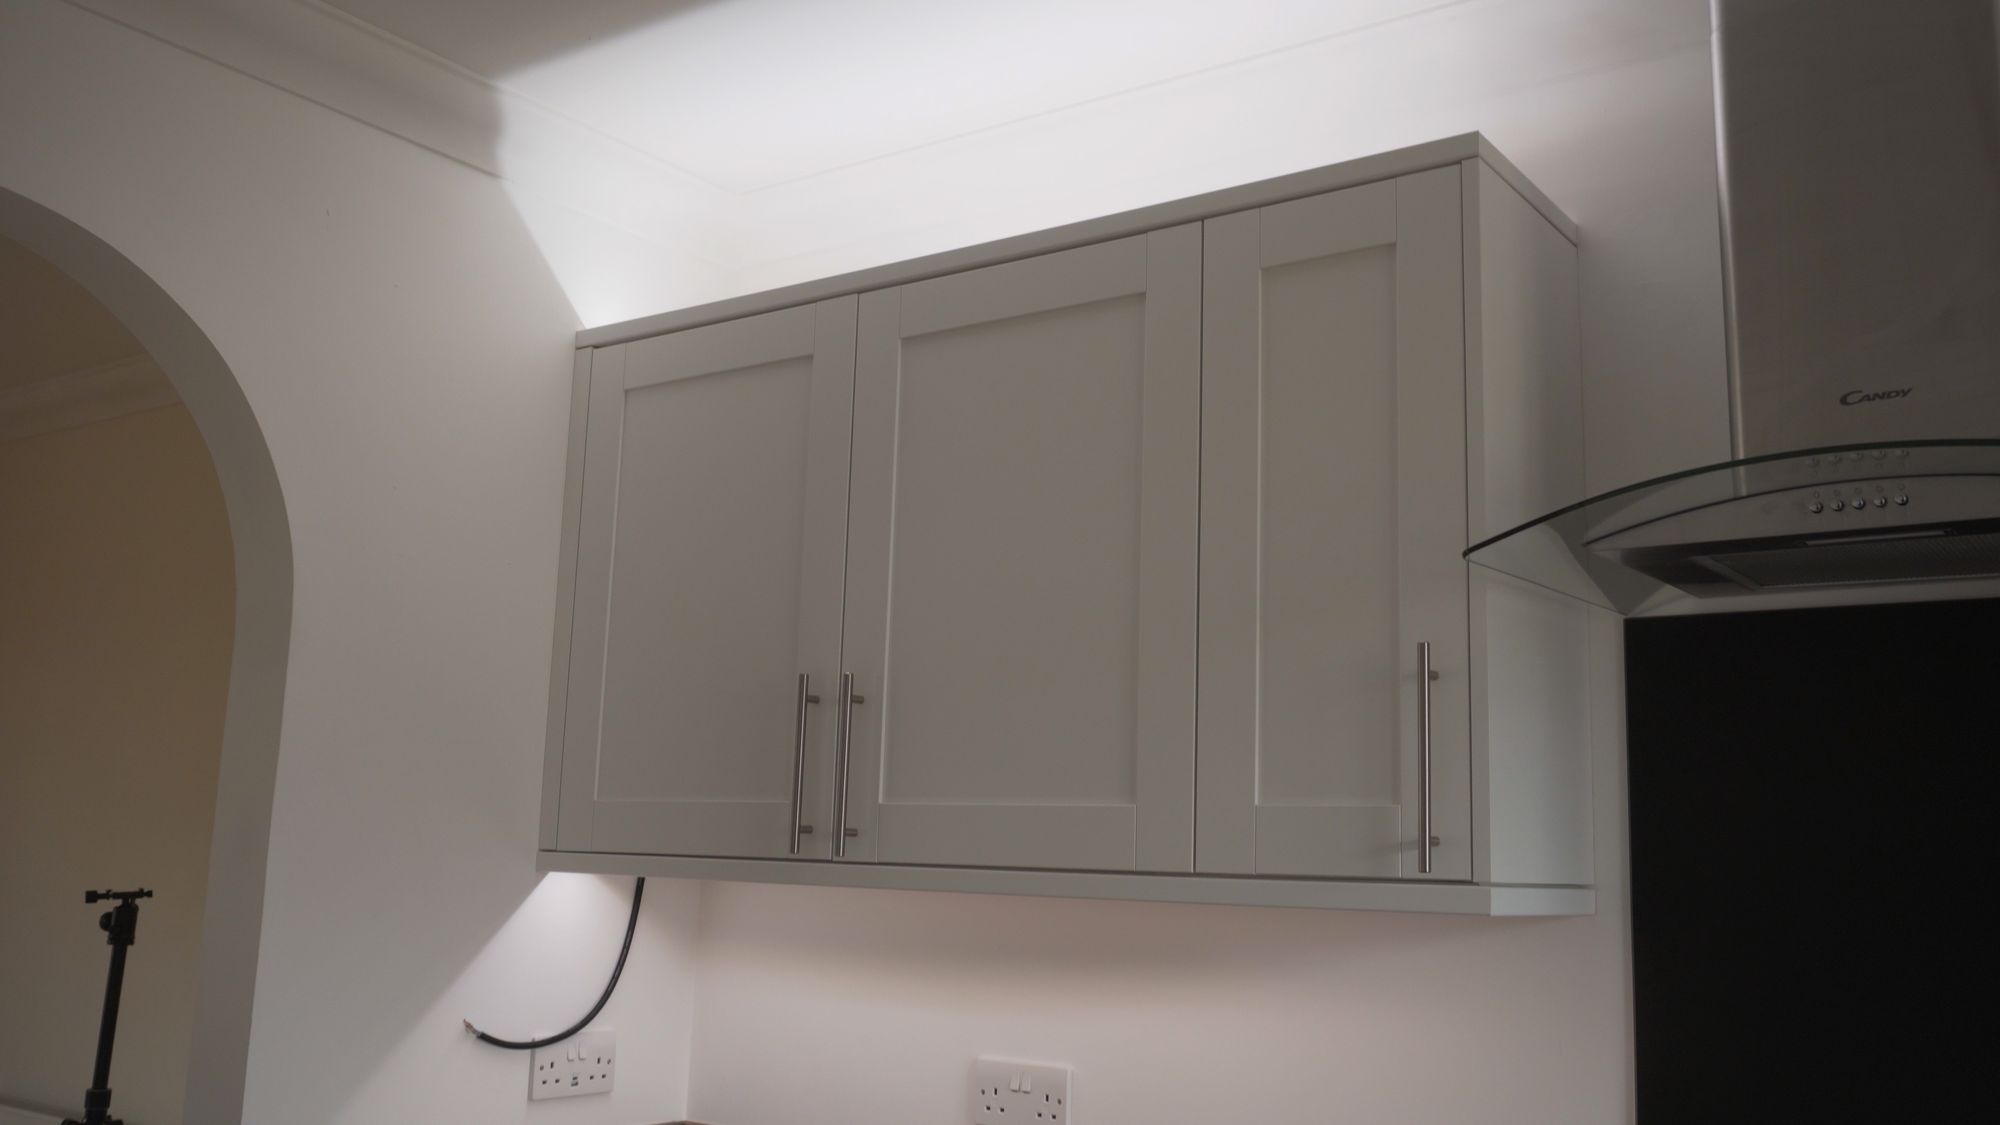
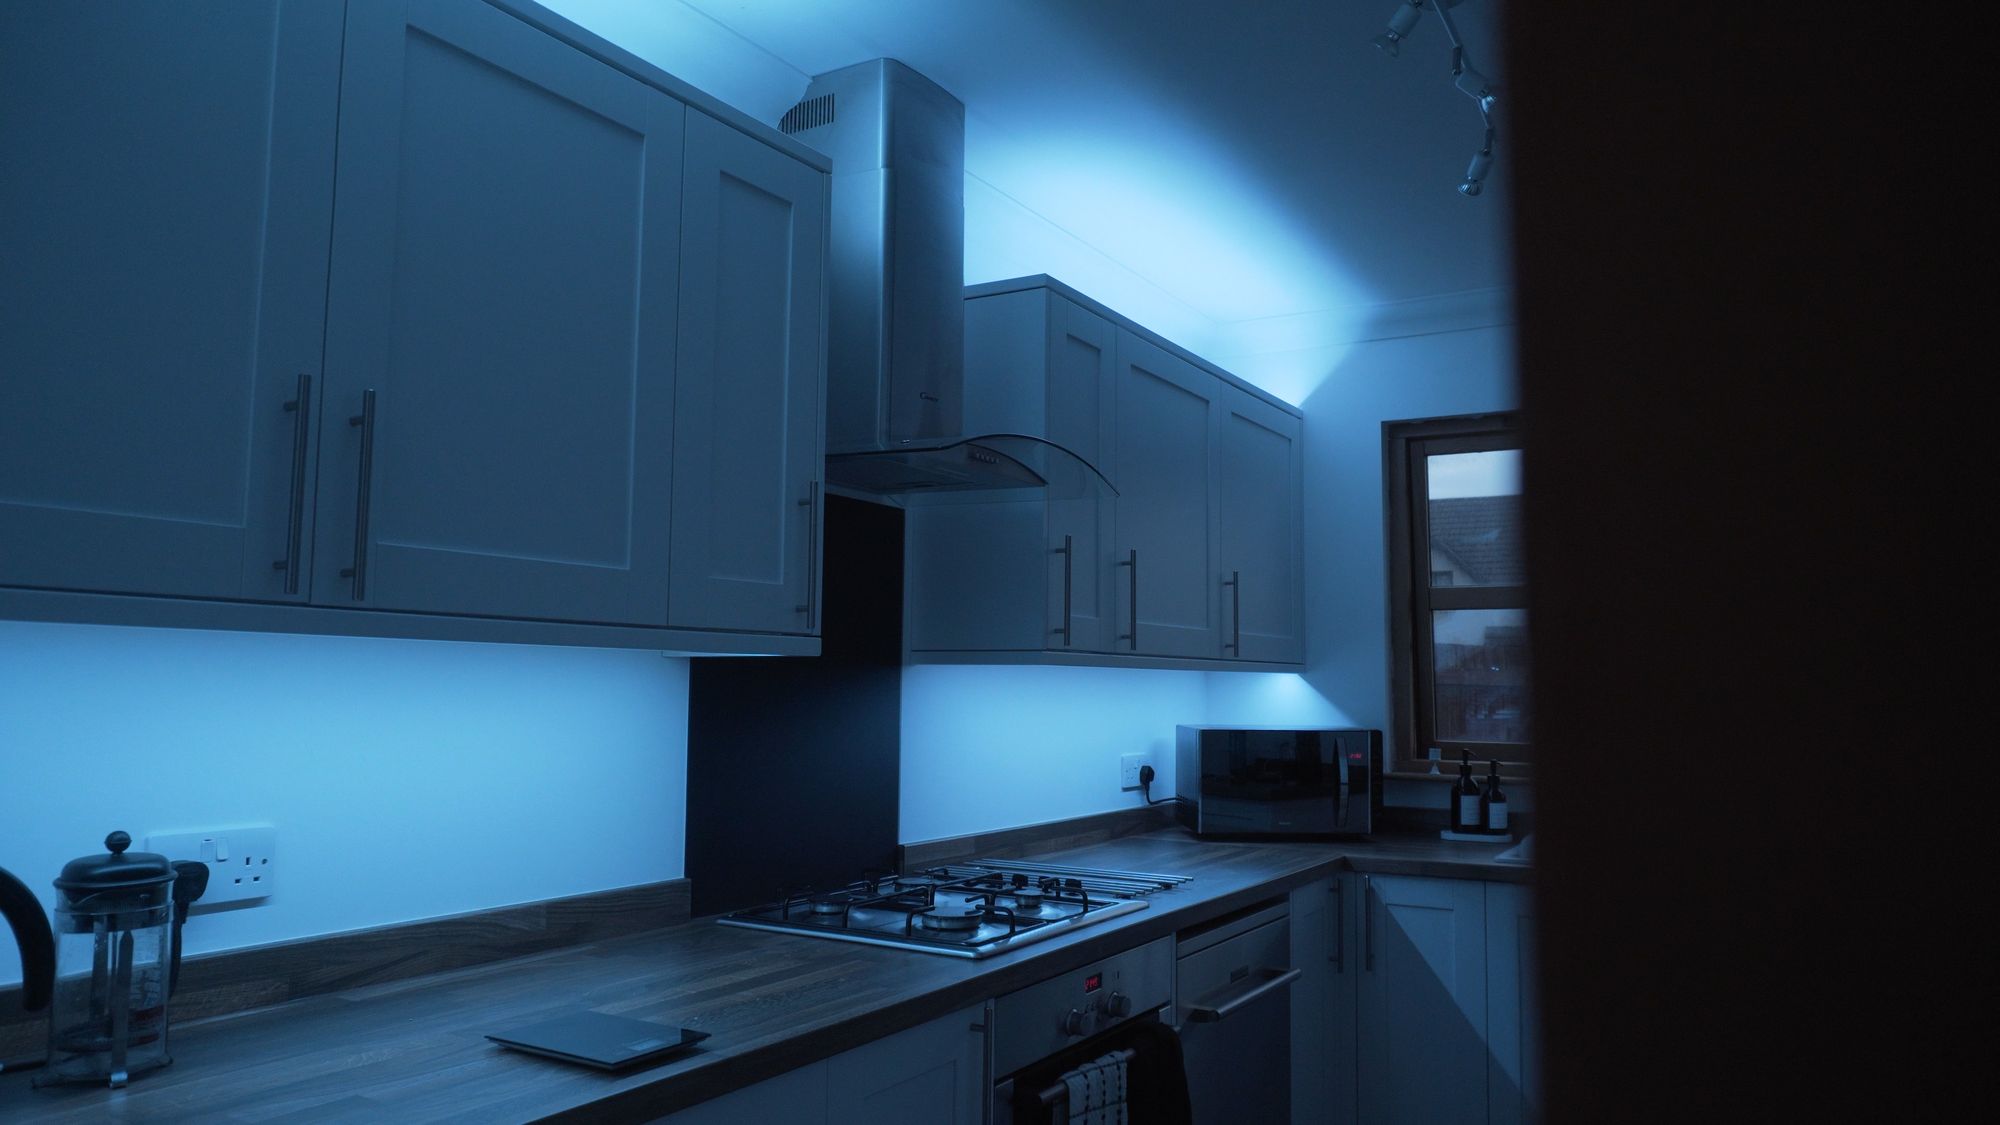
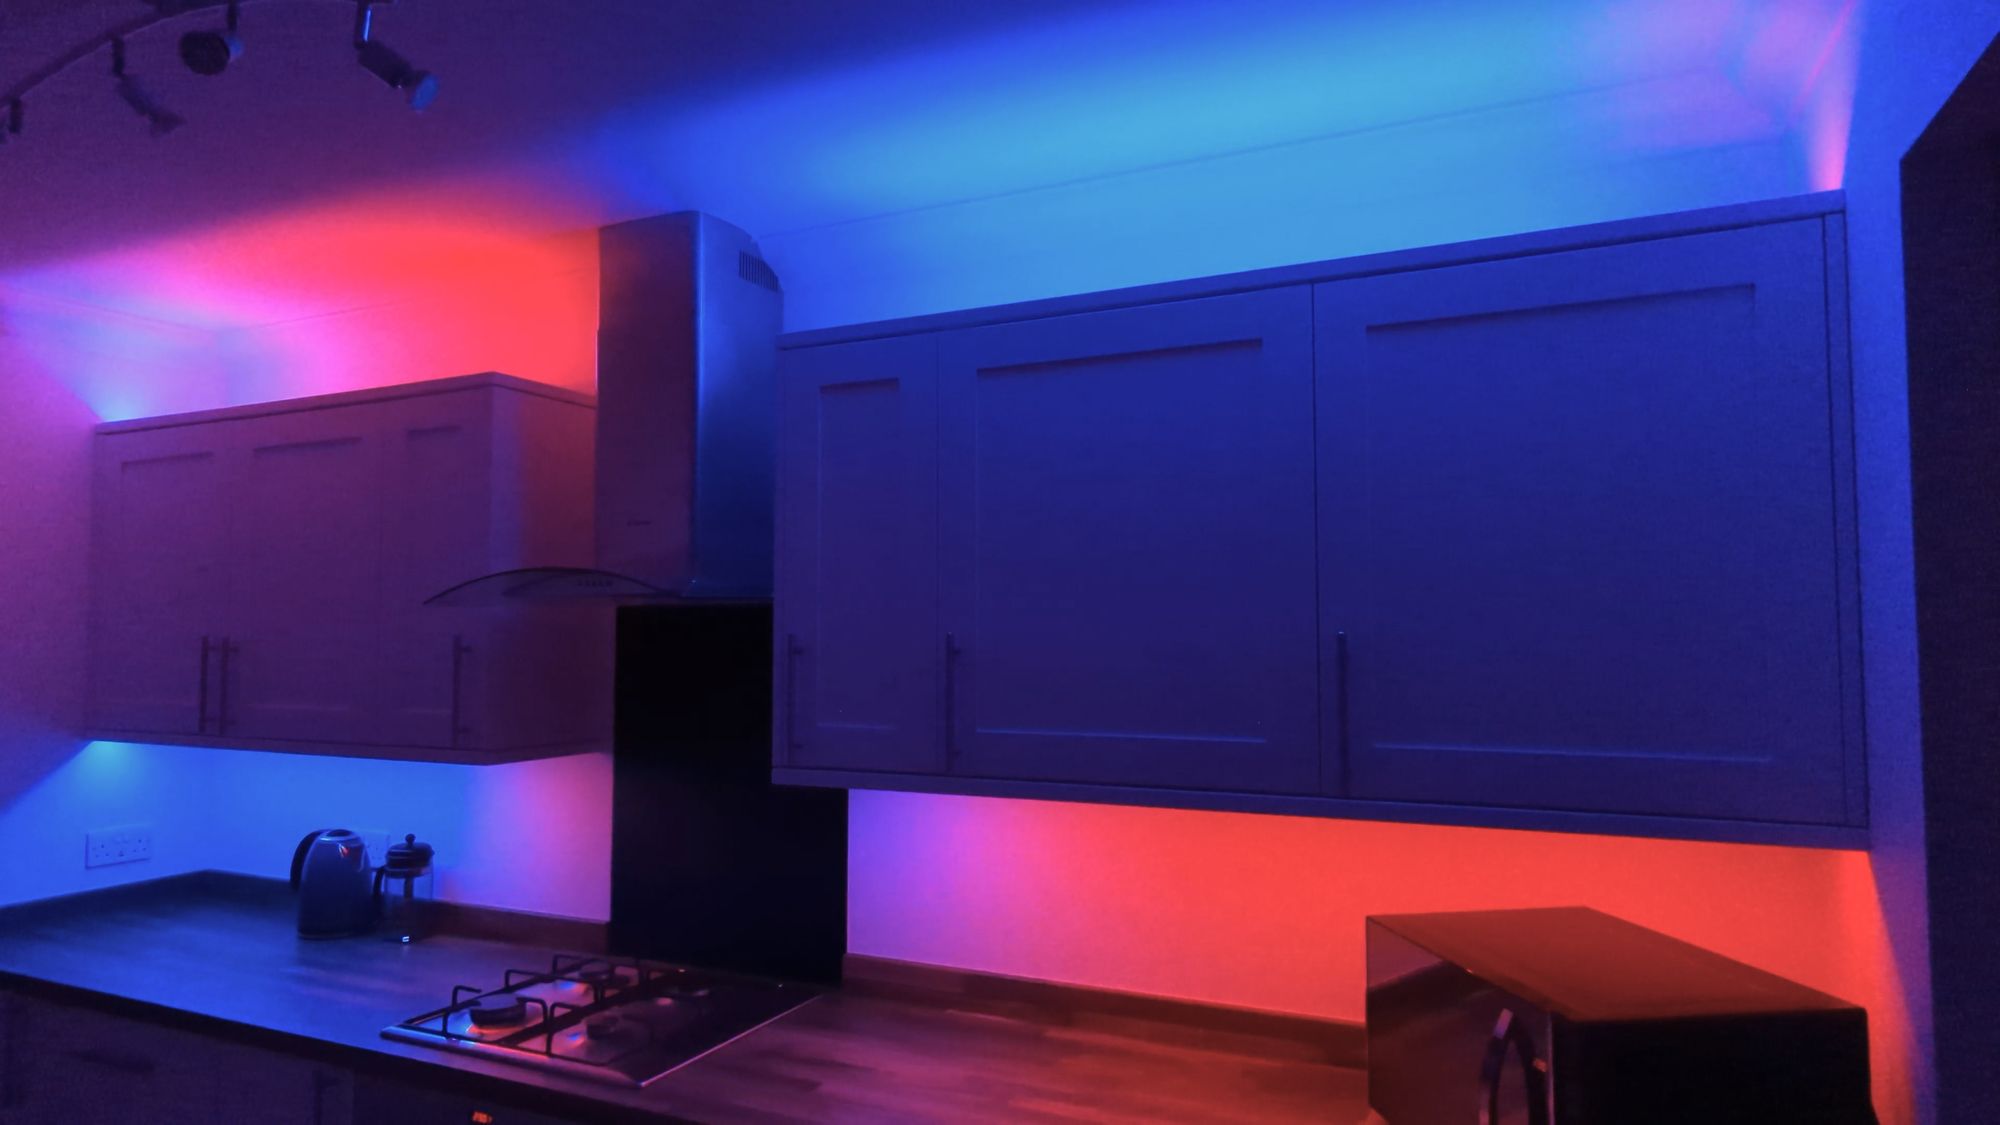
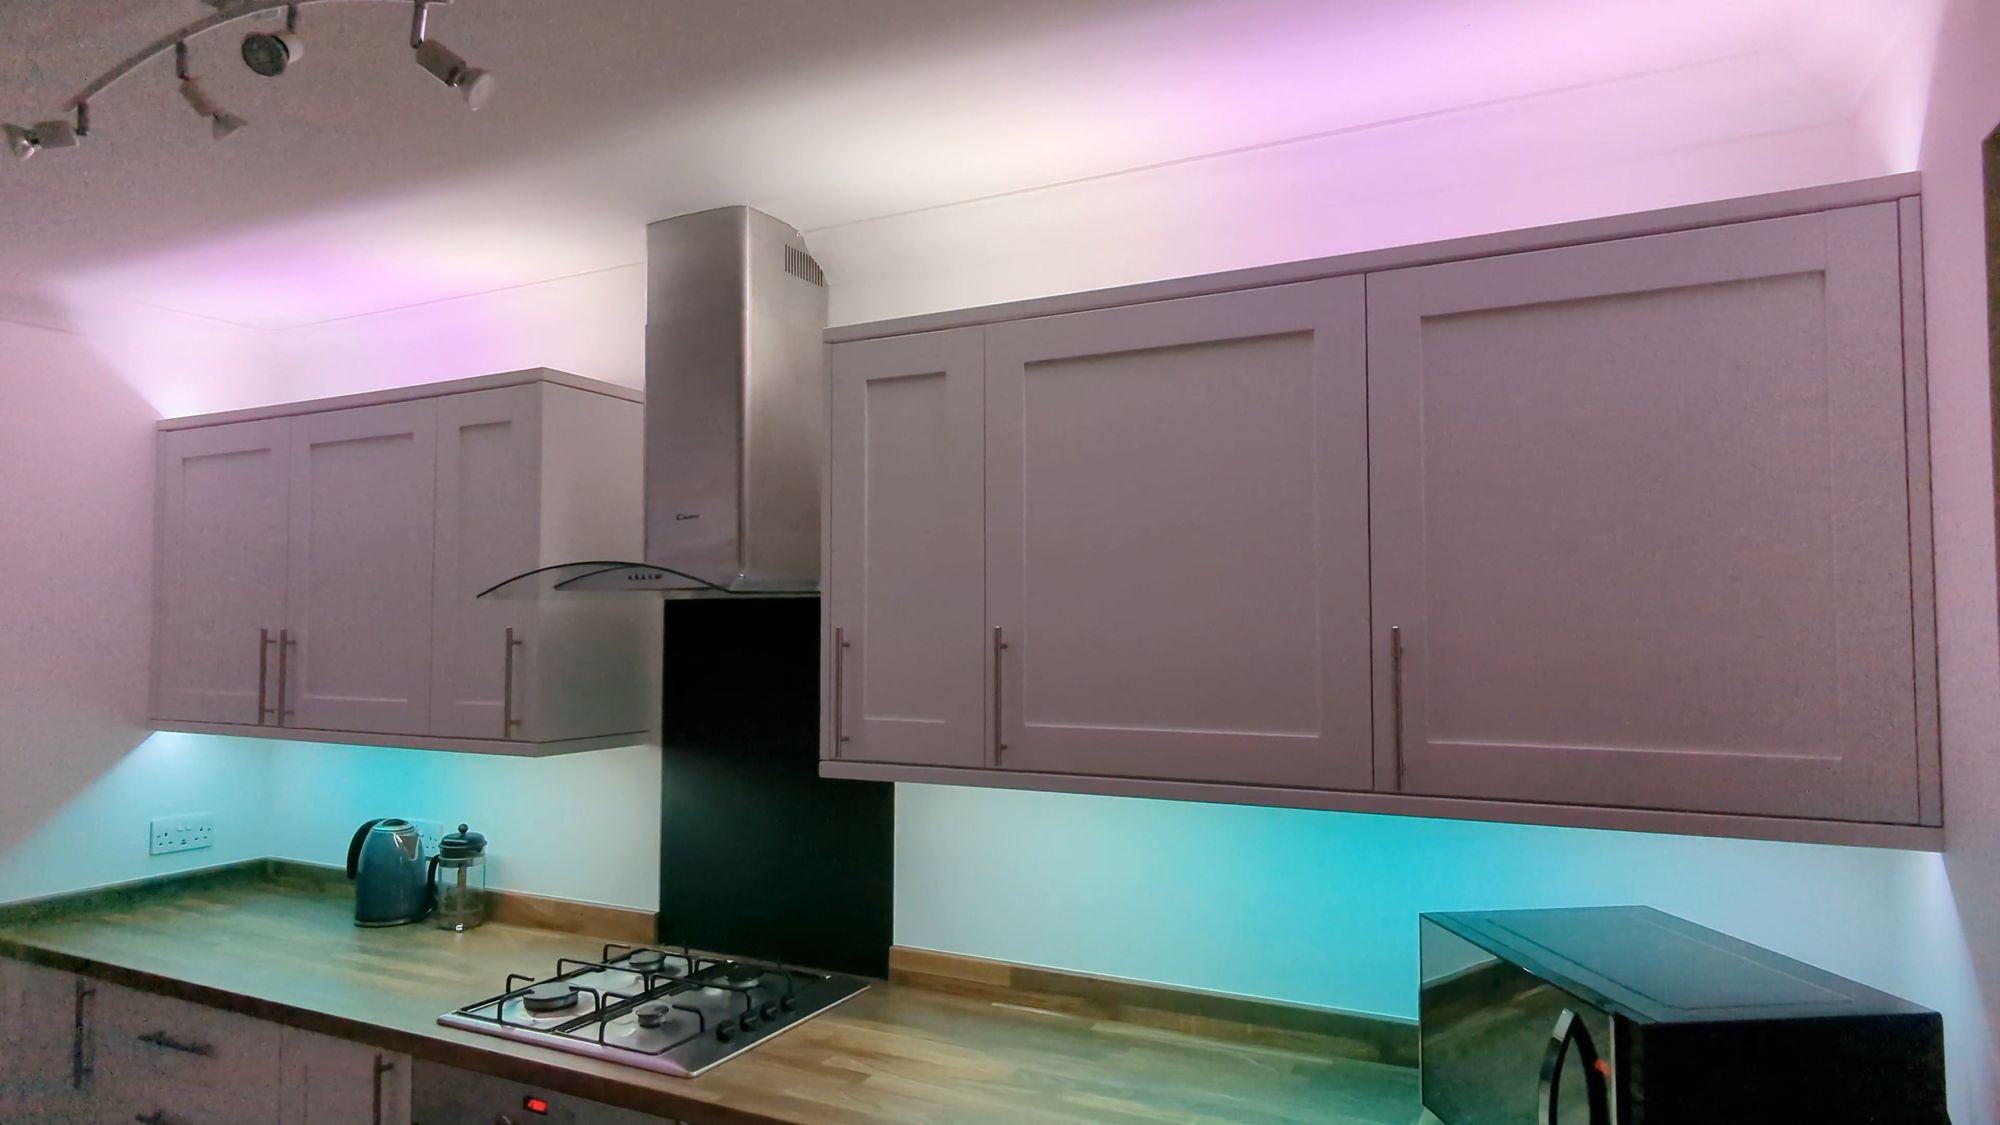
Let there be light!
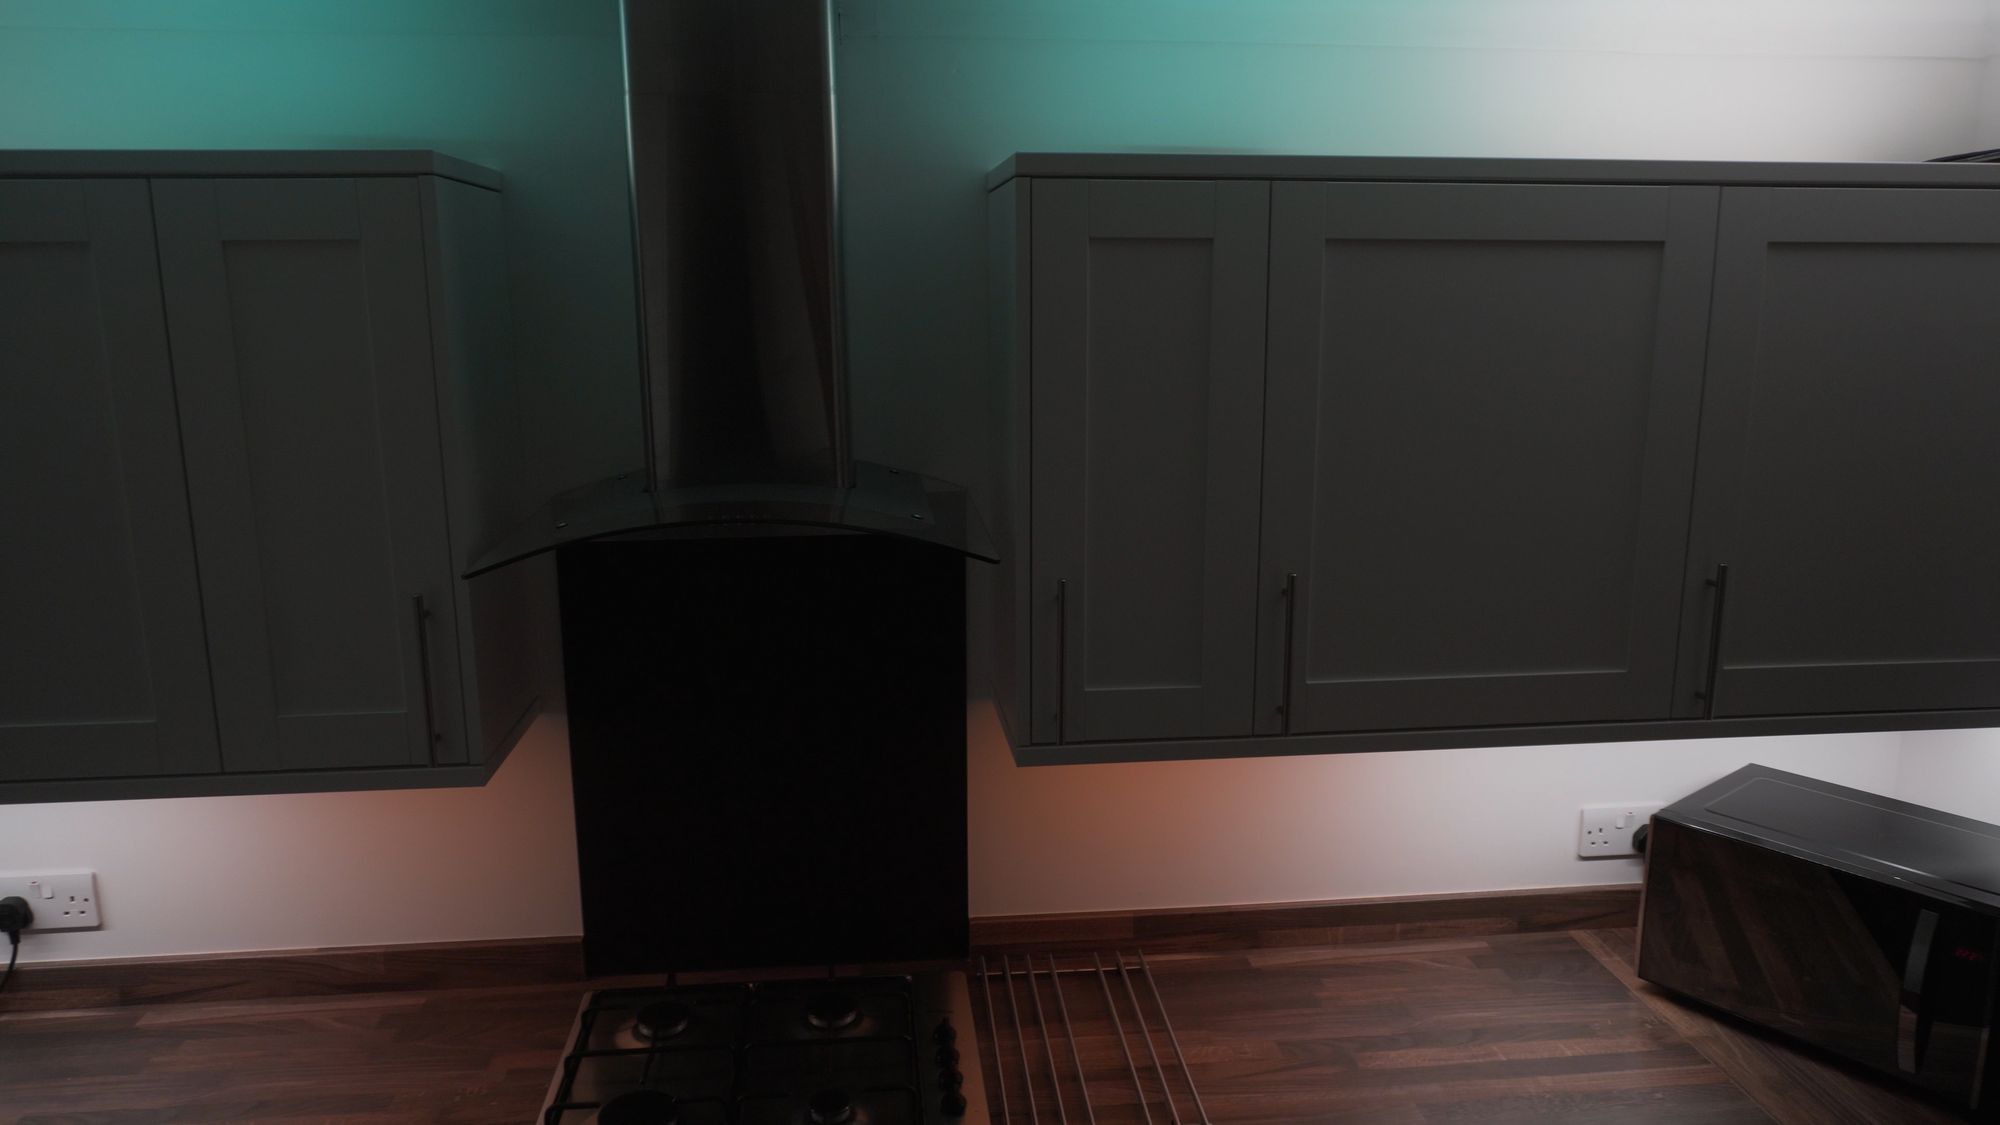
To my delight, the LEDs lit up just as they should, but I noticed one slight issue, the underside of the cabinets on both sides were both a little dimmer than the top, plus had an orange tinge when they were meant to be white.
This is due to a voltage drop that occurs because of not only the amount of LEDs, but in my case it was mostly due to the extremely thin wire I was using to link the top and bottom strip.
To be honest, I shouldn’t have used this thin wire anyways due to the amount of current.
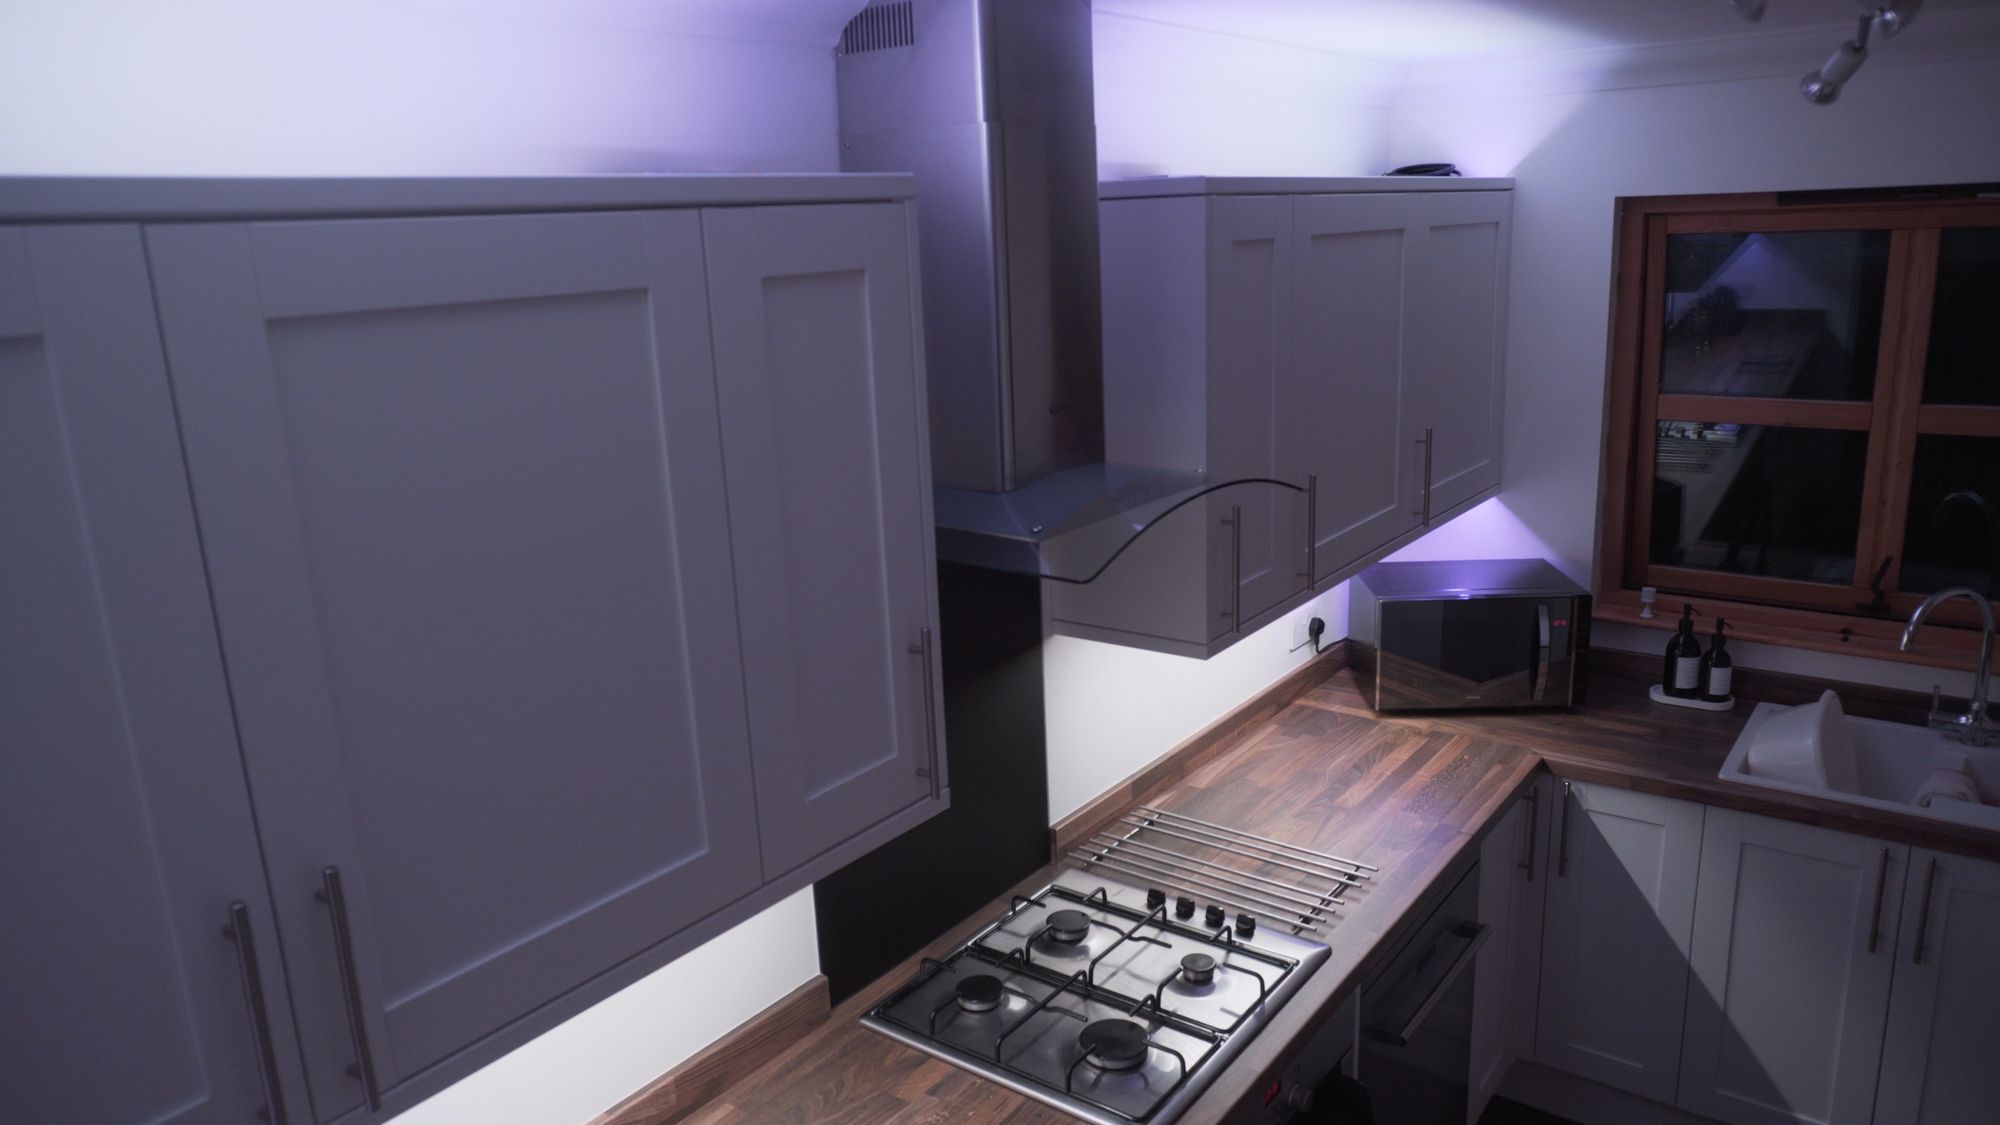
So after replacing it with some much thicker wire, it was time to see the results!
Final Thoughts
I am really happy with how these lights turned out, they are a much needed and welcome addition to this space! They look fantastic, are very customizable and easily light up the room without being expensive to run.
If I were to do anything different, I would probably have went for a 12v strip instead of a 5v strip to better deal with the voltage drop, it’s really not noticeable now with the thicker wire, but there is a slight dip still which I’ll fix with some power injection, but other than that, really happy with the results.
We have barely scratched the surface on all of the cool things WLED can do, it’s a seriously impressive piece of software that has some really powerful features and makes everything so easy!
Do let me know what you think of this lighting and if you plan on doing something similar!