Installing ESP8266 into Arduino IDE

This is a quick (and I mean quick!) and easy guide on installing ESP8266 boards into Arduino IDE which allows you to program all of your ESP8266 and ESP32 boards within Arduino IDE – a really powerful function.
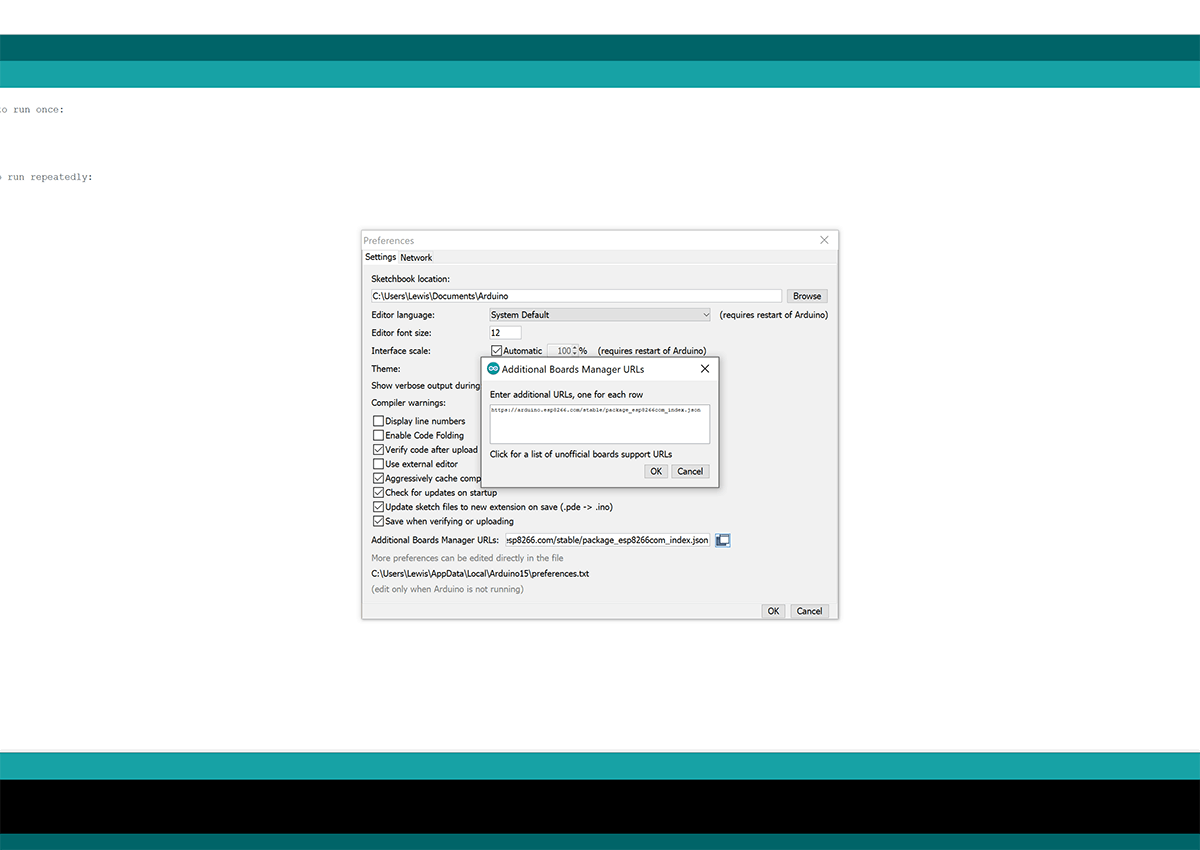
First, open up the Arduino IDE and head to File > Preferences and click the button next to “Additional Boards Manager URLs”.
Enter the following line in the box:
https://arduino.esp8266.com/stable/package_esp8266com_index.json
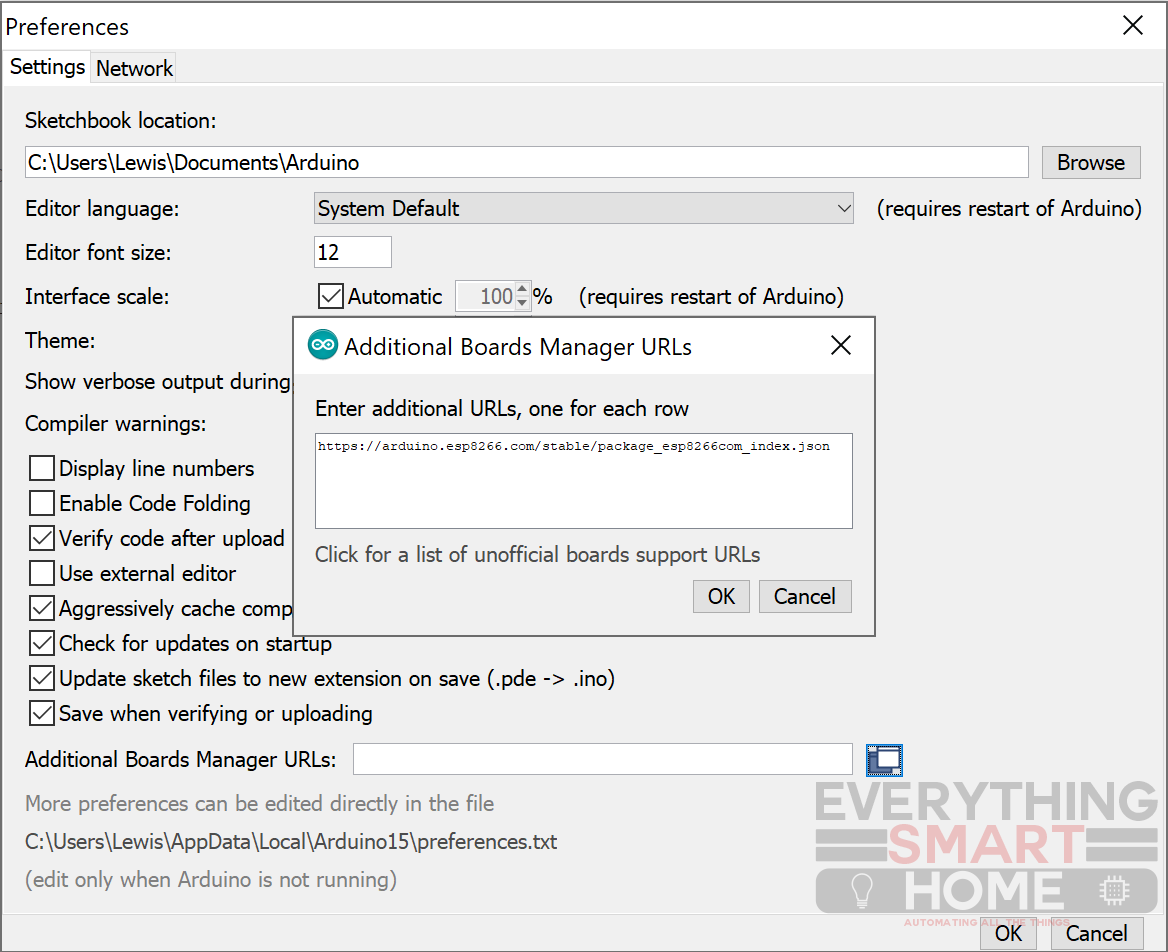
Then press OK and OK again to save.
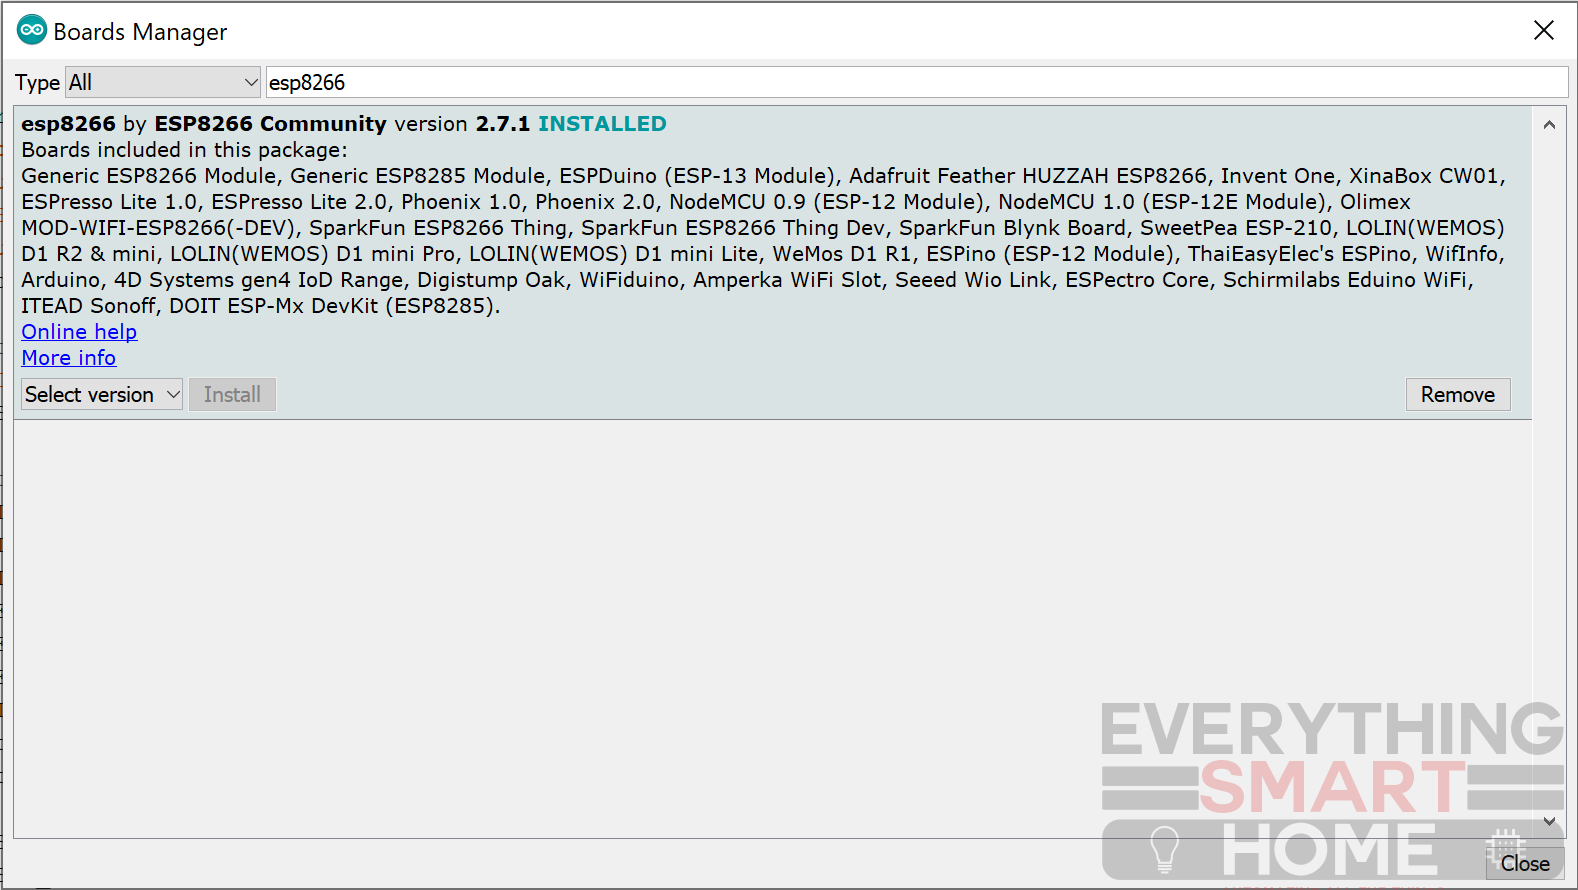
Next, head to Tools > Board > Board Manager, then search for esp8266 and install the esp8266 boards:
Finally, double check everything has installed correctly by heading back into Tools > Board and scroll down the list – you should now see many extra esp8266 boards to choose from:
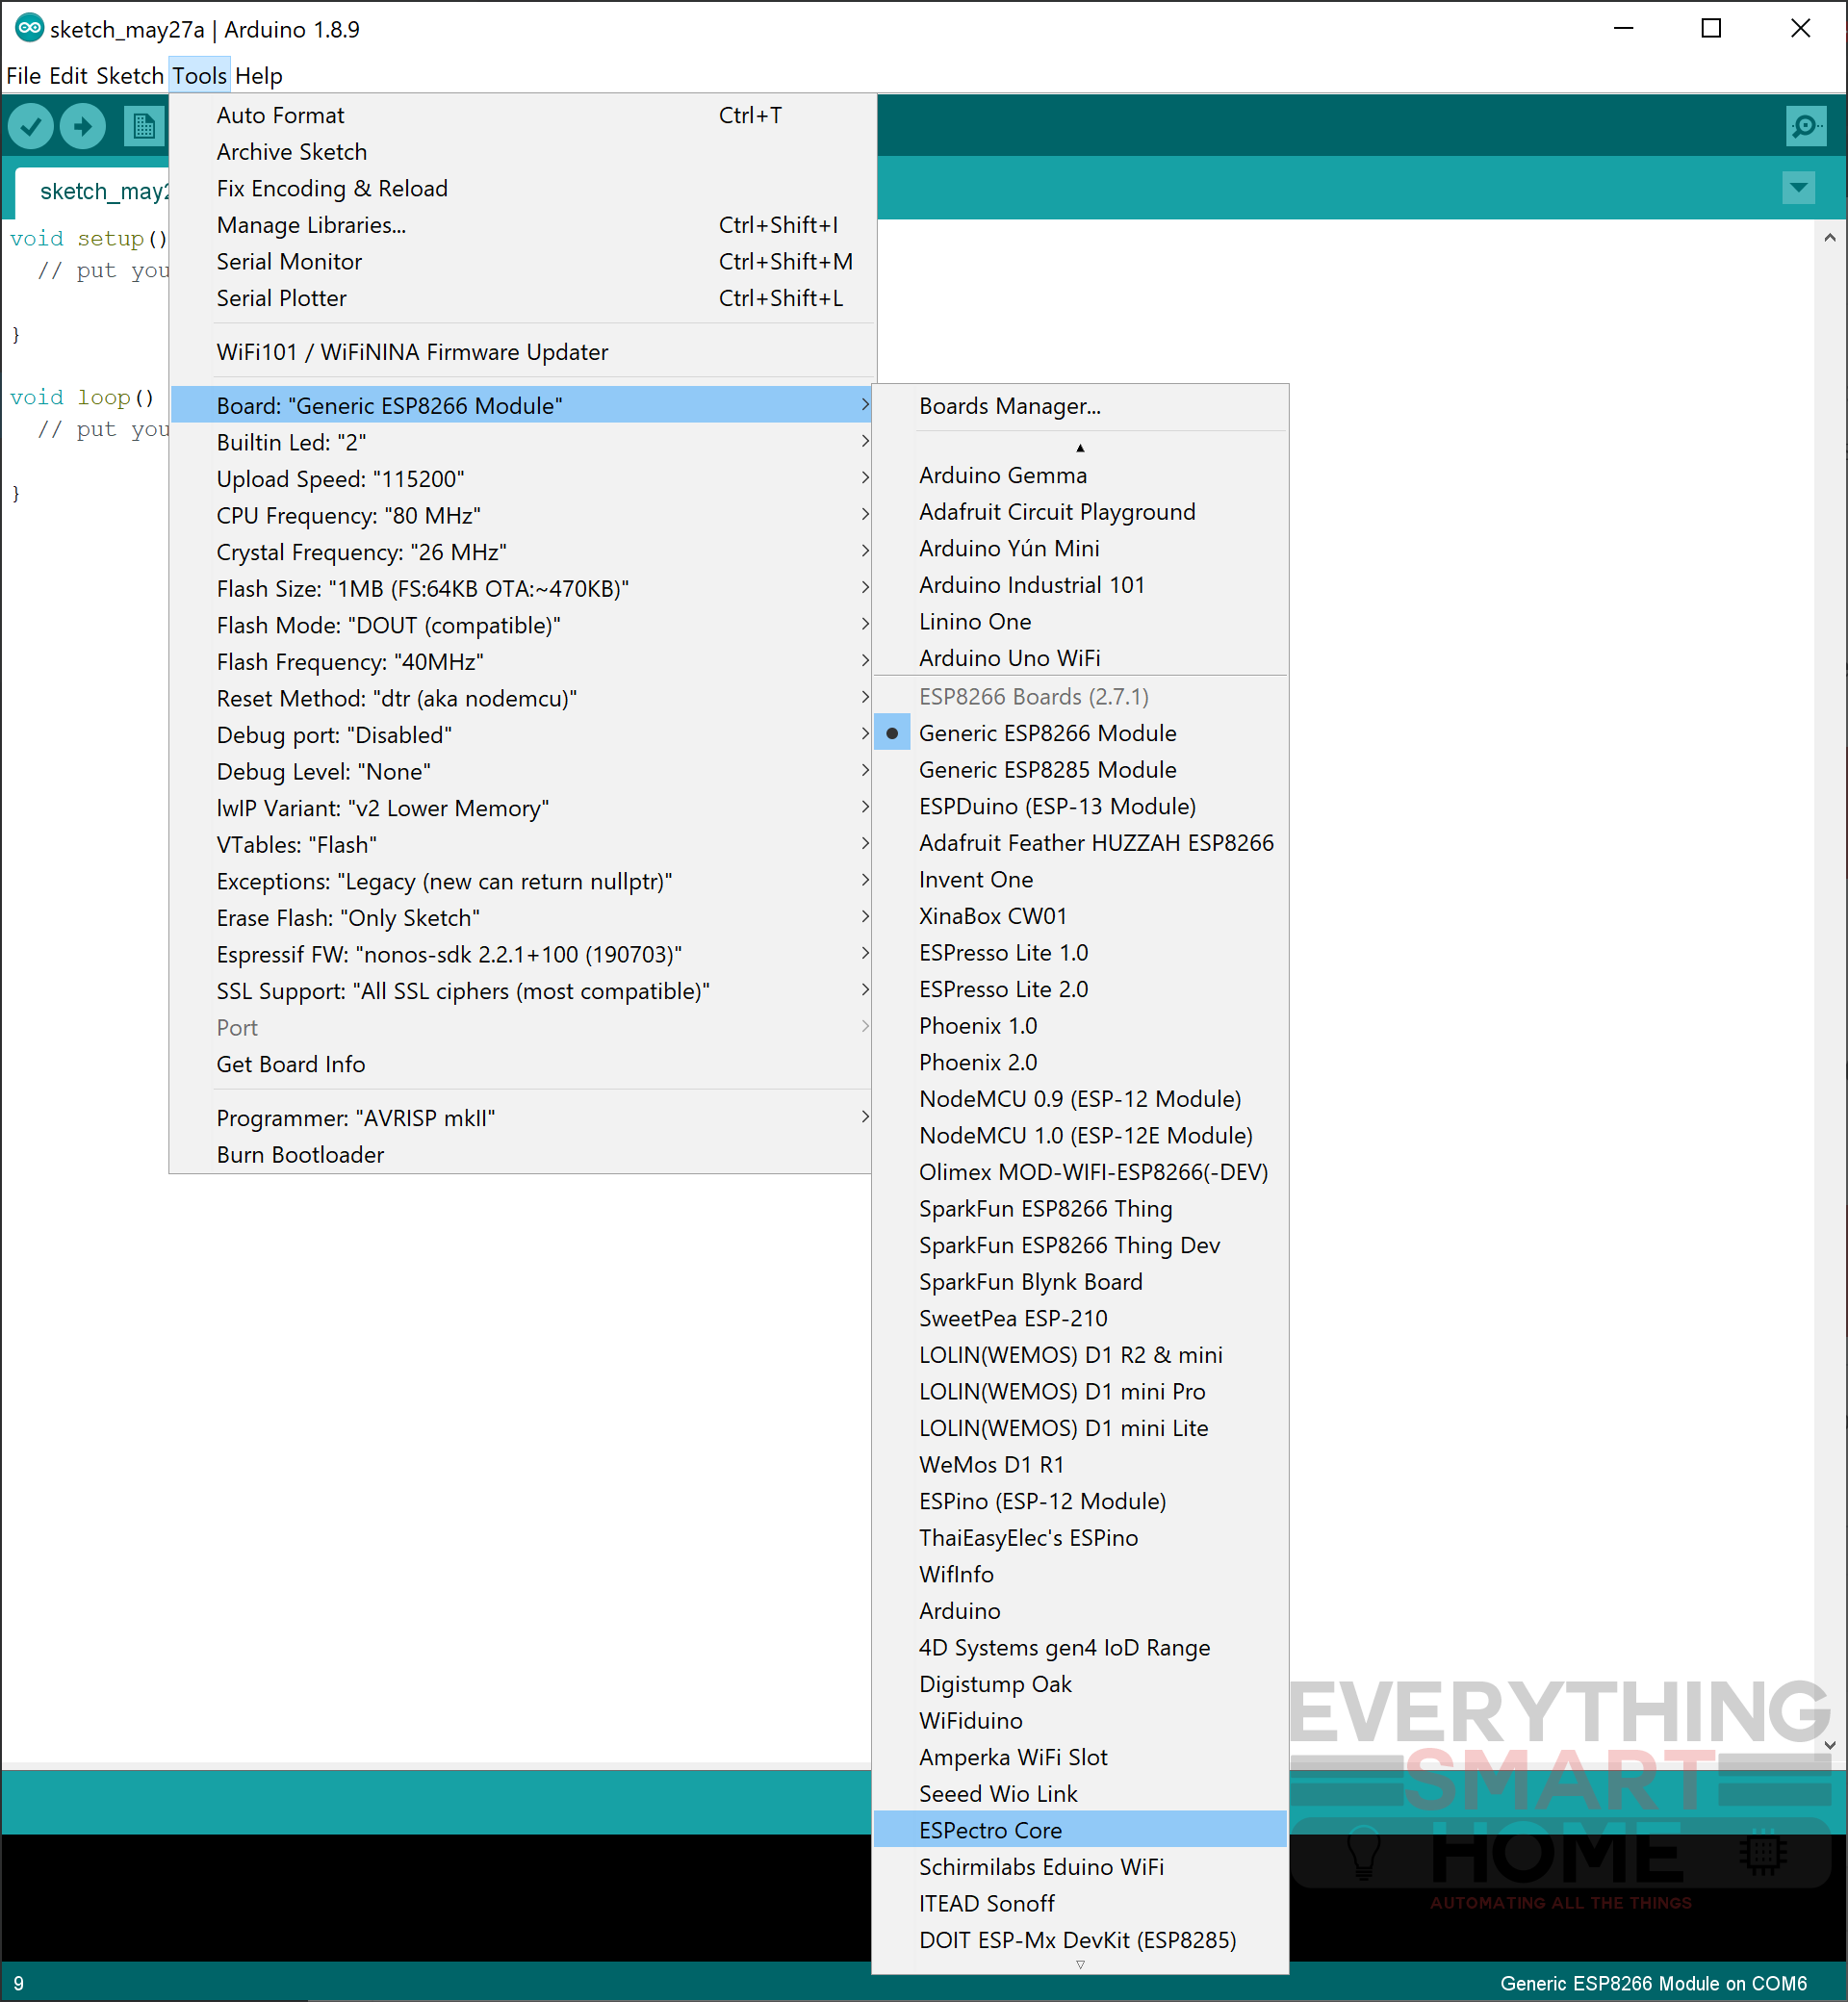
If you do not, restart Arduino IDE and check again, they should now appear.
You can repeat the same steps for adding esp32 boards except add the additional boards URL:
https://dl.espressif.com/dl/package_esp32_index.json
You now have everything you need to develop esp8266/esp32 boards within Arduino IDE!