Getting Started with Home Assistant - Part 3 - Configuration/Adding entities

Welcome to part 3 of the Getting Started with Home Assistant series – Configuration and adding entities.
This series aims to help teach you about the basic configuration and functionality of Home Assistant.
This part follows on directly from where we left off in part 2, so if you have not yet installed and configured Home Assistant then go back and follow that part.
In this part, we are going to learn about the configuration files in Home Assistant, as well as how to add entities to our setup.
Let’s get into it!
Prerequisites
This part of the series assumes you:
- Installed Home Assistant/Hass.io
- Have command line/SSH access to your server
- Are comfortable with editing files using vi/nano
- (Optional) A compatible device that you want to add to Home Assistant
Terminology Cheat Sheet
Let’s take a look at some terminology that is useful to know for this section of the guide.
Config Directory
This is the location where the main configuration files are stored for Home Assistant. The location is dependant on which method you used for installation, if you used Hass.io then it is simple “/config/” and if you followed our installation guide for virtual environment, then it will be in “/home/homeassistant/.homeassistant/”. If you are unsure, open Lovelace and go to Developer Tools then Info and look where it says “Path to configuration.yaml” which will give you the path.
YAML Files
YAML stands for “YAML ain’t Markup Language” and is the “language” of choice for all the configuration files within Home Assistant. There isn’t too much you need to know here, apart from indentation and spacing is key for YAML, so just make sure to double check all spacing and indentation has been adhered too. Do not use tabs, use spaces when indenting.
Text Editor
Since we using command line/SSH we will be using a command line based text editor. You can use whichever you feel most comfortable with if you are more advanced, and while my personal preference is vi/vim, I’m going to use nano for the purposes of this guide because I feel its easiest for beginners to use. If you are a beginner, it’s the one I’d suggest you go with.
Configuration Files
First of all, let’s locate our configuration files so that we can see what we are working with and familiarise ourselves with the config directory.
Go ahead and change directory then list all the files in your config directory:
cd /your-config-directory/
ls -lah

#Hassio
cd /config/
ls -lah

#Virtual Environment
cd /home/homeassistant/.homeassistant/
ls -lah
From here on I will just refer to it as the config directory.
You should have something like this:

You will notice you have several .yaml files:
- configuration.yaml – this is the main config file for Home Assistant (I will refer to it as config file from now on) and is where you add all your entities and platforms as well as several other things. It also refers to the other yaml files by “including” them within this one.
- automation.yaml – where you would enter any automations you want to create, this is where lovelace also writes any that you created in Lovelace
- customize.yaml – again there is where any entity customizations would be entered and also where Lovelace saves anything you entered in the Customization section.
- groups.yaml – groups is something we haven’t yet come across. Groups allows you to group multiple entities together to act as a single entity. For example, if you have 4 light entities called “light.livingroom_X” (X being 1 to 4) then you could group them together into a single entity called “light.livingroom”. This is much nicer to control.
- scripts.yaml – As above, where you enter any scripts you want to have and where lovelace writes any scripts you create in the UI.
- secrets.yaml – This is a location that allows you to enter any passwords or other “secrets” here so that all sensitive information is kept in a single file and out of the main config file. It means you can share your configuration file with others without worrying about having to go through and redact your main configuration. Note this is a plain text file and can obviously be read by anyone so do not treat this as a “secure” file.
We are only going to be looking at the main config file in this part, but everything you will learn here you can put into practice with all the other files, since they all use YAML.
Lets take a look at the main config file:
nano configuration.yaml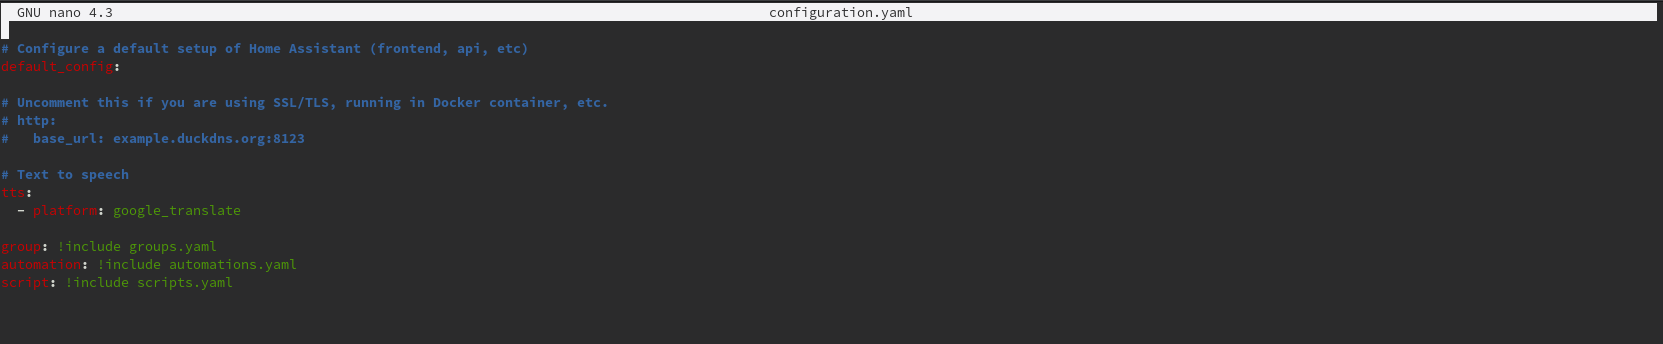
Even though it’s pretty empty at the moment, let’s break it down.
At the top we have:
default_config:This line tells Home Assistant to load a default set of integrations/components which can be found here. Basically its the recommended setup from Home Assistant so I would leave this in unless you have a specific reason to disable it.
Then we have:
tts:
  - platform: google_translate
This section enables the text-to-speech (tts) integration/component, then enables the Google Translate platform. This does not require any other options so we do not need to put anything else here.
Finally we have the last section which is:
group: !include groups.yaml
automation: !include automations.yaml
script: !include scripts.yaml
Remember earlier I mentioned the other yaml files and how they are included via the main configuration? That’s what this section does, it reads those other files and includes the contents directly here. You could add the content from those files directly here, but that could make this file rather large and unwieldy so this is a nice way to organise everything.
Adding entities
At this point, you might be asking “That’s all well and good, but how do I actually know what to write in this file!?” – that’s a fair question and one I will try to answer now.
Now we’ve looked at the structure of the config file, let’s try and answer the two main questions:
- How do I know what to write in this config file?
- How do I actually add my entities to the config file?
First things first, we need to find out if our device/entity is compatible. Head over to the integrations page here. You can see that at the time of writing this there are 1485 integrations currently which is amazing. You will see everything is organised into categories on the left hand side:
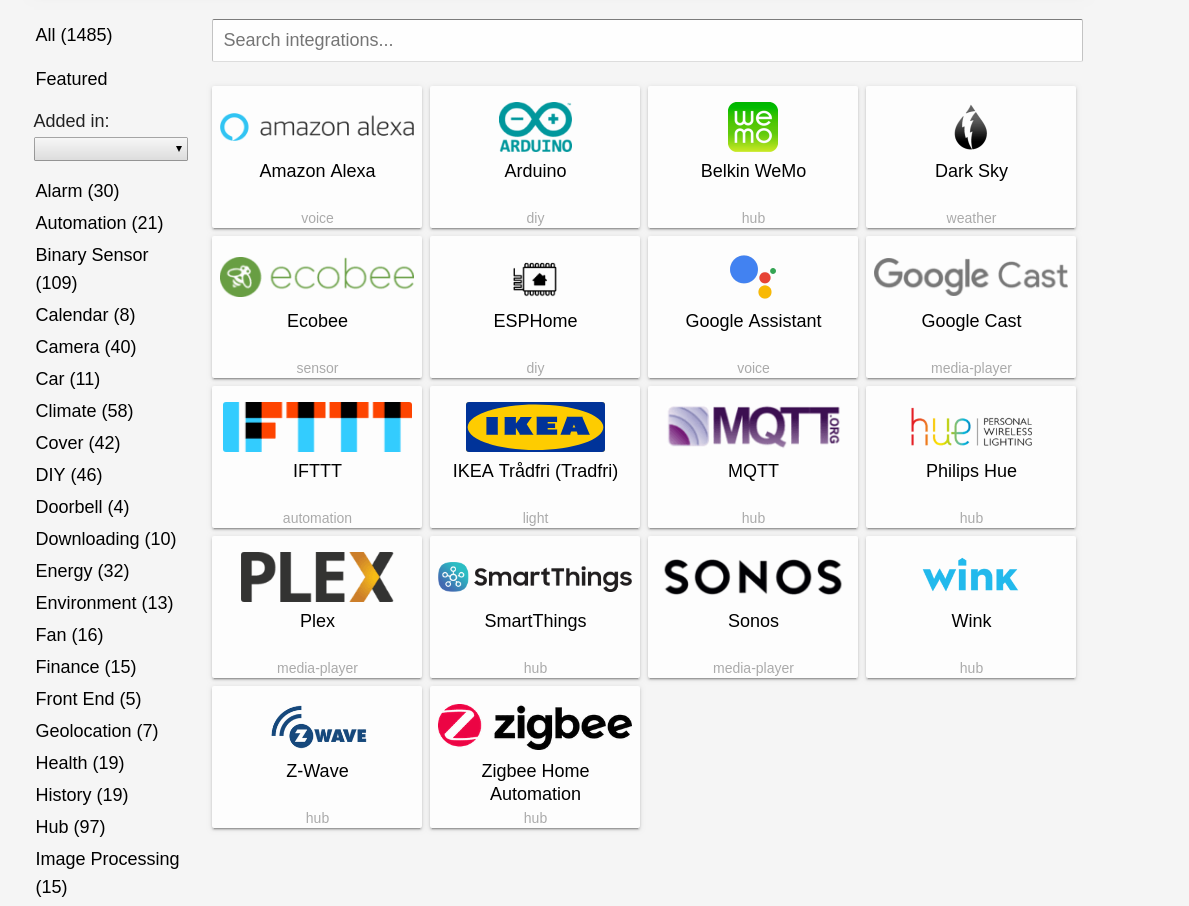
Use the categories or the search to find your entity or device.
This section of the guide becomes difficult because everyone has access to different devices so its hard to cover all basis. However having said that, let’s take a look at an integration that pretty much everyone should be able to do – a simple internet speed test.
Go to the “system monitor section” and click on the entry for speedtest.net, or simply search for speedtest.net (click either entry):
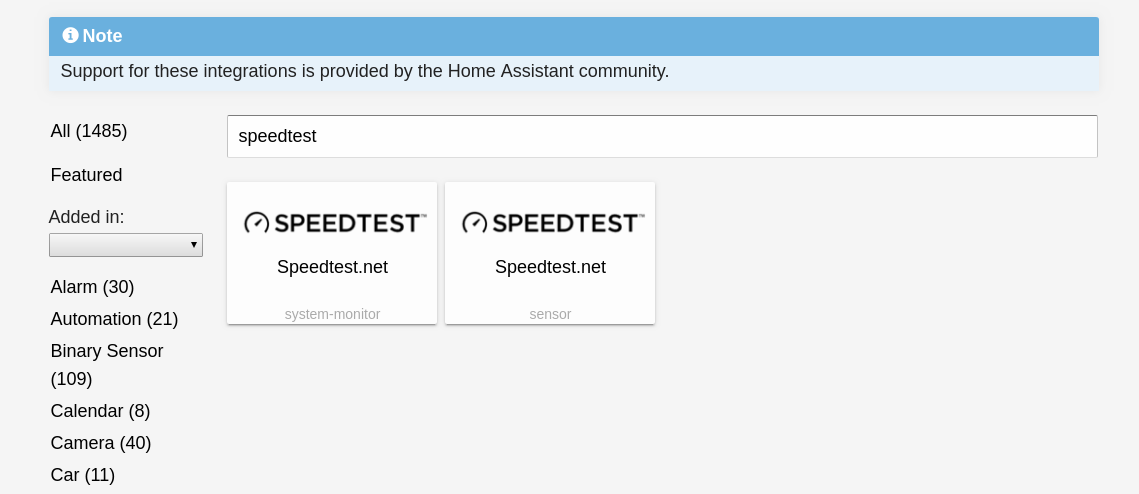
This page gives us all the information we need to add a speedtest.net sensor to our config file.
So lets add our first sensor!
Open your config file and add the speedtest.net integration by specifying a new integration:
speedtestdotnet:This tells Home Assistant that we want to load the speedtest.net integration.
Directly underneath that and indented with two spaces, we add the options for that integration. Specifically we are going to add which conditions we want to monitor:
speedtestdotnet:
  monitored_conditions:
    - ping
    - upload
    - download
Notice how after each colon we specify, we indent to start a new sub-section:
speedtestdotnet:           //No indentation because its a new parent section
  monitored_conditions:    // 2 space indentation because monitor_conditions "belongs" to the speedtestdotnet
    - ping                 // Another 2 space indentation (4 total) because these 3 options belong to "monitored_conditions"
    - upload
    - download
Hopefully that makes sense.
Let’s add some more options, we want to schedule a speedtest every 5 minutes (I wouldn’t actually recommend this for production), from the integration page we can see that there is an option for “scan_interval” which allows us to specify at what time the test should run. Add the scan_interval option so that your config looks like:
speedtestdotnet:
  monitored_conditions:
    - ping
    - upload
    - download
  scan_interval:
    minutes: 5
Notice how scan_interval has a 2 space indentation to indicate it “belongs” to “speedtestdotnet” and not “monitored_conditions”?
The full configuration will look similar to this:
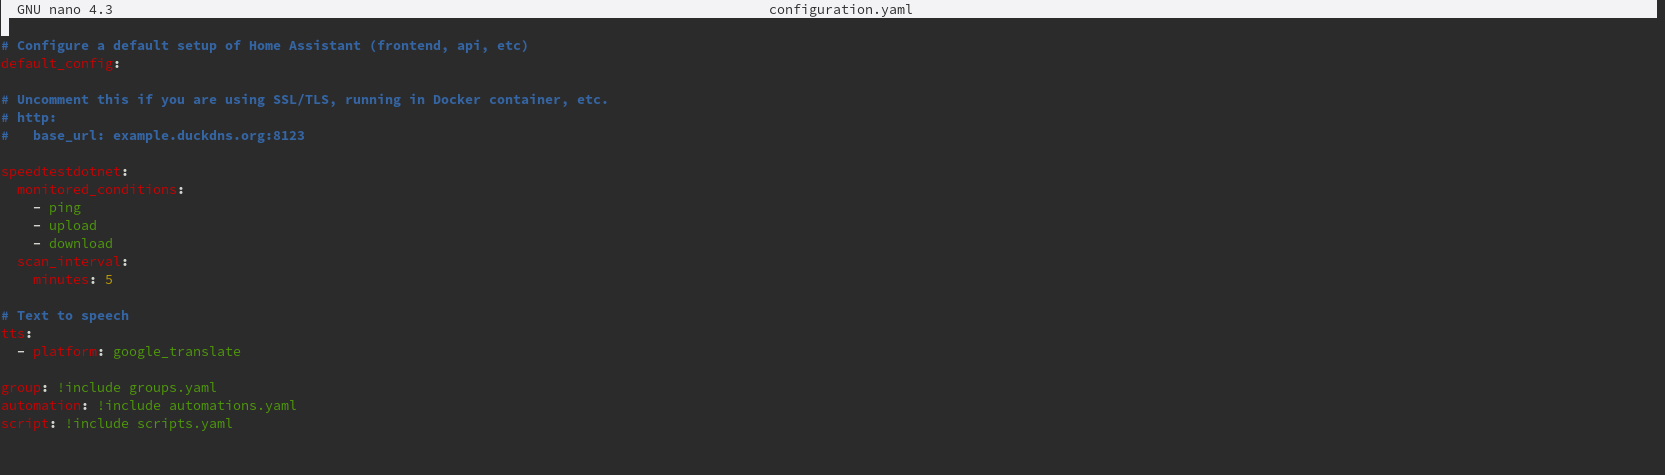
Notice how nano (or vi) has different colours? Because the text editor is yaml aware and automatically changes colour depending on the section.
Save the file (press ctrl + x and hit enter if using nano) and then go into Lovelace. Go to Configuration then server control. Press check config which should say “Configuration is valid” then press restart under server management. Once Home Assistant restarts, go to Developer Tools then states.
You should see you now have 3 new sensors:
- sensor.speedtest_ping
- sensor.speedtest_upload
- sensor.speedtest_download
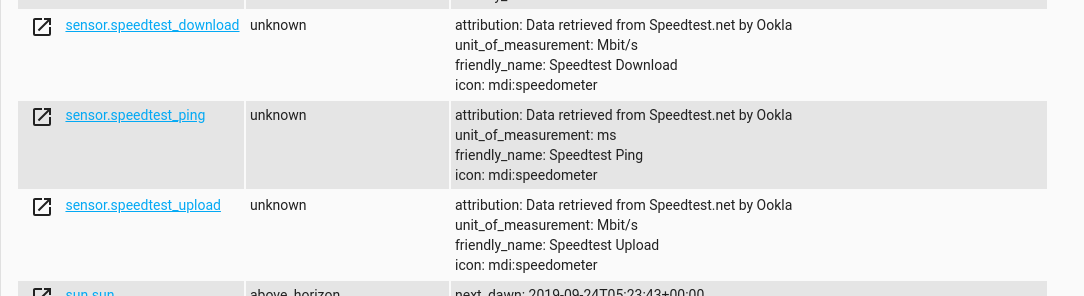
The state is currently unknown, we will need to wait up to 5 minutes for the test to run. At which point the states will change to:
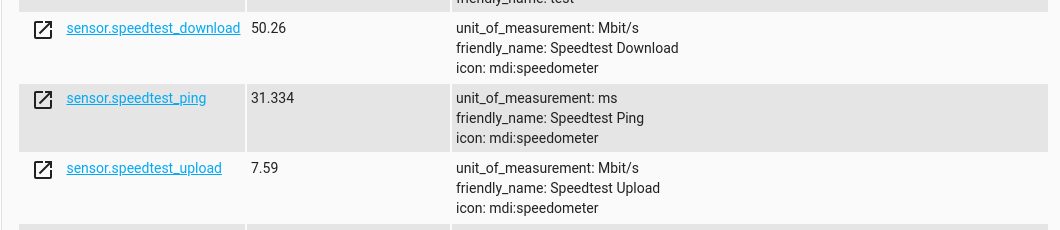
Well done, we’ve just added our first sensor to Home Assistant!
Let’s take a look at another practical example and add a device tracker using a simple ICMP ping. Once again using the integrations page, find the ping component.
This time we can see that the ping component can be used as a binary sensor or as presence detection. Binary Sensors are extremely simple and only have 2 states, “on” or “off” (hence the binary part). This is incredibly useful for many reasons, but we are actually going to use the presence detection platform because we want to associate a device with a person.
Go ahead and add the following to your config file:
device_tracker:
  - platform: ping
    hosts:
      your_phone: 192.168.1.100
Note the indentation as we discussed above.
Your full config should now look like this:
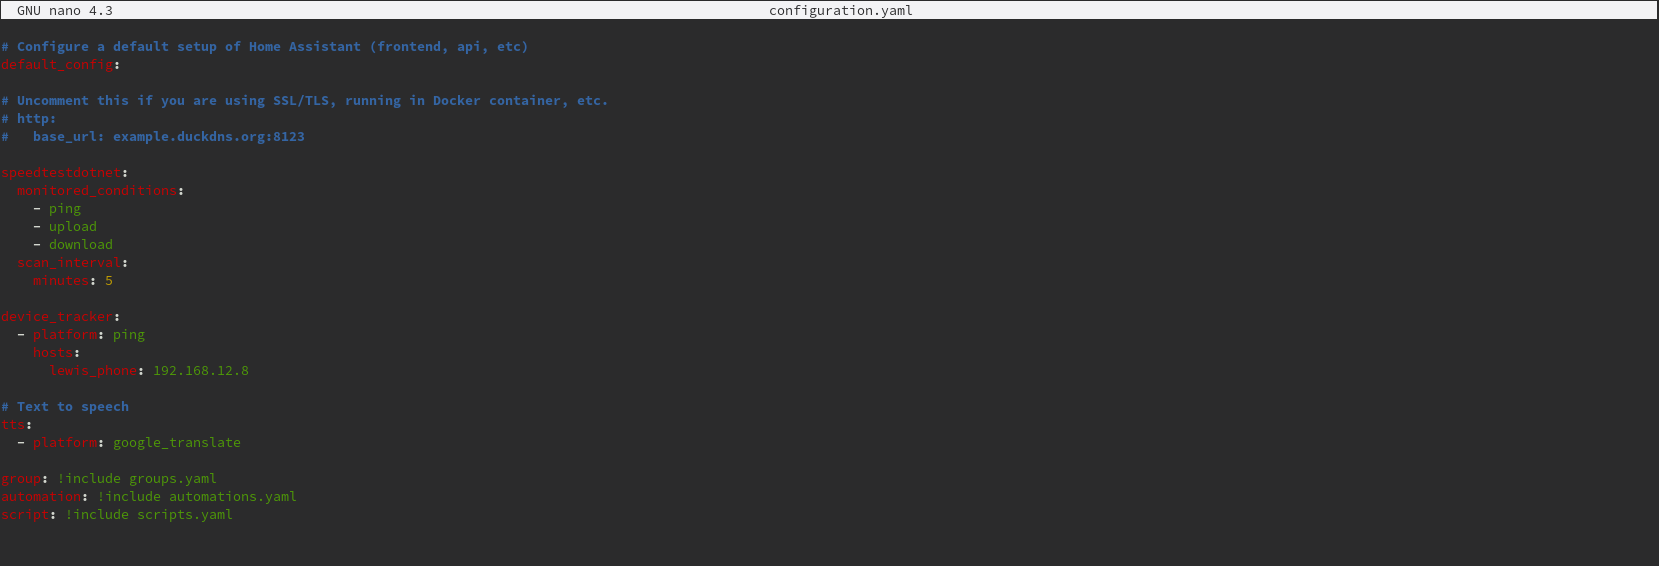
Save the config and restart home assistant like we did before.
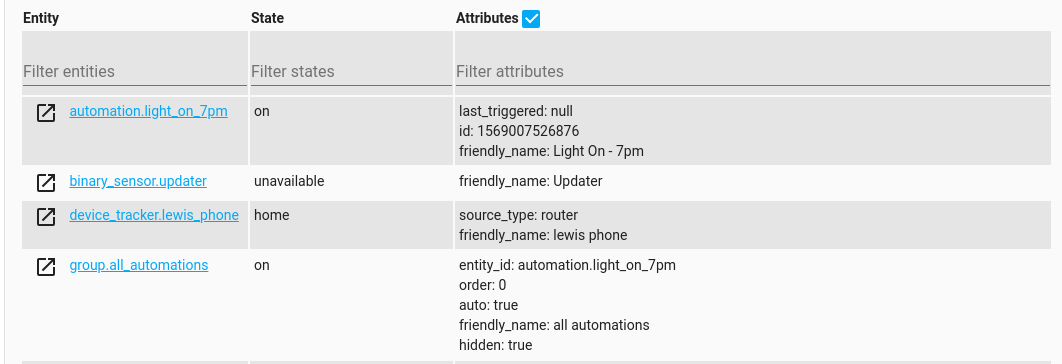
Once again go back to Developer Tools then states. You will see that I now have entry for “device_tracker.lewis_phone” with a state of “home”:
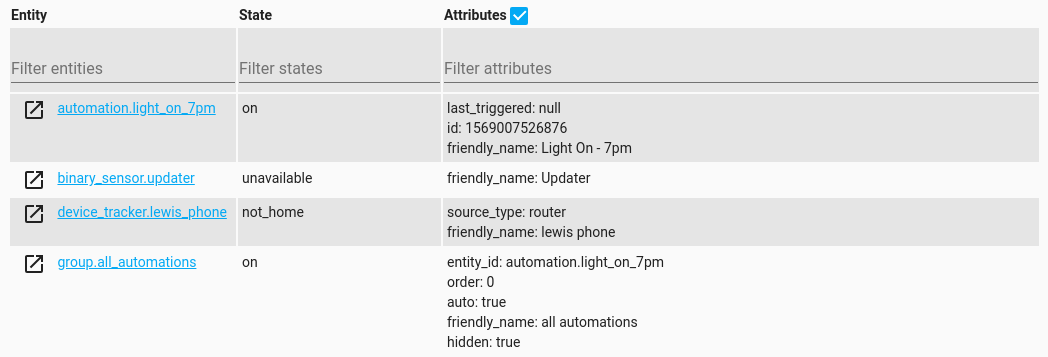
If I disable the Wifi to simulate my device leaving the house the state changes to “not_home” after a few minutes:
What about if we want to add multiple devices? Easy!
Back in the config file, simply define another device using this:
device_tracker:
  - platform: ping
    hosts:
      your_phone: 192.168.1.100
      tests_phone: 192.168.1.101
Full config:
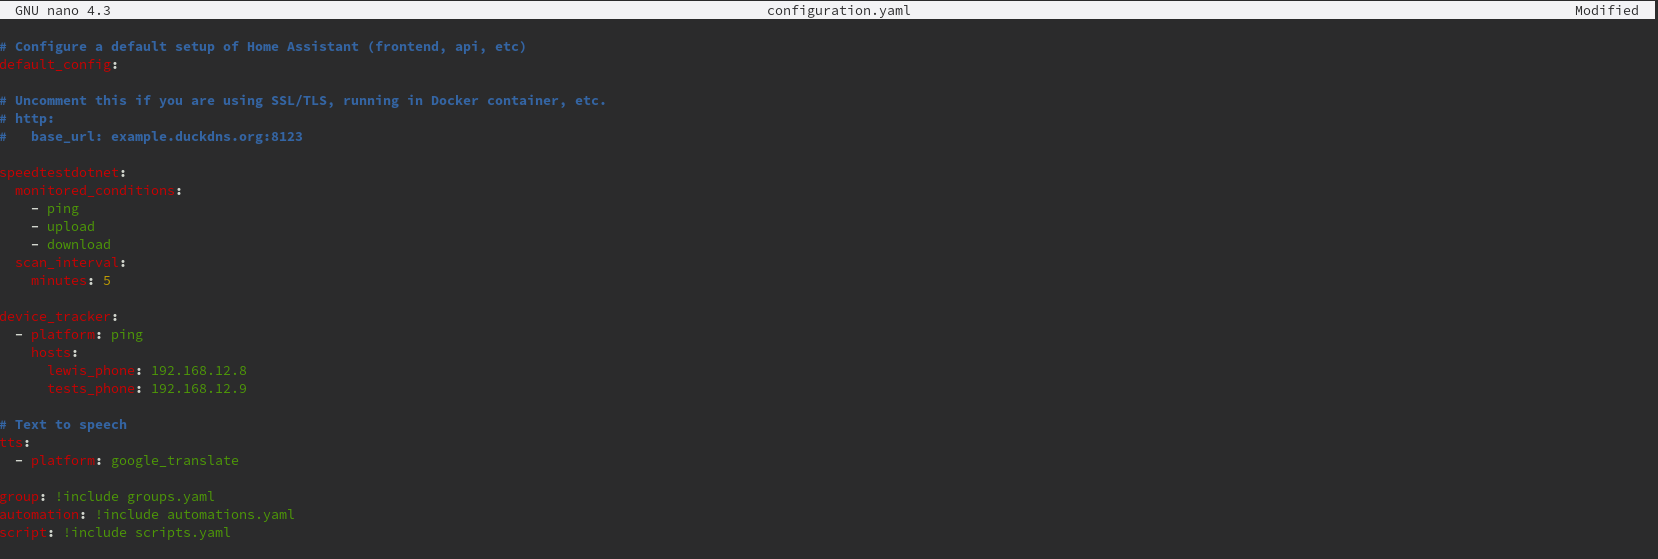
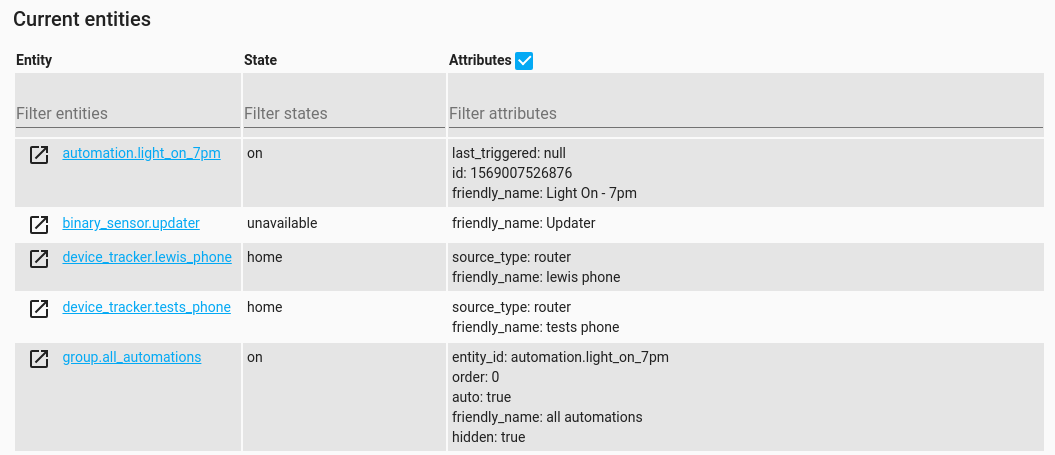
Again save and restart Home Assistant. Checking states we now see our second entity show up:
Remember in part 2 we briefly looked at “persons” and we added a second person using Lovelace? We can now associate these devices with those users.
Again in Developer Tools then states you should have 2 people entities with the following states of unknown:

The state is unknown because Home Assistant had no way of tracking these people…until now!
Go to Configuration then persons. Click on the first person and now we can click the drop down to add a device:
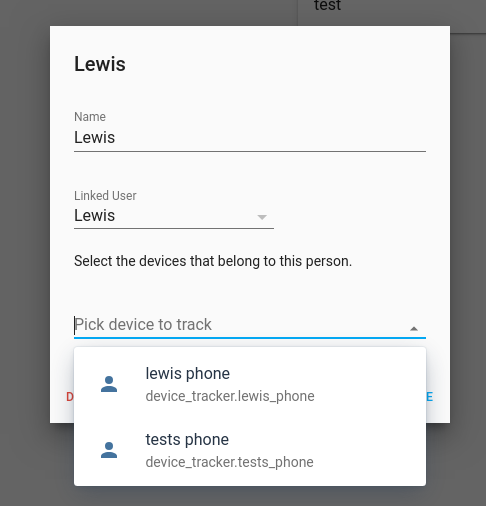
Do the same for both users.
Go back to States and now our person state matches the device_tracker state:
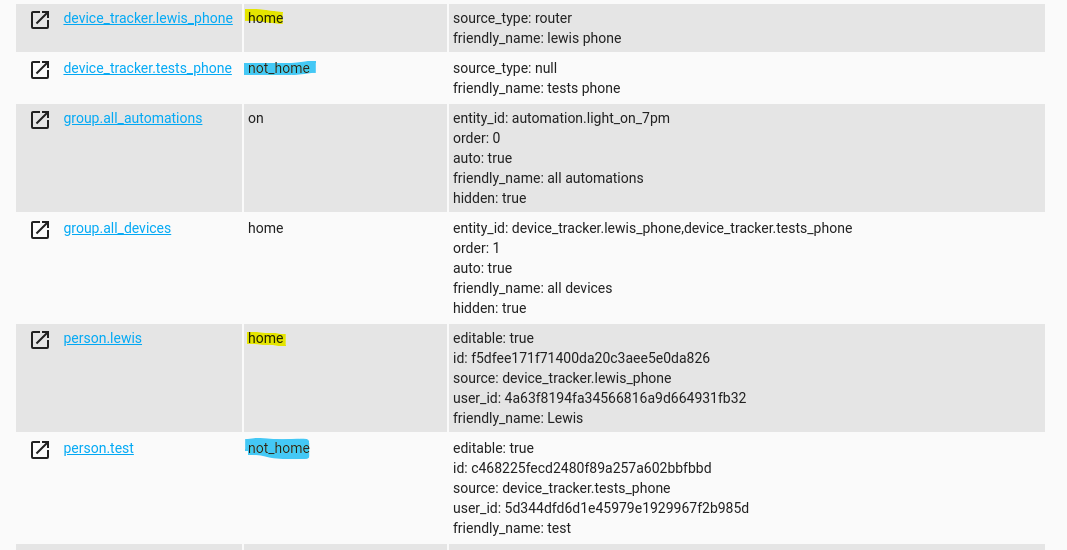
And now we have a simple device tracker for our setup which will greatly assist our automations!
Final Words
Hopefully now you understand the following:
- Where the Home Assistant configuration files are located
- How the config files work
- How to add entities/integrations to Home Assistant
In the next part of the series, we are going to take a look at how to create some more advanced automations using templates so look out for that one when it drops!