Fingerprint Sensor Module with Arduino

Adding a Fingerprint sensor to an Arduino/Raspberry Pi/ESP8266 has always been an interesting way, in my opinion, of adding security to a project, given how simple it is and your fingers are something you always have with you…hopefully!
One issue I always found with the fingerprint sensor modules that are available for the Arduino is there was no way to remotely add/enroll new fingerprints meaning you would have to re-program everytime you wanted to add a new fingerprint which could potentially be a pain.
After giving it a little thought, I think I have the solution to that using MQTT! Let’s not get too ahead of ourselves though, that will be coming in part 2 of this build.
Today we are going to be focusing on building a basic fingerprint reader project with an FPM10A Fingerprint Sensor Module, where I will show you how to enroll new fingerprints, as well as scan known fingerprints which will control an LED as a simple example. Let’s get started!
Parts List
For this build you will need the following parts:
- Arduino Uno – You can use any other suitable board
- Fingerprint Sensor Module FPM10A
- Solderless Breadboard
- LEDs – Using 1x Green LED and 1x Red LED to indicate status
- 2 x 330 ohm resistors
Guide
Hardware
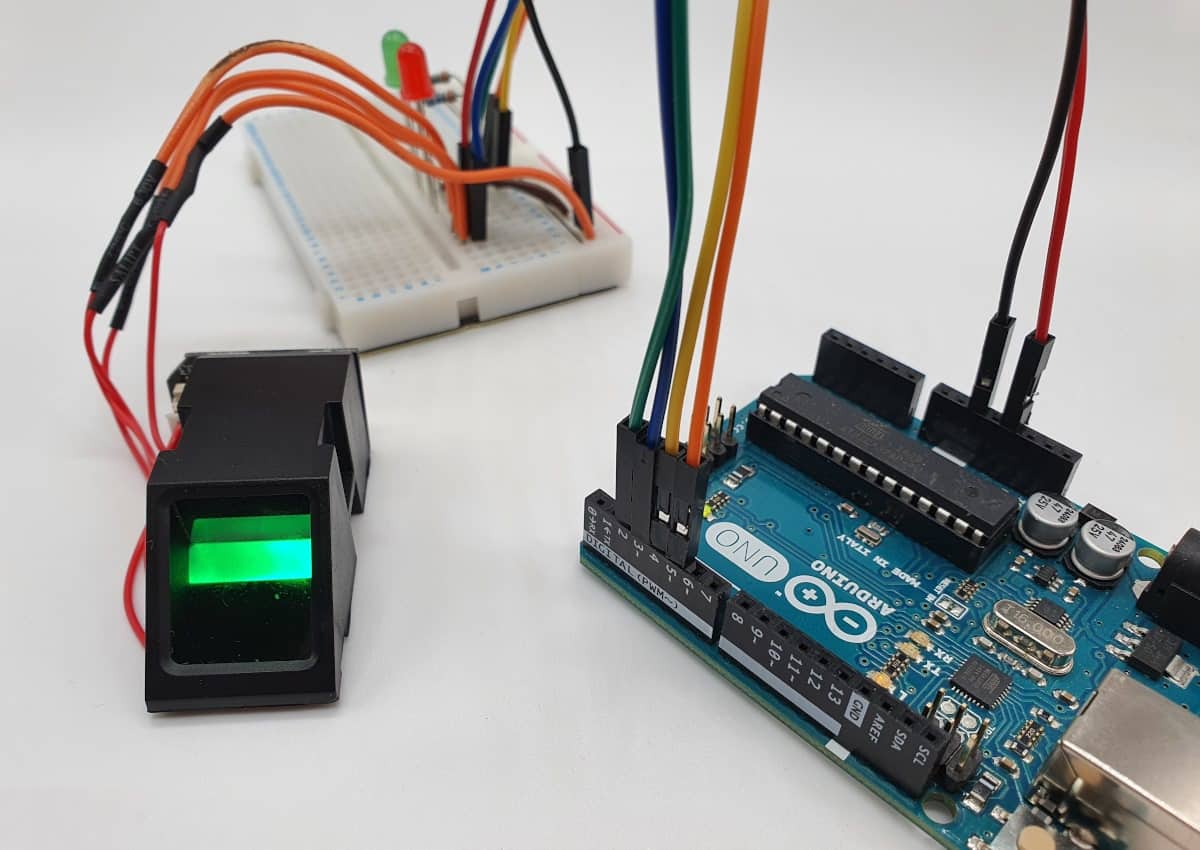
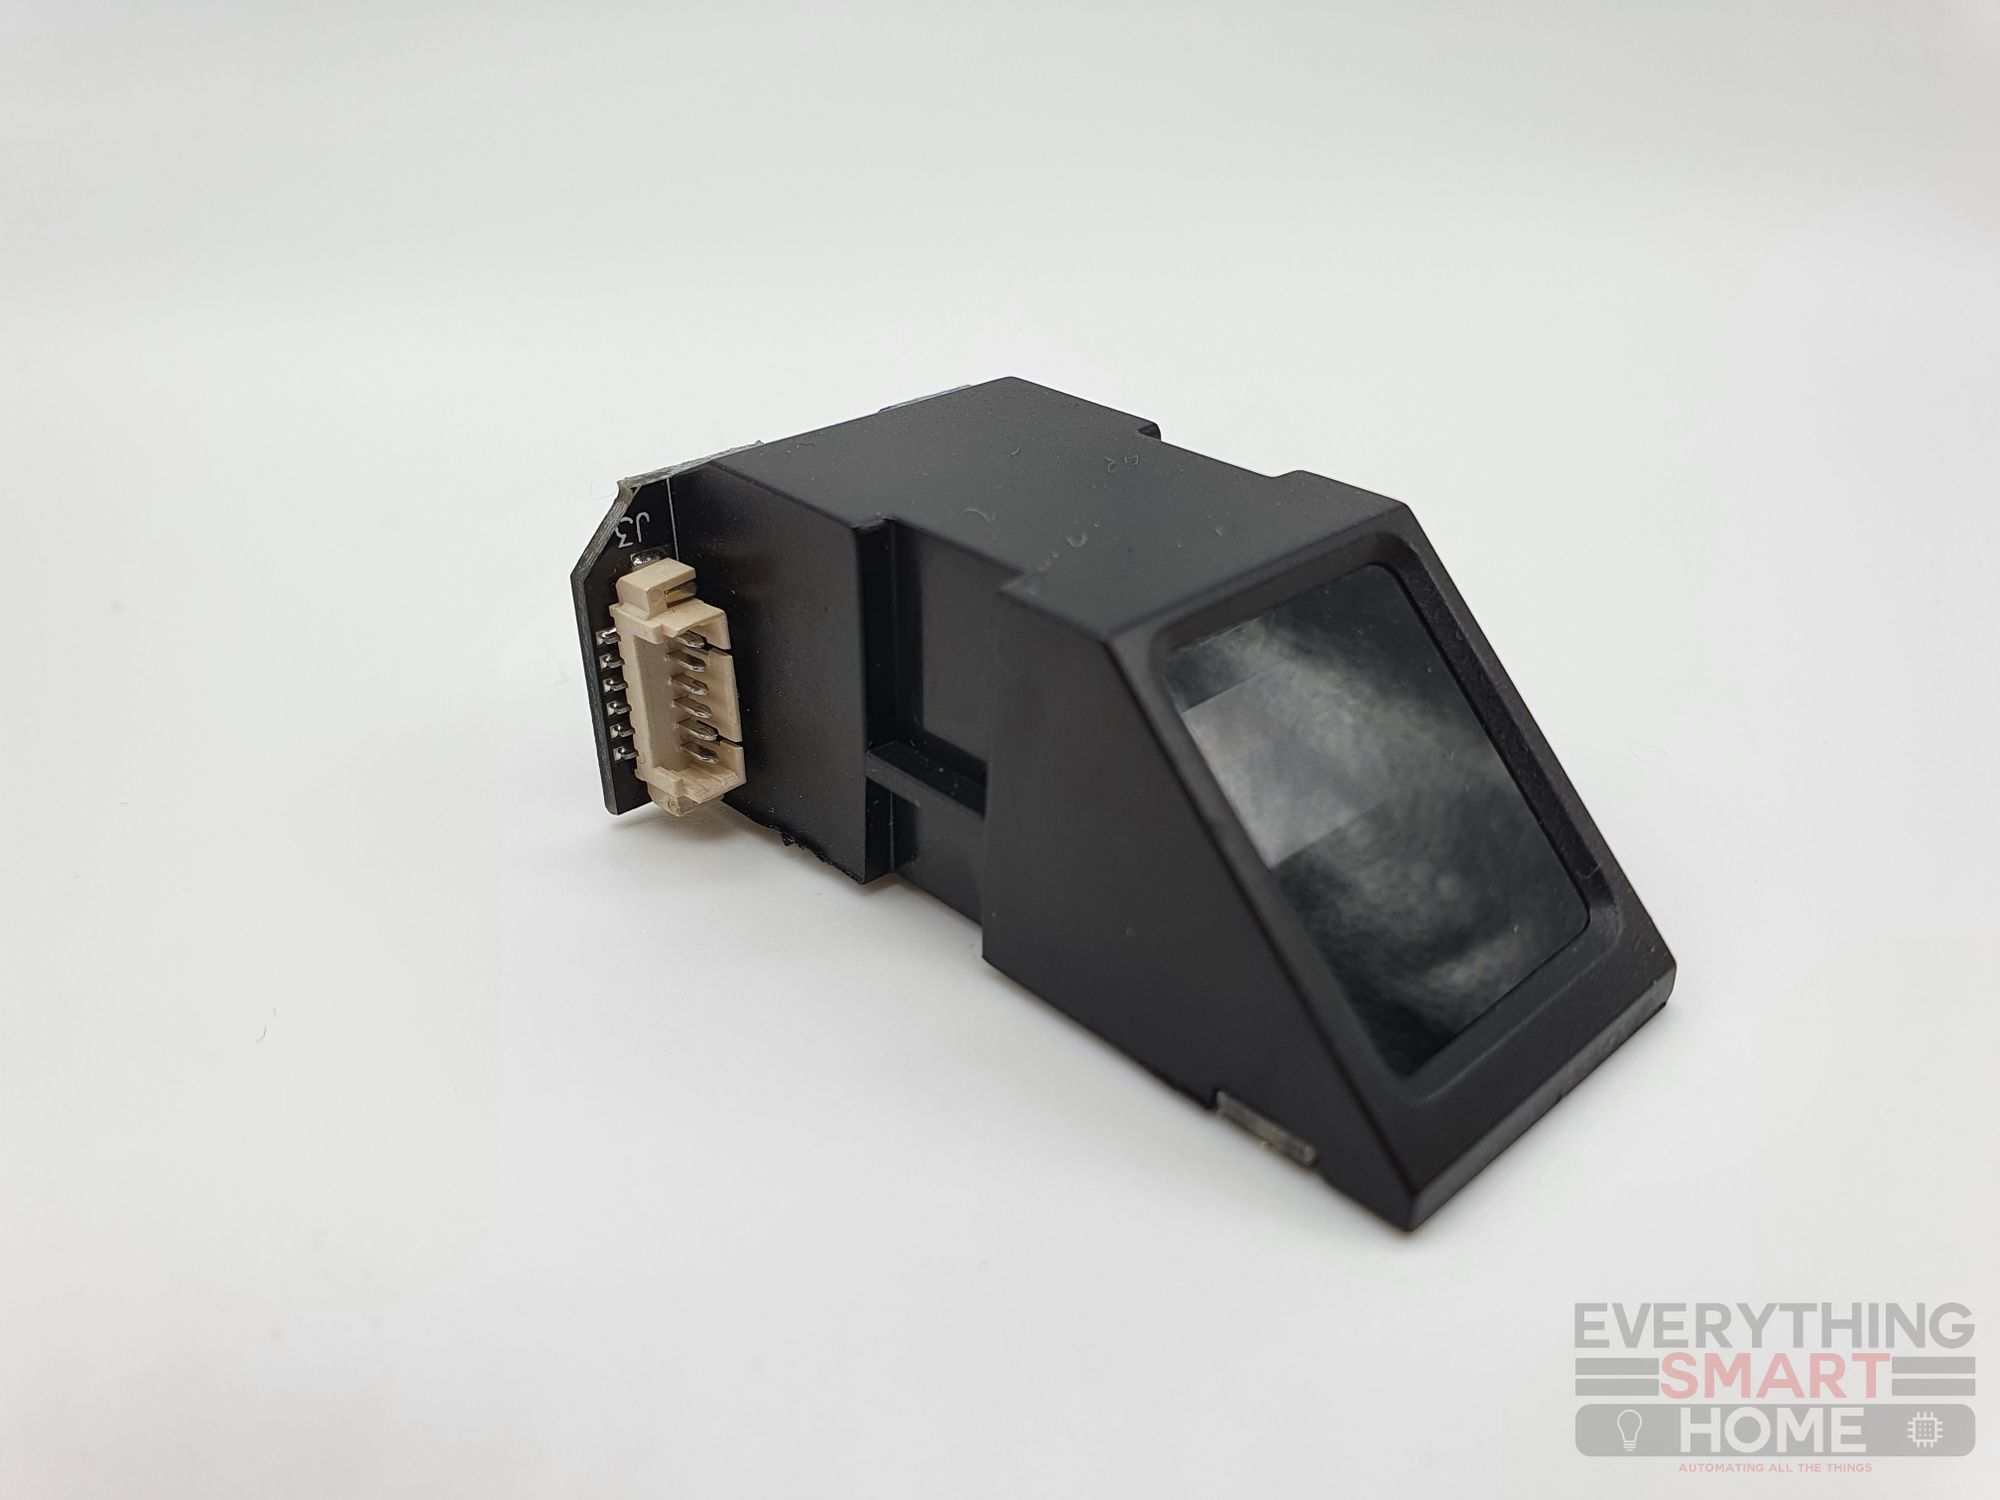
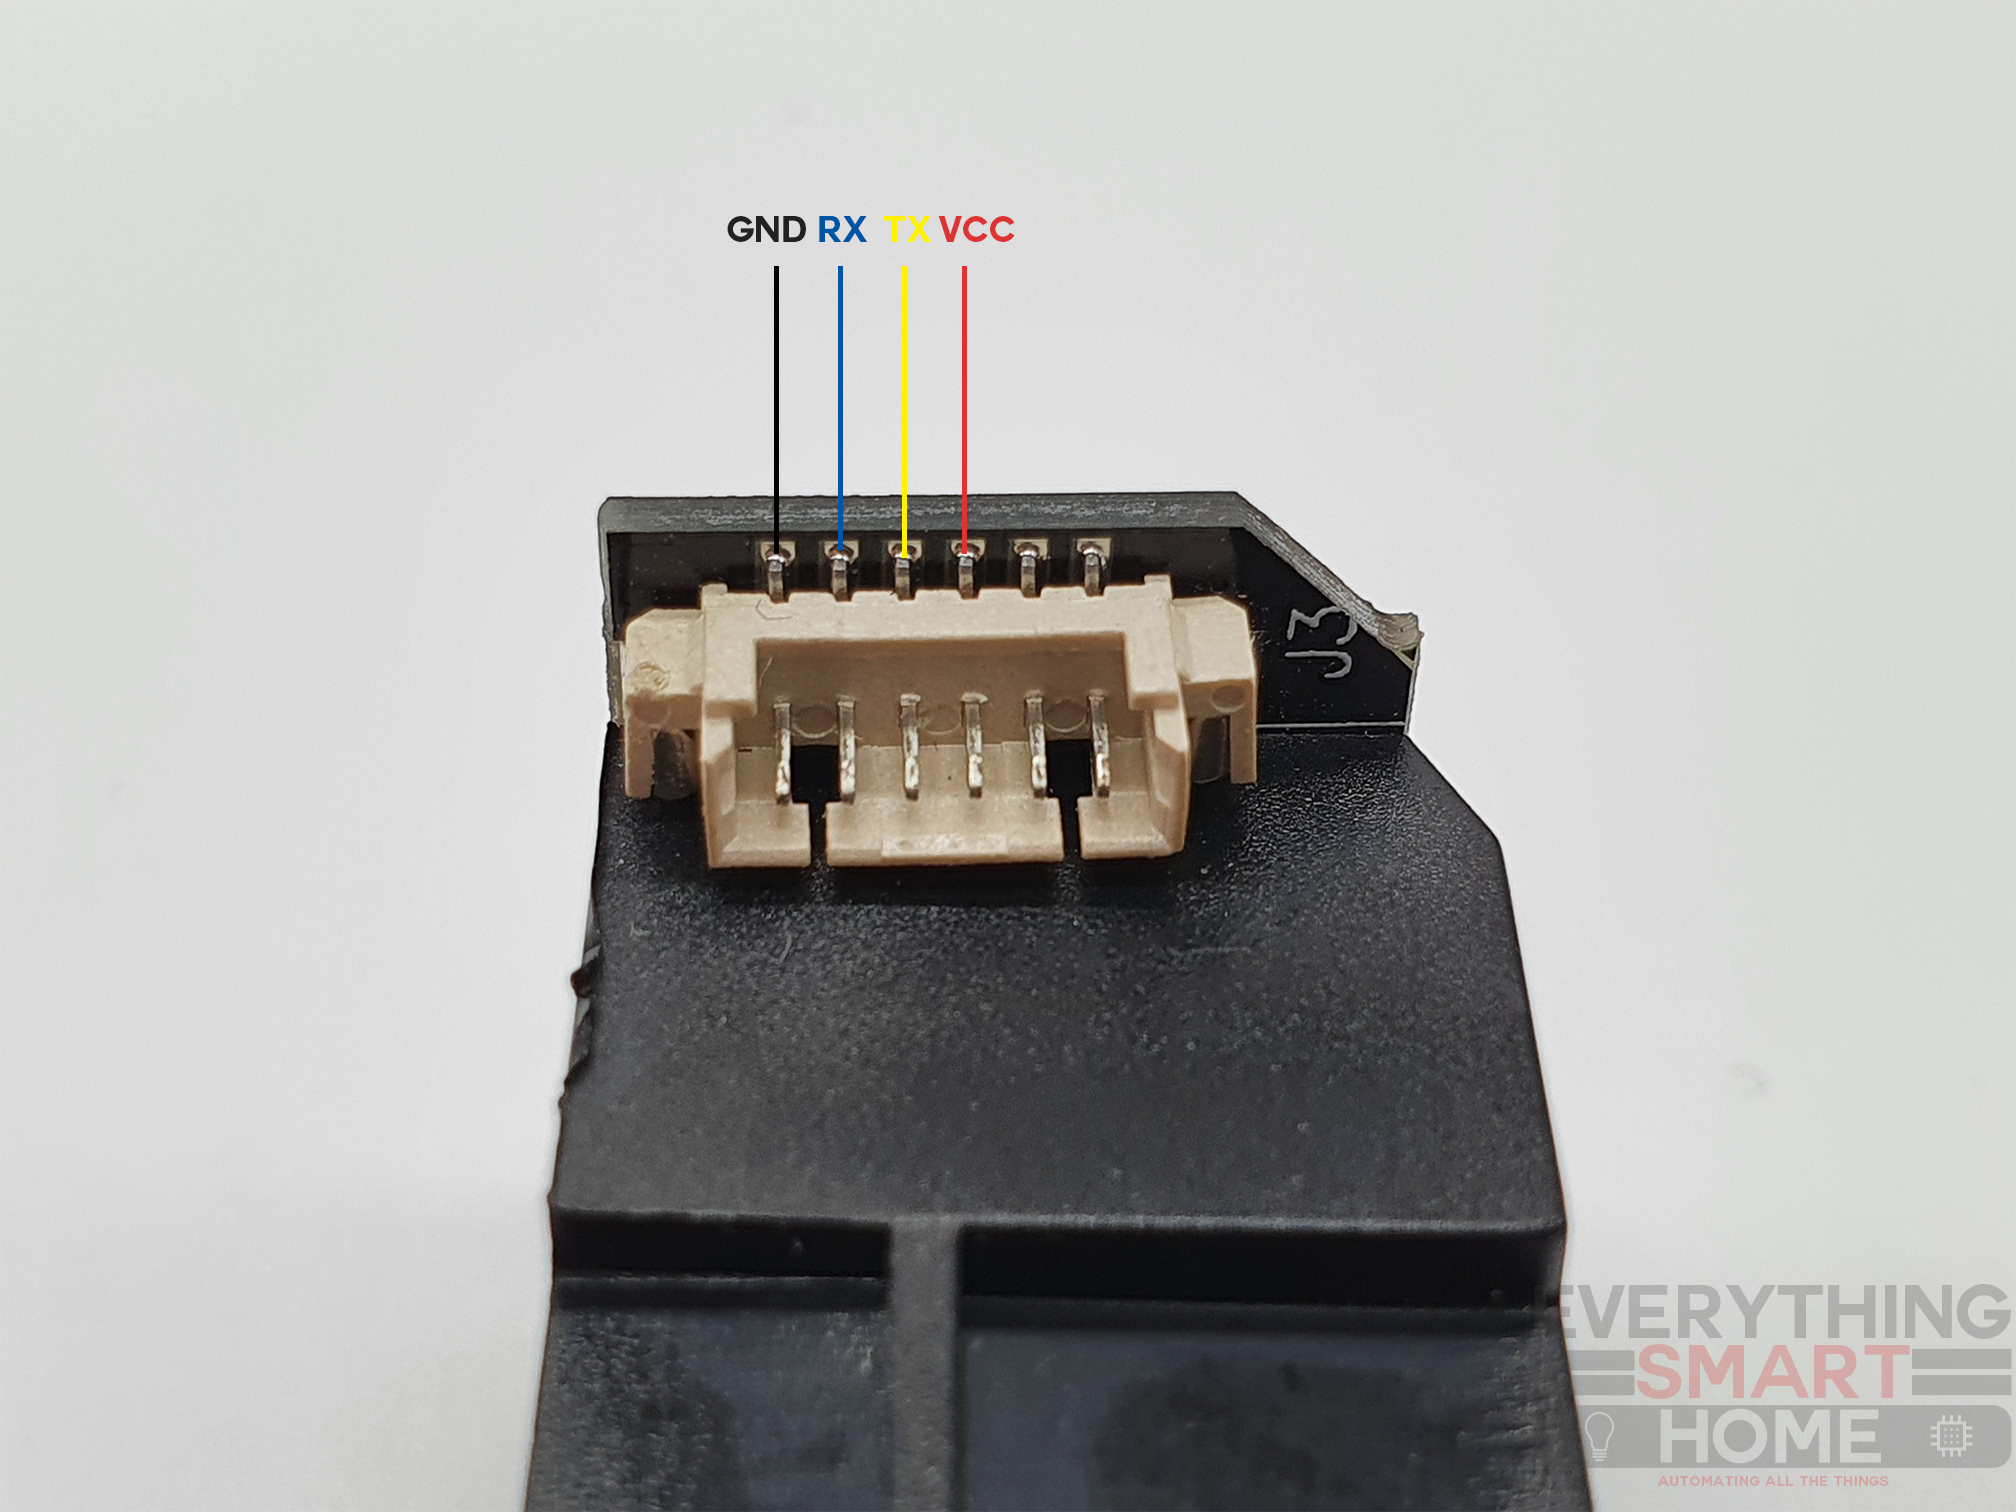
Wiring the Fingerprint Sensor to the Arduino is a pretty easy job with just 4 wires required (despite there being 6 pins on the board). First lets take a look at an overview of the sensor:

And here is some of the specifications of this sensor from the Adafruit listing:
- Supply voltage: 3.6 – 6.0VDC
- Operating current: 120mA max
- Peak current: 150mA max
- Fingerprint imaging time: <1.0 seconds
- Storage capacity: 162 templates
- Safety ratings (1-5 low to high safety)
- False Acceptance Rate: <0.001% (Security level 3)
- False Reject Rate: <1.0% (Security level 3)
As you can see, its a pretty capable sensor for the price!
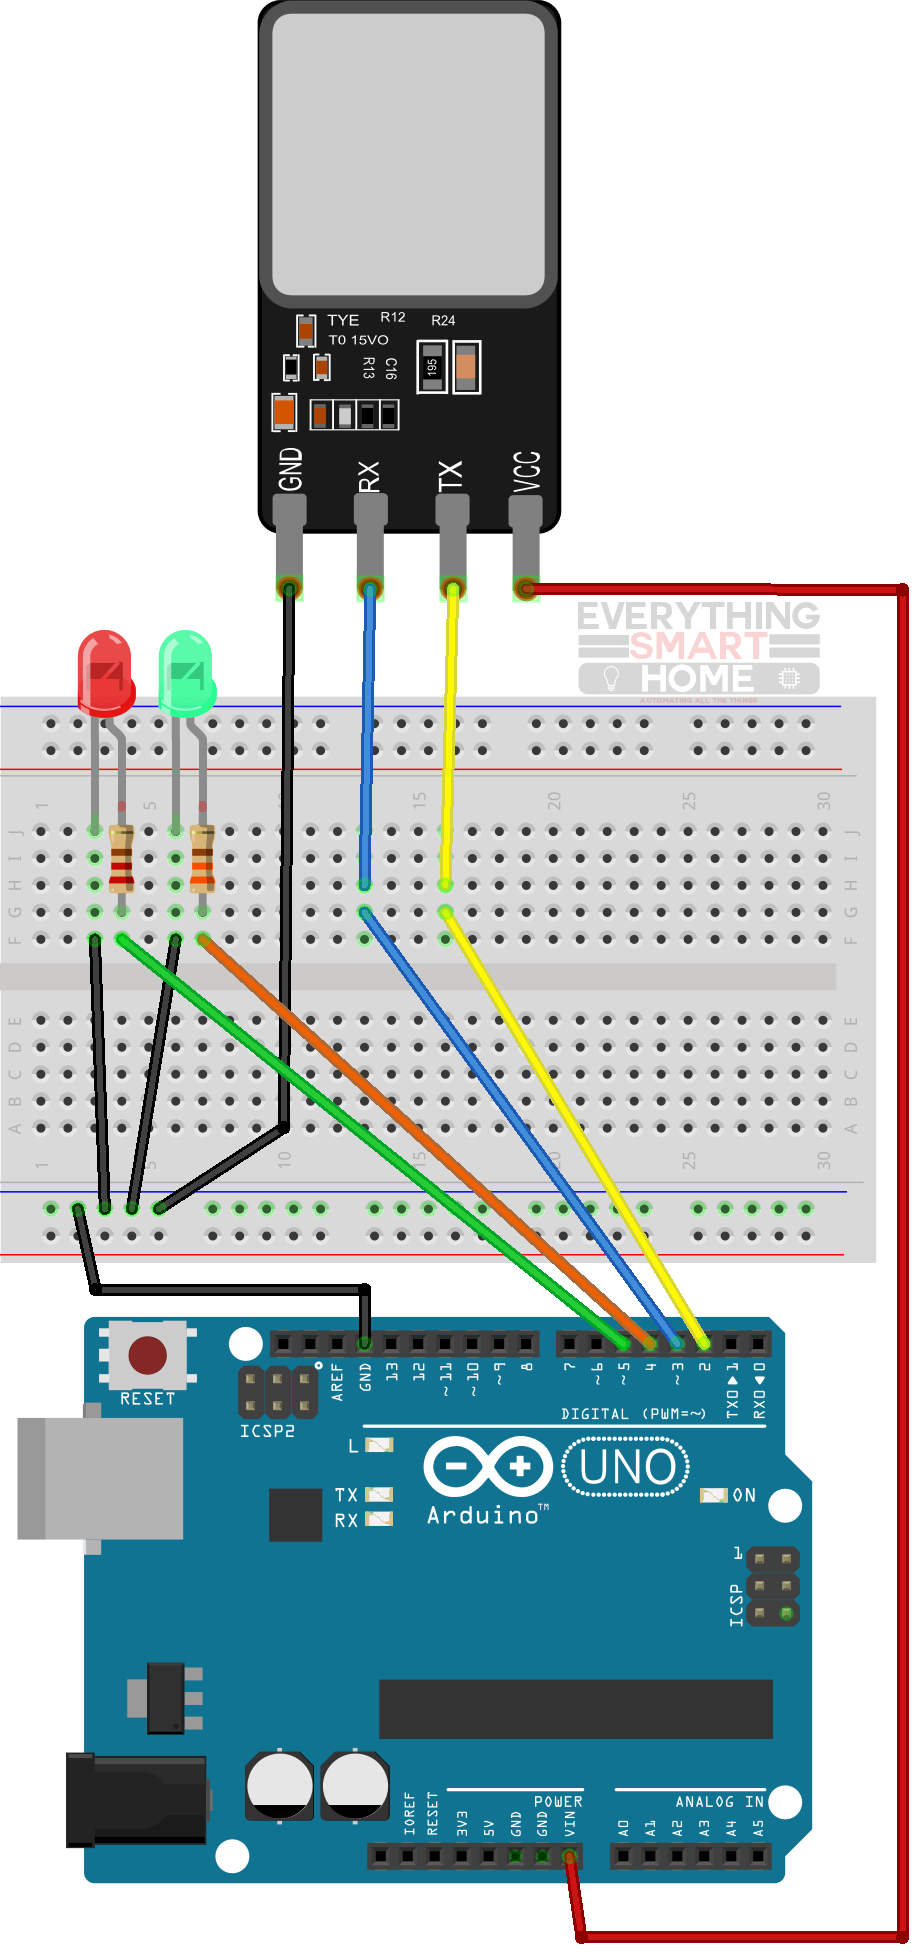
Firstly, here is the wiring diagram we are going to be working with:
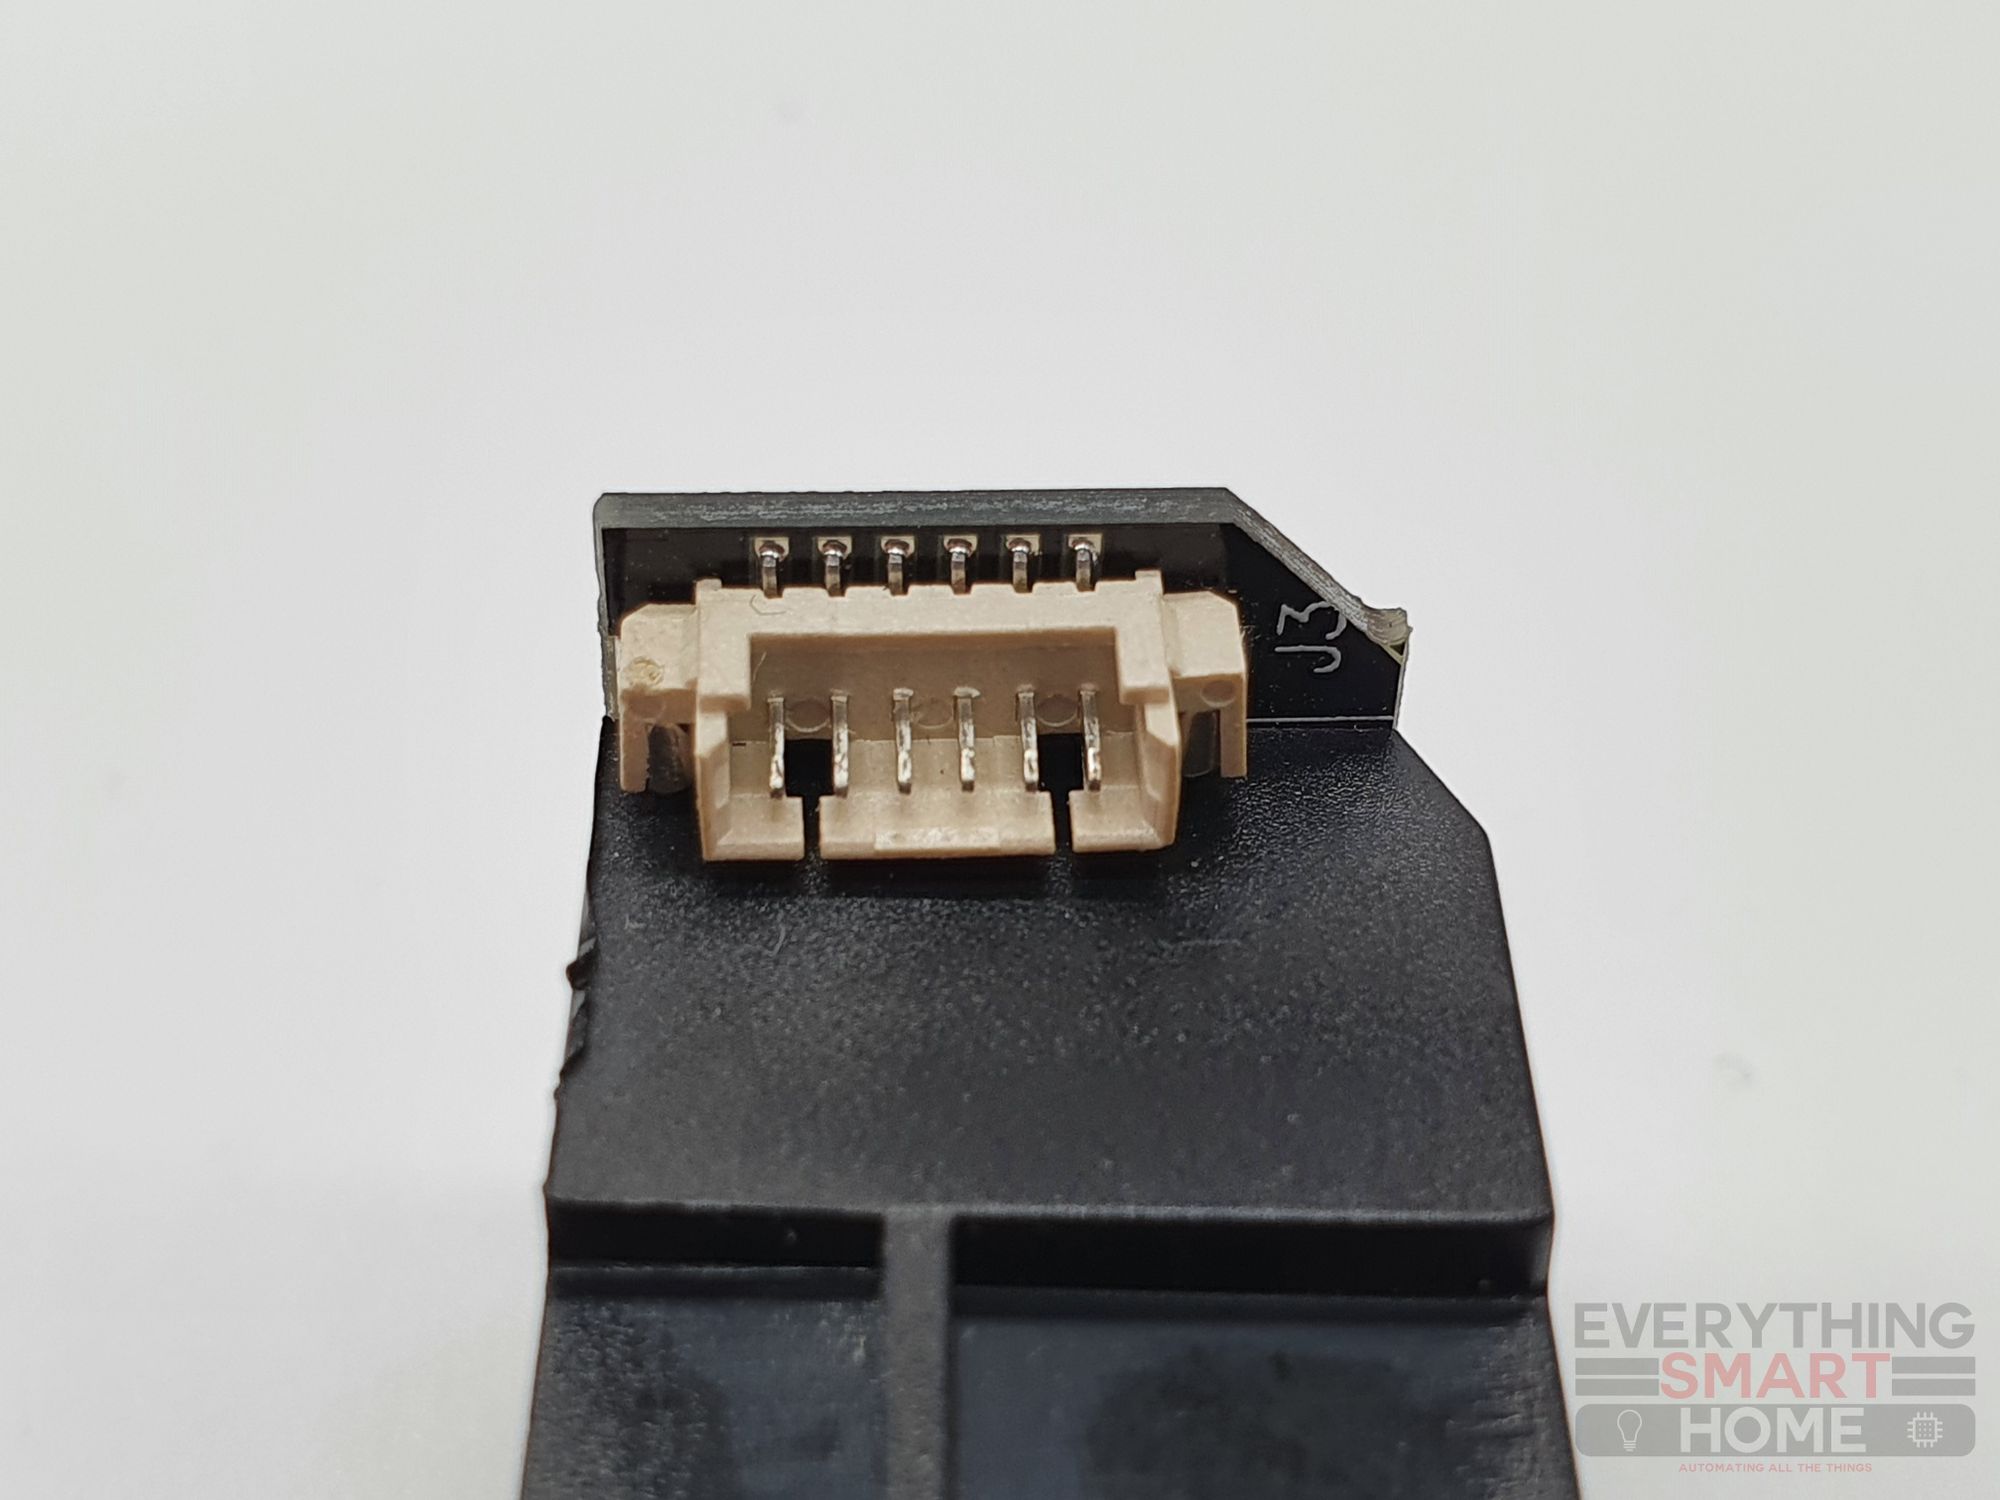
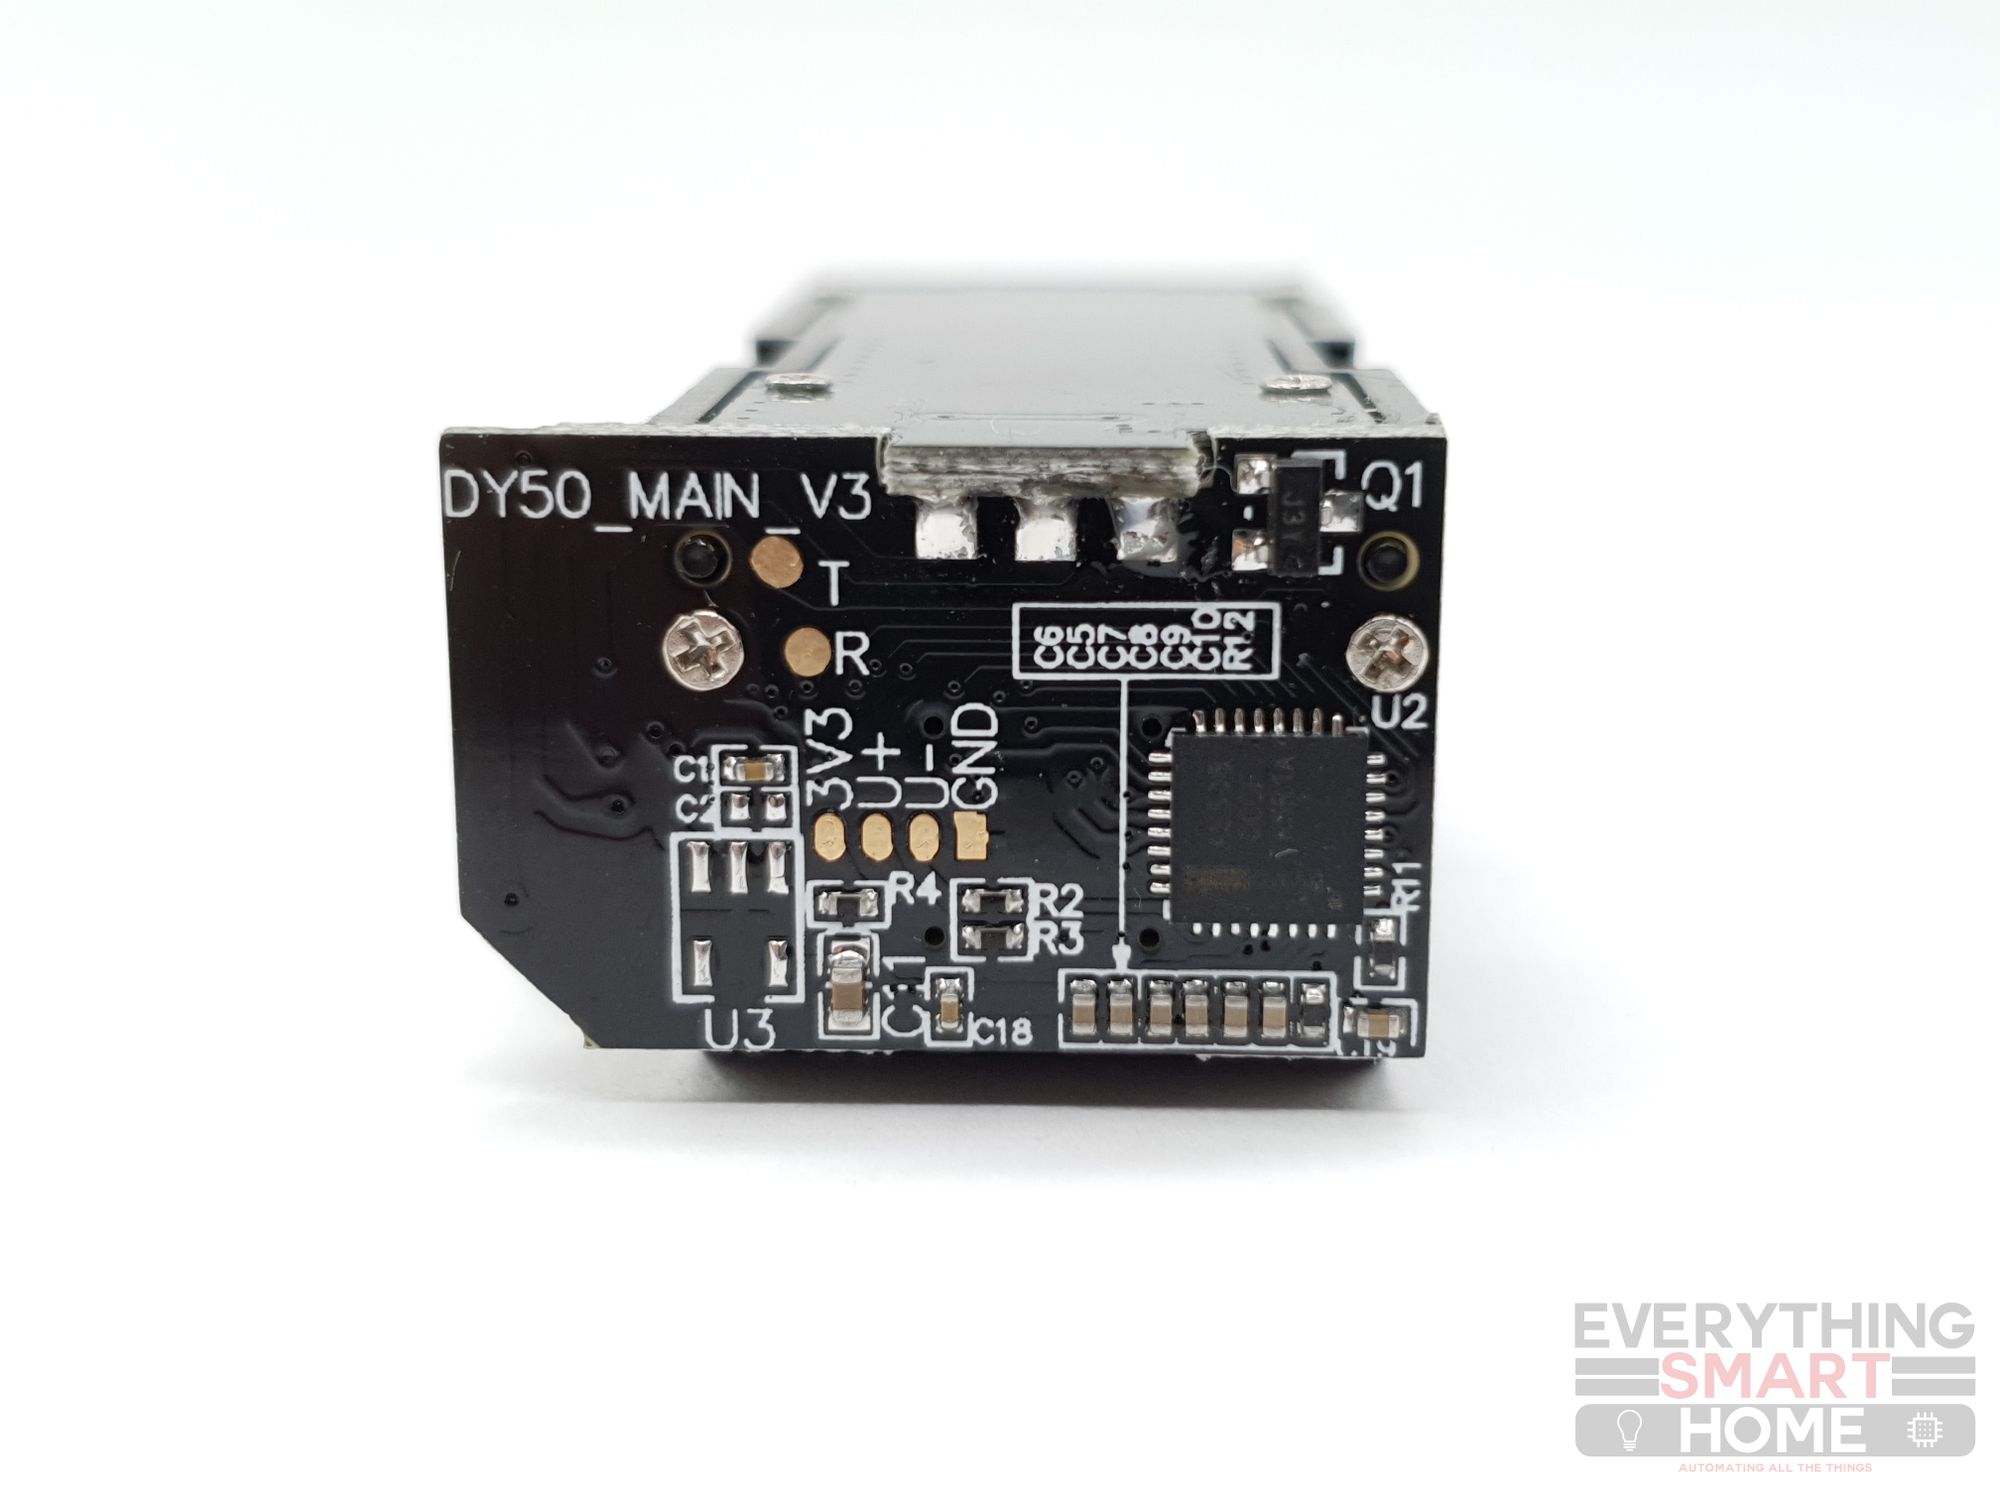
And here is a close up of the sensor with each pin labelled:
Pretty simple stuff. Go ahead and wire things up as per the diagram above and connect the USB of the Arduino to your computer and fire up Arduino IDE.
Software
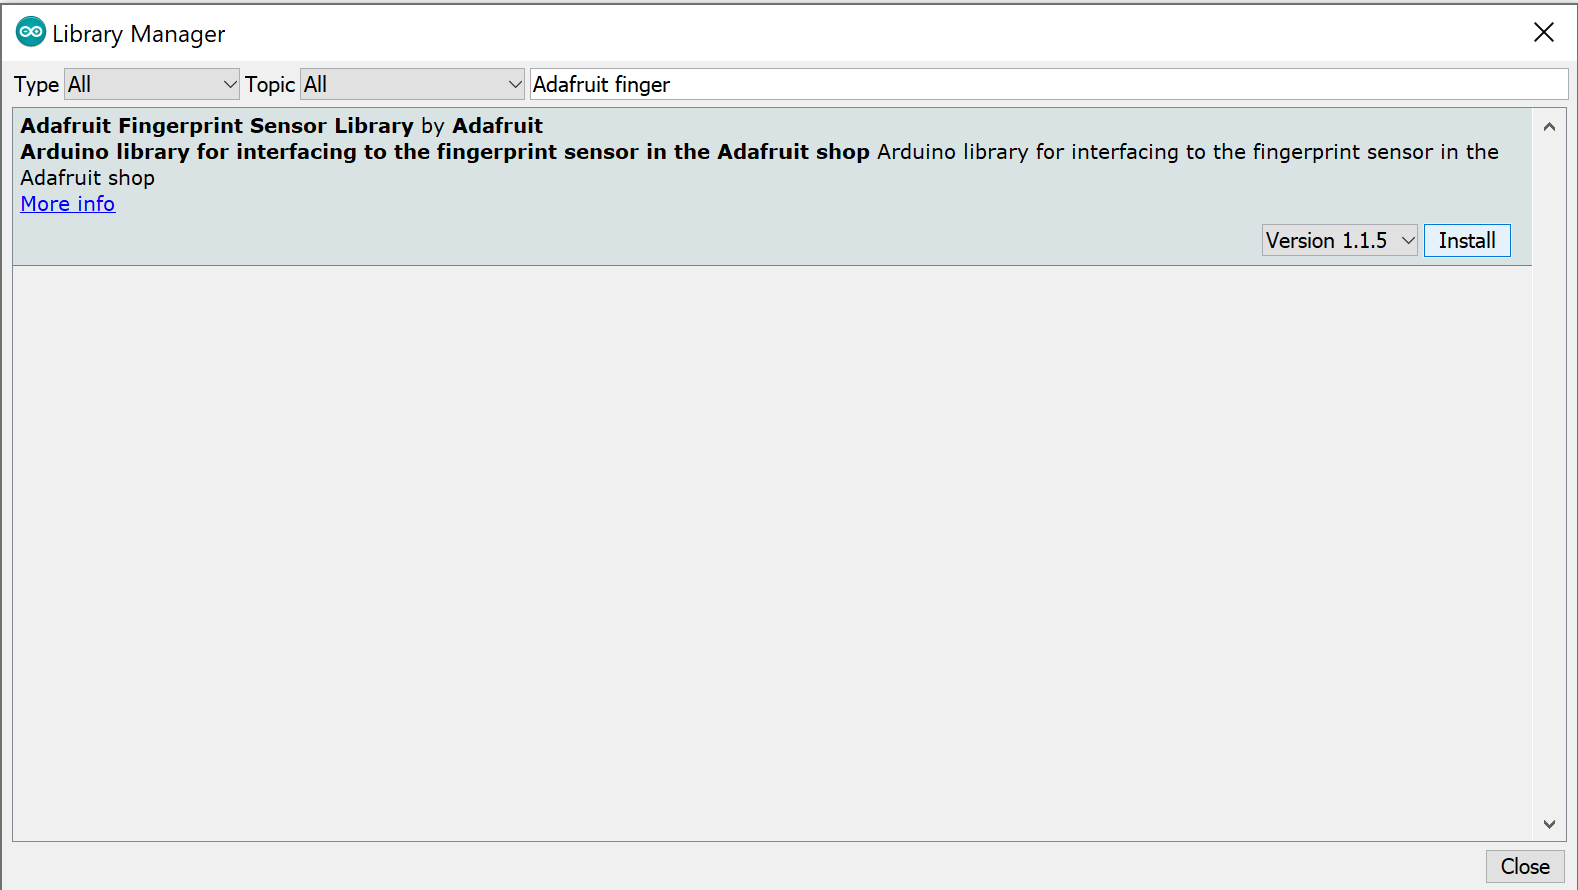
We are going to be using the excellent Fingerprint Sensor Library by Adafruit. Within the Arduino IDE, go to Tools > Manage Libraries and search for “Adafruit Fingerprint”, then select and install the library:
Once installed, lets check out some of the examples offered by this library.
Enrolling
Enrolling a fingerprint is the process where you add a new fingerprint into the “database” on the fingerprint sensor.
First load up the Enroll example by going to File > Examples > Adafruit Fingerprint Sensor Library > enroll
This will gives us a good opportunity to check our wiring.
The enroll sketch (and indeed all of the examples) are pretty simple to follow. In its simplest form it works like this:
- The fingerprint sensor will attempt to find the fingerprint sensor. If you get a message saying it cannot find the fingerprint sensor, check or try reversing the TX and RX wires.
- If successful, the main loop will be started. The program will prompt for an ID for the finger you want to add, from 1 to 127 available slots.
- Once an ID is entered, the program will wait for a finger to be placed on the scanner
- Once a finger is detected, the program will take an image of the finger and do a couple of checks to ensure it is valid (clean image, fingerprint features detected etc). It will prompt you again to re-place the finger on the scanner and do the same checks.
- It will then store the fingerprint in its on-board memory and restart the loop.
Using the serial monitor, the process looks something like this:
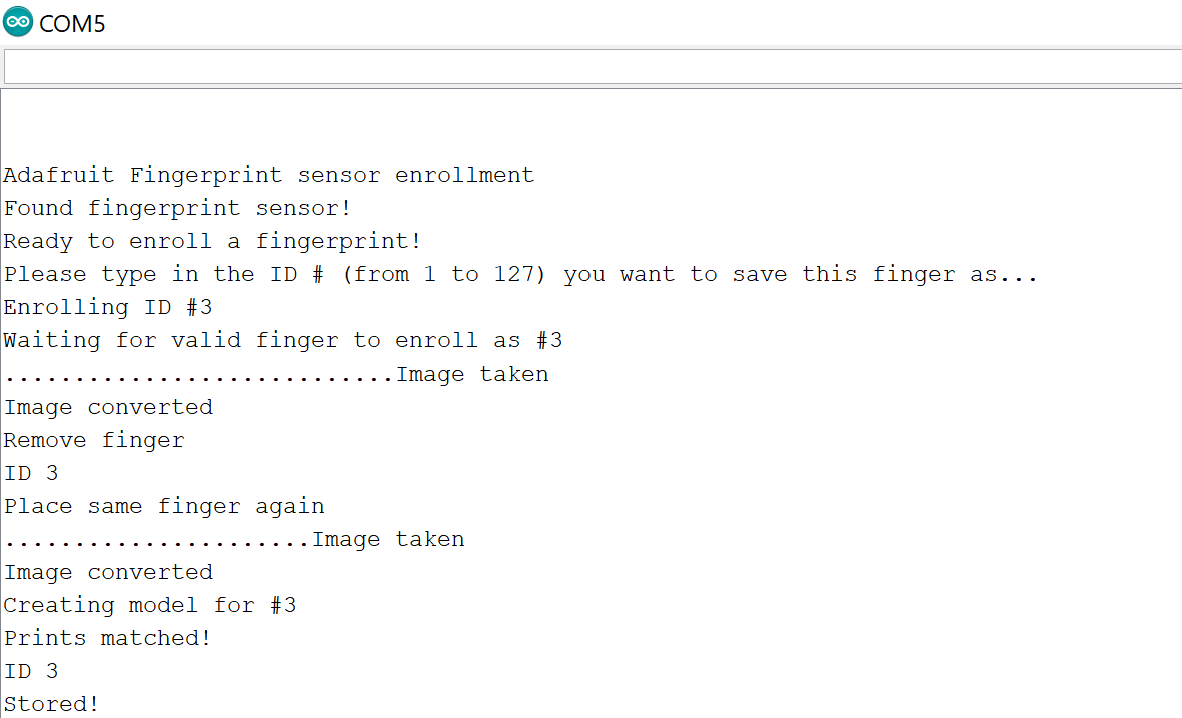
You can see I enrolled a new fingerprint as ID #3, and that fingerprint is now stored on the fingerprint sensor locally.
Checking Fingerprints (Authorization)
Now we can check the fingerprint(s) we added work, load the fingerprint example by going to File > examples > Adafruint Fingerprint Sensor Library > fingerprint.
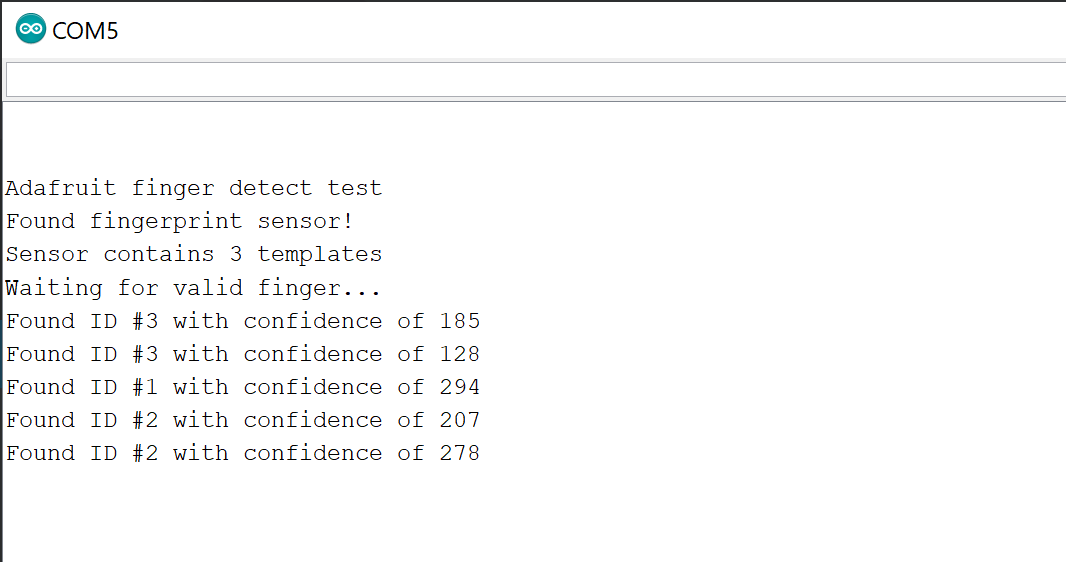
This sketch is even simpler, it simply waits for a fingerprint to be placed on the scanner, takes an image and checks it against all known fingerprints in its database, if it matches then it returns a successful match as well as a confidence score.
Checking a fingerprint with this example looks a little something like this:
Controlling outputs
Our final example will allow us to control the LED’s based on a successful or unsuccessful match, red for unauthorized and green for authorized.
With just a few adjustments to the main loop of the Adafruit Fingerprint example, we can control outputs based on a match, the code looks like this:
/***************************************************
  This is an example sketch for our optical Fingerprint sensor

  Designed specifically to work with the Adafruit BMP085 Breakout
  ----> http://www.adafruit.com/products/751

  These displays use TTL Serial to communicate, 2 pins are required to
  interface
  Adafruit invests time and resources providing this open source code,
  please support Adafruit and open-source hardware by purchasing
  products from Adafruit!

  Written by Limor Fried/Ladyada for Adafruit Industries.
  BSD license, all text above must be included in any redistribution
 ****************************************************/


#include <Adafruit_Fingerprint.h>
#define greenLED 4    //Output Pin of Green LED
#define redLED 5      //Output Pin of Red LED
SoftwareSerial mySerial(2, 3);

Adafruit_Fingerprint finger = Adafruit_Fingerprint(&mySerial);

void setup()
{
  Serial.begin(9600);
  while (!Serial);  // For Yun/Leo/Micro/Zero/...
  delay(100);
  Serial.println("\n\nAdafruit finger detect test");

  pinMode(redLED, OUTPUT);
  pinMode(greenLED, OUTPUT);

  // set the data rate for the sensor serial port
  finger.begin(57600);
  delay(5);
  if (finger.verifyPassword()) {
    Serial.println("Found fingerprint sensor!");
  } else {
    Serial.println("Did not find fingerprint sensor :(");
    while (1) { delay(1); }
  }

  finger.getTemplateCount();

    if (finger.templateCount == 0) {
    Serial.print("Sensor doesn't contain any fingerprint data. Please run the 'enroll' example.");
  }
  else {
    Serial.println("Waiting for valid finger...");
      Serial.print("Sensor contains "); Serial.print(finger.templateCount); Serial.println(" templates");
  }
}

void loop()
{
  uint8_t result = getFingerprintID();
  if(result == FINGERPRINT_OK) {
    digitalWrite(greenLED, HIGH);       //Fingerprint scanner returned a match, turn on Green LED and turn off Red LED
    digitalWrite(redLED, LOW);
    delay(500);
  } else if (result == FINGERPRINT_NOTFOUND) {
    digitalWrite(greenLED, LOW);        //No match, turn off Green LED and turn on red LED
    digitalWrite(redLED, HIGH);
    delay(500);
  } else if (result == FINGERPRINT_NOFINGER) {
    digitalWrite(greenLED, LOW);     //Set both LED's off until a finger is placed on the scanner
    digitalWrite(redLED, LOW);
  } else {
    digitalWrite(greenLED, LOW); //Some other error occured, flash the red LED twice to indicate.
    digitalWrite(redLED, HIGH);
    delay(200);
    digitalWrite(redLED, LOW);
    delay(200);
    digitalWrite(redLED, HIGH);
    delay(200);
    digitalWrite(redLED, LOW);
    delay(200);
  }
  delay(100);            //don't need to run this at full speed.
}

uint8_t getFingerprintID() {
  uint8_t p = finger.getImage();
  switch (p) {
    case FINGERPRINT_OK:
      Serial.println("Image taken");
      break;
    case FINGERPRINT_NOFINGER:
      Serial.println("No finger detected");
      return p;
    case FINGERPRINT_PACKETRECIEVEERR:
      Serial.println("Communication error");
      return p;
    case FINGERPRINT_IMAGEFAIL:
      Serial.println("Imaging error");
      return p;
    default:
      Serial.println("Unknown error");
      return p;
  }

  // OK success!

  p = finger.image2Tz();
  switch (p) {
    case FINGERPRINT_OK:
      Serial.println("Image converted");
      break;
    case FINGERPRINT_IMAGEMESS:
      Serial.println("Image too messy");
      return p;
    case FINGERPRINT_PACKETRECIEVEERR:
      Serial.println("Communication error");
      return p;
    case FINGERPRINT_FEATUREFAIL:
      Serial.println("Could not find fingerprint features");
      return p;
    case FINGERPRINT_INVALIDIMAGE:
      Serial.println("Could not find fingerprint features");
      return p;
    default:
      Serial.println("Unknown error");
      return p;
  }

  // OK converted!
  p = finger.fingerFastSearch();
  if (p == FINGERPRINT_OK) {
    Serial.println("Found a print match!");
    return p;
  } else if (p == FINGERPRINT_PACKETRECIEVEERR) {
    Serial.println("Communication error");
    return p;
  } else if (p == FINGERPRINT_NOTFOUND) {
    Serial.println("Did not find a match");
    return p;
  } else {
    Serial.println("Unknown error");
    return p;
  }

  // found a match!
  Serial.print("Found ID #"); Serial.print(finger.fingerID);
  Serial.print(" with confidence of "); Serial.println(finger.confidence);

  return finger.fingerID;
}
You can find this on Github here.
Upload the sketch and give it a try with unknown and known fingerprints to check it works OK.
And there you have it, you should now have a working fingerprint sensor that can control outputs.
Be sure to check out part 2 where we kick this up a gear and make it much more advanced by making it MQTT compatible to be able to add new fingerprint sensors remotely all through Home Assistant.