Face Recognition Just Got Easier - Home Assistant Double Take Guide

A few months ago I covered the ultimate NVR install (sorry no article on that, I got a bit…behind on posting!) which covered combining the object detection and recording capabilities of Frigate, with the face recognition of DeepStack to give you the best of both worlds. Whilst both of those systems are great – to get it working required little more manual intervention and they felt disconnected from each other, unfortunately.
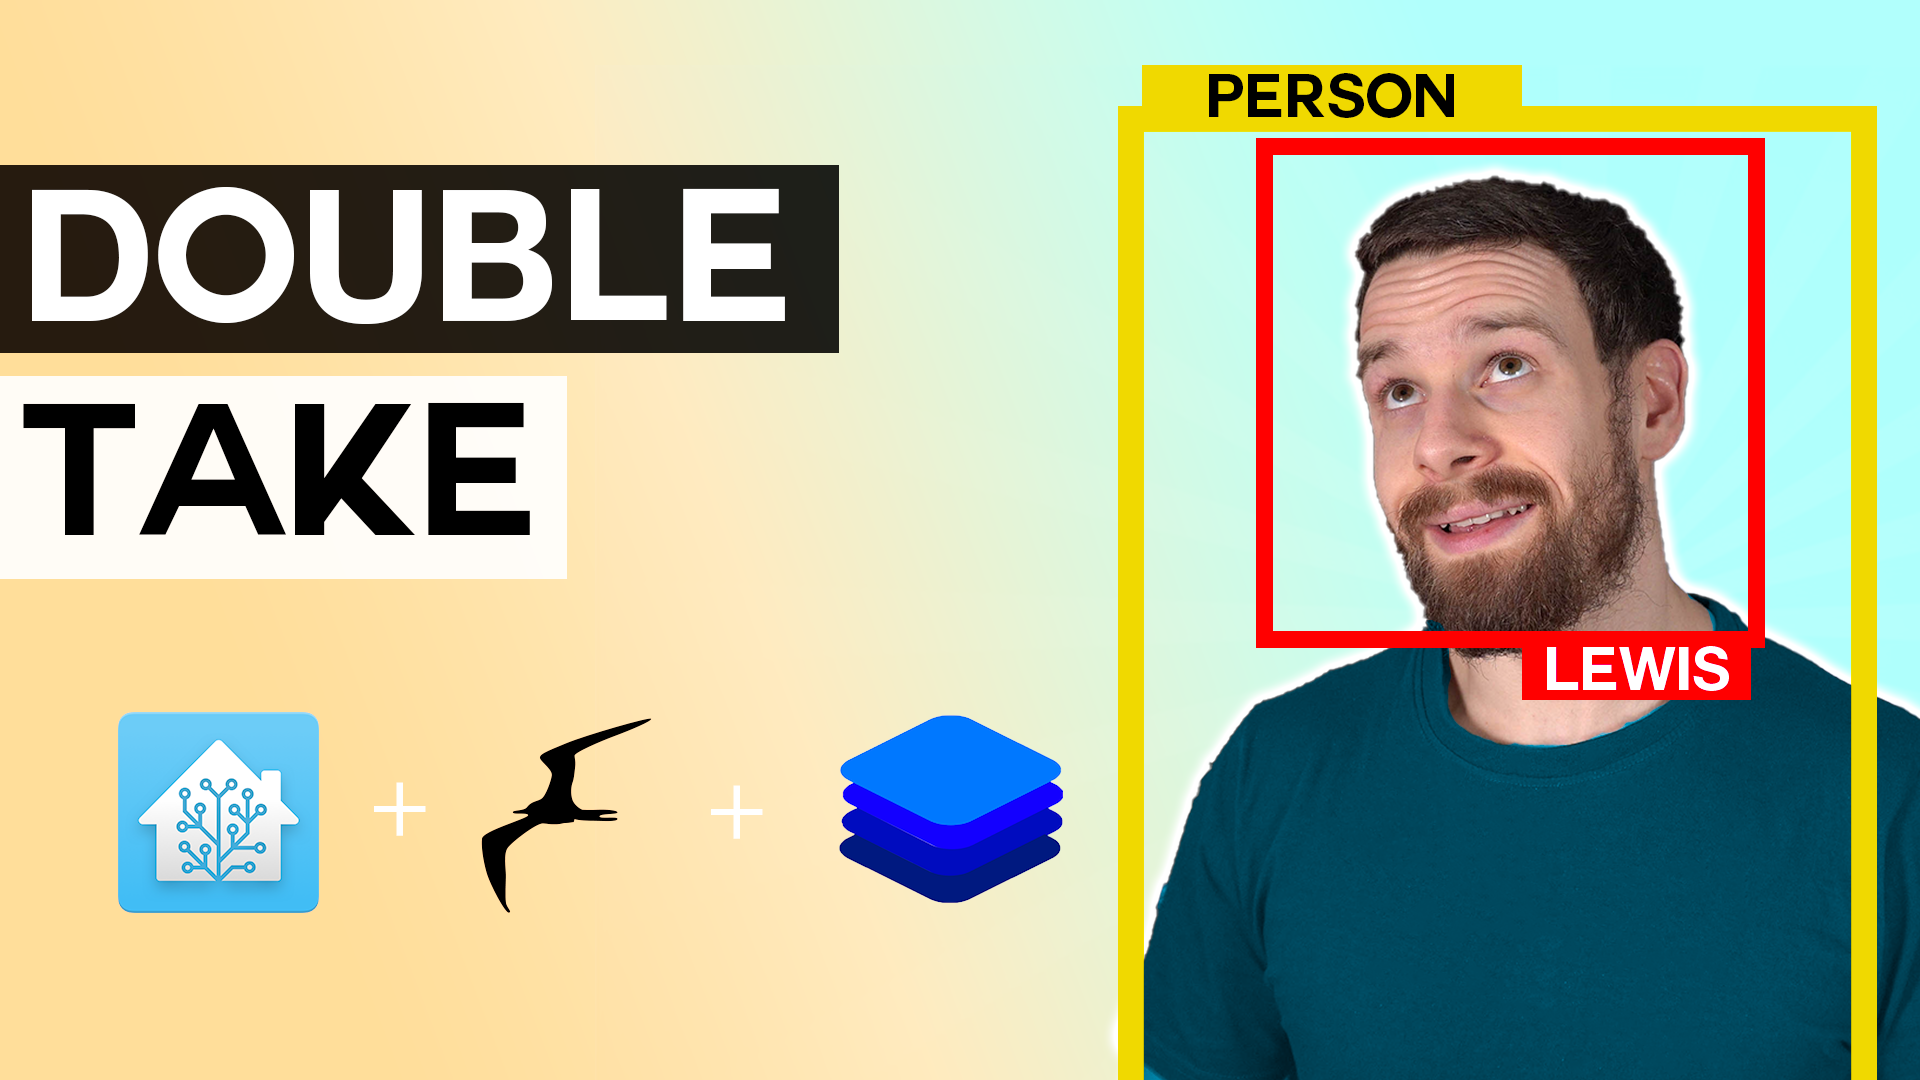
Enter Double Take: a unified interface to combine the powers of both object detection and face recognition in one easy to access place, with the ability to train facial recognition images in seconds right from inside of Home Assistant!
Video:
What is Double Take?
Firstly, lets take a look at what Double Take is along with some of the features and benefits that it gives you: Double Take is an open source project created by David Jakowenko designed to be a unified interface for processing and training images for facial recognition. Double Take supports several detectors, integrates with Home Assistant as well as MQTT and, the cool bit is that you can actually train and un-train faces right from the UI. This makes it much easier for anyone to use than ever before and that was one of the challenges with DeepStack.
DeepStack wasn’t the easiest nor most user friendly thing to train faces for but Double Take helps us to easily solve that issue. The other thing that wasn’t the easiest to do was run facial detection automatically after a person was detected. So, with the Frigate and DeepStack setup, we used to get Frigate to detect a person and then when that happened, we would use a Home Assistant automation to get DeepStack to run facial detection on that image. Well… Double Take is going to take care of that whole process for us with a nice clean UI to manage it all, right from inside Home Assistant. What a time to be alive!
It is also worth mentioning that Double Take works with Frigate as the NVR which handles the recording of footage, snapshots and its handling the object detection – looking for a person in the camera image when a person is detected.
Double Take will then pass that image into what is called a detector for facial recognition and, as mentioned earlier, Double Take supports 3 different detectors: DeepStack, Compreface and Facebox.
Pre-Requisites
We are going to be using DeepStack for this guide since we’ve already covered the install process (again, no article sorry…OK I was REALLY behind) for that in the past but if you want to use any of the other detectors then the configuration should be pretty similar. Also, if you want to follow along with this guide, you are going to need to have Frigate already installed and working.
Alright, so now that we have Frigate and DeepStack up and running, lets get into the install! Now, as a little side note, literally just a week or two ago, Double Take officially added the install option for running as a Home Assistant add-on – making our lives much easier! If you don’t use Home Assistant add-ons then it is straightforward if you want to run it as a docker container.
Home Assistant Double Take Add-on
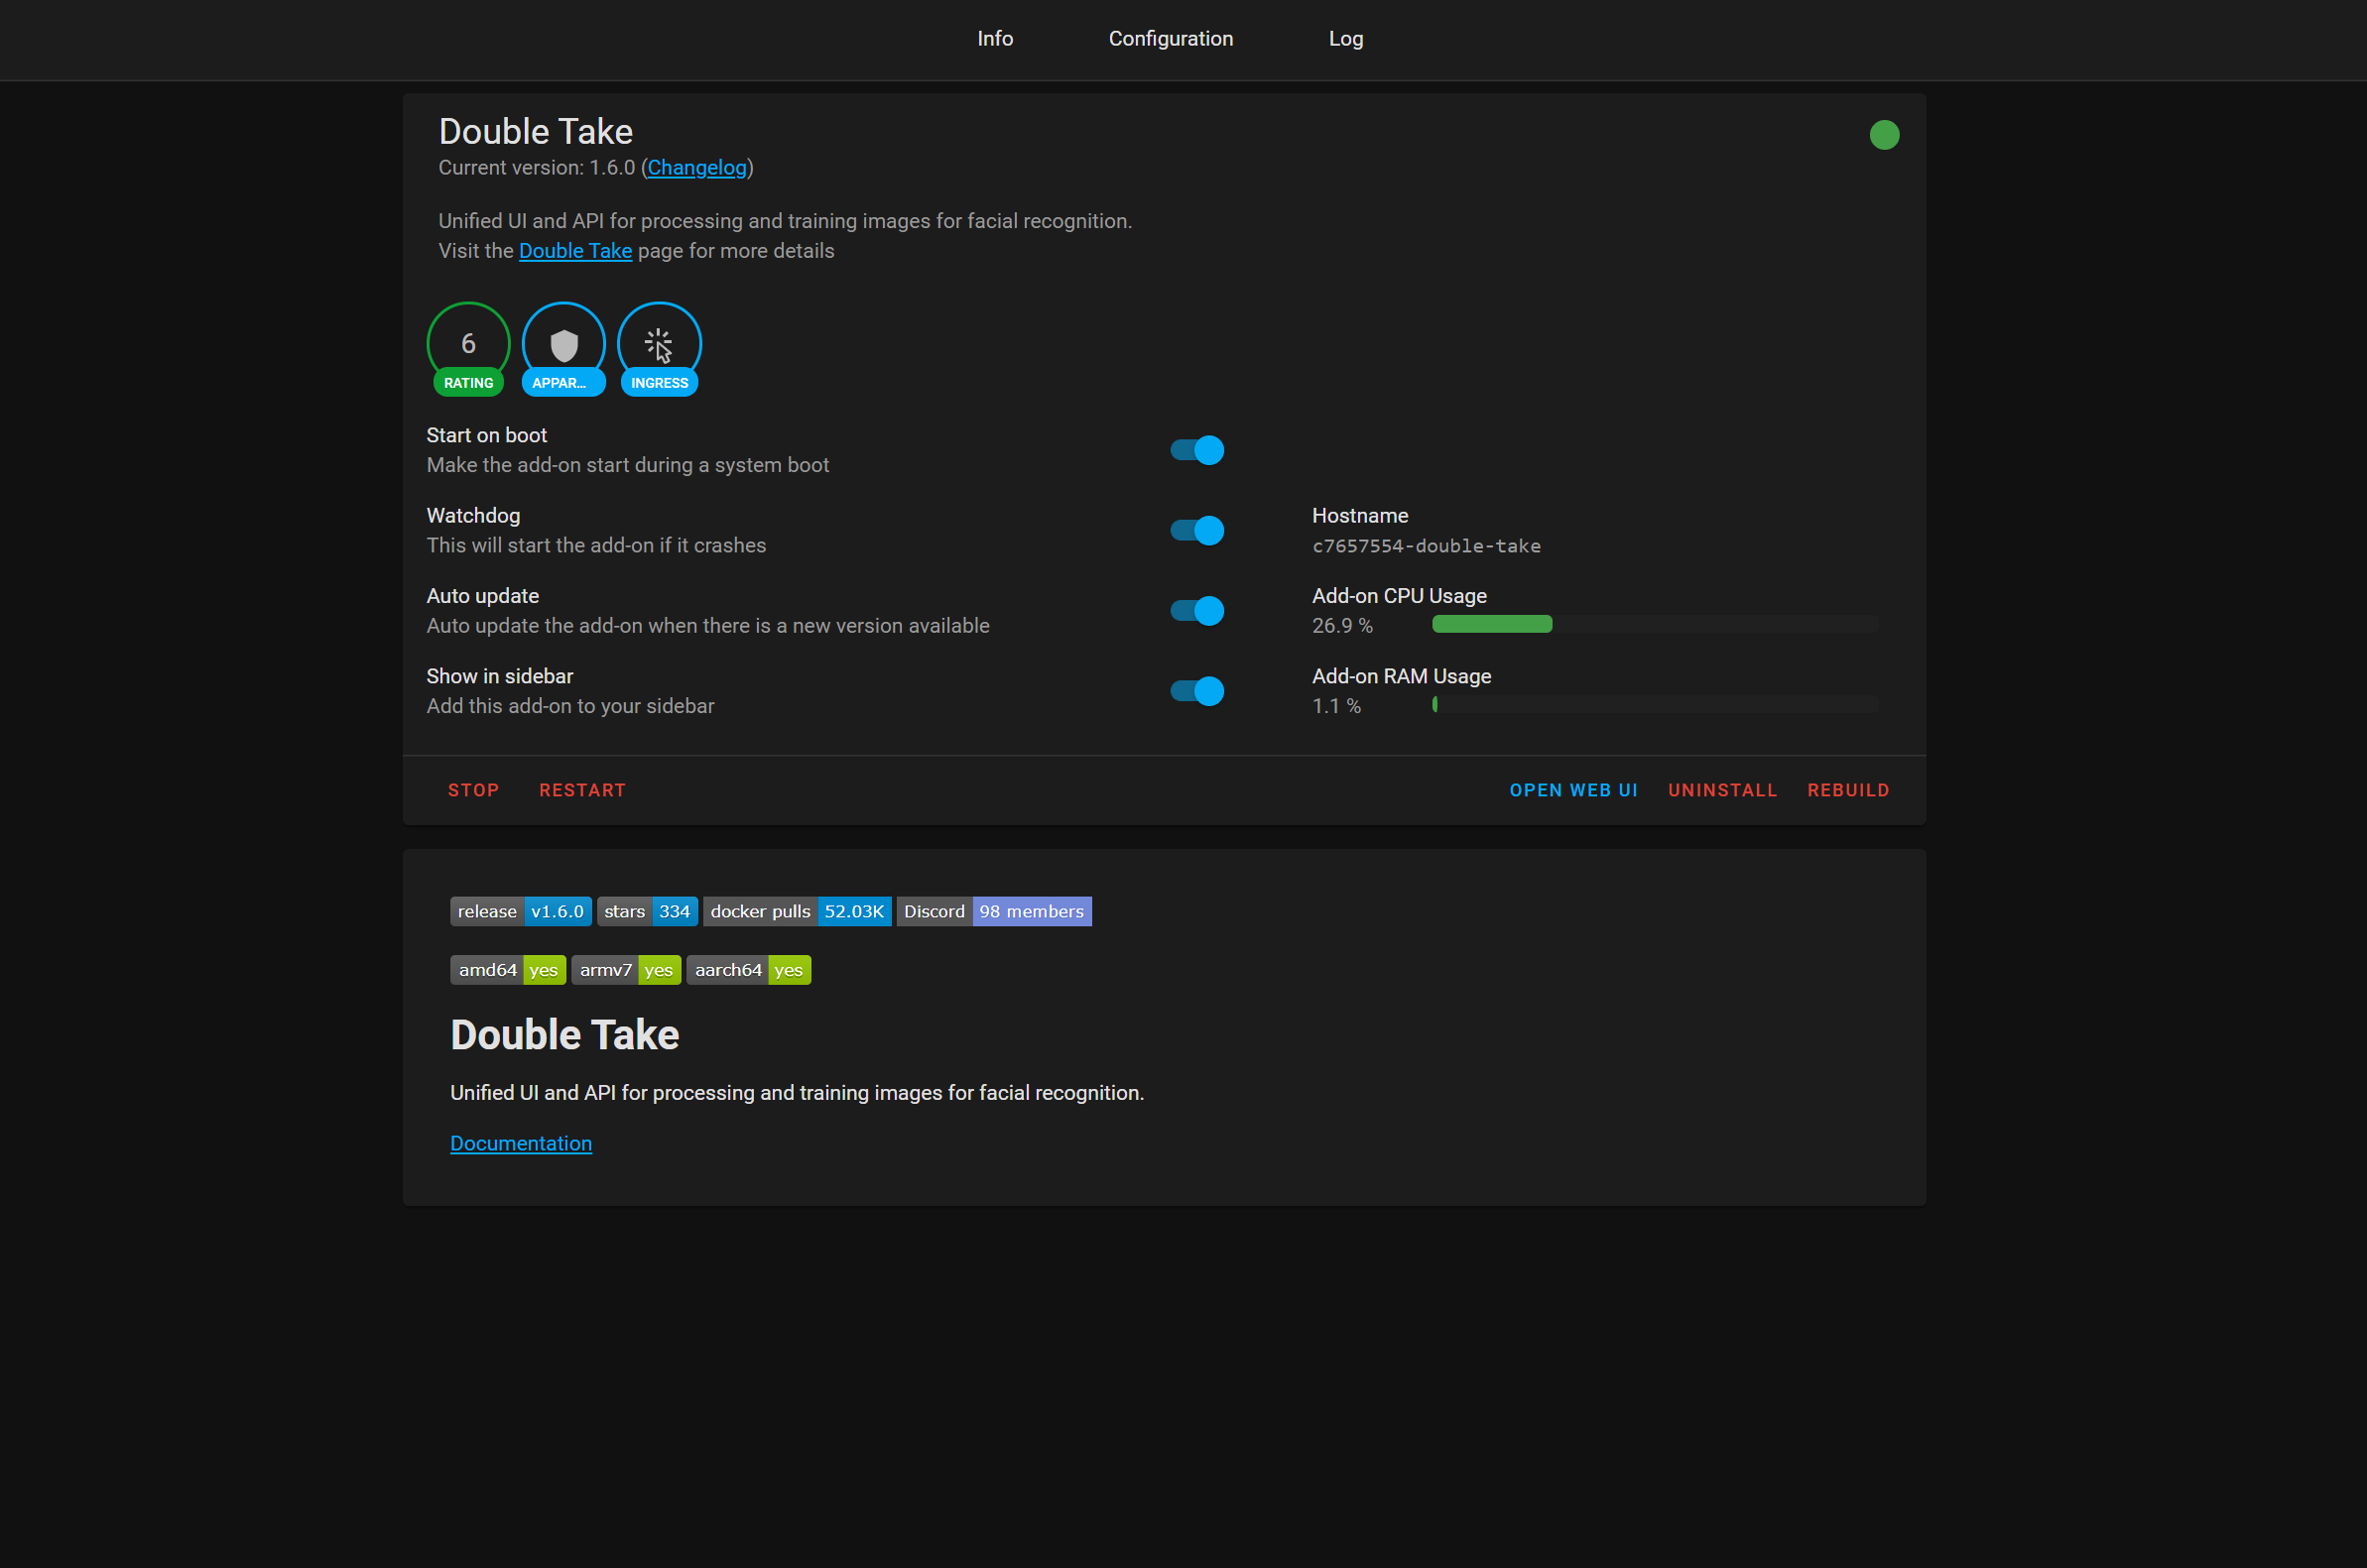
Now, lets begin. Head over to supervisor then add-on store and hit the three dots and click repositories. Paste in the this link which will add a new repository for the Double Take add-ons. Then find the newly added Double Take entry and hit the install button. Once installed, you can tick watchdog, auto update and show in sidebar options if you wish. Go ahead and hit the start button, since all of the config is done inside the Double Take UI.

Double Take Configuration
Open up the Double Take UI and you will land at the main dashboard – you will see that it says no files found which is expected as we haven’t yet told it where Frigate is located yet – go up to the top, head over to the config tab and then we need to configure our MQTT with our Frigate and DeepStack details which is pretty straight forward.
First enter the MQTT broker details and making sure to include the IP address, username and password for your MQTT details. This needs to be the the same MQTT broker that your Frigate server is connected too as this is how it communicates with Frigate to start the facial recognition:
mqtt:
  host: mqtt_IP
  username: mqtt-user
  password: mqtt-password
Next enter the URL of your Frigate server and if you are running Frigate on Home Assistant then this will just be the same IP or hostname as your Home Assistant server, with port 5000 at the end.
frigate:
  url: http://frigate_IP:5000
The last thing to add is our detector, the detector is what will process our facial recognition from Frigate, once a person is found. In this case we are using DeepStack for this, but if you want to use another detector either Compreface or Facebox then you will want to slightly tweak this config here. For DeepStack we need to enter our DeepStack URL, and if you are using an API key then you can specify that here too, I’m not so I will leave that blank:
detectors:
  deepstack:
    url: http://deepstack_IP
    key:
    timeout: 30
Your config should then look a little bit like this:
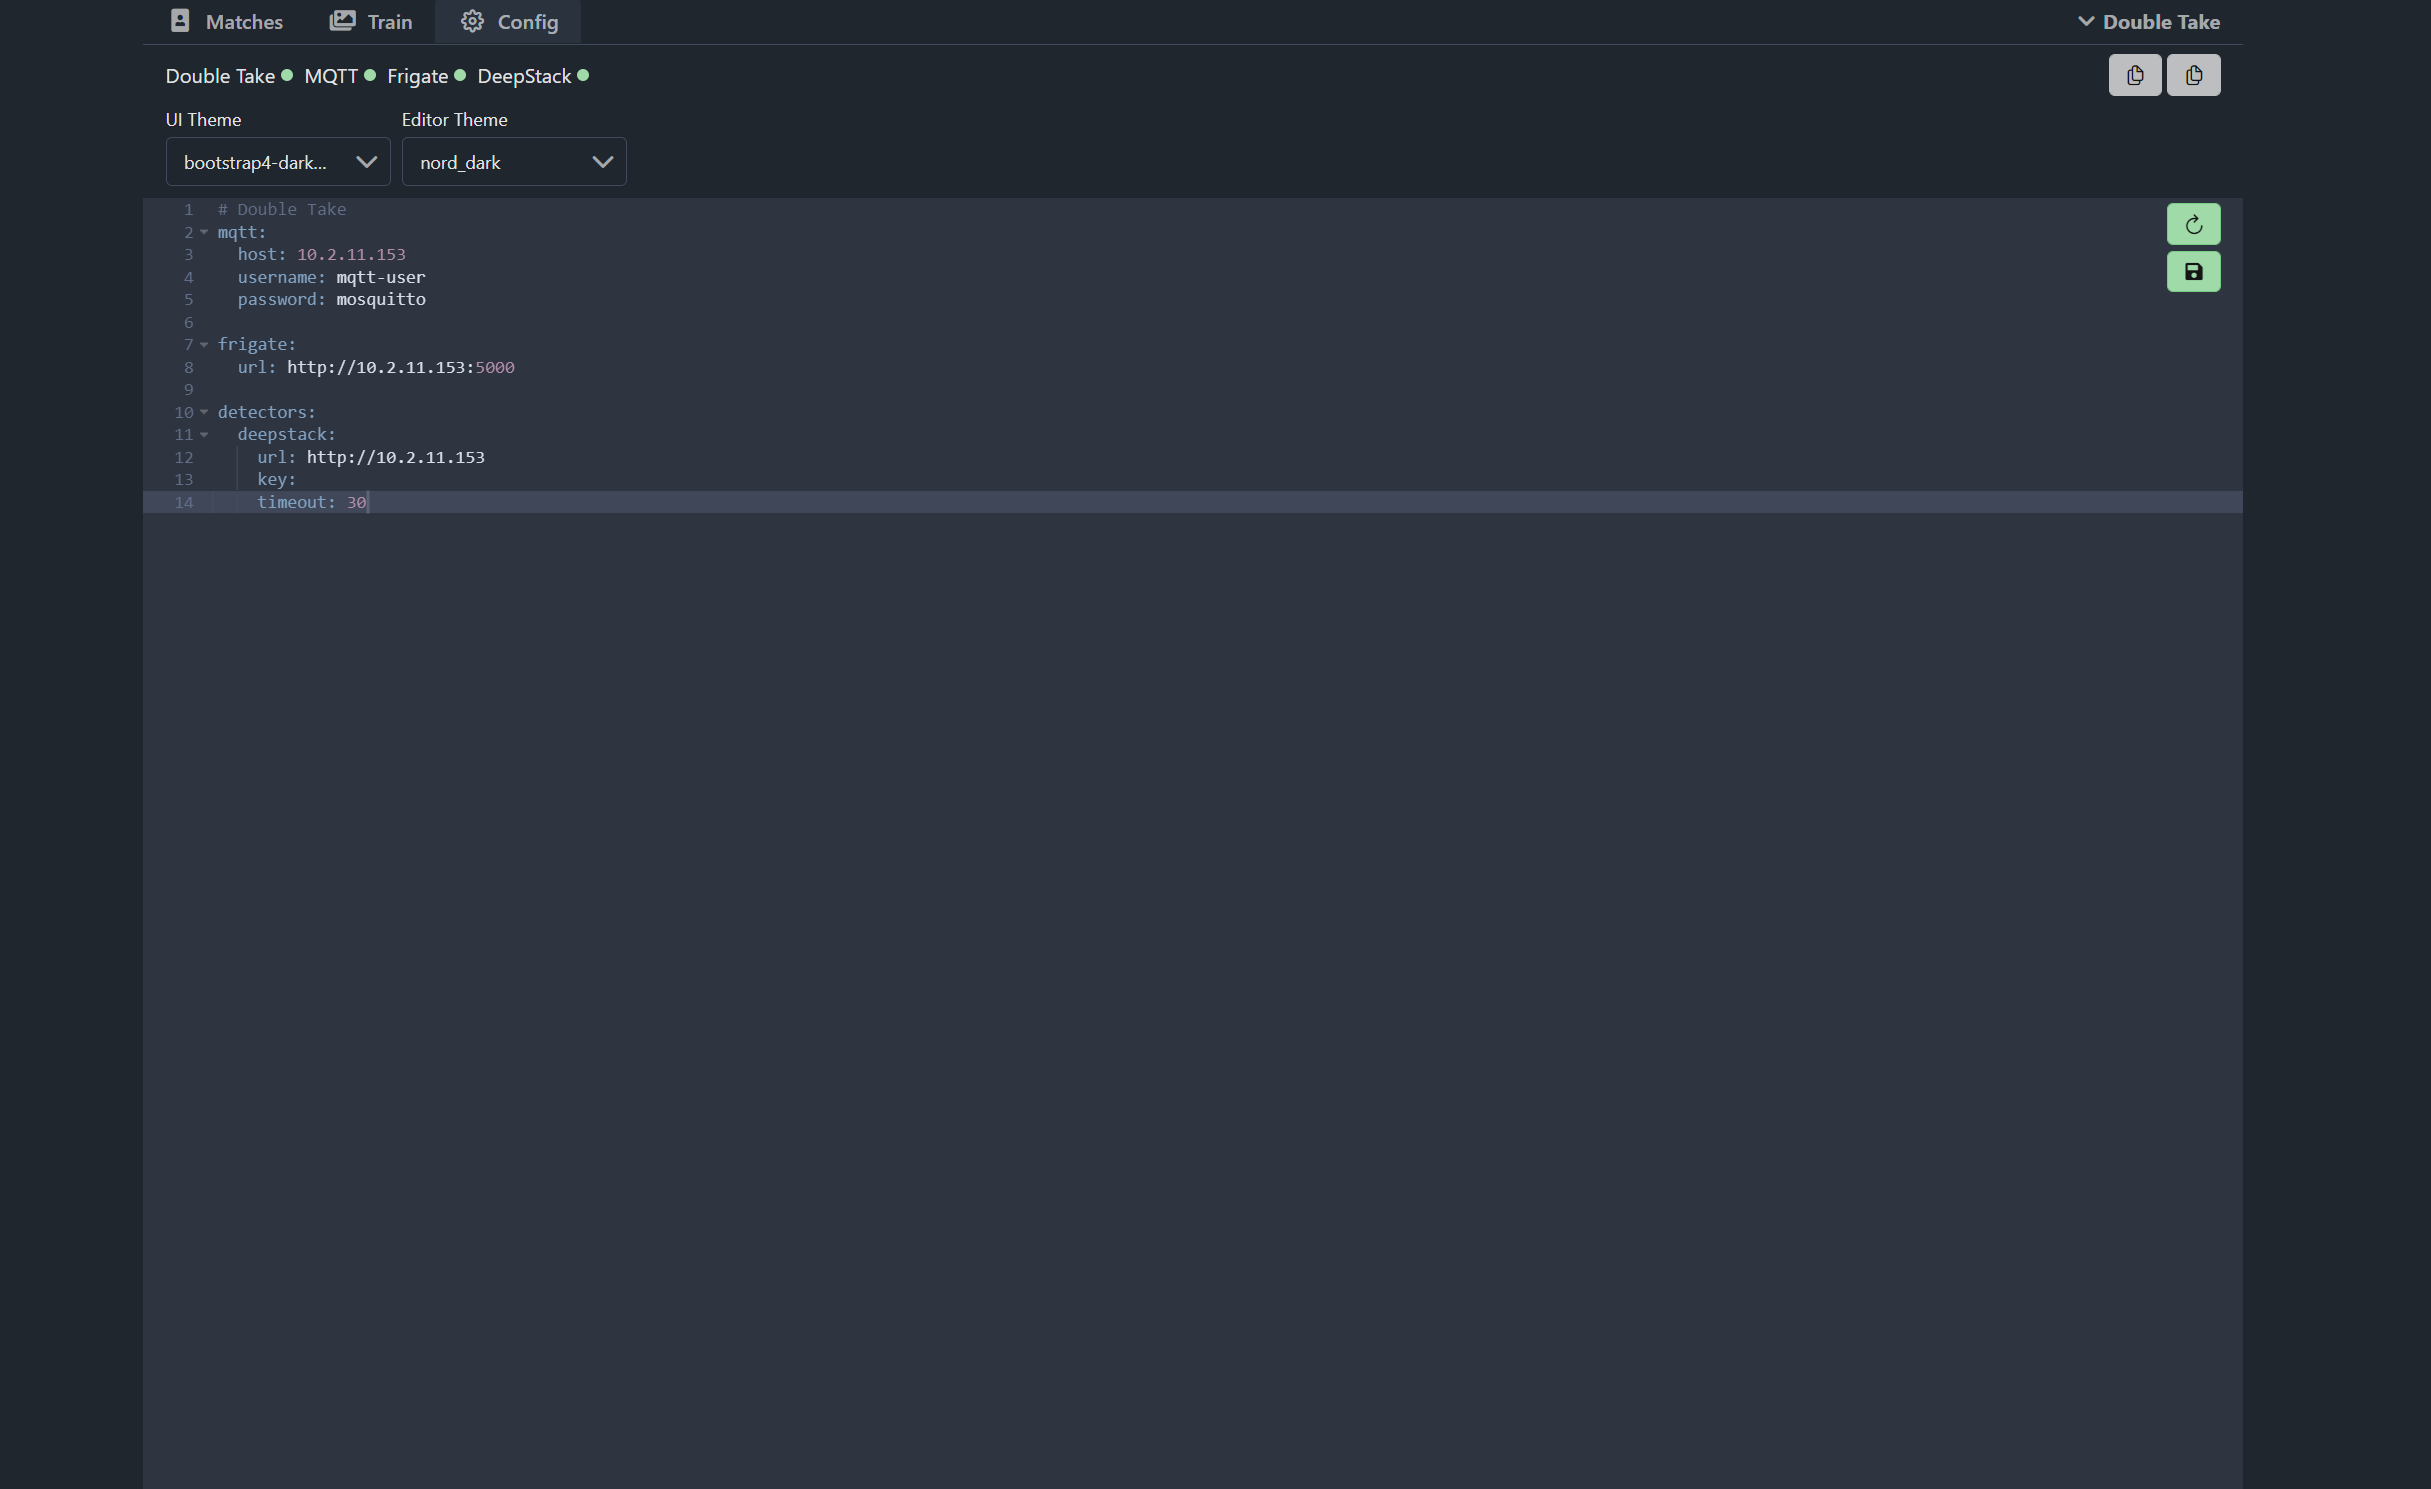
On the ride hand side you can then hit the save config and restart button, once you do that, Double Take will restart with the new config and then you’ll notice at the top left hand corner that it will show you the connectivity status of MQTT, Frigate and DeepStack. If they show up red, then you’ll need to double check settings and logs, and you can access the logs in the top right hand corner.
And that is really it for the Double Take setup in terms of config, if you did everything correctly you can now walk in front of your camera to trigger Frigate to your first match. You’ll need to make sure that inside of your Frigate config, you have person detection enabled.
Training Faces
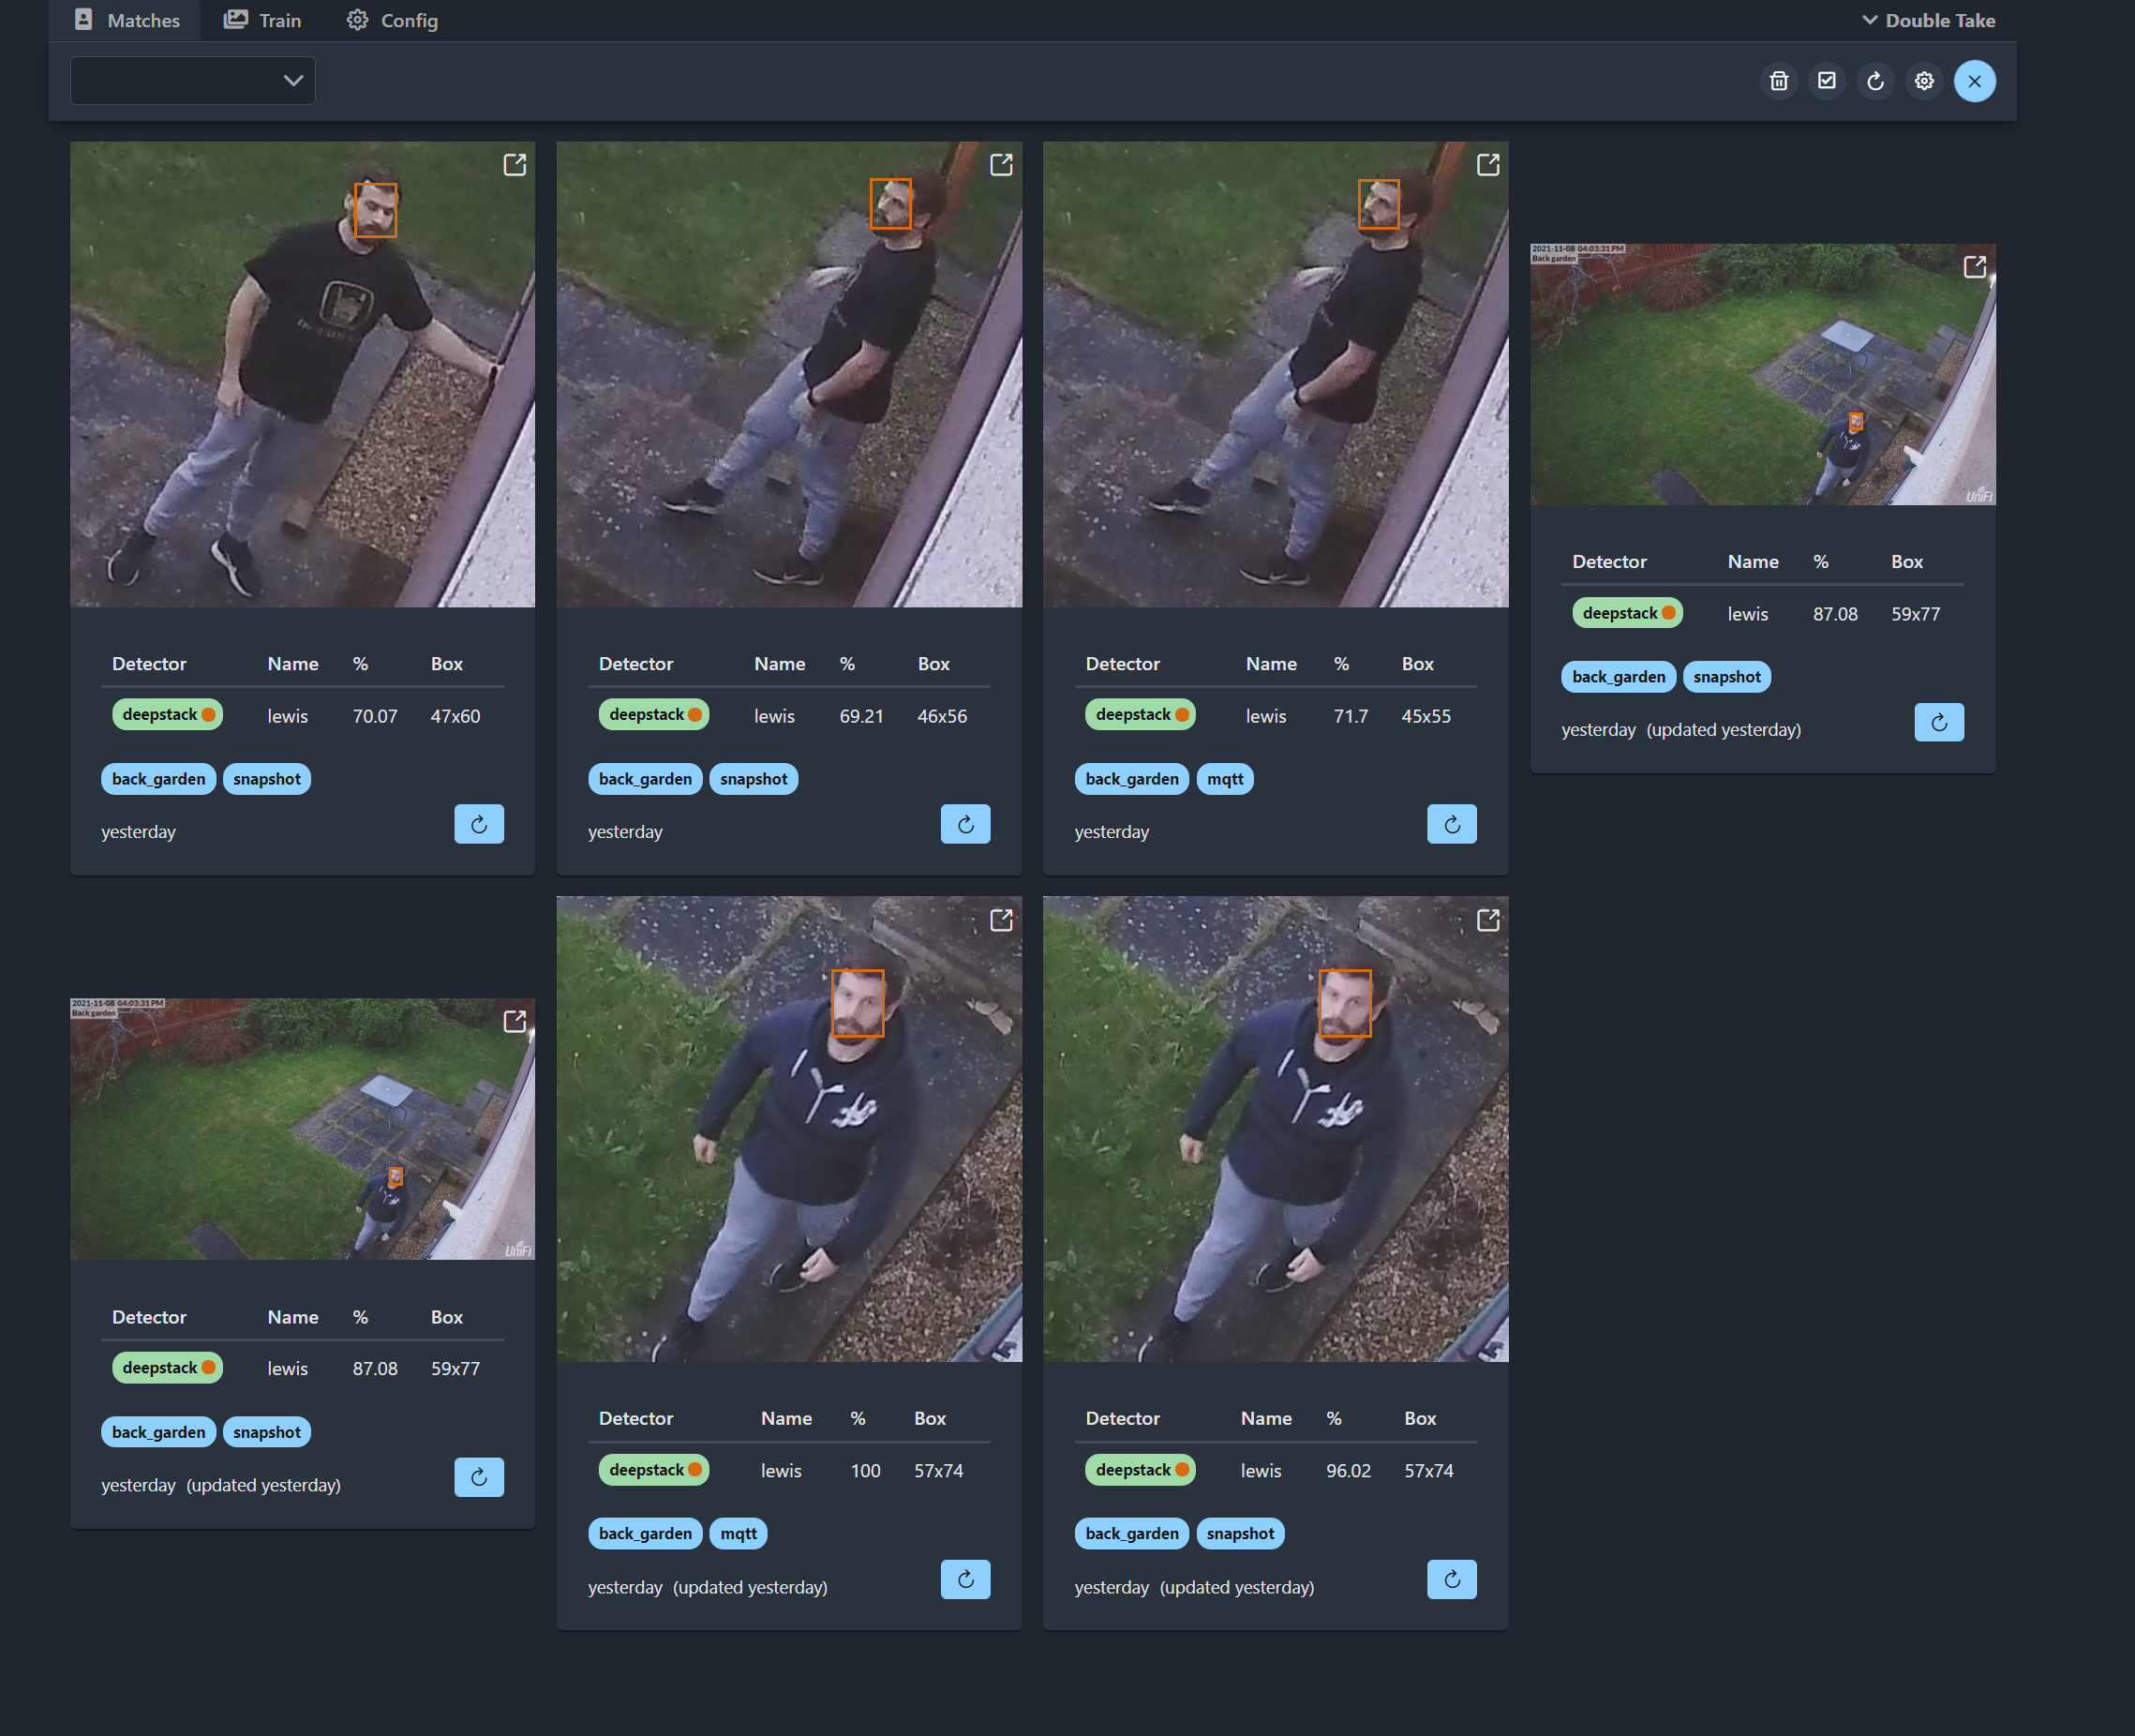
Once you walk in front of your camera and trigger Frigate, you should get an image like this appear in your matches:
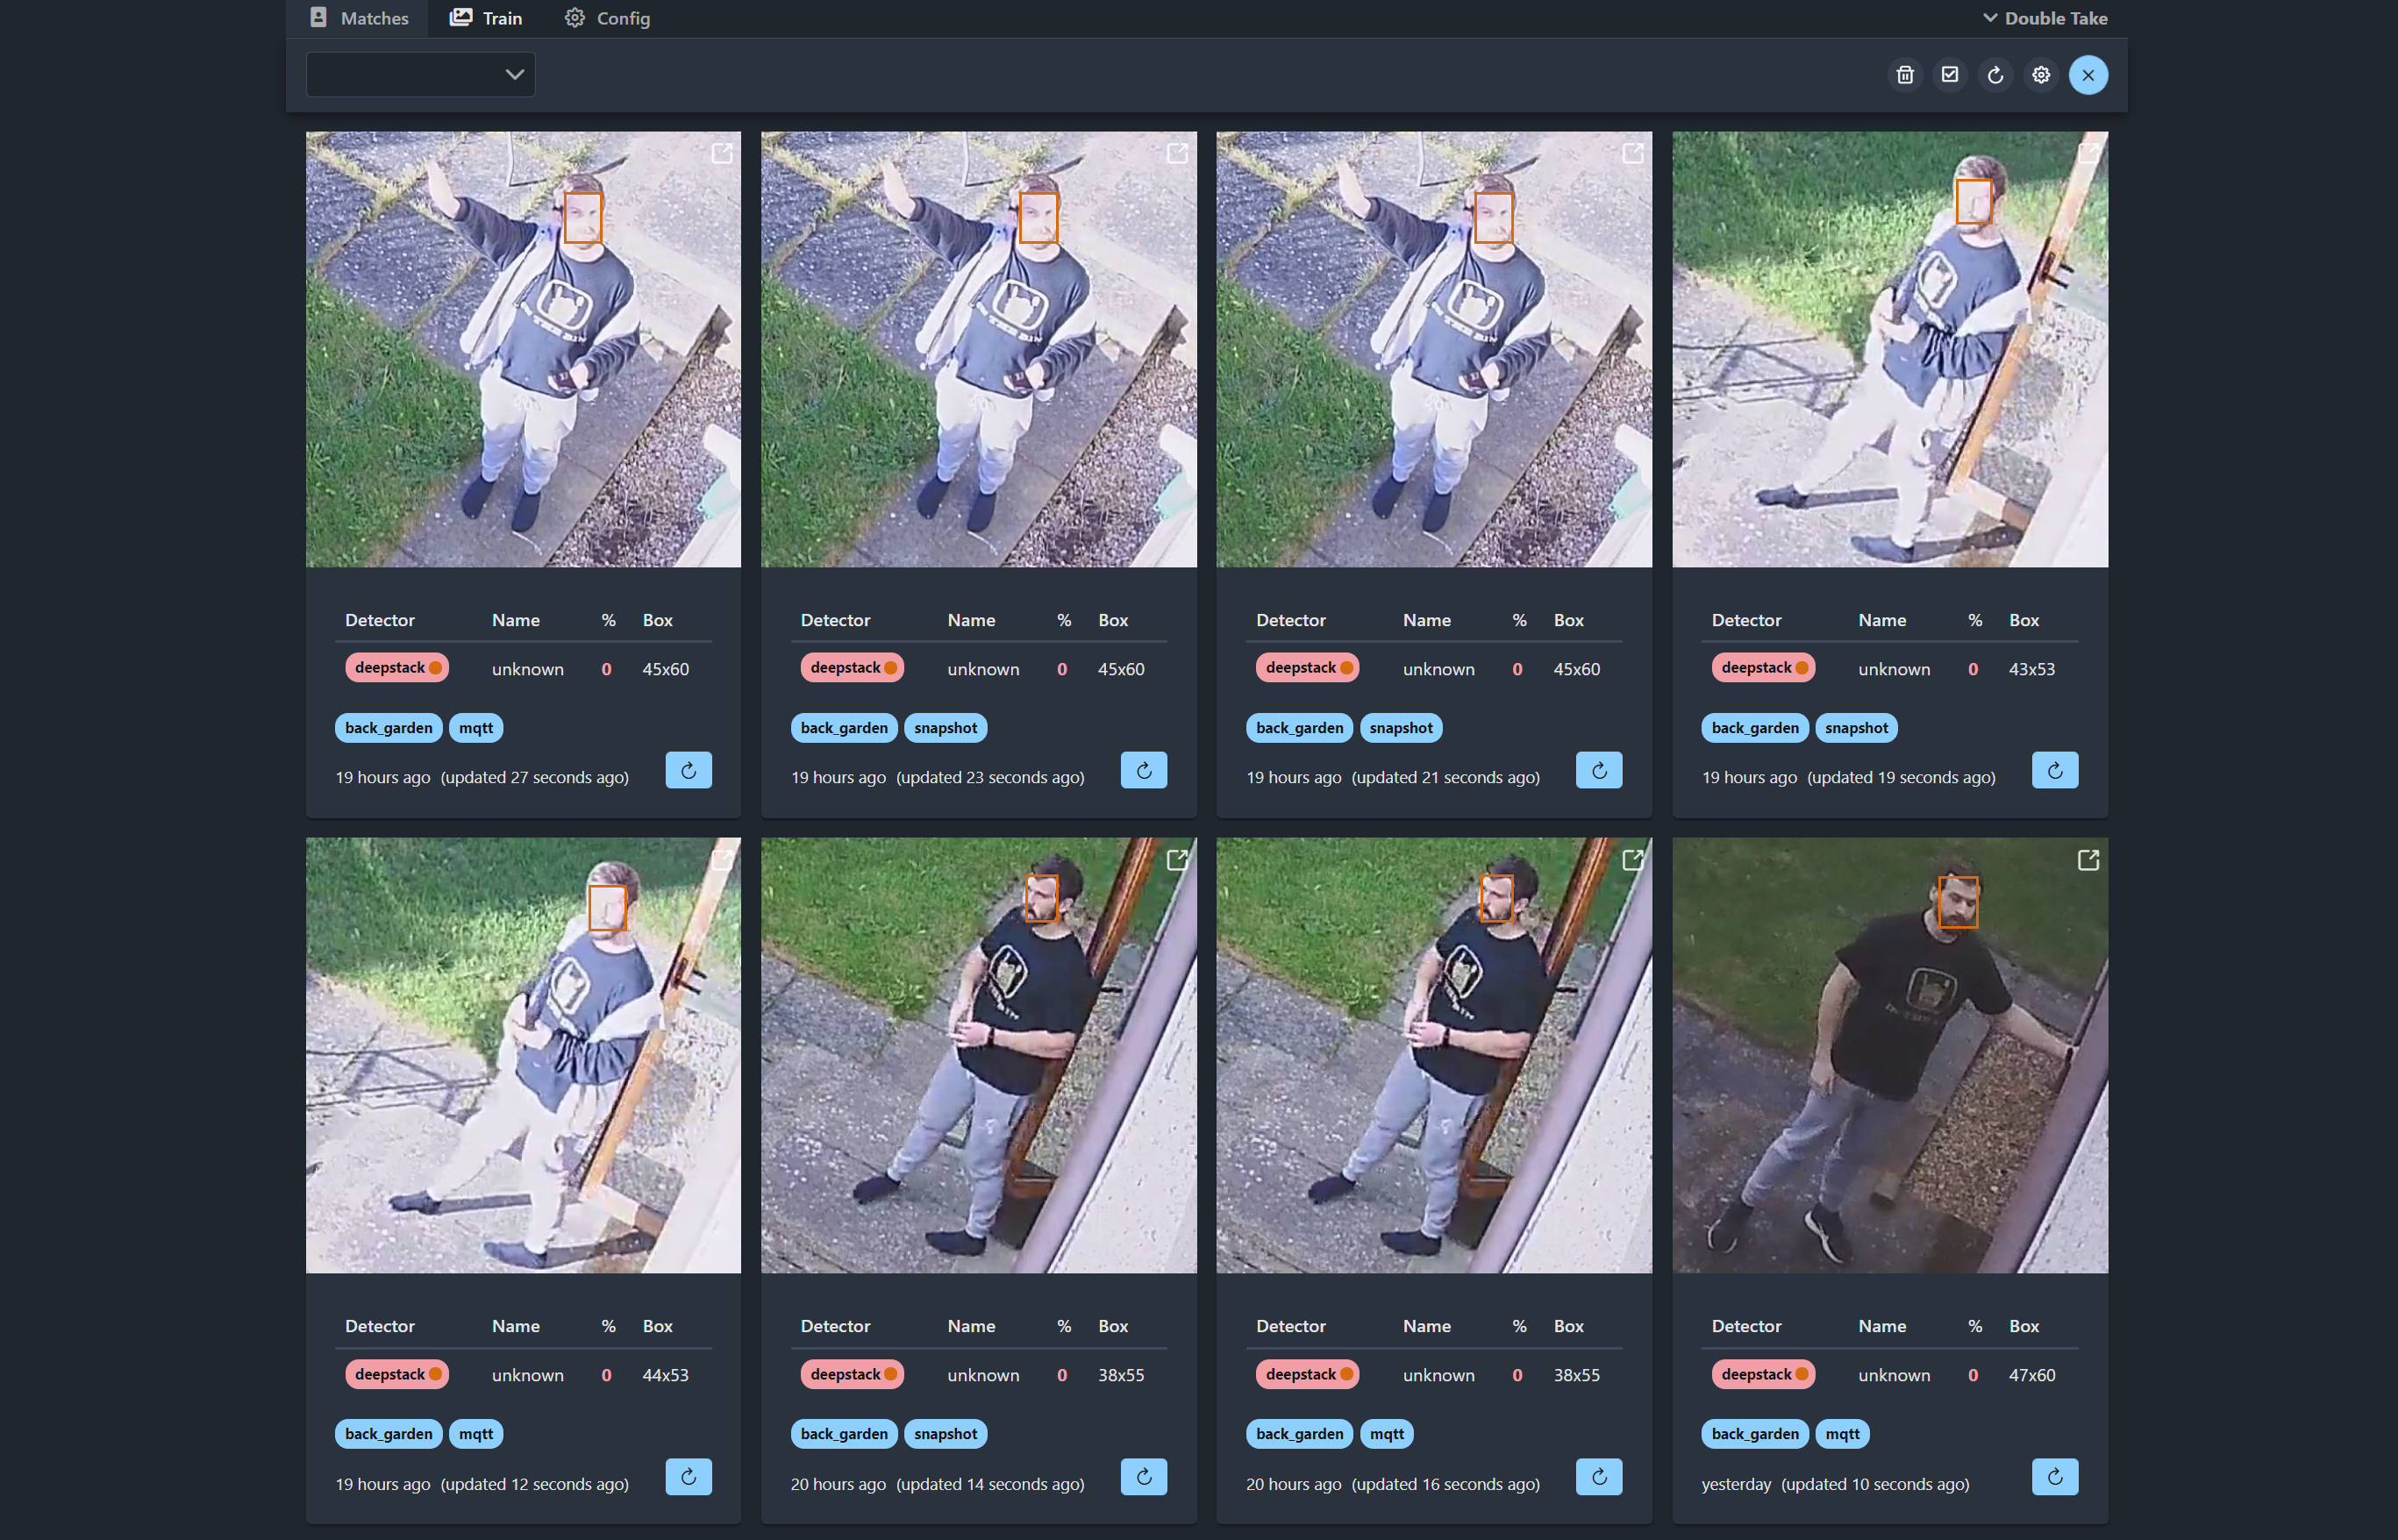
From the get go, we can see a few things here, firstly it gives our detector name as DeepStack and it also returns the name as unknown because we haven’t yet trained any faces. The percentage that is currently 0, is the confidence level which will show up again after training. Underneath you have the camera that it came from as well as if it from MQTT or from Frigate snapshots. You may get duplicate images appearing here because Frigate will send the image of the person over MQTT first when the initial detection is made, then when it saves the more accurate snapshot it will also send that image to Double Take for processing too. You can disable this behaviour if you want.
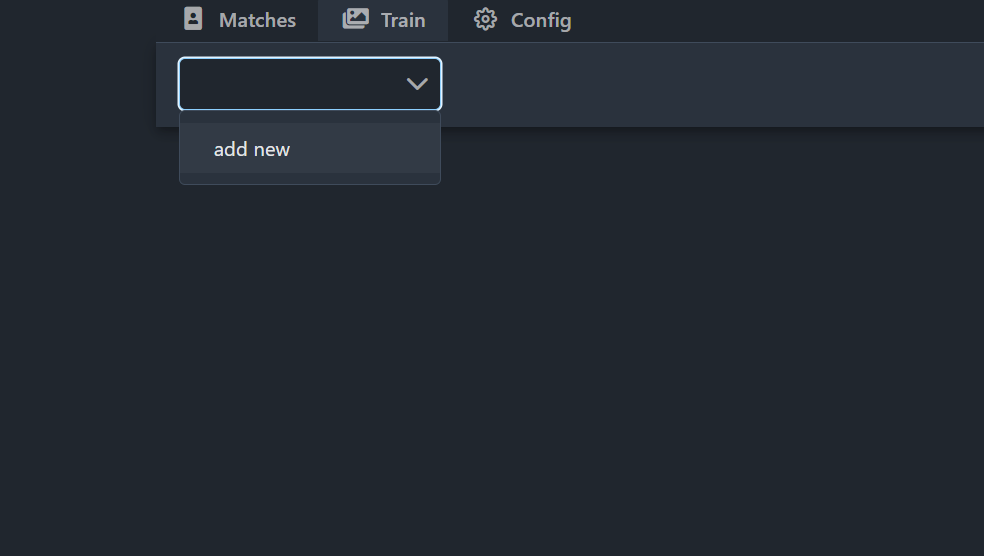
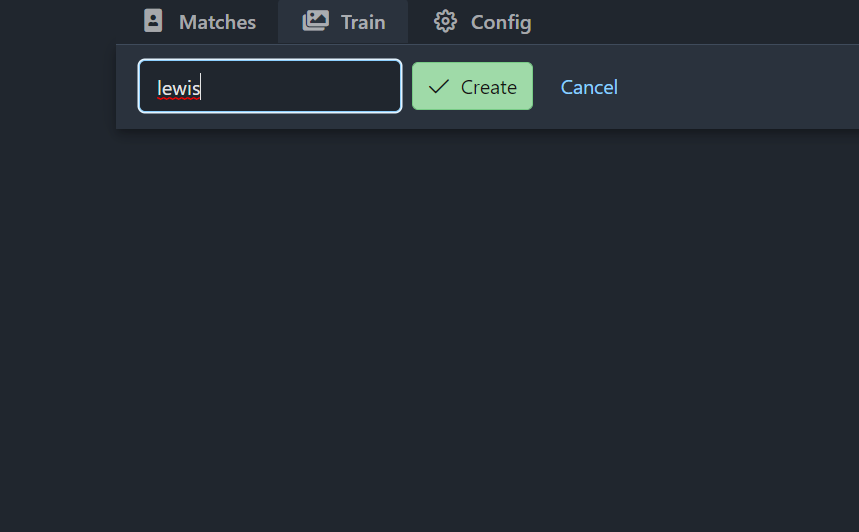
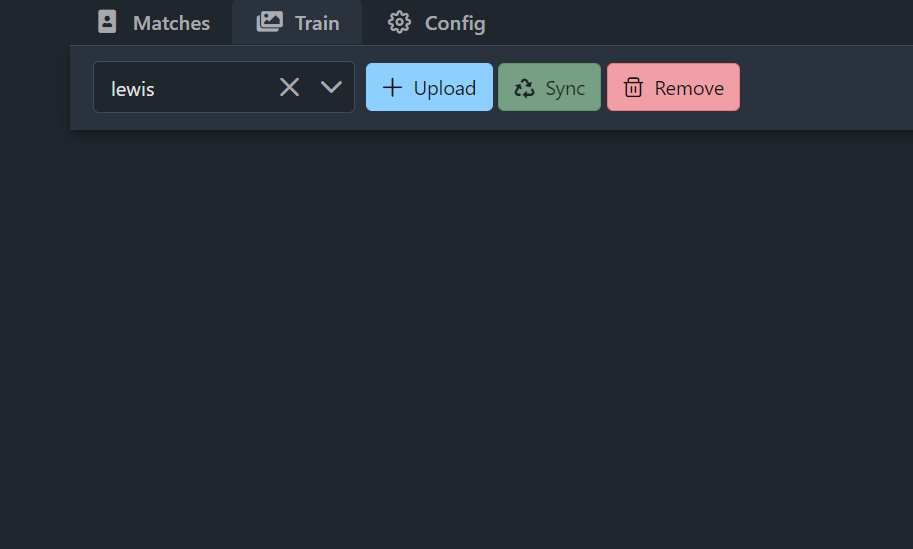
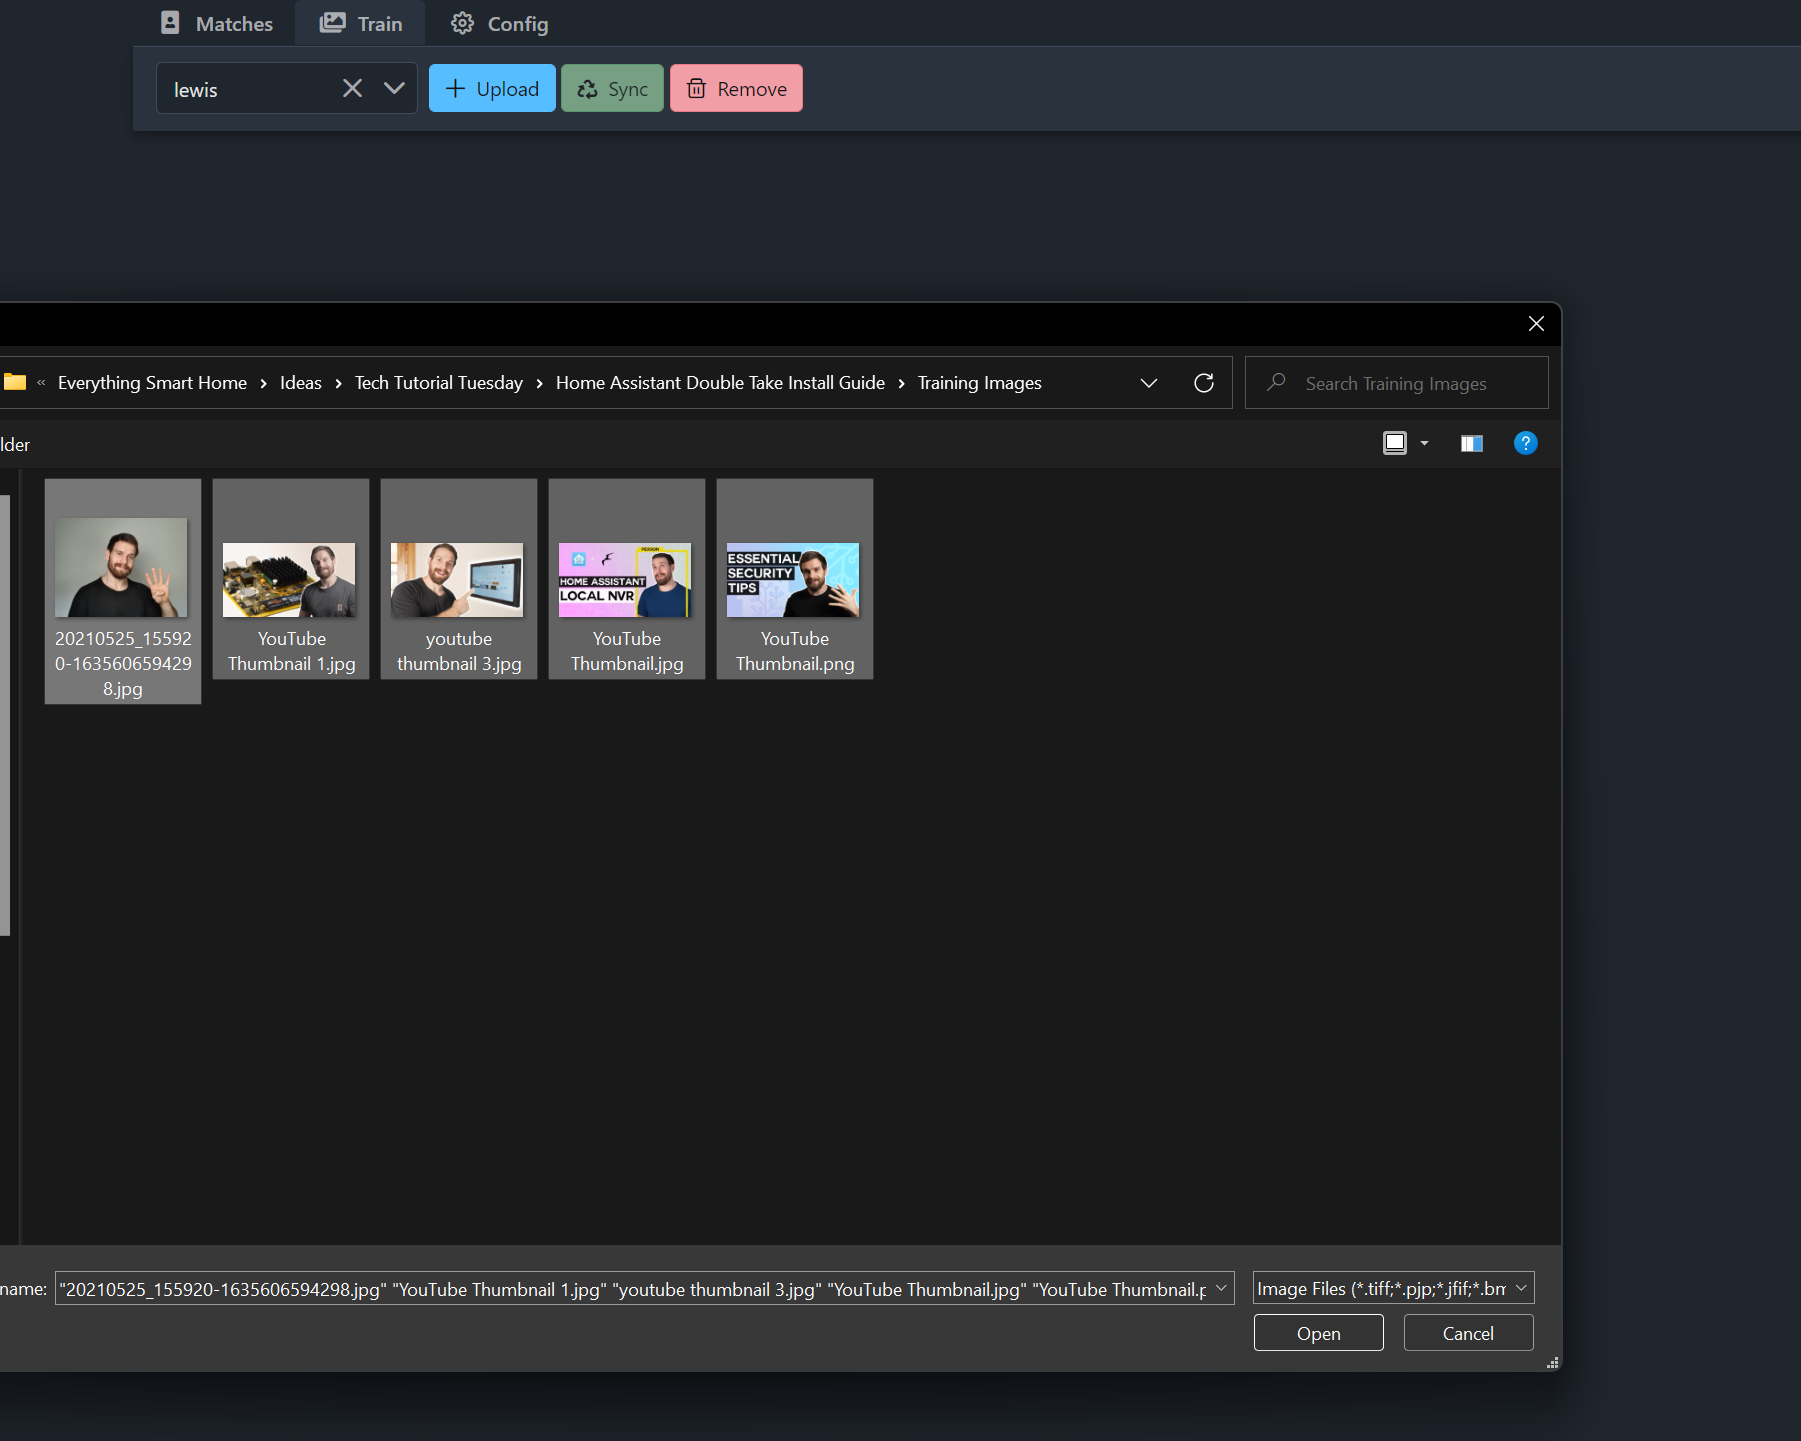
Now we are going to train some faces so that we can start matching images. Head over to the train tab, and then using the drop down at the top select add new then enter the name of the person you want to match. Now we have a couple of ways we can match faces here, either we can upload our own images for training, or we can use some of the images from the camera itself to train it on or both. I’ll show you how to upload your images first, hit the upload button and then select some images to upload, and you can select multiple images at one time. As soon as you upload these, DeepStack will start training a model based on your face, how cool is that:
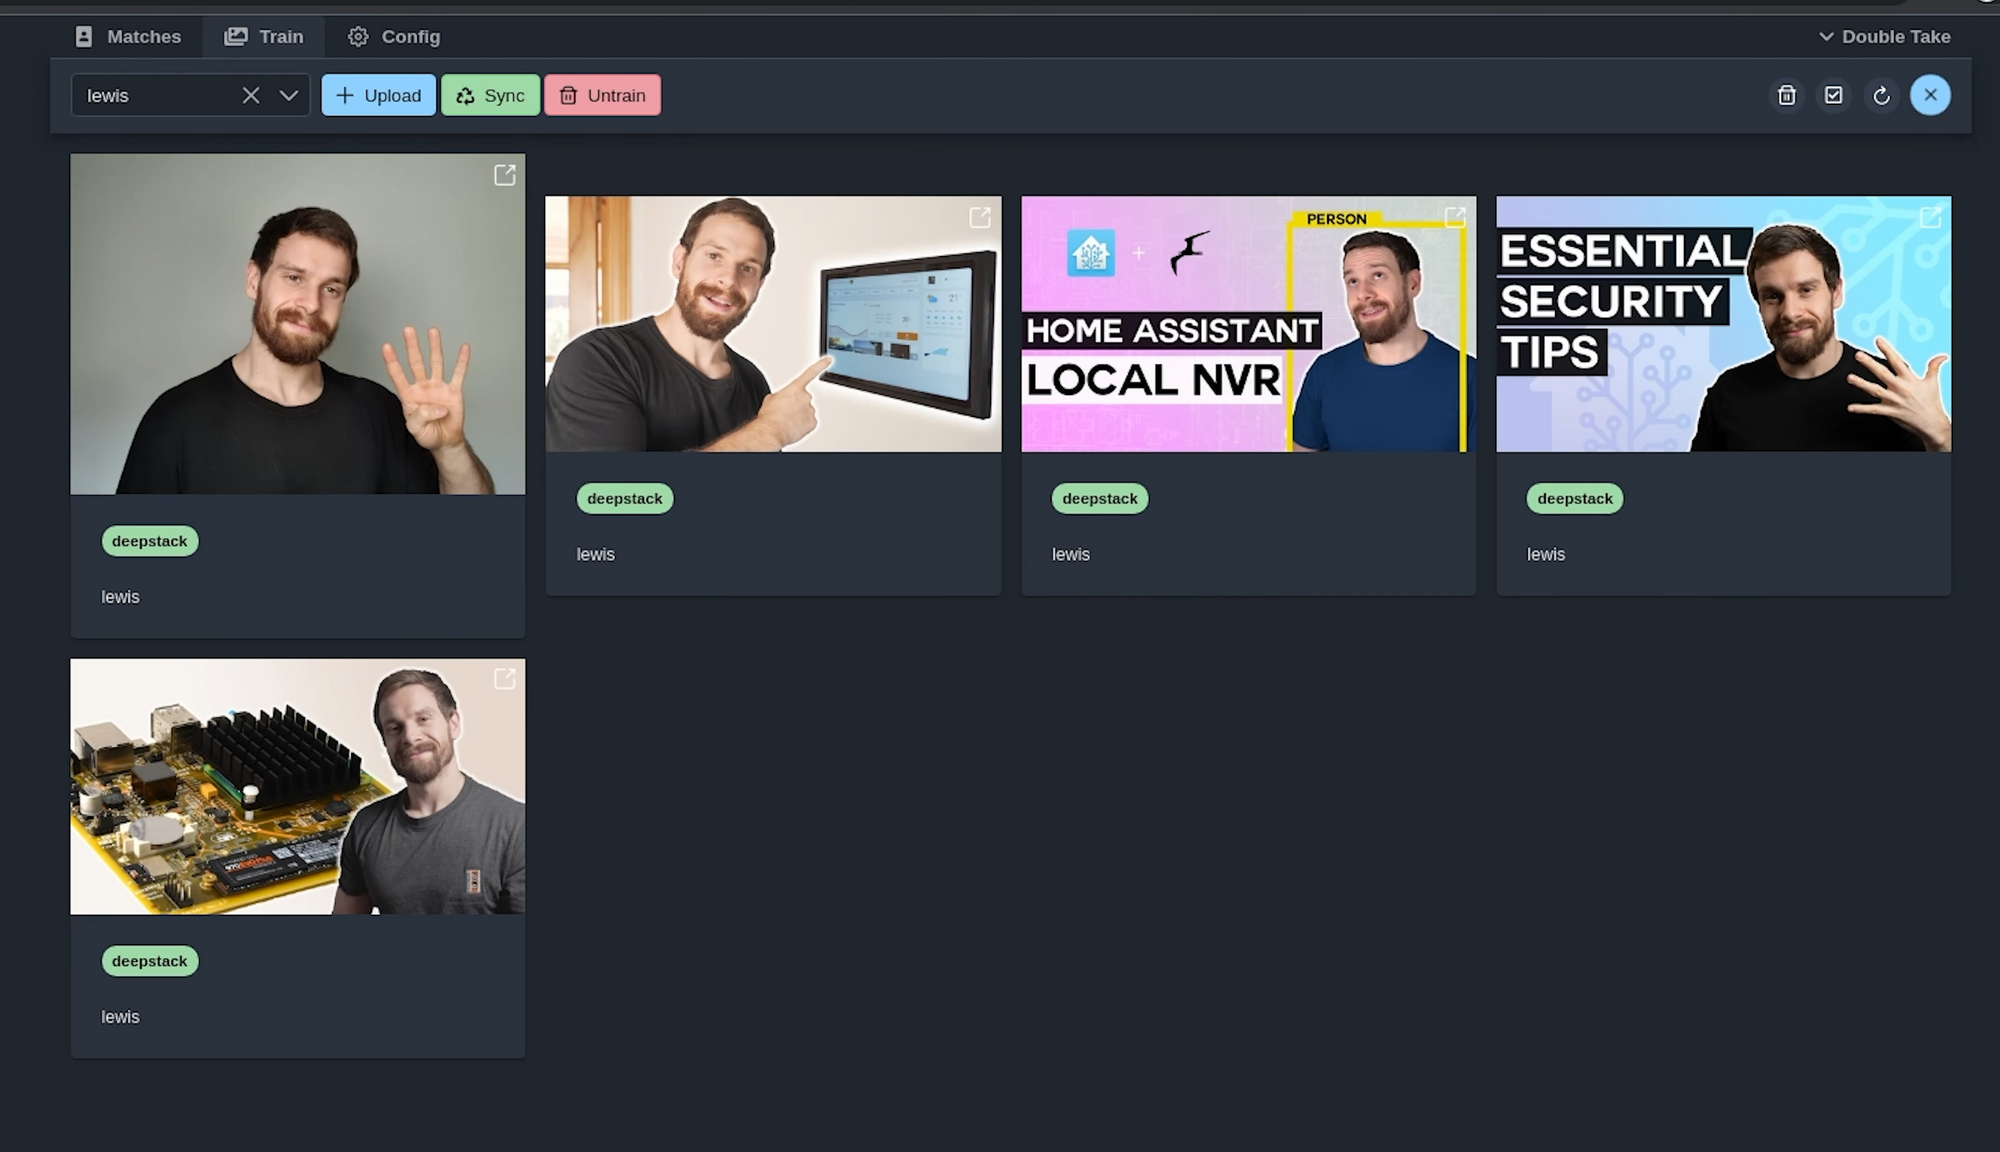
And now if we head back to matches, what you can now do is re-process the images that were previously unmatched to see if it now gets them by pressing the refresh button, this will then ask DeepStack to recheck the image after we have now trained it.
So that is really quite straight forward to use, you can train images right from the double take UI using images from your actual camera, or you can train images by uploading your own, and you can easily see an overview of all the faces that were detected, how confident Double Take was that it matched the face and you can really re-process images that you just trained, really easy to use and works really well. Now lets take a look at creating a really simple automation to notify you about matched images.
Home Assistant Automation
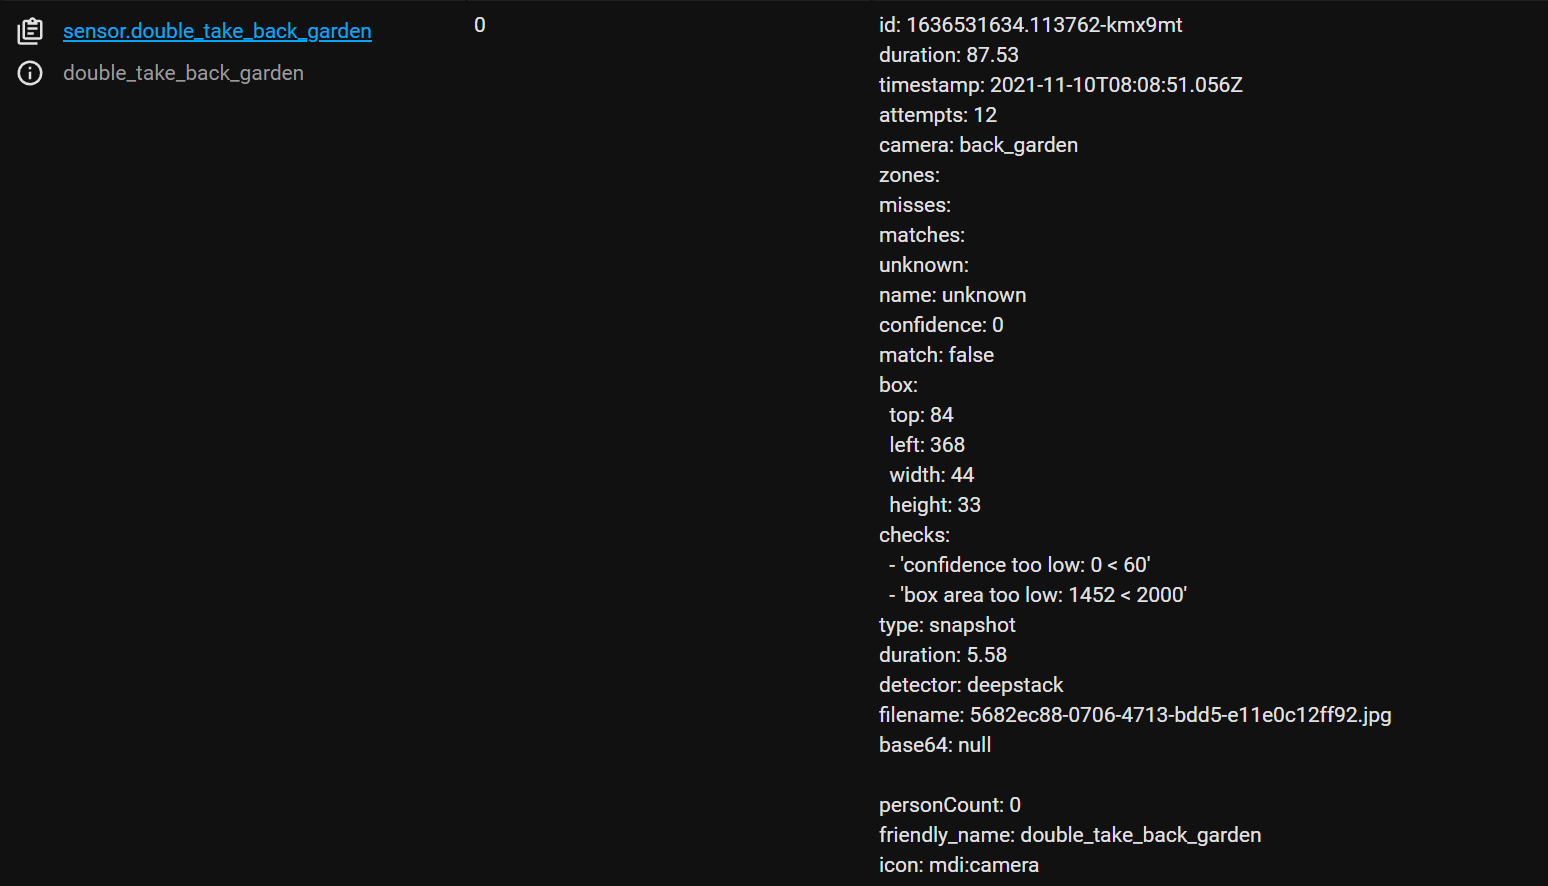
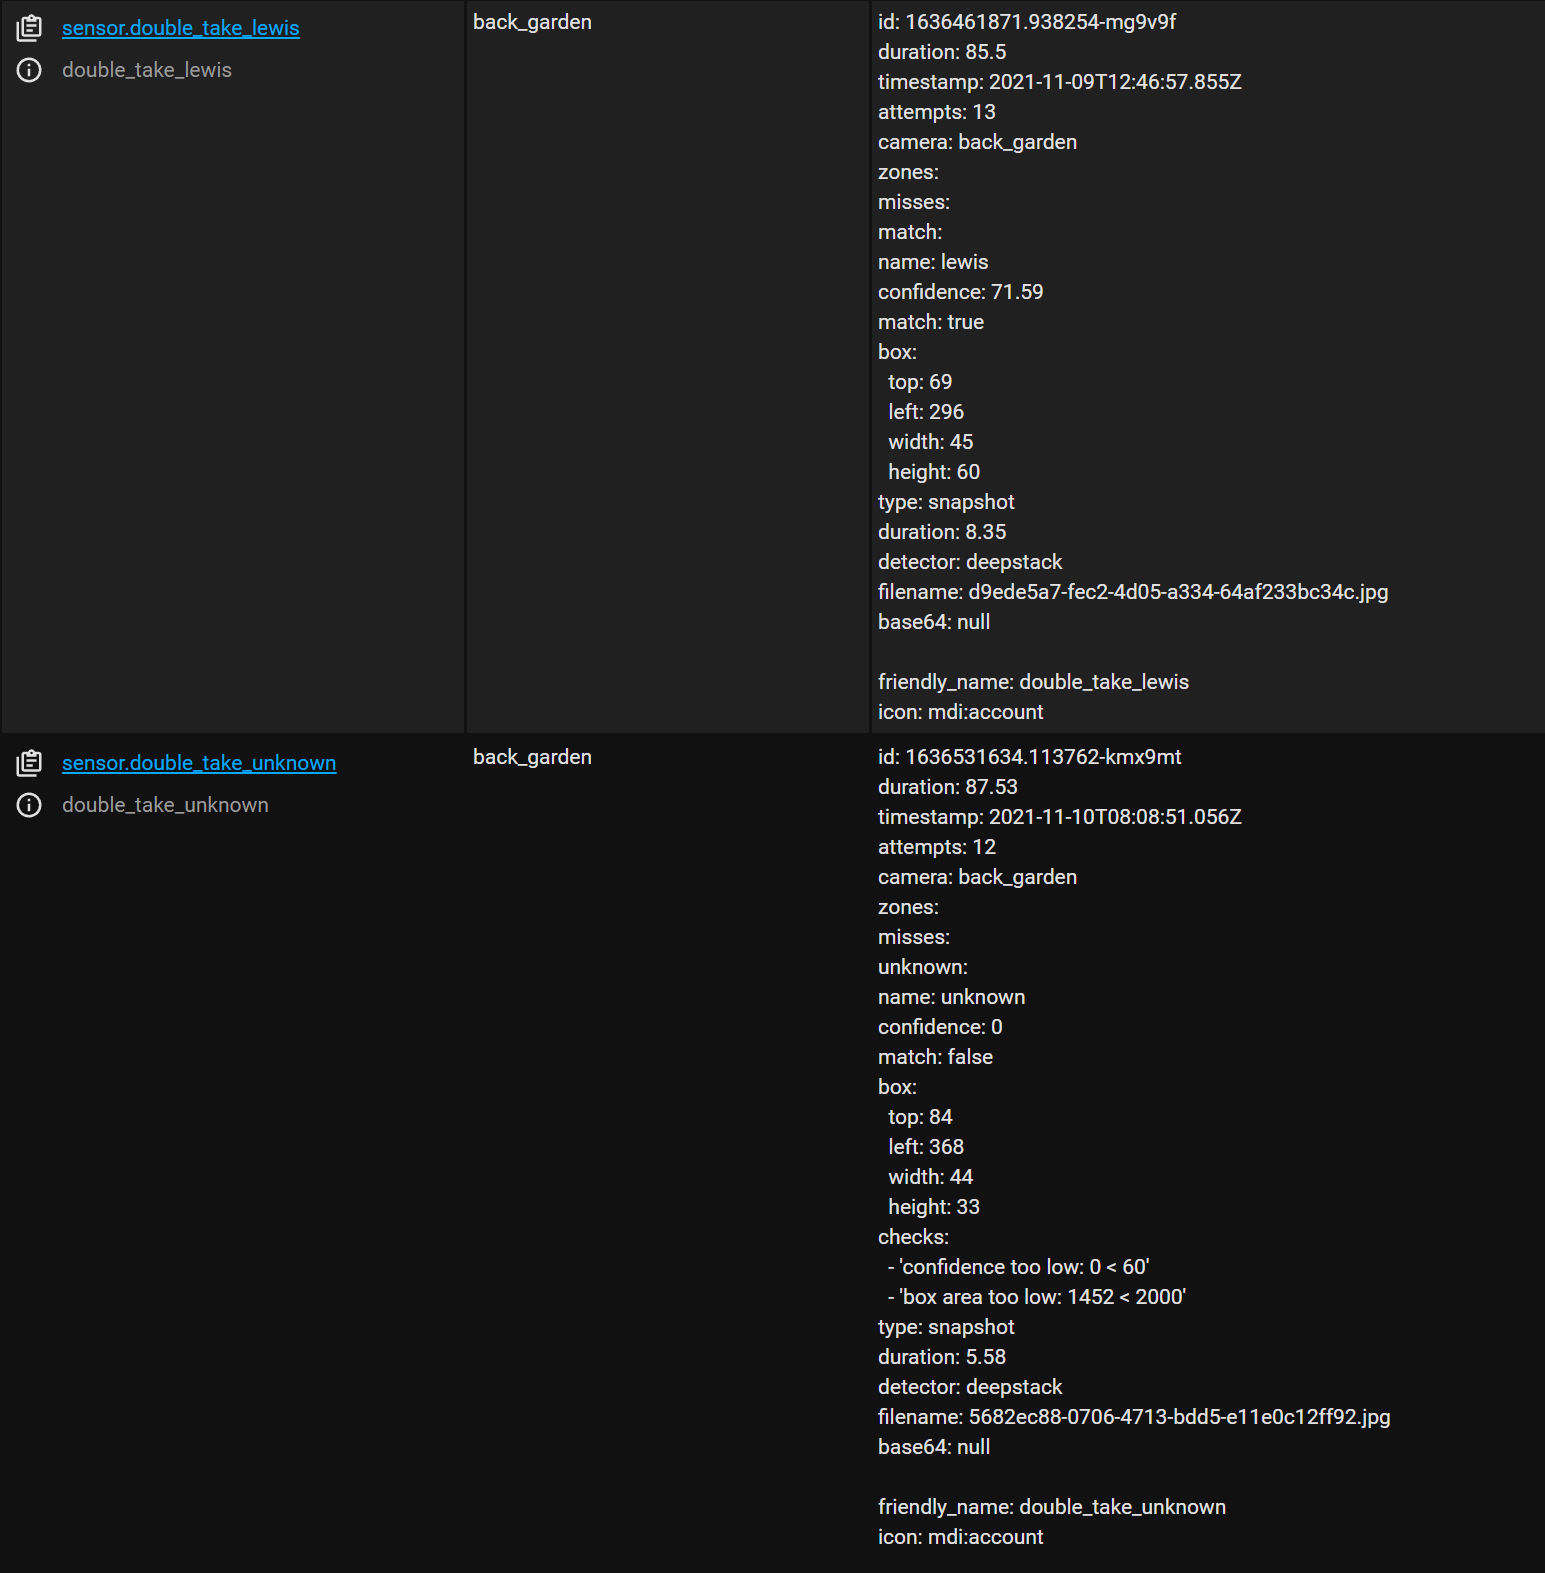
First, before we can create an automation, lets take a look at some of the sensors that are now exposed to home assistant that we can actually use in our automation, if we look inside of dev tools we can now see we have a few sensors listed for Double Take, firstly we have a sensor for our back garden camera itself which contains the last matches for that camera, and we also have sensors for the people we have matched through facial recognition and an unknown sensor for when someone can’t be matched. There is also a ton of extra information inside the sensor attribute that you power users may want to utilise inside your notifications:
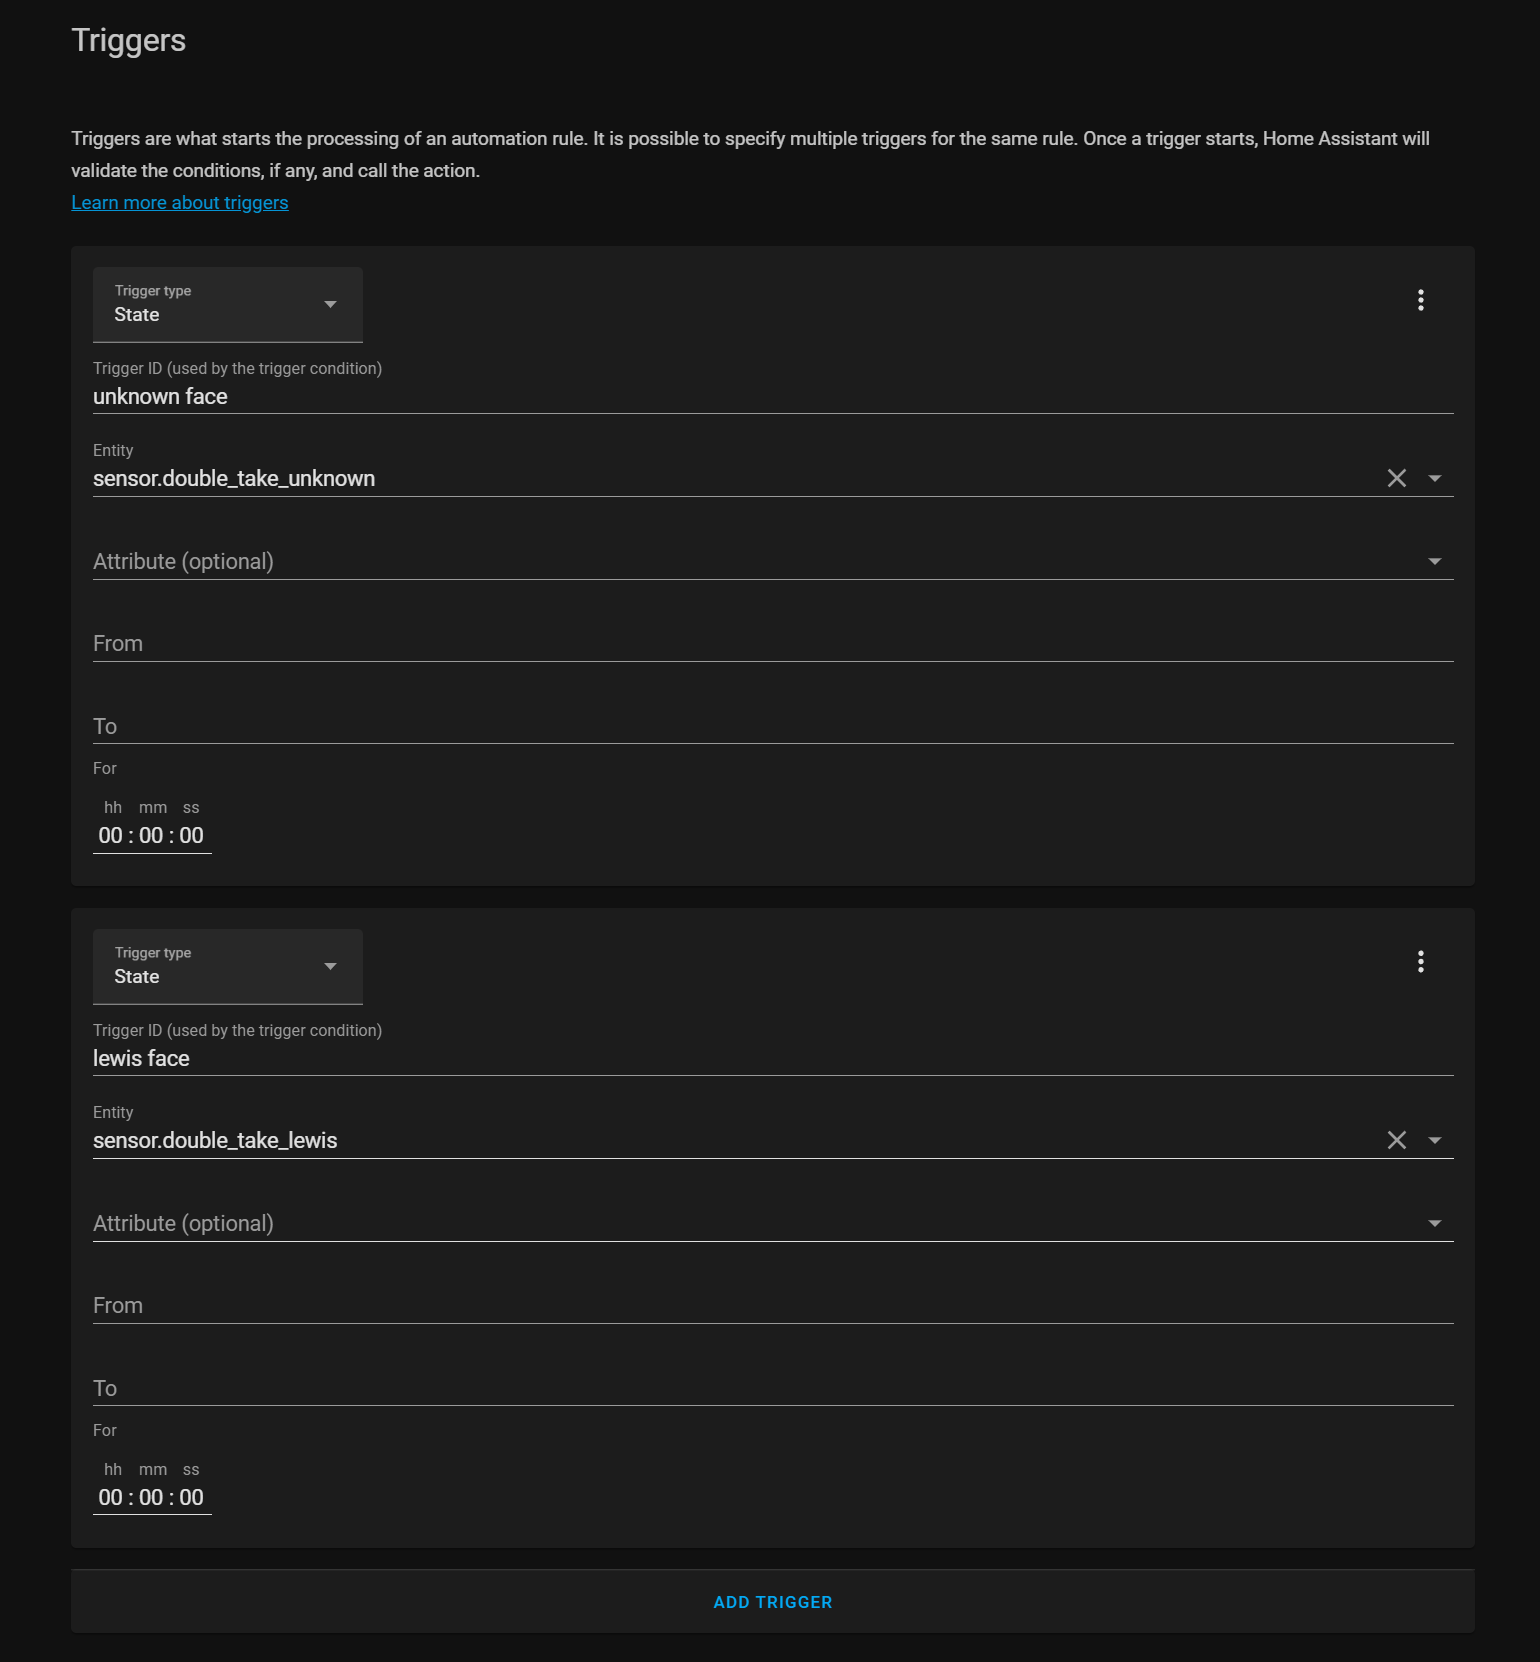
Head over to configuration, automations and create a new automation. For the state we are going to use those two sensors we just discovered, I am going to first use the unknown sensor, leaving the on and off boxes blank but entering a trigger ID so I can use it later. Then I’m also going to add the sensor for my own name, again entering a trigger ID.
Then under the actions box I’m going to use the choose action, which allows us to have different actions run based on what just happened, super useful for combining automations, and then for option number 1 under the condition, I select trigger from the down and select my unknown trigger ID.
For the action I enter call service and select the notify service. I’m then going to switch over to YAML mode first because we are going to use a template, and give my notification a title. In the message I can then also enter a message, using the state of the unknown sensor which will be the camera name. I then add a second option, this time filling in the details for the sensor that finds a match and enter a slightly different message.

This time when I then walk in front of the camera, you will then get a simple notification that tells you someone was detected in the camera and whether or not the person was recognised.
There are for more advanced things you could do here like having it on a schedule, tell you the confidence level, attaching images from the camera of the face that was detected, infact I’ve done entire videos on iOS and Android actionable notifications which covers how to do all of those things, and there is also an example in the Double Take Documentation here.
Final Words
And that is about going to do it for this video, that was your first look at and how to install Double Take for detecting, processing and training facial recognition images easily using the Double Take UI, you guys have been asking quite a lot about this one for a few months now so it was really good to finally check it out and see what it was like and I was super impressed at how well it works, David has done a fantastic job with this so far in the short time it’s been around.
But let me know what your guys thoughts are on this down in the comments, I know that training faces wasn’t the easiest job to do before because you had to use the command line to do it, so having this built right into the UI is super useful. Catch you in the next one!