Building a temperature sensors for Home Assistant - Wemos D1 Mini with DS18B20 build guide

The world has changed a little bit in the past couple of weeks/months depending on where you live with a global pandemic currently on-going, meaning more and more of us are currently spending a lot more time indoors that we would either like or are used to thanks to the Coronavirus/COVID-19 situation.
Now that many of use have much more free time on our hands than we perhaps normally do, we thought it was the perfect time to get round to some of those projects that have been on back burner for a while!
First one we are going to tackle is some temperature sensors, great for those of you spending more time at home and wanting to take your heating system up a notch if you already have a smart heating system or plan to create your own. I’ve done a few heating installs using Sonoff as a cheap alternative to Hive for example.
I’ll show you how to take a DS18B20 temperature sensor and add it to Home Assistant for some really accurate and reliable temperature readings.
Parts List
There aren’t too many essential parts for this build to make it work:
- Wemos D1 Mini – although you can use any similar esp8266 board you wish
- DS18B20 temperature sensor – this is a really accurate sensor which allows the chaining of multiple sensors on a single data wire.
- 4.7k resistor – although anything from 1k should suffice.
- Breadboard/dupont jumper cables – optional for soldering
- Mini breadboard – optional for soldering
- heatshrink – optional for soldering
If you want to make a “permanent” job then you’ll need a soldering iron and 3D printer if you want to make the enclosure.
Guide
Hardware
The nice thing about the DS18B20 temperature sensors is that they are really accurate, super small and you can chain a whole bunch of them together using a single wire for data. The way they work is each sensor has a hard-coded unique address (kinda like a MAC address).
A quick note, I found a few articles from a couple of years ago stating that using resistors with the DS18B20’s is no longer required. This one in particular is super detailed. I have personally tested without using resistors and I got the same readings as with the resistor so it does work but YMMV. I don’t have the equipment or the technical know how to verify if this is the case so I’m recommending you use the resistor if you can.
First we need to connect the DS18B20 to the Wemos D1 Mini (or whichever board you are using) which is simple, it requires just 3 connections – 3.3v/5v, Ground and Data.
The easiest way to identify the wires on the DS18B20 I’ve found is to have the flat of the sensor facing you (its a half circle) then from left to right it goes Ground, Data, VCC. The resistor should be placed between VCC and Data:
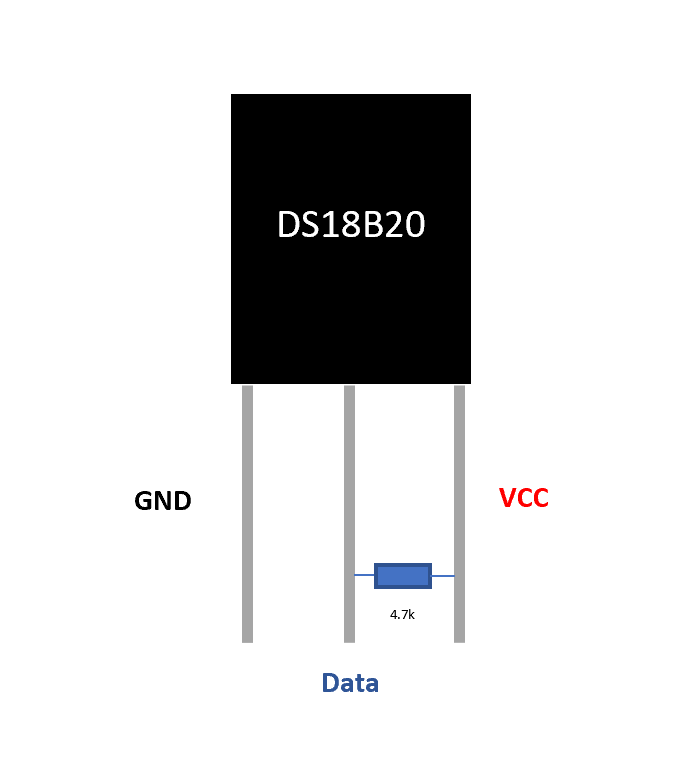
The table should help you wire things:
| Wemos D1 Mini | DS18B20 |
|---|---|
| 5v | VCC |
| Ground | Ground |
| D4 | Data |
Go ahead and grab your Wemos or other board and insert it into the breadboard. Next grab some jumper wires and connect the DS18B20 to the board as above. Finally insert the resistor into the breadboard between data and VCC.
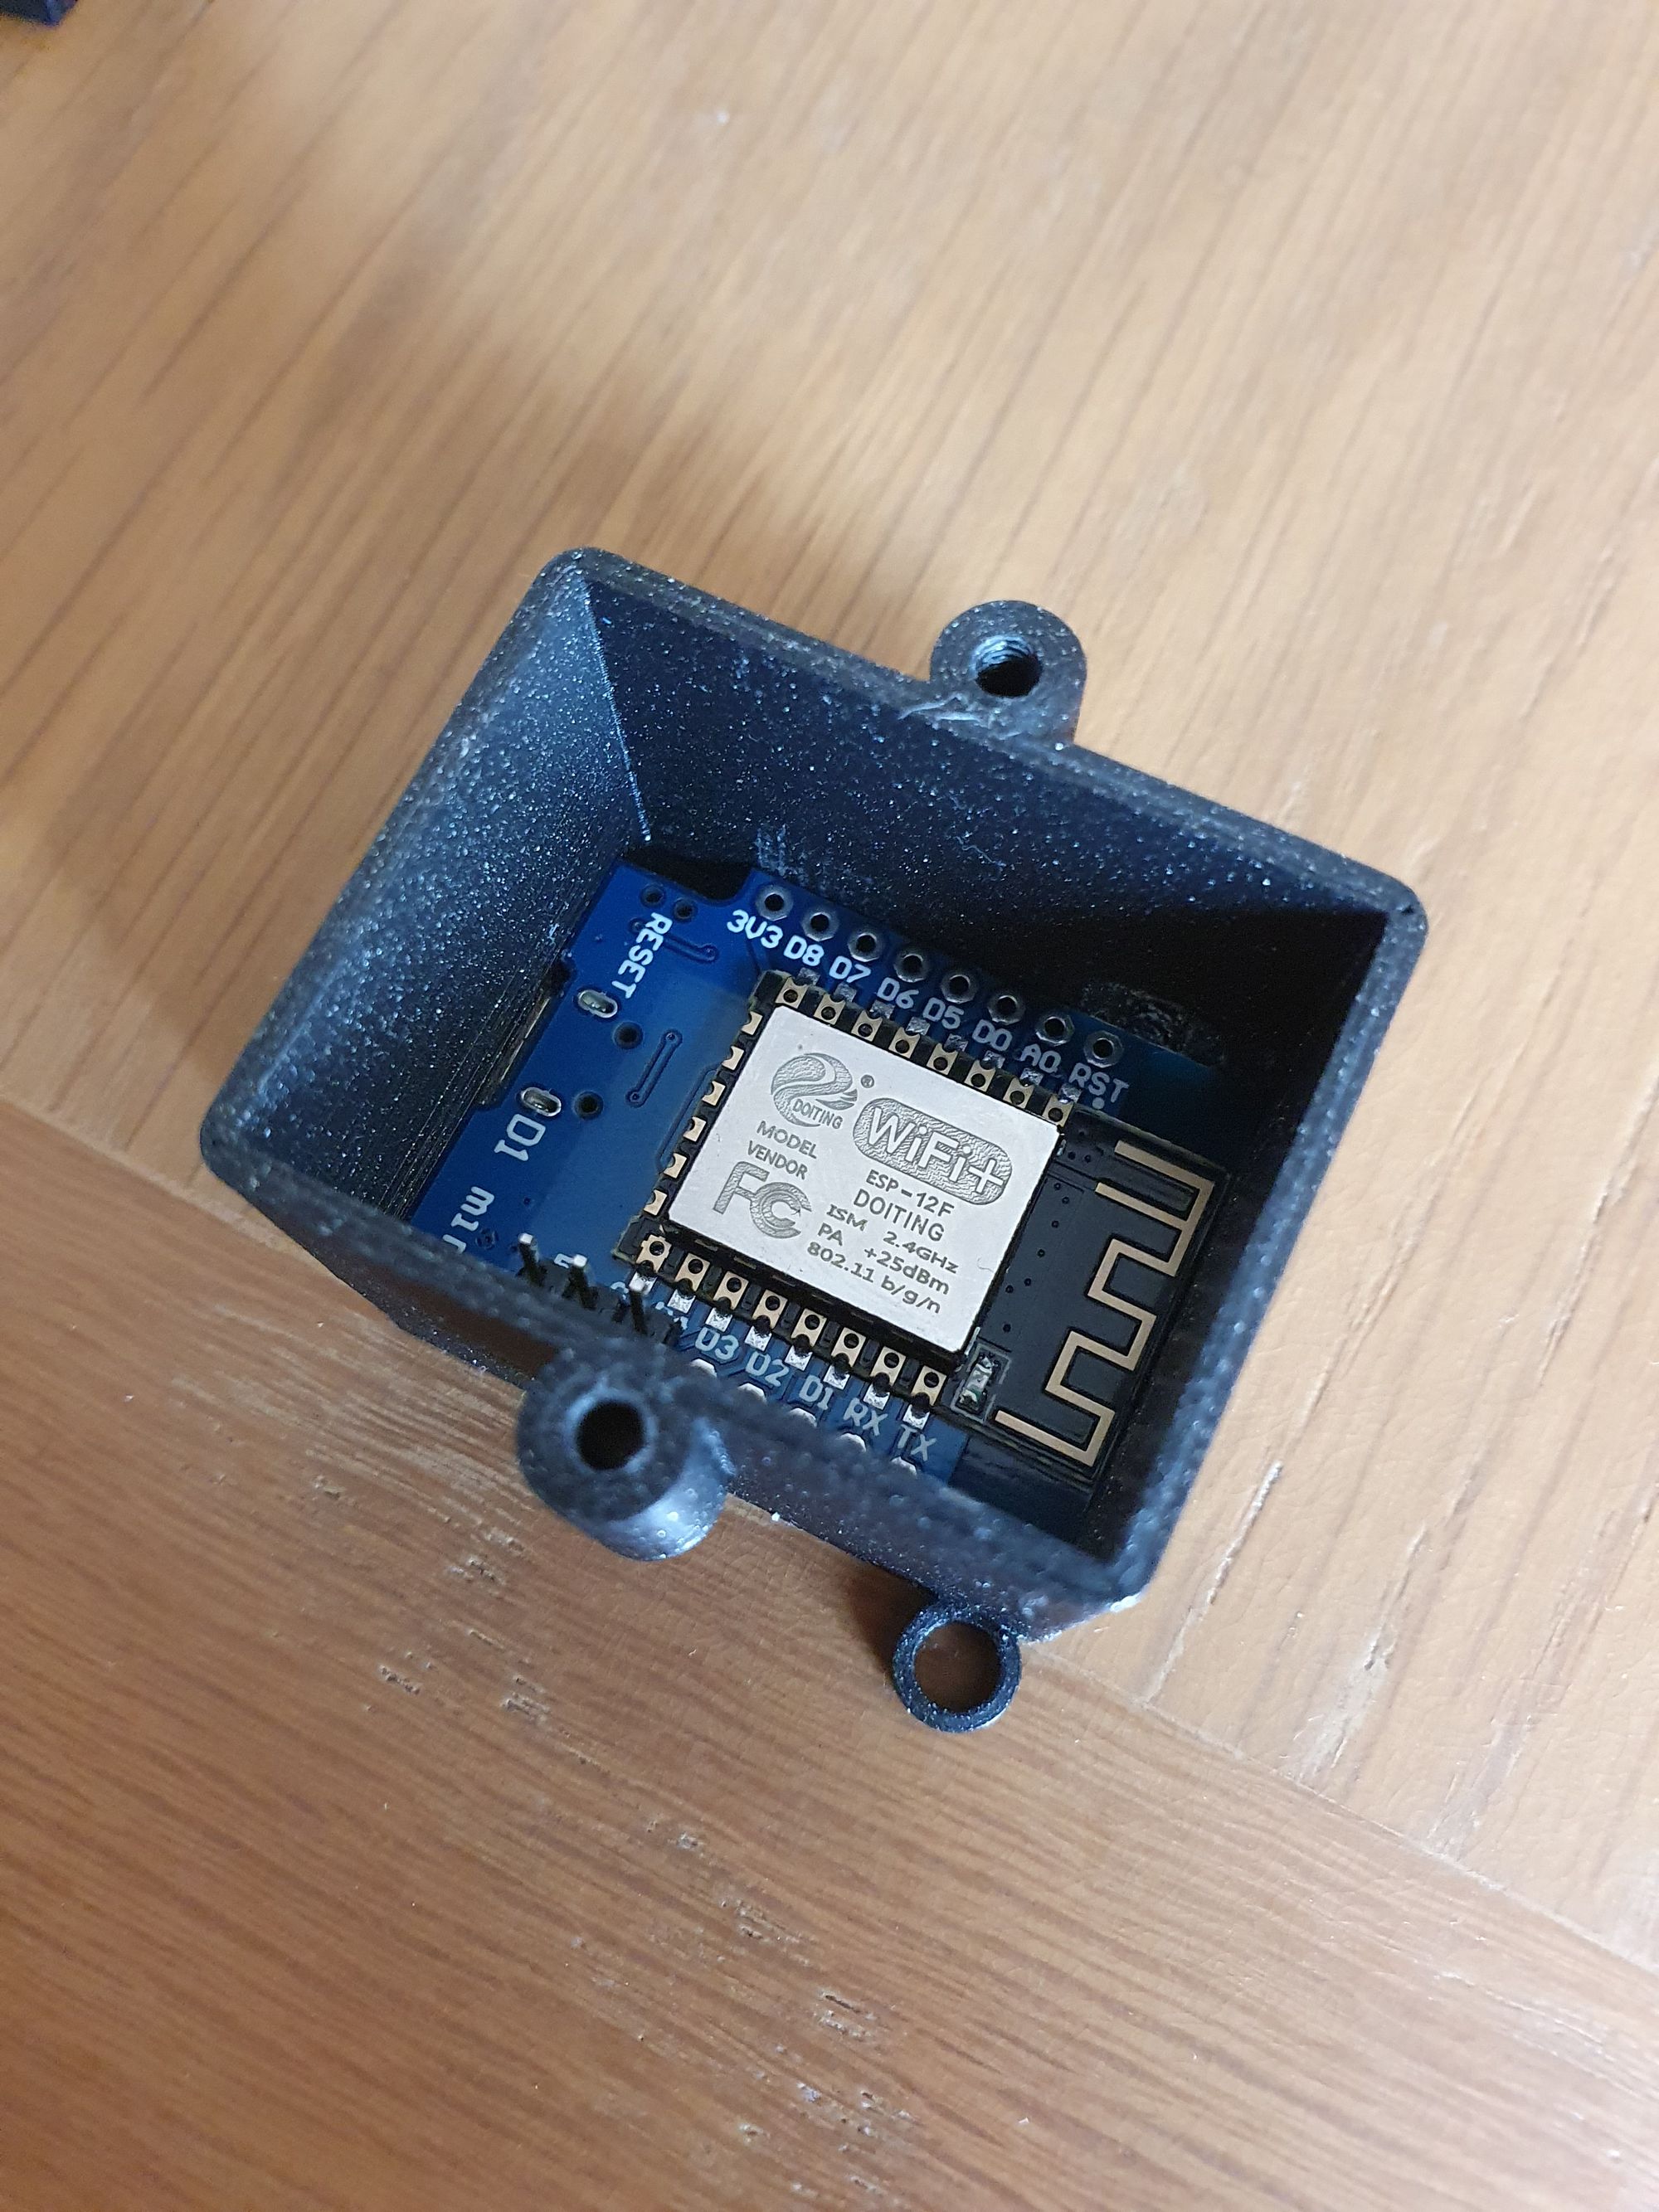
You should have something like this (excuse that I have soldered the top of my connections):
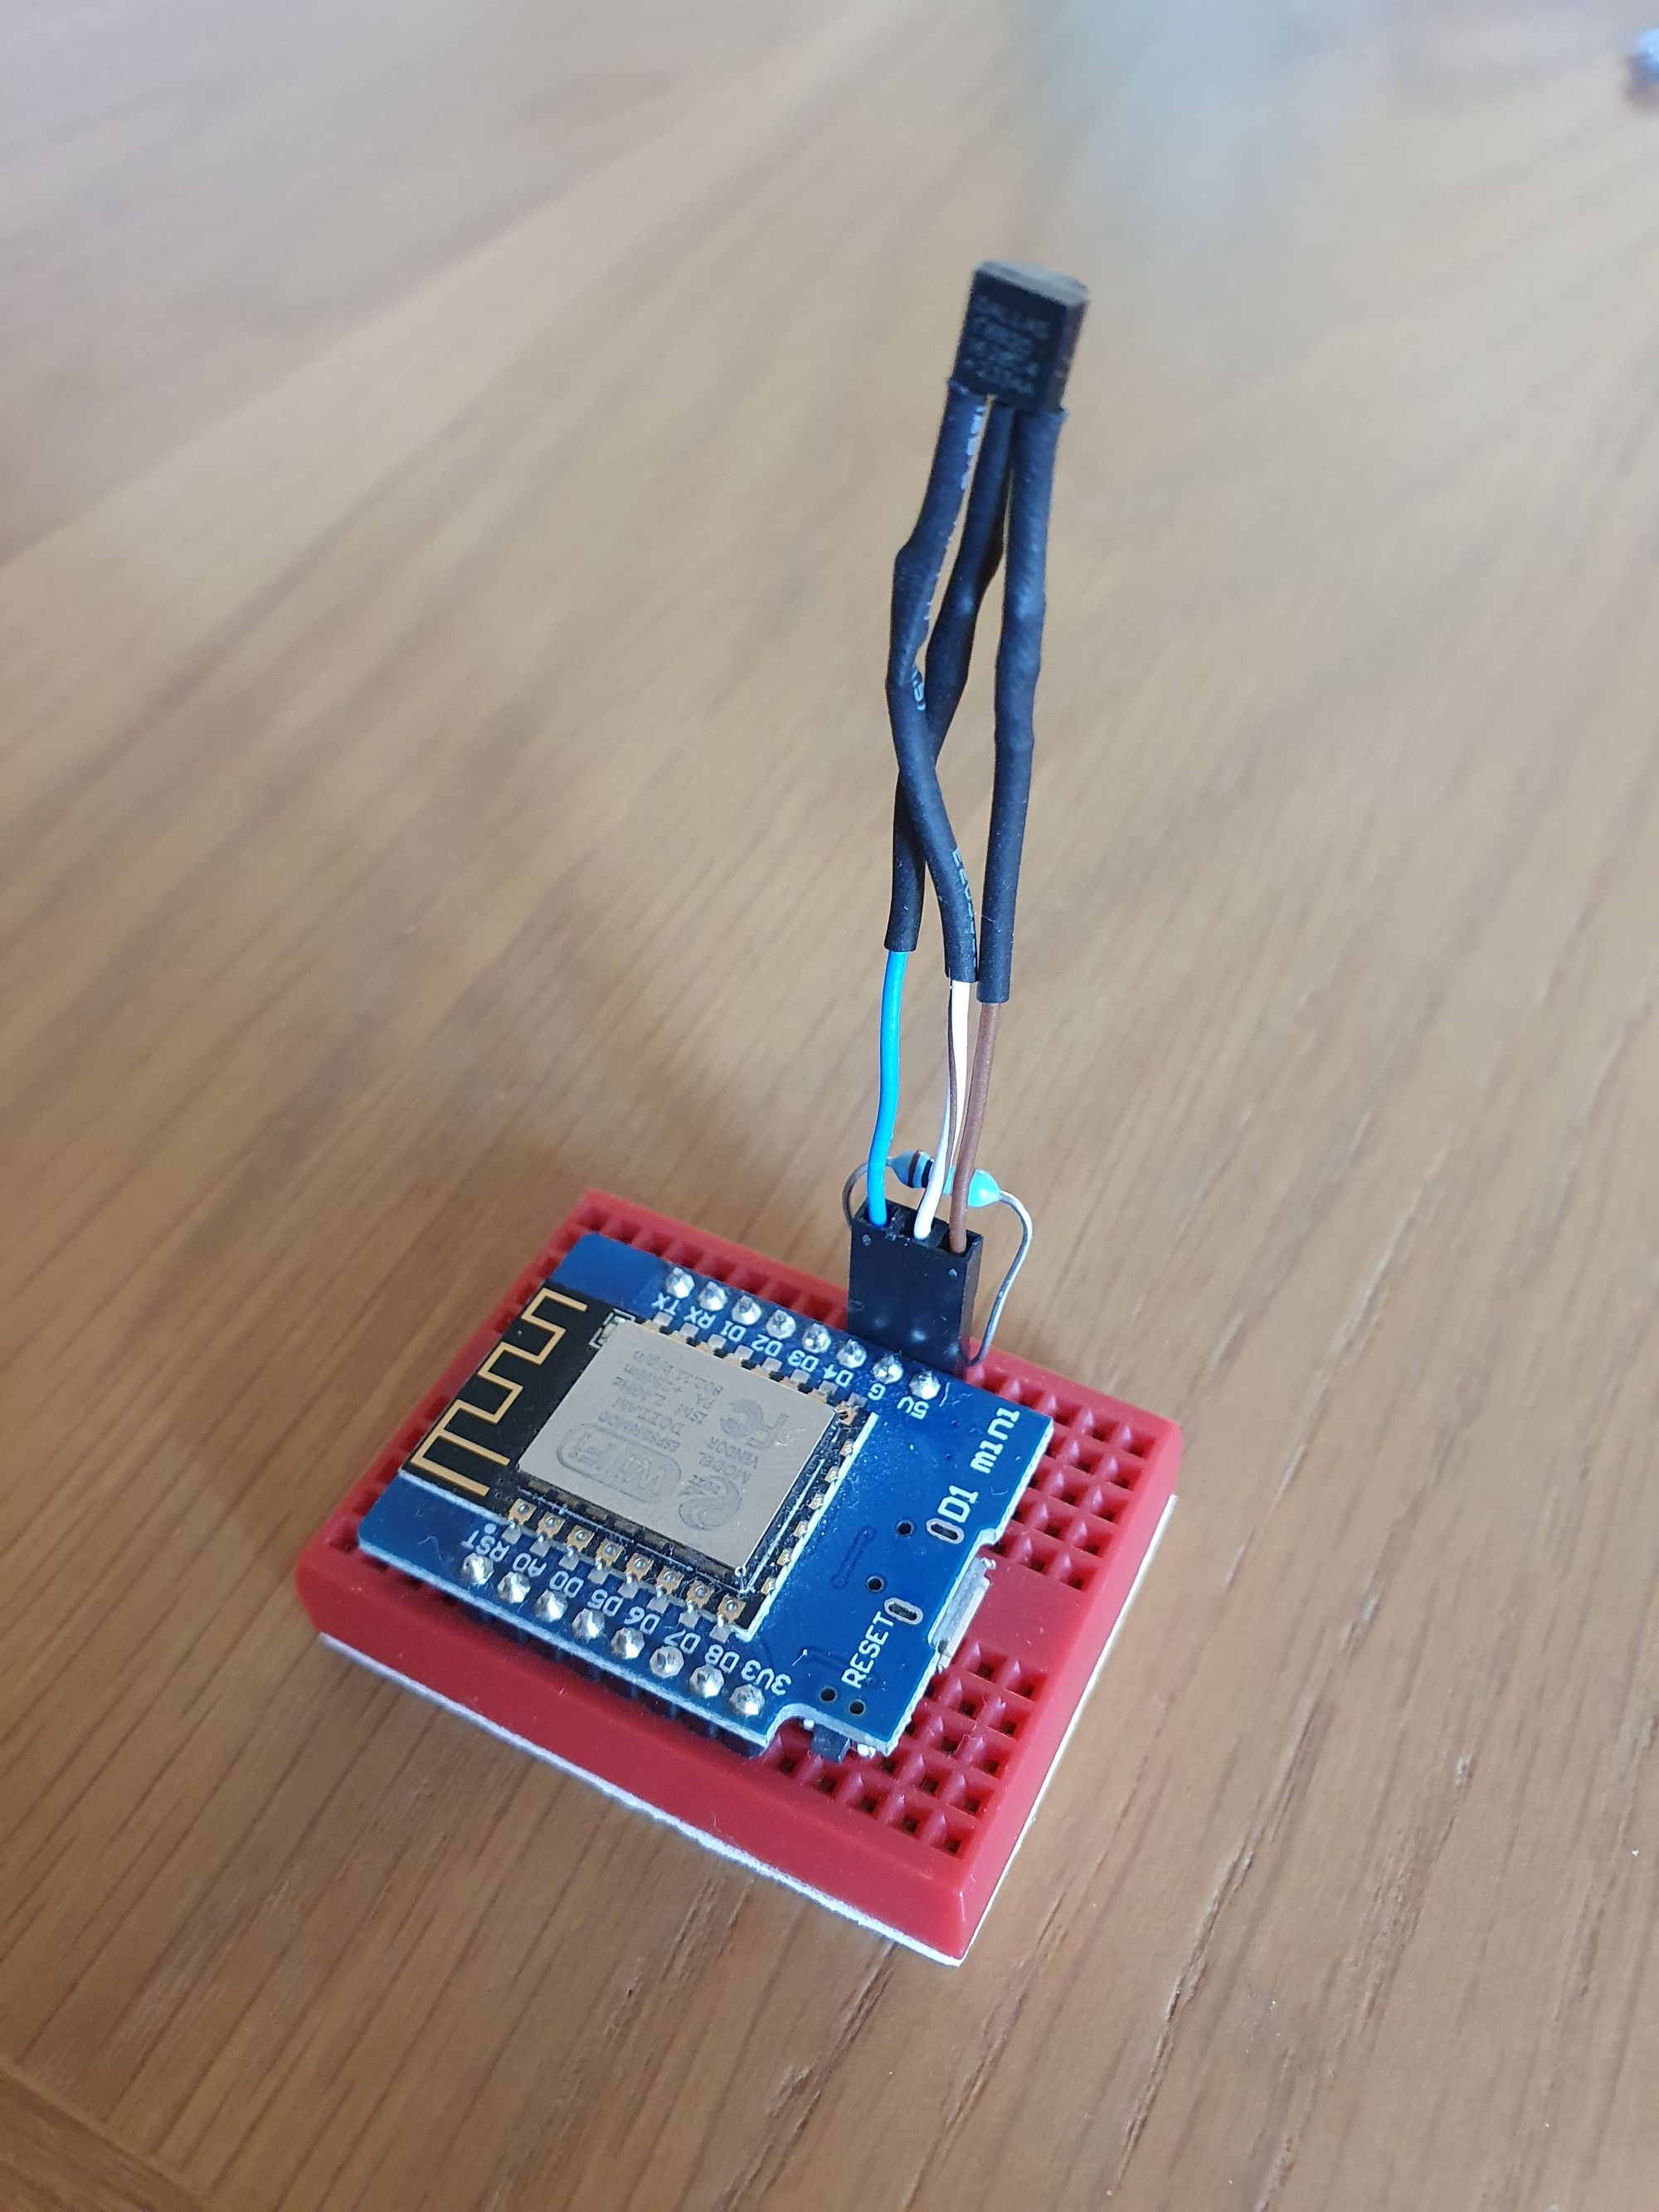
We should now have a functioning sensor that we can program.
Software
We are going to be using ESPHome on this since we want to integrate our DS18B20 directly with Home Assistant. Use the following config file to program the sensor initially:
esphome:
  name: bedroom_temperature
  platform: ESP8266
  board: nodemcuv2

wifi:
  ssid: "Your SSID"
  password: "Yourwifipassword"

# Enable logging
logger:

# Enable Home Assistant API
api:
  password: "apipassword"

ota:
  password: "otapassword"

dallas:
  - pin: D4
    update_interval: 30s
Plug in the Wemos via USB initially to get the first program uploaded and then OTA updates will be possible. Check here for how to install and run ESPHome.
Run the above config and watch the console, you will see an output like this:
[C][logger:175]: Logger:
[C][logger:176]:   Level: DEBUG
[C][logger:177]:   Log Baud Rate: 115200
[C][logger:178]:   Hardware UART: UART0
[C][dallas.sensor:070]: DallasComponent:
[C][dallas.sensor:071]:   Pin: GPIO2 (Mode: INPUT)
[C][dallas.sensor:072]:   Update Interval: 30.0s
[D][dallas.sensor:077]:   Found sensors:
[D][dallas.sensor:080]:     0x48041674E11DFF28
The last line gives us the unique address we discussed before, copy this and amend the config file to look like:
esphome:
  name: bedroom_temperature
  platform: ESP8266
  board: nodemcuv2

wifi:
  ssid: "Your SSID"
  password: "Yourwifipassword"

# Enable logging
logger:

# Enable Home Assistant API
api:
  password: "apipassword"

ota:
  password: "otapassword"

dallas:
  - pin: D4
    update_interval: 30s

sensor:
  - platform: dallas
    name: "Bedroom Temperature"
    address: "0x48041674E11DFF28"
And upload via USB or OTA. Watch the console again and this time you should start to see some temperatures being outputted every 30 seconds:
[D][sensor:092]: 'Bedoom Temperature': Sending state 19.06250 °C with 1 decimals of accuracy
[D][dallas.sensor:148]: 'Bedroom Temperature': Got Temperature=19.1°C
[D][sensor:092]: 'Bedroom Temperature': Sending state 19.12500 °C with 1 decimals of accuracy
[D][dallas.sensor:148]: 'Bedroom Temperature': Got Temperature=19.1°C
[D][sensor:092]: 'Bedroom Temperature': Sending state 19.12500 °C with 1 decimals of accuracy
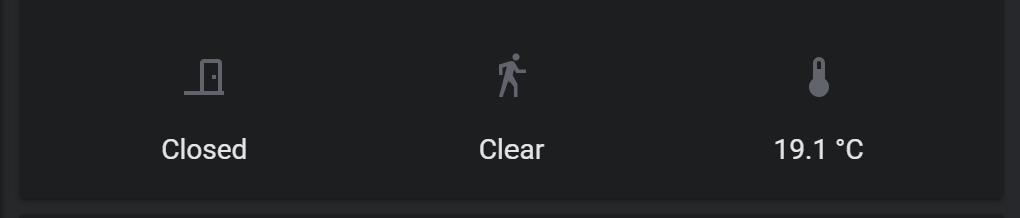
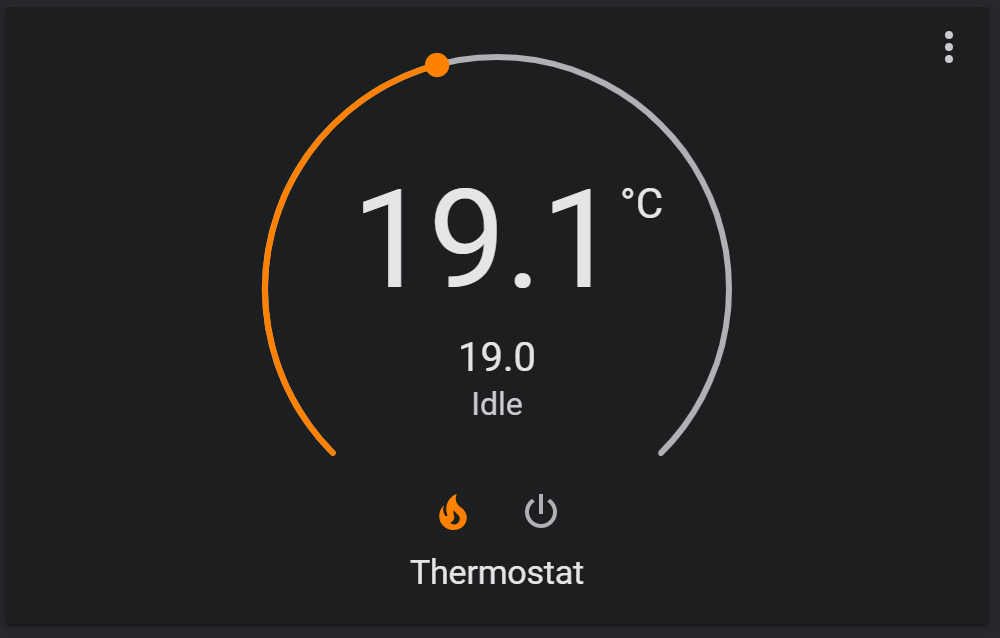
[D][dallas.sensor:148]: 'Bedroom Temperature': Got Temperature=19.1°CExcellent! Now head into Home Assistant and configure it via integrations. Once added you will see the temperature being reported:
From there we can then add a thermostat to integrate directly with our heating system:
Enclosure
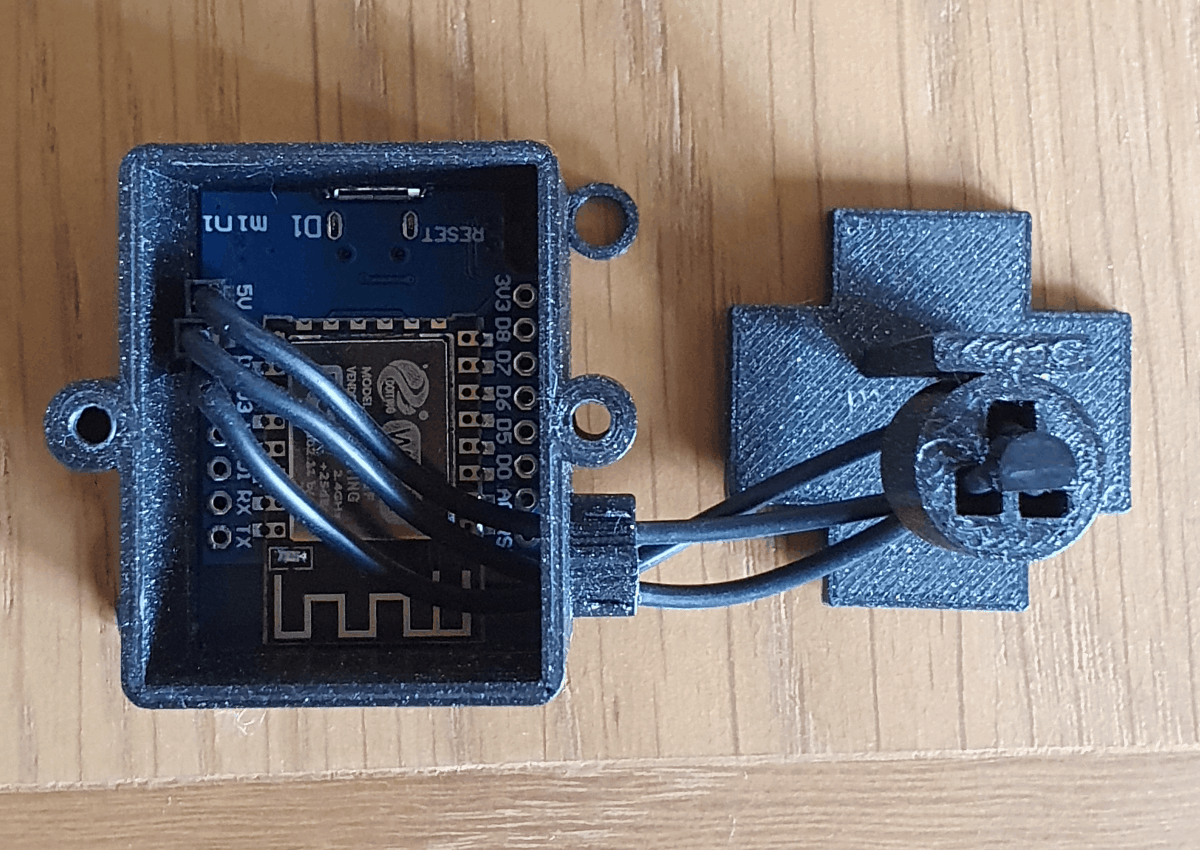
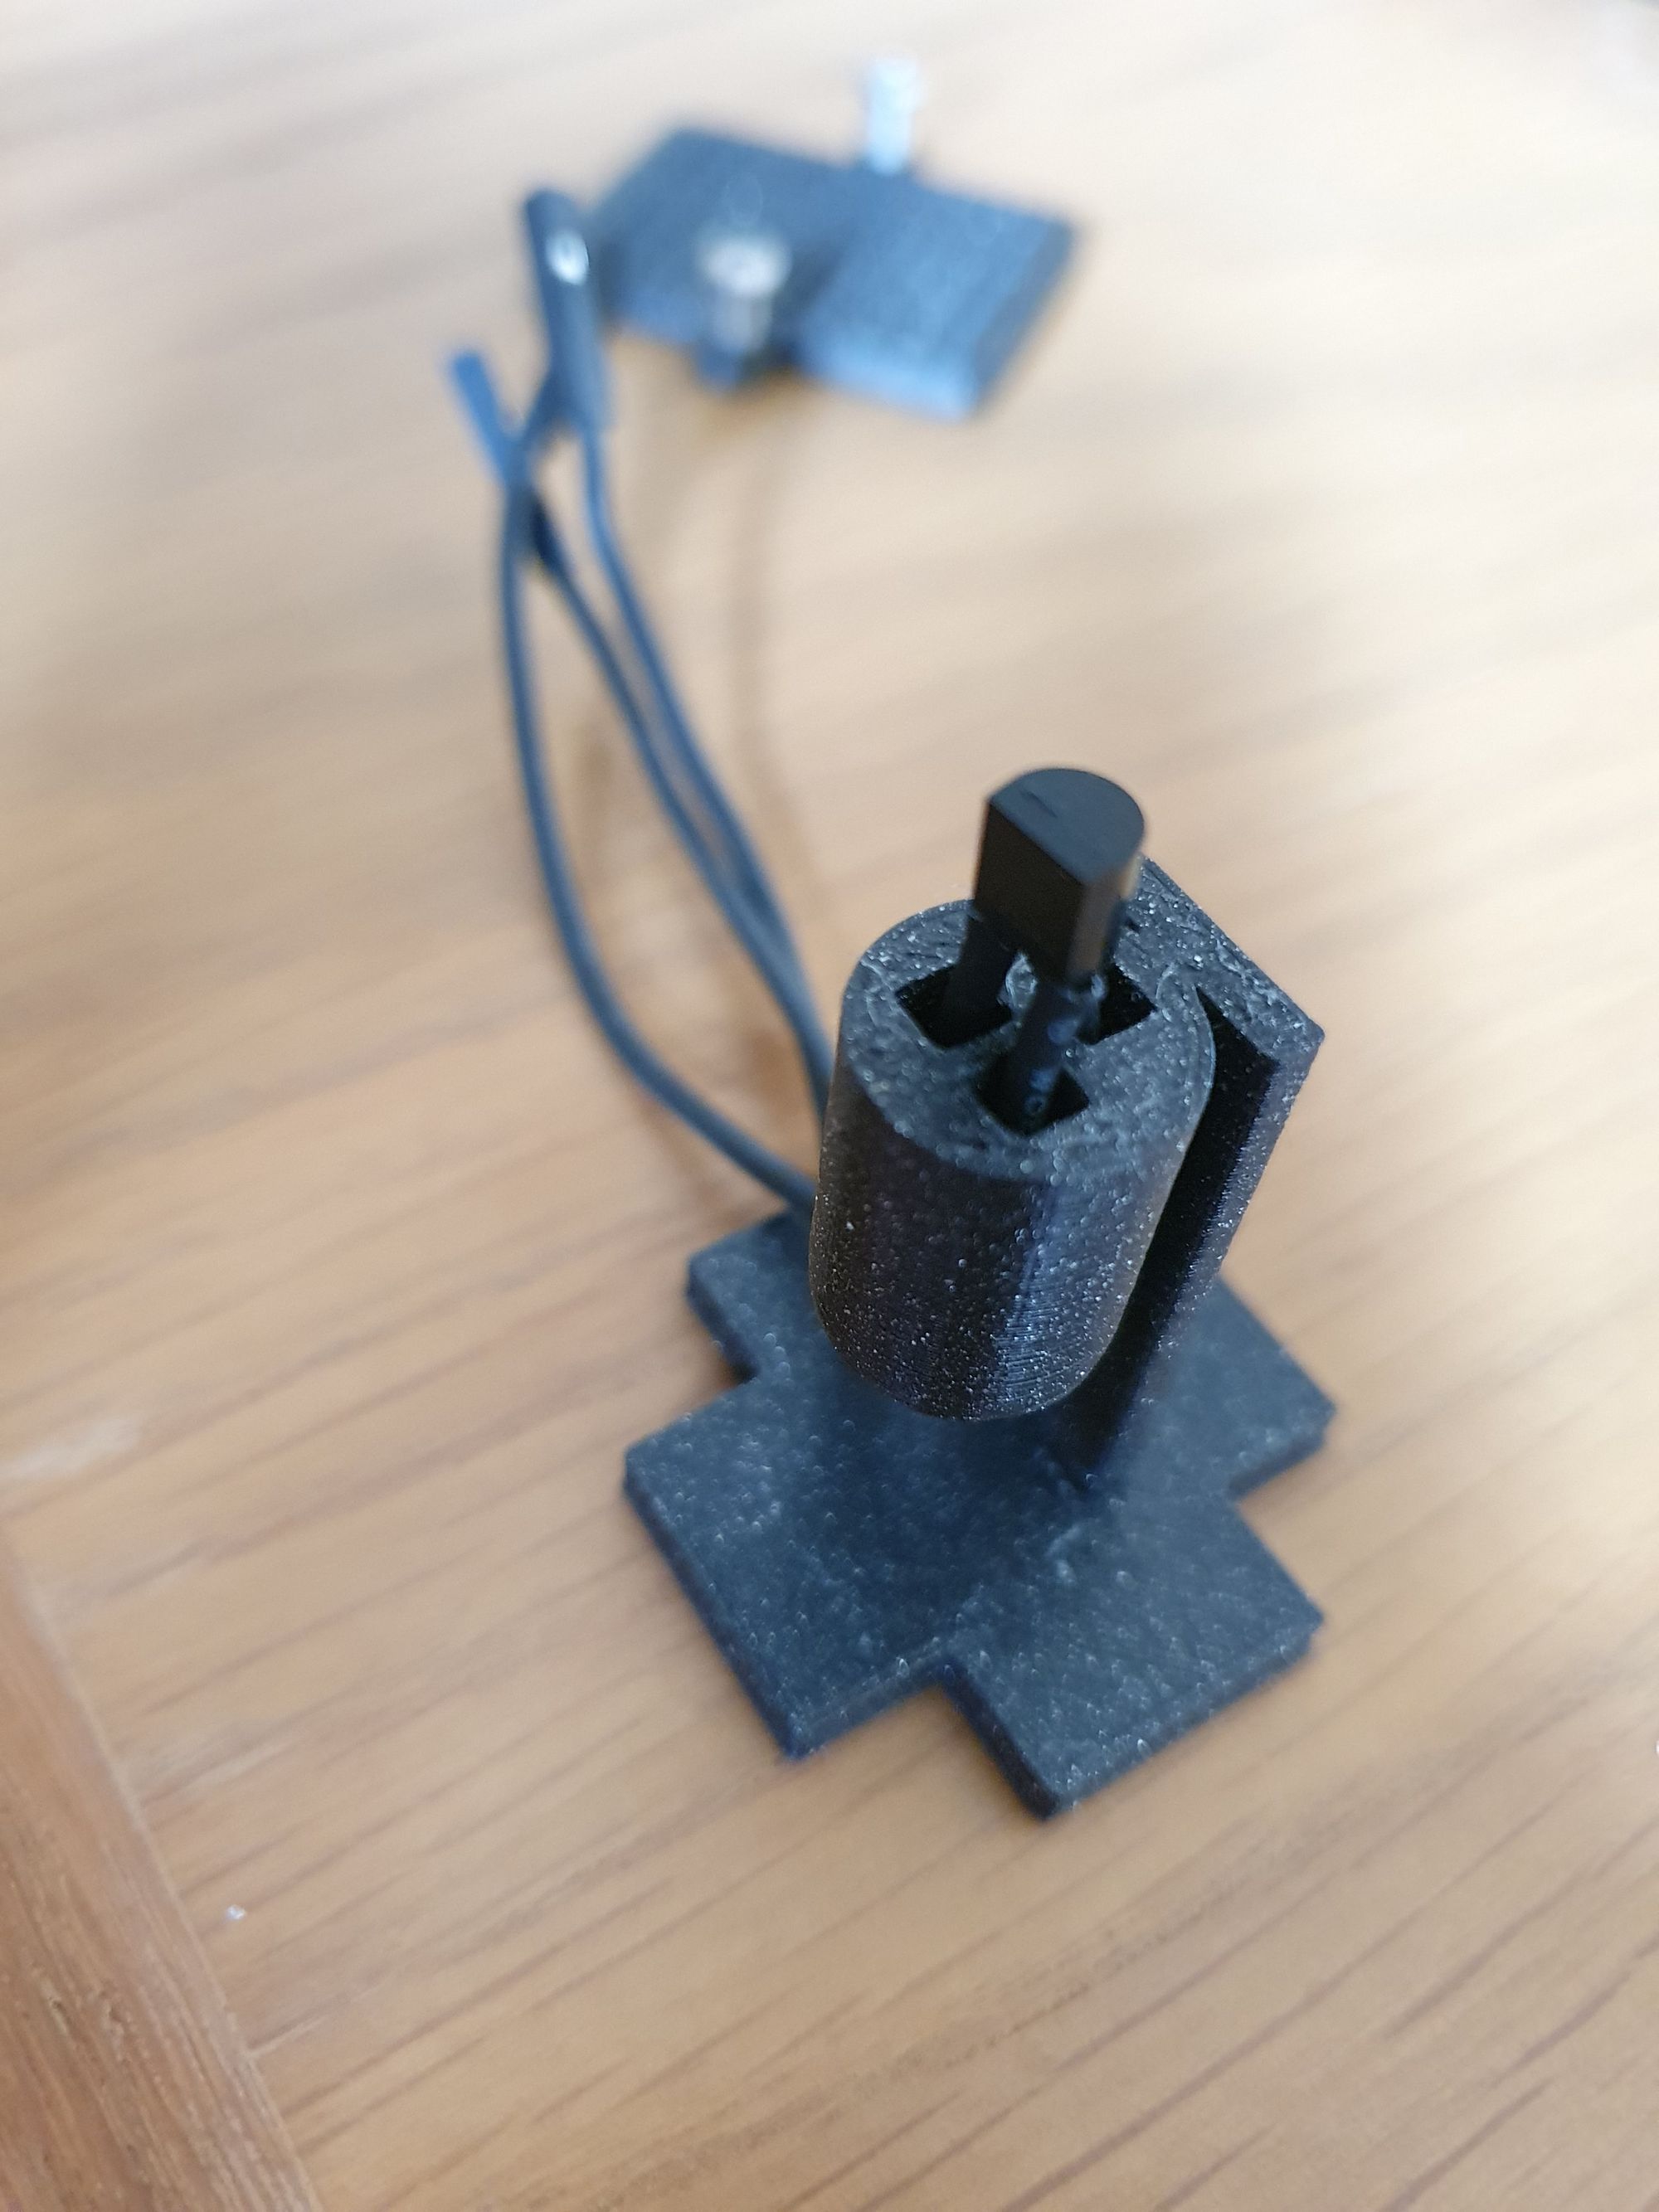
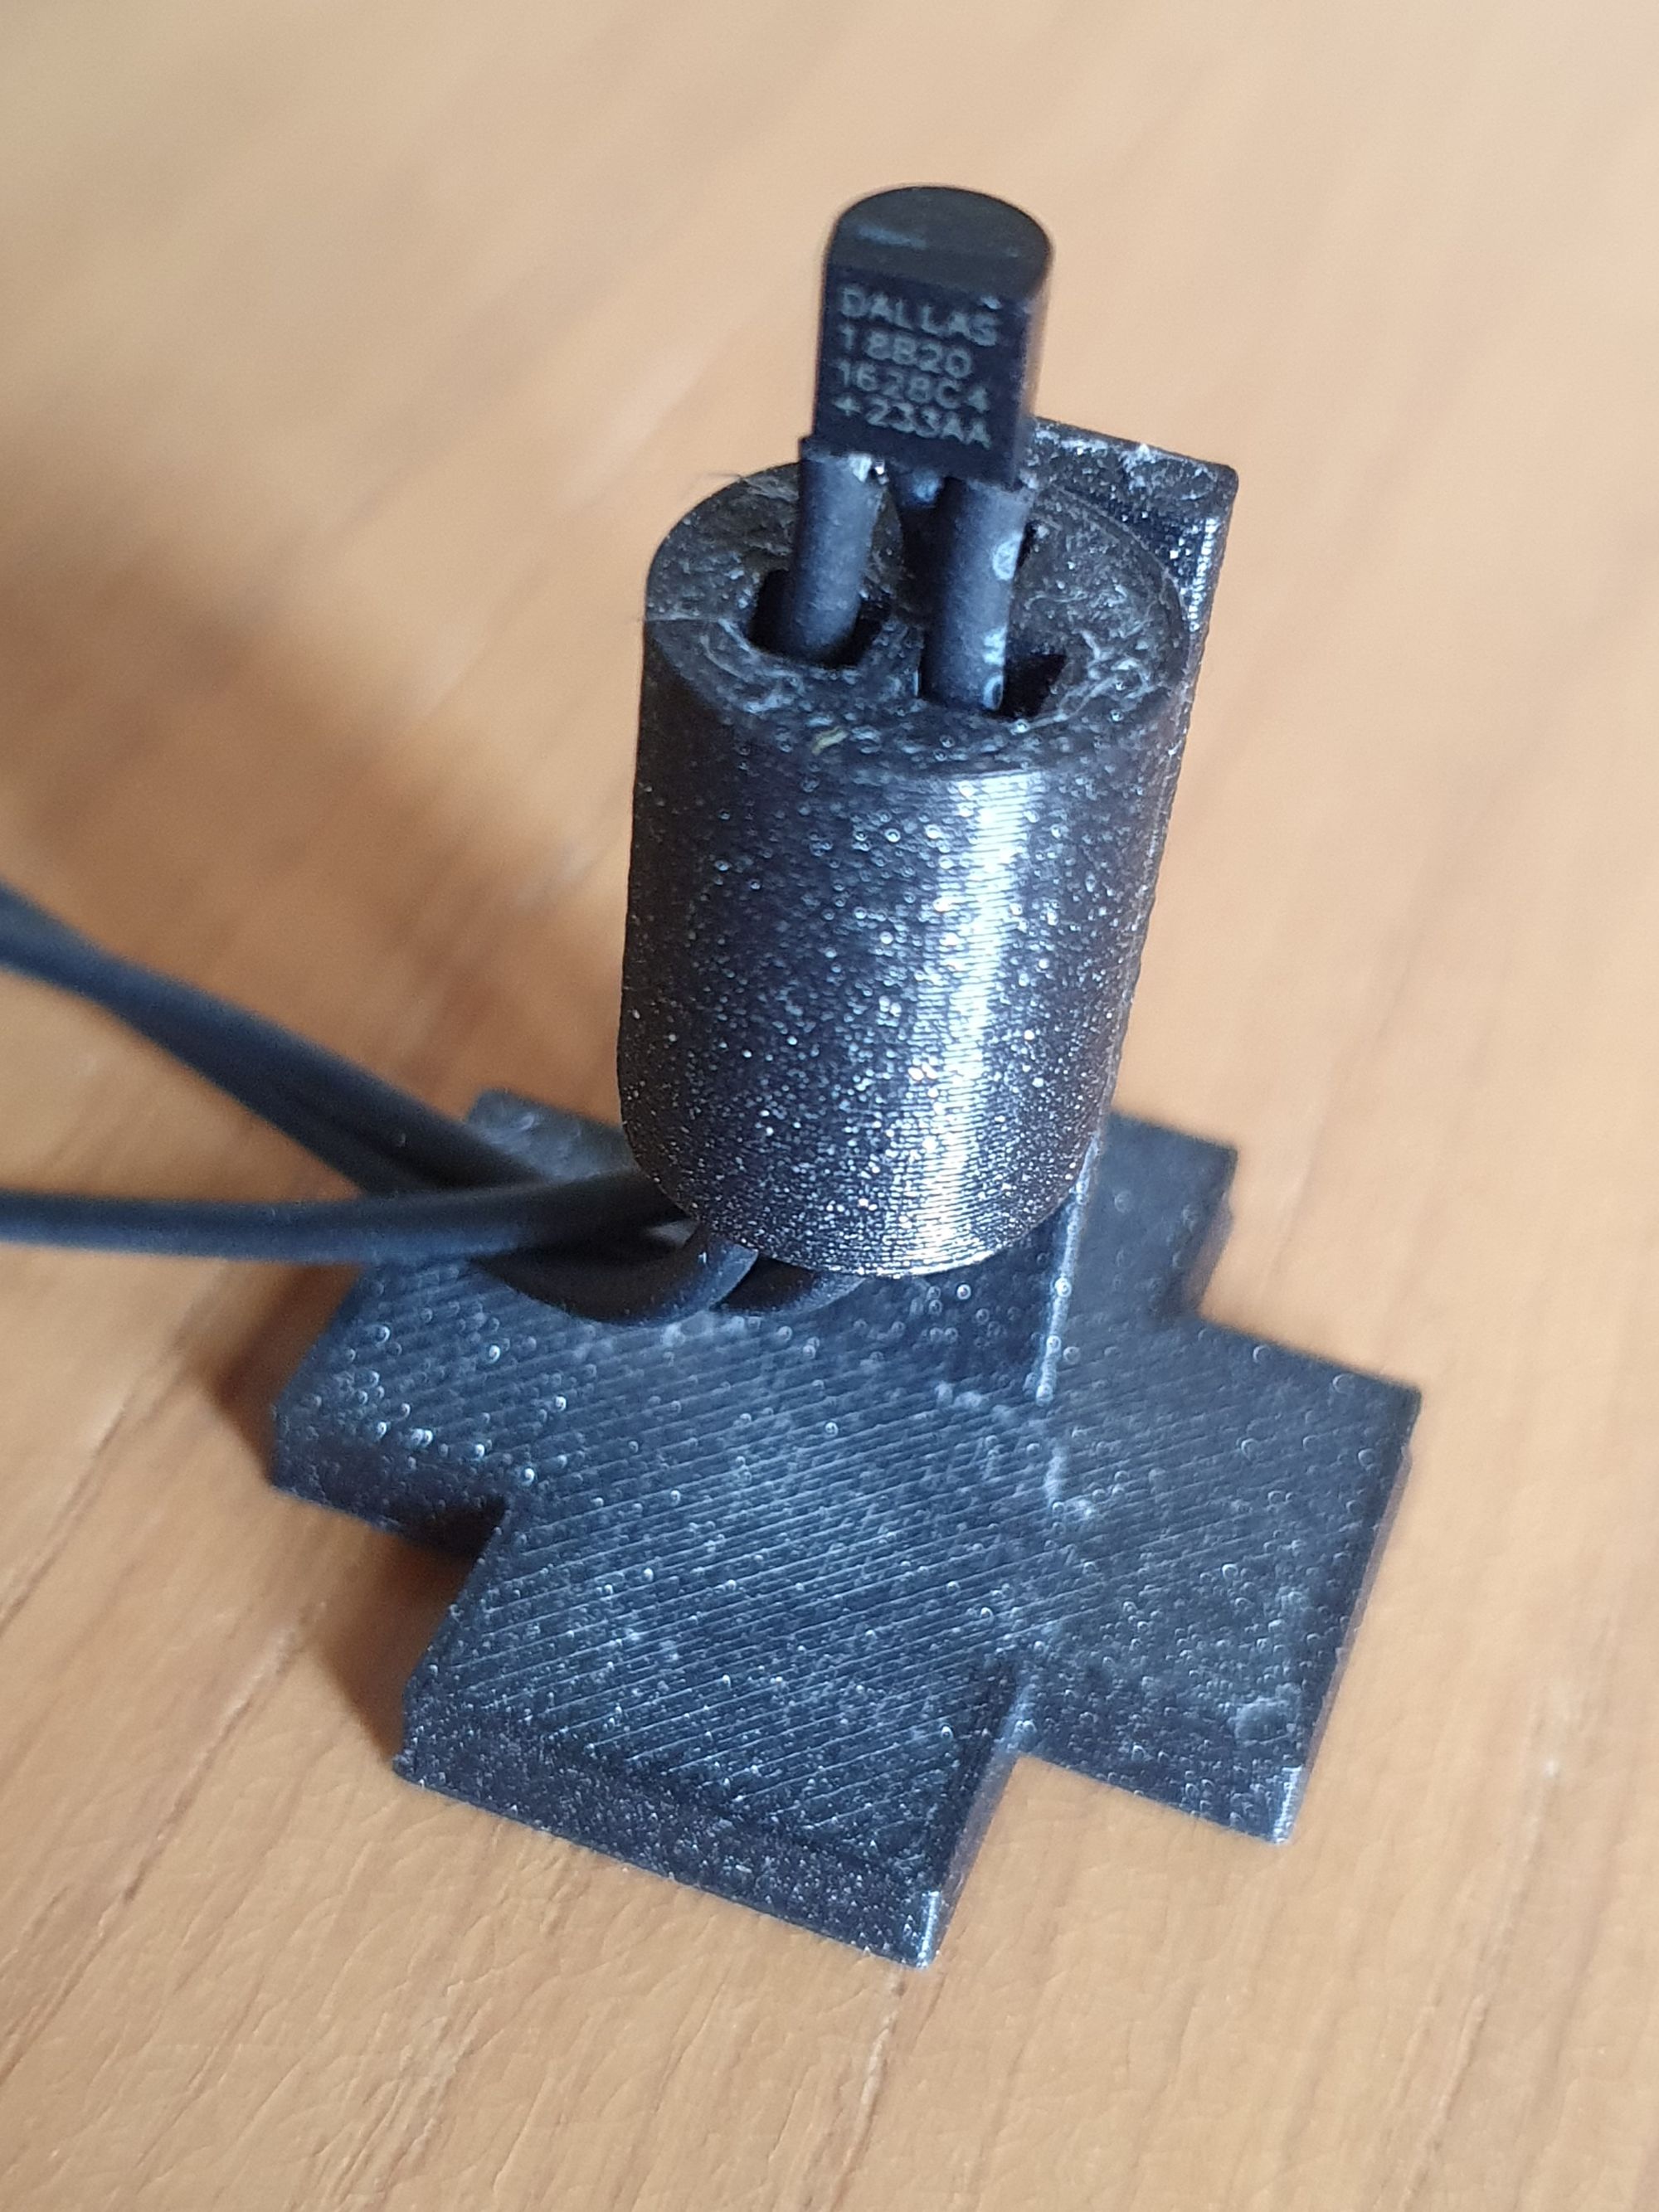
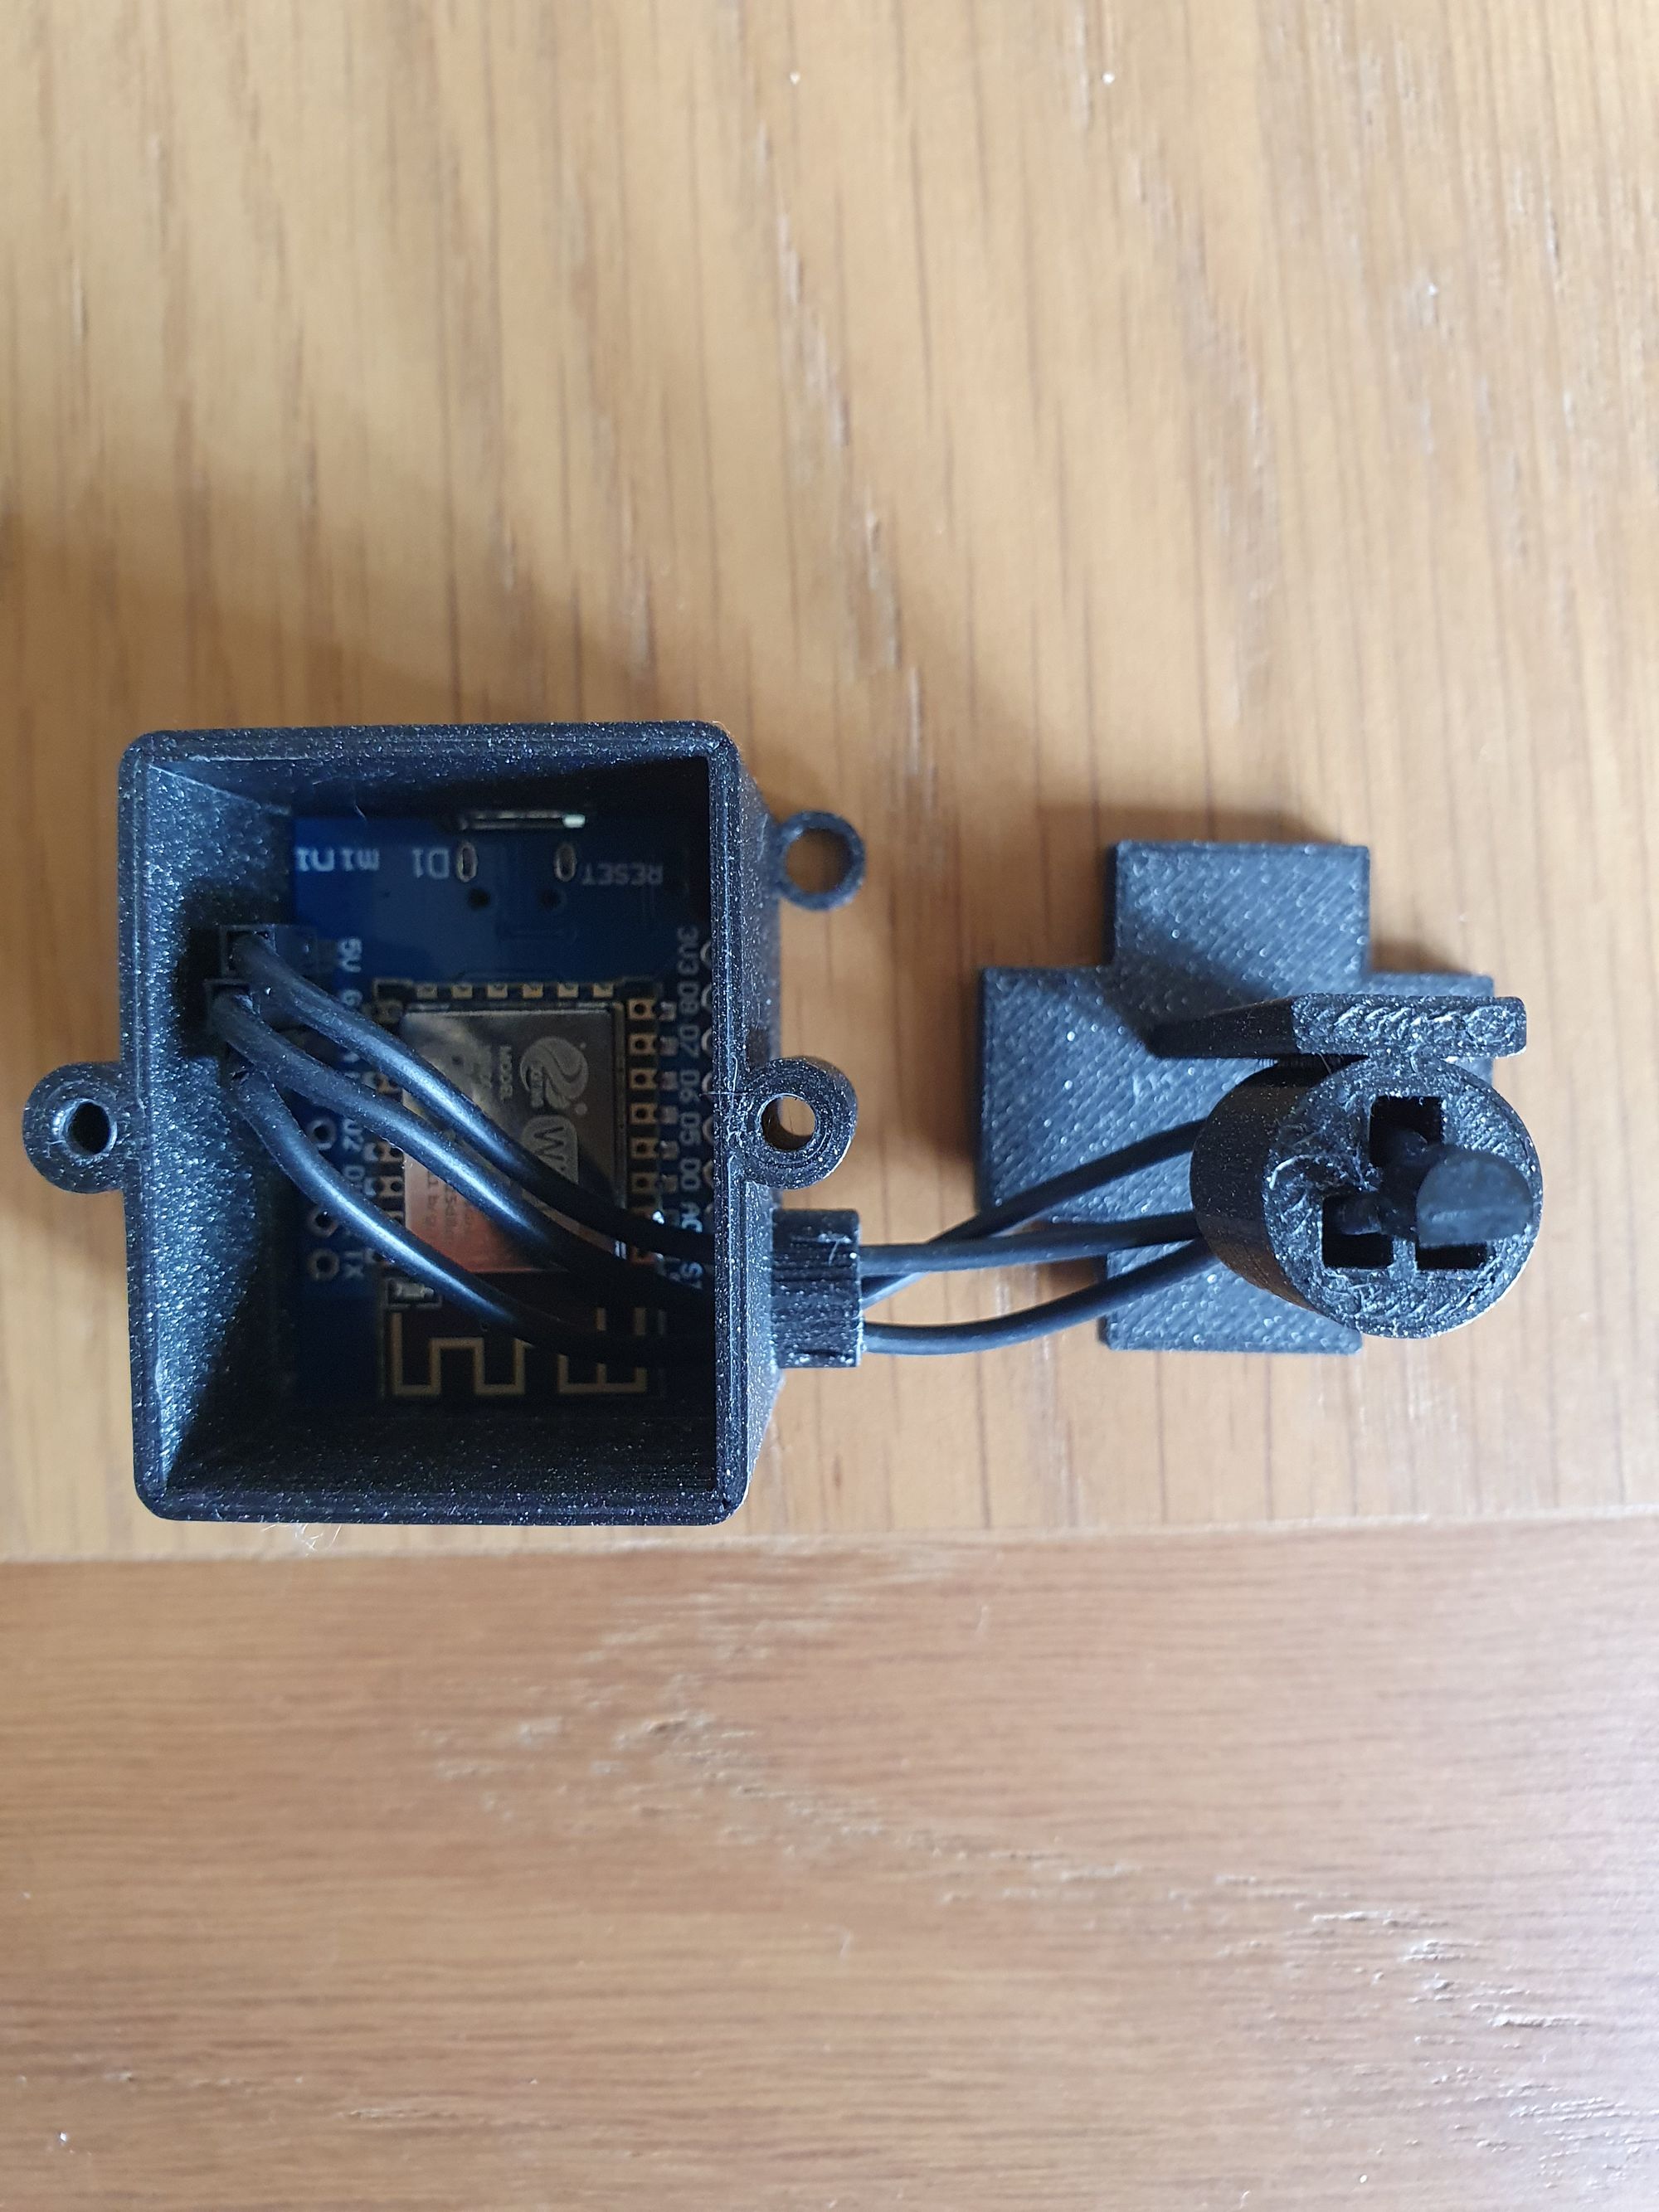
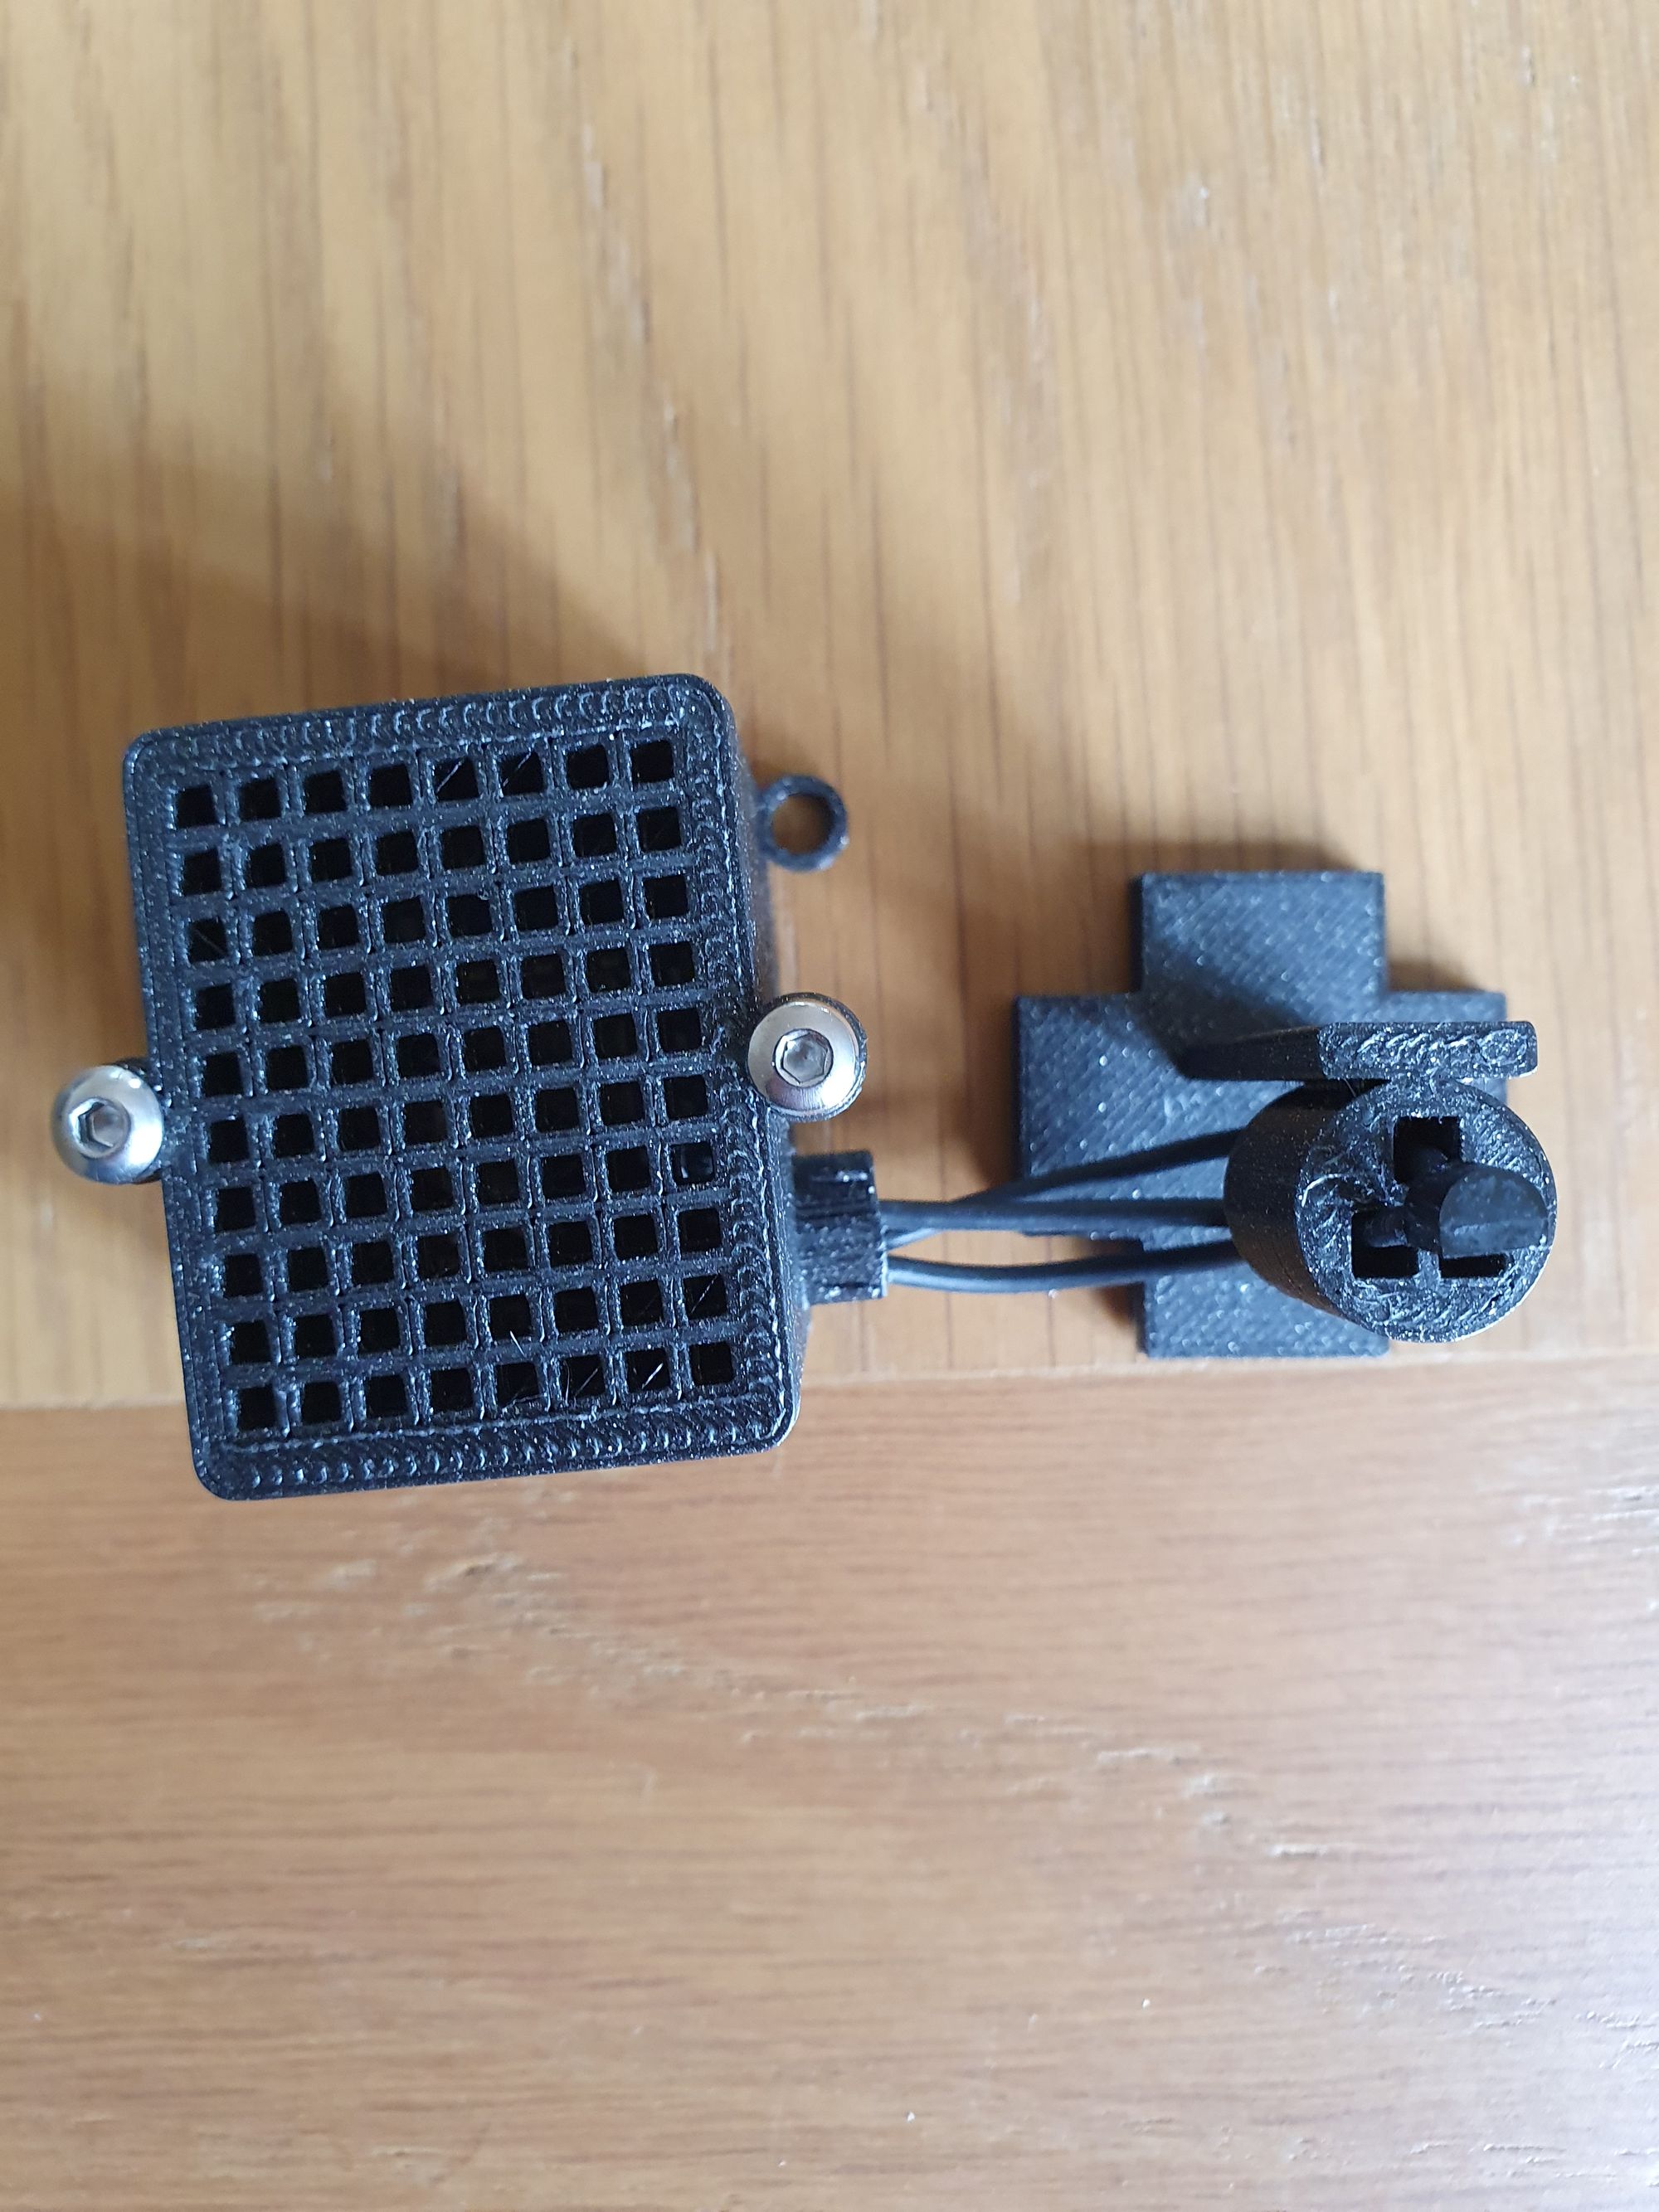
I’ve created a little enclosure and stand in order to keep things nice and neat.
I experimented with a few designs where the sensor was within the main case (still sticking out the top) but the small amount of heat from the esp8266 was heating up the plastic and making the sensor read about 2 degrees higher than it should have been, even with loads of ventilation everywhere so decided to make a separate stand. I’m by no means an expert on heat transfer and very much a beginner when it comes to 3D design/printing so I’m sure improvements can be made!
Anyhow, you can find the STL files on Thingiverse here.
You will need 1 x box, 1 x lid and 1 x stand if you want to free-stand the sensor. You need 2 x M3 screws for the lid.
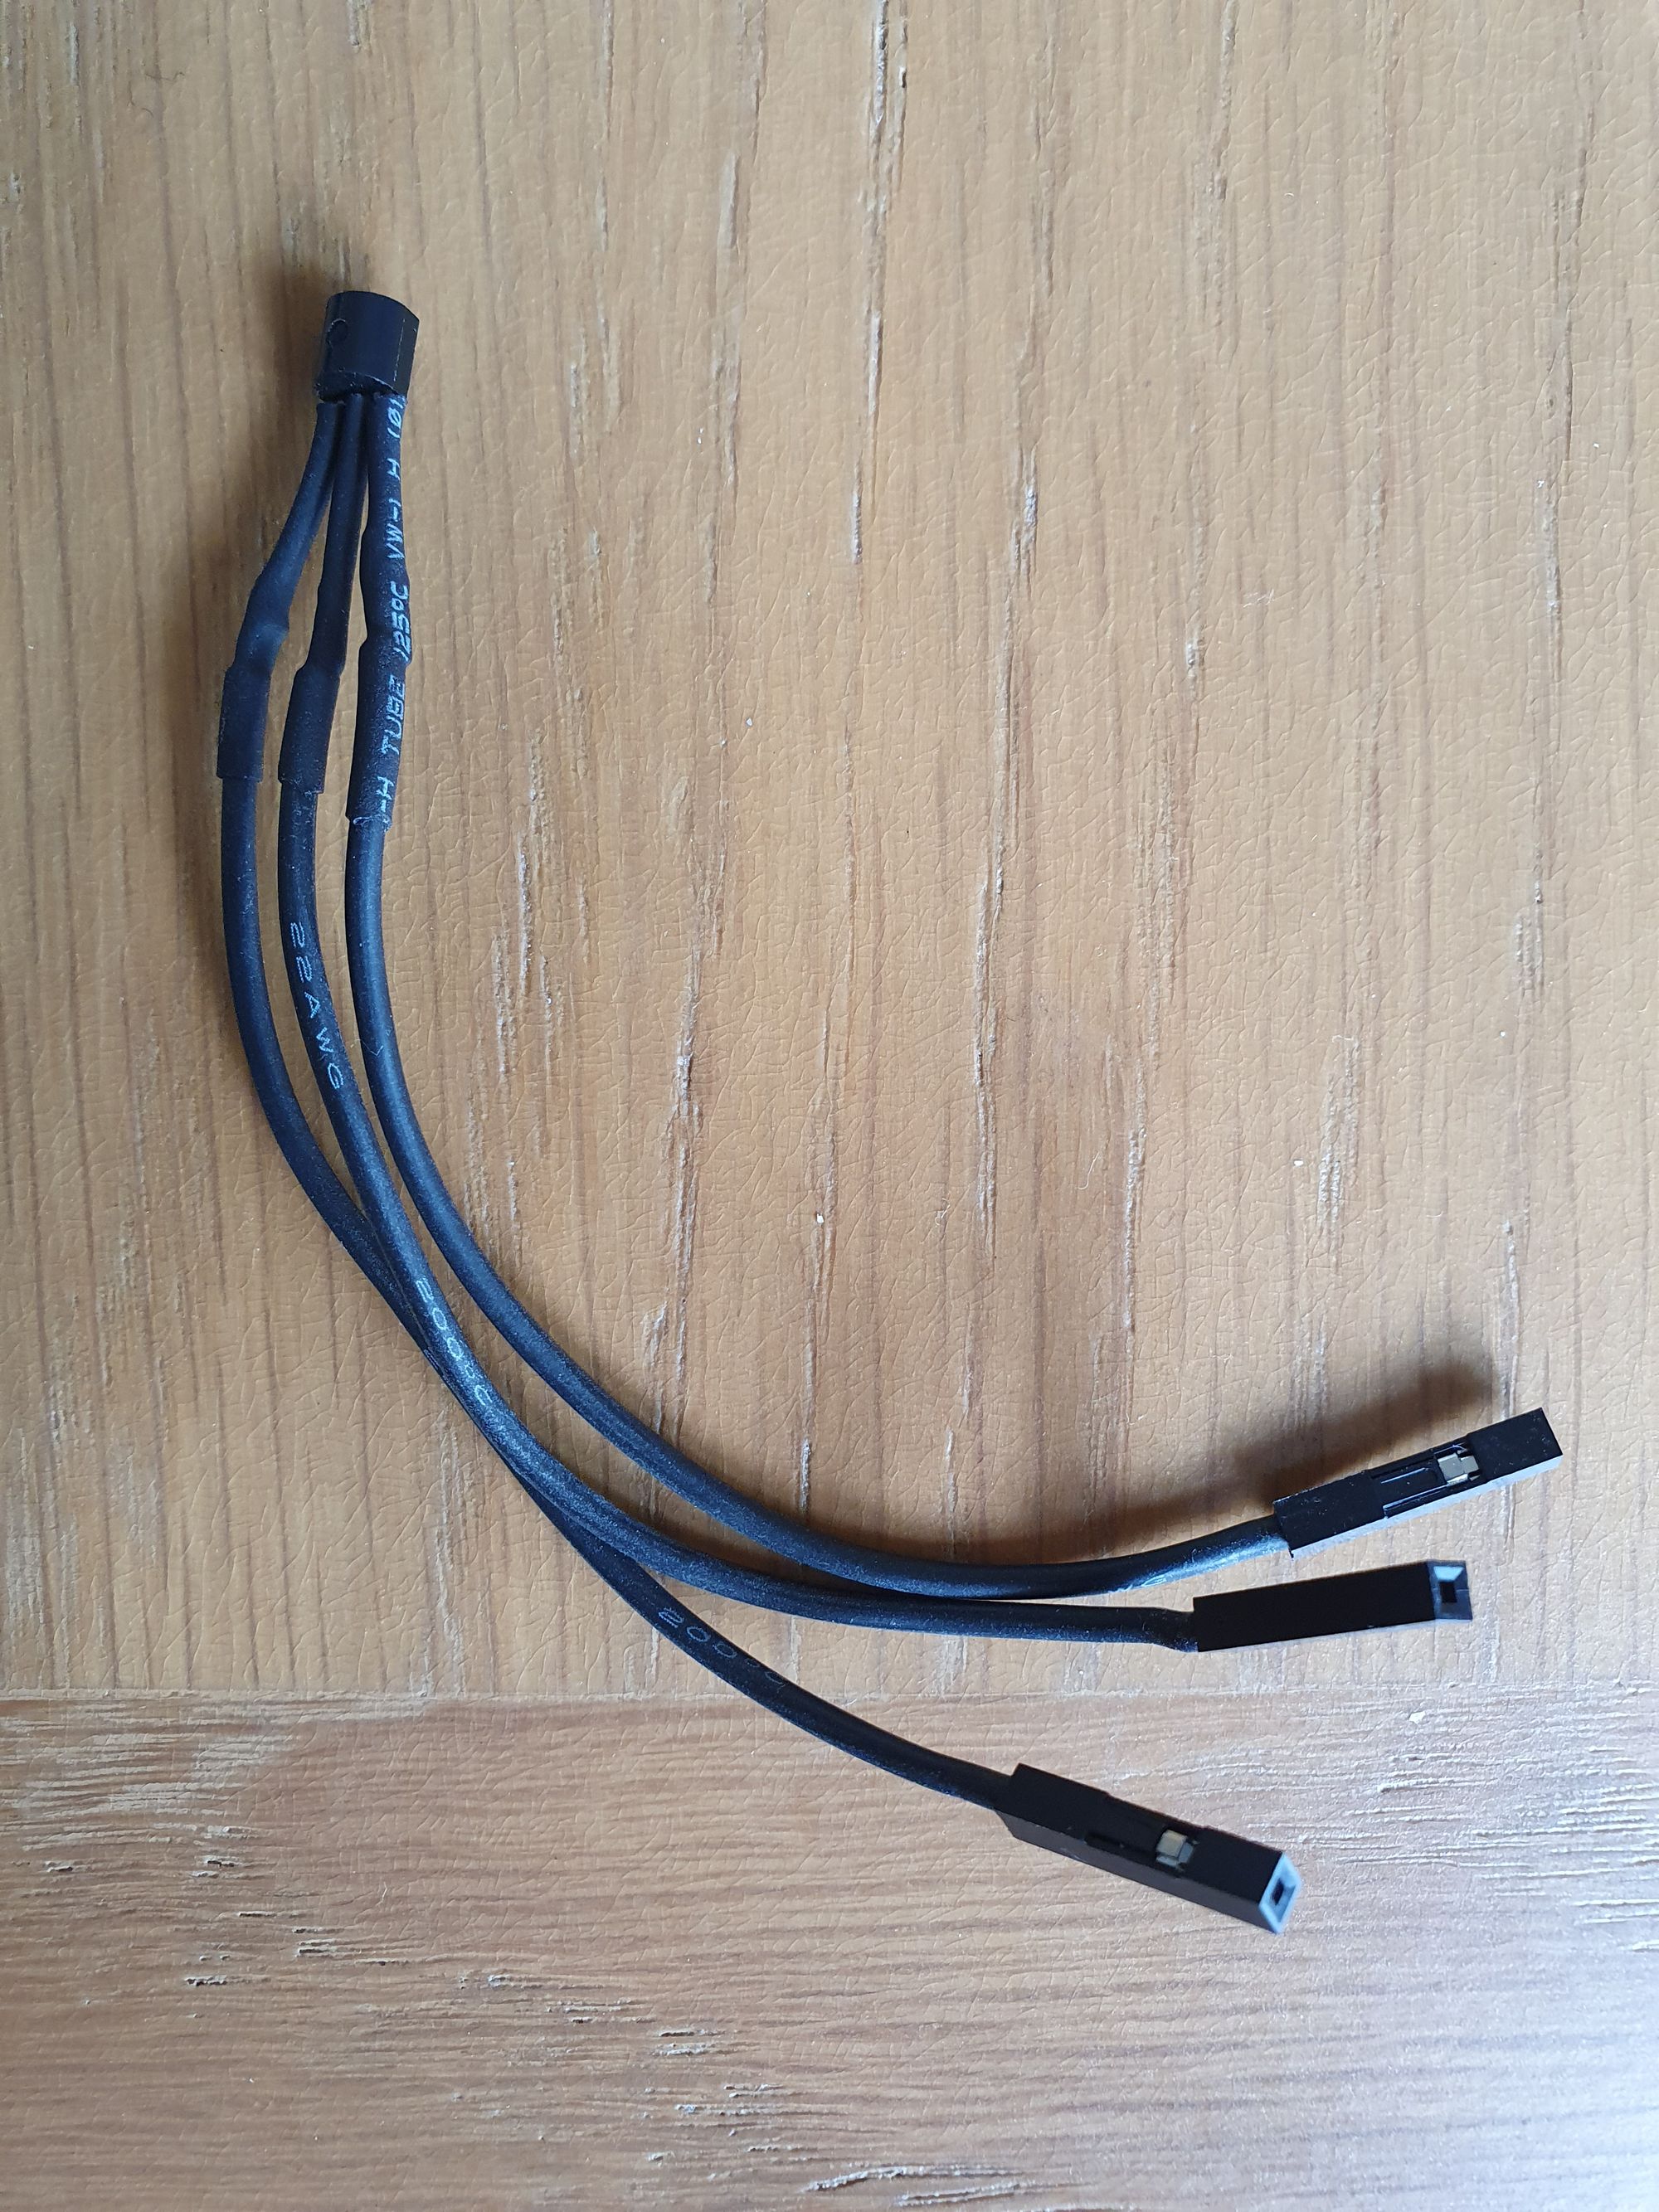
I soldered DuPont cables with heatshrink to the sensors, fed them through the stand which holds it nice and secure, then through the hole in the case and plug into the box.
The final article looks like this:
Conclusion
Hopefully you should now have a working DS18B20 temperature sensor that you can use to make your heating a bit smarter or just generally keep an eye on the temperature all from within Home Assistant.
Hope your all keeping safe and well amidst the Coronavirus pandemic.
As always, anything else you’d like to see us make, hit us up!