Home Assistant Yellow: First Impressions!

Home Assistant Yellow has been absolutely smashing its crowdfunding goals since it first launched, reaching its initial target in under 5 days and currently its over 180% funded with 11 days left and I can see why: it’s a really attractive first attempt at some custom hardware from the folks over at Home Assistant.
When Home Assistant Yellow was first announced, I answered some of the most questions about the announcement here, if you are interested.
While it’s all well and good looking at some images of a product on a Kickstarter website, sometimes you just want to actually get a physical look at a product to get a feel for it. Well, it just so happens that I’ve actually got one here, so, why don’t we do that?
The guys over at Home Assistant were kind enough to ask if I wanted to check out the Yellow to give you my thoughts on it – apparently this is one of only two units out there in the world right now, therefore we will definitely need to be careful with this one – so yeah, big thanks to Paulus and the team for sending this over!
I’ve had this for a couple of days to play around with and to give you my first initial impressions – not quite long enough for a full review but that will be coming shortly, so make sure to get subscribed so you will get a notification when that is uploaded so you don’t miss out!
I thought it would be fun to physically show you the hardware, I don’t have the final case yet, only a prototype 3d printed case but I am excited to show you the rest - let’s get into it!
Video:
Design and Specs
- Carrier board for Raspberry Pi Compute Module 4 (CM4)
- Integrated smart-home wireless (Silicon Labs MGM210P Mighty Gecko Module)
- Supports Zigbee 3.0, OpenThread, and Matter
- 2.4 GHz radio with TX power up to +20 dBm
- Pre-installed with Zigbee 3.0 firmware (EZSP), can be upgraded
- Expansion slot
- For NVMe SSDs (M-Key)
- M.2 socket M-Key
- Supports 2230, 2242, 2260, and 2280 modules
- PCIe x1
- Note: Google Coral AI Accelerator not working, details in this issue
- Gigabit Ethernet
- 2 x USB 2.0 Type-A host port
- 1 x USB-C 2.0 device port (Silicon Labs CP2102N USBXpress USB bridge)
- UART mode (default): debug USB-to-serial adapter
- USB mode: CM4 USB 2.0 interface for USB recovery
- 3.5mm audio Jack – High-quality stereo audio DAC
- 2 x Push button
- Red: Factory reset
- Blue: To be determined
- RTC backed by CR2032 battery
- Power12 V / 2 A through barrel DC power jack (5.5 mm x 2.1 mm)
- Ethernet: PoE+ IEEE 802.3at-2009 Class 3 or 4 (selectable via jumper)
- Typical power usage
- Idle ~1.5 W
- Idle with NVMe ~2.5 W
- Load ~5-9 W
- Enclosure: 123 mm x 123 mm x 36 mm
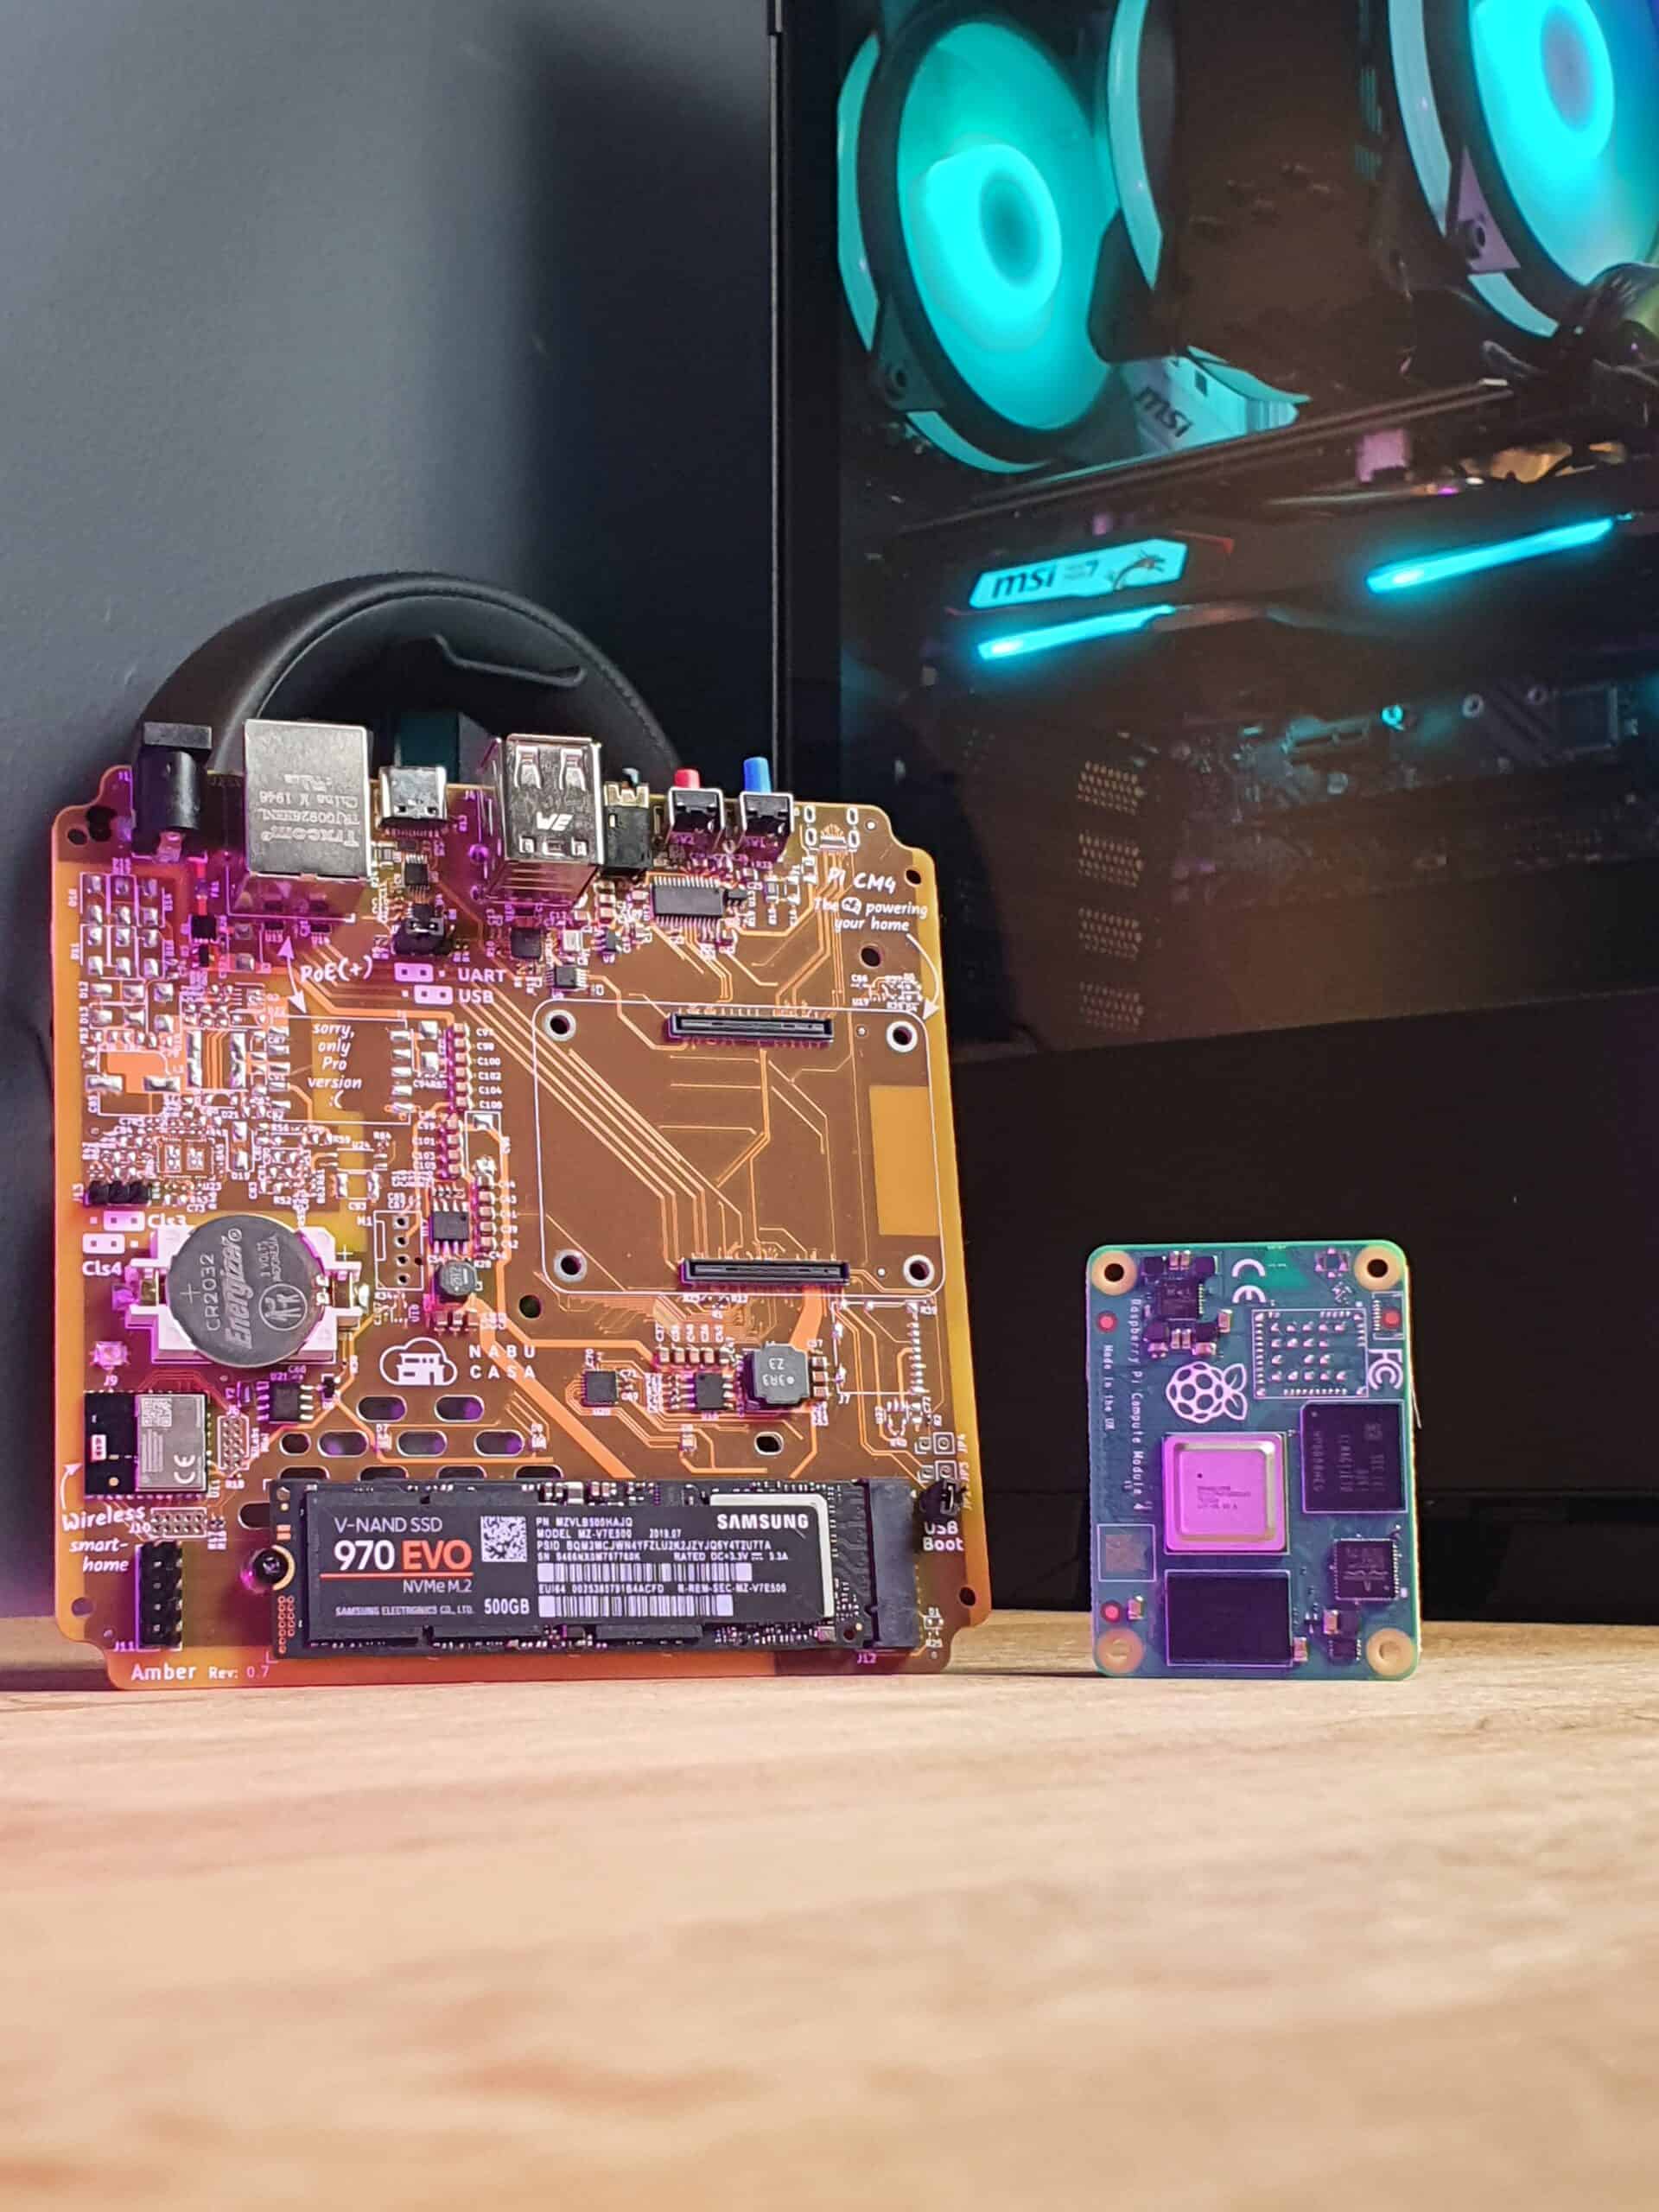
The first thing I noticed about Yellow when I unpacked it was that it’s actually much smaller in the hand than I was expecting: you can easily hold the board in one hand and the footprint is really small.
Now as mentioned I don’t have the final case yet so we will need to wait a little while to see what the full unit is like, but the board itself is super nice and compact, meaning that this guy can be tucked away really anywhere if you want to and it’s not going to take up a lot of space.
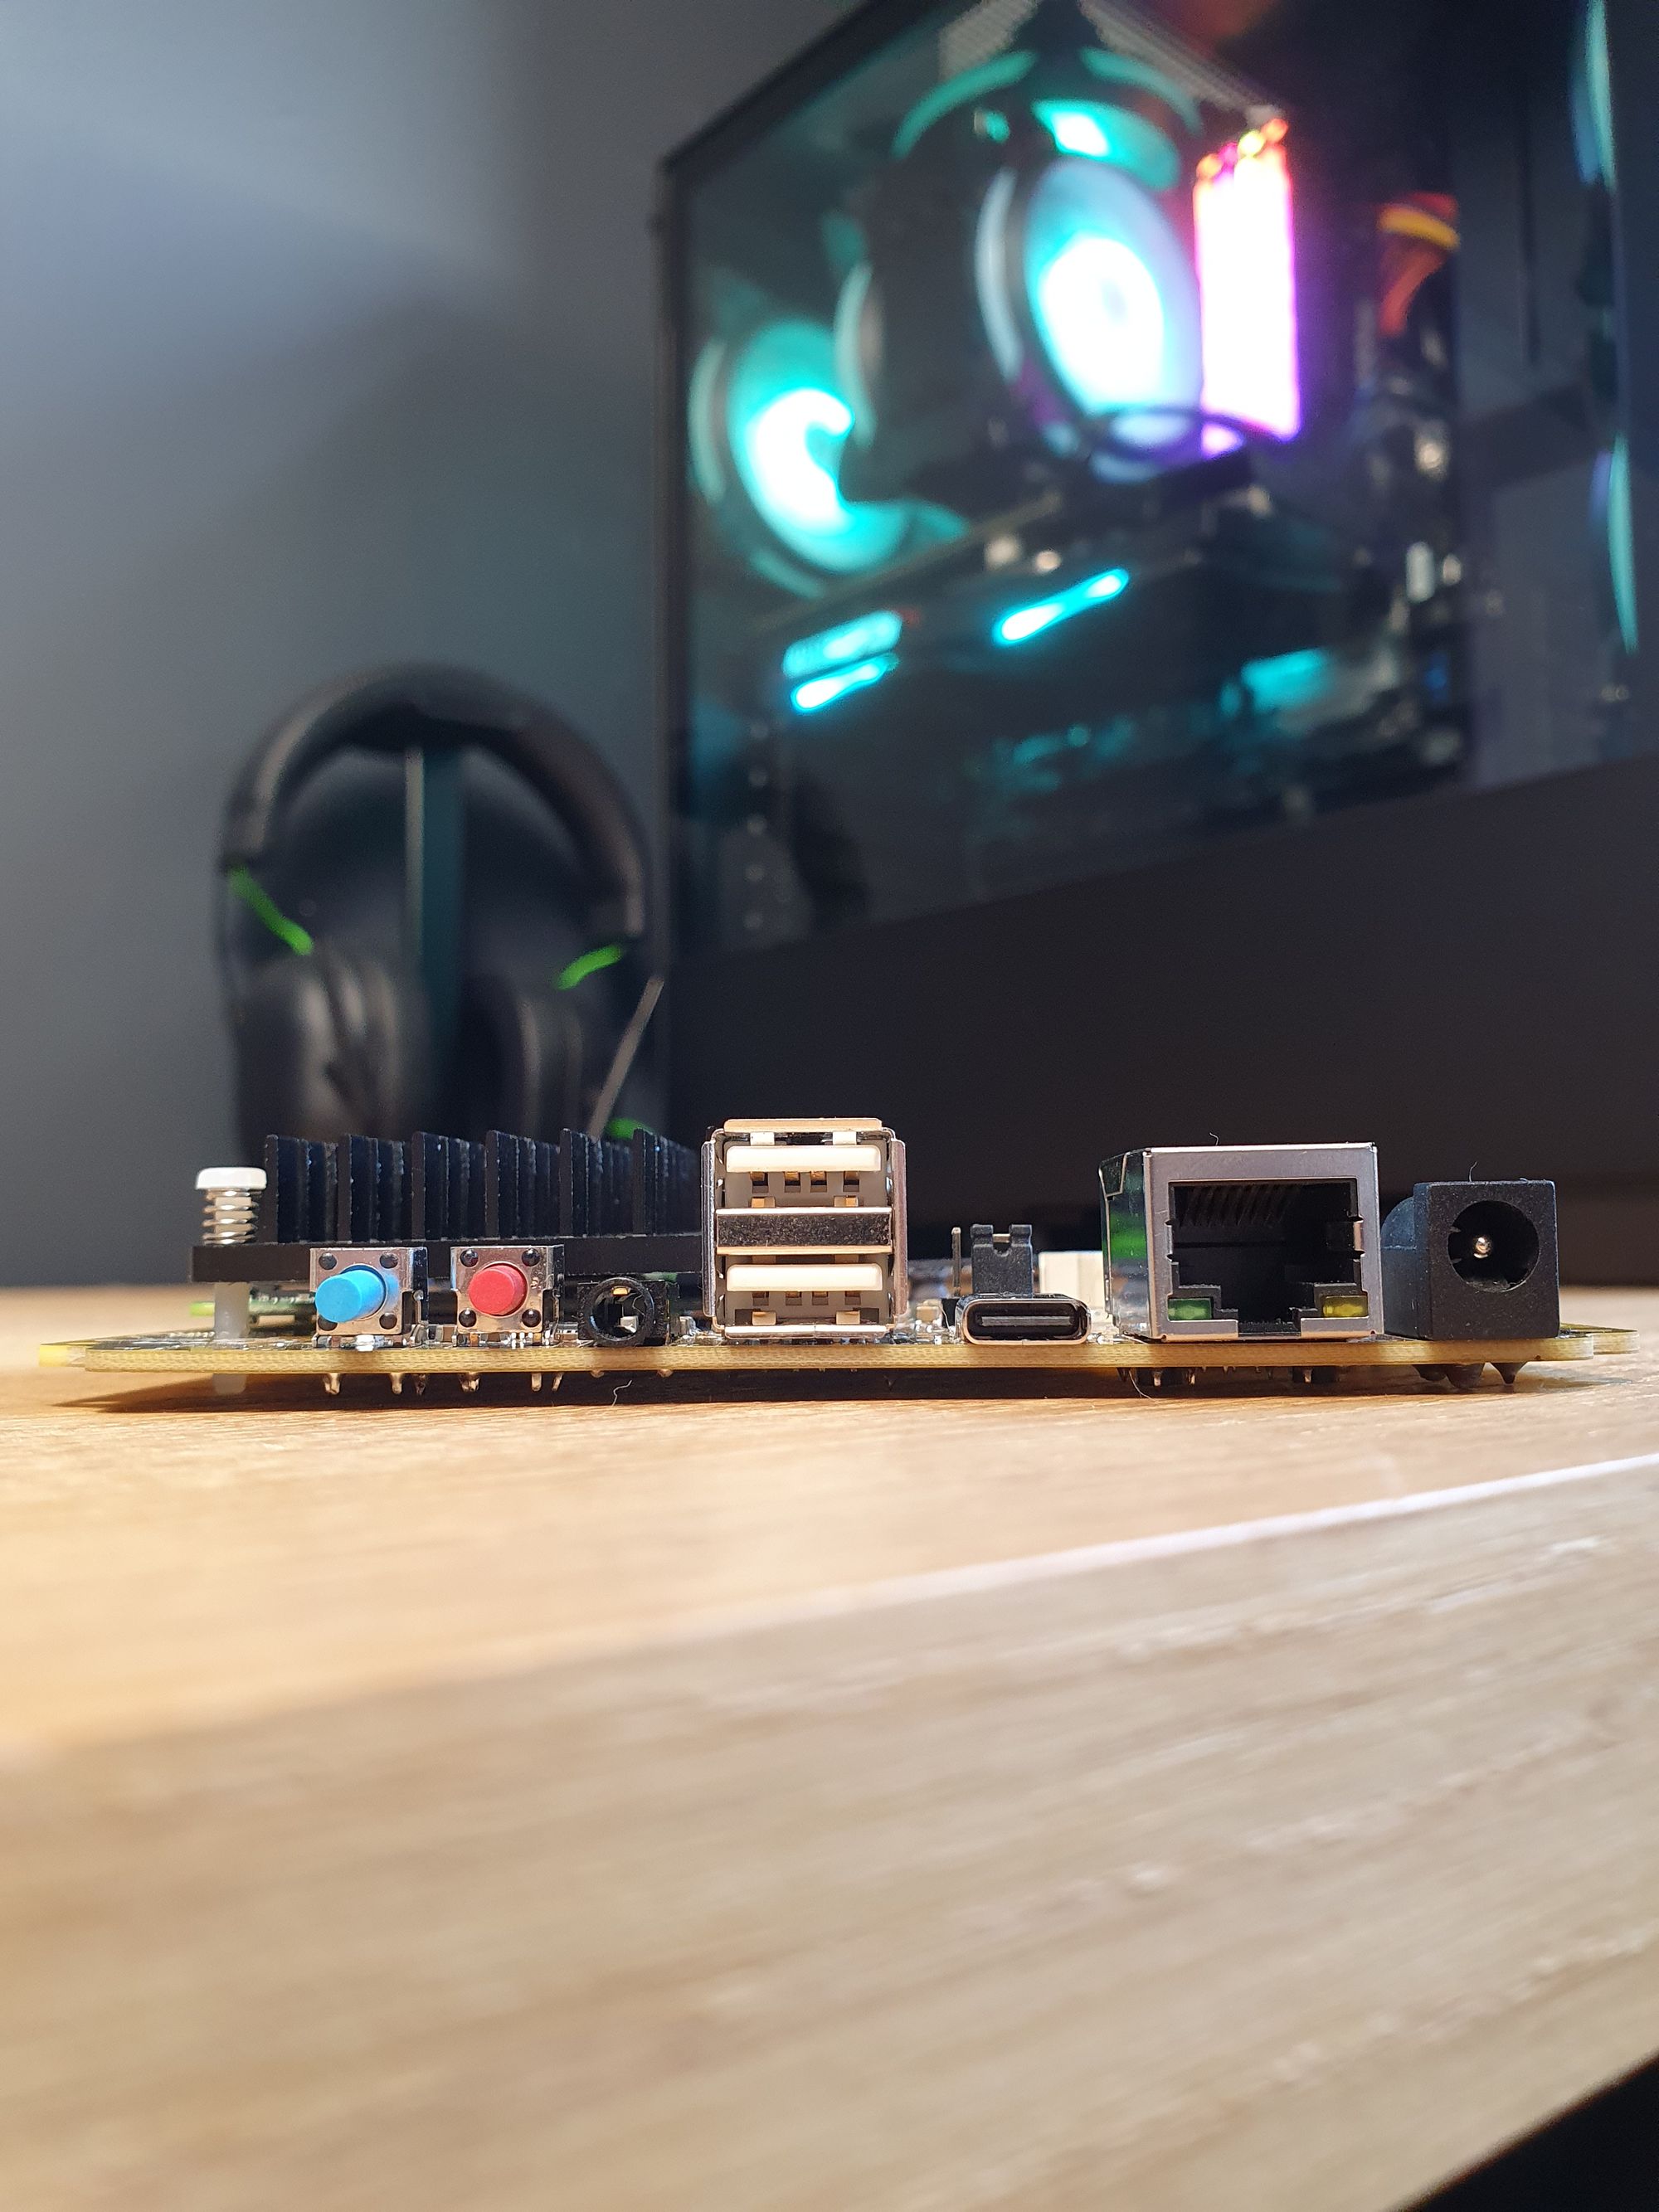
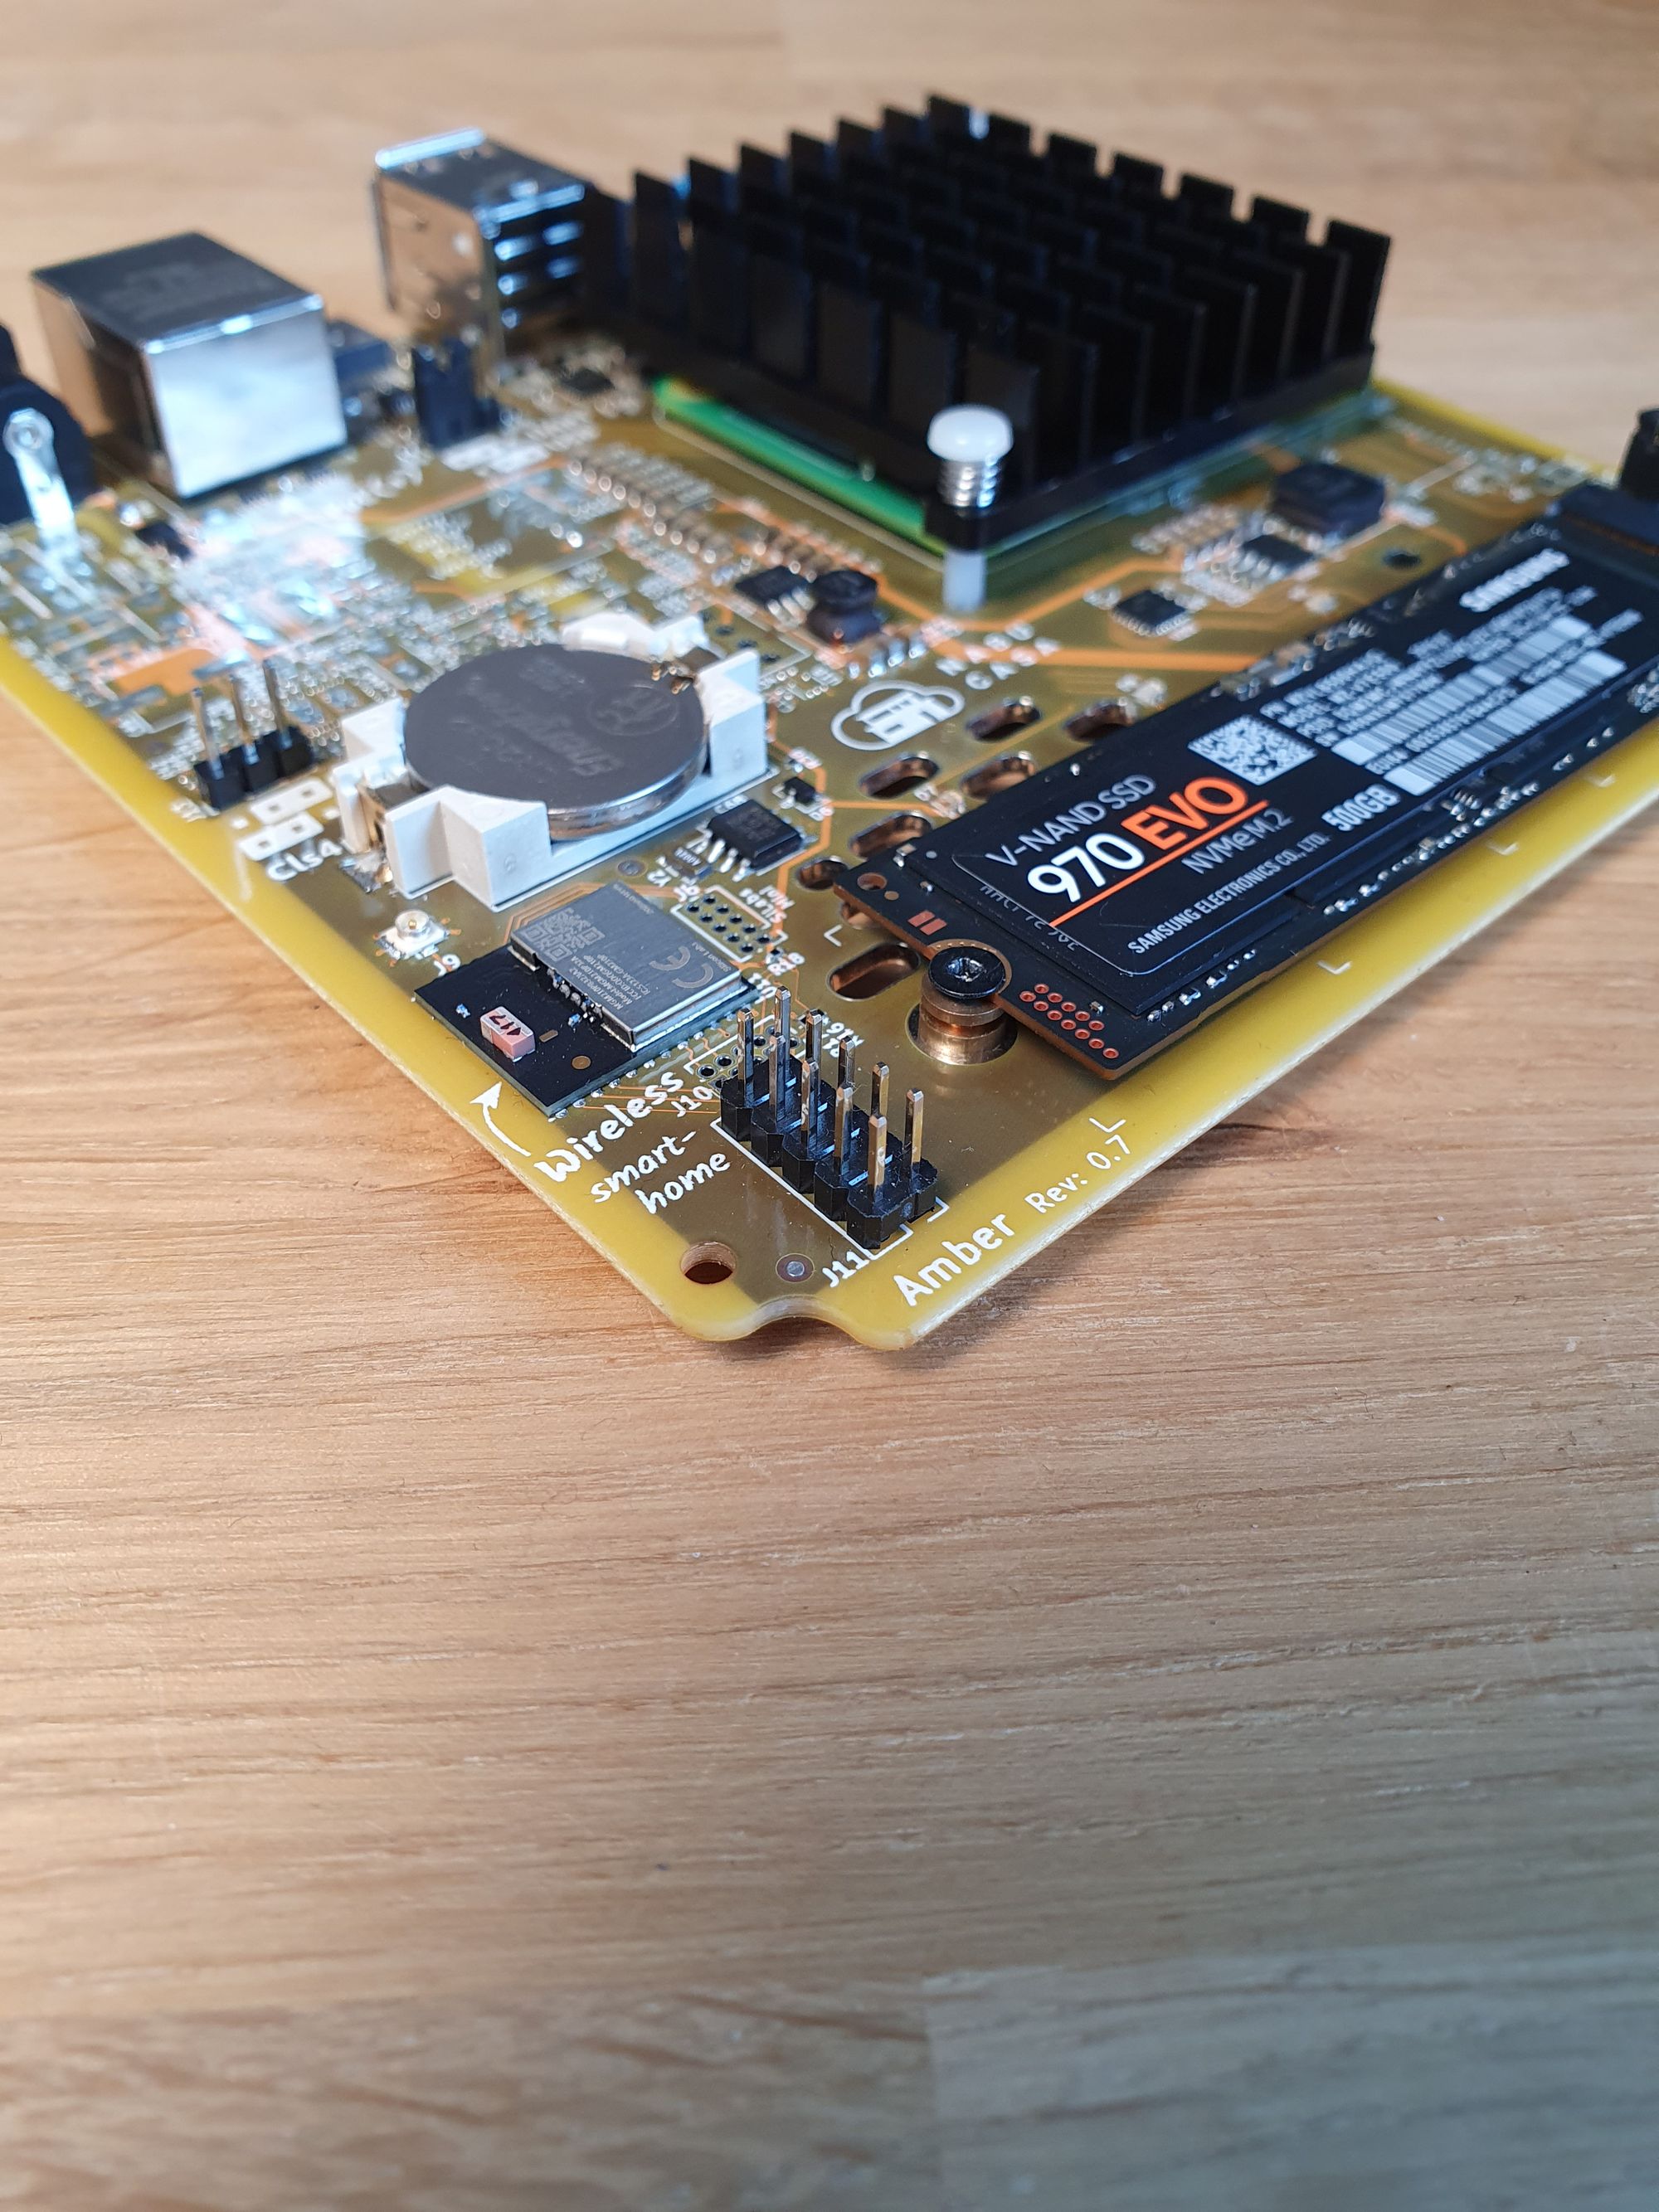
Lets quickly re-cap the ports we have here, so in terms of the main IO, we have a power jack, a gigabit ethernet port with optional power over ethernet, a USB type-c port, 2 USB 2.0 ports, a 3.5mm audio jack and 2 physical buttons, one of which is reserved for factory reset.
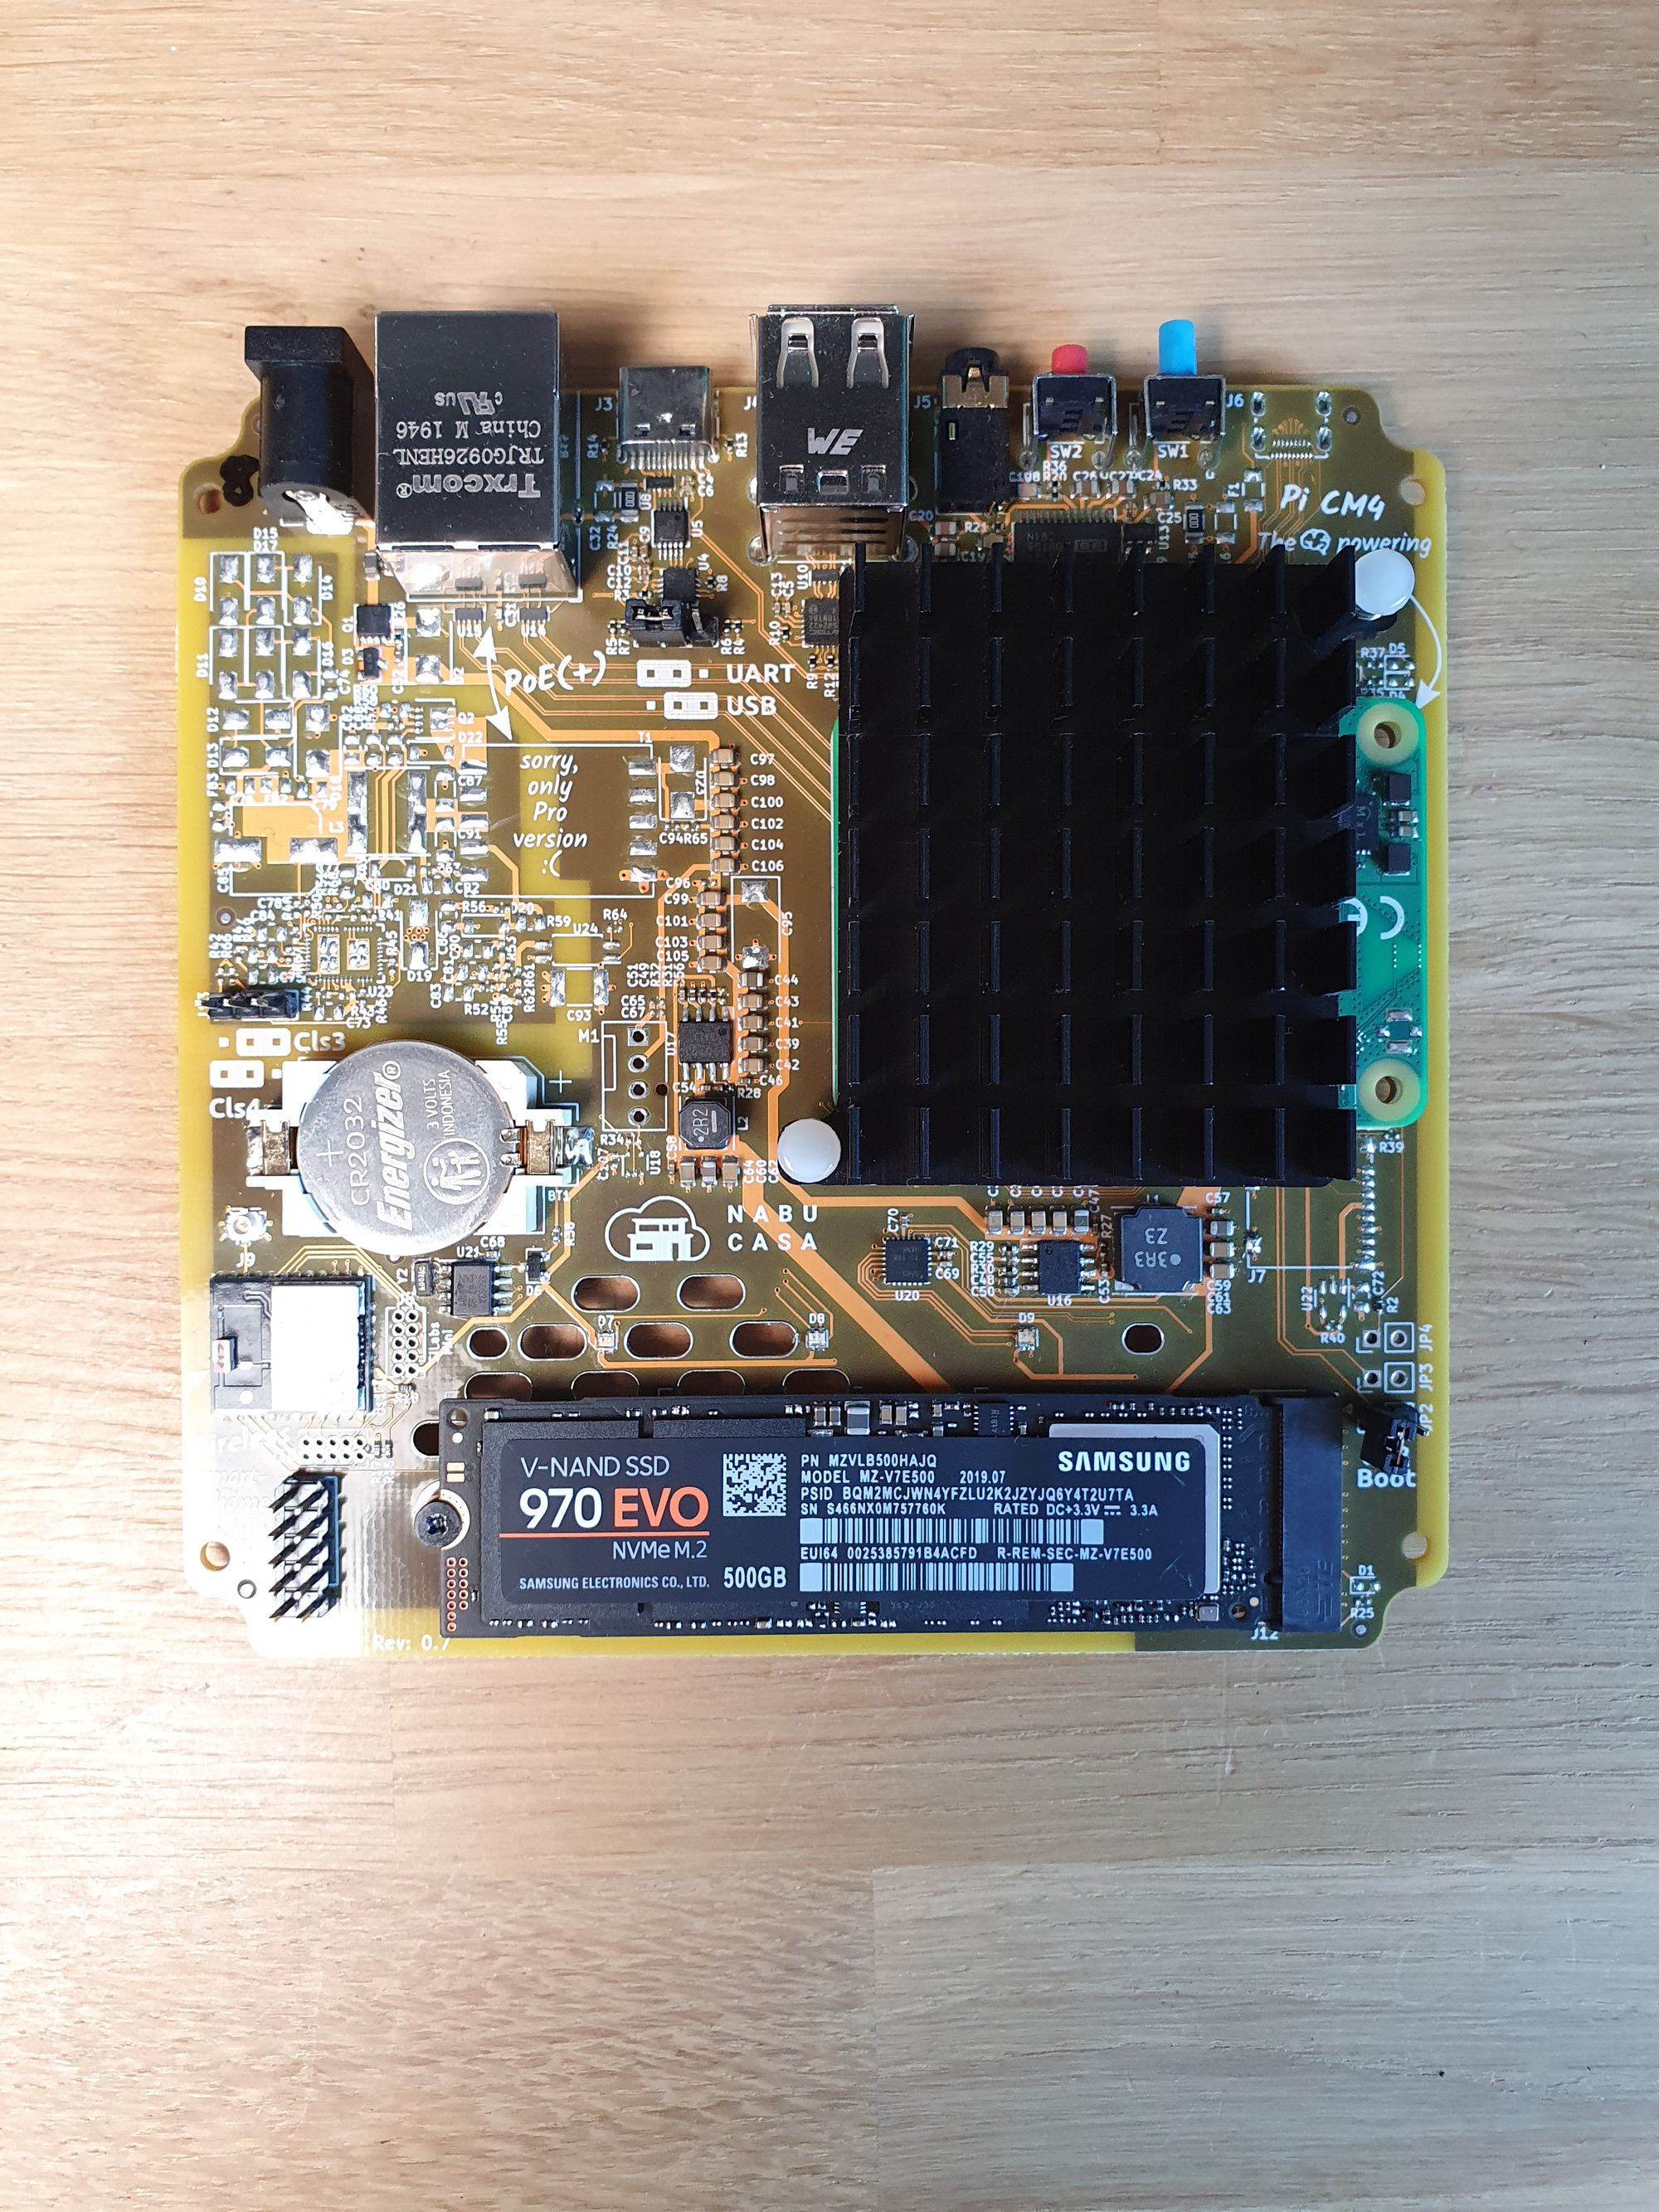
Then down at the bottom of the PCB we have our m.2 slot which can be used for expandable SSD storage – which we are going to dive deeper into when we do the full review.
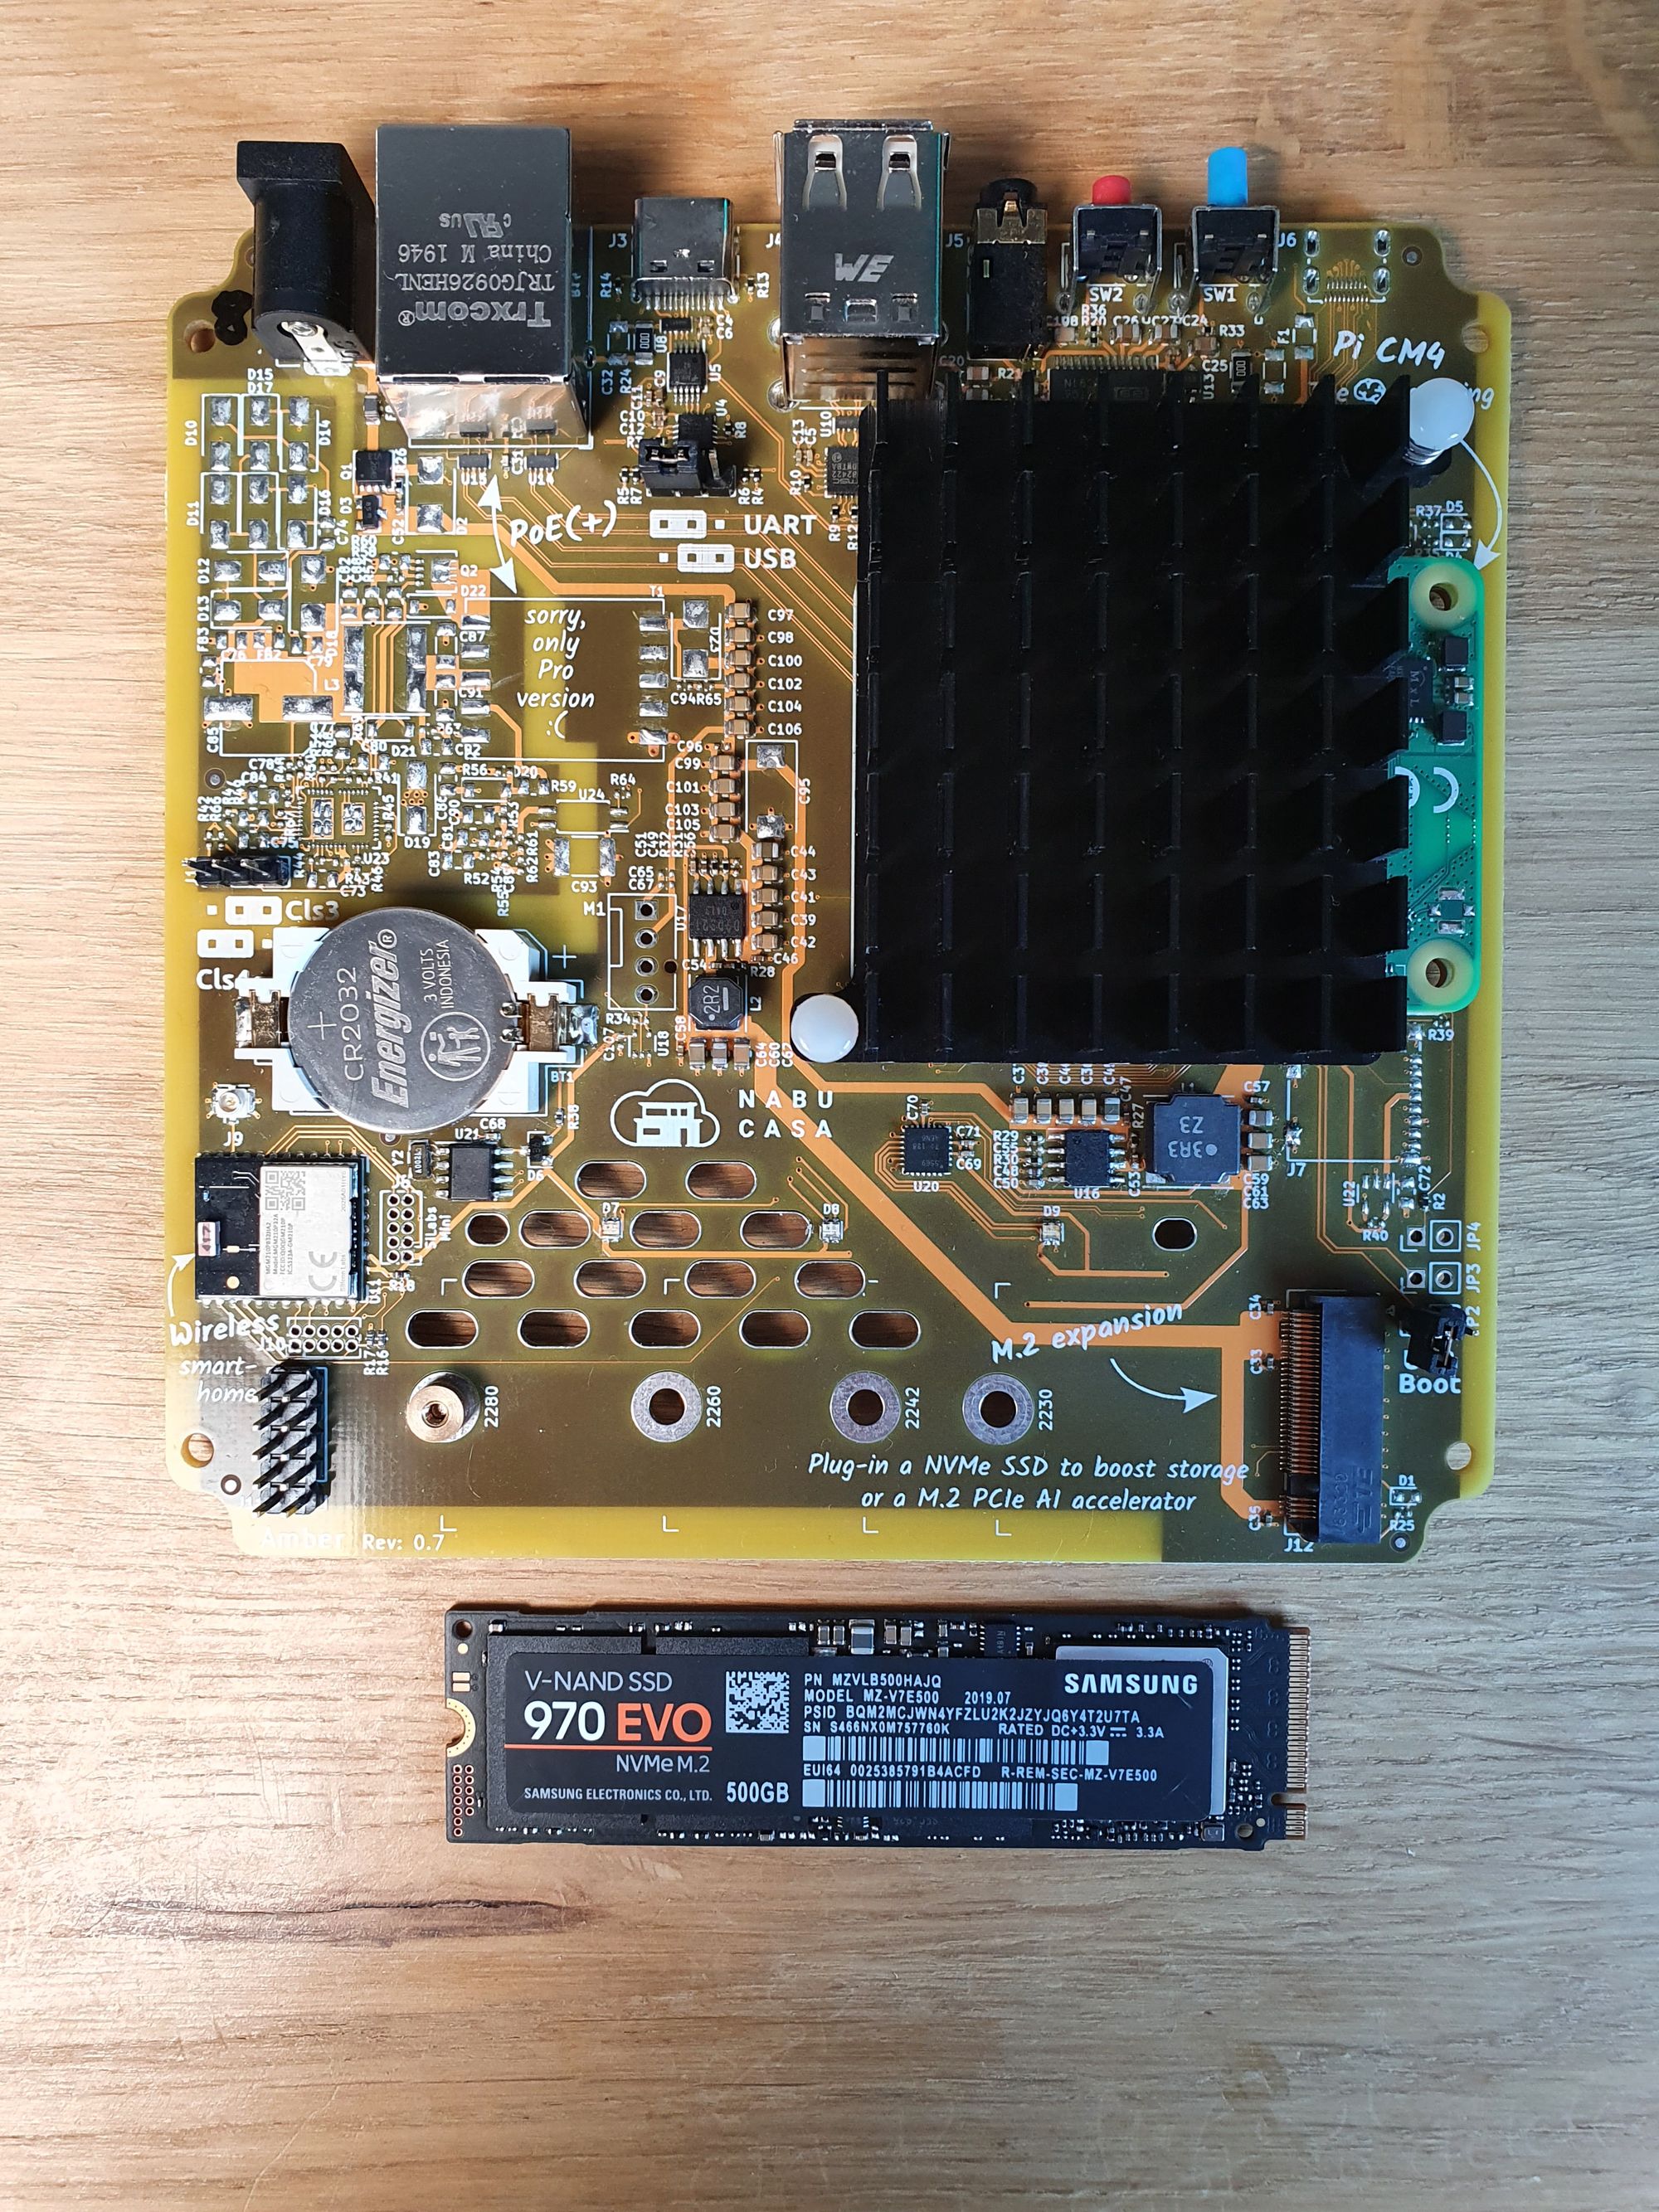
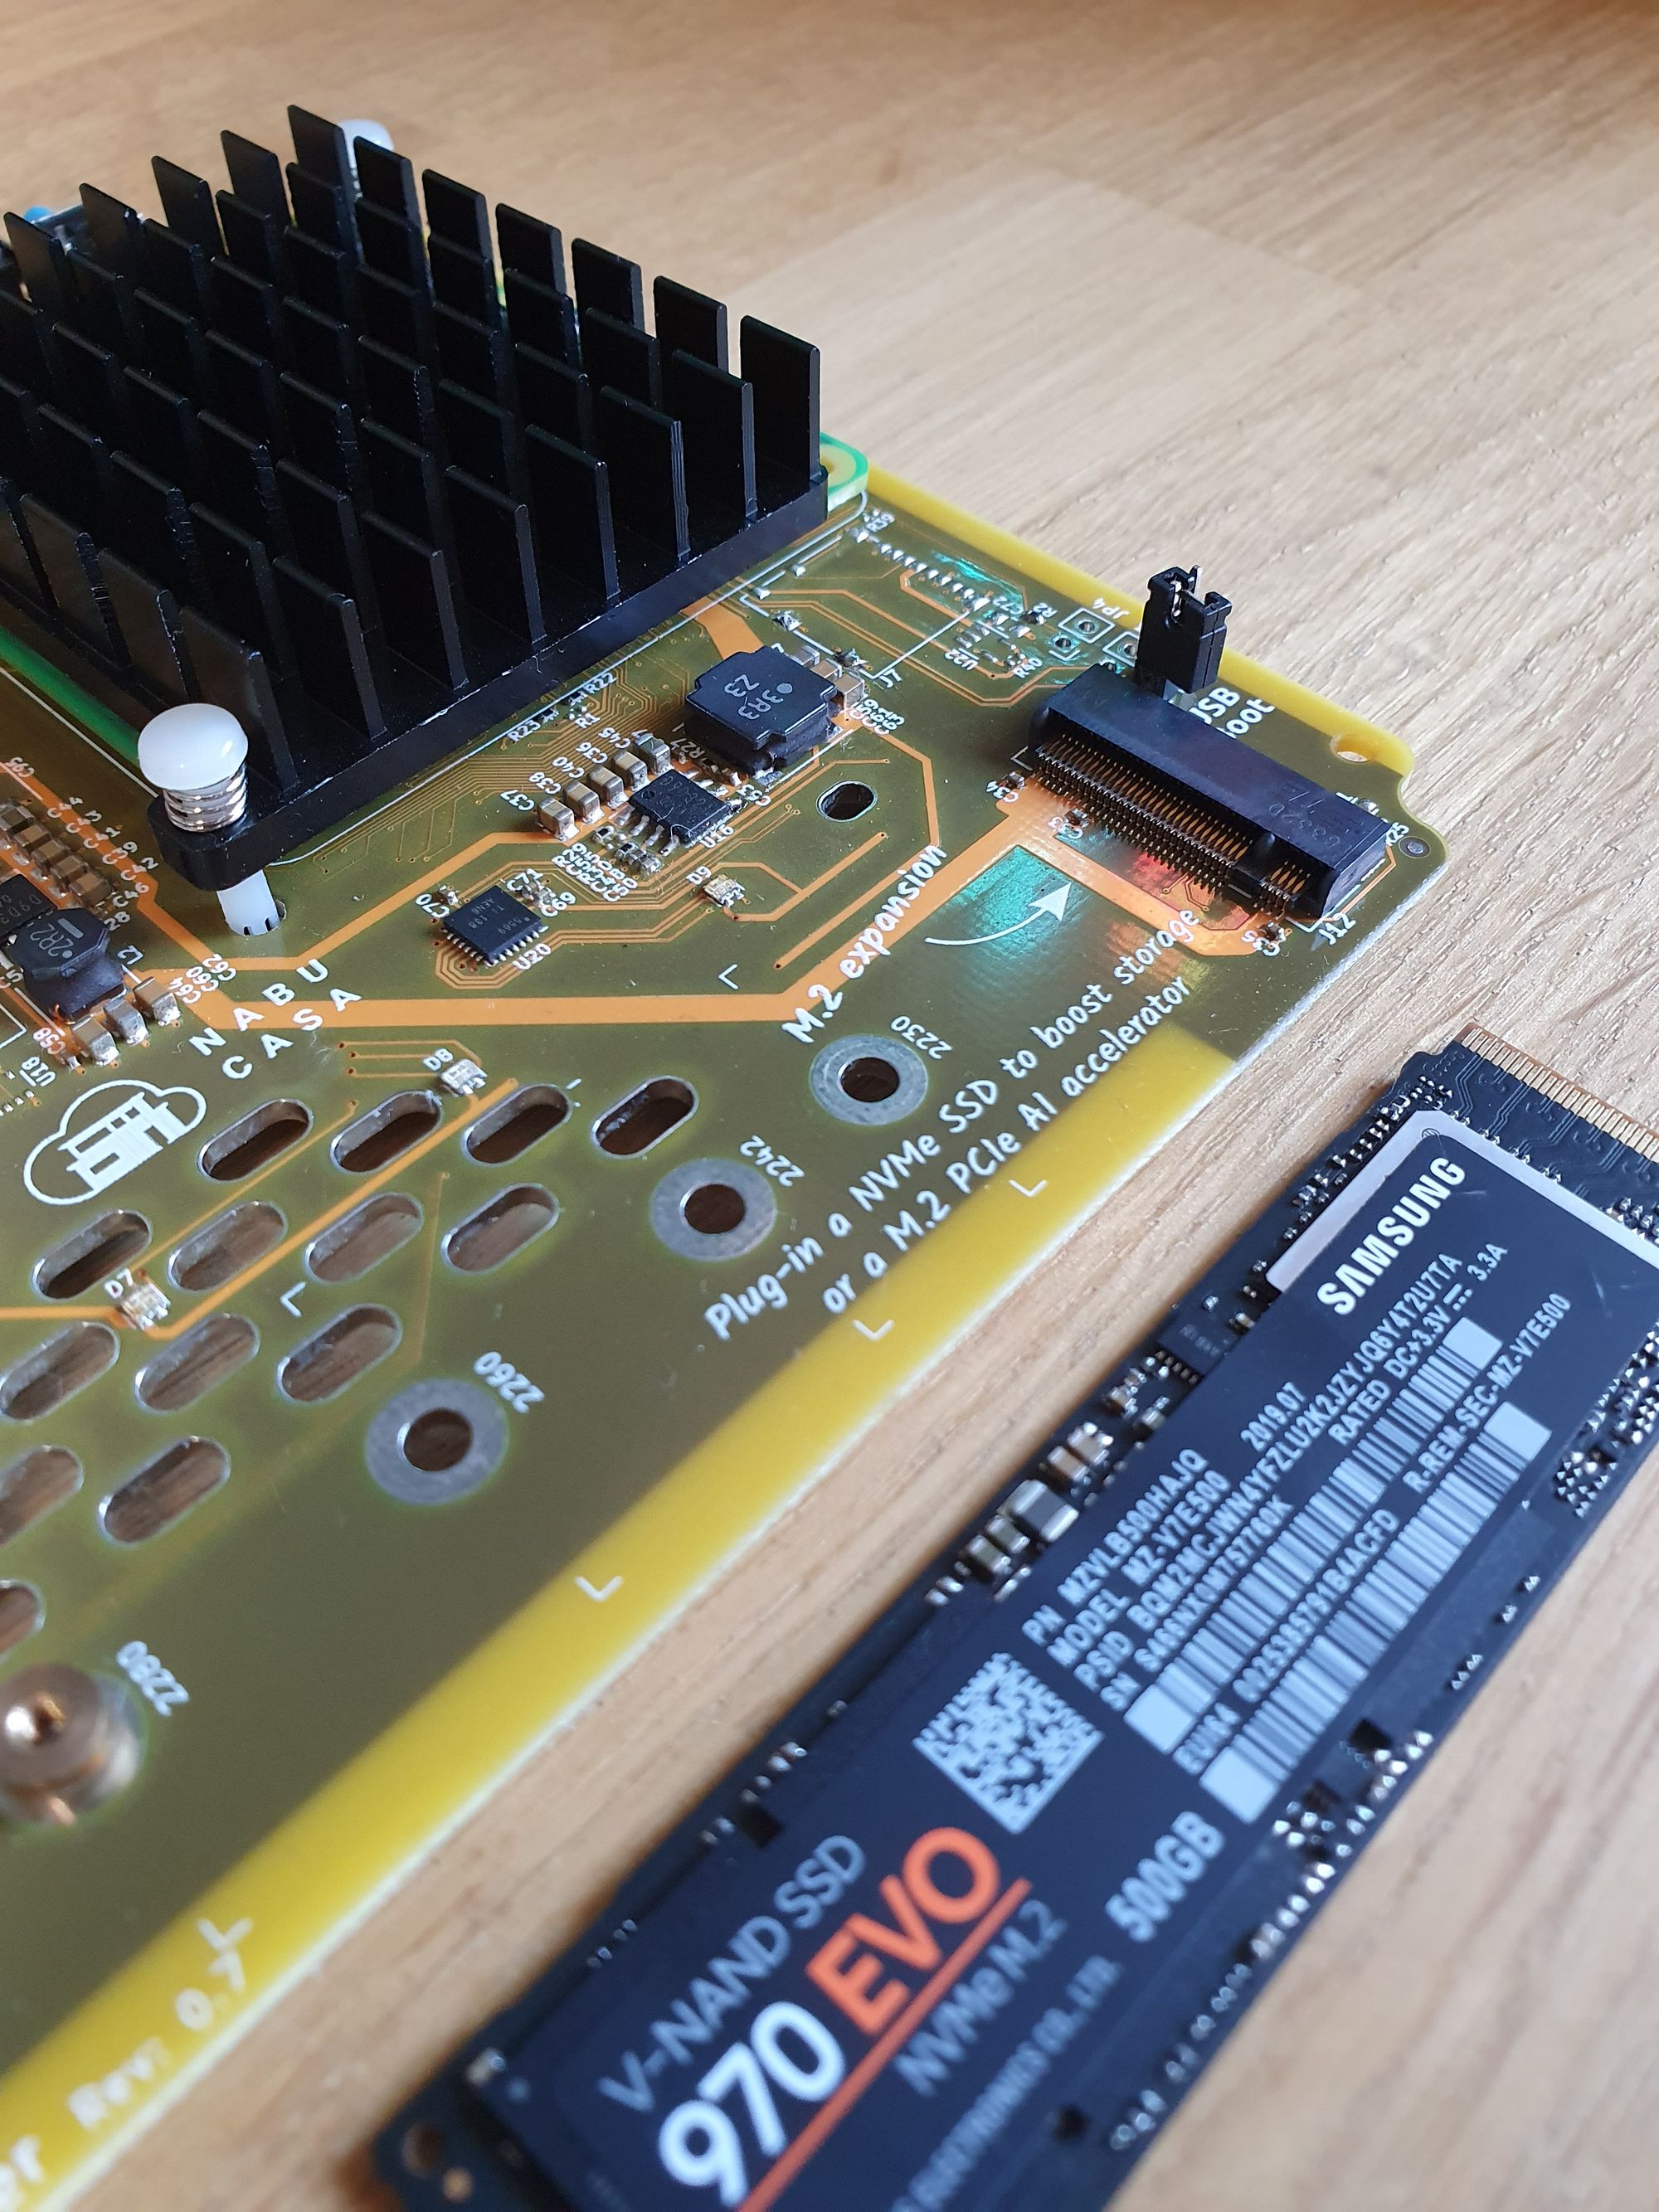
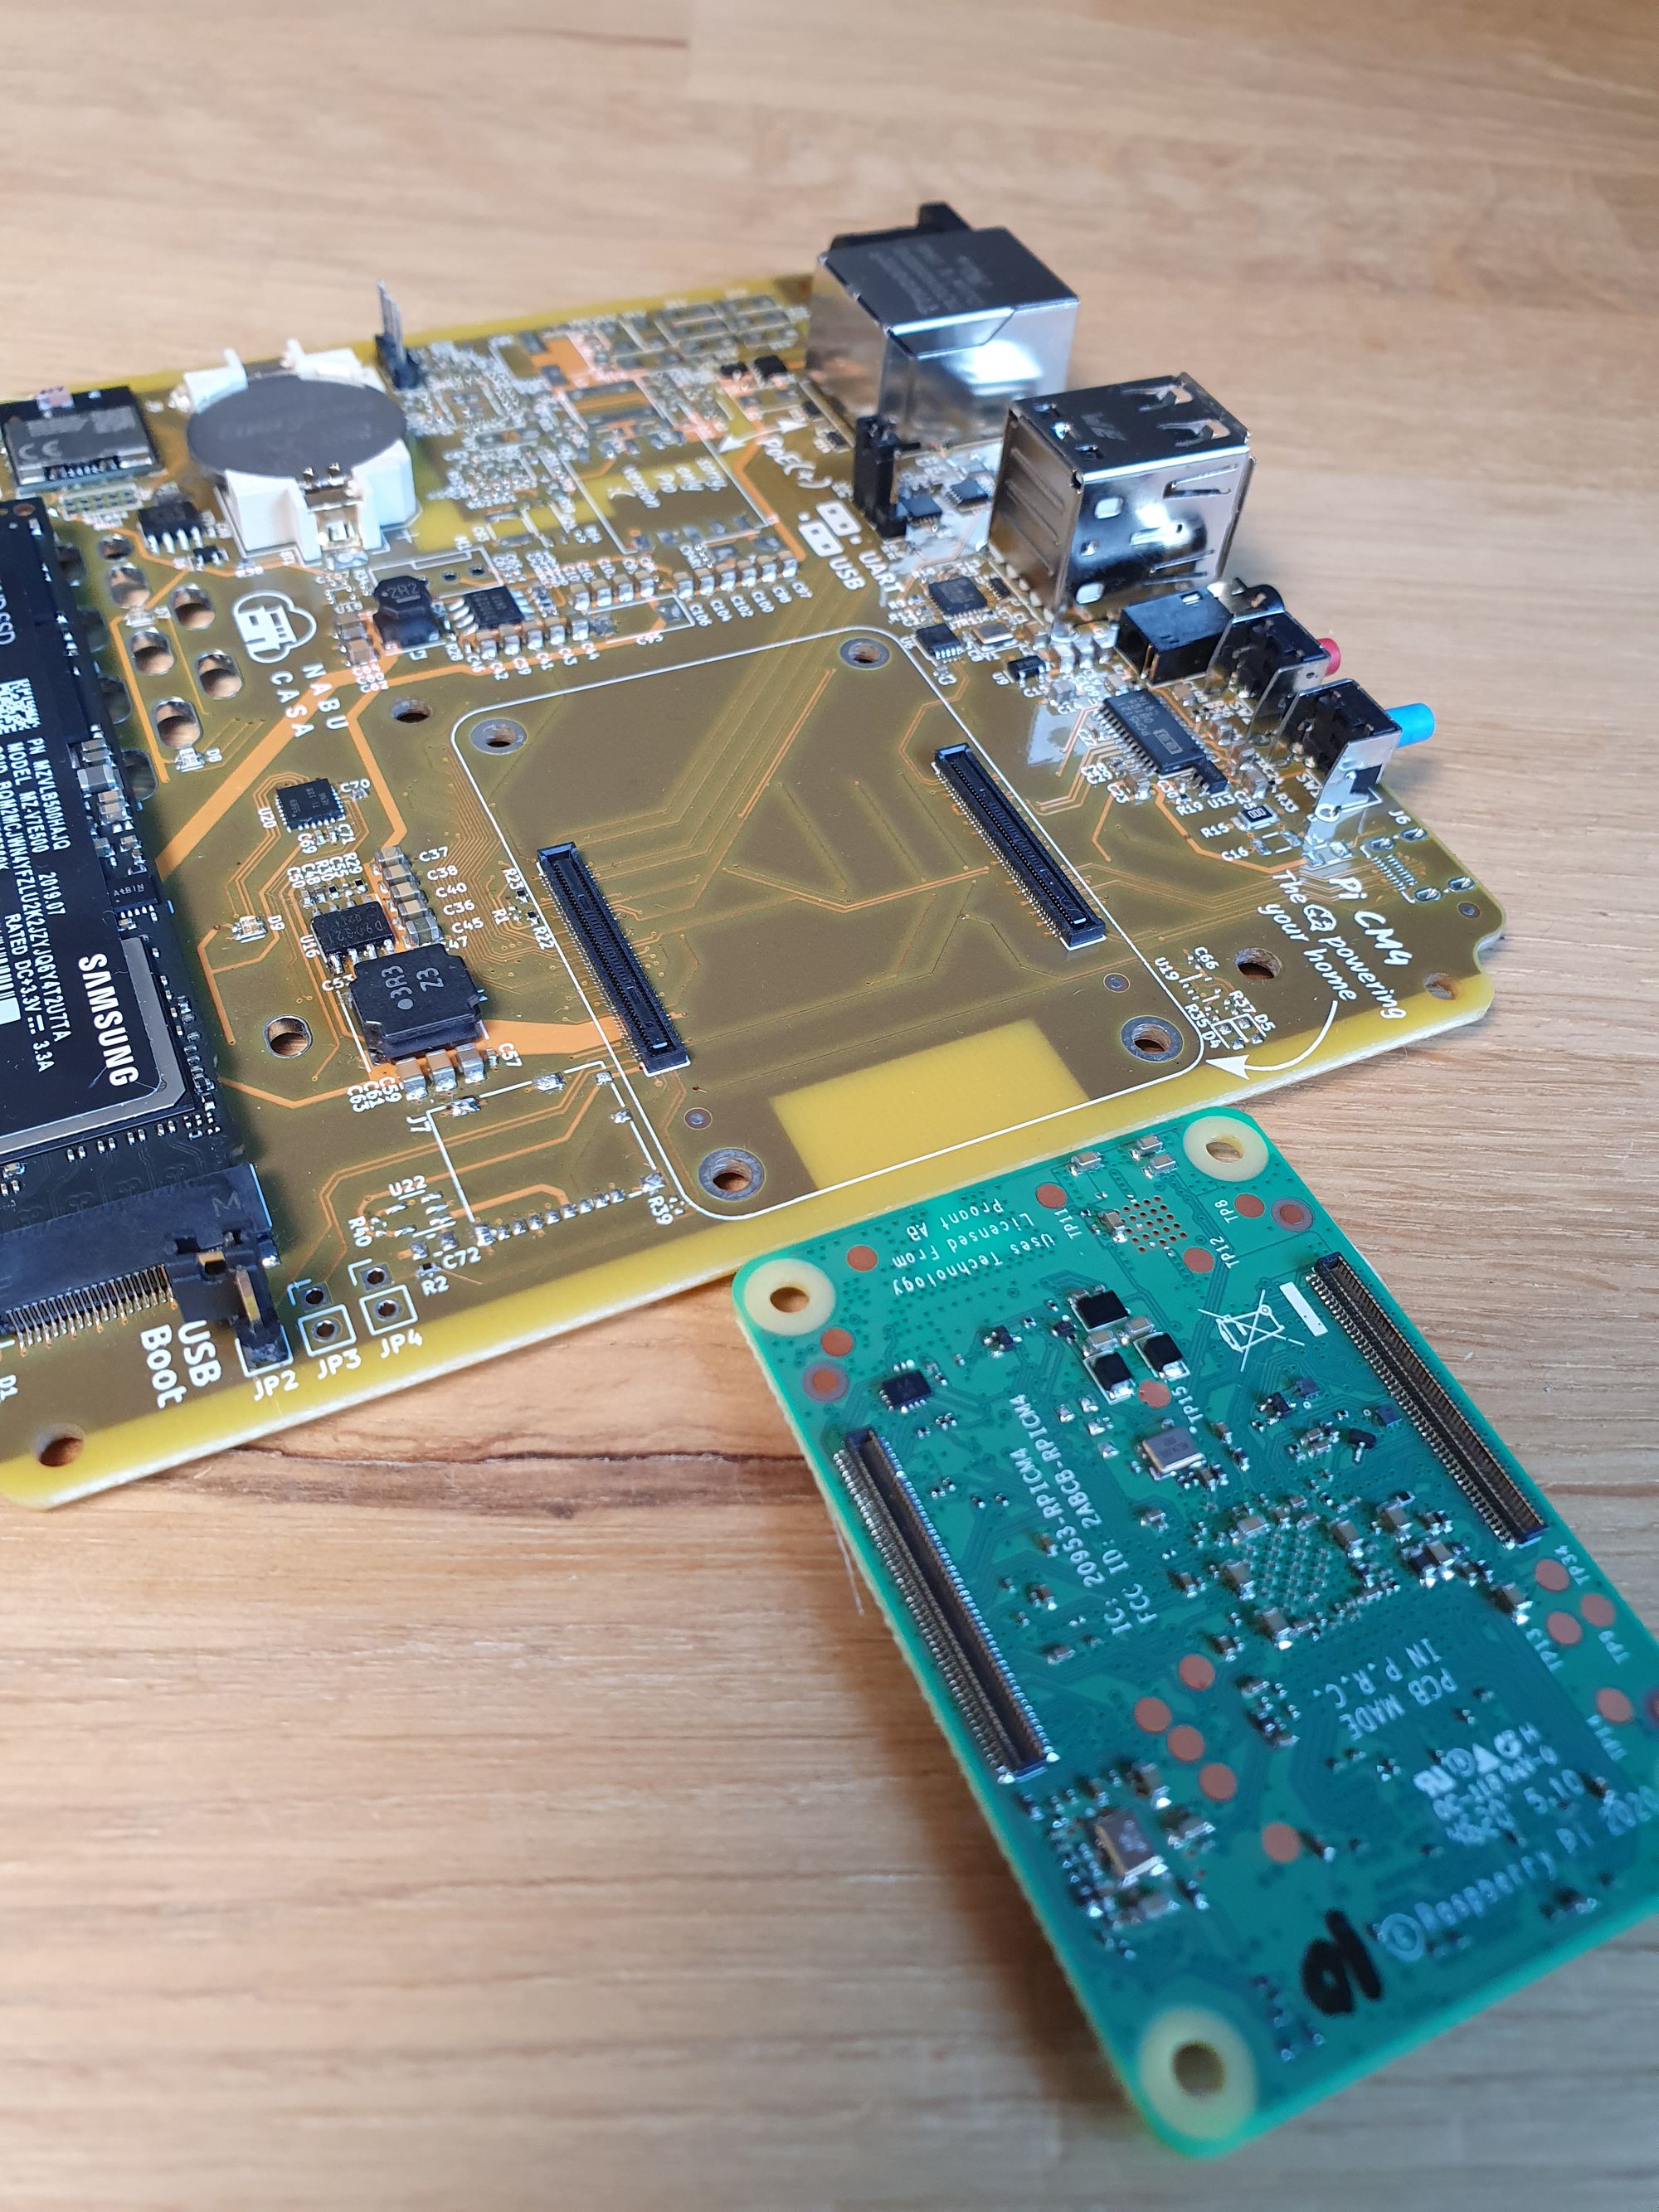
Above that we have these two teeny tiny connectors where our Raspberry Pi Compute Module connects to and it literally just pushes on and pulls off. It’s not extremely easy to pull of so it’s not like you’re going to accidentally knock it off – it does require a bit of force to remove it – but it does make it so it is incredibly easy to swap it out if you want to upgrade RAM, Storage or connectivity in the future by simply replacing the Compute Module. You’ll also notice the PCB has some small holes in it: this is for the custom heatsink for the Compute Module that snaps right into place and helps keep the temperature down.
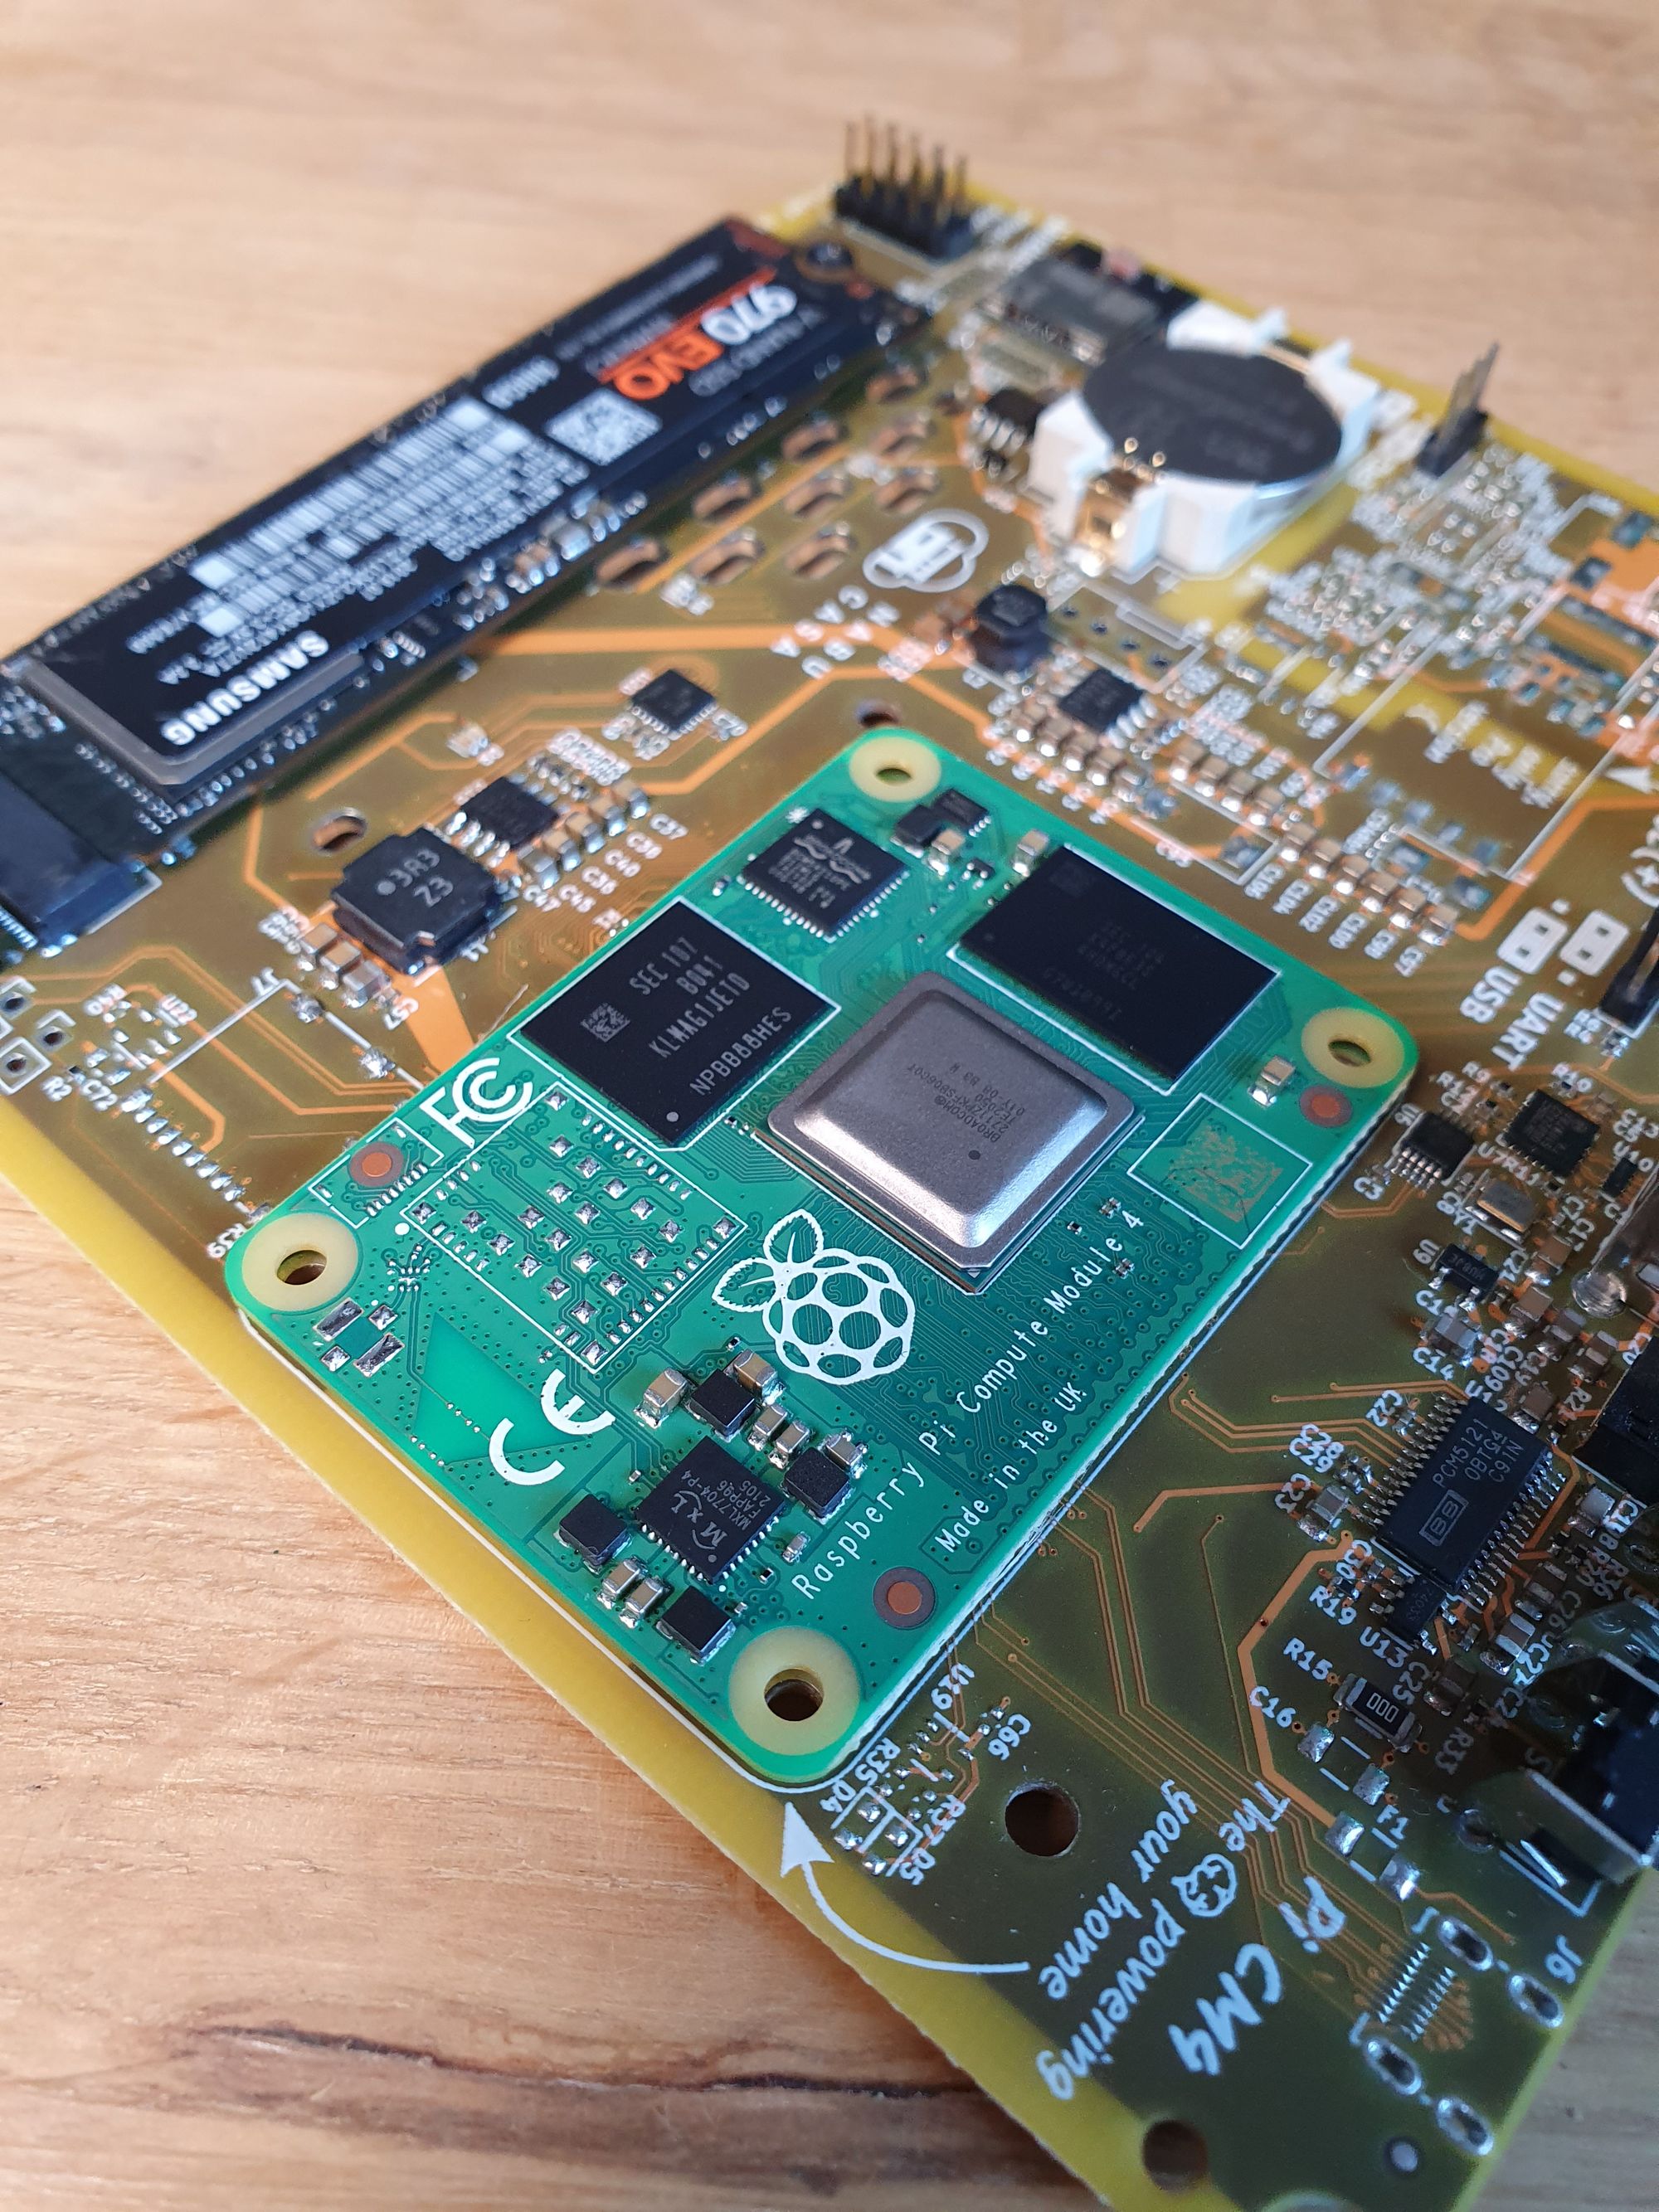
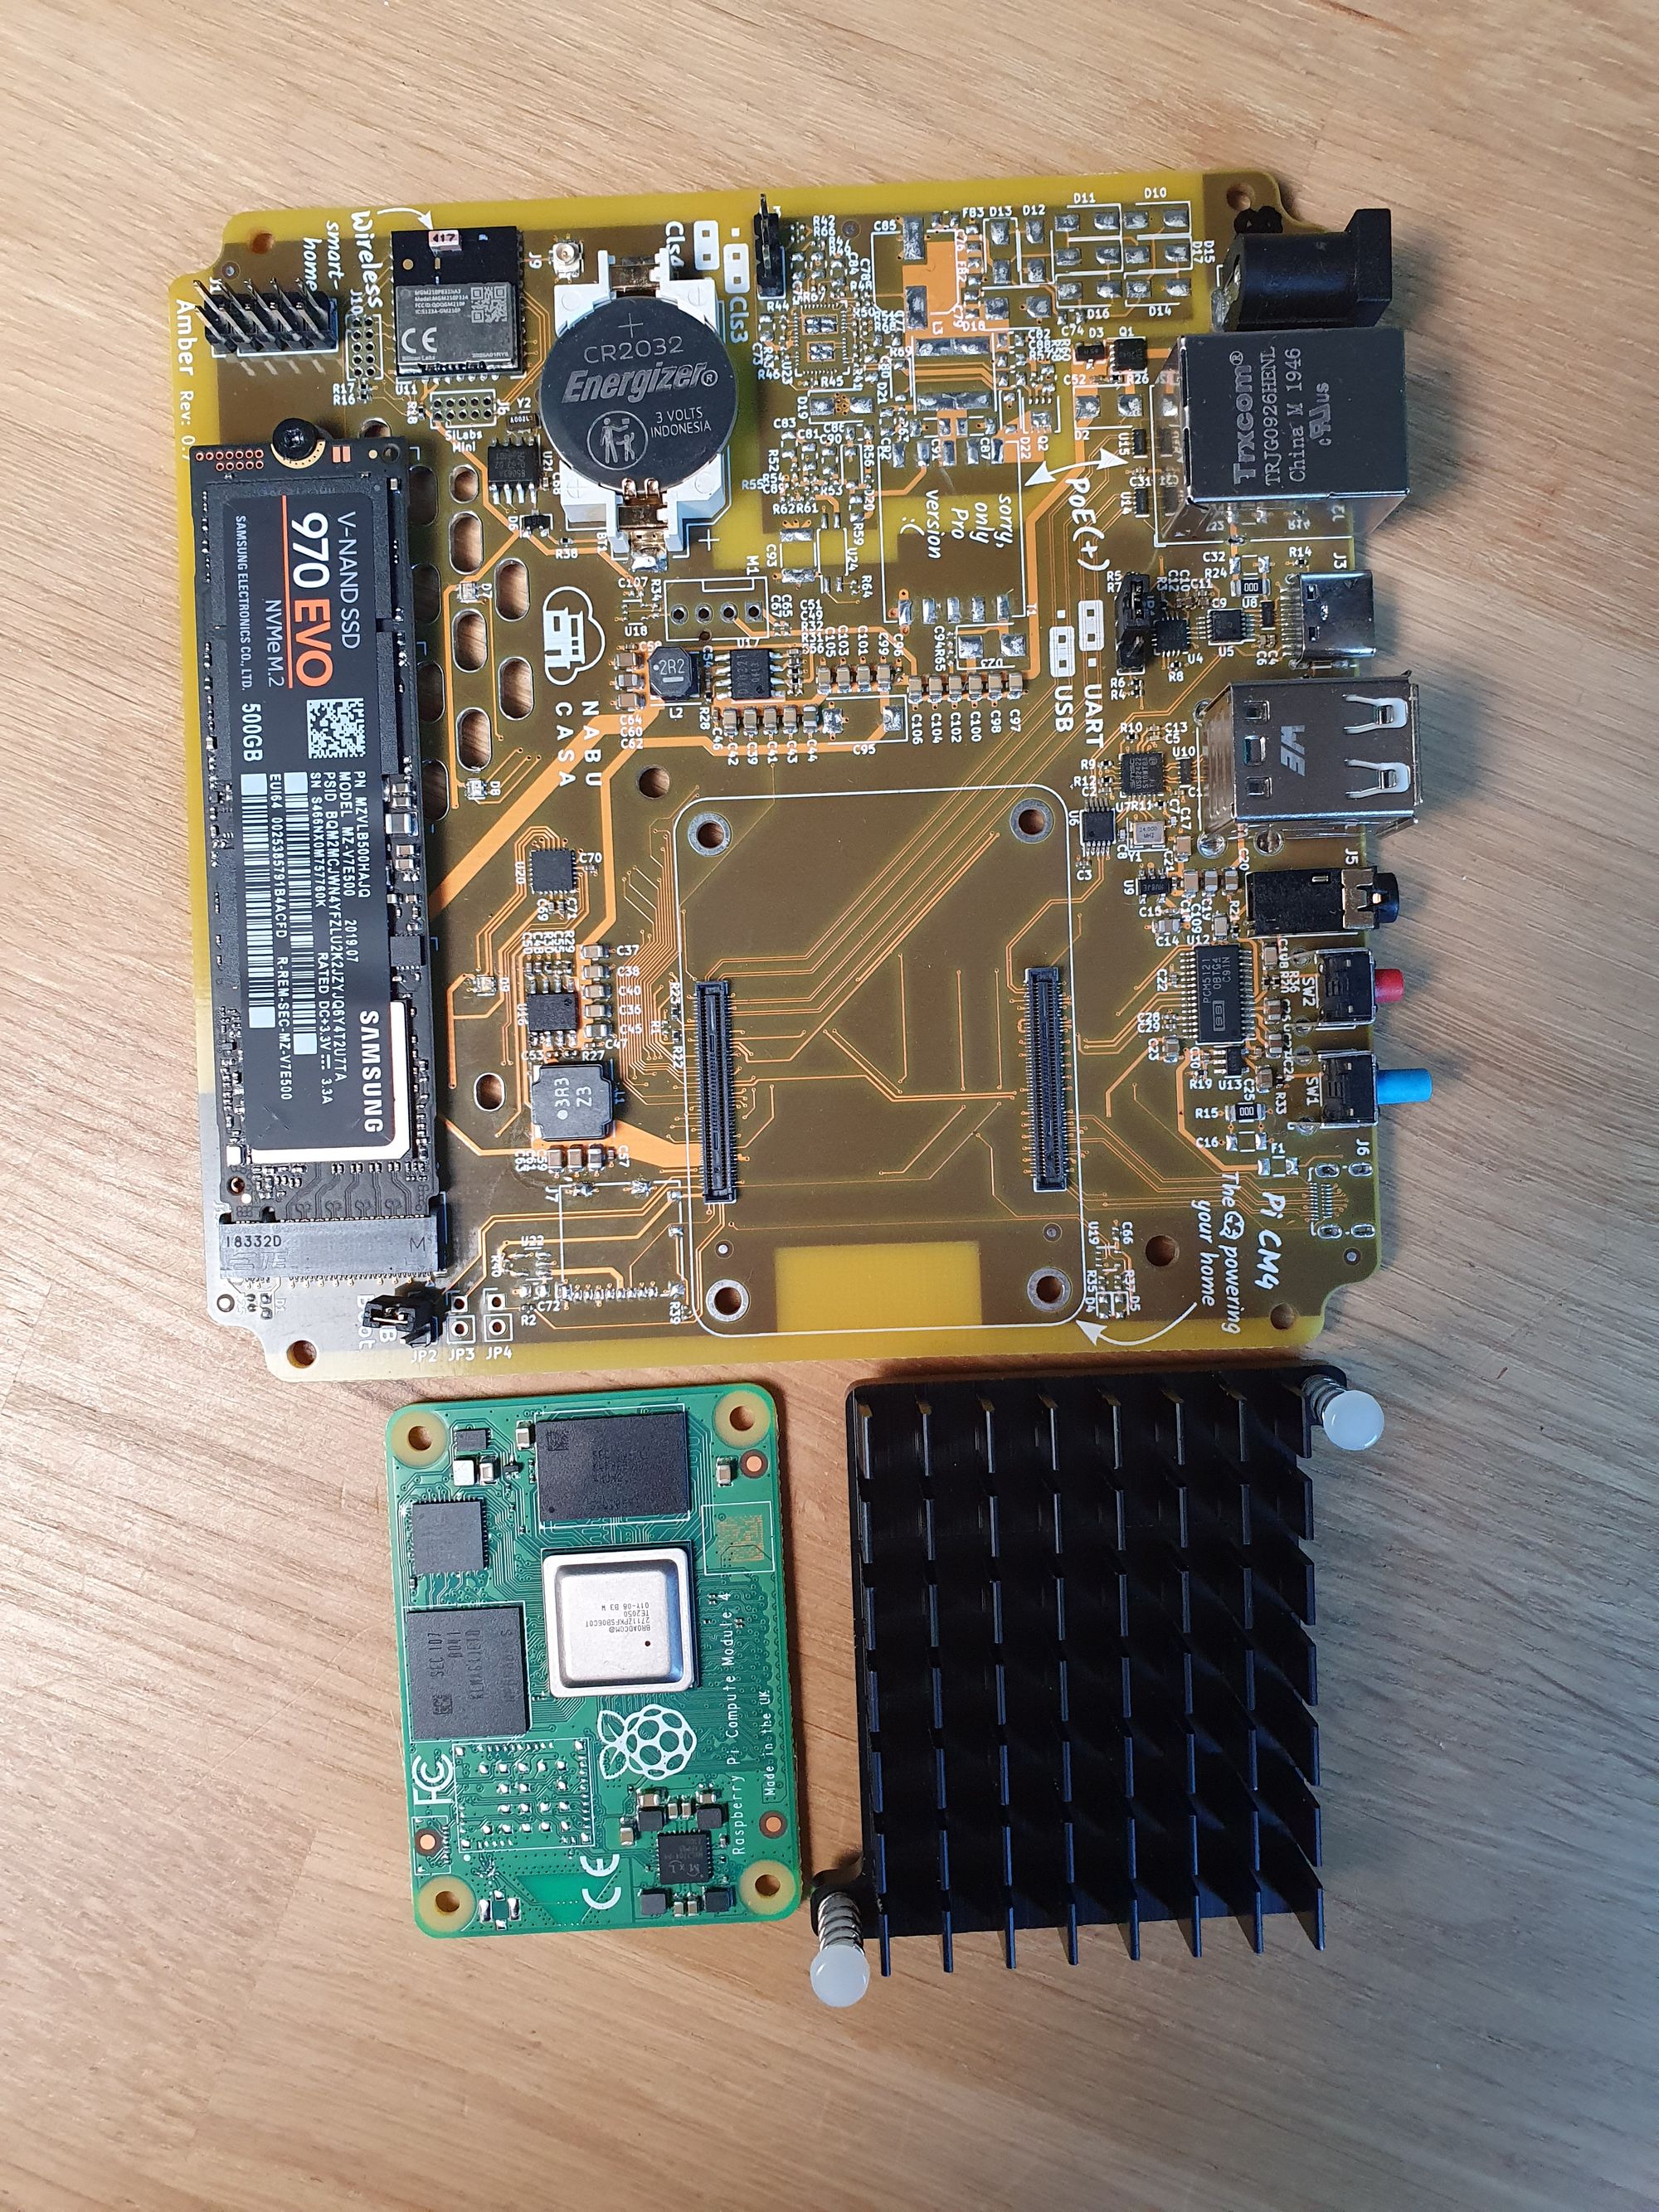
Finally in the bottom right hand corner, we have our teeny tiny silicon labs Zigbee module which will allows us to get up and running with Zigbee devices right out of the box without having to add any dongles to our setup. It is just all contained in this one unit and, of course, they mentioned that this is going to get the firmware update to upcoming connectivity standards Matter and thread once those standards are finalised. Therefore you’re getting that future compatibility.
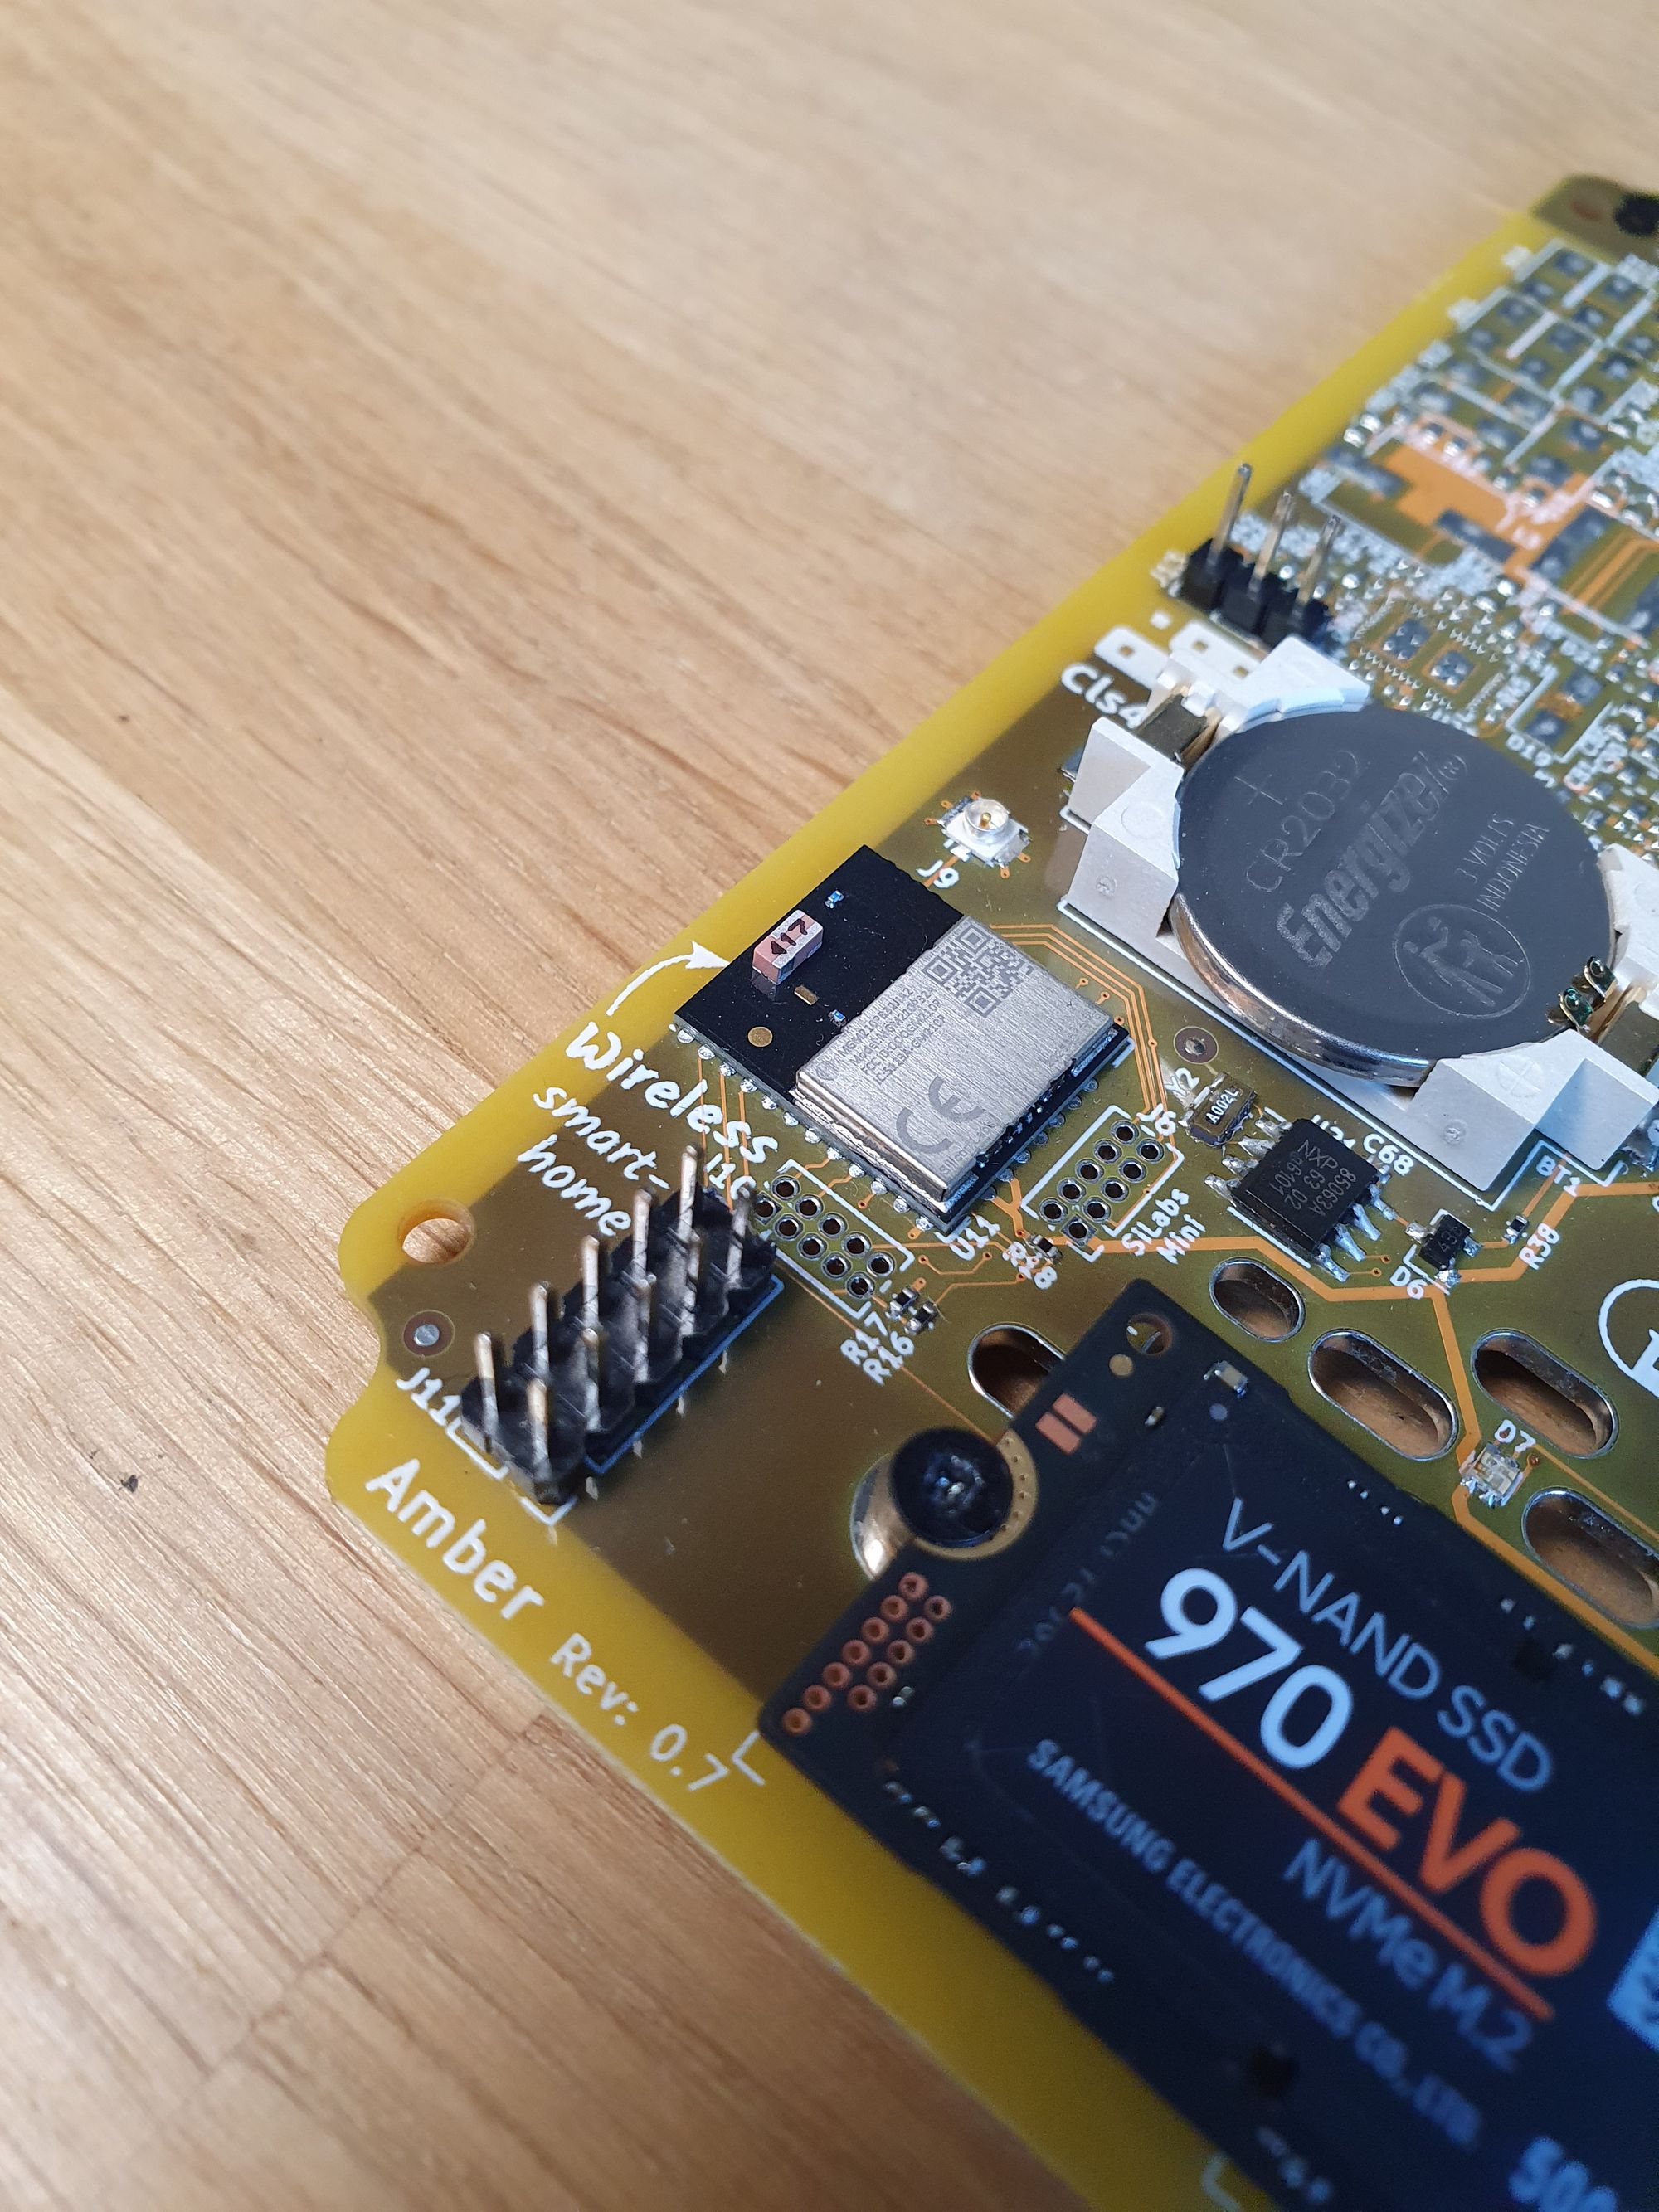
Oh, and if you look really closely just below the Zigbee module, you will see that there is a 10 pin header and these are some of the Raspberry Pi’s GPIO pins – not the 40 pin header you might expect to see on a standard Raspberry Pi. Lots of the pins are already used from the Zigbee module or buttons or LEDs etc., but you do have a couple right at the bottom of the board.
Versions
Now there is a few different versions of the Amber available: the one I have here is the standard Home Assistant Yellow – which is the complete package – so it has the amber PCB with a Compute Module 4 with 2GB of RAM and 16GB of eMMC storage, the power supply, case and heatsink. Literally everything you need so if you do order that version, you will just need to plug it in to power and ethernet and viola, you are done.
There is also the PoE version which I think they are calling Yellow Pro. This features power over Ethernet so you only need a single cable for data and power, which is really nice but you also supply your own Compute Module 4 so that you can choose which ever suits your needs in terms of ram and storage. You’ll need to do a bit more work to get it installed as opposed to just plugging it in like the standard version, but you are getting the nice addition of the Poe. I don’t have one of those here today unfortunately (that would be pushing my luck) but I do have one of those on order so when we do get that, we will be able to take a closer look at it and show you how that works.
Initial Setup
So as mentioned, setting up the Yellow so far has been a breeze! Literally plug this guy into ethernet, plug in power, wait a few minutes and you’ll be able to access Home Assistant in your browser as normal. Again, depending which version you buy, you may have a few extra steps to do. However, if you get the kit that comes with everything then setup is super simple, allowing you to dive right in and get started with connecting your devices.
Now speaking of power, you will need a 12v 2a power supply which comes with the Home Assistant standard kit but if you get the power over ethernet version, obviously you will probably be powering it via your ethernet cable.
Now you may be looking at the USB type-C port on the back here and wondering if you can use that for power and unfortunately you can’t. It is actually used as a serial monitor so that you can see a “display” of sorts since there is no HDMI port – kind of mixed feelings on that one – but you do either have the included power brick or you’ll be going for power over ethernet anyway, in which case its a not an issue.
Final Words
So that is your first look at the brand new Home Assistant Yellow and we are definitely going to be doing a deeper dive into this in the next few days where we will go into much more details, so if you have any questions that you want to see in the full review, please do let me know in the comments! I will try my best to cover them. Maybe you are interested in how the SSD works or you want to see how the Zigbee aspect works? Or possibly you want to know what happens if you factory reset it?
Big thank you to Paulus and the rest of the team at Nabu Casa and Home Assistant for sending this over so I could give you all a closer look at it. I really appreciate it and it is super cool of you guys.
By the way, if you like the look of Yellow and you want to get your hands on one then there is still time! There are around 9 days left of the kickstarter if you want to pick one up as your next upgrade. Shipping times for the standard version are getting a bit longer now just because of how crazy the world is right now for electronics but some of the other versions are currently around May or July shipping time so that is still a good option. I for one cannot wait for this to launch and for this to start shipping as I am really excited to see this product coming to life!
But that is about it for now, hopefully you guys enjoyed this review and I certainly hope you found it as interesting seeing this hardware in the flesh as I did!
Let me know your thoughts in the comments down below; have you have already backed one or perhaps now you’re planning on picking one up? Thank you, as always, for your support.