Getting Started with Home Assistant - Part 2 - Setup and Lovelace Overview

Welcome to part 2 of the Getting Started with Home Assistant series – Setup and Lovelace.
This series aims to help teach you about the basic configuration and functionality of Home Assistant.
This part follows on directly from where we left off in part 1, so if you have not yet installed Home Assistant then go back and follow that part.
In this part, we are going to finalise the setup then take a look at how Home Assistant works and an overview of every single menu in the Lovelace interface.
Let’s get into it!
Table of Contents
- Finalising Setup
- Terminology Cheat Sheet
- Entities
- States
- Attributes
- Lovelace
- Overview
- Logbook
- History
- Developer Tools
- States
- Services
- Logs
- Templates
- MQTT
- Info
- Hass.io
- Dashboard
- Snapshots
- Add-ons
- System
- Configuration
- Integrations
- Users
- General
- Server Control
- Persons
- Entity Registry
- Area Registry
- Automation
- Scripts
- Customization
- Notifications
Finalising Setup
If you followed to the end of part 1, we left at the “Welcome” screen.
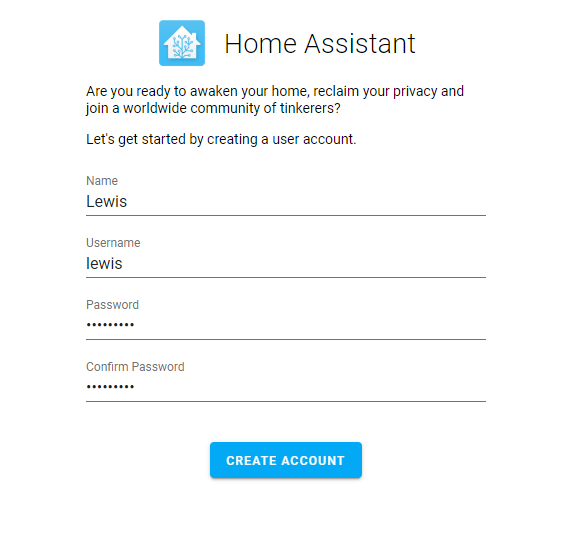
Go ahead and fill in the information on the first screen, this is just creating a user account that you will use to login with:
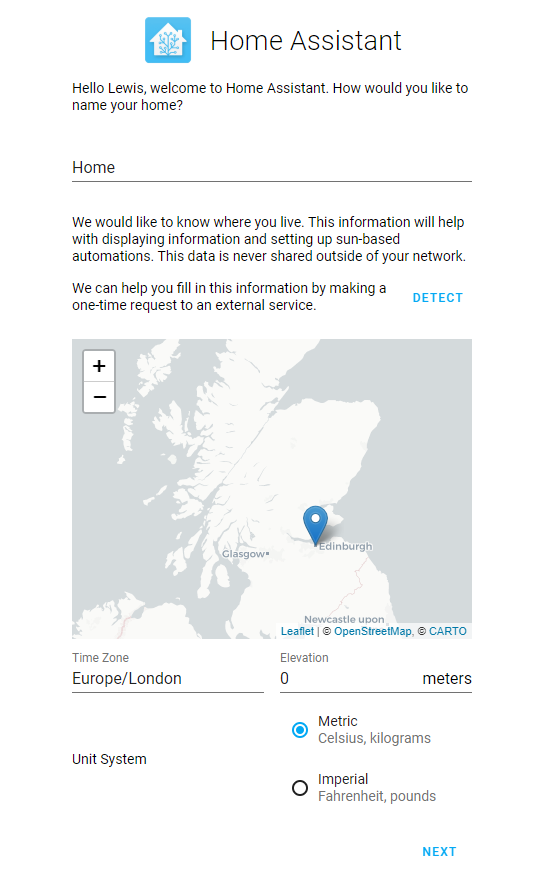
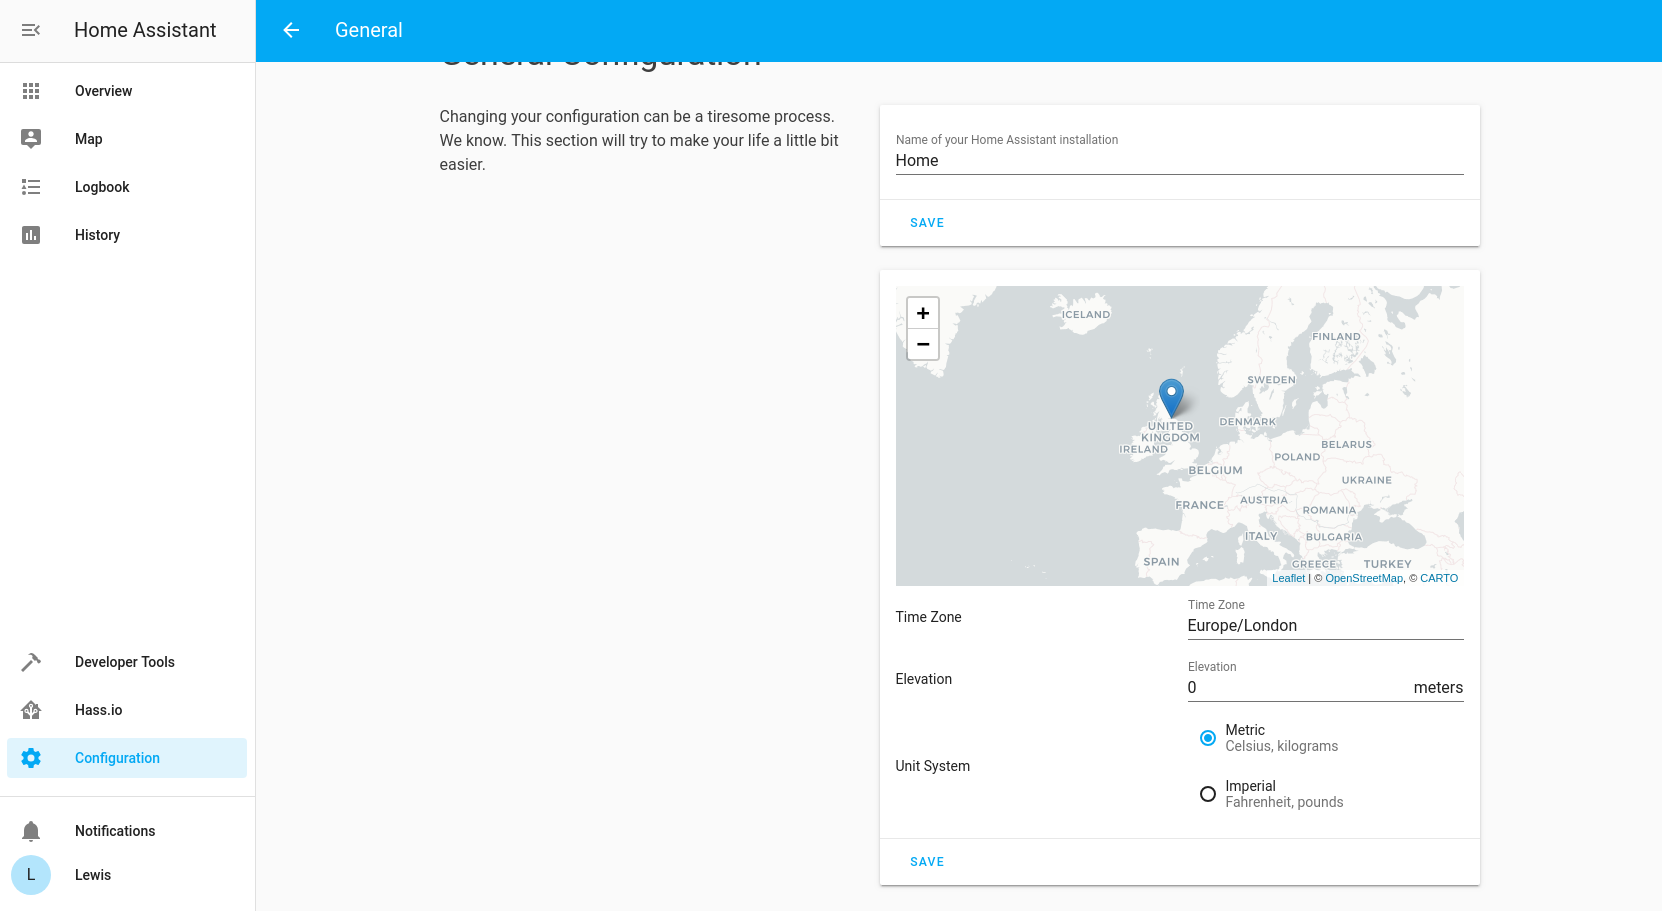
Hit next, then give home assistant a name, set your location, timezone and unit system:
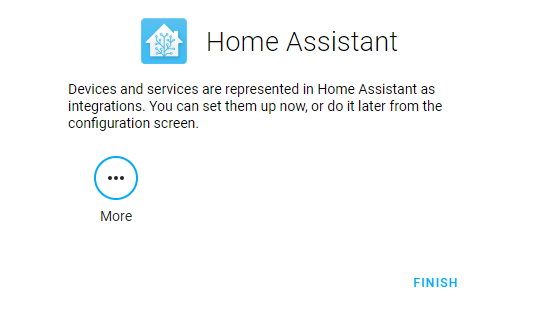
Hit next again. You will then be asked if you want to setup any integrations, press finish for now as we will cover this later:
Setup will finish and you will be left at the Lovelace dashboard:
We are going to finish the setup by configuring/enabling a few recommended options before we dive into Lovelace in Home Assistant.
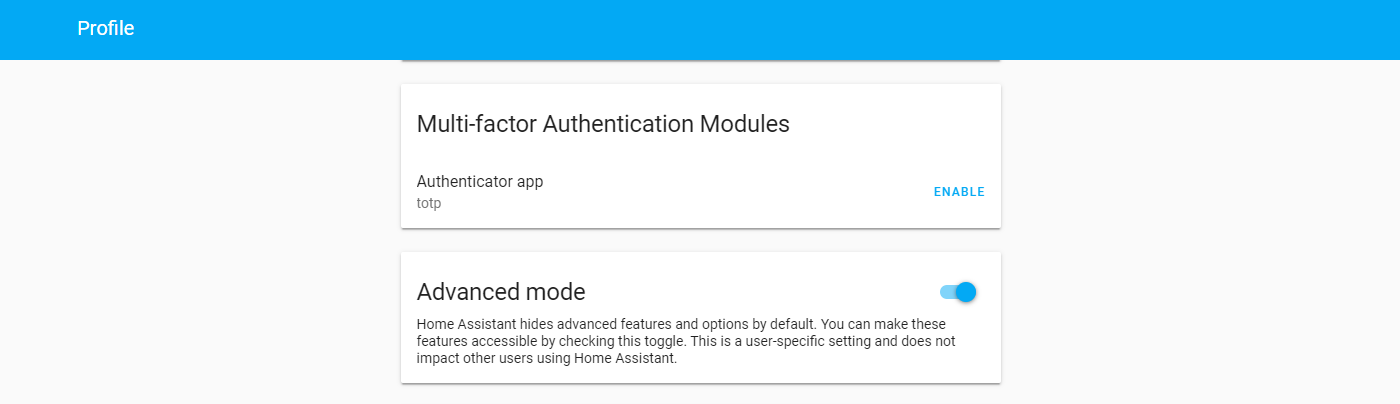
Click on your username in the bottom left hand corner, this will display the options for your user account only. Other options we will configure later will be system wide, but anything within this menu is for your own account only.
Scroll down and enable Advanced mode, this will ensure we have access to everything as an Administrator of the system:
If you are using Hass.io then we will need to enable SSH so that we can access the config files. If you installed via Virtual Environment then skip these steps as you likely have access to SSH already.
Click on the Hass.io menu, then click on the add-on store tab along the top:
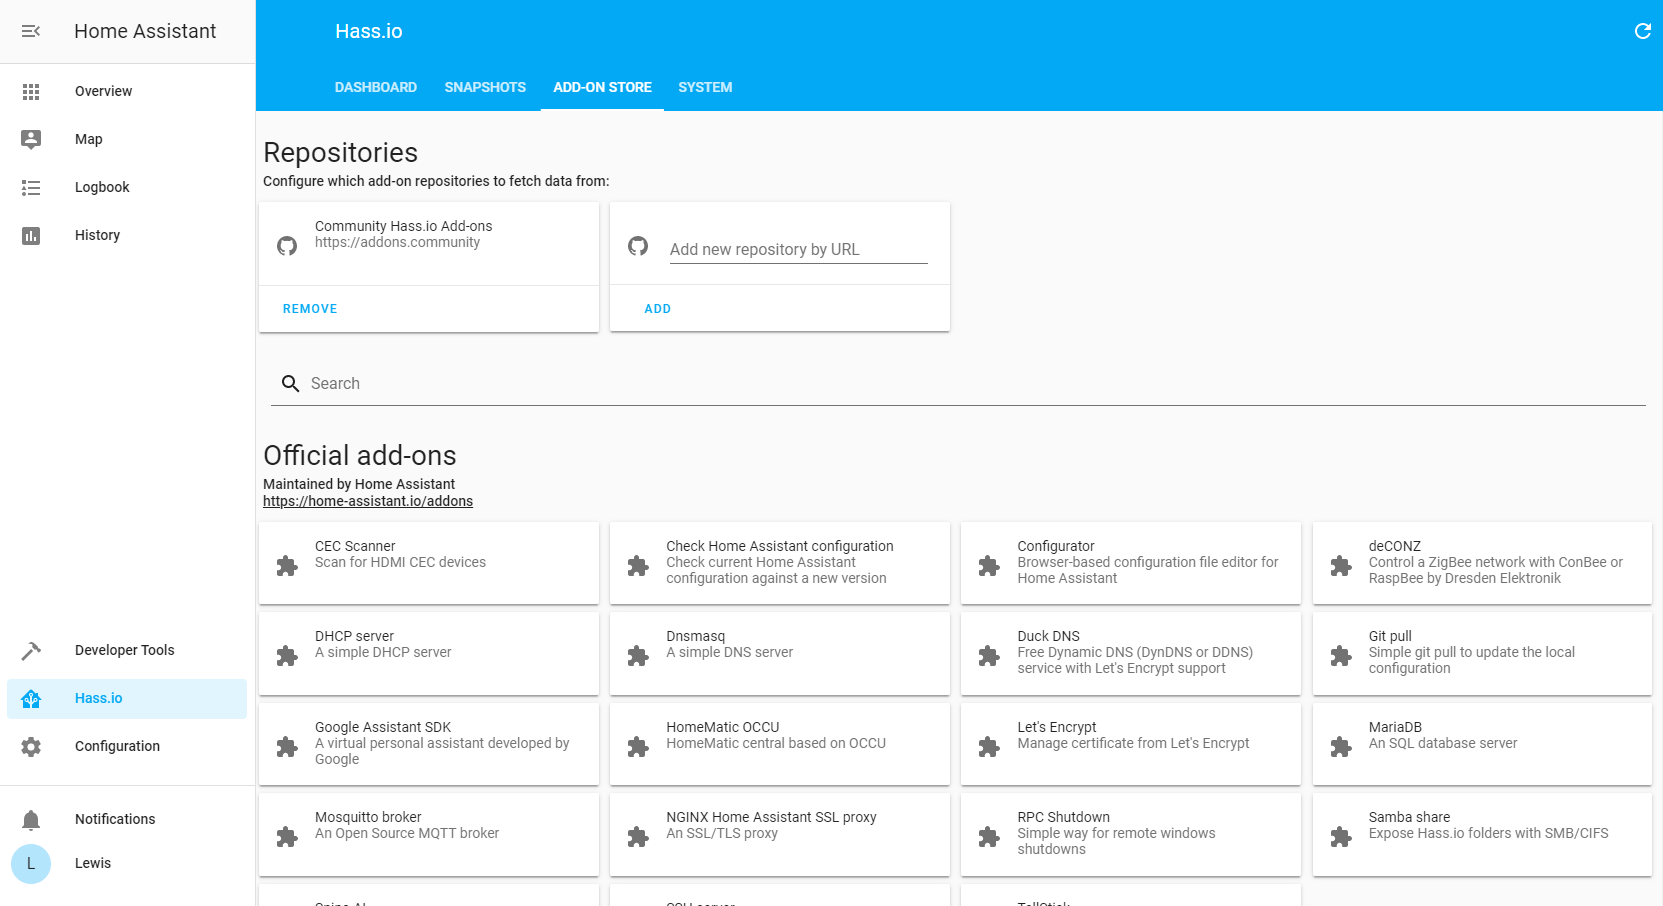
This tab allows for super easy add-ons for Home Assistant with single clicks. It’s really powerful and will grow a lot in the future.
Go ahead and find SSH server under the Official Add-ons and click it, then press install:

After a few seconds, the module will be installed and you will be presented with a few options:

Scroll down to the “Config” section. It is recommended to use authorised keys instead of password option, but the password option is perfectly fine to use and is what we are going to use here. Enter a password in the field and hit save.
Scroll back up and press start to start the SSH service. You can now test the SSH connection using root and the password you just set:

That’s our very very basic setup of Home Assistant finished!
Terminology Cheat Sheet
Before we get into Lovelace in Home Assistant, it’s probably a good idea to familiarise ourselves with some key terminology for this part:
Entities:
Entities are the main component of Home Assistant. It is a collective name given to all of our devices, sensors, lights, media players, cameras etc etc, basically anything you want to interact with is an entity.
States
Every entity has a state, and a state is as it sounds – the current state of the entity. So for example if I have a light entity that is turned off it’s state is “off”. If I then turn that light on, its state becomes (you guessed it) “on”. An entity can only have one state.
Attributes
Attributes are additional “options” that an entity has. An entity can have many attributes unlike states. For example, how bright is a light and what colour it is set to. Using the light entity from above which has an “on” state, the “brightness_pct” attribute is set to 100 (full brightness) and the “colour” attribute is set to “red”.
Attributes can be used for device control i.e set brightness of a bulb or they can be used to act upon in automations i.e if the temperature is below 18 degrees, turn the heating on.
Lovelace
Lovelace is the user interface that ships with Home Assistant. It’s very configurable and easy to work with and supports mobile or desktop screens.
Let’s take a look through every page in Lovelace and give a brief overview of what each section does.
Overview
The overview page is where you will spend the majority of your time after configuration. It is the main “dashboard” if you like, which displays all of your devices (sensors, switches, lights, media players, alarms, climate controls, calendars, cameras and anything else you can possibly imagine) to give you a status or provide direct control (turn lights on and off for example). This is what people refer to as Lovelace within Home Assistant.
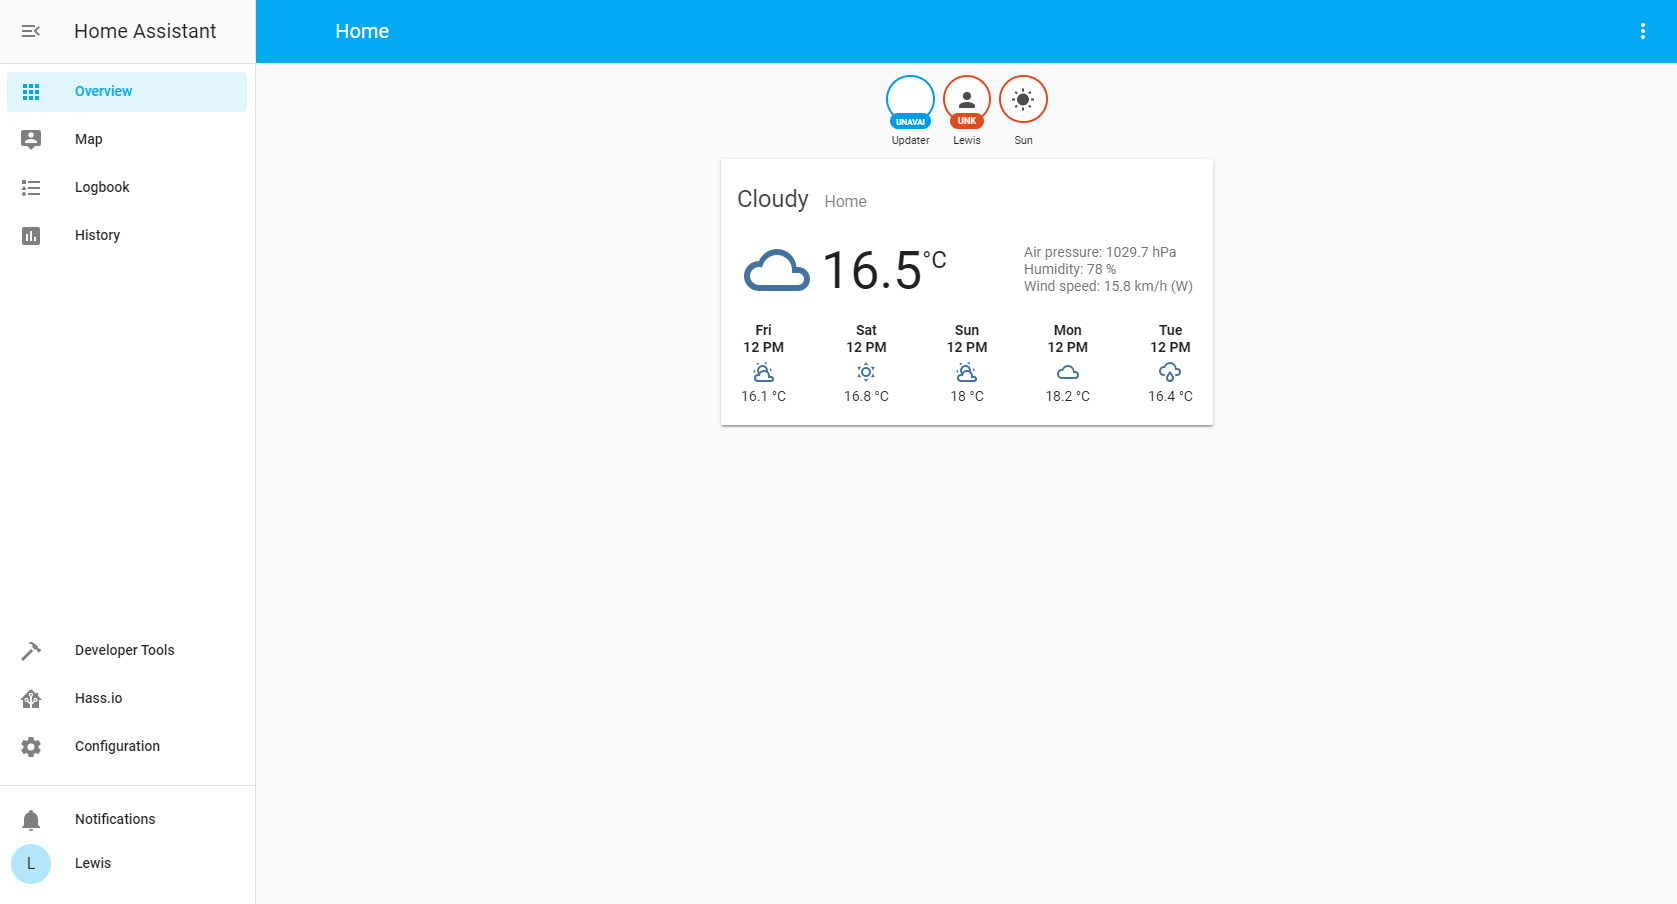
The dashboard is made up of “cards” which will be familiar if you are used to Google Material Design. Each card is configurable with any information you want on them. Let’s take a look at a practical example:

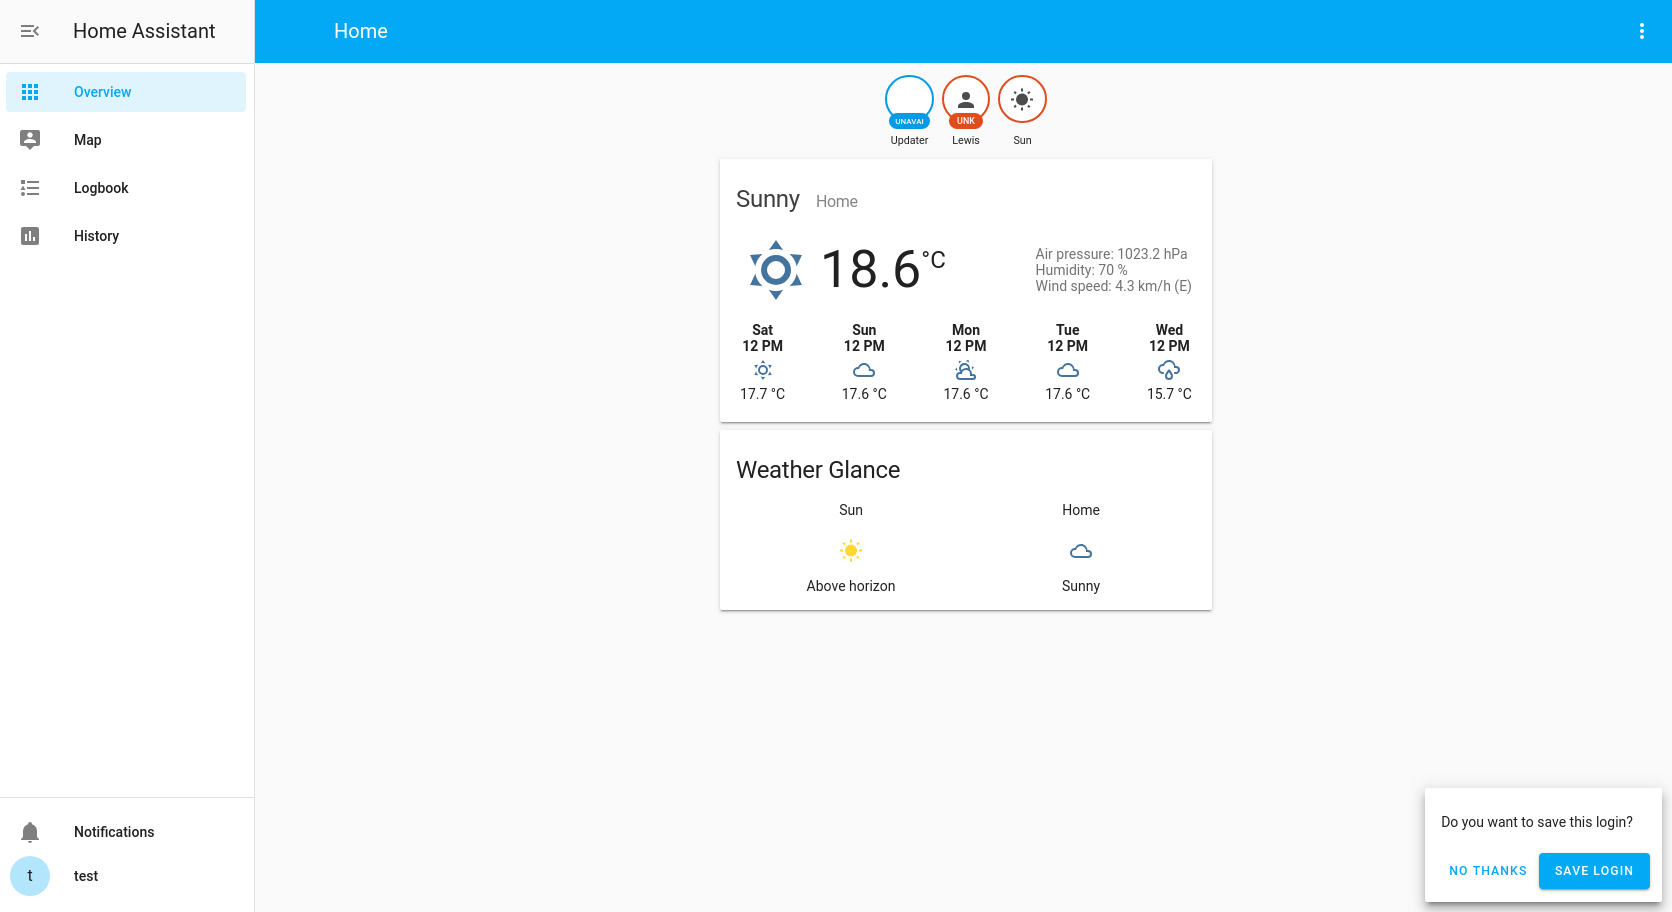
Here we have the default dashboard after installation. You can see it has added a default card for us, displaying weather forecast information. This is automatically gathered from the location you set earlier during setup.
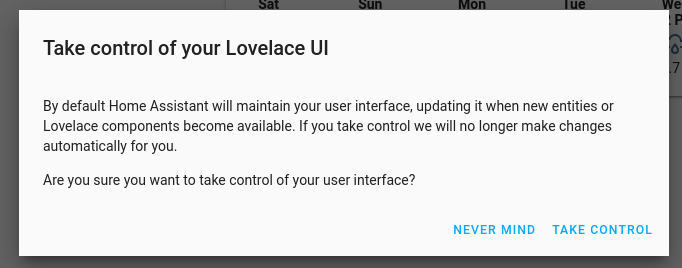
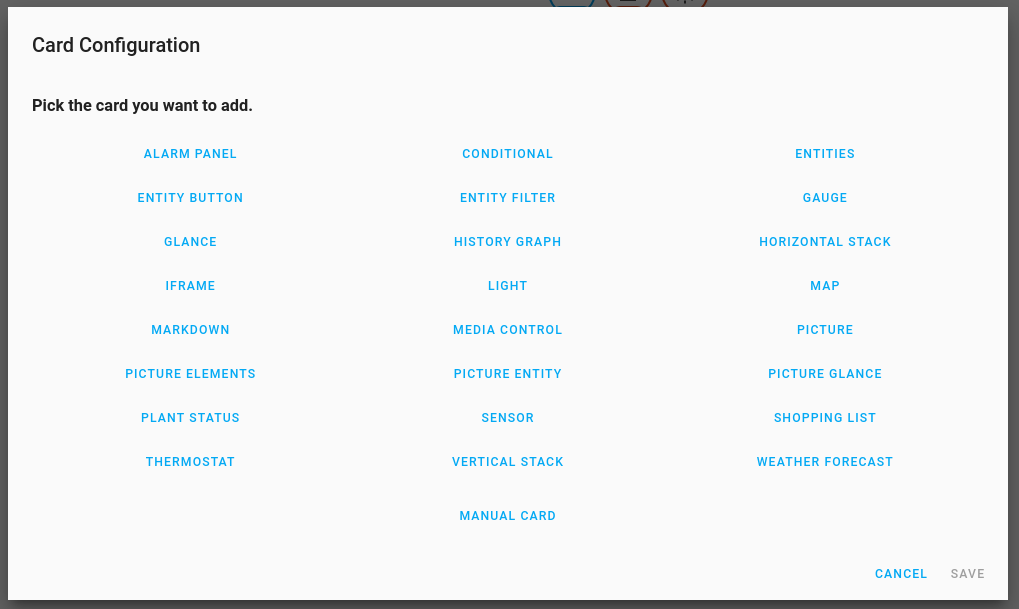
Let’s add another card to the interface. In the top right, hit the 3 dots and press configure UI. You will receive a warning, hit take control:
Then press the orange plus symbol to add a new card, from the list choose the Glance card:
The glance card is as it suggest, provides minimal information about an entity. From there, give the card a name if you want, choose 2 columns then from the Entity drop down and select Sun.sun and Weather.home then save:
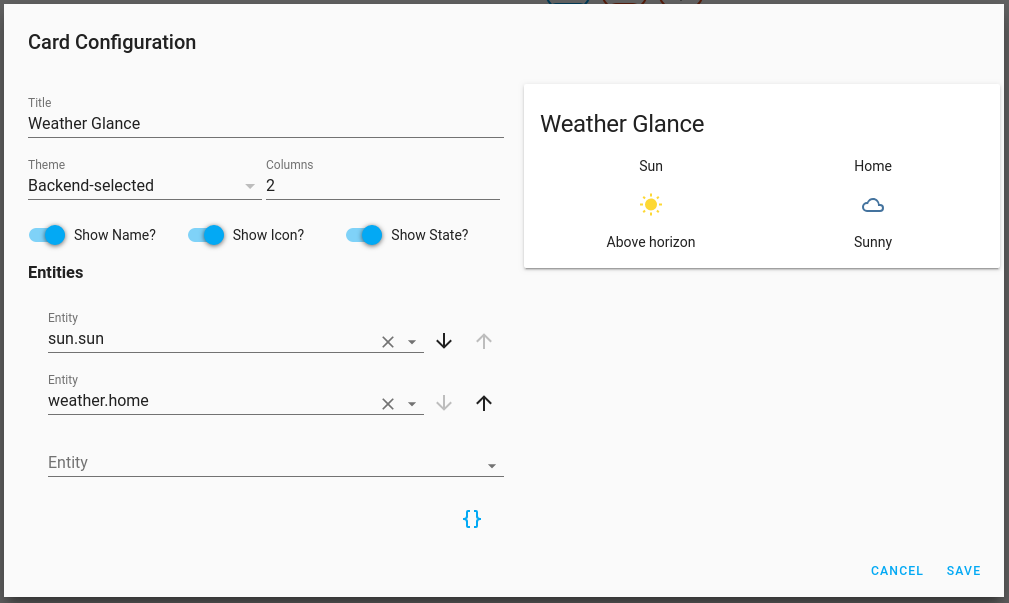
This has given us a nice new card in the dashboard with the states of our entities, in this case the sun and weather default entities:

This isn’t particularly useful per say but when we add more entities later in the series it will be!
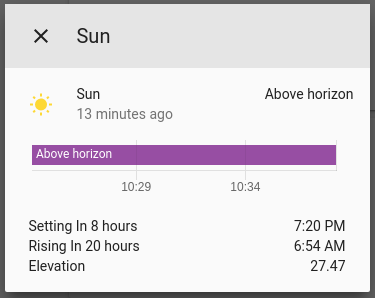
You can click on the icon to bring up further information, if I click on the sun icon it brings up further information:
Logbook
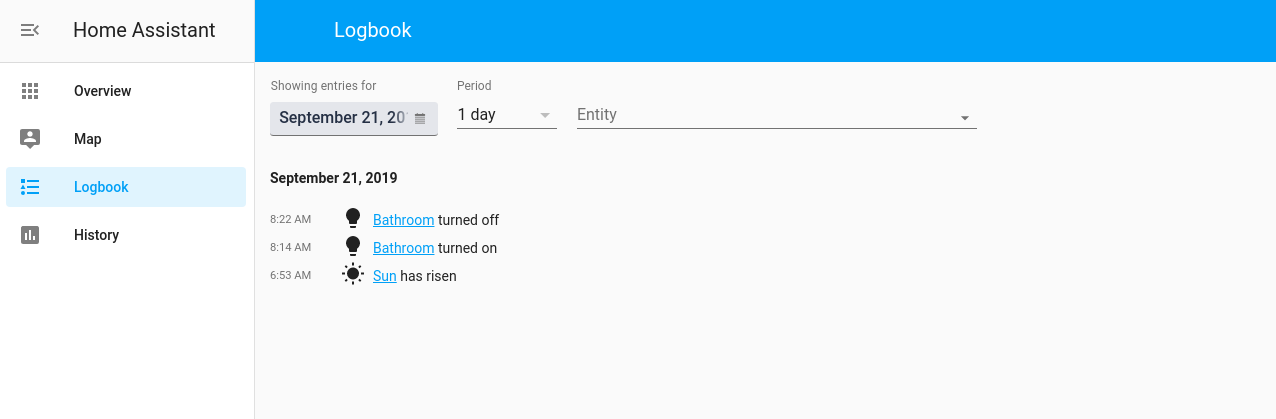
Logbook is a really useful way of tracking what entities changed and when. It’s a list of any entities that changed and when, you can even track back previous days to check. You can see in this example that I have a light called “bathroom” that is being switched on and off:
It becomes more useful when we start using automations, as it can help figure out the series of events that triggered an automation.
History
History is like Logbook but gives us much more information over a longer period of time. It can also display graphs depending on the entity if the entity has number states instead of “off” or “on”. It is useful for seeing how long an entity had a state for. Hover over each section of the entity to get more information about its state:
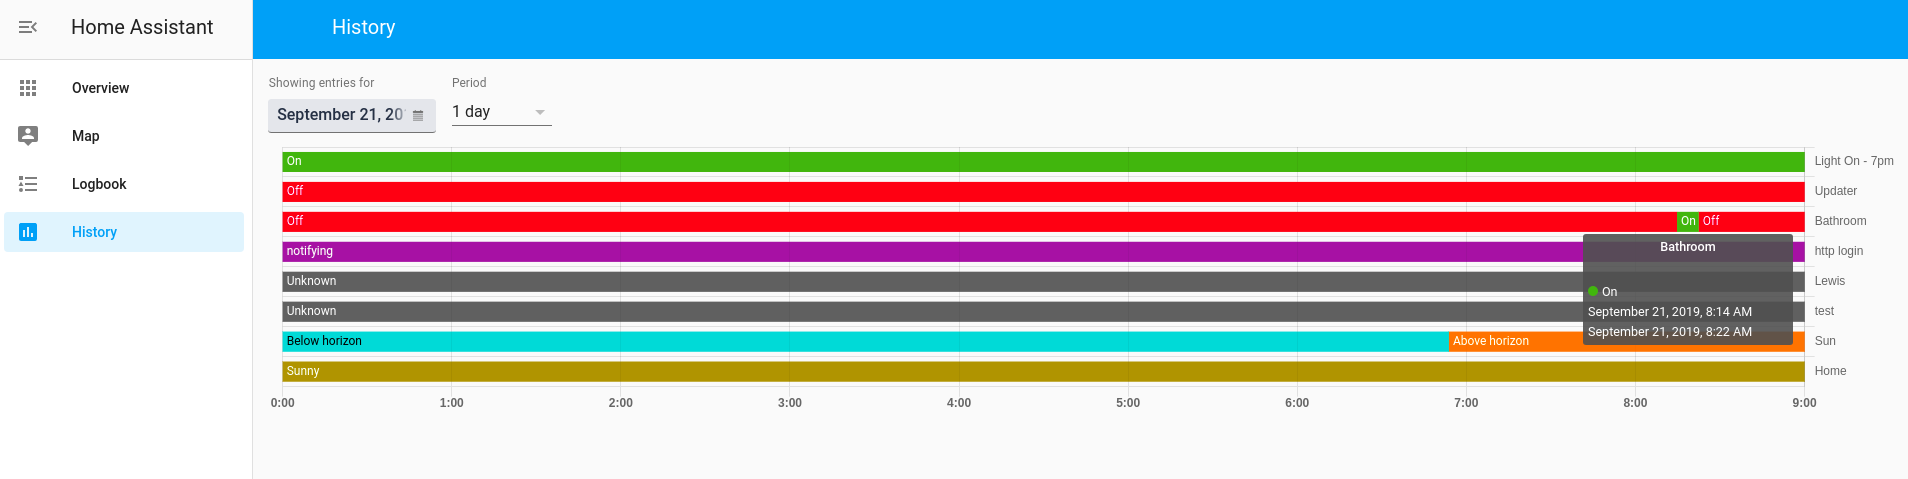
We can see that the bathroom light entity has been on from 8:14am to 8:22am.
Developer Tools
States
The states page helps us to understand entities, states and attributes a bit easier.
It lays out all our entities, states and attributes into an easy to read table:
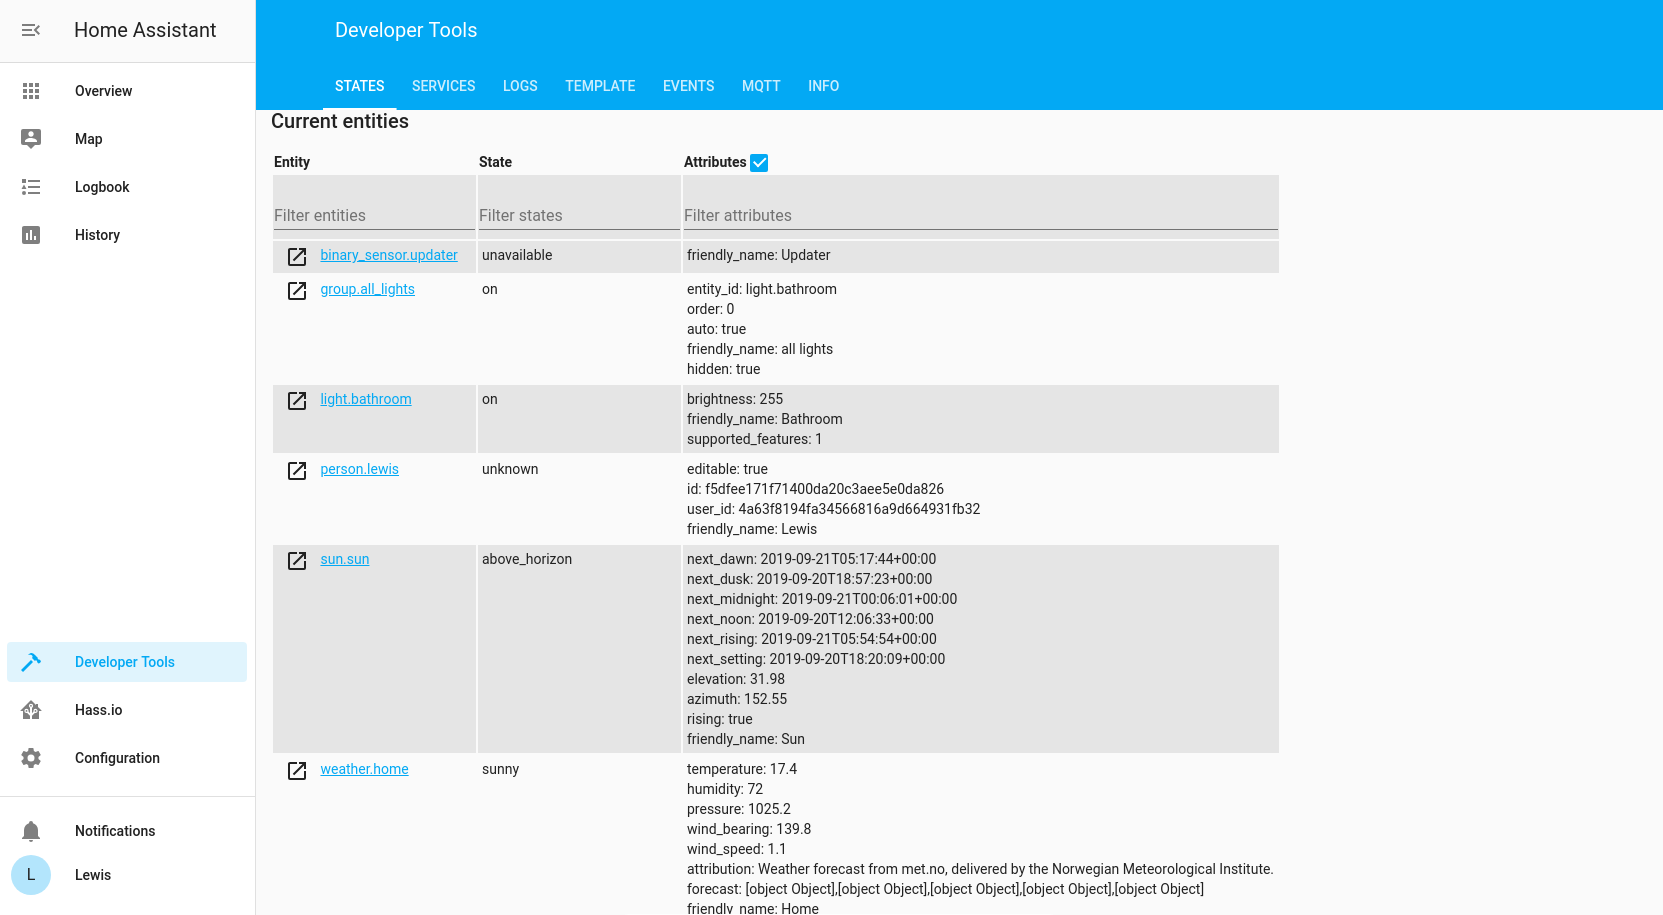
We can see some of the default entities, as well as the light.bathroom entity. We can see that the bathroom light entity has a state of “on” meaning the light is currently turned on, and it has a 2 attributes (ignore supported_features):
- brightness – The brightness value of our bulb
- friendly_name – “light.bathroom” isn’t the nicest looking, so we give it a friendly name of “Bathroom” which is displayed in Lovelace.
The number of attributes listed is entirely entity dependant so don’t worry if you don’t have much. Bathroom light is just a simple dimming bulb, hence it only has brightness control.
If we take a look at the weather.home entity, it has more attributes:
- Temperature
- Humidity
- Pressure
- Wind_bearing
- Wind_speed
- etc
Some of these are useful, some not so much, but the point is to have as much information as possible incase you do want to use it.
You might have noticed at the top of the states window, you have this:
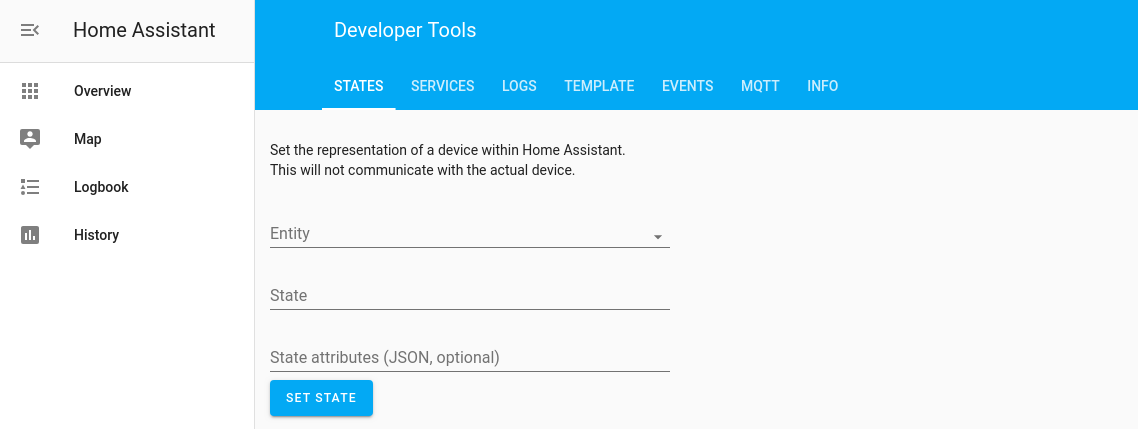
This is a really useful tool, it allows us to manually set the state and attributes of a device without actually changing the device. This can be extremely powerful if you want to test triggering an automation to see if it works without having to wait for the event.
For example, lets say you have an automation (coming later in the series!) that turns on lights at a certain sun elevation, when it gets below 10. Rather than wait all day for the sun to start getting lower, we could manually set the attribute to this which would trigger our automation and we can verify it is working:
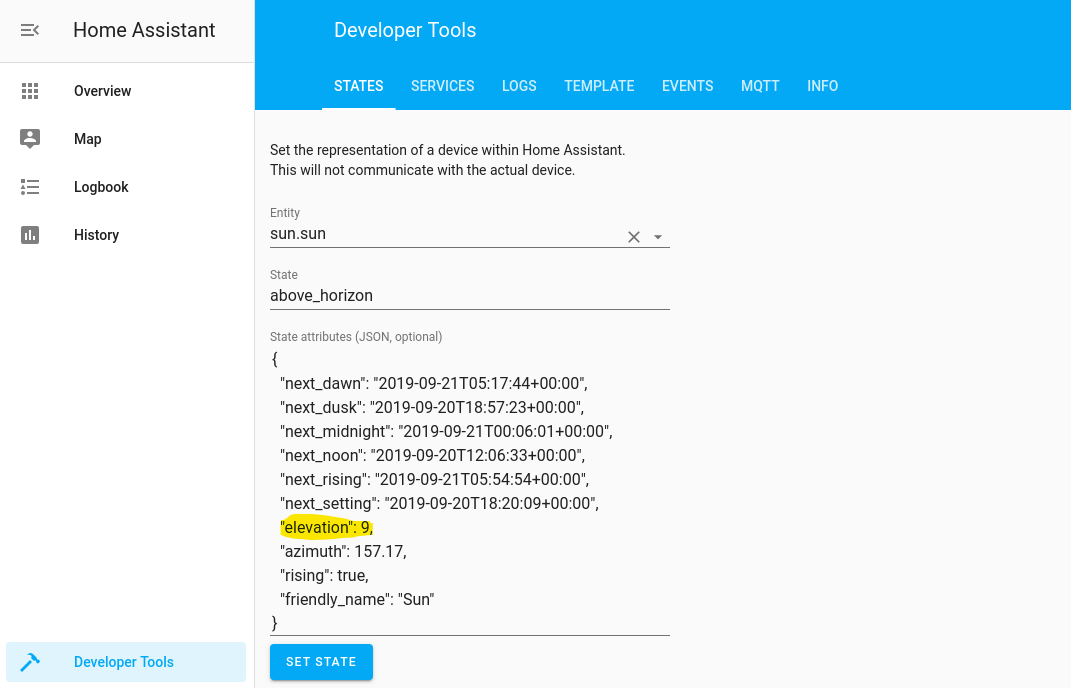
To pre-populate this information, simply click on the entity from the table and it will insert all the information for you, then simply change the value you want and hit set state. The information in the table will change instantly.
Services
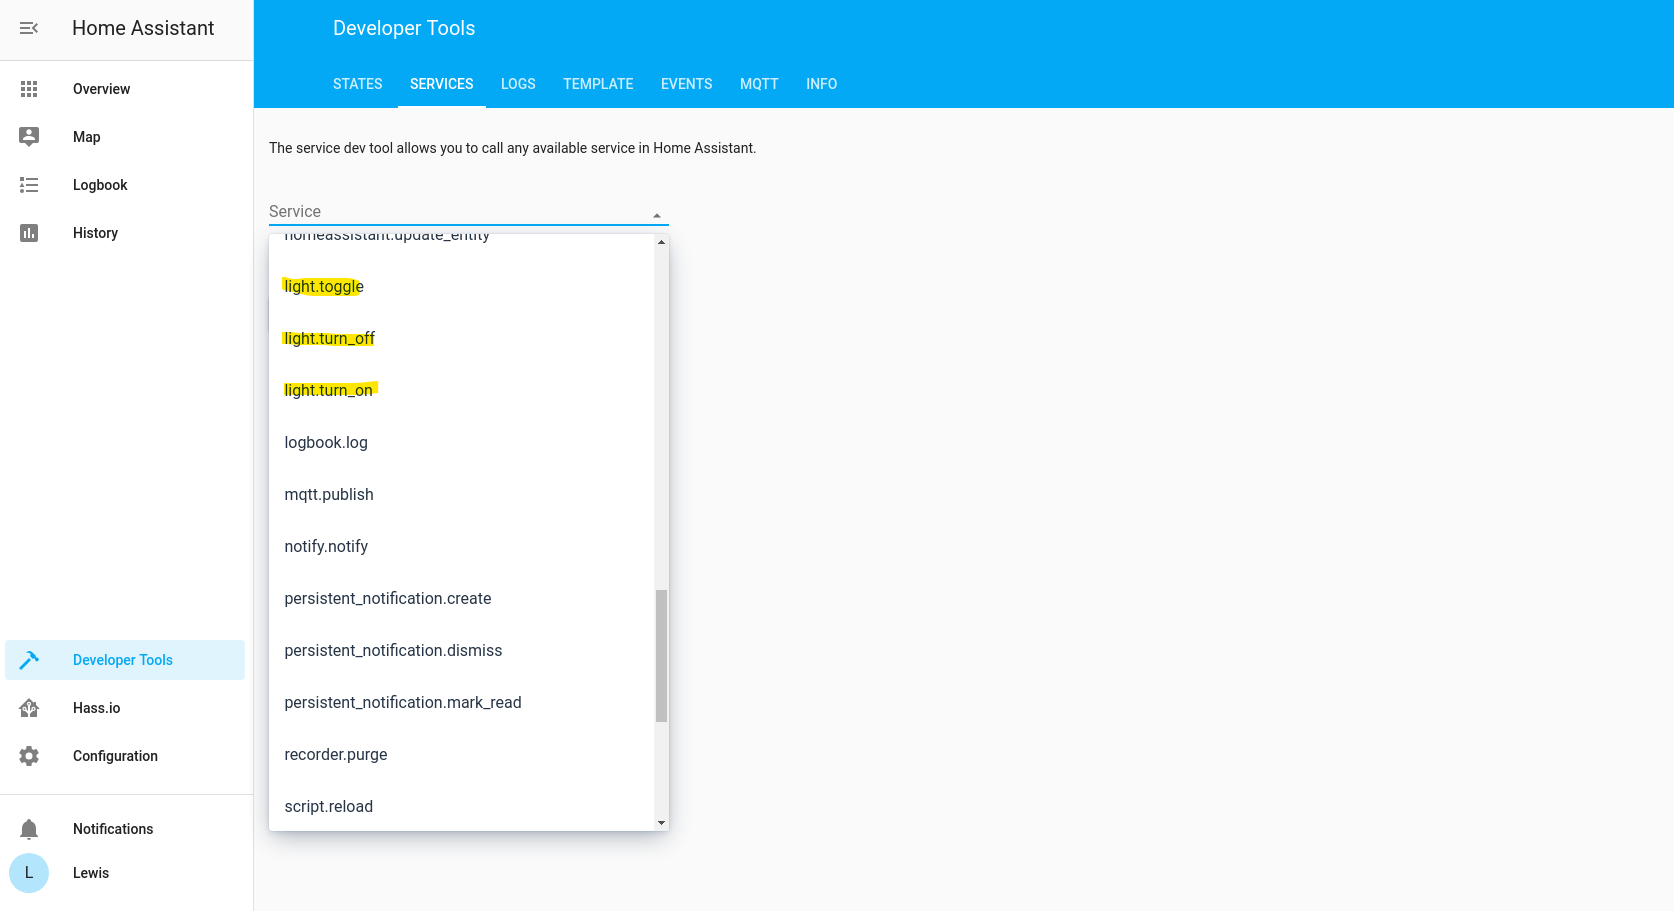
Services is what allows you to control entities from HA. The list of services you will see is based on what entities you have, if you don’t have a certain type of entities then these services will be hidden from view.
Click on the services drop down and have a look at the list. Because I have a light entity, I have 3 light services showing:
If I wanted to turn the light off using a service, I could simply enter the following:

First select the service, then select the entity from the drop down and press call service.
The JSON data can be ignored for now but we will use this later when we come to automations.
It’s worth nothing that services do not need to be used in the lovelace UI, for example if you want to toggle a light from lovelace then you just click it and lovelace does the services in the background, you do not need to set these up manually or anything, the system is smart enough to know!
Logs
The logs tab is simple, it provides with the home-assistant.log file and is basically a debug log for home assistant, particularly useful to view any malfunctioning entities or any issues when HA starts up.
Templates
The templates window allows you to experiment with templates to find the correct syntax.
Templates are incredibly useful and powerful, these will massively enhance your automations. They allow for multiple scenarios to exist and in its simplest form are like “if” statements.
For example in basic coding terms you might have something like this: “if sun is above_horizon then turn the lights off else if sun is below_horizon then turn lights on”.
Or another slightly more advanced example could be something like: “if the sun elevation is above 20, turn lights off else if sun elevation is above 10 and below 20 turn the lights on at 50% brightness else if sun elevation is below 10 turn the lights on at 100%”
Templates are done using the Jinja2 template engine and do take a little bit of getting used to.
We are going to do a whole dedicated topic on Templates in a later date and everything will become much clearer, but lets take at a simple example using the our light bulb again:
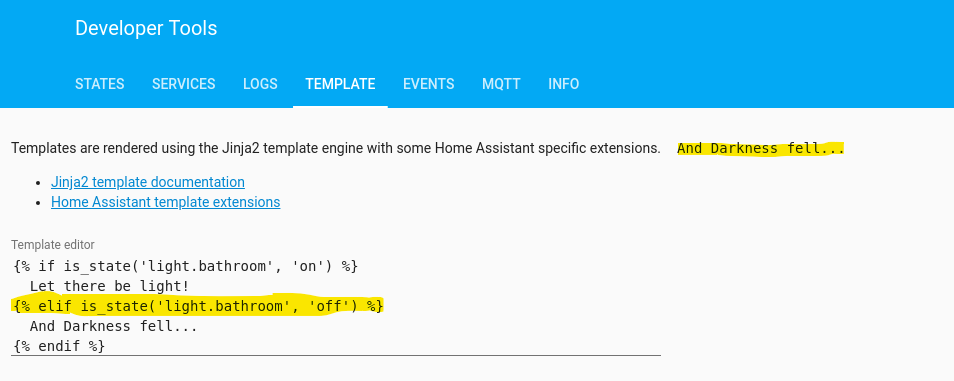
Clearly this isn’t a useful template but it does do a good job of demonstrating templates.
The first line says if the state of the light is on, print “Let there be light!” else if the state of the light is off, print “And darkness fell…”
Hopefully that makes sense, templates will become much clearer down the road!
MQTT
The MQTT tab allows you to publish data to an MQTT topic (assuming you have MQTT configured), this can be particularly useful if you want to test your device first before going and adding configuration for it.
Info
This page just provides useful information about HA such as the version. One useful item here is it gives you the location of the config file in case you can’t find it!
Hass.io
This section will only be visible if you are using Hass.io, if you installed via Virtual Environment then you won’t have this section and can skip!
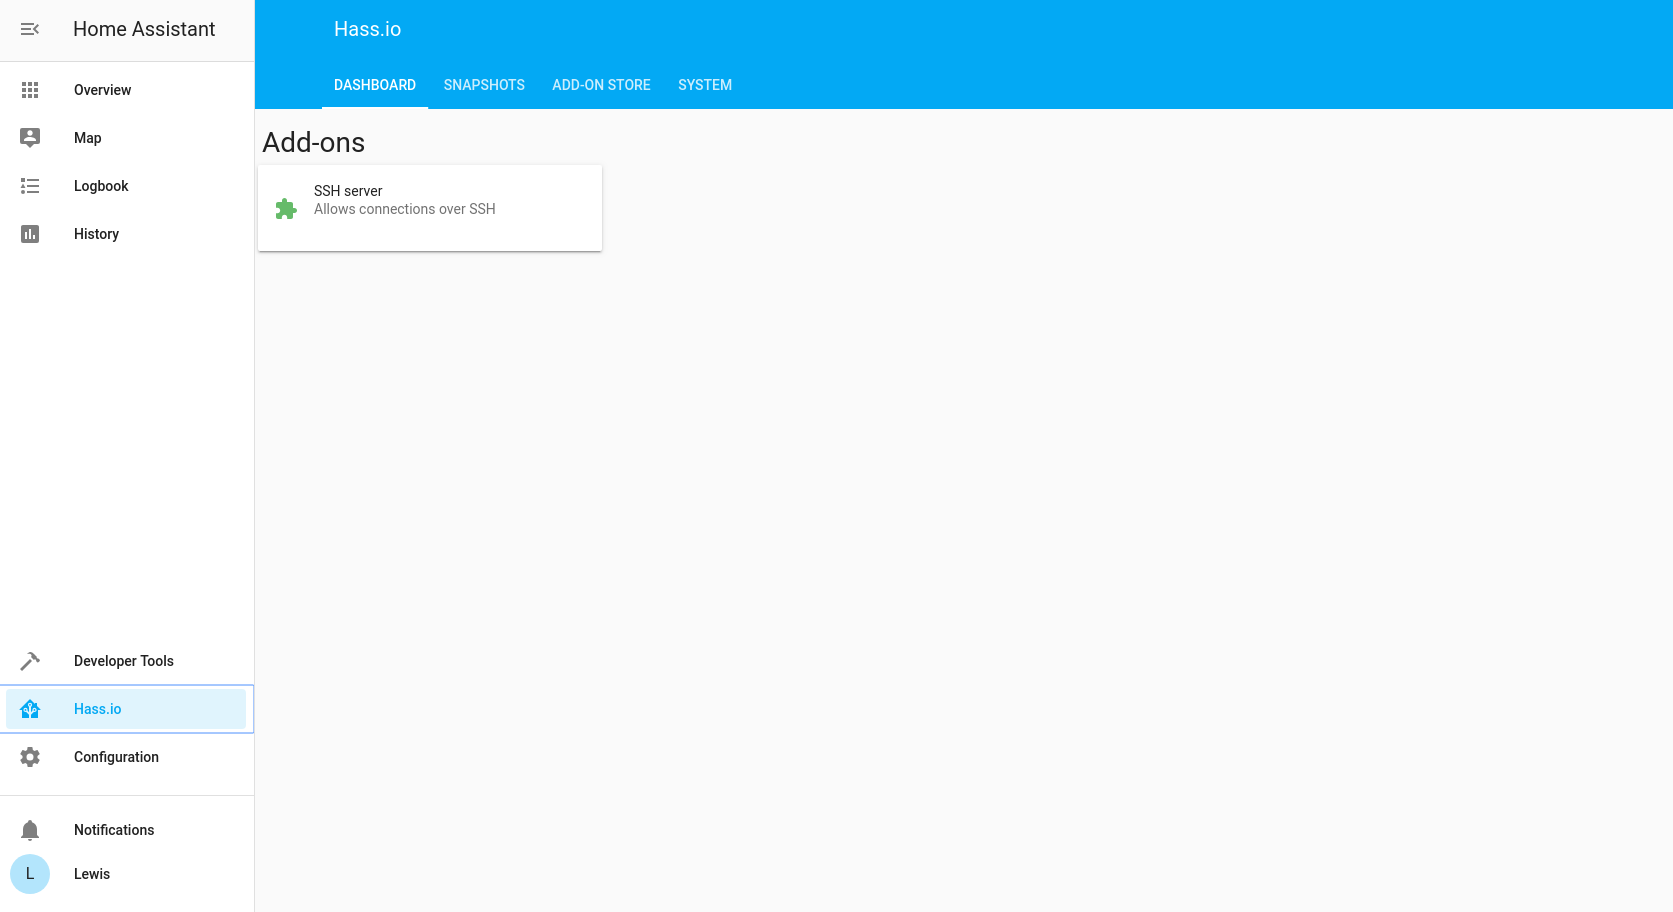
Dashboard
This page shows a list of currently installed add-ons, if you followed the guide from earlier you should currently have SSH Server listed in there:
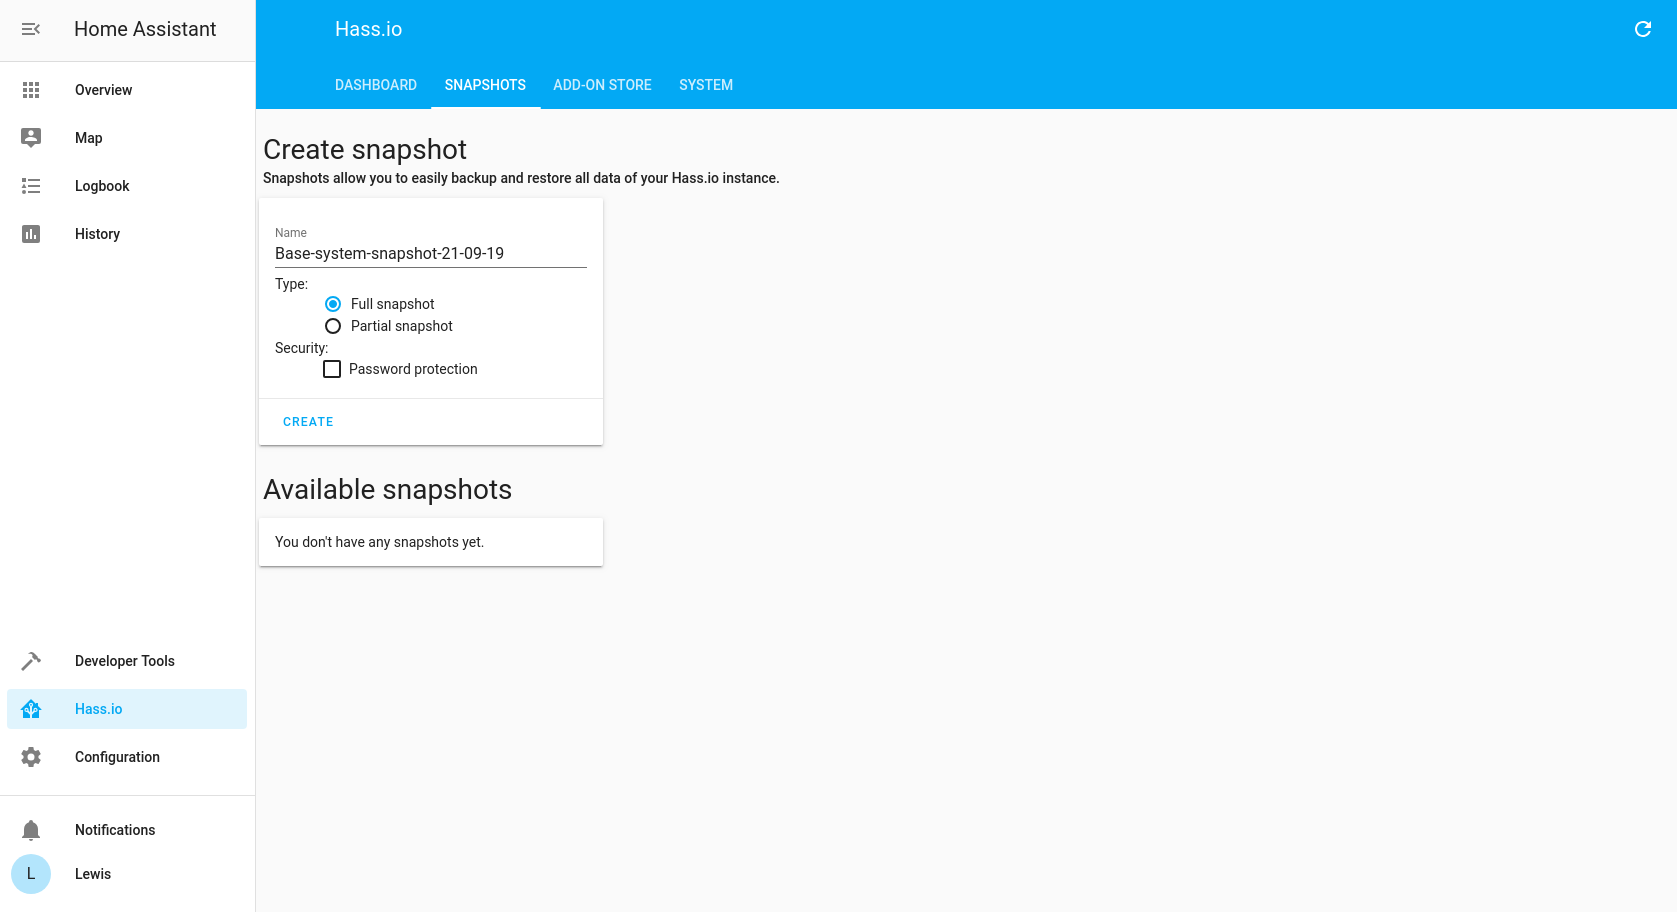
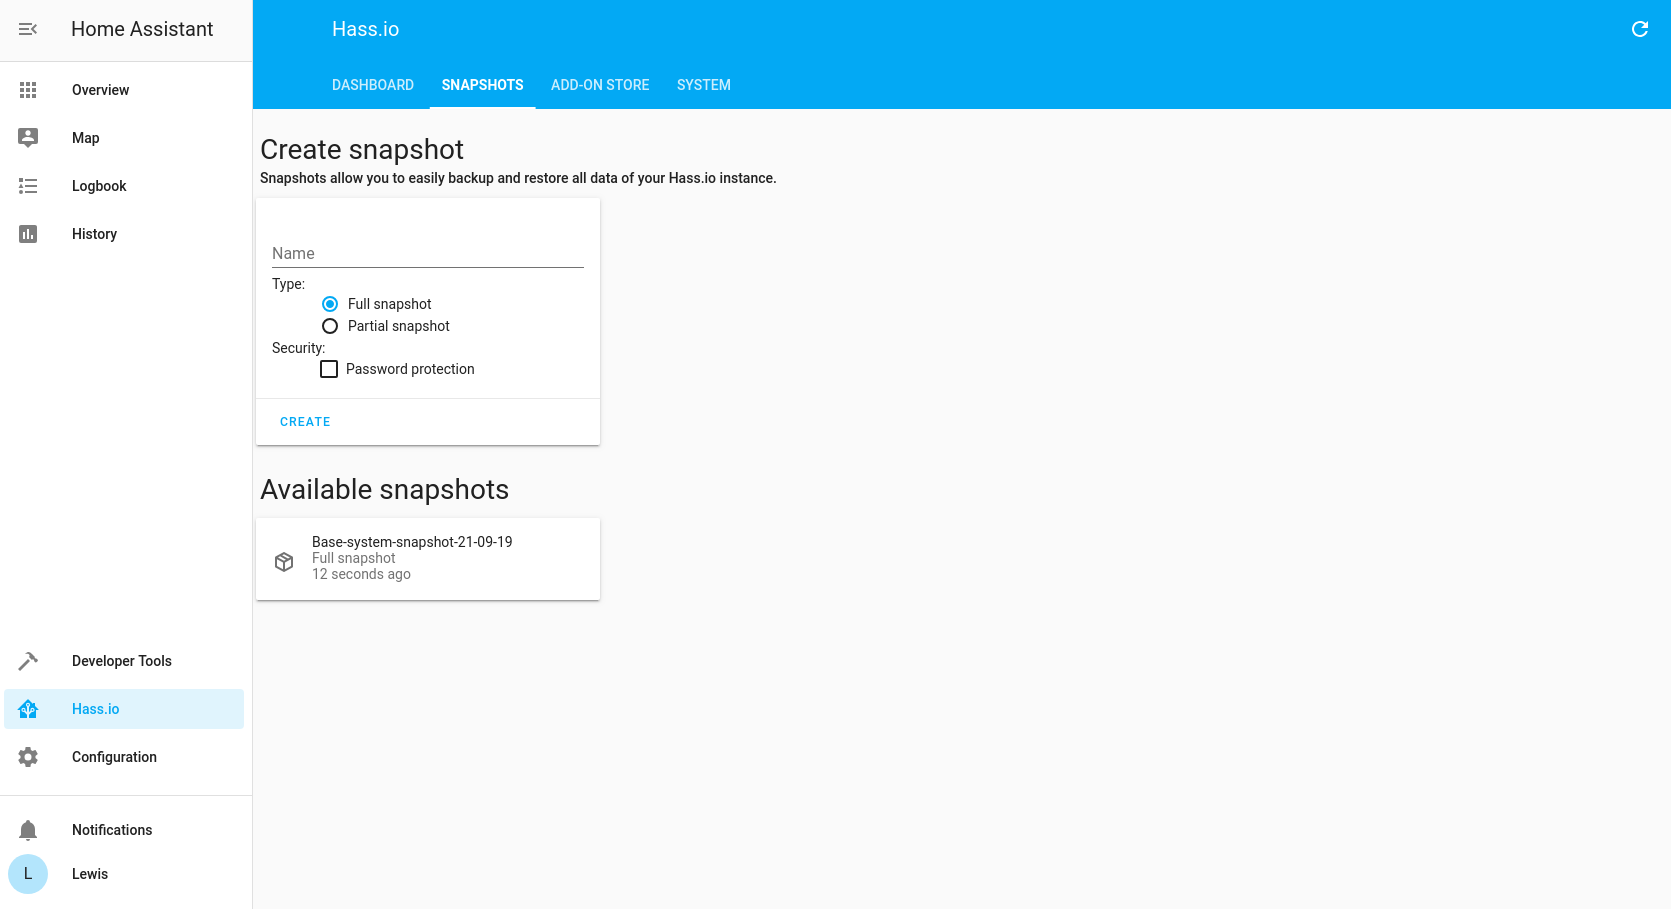
Snapshots
Snapshots allow you to create a backup, it is a “snapshot” of the data as it was in that moment in time. You have the option to create a full or partial snapshot.
Let’s create a base snapshot now so we have one of the clean install. Go ahead and name it, and select the full snapshot option. You can set a password if you would like. Press create, and a few seconds later you will have a snapshot listed:
You can click on the snapshot to give you more information, you can download it for offline storage, you can restore it or you can delete it:
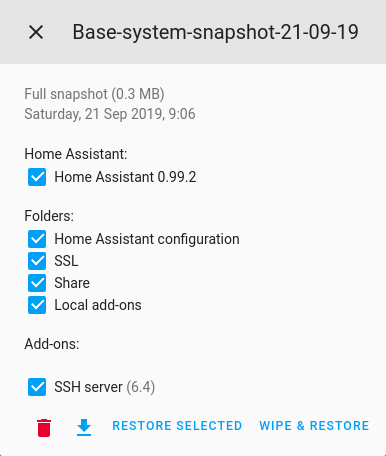
Snapshots are a great way to revert back if you have an issue, I suggest making regular snapshots just in-case!
Add-ons
As mentioned earlier, add-ons are a really simple way of installing modules and expanding your HA setup. There is official add-ons from Home Assistant directly, along with loads of community add-ons. They offer one click installation and are really easy to configure.
Have a look through the list and see if you want to install any that suit your environment!
System
This tab provides information specifically about the HassOS system as well as a system log. You can change the system hostname here if you’d like, restart/shutdown the instance or import settings from a USB stick.
Configuration
Configuration is where you can configure HA settings from within the UI.
Home Assistant is currently implementing many of the things that were traditionally done in config files, into configurations. At this moment in time, you can now configure the following in the UI:
- Automations
- Scripts
- People
- Areas
- Entities – to an extend…
Let me clarify that last one, you can currently add some entities automatically and you can delete some entities.
I can here you cry already “that didn’t clarify anything!!!!”, let me explain further in the sections below.
The truth is its tricky to explain at the moment, Home Assistant was always done with configuration files in the earlier releases as this made most sense, then overtime with each release, Home Assistant has been slowly adding the functionality into the UI. This puts it in an “awkward” (but totally necessary!) position where some stuff can be done in the UI and some stuff needs to be done in config files. Everything can still be done in config files however.
Integrations
Remember when I said some entities can be added in the UI? That’s where we do this. At this point you probably have only a “weather” entity listed, go ahead and click the plus symbol to look through the list of platforms that can be added via the UI:
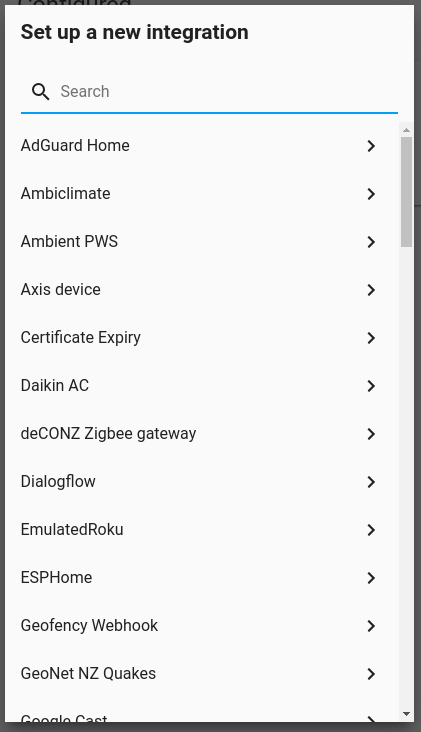
There are a quite a few things you can add here and to be fair, many of them are very popular.
Users
Remember when you set your username and password at the very beginning? Here is where you add additional users.
Go ahead and click the plus symbol and create a new user:
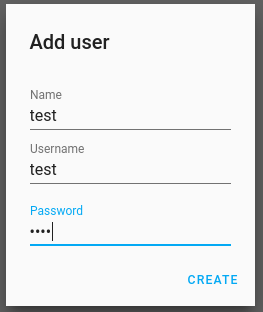
Once you press create, you will get a confirmation screen and you can assign the user to a group. Administrators group will give them full access to everything, the same as your own account does. The users group will only allow them to see the dashboard, logbook and history items. They will not have access to any of the configuration items:
General
This is where you can edit those settings we entered in the beginning, location, timezone and units of measurement:
Server Control
This menu allows you to easily restart the HA instance. If you make a change to the configuration file, you will need to restart it. This is an easy way to do so here.
Persons
You can add people you want to “track” in here. Tracking people is great for using in automations, for example you could set the house alarm when you and your partner are both out of the house. Adding a person here will create a person entity as you will have seen earlier. This person entity has a “home” or “not_home” state. You need to associate a device with a person for tracking to work.
These days most people carry their mobile phones with them at all times, so genuinely its a safe assumption that if a persons mobile phone is not active/not reachable then that person is not home.
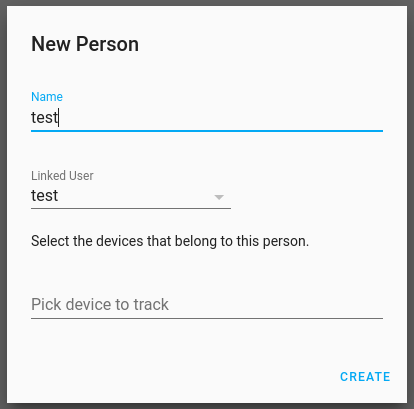
Let’s create a secondary user by clicking on the plus button again and entering our details. You can associate a person with a user account if you wish or leave it blank. It will also ask you to associate a device with the person, but we won’t configure that yet:
Go back and check in Developer tools > states and you will now see a new “person” entity!
Entity Registry
This will list all entities you have, as well as allowing the deletion of entities. It allows for the deletion of entities that have been configured through the UI. You can also override the names in here too.
Areas
Areas is a pretty new feature that doesn’t have any functionality at this moment in time apart from it allows you to define areas of your home that you can add entities too for organization.
In future releases this will have the ability to control devices all within an area for example, as well as being able to add user permissions based on an area.
Automations
This is a big and powerful feature, we are going to do a dedicated section to Automation soon so look out for that.
The automation function allows you to add automations directly through the Home Assistant Lovelace UI rather than through configuration files.
Let’s create a simple automation using our trusty light. I’m going to create an automation to turn on the light at a certain time.
Click the plus button which will open a new screen with several options. Automations have several components:
- Trigger – what “triggers” the automation to start
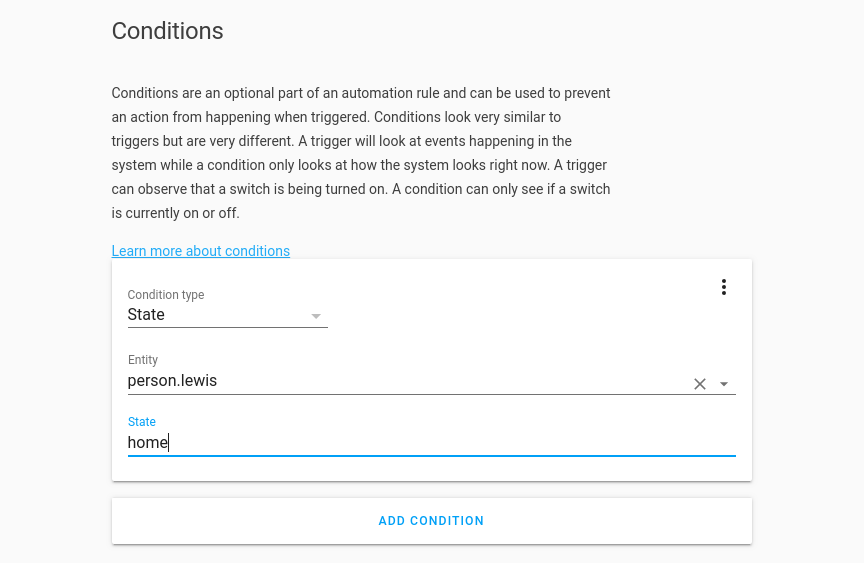
- Condition – the only execute the automation if X is true
- Actions – the action to perform if the automation is triggered and the condition is met
Give your automation a name. I’m going name this “Light On – 7pm”. Next up we specify a trigger. Select the trigger type drop down and you can see we have quite a lot of options here:

I’m going to select my trigger as “Time” since I want this to trigger at 7pm. Then I simply enter 19:00 in the at box:

You can have multiple triggers here if you want to.
Next we set a condition, I’m going to set the condition that I only want the light to turn on if I am home. From the condition type box, choose state. The entity is going to be me, so “person.lewis” and the state I want is “home”:
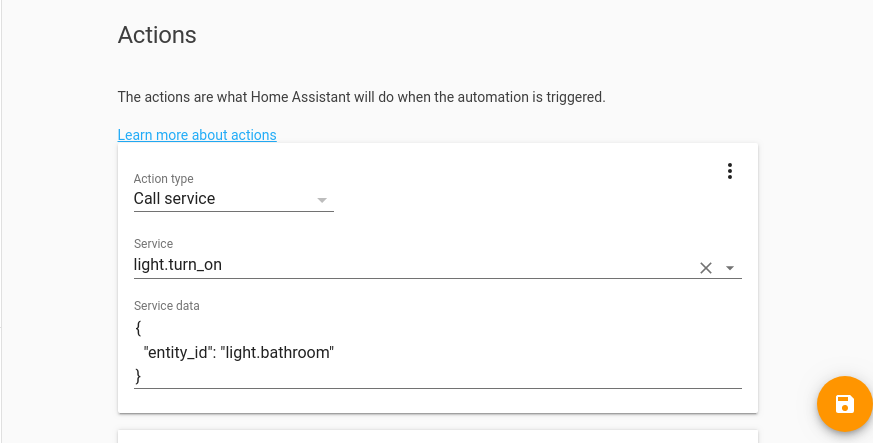
Finally we set what action to take if the automation is triggered. From the action type choose “call service”, the service you will recognise from earlier is going to be “light.turn_on”. The service data box is where we enter some options so that the service knows which entity to target.
If we go back to developer tools > services and choose “light.turn_on” from the drop down, we can see all the options that are available for that service:
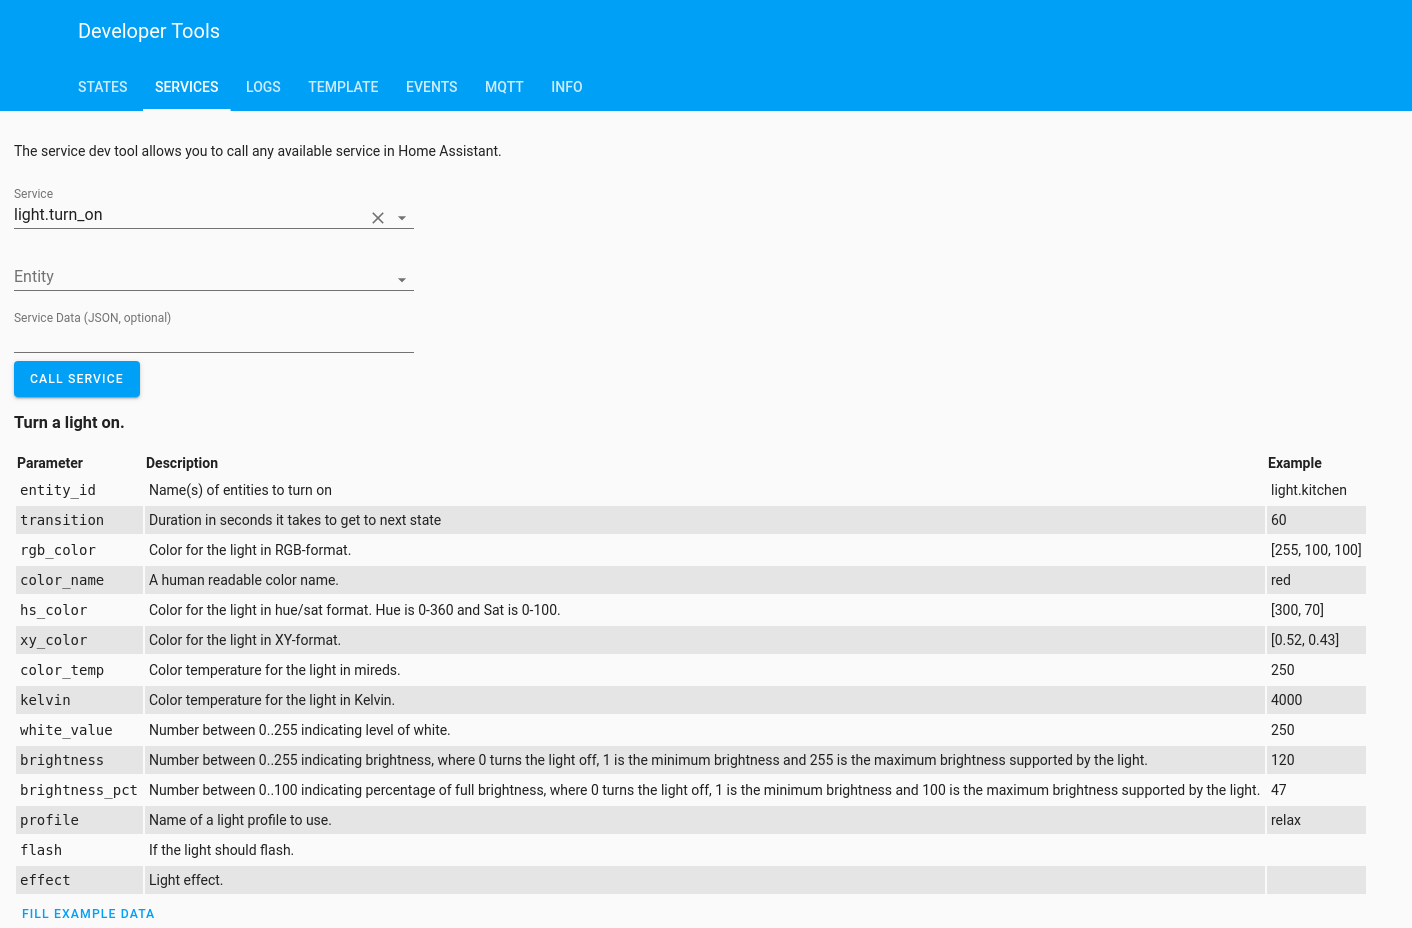
If we take a closer look, we see the “entity_id” value tells the service which light to turn on.
Back to the automation, now that we know the parameter, we can enter this in the service data box, wrapped in quotes:
Hit the save button to save the automation. Hit the back button and now we can see our new automation:
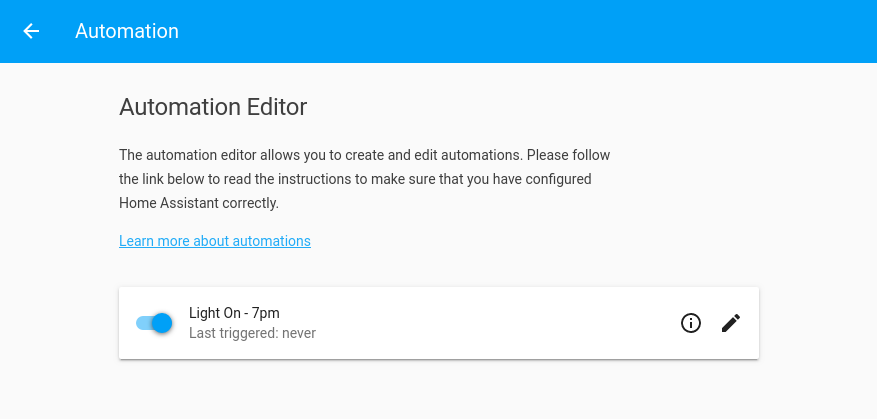
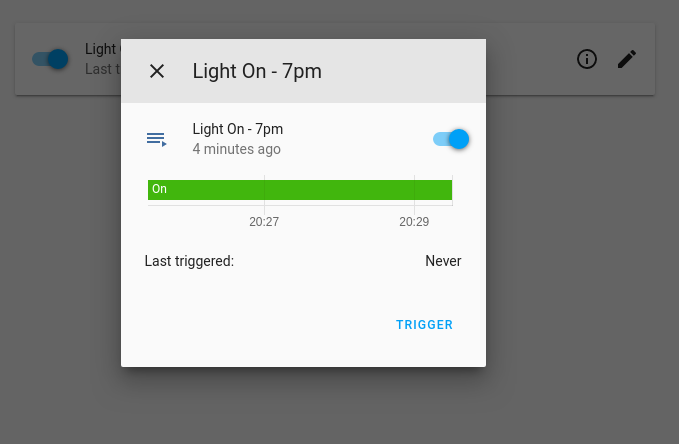
You can see we have the option to toggle the automation on or off if we want, it shows us the last time it triggered and if you click on the information button, we have the option to manually trigger it. If you manually trigger the automation, it will ignore any triggers you have specified but it will test your conditions and actions. This is useful if you want to test that the conditions are correct:
We have now created a simple automation!
Scripts
Scripts are just like scripts on any other system, they allow for a sequence of events to happen on demand. They can be used for repetitive actions, instead of typing everything out each time, you can add the sequence of events to a script then just call that script every time you want to execute.
They can be called from automation’s which is great since you are likely to have quite a lot of repetitive actions, such as turning off multiple lights.
I won’t run through creating a script here as its very similar to creating an automation, just without the triggers and conditions.
Customization
Customization allows you to override some of the attributes for an entity and perhaps add some more “user friendly” features like changing the display icon, changing the units of measurements, friendly name etc.
Lets change the icon of our light bulb. Icons in Lovelace are done from the Material Design Icons, the cheat sheet is located here. Search through and find an icon you want to change to and take a note of the code, I’m going to change my icon to the “mdi-lightbulb-outline” on:
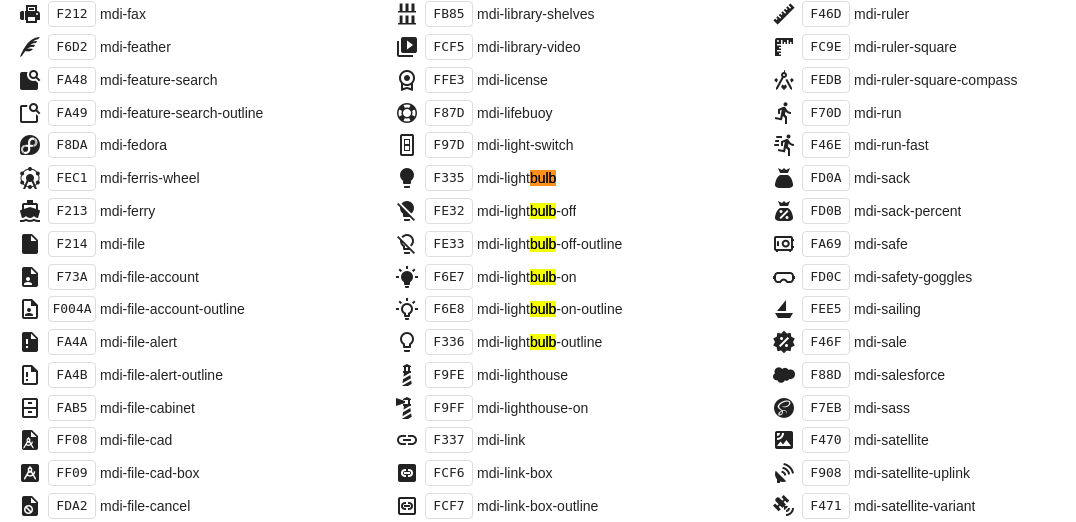
Select the light bulb entity from the drop down, then from the attribute drop down, choose icon. In the icon field, enter the code we chose earlier with a small change, instead of using a dash after mdi, change it to a colon. So “mdi-lightbulb-on-outline” becomes “mdi:lightbulb-on-outline”. You should see the box populate with what your icon will look like (this doesn’t always work so don’t worry if you don’t see anything):
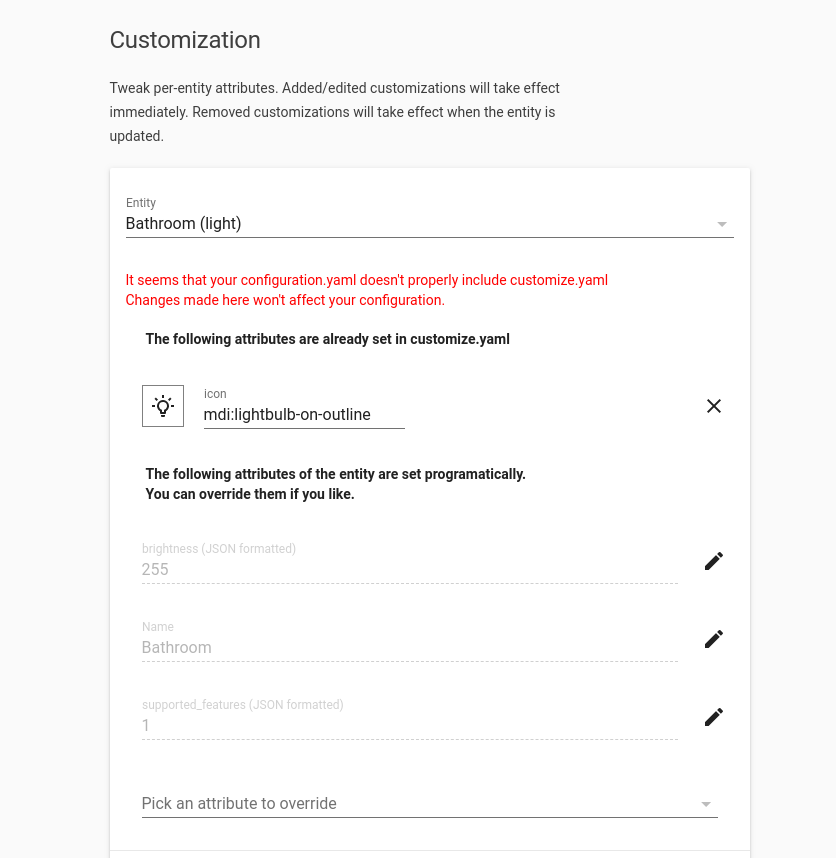
To remove, simply hit the X and save.
Notifications
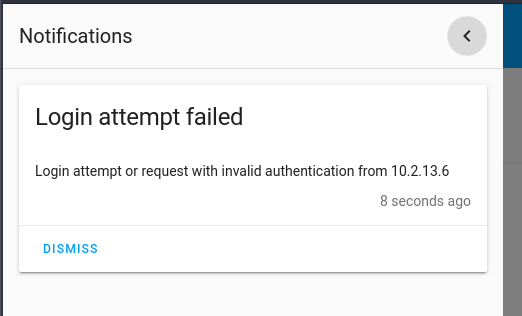
As you can guess, notifications will show you if the system wants to notify you of something.
Home Assistant, as we will see in later parts, has a discovery component which can automatically scan for known devices and display them in Lovelace. If it finds any, it will notify you here.
Another thing that will show up is if someone incorrectly logs into your system:
Final Words
Hopefully you now have a better understanding of how to use the Home Assistant Lovelace interface, where to go to make configuration and understand entities, states and attributes.
In part 3, we are finally going to get adding some entities to Home Assistant through the configuration file so that we can tie everything together and make Home Assistant usable!