Getting started with Home Assistant - Part 1 - Installation


Introduction
Welcome to the first part of our Getting started with Home Assistant series, in this part we will take you step by step through installing Home Assistant.
This series aims to help teach you about the basic configuration and functionality of Home Assistant.
Home Assistant is a wonderful open-source project that provides a very feature rich way to integrate all your smart home devices (and often “dumb” devices too!) into a single app, rather than trying to juggle multiple applications for each device. It also aims to rid the need for the “cloud” and gives you back local control. It has a staggering amount of integrations and options, 1485 at the time of writing and more constantly being added. Check them out here.
Guide
Table of Contents
There are many ways of installing Home Assistant, we will cover a few of the more popular ones here. Skip ahead to the relevant section for you:
- Hass.io on Raspberry Pi
- Hass.io for VMWare
- Home Assistant for Ubuntu/Debian/Fedora/Arch/CentOS using Virtual Environment/Python
Home Assistant OS/Hass.io on Raspberry Pi
This is probably the most popular method of installing Home Assistant and is really simple.
Requirements:
- Raspberry Pi, Intel Nuc, ODroid, OrangePi-Prime or Tinkerboard
- Large enough SD card (32GB is recommended) of good quality from a known brand (Samsung, SanDisk etc) as we want this to last. Cheaper SD cards can wear out very quickly.
- Access to Windows/Linux/MacOS to burn the SD card image
- Optional USB stick if you want to create a static IP (any size)
Installation
Download and install Balena Etcher to your machine. It is available for Linux, MacOS and Windows.
Download the Hass.io image for your device from here, make sure to choose the correct one for your device.
Insert your SD card and fire up etcher. It goes without saying that anything stored on the SD card will be wiped clean and lost.
Once open, you will see this nice simple screen:
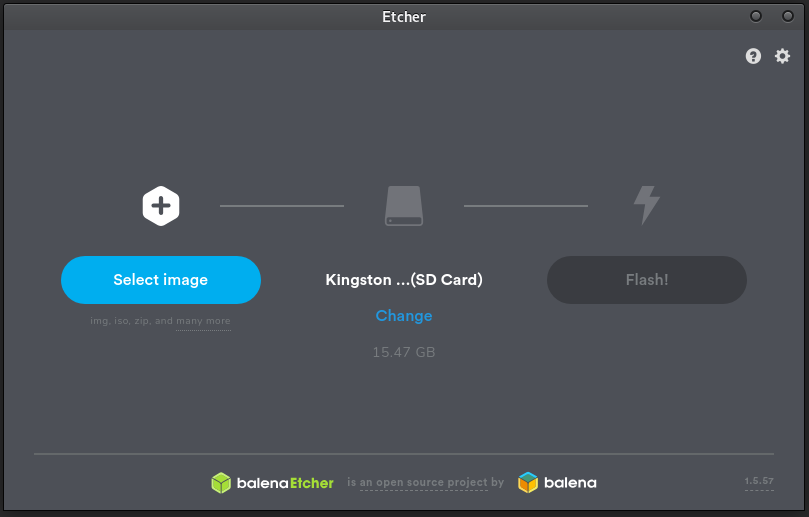
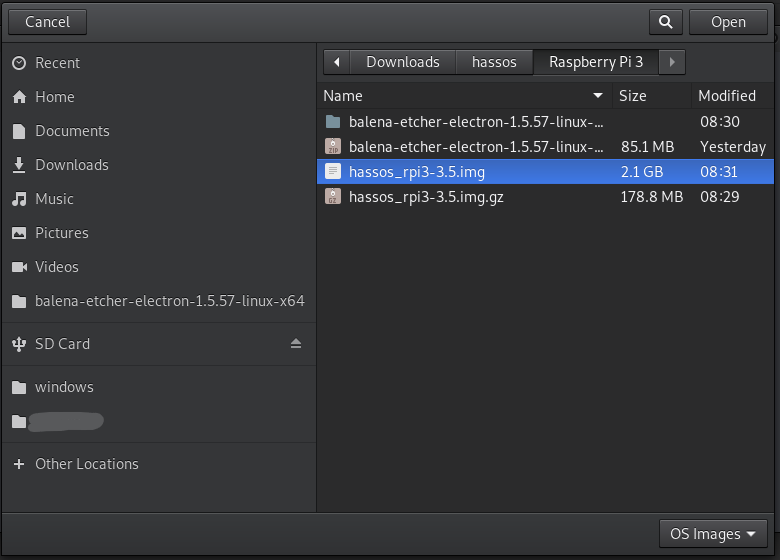
Go ahead and press the “Select image” button and navigate to your downloaded image:
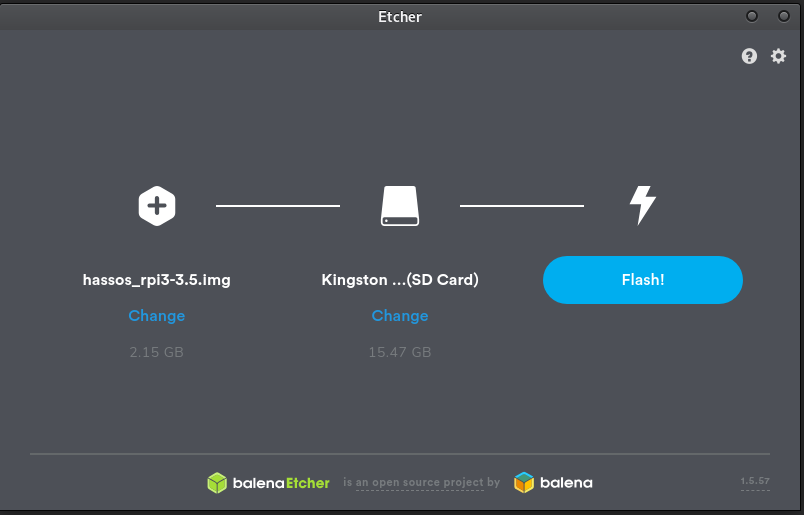
Ensure that Etcher has selected the correct device at this point, if not press the “Change” button and select the correct device.
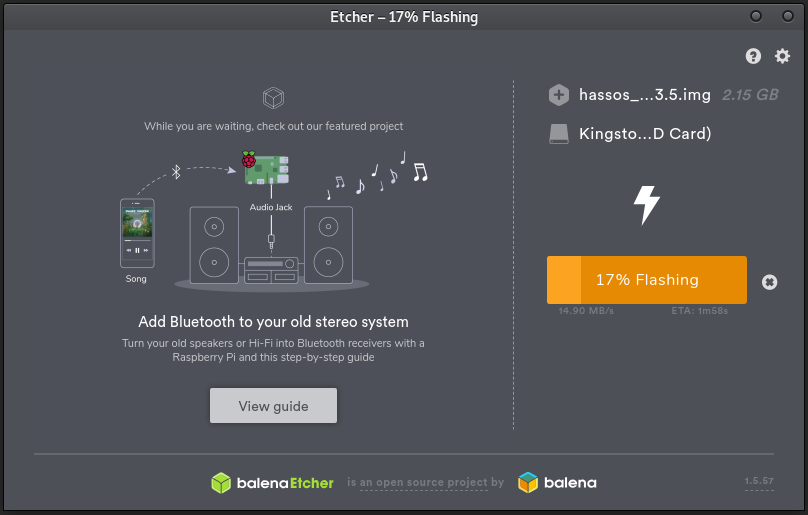
Press the flash button and the process will start, this could take a few minutes depending on the speed of your card:
Once finished, go ahead and eject the device.
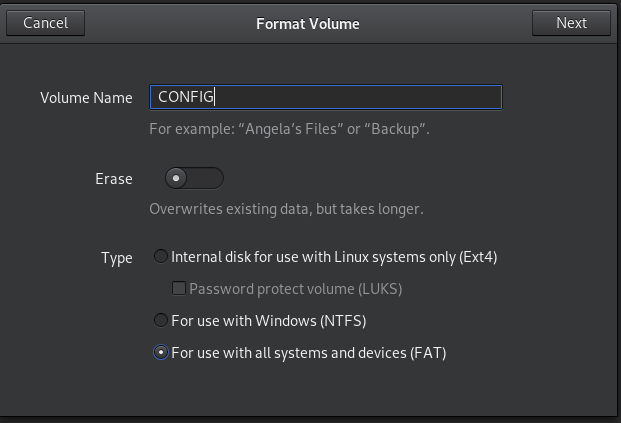
If you want to set a static IP, insert your spare USB stick now. Right click the USB stick and press format (again this will wipe everything from device), ensure that you choose FAT32 as the filesystem type and give the drive a label of “CONFIG”:
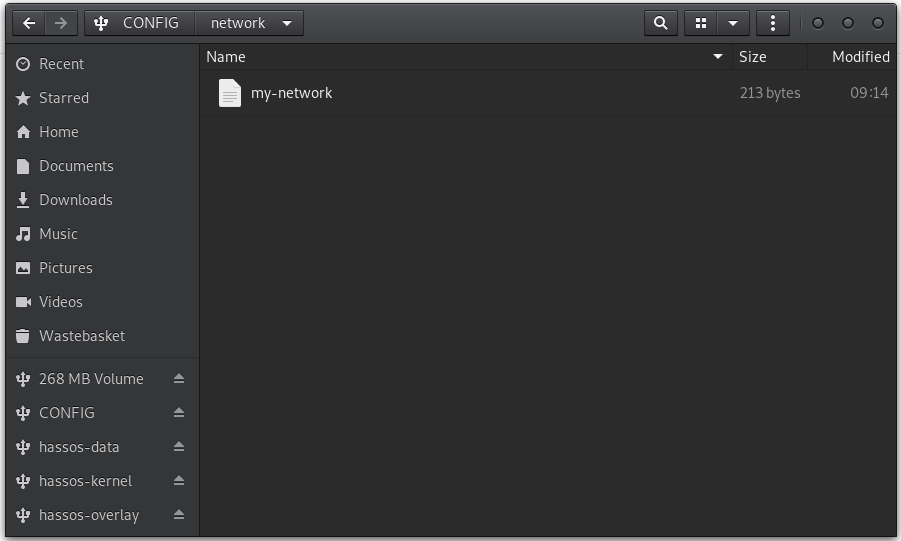
Once formatted, create a folder called “network”. Open a text editor and paste the following in:
[connection]
id=my-network
uuid=d55162b4-6152-4310-9312-8f4c54d86afa
type=802-3-ethernet

[ipv4]
method=manual
address=192.168.0.50/24,192.168.0.1
dns=192.168.0.1;

[ipv6]
addr-gen-mode=stable-privacy
method=auto
Change the address to whatever you want the IP to be. The “192.168.0.1” after the comma is the gateway address which you will need to set to your environment. DNS will also need to be set.
Save this file to the “network” folder created above and name it “my-network” with no extension:
Eject the USB stick.
With the power removed, insert the SD card into the Raspberry Pi or other device, along with the optional USB stick.
Power the device on and let it boot. It will download any updates to Hass.io which could take a little bit of time so be patient.
Once completed, you should be able to open a web browser and connect to the web page using http://you-ip-address:8123 which should give you:
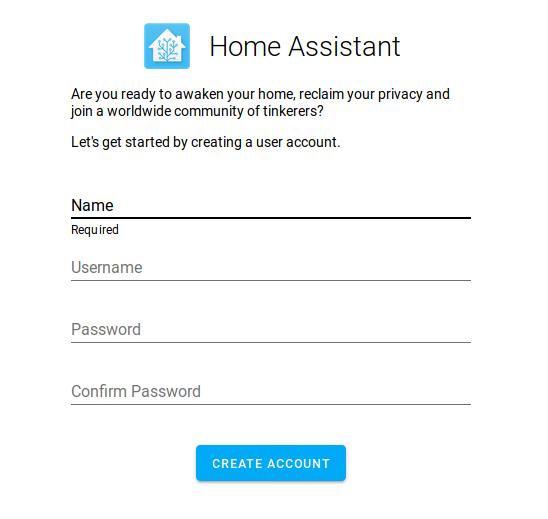
If this works you will be presented with the initial setup page and Home Assistant is now running! In the next part of this series, we are going to be running through a basic configuration.
Hass.io/Home Assistant OS for VMWare/Hyper-V/VirtualBox
Installing Home Assistant OS/Hass.io is simple and is available for most virtualization platforms which is really nice, it’s really quick to get up and running.
Requirements:
- A virtual environment setup and installed – VMWare ESXI/Workstation, Hyper-V or VirtualBox.
Installation
I’m going to use VirtualBox for this example but the principles are the same for VMWare ESXI/Workstation and Hyper-V.
First download the correct disk format for the platform you are using here:
- VMWare – Choose the VMDK option
- Hyper-V – Choose the VHDX option
- VirtualBox – Choose the VDI option
Once you have the zipped file downloaded, extract it to a location you want to store the machine in:


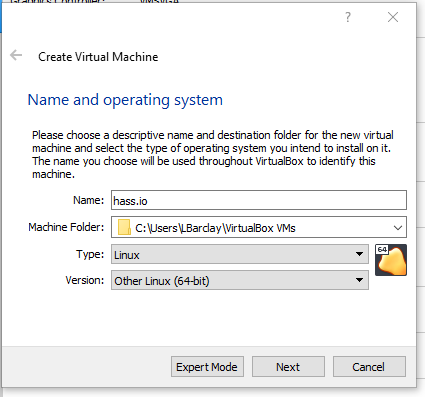
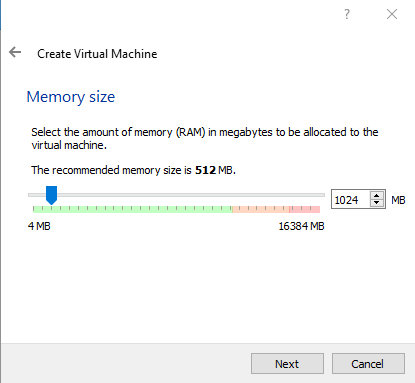
Open your Virtual Machine manager and create a new machine. Go through the following steps:
- Give the machine a name, mine is called hass.io
- Set the version to Linux 64 bit
- Assign CPU and RAM based on your hardware, 512mb to 1GB should be plenty, 1 or 2 cores will also be great.
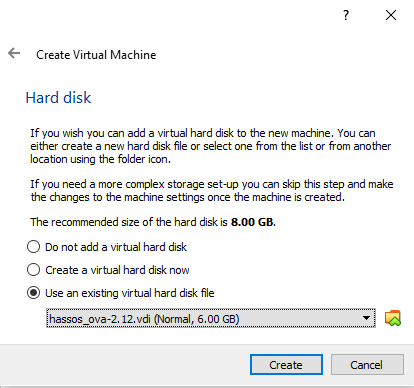
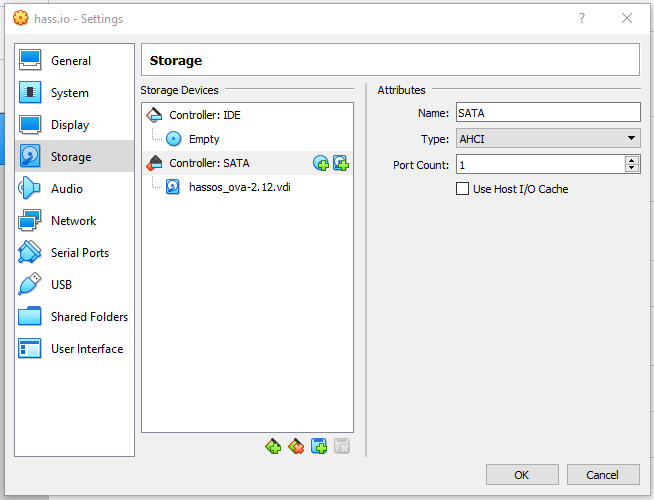
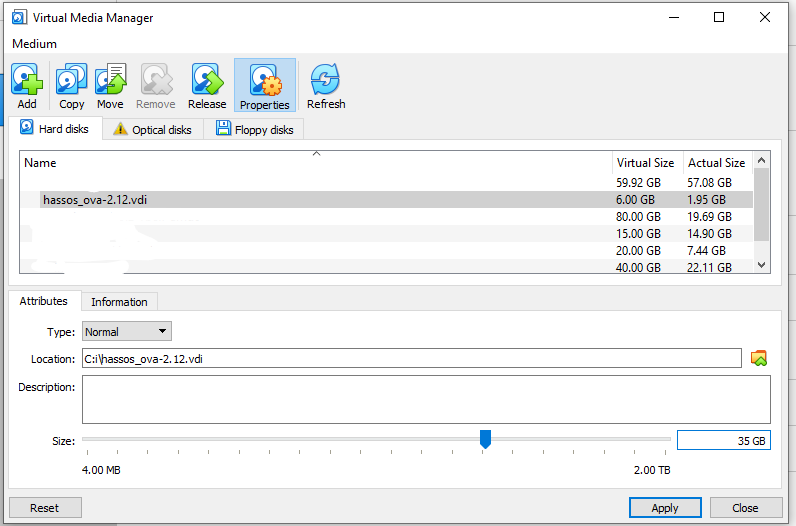
- When asked about hard disk, use an existing hard disk and attach the extracted hard disk file from earlier.
- Expand the disk size to 35GB+, the default is 6GB at the time of writing.
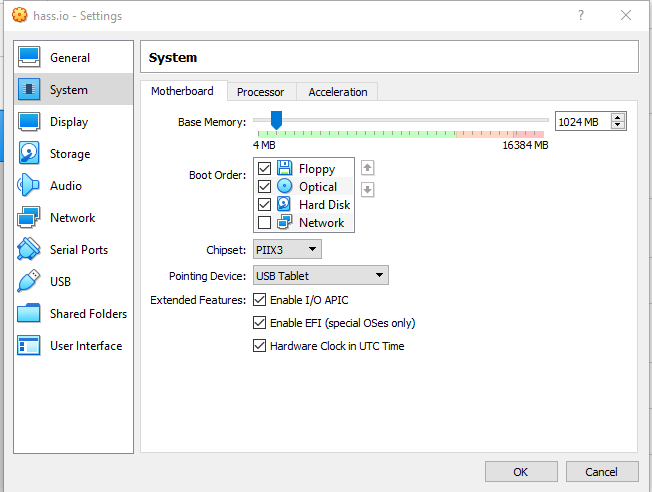
- Once created, edit the options of the machine and enable EFI option, the machine will not boot without this.
- In network settings, attach a network adapter and ensure promiscuous mode is on.

You can now start the newly created VM and it should hopefully boot up. If you get an error around no boot device, ensure you have enabled EFI as above.
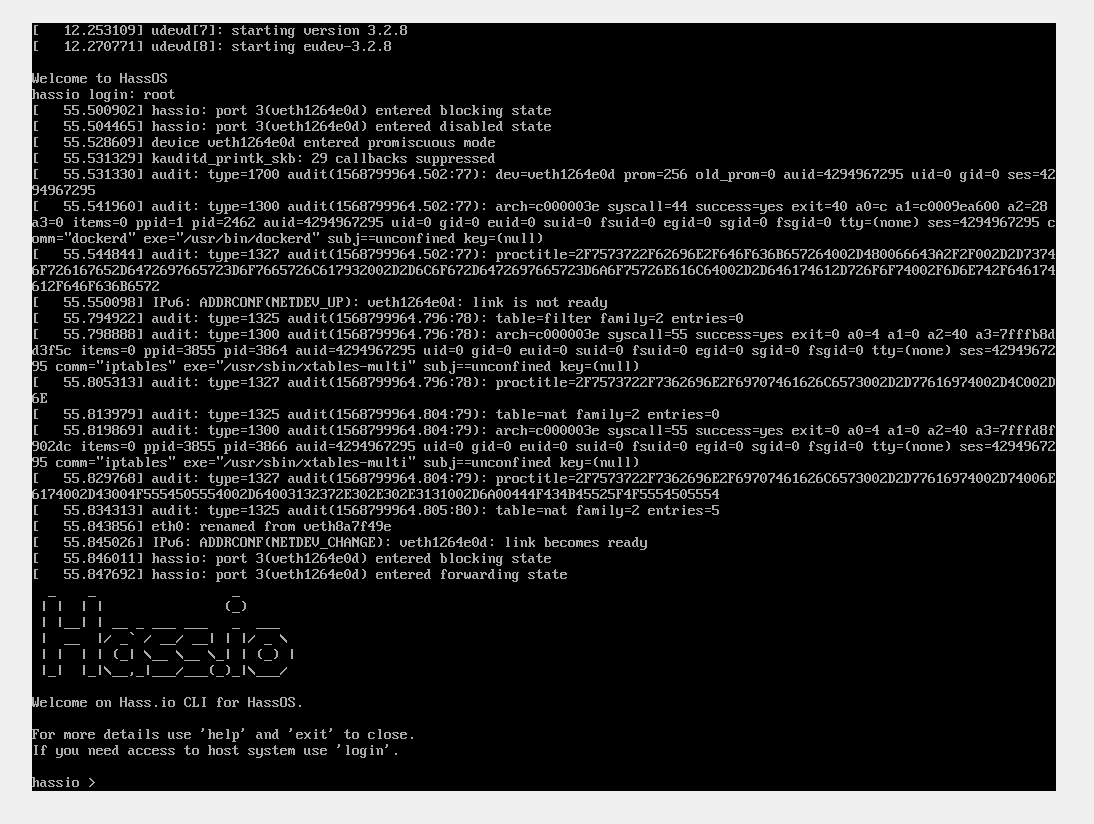
Once started, hit enter to get the login screen, enter root and hit enter. There will be no password. You will be dropped to the hassio command line:
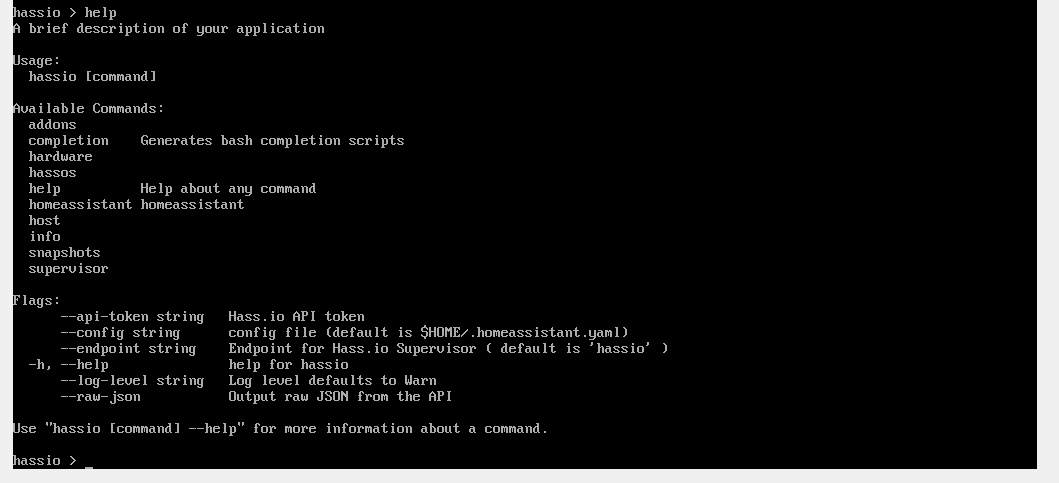
You can get a list of available commands by typing “help” You can get further help about a specific command by typing “[command] –help” for example “homeassistant –help” which will give you further options:
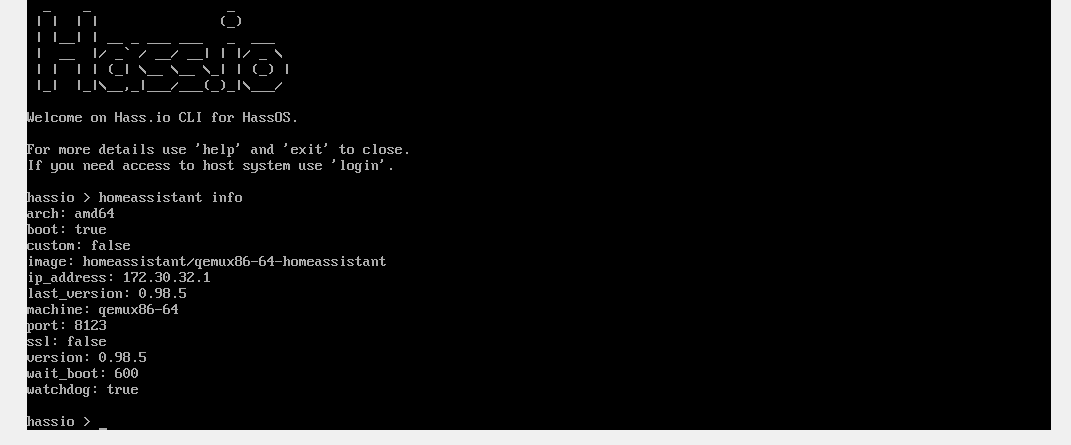
We are going to check some information about Home Assistant first, do this by using “homeassistant info”. This will print information about Home Assistant and confirms it is running. You can see we are on version 0.98.5:
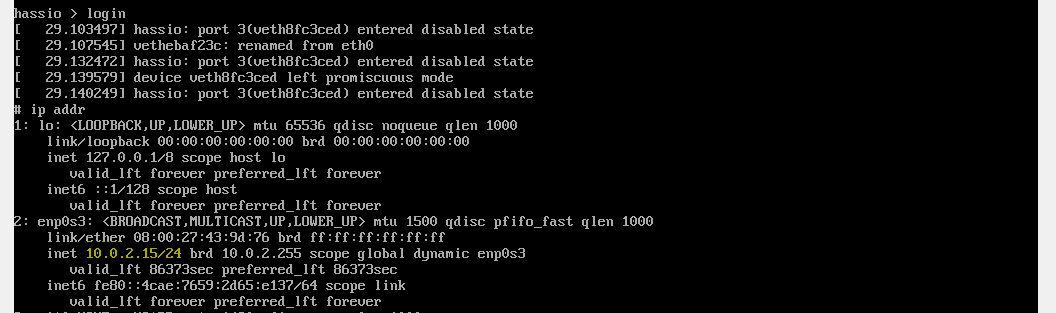
Finally we are going to get the IP address of our Hass.io instance so we can open the WebUI, do this by typing “login” which will give you the host OS’s command line. Then enter “ip addr” and search for your host machines IP address:
Finally, we connect to Hass.io using the browser on port 8123:

If this works you will be presented with the initial setup page and Home Assistant is now running! In the next part of this series, we are going to be running through a basic configuration.
Home Assistant for Ubuntu / Debian / Fedora / Arch / CentOS using Virtual Environment/Python
This section will take you through installing Home Assistant on pretty much any Linux Distro. The steps should be applicable to any modern distro, but for the purposes of this I am using Ubuntu 19.04. I’d suggest using a server variant of your distro to keep the footprint minimal since it will be a server, but the desktop variant will work perfectly well if you aren’t as comfortable with the command line.
Requirements
- A Linux OS installed and booted, with network access
- SSH/Terminal access to server
Installation
I’ll leave this gallery here of all the steps required, refer back at anytime if you need help:


Firstly we need to make sure we are using the latest packages:
Debian/Ubuntu/Raspbian:
sudo apt-get update && sudo apt-get upgrade -y

Fedora/CentOS/OpenSUSE
sudo dnf update -y
Then we install the required python packages and dependencies in order to run HA:
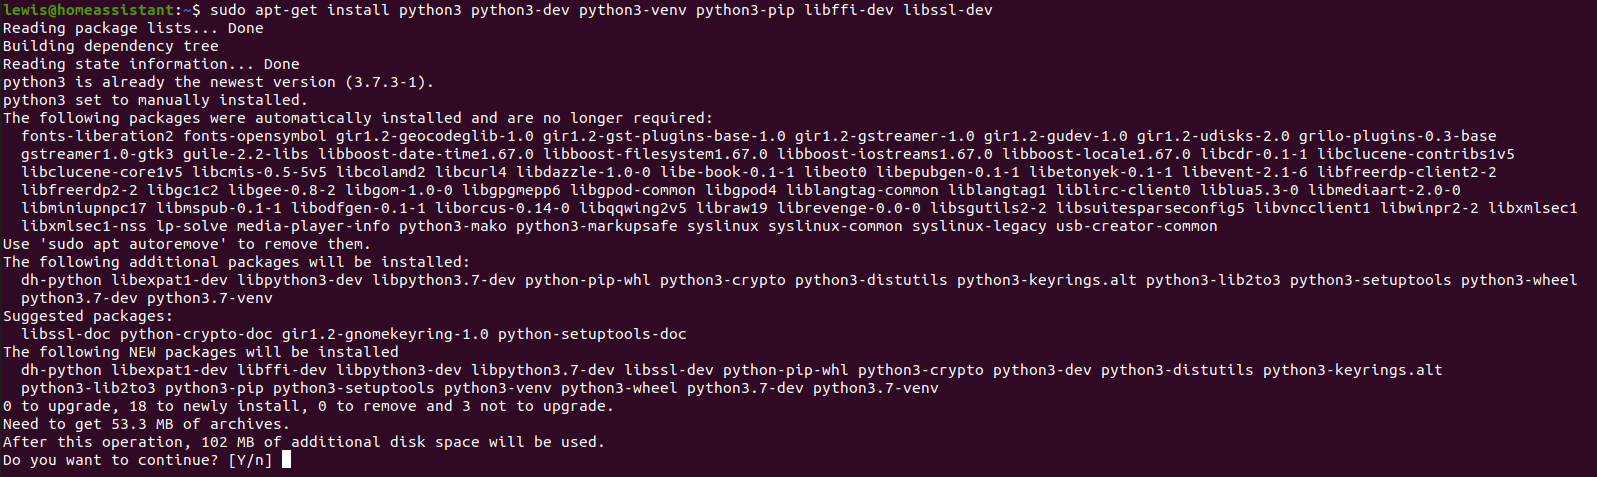
Debian/Ubuntu/Raspbian:
sudo apt-get install python3 python3-dev python3-venv python3-pip libffi-dev libssl-dev -y

Fedora/CentOS/OpenSUSE
sudo dnf install python3 python3-dev python3-venv python3-pip libffi-dev libssl-dev -y
Next we create a homeassistant user which will run the service later on and will create a home directory for us:
Raspbian on Raspberry Pi:
sudo useradd -rm homeassistant -G dialout,gpio,i2c

Everything else:
useradd -rm homeassistant
The raspberry pi command is slightly different – we add the homeassistant account to the dialout, gpio and i2c groups so that we can control various functions of the raspberry pi through HA.
Next, we are going to create a new directory for the virtual environment in the /srv directory and change the ownership to our newly create account:
cd /srv
sudo mkdir homeassistant
sudo chown homeassistant:homeassistant homeassistant
Then we change to the homeassistant account and create the virtual environment:
sudo -u homeassistant -H -s
cd homeassistant/
python3 -m venv .
source bin/activate
Install home assistant using pip via the following commands:
python3 -m pip install wheel
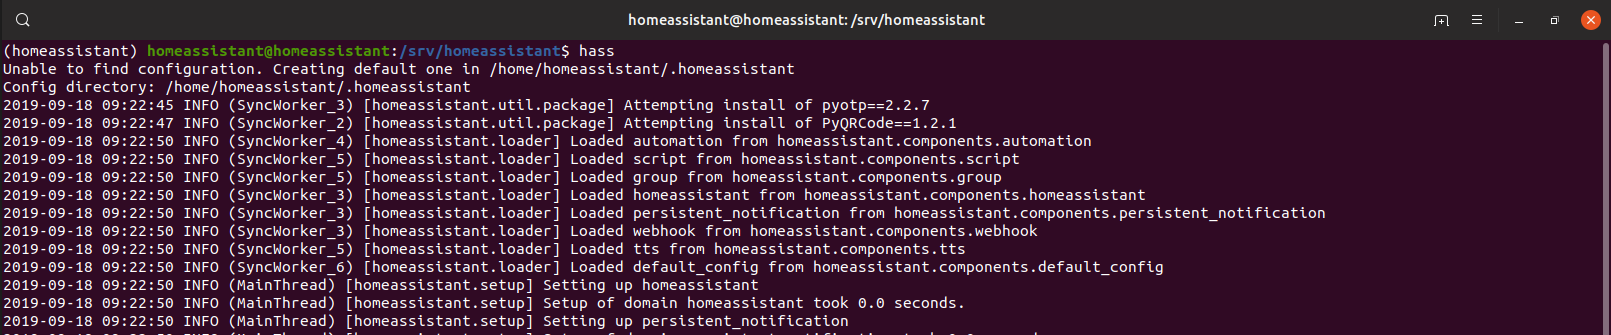
pip3 install homeassistantFinally, we can temporarily start Home Assistant for the first time:
hassThis could take a few minutes depending on your hardware and internet speed, it will take longer the first time but will be quicker subsequently.
We aren’t quite done, we are going to create a service so that Home Assistant starts up automatically everytime we reboot the machine.
Press CTRL + C in the terminal to exit Home Assistant for now.
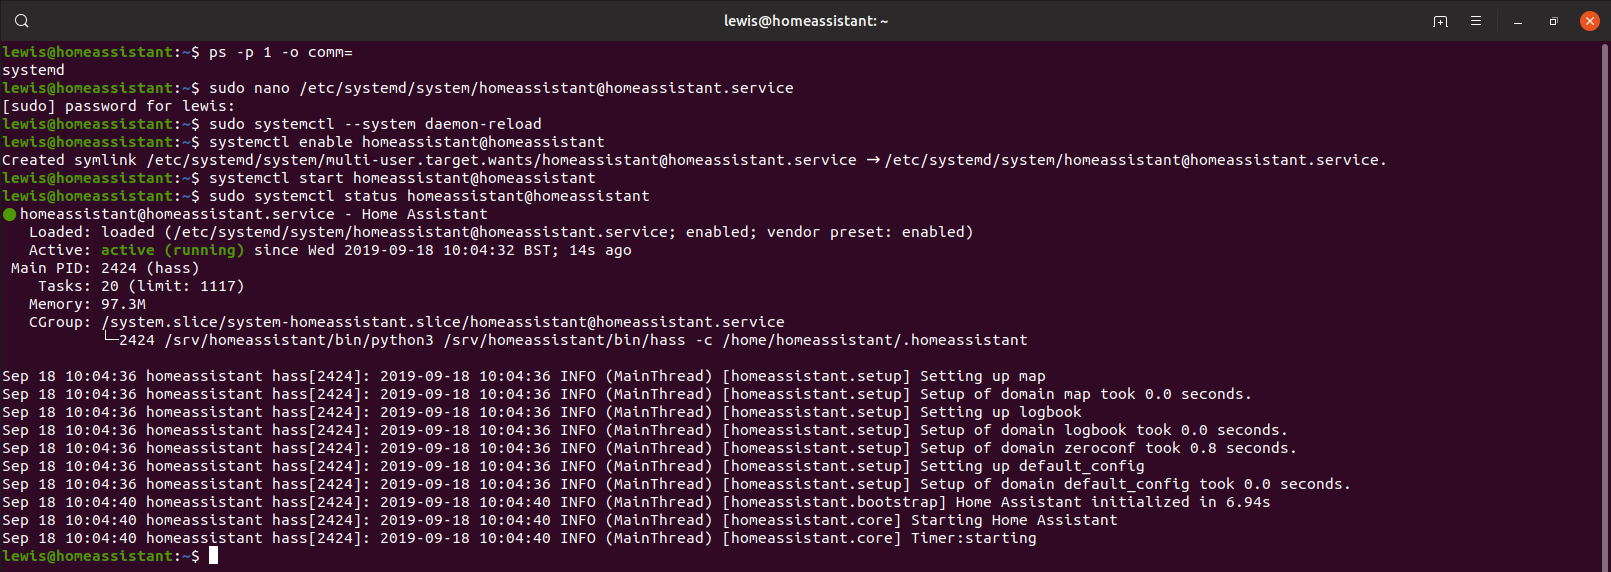
First confirm that we are using systemd on our distribution:
ps -p 1 -o comm=Which should return “systemd”.
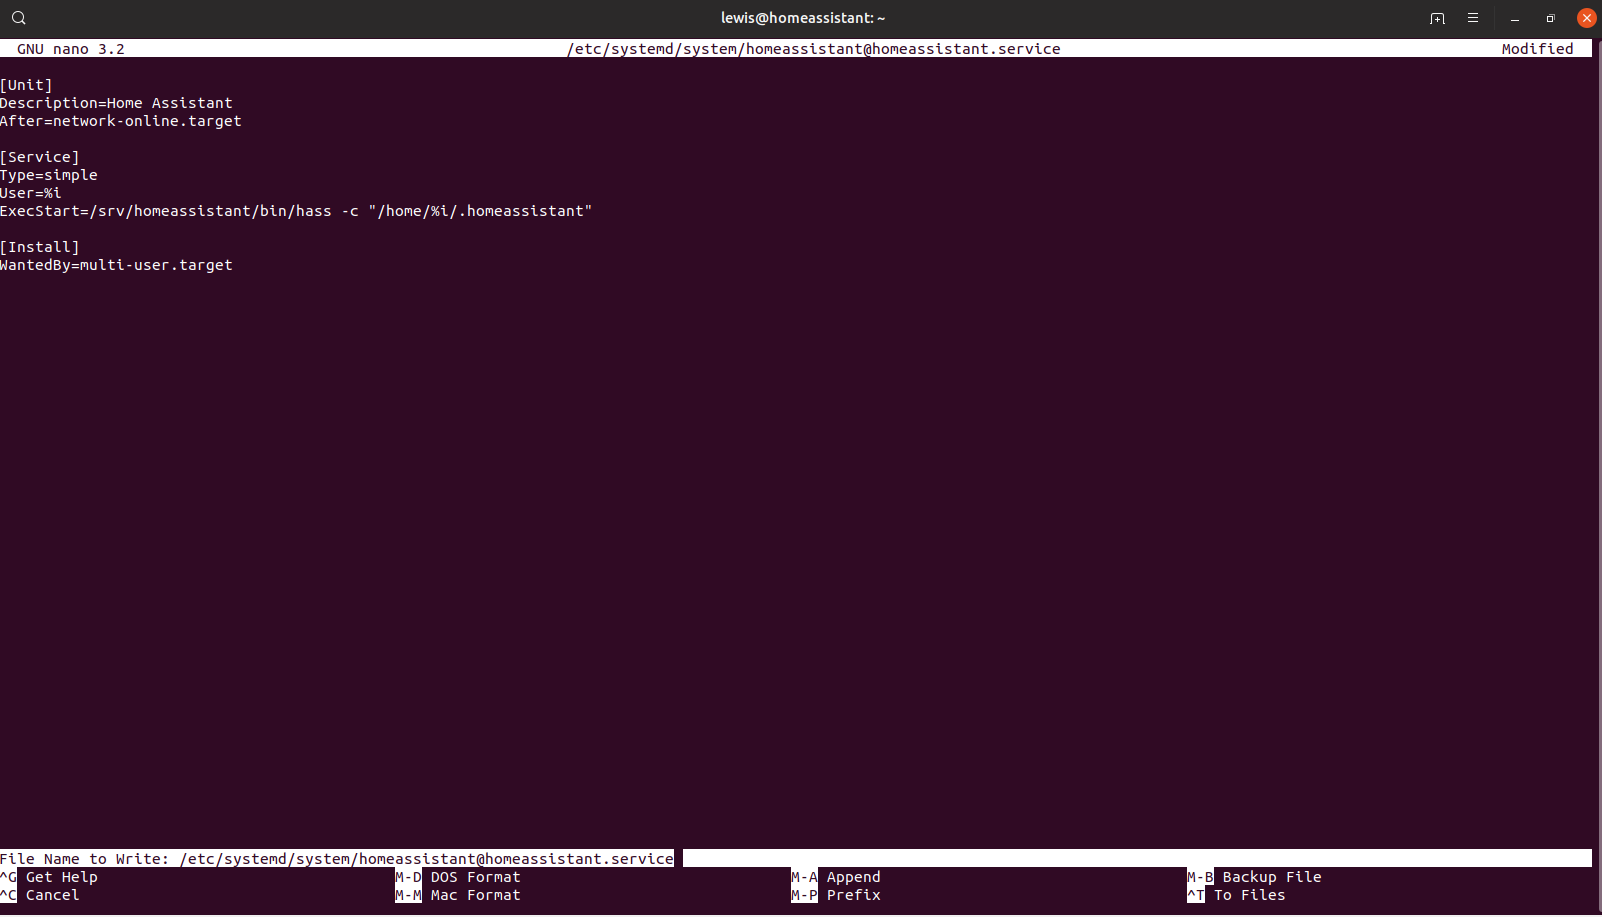
Create a new file in /etc/systemd/system called [email protected]:
sudo nano /etc/systemd/system/[email protected]Paste the following in:
[Unit]
Description=Home Assistant
After=network-online.target

[Service]
Type=simple
User=%i
ExecStart=/srv/homeassistant/bin/hass -c "/home/%i/.homeassistant"

[Install]
WantedBy=multi-user.target
Save and exit by pressing CTRL + X, hit enter to confirm.
Finally, we make systemd aware of new service, enable automatic start, start the service and check that it started:
sudo systemctl --system daemon-reload
sudo systemctl enable homeassistant@homeassistant
systemctl start homeassistant@homeassistant
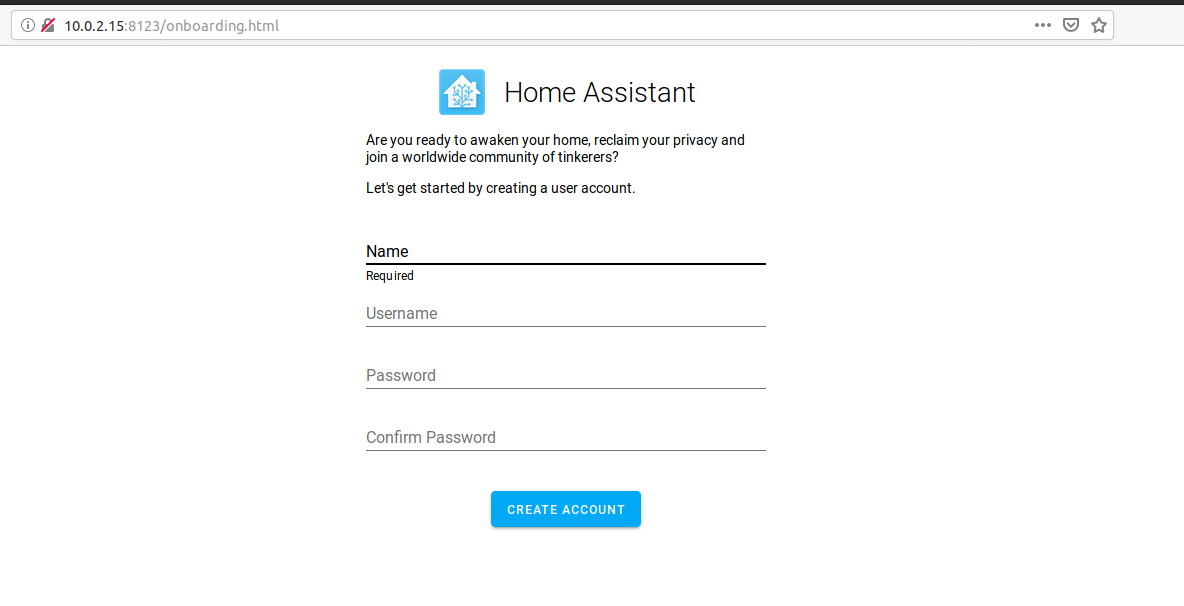
systemctl status homeassistant@homeassistantAssuming this worked OK it should be possible to connect to the web interface via your browser. We need the IP address to do this, if you do not know this then run the following:
Some distros (Ubuntu) have removed ifconfig by default so use ip addr:
ip addr

Otherwise:
ifconfig
Look for your IP address (see image) and enter this into your browser, make sure you are on port 8123.
If this works you will be presented with the initial setup page and Home Assistant is now installed! In the next part of this series, we are going to be running through a basic configuration.