Flashing any Smart bulb, plug or switch with Tuya-Convert

I wrote last year about over the air flashing of smart bulbs using the Tuya-convert procedure. However, back then there was no current way to bypass a firmware that Tuya started loading onto newer devices to block this flashing.
Why would you want to do this in the first place? Well the smart bulbs, plugs and switches that have flooded Amazon the past couple of years are almost all Tuya based, the problem with this is that they have a reliance on sending data out to the Chinese cloud where we aren’t exactly sure what data they are storing. It also means you lose local access, if your internet goes down you won’t be able to use these. We would like to take back control using something like Home Assistant.
Thankfully for us all, the guys working on the Tuya-convert project managed to figure out how to solve this problem and released a new version of Tuya-convert.
There have also been a couple of changes to the messages you get and how things work, so I figured I’d do an updated guide to show you step by step how it works. It’s now easier than ever to take back control of your smart bulbs, plugs and switches and free yourself from the cloud!
Guide
Prerequisites
There are a few things you will need to flash your Tuya based device:
- A laptop/Raspberry Pi with WiFi running some form of Linux (you can use a live CD) – I’d recommend Debian/a Debian based distro like Ubuntu or Kali, but it does work with others with some minor modifications like Fedora which is what I’m using here.
- A secondary device with WiFi like a Smartphone.
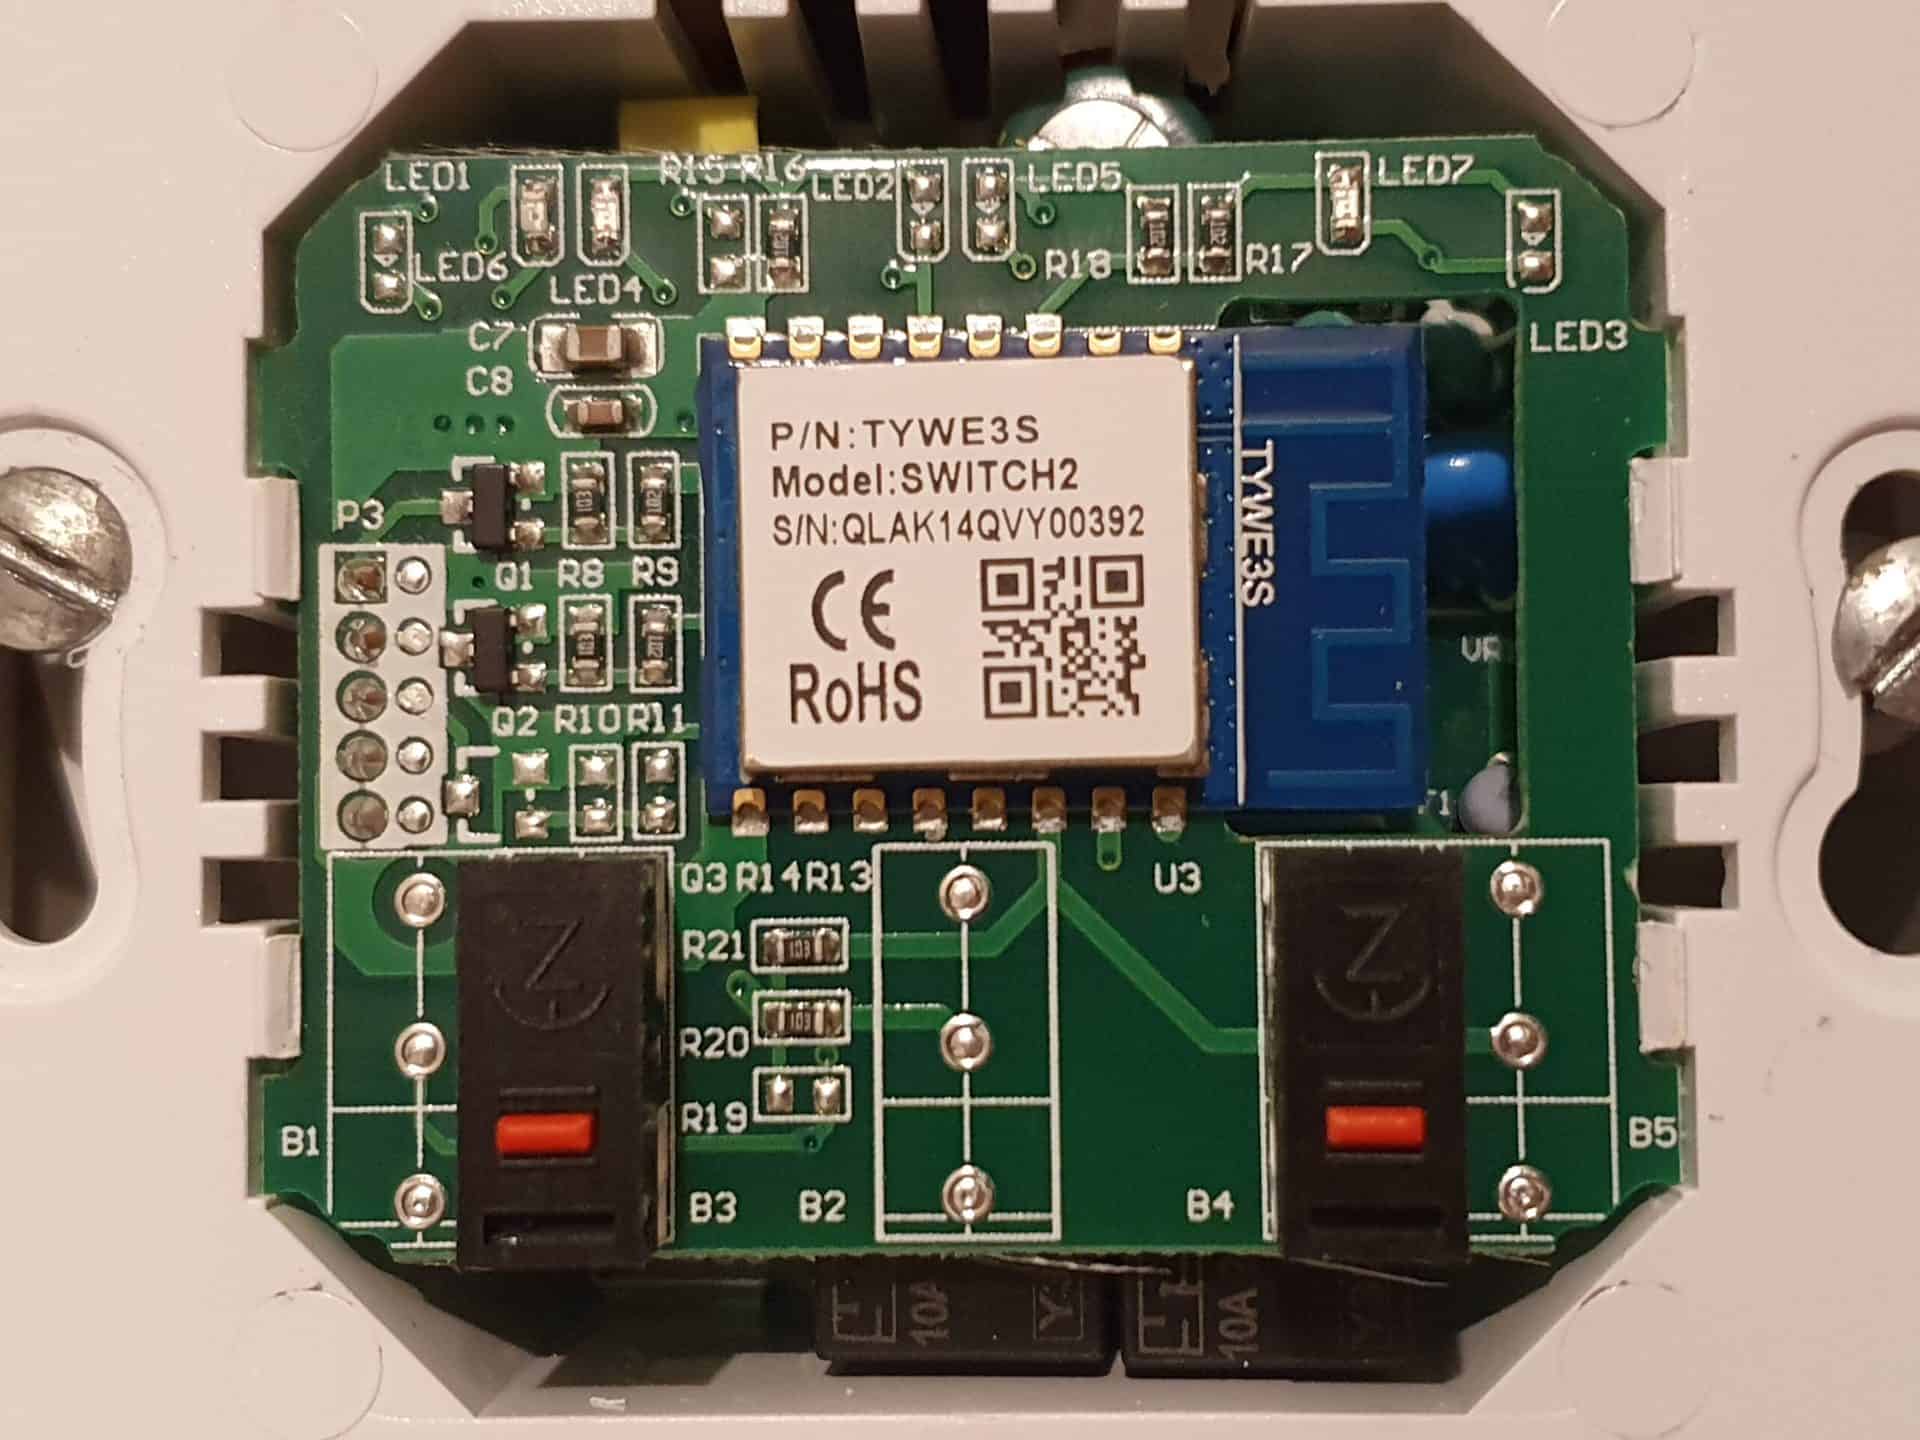
- A Tuya based smart device – bulb, plug or switch. A good way to check if the device is Tuya based is if it uses the “Smart Home”, “Smart Life” or other Tuya smart app.
Once again, I’d suggest as soon as you receive your smart device that you do not connect it to the Smart Life/Smart Home App. If you do this, your device may automatically update to a new firmware that makes this process not work.
Tuya-Convert
With your Linux environment running and booted, we need to grab the latest copy of Tuya-convert with a few commands:
# Debian/Ubuntu/Kali/
sudo apt install git
git clone https://github.com/ct-Open-Source/tuya-convert
cd tuya-convert

#Fedora
sudo dnf install git
git clone https://github.com/ct-Open-Source/tuya-convert
cd tuya-convert
Next, we run the script to install the prerequisite software:
# Debian/Ubuntu/Kali
./install_prereq.sh

#Fedora - Modify the two lines in the install_prereq.sh file from this:
sudo apt-get update
sudo apt-get install -y git iw dnsmasq hostapd screen curl build-essential python3-pip python3-setuptools python3-wheel python3-dev mosquitto haveged net-tools libssl-dev

#To this:
sudo dnf check-update
sudo dnf install -y git iw dnsmasq hostapd screen curl kernel-devel python3-pip python3-setuptools python3-wheel python3-devel mosquitto haveged net-tools openssl-devel
Once complete, you should have “Ready to start upgrade” message.
Inside this directory there is a config.txt file, edit this with your WiFi adapter name. Use the “iwconfig” command to list all wireless adapters and get the name.
Then we are ready to start the flash with:
./start_flash.shType “yes” at the prompt to confirm you know what you are doing. Then you will see the following message:
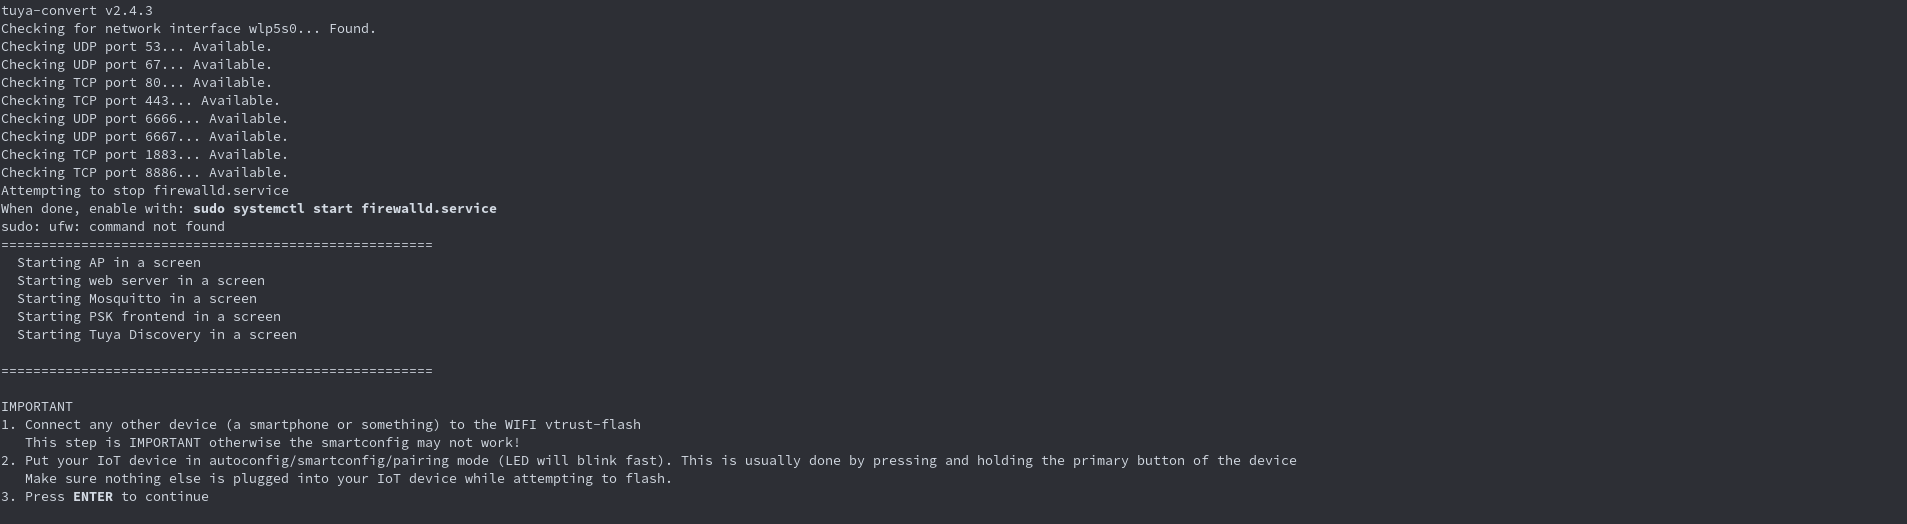
Do not press anything yet. Connect your phone or secondary device to the the “vtrust-flash” access point. Make sure to accept any prompts that there is no internet access and you want to stay connected.
Next, put your smart device into pairing mode. You do this using the following methods:
- Bulbs – physically switch the bulb on-off-on-off-on in semi quick succession. The bulb will start to flash quickly.
- Plugs – Using the wall switch, turn the plug on-off-on-off-on in semi quick succession. The LED on the button will begin to flash quickly.
- Switches – Press and hold the primary button on the switch until the indicator LED flashes quickly.
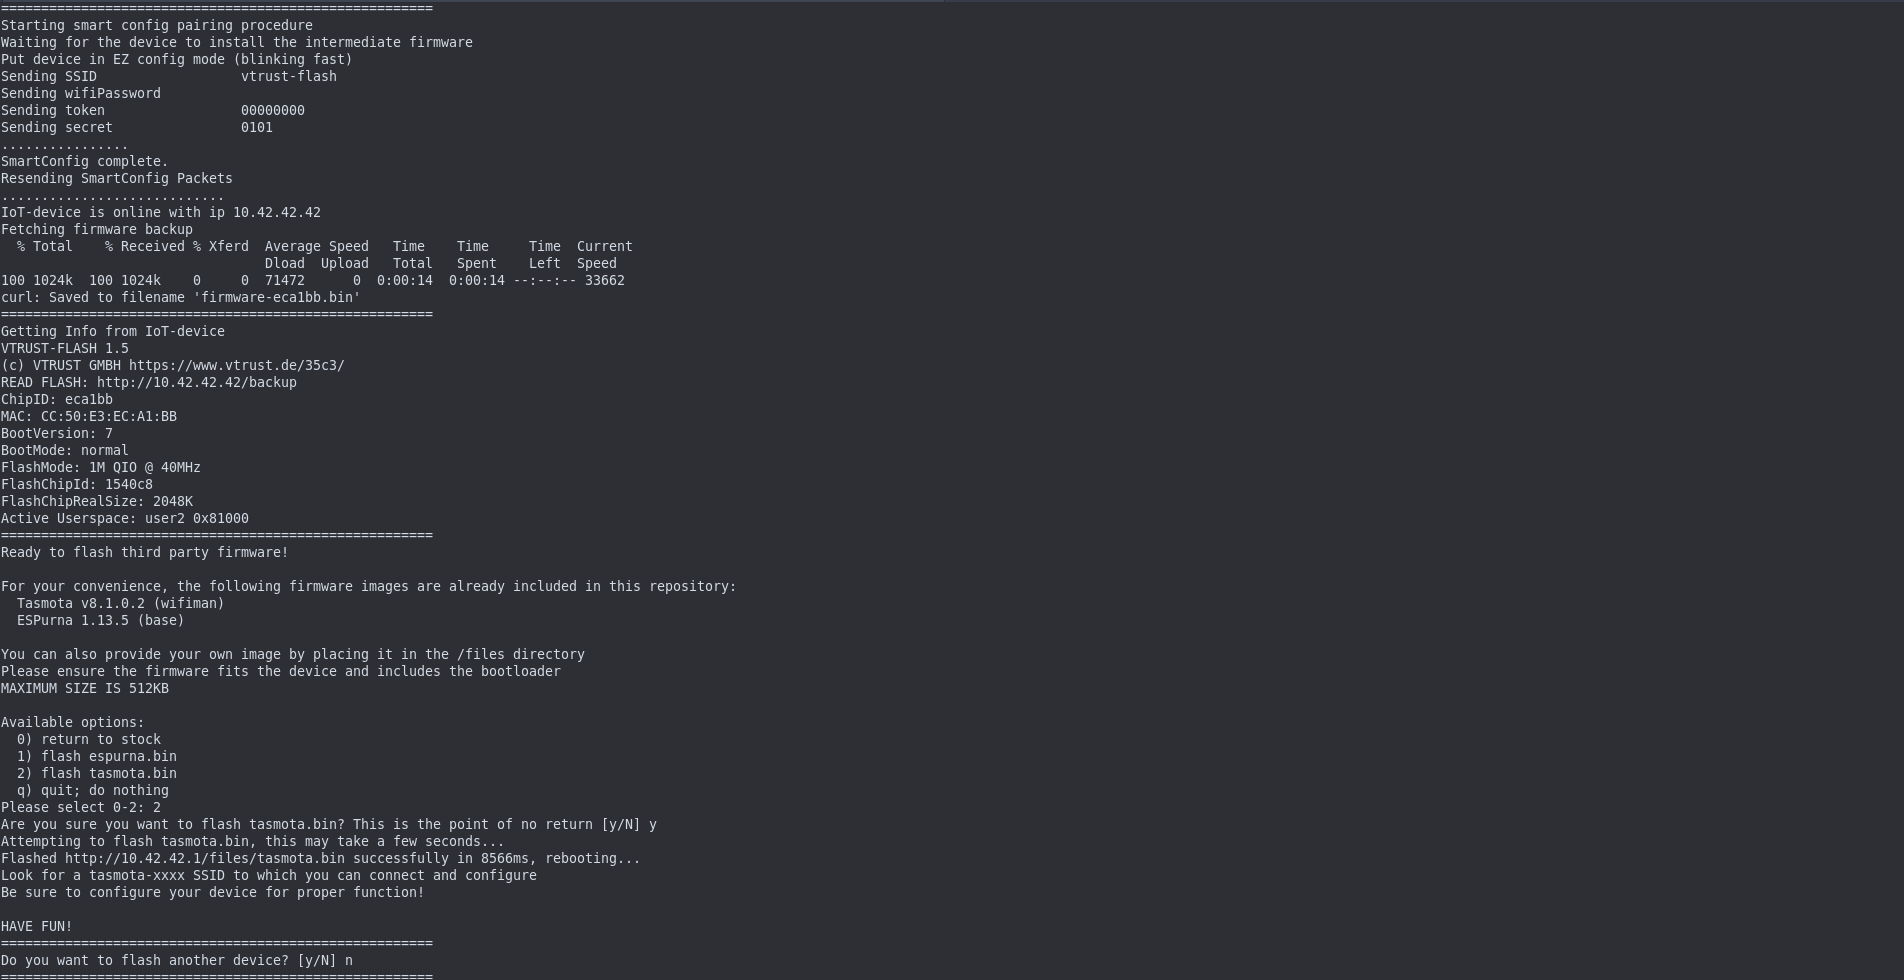
Once in pairing mode, press enter to start the process. The Tuya-convert process will start and it takes about 60 seconds or so, it will display information about the smart device once it is detected.
You will then be asked to make a choice, flash ESPurna, flash Tasmota or return to stock:
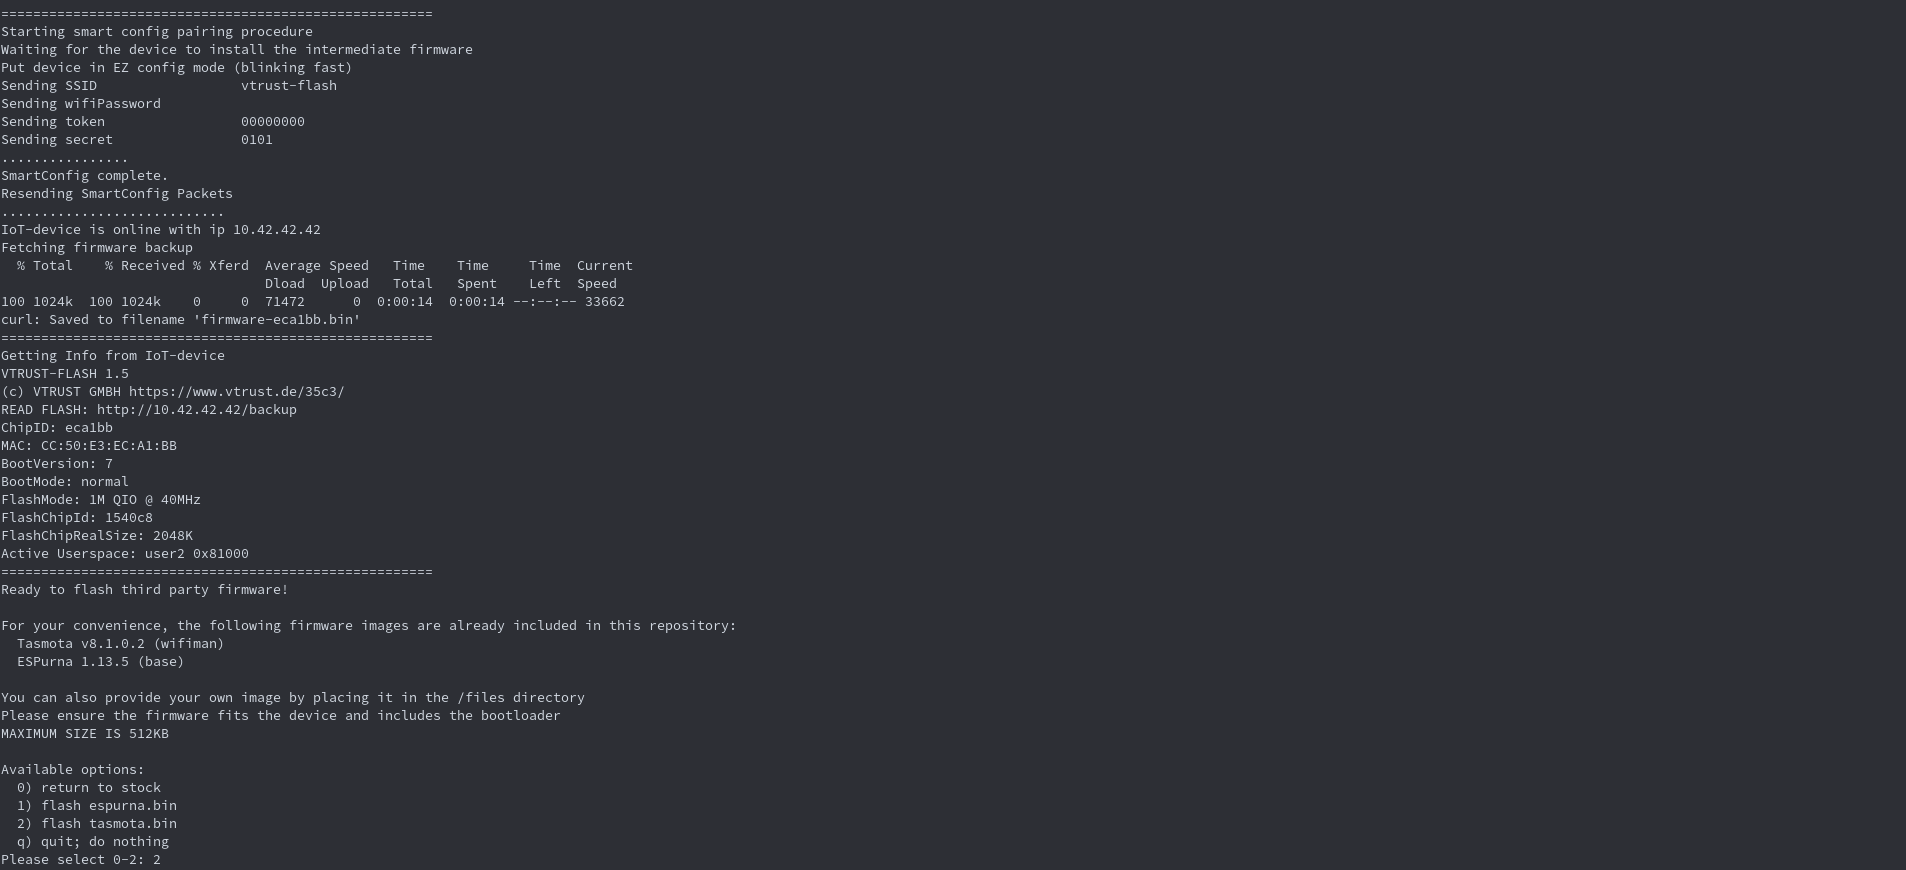
Go ahead and choose which firmware you want (the stock firmware is backed up) and the procedure will complete. I am using Tasmota for this example but once you have any of the custom firmware on there, you can change to another at any point.
Finally, Tuya-convert will complete and will ask if you want to flash another device, which you can do so if you wish:
Cleanup
If you are using a live CD for this, you don’t need to do anything further, just reboot and everything will be working.
However, if you used your main Linux distro, you might have issues with the network card not appearing, this is because sometimes it is left in monitor mode by Tuya-convert, luckily should be easily resolved:
ifconfig wlanX down
iwconfig wlanX mode managed
ifconfig wlanX up
service NetworkManager restart
WiFi should start working again.
Conclusion
Thanks to the amazing guys behind the Tuya-Convert project we can unlock all of our smart devices and integrate them into Home Assistant, OpenHAB, Domoticz or any other Home Automation software and remove the need for these devices to have cloud communication.
I would recommend flashing as many of your devices as you can with this procedure, this is a constant battle to stay ahead of any firmware updates that might mitigate this procedure!
As always, leave your thoughts/feedback below, let me know anything you want to see in the future and don’t forget to subscribe to be instantly alerted of the latest posts.