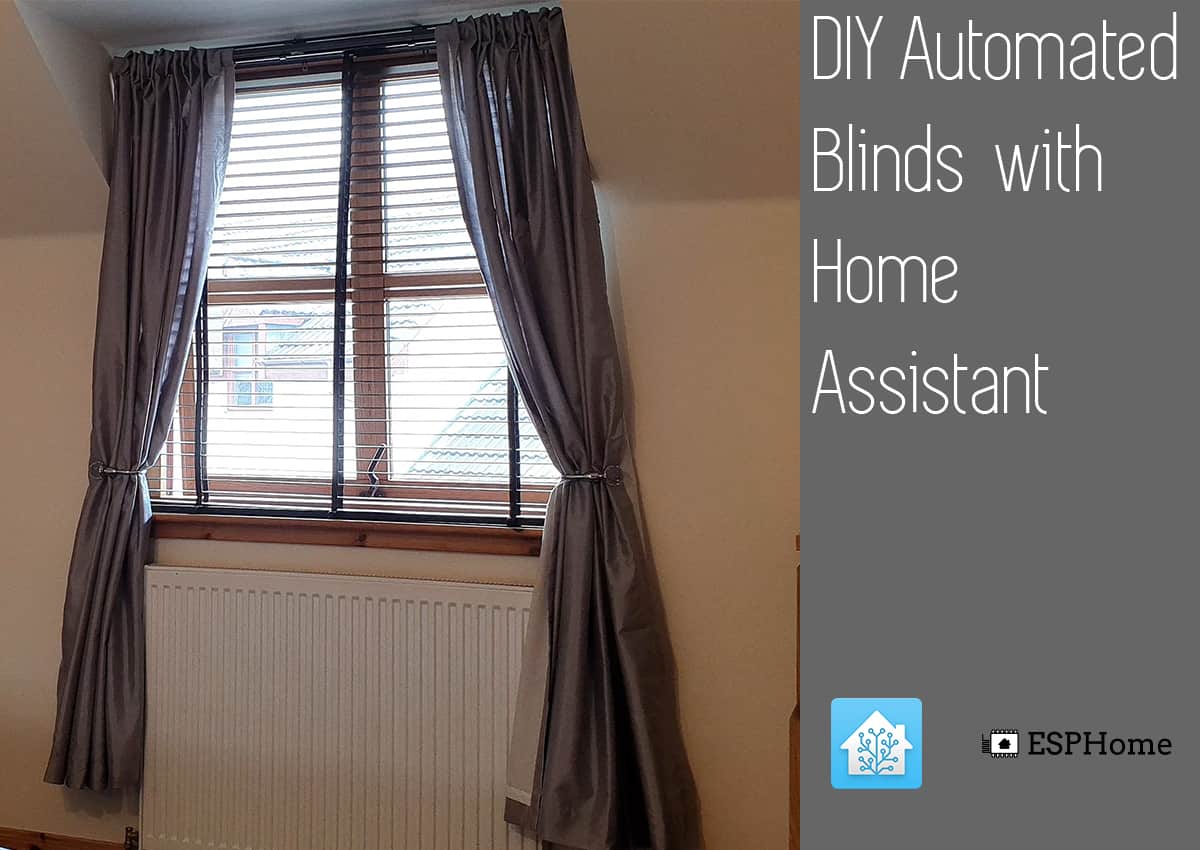
DIY Motorised Smart Blinds

Building your own motorised smart blinds is a really attractive idea and something I’ve been meaning to get to for quite some time – after all, some of the off the shelf solutions are very nice yet for some reason command an extremely premium price for what they are. Don’t get me wrong though, if you just want something you take out the box and it works, they are an excellent option.
However if you are attempting to kit out a whole house this could become a very costly exercise depending on the number of blinds you have. So I started to think of an alternative (as I like to do!) to come up with a solution that should be more attainable to more people.
Today I will show you how I built motorised smart blinds for under £15/$18 per blind, using a cheap stepper motor and an ESP8266, Home Assistant and ESPHome. You could just as easily implement MQTT on this to make it platform free.
Video
I thought I’d try making a video for the first time to see how it went, which you can follow along with here if you prefer video format:
Parts List
There are 7 components we need to make the motorised smart blinds:
- Wemos D1 Mini – You can use any esp8266, the Wemos D1 Mini is compact and fits inside the blind nicely.
- 28BYJ-48 Stepper Motor
- A4988 stepper motor driver
- LM2596 Buck Converter – Takes our 12v input and steps it down to 5v to power the Wemos D1 Mini
- 12v DC power supply – Anything from 1.2A and upwards should suffice
- Female barrel jack with terminals
- 2 x M4 x 25mm bolts and nuts
You will also need a 3D printer to print the small spooler that is used.
Print the Spooler
First thing is to print the spooler. I’m not sure if it would be classed as a spooler but I’m sticking with it. You can find the link here.
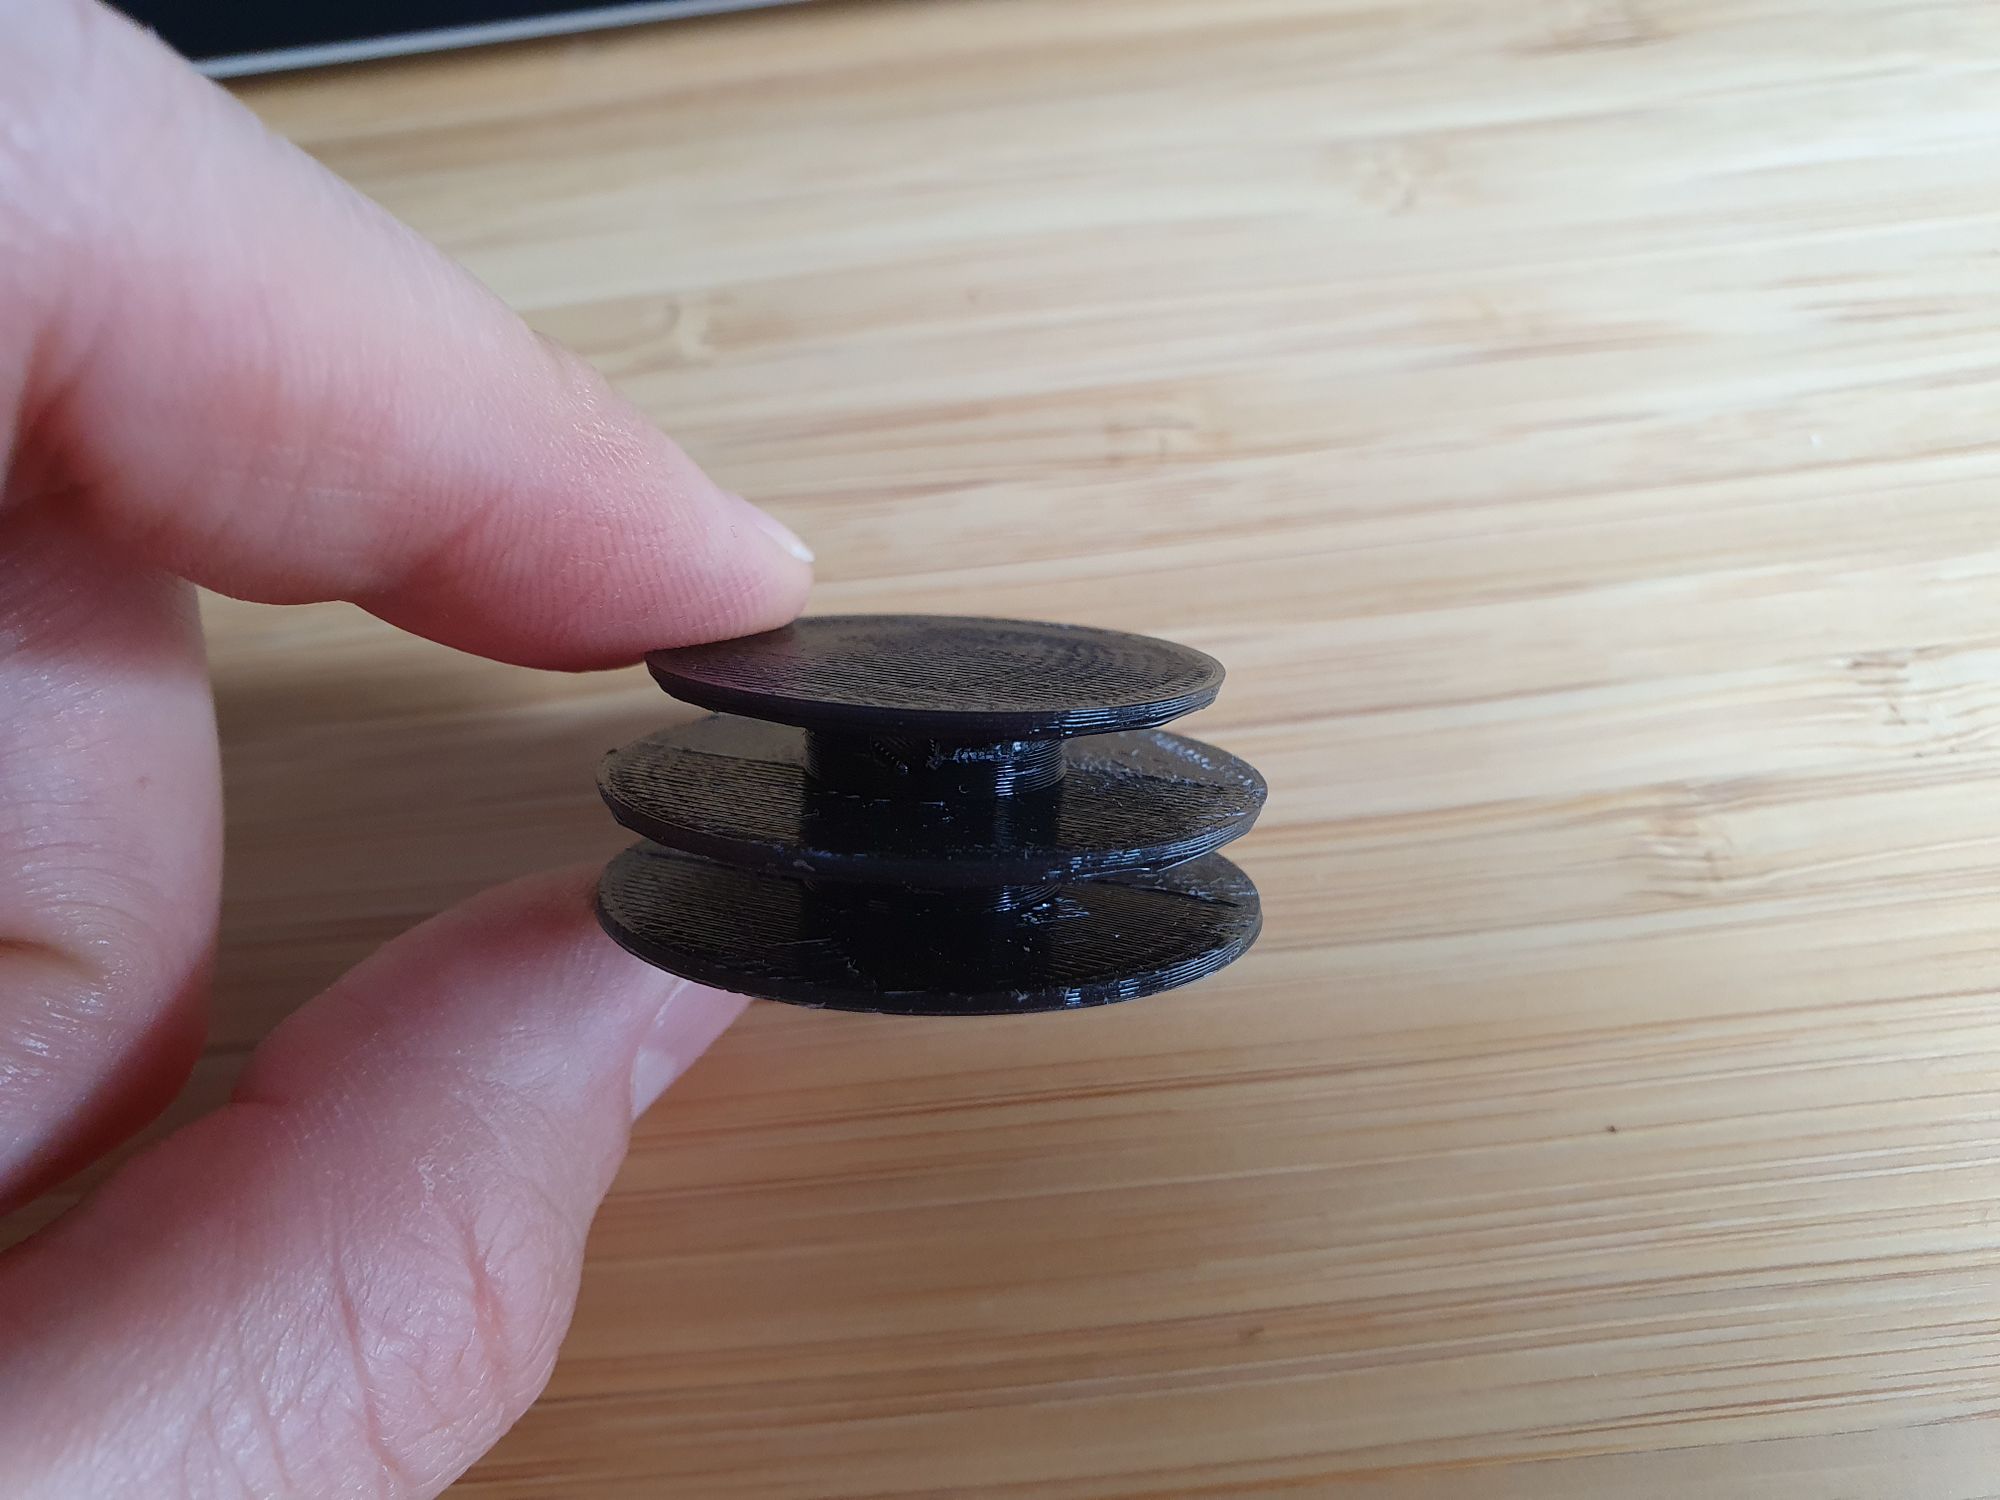
You will need to print with supports, but if you configure the support settings correctly it is very easy to remove. Once done, the spooler will look like this:
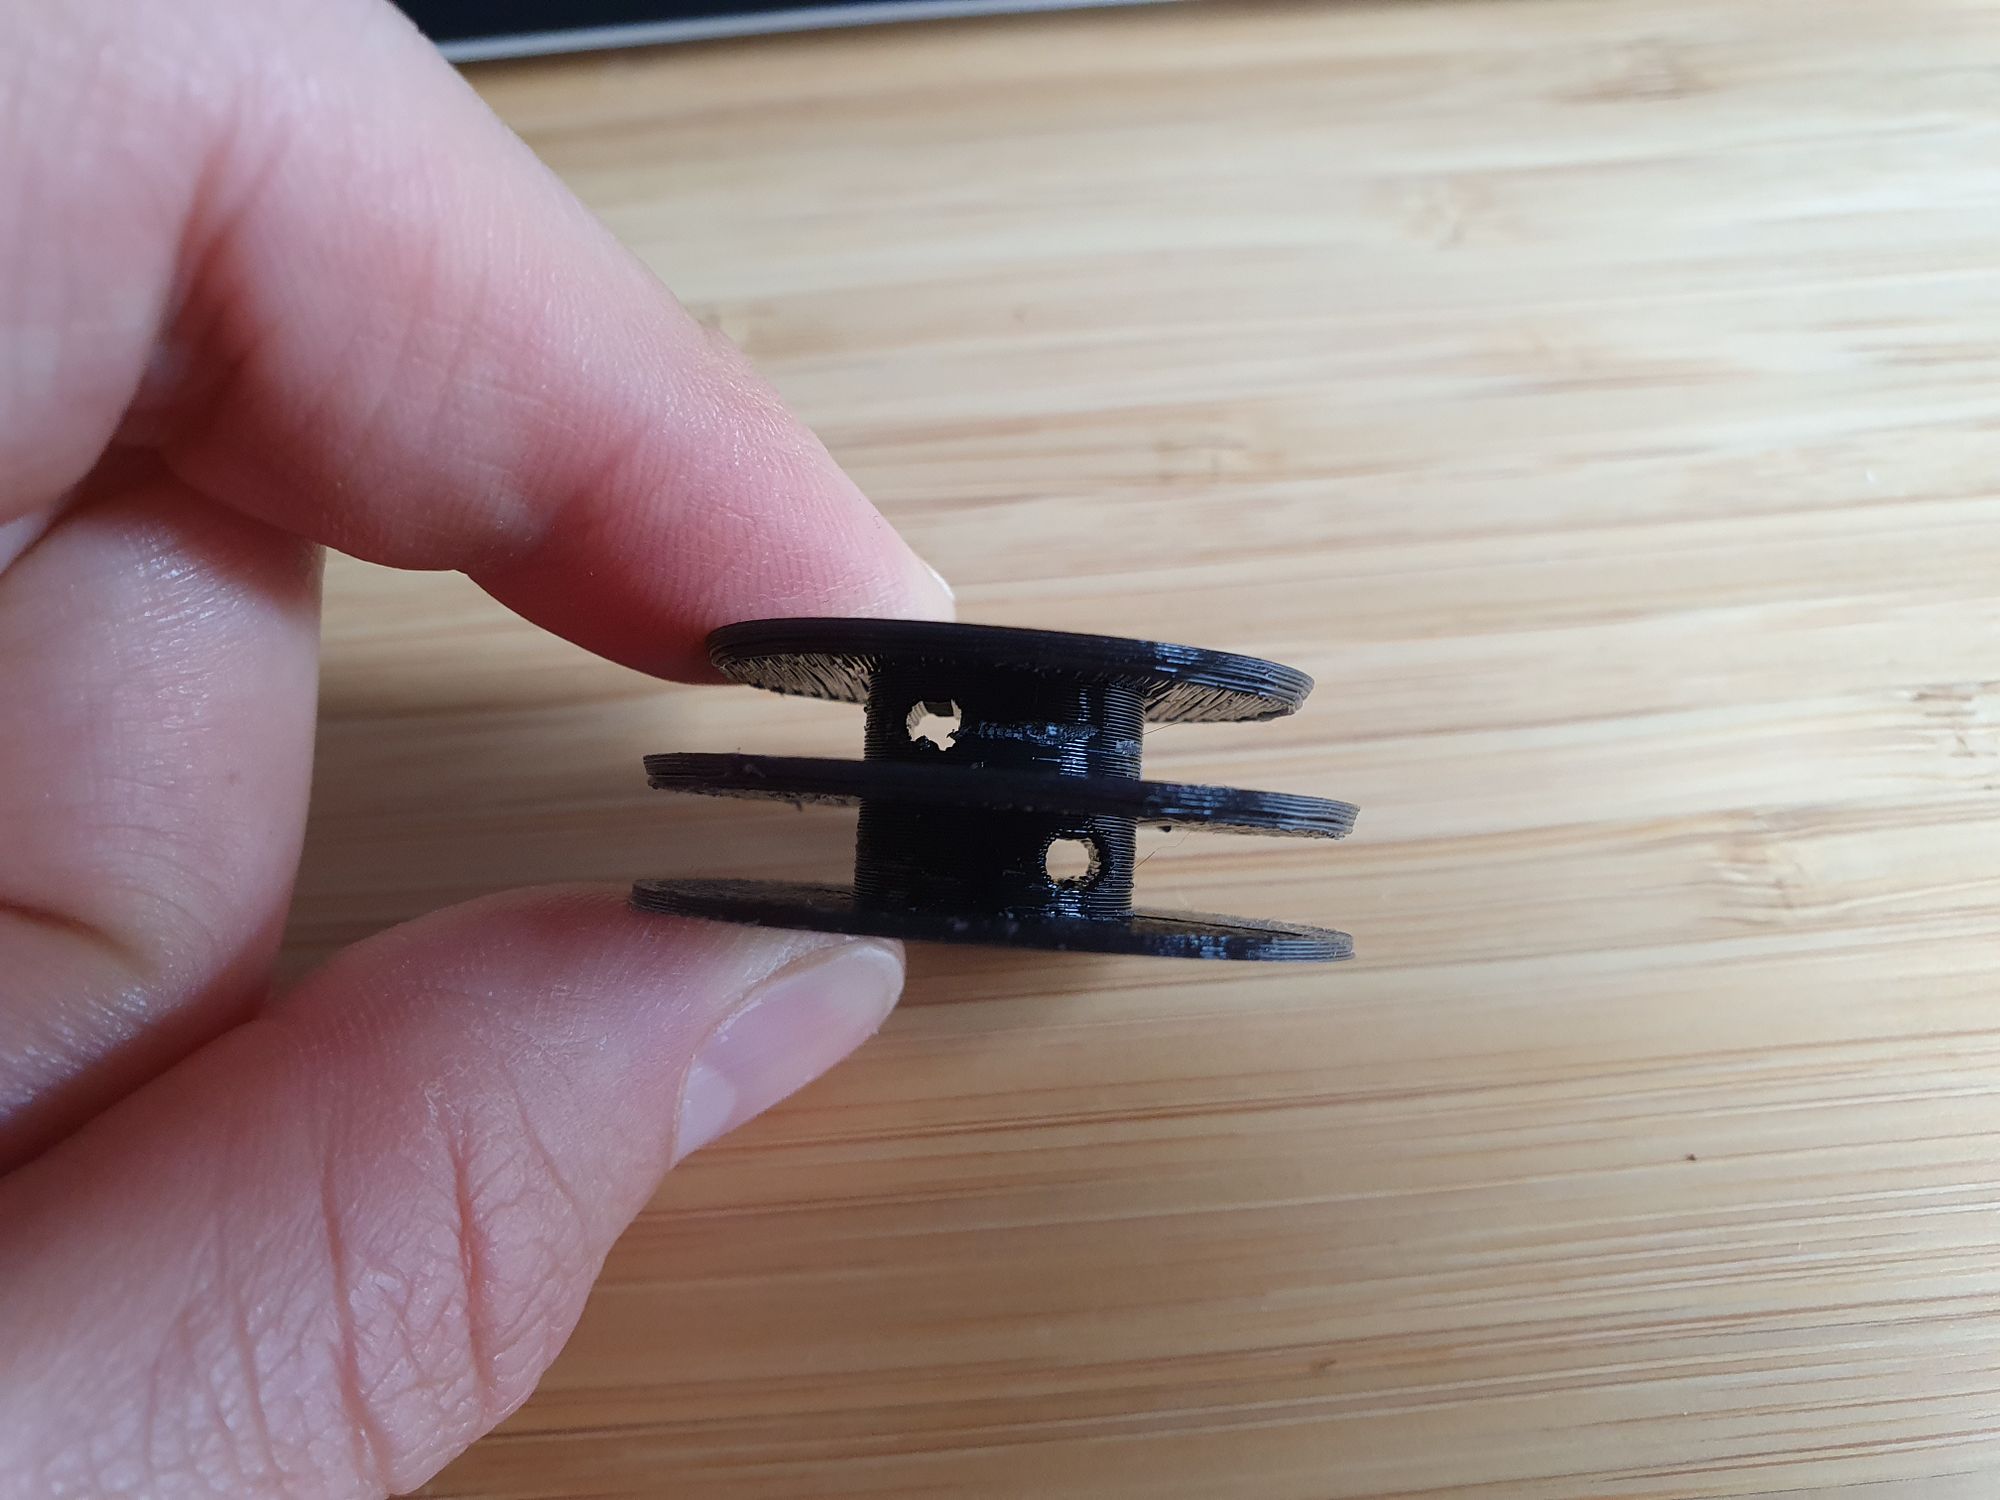
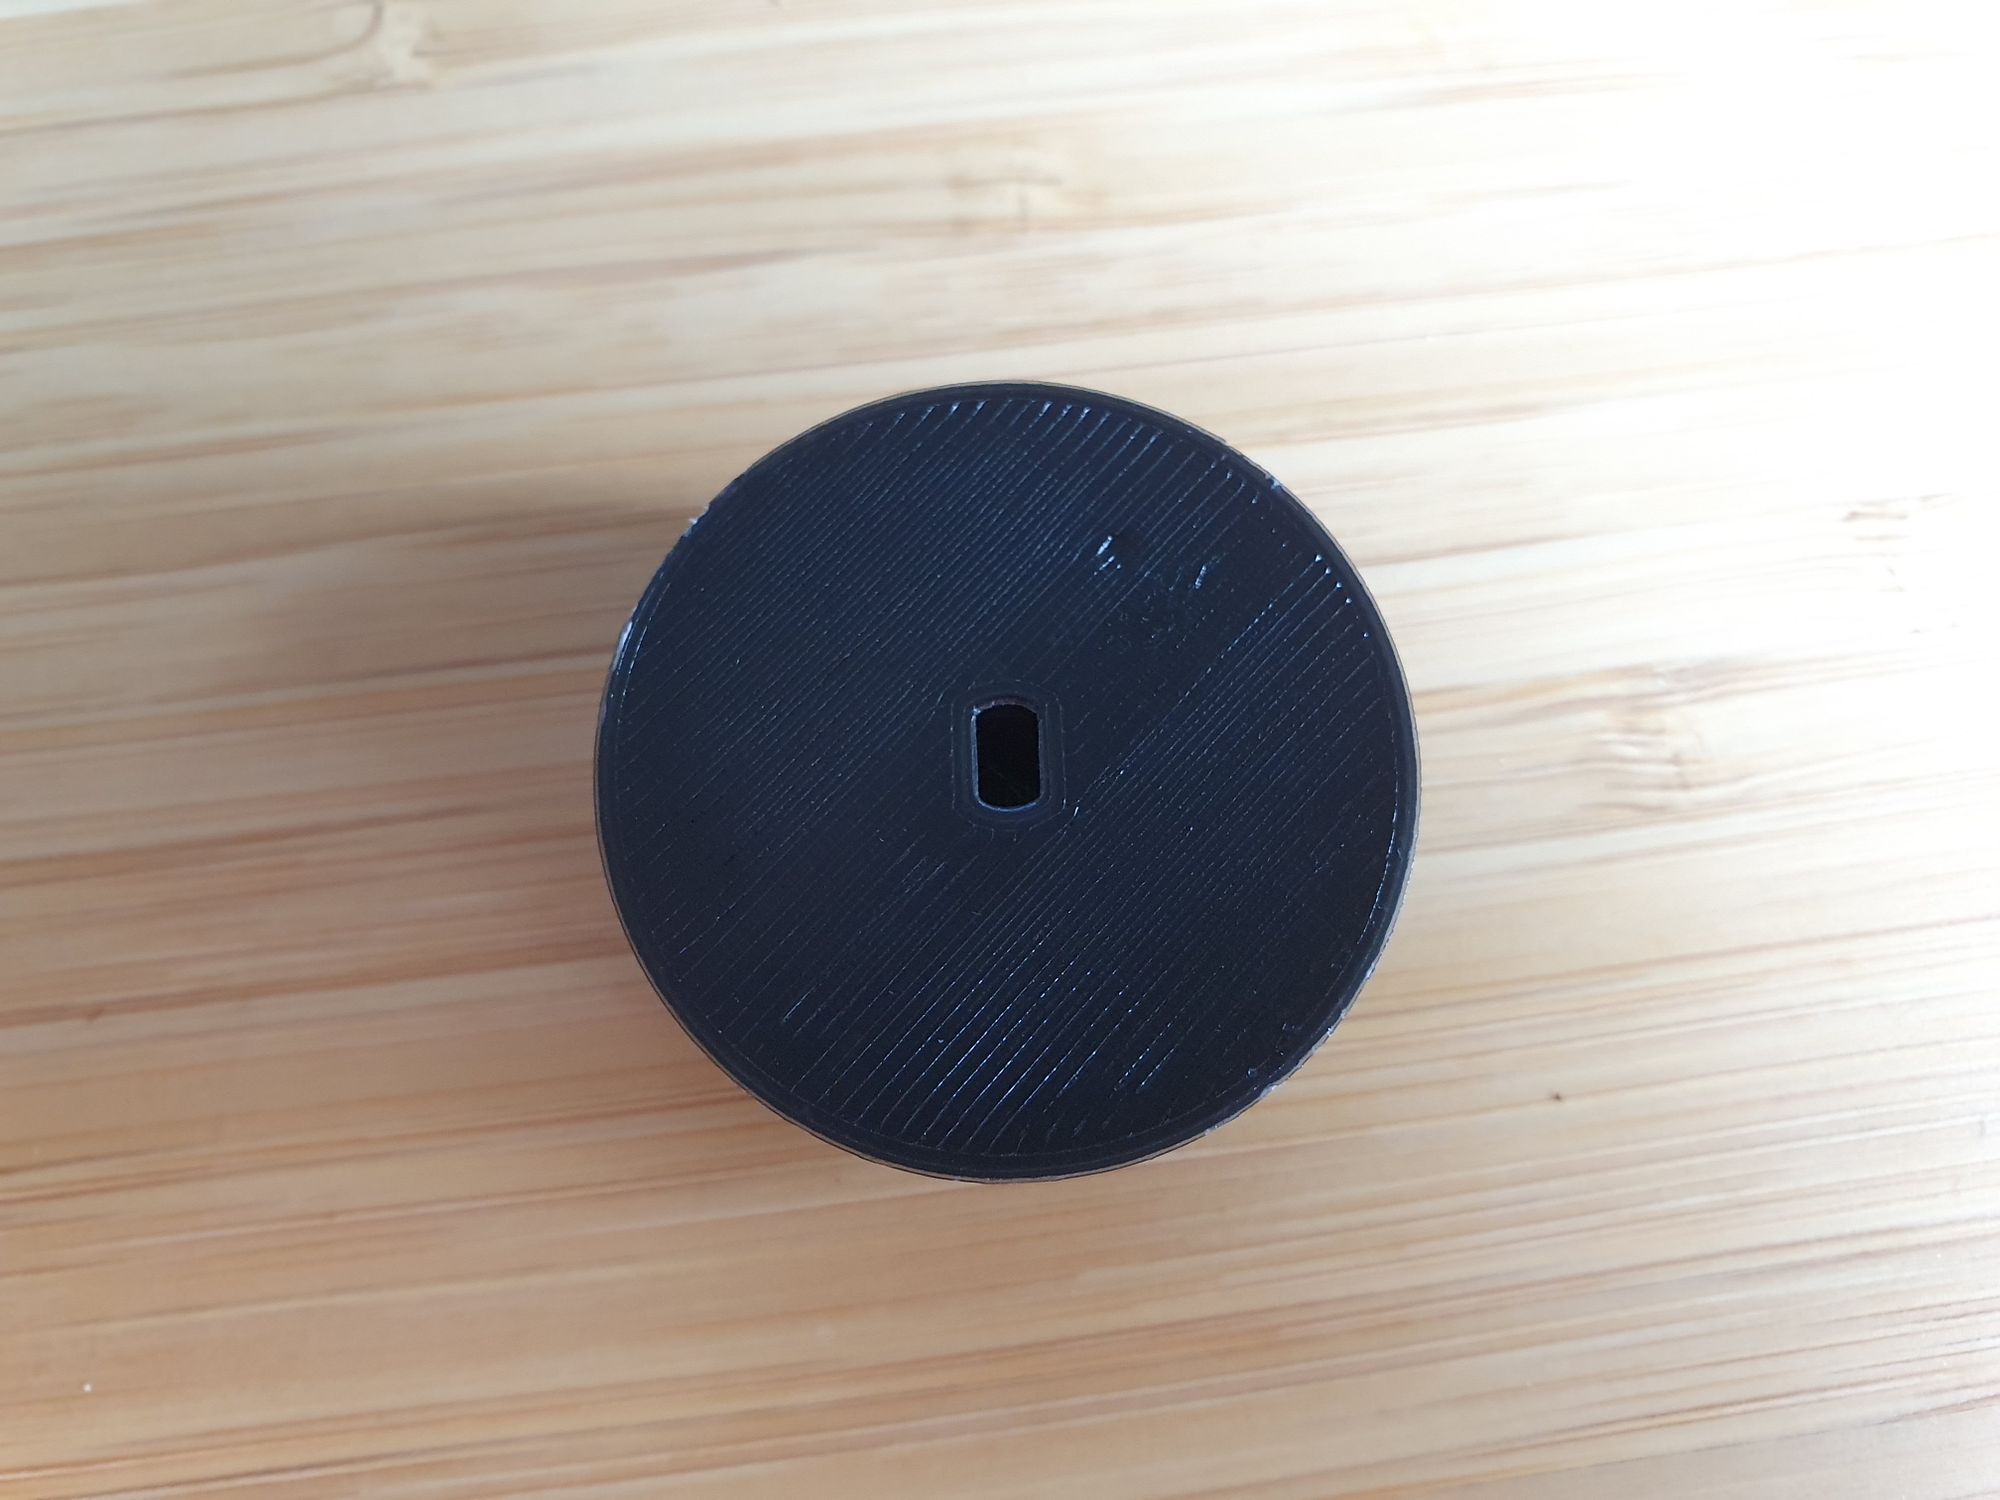
On the bottom is a little slot which is used to attach to the spindle on the stepper motor.
Stepper modification
You will need to modify the stepper driver as I have written about previously here. This is a 2 minute modification and is very easy to do. Make sure to limit the current to around 0.1mv/250ma.
Blind removal
Next we need to remove the blind from the window (unless you have lots of room above the blind for access) – to do this, there should be two clips at either end of the blind that hold it into the brackets, you can open one of the clips on one side and this will allow you to easily slide the blind in and out.
Make sure to move the blind to the top position to make things easier for yourself.
Blind and Motor Preperation
With the blind removed, you should now have easy access to everything inside.
It’s worth noting that this was not my preferred method of operating the blind, having said that I do think it’s a great solution and has worked flawless for me so far.
I would have preferred to turn the main shaft directly, however in my case the shaft was extremely tough to turn directly and the stepper was not up to the task. Using the pull chord however it goes through a small pulley which is able to turn the shaft much easier.
First you will need to identify the pull chord that tilts the blinds up and down. This will normally be fed through a small hole that allows it to hang down. Pull the chord back inside the blind channel:
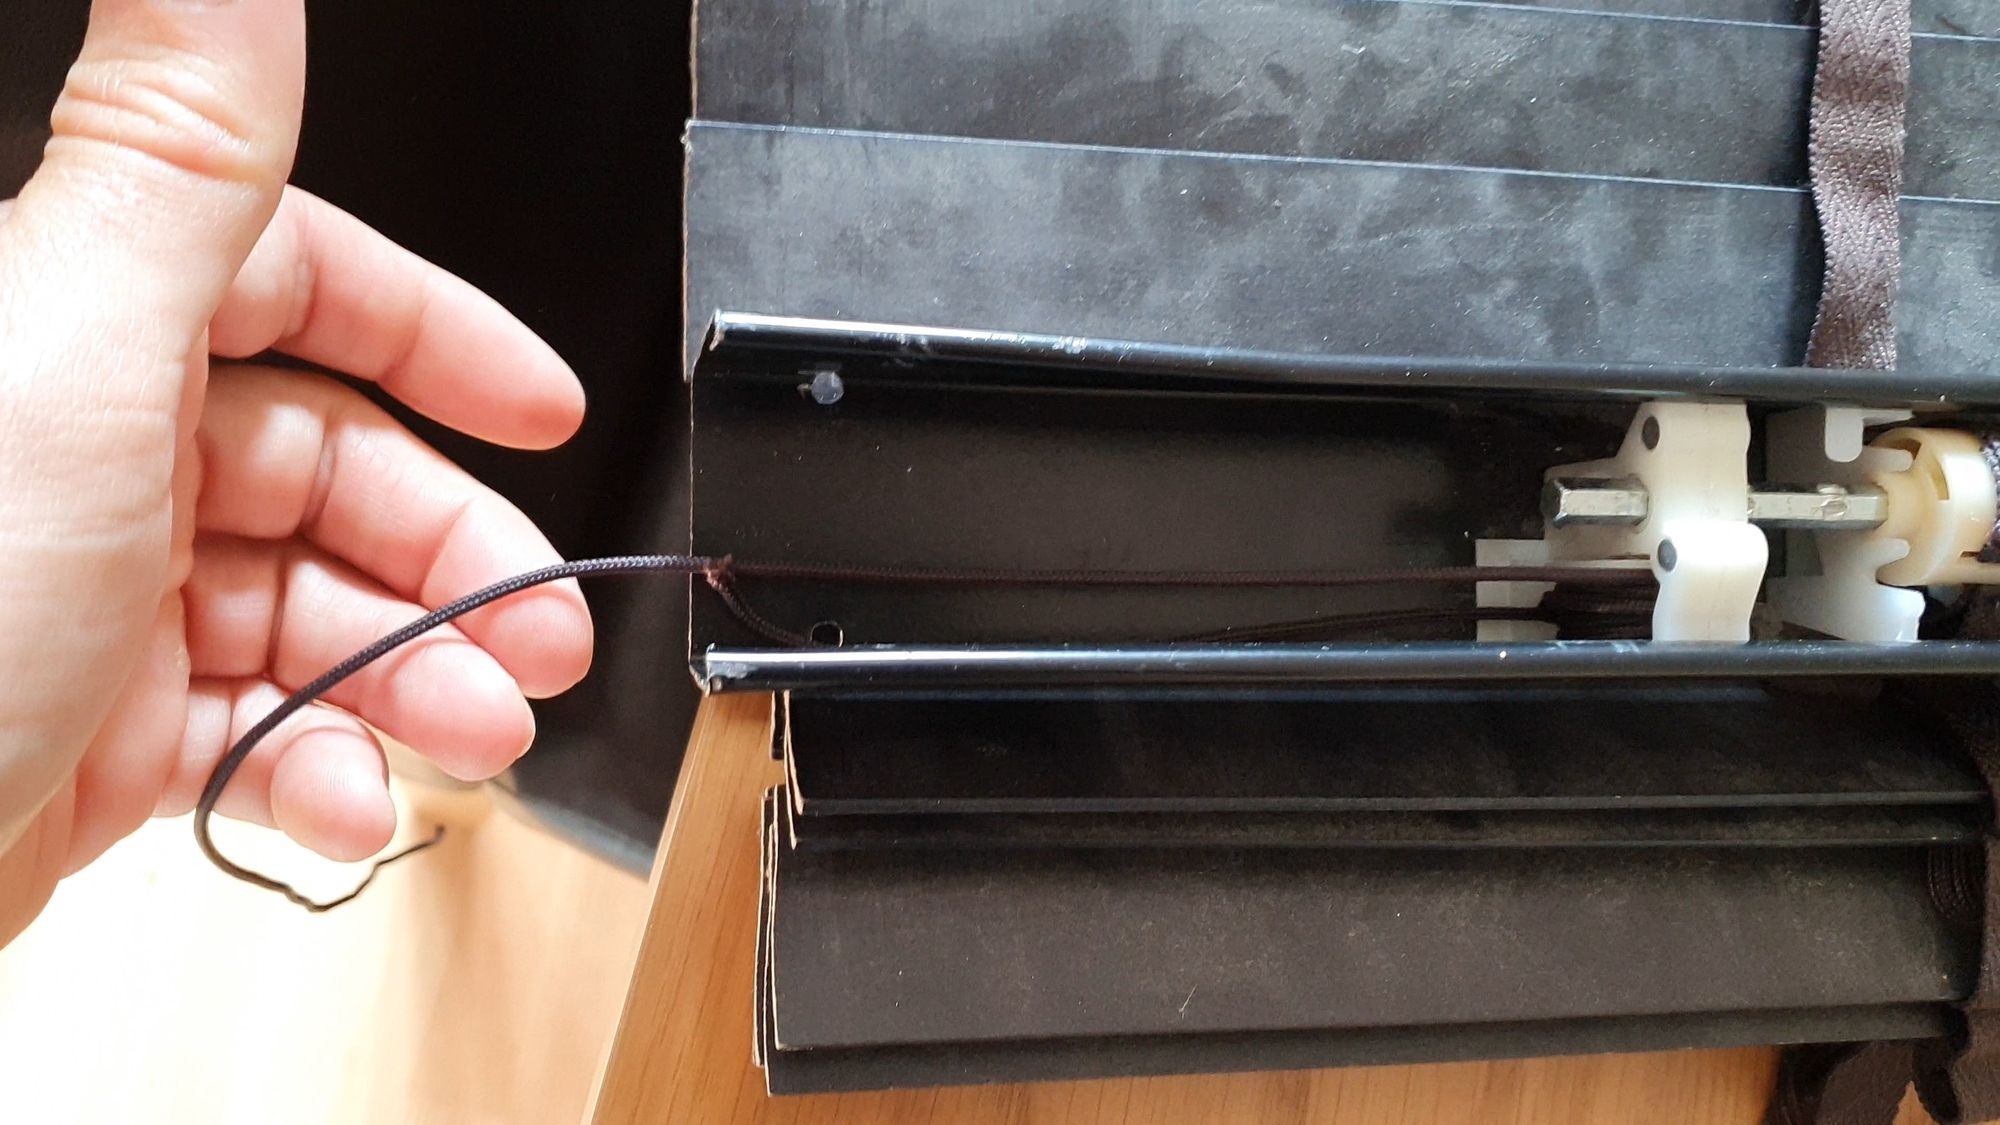
Then you will want to tilt the blind all the way to one side, so pull one end of the chord as far as it will go to fully close it. You will end up with one short piece of chord and one long piece. This is done so that we can “preload” the spooler to make things easier.
Next, identify where you will store the electronics inside the blind. I have the stepper motor at one end of the blind and the electronics at the other side, there is simply not enough room inside my blind to have them next to each other, but this is a small blind so yours might be different.
Then once you have this worked out, you may need to extend the wires on your stepper motor. I used a spare length of CAT5e network cable to run my wires from one end of the blind to the other, and attached it to a Dupont Connector:
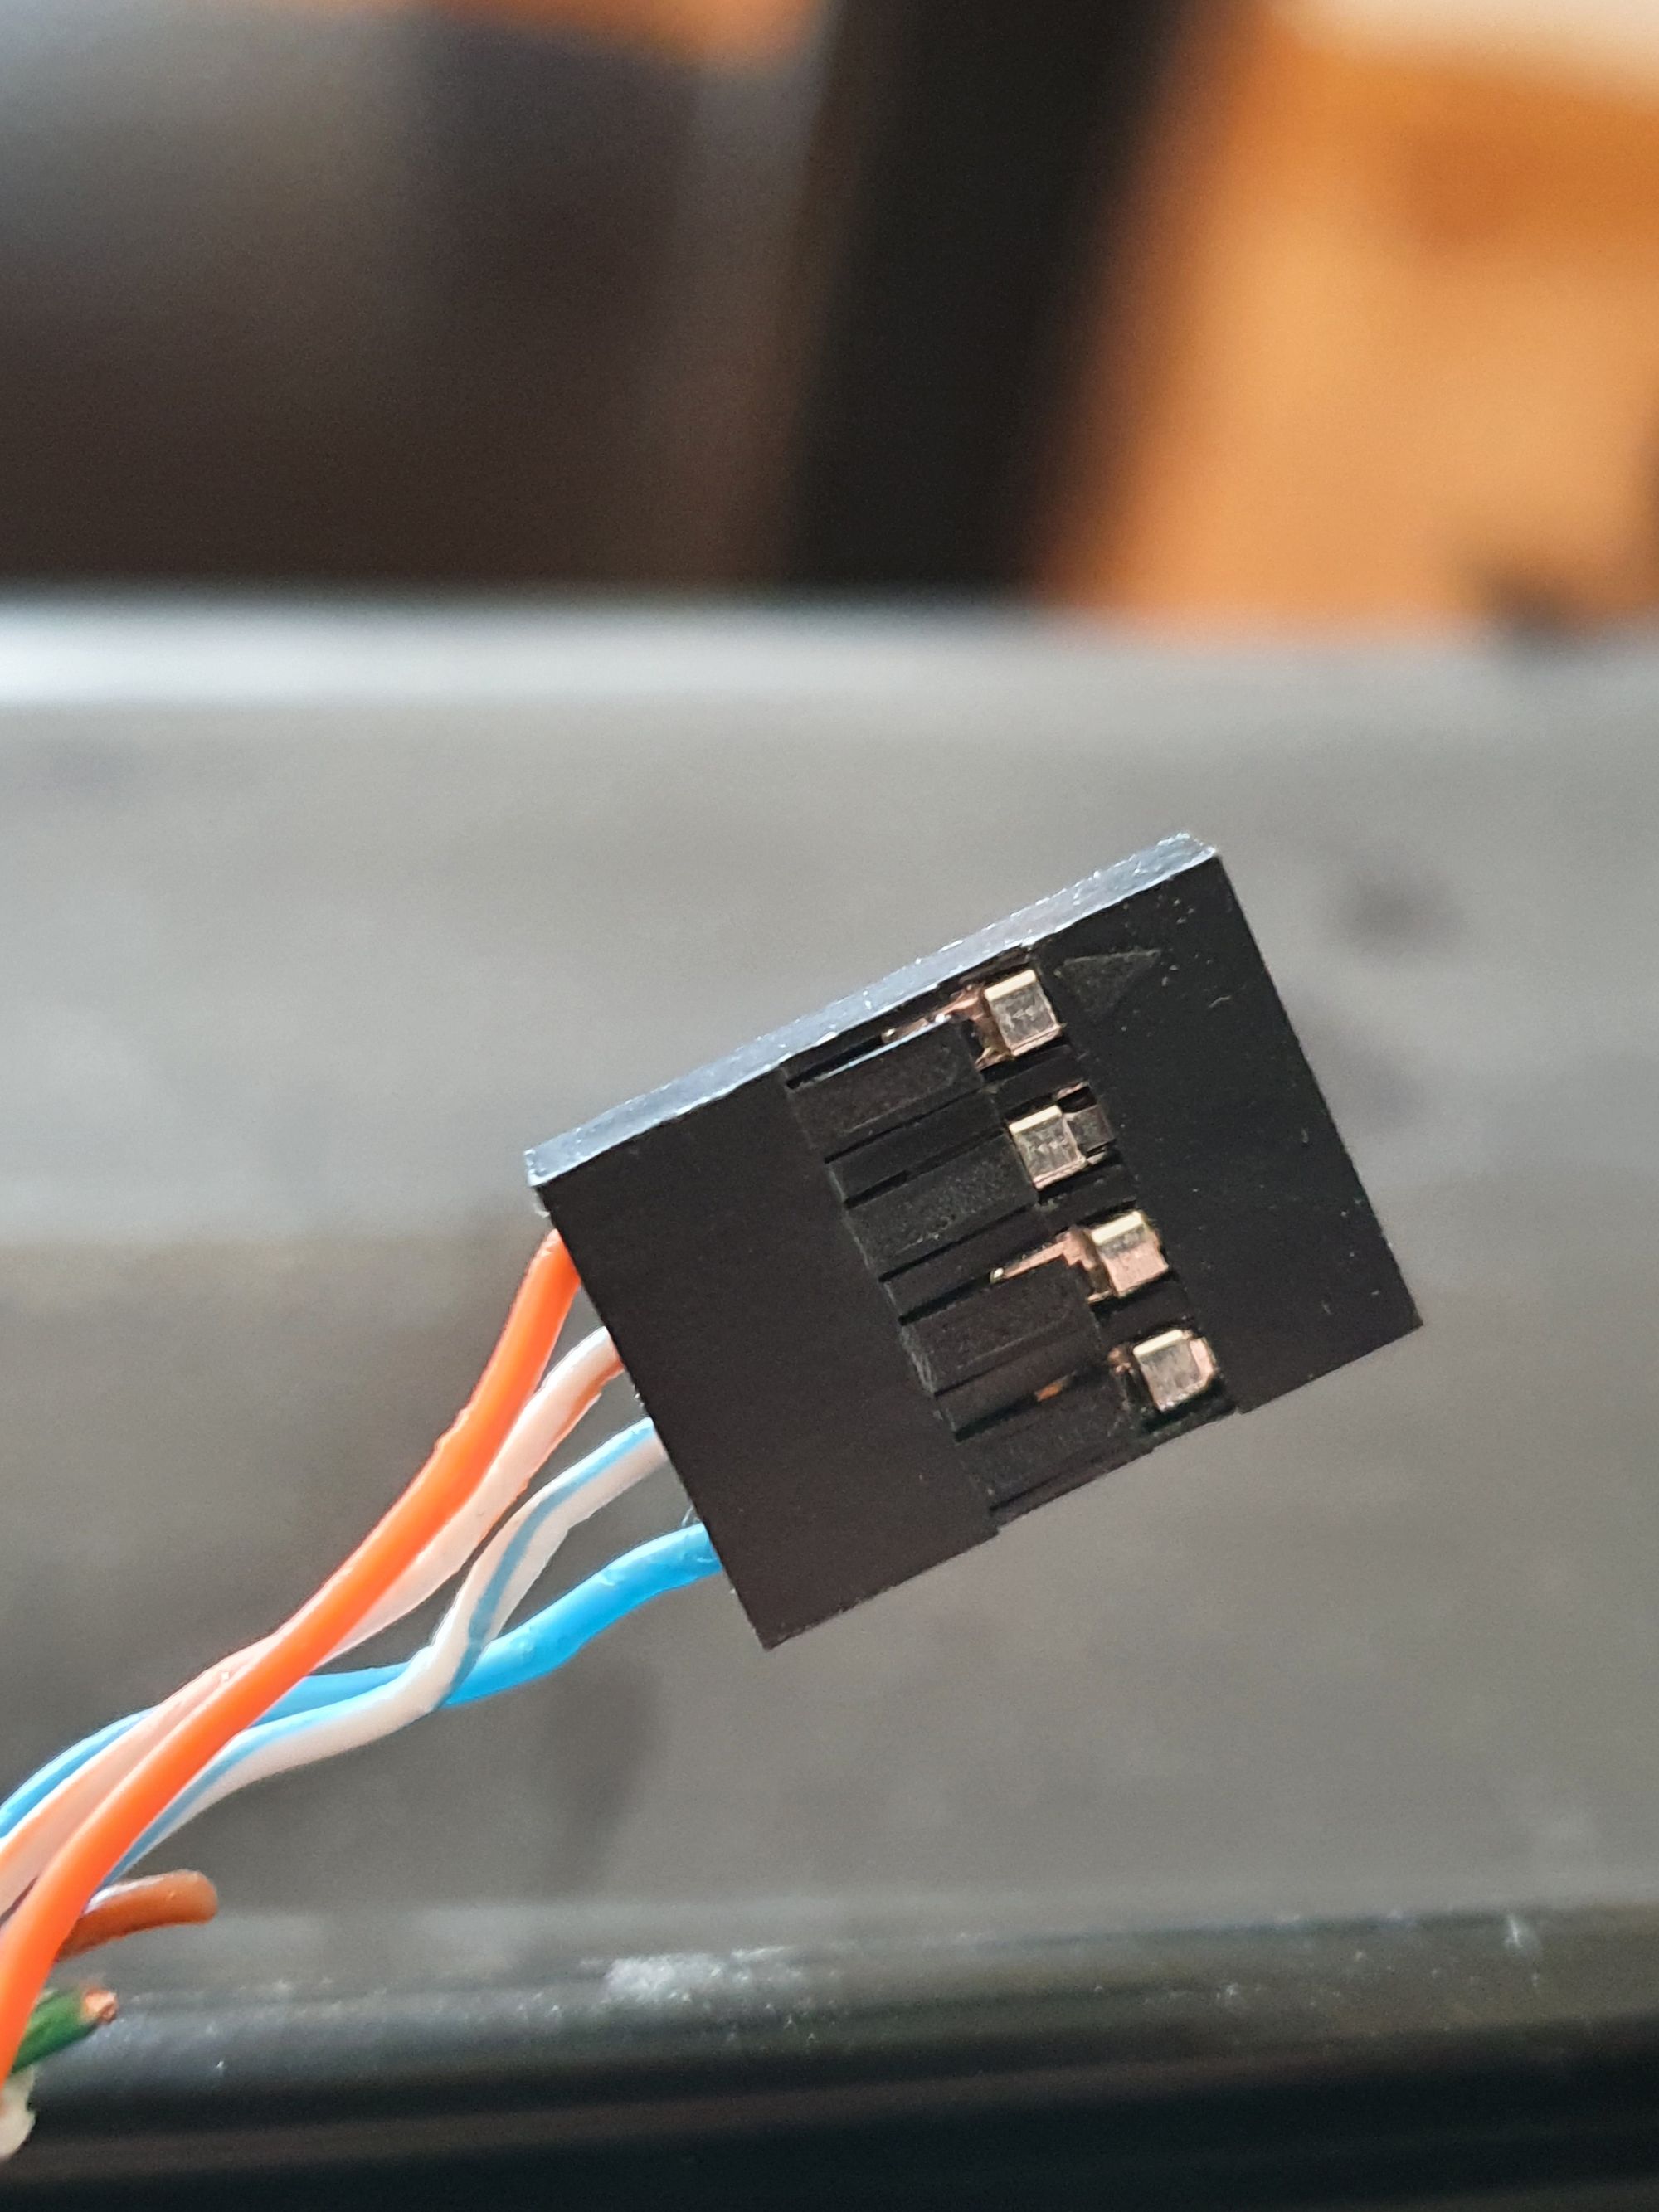
First I used the Blue and Blue/White cables on the CAT5e cable to attach to the Blue and Yellow wires on the stepper since they represent coil #1 on the stepper. I used Orange and Orange/White cables on the CAT5e cable to attach to the Orange and Pink wires on the stepper as coil #2.
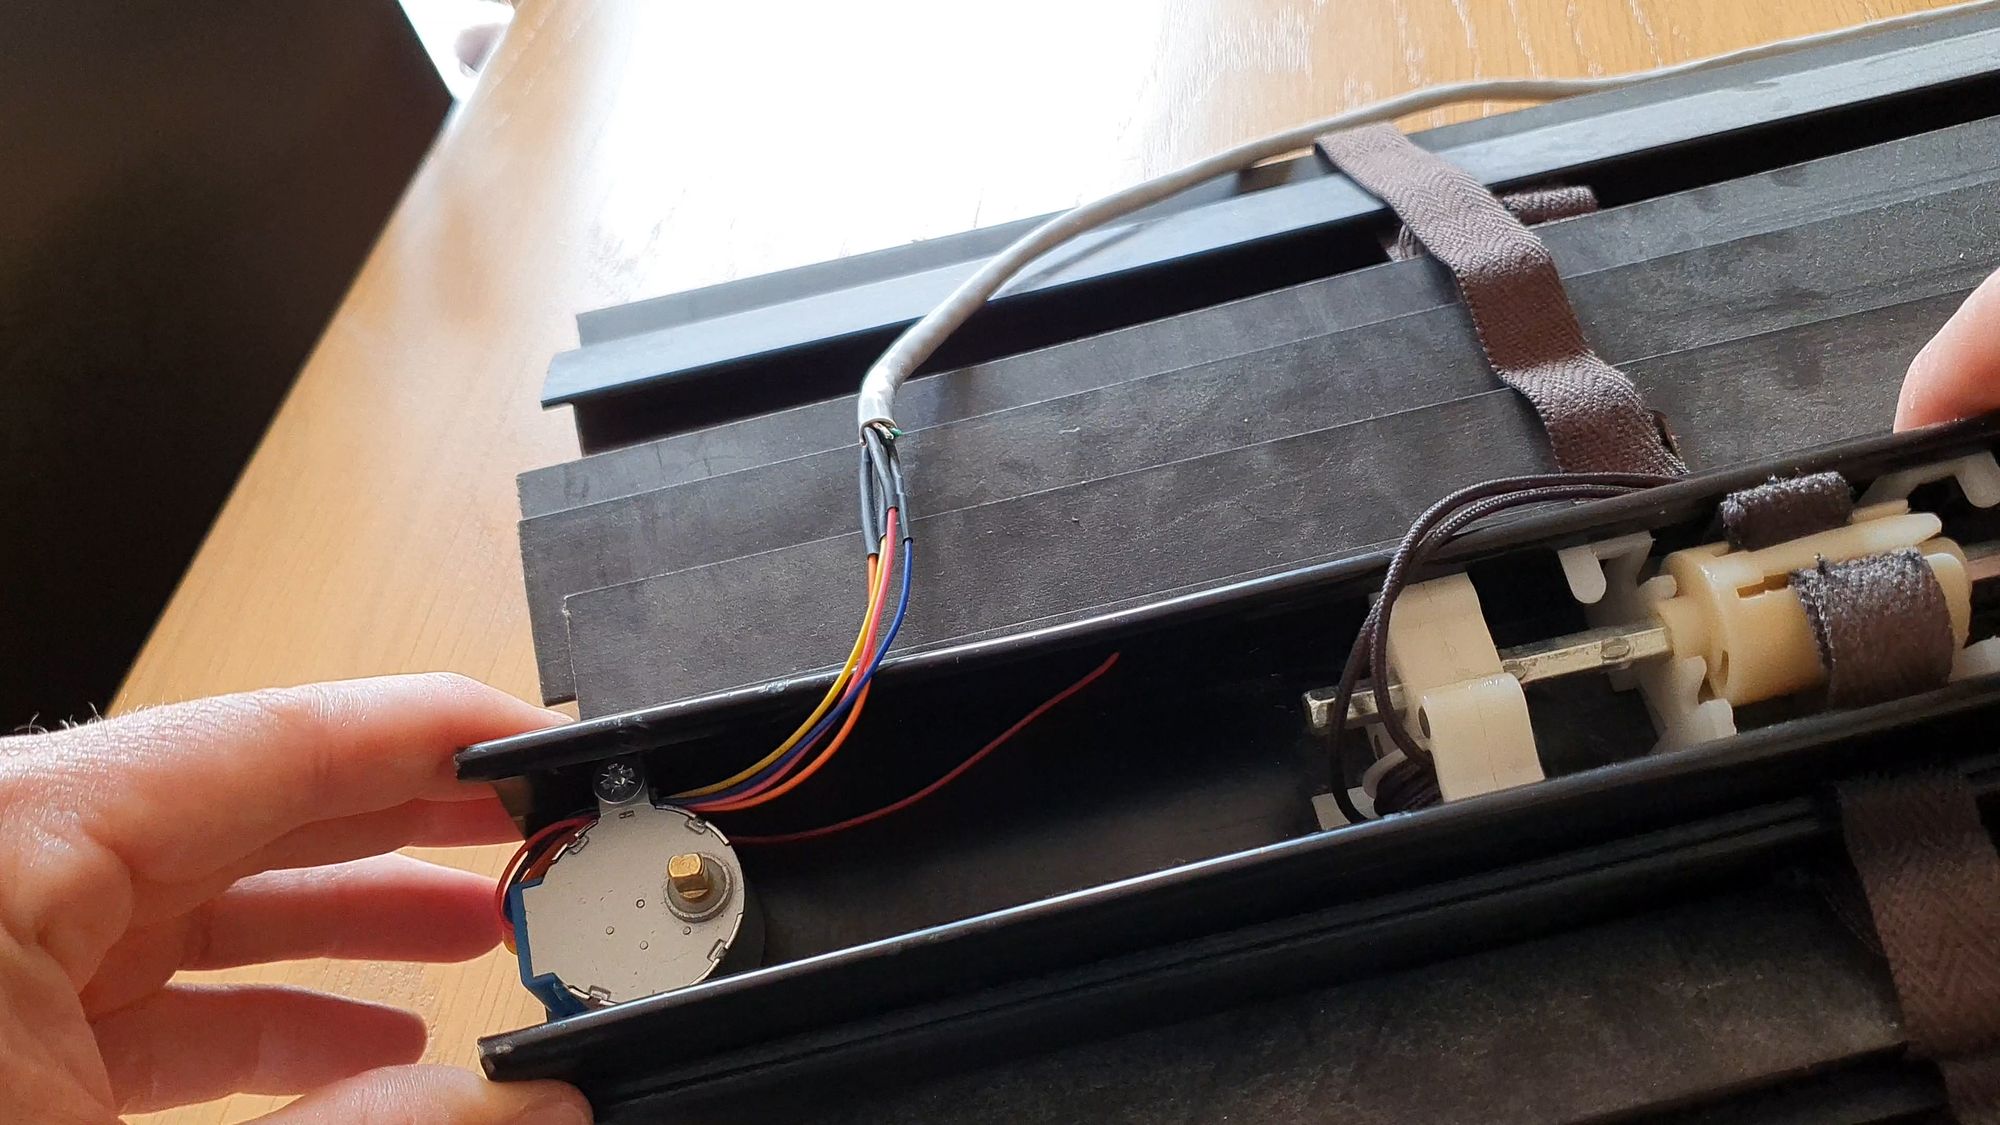
Attaching the motor
Next we need to attach the motor to the blind. To do this, you will need to drill two 4mm holes into the blind. Place the motor on the blind, mark the position of the holes carefully and drill the holes. Then attach the motor and insert the 2 x M4 x 25mm bolts through and secure using the nuts:
Once attached, route the CAT5e cable to where you are storing the electronics. Mine goes all the way through the middle of the blind to the other end, be sure not to snag any cables or mechanisms on the way.
Attaching the spooler
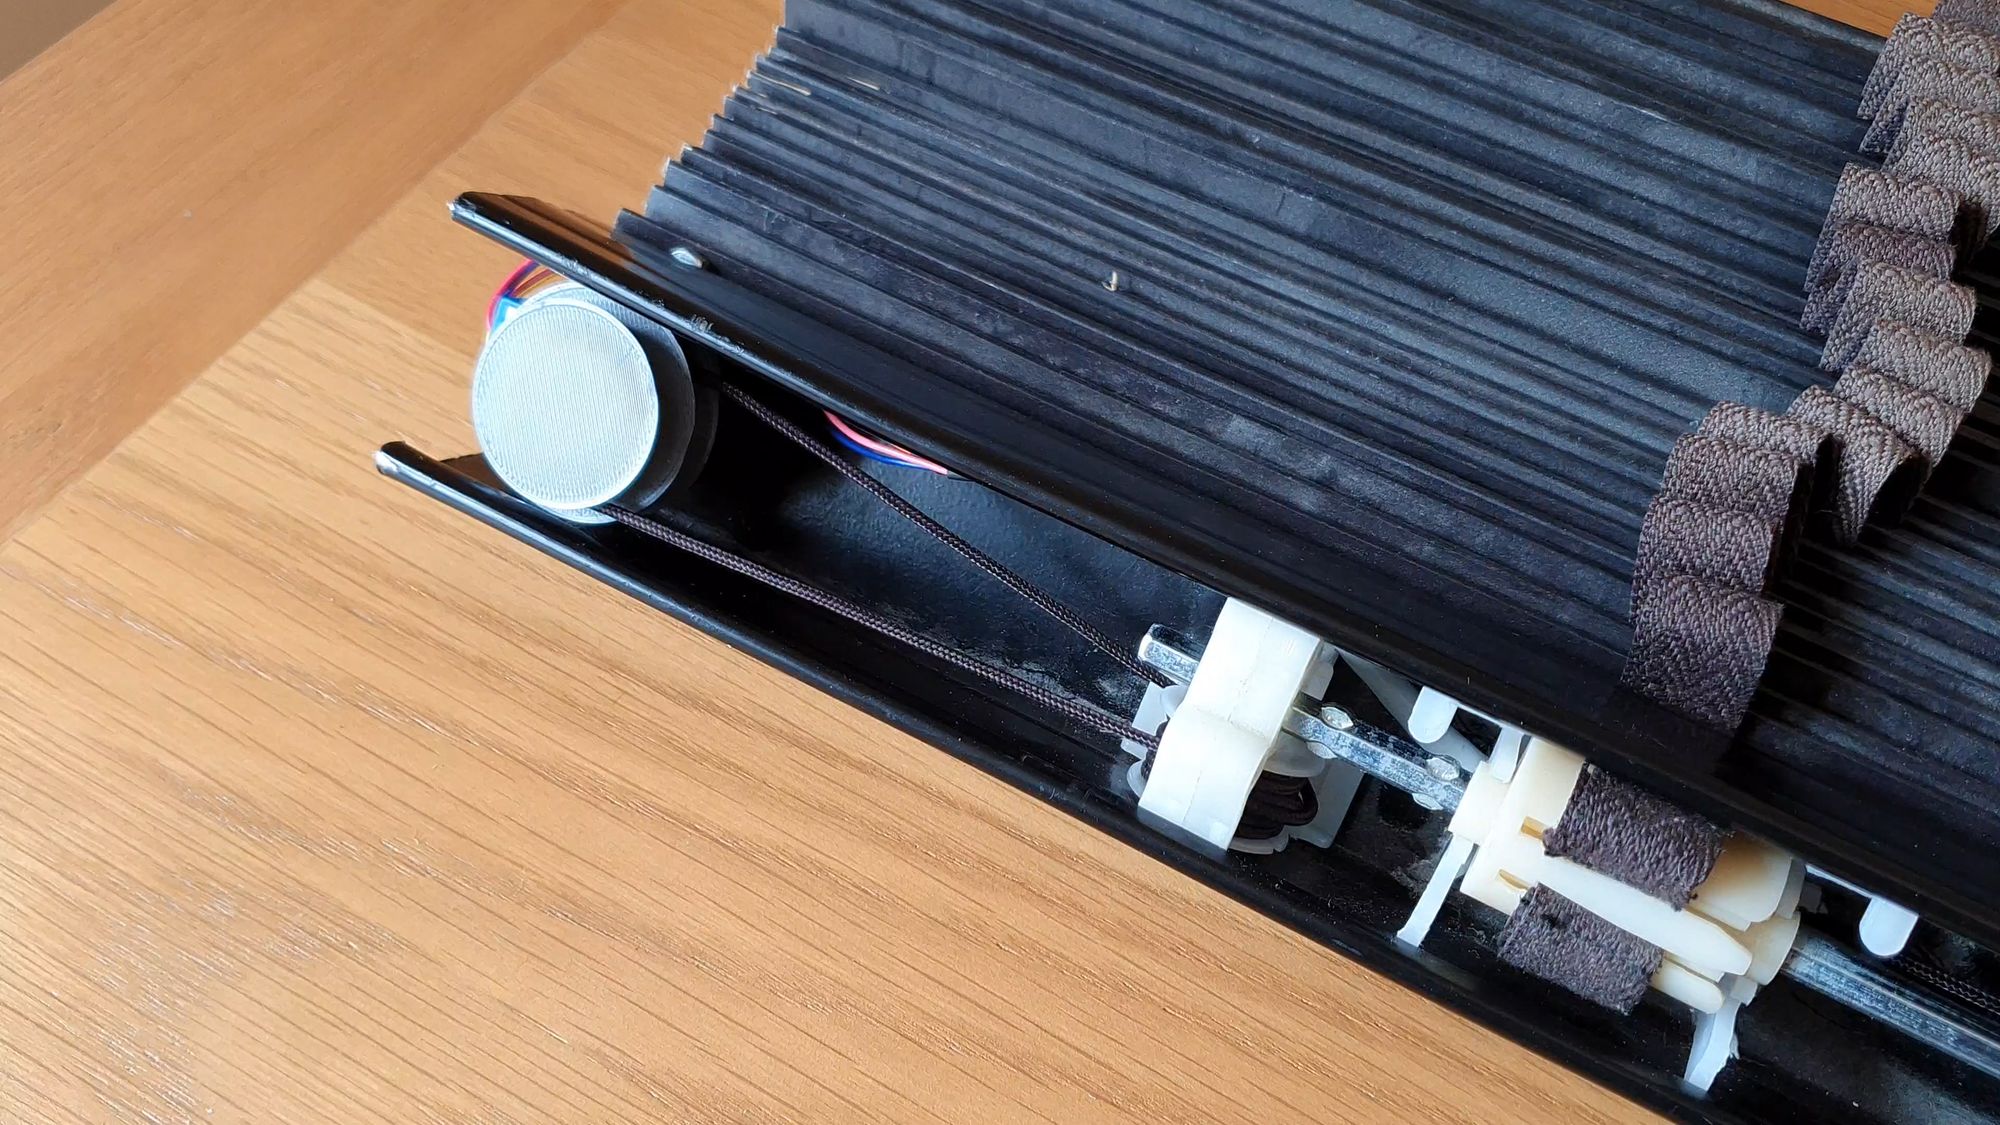
We are now ready to attach the spooler, but first we need to preload the chord. With the spooler not attached to the motor, you should take the long end of the chord (remember, the blind should be fully closed in one direction) and thread it through one of the holes on the spooler. Tie a knot in the very end and then wind the chord around the spooler until it is at an appropriate length – long enough to just reach the spindle of the motor but not so long that there is slack – you should have some tension in the chord.
Take the shortest end and thread that through the other hole and tie a knot in this piece also. Then attach it to the stepper like so:
You will most likely need to trim the length of your chord in order to fit inside the spooler. This will require a bit of trial and error depending on your blind so just make sure to take it slow, measure, cut then test.
Also, make sure to not cross the chord over each other. The chord needs to be free to move and not rubbing on anything.
Wiring
Finally its time to wire up the rest of the components, take a look at the following schematic:
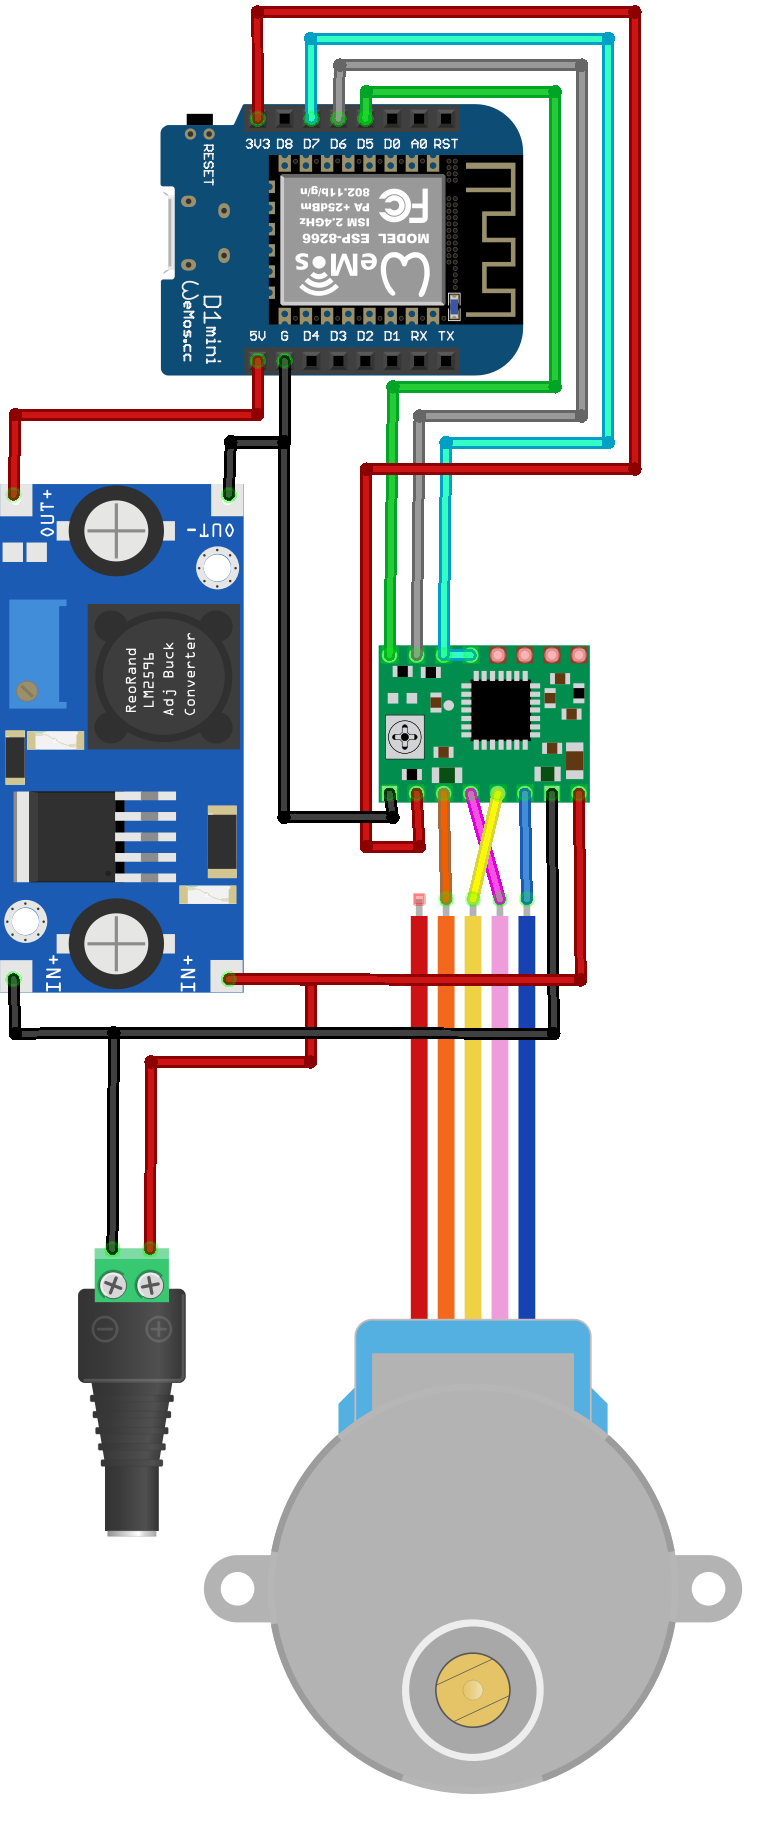
Firstly we wire the barrel jack connector to the LM2596 buck converter and also to the A4988 VMOT pins – this is so we can drive the stepper motor at 12v.
Then from the LM2596, making sure you have set the output to 5v using the small screw, wire this to the Wemos D1 mini. From the D1, you will then want to wire 3.3v and ground to the 3.3v and ground on the A4988.
You will also want to wire D5, D6 and D7 to the A4988. Make sure you have also bridged the SLEEP and RESET pins on the A4988 – this is so it can enter sleep mode and keeps the heat and stress down on the motor and driver.
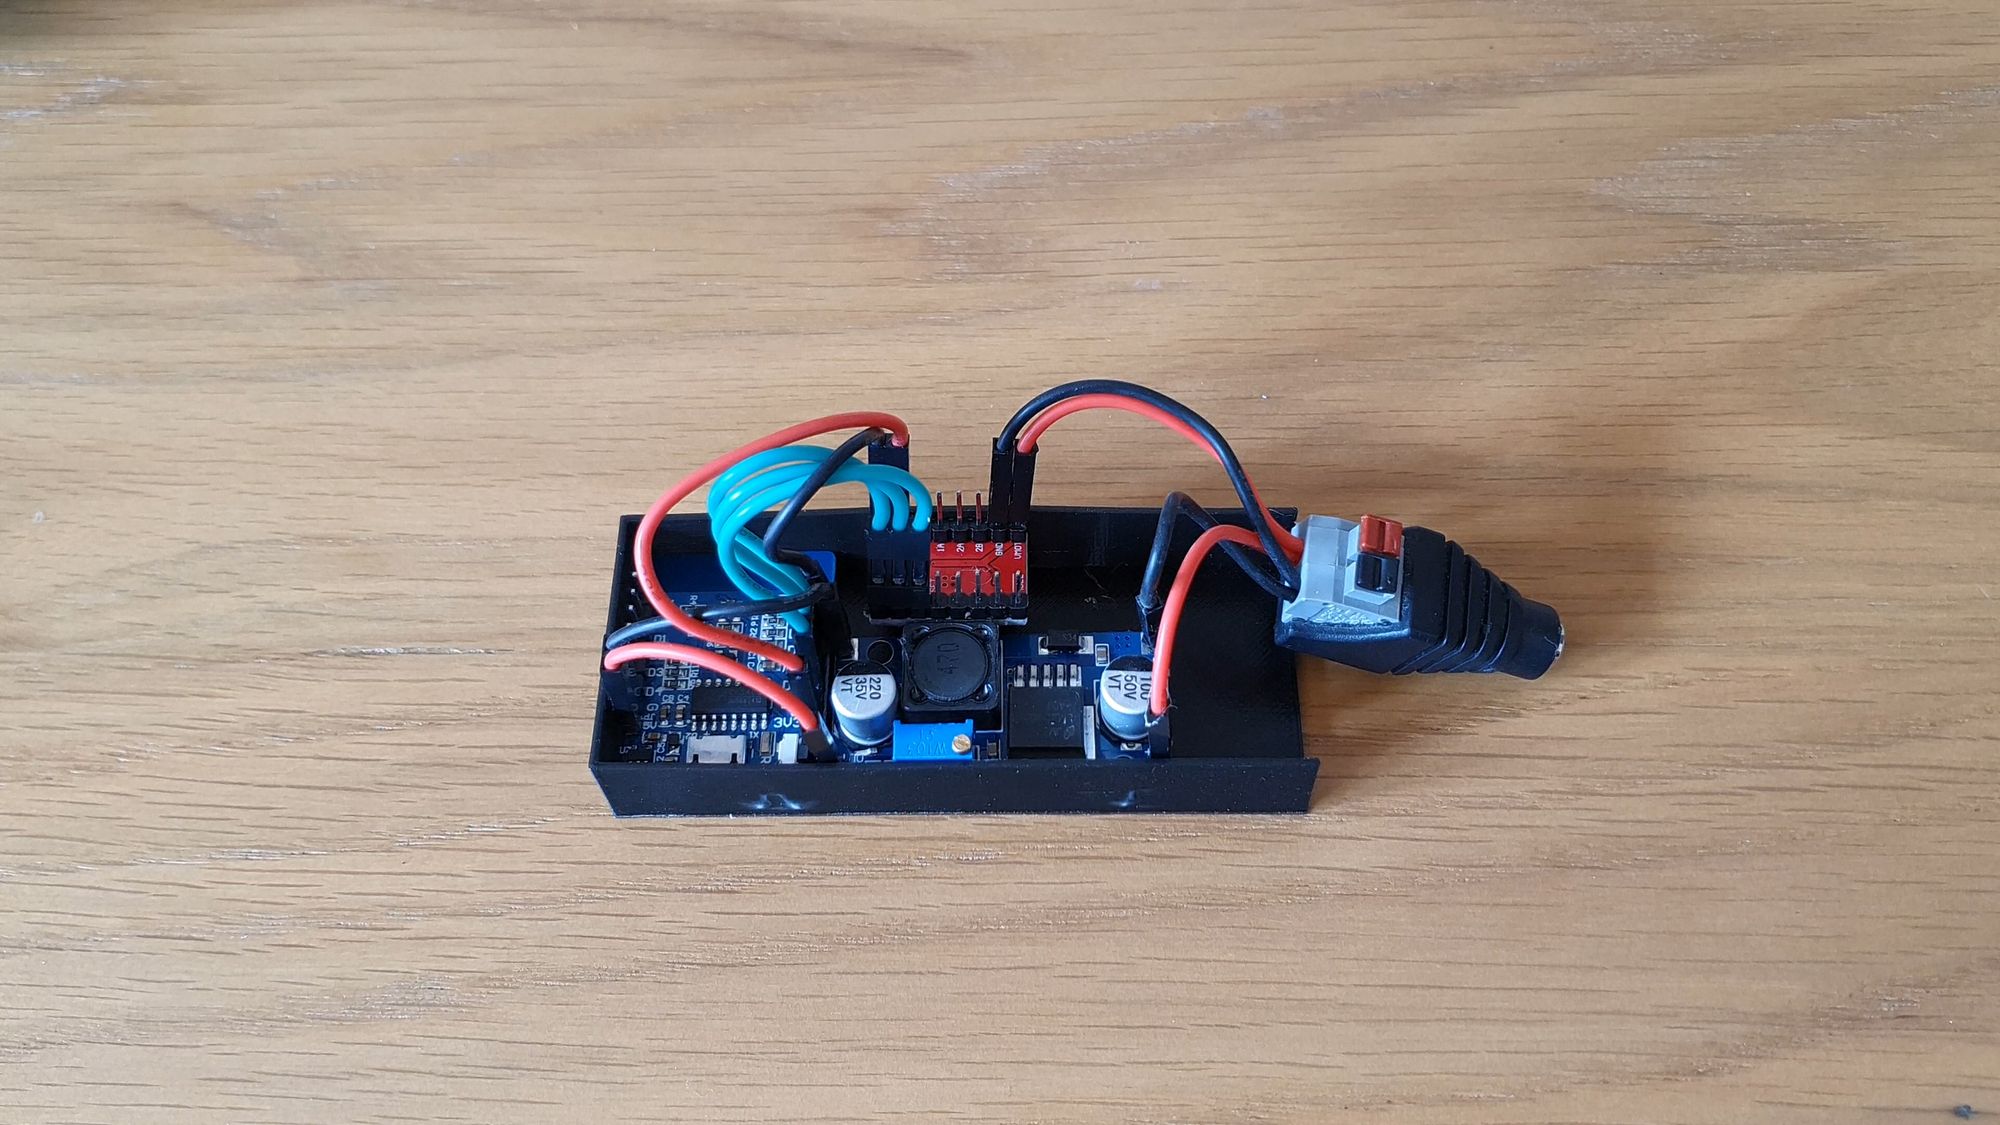
Try to keep the wiring as short as possible so it fits inside the blind, it might also be worth 3D printing a box to keep everything inside so it doesn’t short out on the blind (if it is metal like mine) – here is what mine looks like:
Software
We are using ESPHome for this project so we can use the Home Assistant integration. You could just as easily use Tasmota or your own firmware with MQTT to do the same thing.
If you aren’t sure how to use ESPHome, the easiest way is through the Home Assistant add-on. Go to Supervisor > Add-on store > ESPHome > Install to install the add-on. Follow the instructions for configuration there.
Using the following ESPHome config, load this onto your own esp8266, this is available on GitHub too:
esphome:
  name: my_blind
  platform: ESP8266
  board: d1_mini

wifi:
  ssid: "Your Wifi SSID"
  password: "Your Wifi Password"

logger:

ota:
  password: "OTA Password"

web_server:
  port: 80

api:
  services:
    - service: control_blind
      variables:
        target: int
      then:
        - stepper.set_target:
            id: my_stepper
            target: !lambda 'return target;'
        - sensor.template.publish:
            id: position
            state: !lambda 'return target;'

cover:
  - platform: template
    name: "My Blind"
    id: my_blind
    device_class: blind
    open_action:
      - stepper.set_target:
          id: my_stepper
          target: 6000
      - sensor.template.publish:
          id: position
          state: !lambda return id(my_stepper).target_position;
    close_action:
      - stepper.set_target:
          id: my_stepper
          target: 0
      - sensor.template.publish:
            id: position
            state: !lambda return id(my_stepper).target_position;
    stop_action:
      - stepper.set_target:
          id: my_stepper
          target: !lambda return id(my_stepper).current_position;
      - sensor.template.publish:
            id: position
            state: !lambda return id(my_stepper).current_position;
    optimistic: true
    assumed_state: true

sensor:
  - platform: template
    name: "My Blind Position"
    id: position

stepper:
  - platform: a4988
    id: my_stepper
    step_pin: D6
    dir_pin: D5
    sleep_pin: D7
    max_speed: 700

    # Optional:
    acceleration: inf
    deceleration: inf
Insert into the blind and test run
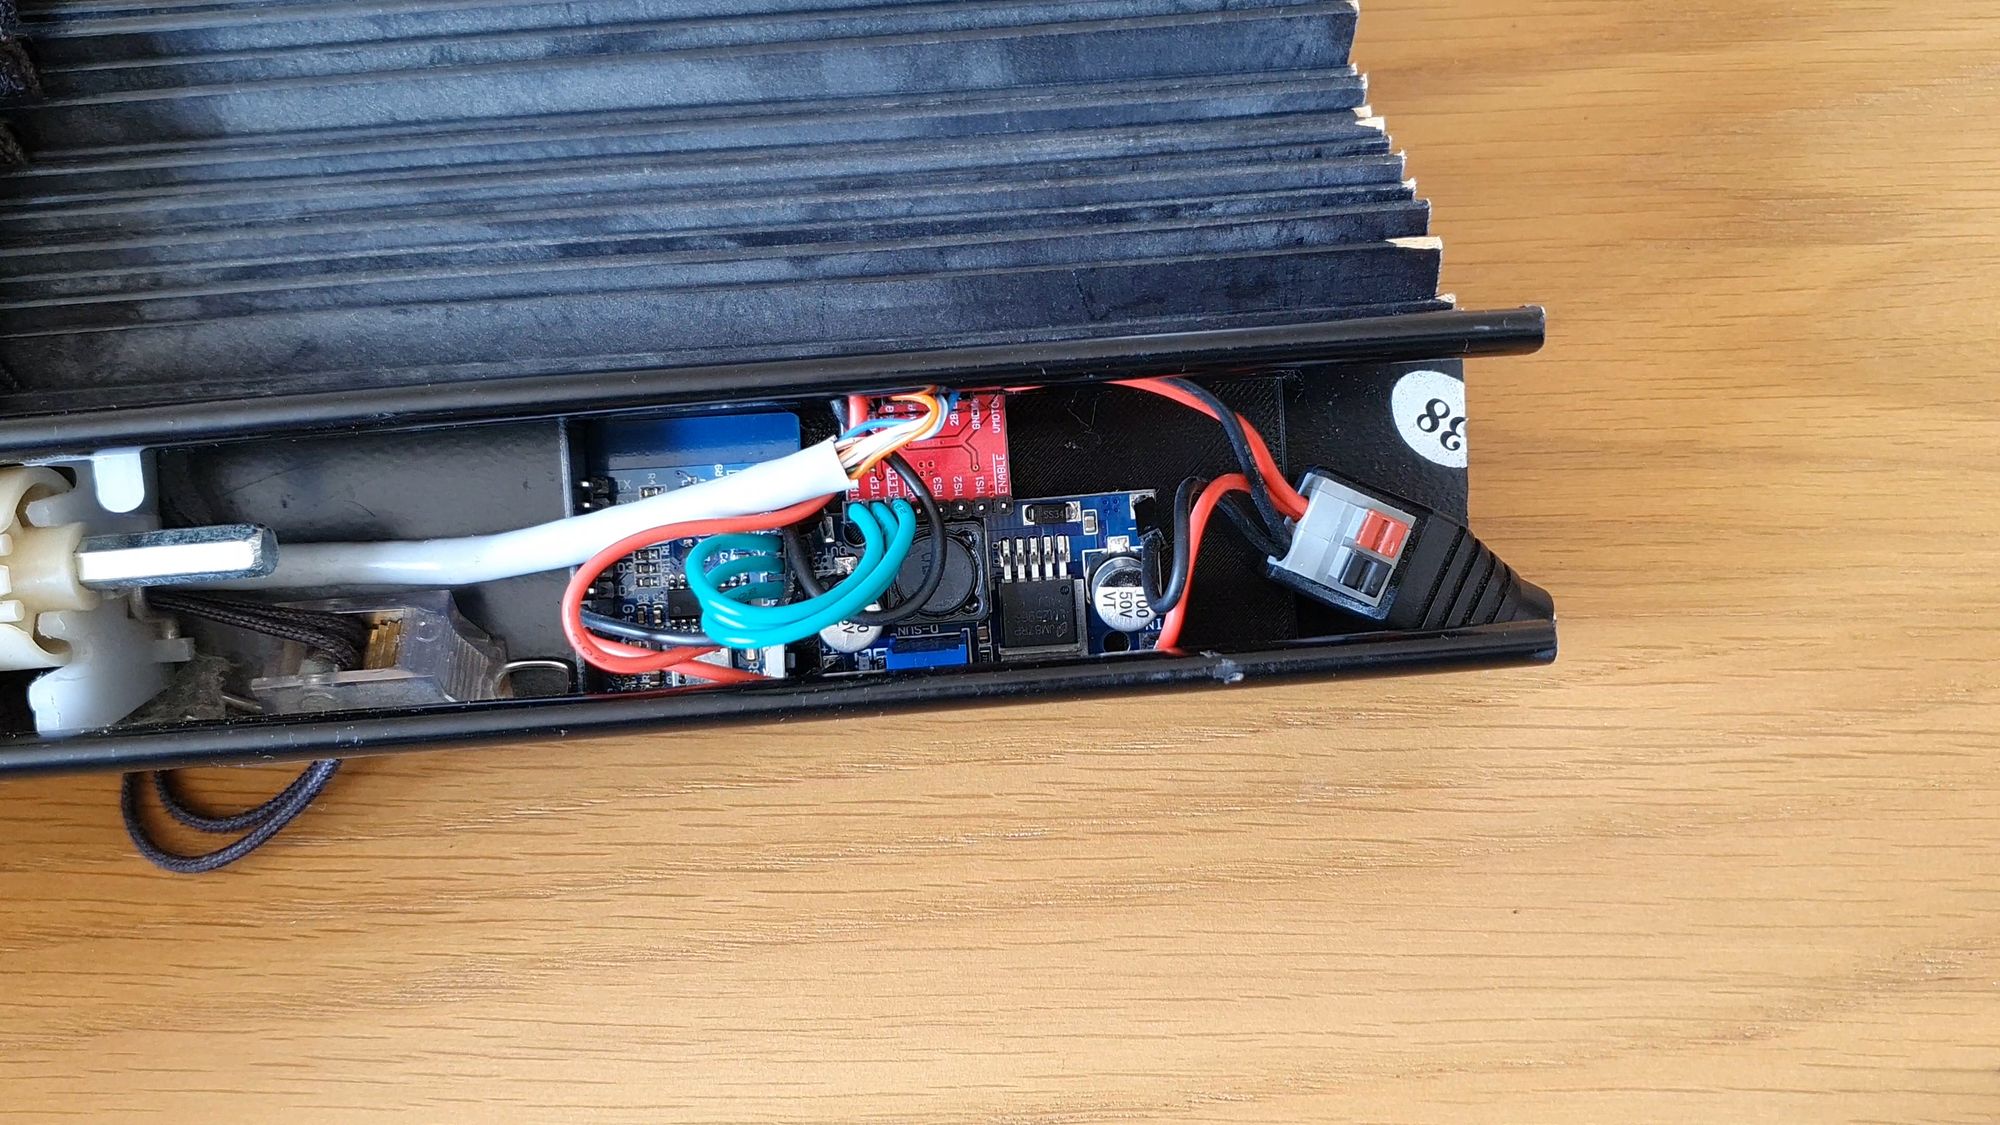
We are now in a position to slot the Wemos D1 mini, buck converter, driver board and barrel jack connector into the blind. Go ahead and do that now, then attach the cable from the stepper motor to the A4988 driver. It uses the pins A1/A2 and B1/B2 – make sure the orientation is correct as per the schematic above.
Once done, it should look like this:
Then plug in the power supply so that we can give it a test.
After adding to Home Assistant (Configuration > Integrations > Add > ESPHome) then test the up and down arrows for the cover. Ensure the motor moves freely in both directions.
Refitting and calibration
Refit the blind into its original position and plug in the power. Give it another test to ensure it works when the blind is refitted.
You will then want to “calibrate” the number of steps the motor makes to open and close. Put the blind into the position you want to be fully closed , either by hand or if not possible, you can change the close target in the code to get it fully closed:
close_action:
      - stepper.set_target:
          id: my_stepper
          target: 0 # Change to a positive or negative value such as -1000
Once fully closed, change it back to 0 if you wish. When the blinds boots up initially it will assume the start position is closed.
With the blind now fully closed, press the open action in Home Assistant. See how far it moves with the stock target of 6000. If you need it to move more, increase the target. Less movement you need to lessen the target:
open_action:
      - stepper.set_target:
          id: my_stepper
          target: 2000 # or 8000 for example
Figure out the exact target that will open the blind to the position you want. Then give it one final thorough testing to make sure the mechanism is operating correctly.
Automation ideas
Here are a couple of automation ideas that you can use with your cool new motorised smart blinds:
- Using the bed occupancy sensors, you can automatically open/close the blind on sleep/wake.
- Close the blind at a certain time of night
- Open the blind incrementally over a 15 minute time period to wake you up.
- Follow the sun open and closure.
Conclusion
Hopefully you managed to follow along to create your own DIY motorised smart blinds, or at least you get the idea of how I did mine. I really love mine, they’ve worked flawlessly since I built mine and they give me a little kick every time they operate.
So much so that I’m off to make motorised smart blinds for all the blinds in my house!