Creating Wake Up Sunrise Lights with Home Assistant
Start your day right with sunrise wake up lights using Home Assistant!


Intro
Being jolted awake by an alarm or a light suddenly switching on is not the best way to start your day.
So, why not try a more gentle morning wake up by gradually brightening your bedside table lights over a time period of your choosing?
This is supposed to more closely replicate natural light which the body's circadian system prefers and there are plenty of articles and studies out there about lights that follow circadian rhythm which I’m no expert on, however, I can tell you from my personal experience that I have found it a much nicer way to wake up in the morning - especially if I have been in a deep sleep!
Better yet, with Home Assistant, it's very easy to do!
Let's get started!
Scroll right the the bottom for the YAML code 👇🏼
How It's Done
Requirements:
- Light(s) in Home Assistant that support brightness control
- Errr...that's it!
Create an Input Helper
Firstly, we are going to create an input helper in Home Assistant which will act as our selectable alarm so that we can easily change the start time to be anything we want.
Head to Settings, Devices and Services and select Helpers from the tab.
Add a new helper and select the "Date and/or Time" helper from the list. Give your alarm a name, set an icon and then select "time" as the input:

Next, if you want to, you can add this to your Home Assistant Dashboard so you can easily control the start time.
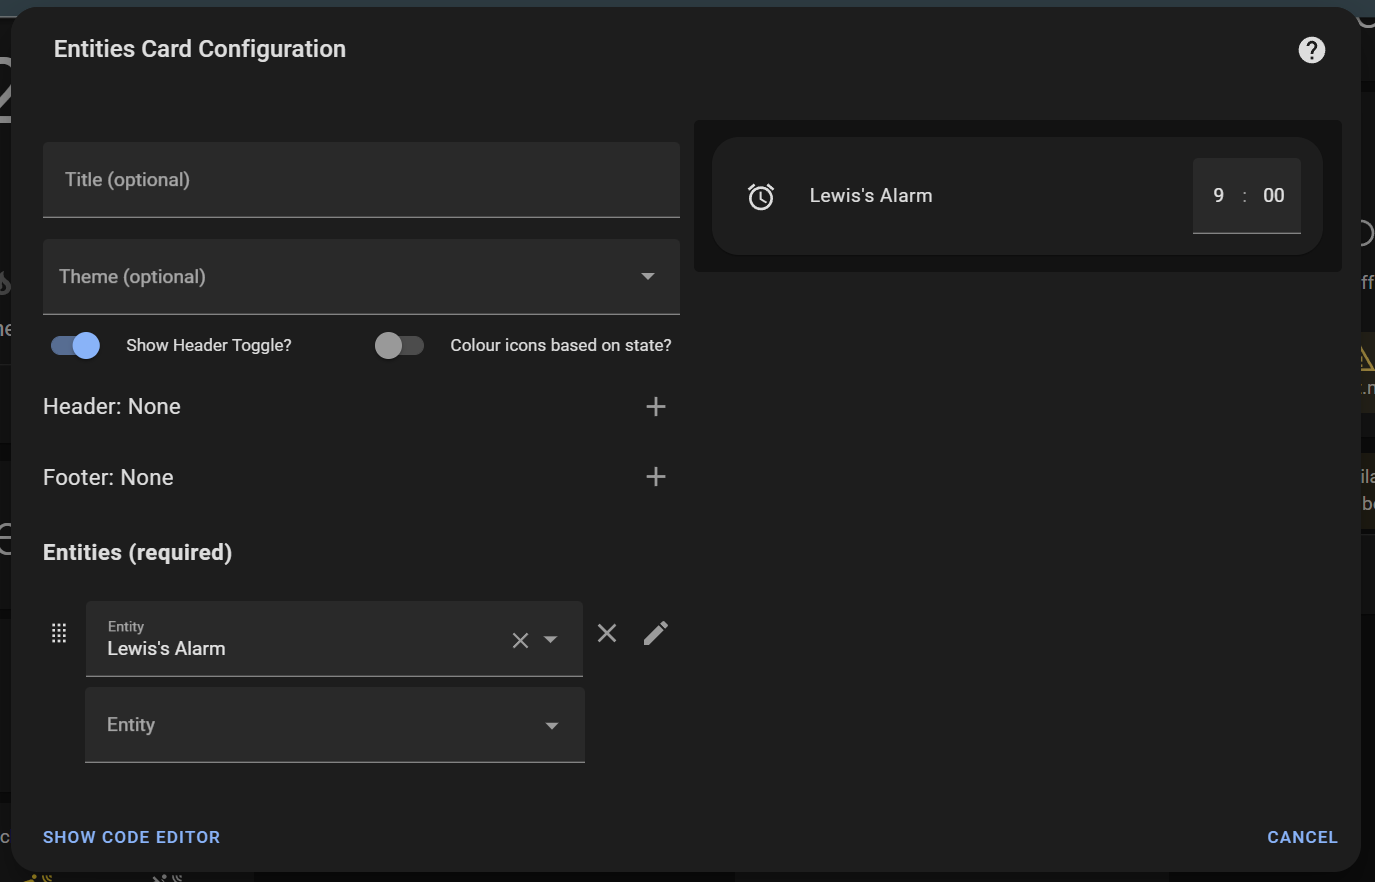
Head to your dashboard, hit the 3 dots in the top right hand corner and select edit dashboard. Add a new card and select the "Entities" card.
Select your alarm input helper from the list and you should have something that looks like this:
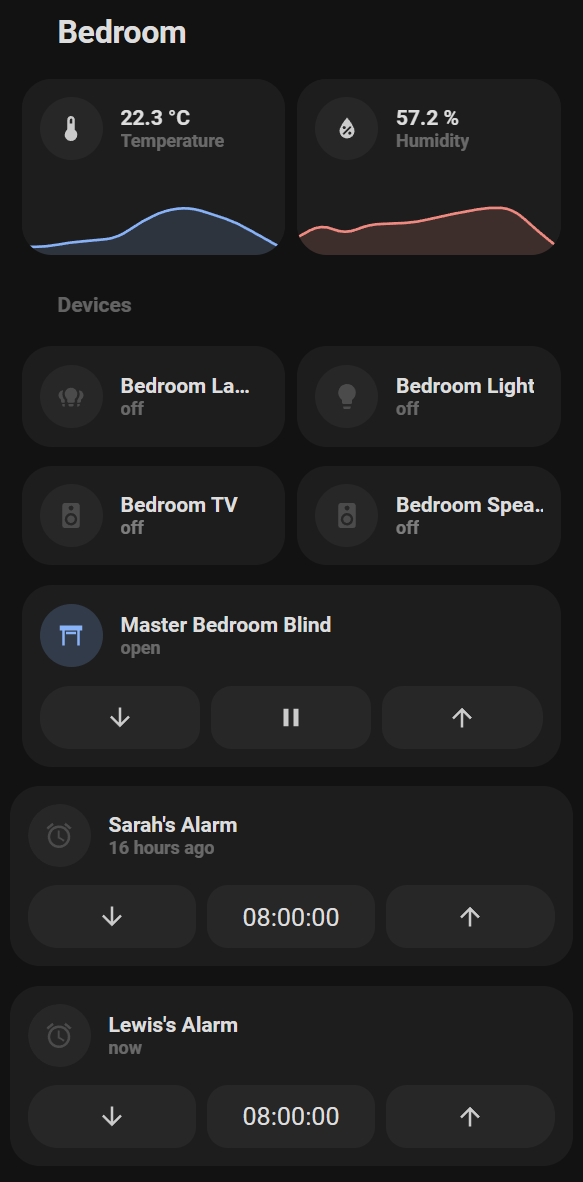
And with some dashboard styling, it looks like this:
The Automation
With our alarm now create, we can do the automation which will run the lights.
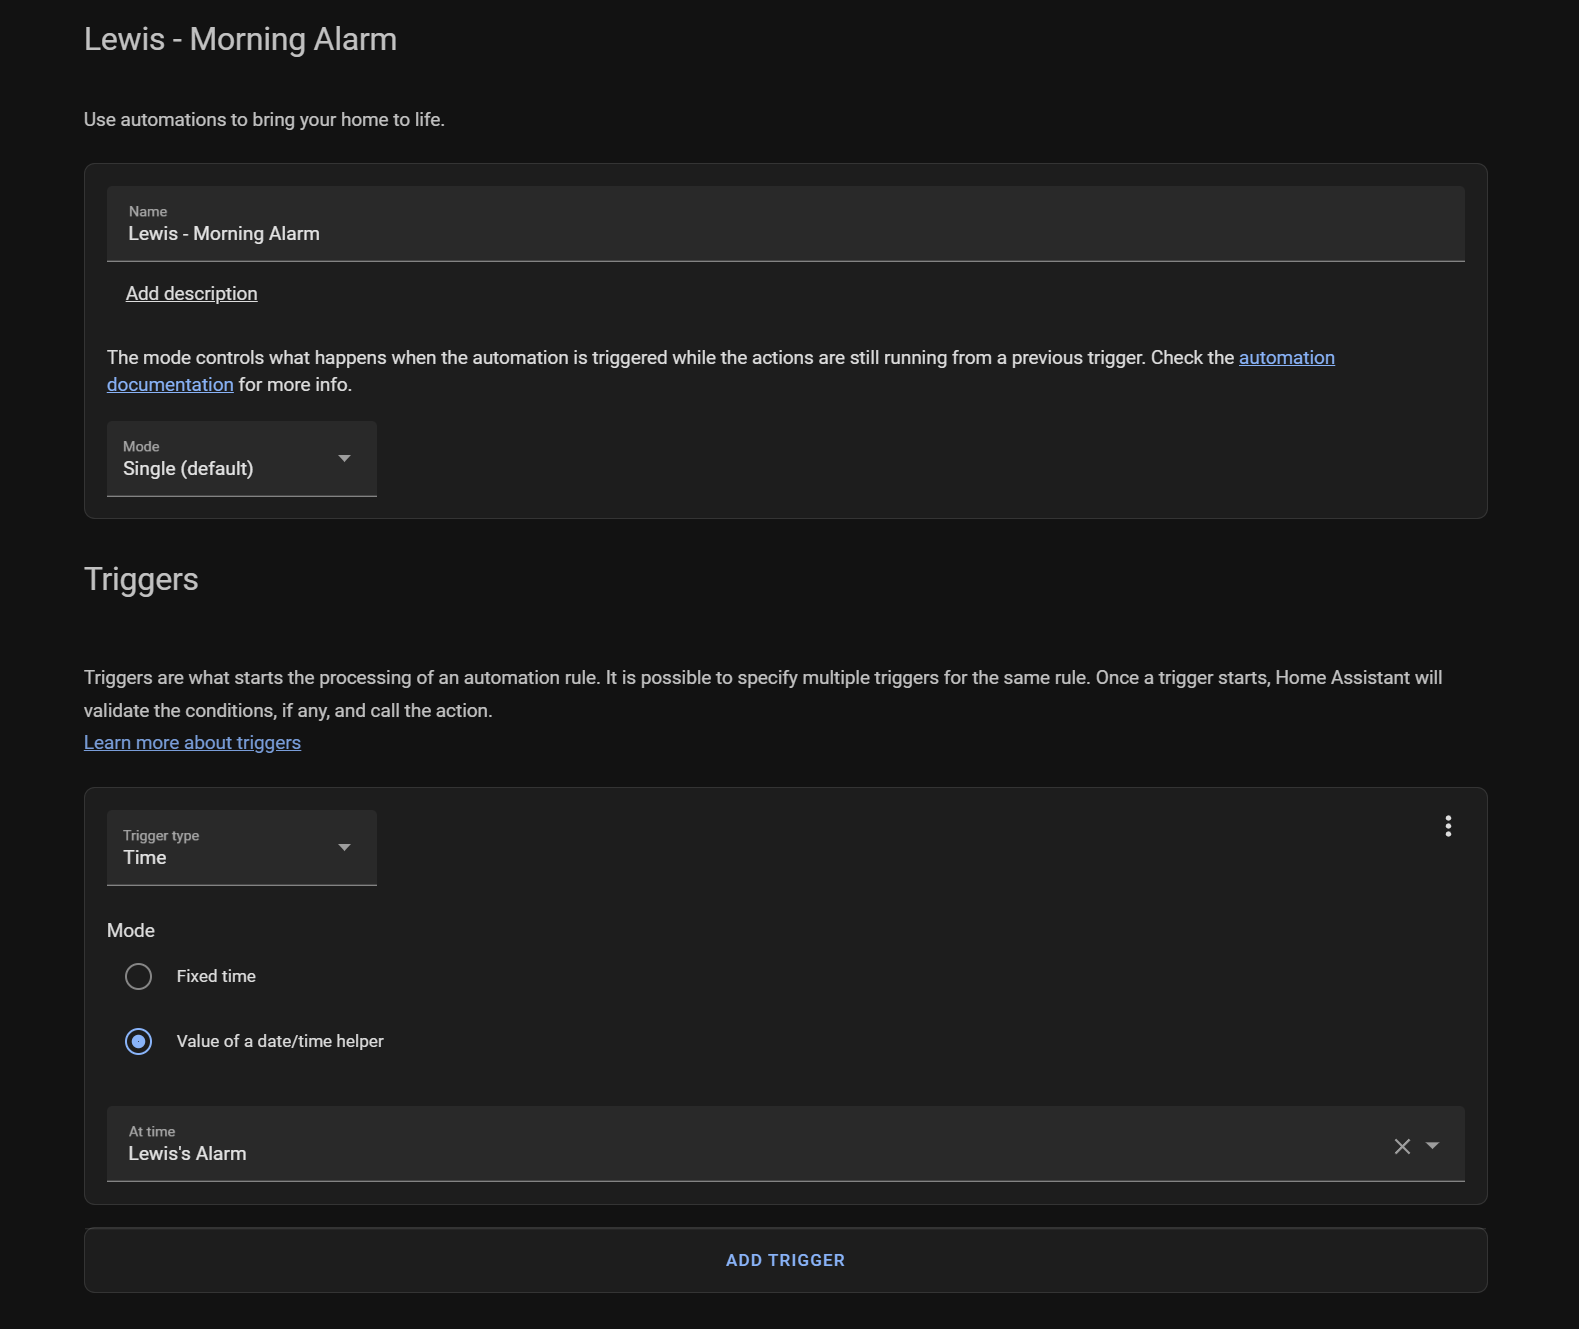
Go to Settings, Automations & Services and create a new automation.
Give your automation a name, and then in the trigger section, select "time" as the type. Then choose "Value of a date/time helper" and select your input helper from the dropdown:
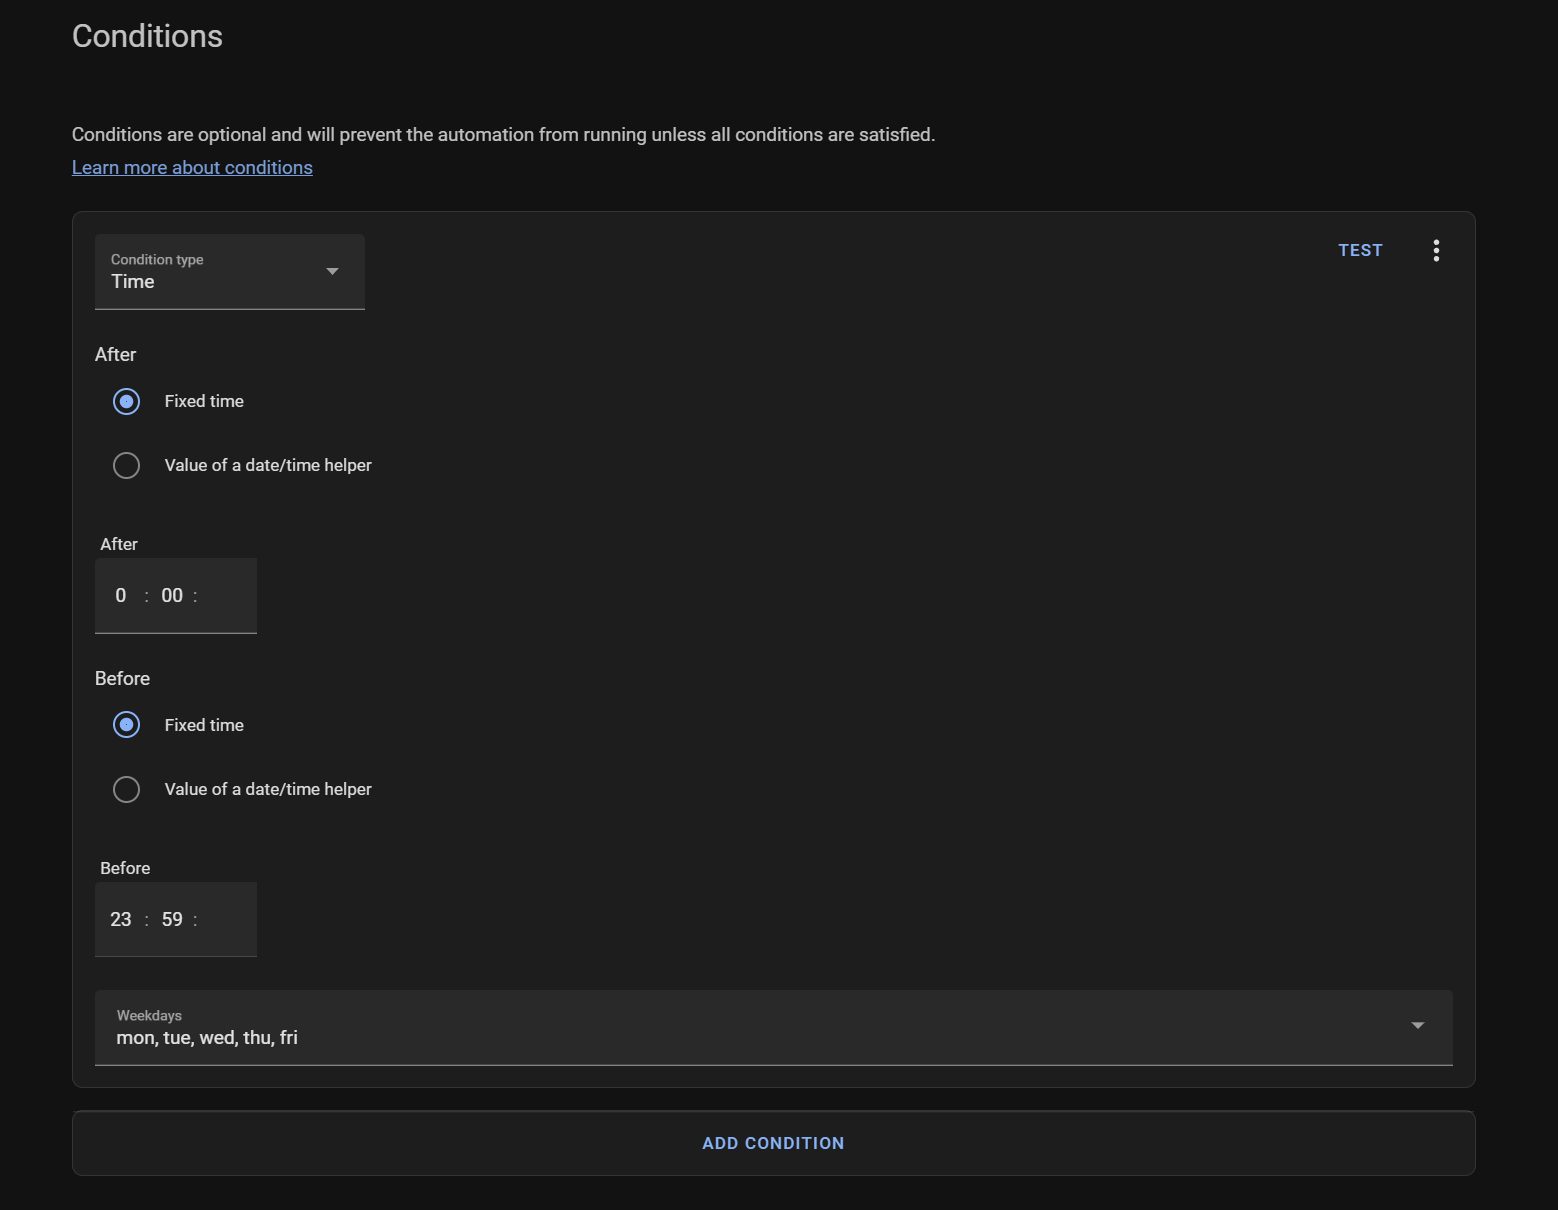
Next, if you want to, you can also add a condition to only run on weekdays:
Finally comes the action - I'm not sure if this is the intended behaviour or a bug, but I had to create 3 actions; the first action turns the light on at 1% brightness, the second action is a slight delay, and the final action transitions the light from 1-100% over a time period. Calling it from off to 100% didn't work for me - again this might be the intended behaviour.
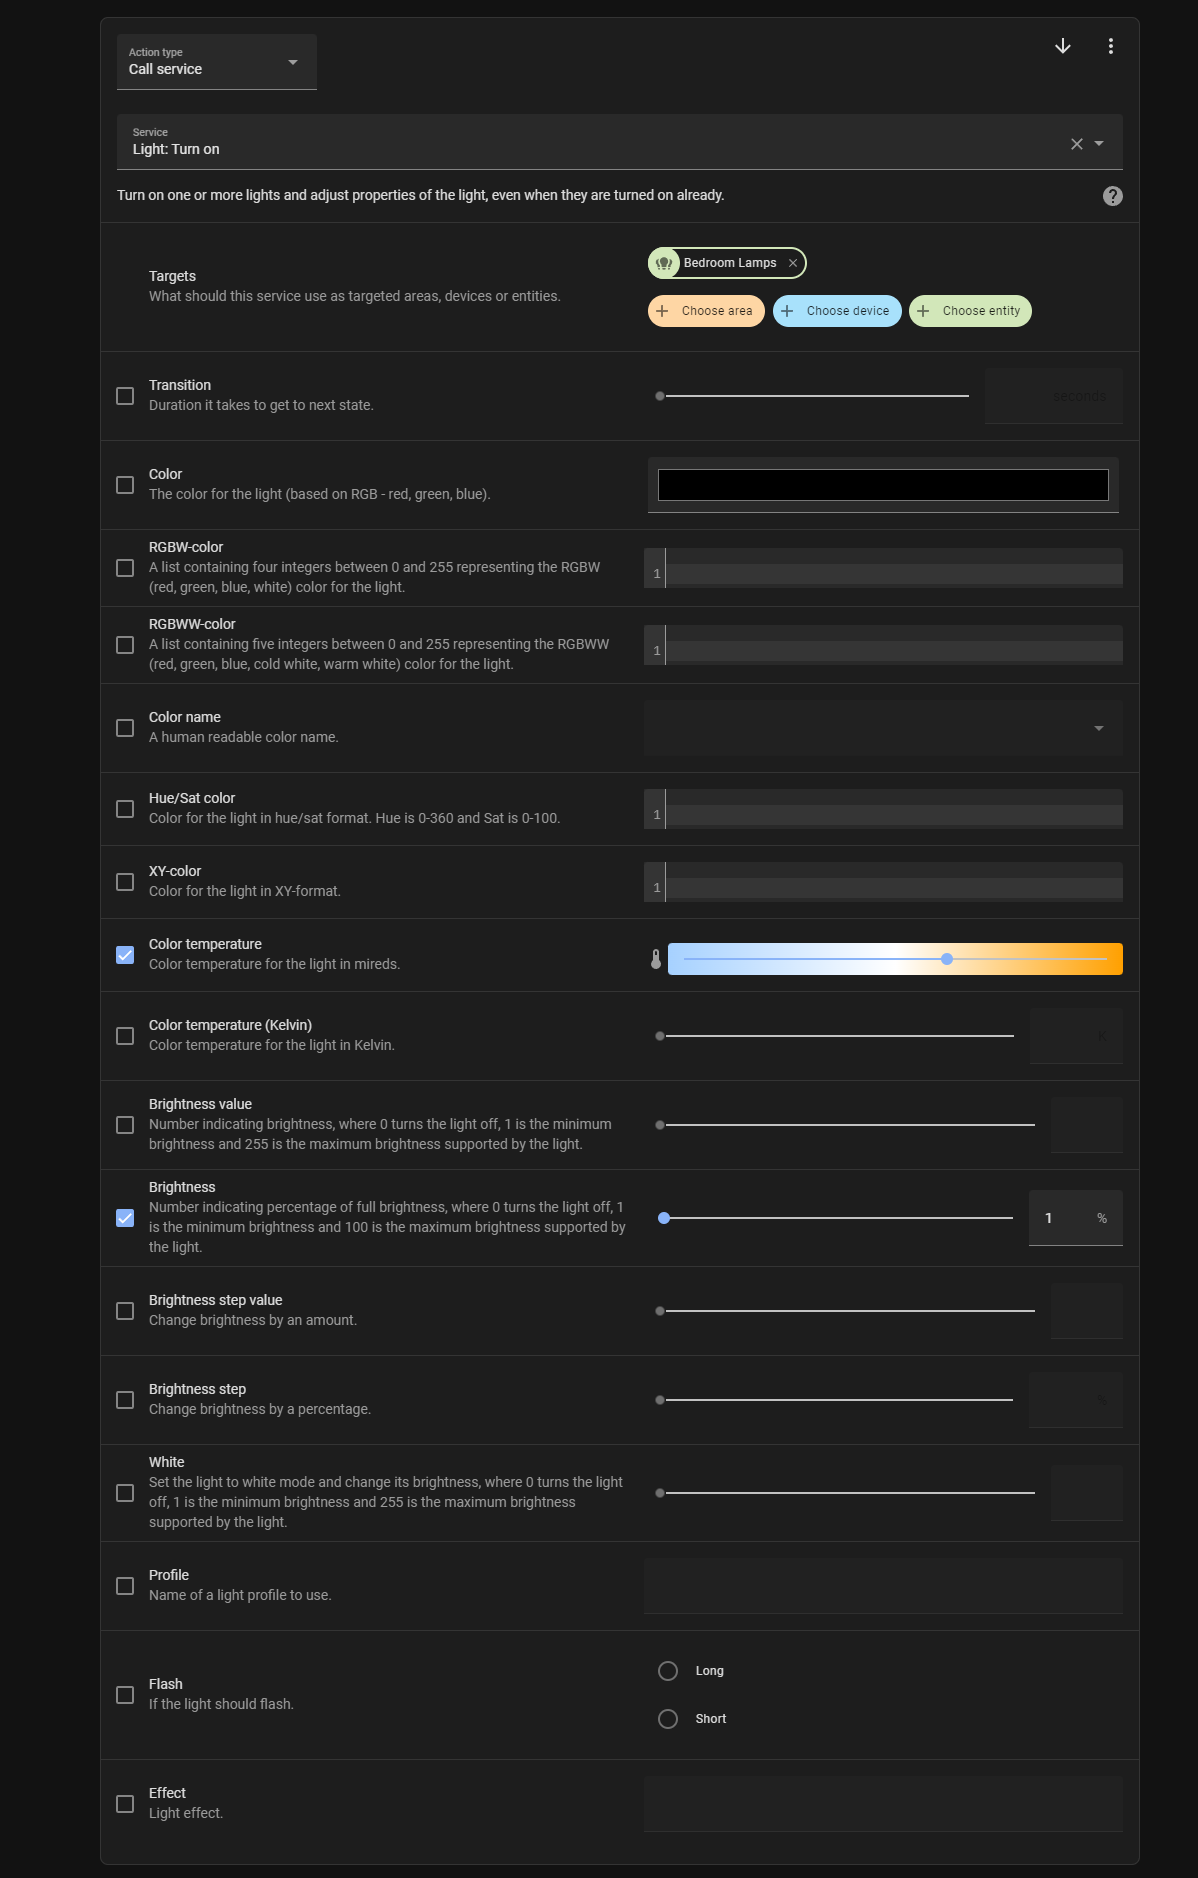
Create the first action and select call service from the drop-down, then as the service choose "Light: Turn On". Select the light or lights you want to control, select the colour temperature you want and set the brightness level to 1%:
And then create another action that calls a short delay:

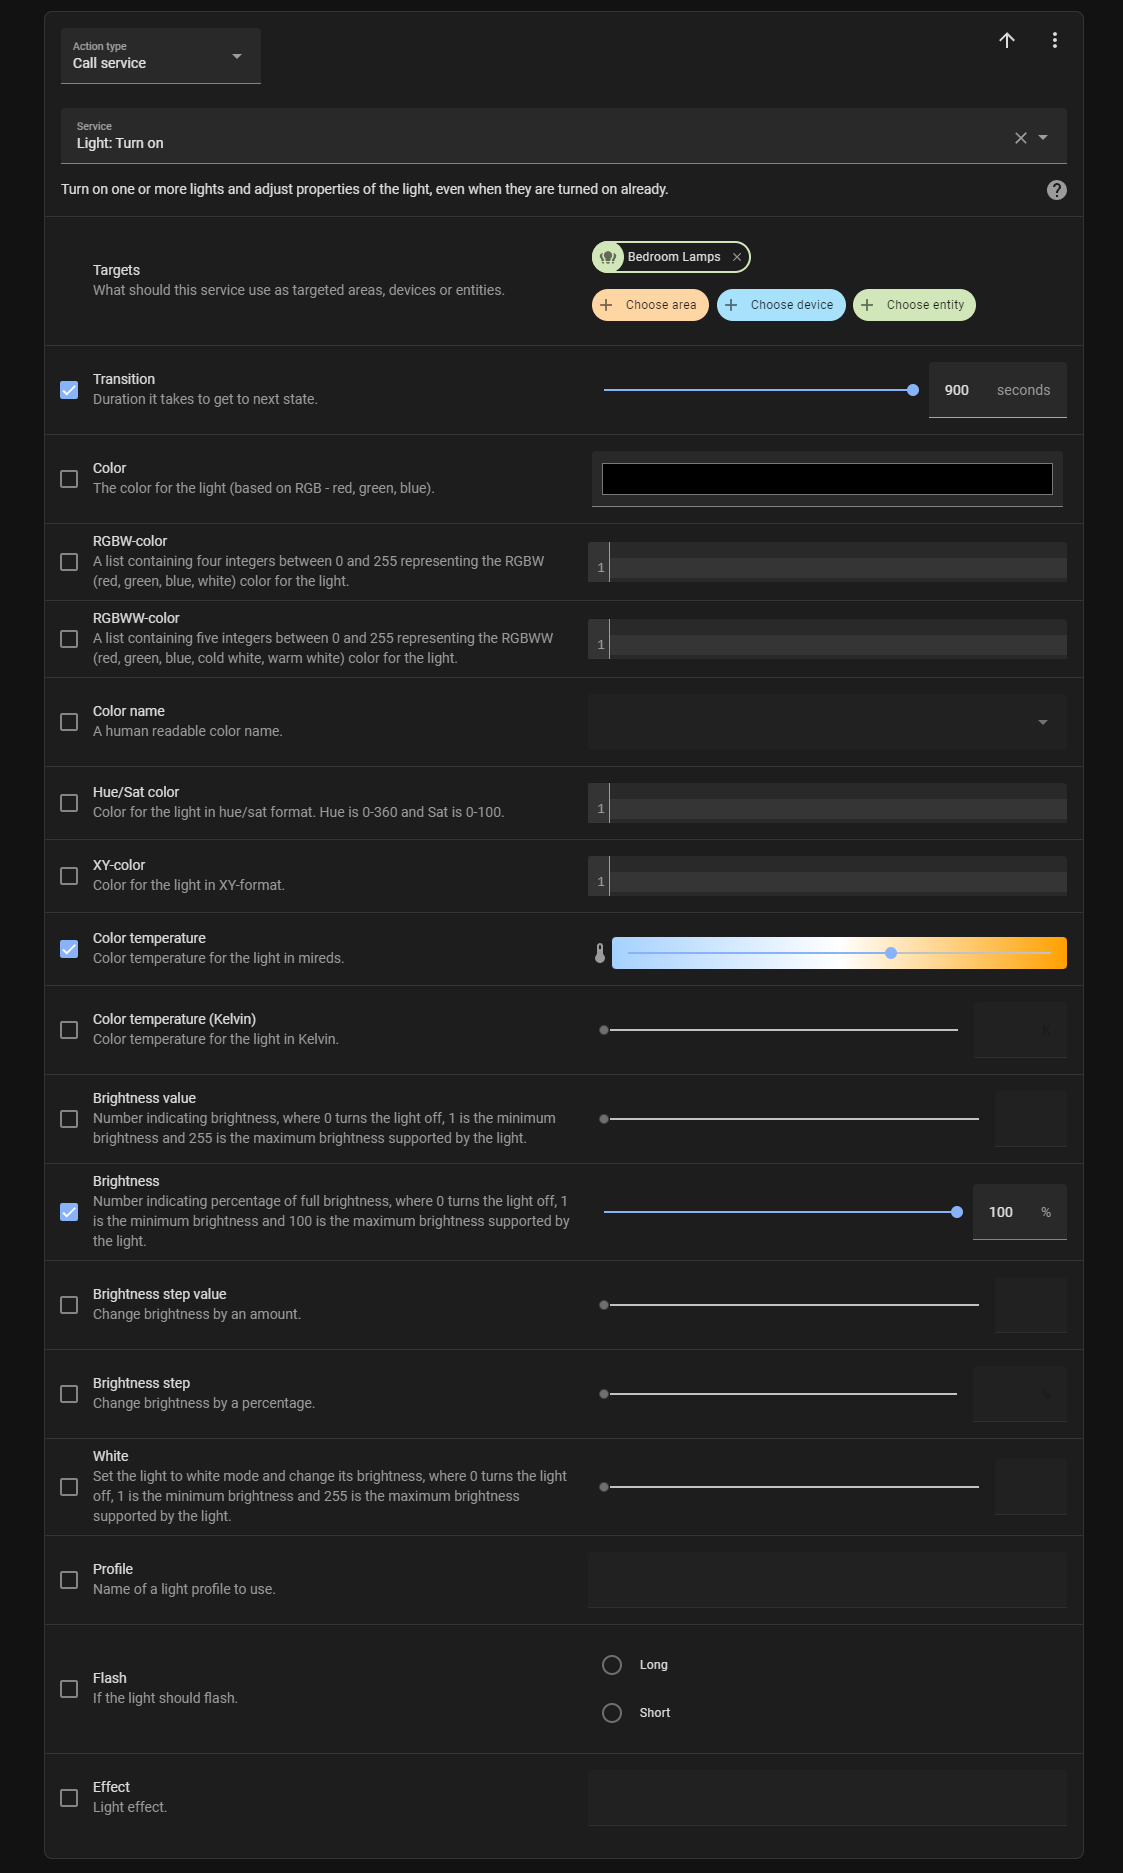
And then the third action again uses the "Light: Turn on" service, but this time, the brightness is set to 100% and we use the transition setting which gradually brighten the lights over the set time:
And that is it!
Now this automation will run at the time you have set, and when it does, your lights will gradually brighten from 0 to 100% over the time given.
Here is the automation code for those who want it:
alias: Lewis - Weekday alarm
description: ''
trigger:
  - platform: time
    at: input_datetime.lewis_s_alarm
condition:
  - condition: time
    after: '00:00'
    before: '23:59'
    weekday:
      - mon
      - tue
      - wed
      - thu
      - fri
action:
  - service: light.turn_on
    target:
      entity_id: light.bedroom_lamps
    data:
      color_temp: 369
      brightness_pct: 1
  - delay:
      hours: 0
      minutes: 0
      seconds: 2
      milliseconds: 0
  - service: light.turn_on
    data:
      transition: 900
      color_temp: 369
      brightness_pct: 100
    target:
      entity_id: light.bedroom_lamps
mode: single