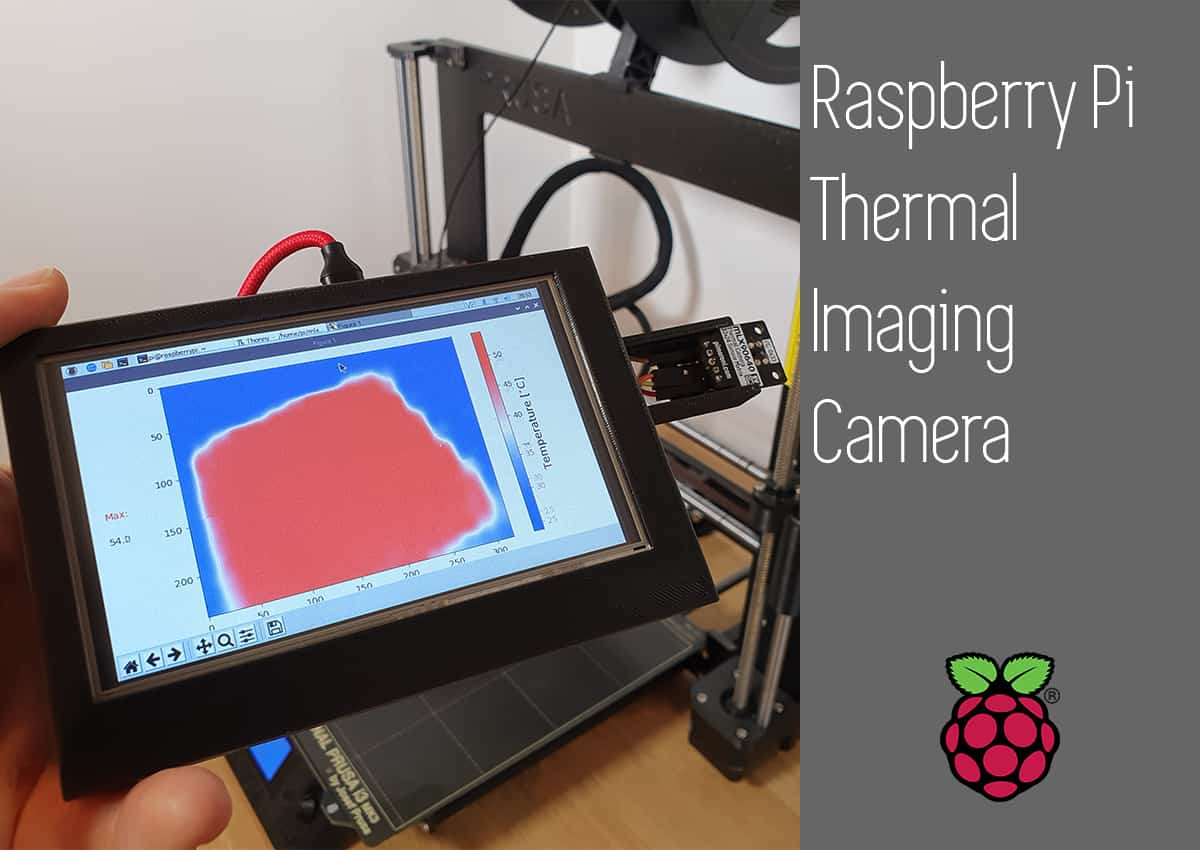
Building a Raspberry Pi Thermal Imaging Camera - MLX90640 guide

In today’s current global situation, thermometers and thermal cameras are more in demands probably than ever before. Here in the UK, many of the shops and restaurants have started taking the temperatures of customers at the door before allowing customers to enter the premises. This got me thinking, is there a better way to do this that doesn’t require human interaction?
I also realised I hadn’t done a Raspberry Pi project here yet either, which is absolutely not acceptable given how much I use the Raspberry Pi! So definitely something I had to quickly rectify!
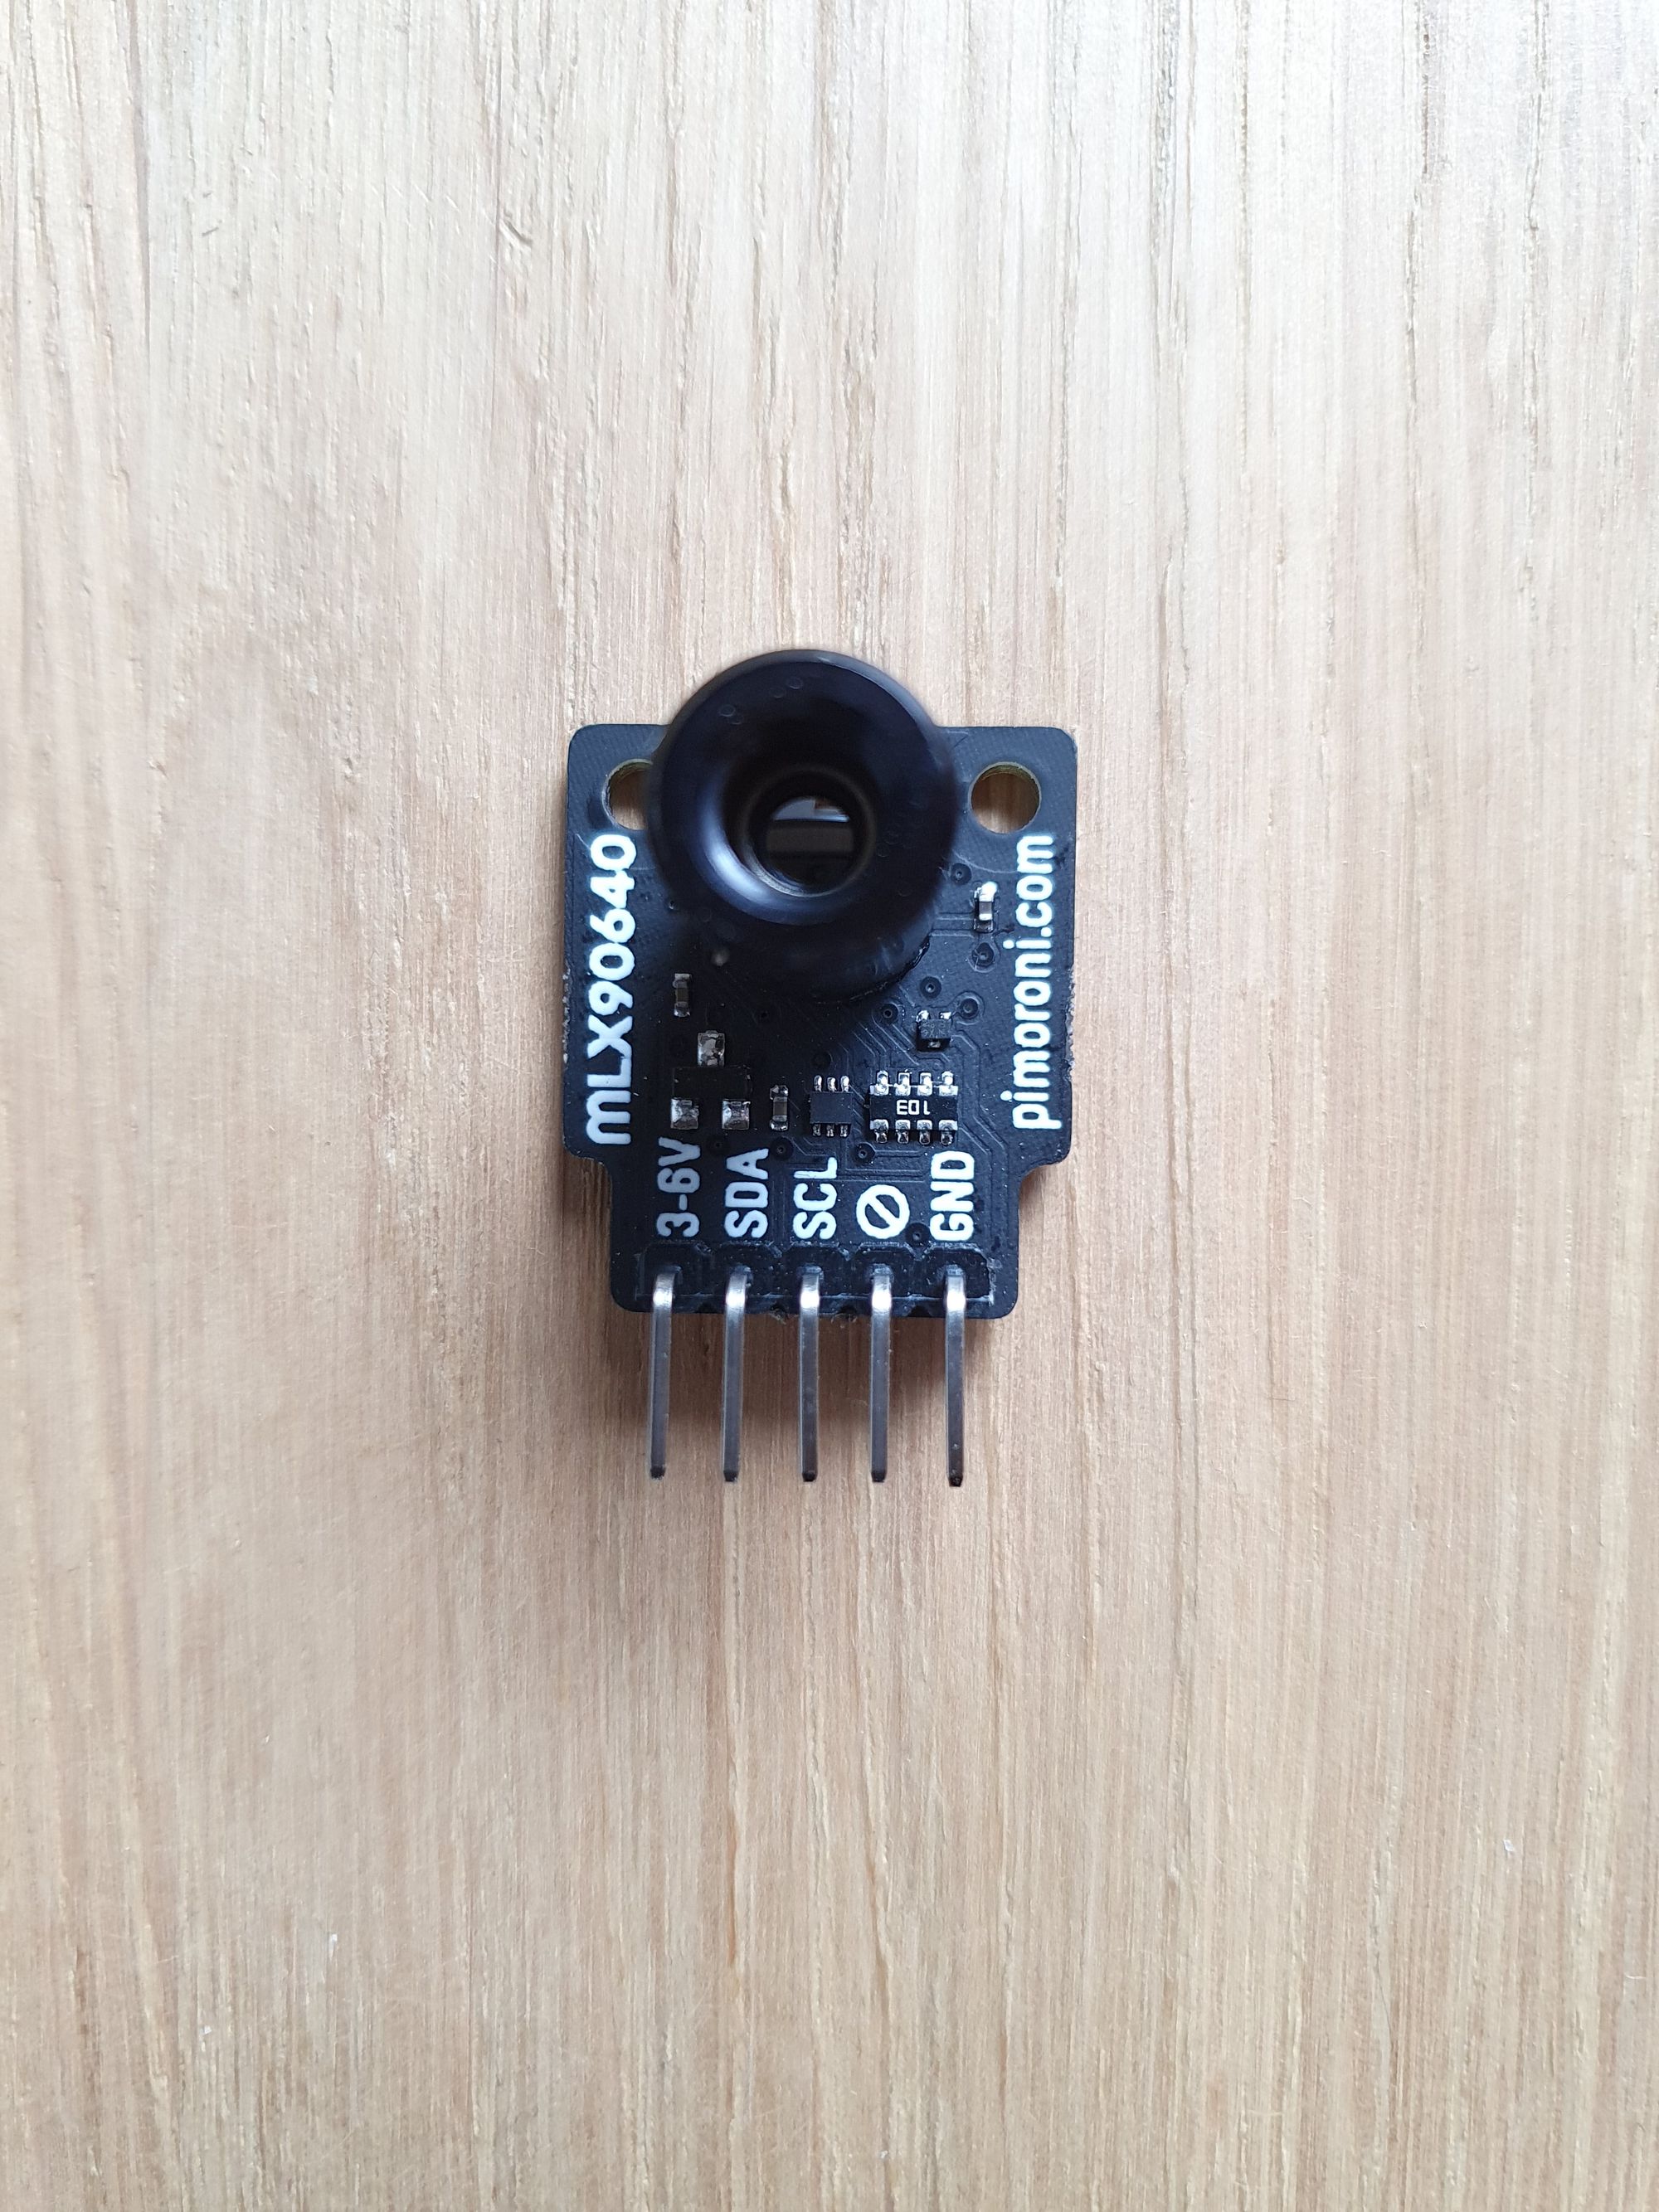
That’s when I came across the MLX90640 – a thermal imaging camera from Melexis – that uses the i2c interface, making it perfect for use with the Raspberry Pi.
The MLX90640 features a 32×24 array of thermal sensors, can operate from -40 degrees Celsius to 300 degrees Celsius, and is accurate to within 1 degree. It’s also very compact, which ties into my other objective.
Making something portable, I wanted to be able to take this around and use it without being tied down to finding a power plug. This whole unit actually runs from a portable battery bank. In my (limited!) testing, I was able to get around 2 hours of use from a 10000Mah battery bank with the camera running.
Let’s get started!
Video
Parts List
- Raspberry Pi 4 – I used a 3B for this as I had one around. The 4 should be capable of more FPS.
- 5 inch touch display – 800×480 resolution
- MLX90640 – I’m using the Pimoroni one, some sellers have seriously cranked the price on these, do not pay over the usual price. For reference, mine was £50/$55
- Right angled header connections
- DuPont wires
- 3D printer – If you want to print the enclosure
Note if you are struggling to find the MLX90640, try these alternate links to The Pi Hut, Mouser UK and Mouser US
Enclosure
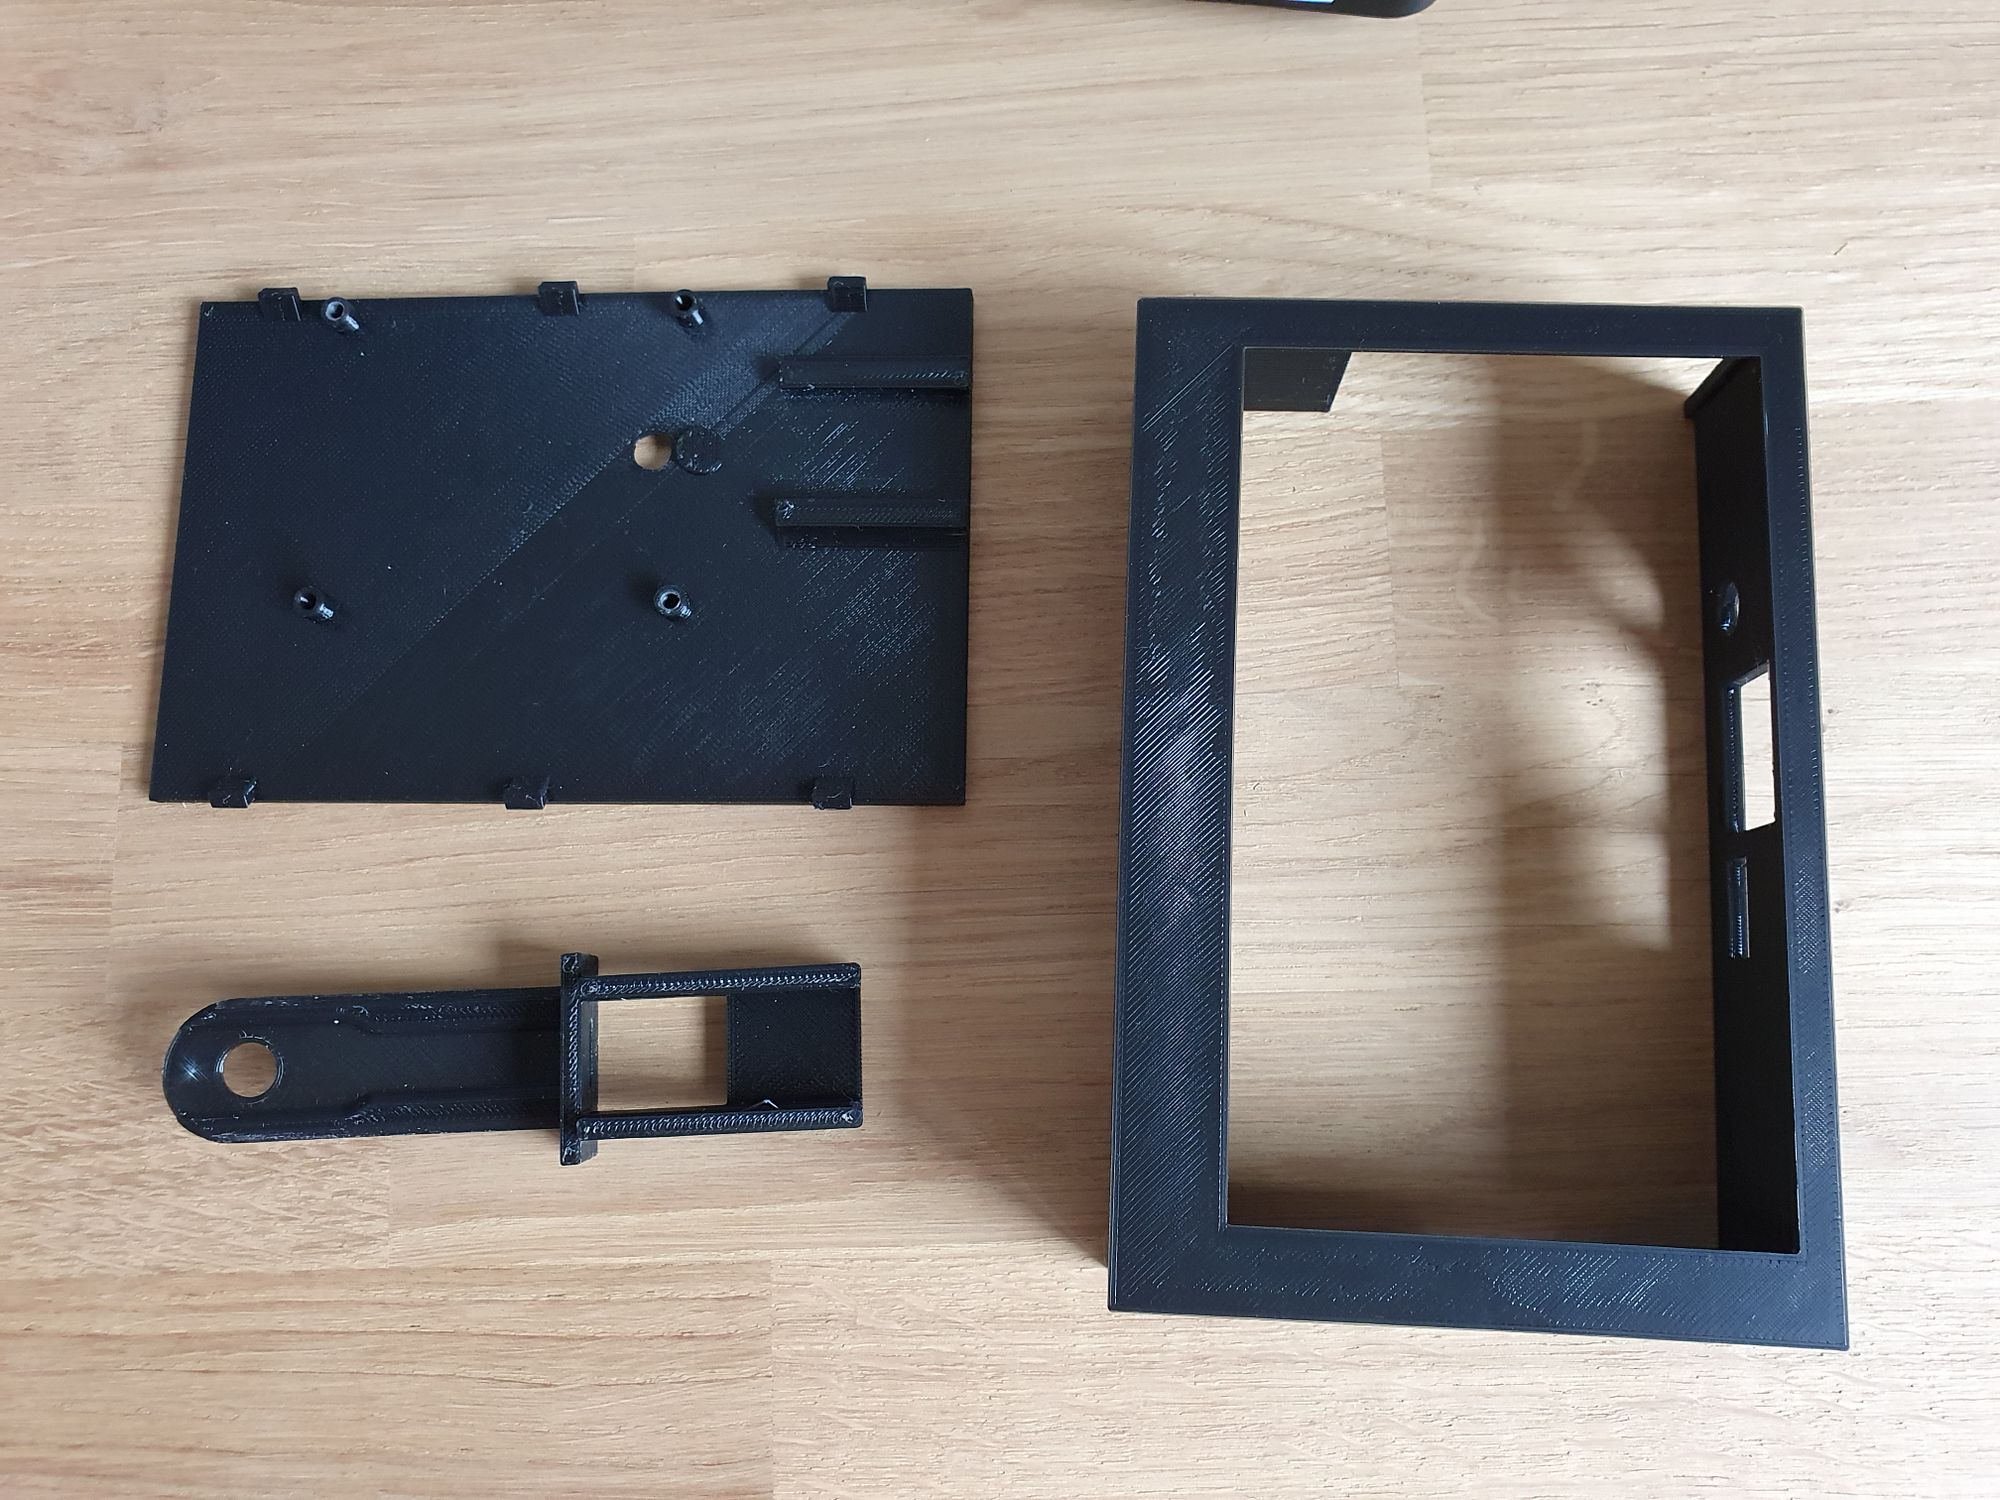
I would start by printing the enclosure to save a little time whilst working on the hardware and software.
Head over to the Thingiverse and print the base, lid and camera clip. It’s worth noting that this case can actually be used as a standalone case without the camera if you so wish! Here are what the 3 parts look like:
Hardware
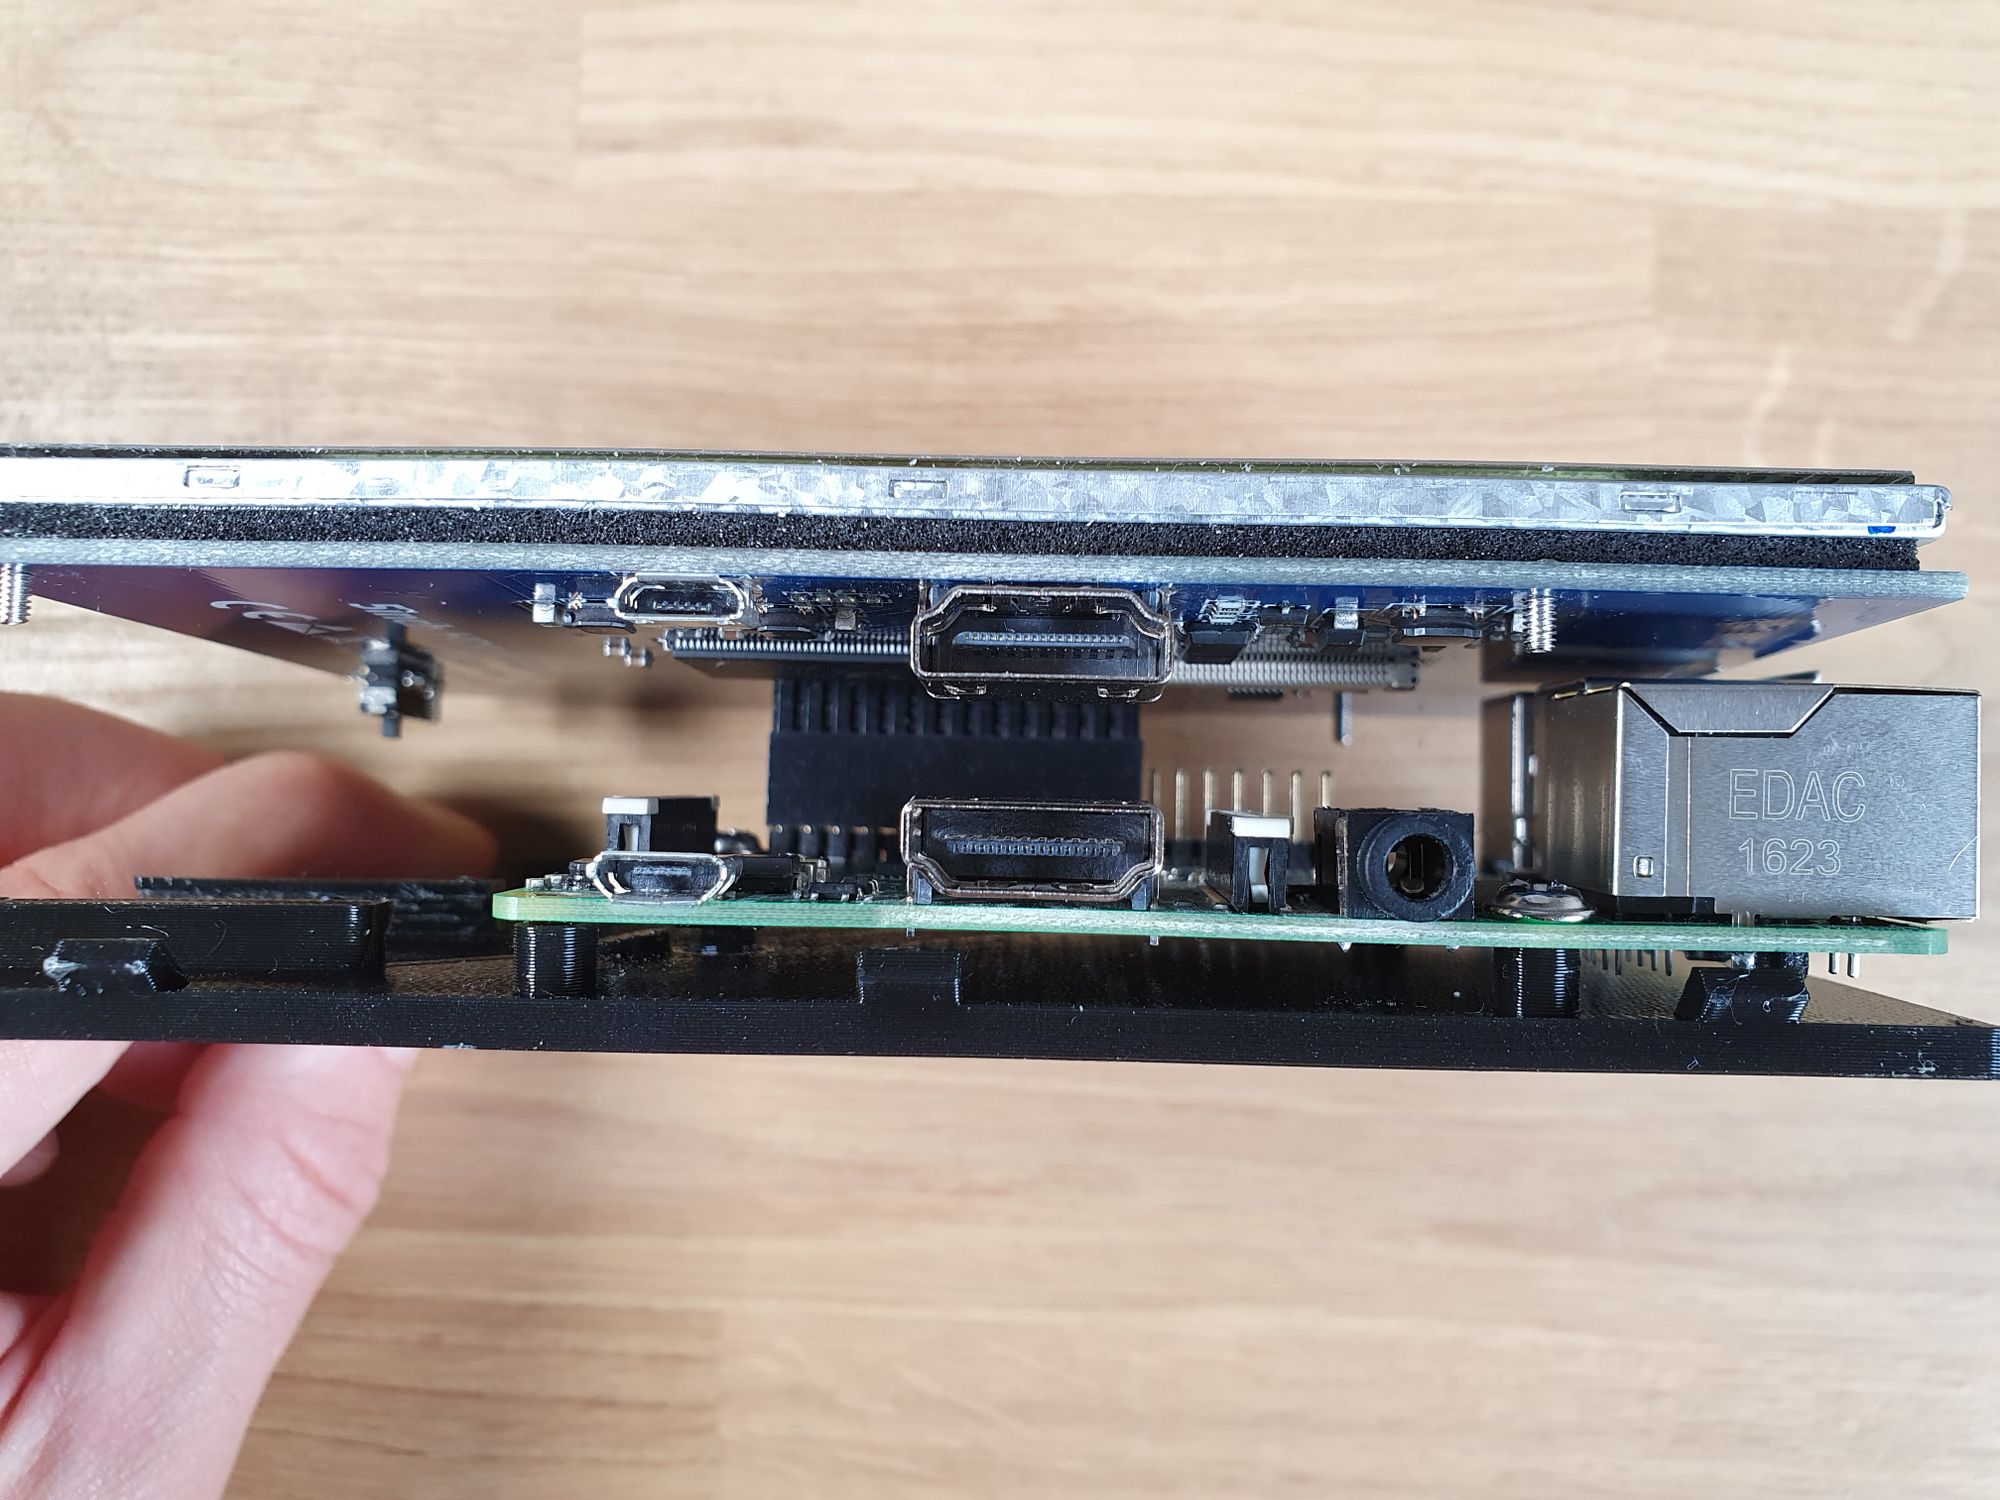
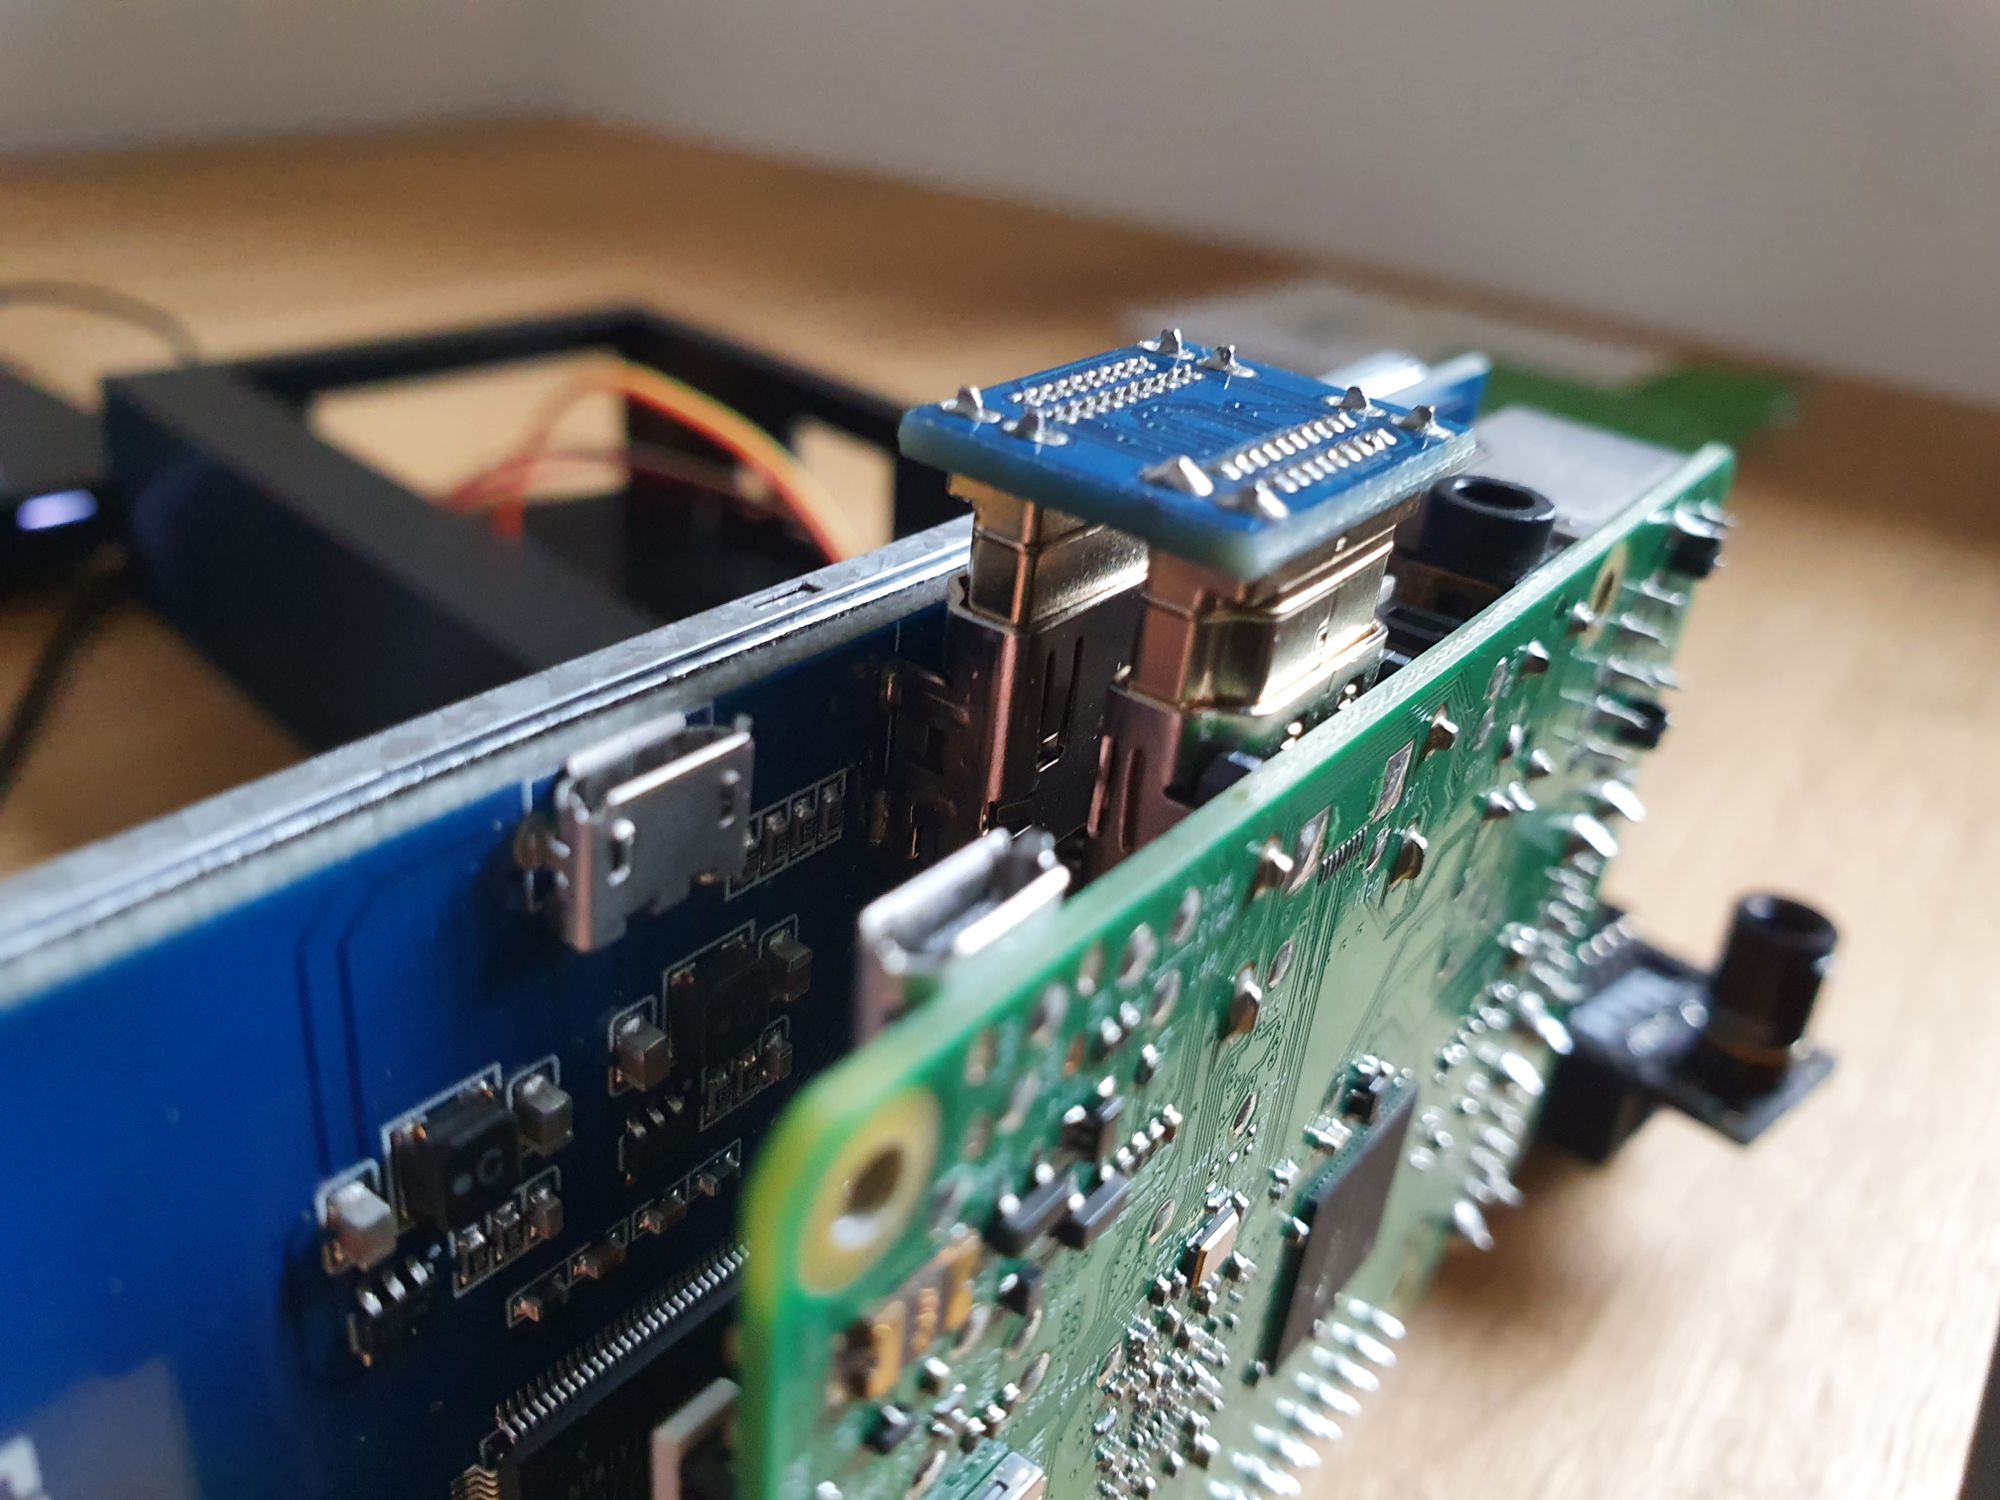
First connect the display to your Raspberry Pi by pushing it onto the pin header. You’ll know you have it right when the HDMI slots line up, and you can then connect the HDMI bridge:
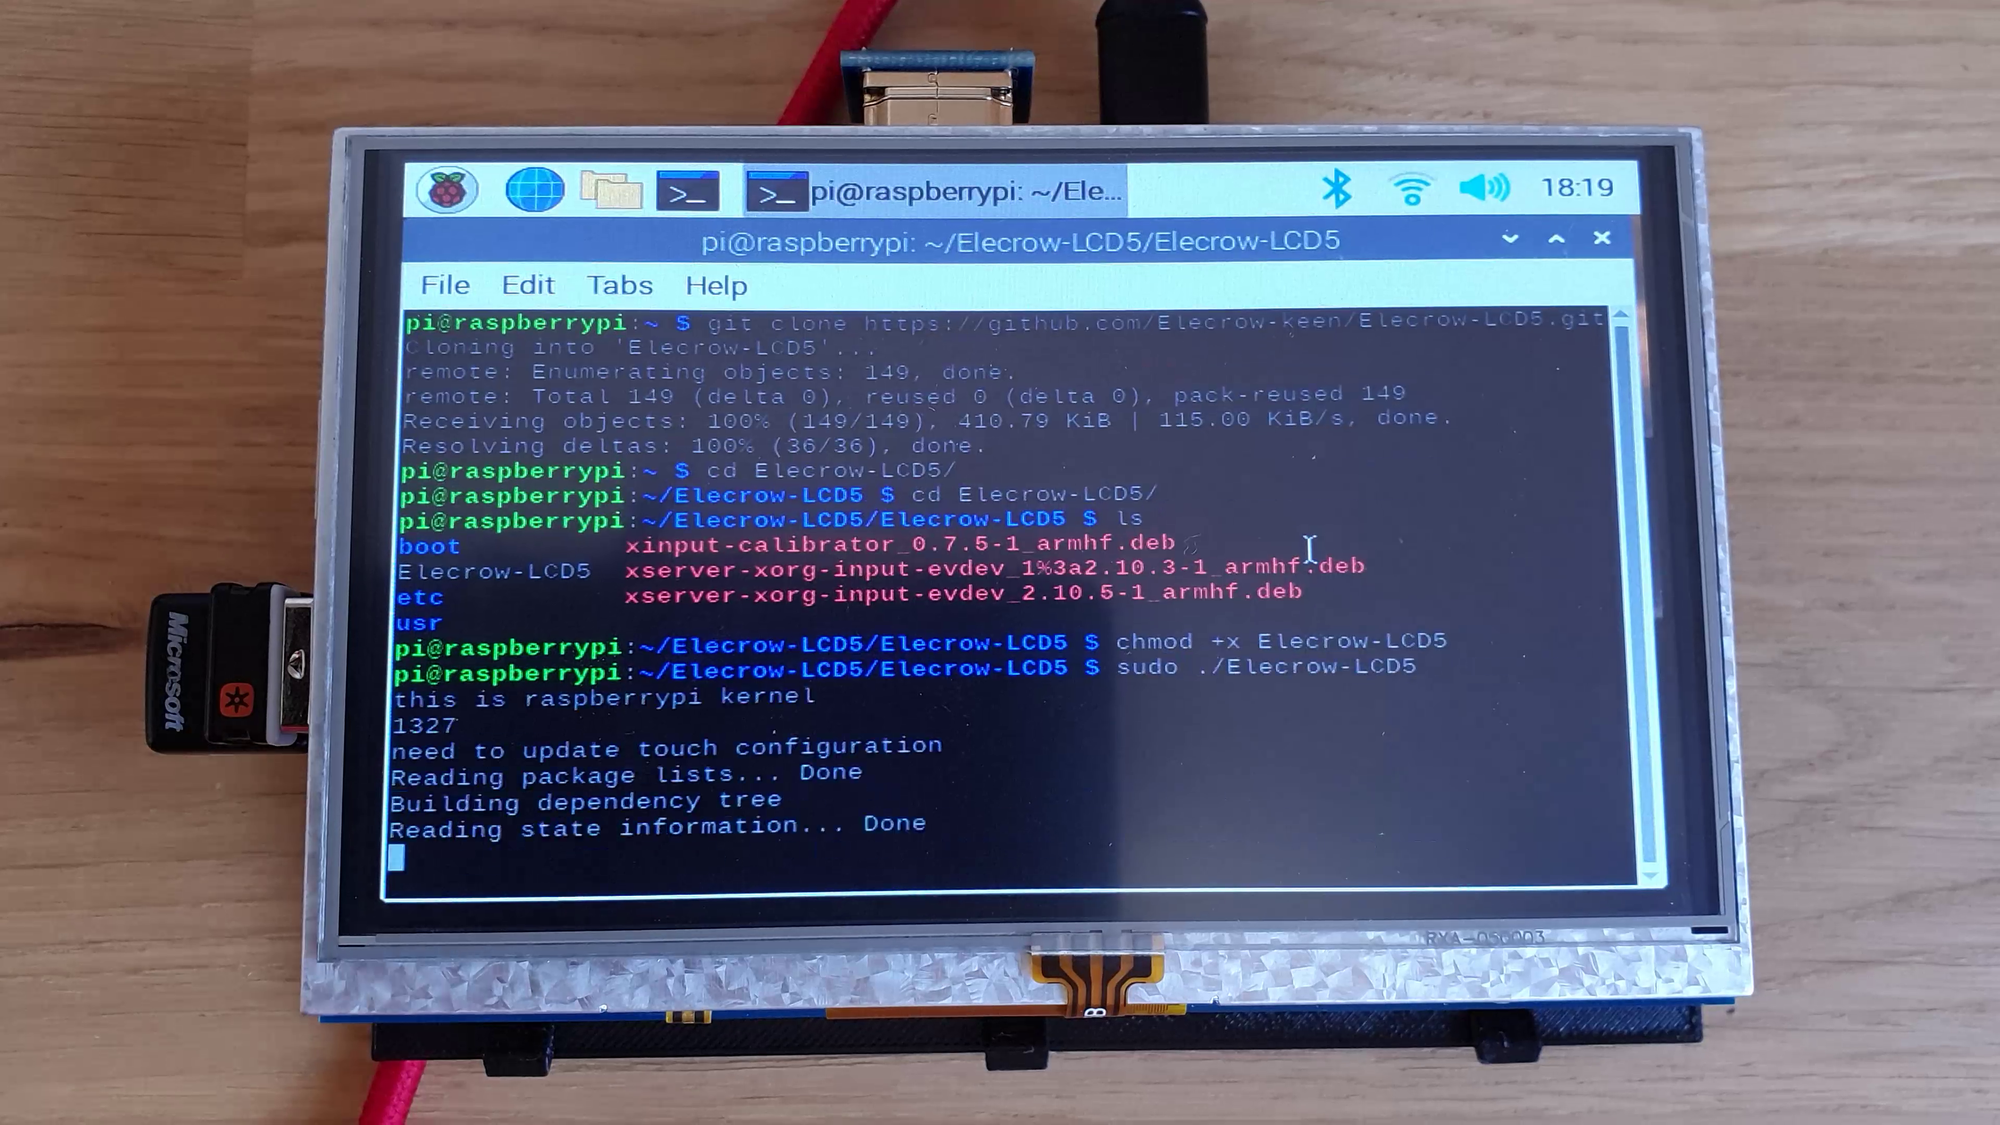
Boot the Pi up so that you can install the drivers required for your display, you’ll find the link for these in the manual of your particular model of display. I’m using an Elecrow display and I installed the display like so:
Power the Raspberry Pi back off for now.
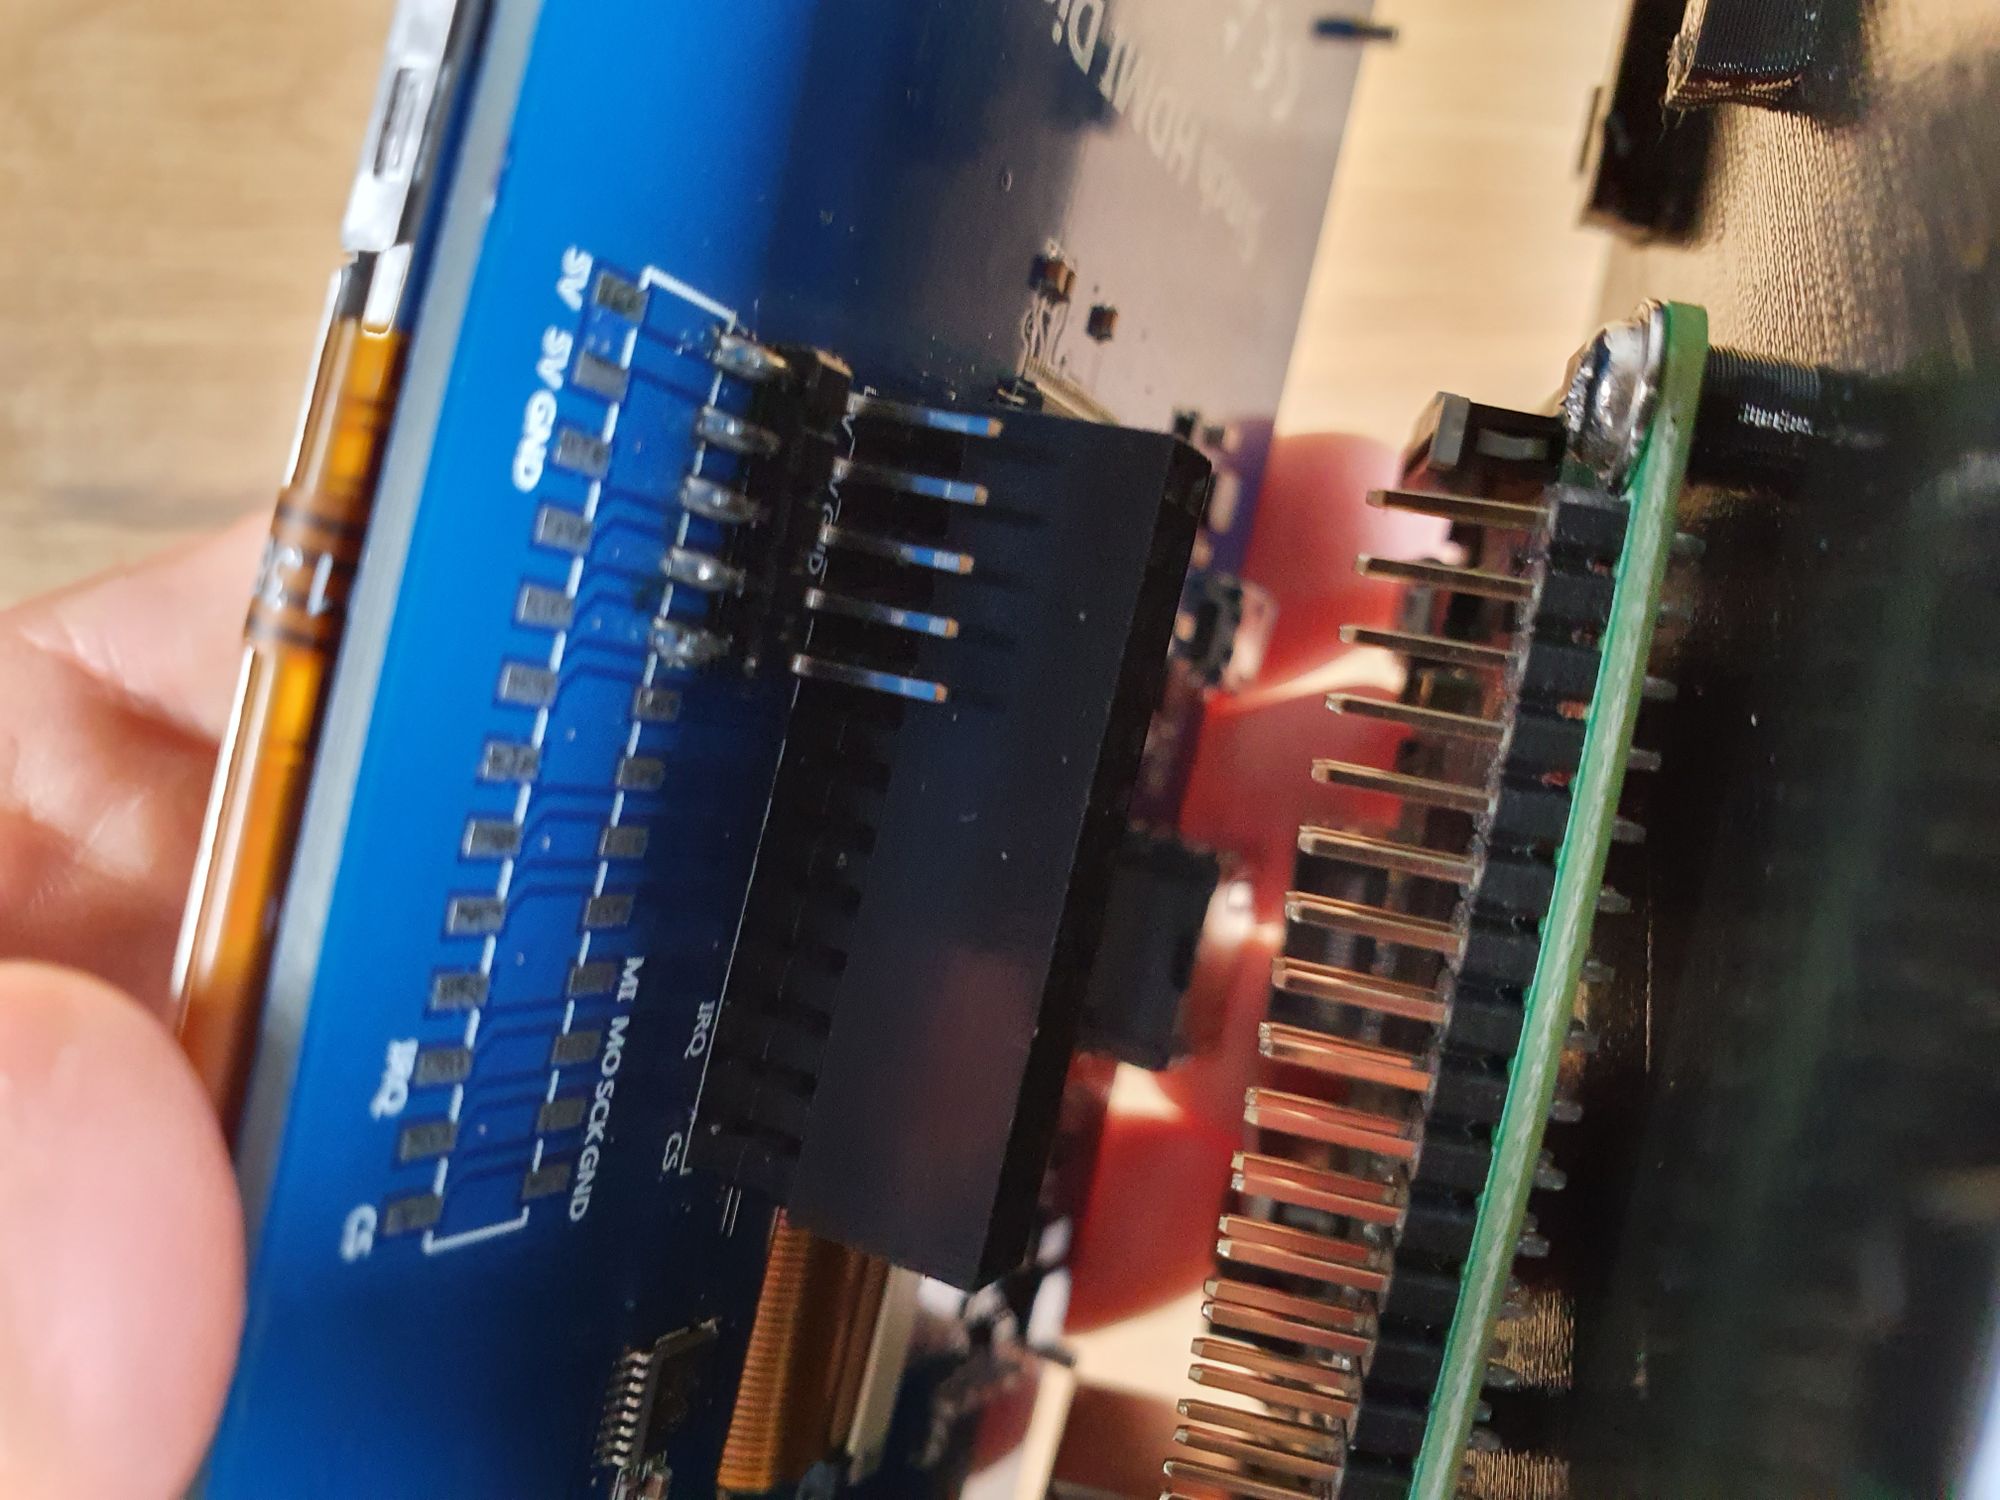
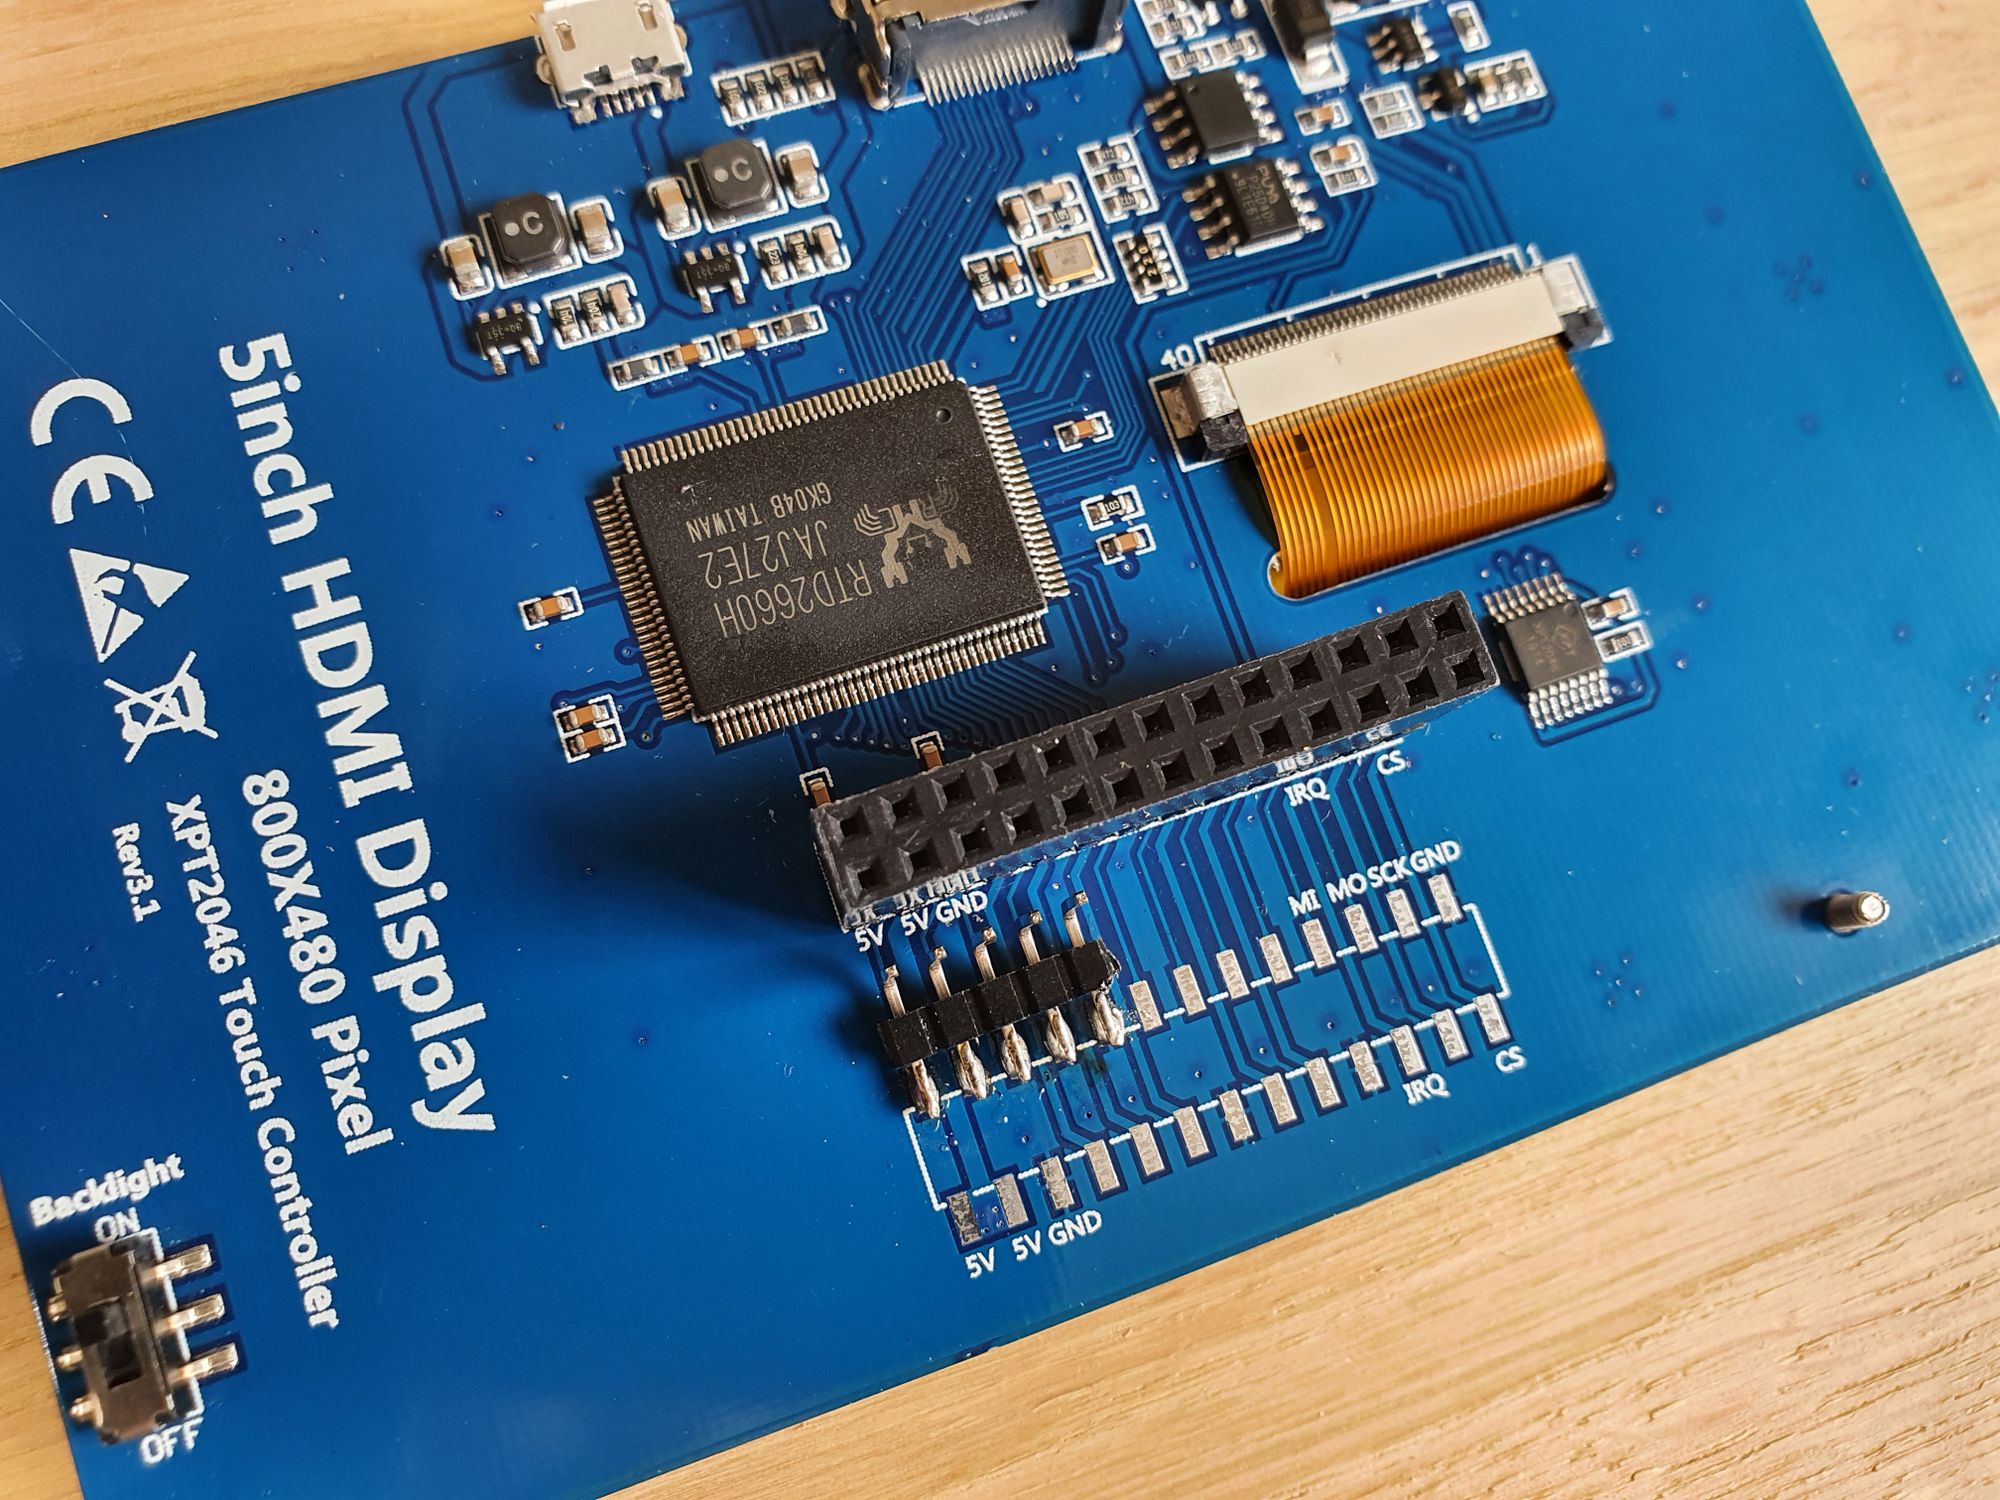
With the display now working, taking a look at the underside of the display, you’ll notice that the header pins are exposed through solder pads on the PCB, these allow you to utilise the pins on the Pi that the display covers.
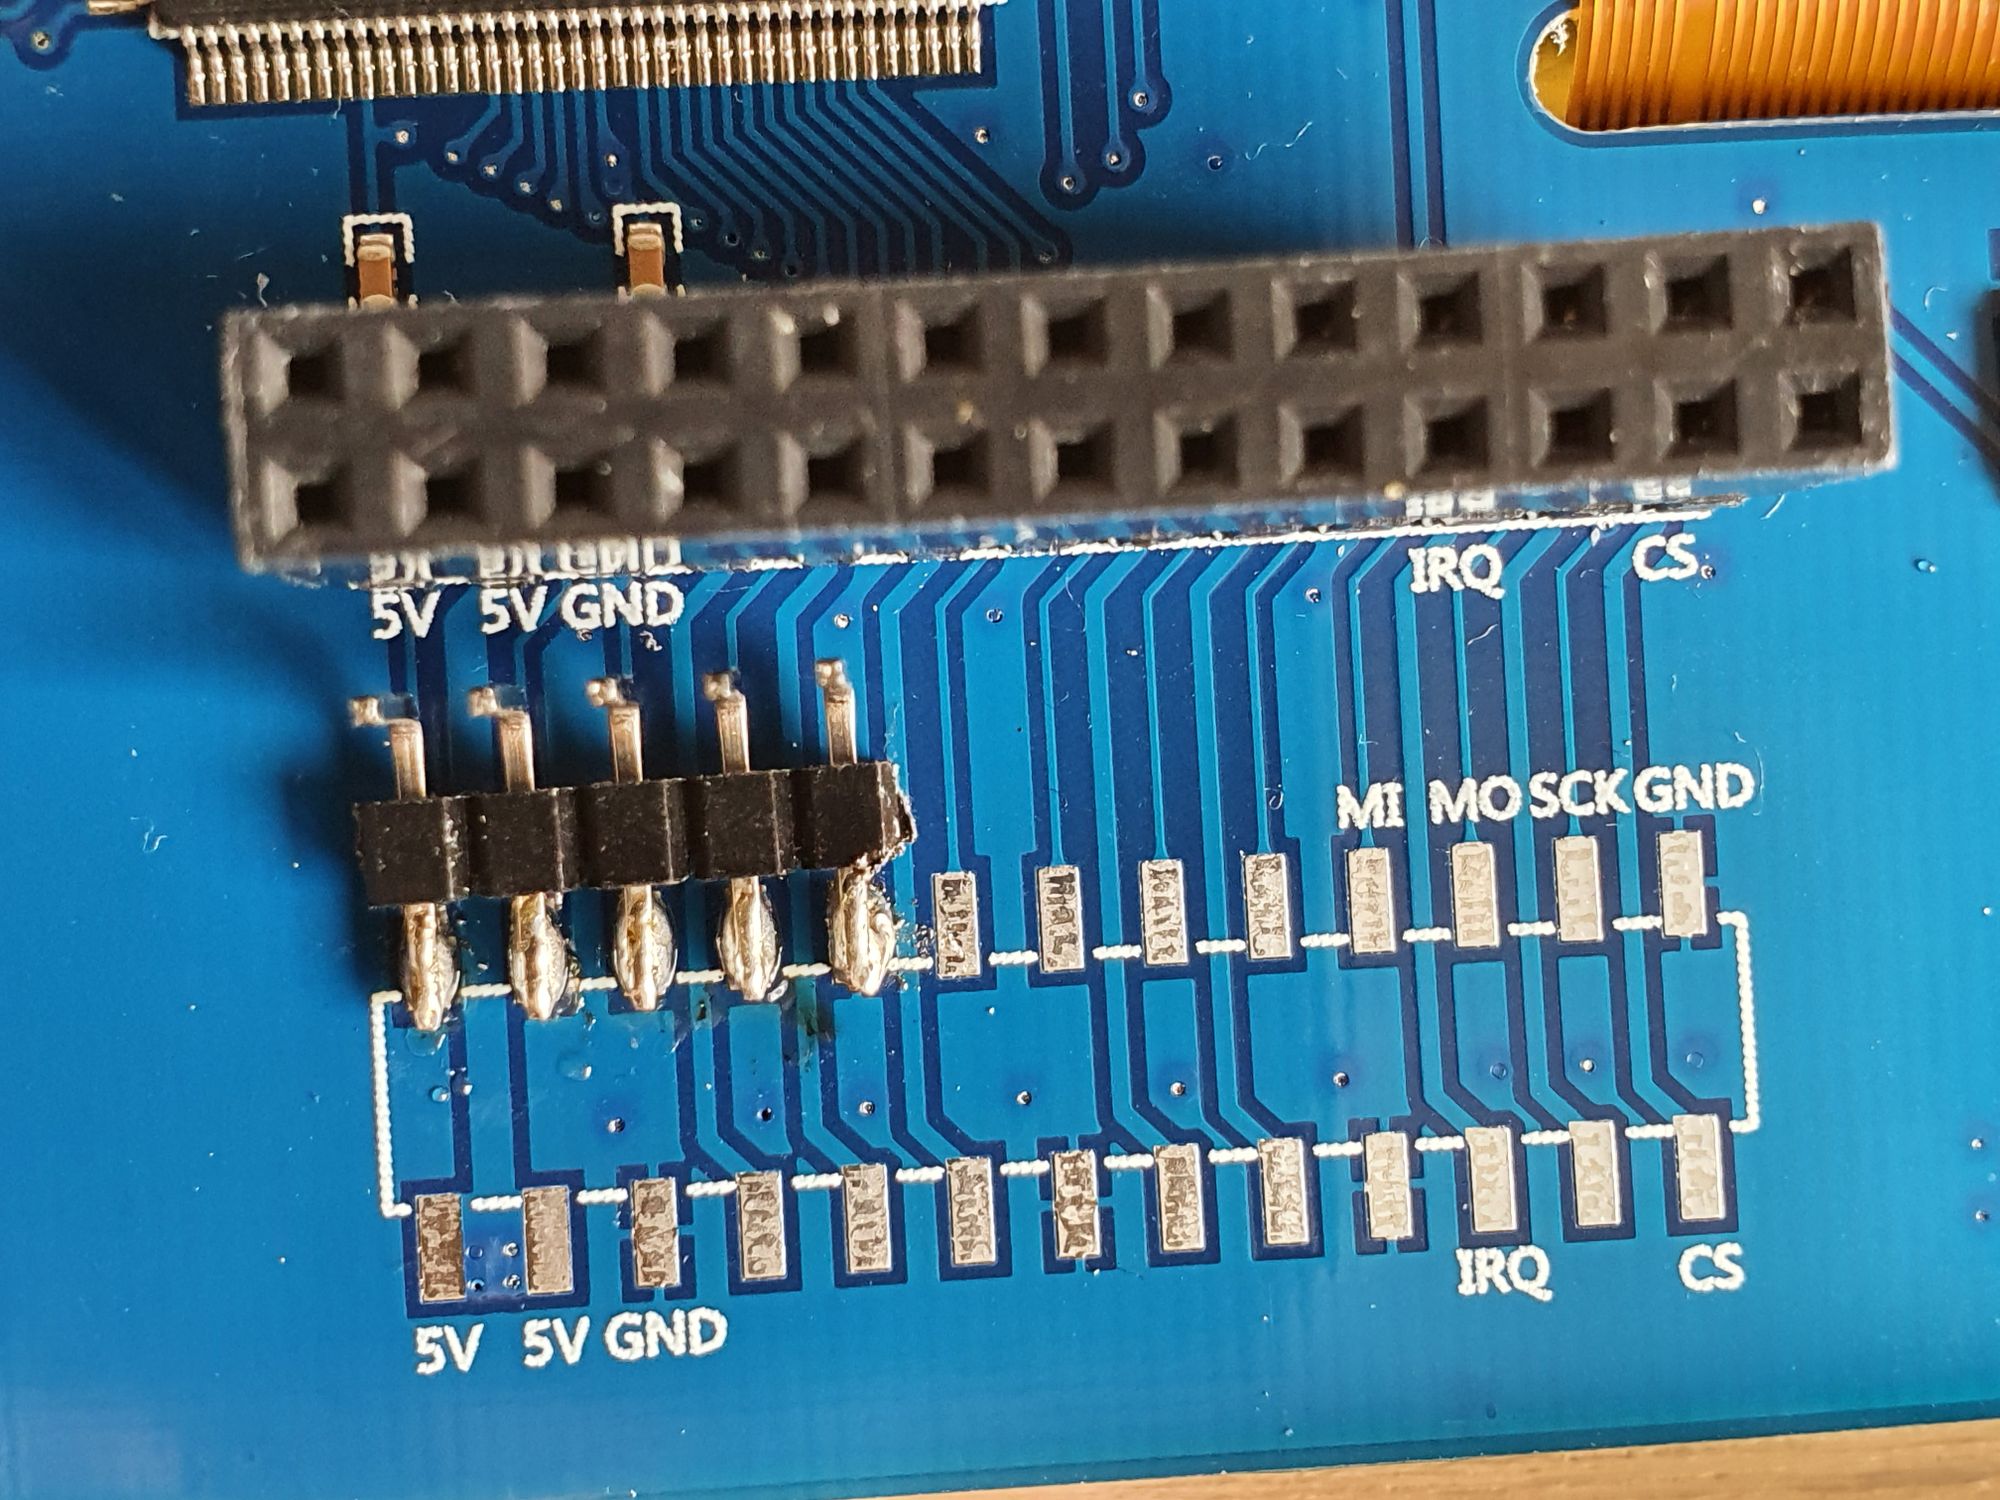
I started by soldering a 5 pin right angled header to the pads, giving me 5v, SDA, SCL and Ground which will be connected directly to the camera:
Connect 5v, SDA, SCL and Ground from the headers, directly to the MLX90640 camera with some DuPont wires. You’ll notice that the pin order on the MLX90640 is the exact same as on the Raspberry Pi which is awesome:
Software
Powering the Pi back up, there is a few packages we need to install. In a terminal, run the following:
sudo apt install python3-matplotlib python3-scipy python3-numpyI tried using the pip install command for this but one of the packages took almost an hour to install, I found the apt command to be much faster in this instance. We will also want to run:
sudo apt install python-smbus i2c-toolsThen run the following 2 pip commands to install the required dependencies:
sudo pip3 install RPI.GPIO adafruit-blinka
sudo pip3 install adafruit-circuitpython-mlx90640
Next we will want to enable i2c and adjust the baudrate of the i2c interface by setting these lines in the Raspberry Pi’s config.txt file located in /boot/config.txt:
sudo nano /boot/config.txt

#Make sure the following line is uncommented:
dtparam=i2c_arm=on

#Then add the following to the end:
,i2c_arm_baudrate=400000

#The full line should be:
dtparam=i2c_arm=on,i2c_arm_baudrate=400000
This will allow the i2c interface to run at a faster speed and allow the camera to provide a faster framerate. Reboot to make sure these changes take effect.
Next you’ll want to clone my thermal camera GitHub repository using the following command:
git clone https://github.com/EverythingSmartHome/mlx90640-thermal-camera.git
cd mlx90640-thermal-camera/
Next we want to ensure that our i2c camera is detect properly by using the i2cdetect command. Run the following:
sudo i2cdetect -y 1This will scan for all devices found on the i2c interface. It will output something that looks like this:
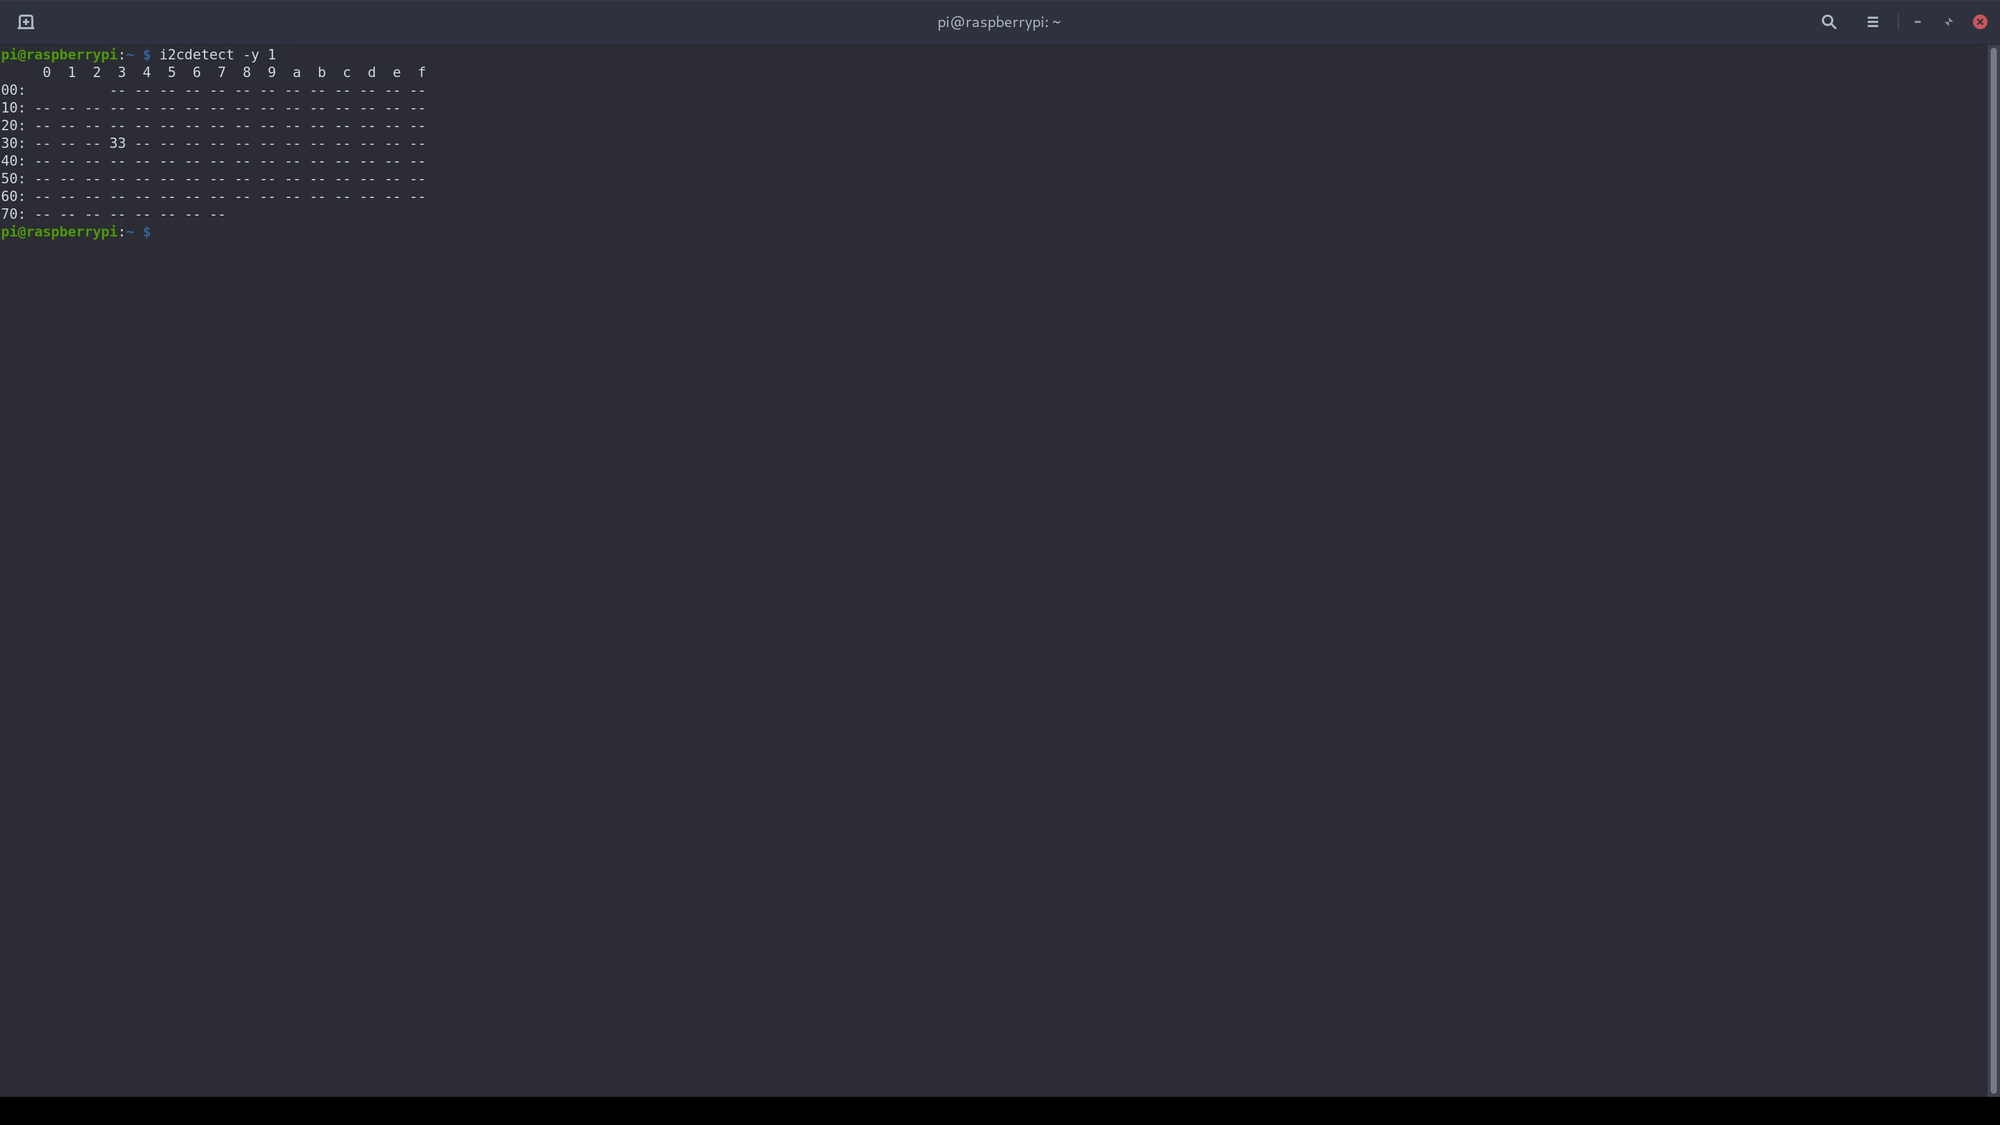
Notice how my camera is on address 0x33 which is as per the manufacturer spec.
Finally we can run the program by running the following:
python3 thermal-camera-advanced.pyIt will take a few moments for the program to start up, but if everything went correctly you should now have a working thermal camera:
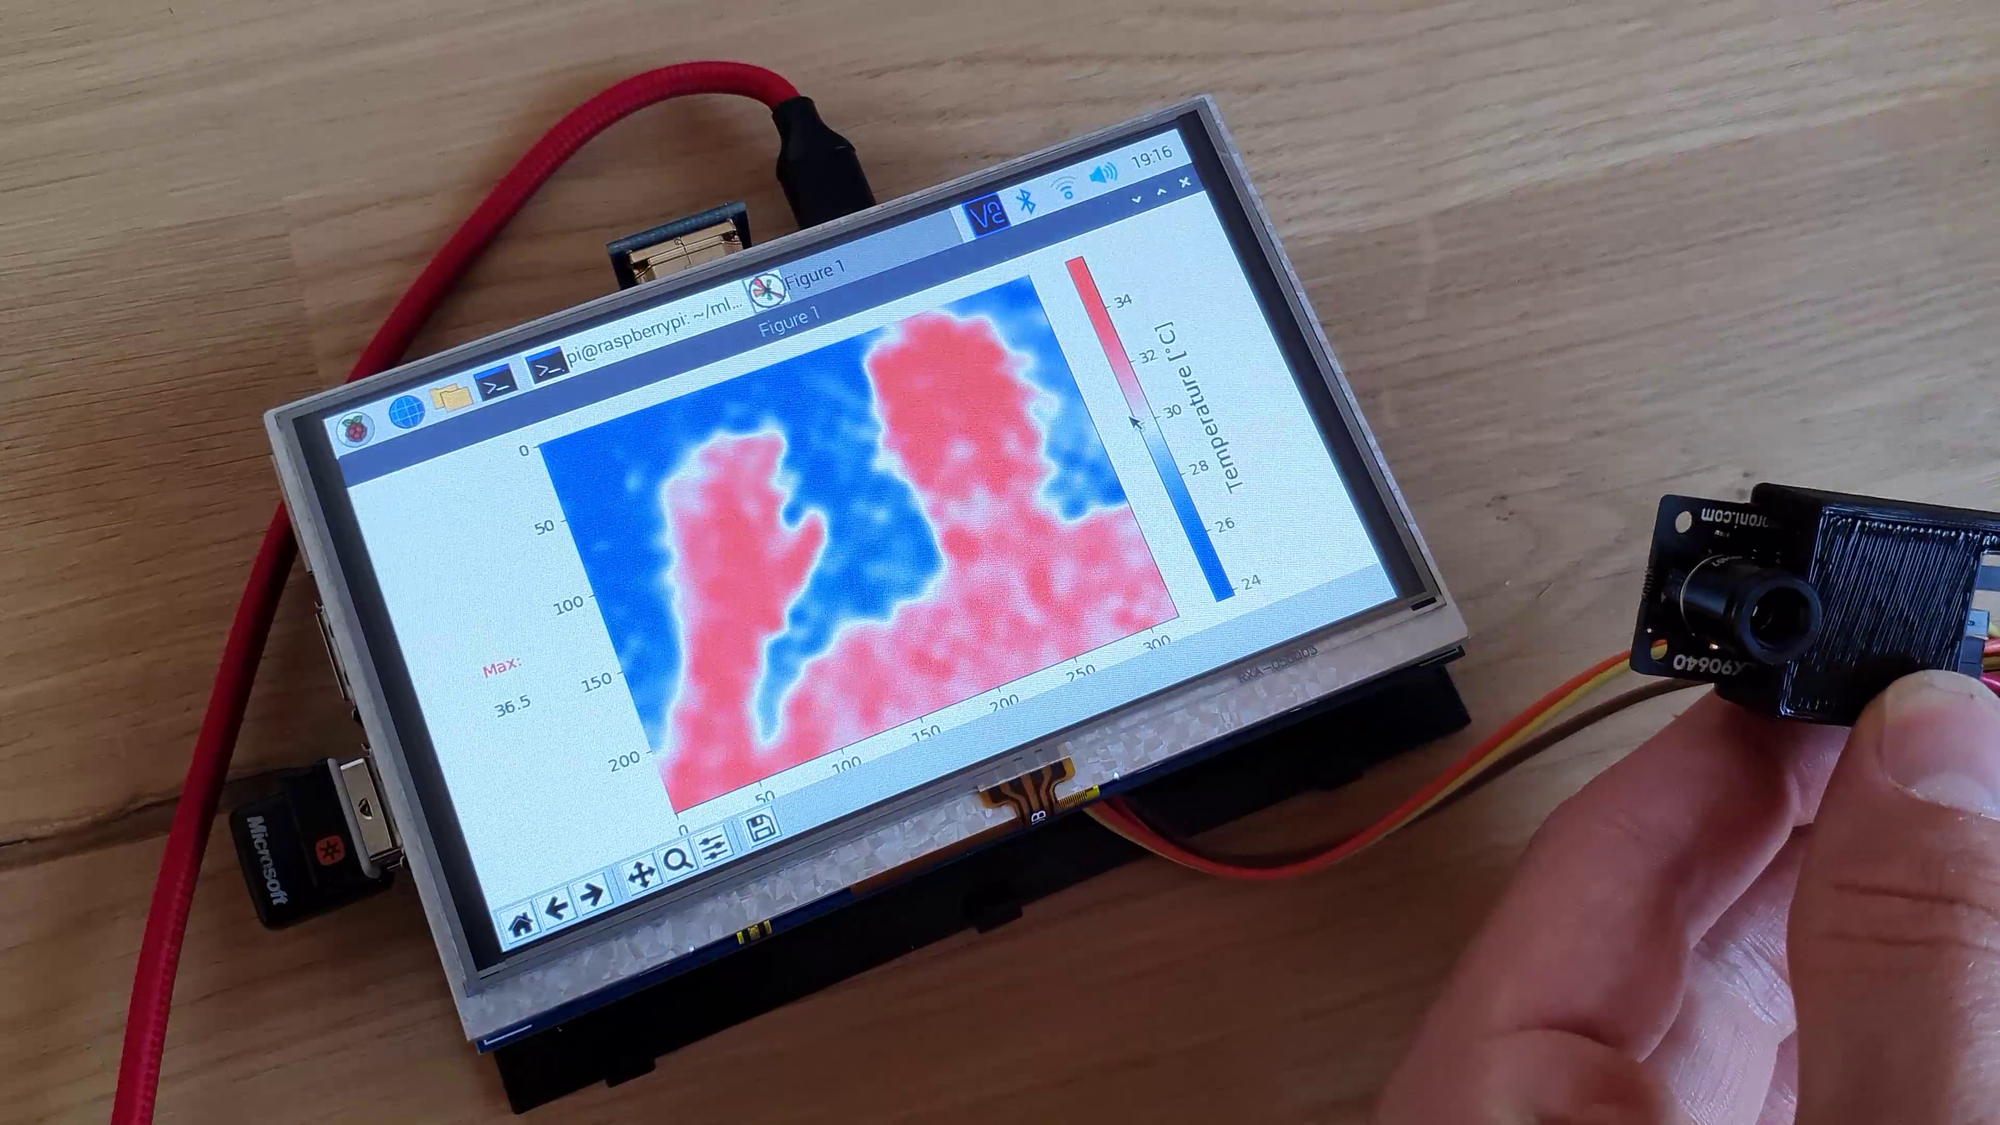
In my testing with this program, you will get around 1.5fps with the Raspberry Pi 3B, I would suspect the Pi 4 would be able to do quite a bit better.
Note if you want the camera to face towards you, run start the program using the following command to enable mirror/selfie mode:
python3 thermal-camera-advanced.py --mirrorFinally, we can take everything for a test run, I suggest aiming it at something that you know the temperature of, I am using my 3D printers print bed set at 60 degrees, and with the camera right up to it, it’s within half a degree which is awesome:
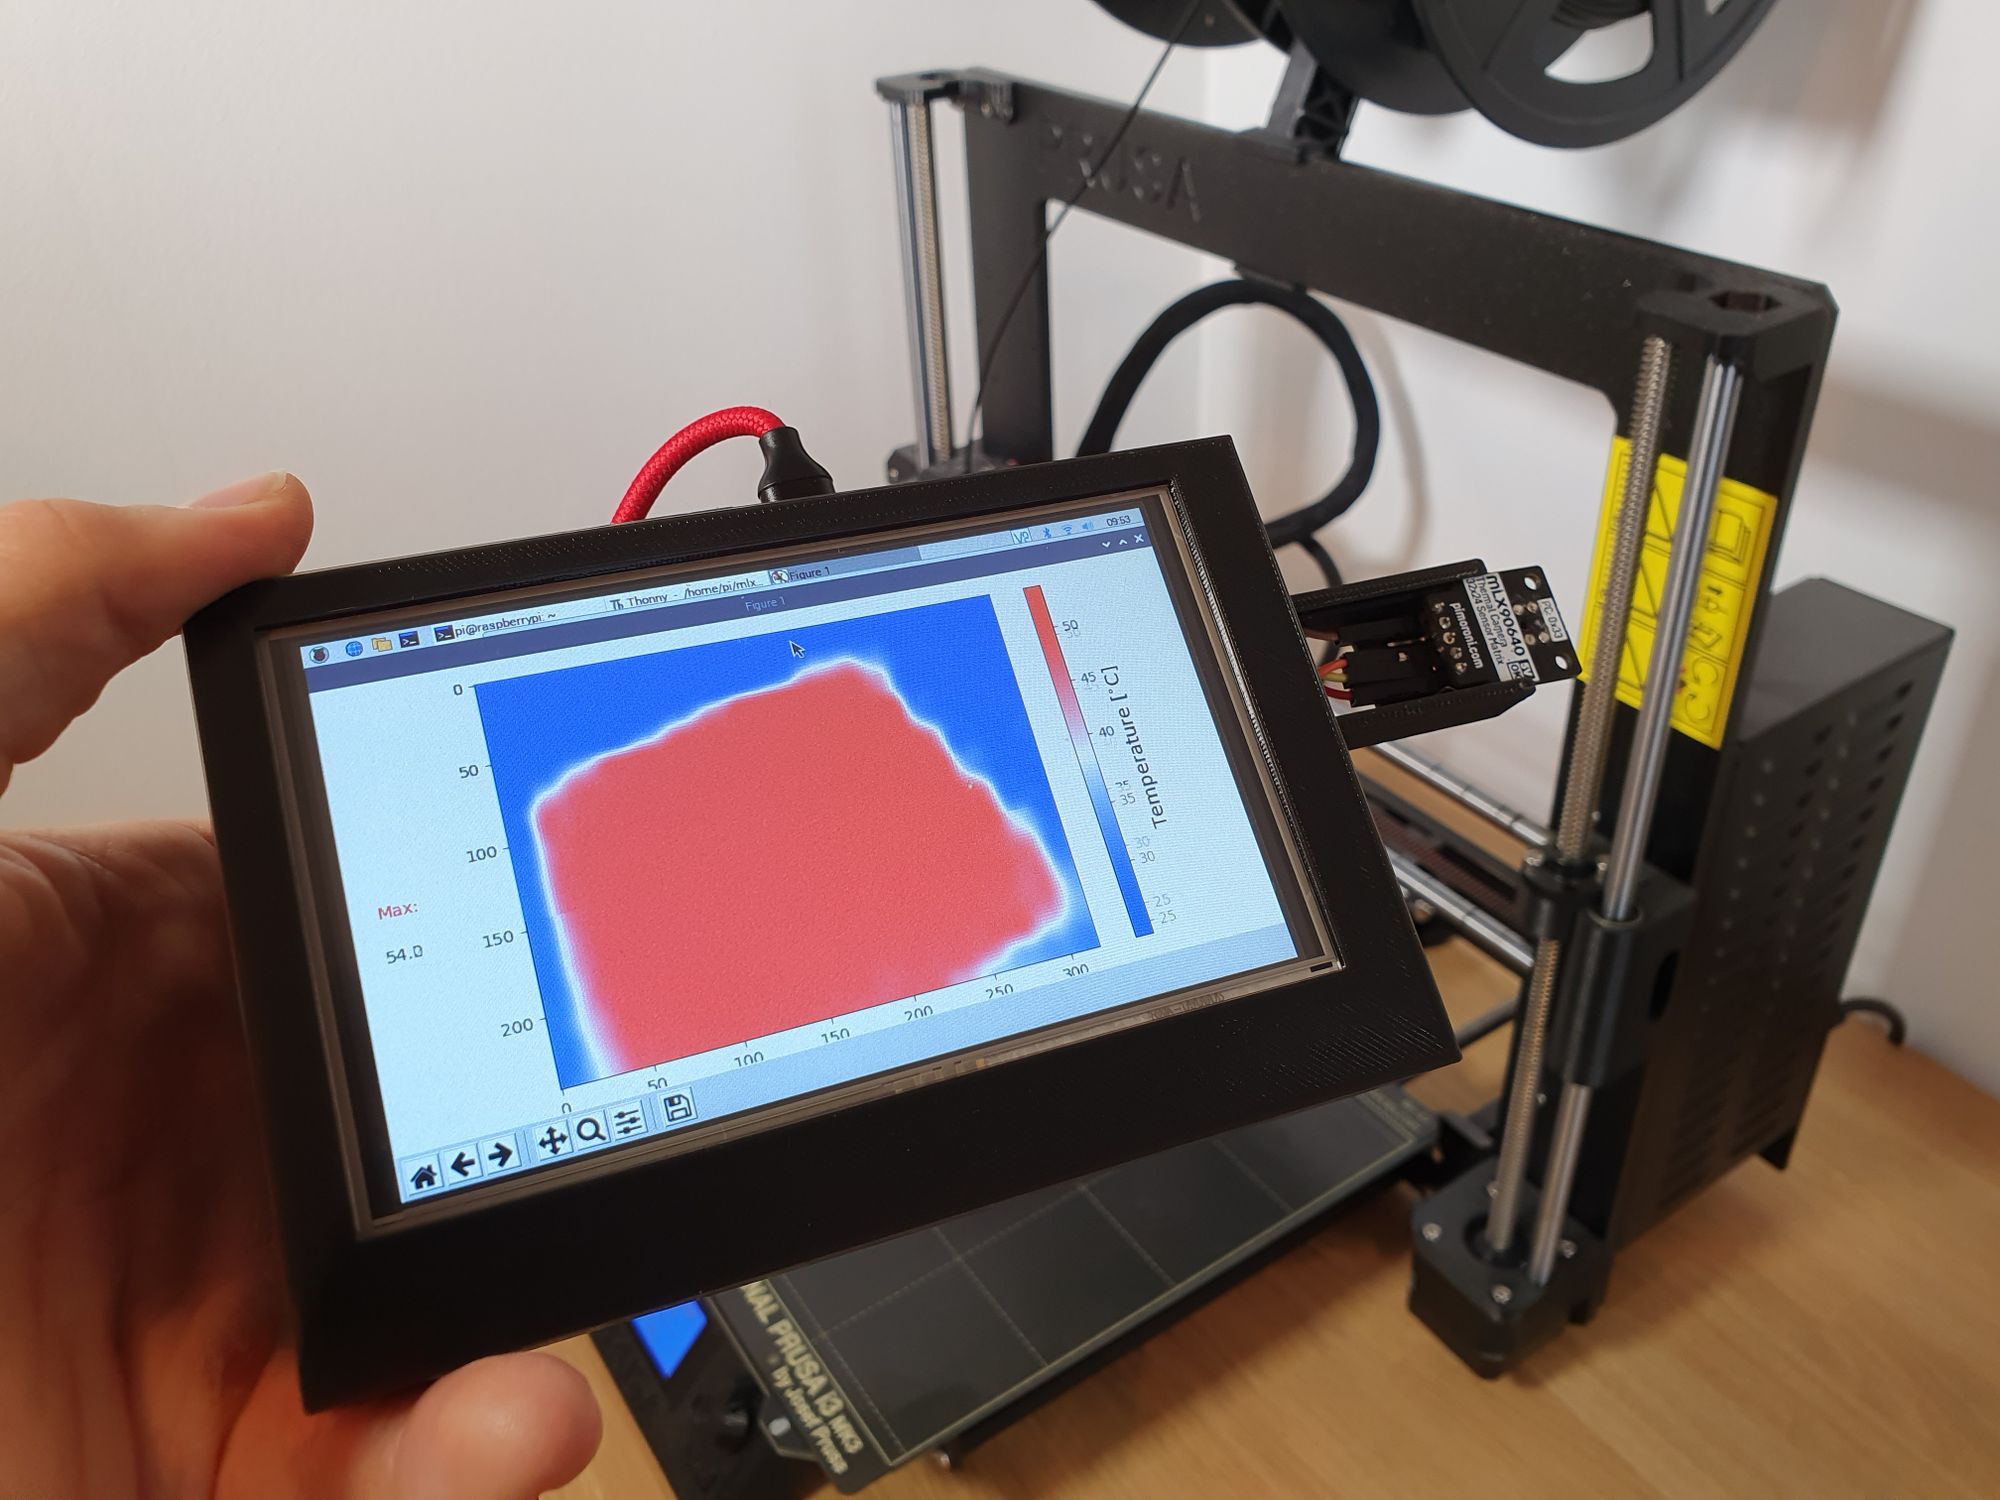
At a further distance it is less accurate as the image above because it depends on a number of variables.
Enclosure
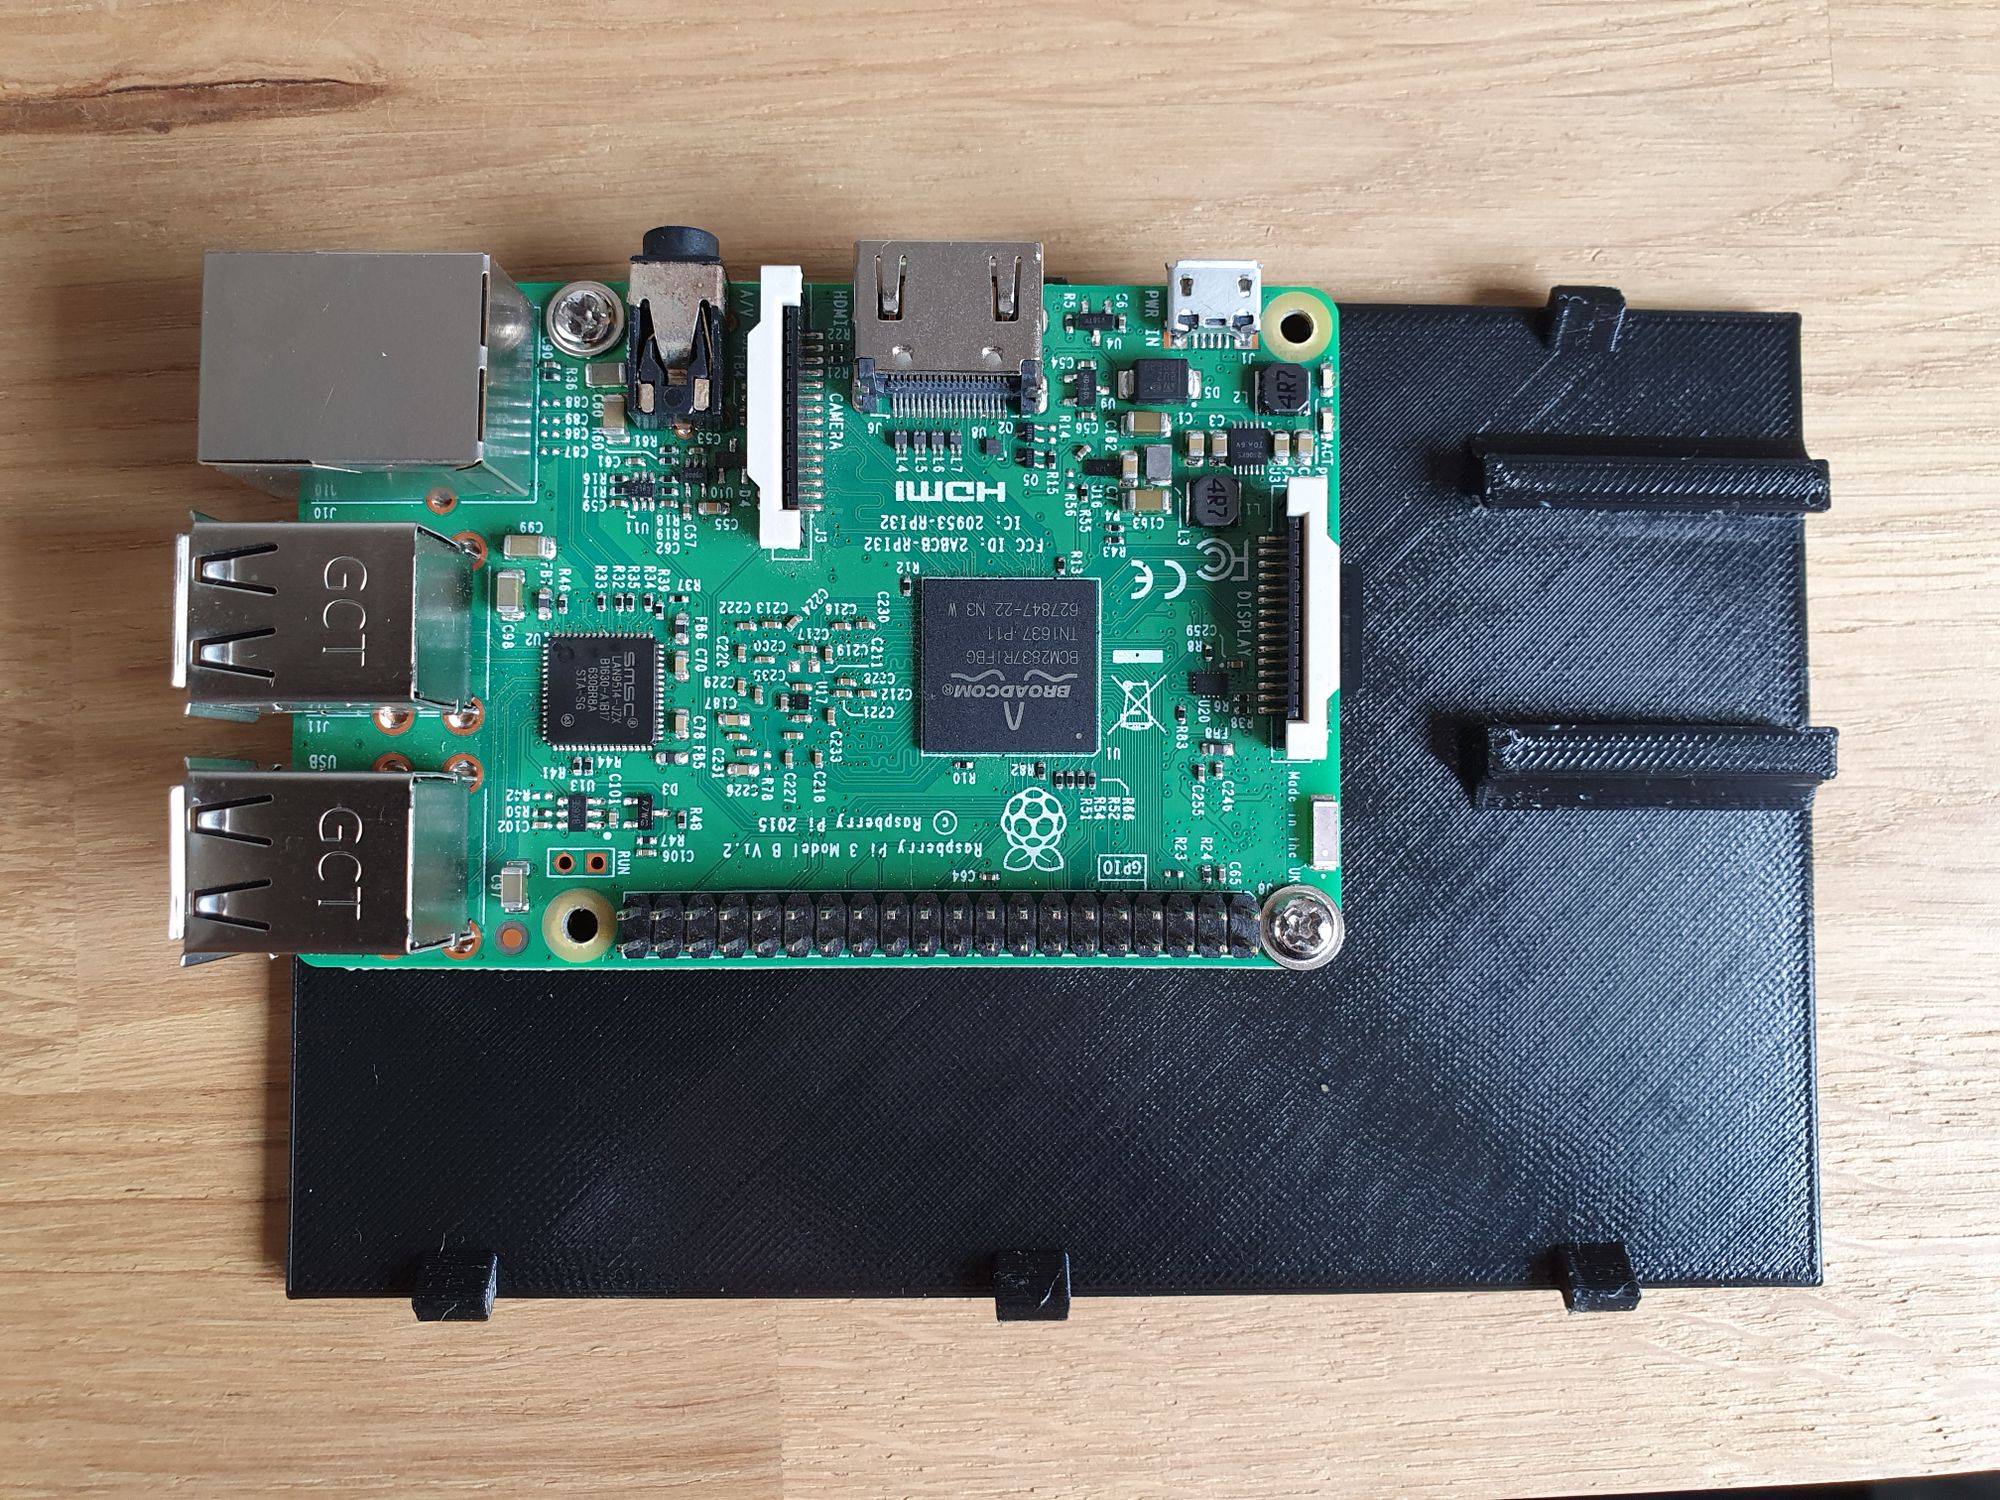
With everything working we can now put everything in the case. Start by screwing the RPI into the base:
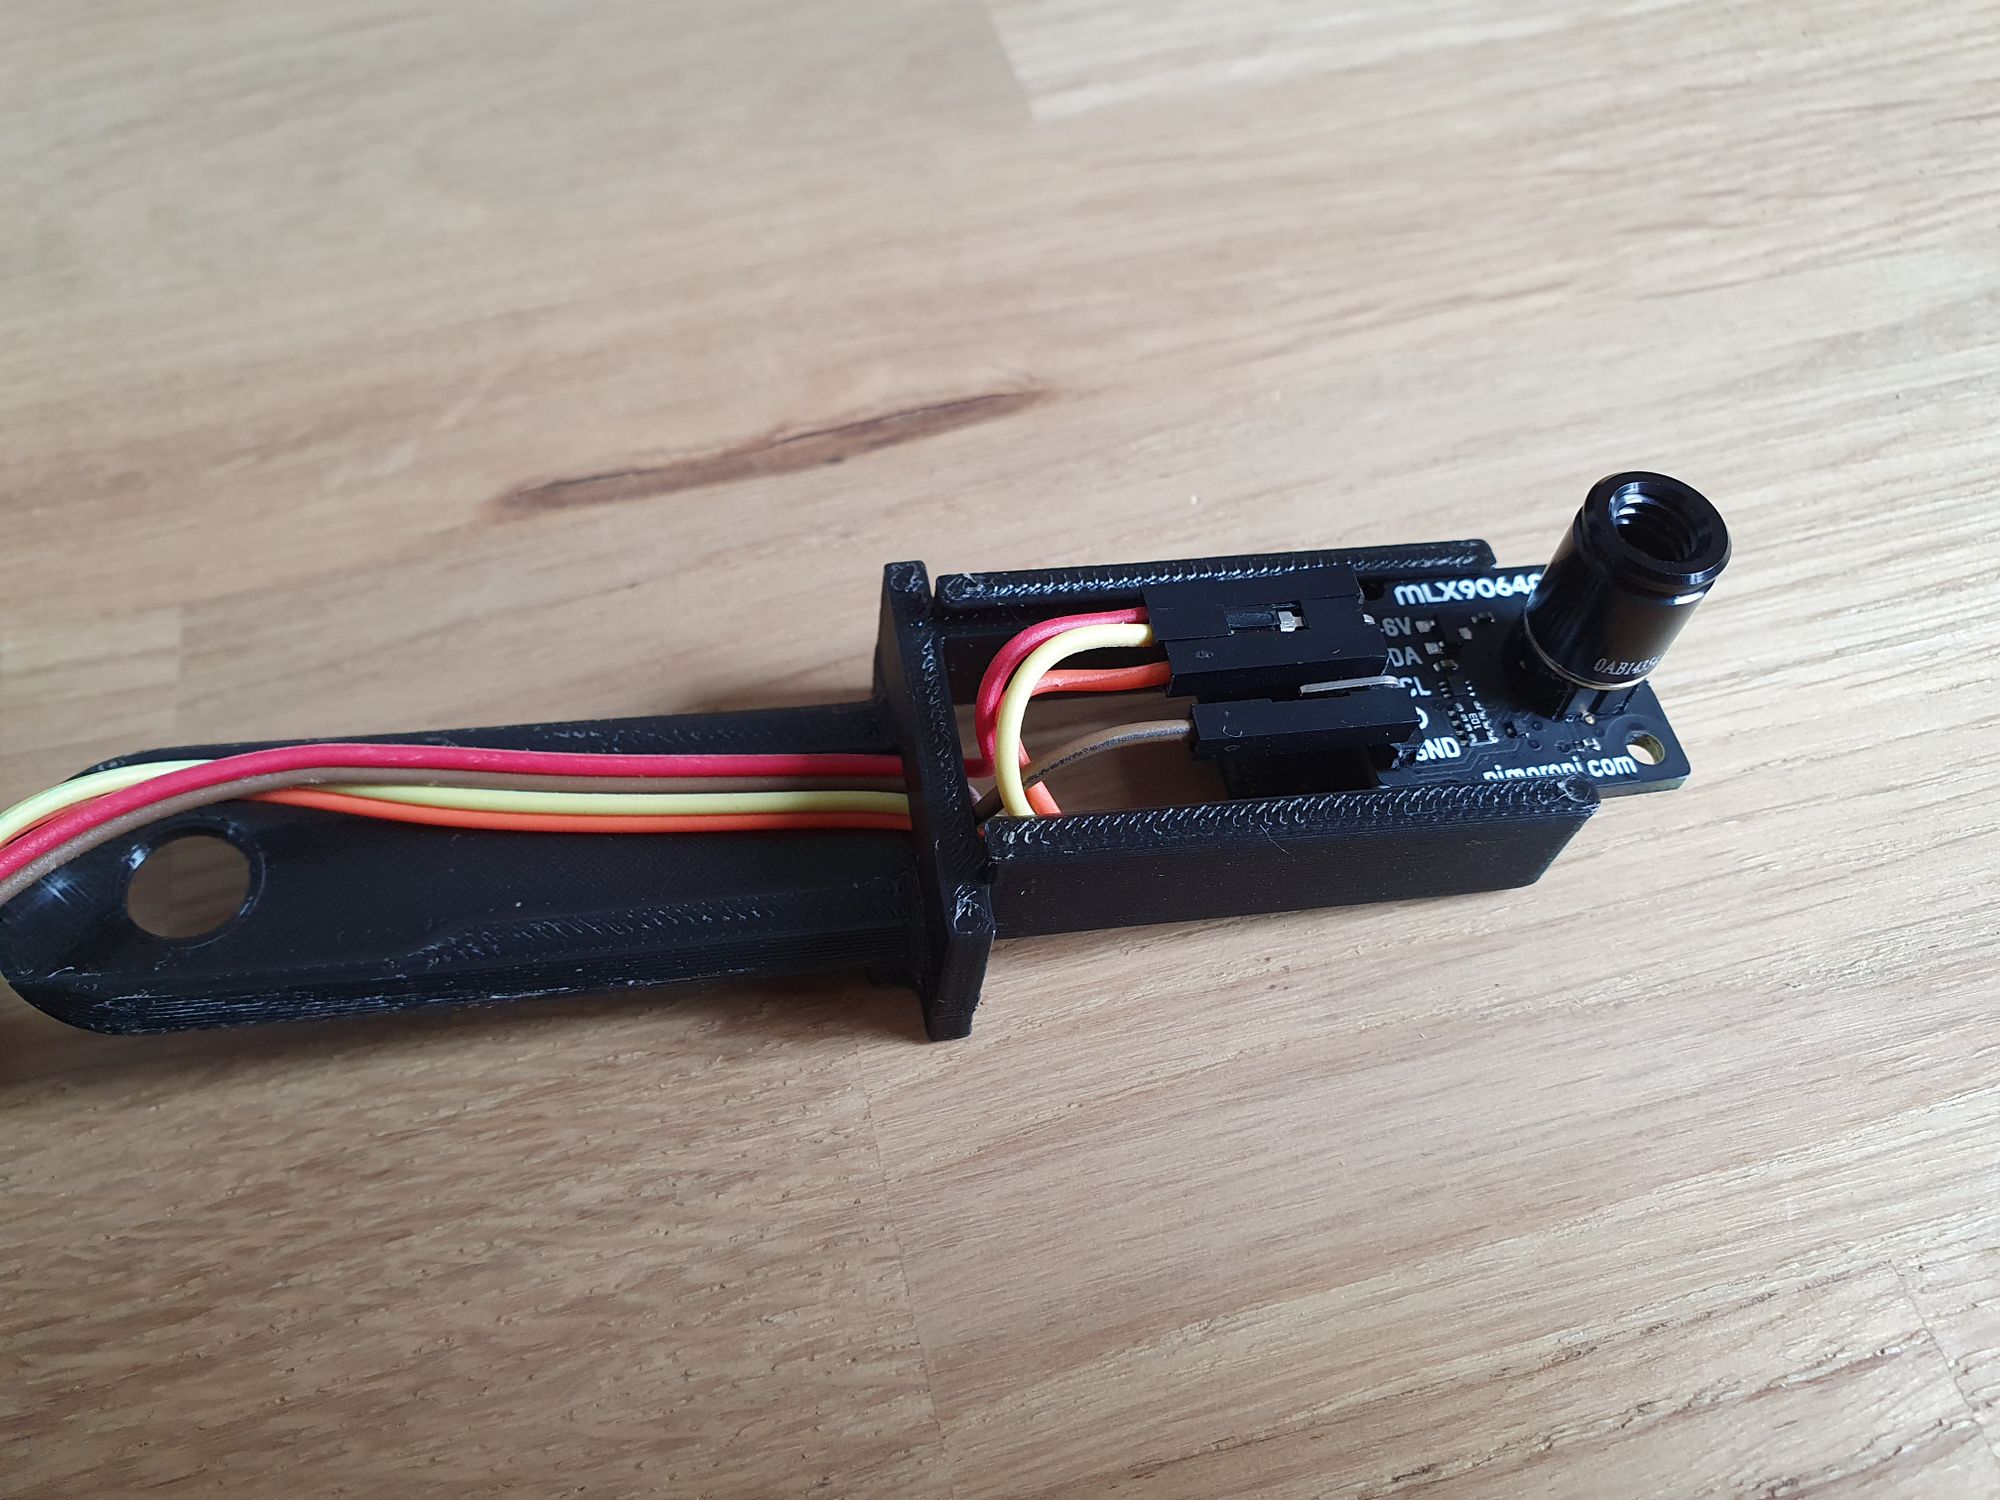
Then with the MLX90640 camera wires attached to the headers on the display, push the display onto the Raspberry Pi. Then you can route the wires through the camera clip, plug them into the camera and slide the camera into the rails on the camera clip:
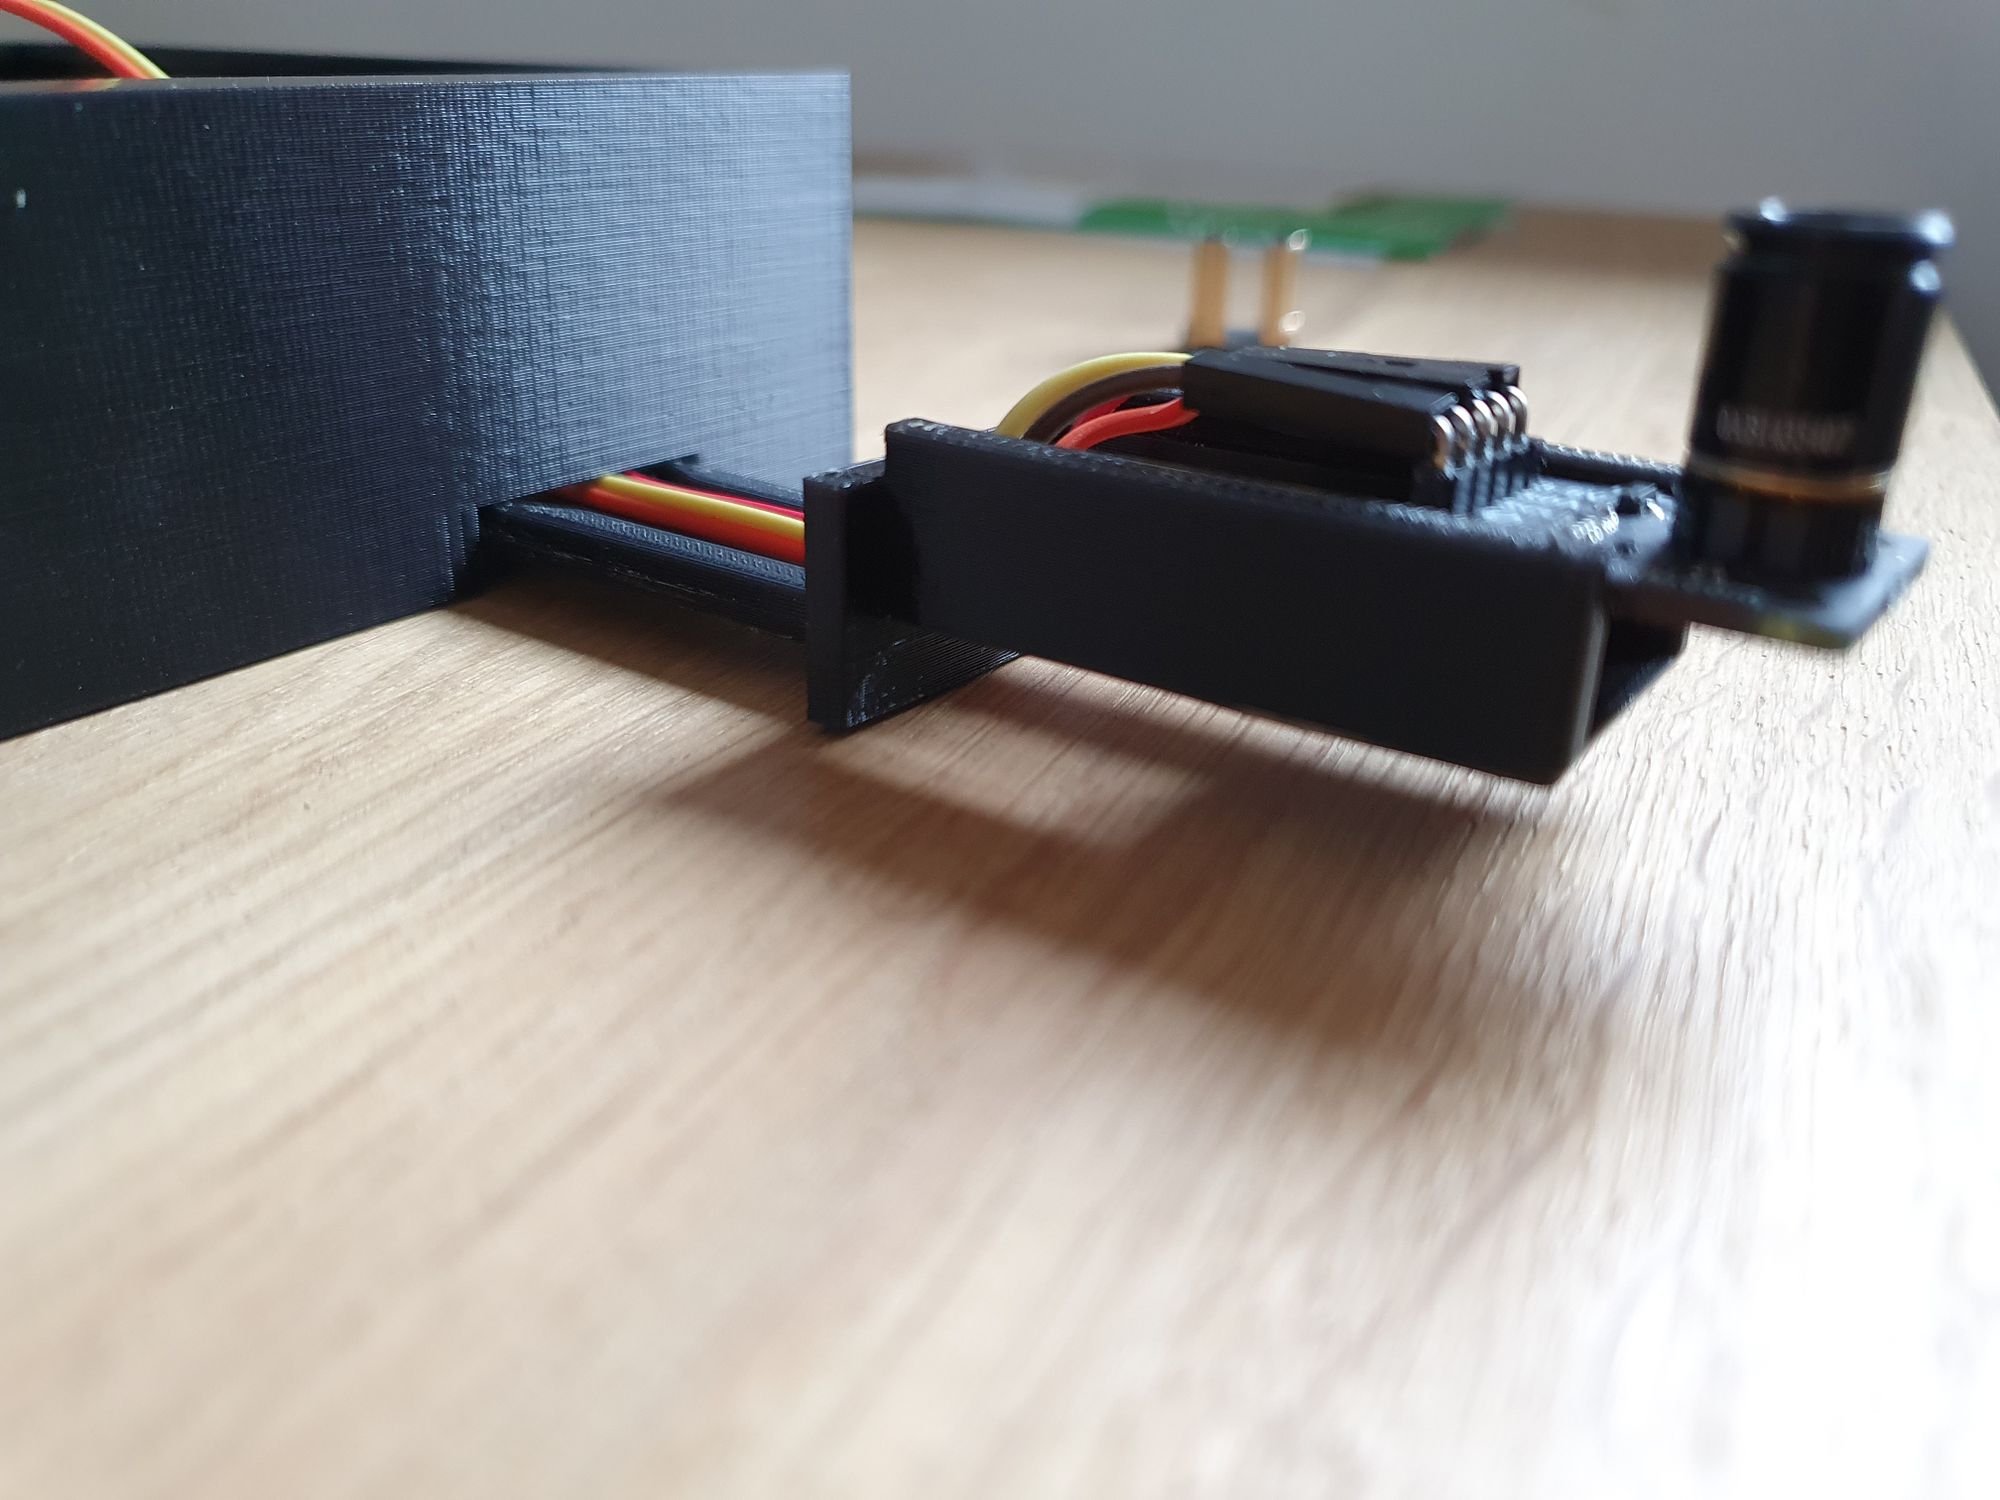
Next put the base into the lid and make sure it clips into place. Finally slide the camera clip into the slot to secure it:
Huge thanks to LuckyPants from our awesome Discord community for helping with a the camera clip, couldn’t have done it without their help!
Conclusion
There we have it, a fully portable, versatile thermal imaging camera using the Raspberry Pi and an MLX90640! I’m really happy with how this project turned out actually, I think it looks great personally and I have quite a few uses for it. One thing that would be an awesome addition to this would be to have a normal camera in addition to the thermal camera, with the thermal image overlaid. Maybe that’s one for the future!
If you are looking for other guides, perhaps consider checking out the WiFi enabled MQTT Fingerprint sensor!