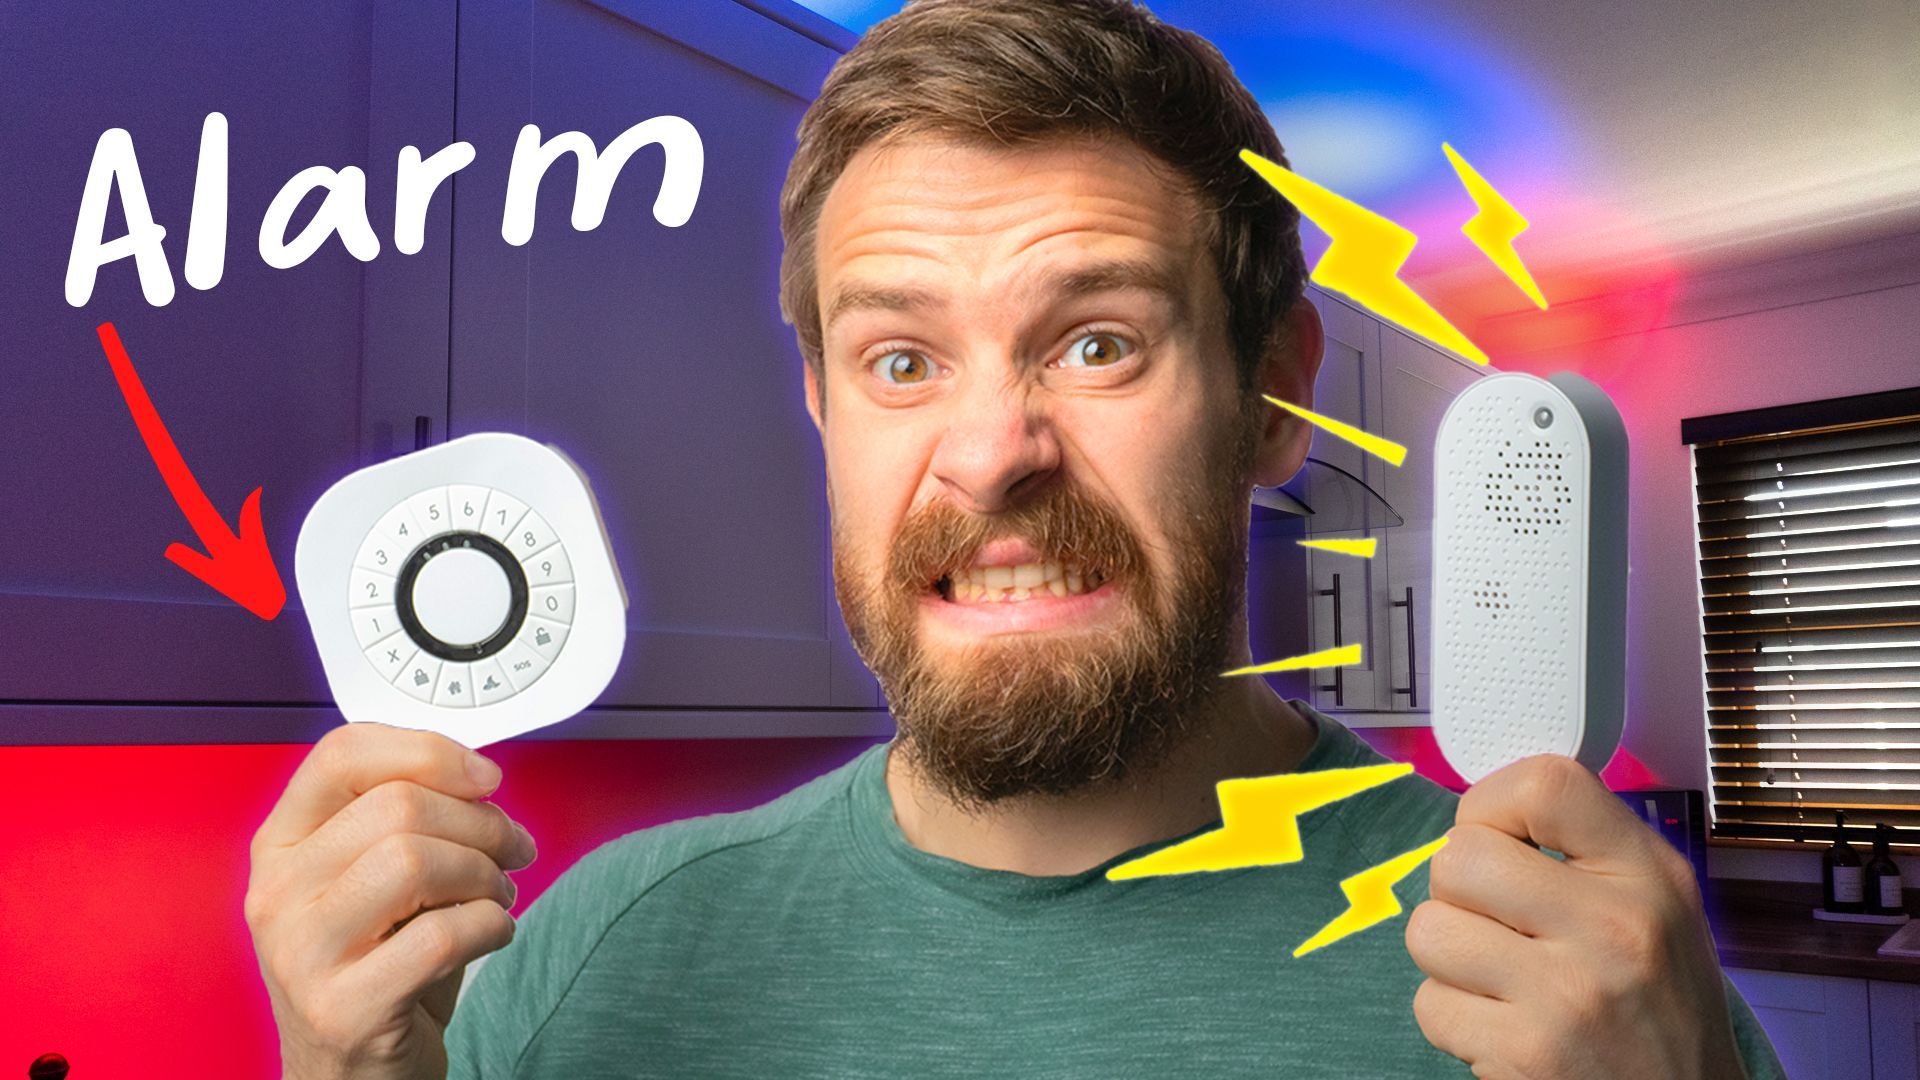
Build Your Own Local Controlled Smart Home Alarm!
You can build your own smart home alarm system in Home Assistant using hardware you may have, and an excellent custom component that makes things super easy!

Have you ever wanted to get yourself an alarm system for your smart home for added security and peace of mind but found yourself put off by expensive monthly subscriptions, being tied into year long contracts and having to buy even more hardware, especially when you likely already have much of the hardware required?
What if you could use the hardware you already own, along with some Home Assistant secret sauce to create your very own locally controlled smart home alarm system with no subscriptions and no contracts?
Today, I'll show you how to create your very own smart home alarm system using Home Assistant!
Video
What You Will Need
A Minimum Setup
The first thing we need to go over before we get into the software side is the hardware because we obviously need some before we can configure them! So, let's first look at what I would call a "minimum setup" and then we will take a look at something a little more fully featured.
Now it goes without saying that a paid service obviously does have some advantages, from 24/7 monitoring, automatic police dispatch and replacement parts and all of that, but this is a much better solution than just not having anything at all!
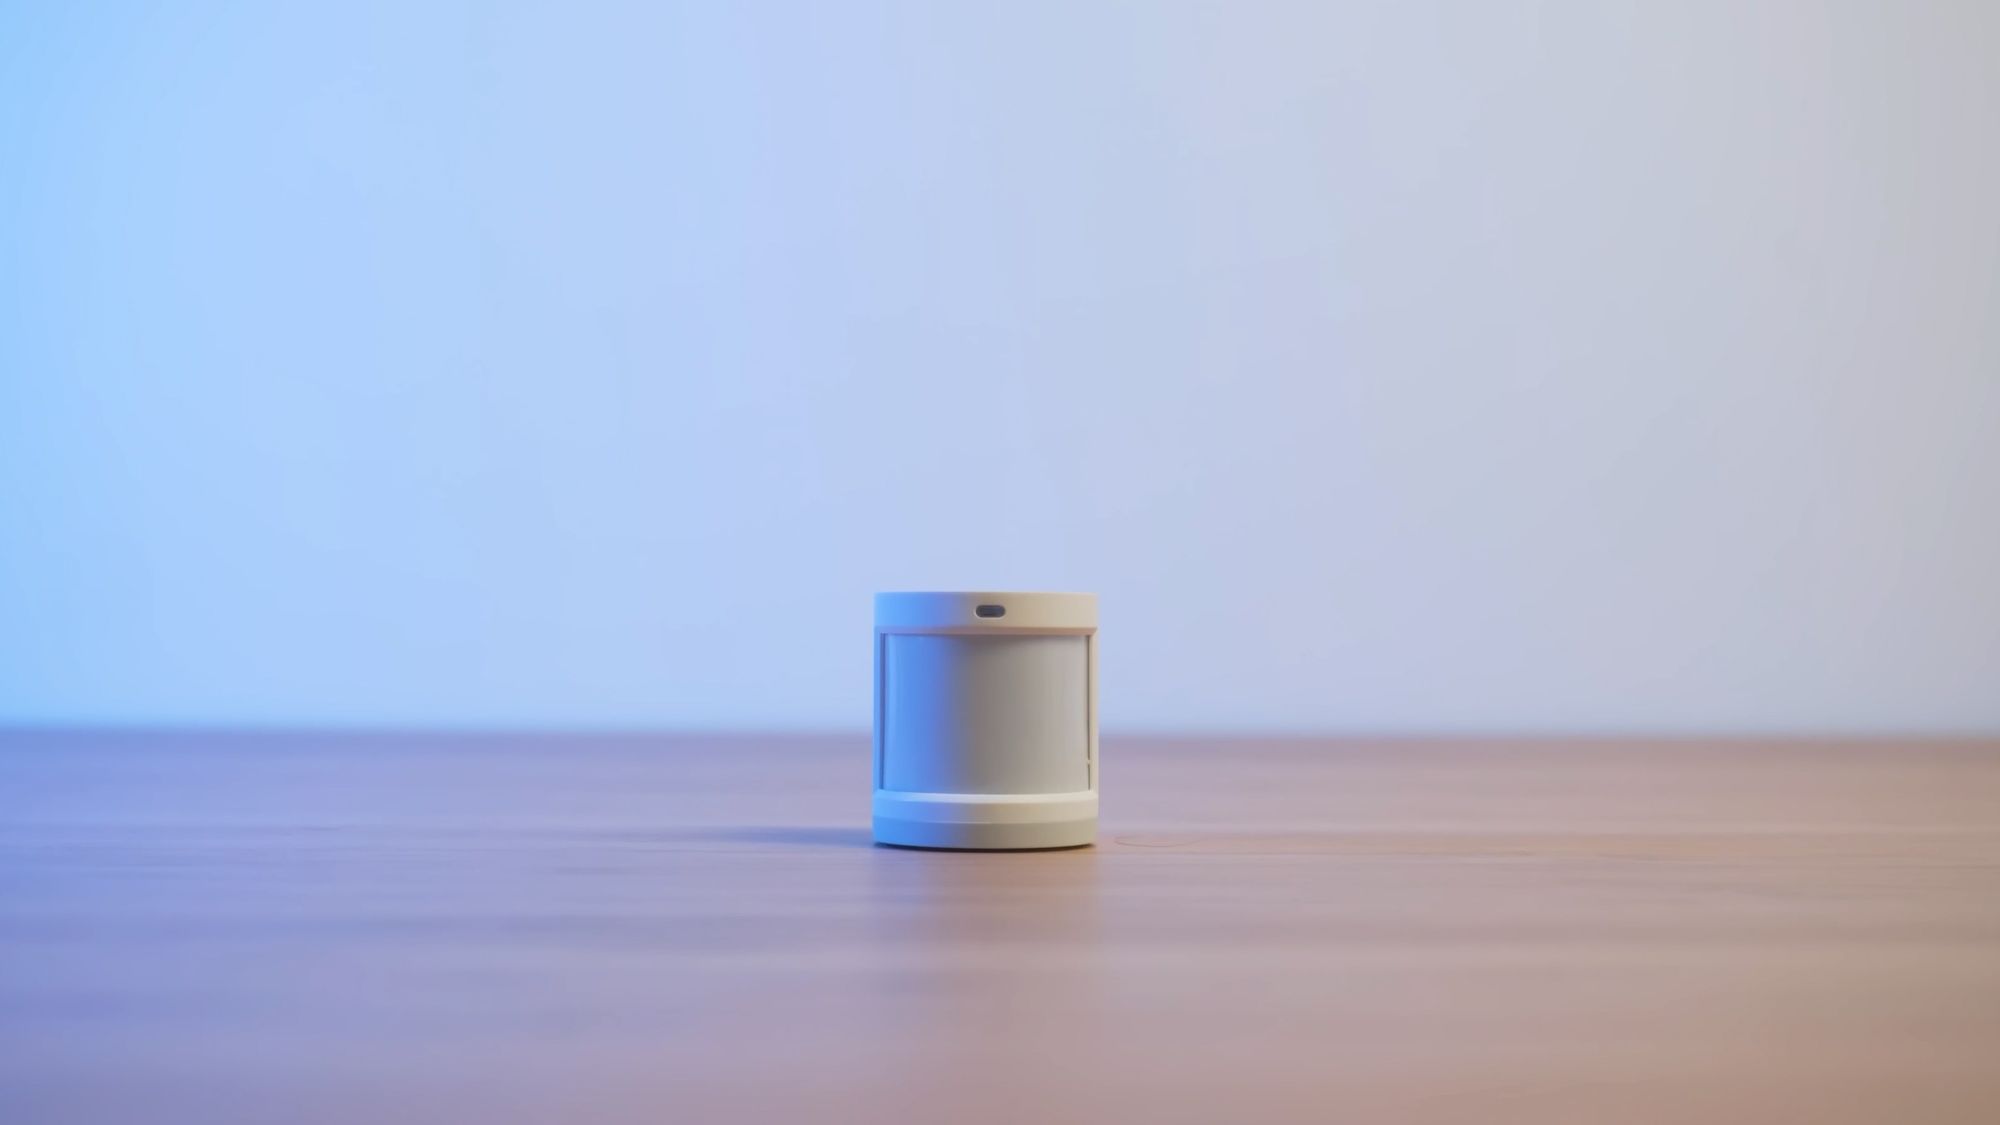
For the minimum setup, we are going to need 2 types of sensor - a contact sensor and a motion sensor. A contact sensor is usually placed on a window/door or an entryway into your property and detects when that door or window is opened and a motion sensor detects movement inside of your property - both of which will send signals to Home Assistant where we can then decide how we want to take action. We can then use our phones to not only receive notifications about what the alarm is doing, but also to set the alarm automatically when we leave for the day or set it manually on our dashboard.

As for which motion and contact sensors to use, on the Zigbee side I really like the Aqara Contact Sensor - battery life is insane, it works really well and that is my go to one. However, if you are not using Zigbee then you may also consider something like the new Shelly Contact Sensor which is Wifi based and has an included lux sensor. Or, now that Home Assistant has much better support for Bluetooth and Bluetooth Proxies, you could also consider the Switchbot Contact Sensor which also has a motion sensor inside so that’s kind of like a two in one device.
For motion sensors, again the Aqara P1 Motion Sensor or Philips Hue Motion Sensor are really good on the Zigbee side. On the Wifi side, again, the Shelly Motion Sensor is good and the Switchbot Motion Sensor is good on the Bluetooth side.
A More Fully Featured Setup
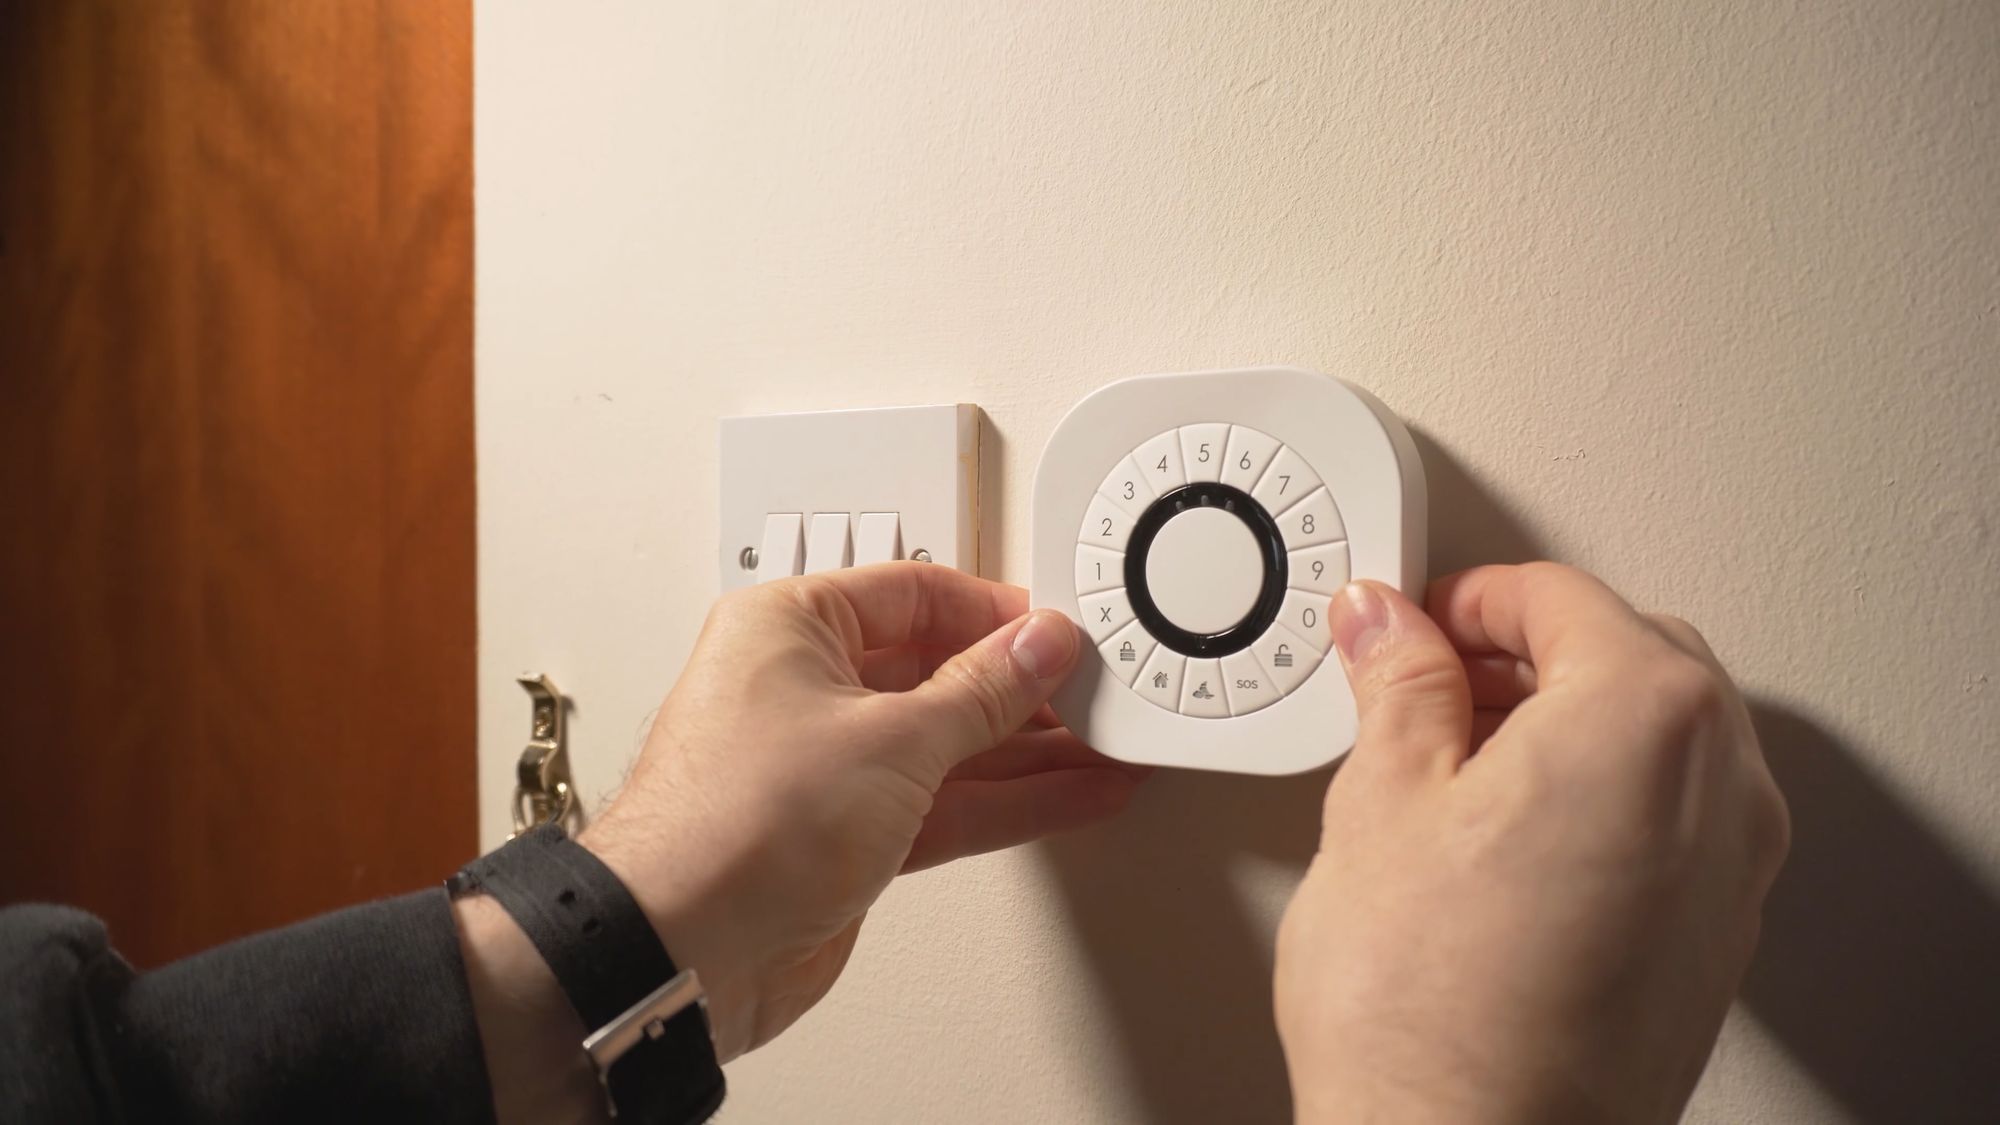
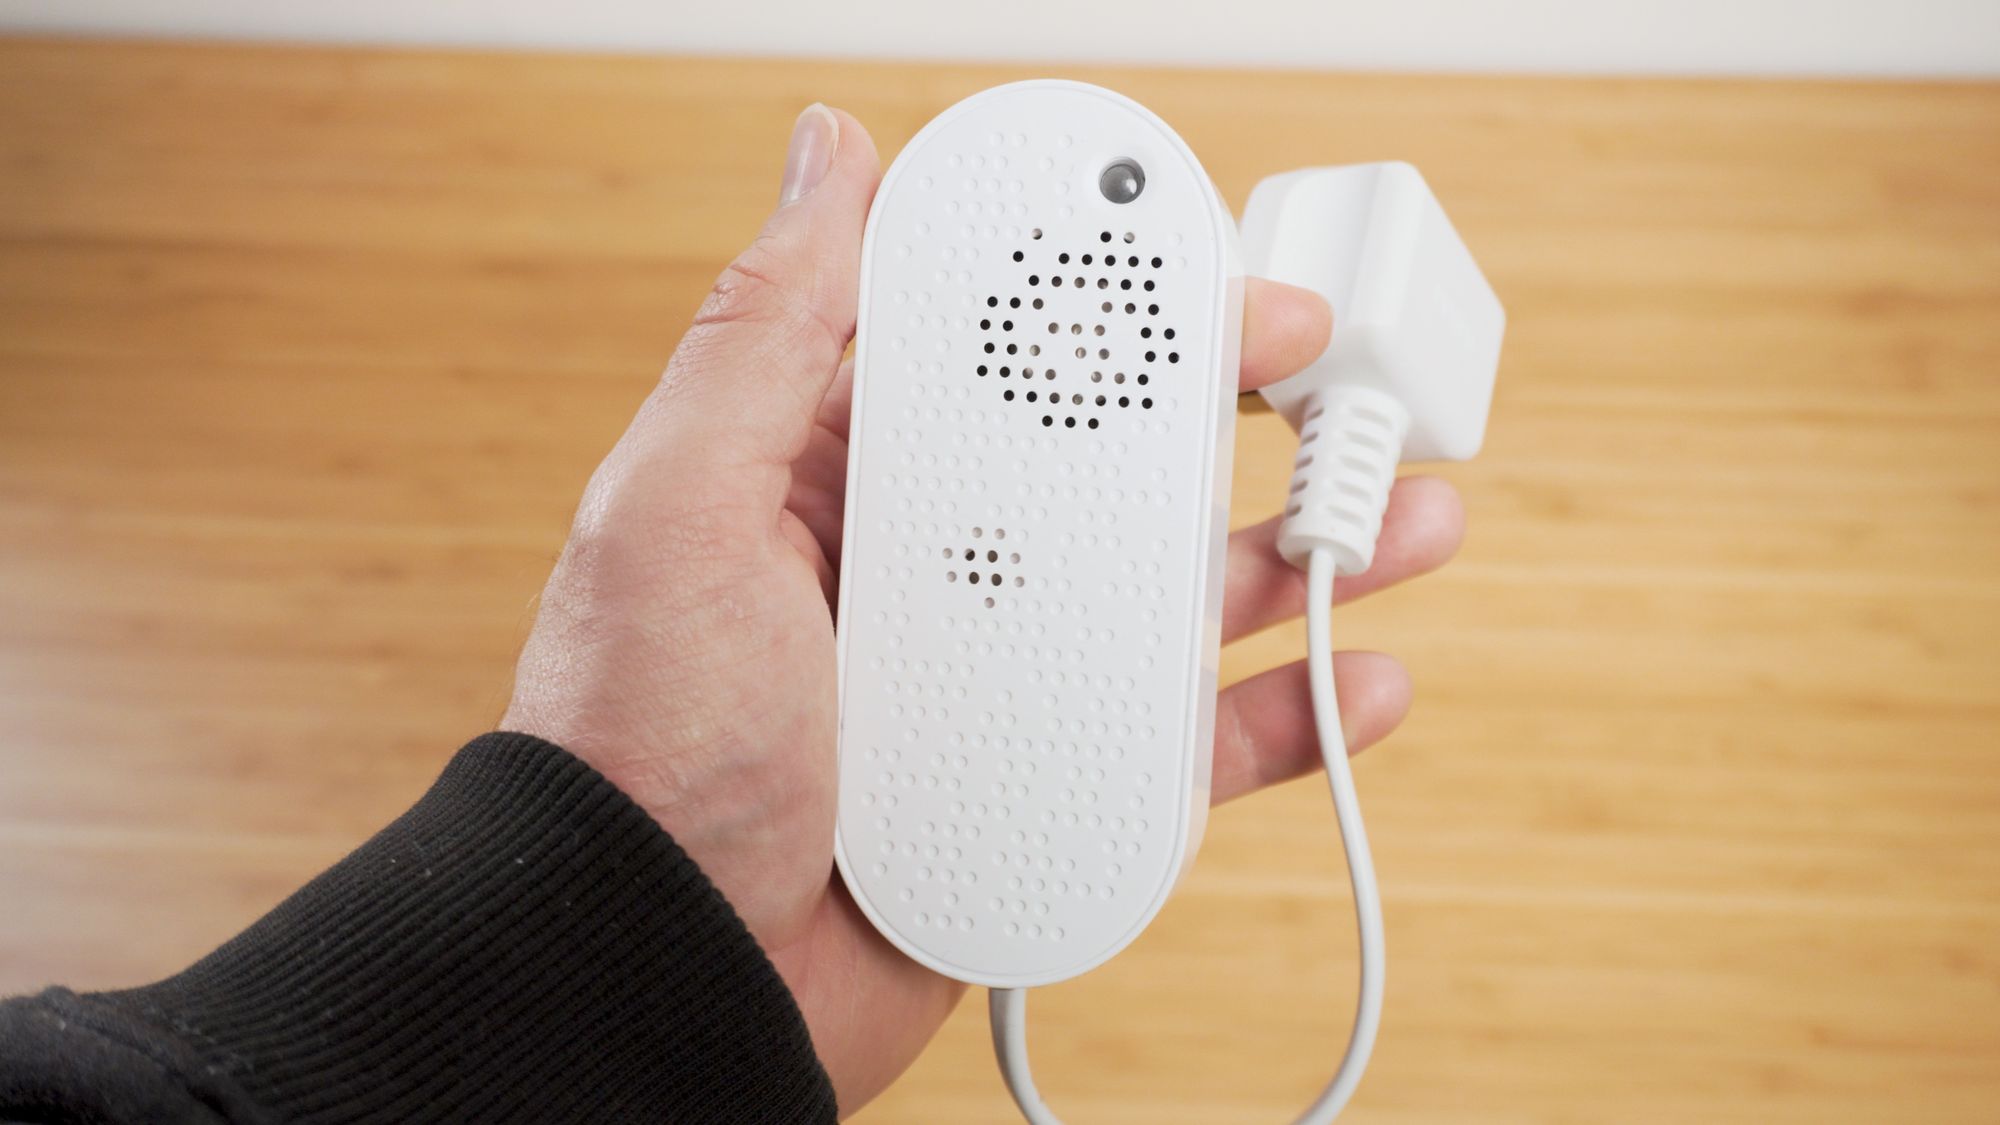
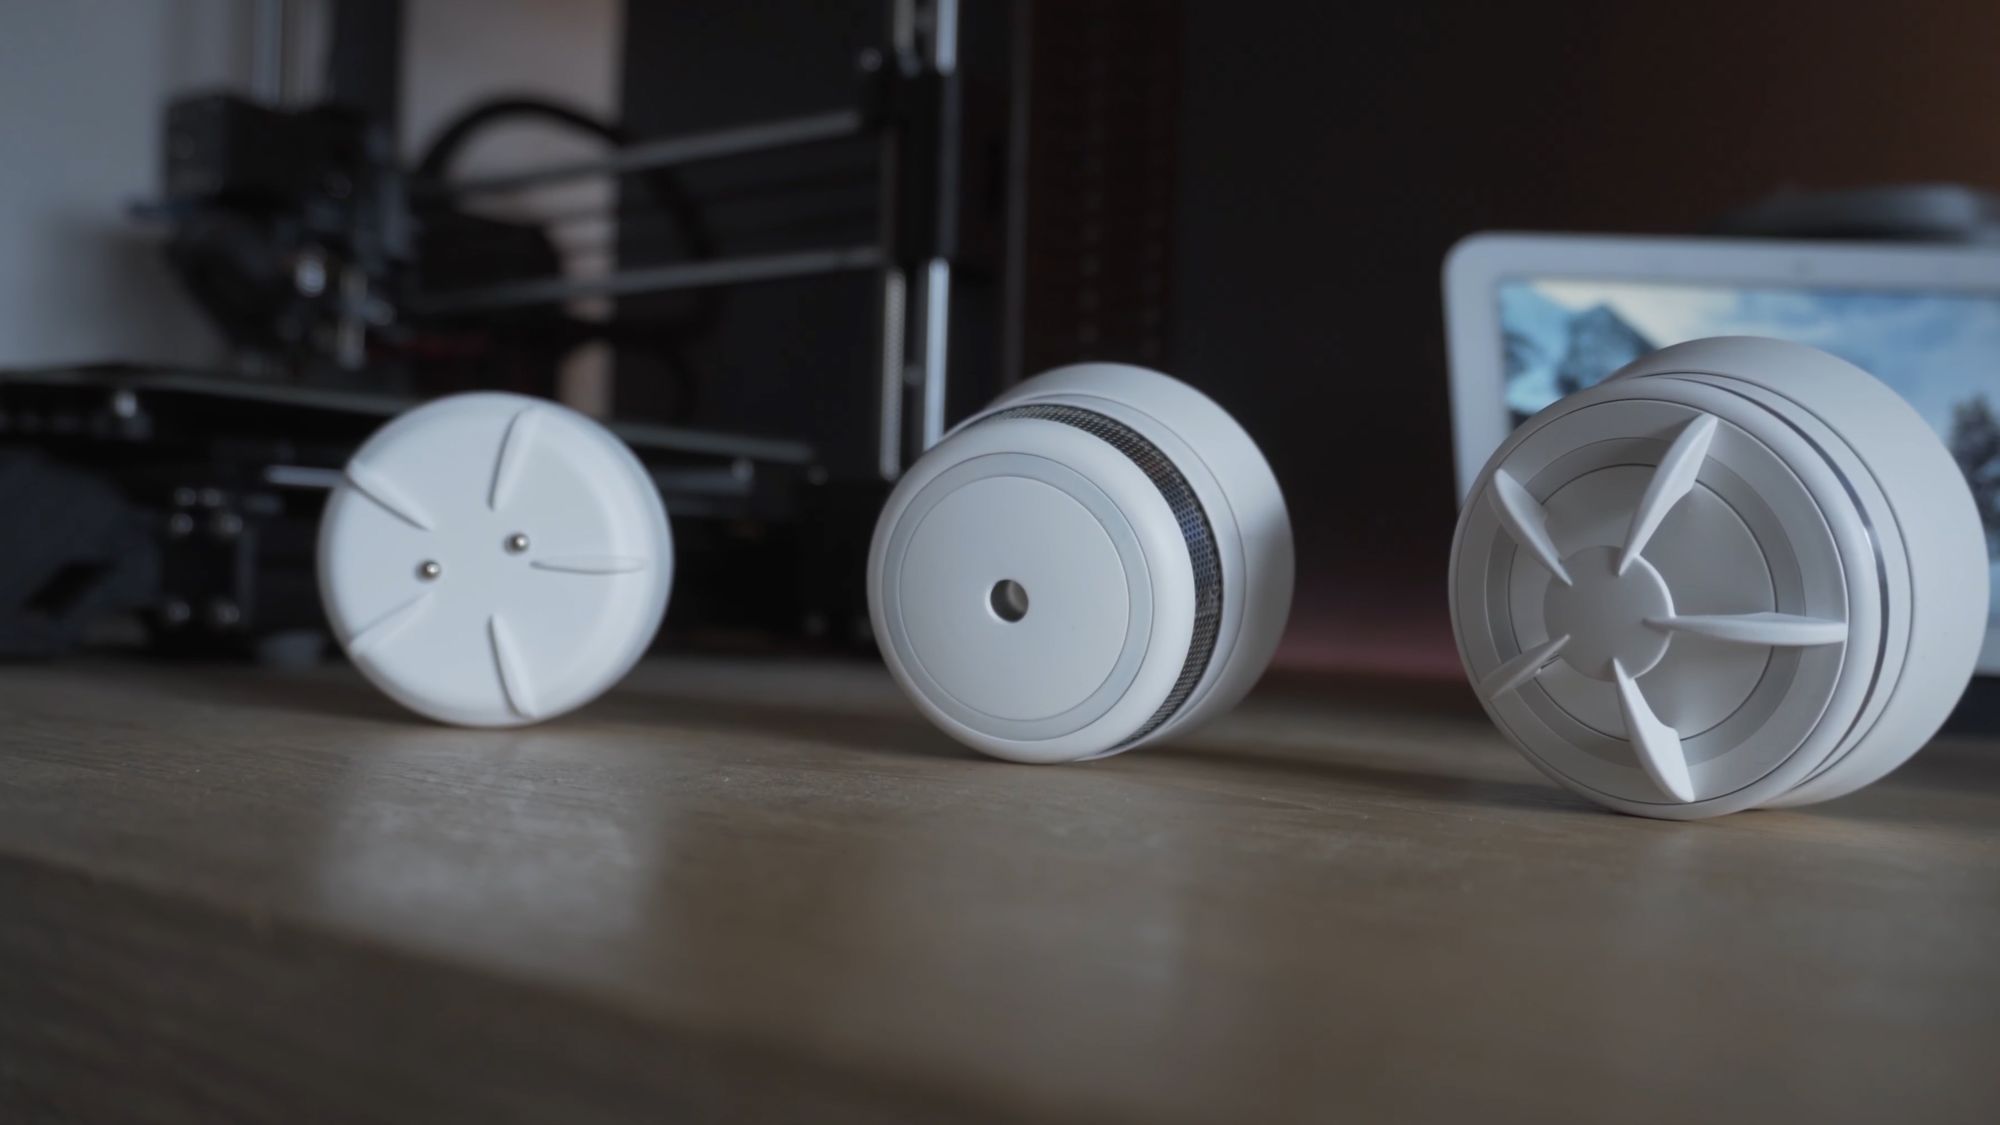
For the more fully featured setup, I would recommend a contact sensor and motion sensors again but this time we are going to include a few more things like a keypad which will allow us to set/unset the alarm with a pin code, a siren for audible alerts and some environmental sensors such as a smoke alarm, heat alarm or leak detector.
These devices can be a little harder to find sometimes and I only have recommendations for some Zigbee stuff at the moment but you may be able to find some other alternatives. For a keypad, I have this one from Develco which I’ve had for a long time now and it works great...it is little bit pricey though and there are certainly cheaper ones out there! Then for a siren, I also have this one from Develco - the thing I like about this one is that it’s mains powered but also has battery backup so if someone tried to unplug it, it will still keep alerting. Finally for environment sensors, you have things like the Aqara Leak Detector for water leaks and then I have the smoke and heat alarms from Develco, once again, that work really well.
Downloading Alarmo
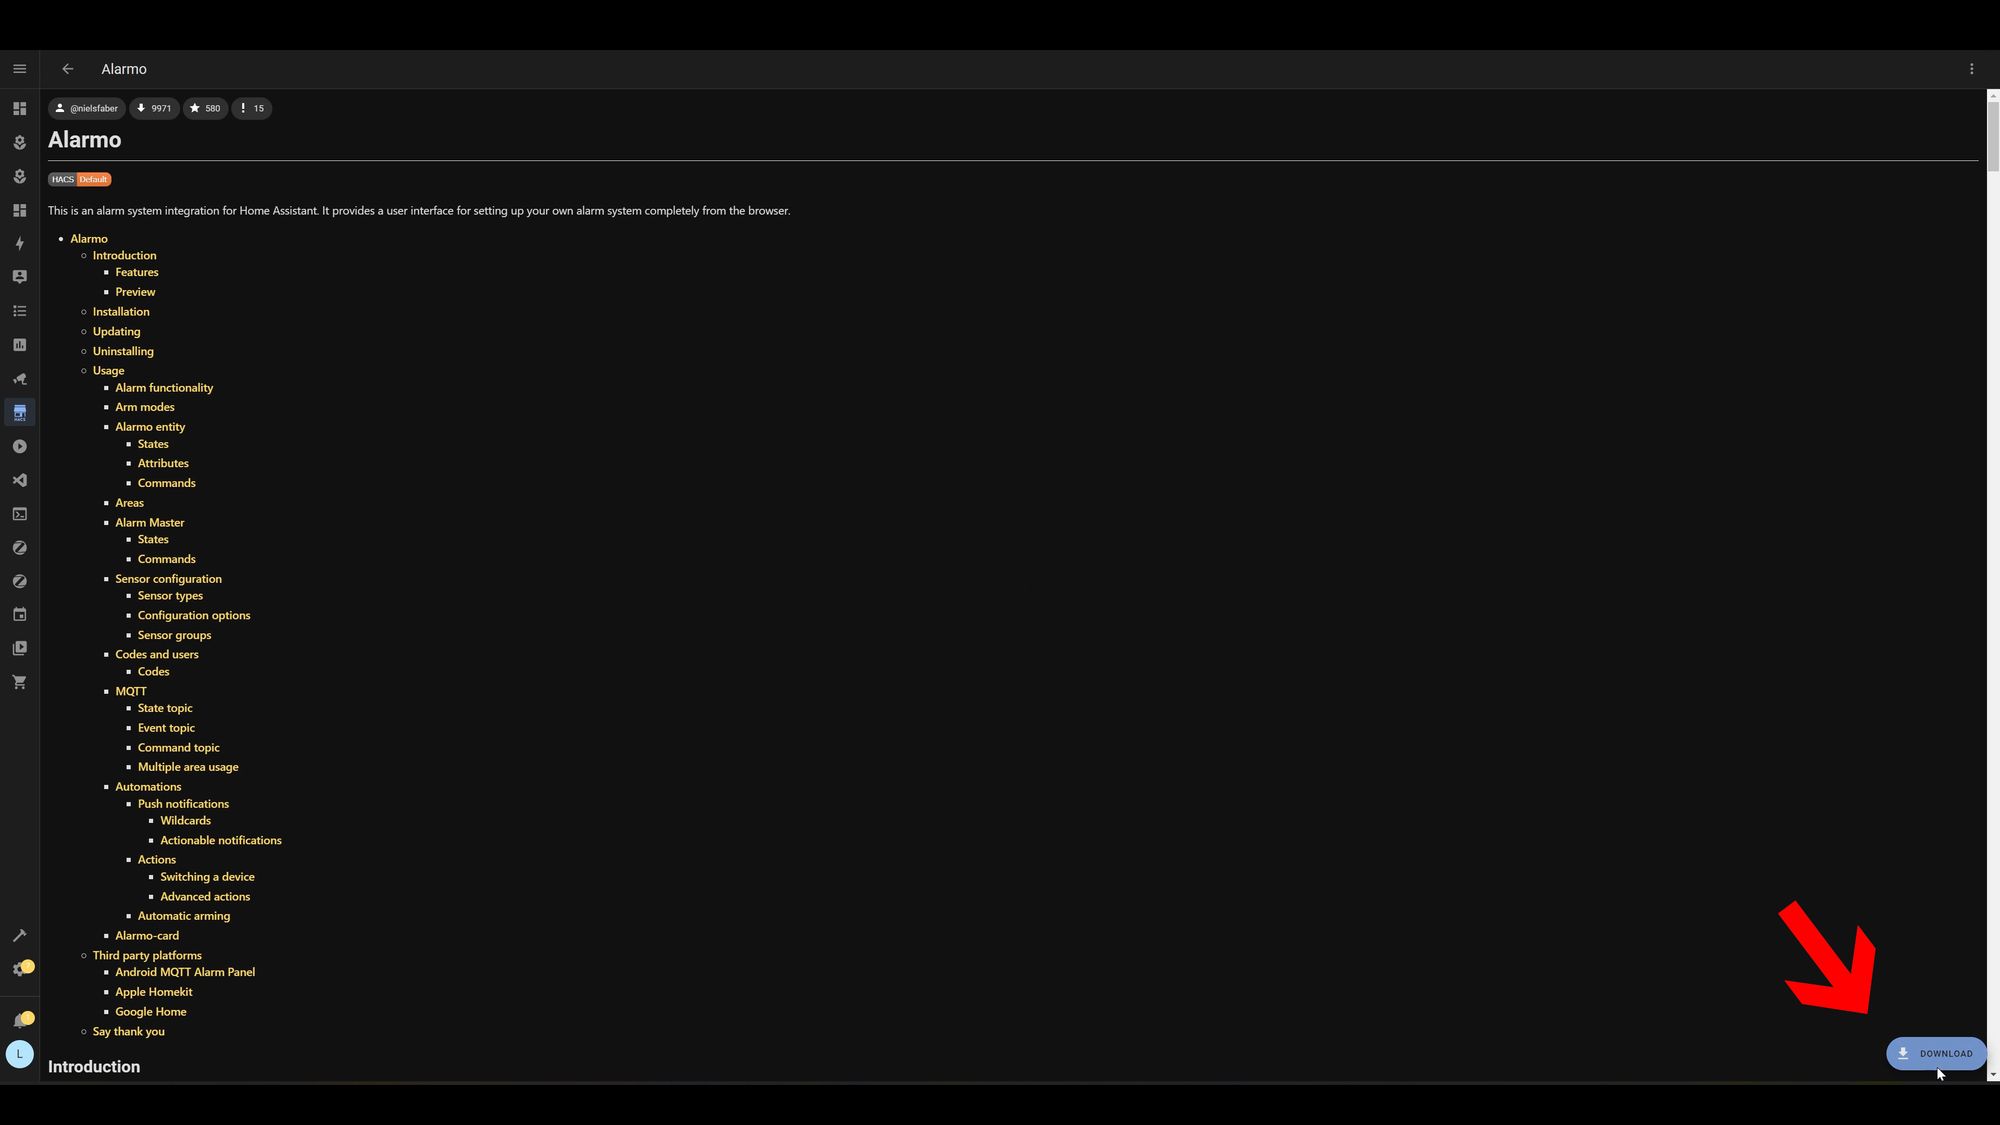
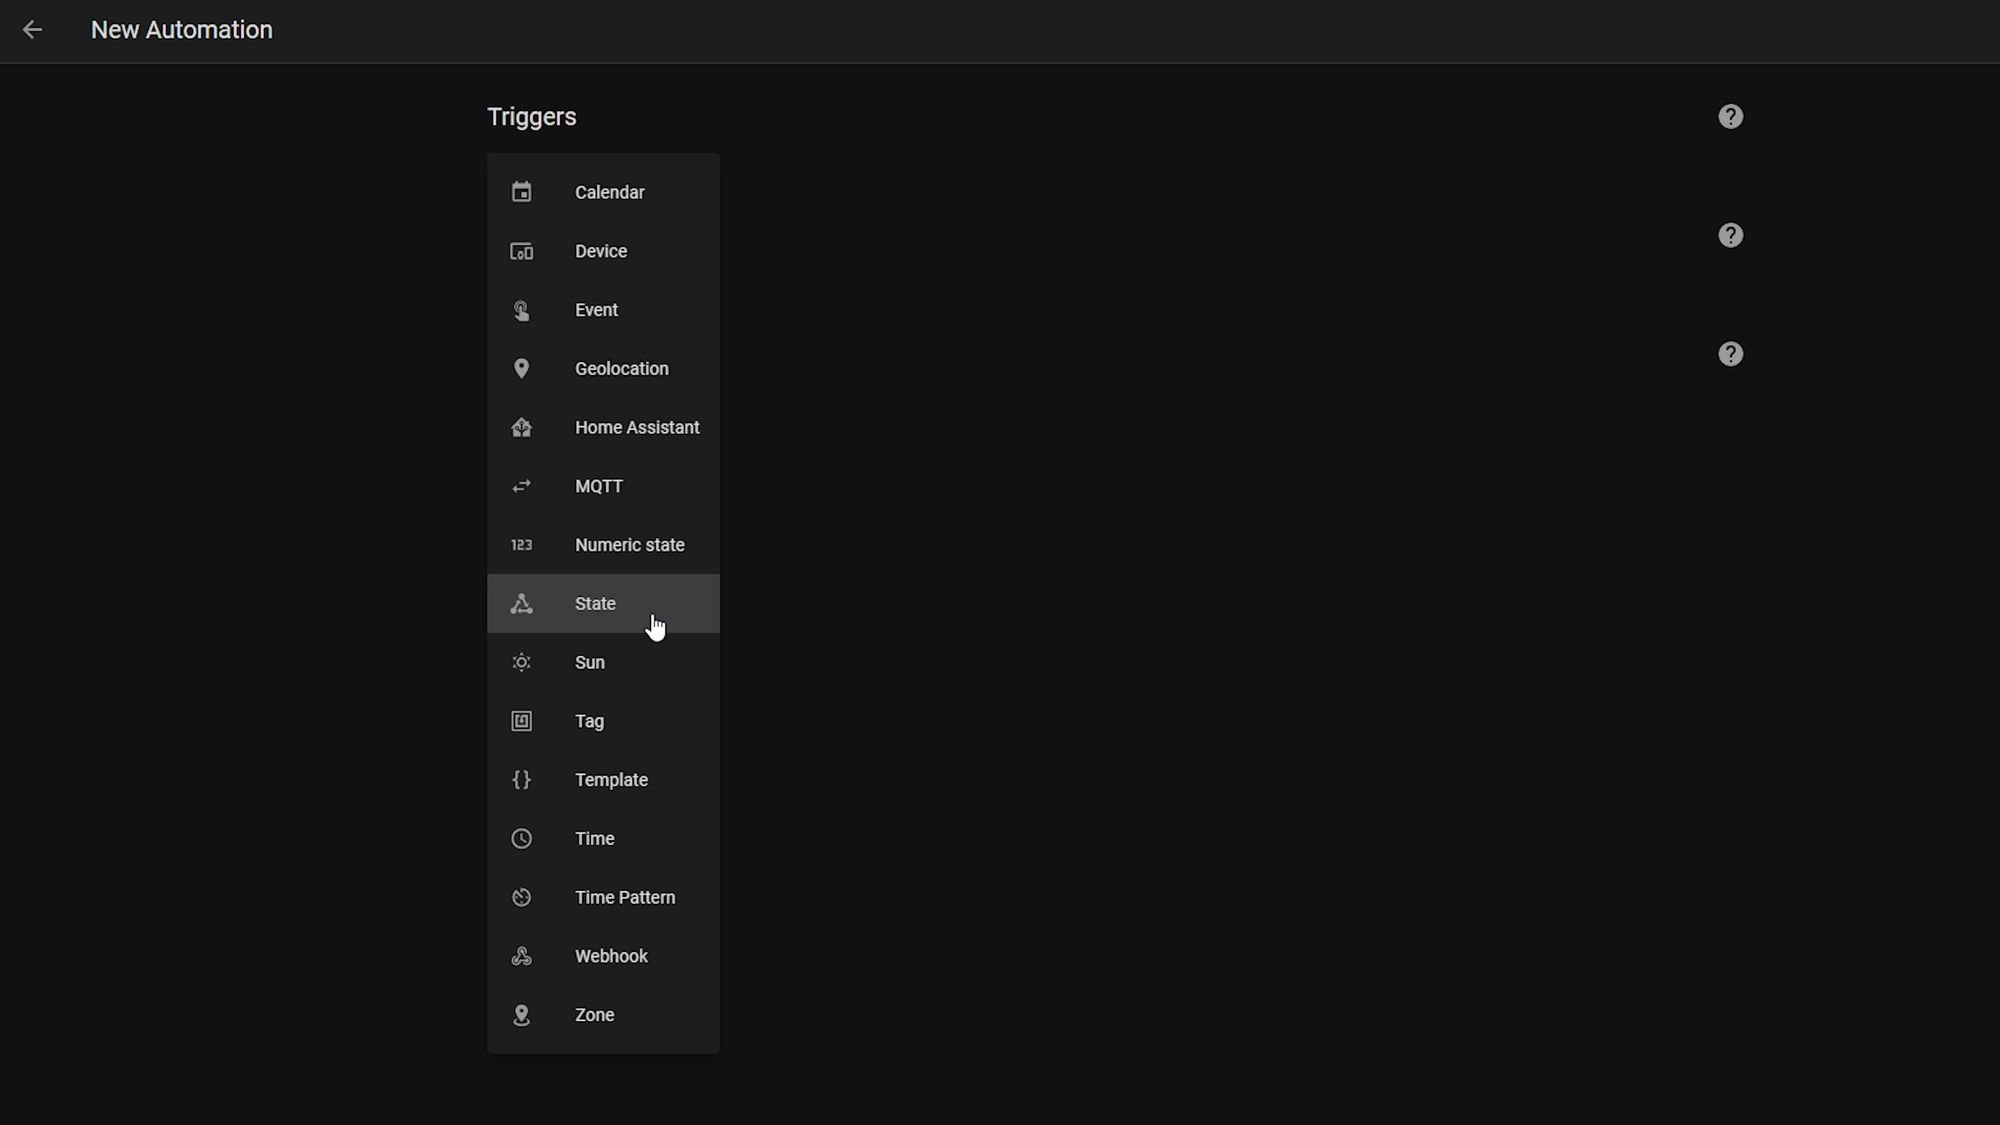
Inside of Home Assistant we are going to use a community made integration called Alarmo by nielsfaber. Now, it is possible to do everything manually inside of Home Assistant using all native components and that is actually how I used to do my alarm for the longest time but Alarmo makes the configuration options really easy to do and it is very customizable.
As I don’t know which hardware you are using, I’ll show you a kind of overview of how everything works so you can fill in the blanks with the hardware you are using and we will also take a look at my setup . I'll also assume that you have your hardware connected to Home Assistant already.
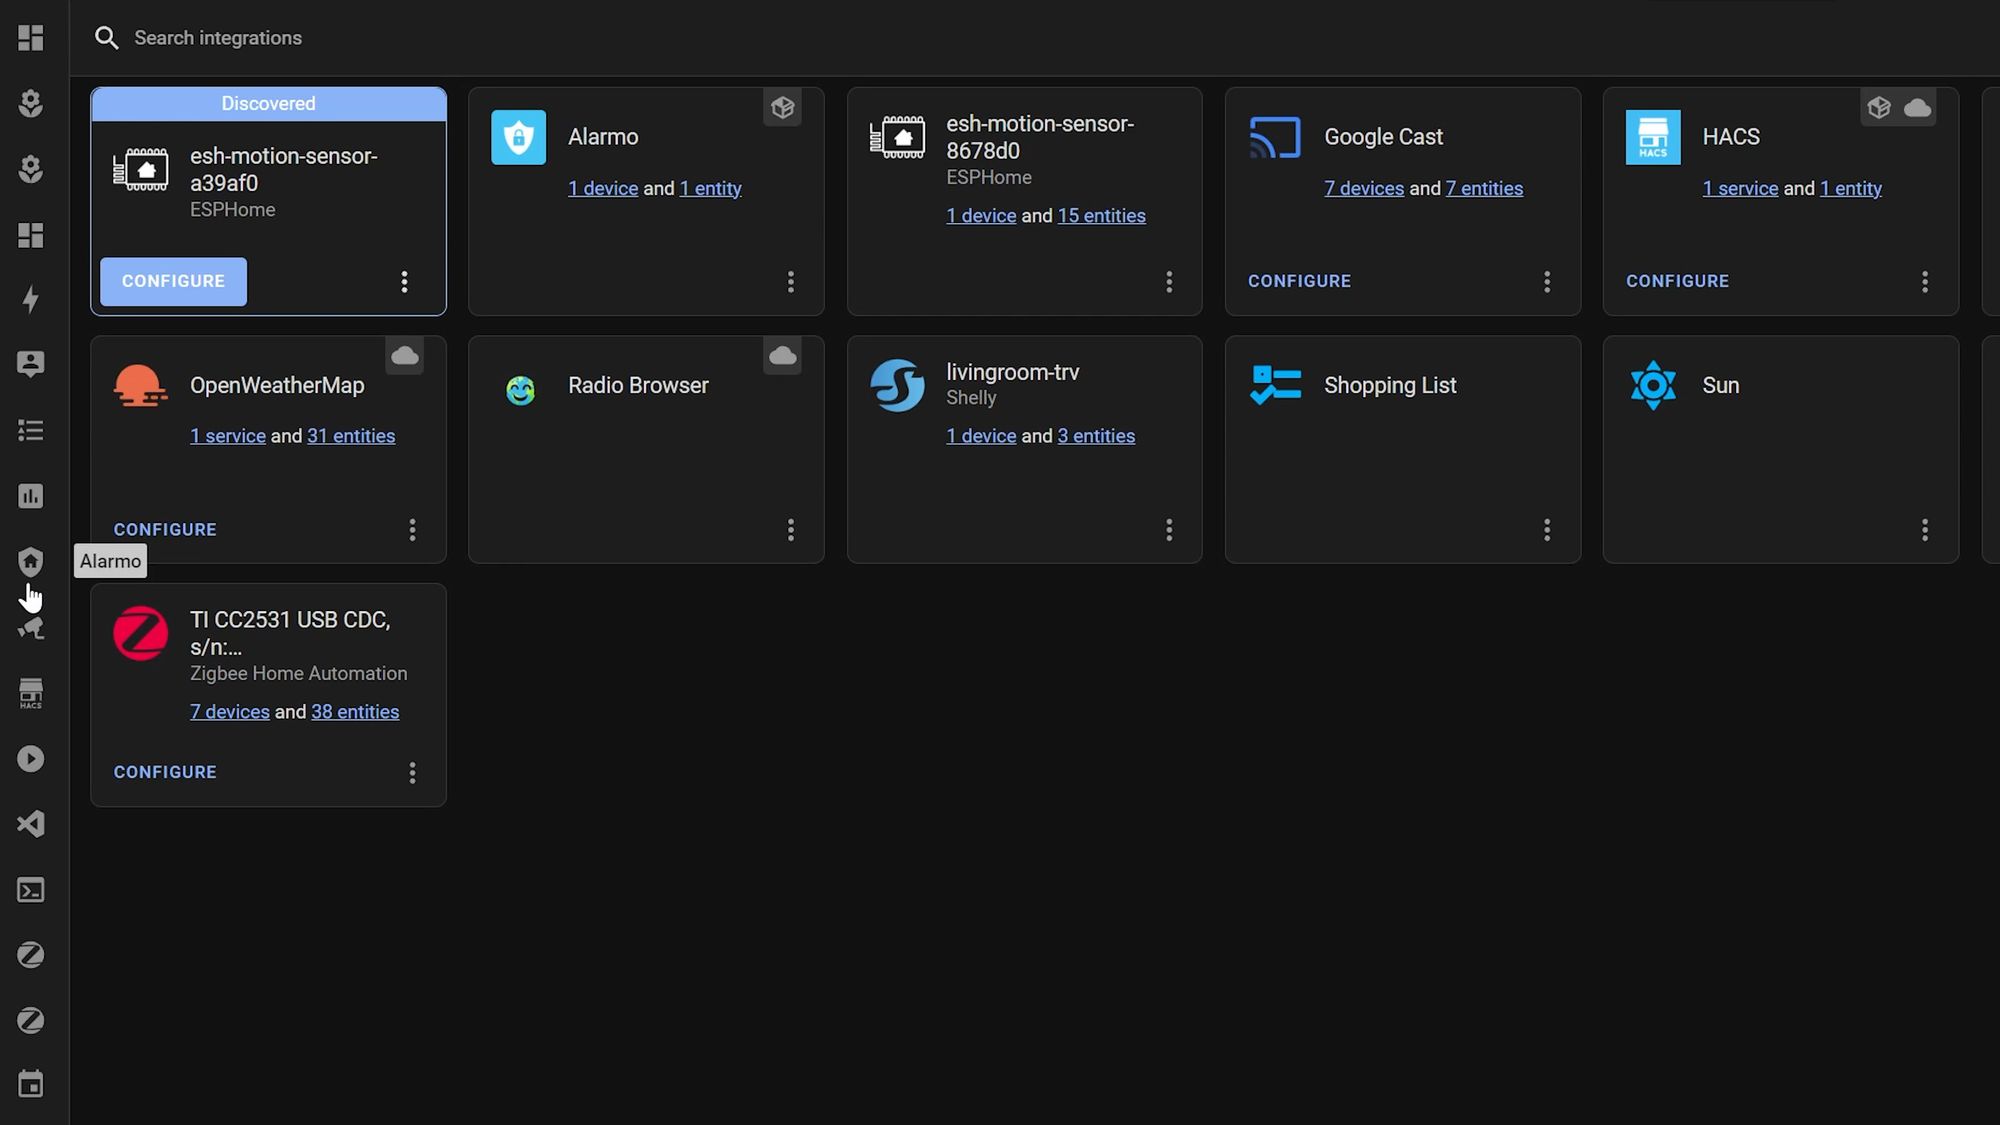
First head over to HACS in Home Assistant which if you don’t have installed check this out, then go to integrations and search for Alarmo and hit the download button.
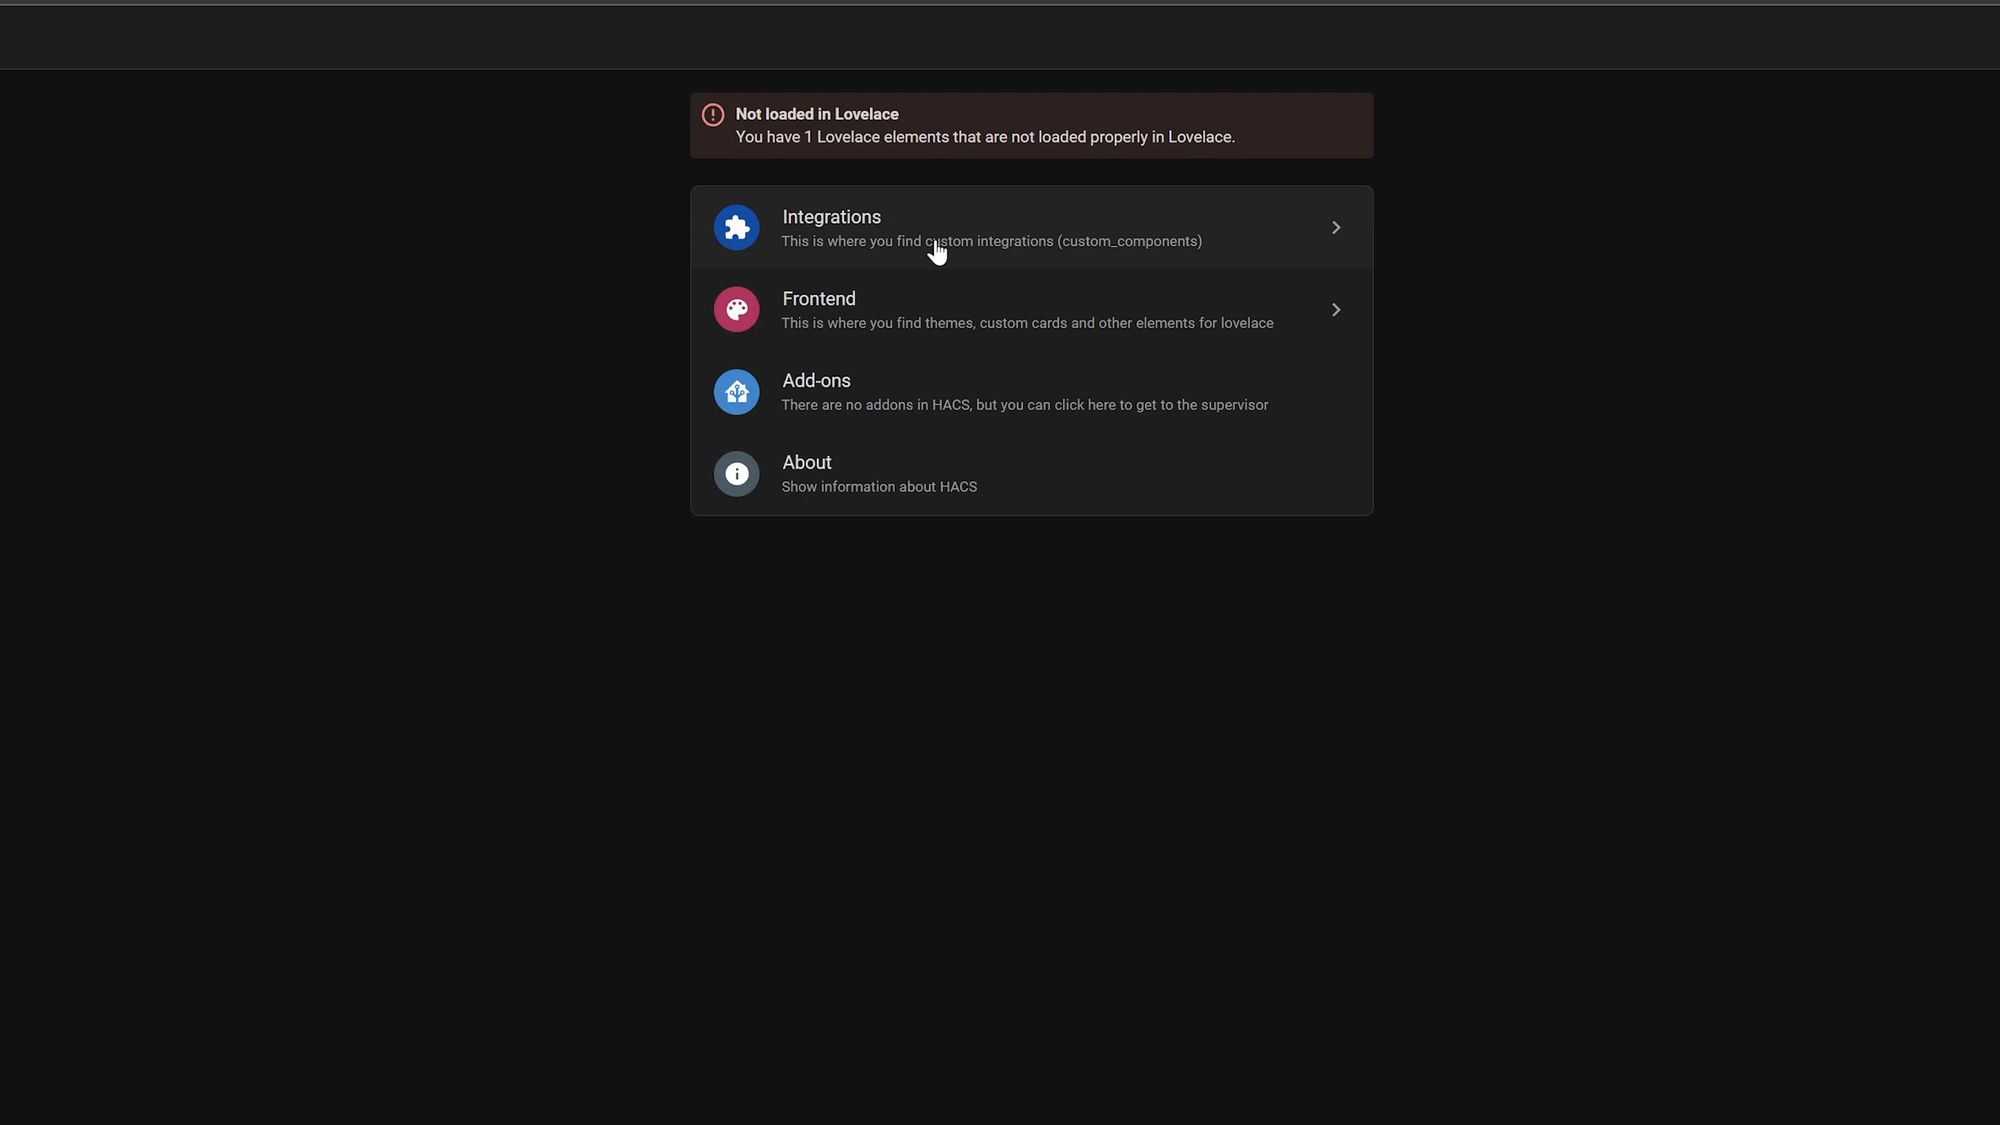

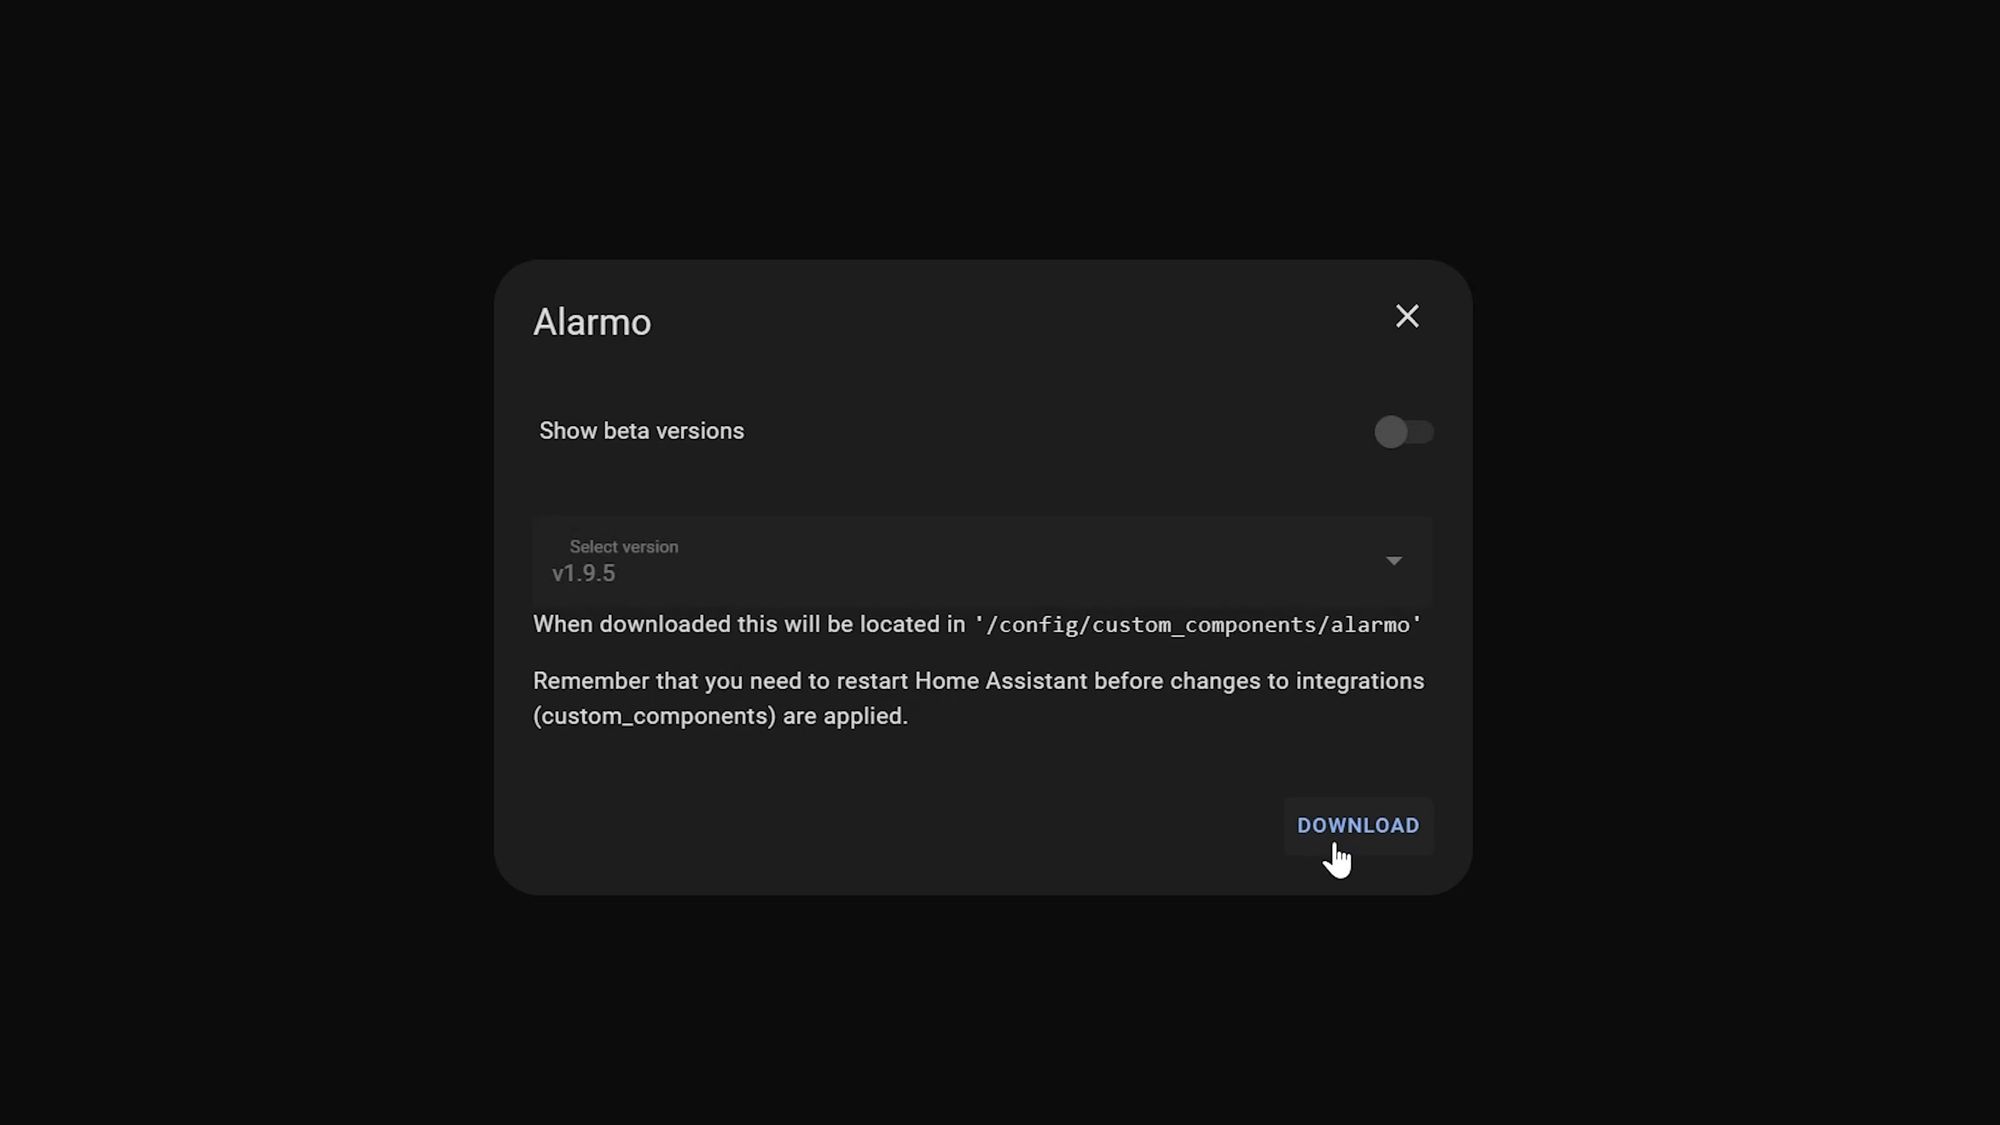
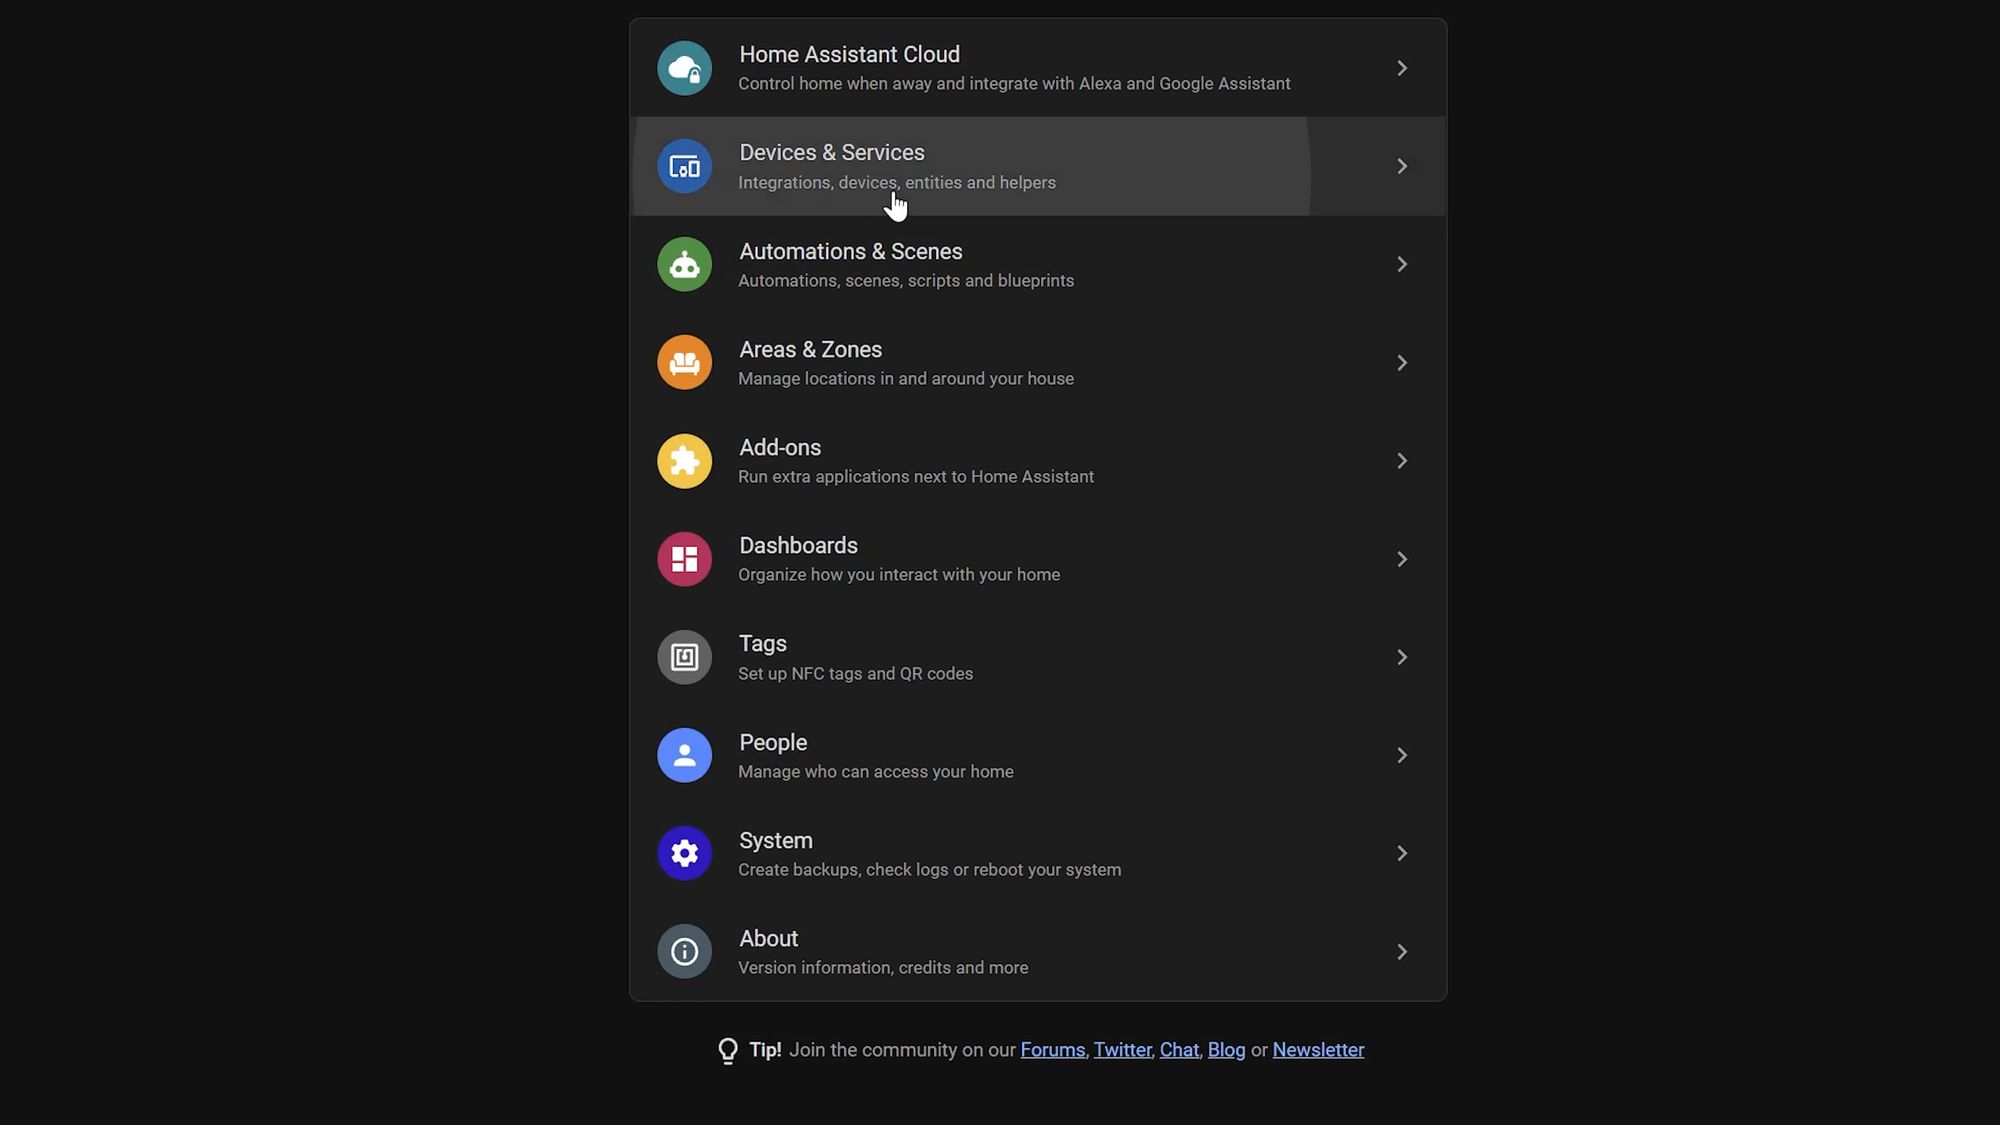
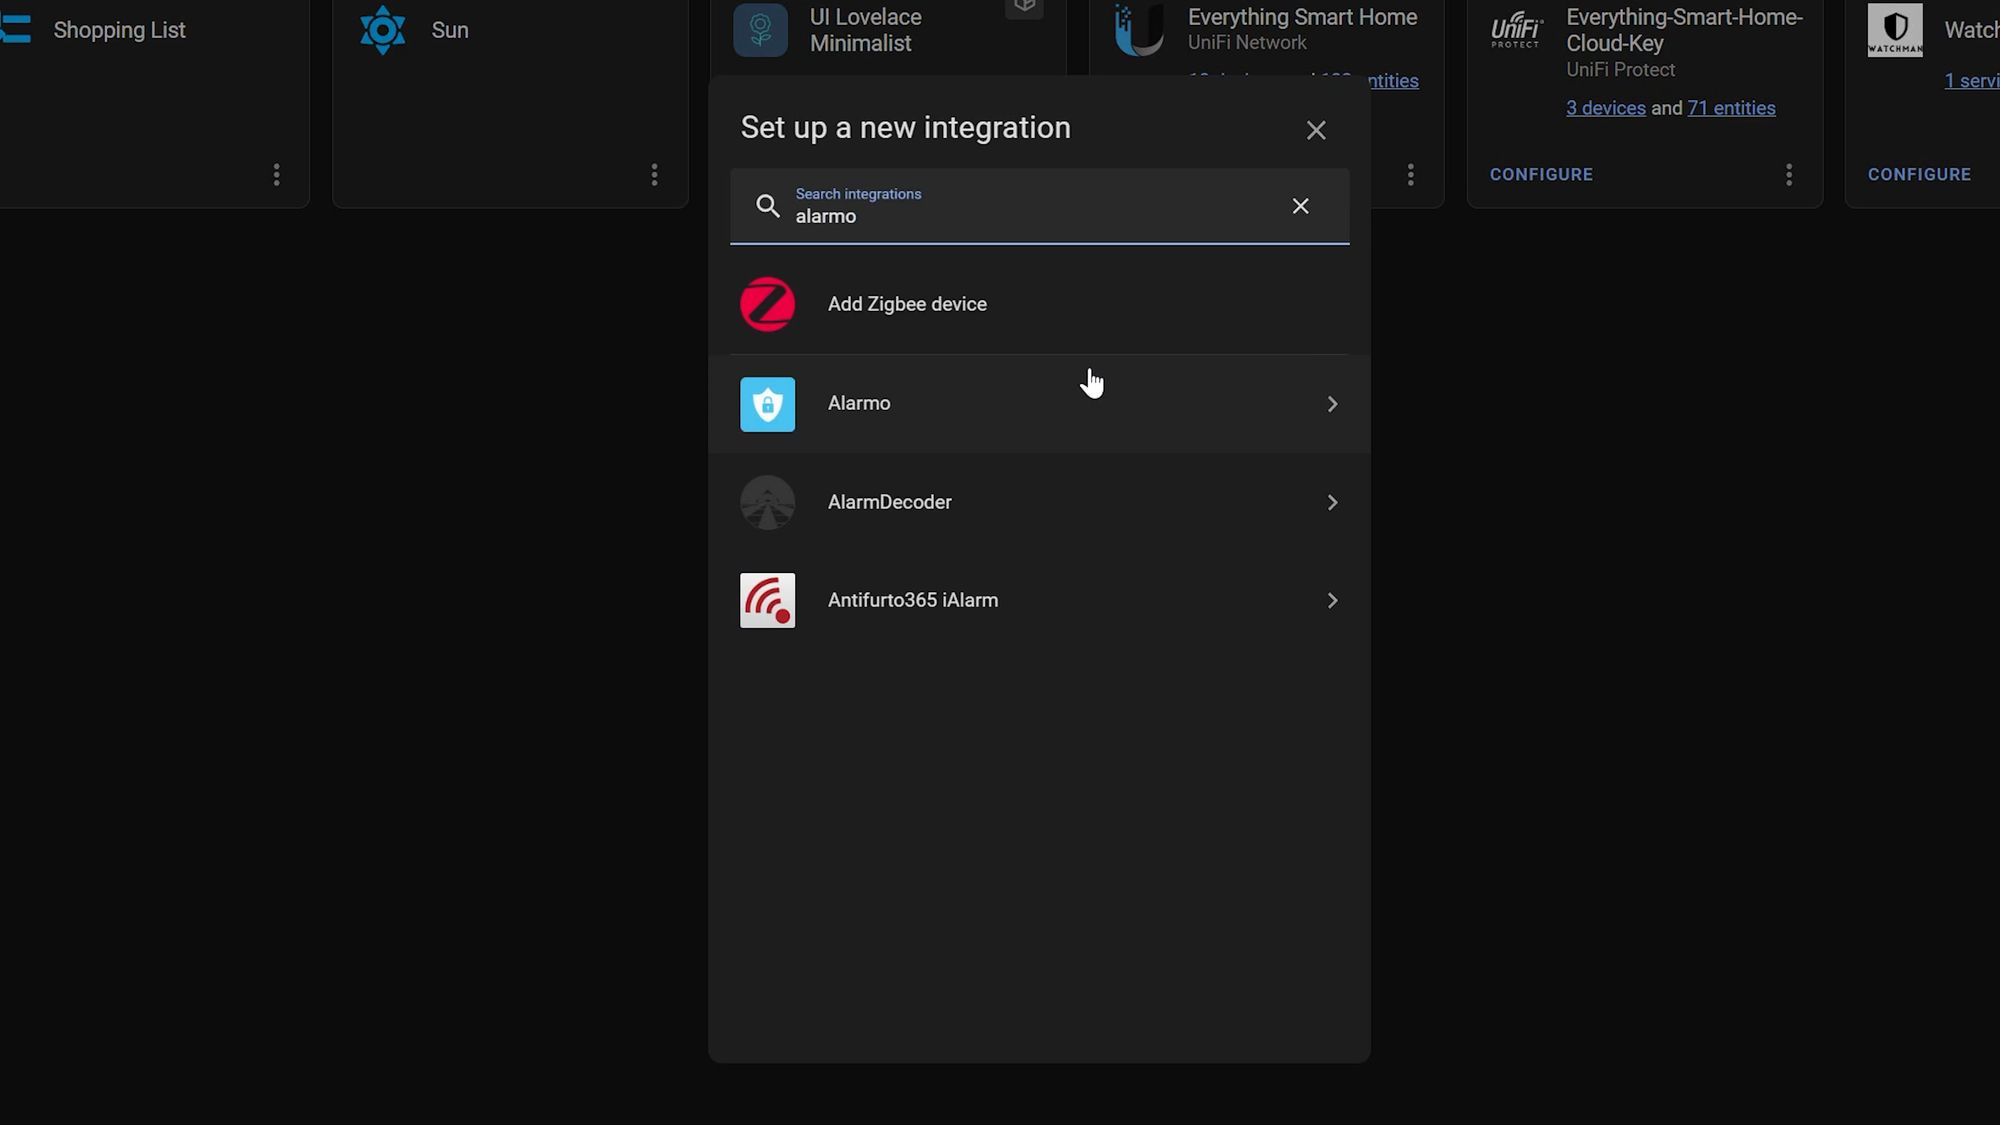
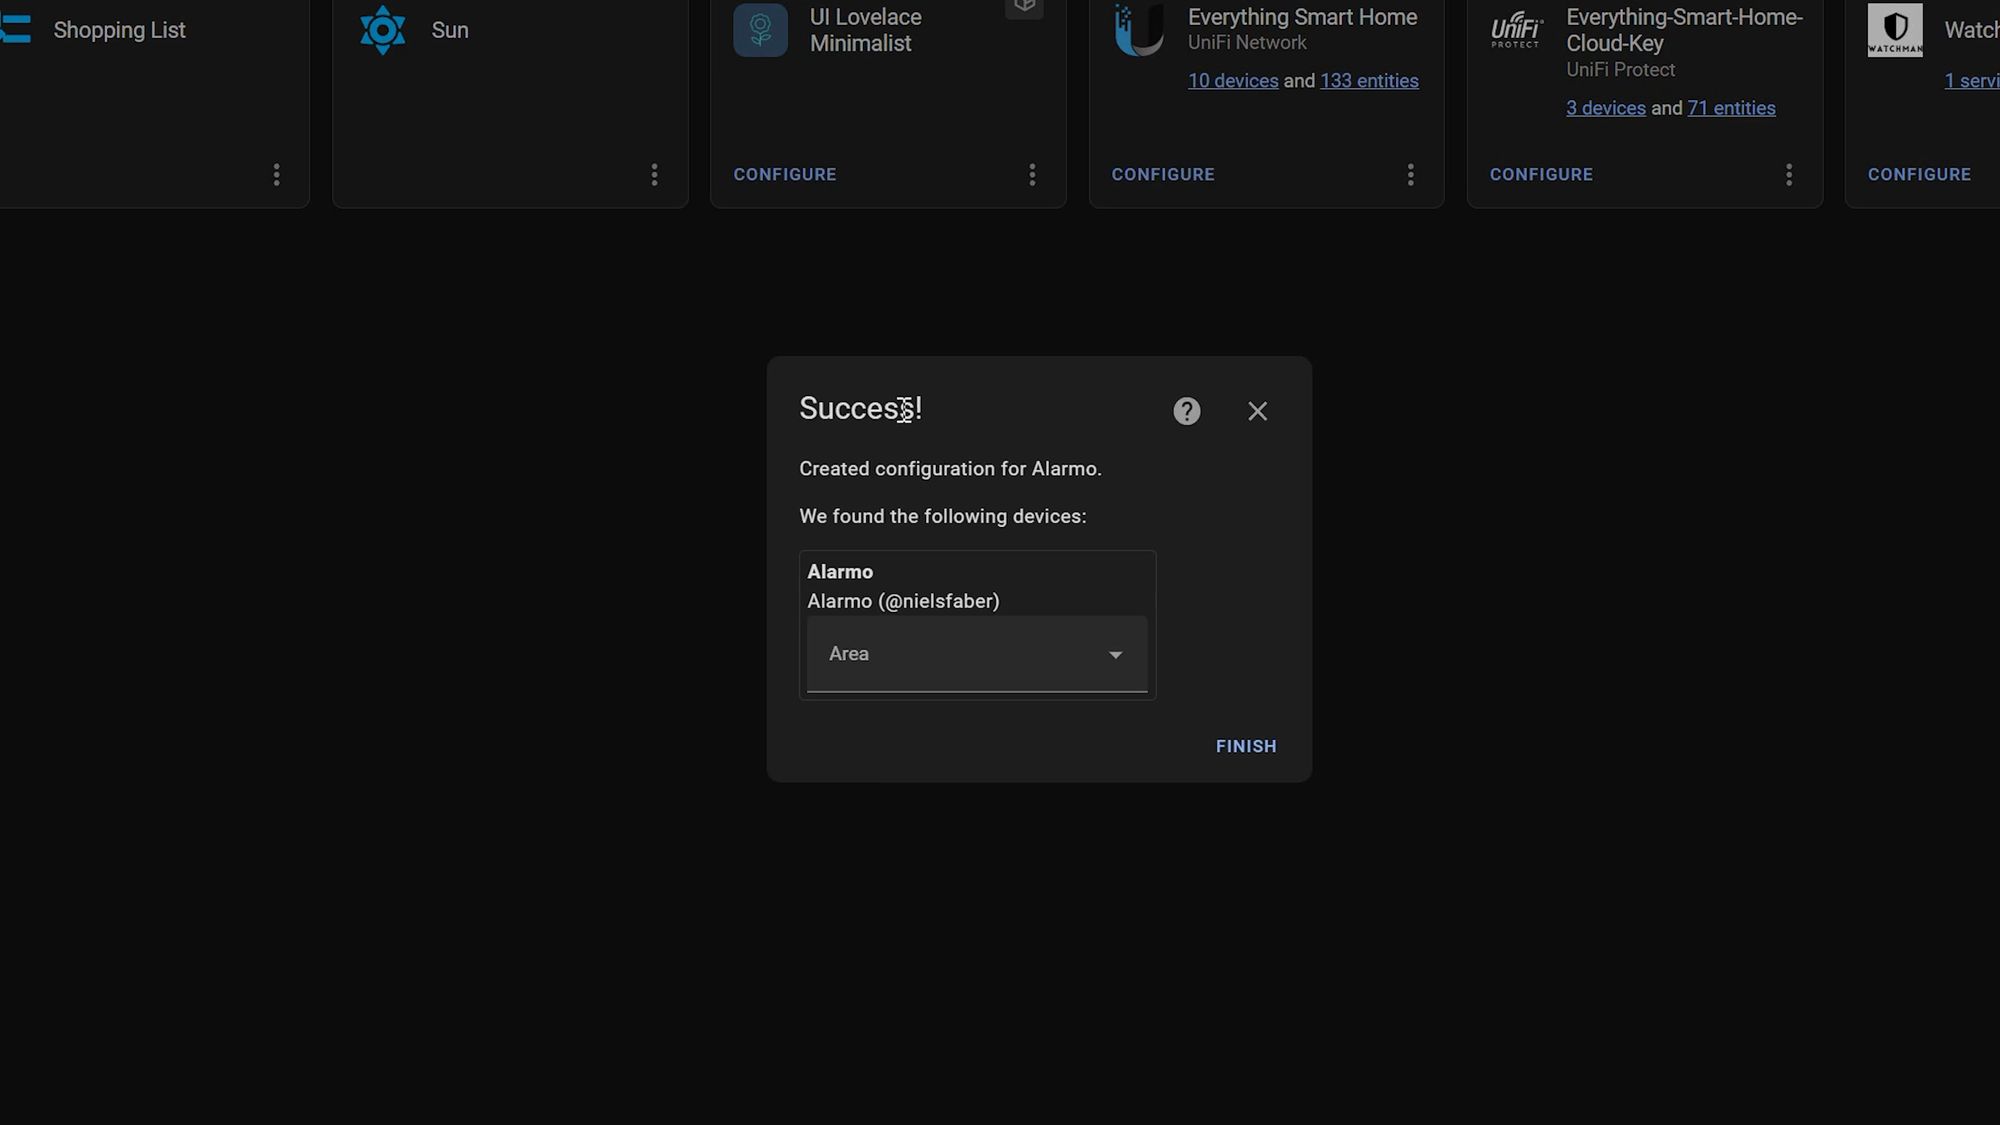
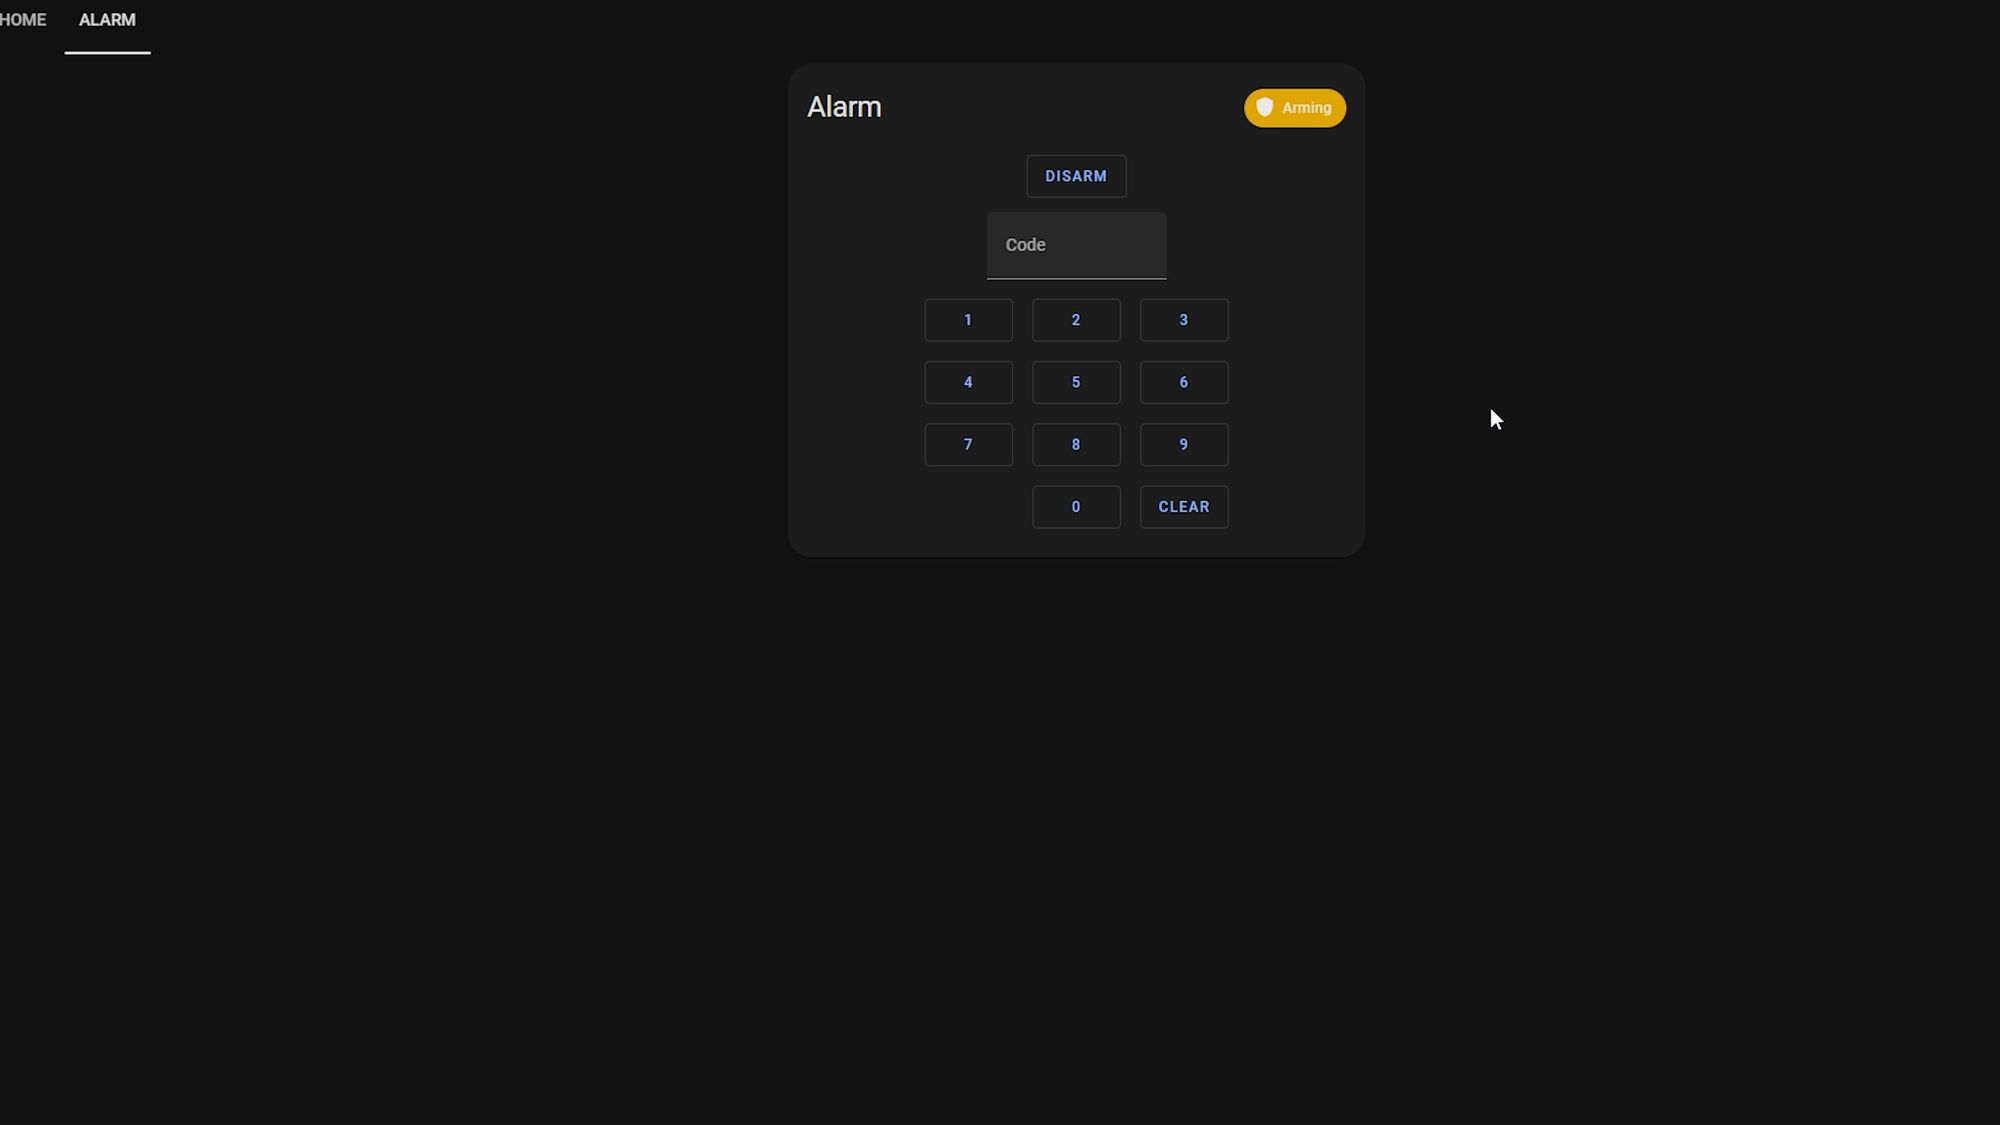
Once downloaded, make sure to head over and restart Home Assistant first for that to take effect, then go to settings, devices and services, add integration and then search for Alarmo. Once Alarmo is added, you will have a button in your sidebar that will take you to the Alarmo settings page.

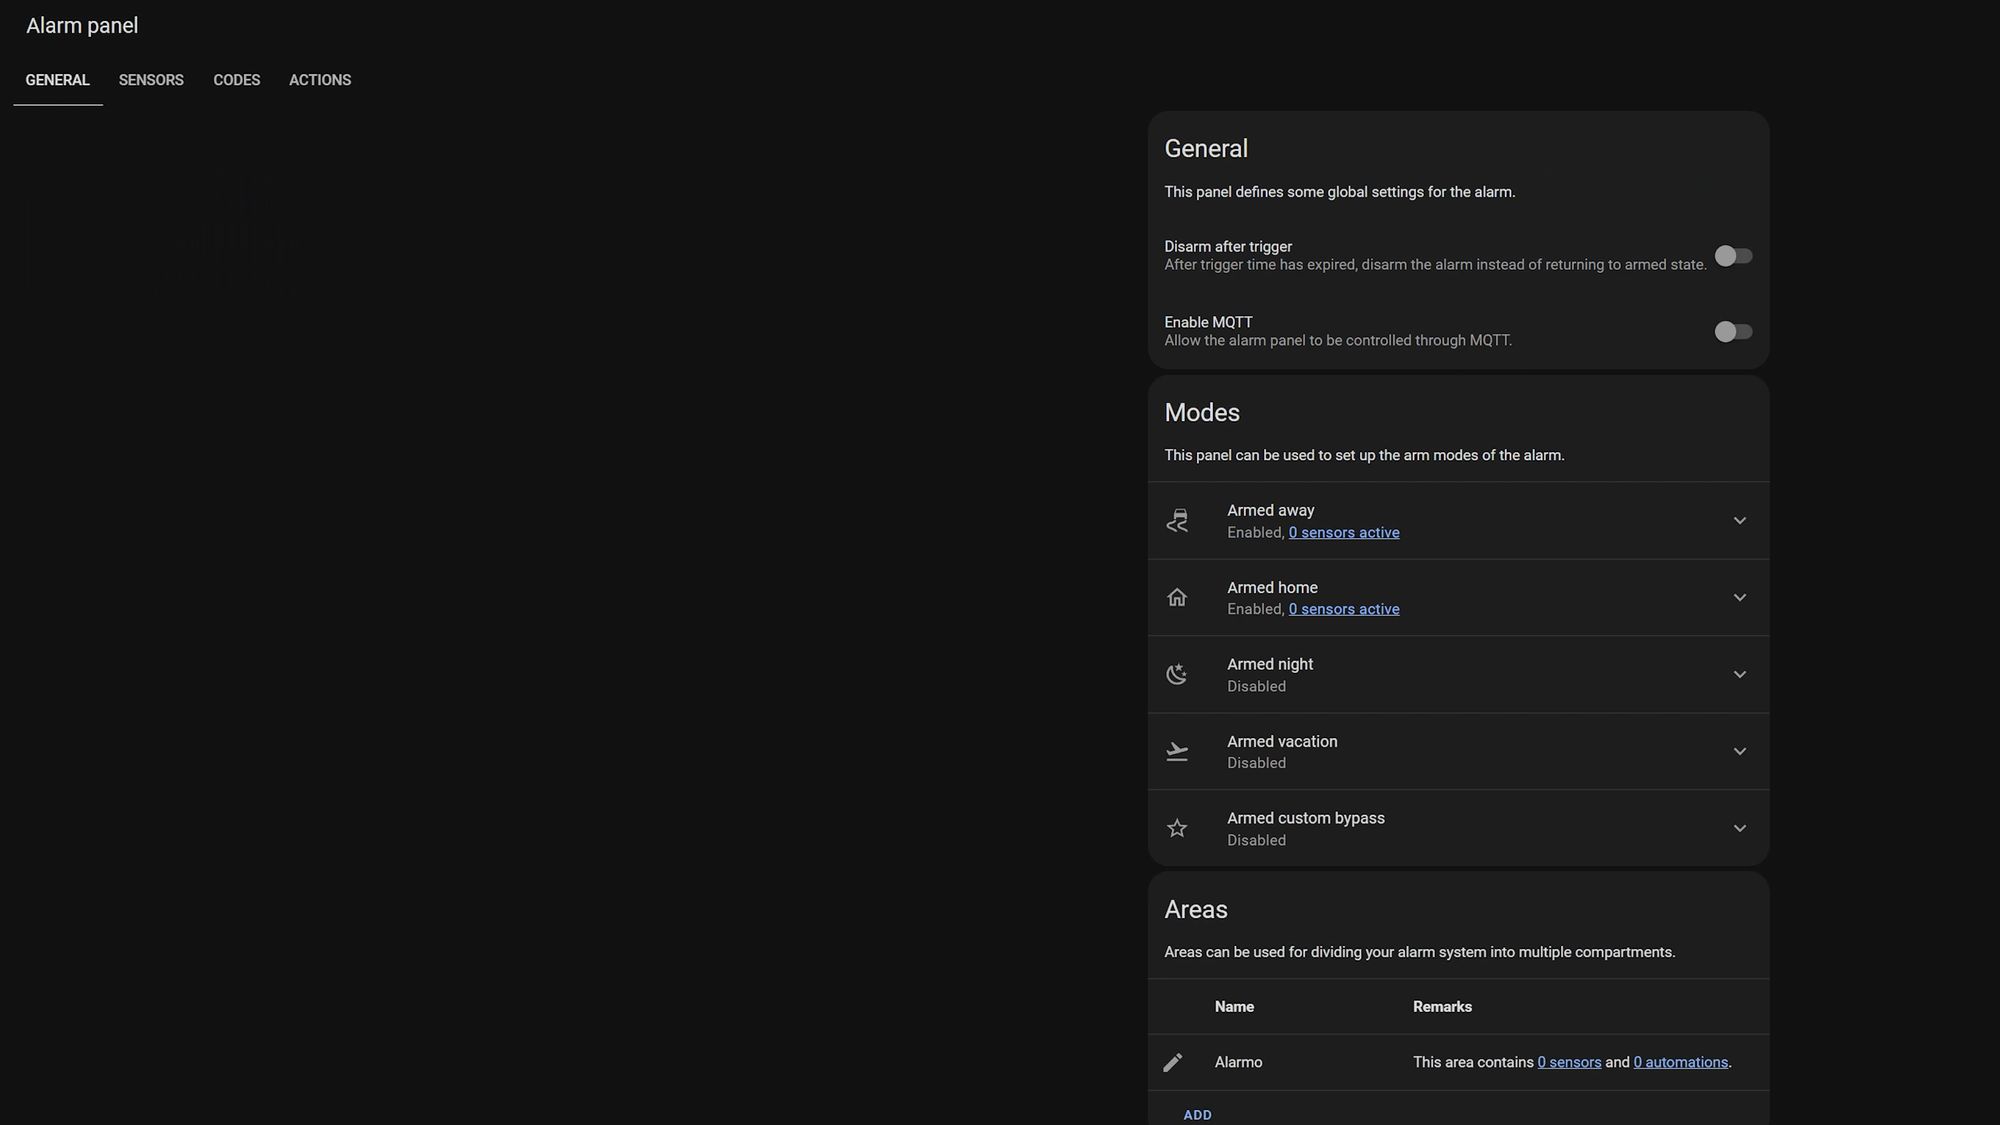
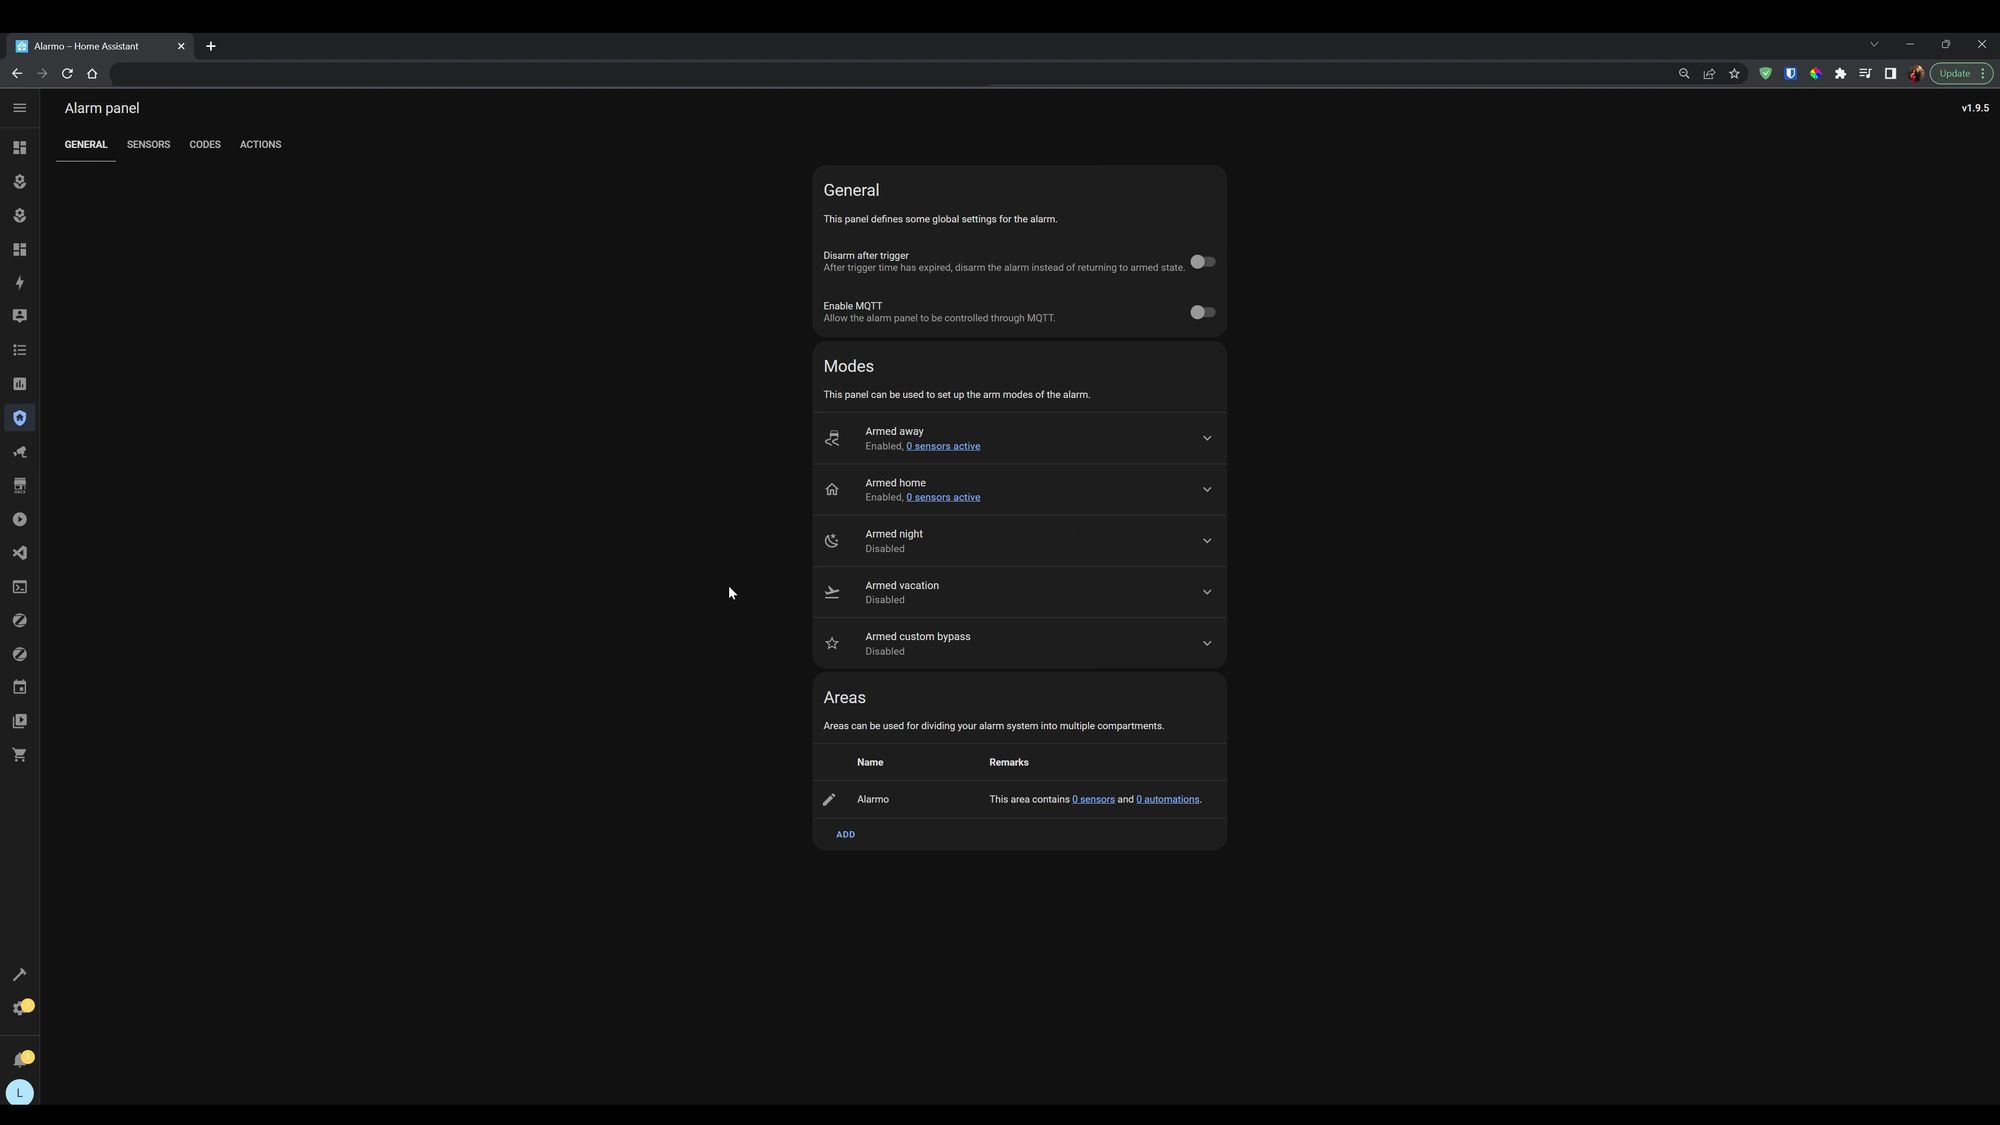
Alarmo Settings
This brings you into the main configuration for Alarmo and pretty much everything is controlled here, although for my setup I do supplement this with some automations and scripts.
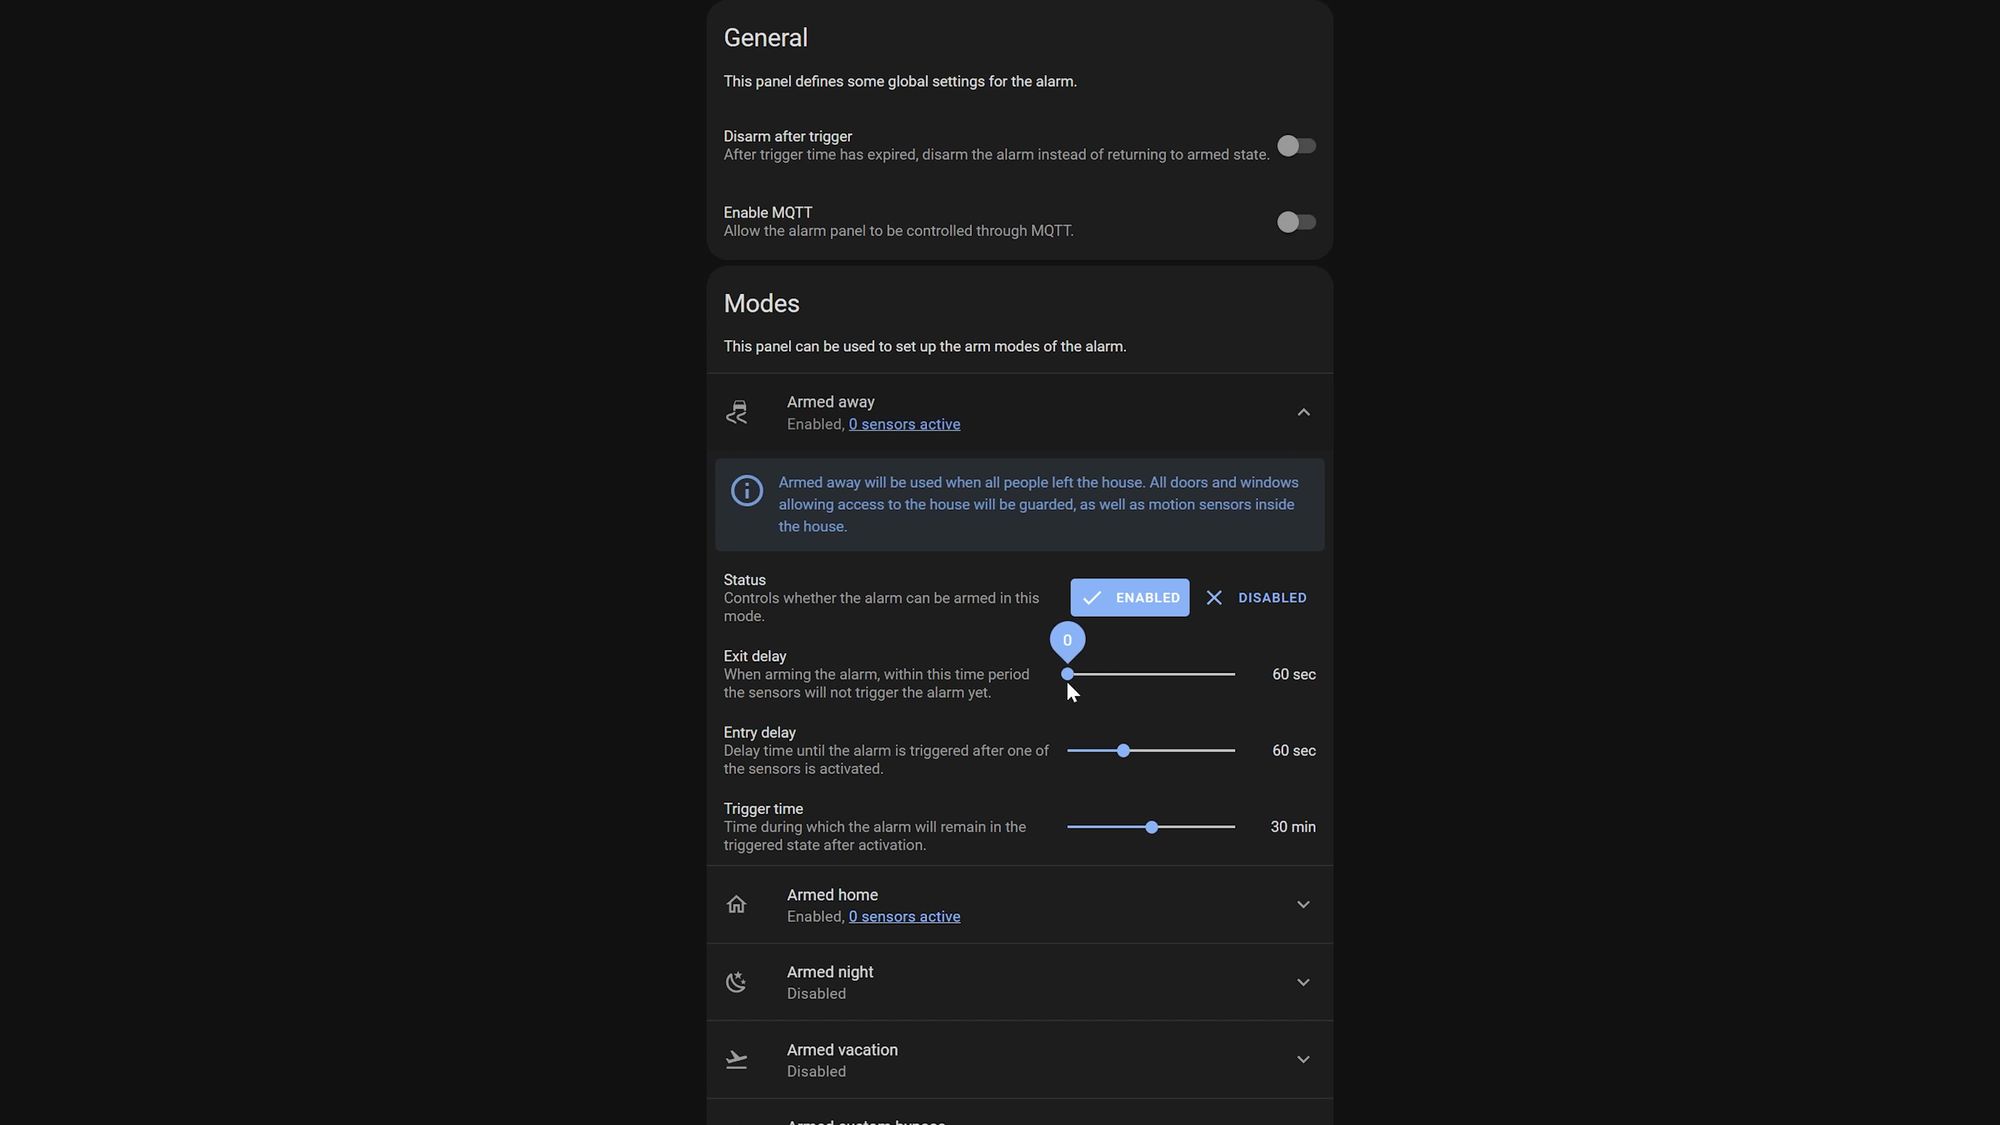
The first thing we are going to do is create a mode for armed away, this is the alarm mode that will be activated when everyone leaves the house. The reason for having different modes is that you may want to have different sensors active for different scenarios. For example, with the away mode, you would probably want to have all of the contact sensors and motion sensors active, but for night mode, you wouldn’t want to have internal motion sensors set, just incase you set them off when going to the bathroom in the middle of the night or anything like that.
Click on the dropdown and then adjust the settings to suit your needs. As my alarm will automatically set when my phones GPS location is away from the house, I like to set the exit delay to zero, but just set the timings to whatever you would like.

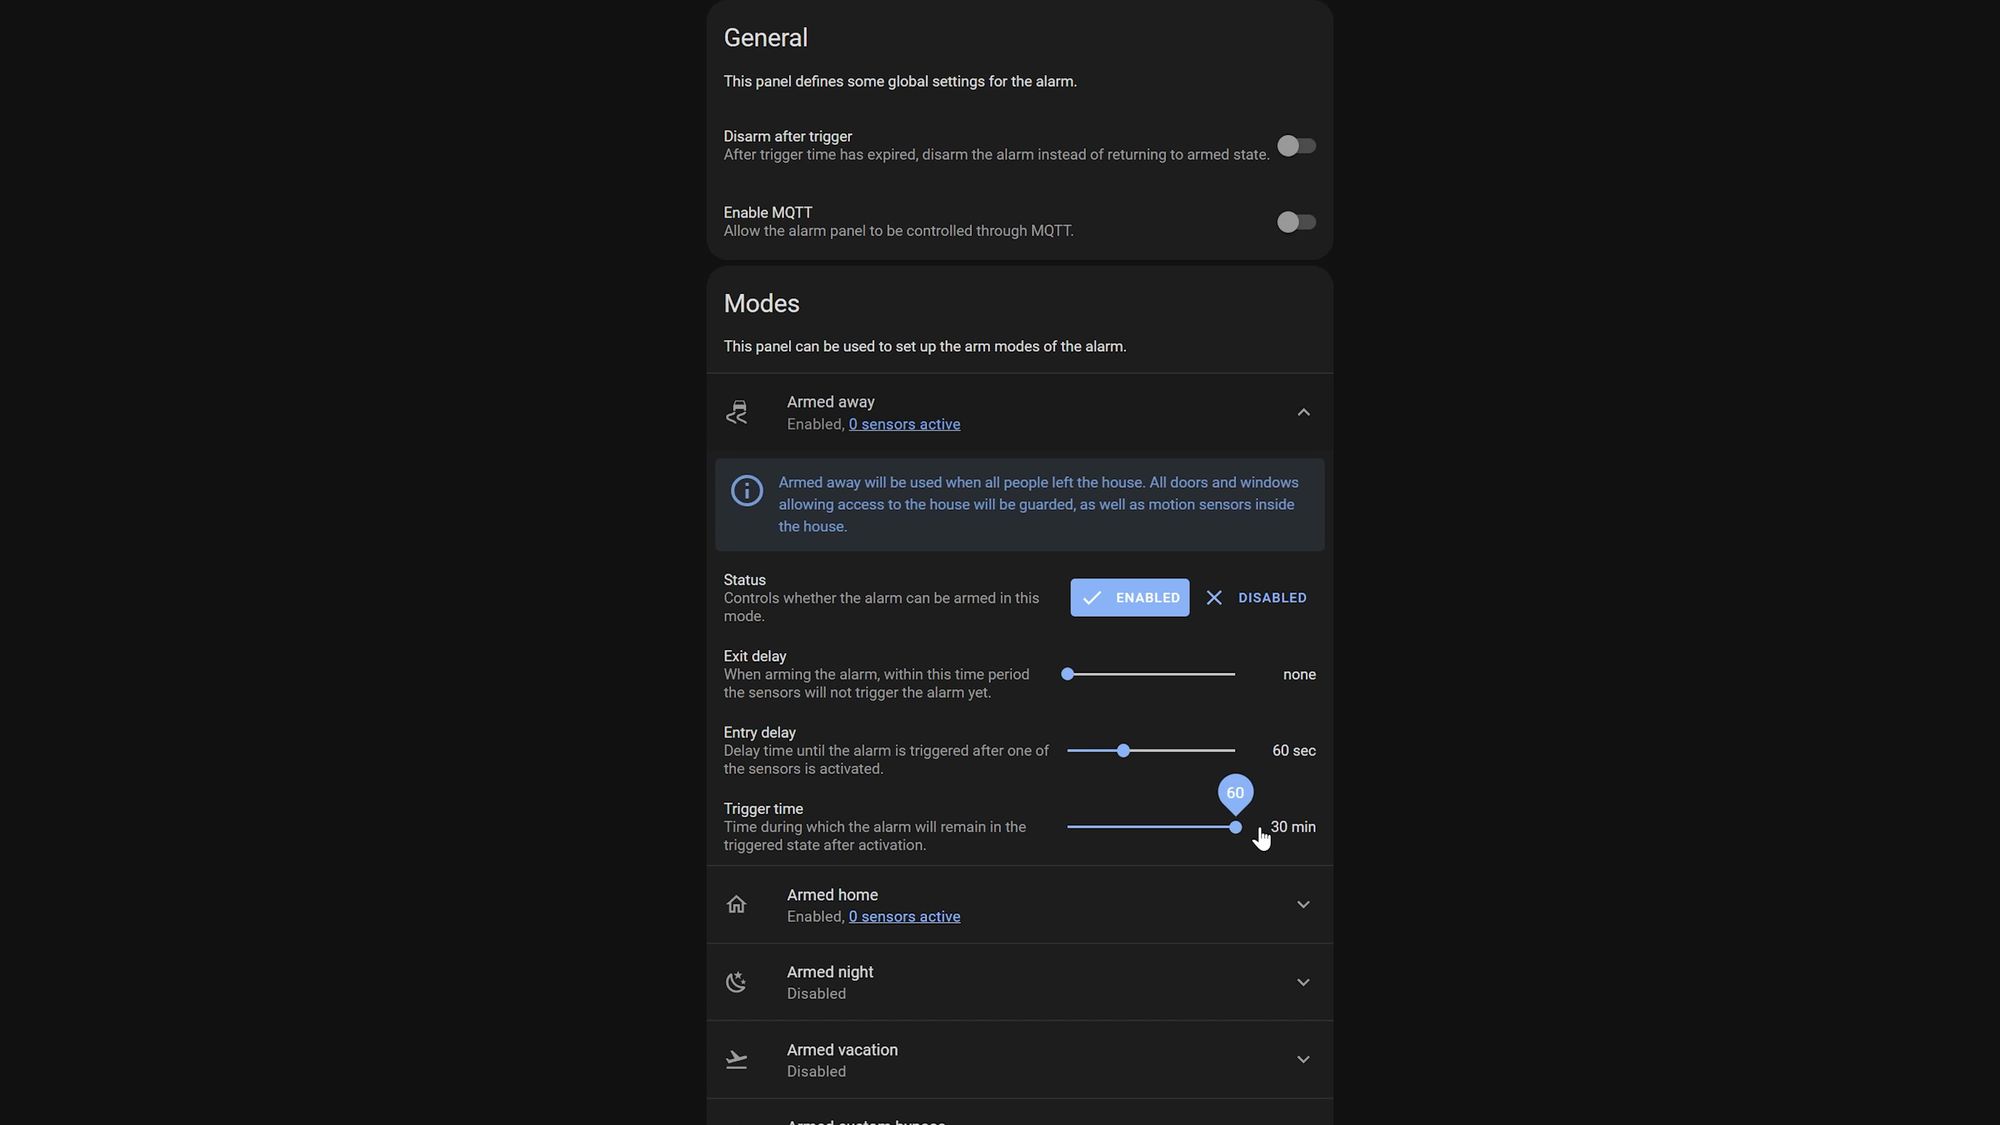
You’ll also notice that it says we have 0 sensors active, so let’s add those now by clicking on the sensors tab at the top.

Connecting Our Sensors
From here, you will see Alarmo gives you a list of all of the sensors you have connected to Home Assistant - and this is where I hope you have a good naming scheme set for your sensors, otherwise this could be quite challenging.
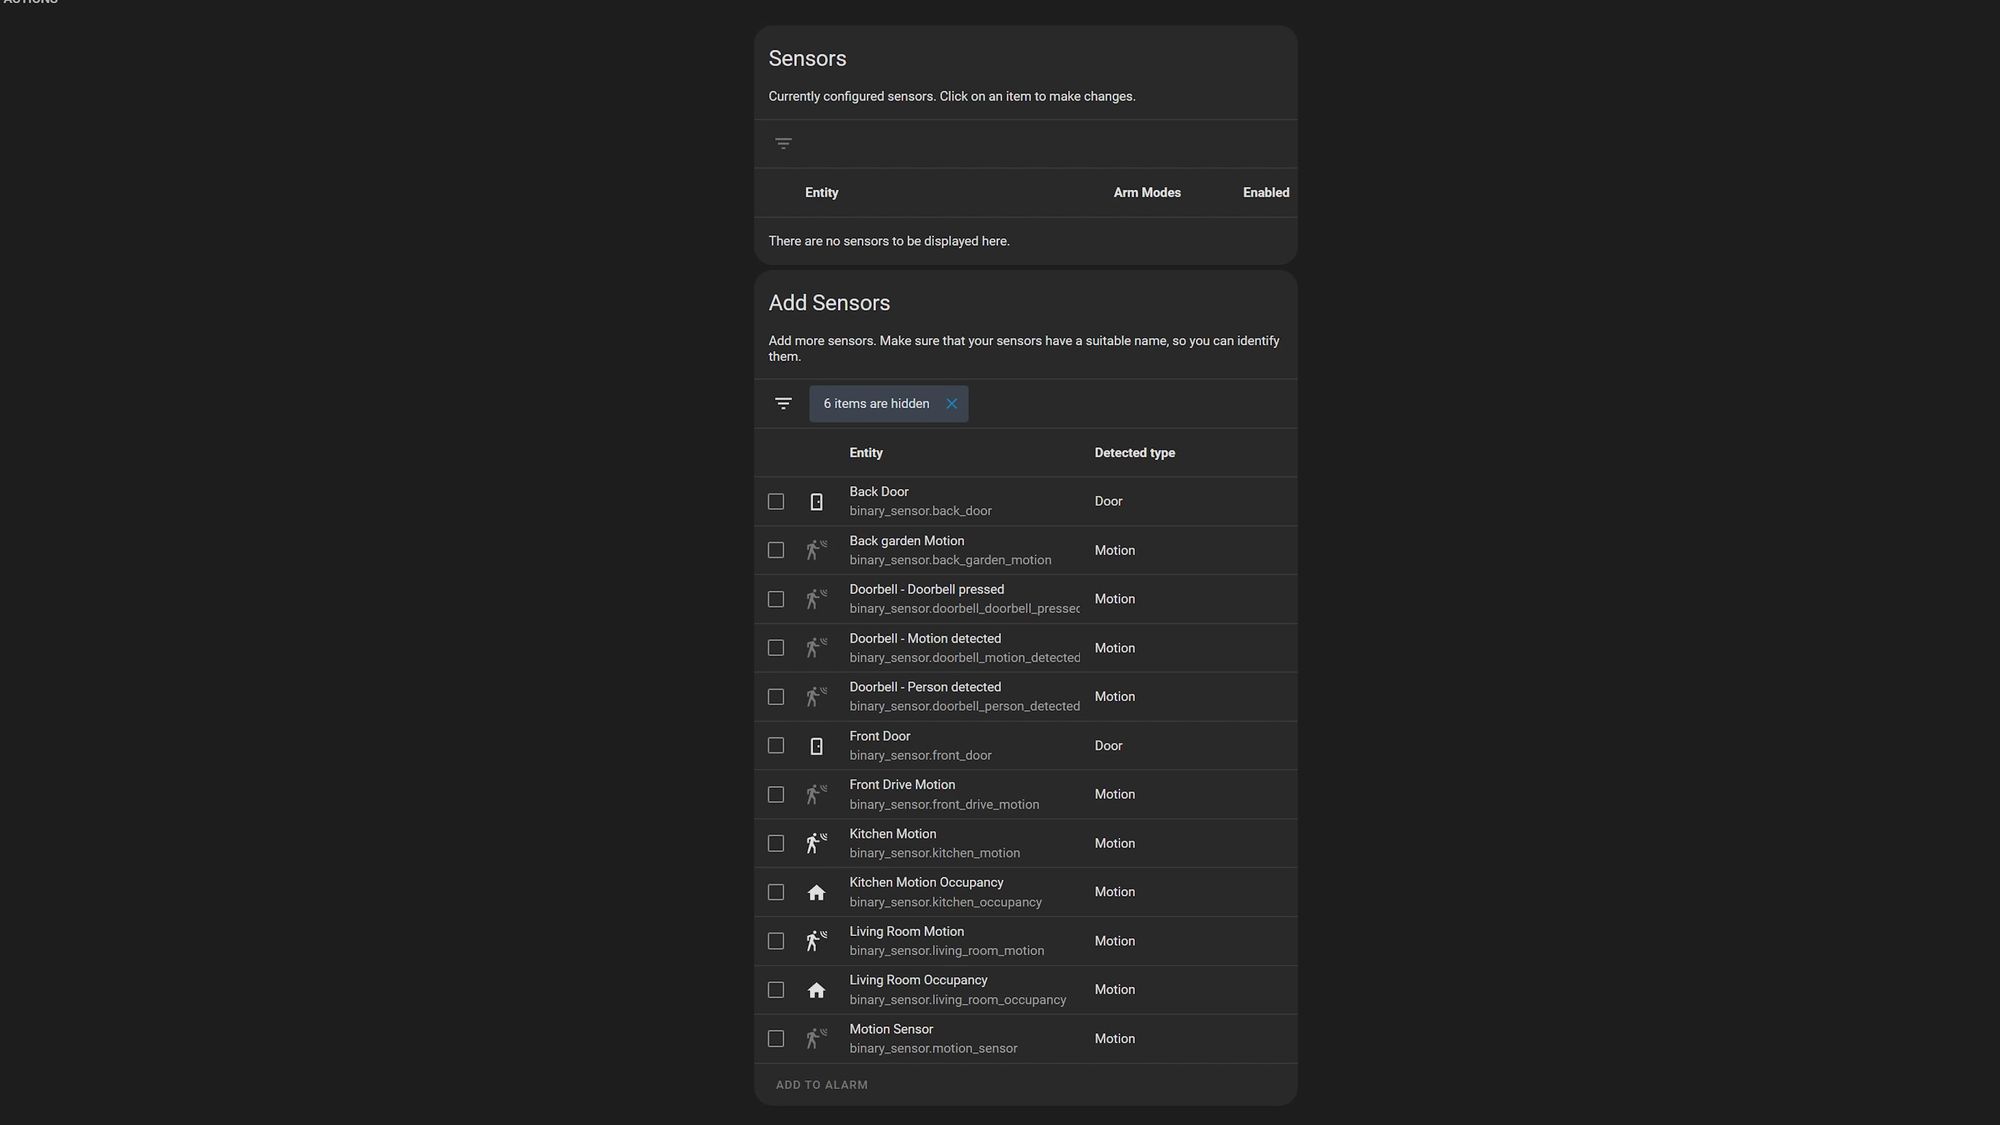
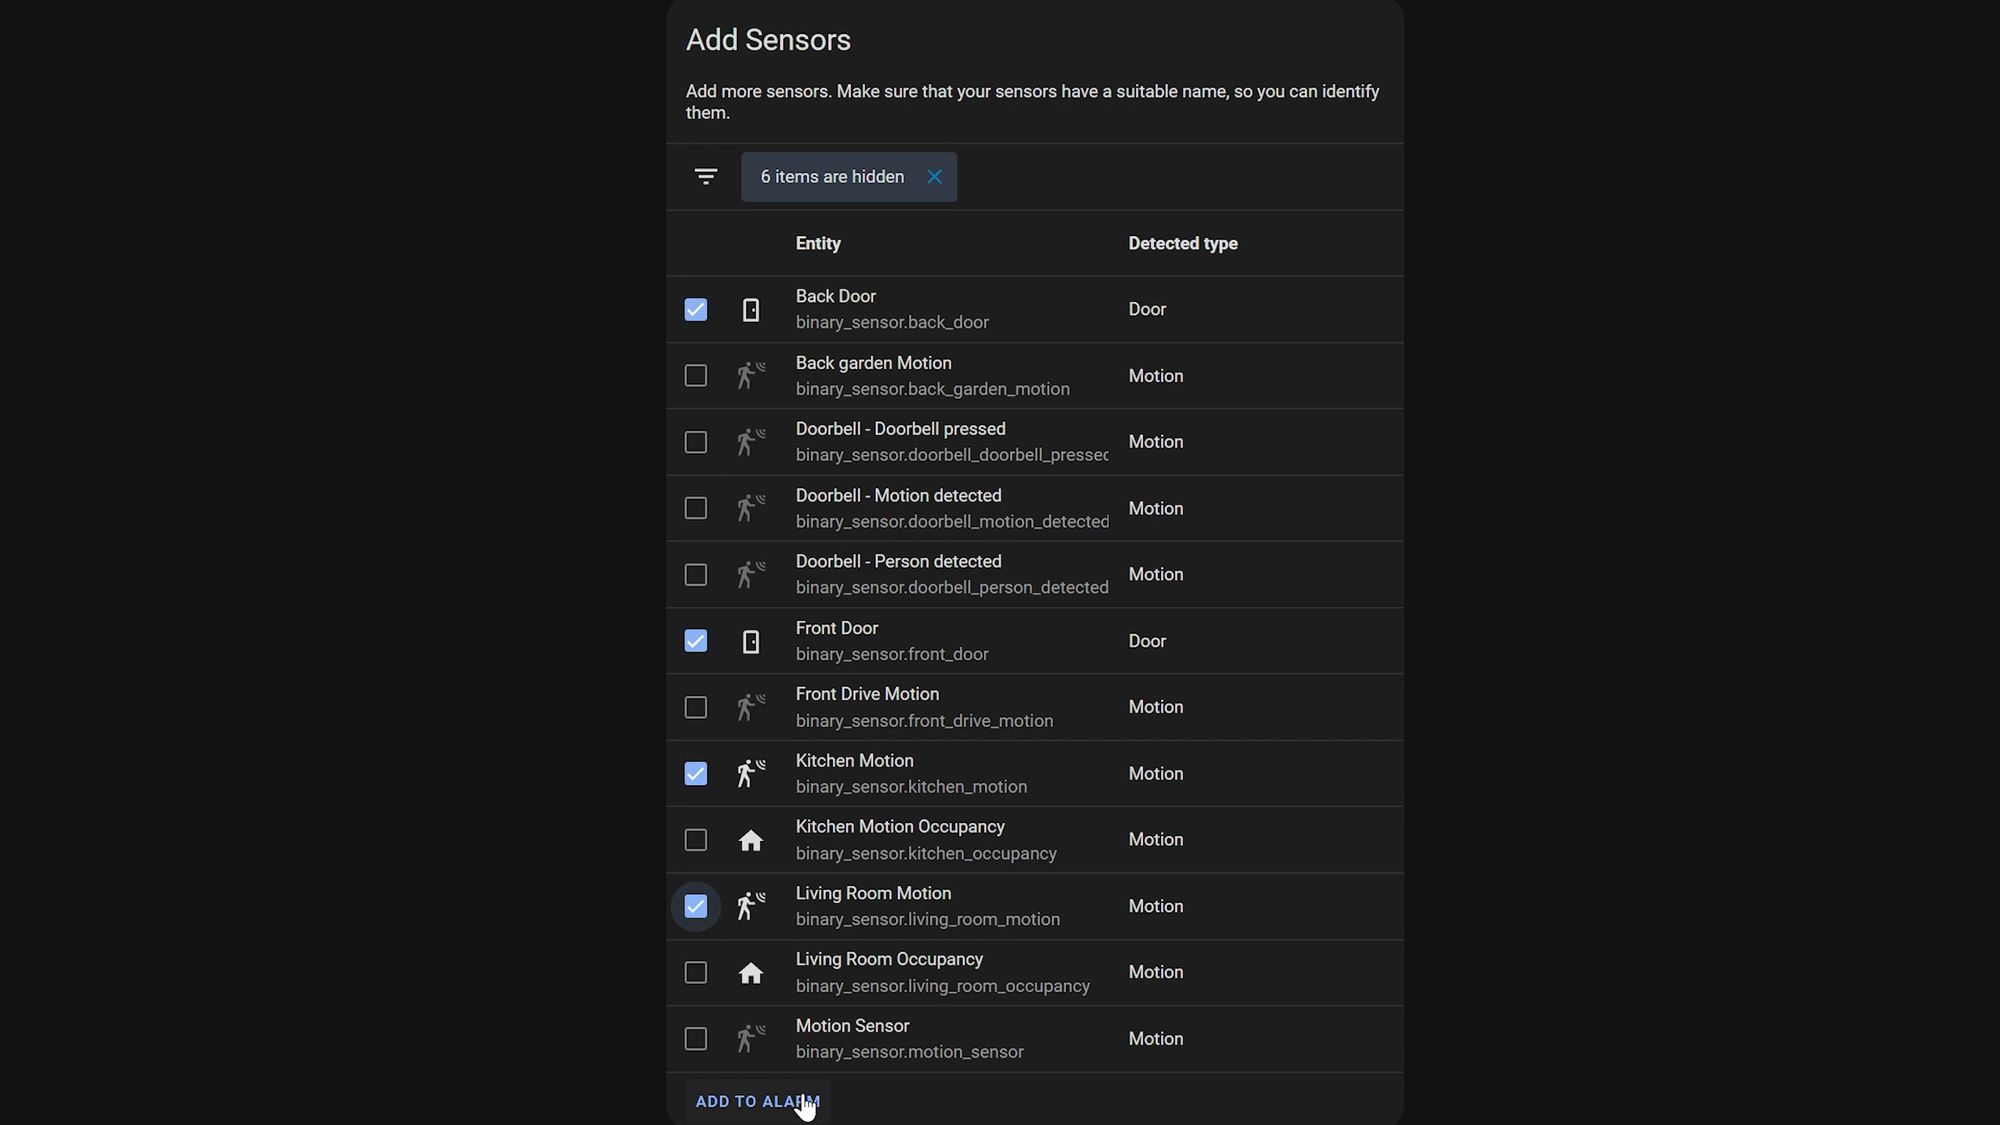
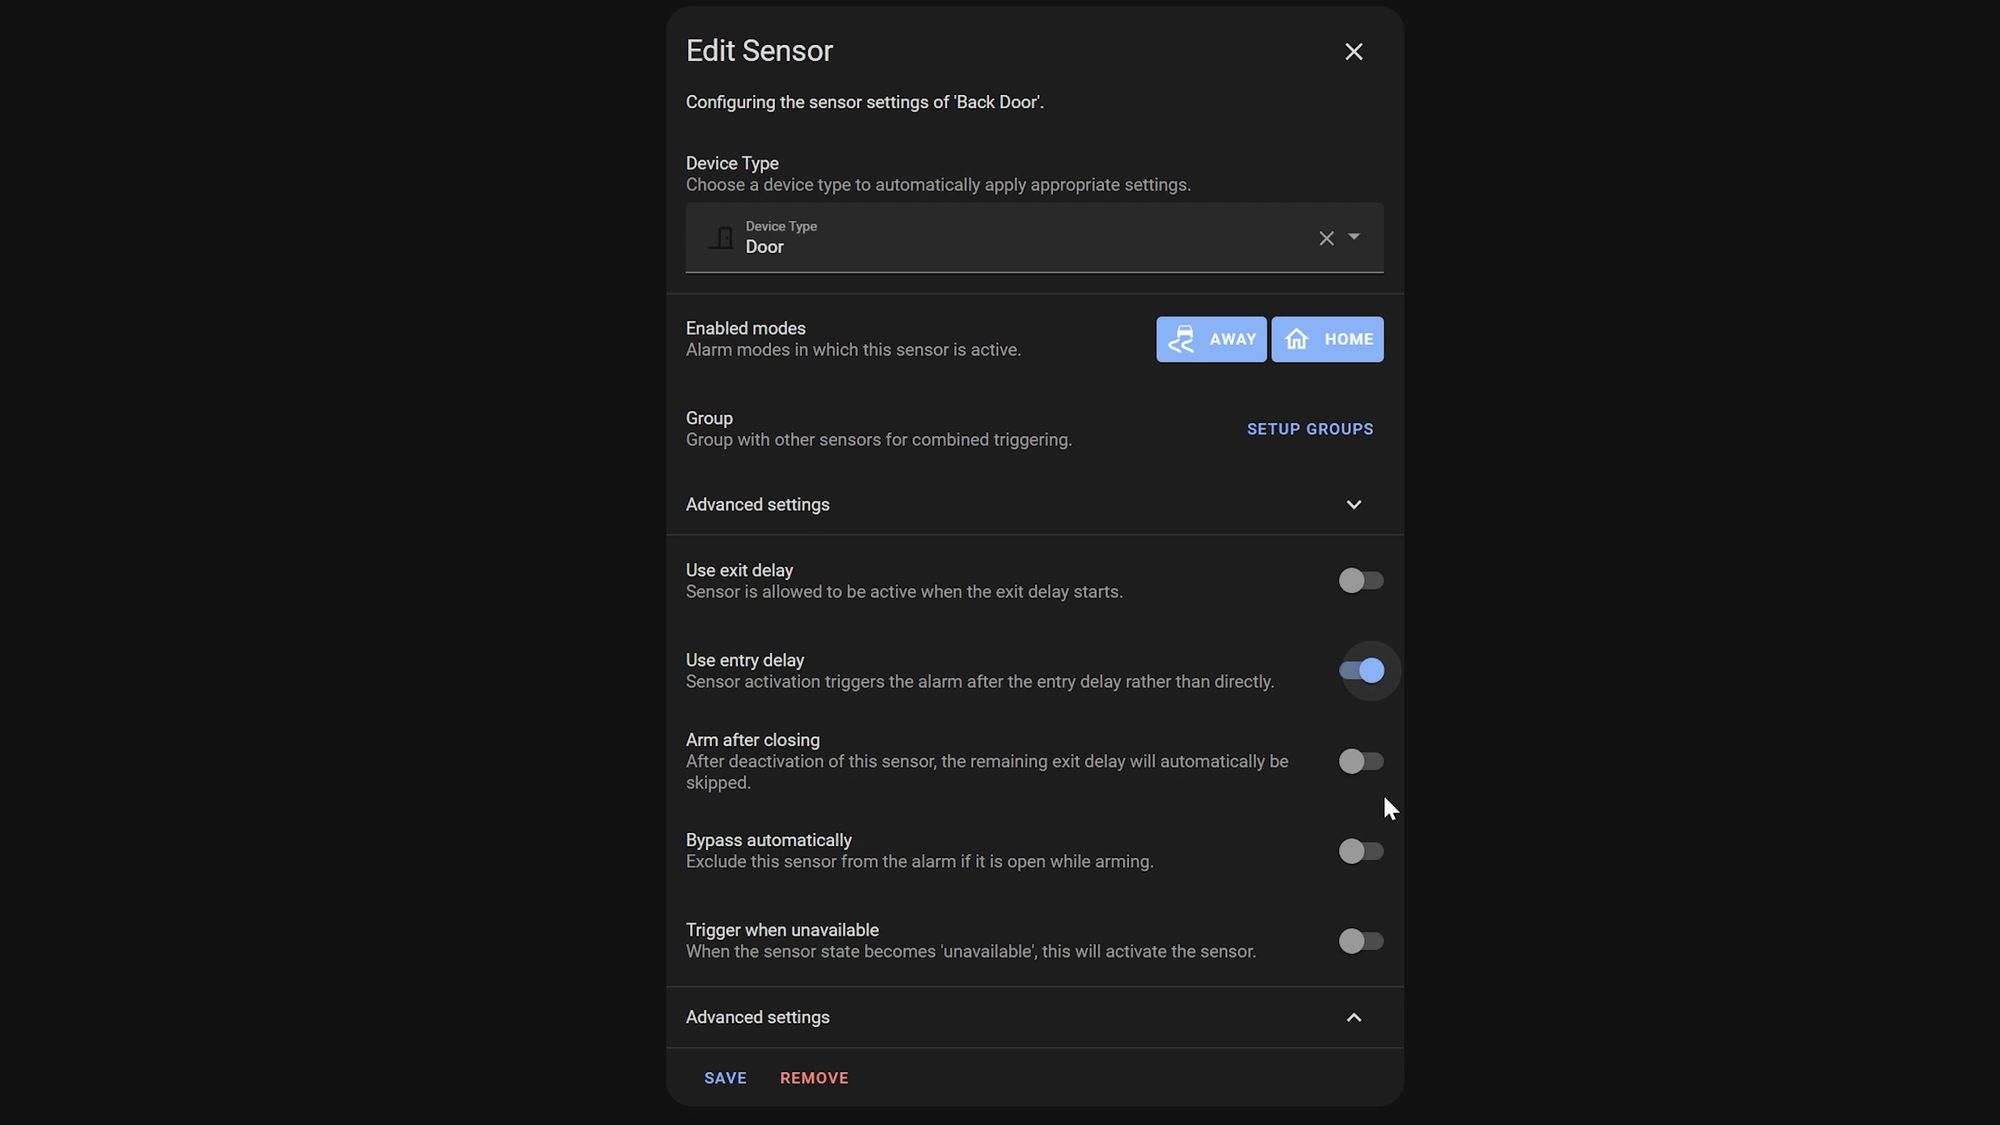
Firstly, lets select all of the devices we want to use for the armed away mode, which is going to be our contact sensors and motion sensors and if you have any smoke or water sensors then you can add those in too if you want. Once selected, click the add to alarm button which will then display all the sensors in the top section, where you can then toggle them on and off. If you now click into one of the sensors, you get more options for customization - Alarmo will make best guesses as to what settings to use depending on the sensor, but we can change some settings to further customize it.

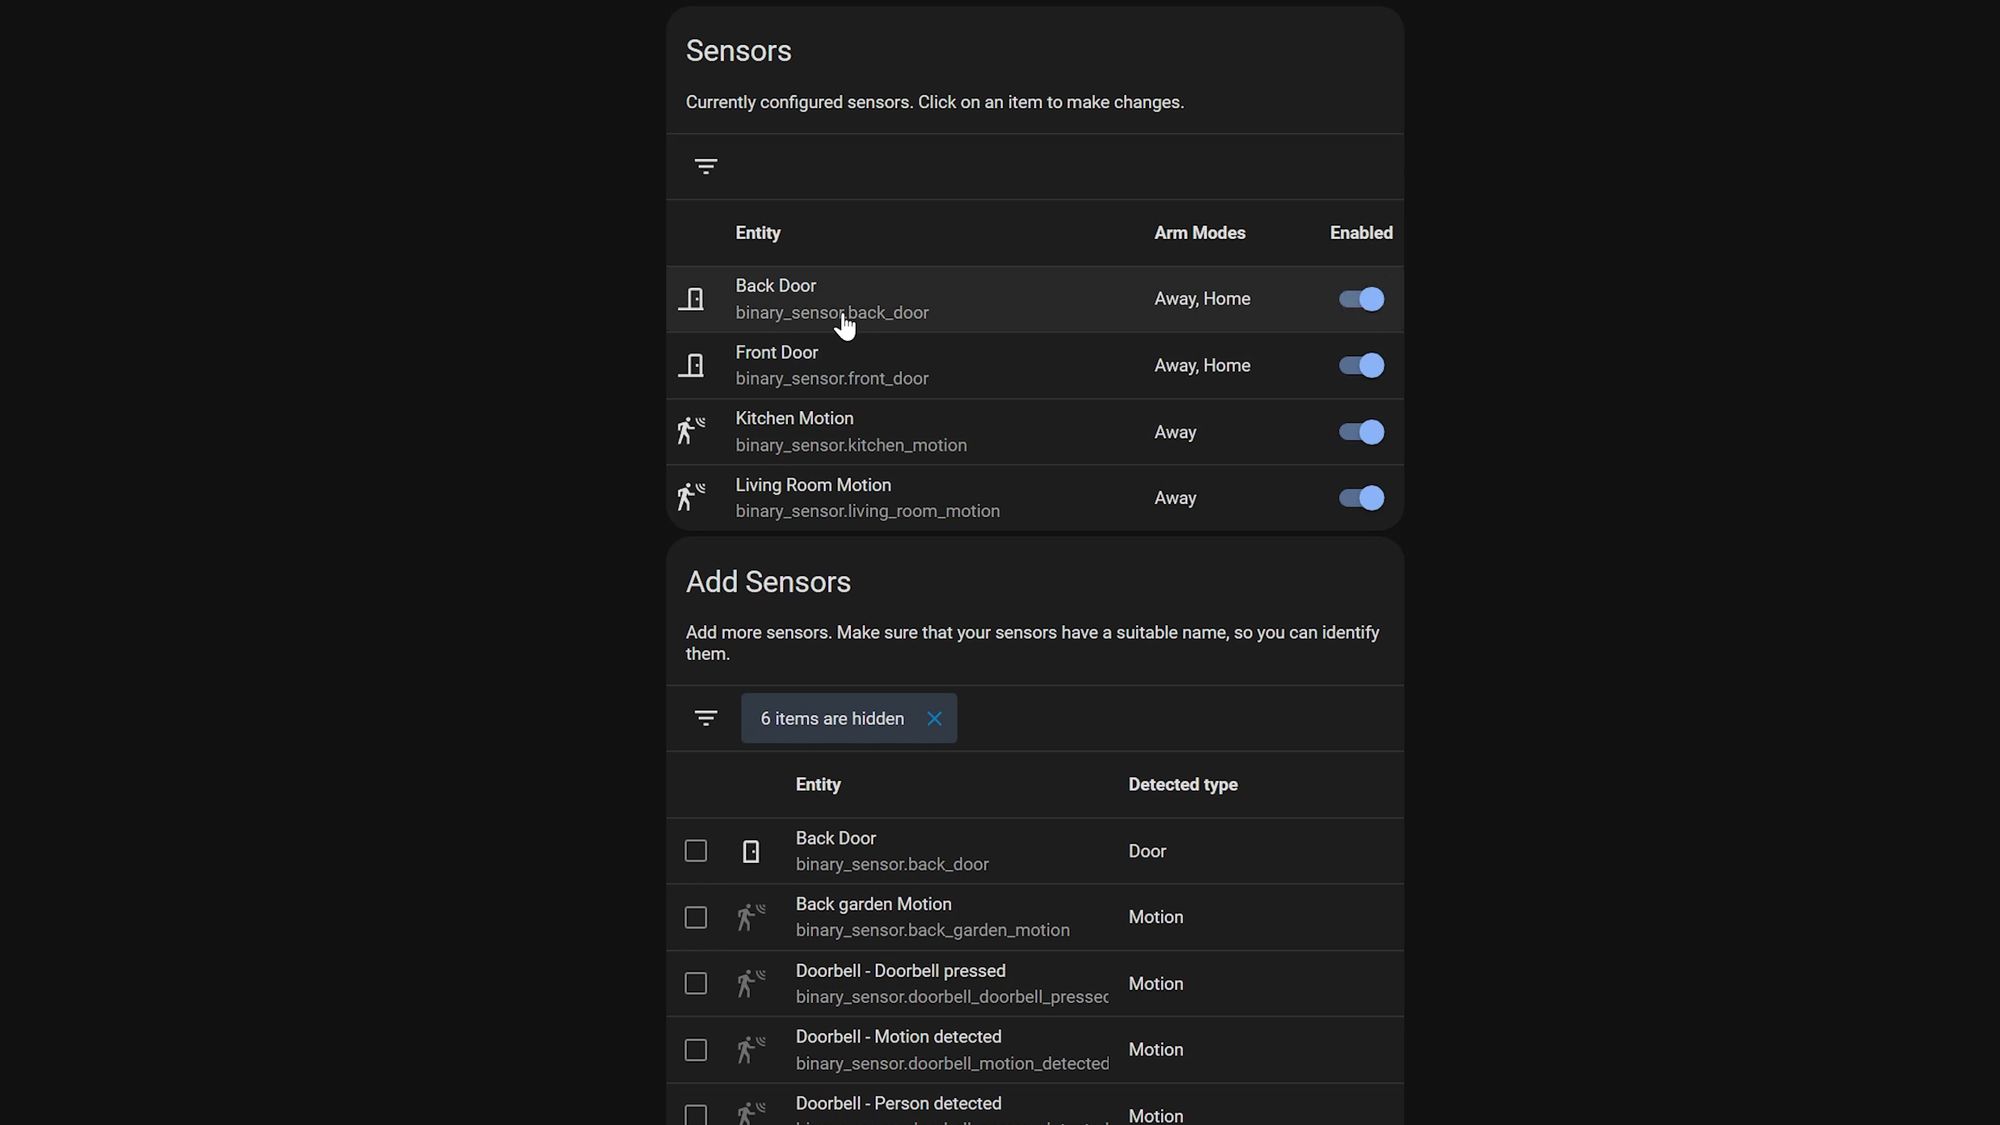

You will see you can set the device type as well as which modes the sensor is active in like we talked about before, but you can also indicate if the sensor is used during exit or entry. So, for example, if you open a door and its not set as entry delay, then it will cause the alarm to immediately start triggering, whereas if you mark it as an entry sensor then it will give you that 60 second period to punch in the code or disable the alarm first.
The other setting that is useful is the bypass automatically setting which is good if you have contact sensors on internal doors that you don’t necessarily mind being open when the alarm gets set. Go ahead and figure out which sensors you want to have active and which ones are entry and exit sensors and apply those to the rest of your sensors.
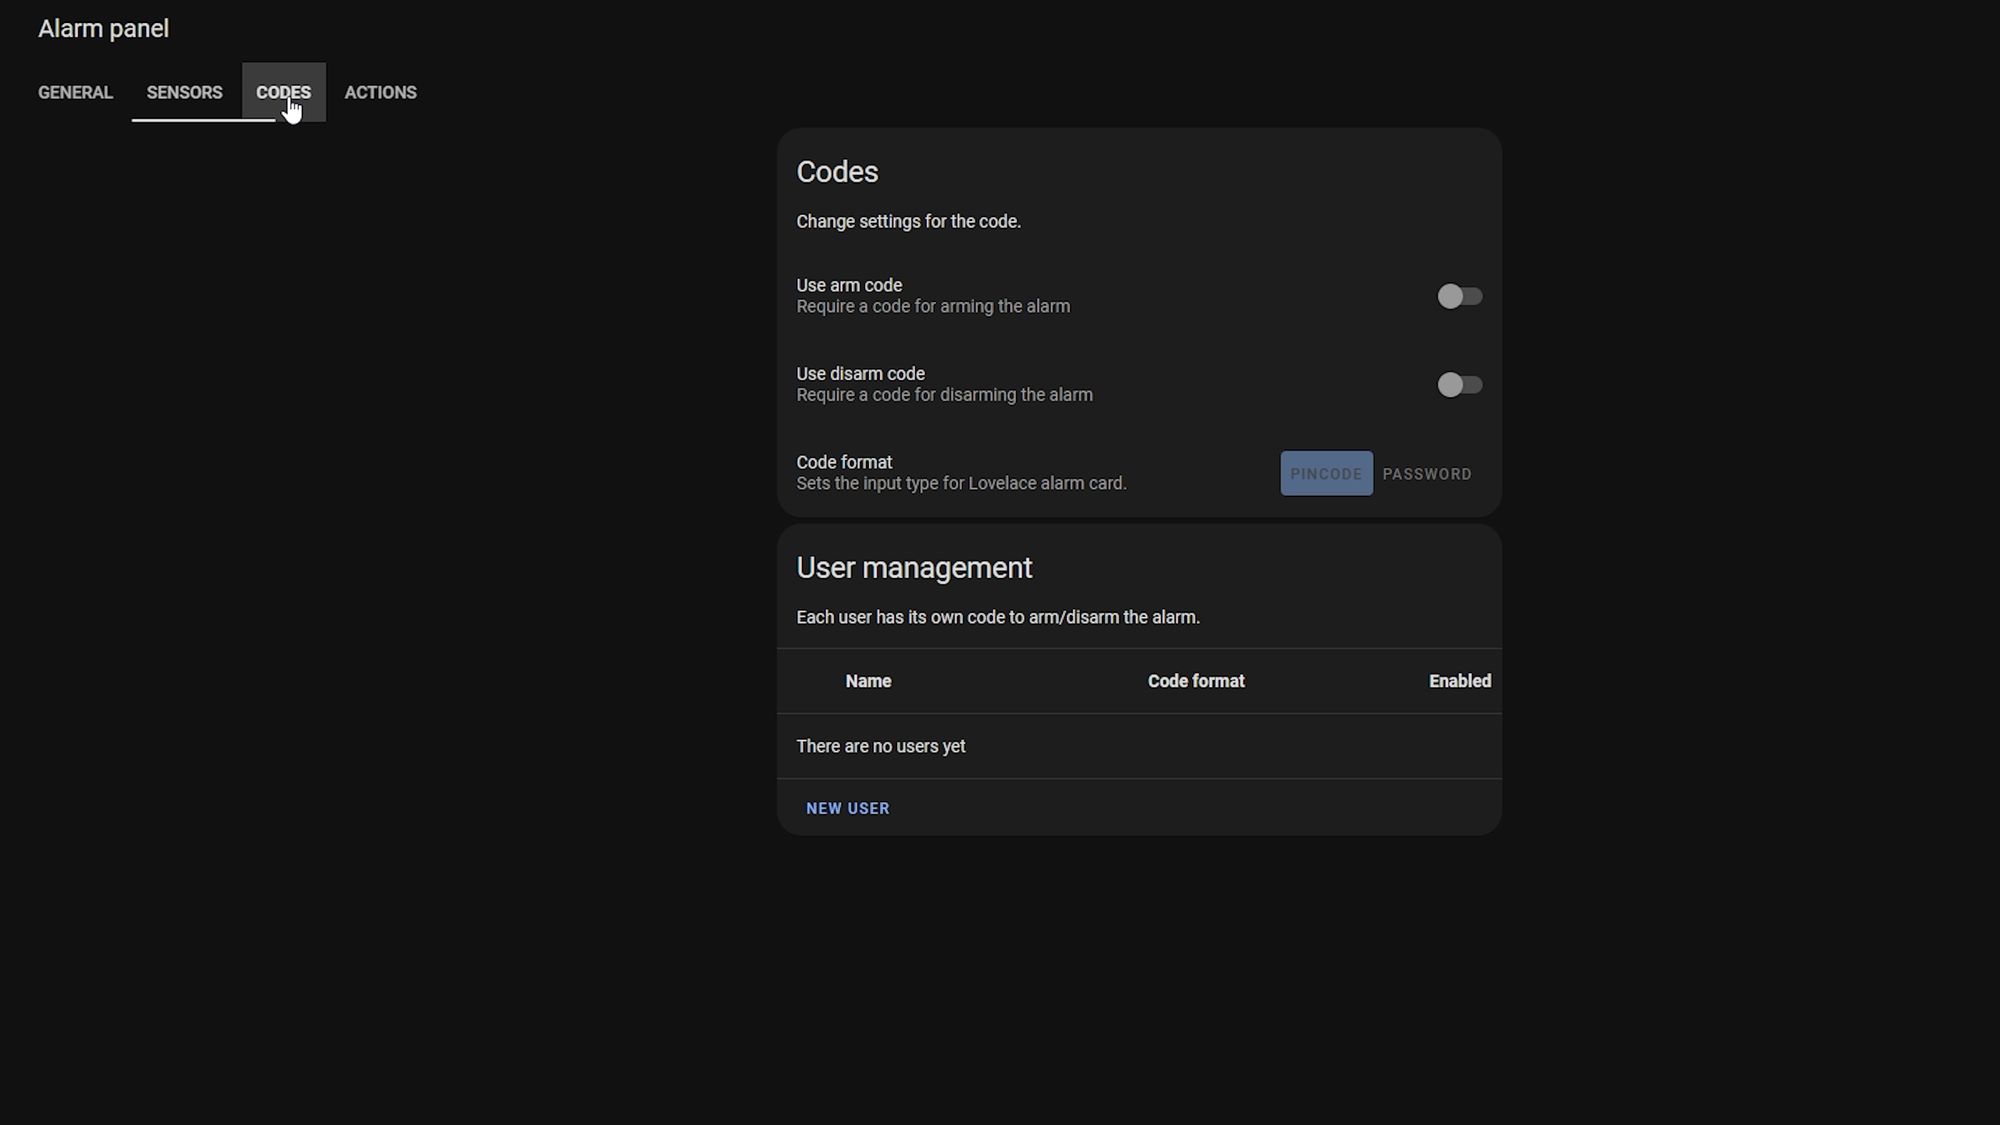
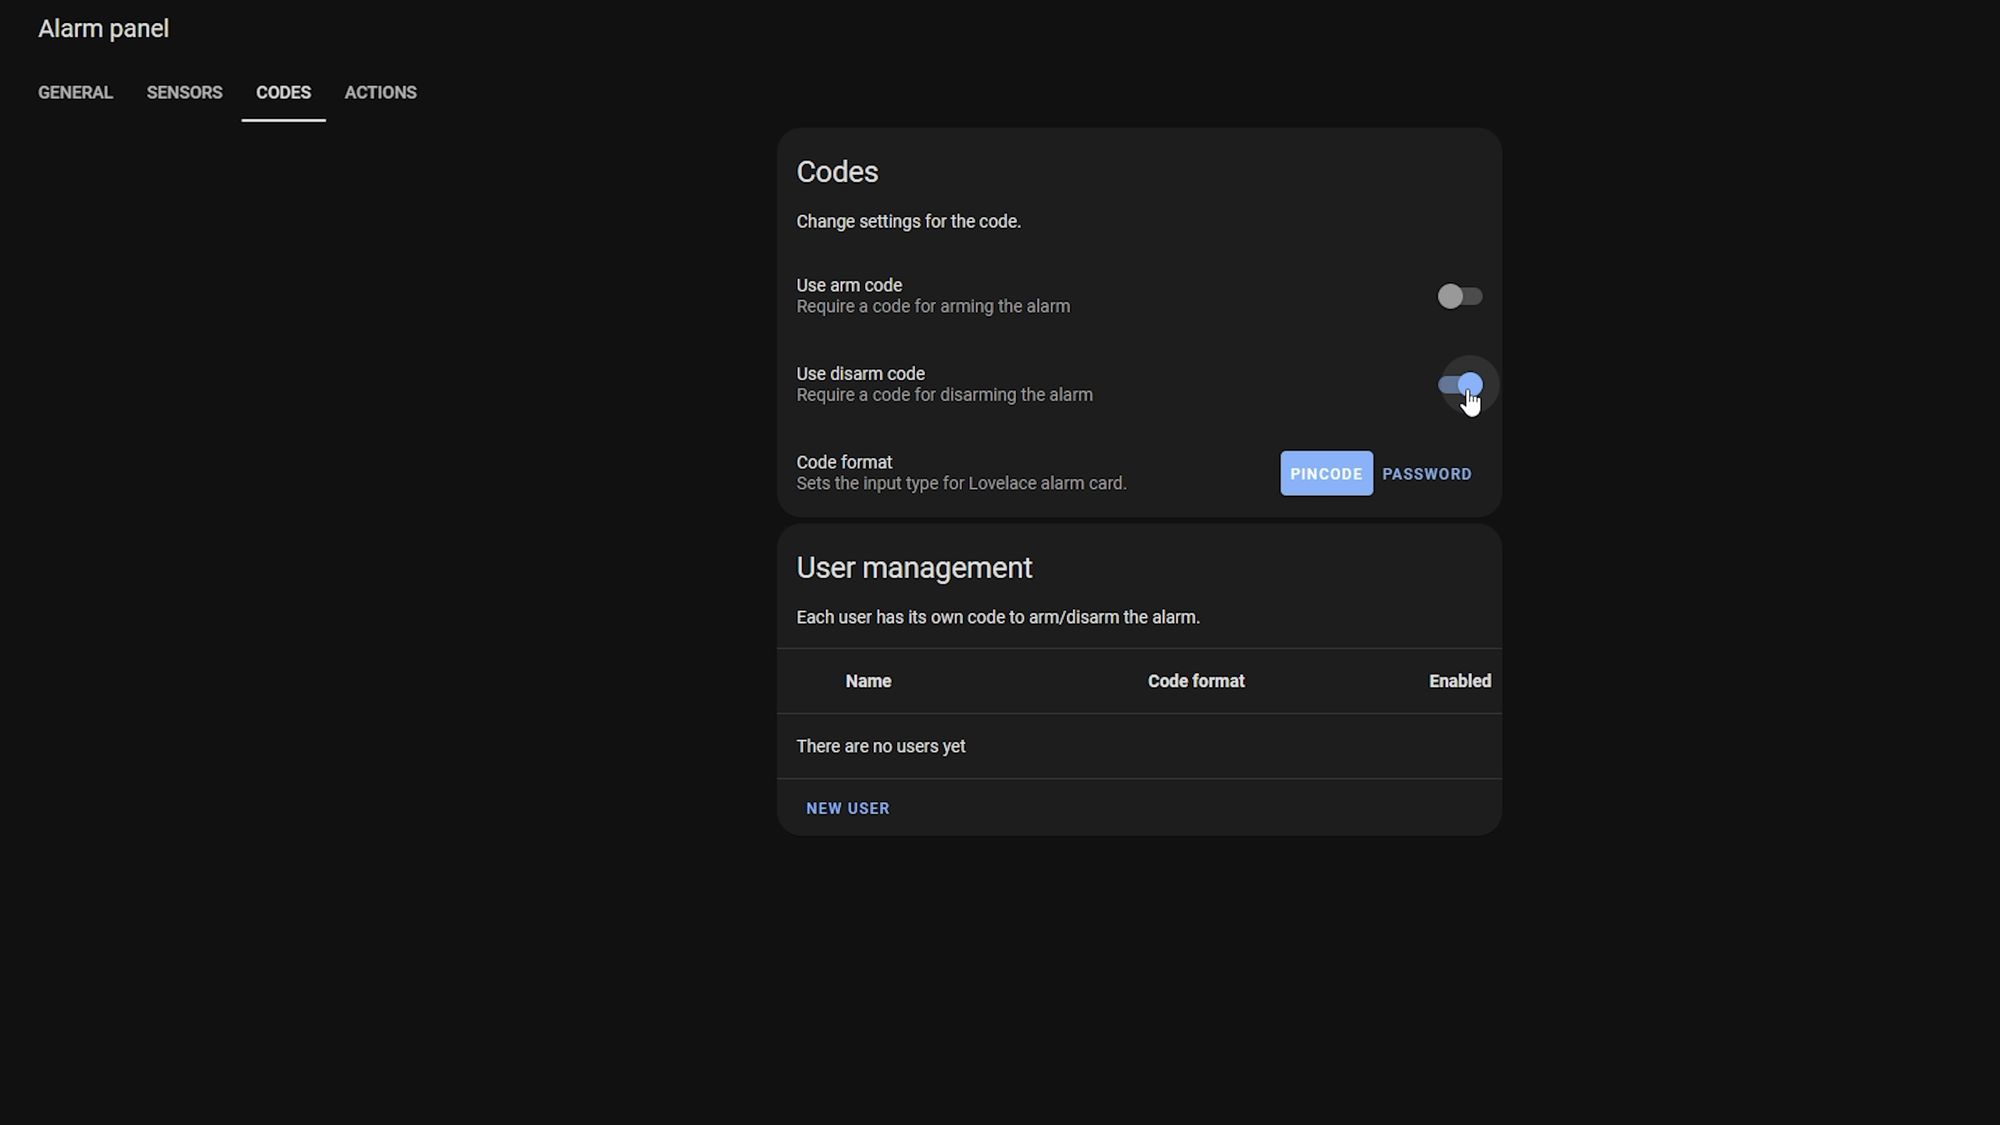
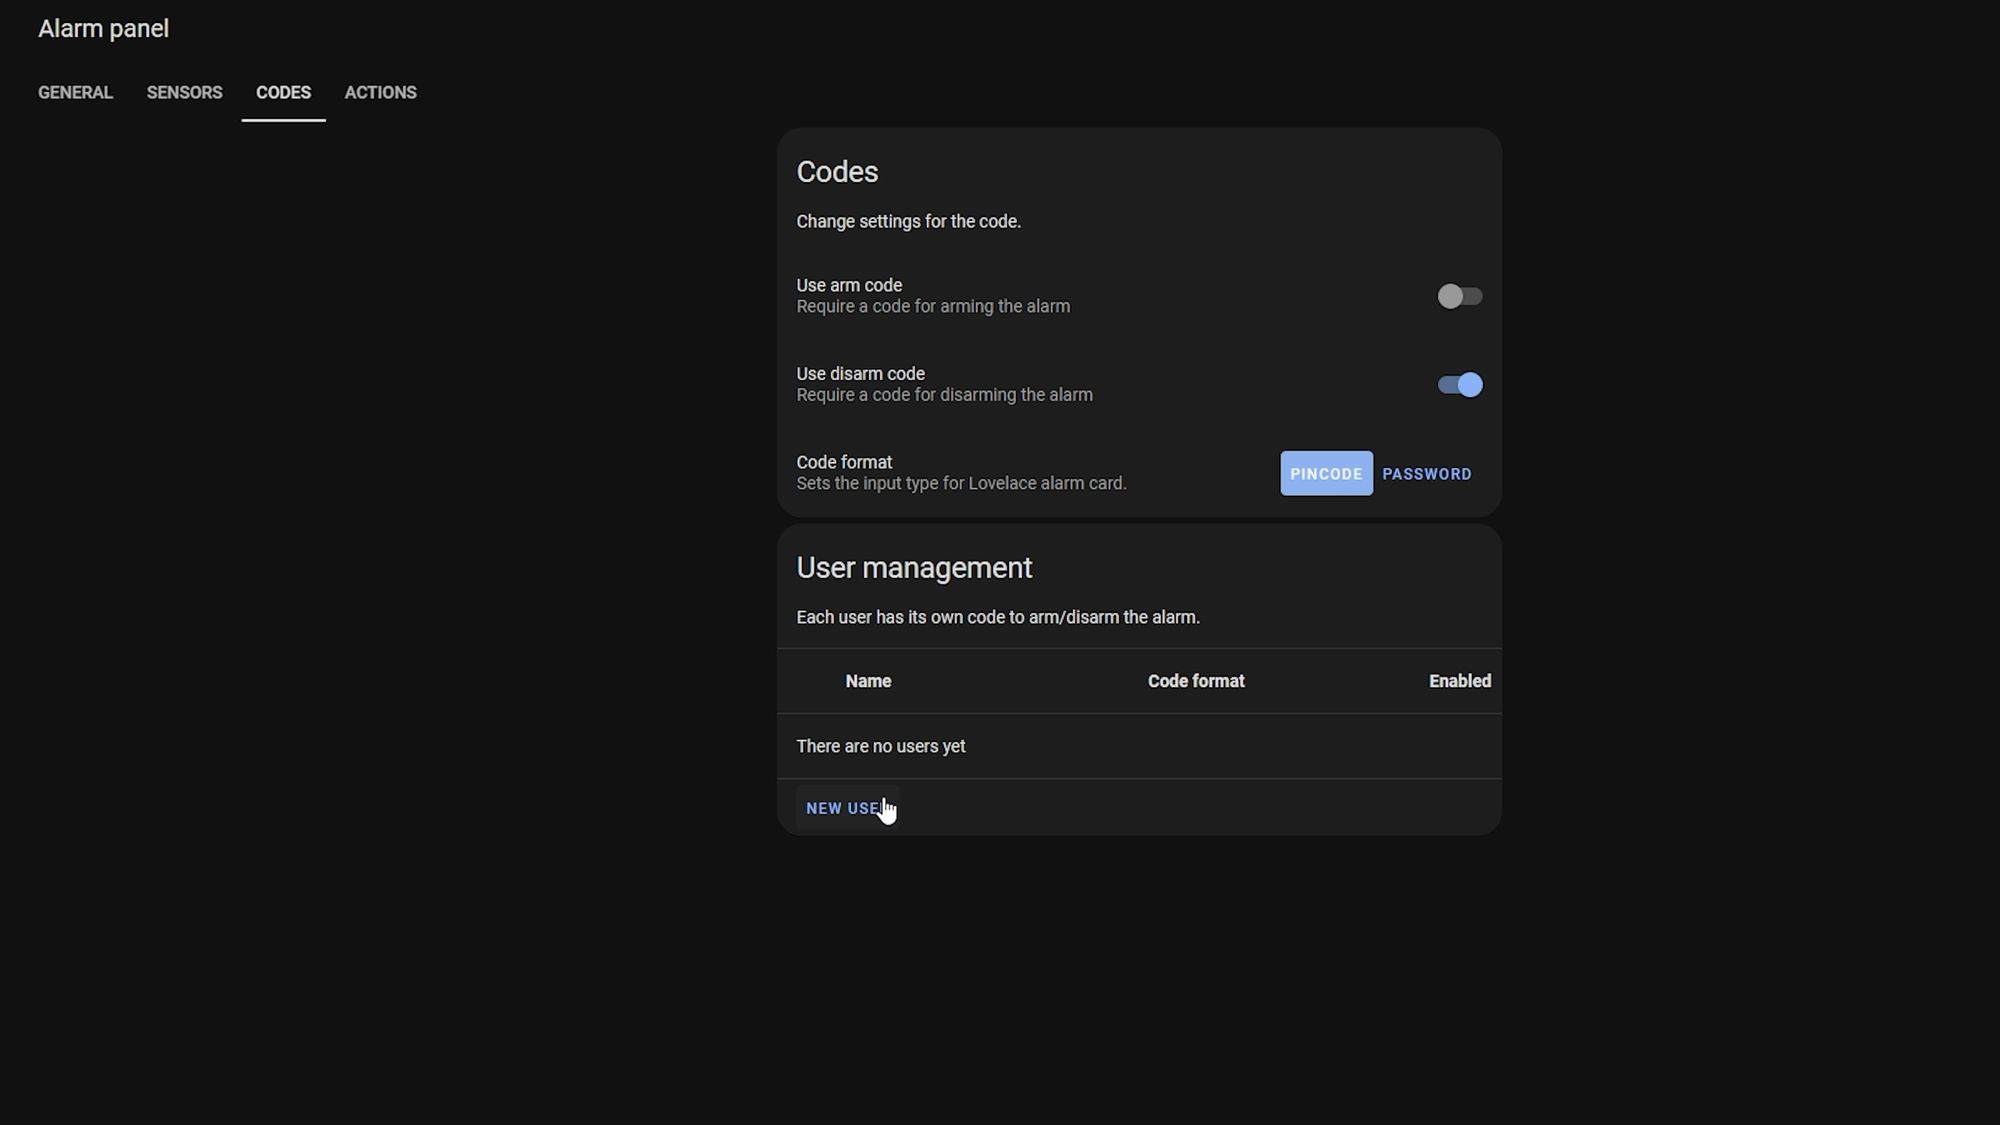
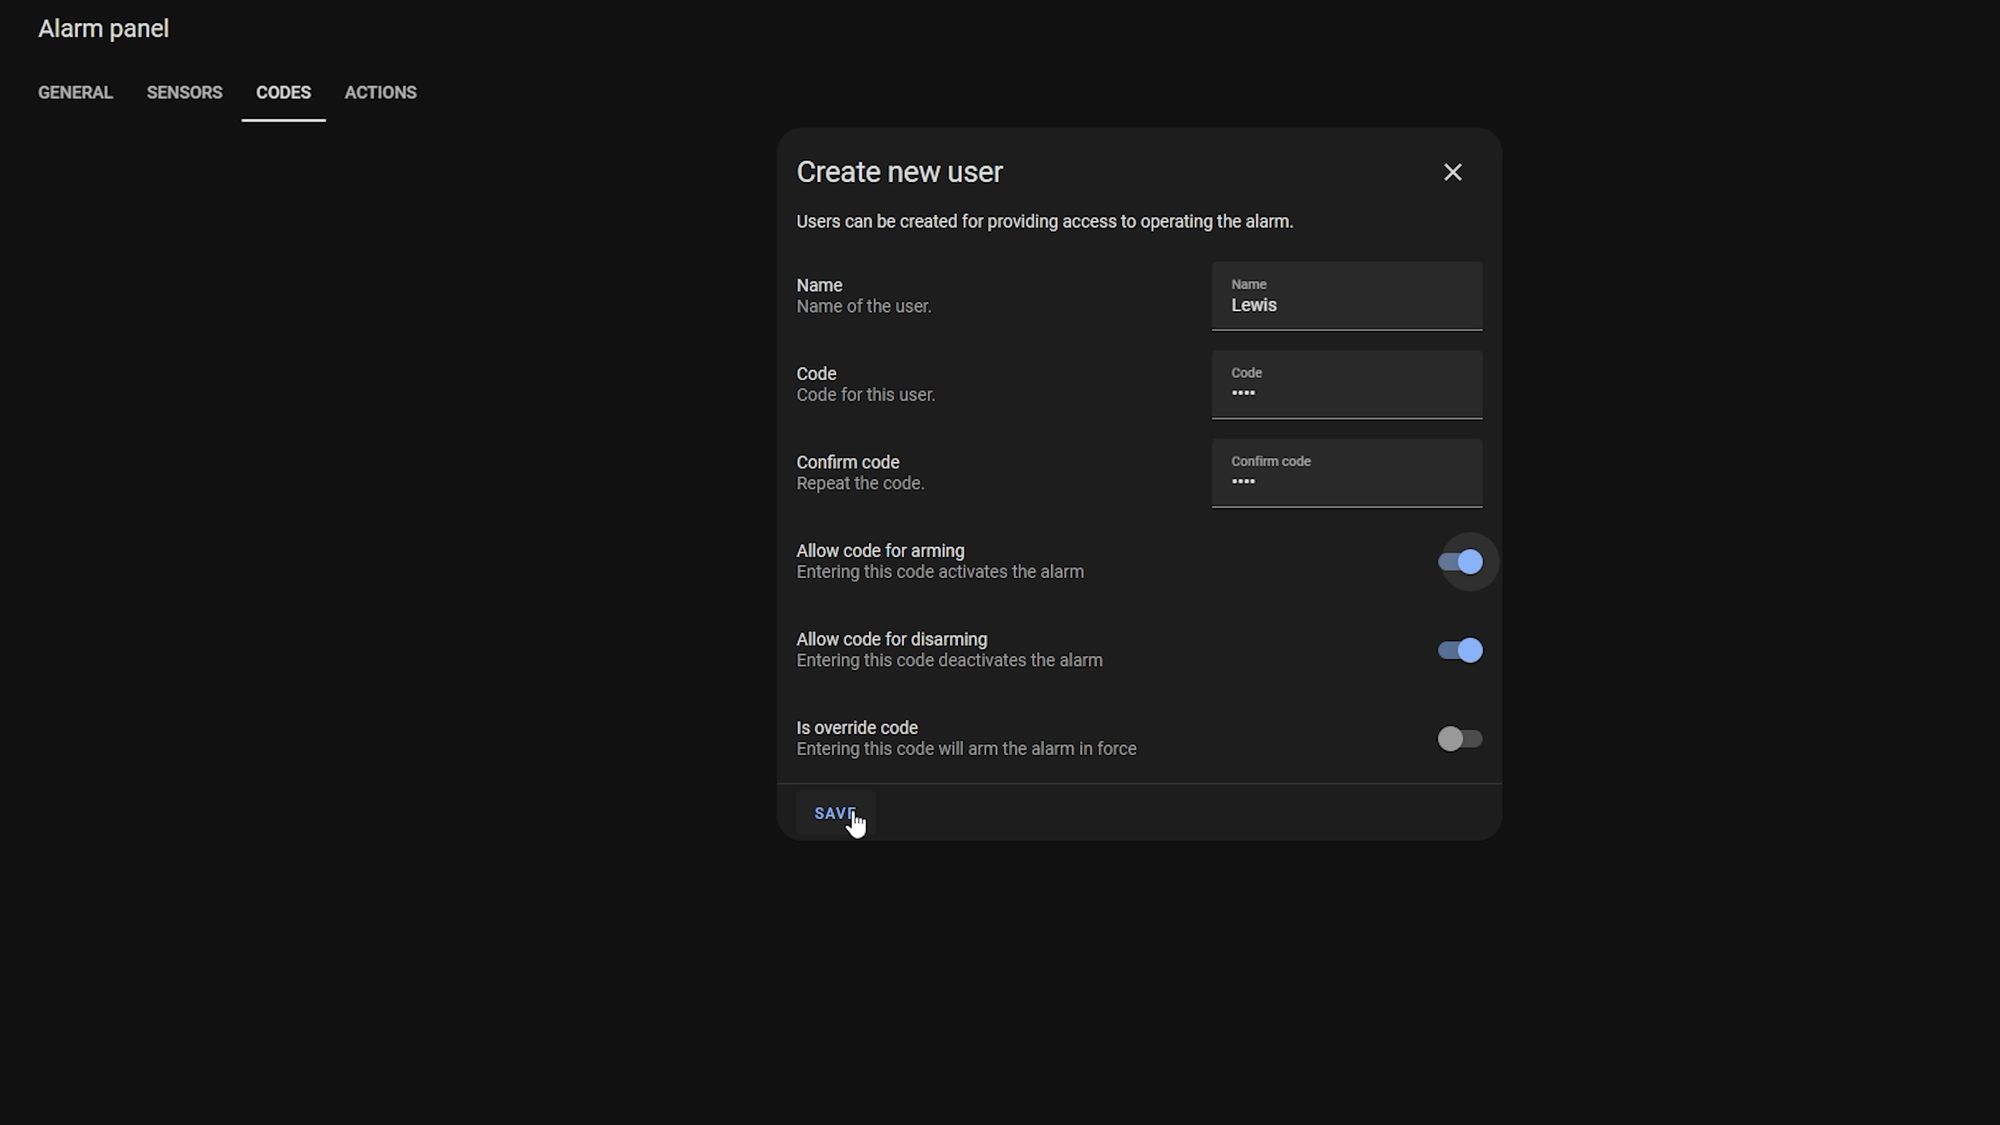
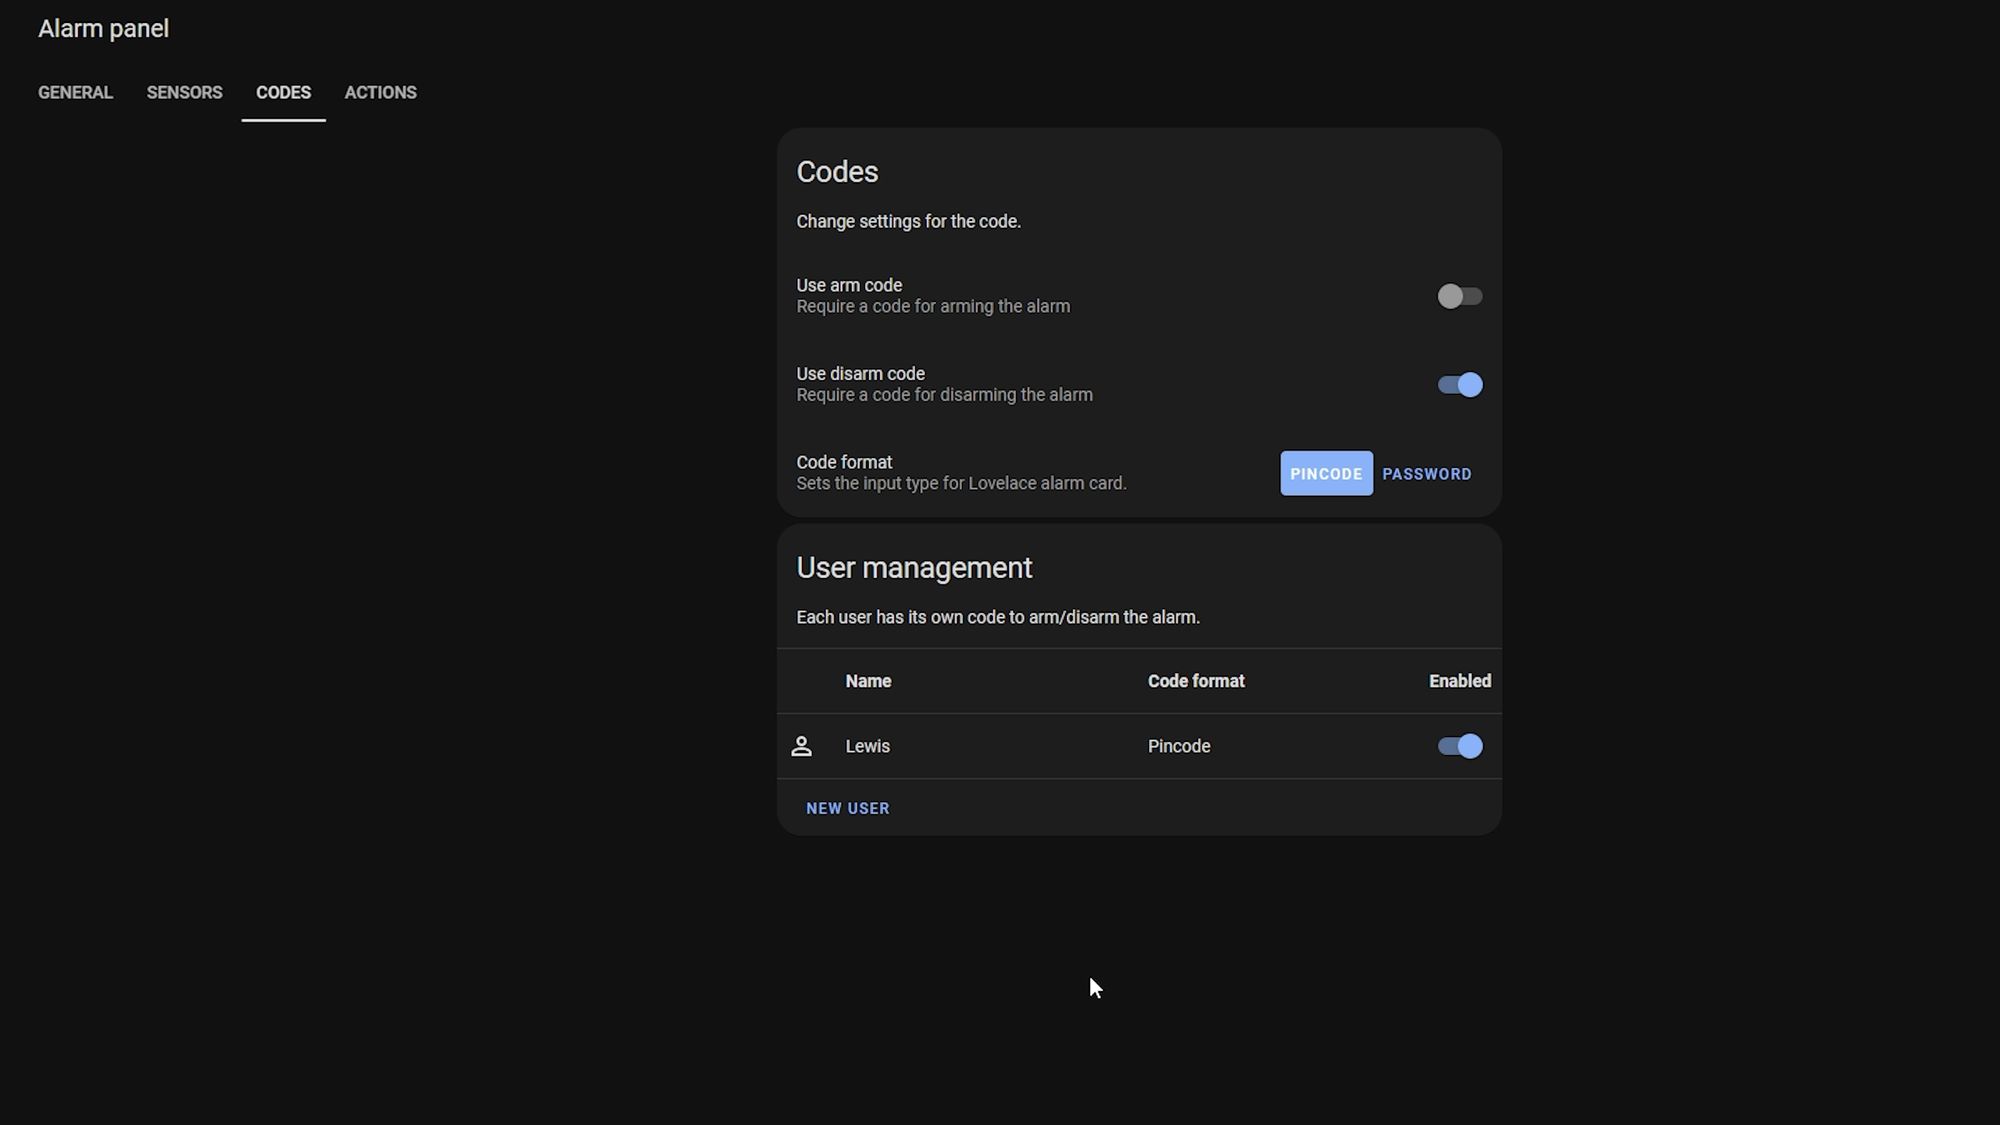
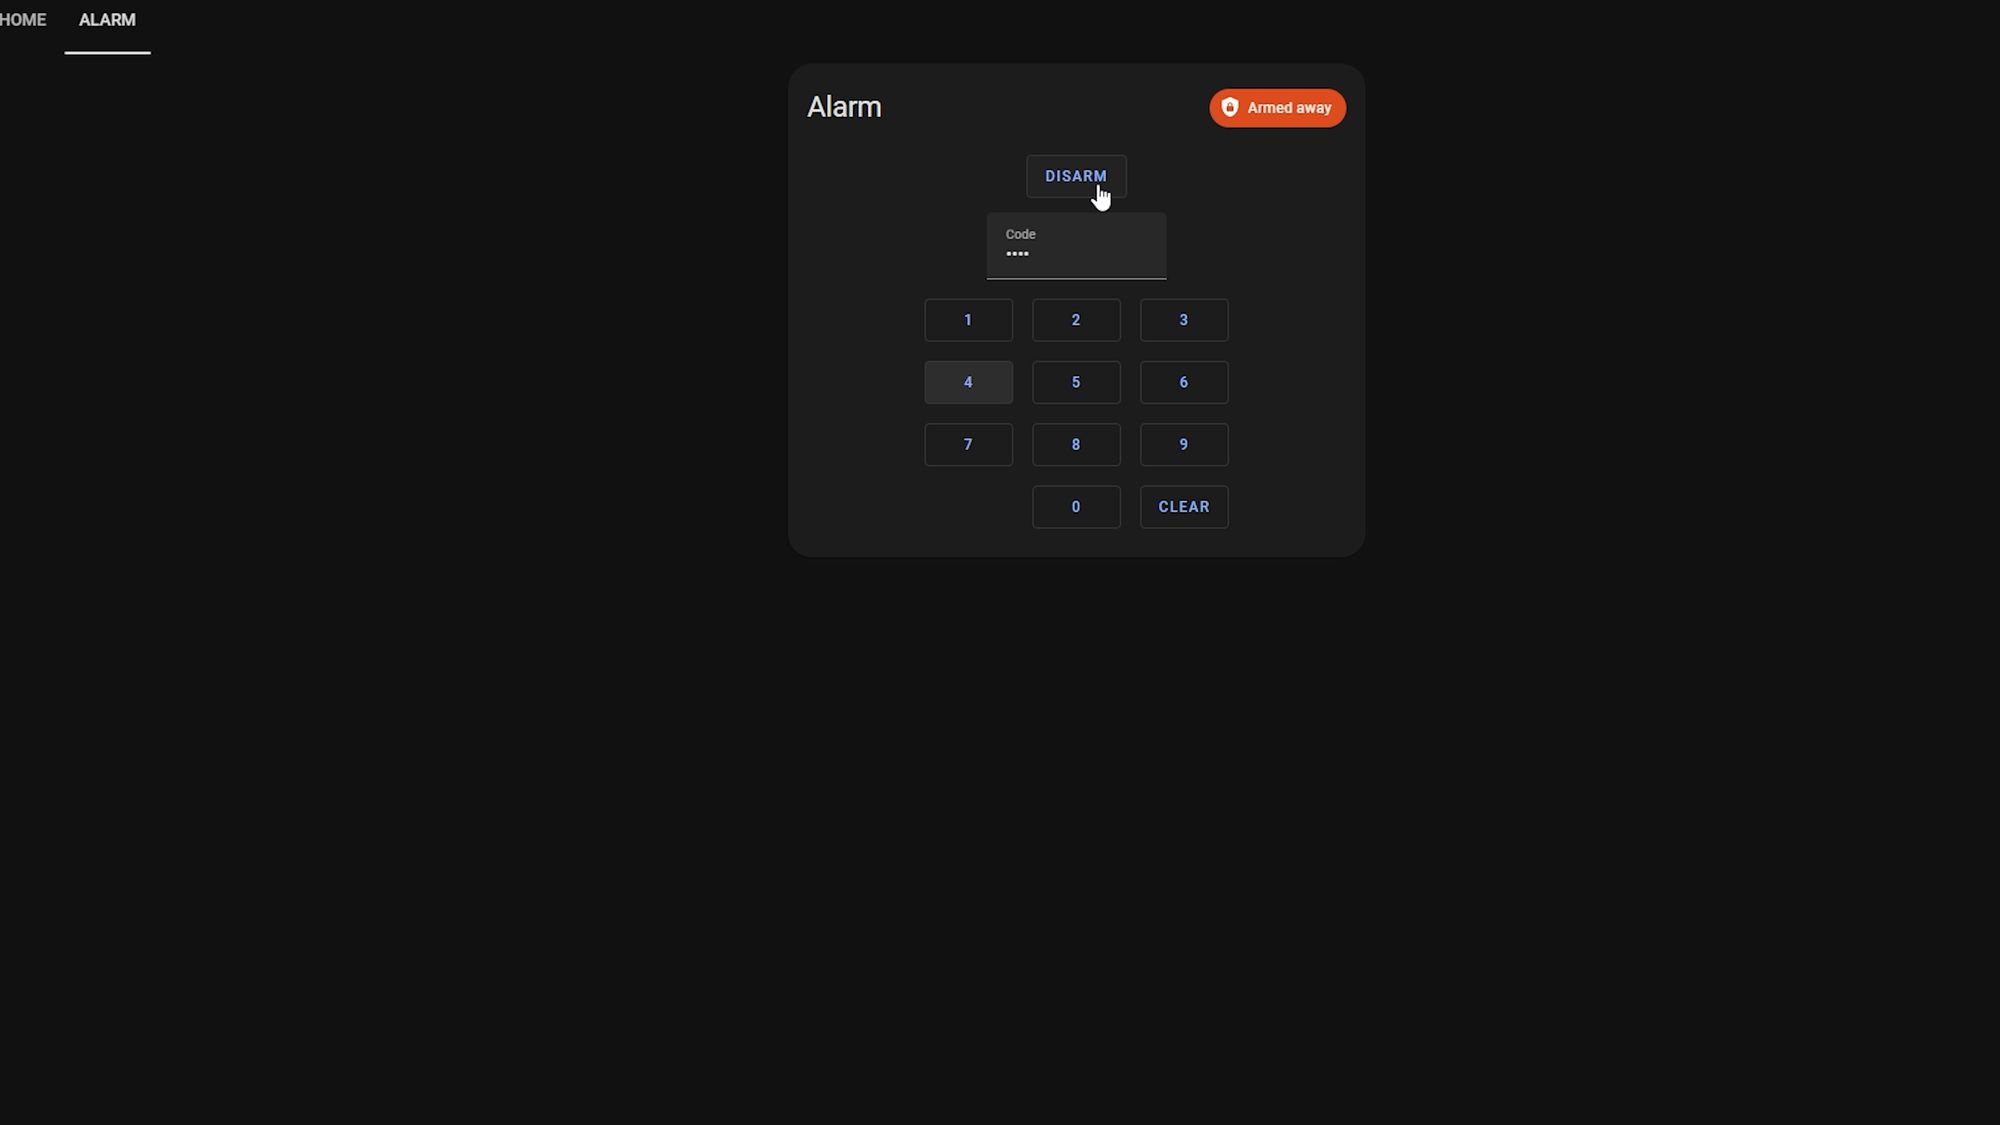
Setting Up The Pin Code
Next, let's set up our pin code for disarming the alarm! Head over to the codes tab at the top, then tick the use disarm code option - I like to have a code for disarming obviously but I don’t have a code for setting one, since this is done with my location - then add a new user and set the code for this person. A little bonus is you can just have one code that everyone uses or you can set a code for each individual person if you want to!
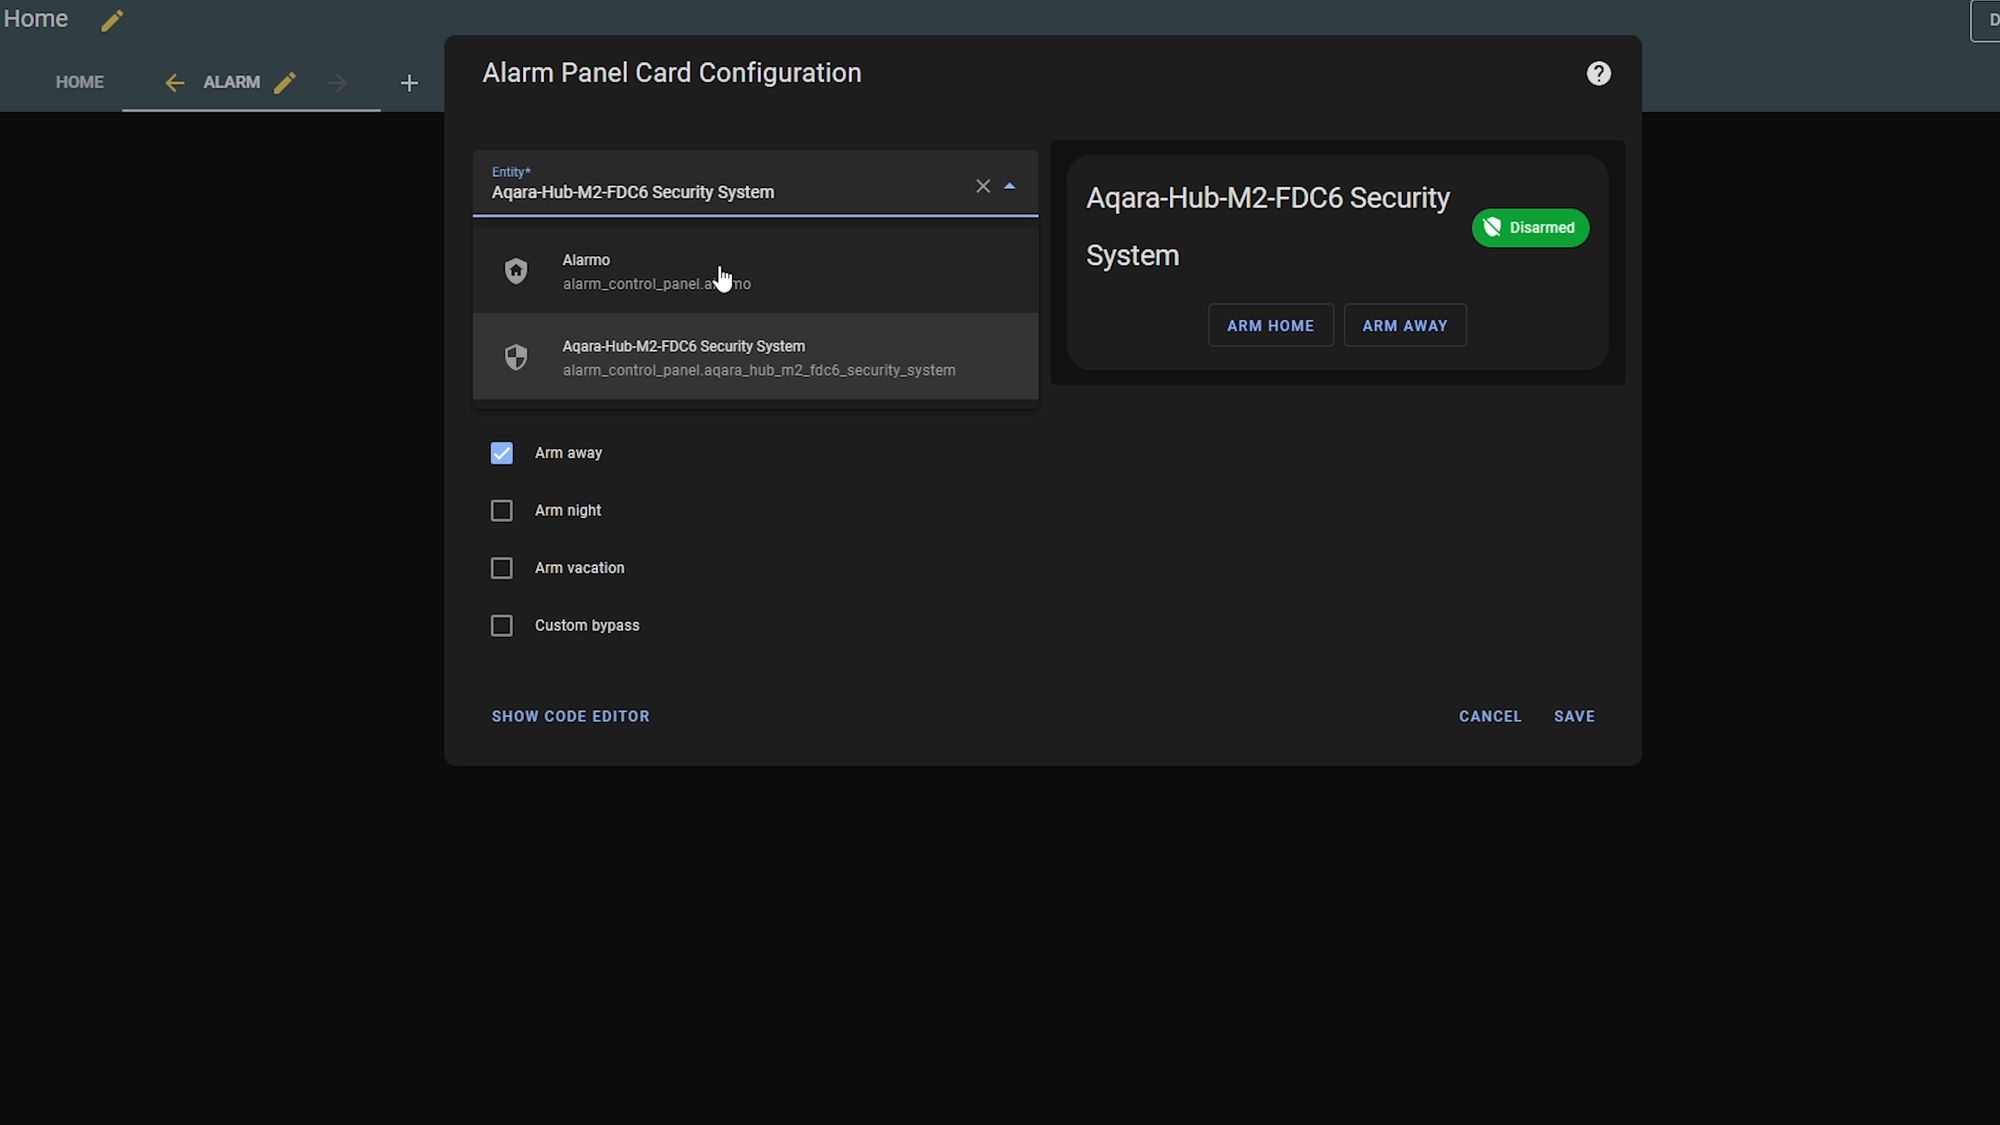
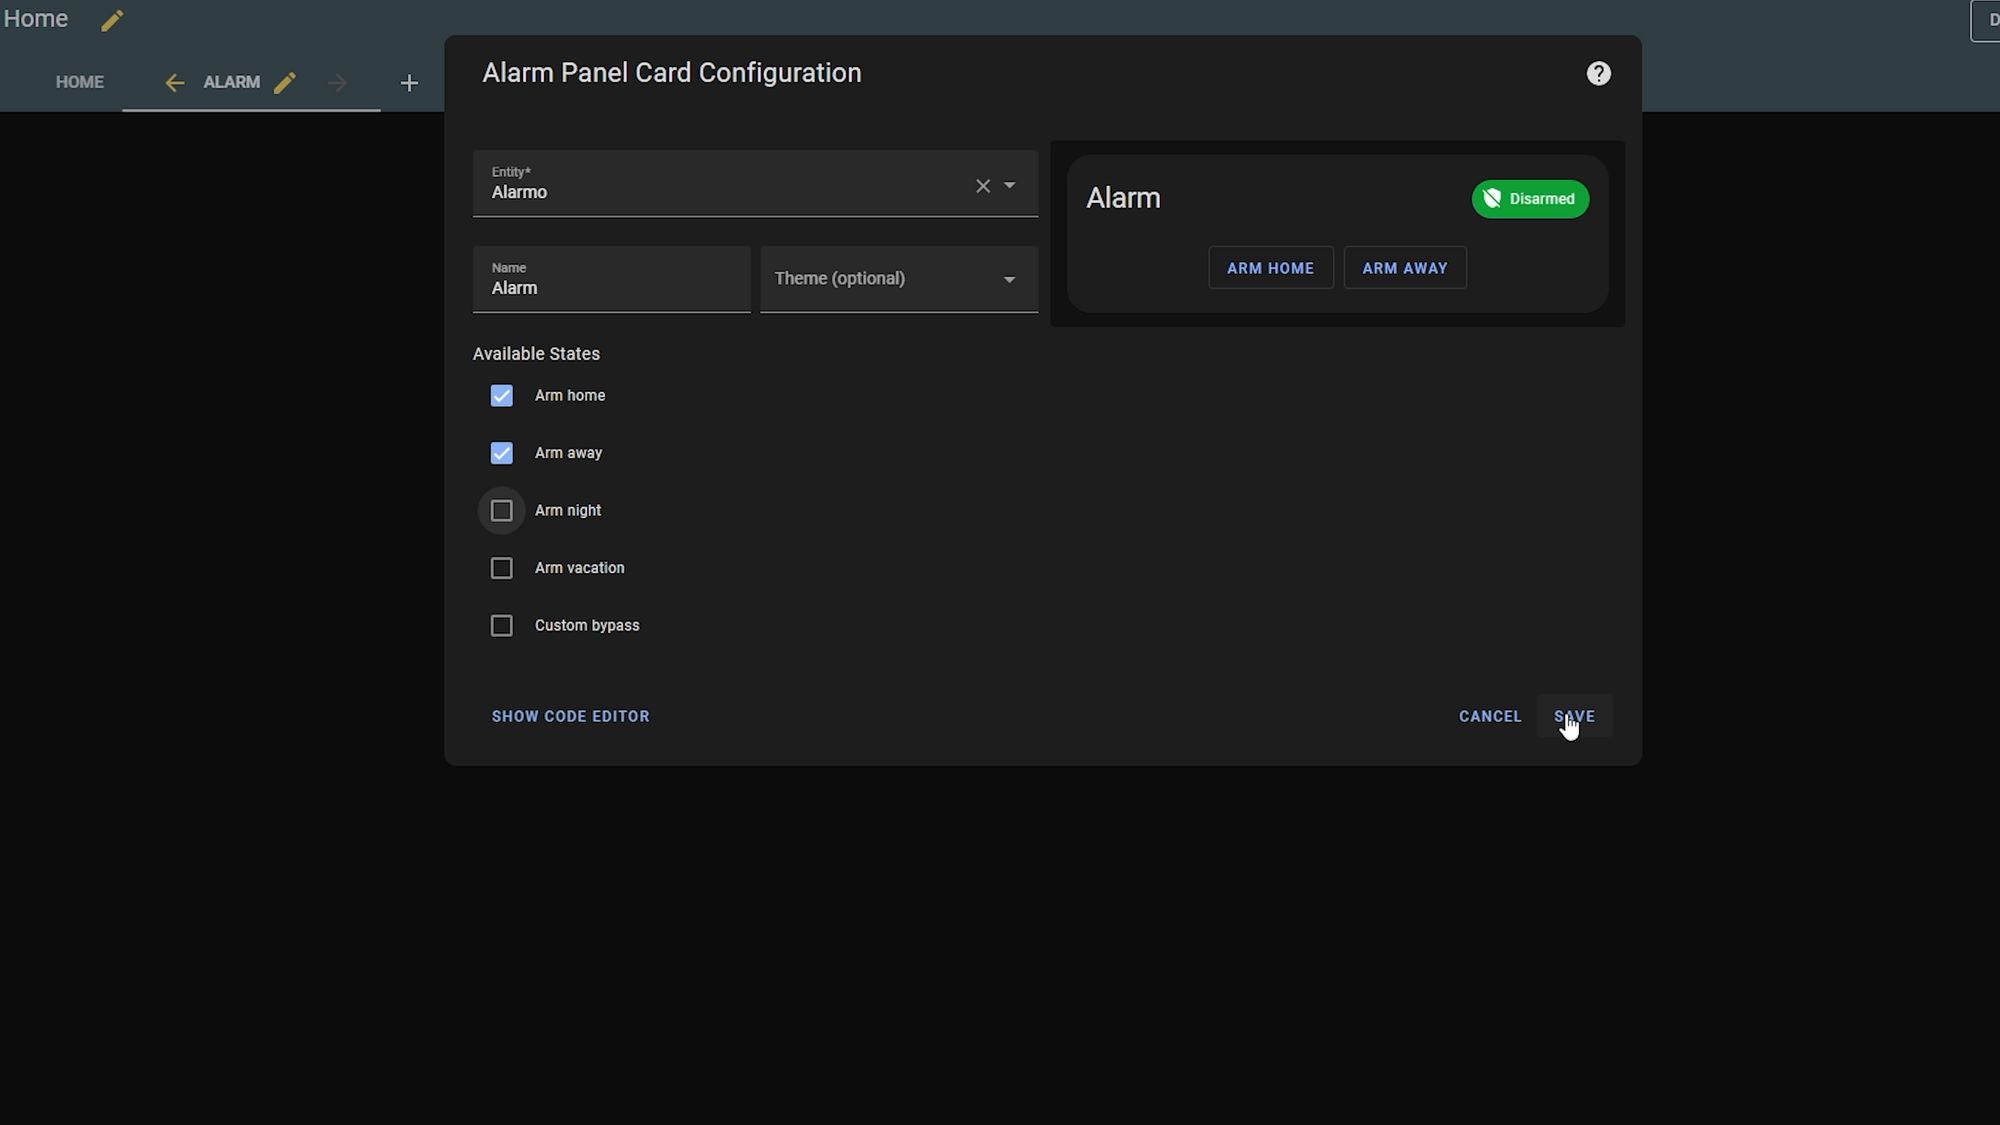
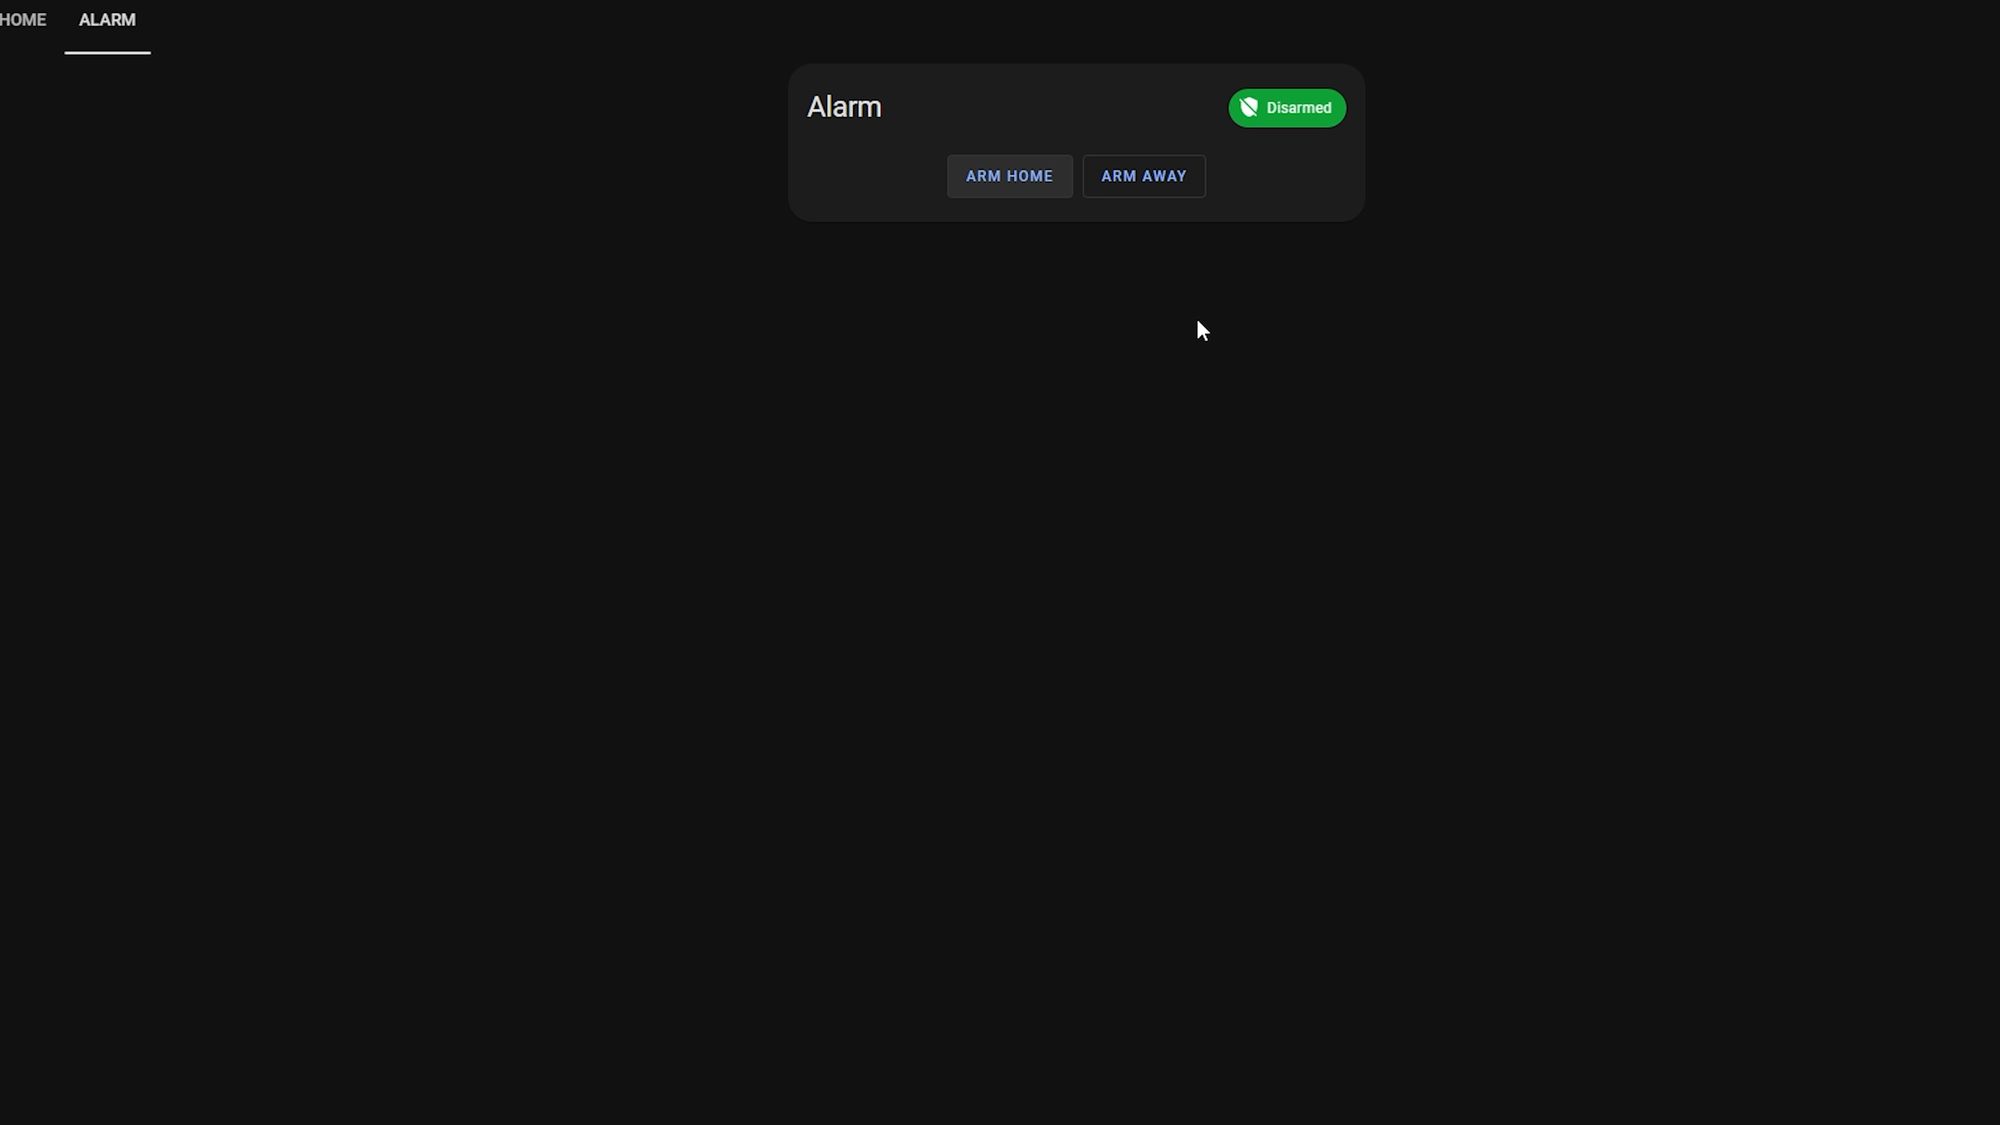
Adding Alarm To Our Dashboard
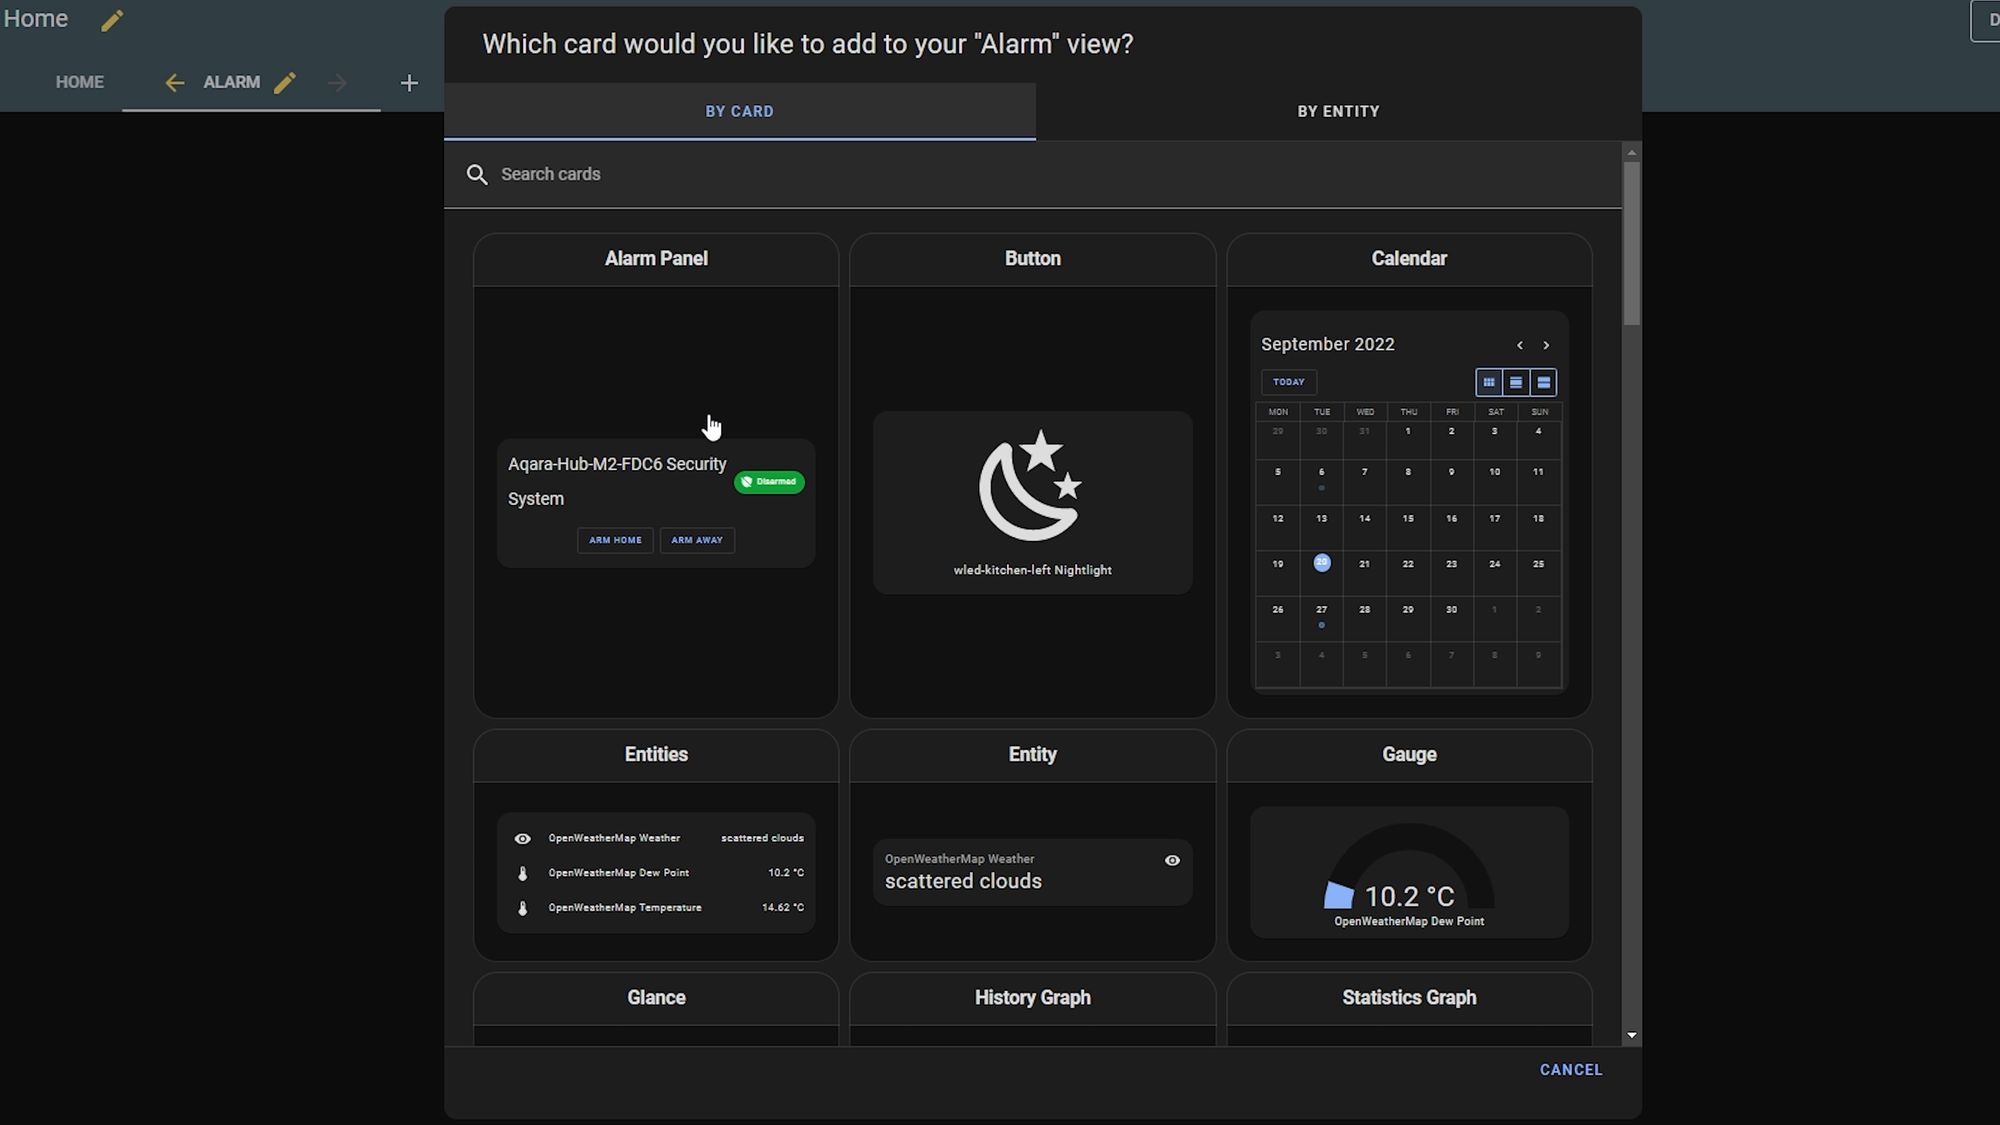
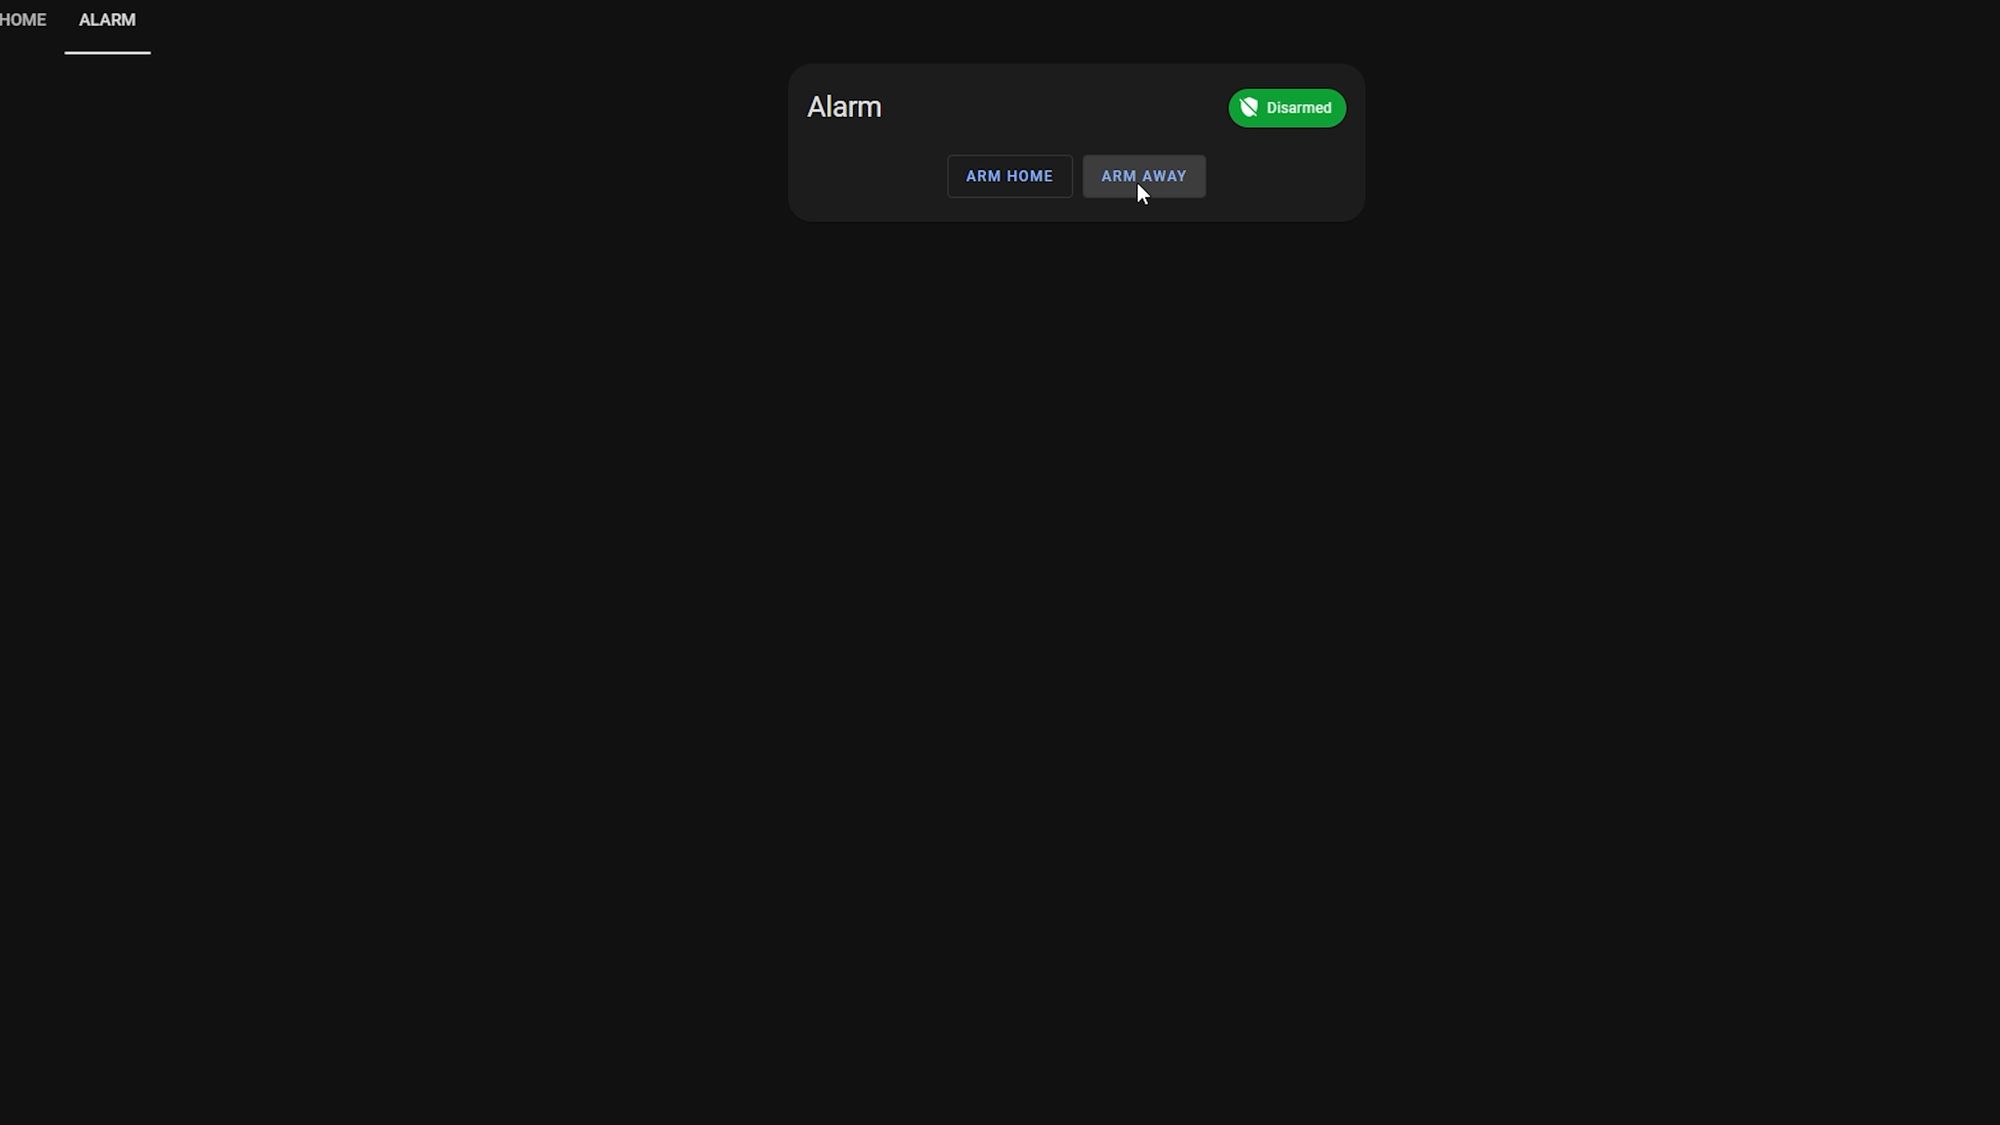
At this point the alarm should now be functioning at a basic level so lets add an alarm card to our dashboard quickly. Edit your dashboard, select add a new card and use the built in alarm panel card. Select the new Alarmo entity as the entity and select the available modes if applicable and hit save.

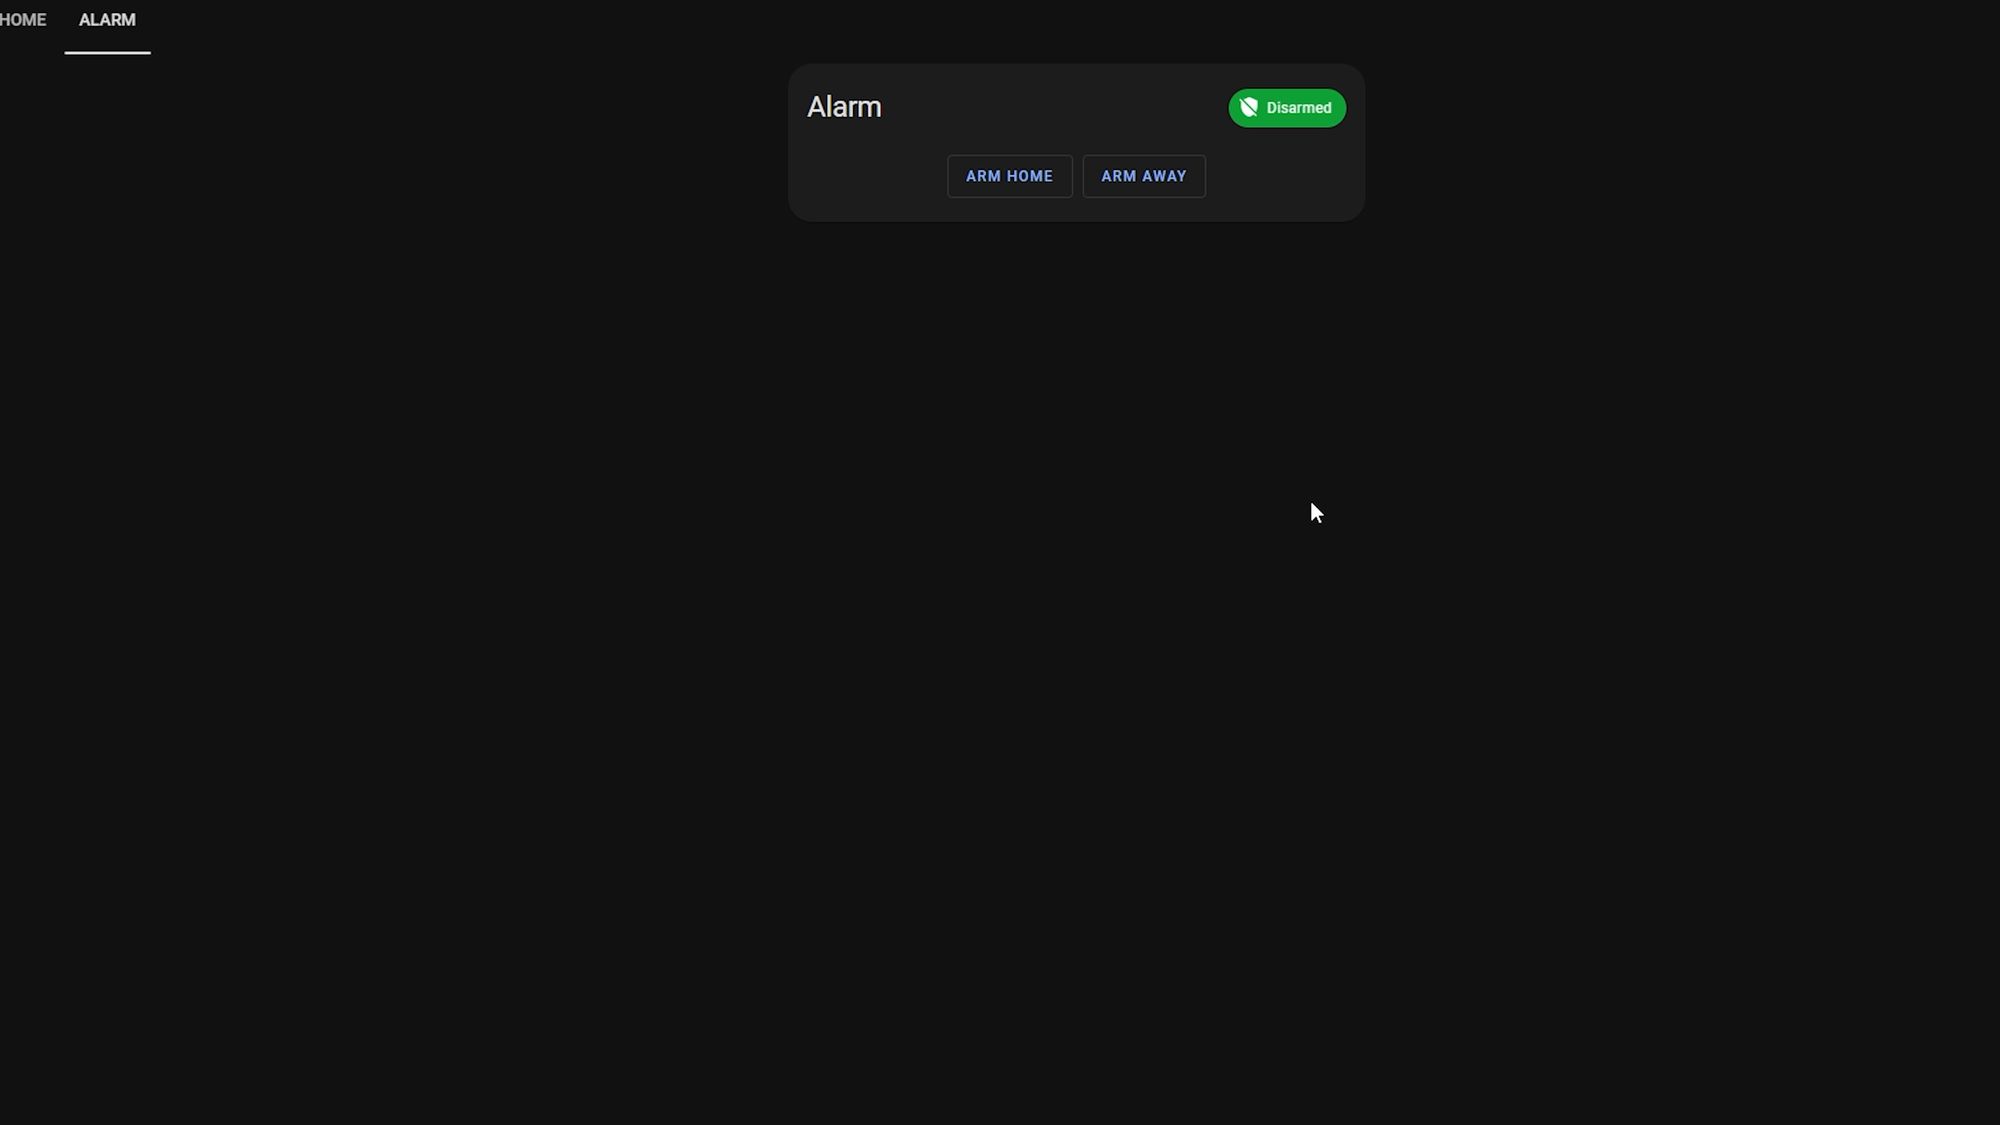
Now if you hit the arm button, the alarm should set itself and now if you trigger one of the sensors, it will go to the pending state which gives you time to enter the code and then it goes to the triggered state... nice, our alarm is working!
Except you’ll notice that it doesn’t actually do very much at the moment…
Creating Notifications
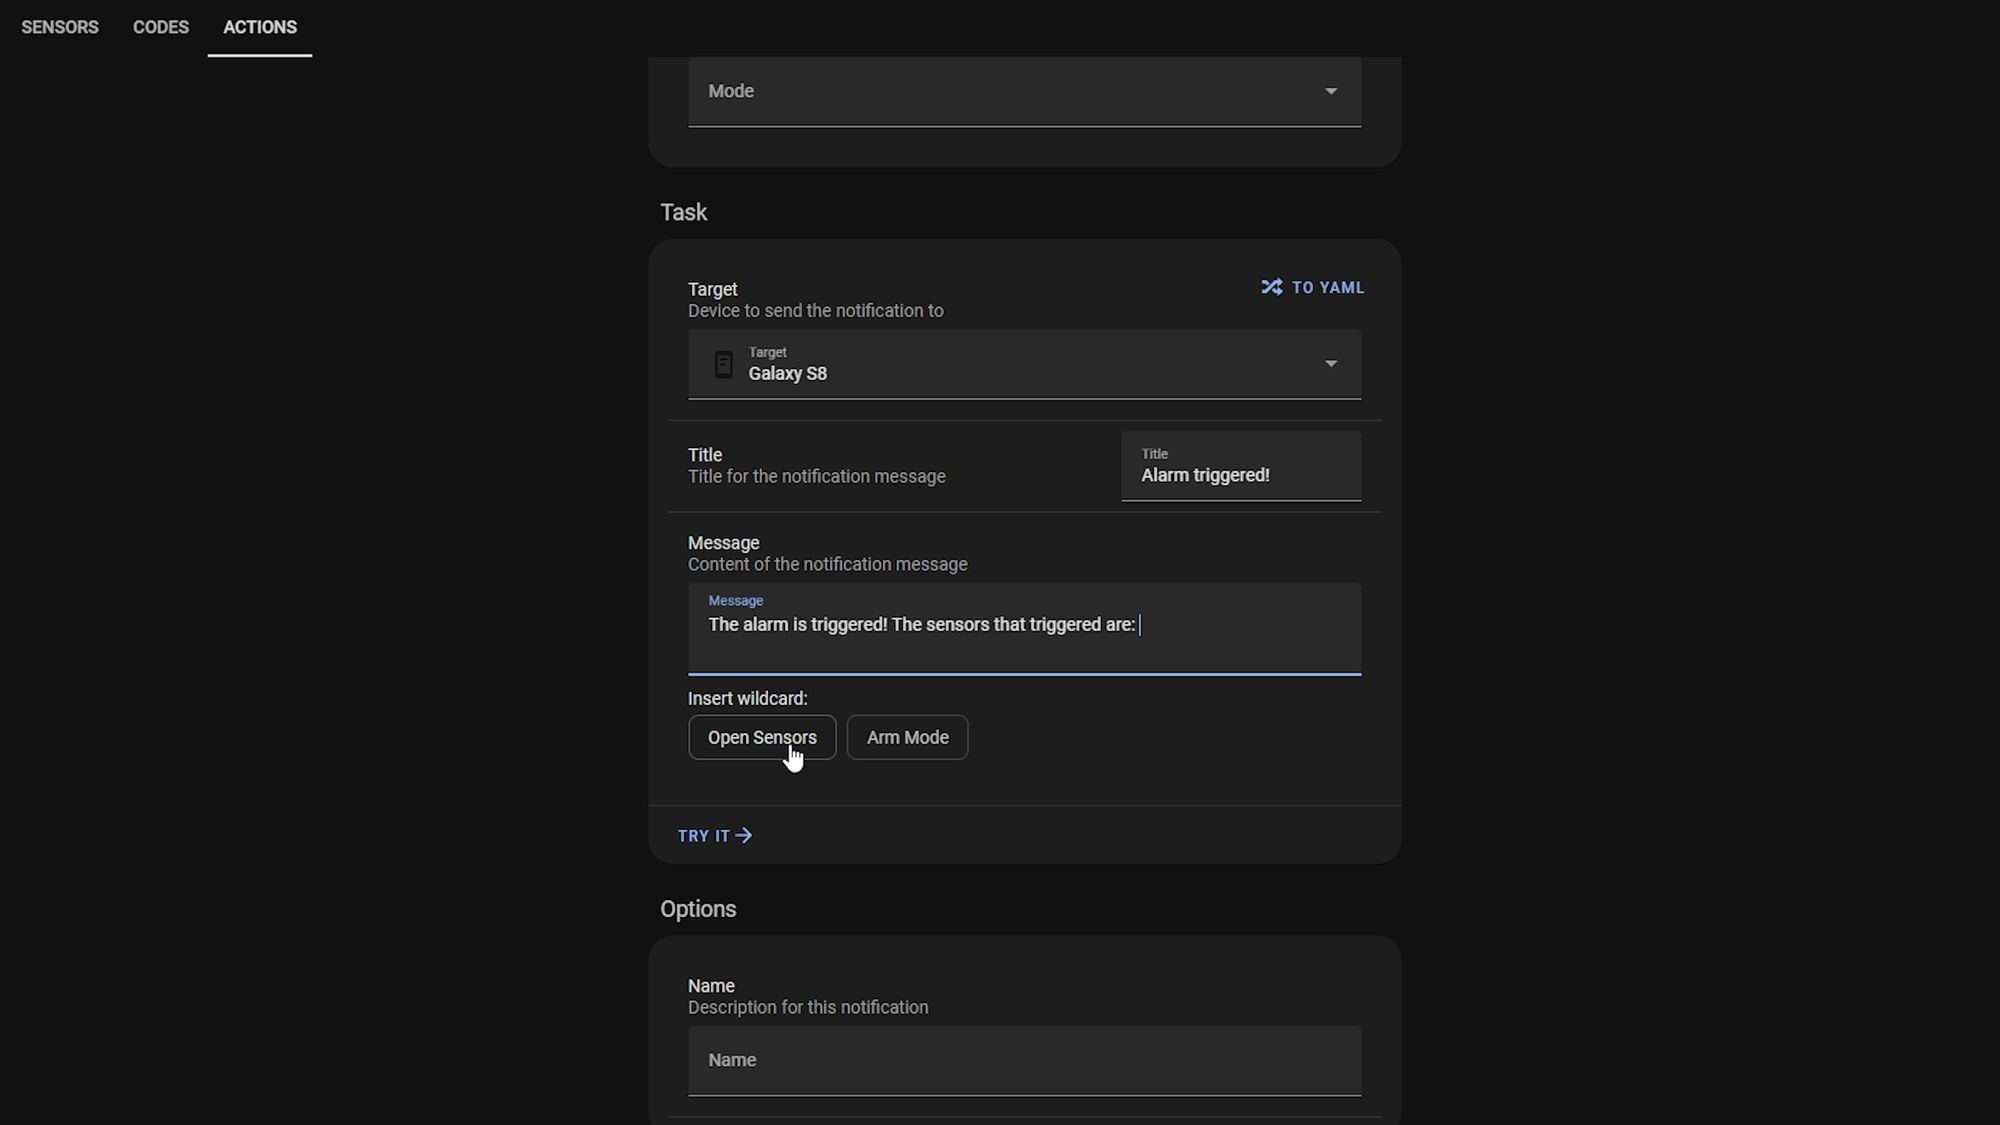
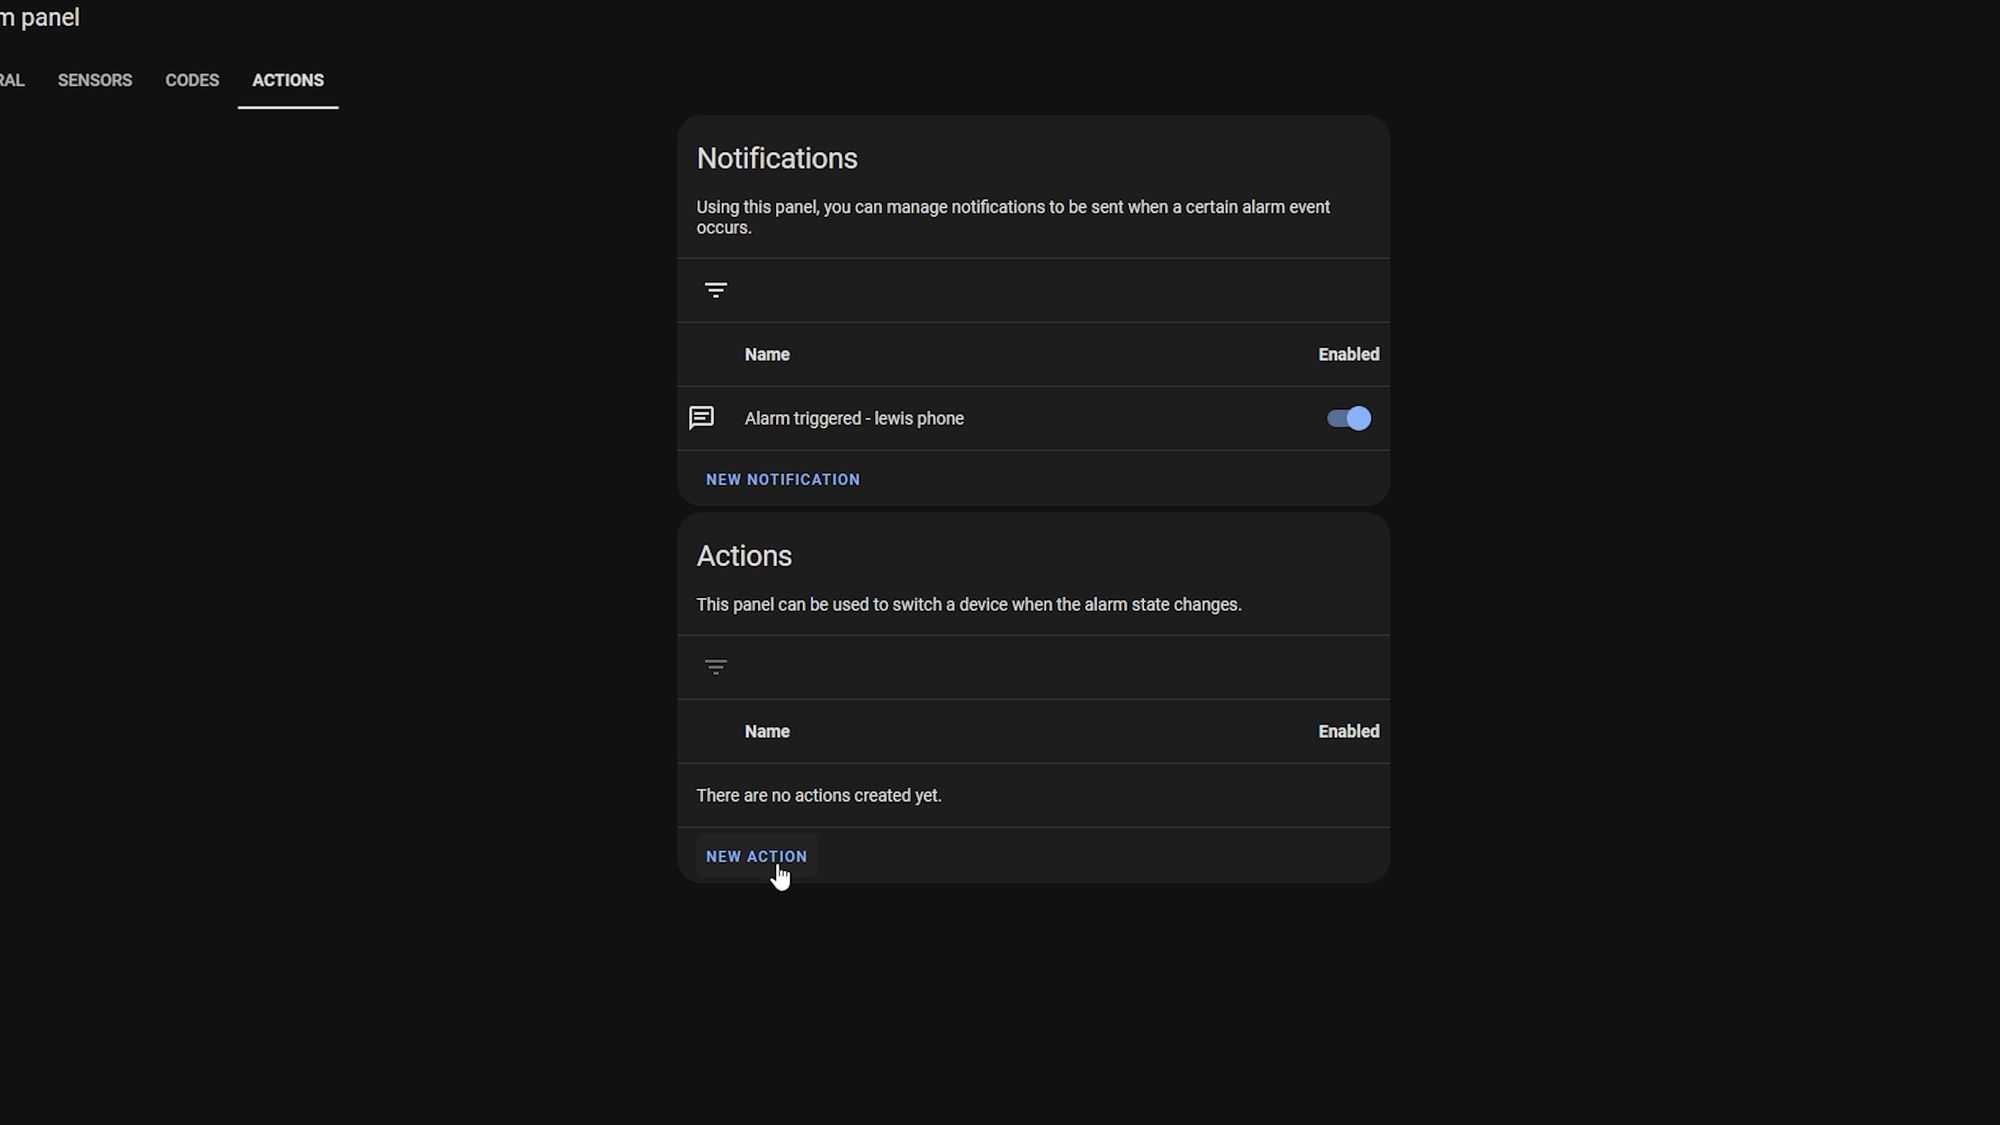
This is where the last tab in the settings comes in: the actions tab. This allows you to create notifications easily to alert you when the alarm is triggered and also by which sensor and it also allows you to create actions to perform when certain things happen to the alarm.

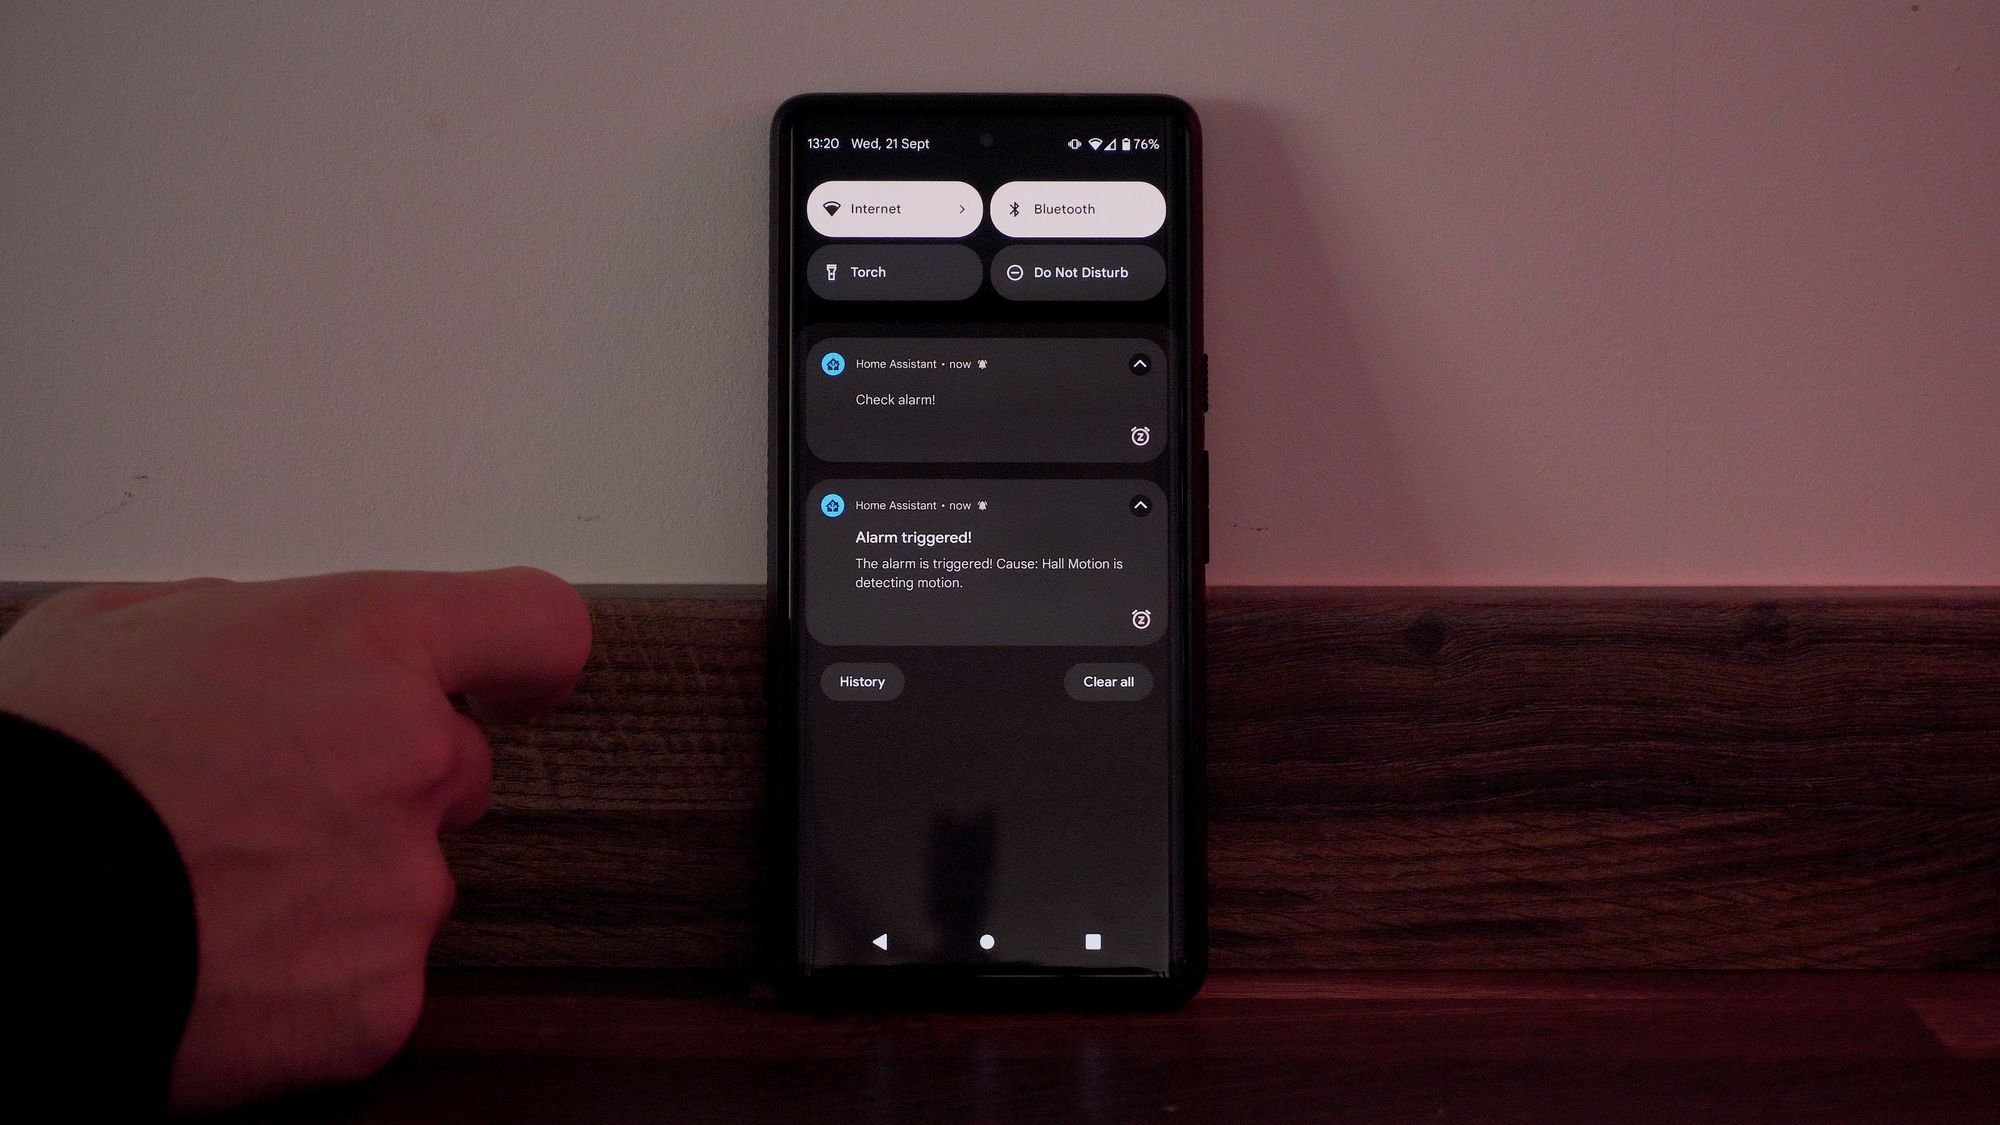

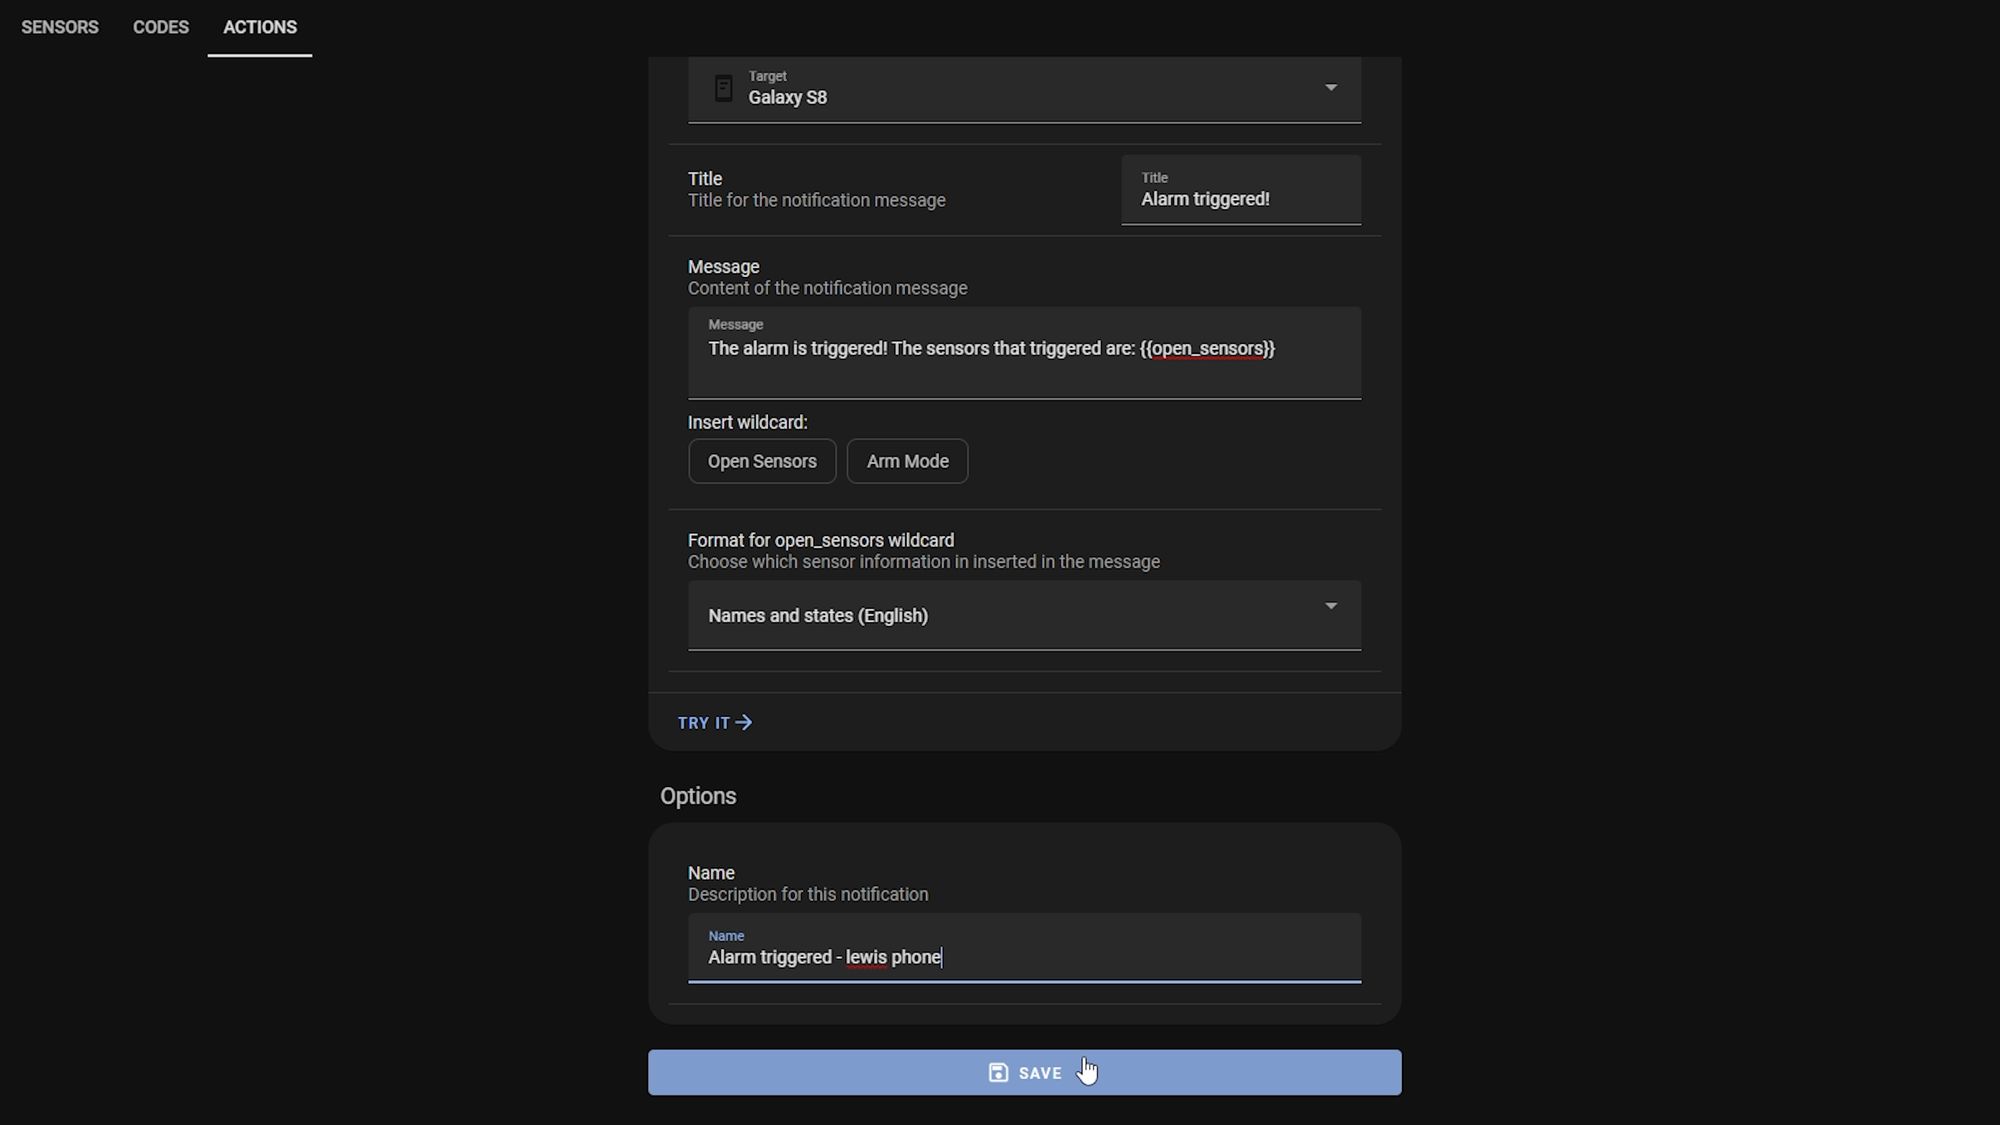
Let’s create a notification first by hitting the new notification button. For the event, I’m going to select alarm is triggered, then under the target I will select my phone and give the notification a title and customize the message.

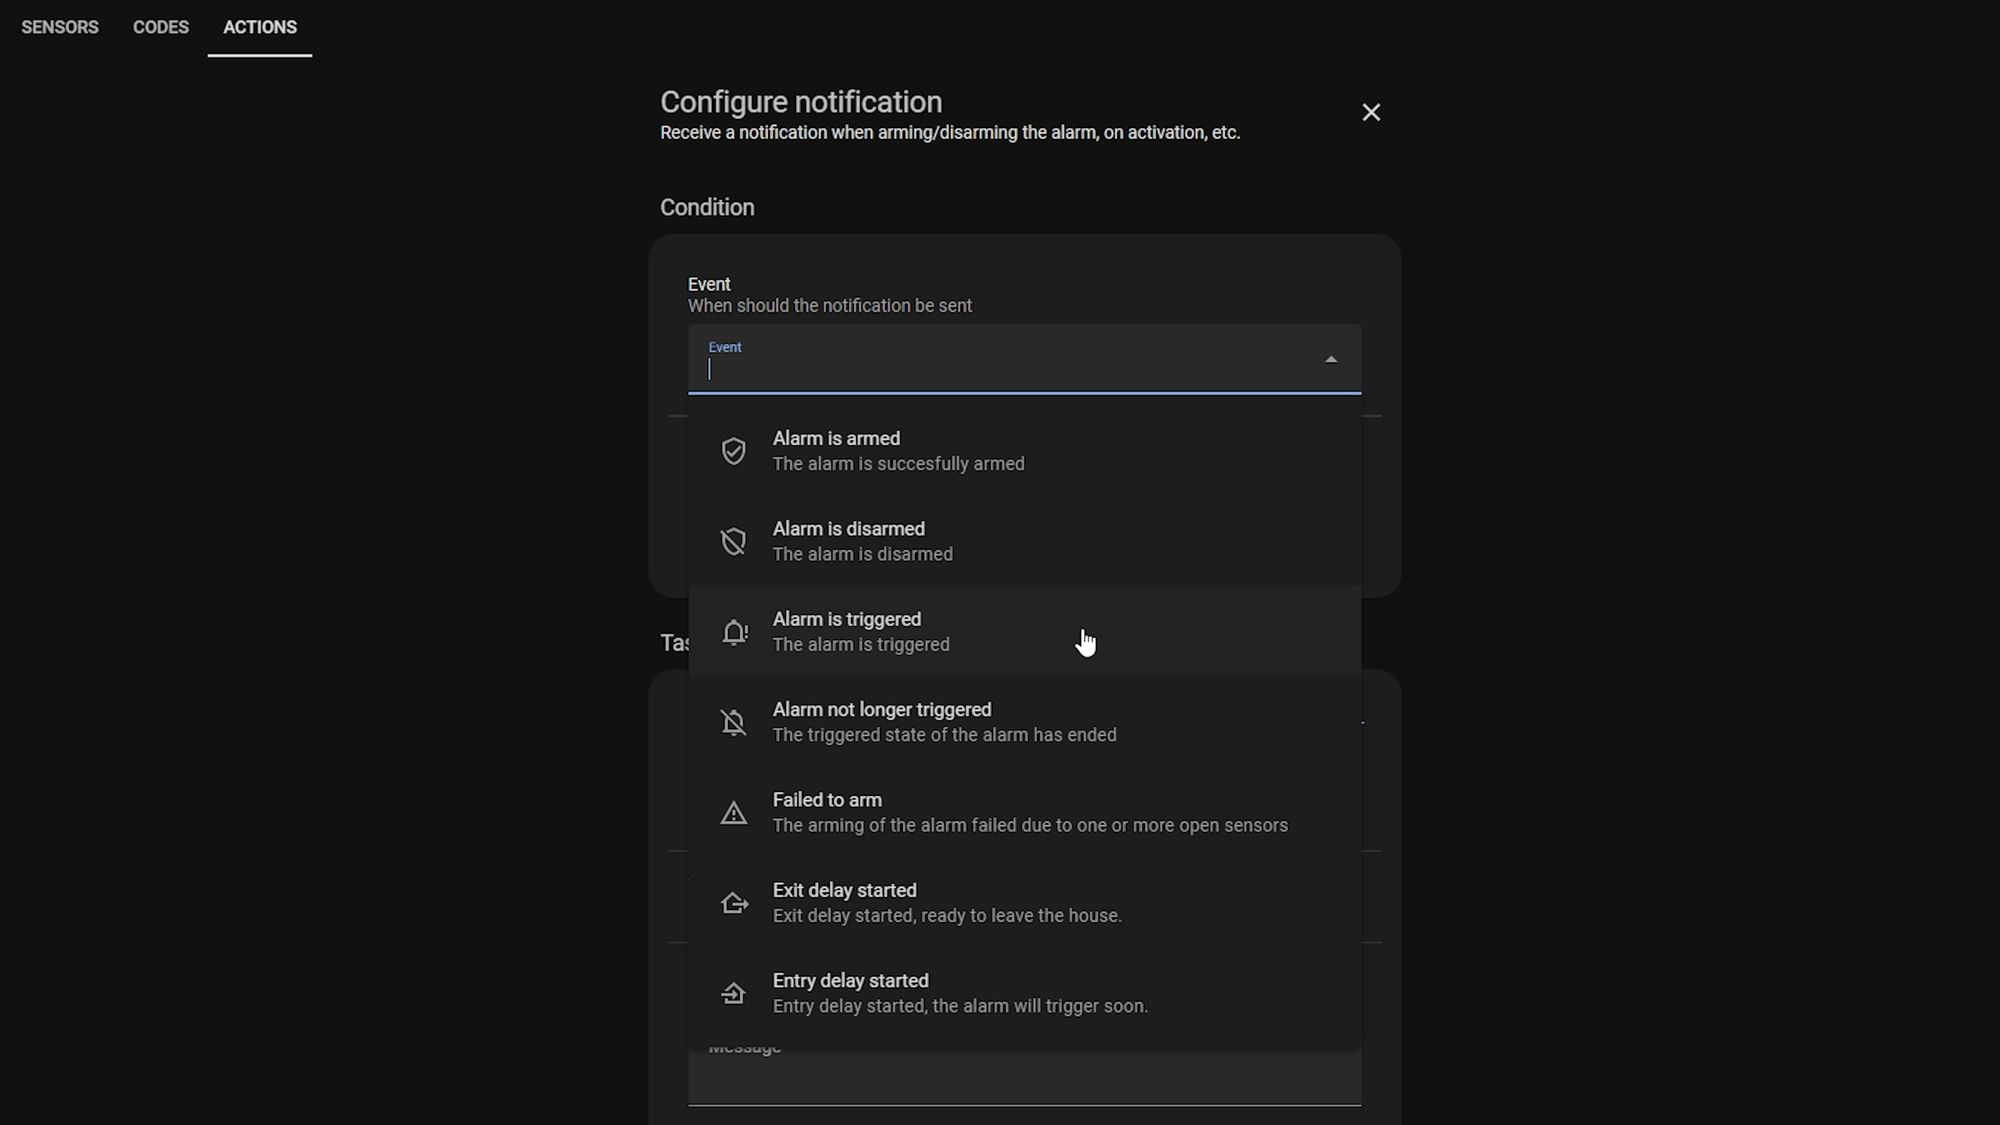
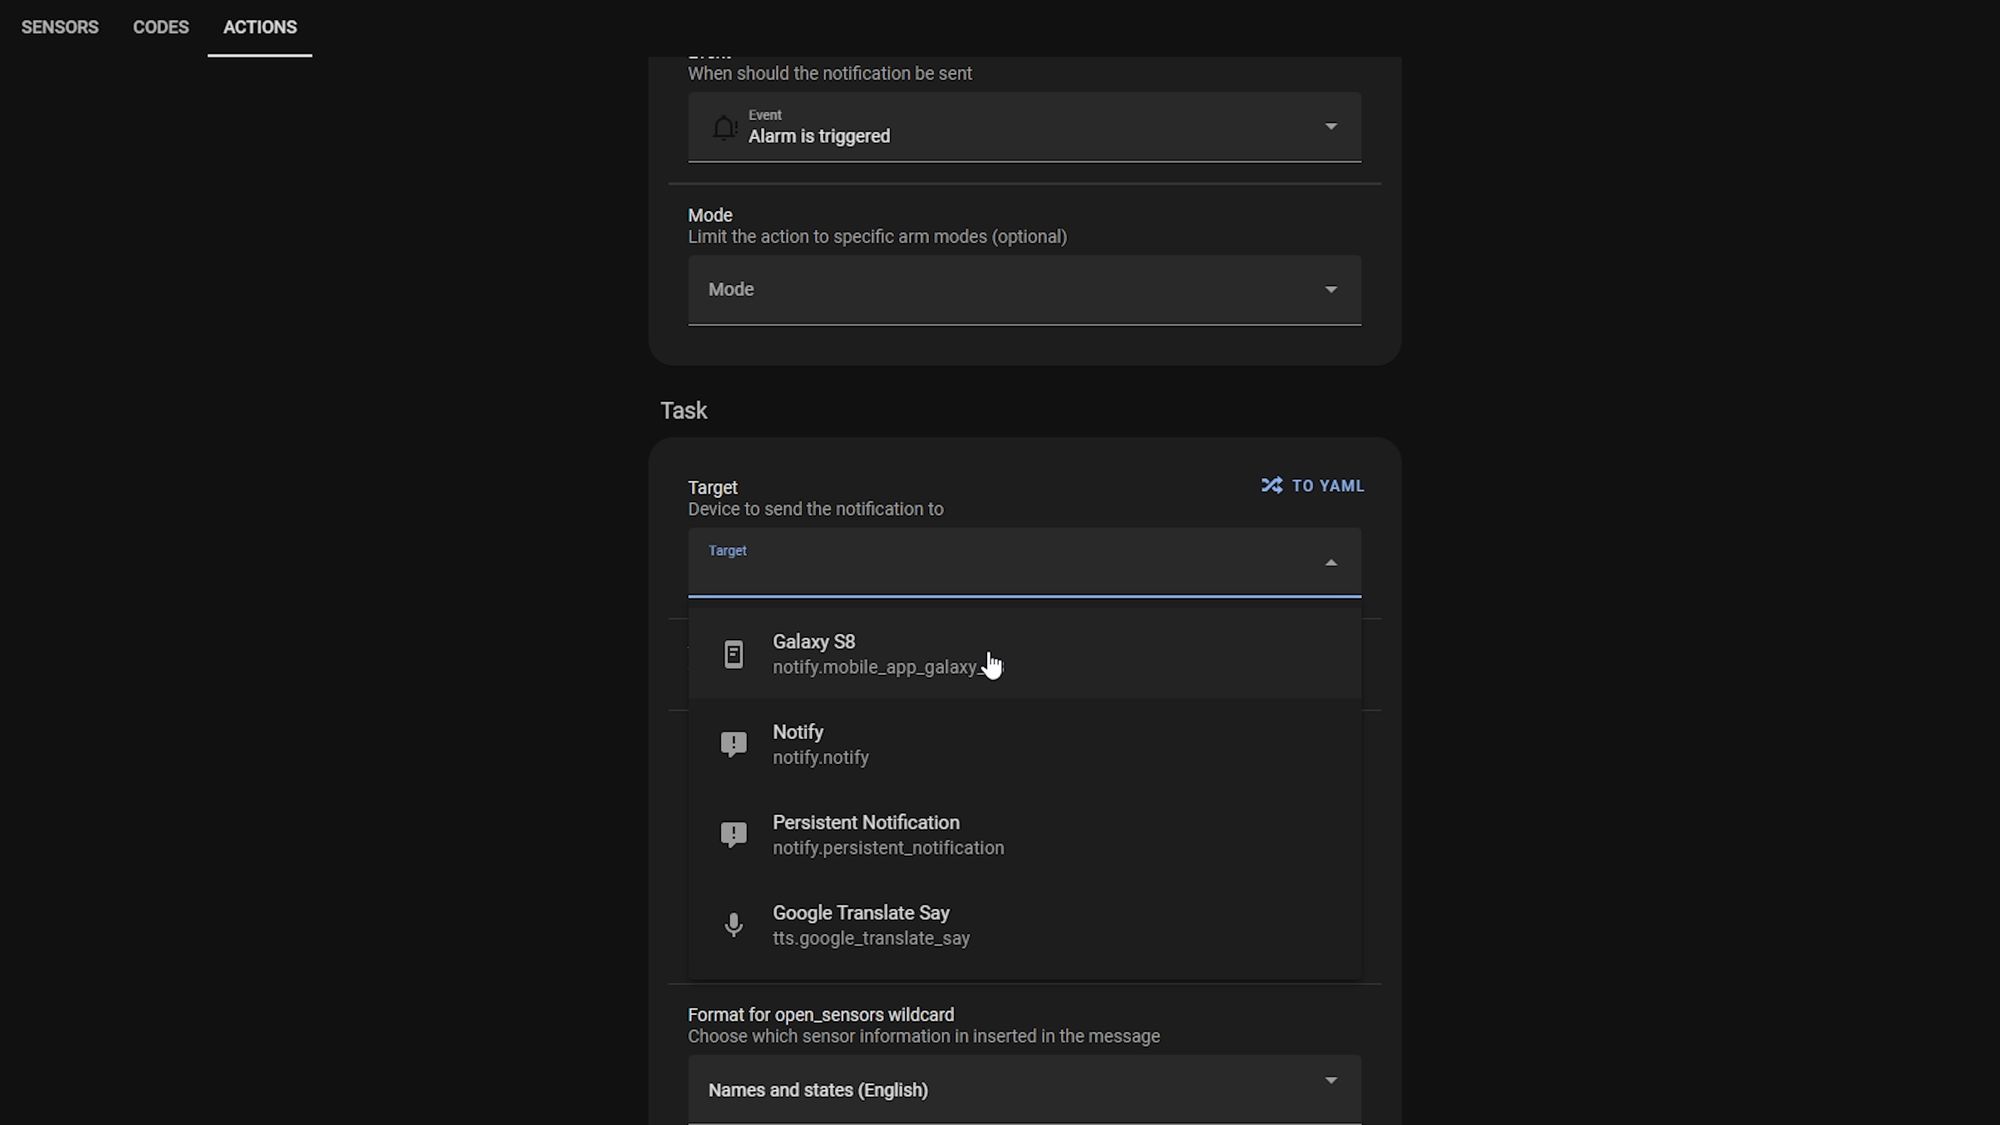
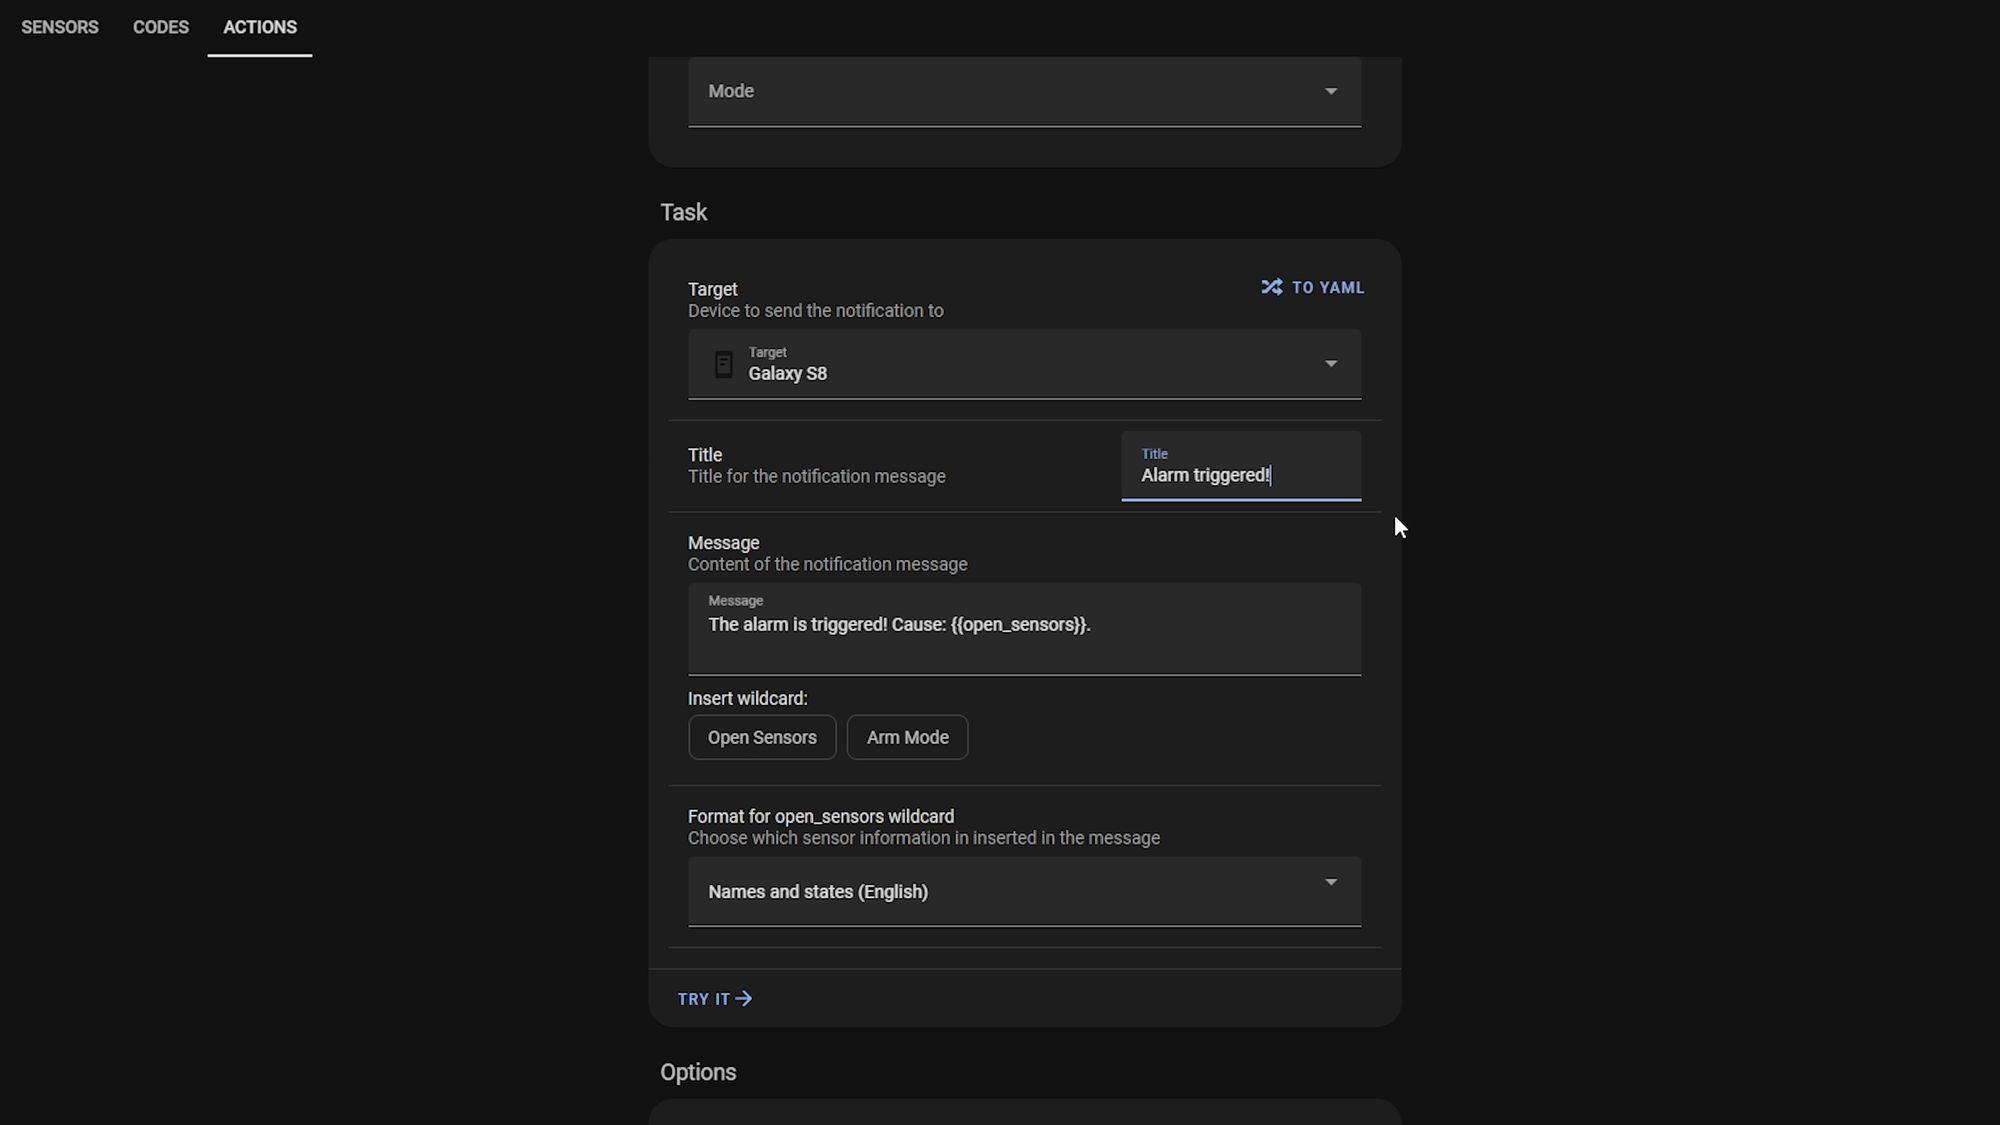
Notice that underneath, there are wildcards you can use for showing which sensor triggered the alarm, as well as the arming mode - being able to see the open sensors in particular is really useful! Then hit save to create the notification, and whenever the action you selected happens, that notification will immediately be sent to the devices you have chosen and you can repeat this to create more than one notification for each action.
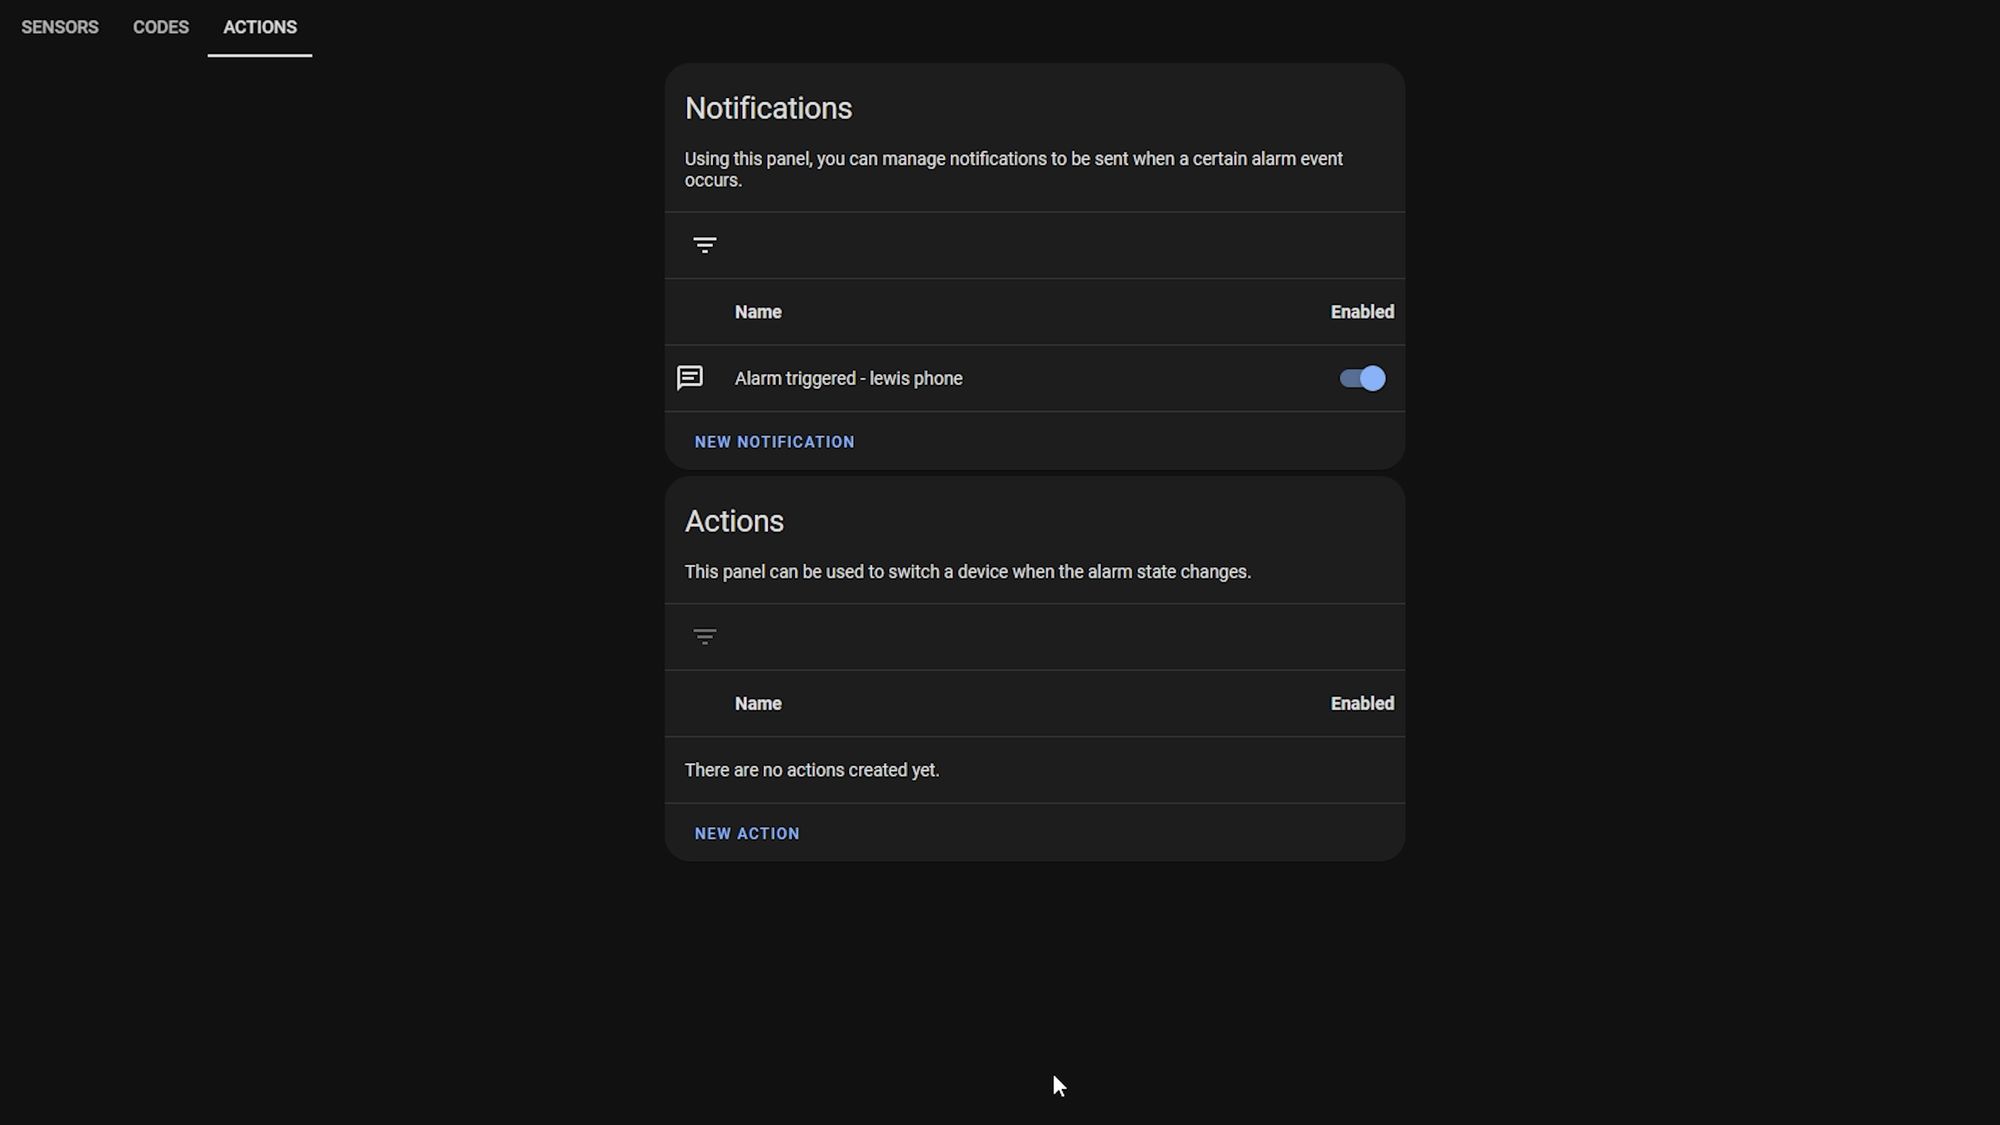
Custom Actions
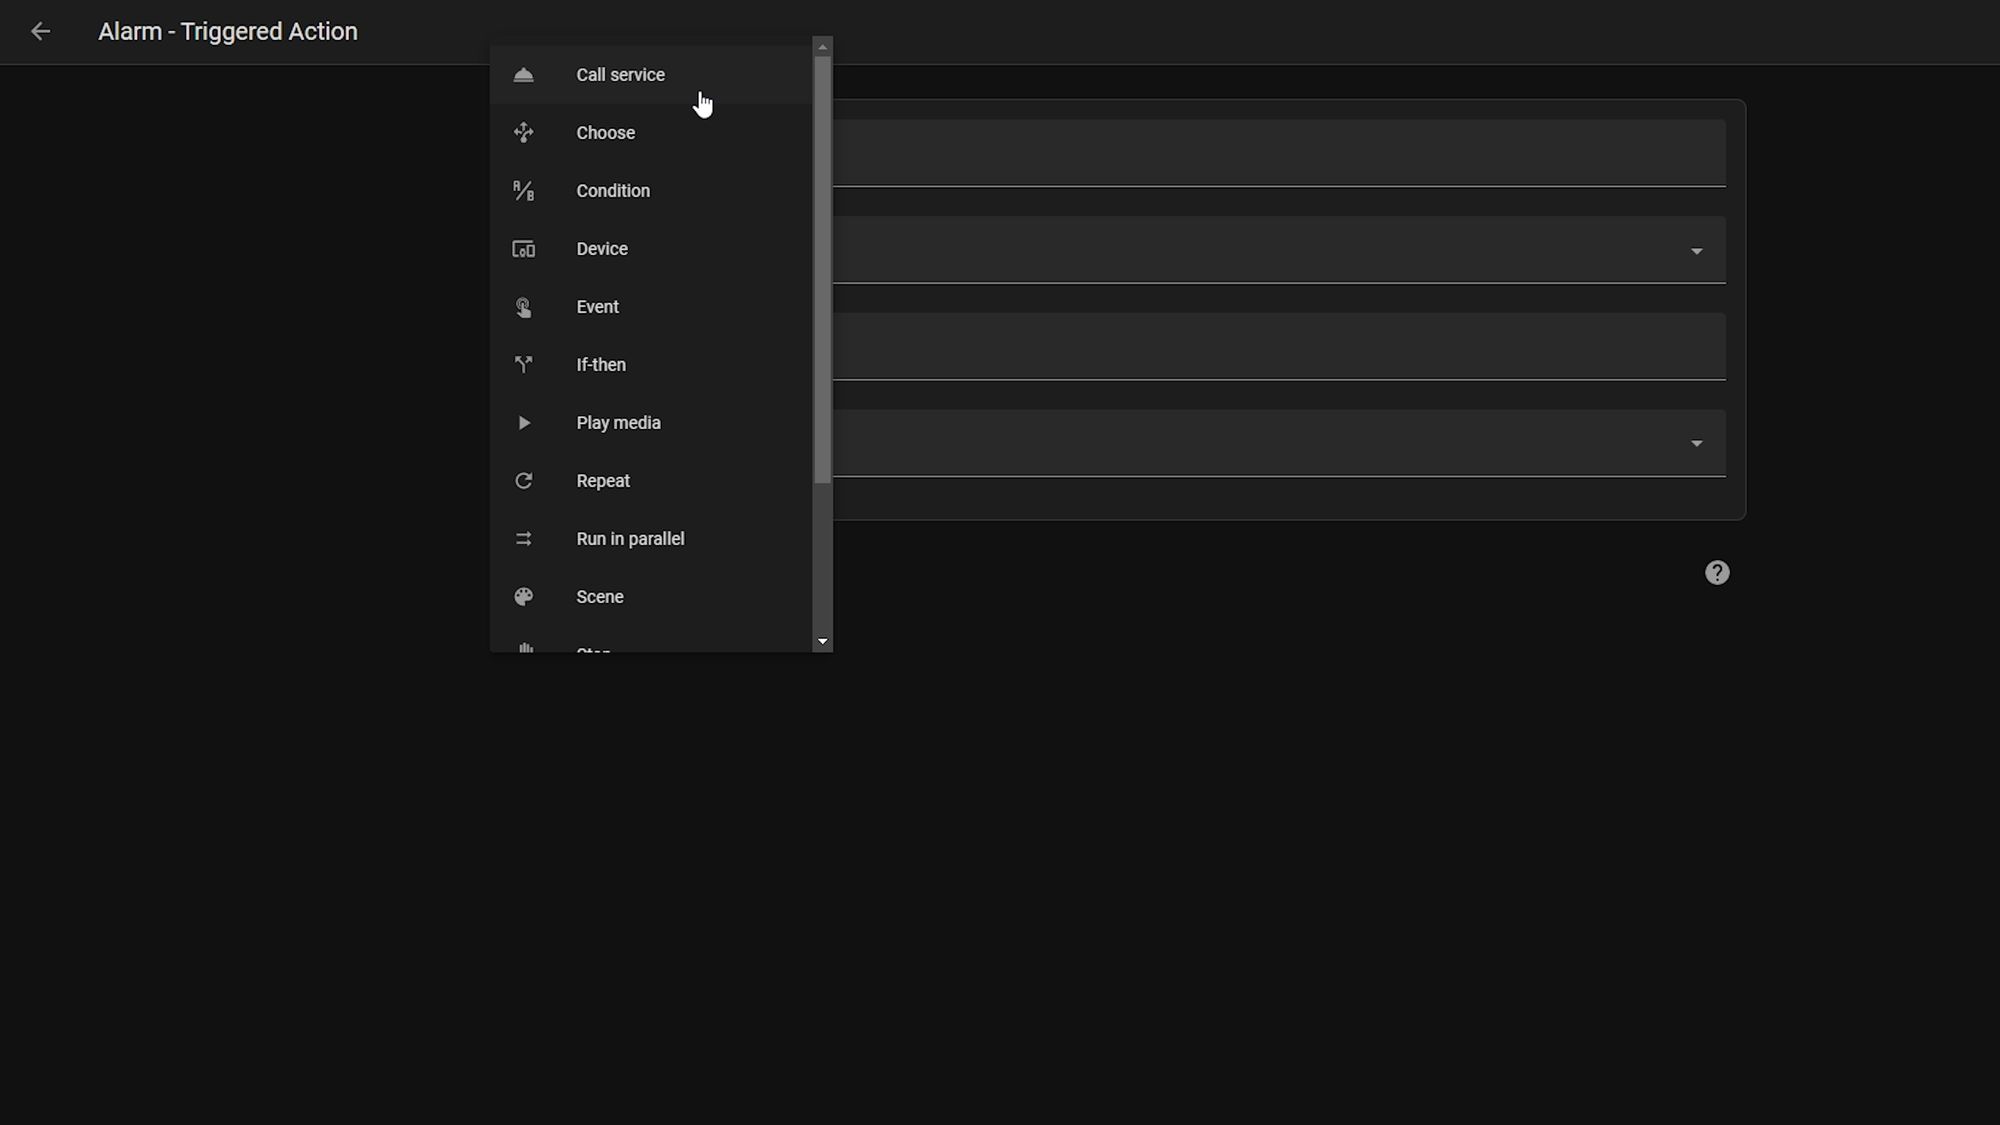
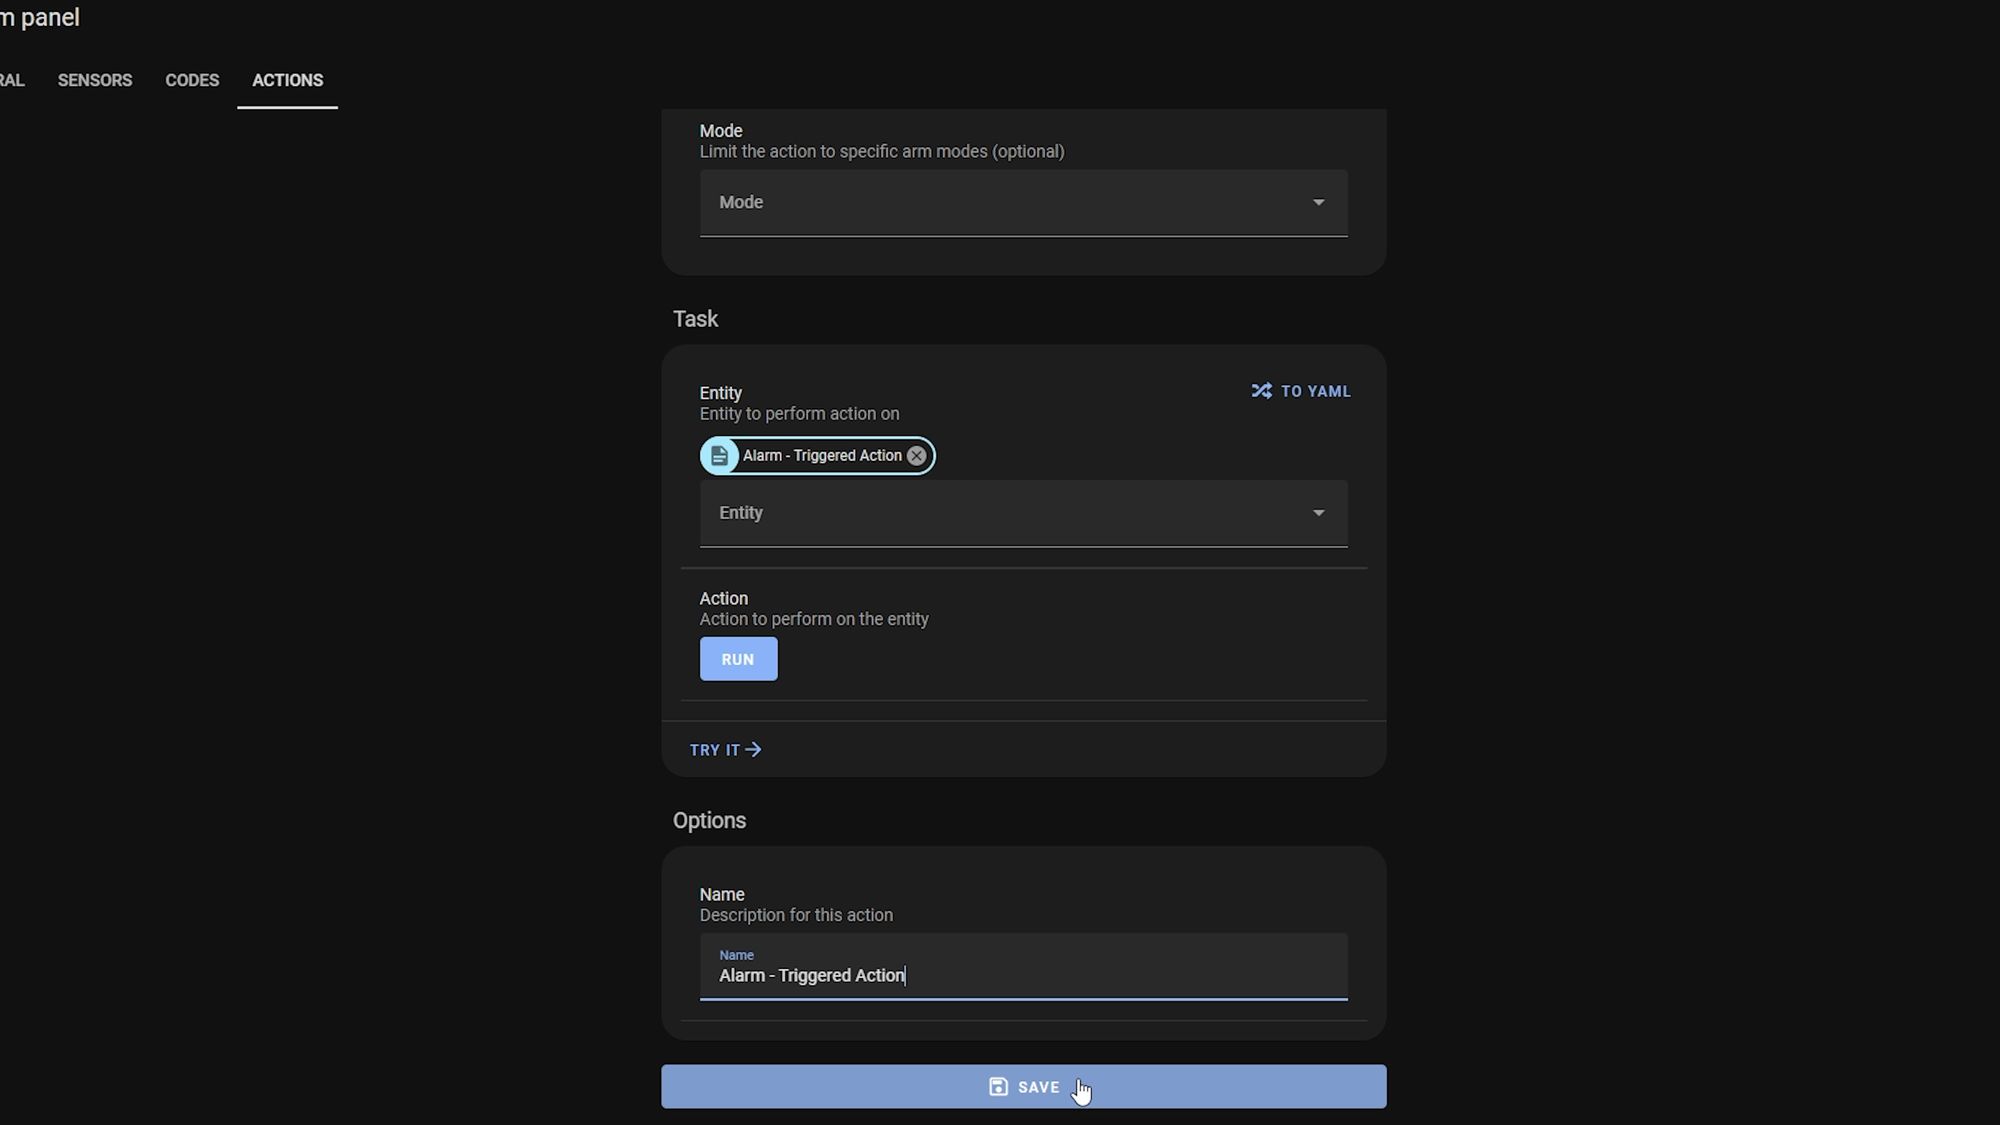
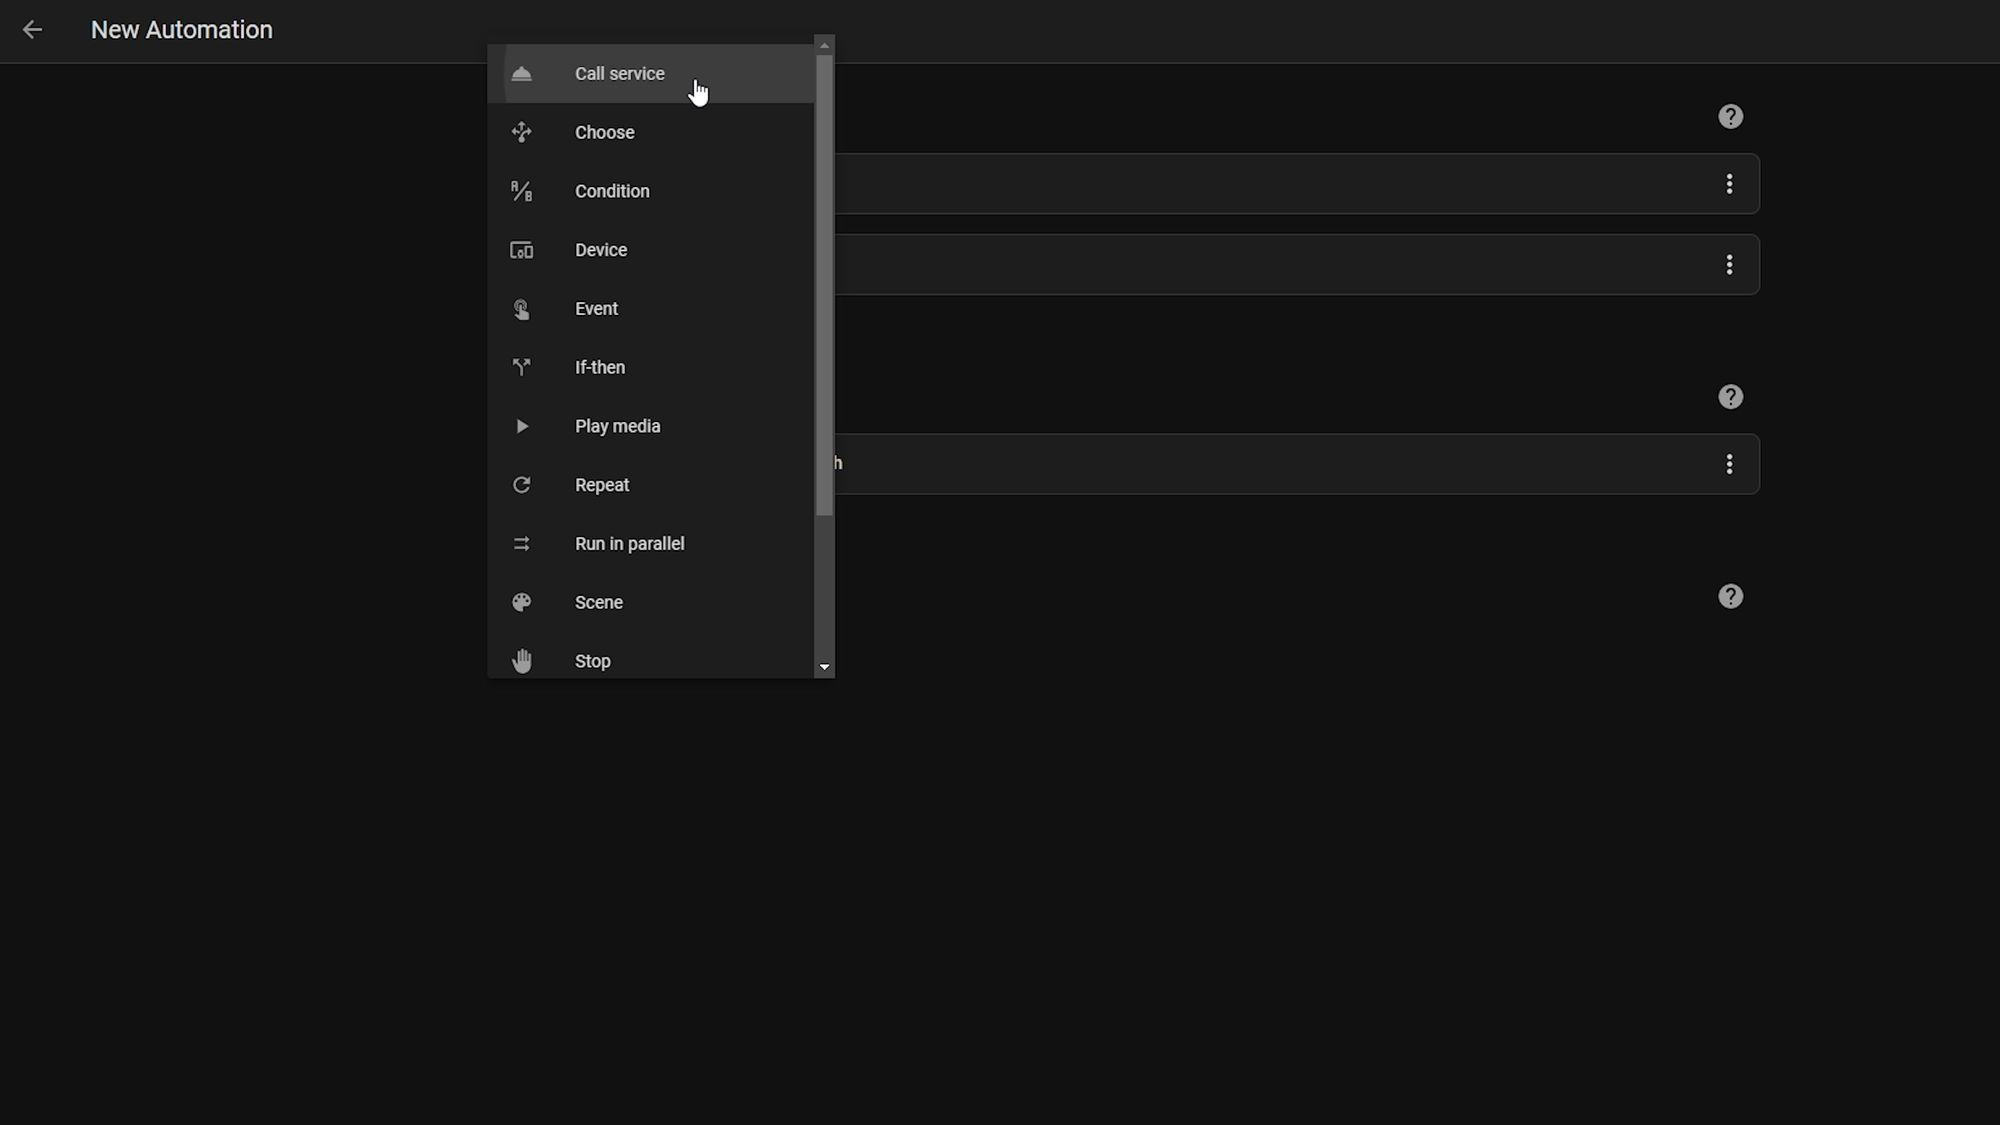
Finally for actions, this is where we can have other things happen depending on the state of the alarm. So, for example, if the alarm starts triggering, then I want to activate my siren and turn on some lights - if you are doing something simple then you could do this directly in the task box inside of Alarmo but I prefer to create a script to do this instead as this means it is easily expandable in the future without having to change the Alarmo settings and you can do more advanced things.
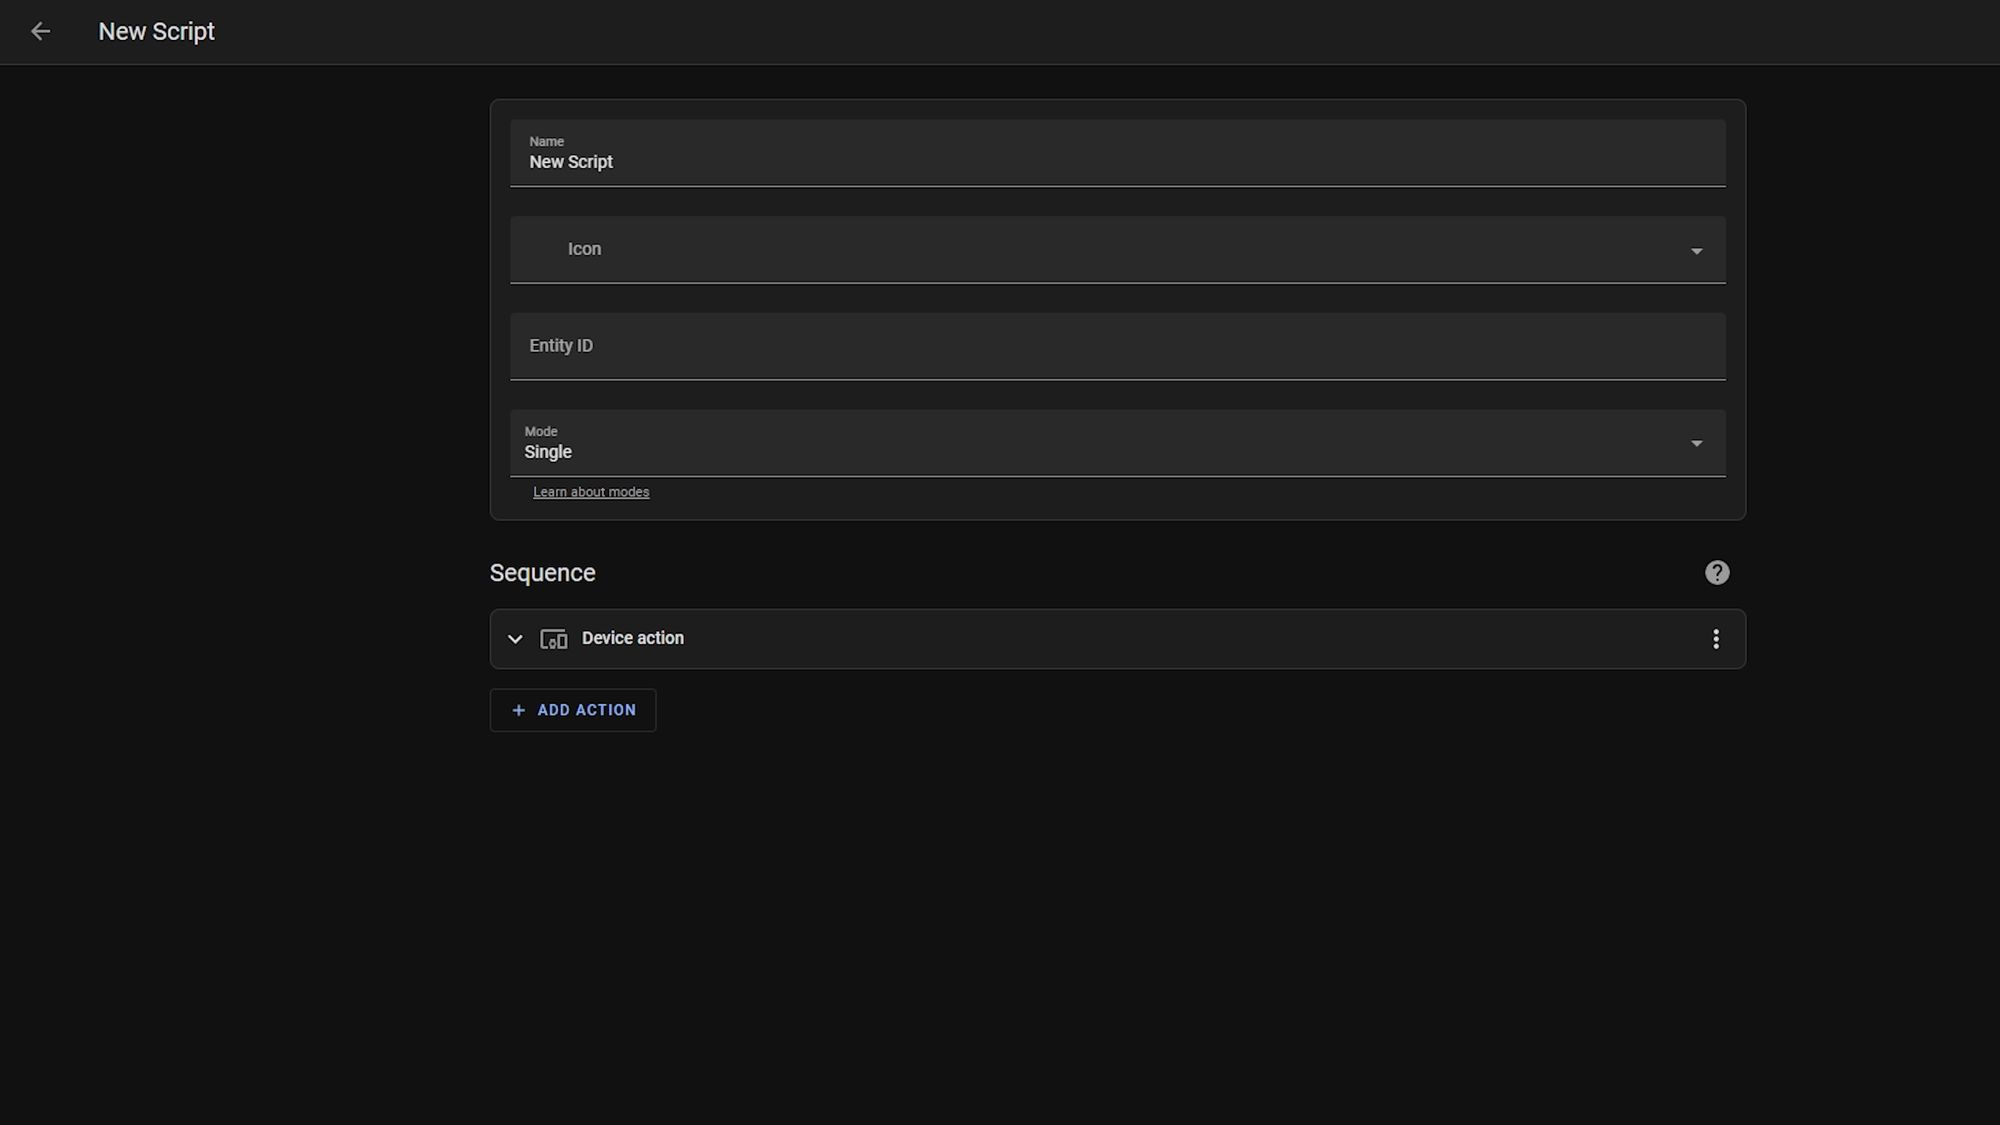
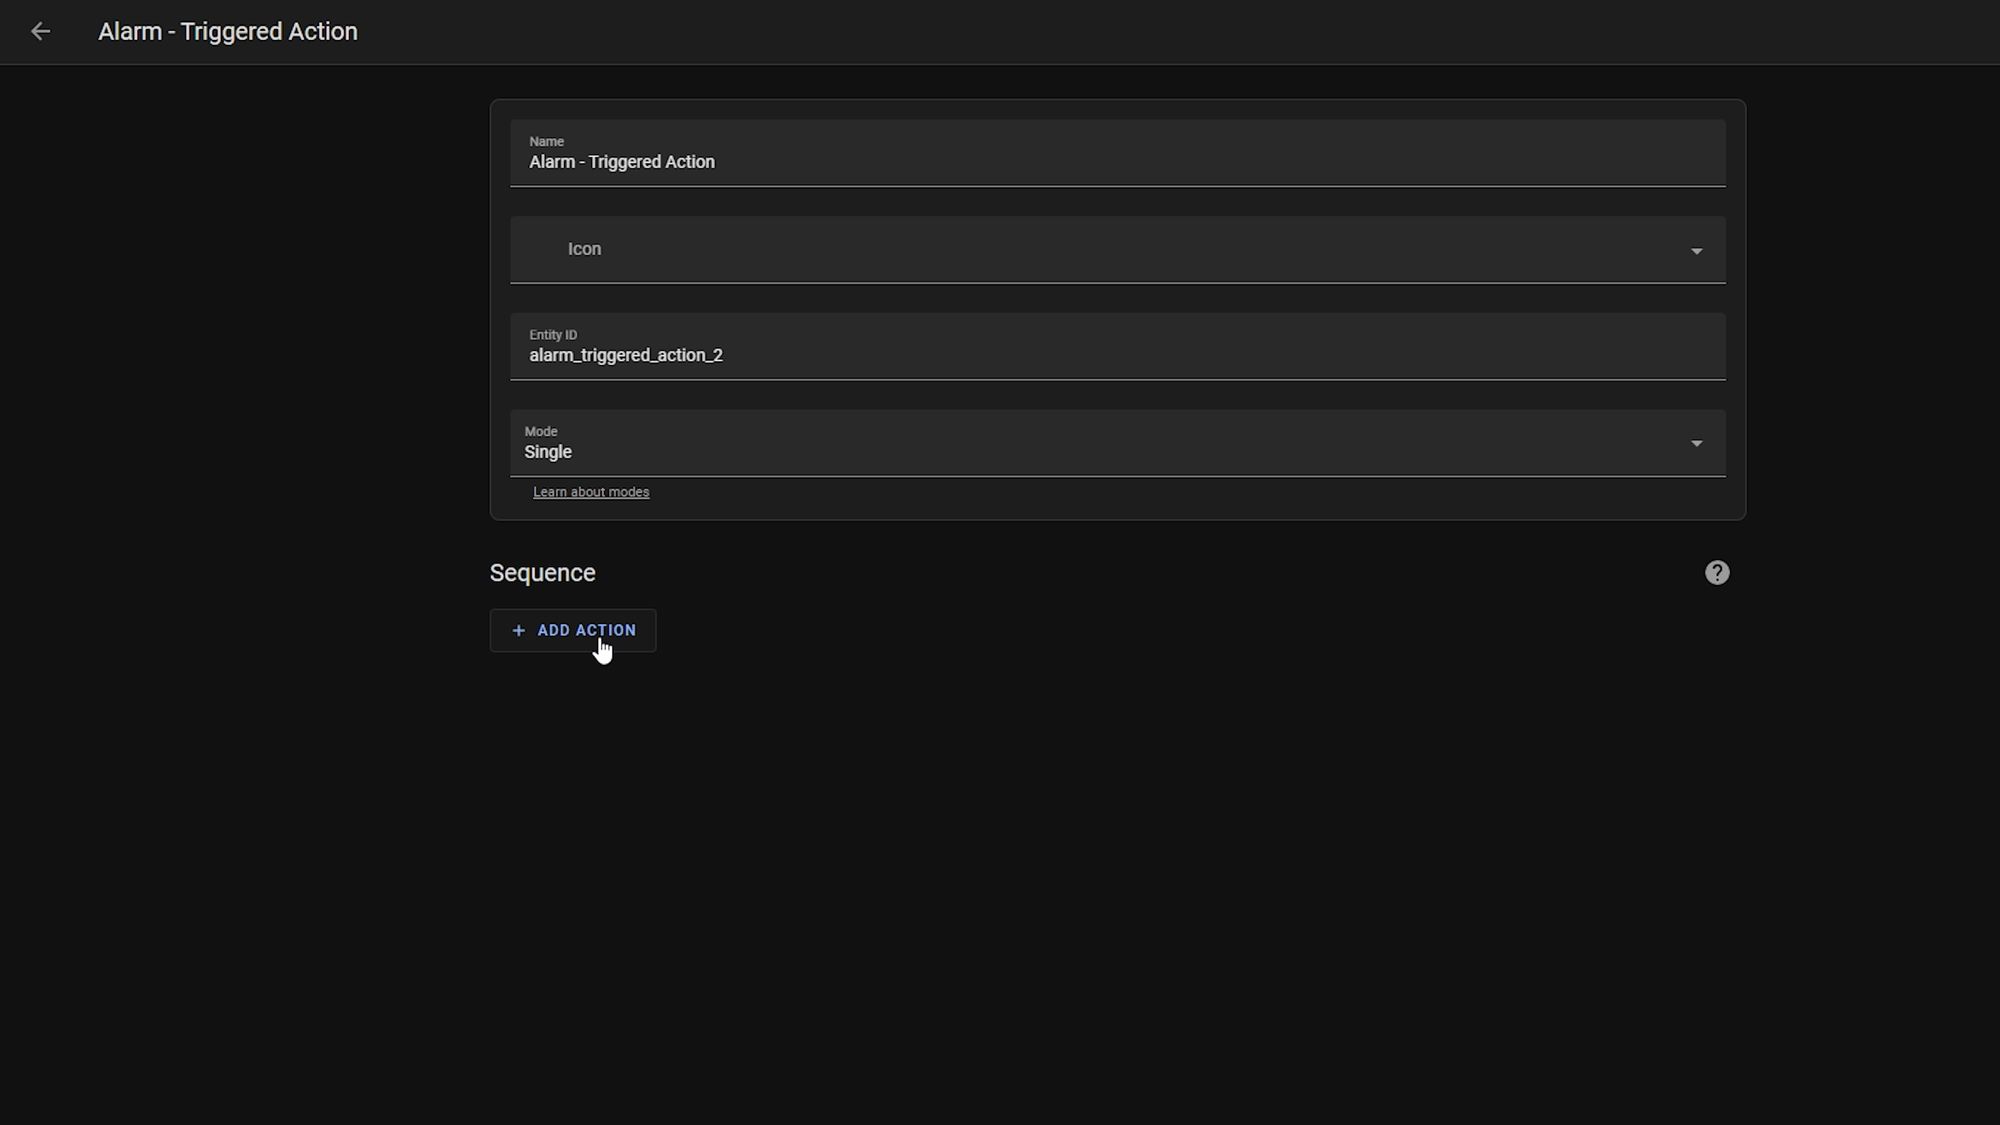
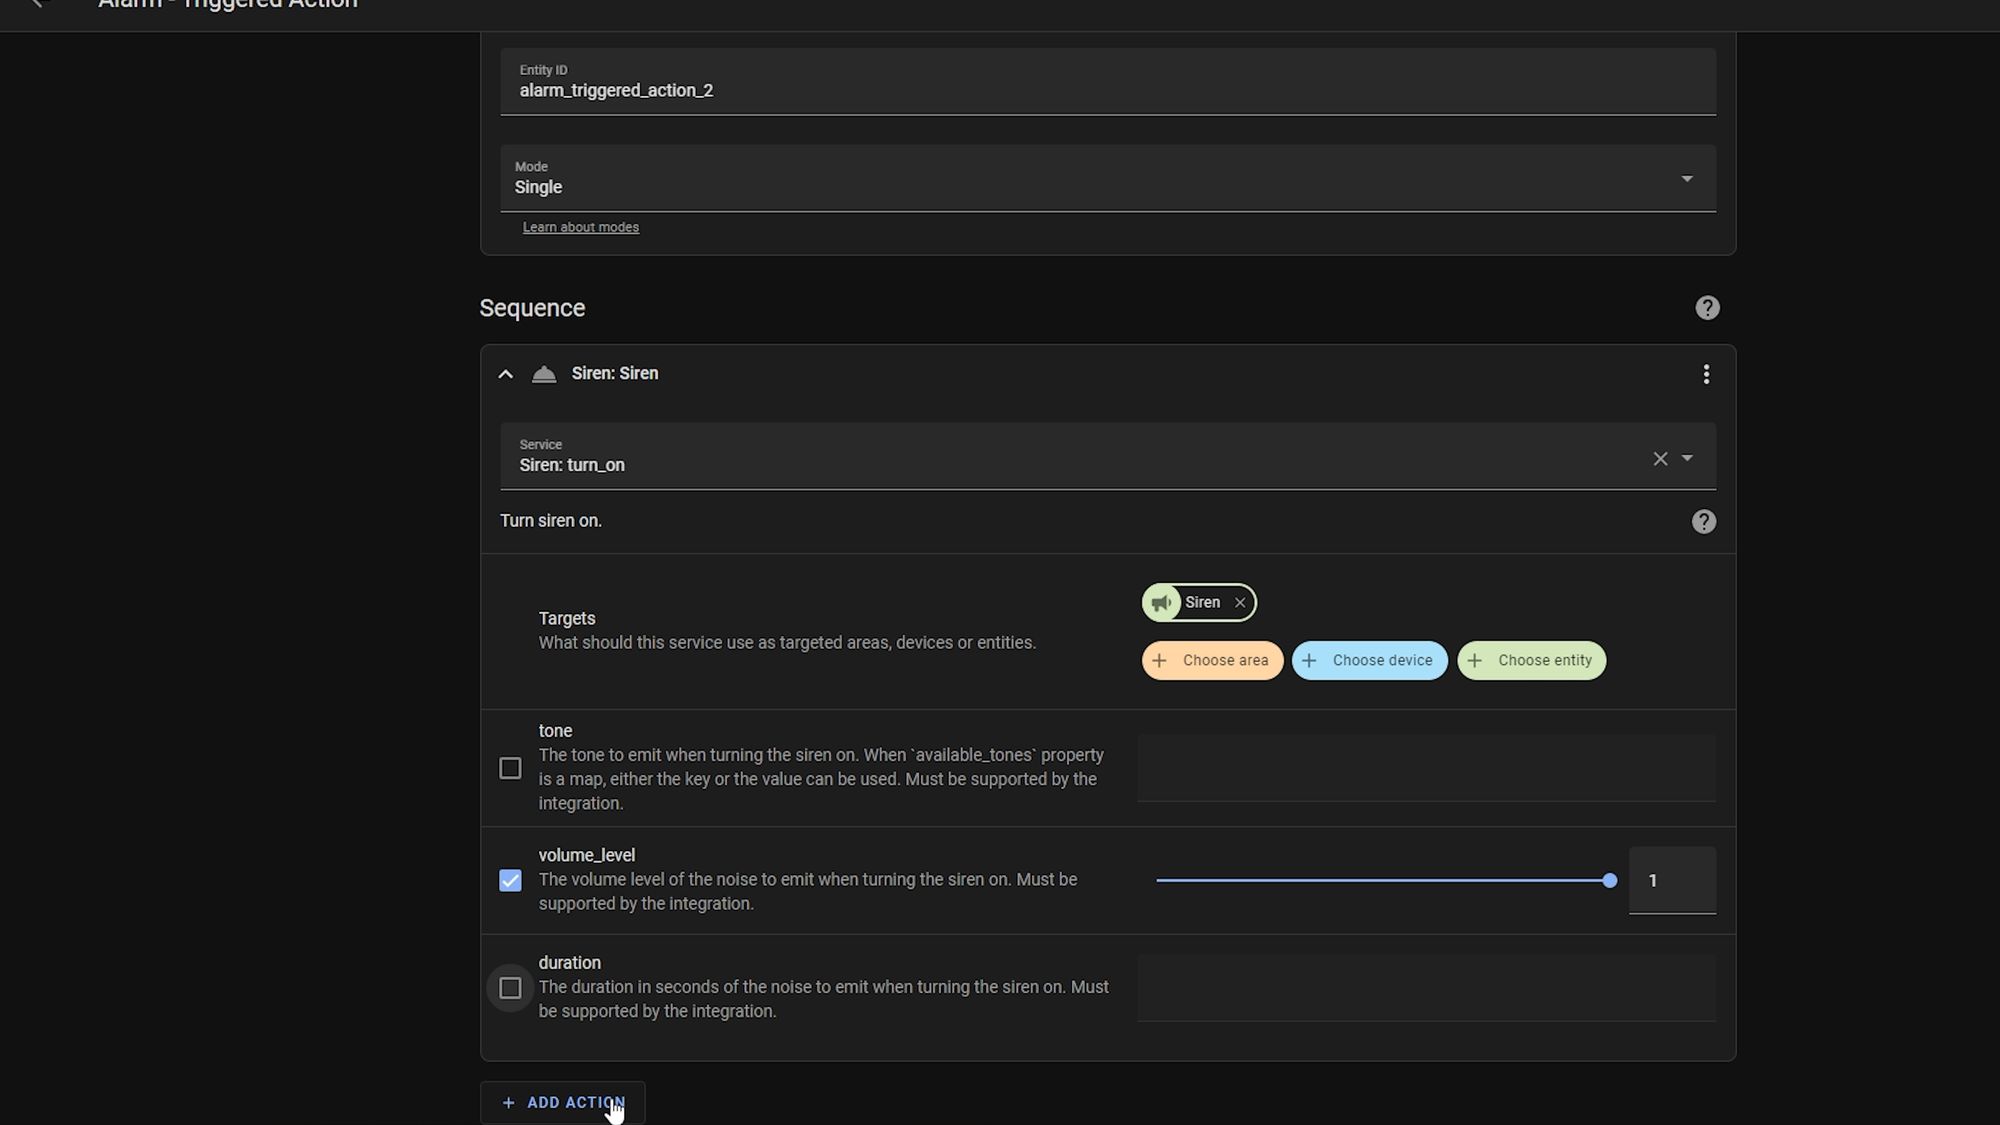
So I’m going to head over to settings, automations and then click the scripts button at the top and create a new script. I’m going to name it "Alarm - triggered action" and then I can start adding my sequence of events that I want to happen when the alarm goes off.
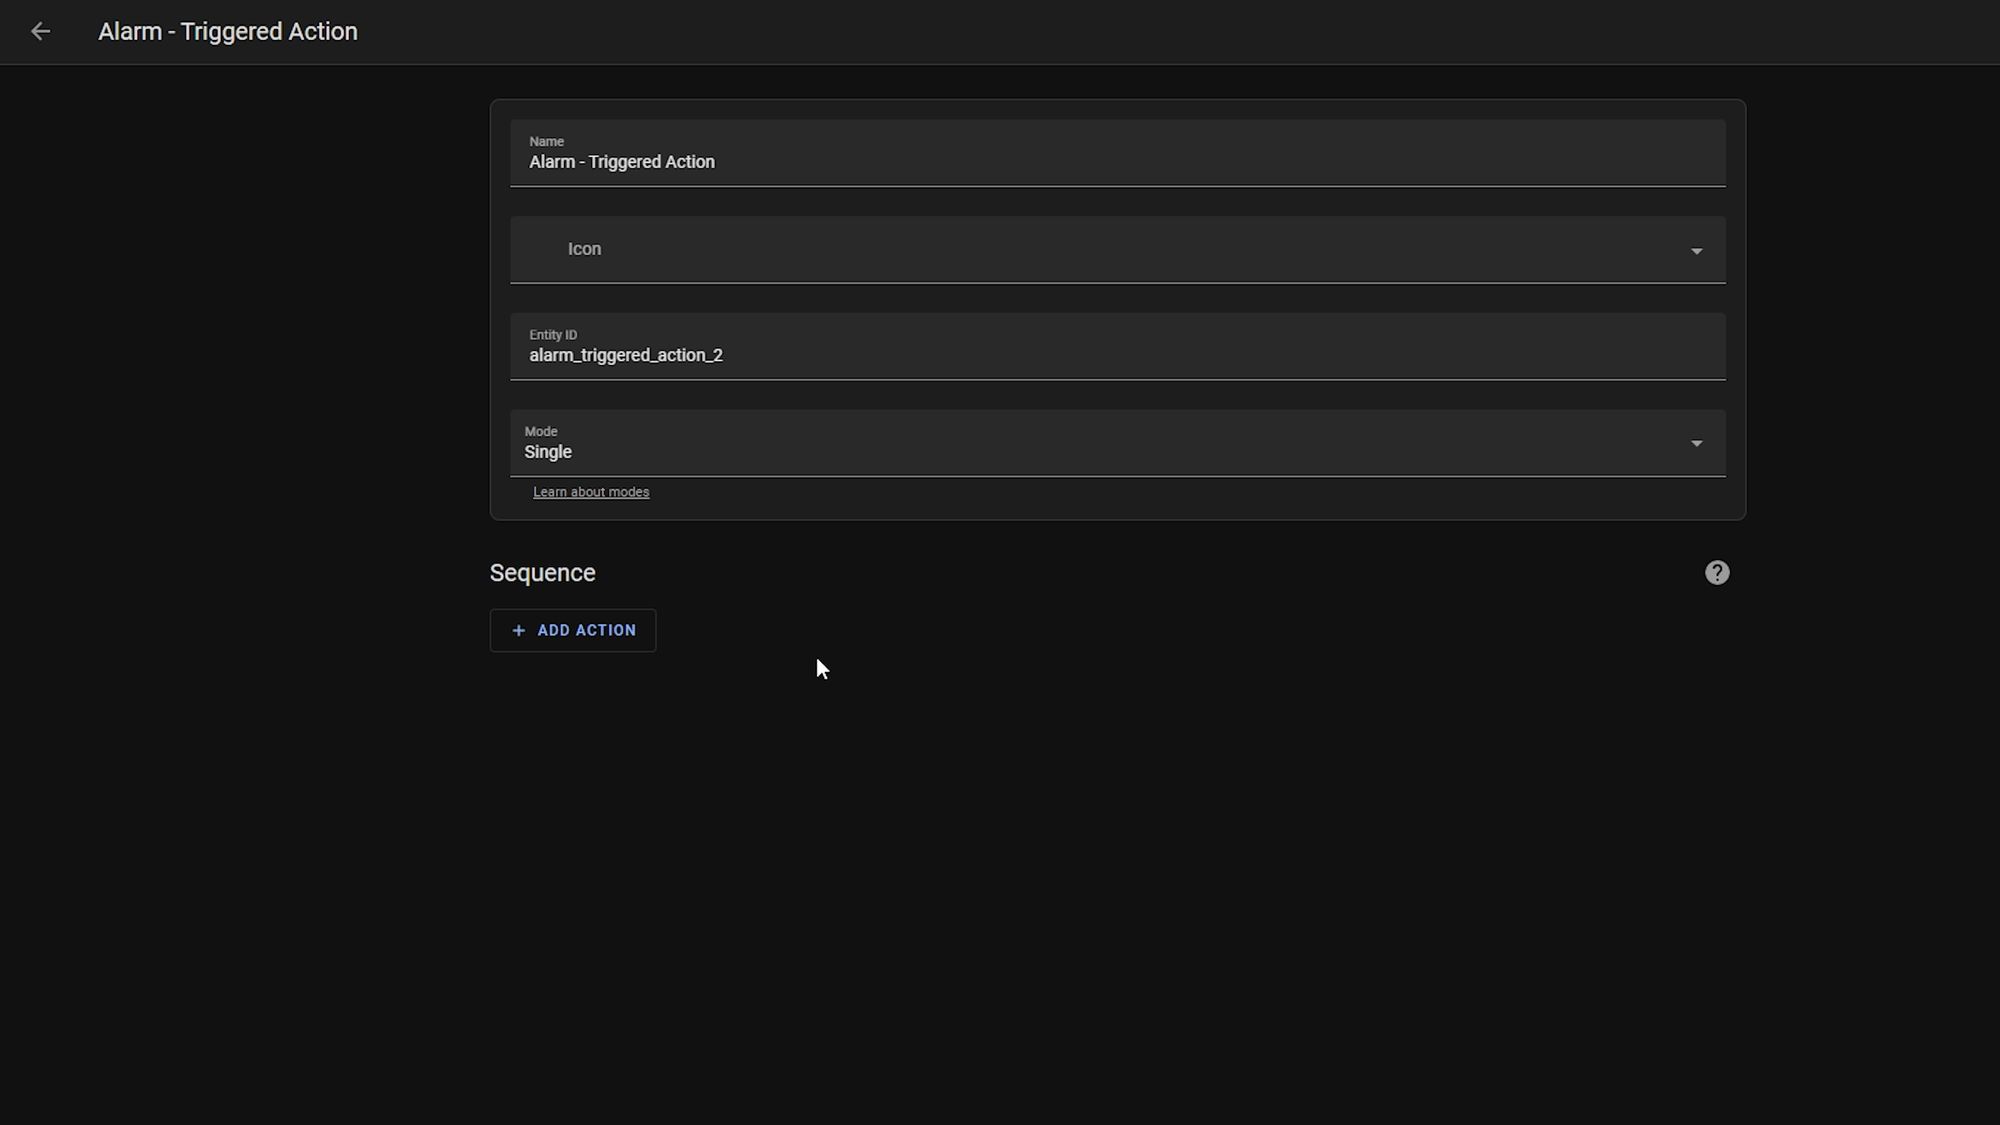
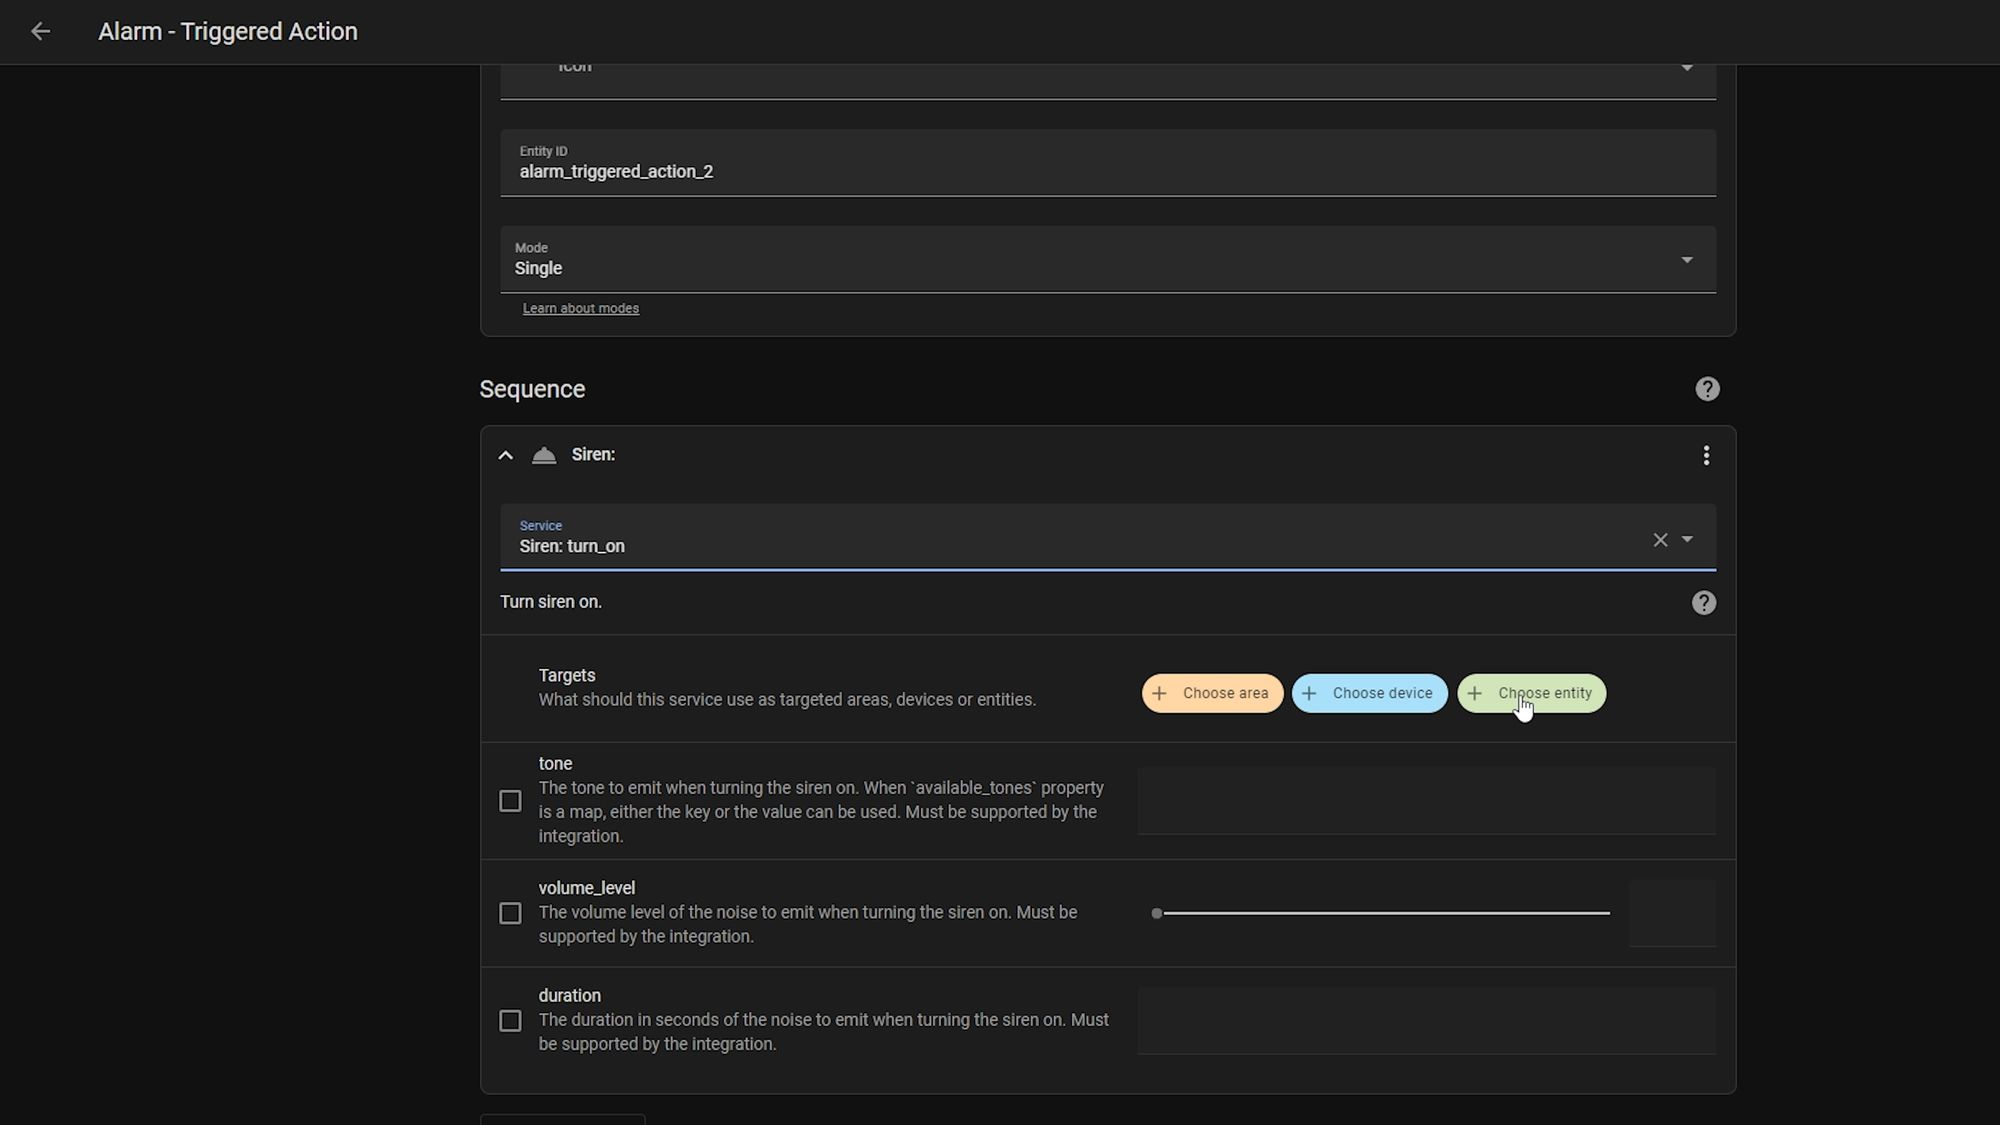
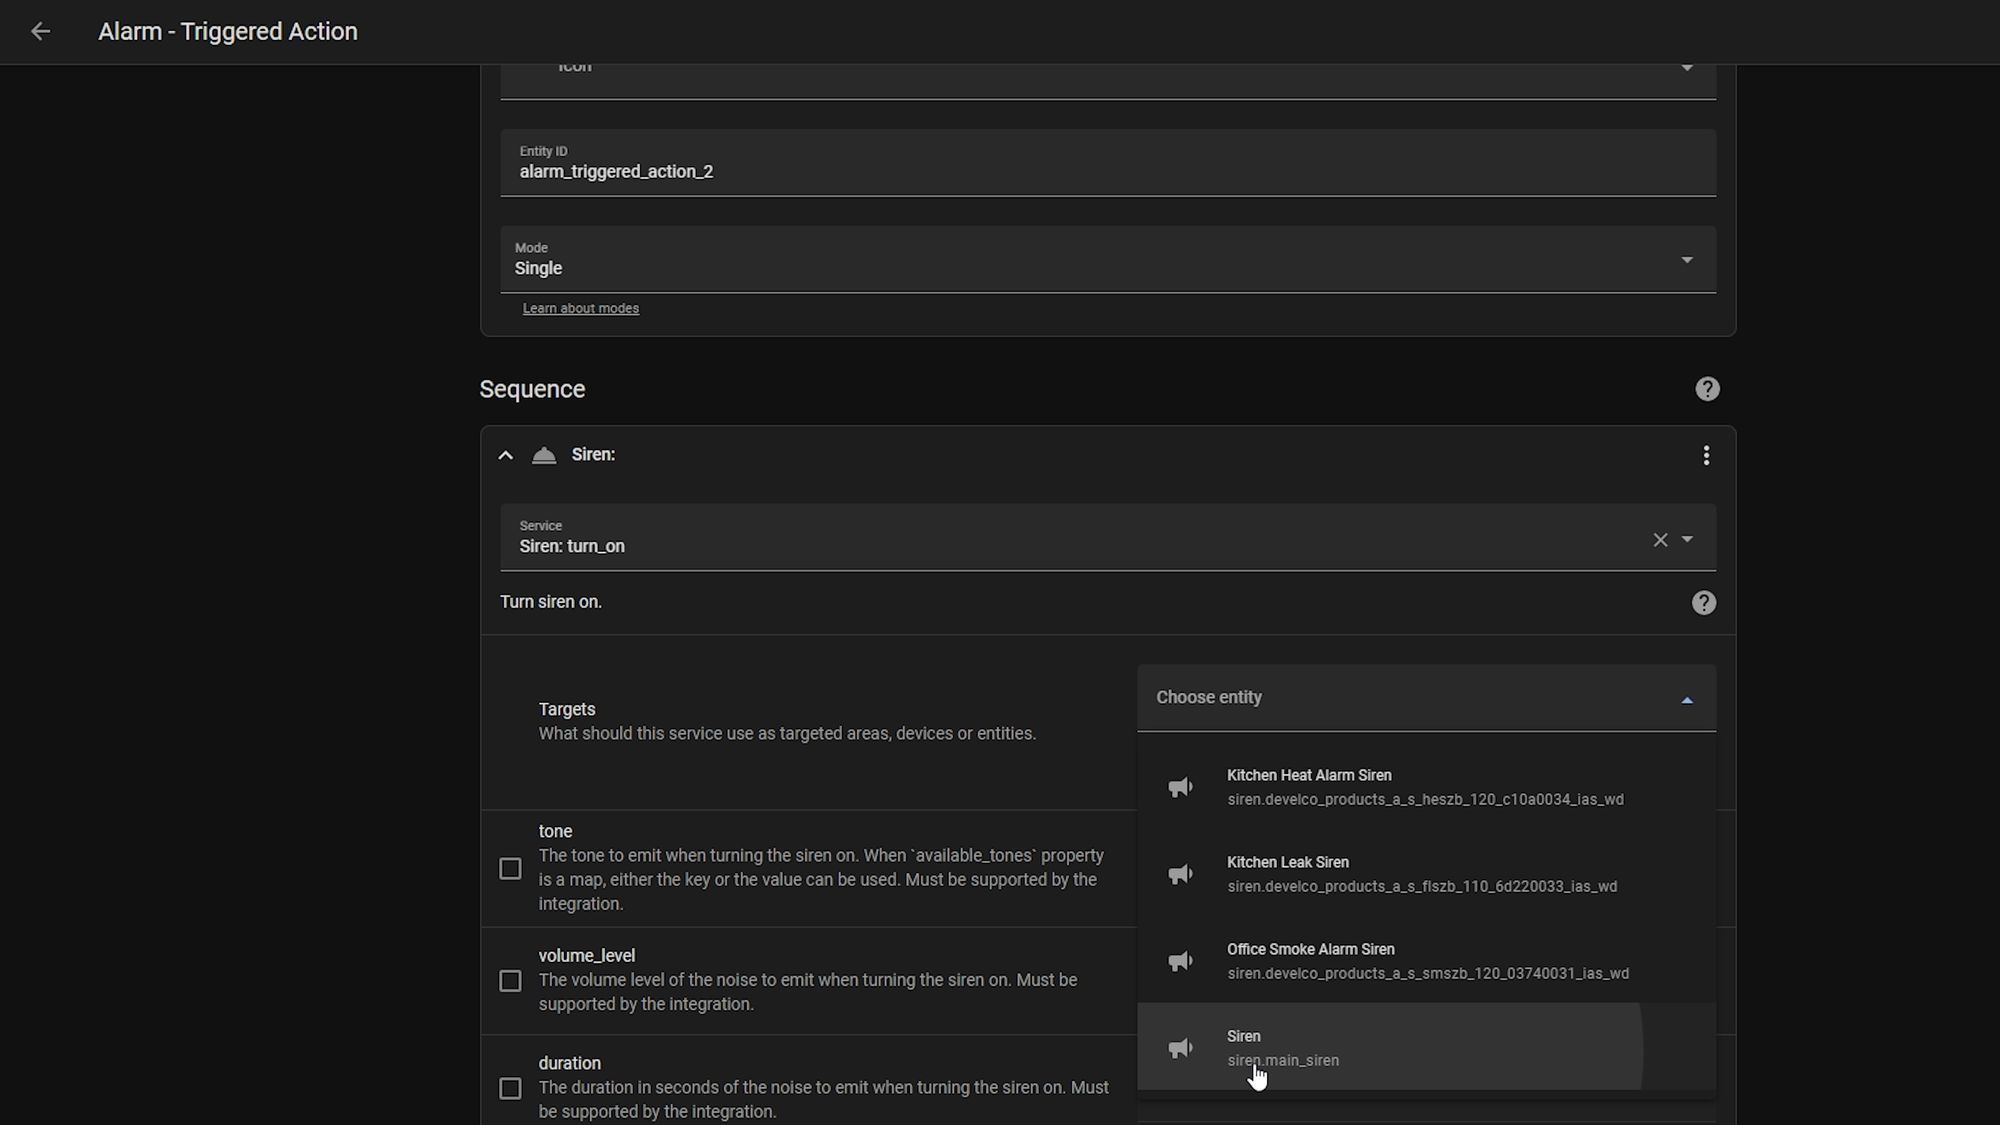
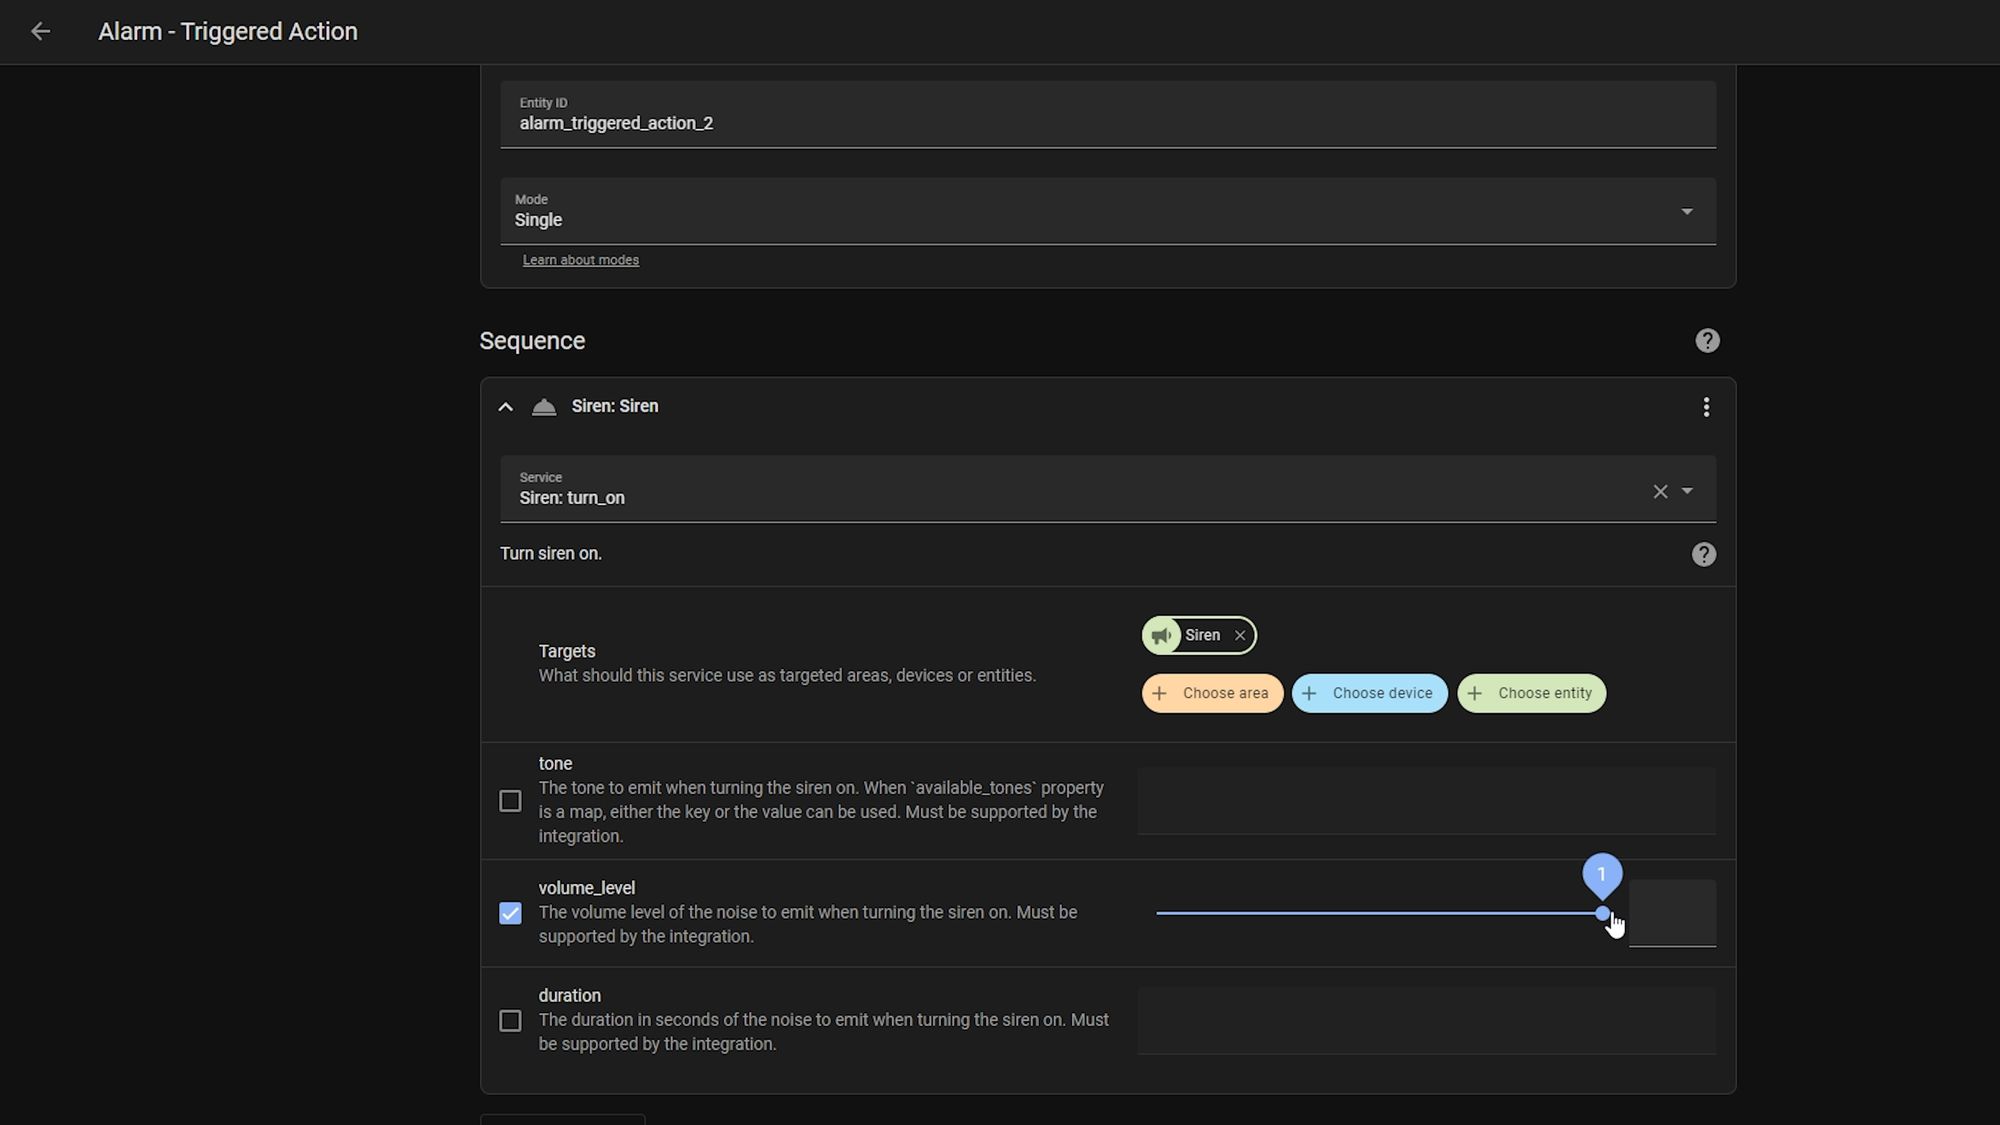
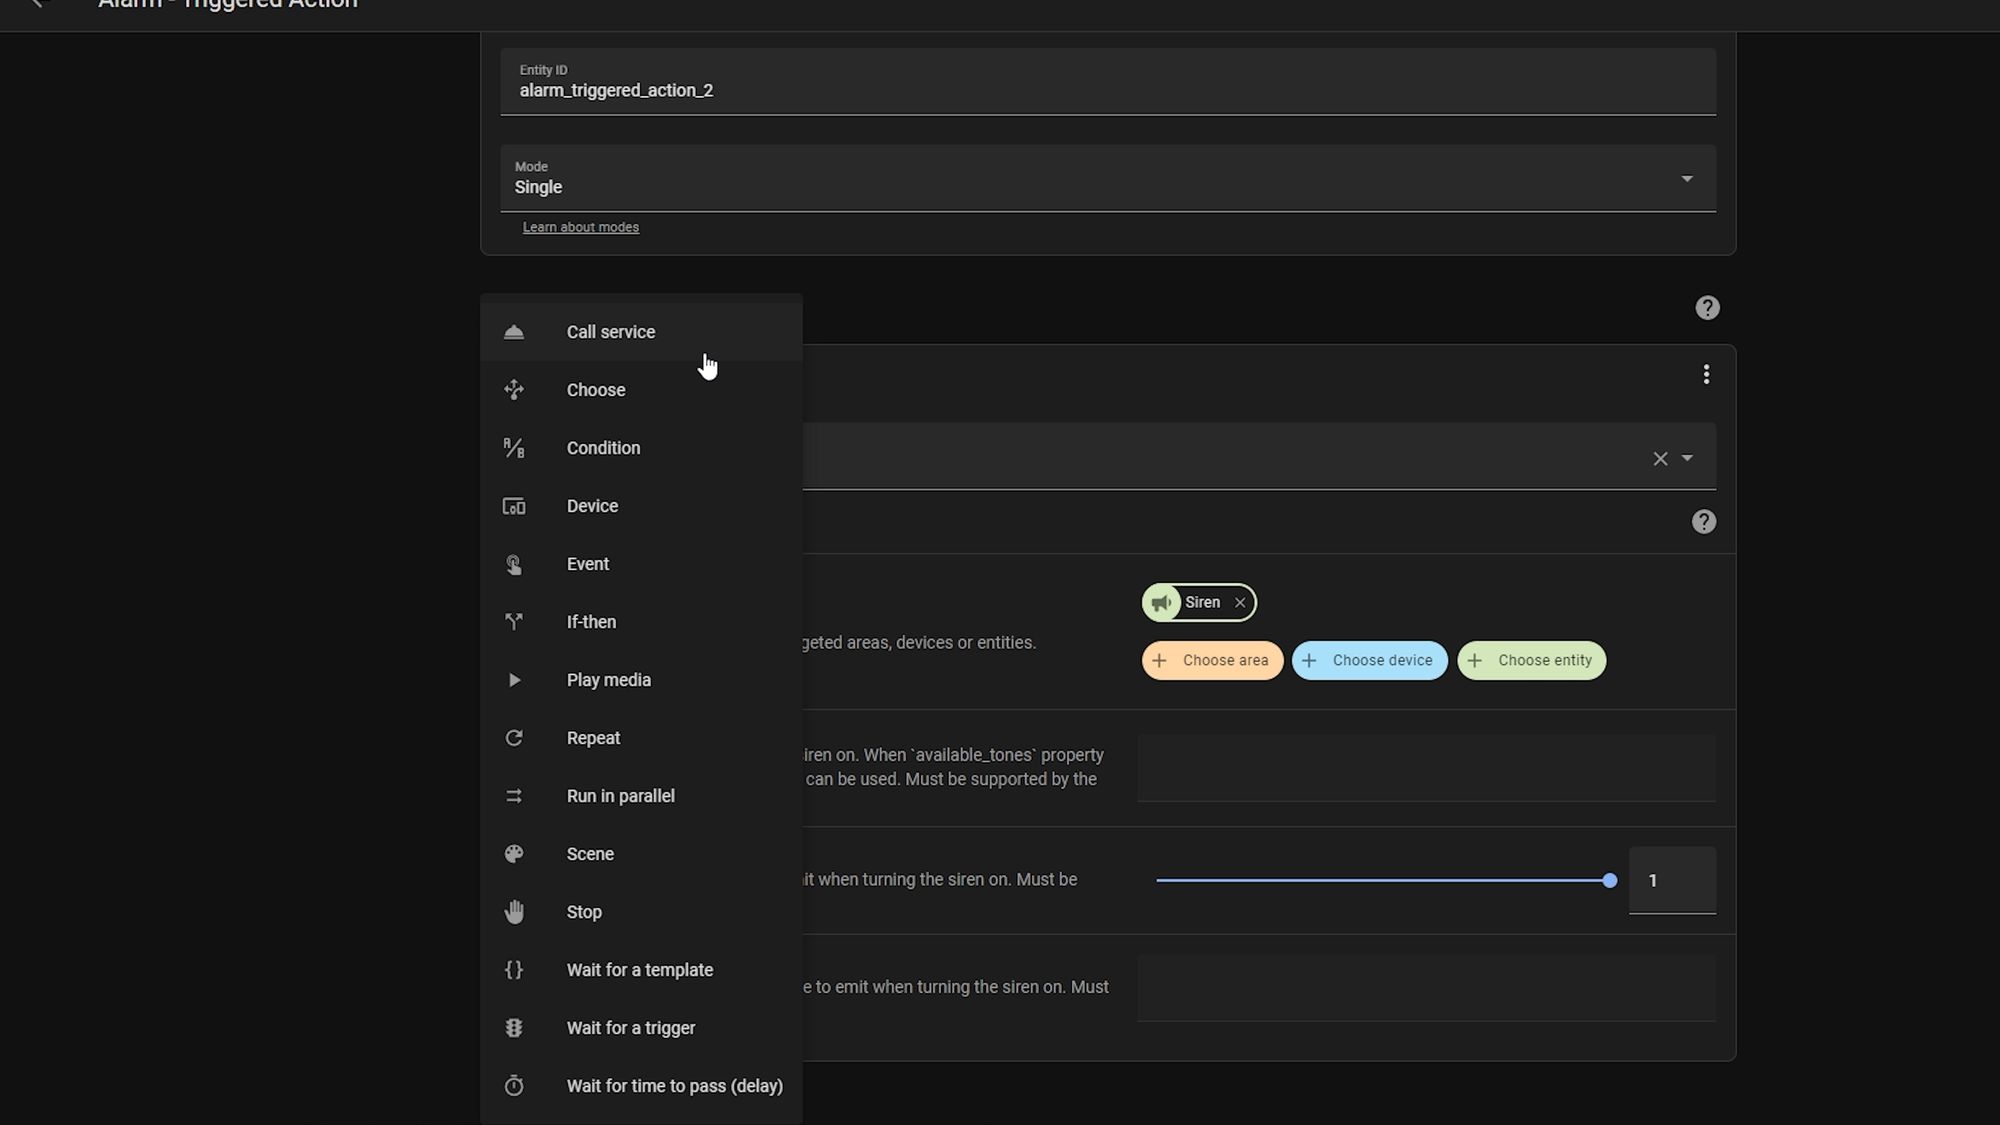
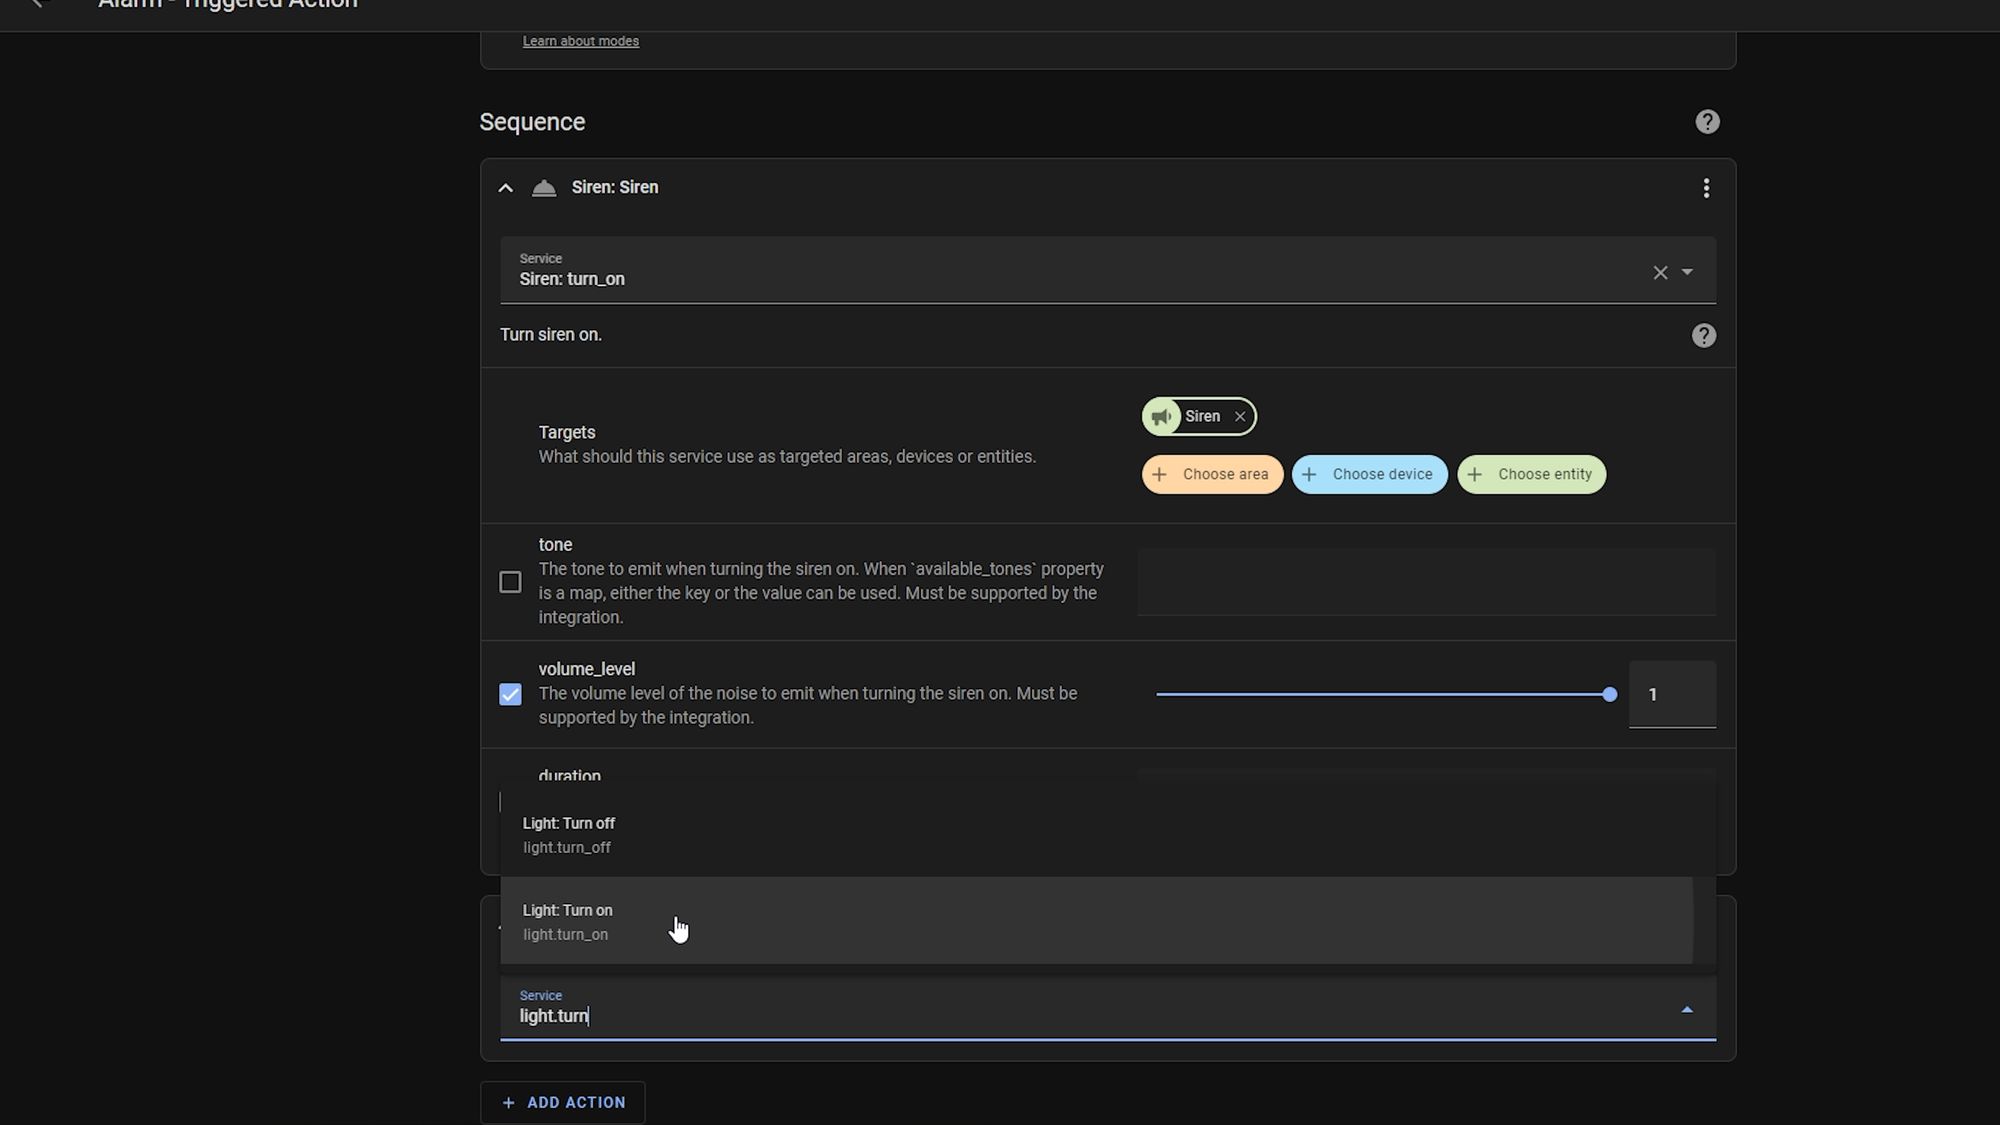
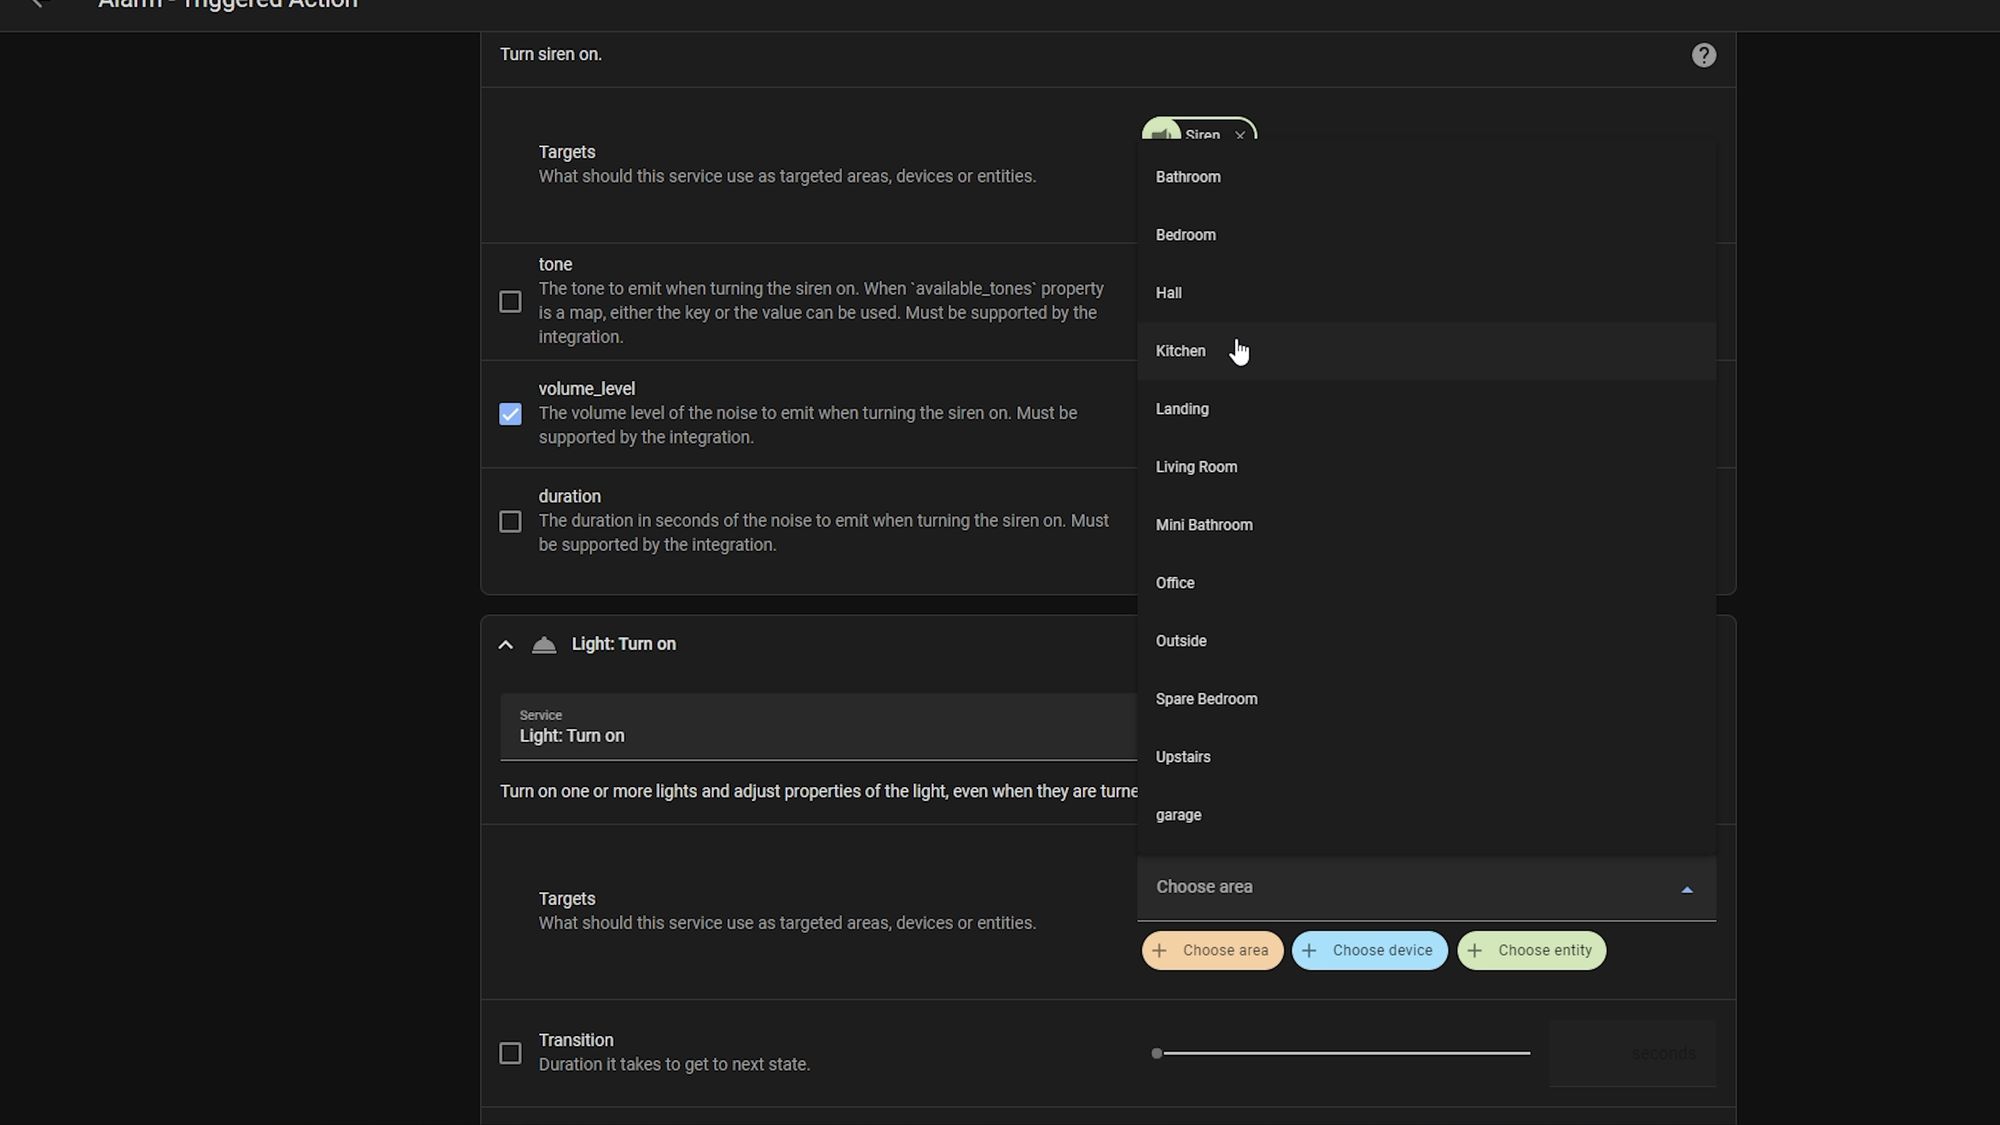
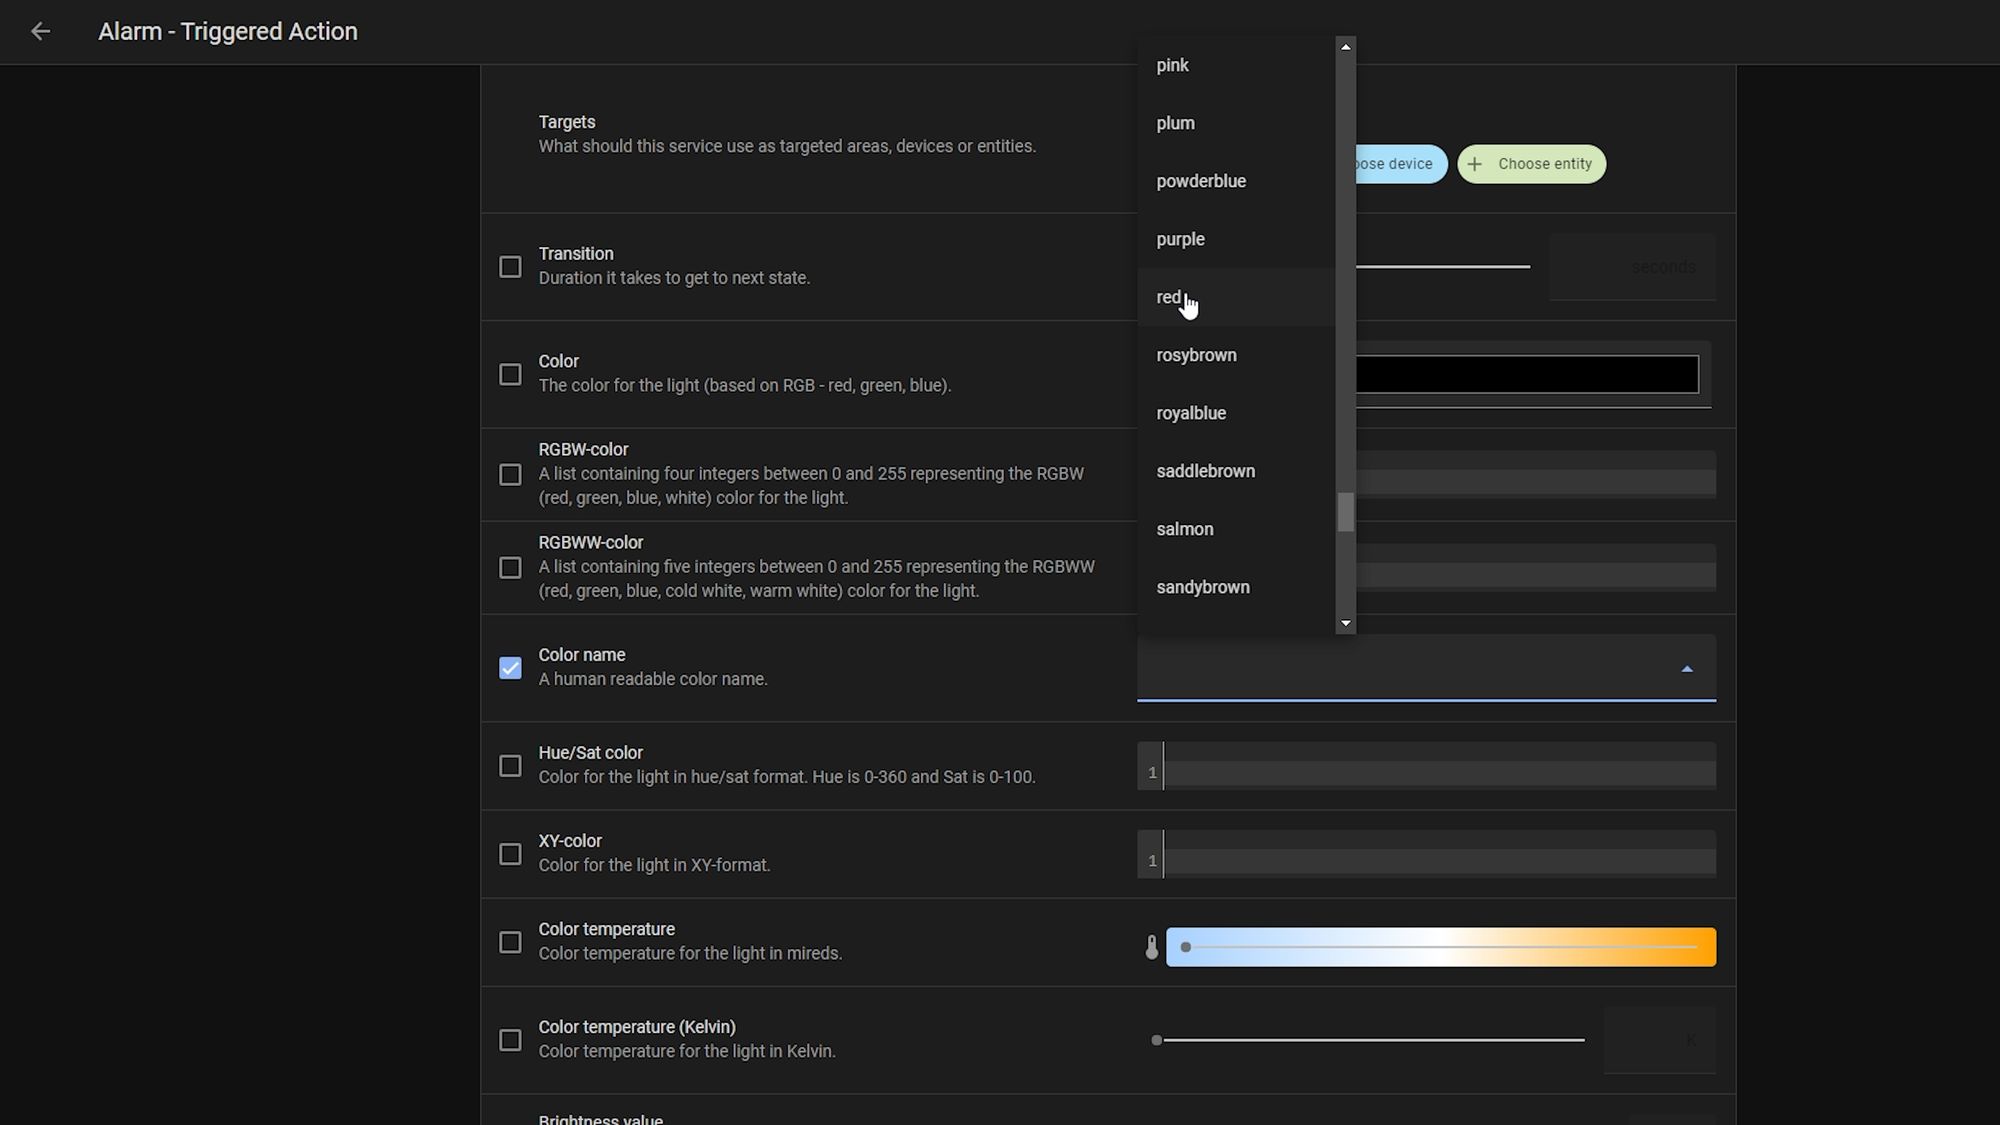
This is going to depend a little bit on how your devices are connected to Home Assistant and what you're working with, but for my particular ones I add a new action and select call service from the drop down. Then, I have a service called siren turn on, I select my siren or sirens as my entity and then set the options. I can then change some lights colours and add my other sirens from the smoke and heat alarms too and then once I am happy with it, I can hit the save button.


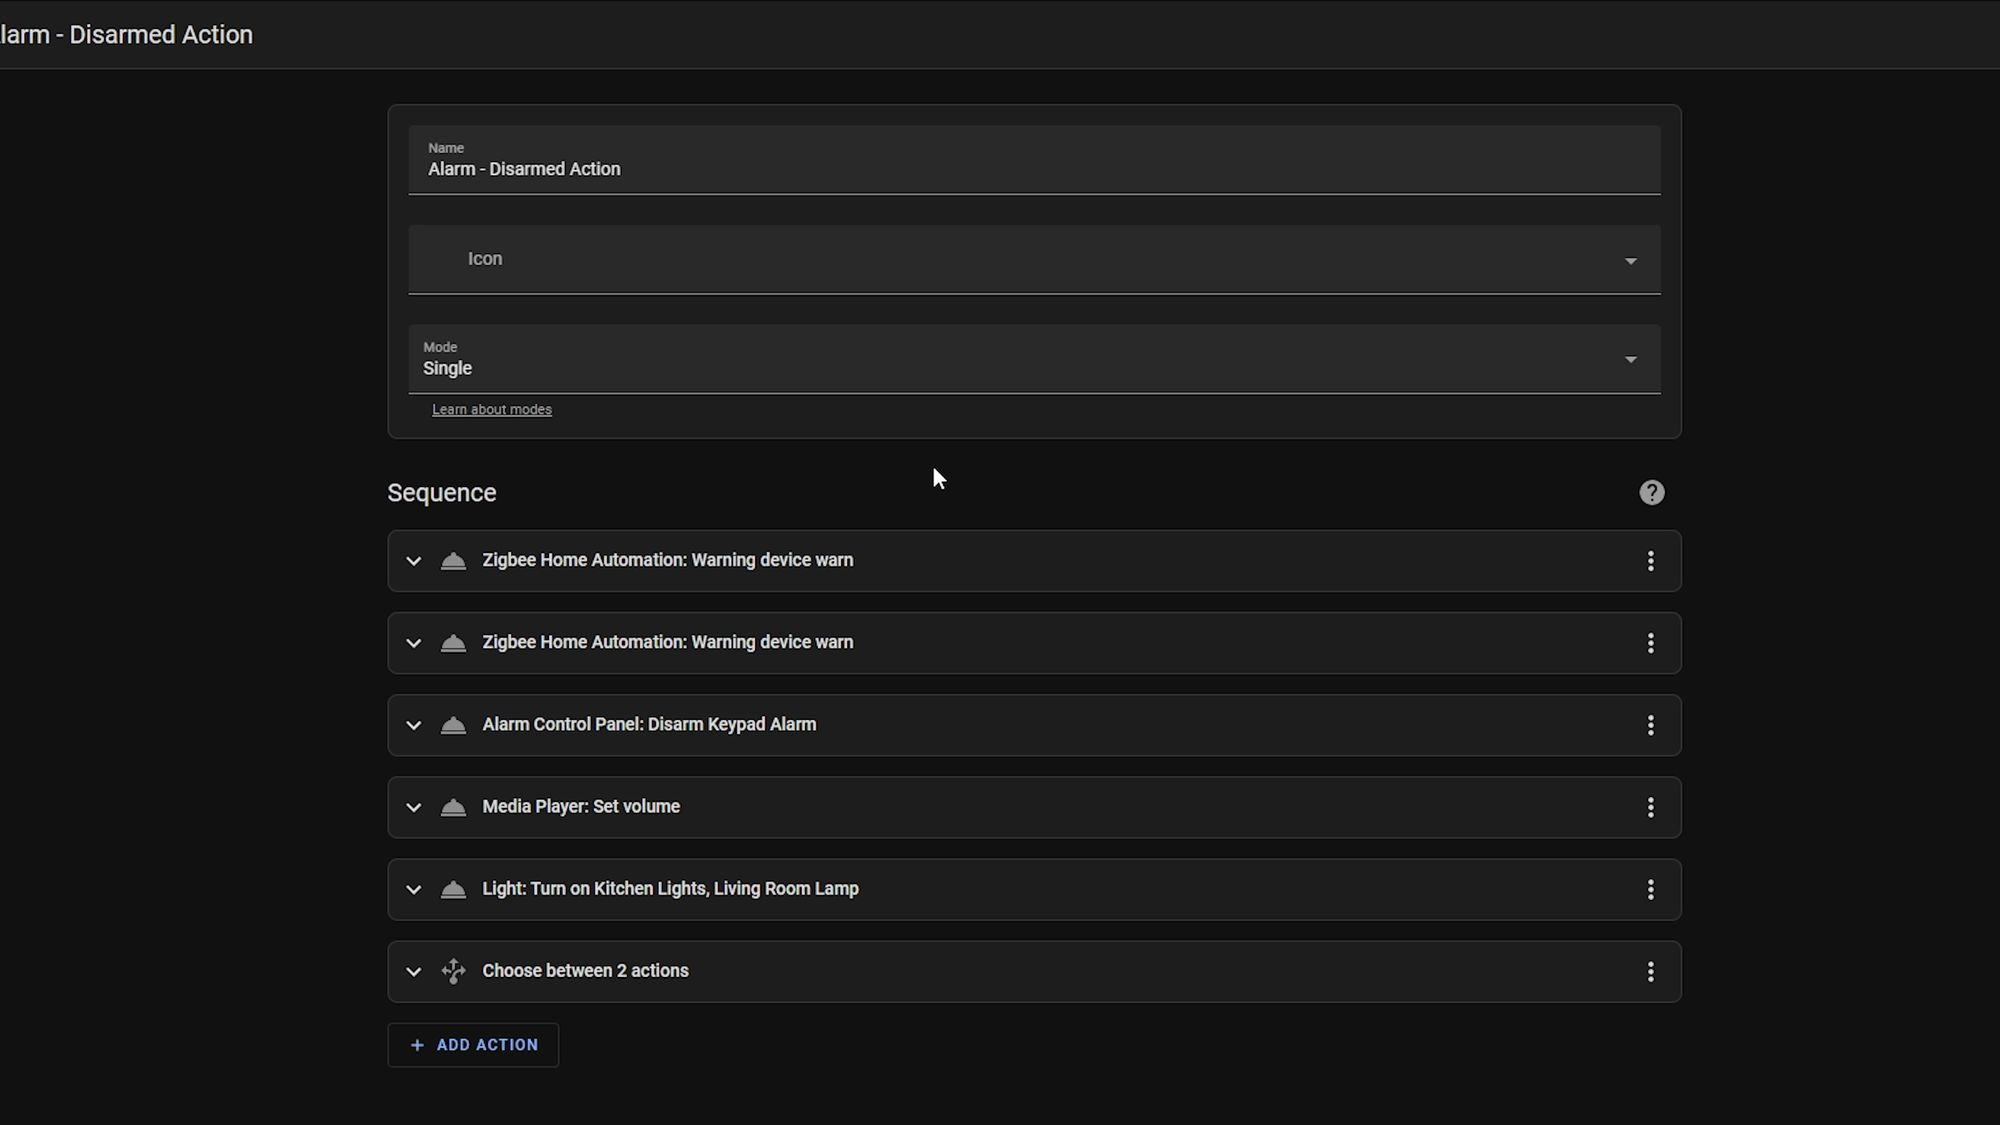
You’ll probably want to go ahead and create another script for a disarm action, so that the siren actually knows when to stop sounding too, otherwise you could be in for a bad time!
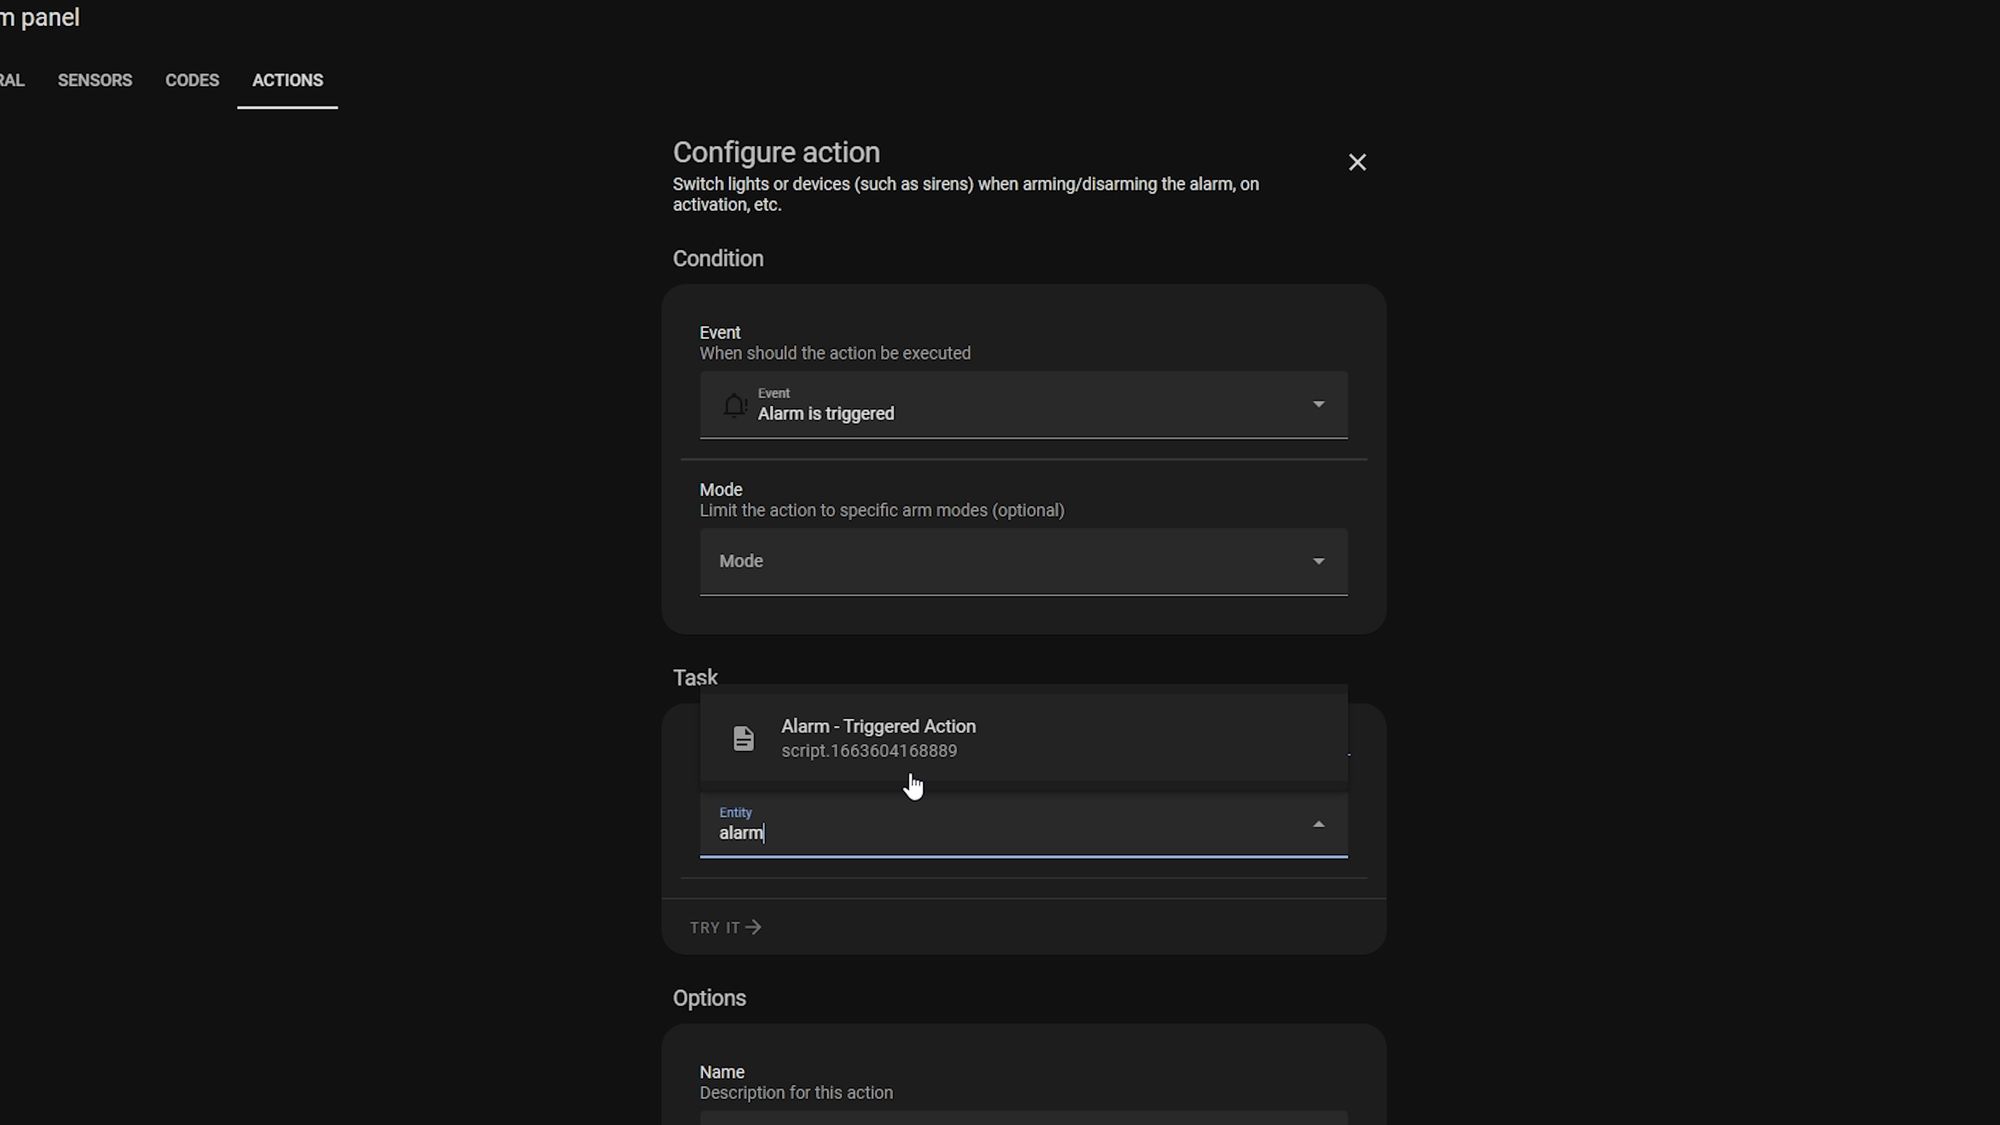
Once you have the scripts created, head back to Alarmo, into actions and create a new action. Search for and select the script from the entity box, then click on run as the action, and hit save.

That’s your custom actions now added! You will, of course, want to create custom scripts for all of your actions like I have and have different things happen depending on the state.
Setting Up The Alarm To Automatically Set
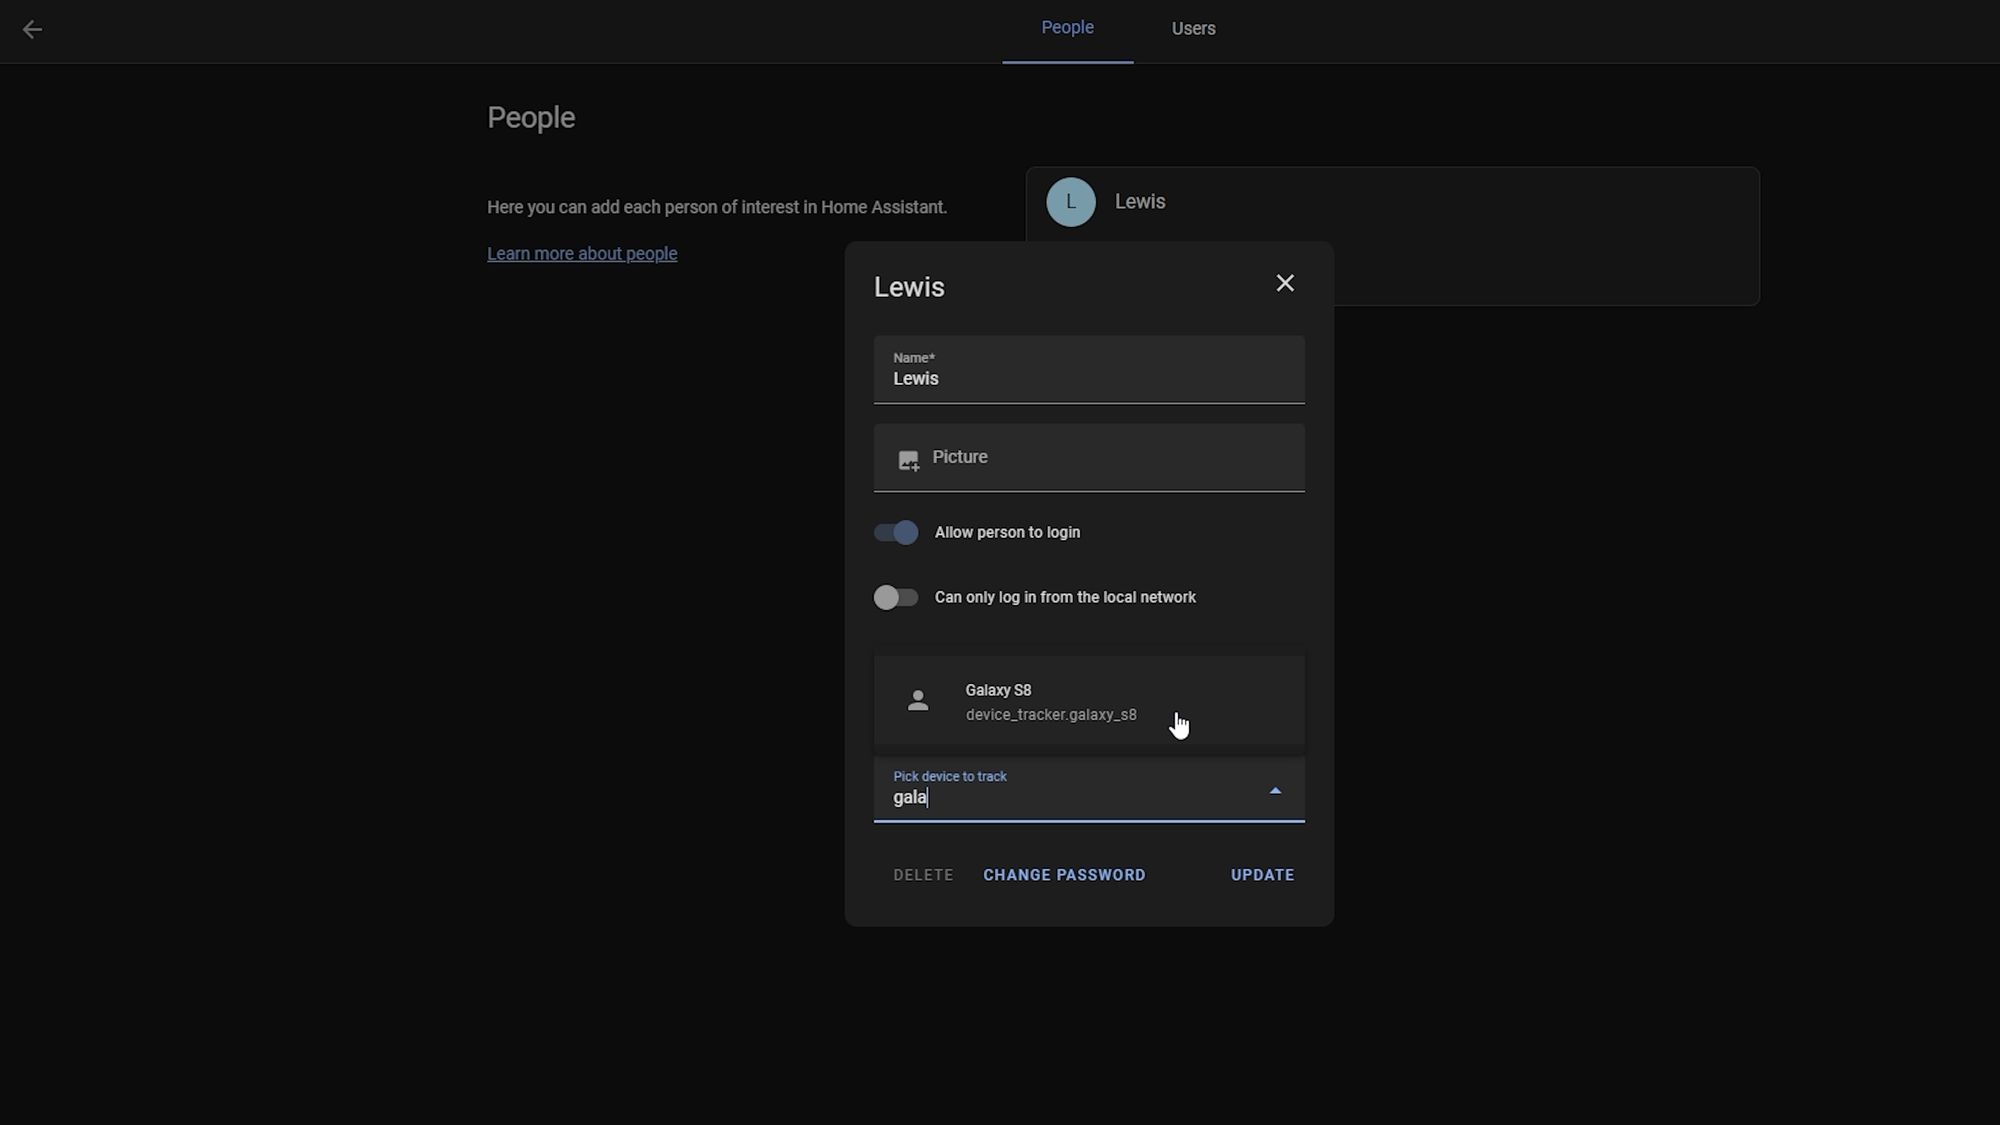
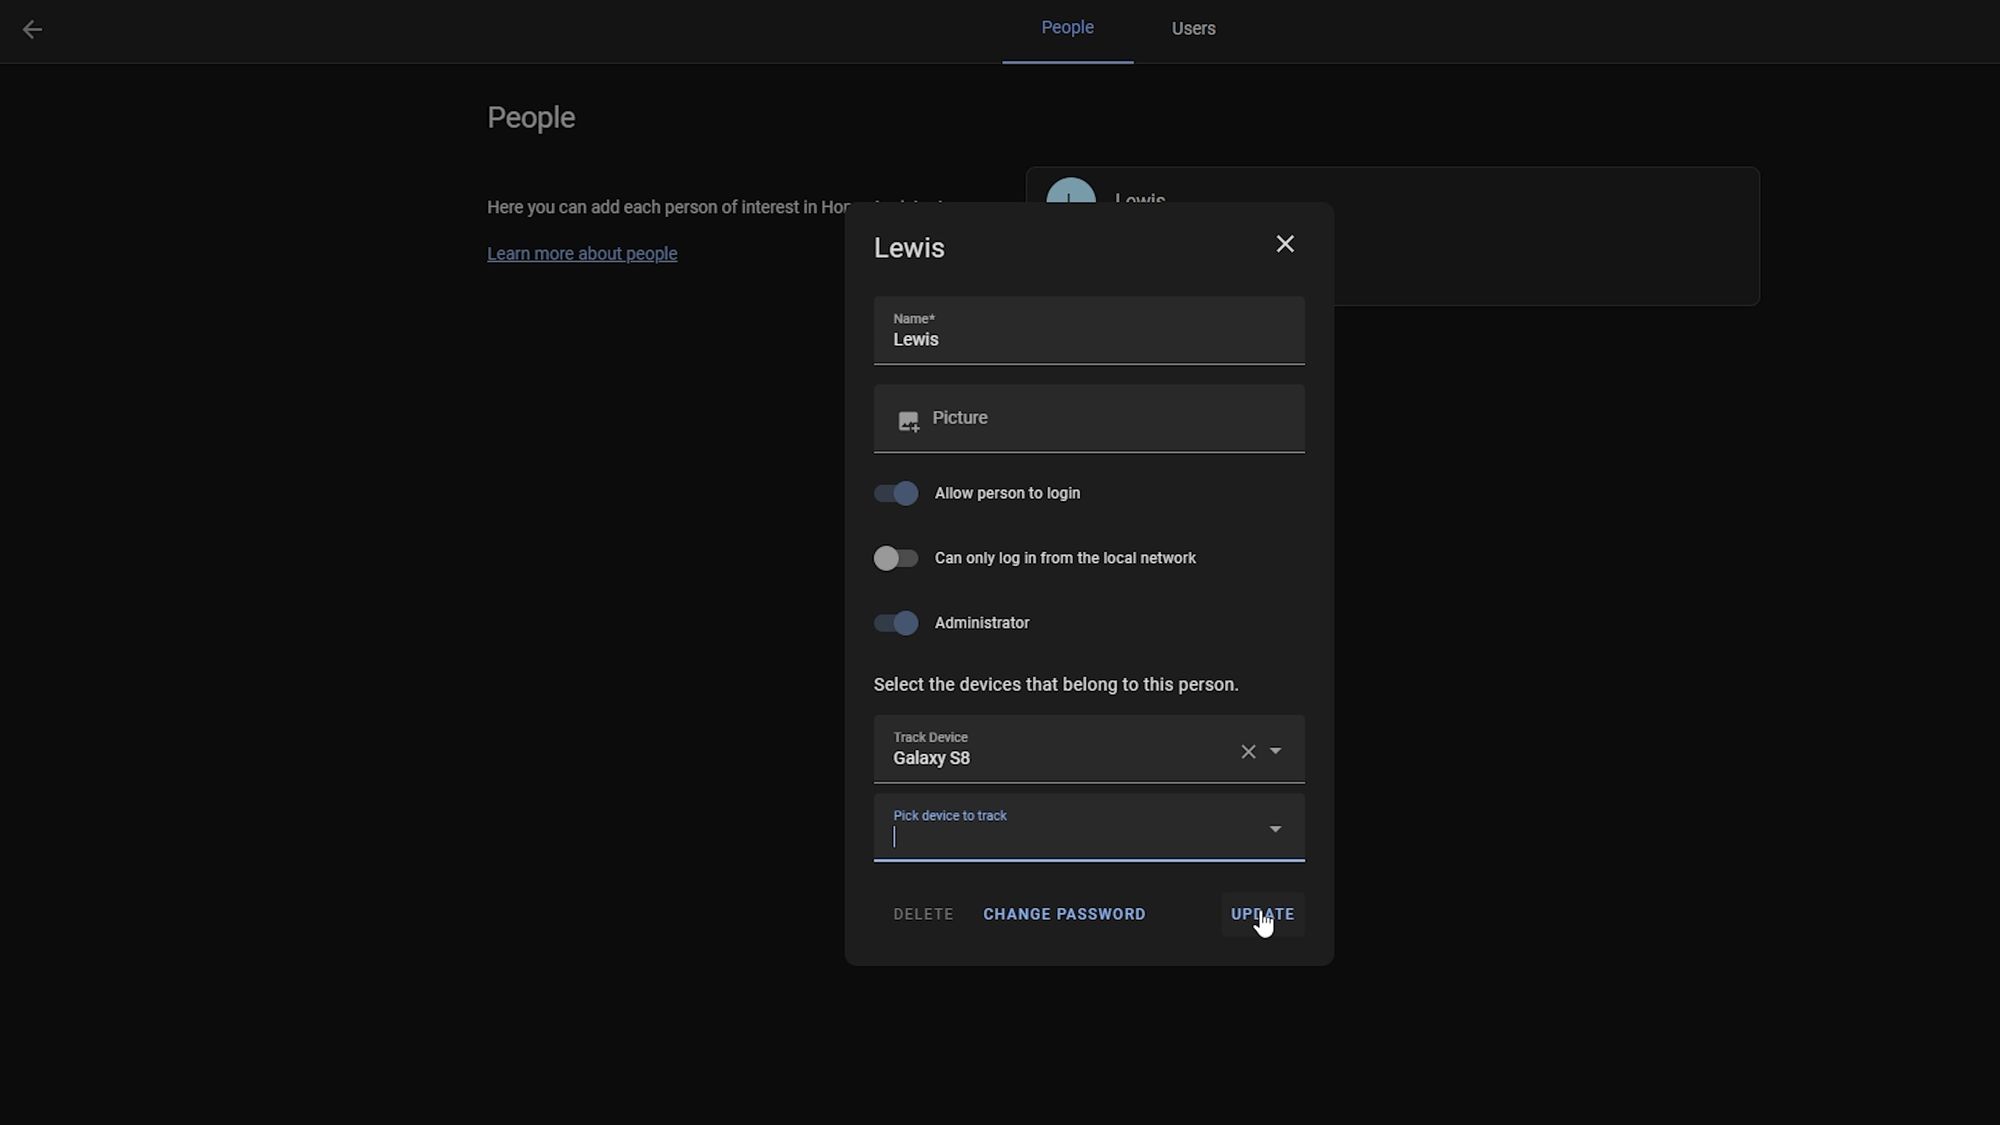
The final thing I wanted to go over for now, was how to set the alarm automatically when you leave the house. You’ll need to make sure that you have the Home Assistant companion app installed on your phone already which is really easy to do and then we need to link it to our person.
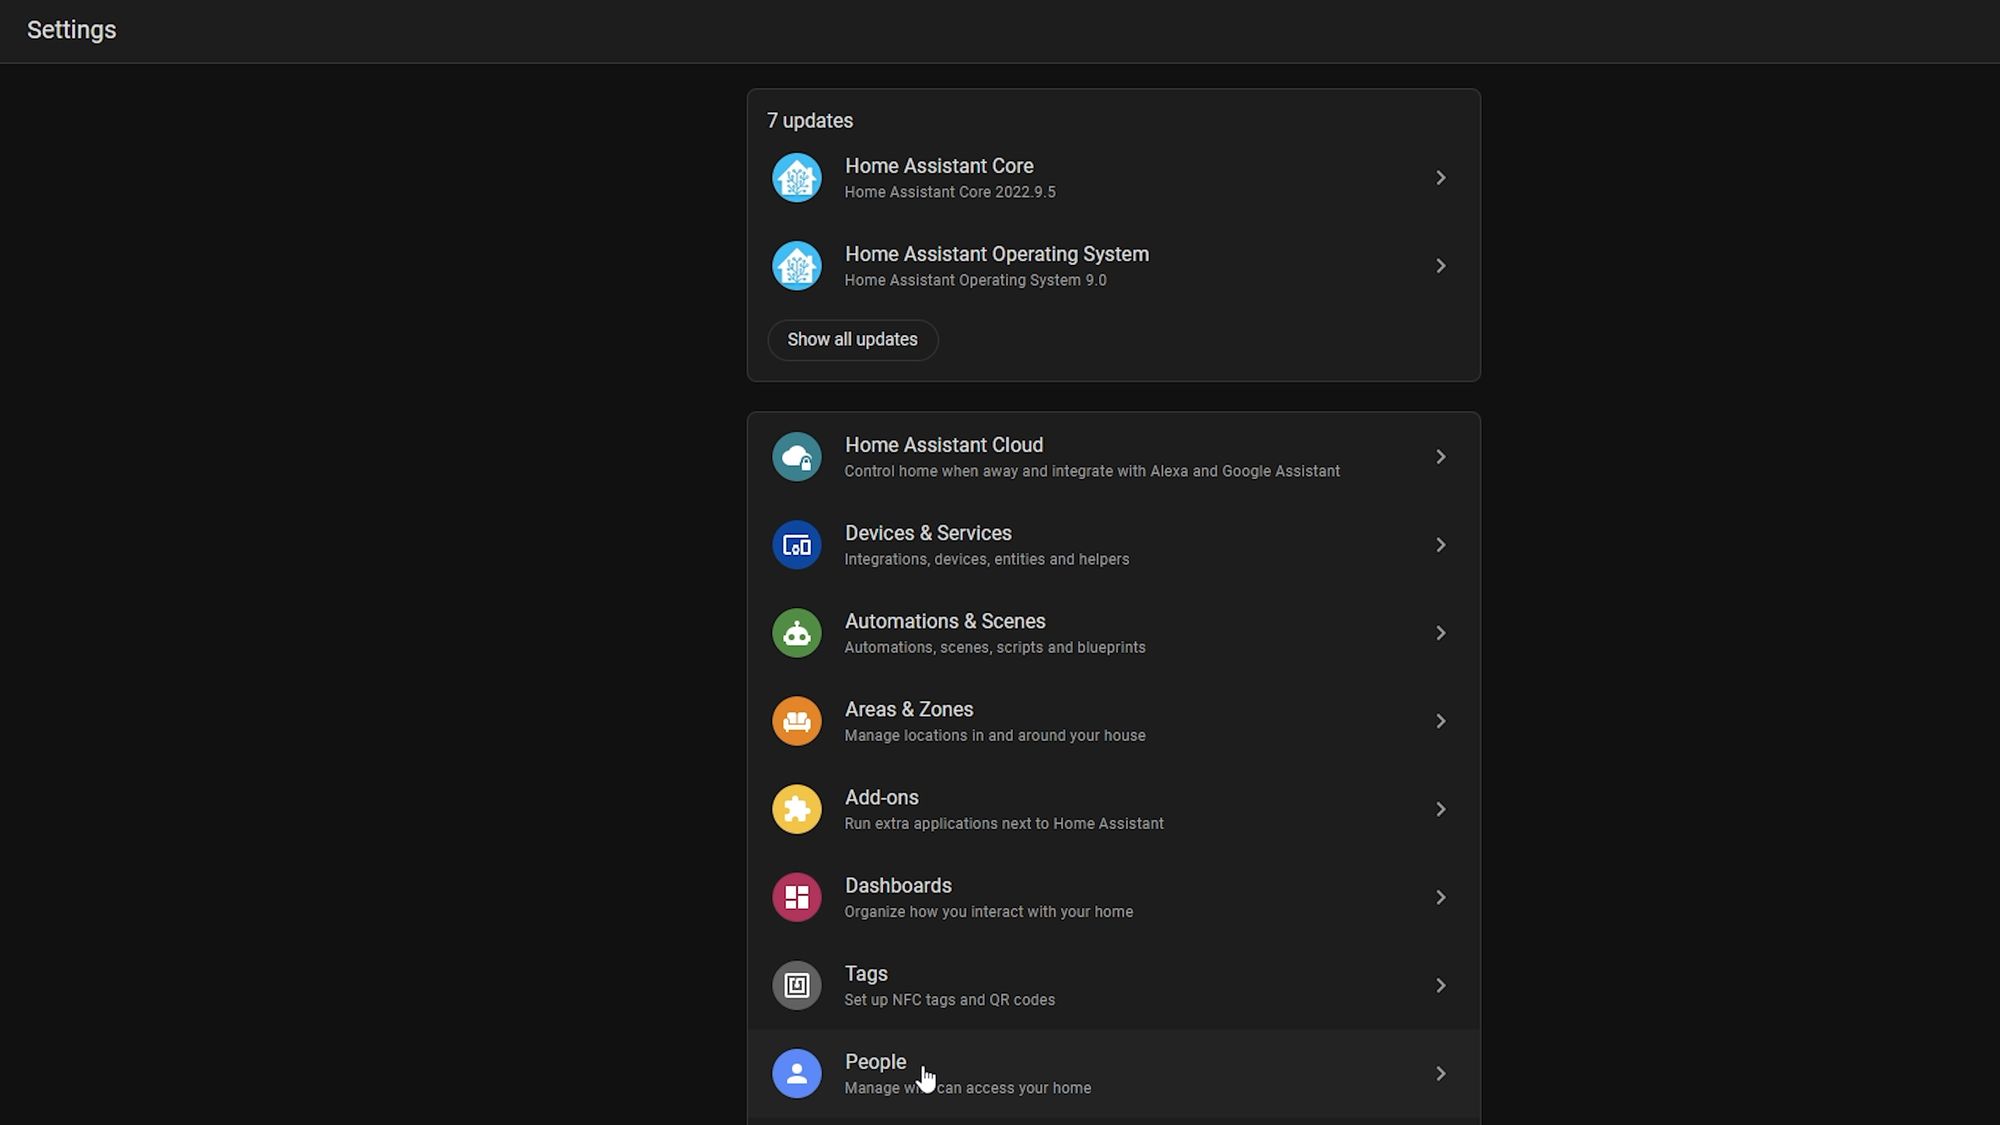
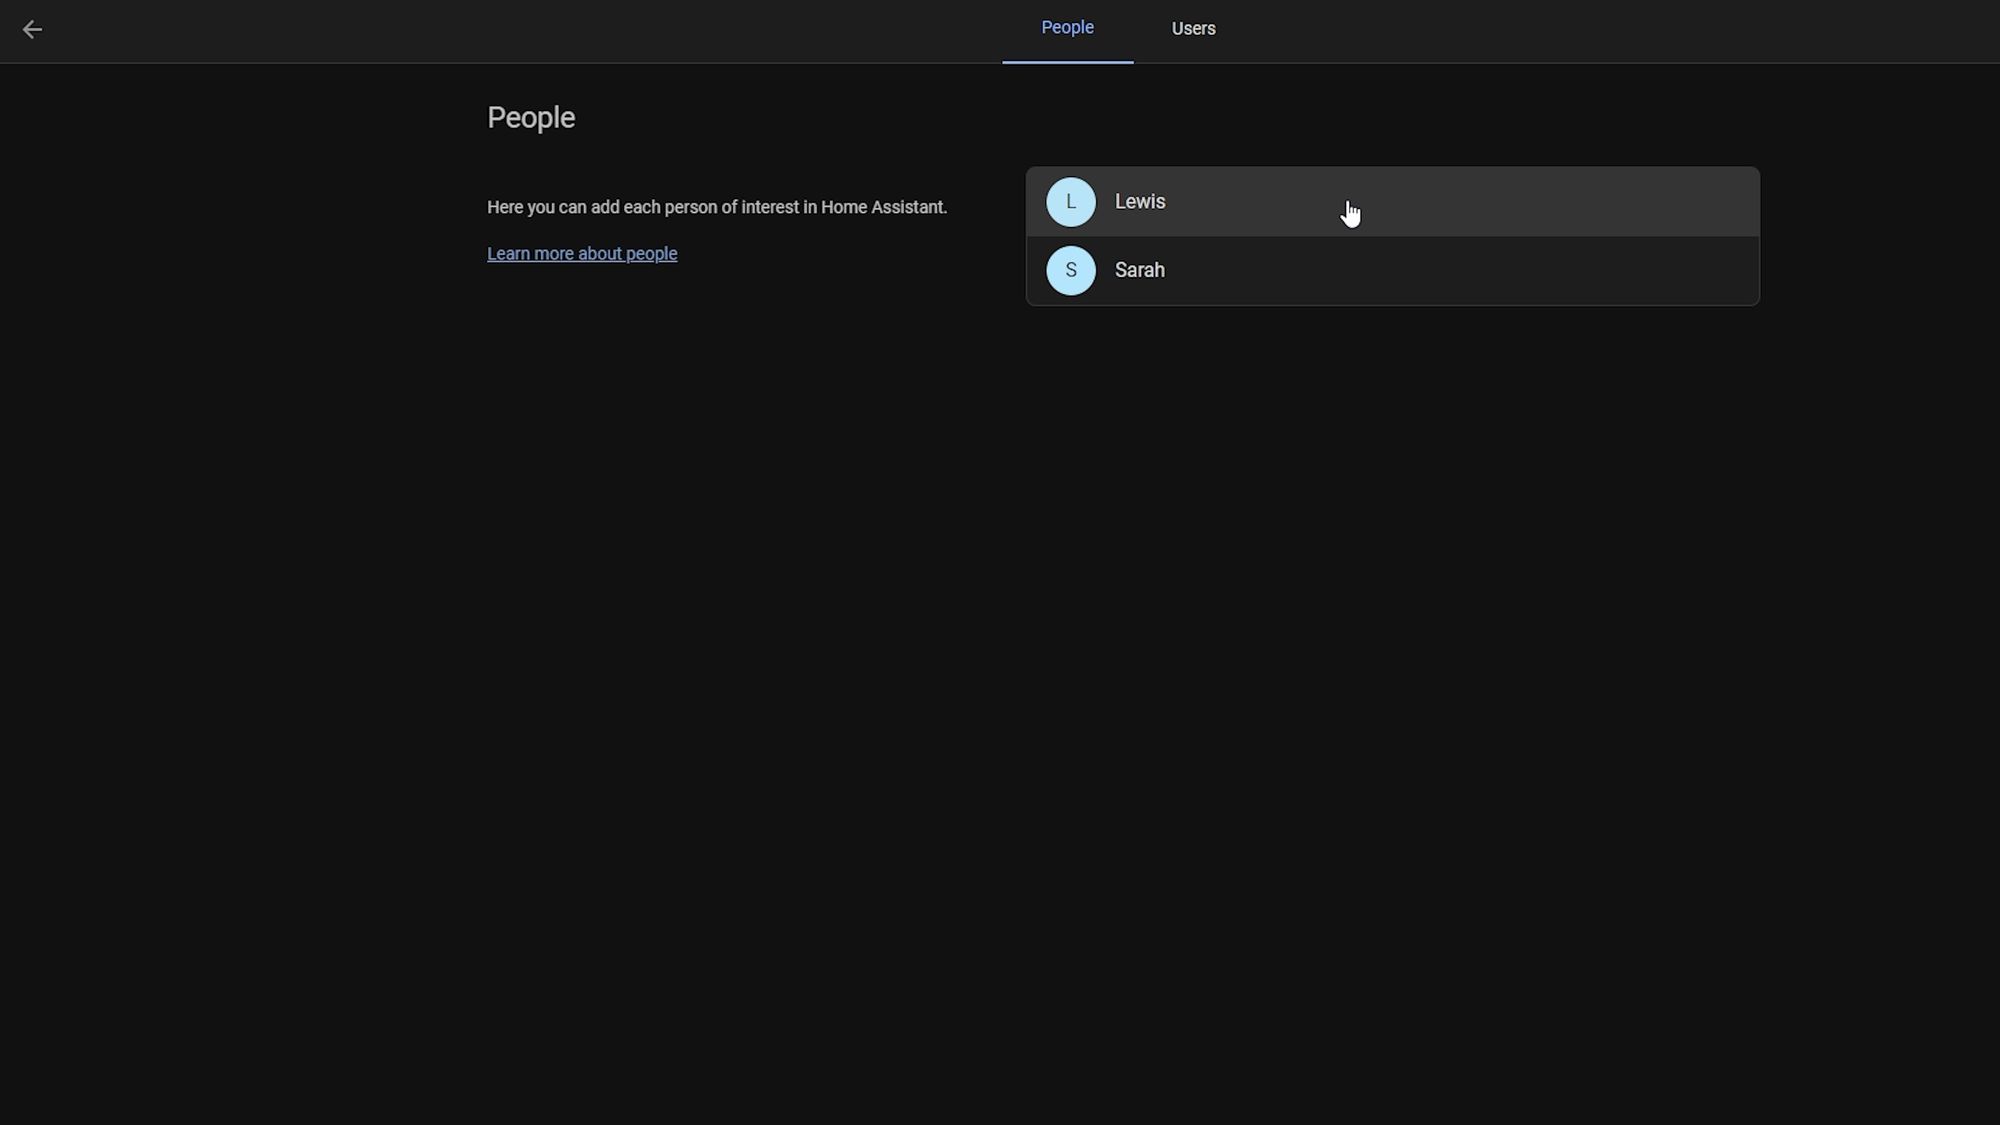
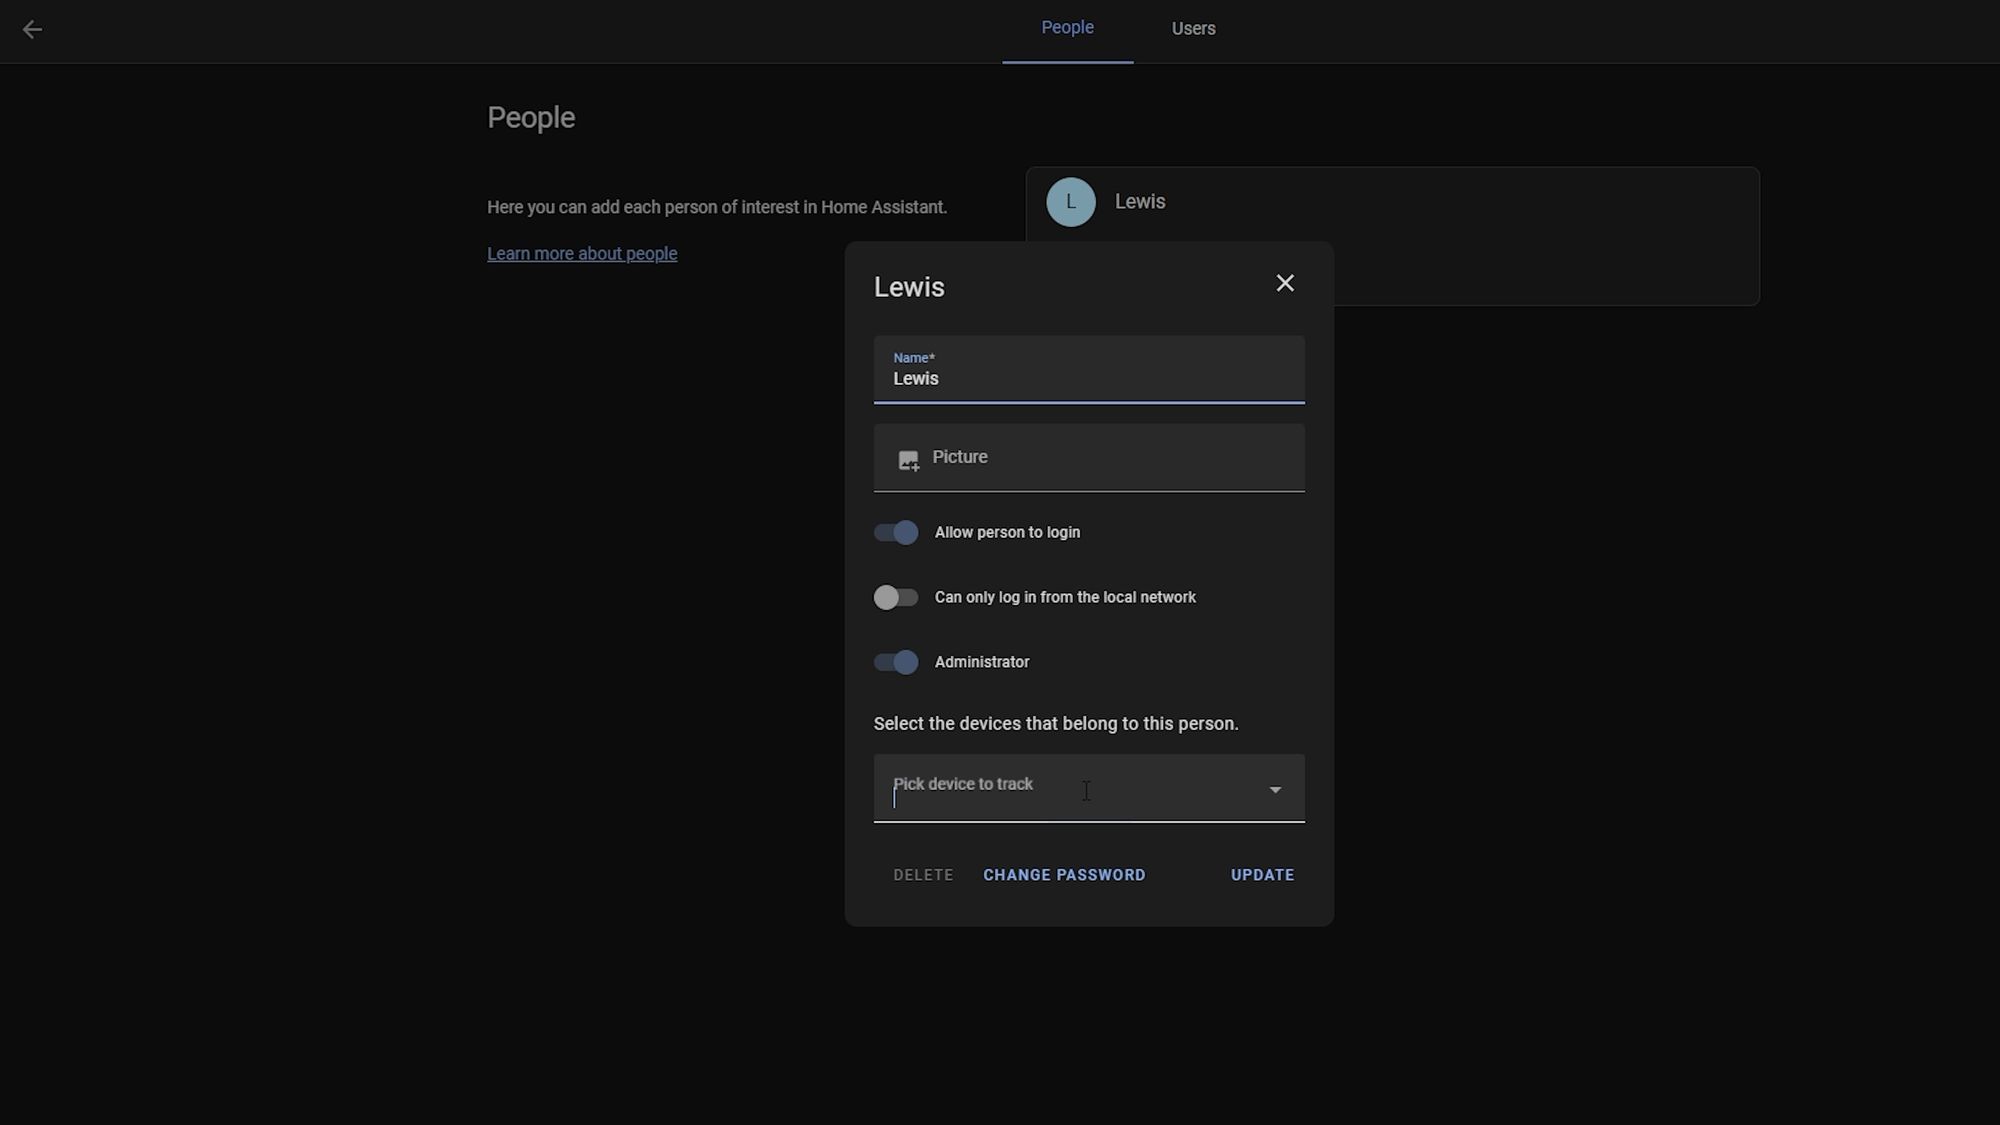
Head over to settings, people and then select your username and then under the track devices section make sure to find and add the device that belongs to you or your person. You can just repeat that process for any other users you may have.
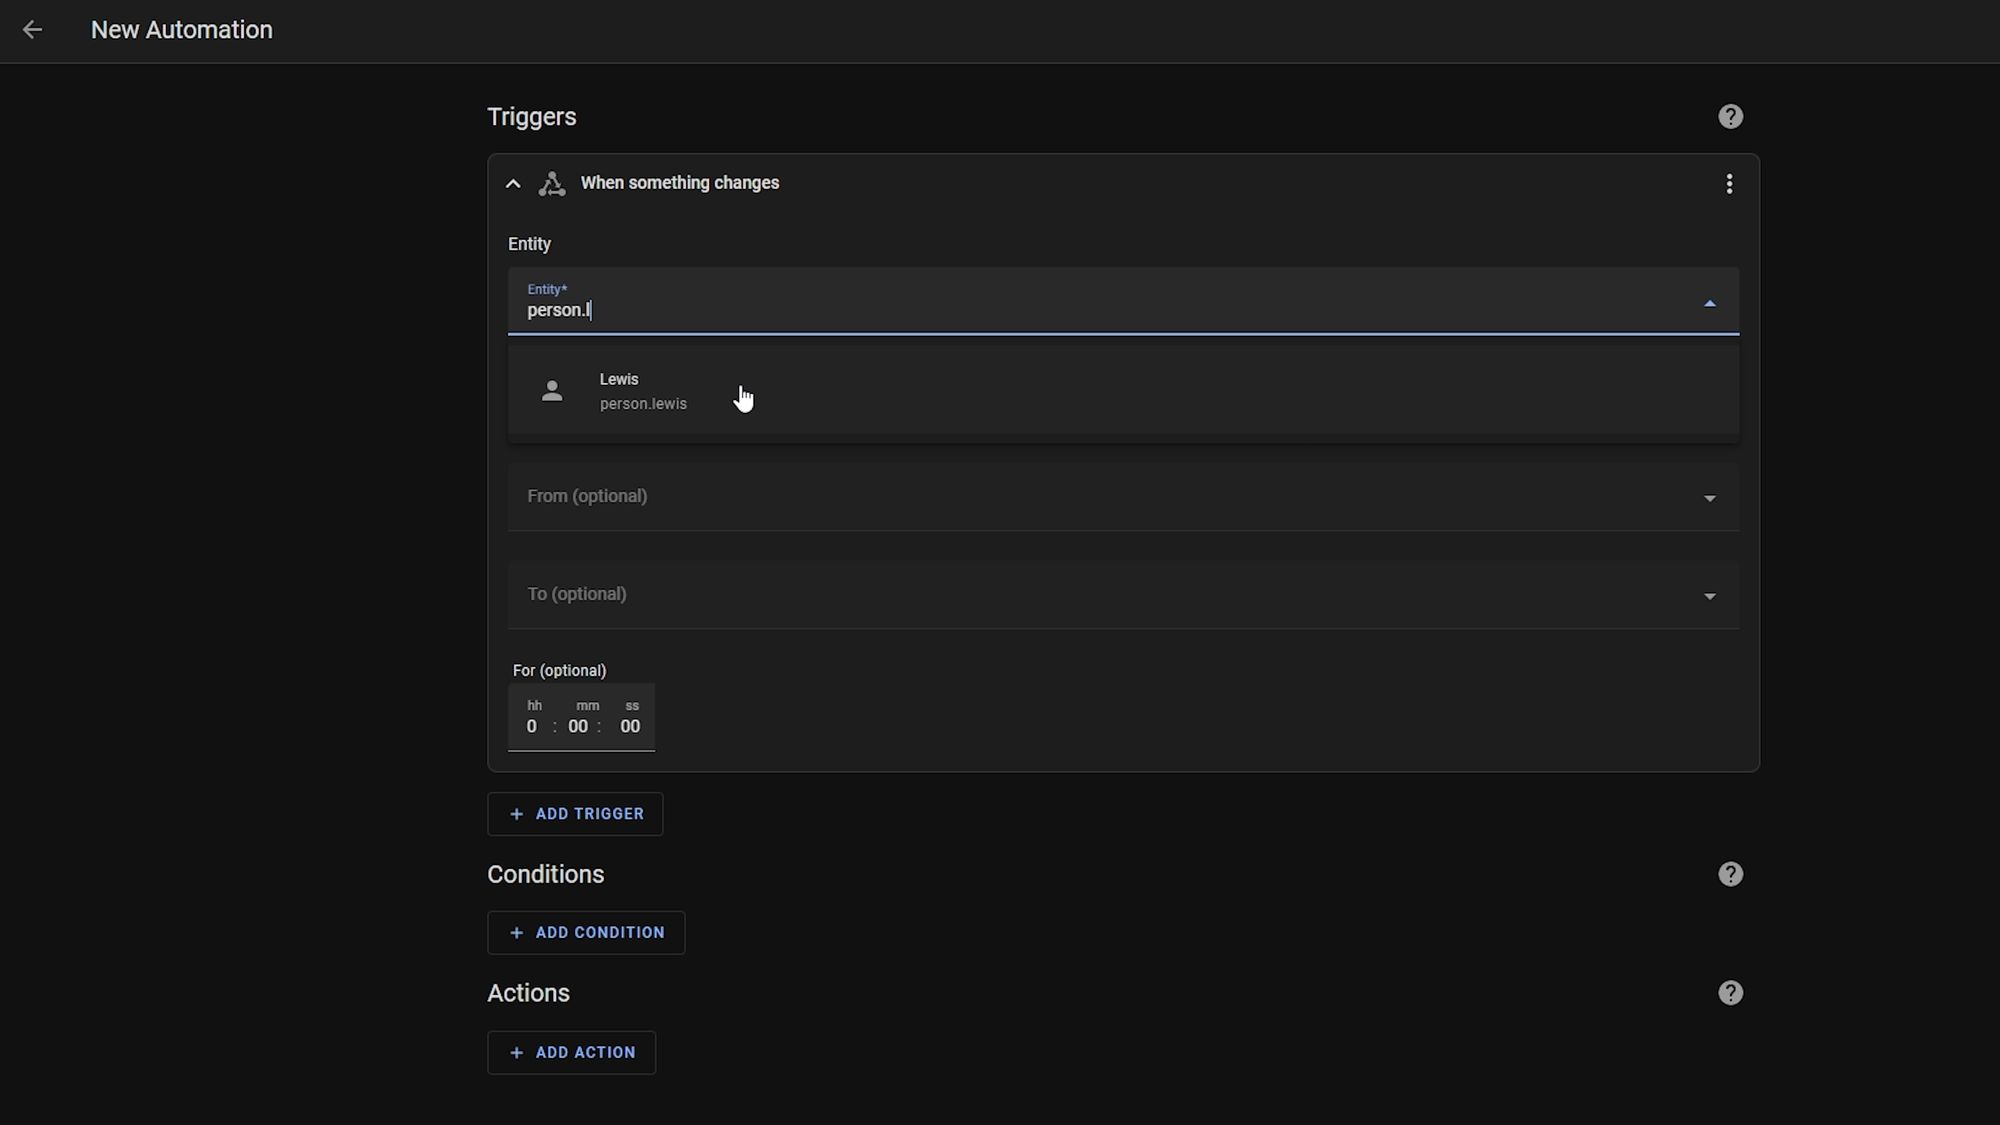
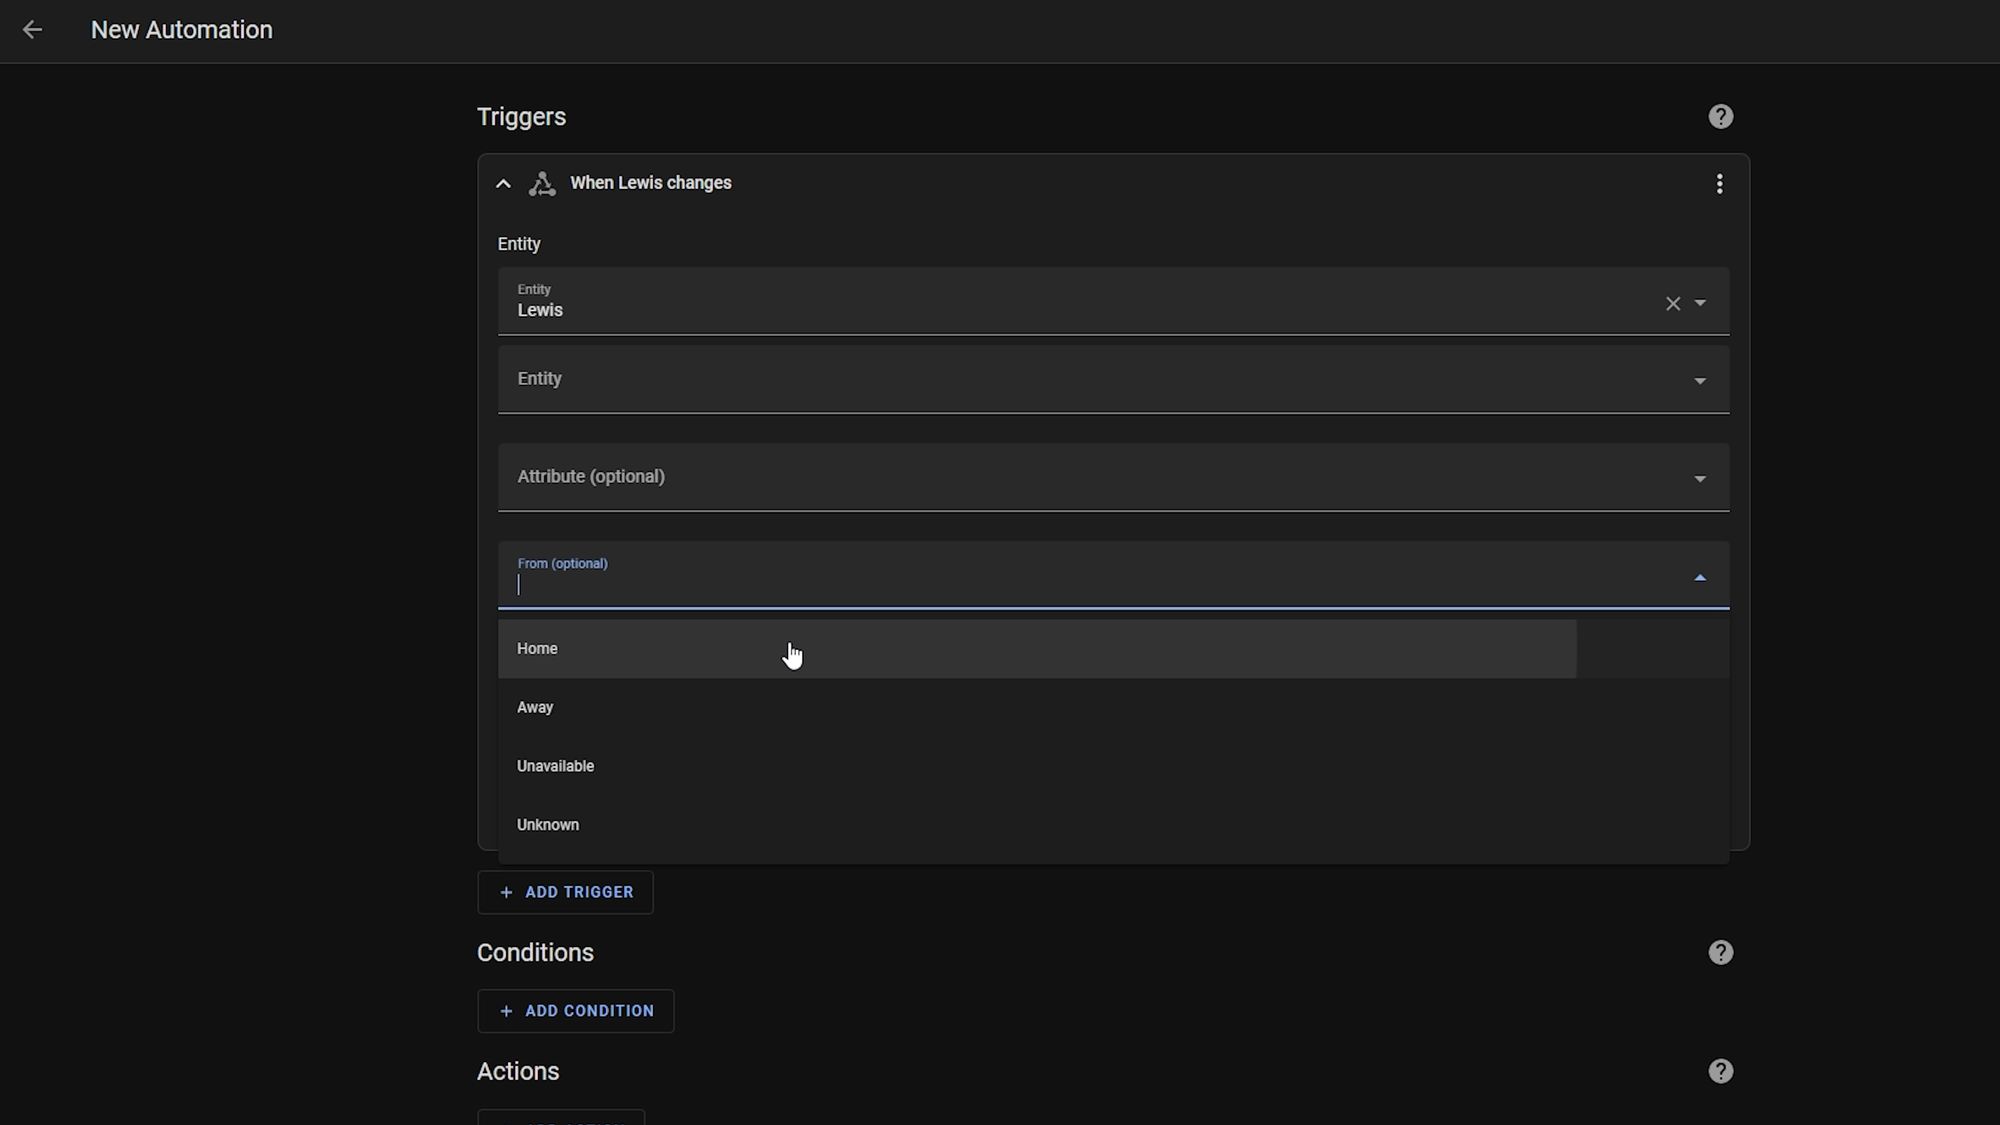
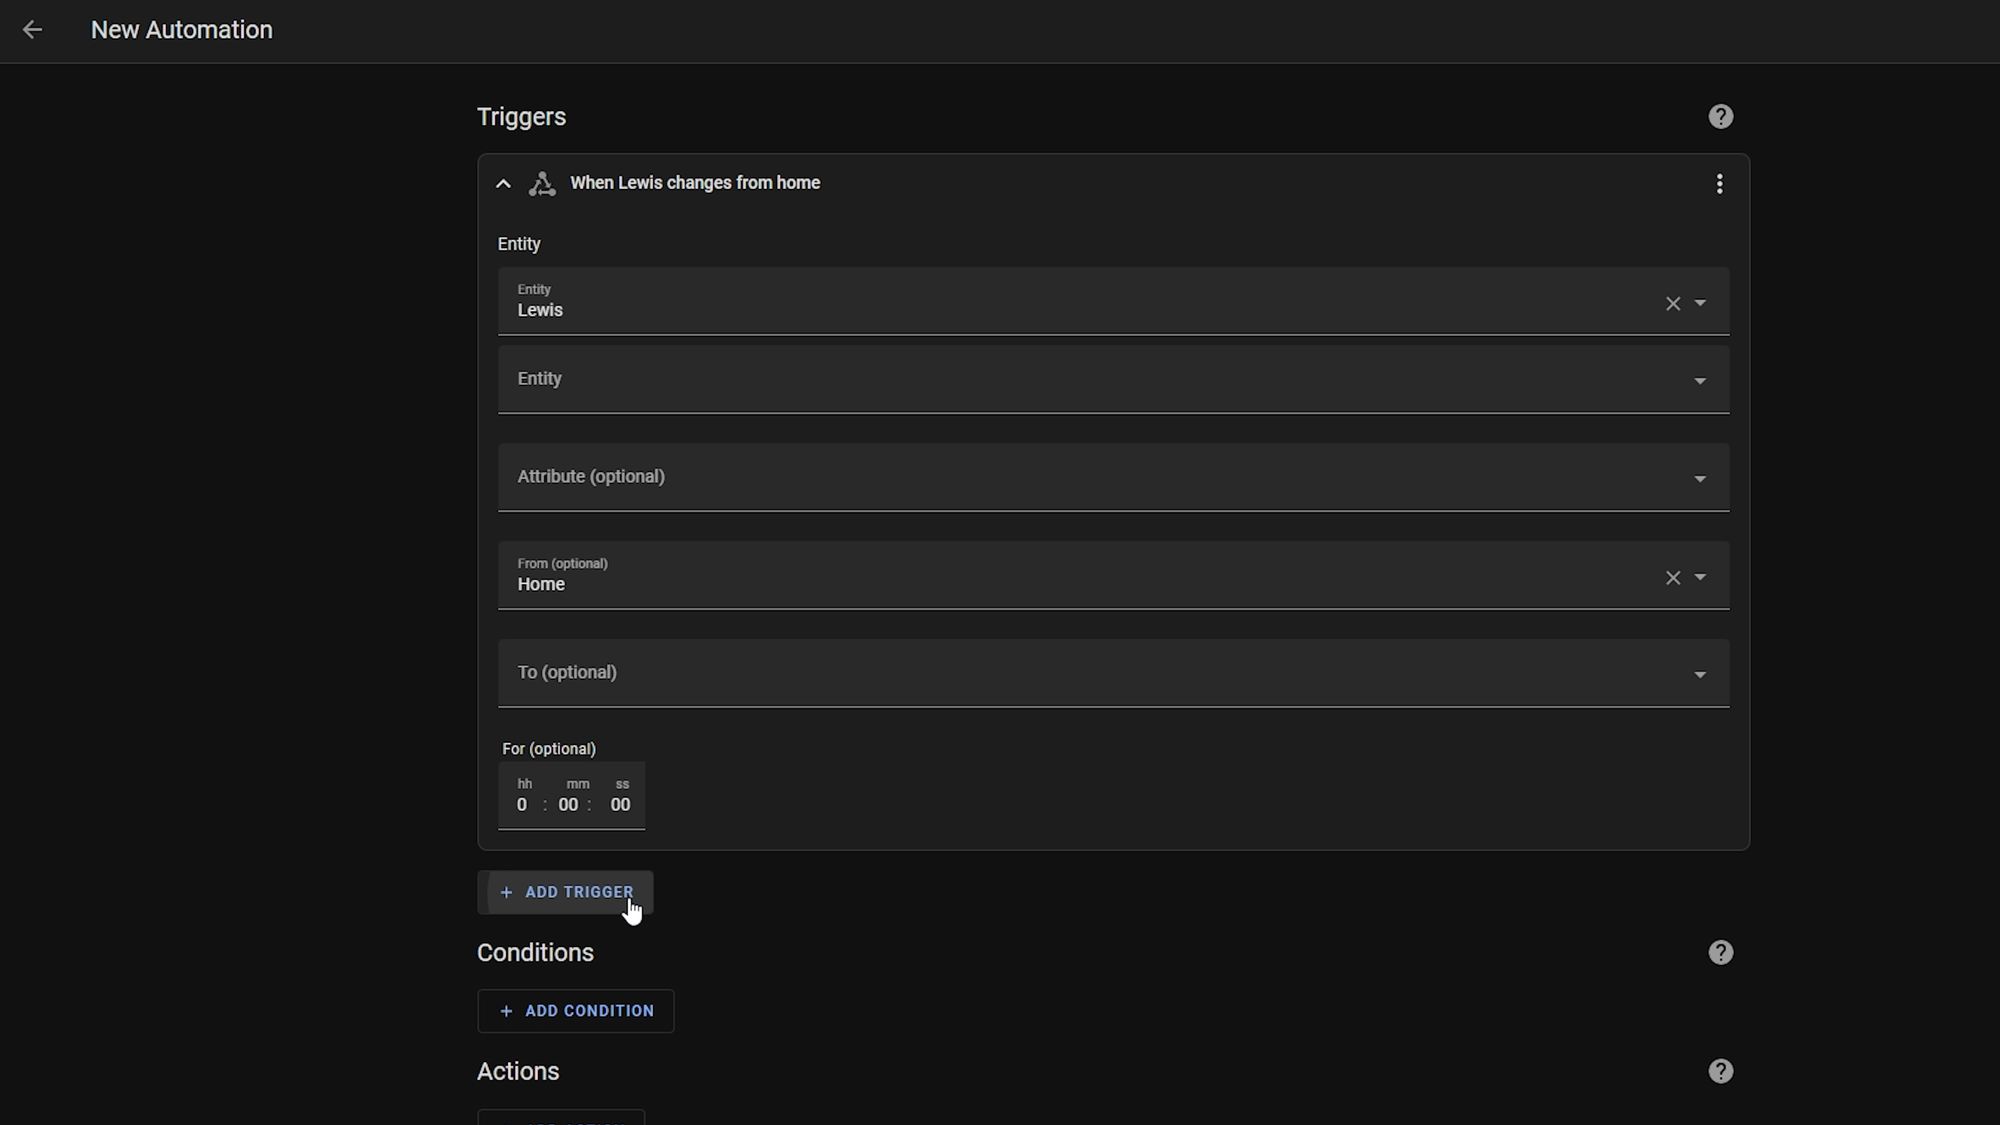
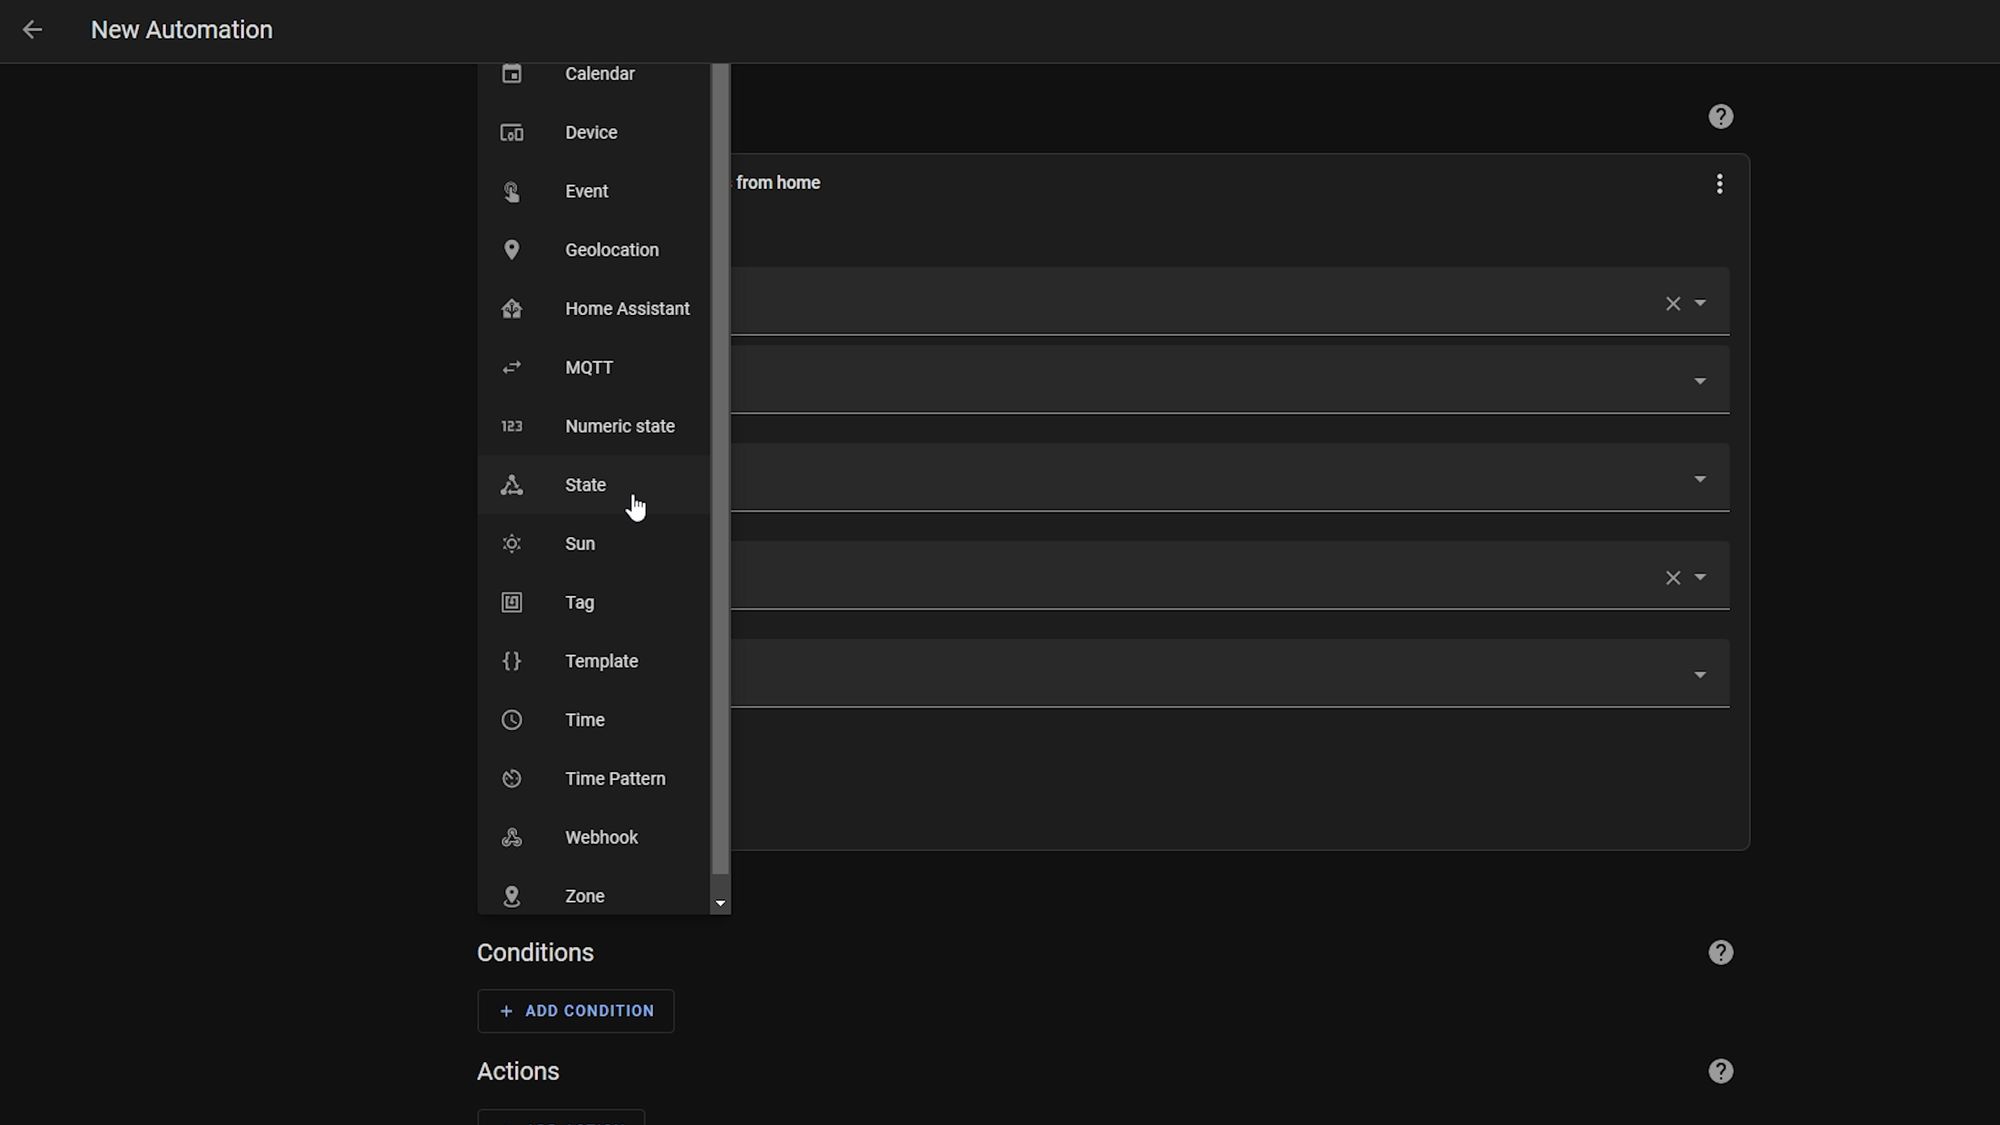
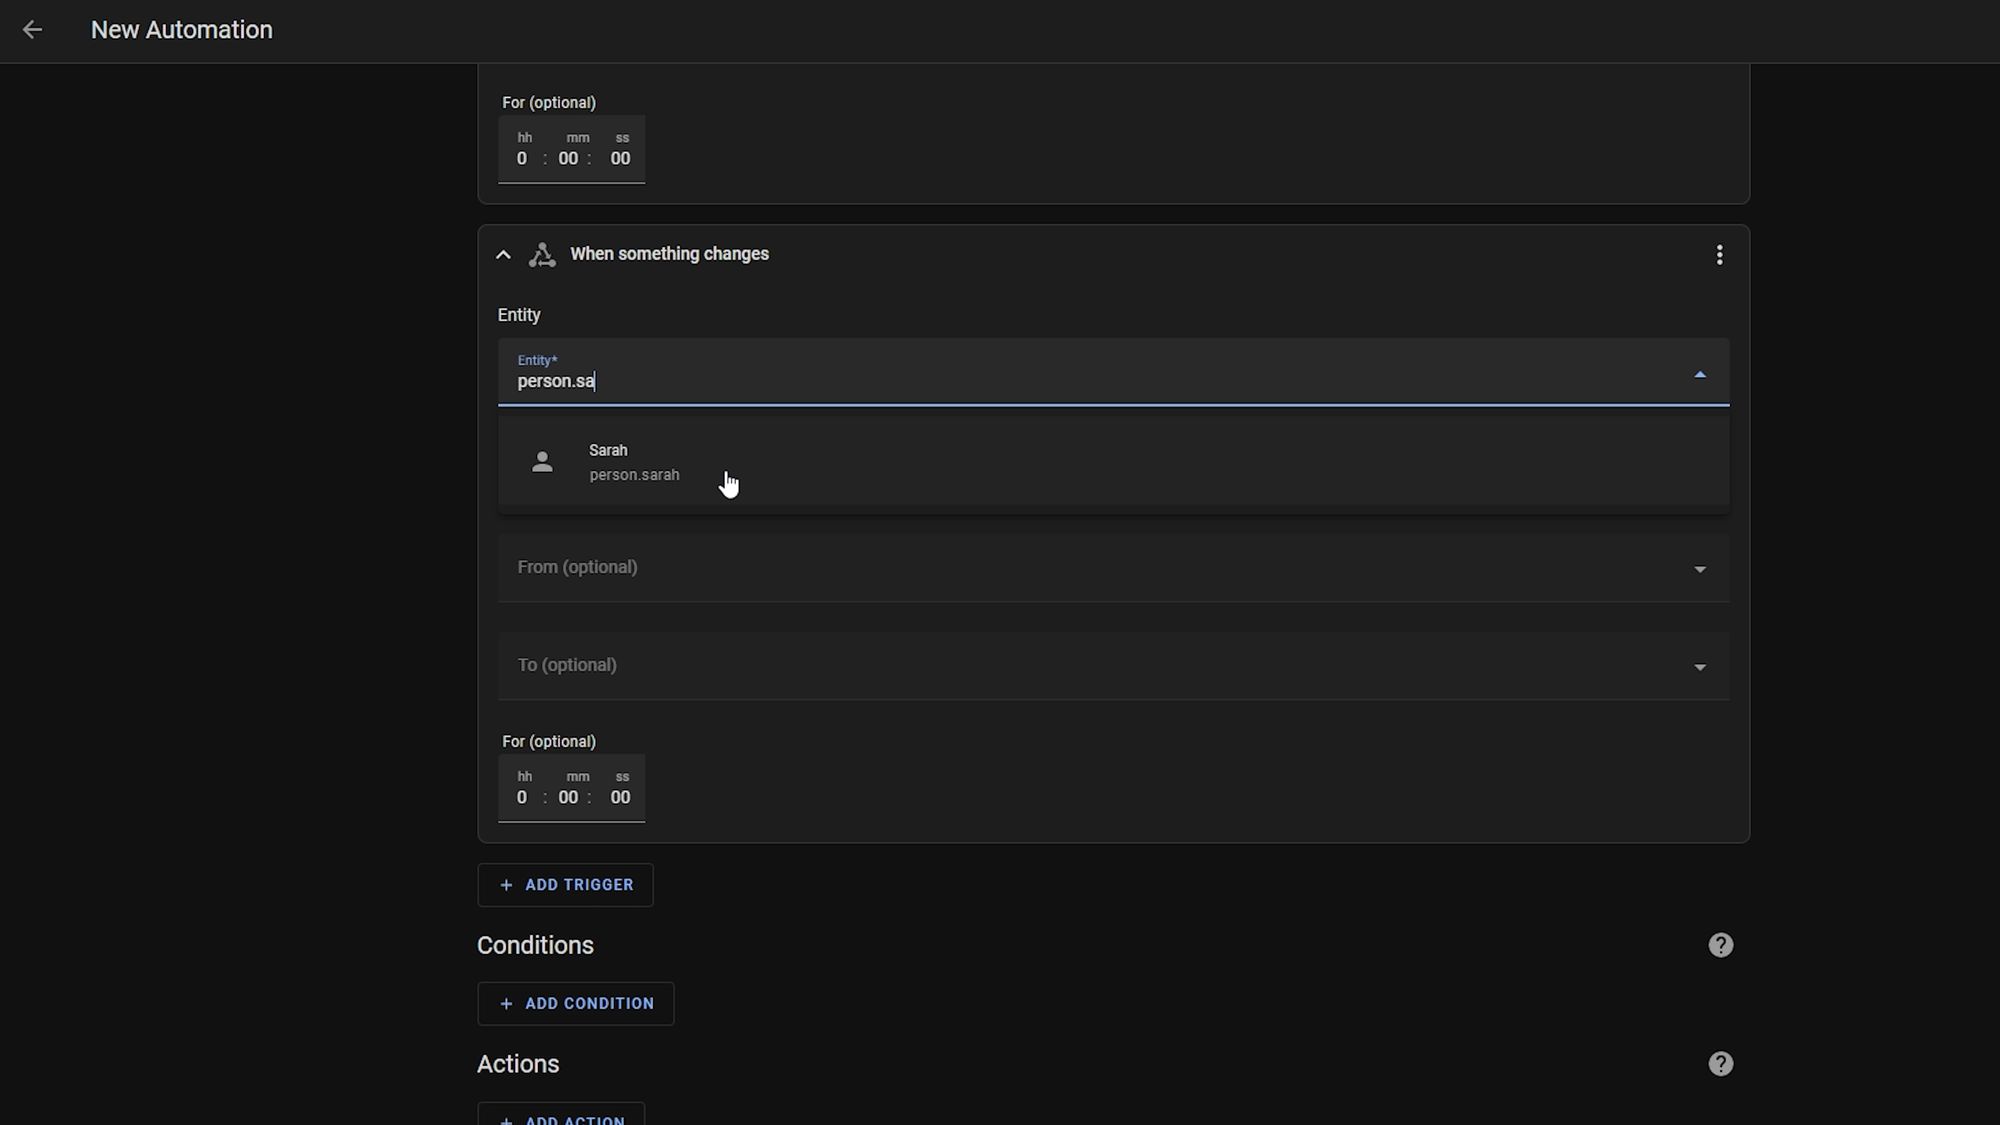
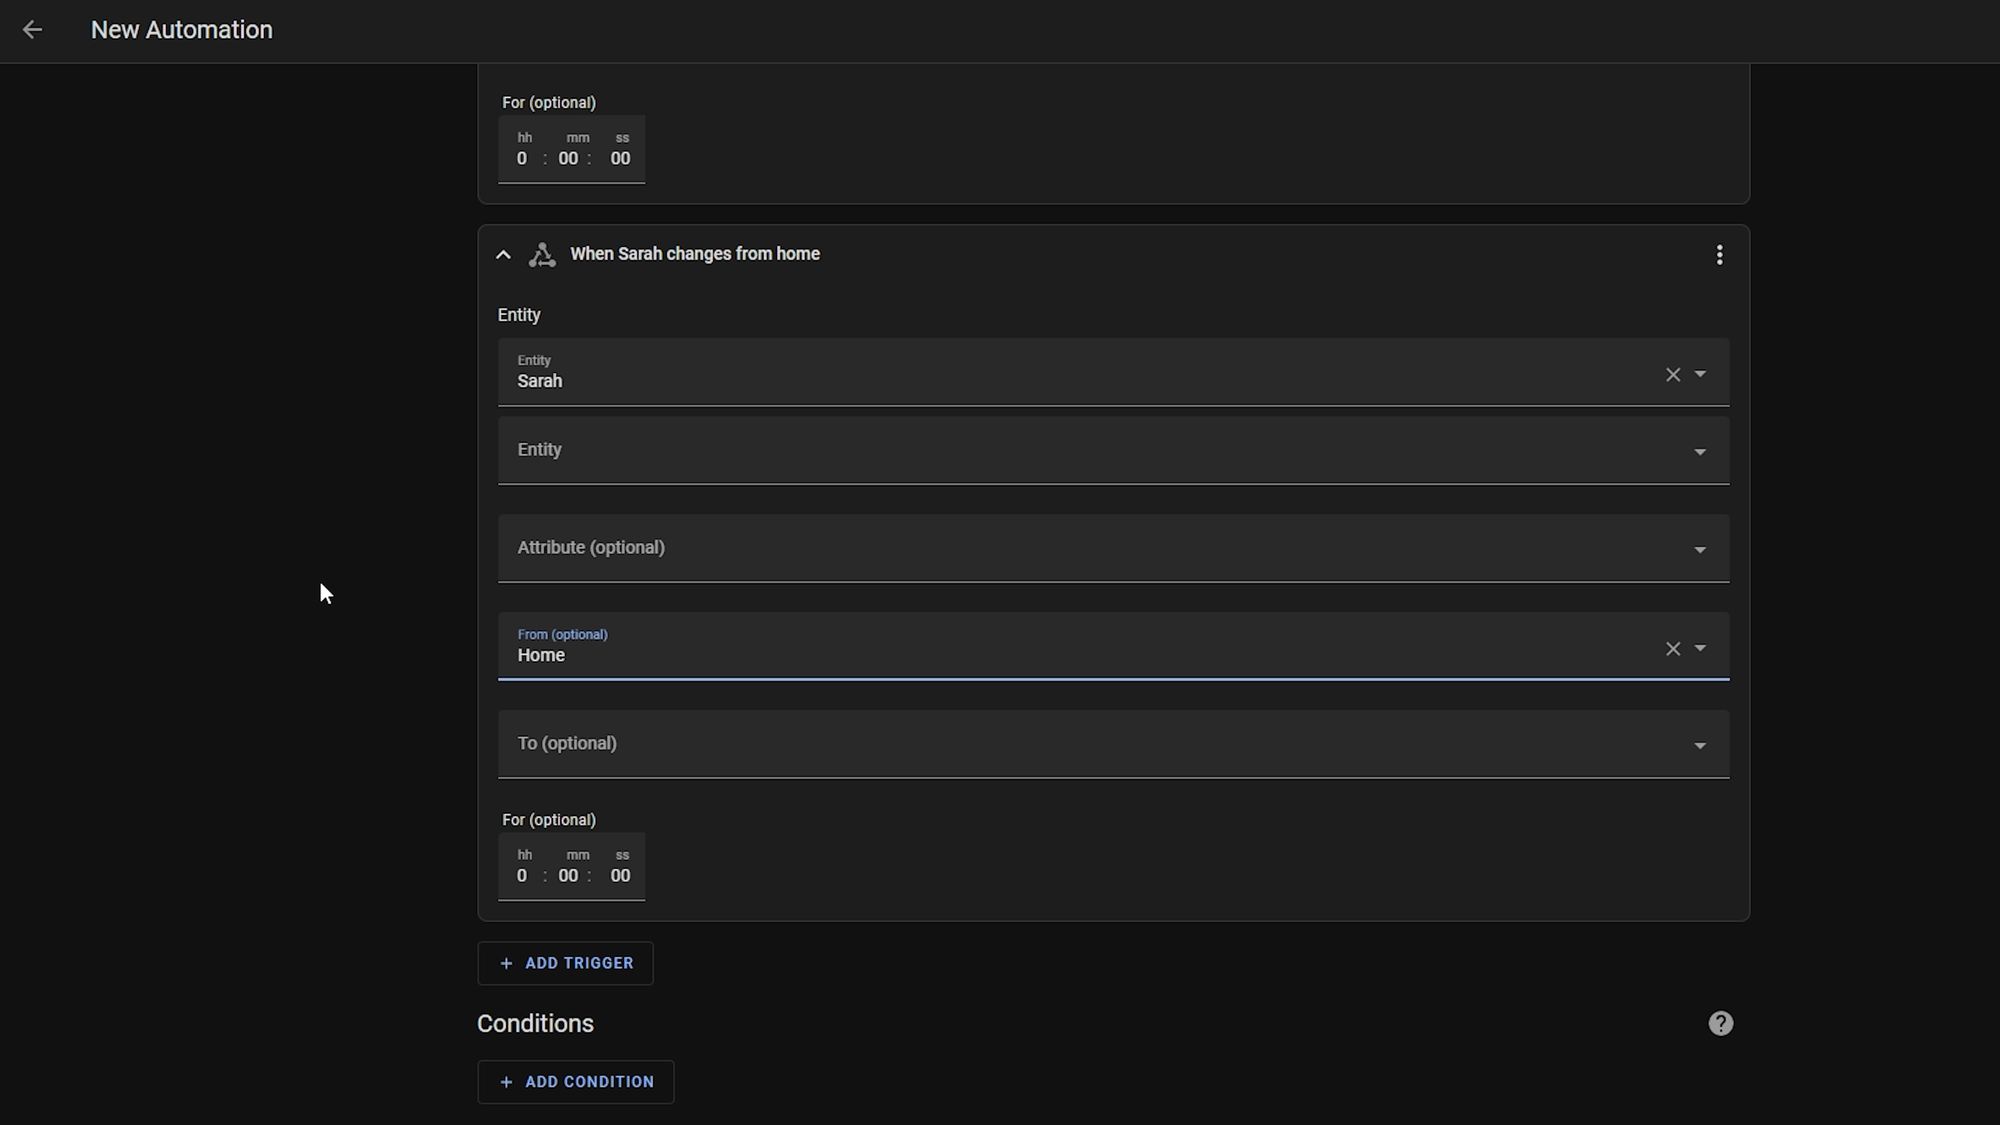
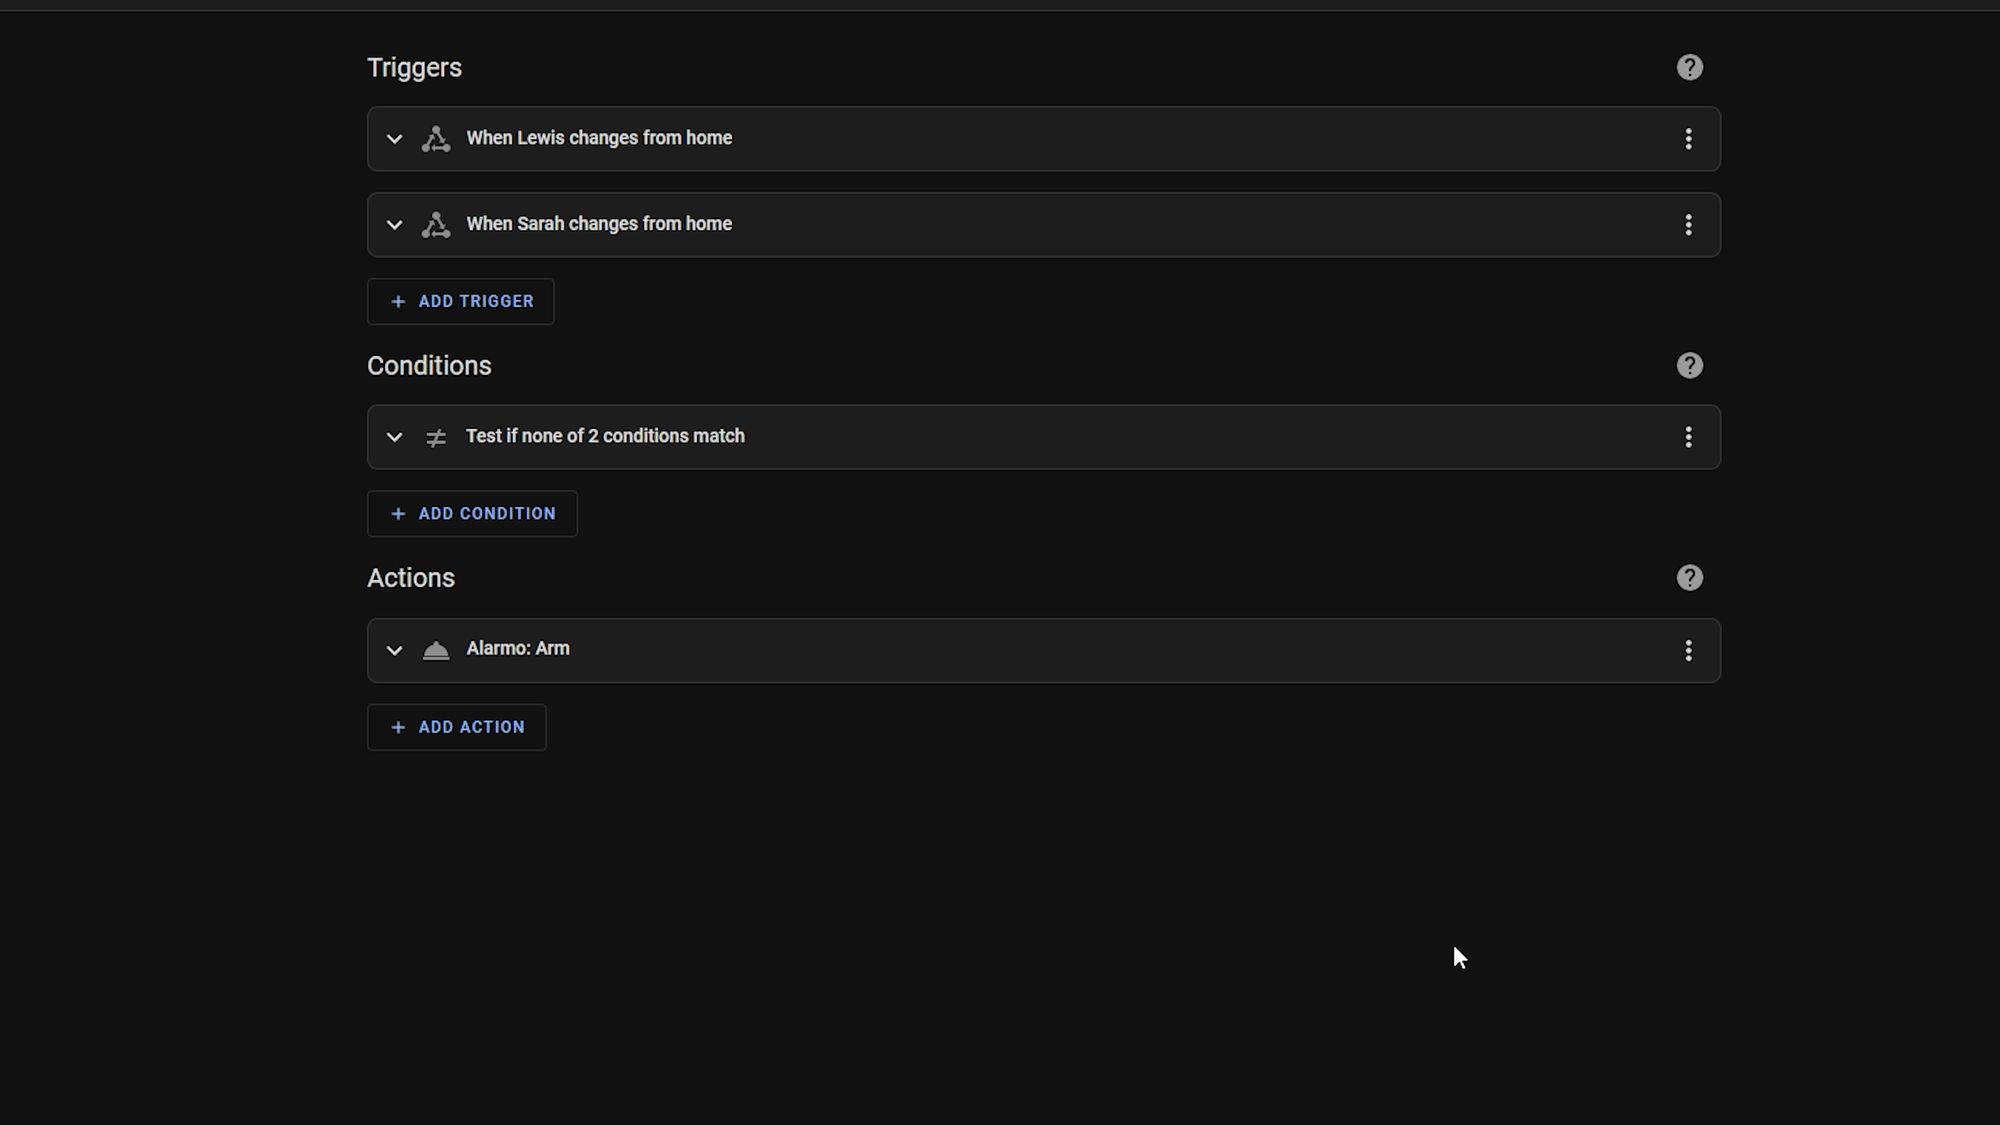
Once done, head over to settings, automations and create a new automation. Then in the trigger section, select state as the type and then in the entity box, search for your username. In the from box, select home, which means that this automation will be triggered when I leave home.


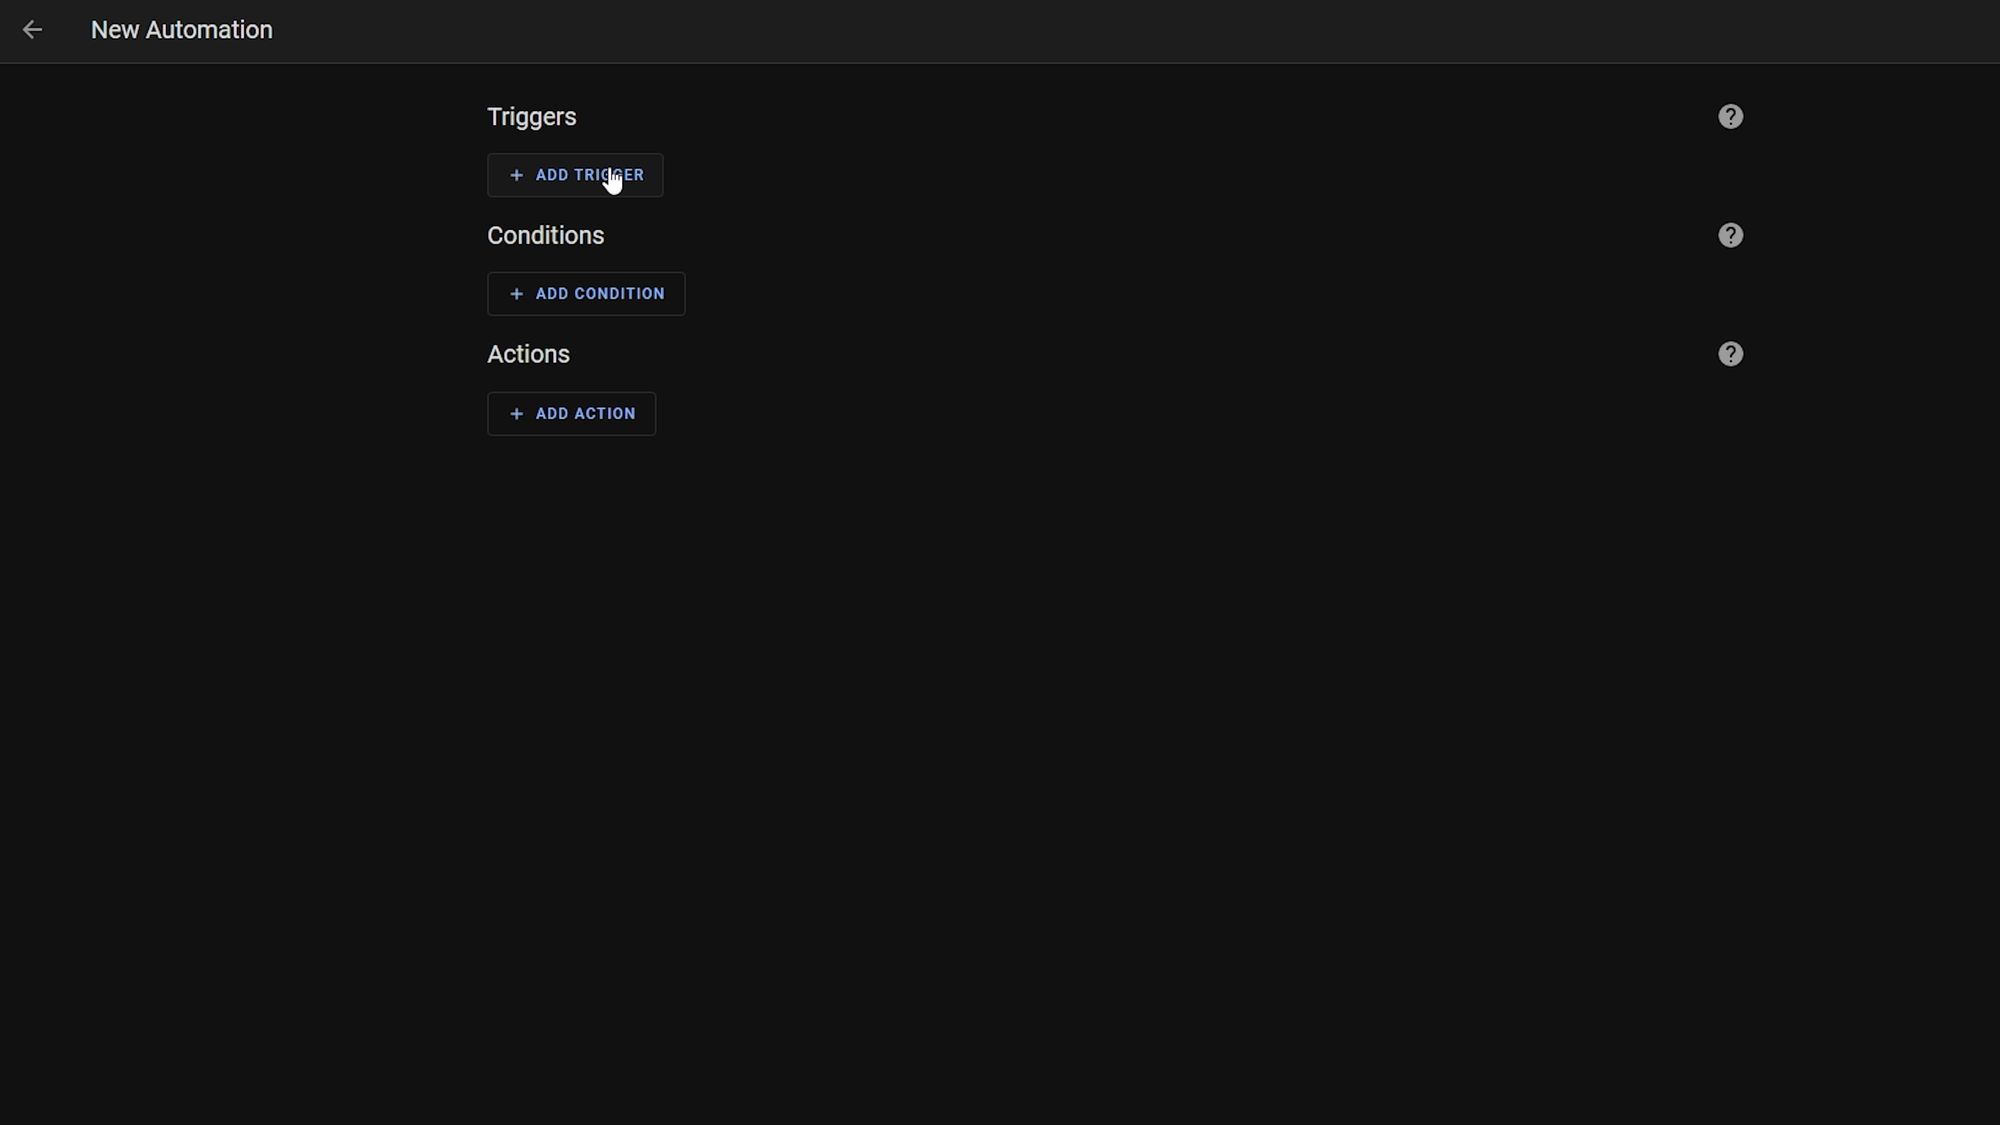
Then repeat and add another trigger with any other people you may have.
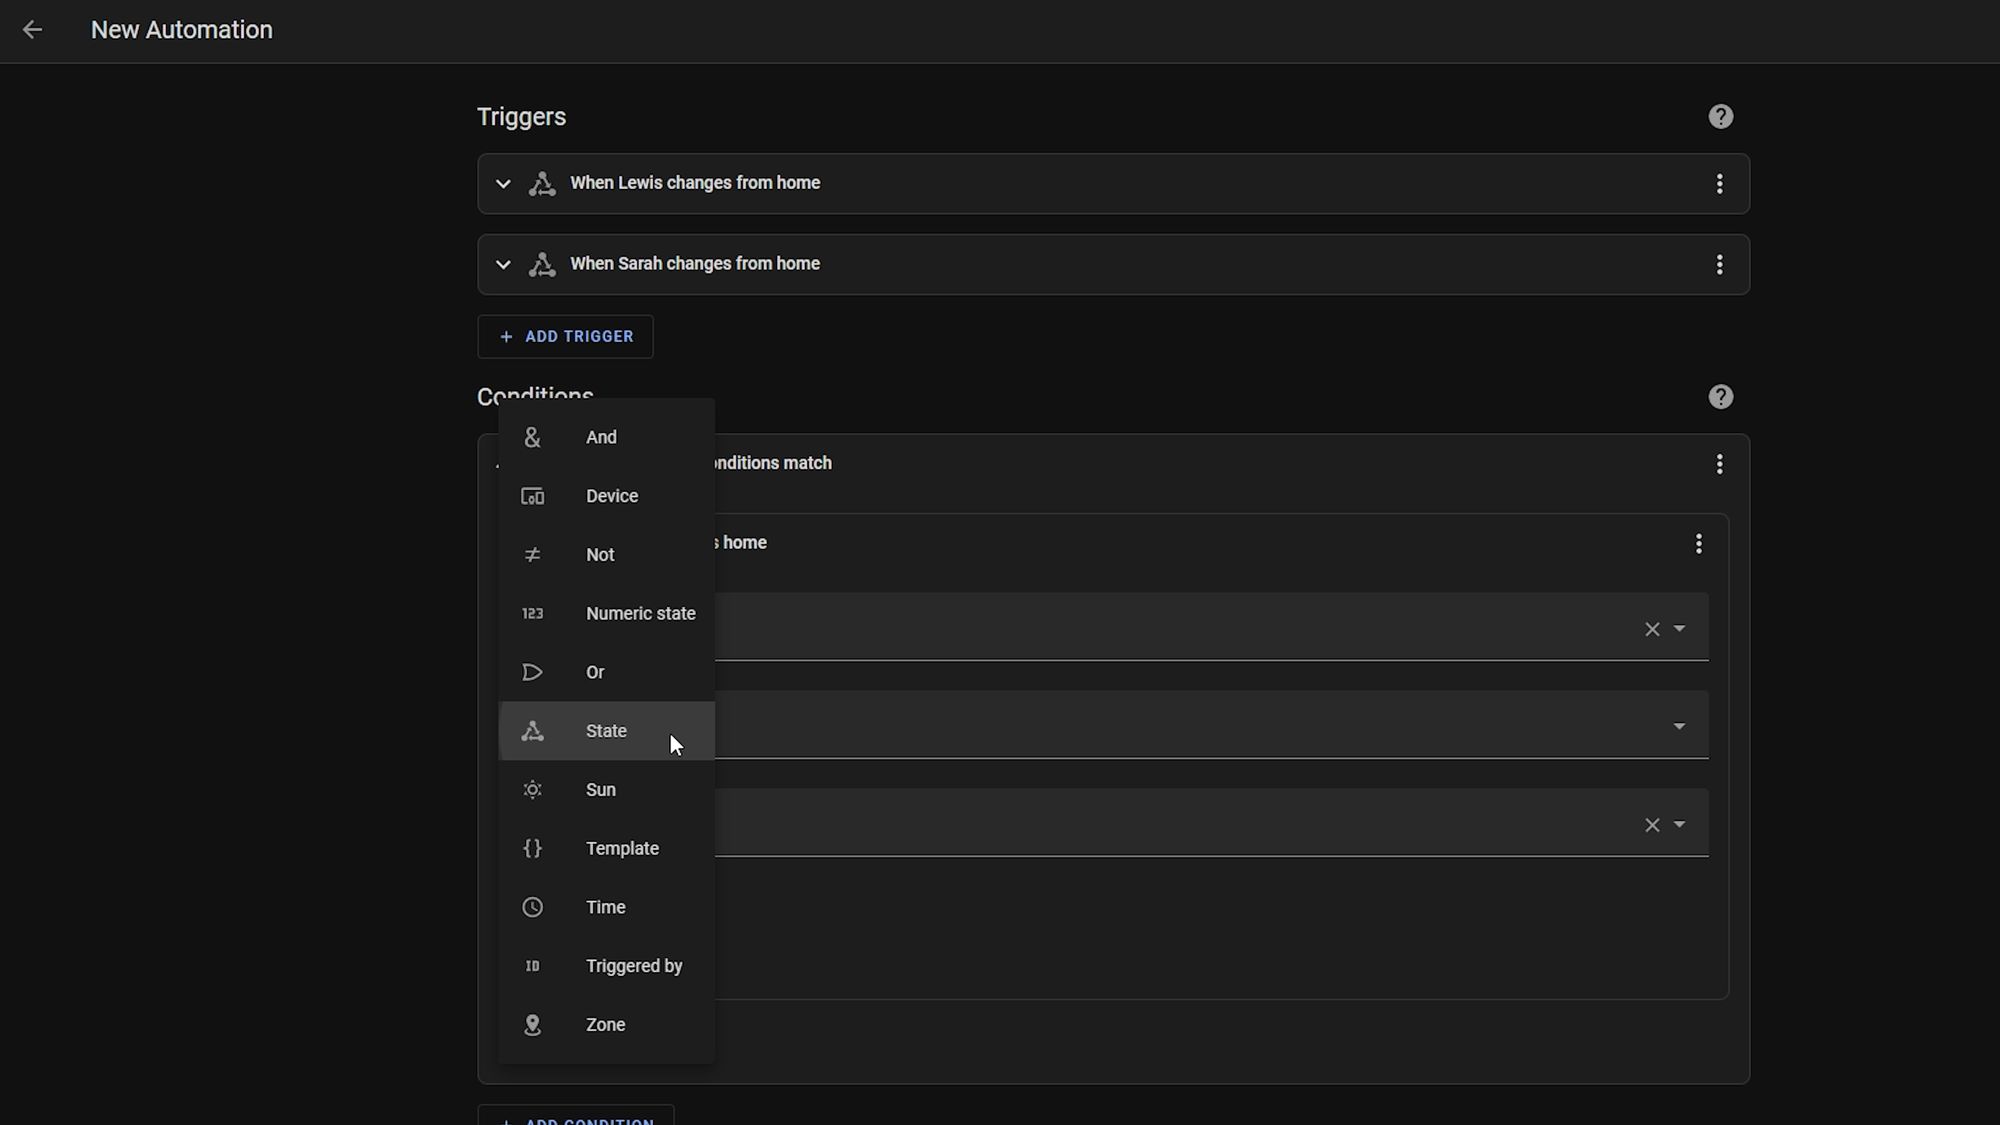
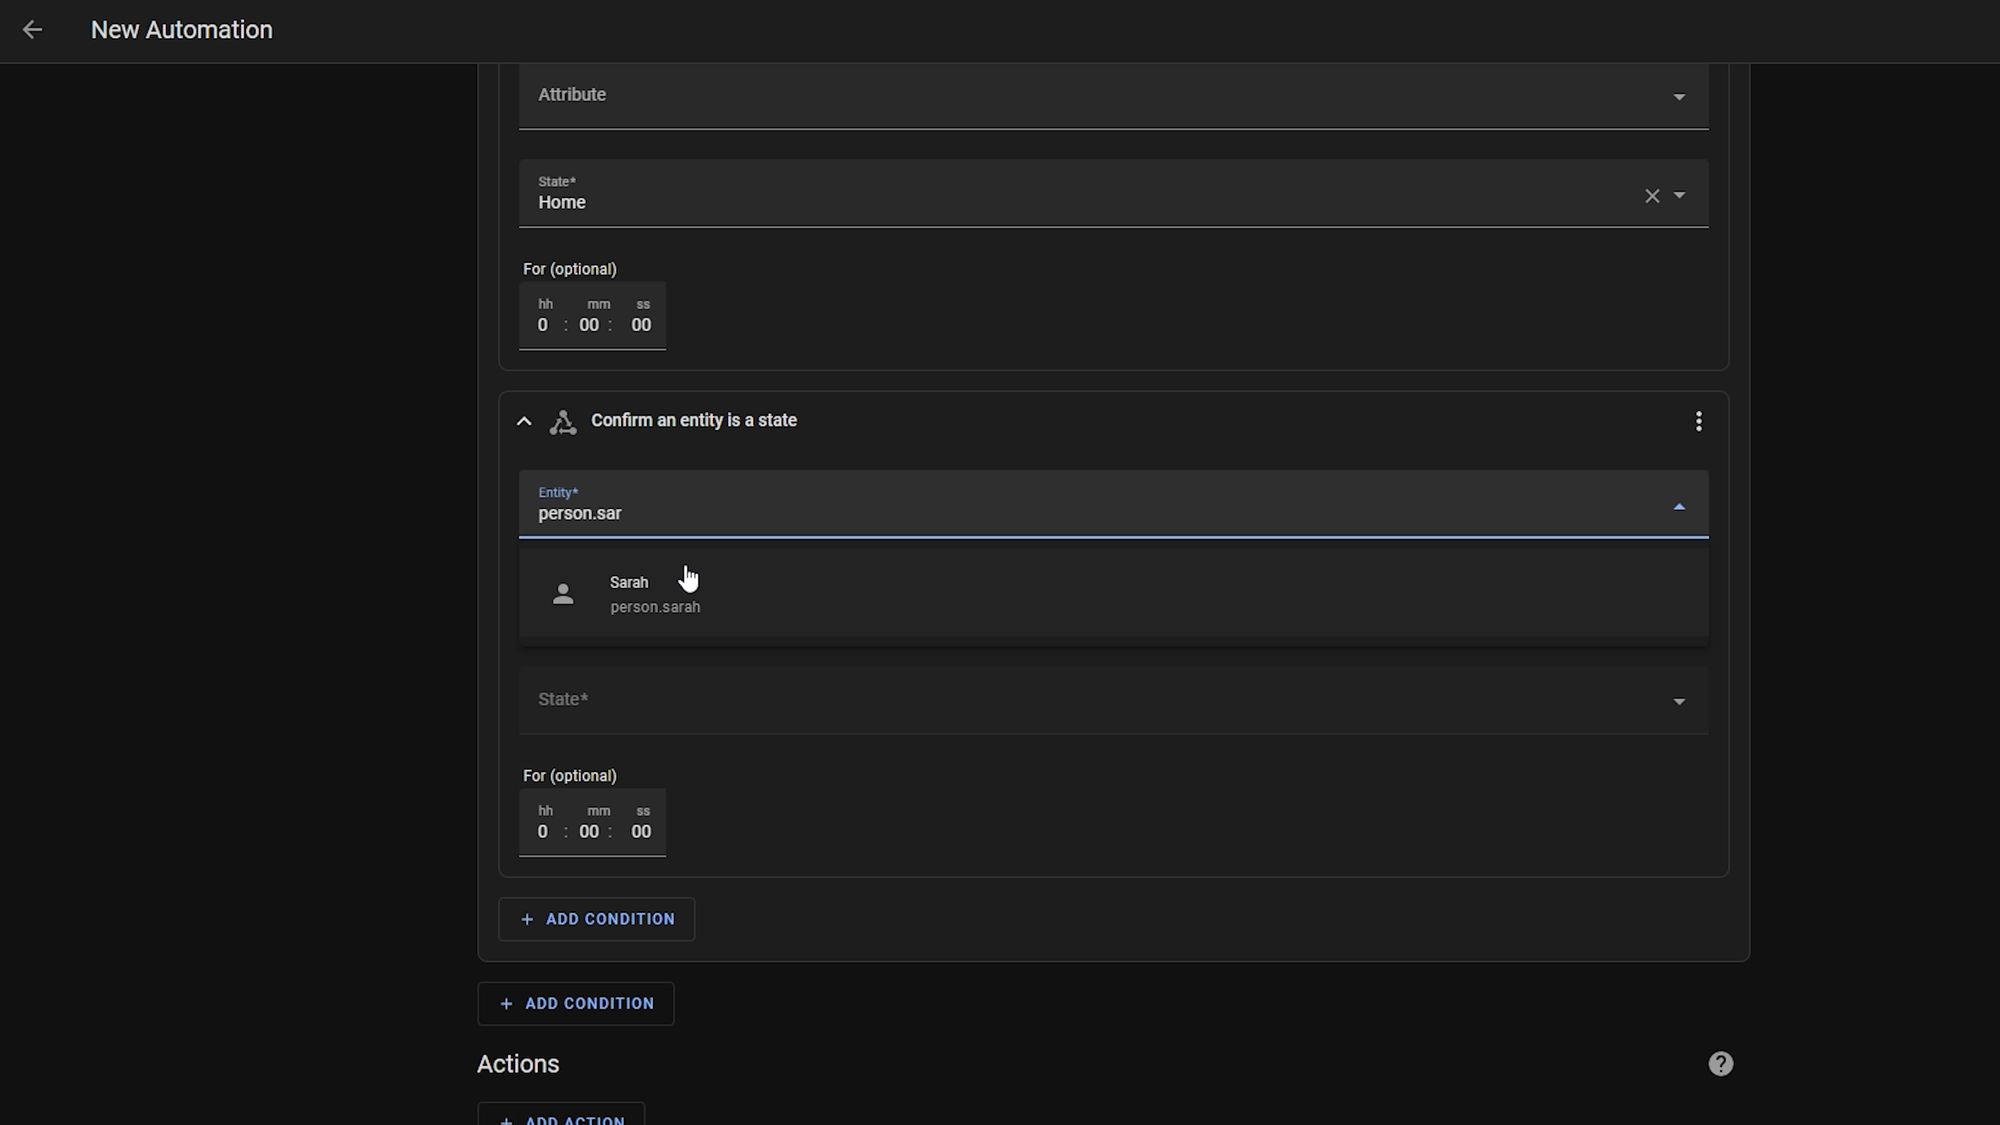
Then, in the conditions box, select not as the type and then select the state as the condition. Search for your username again and in the state box select home.
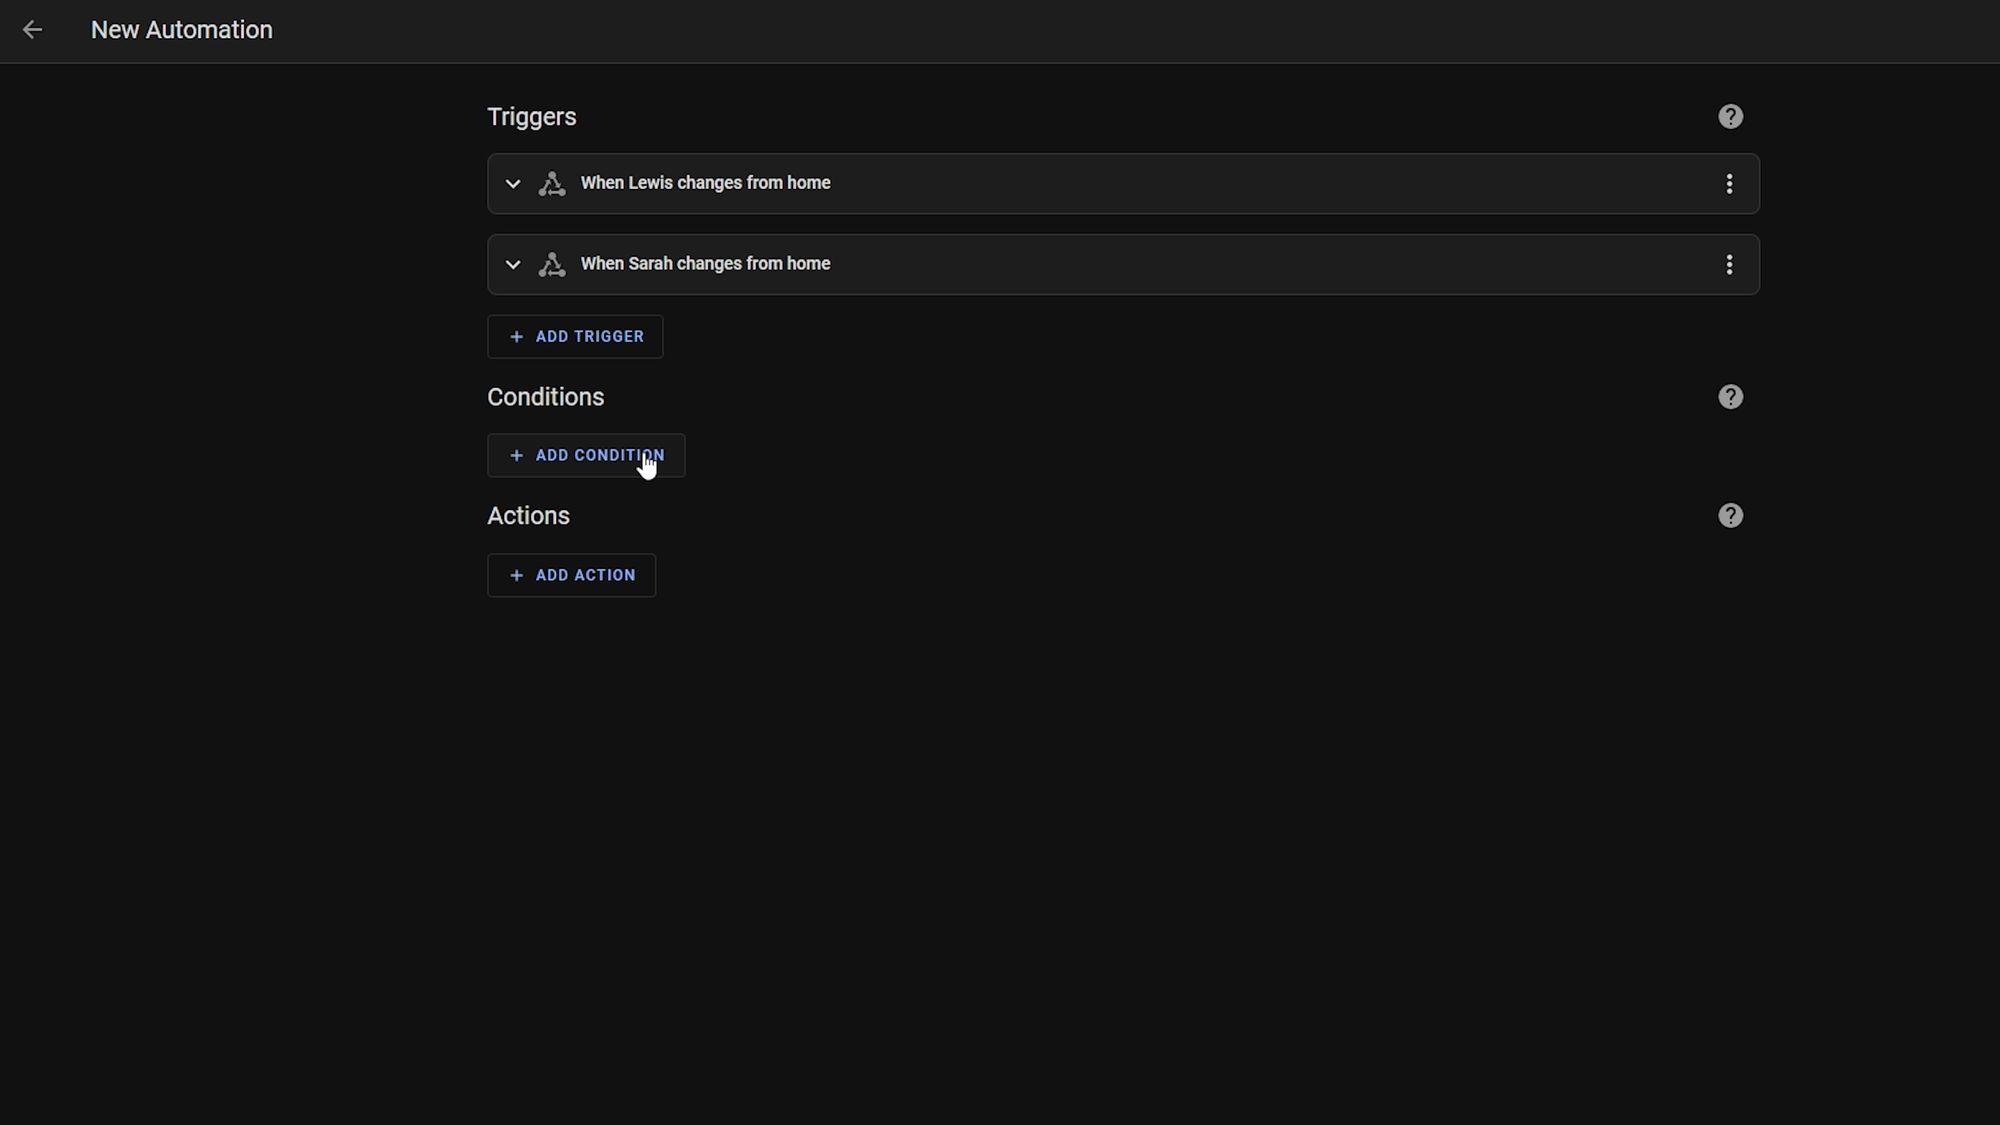
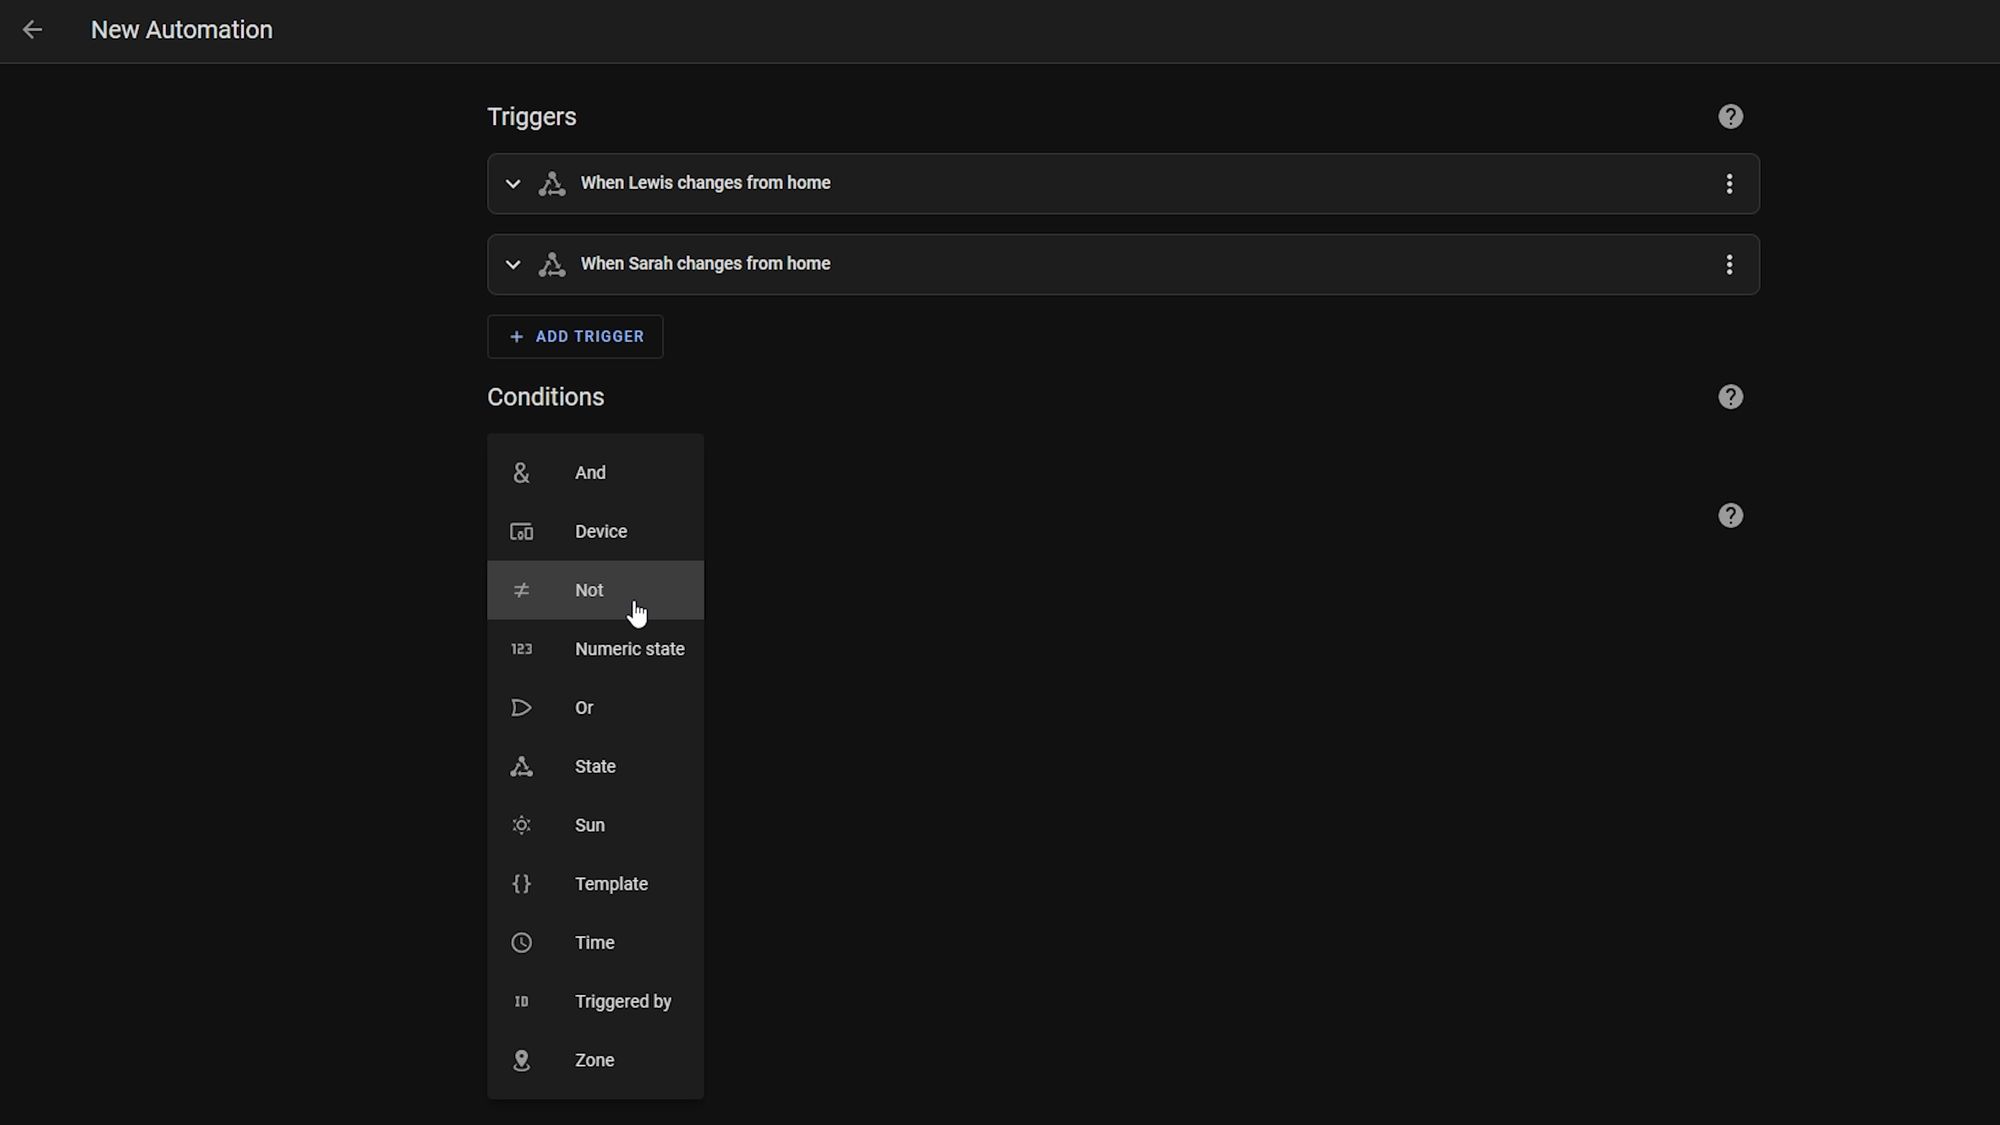
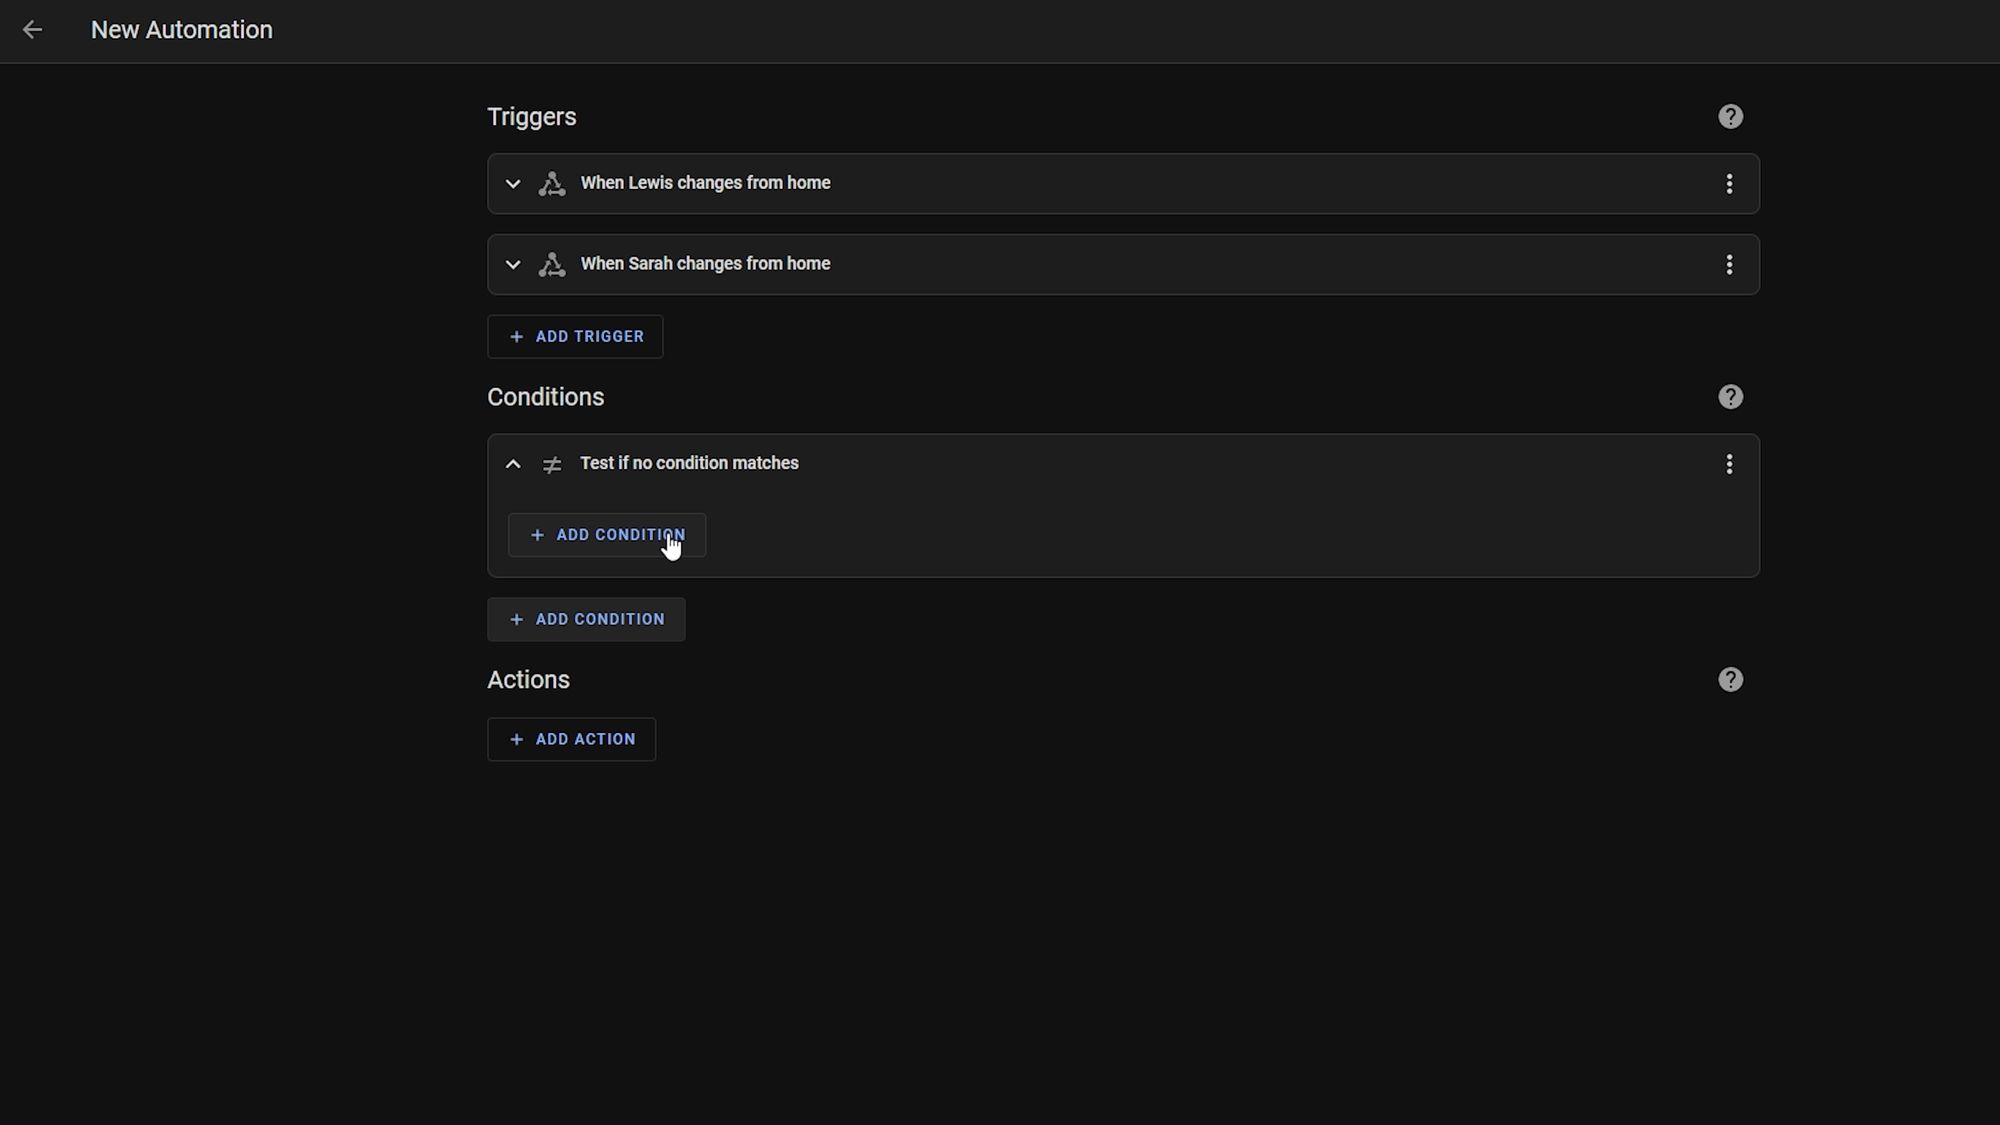
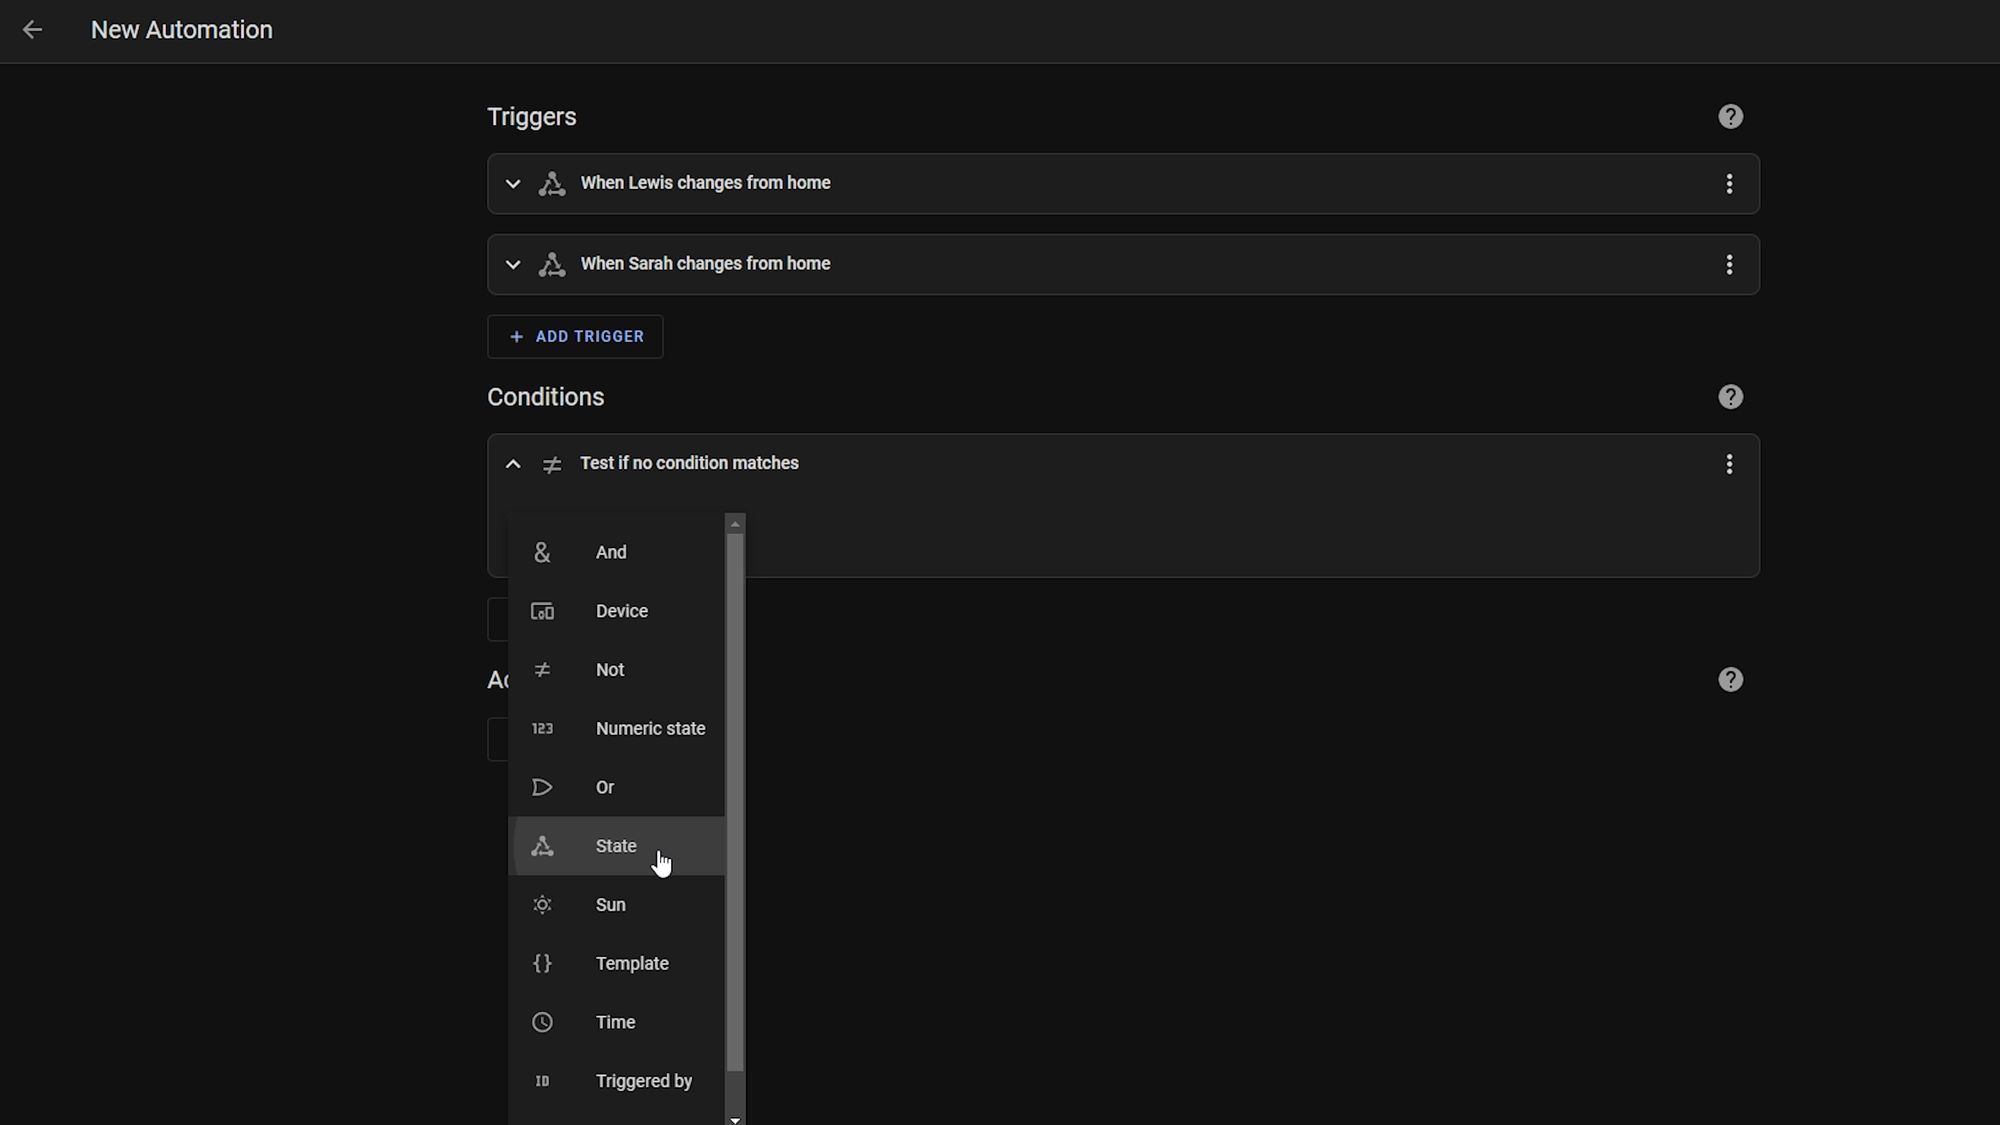
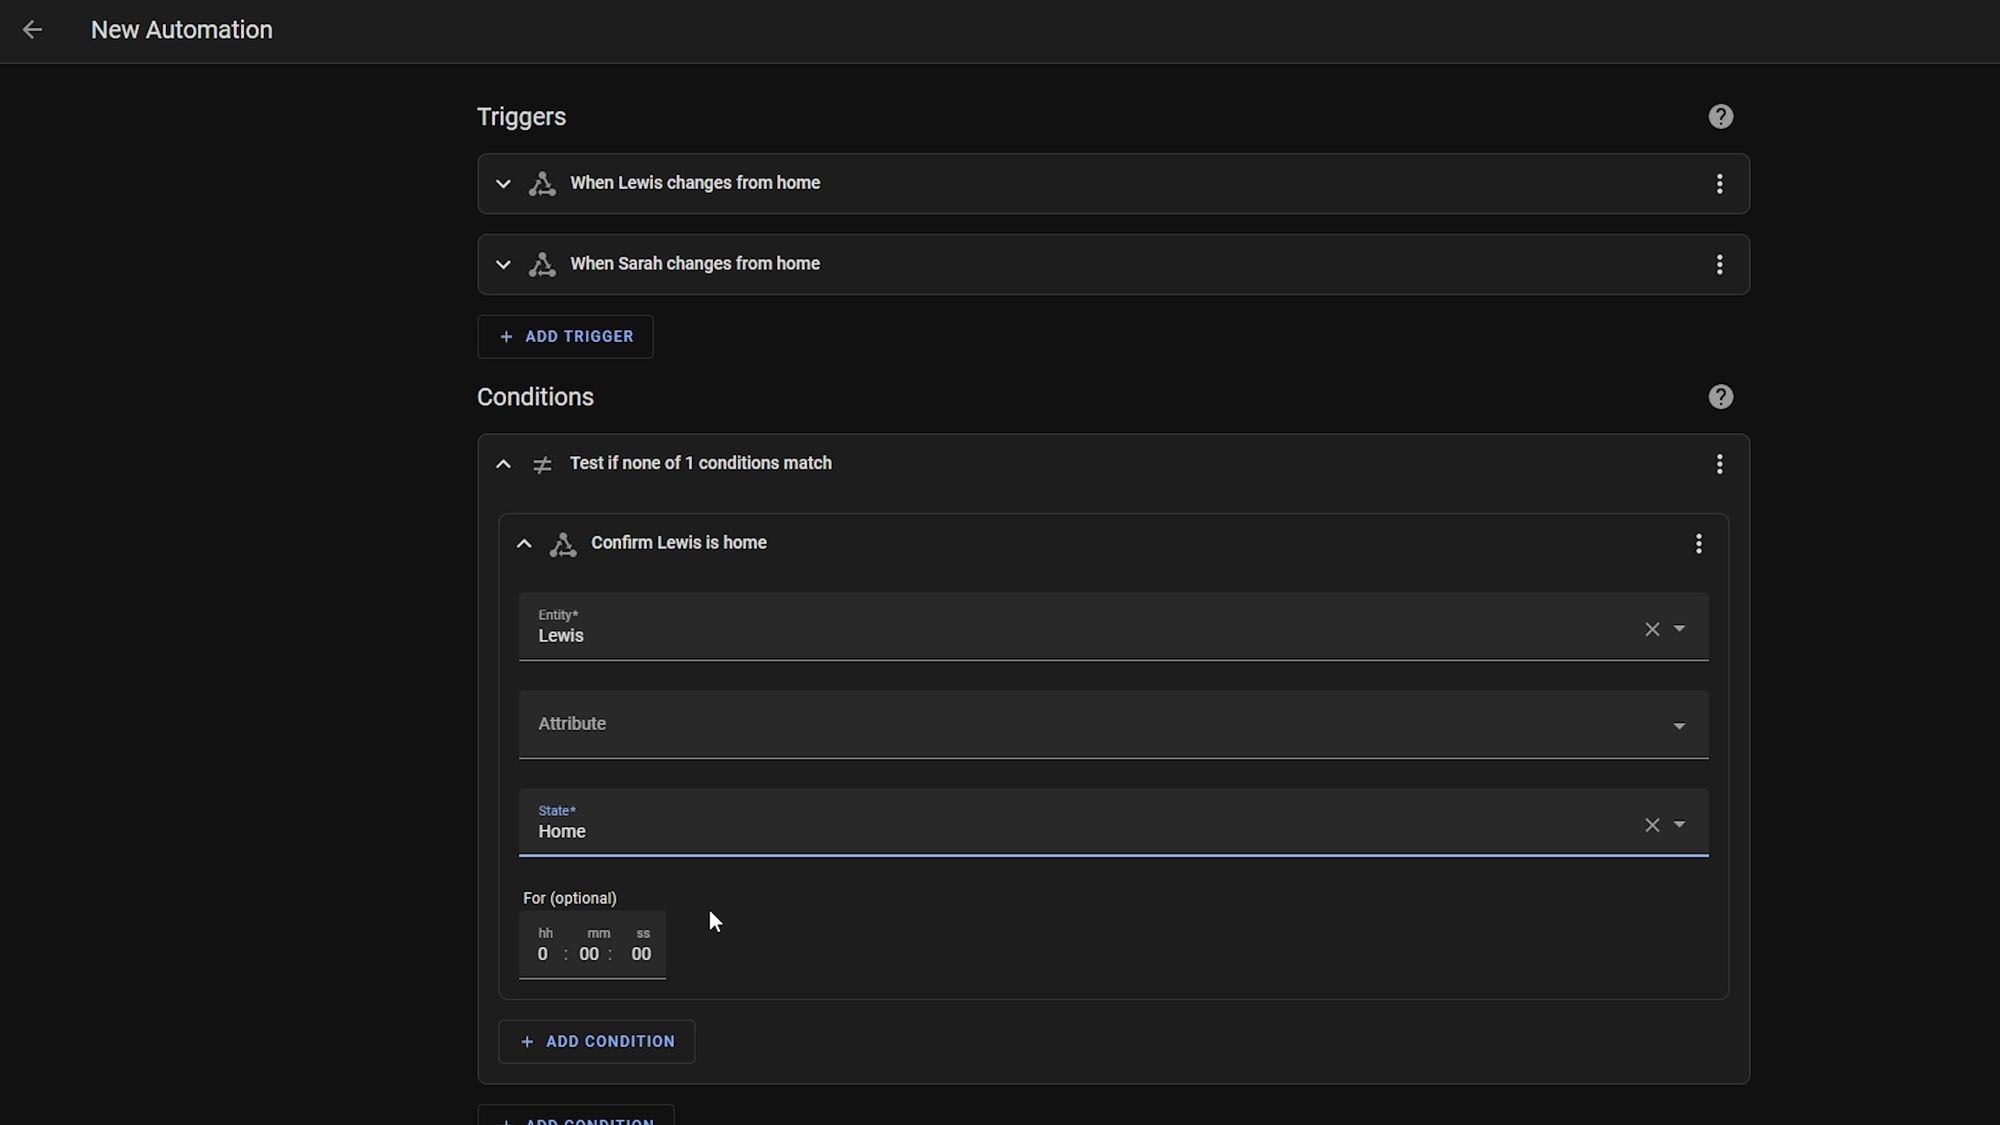
Then add a second condition and again add all of your usernames in here.
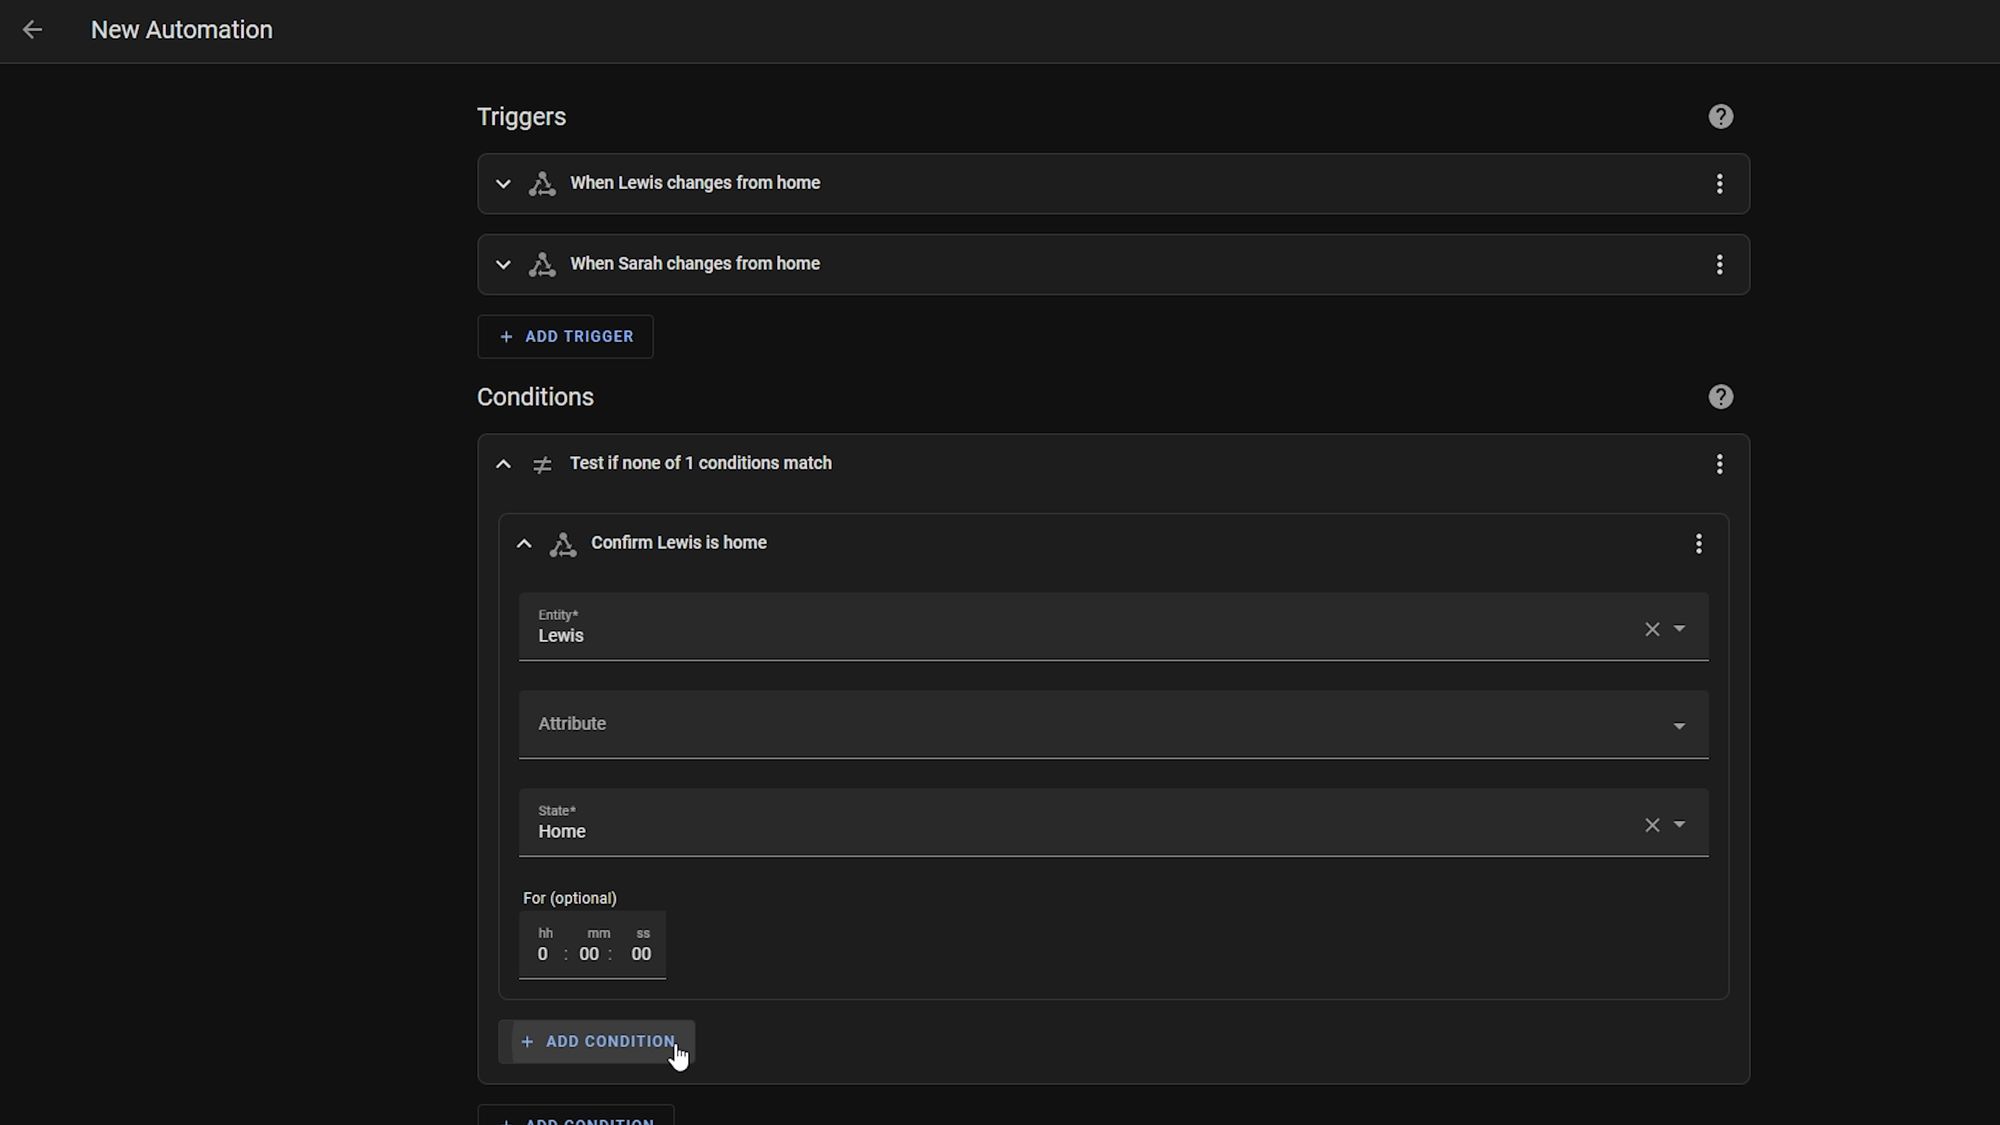

I know this might seem a little confusing, but basically what this does is check that no one is at home and if they aren’t, then the automation will proceed, and if one of any of the users specified are home, then the automation will not proceed - this means the alarm won't automatically set accidentally when someone is home.

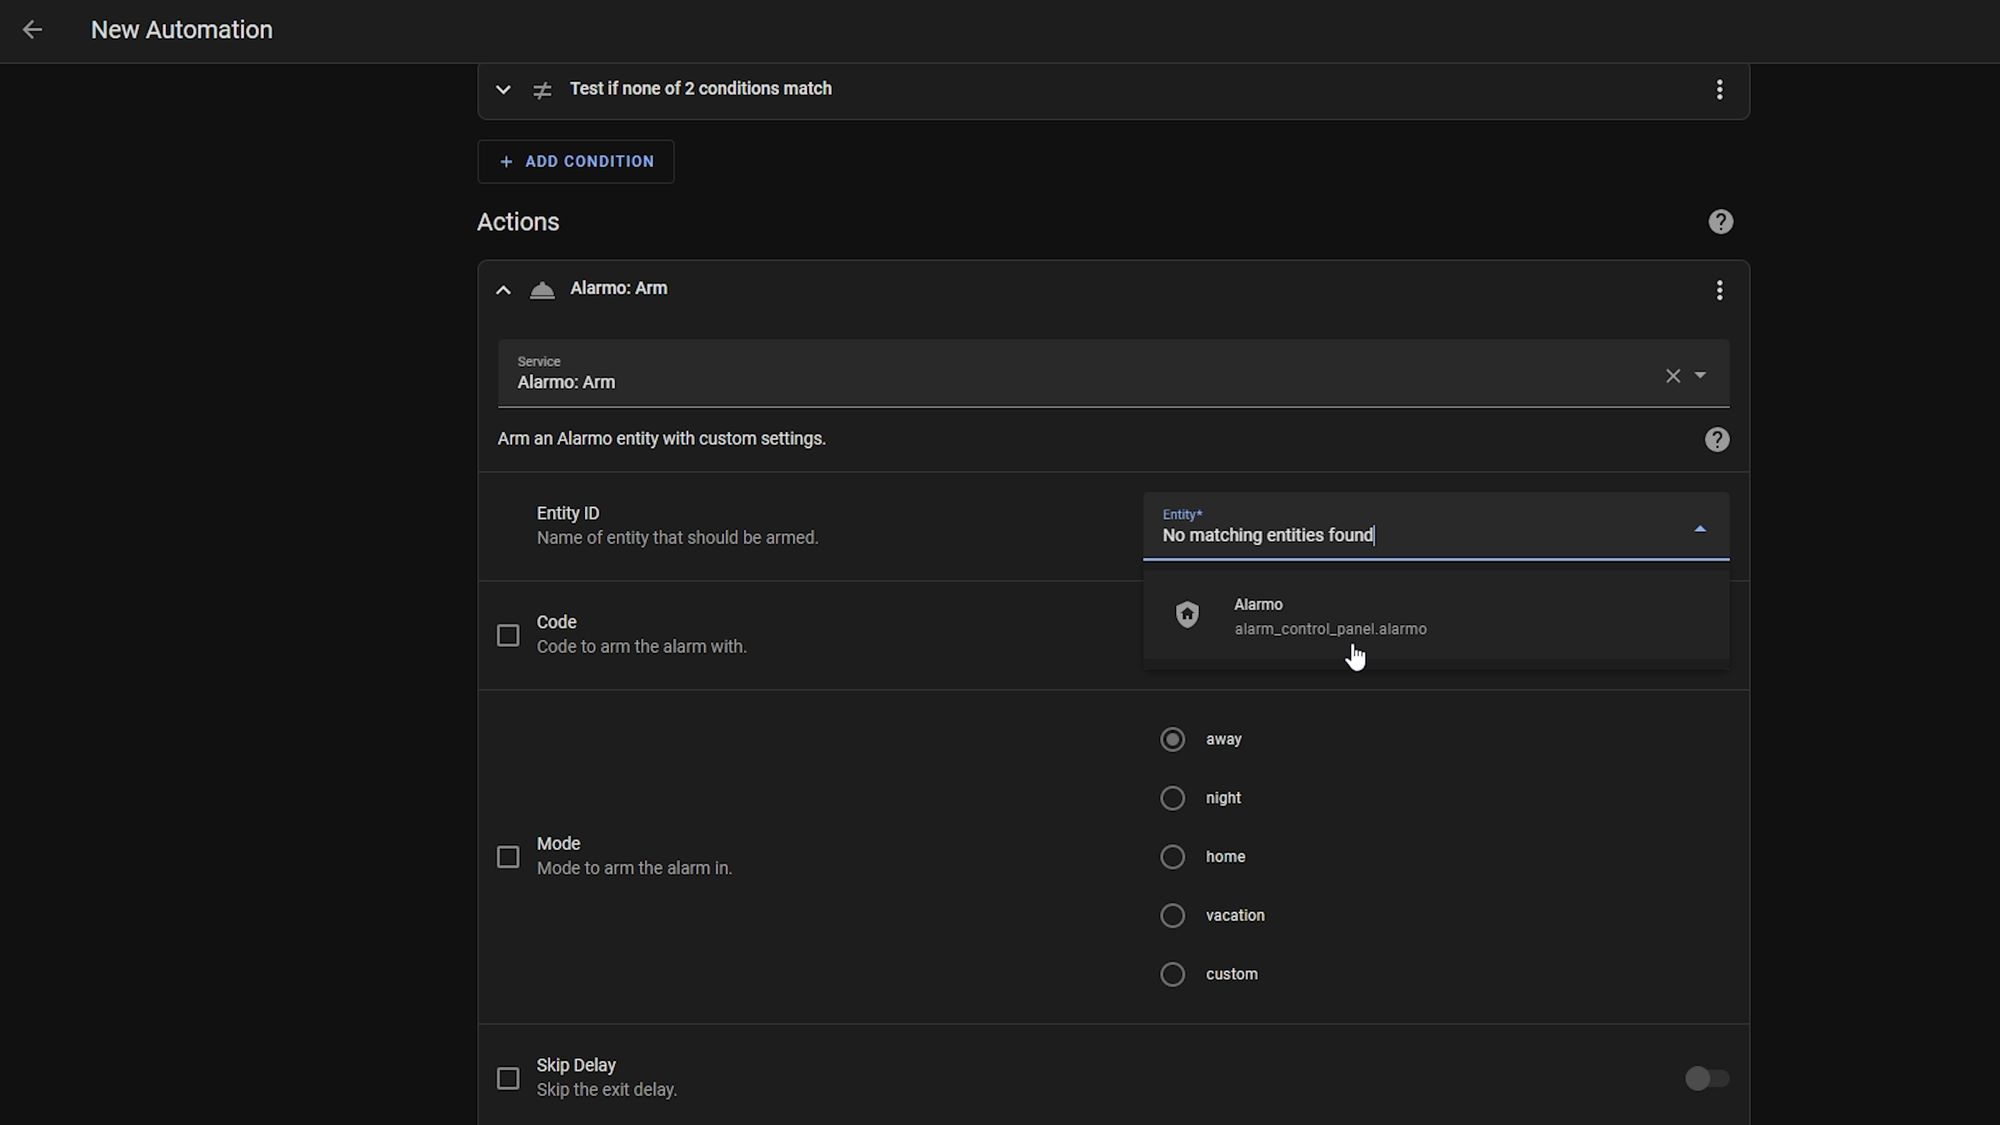
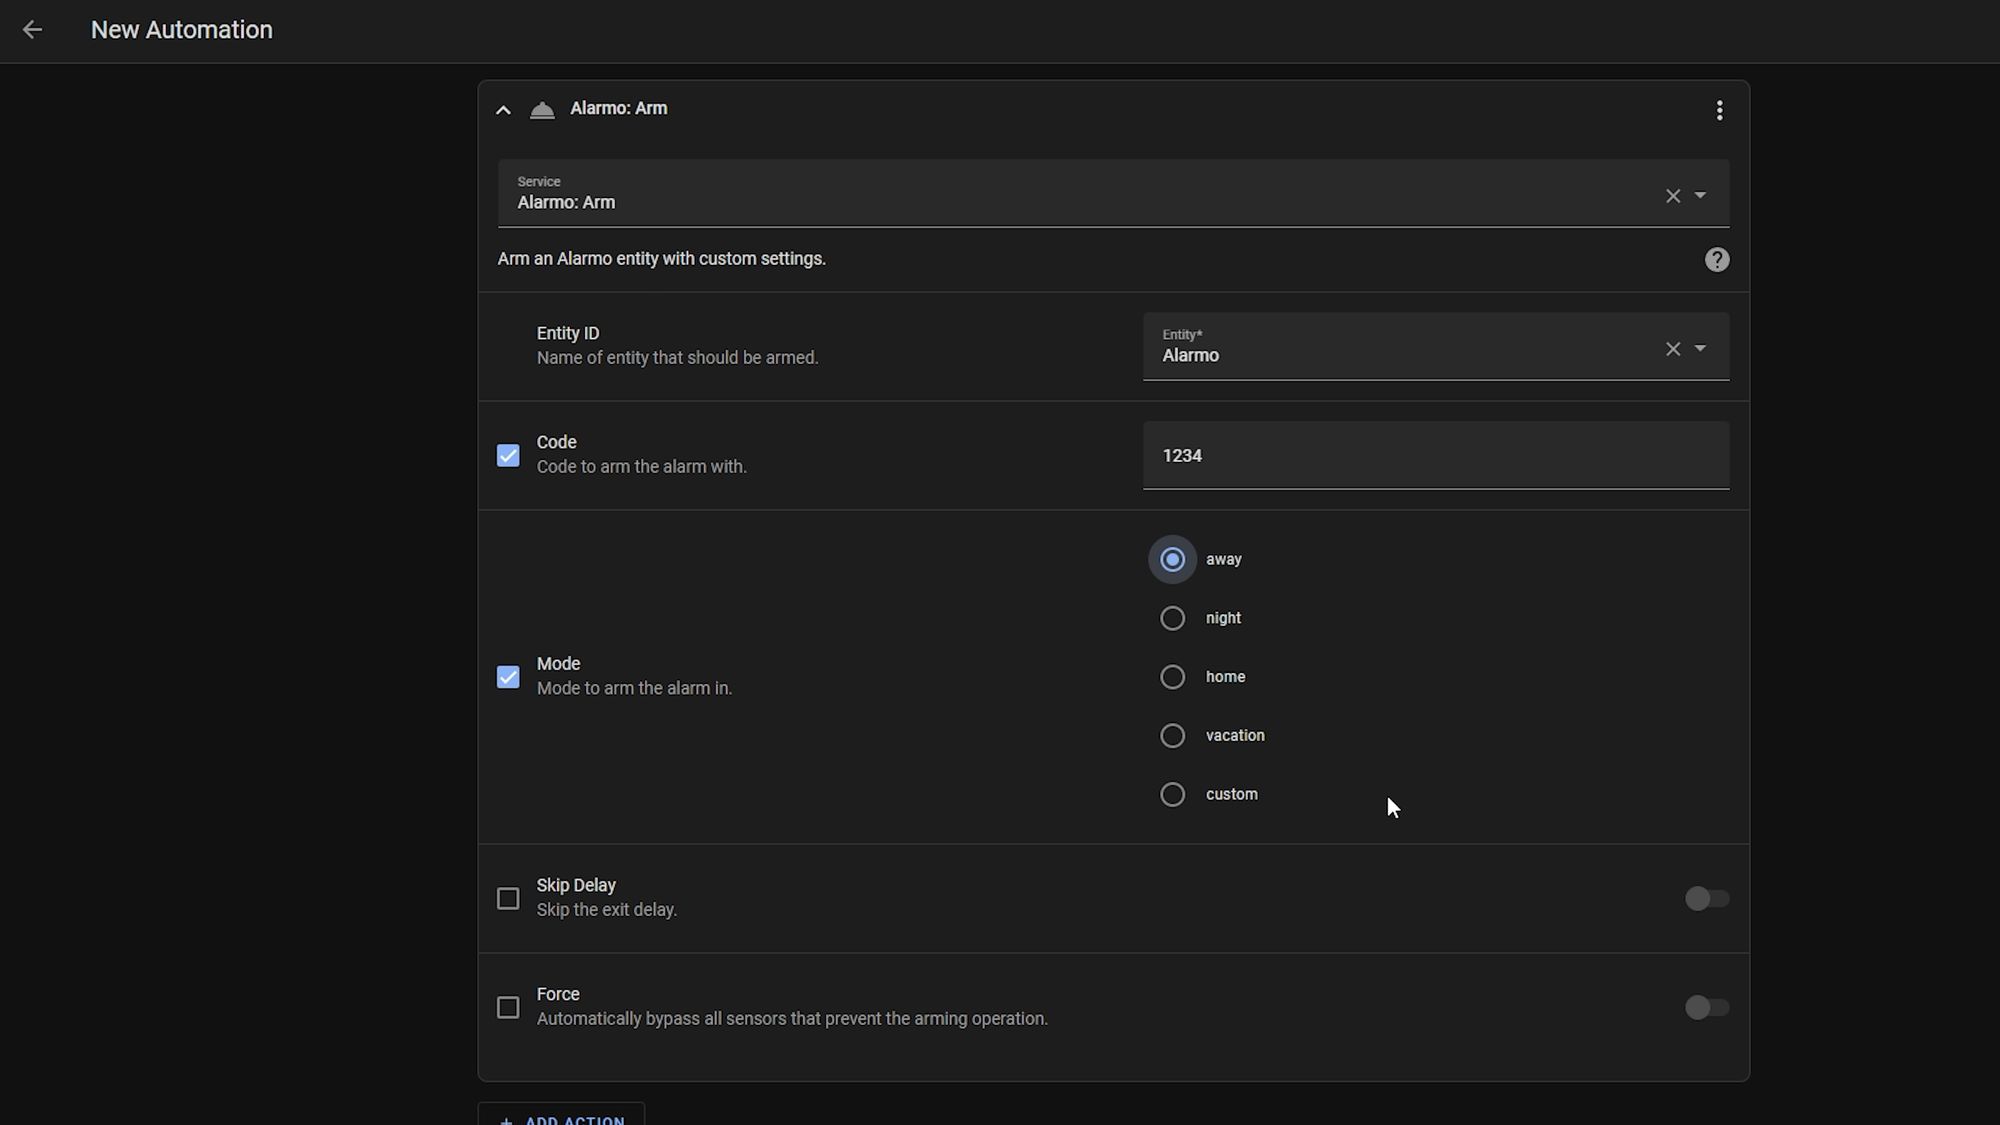
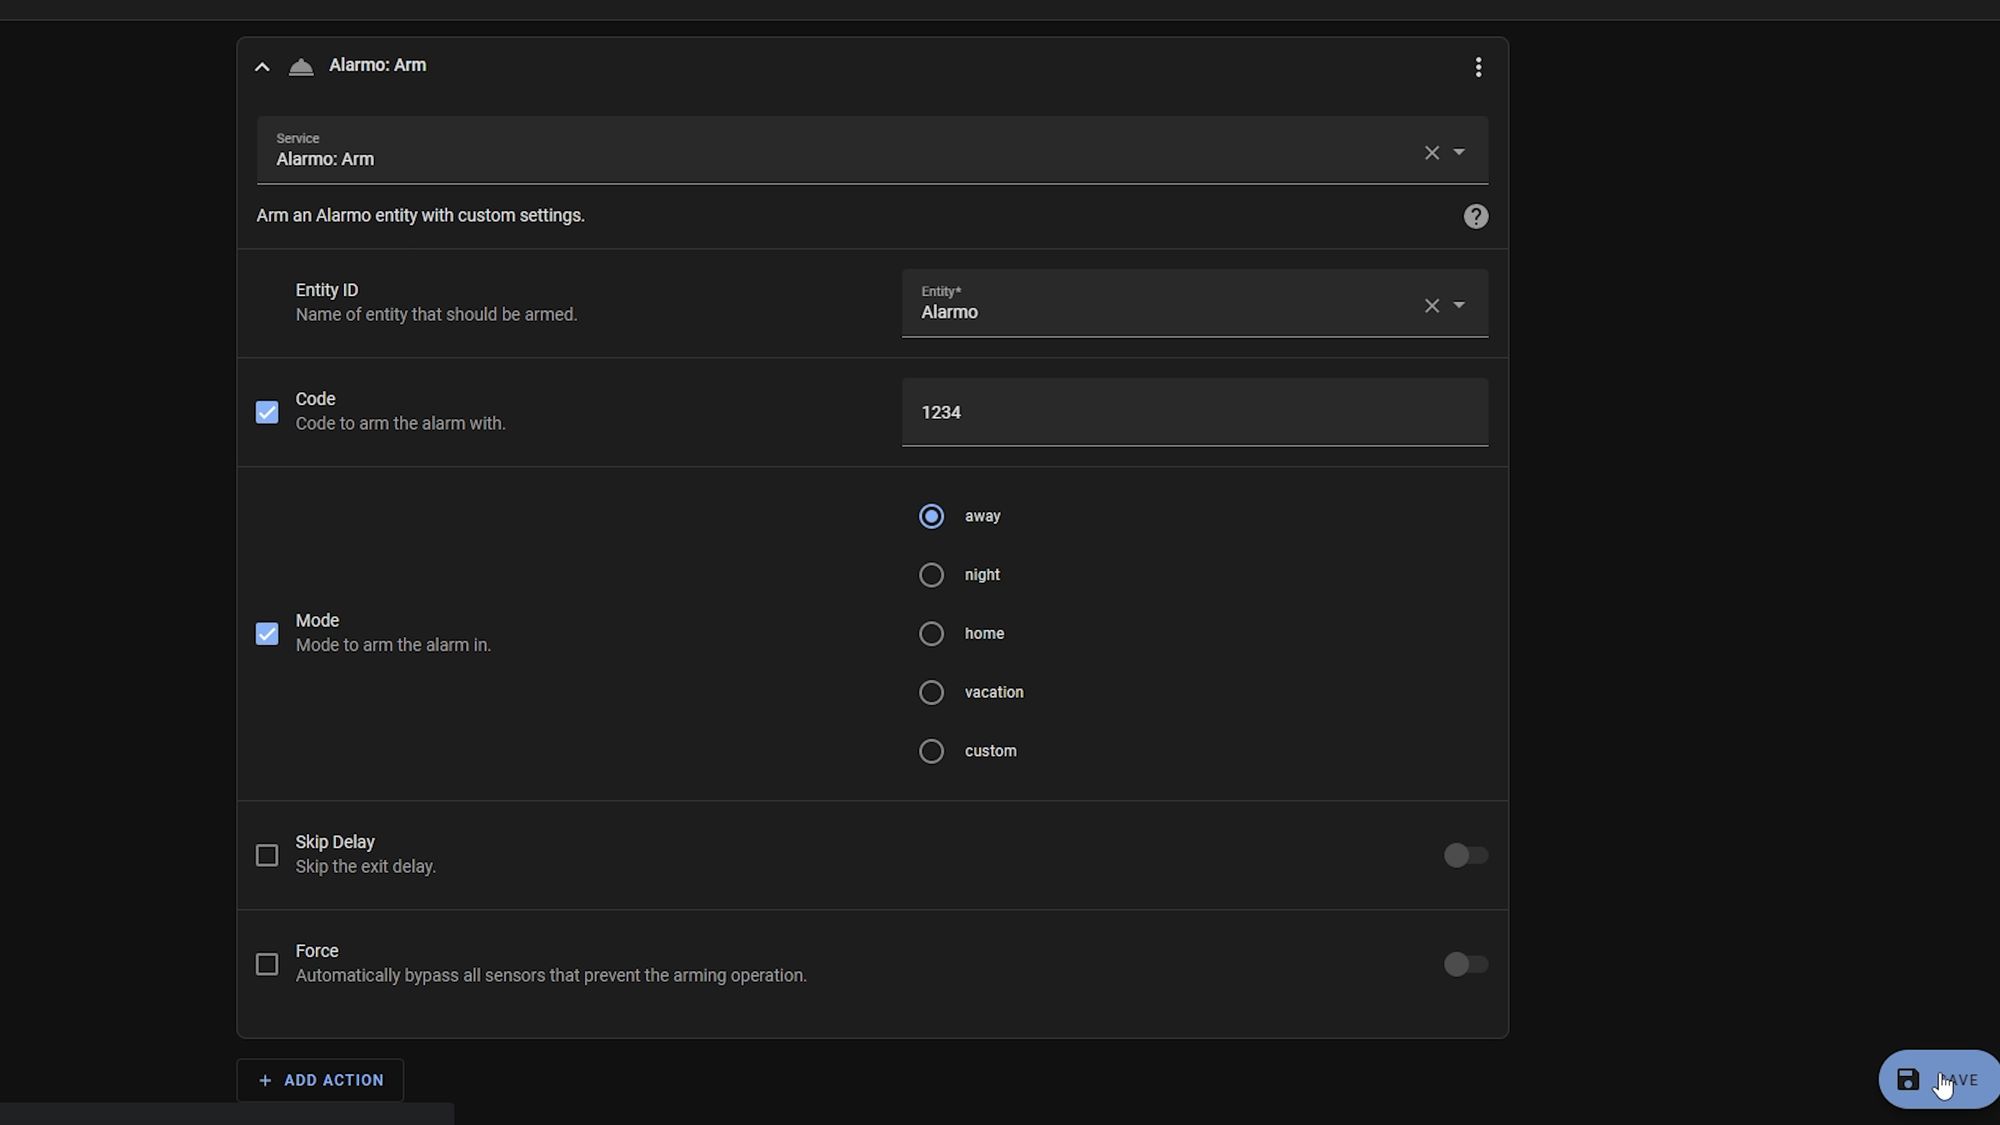
Under the action section, select call service, then in the service box, search for Alarmo and select the Alarmo arm service. Select your Alarmo entity from the box and enter a code if you ticked that option earlier.
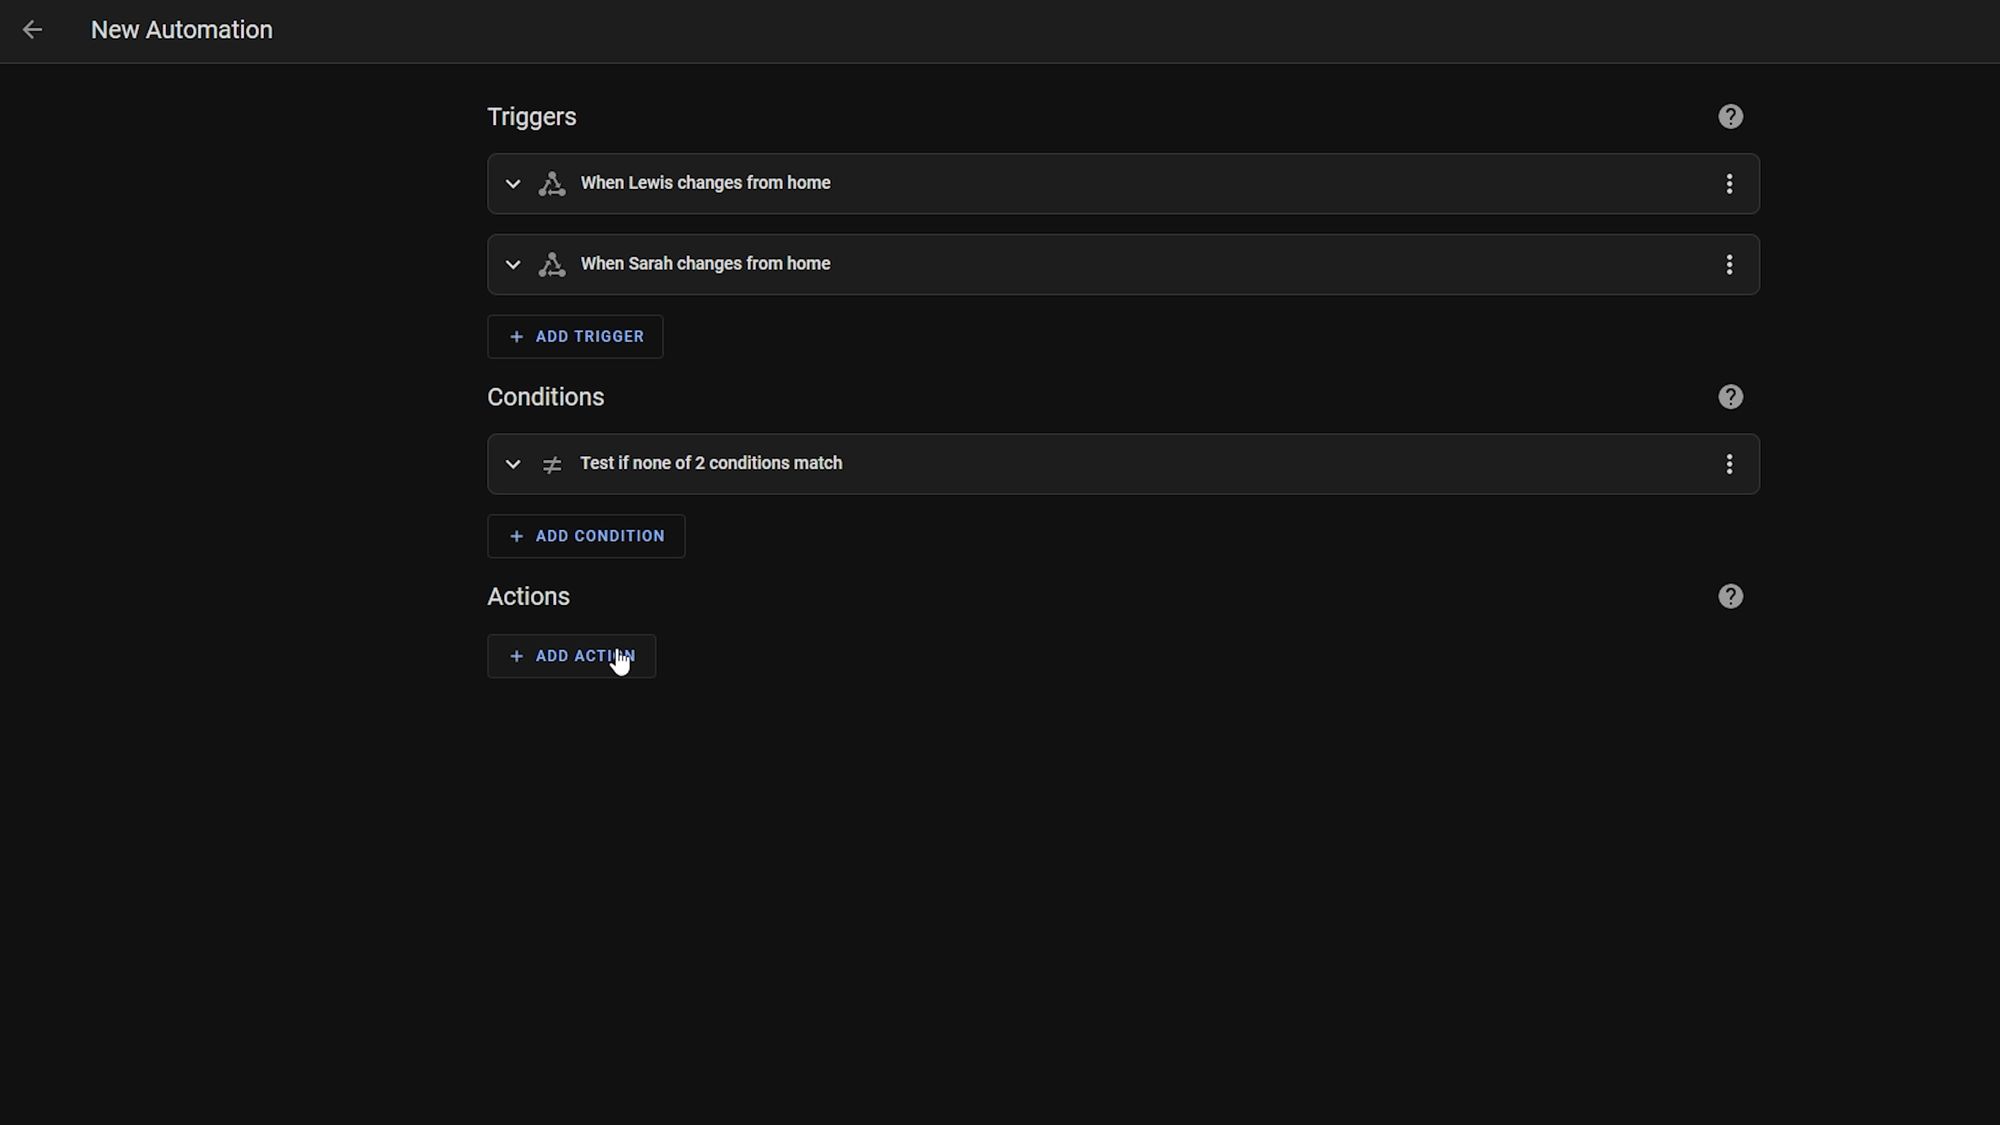

Finally hit save so it stores the automation and you are now done! Whenever you leave the house, the alarm should be automatically set, and then you will need to disable it on entry from your dashboard or keypad.

That's It!
There we go! That is how to go about creating an excellent, locally controlled and very customizable alarm system inside of Home Assistant, using hardware that you probably already have some of.
Now, there is a lot of information here to get everything up and running initially and there is a lot more you can do with this. For example, using the keypads, I have a Zigbee keypad that I have linked up to Alarmo which I have managed to get working with multi-code support so that then announces the person who disarmed the alarm on our speakers - this was a little challenging to get working but works really well! I also do some other stuff with our smoke and heat alarms, so if you are interested in seeing some of the more advanced stuff, let me know and we can do a follow up on that soon!
I hope this was useful to you and thank you so much for all the continued support!
Until next time...