Automate your Internet Usage with Home Assistant and Unifi

There are many reasons you may want to be able to automatically control devices on your network; maybe you want to disable your kids devices at a certain time so they can’t be up all night playing those pesky computer games or maybe you have indoor cameras that you only want to be powered on when you are away from home. Whatever the reason may be, if you have a Unifi network, then it is super easy to automate this however you want with Home Assistant and the Unifi integration.
Video
Pre-requisites
Now for this to work you are going to want to make sure you have both Home Assistant and a Unifi controller already running on your network. There are a couple of different ways you can control devices on your network:
The first way is devices connected to your Unifi Wireless Access Points. You can actually block or unblock clients meaning they physically cannot access the internet or communicate with anything else and you can also get stats from the device about how much bandwidth they are using and things like that.
The second way is if you have a Unifi switch, then you can physically control the ports on that switch to turn them on or off – great for if you have internet curfews or something similar. You can actually even control the power over Ethernet for those switch ports meaning that you can physically cut power to a device if you wanted too, giving you that extra peace of mind!
Creating a Home Assistant User
First thing we are going to want to do is head over into your Unifi console and we are going to want to add a new user – if you are using a cloud-key then you will find this in the apps button in the top right hand corner – then click on users. If you are using a standalone controller, it is in Settings > System Settings > Admins:
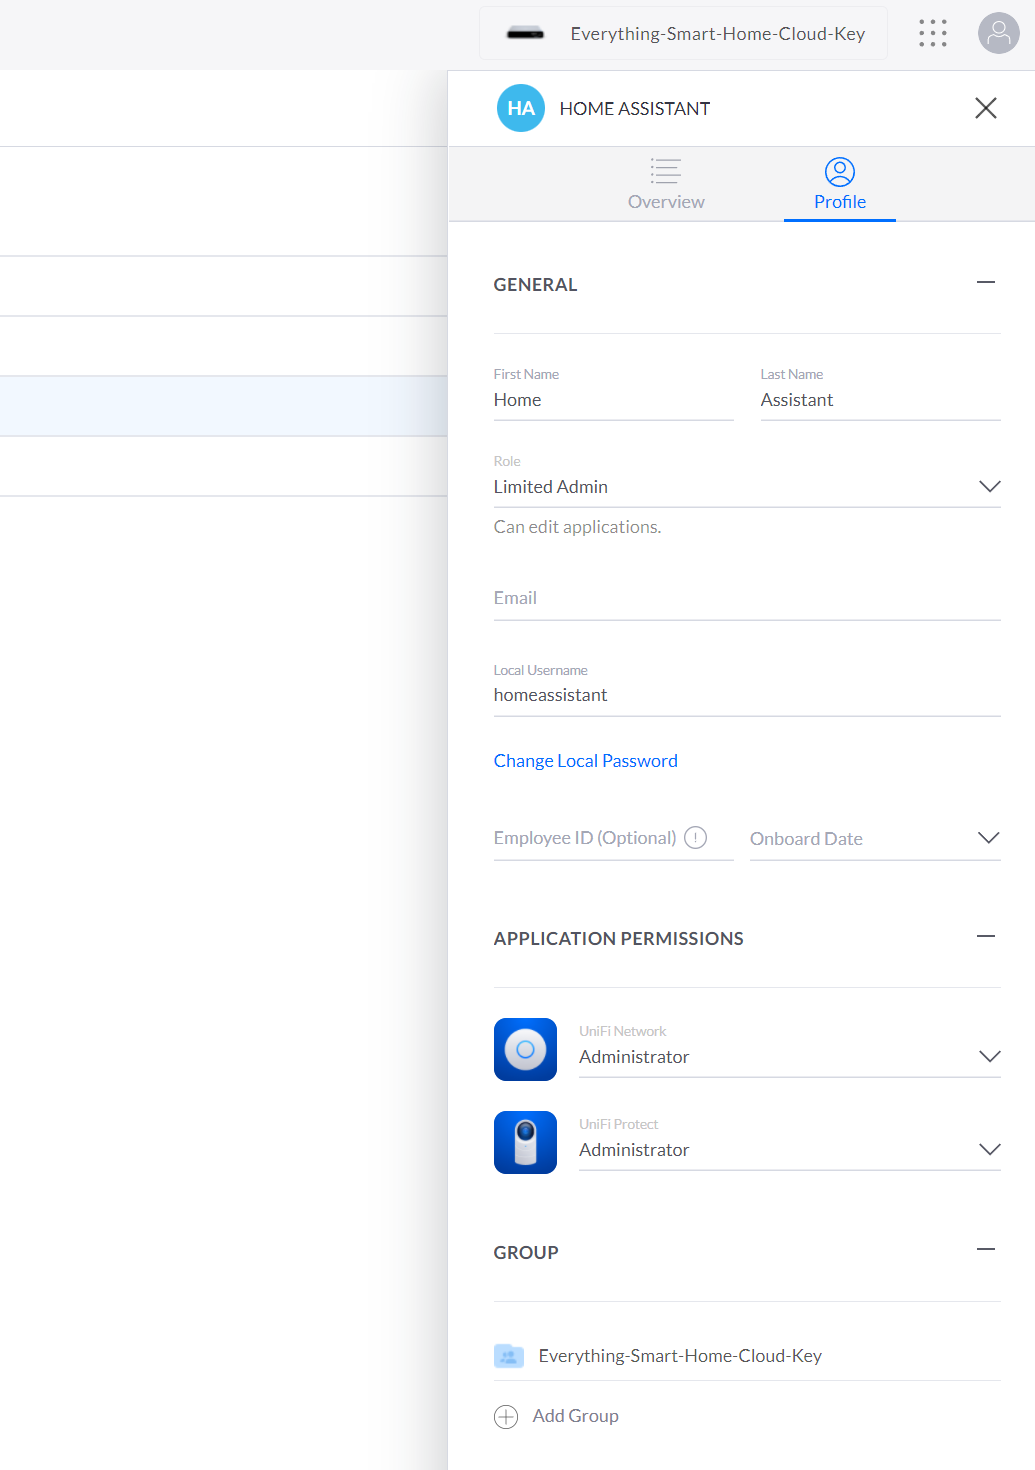
From here create a new user and you’ll want to make sure that this is a local account rather than a cloud account, then fill in the username and password and set it to be a limited admin. If you don’t want to control anything and you just want stats, then read-only will do but otherwise set administrator privileges. Make sure to save, then head over into Home assistant and into Configuration > Integrations.
Home Assistant Integration
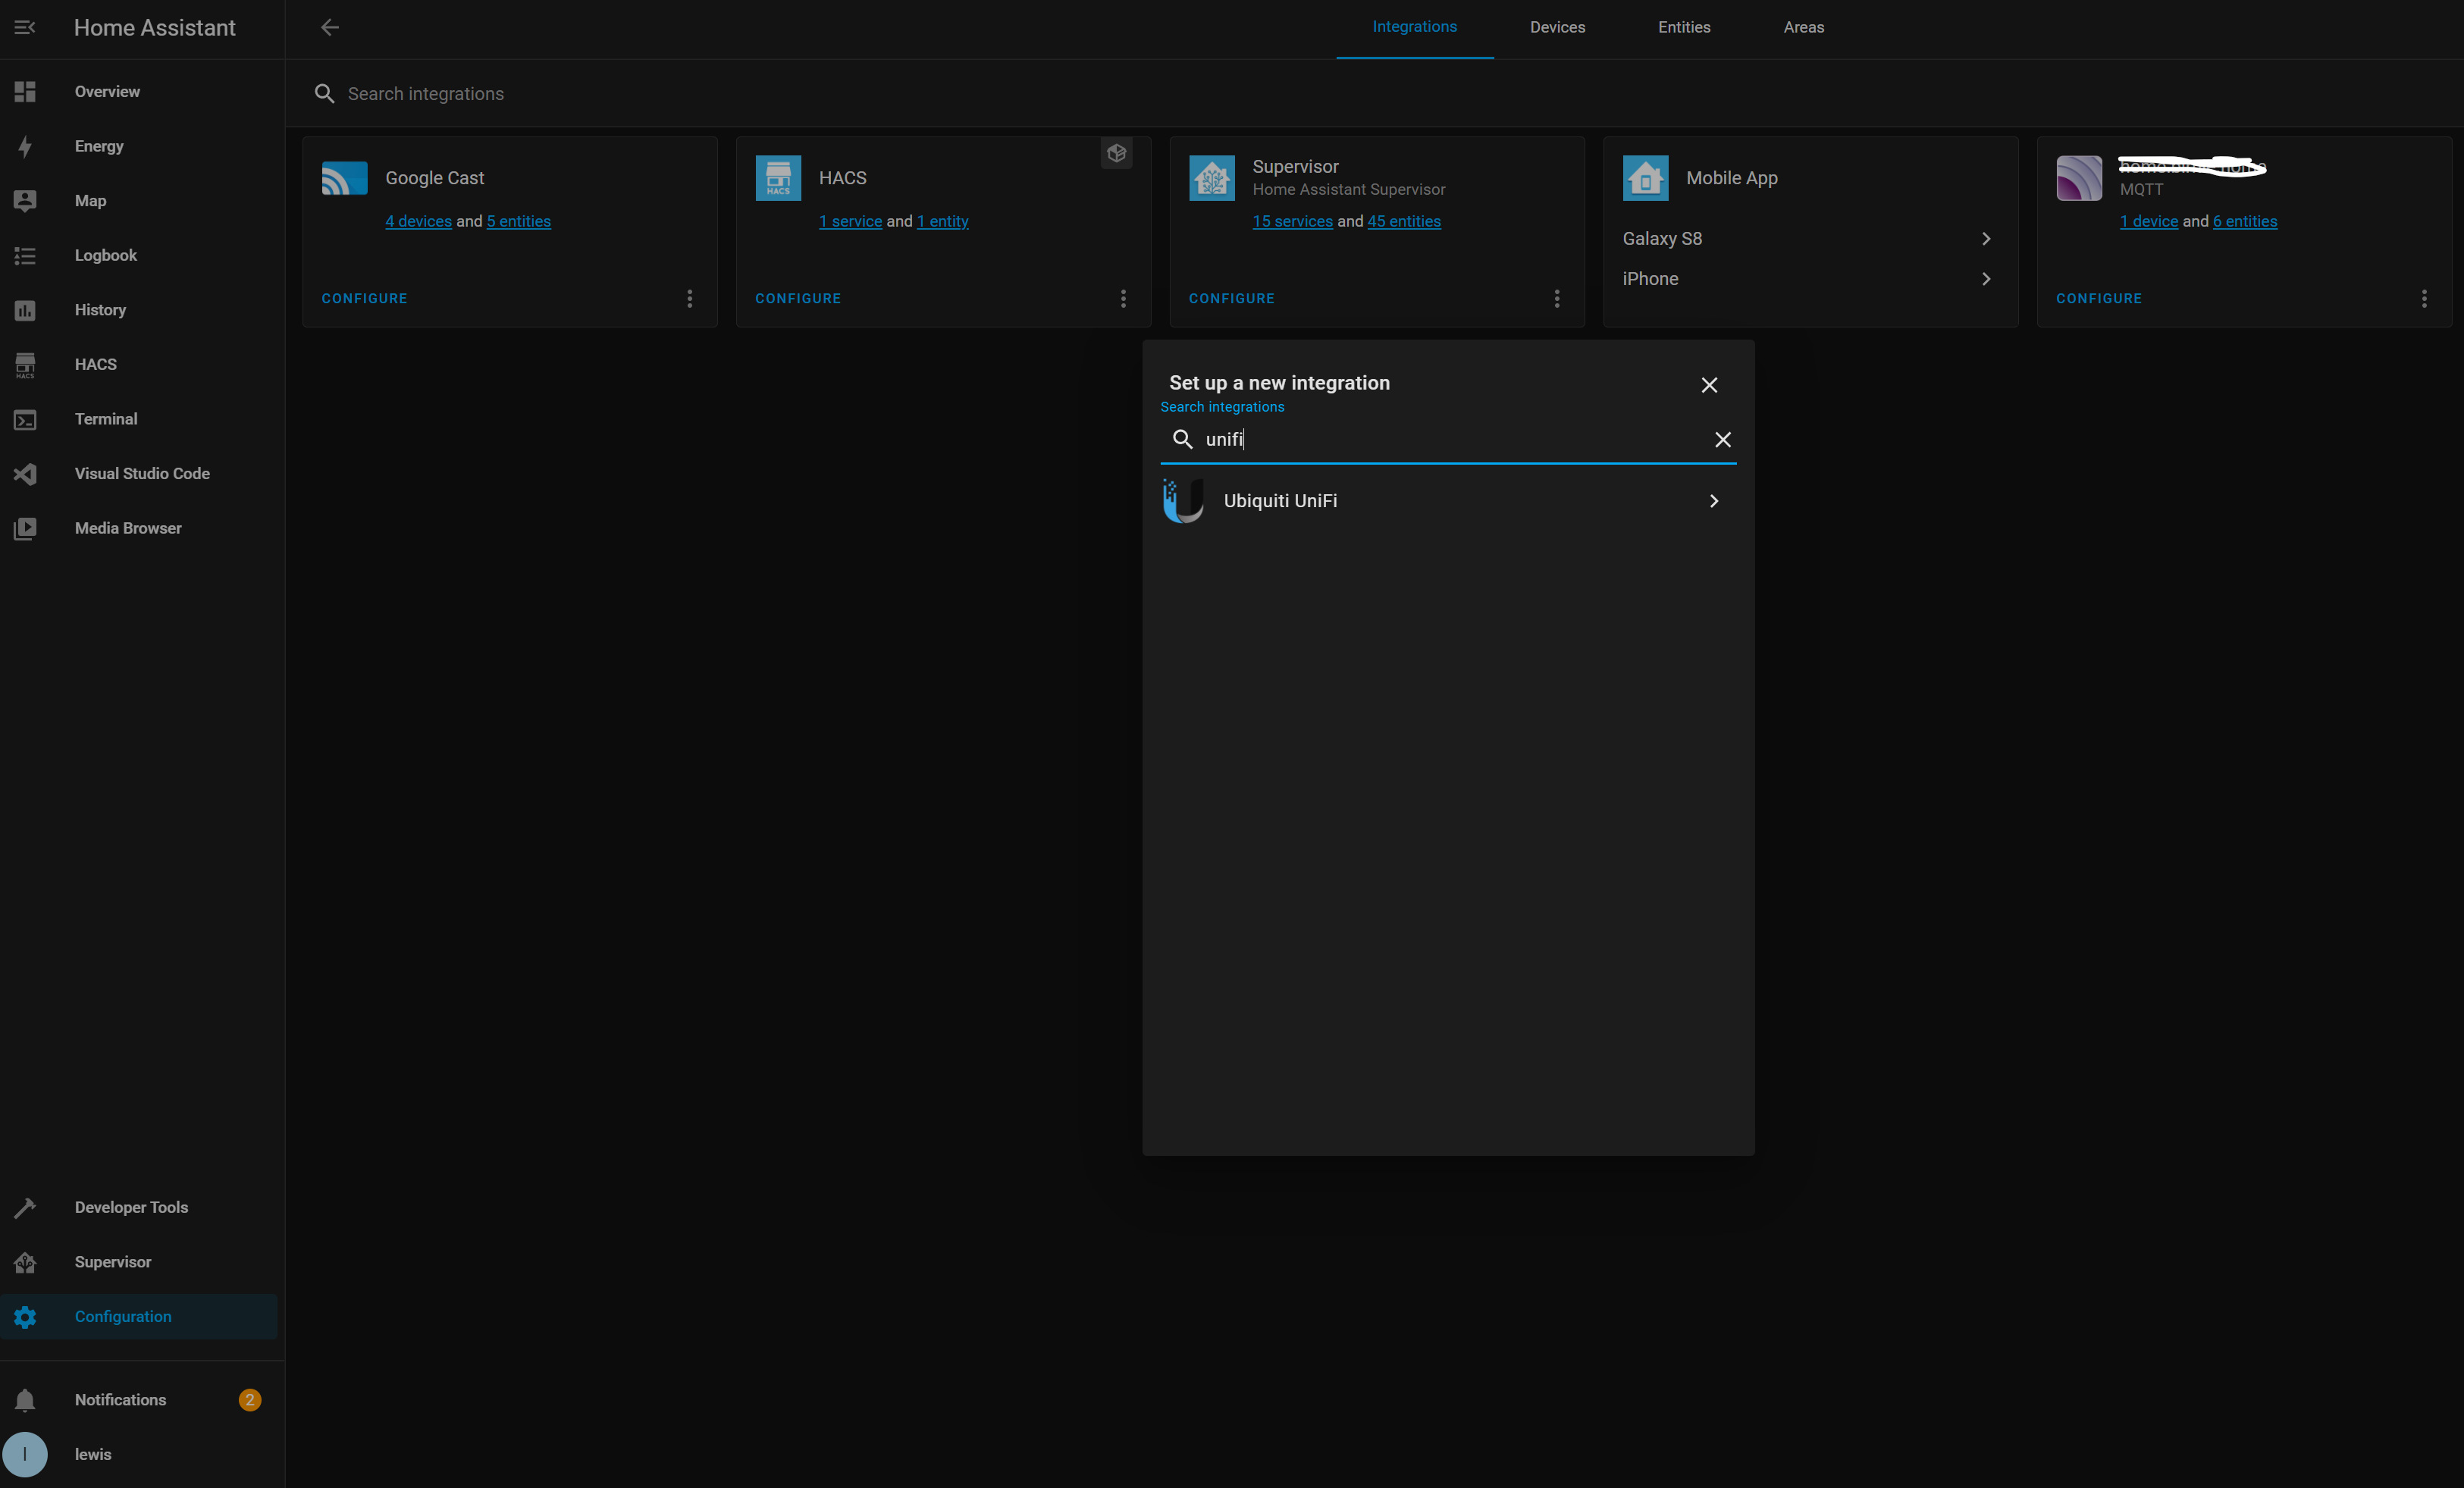
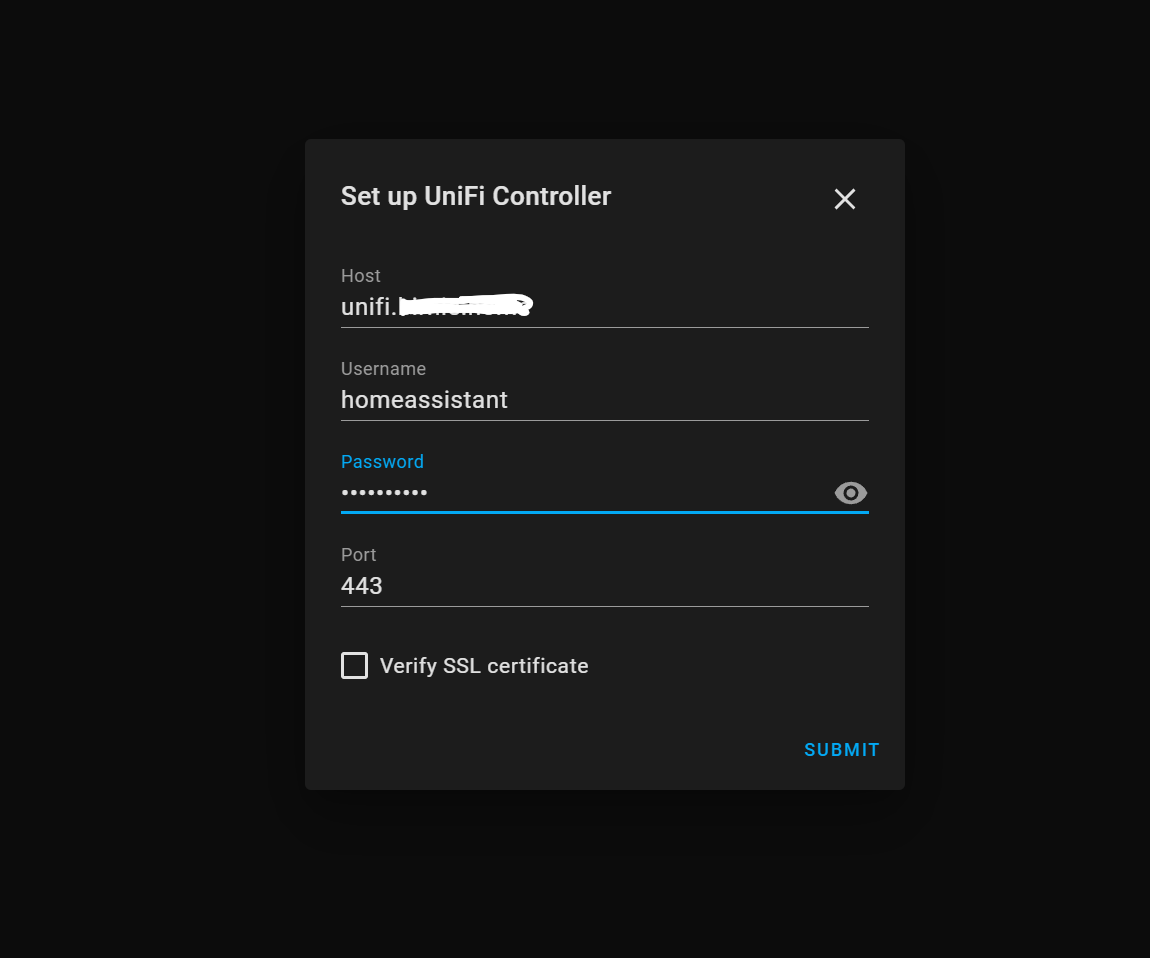
Now we are going to add the Unifi Integration to Home Assistant. From the Integrations page, hit the plus button in the bottom right hand corner, then search for Unifi. In the host box, enter the hostname or IP address of your controller – try to use hostnames where possible – and then enter the username and password for the home assistant account we just created.
For the port you will want to enter port 443 for cloud key, or for standalone you will want to enter 8443. Hit submit and then you can select the site you want to add, either the default site or another if you have it configured:
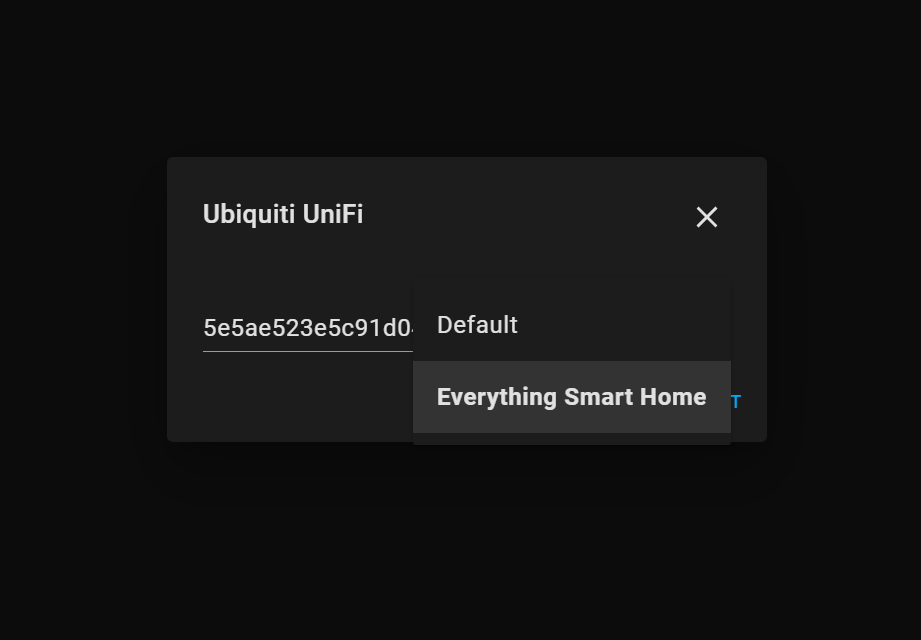
Hit next and you should see all your devices pull through and then hit finish.
What we have done now is add all of our devices as device trackers, so that we may use them for presence detection to see who’s home and who is not. However, we are going to take this a bit further by now adding devices we want to be able to control wifi access and port status.
Configuring Access Control
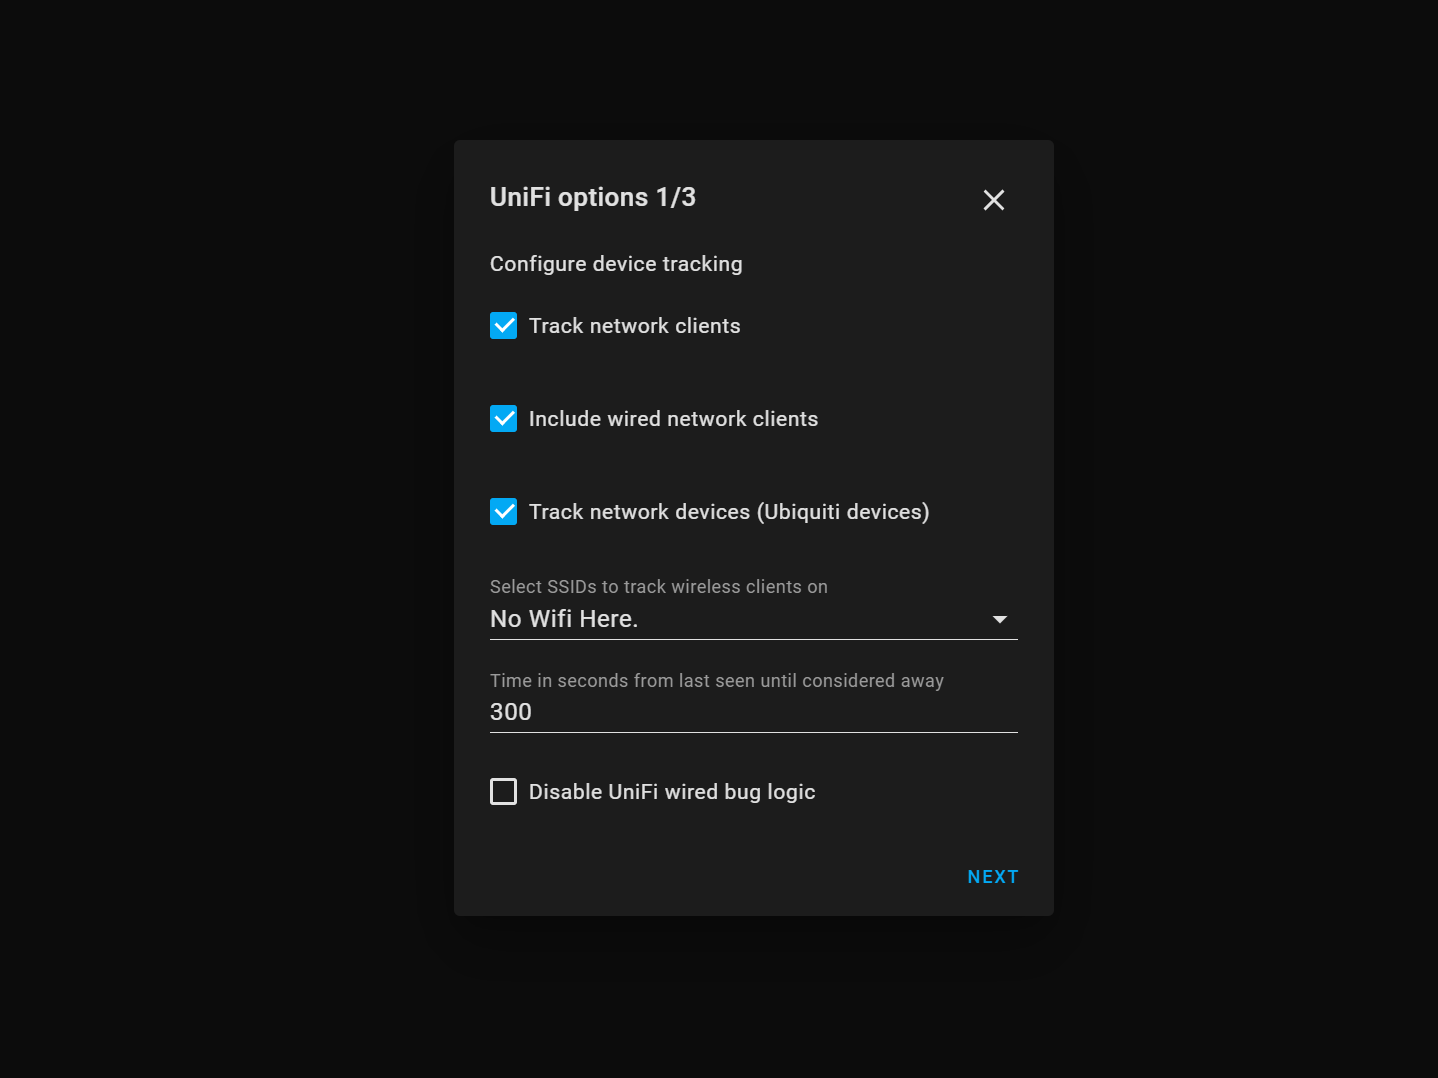
So hit the configure button on the Unifi integration we just added and from here we have a few pages of options to configure.
Firstly, you will want to check or uncheck these options as you see fit – having all of these ticked can add quite a lot of new entities to your network depending how large it is – but it is useful for tracking devices for presence. It’s not an issue having lots of new entities added but it may clutter up your device list if you prefer to keep things clean!
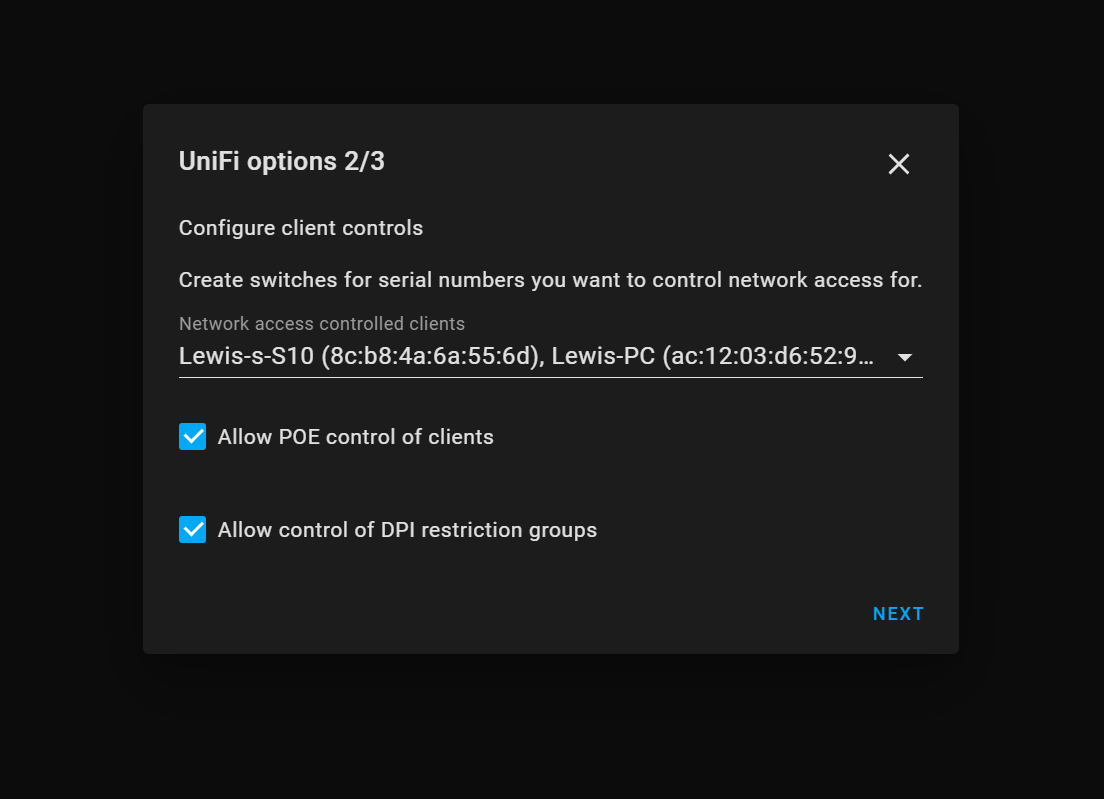
On the next page we have the options we are looking for, which is for access control. From here select all the devices from the drop down that you want to be able to control network access too. You may also want to tick the allow PoE control of clients option, this is really useful. For example, if you have an indoor camera that you want to physically cut the power too if you are at home so that you know for sure that not only is it not connected to the internet, but in fact it’s not even powered on.
On the final page you can then select if you want to have sensors that track bandwidth usage – this could be useful, if say, for example you wanted to disable a device after a certain amount of data had been transmitted.
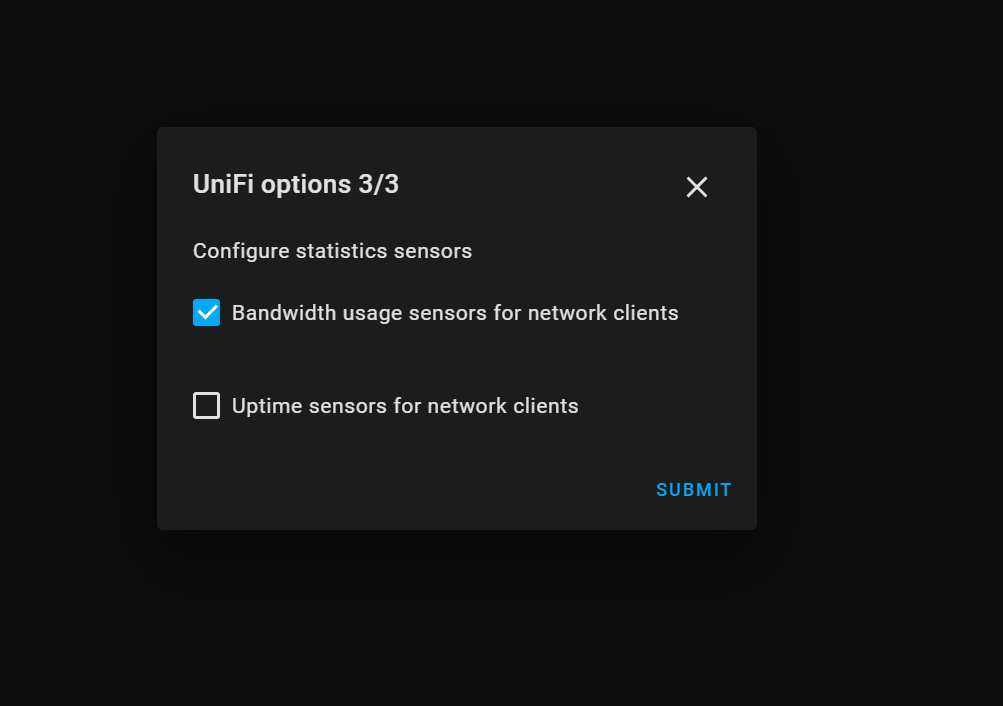
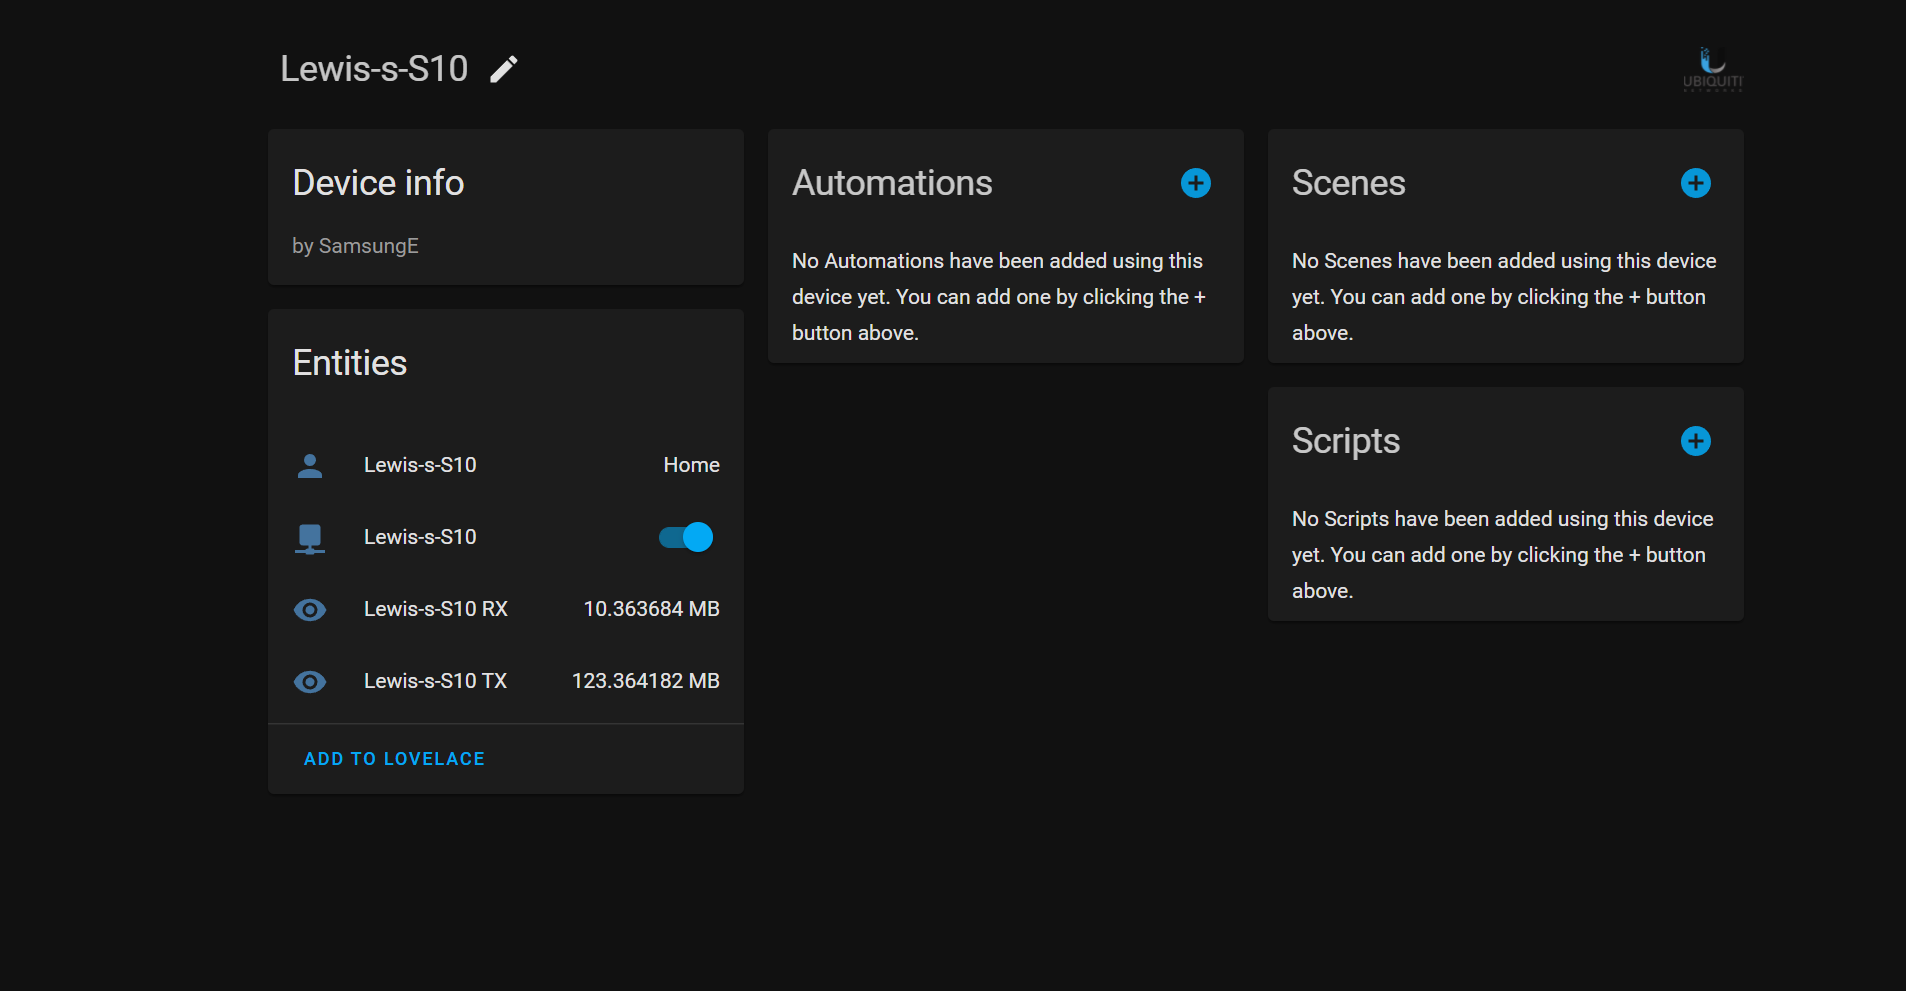
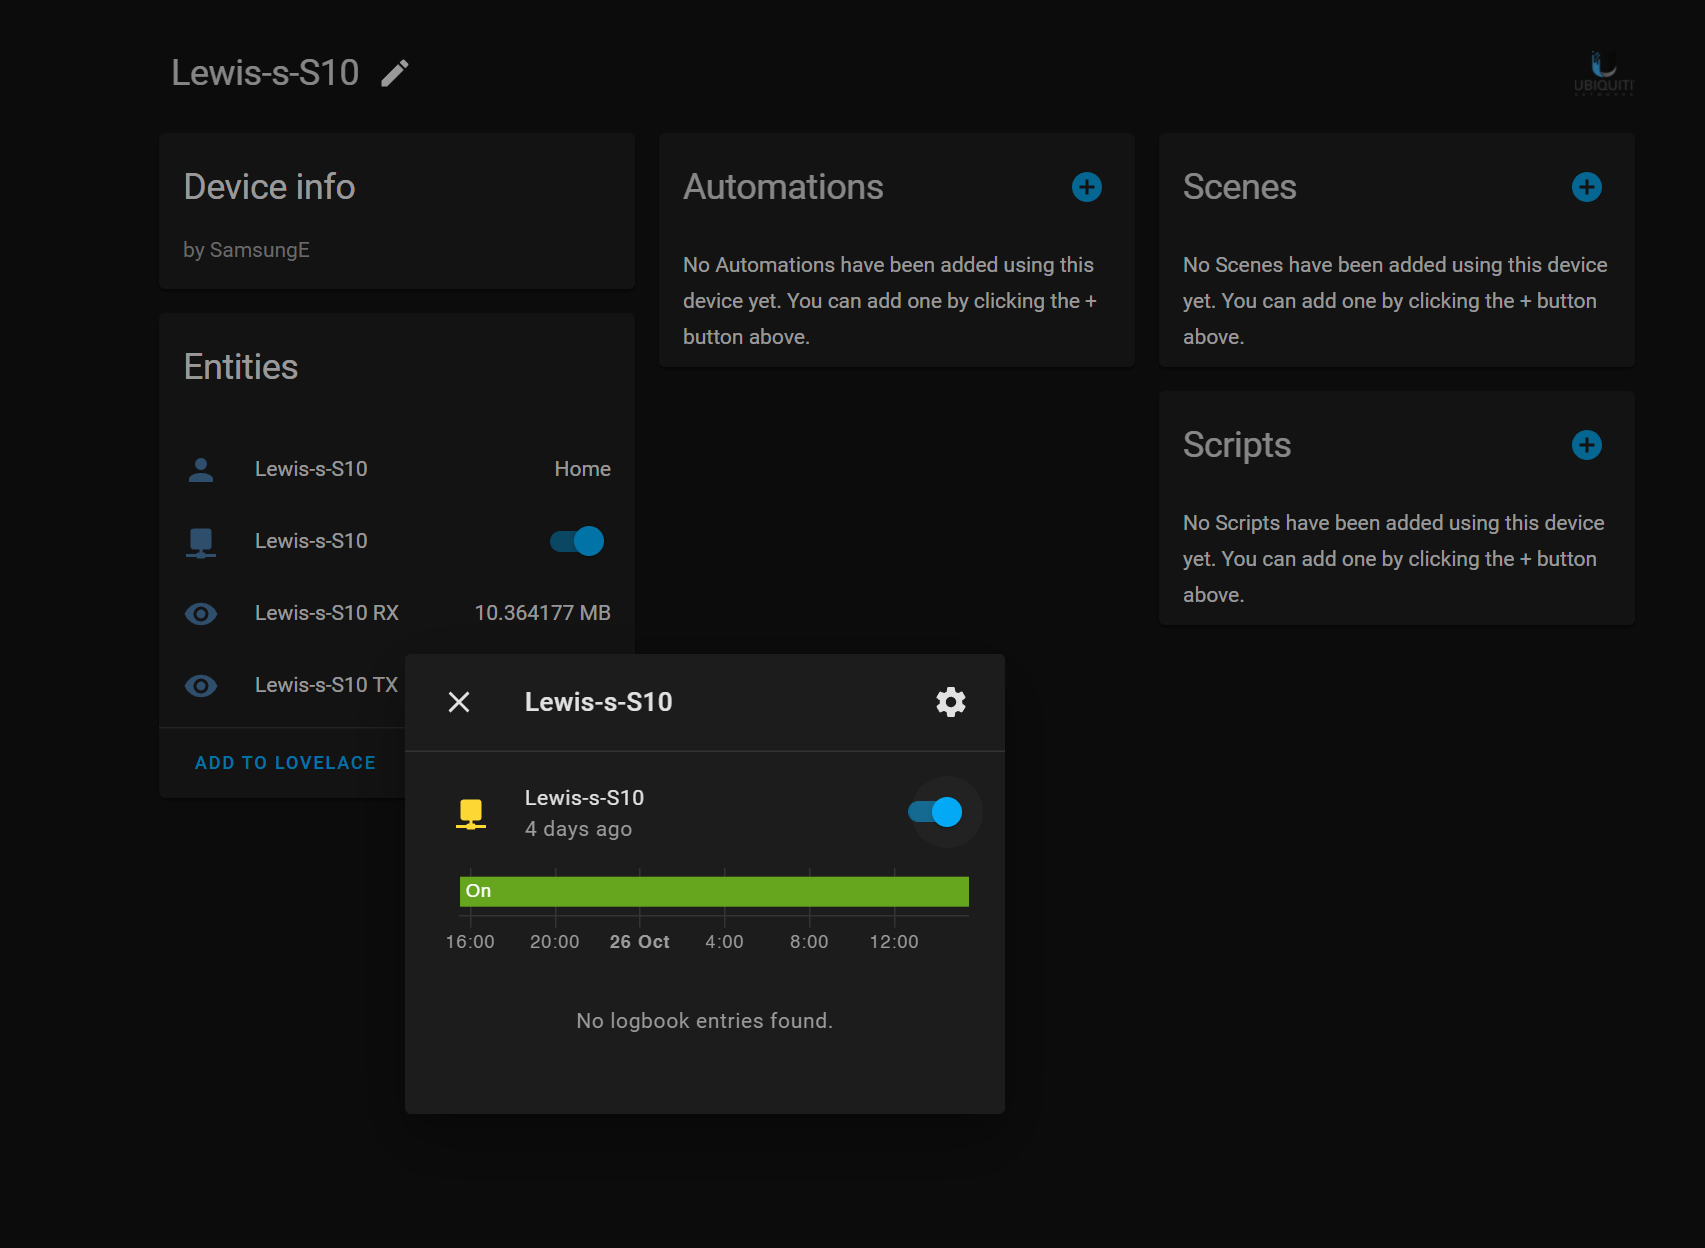
Hit submit and then if we go into devices and pick one of the clients from the list that we selected from the drop down, you can see we now have a switch on it.
In this example, this is a Wifi device and so we get a little toggle switch with the network symbol. Toggling this switch will cause the client to be immediately permitted or denied network access.
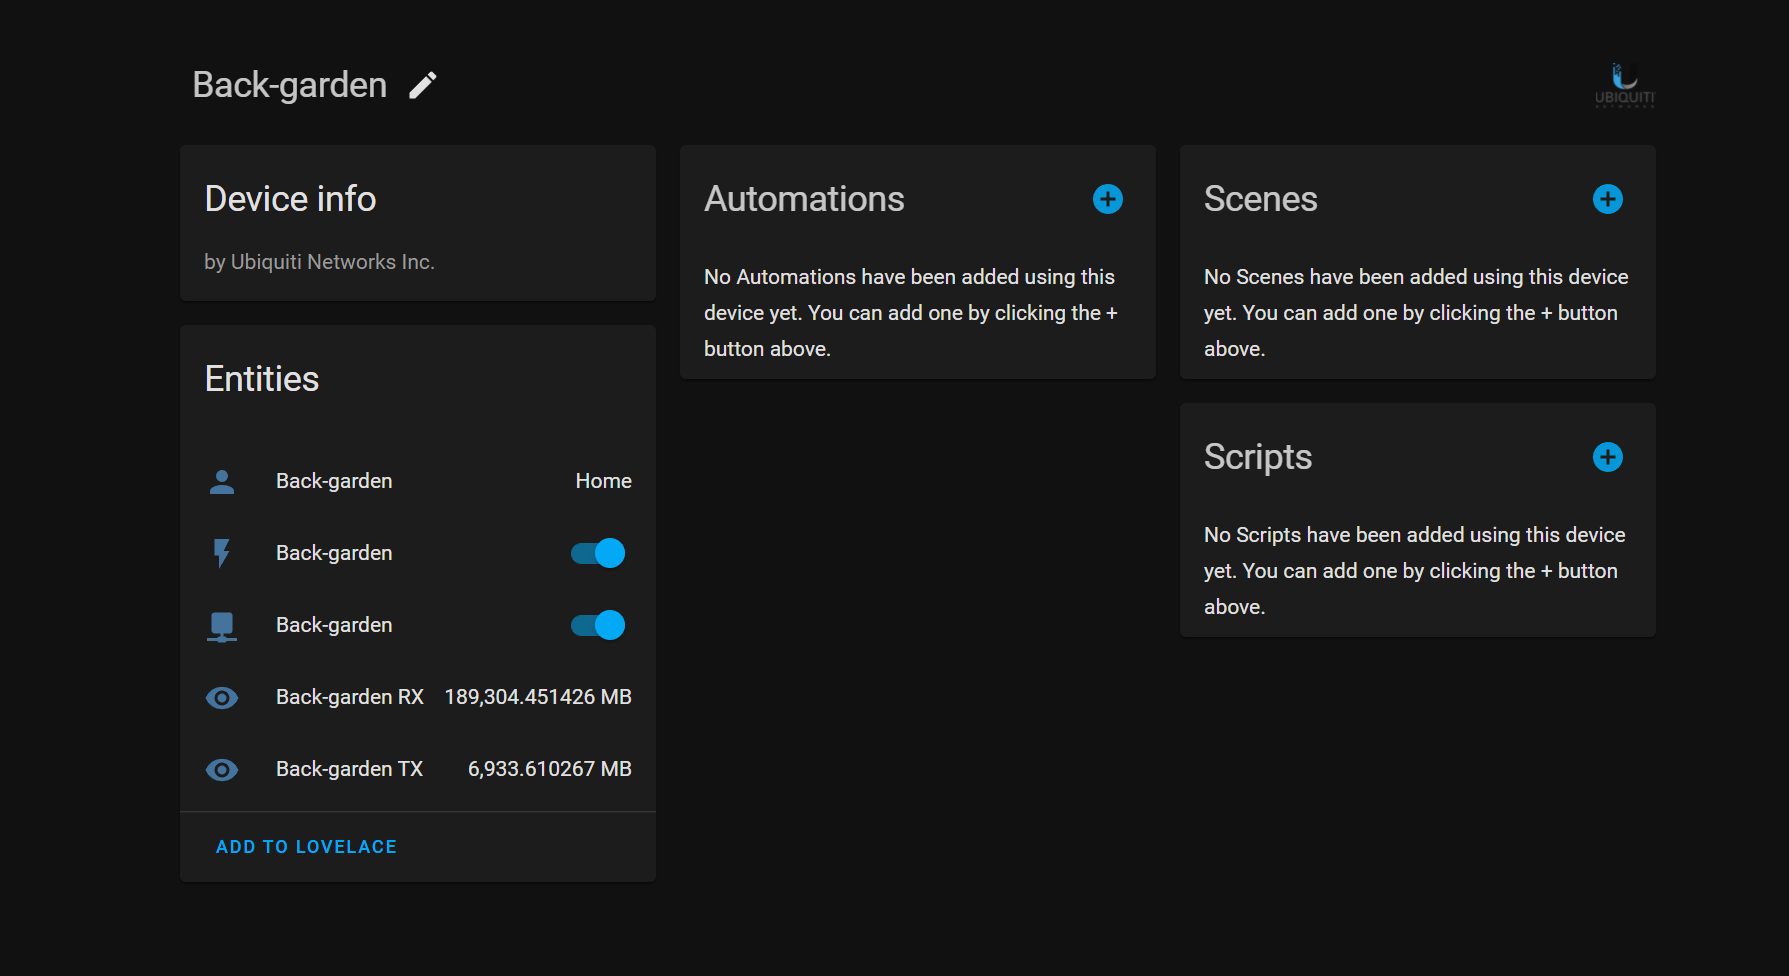
If we then switch over to a wired PoE client like my back garden camera, you will see that the switch looks a little different, and thats because this is controlling the PoE port on our switch. Network switch that is, not Home Assistant switch….you get the idea! We can look in the attributes of this switch and see information about our PoE values and if we toggle it, this will cause the power over ethernet for that particular port on our Unifi switch to be disabled; meaning the camera is no longer receiving power and obviously cannot communicate.

Home Assistant Automation Example
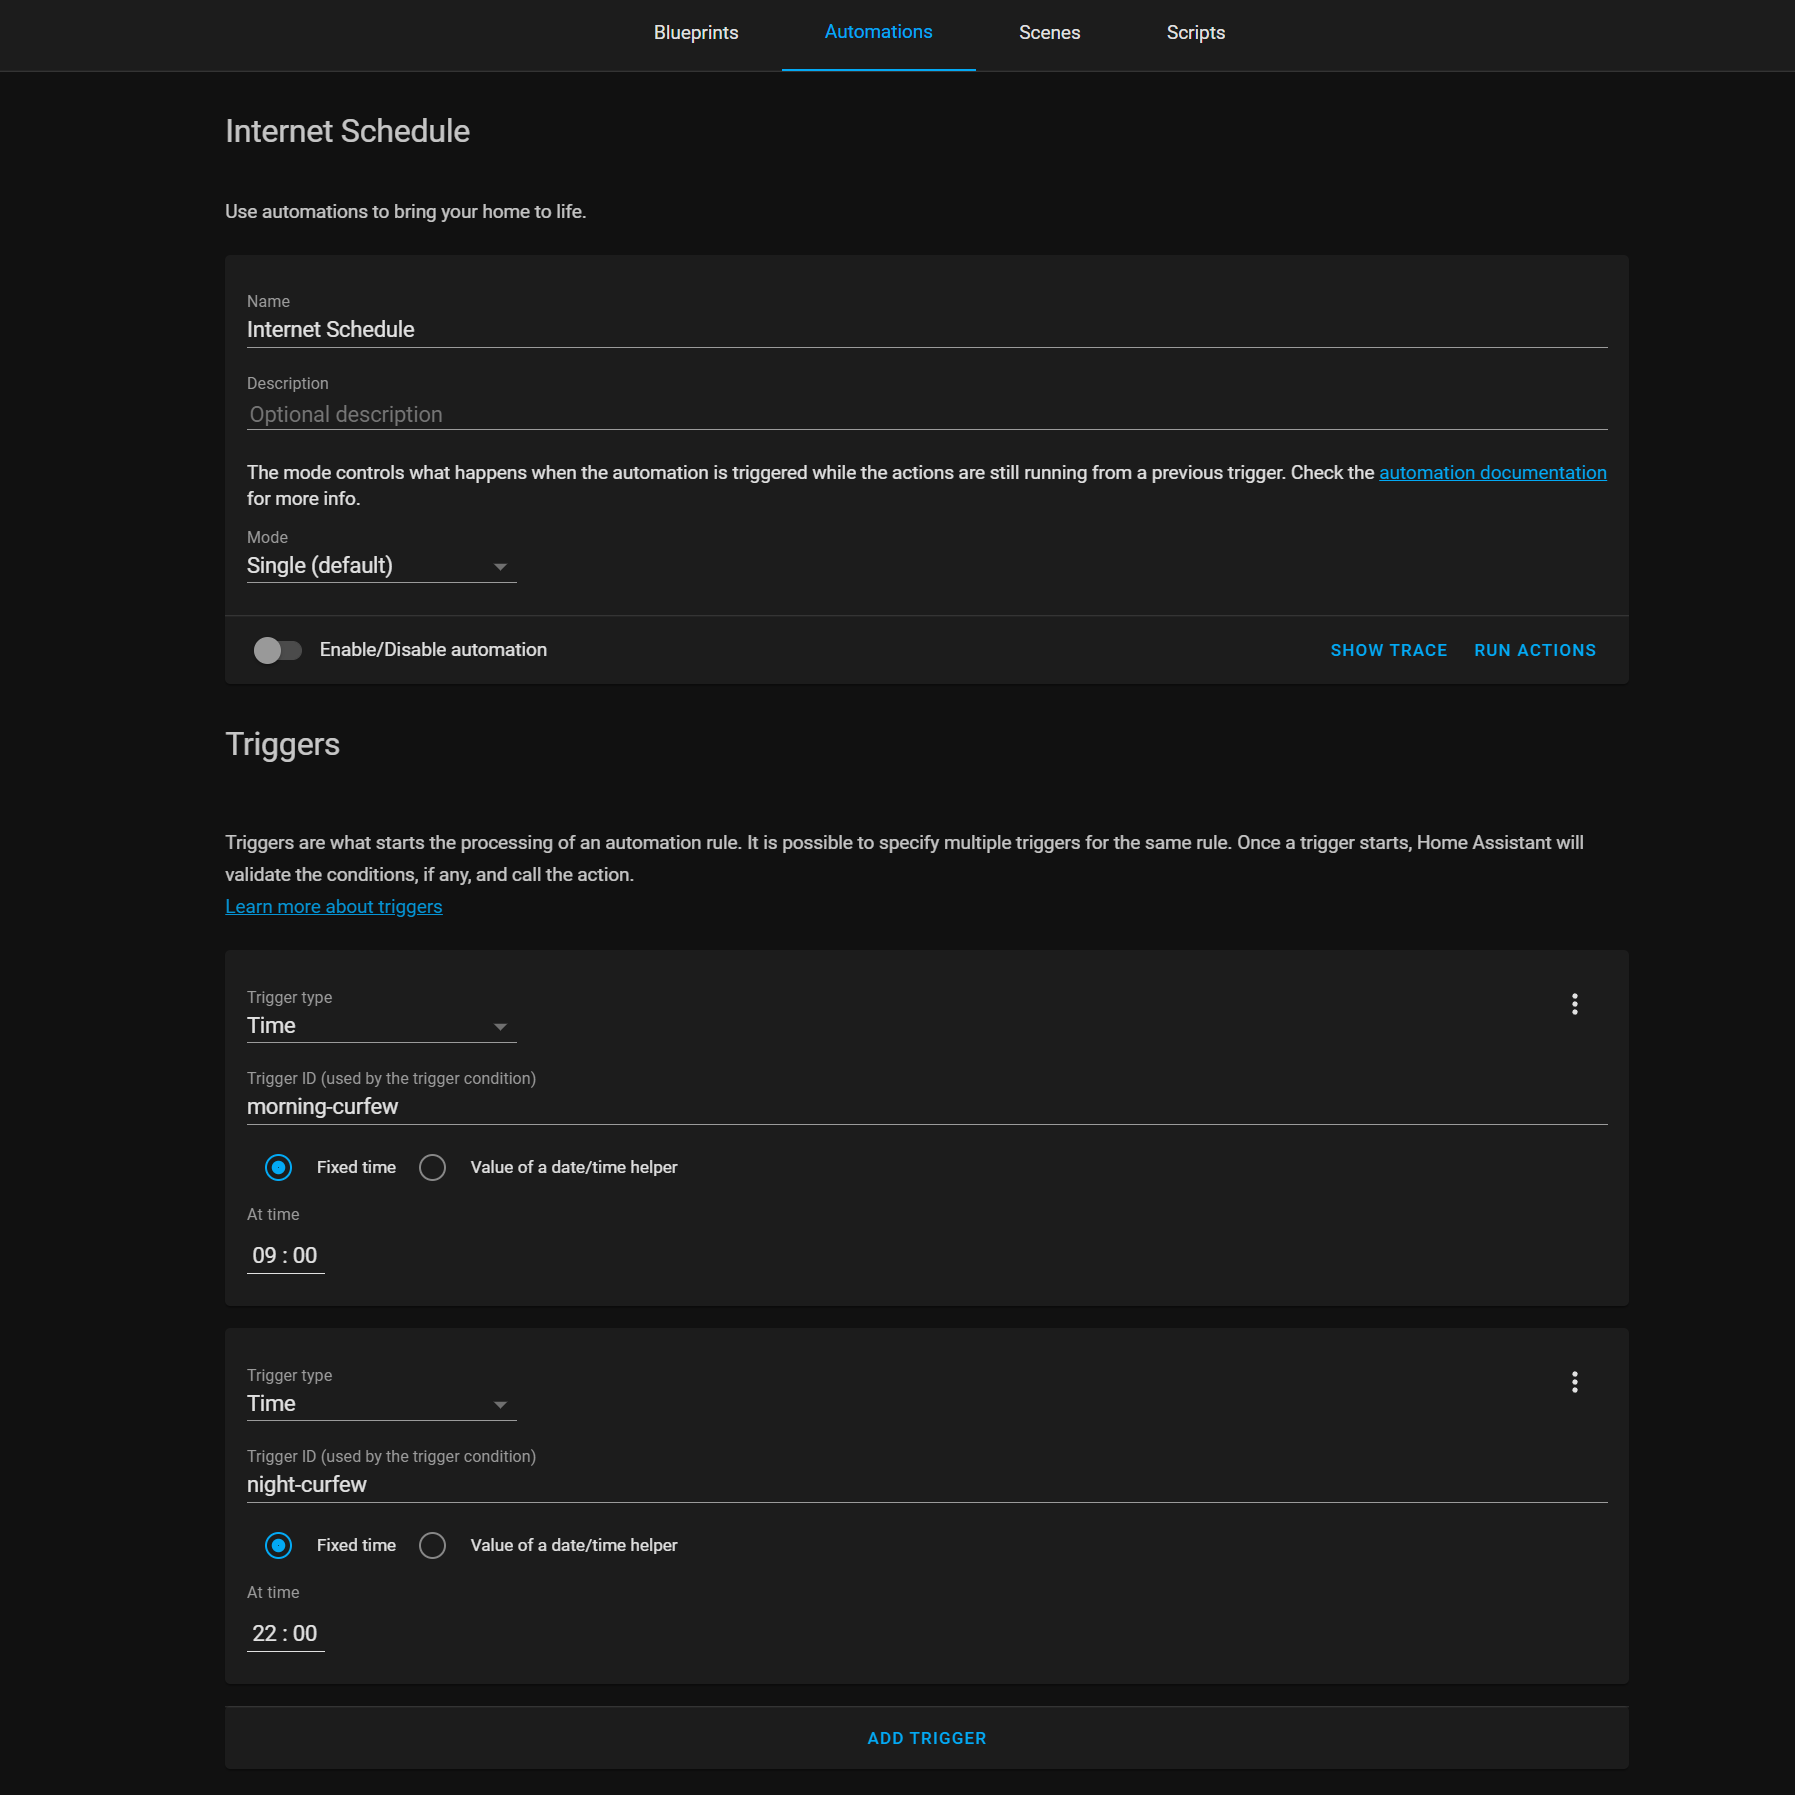
So lets put this into practice by creating a simple automation. Head over to configuration and automations then create a new automation and, for example, if you wanted to create an automation that turns off network access for a device at 10pm and turns it back on again at 9am, you could do something like this. Create two triggers, one for time at 9am and one for time at 10pm, making sure to set trigger IDs:
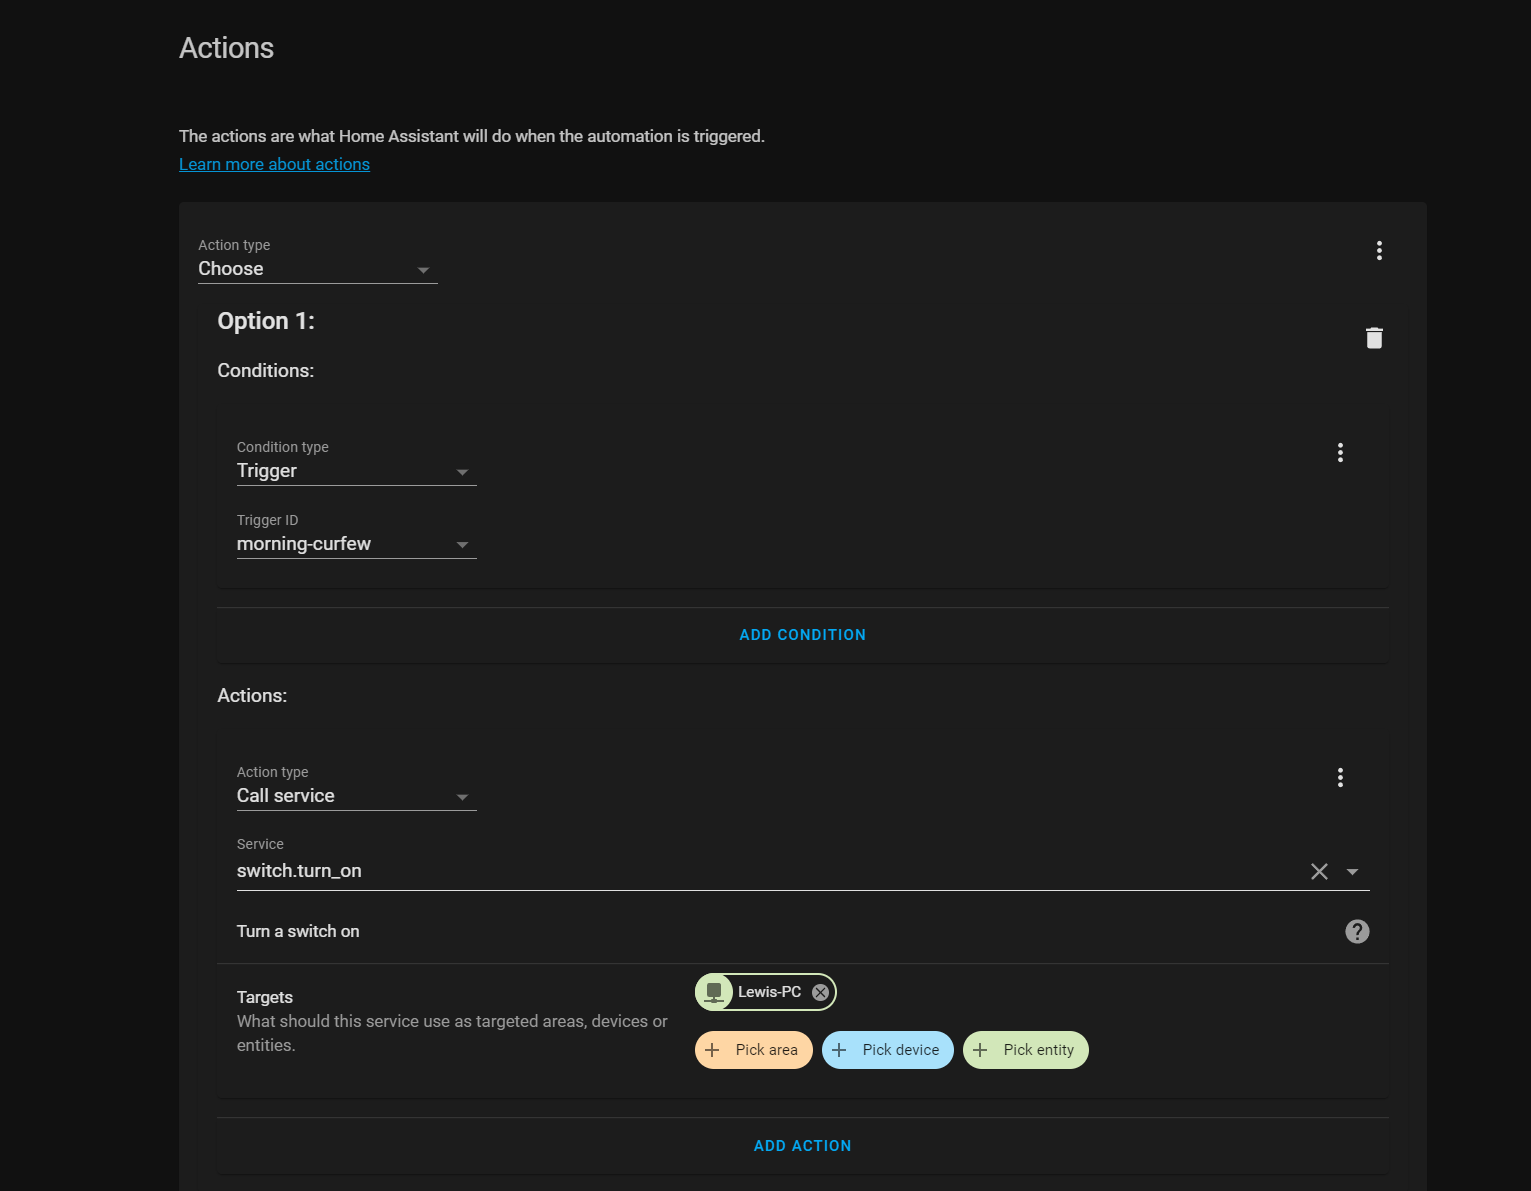
In the action section, we are going to select the choose action, then for option 1 inside of the condition, select trigger from the drop down and then select morning curfew as the trigger ID. For the action you will want to select call service, then choose switch turn on from the next dropdown. As the target, we then select the device we want to control.
Then add another option and repeat the same steps, this time selecting the night curfew as the trigger ID and this time we use the switch turn off service instead.
As a side note – doing your automation like this is a really nice way to combine what would be multiple automations into one, but it can be a bit more complicated way to do things. So if you want to keep things simple then there is absolutely no problem with creating these as two separate automations!
Hit save and now whenever 10pm rolls around, network access will be disabled on the device and automatically re-enabled at 9am.
Final Words
And there we go! That is how to add the Unifi integration to Home Assistant for device tracking but also how to add devices that you can control network access with – even controlling PoE ports on switches – and finally how to create a simple automation to automatically make that happen.
Like I said there are tons of uses for this that I can think of and we’ve only covered a few of them here. Let me know in the comments what you plan on using this for or currently using this for – I bet there are tons more that I haven’t even thought of yet!
Hope you all enjoyed this tutorial on the Home Assistant Unifi Integration – it has been a minute since I last did one and I missed it! If you are looking to get started with Home Assistant, check out the getting started guide!
As always, thank you for your support. It is much appreciated!