The Full Guide To Getting Started With Home Assistant Yellow!
The Home Assistant Yellow is a smart home hub focused on local control, privacy and powerful automations - come along as I show you how to set it up from start to finish.

The Home Assistant Yellow is Home Assistant's first try at their very own custom Smart Home hub, that puts privacy and local control first.
It was announced almost 9 months ago and if you bought one back then, chances are you're going to be receiving your unit very soon! So what a better time than now to take a deep dive into the Home Assistant Yellow and show you everything you need to know to get it up and running, including how to migrate from your old setup, to your brand new shiny Yellow!
Video
Quick Re-Cap
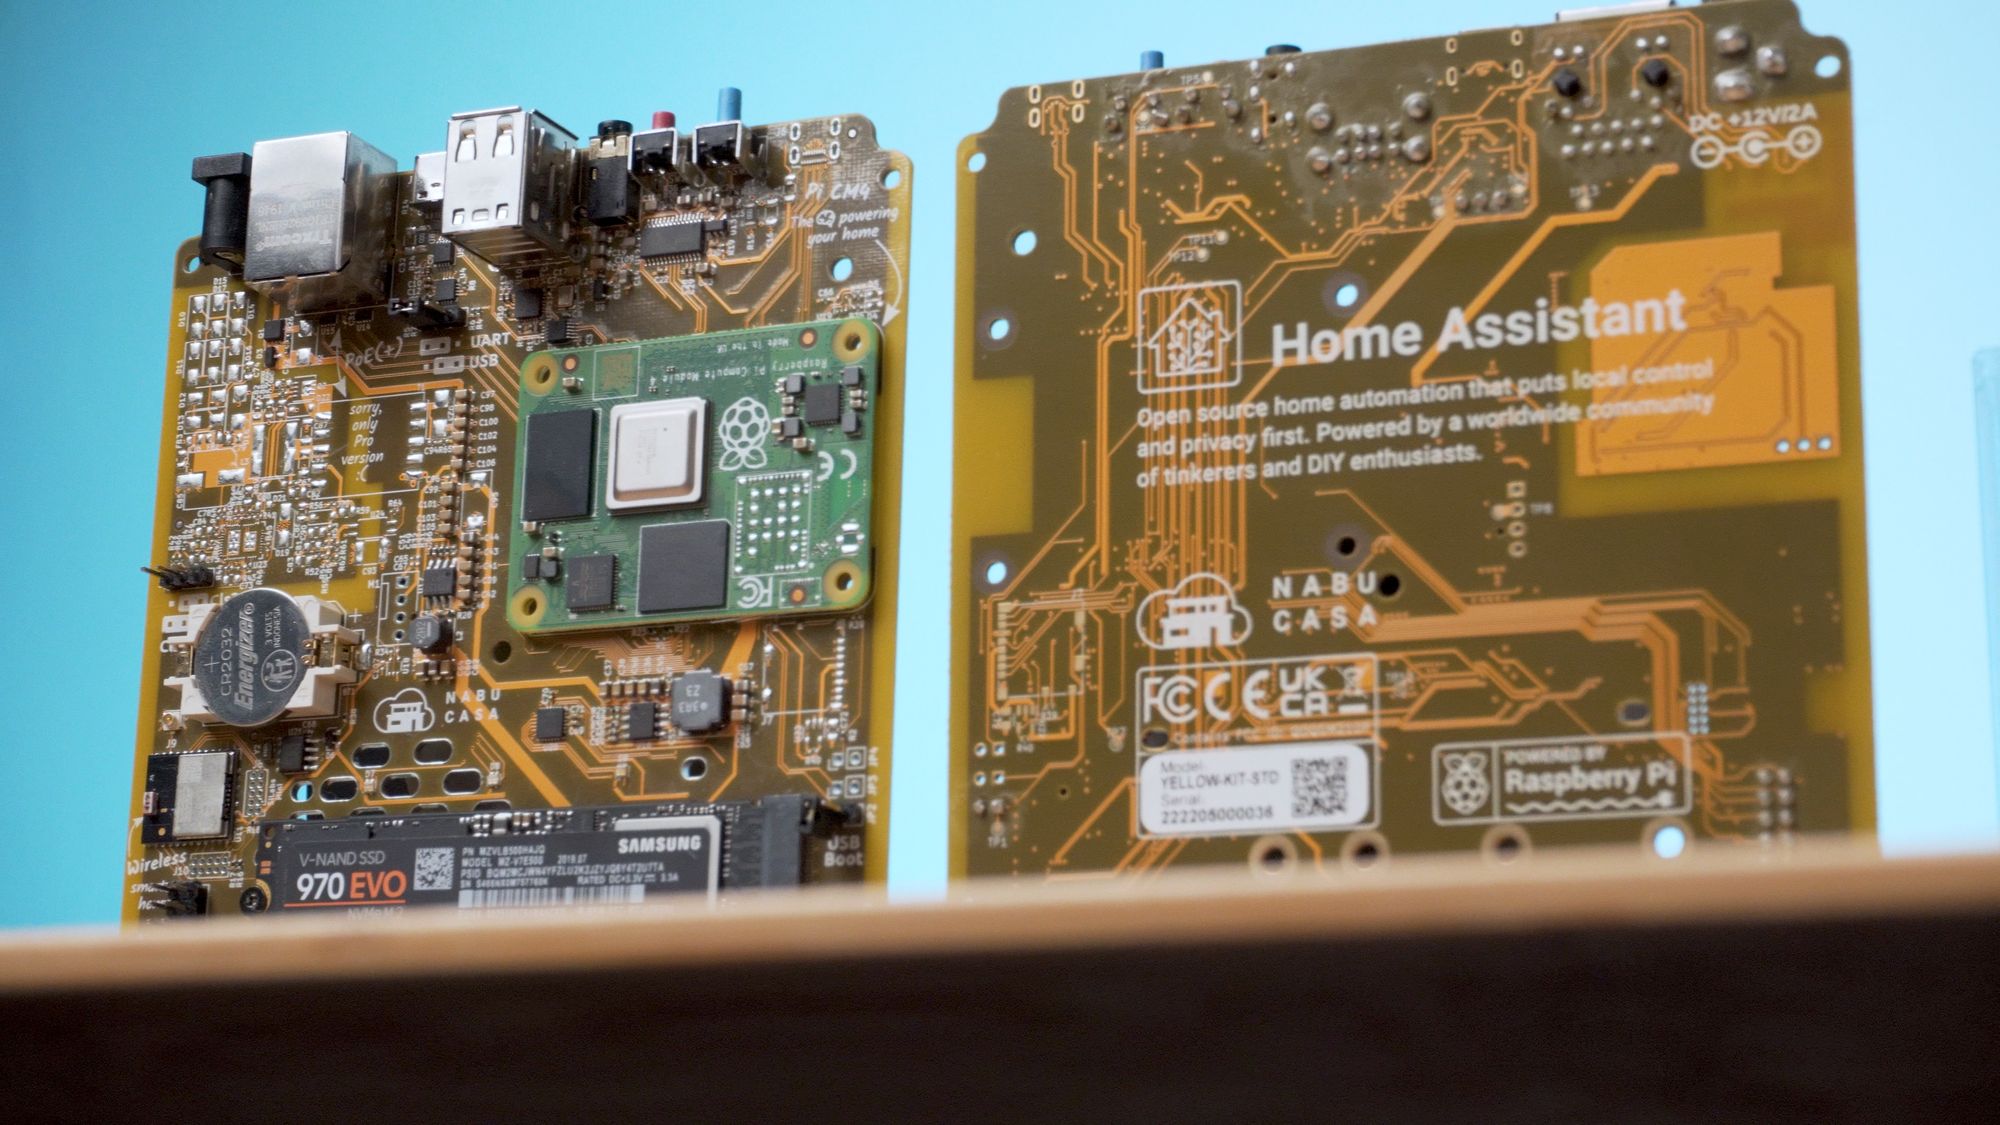
The Yellow is Nabu Casa's custom hardware to run the Home Assistant software - which is a powerful, privacy and local control focused home automation platform.
It's built on a Raspberry Pi Compute Module 4, has an on-board ZigBee and Thread radio built in with an update to Matter coming later.
It also is available in 3 different versions: the standard Home Assistant Yellow which has everything you need including the Compute Module, or in 2 kit variants - either Power over Ethernet or a standard power supply kit. Both kit variants choose your own Compute Module depending on your needs.
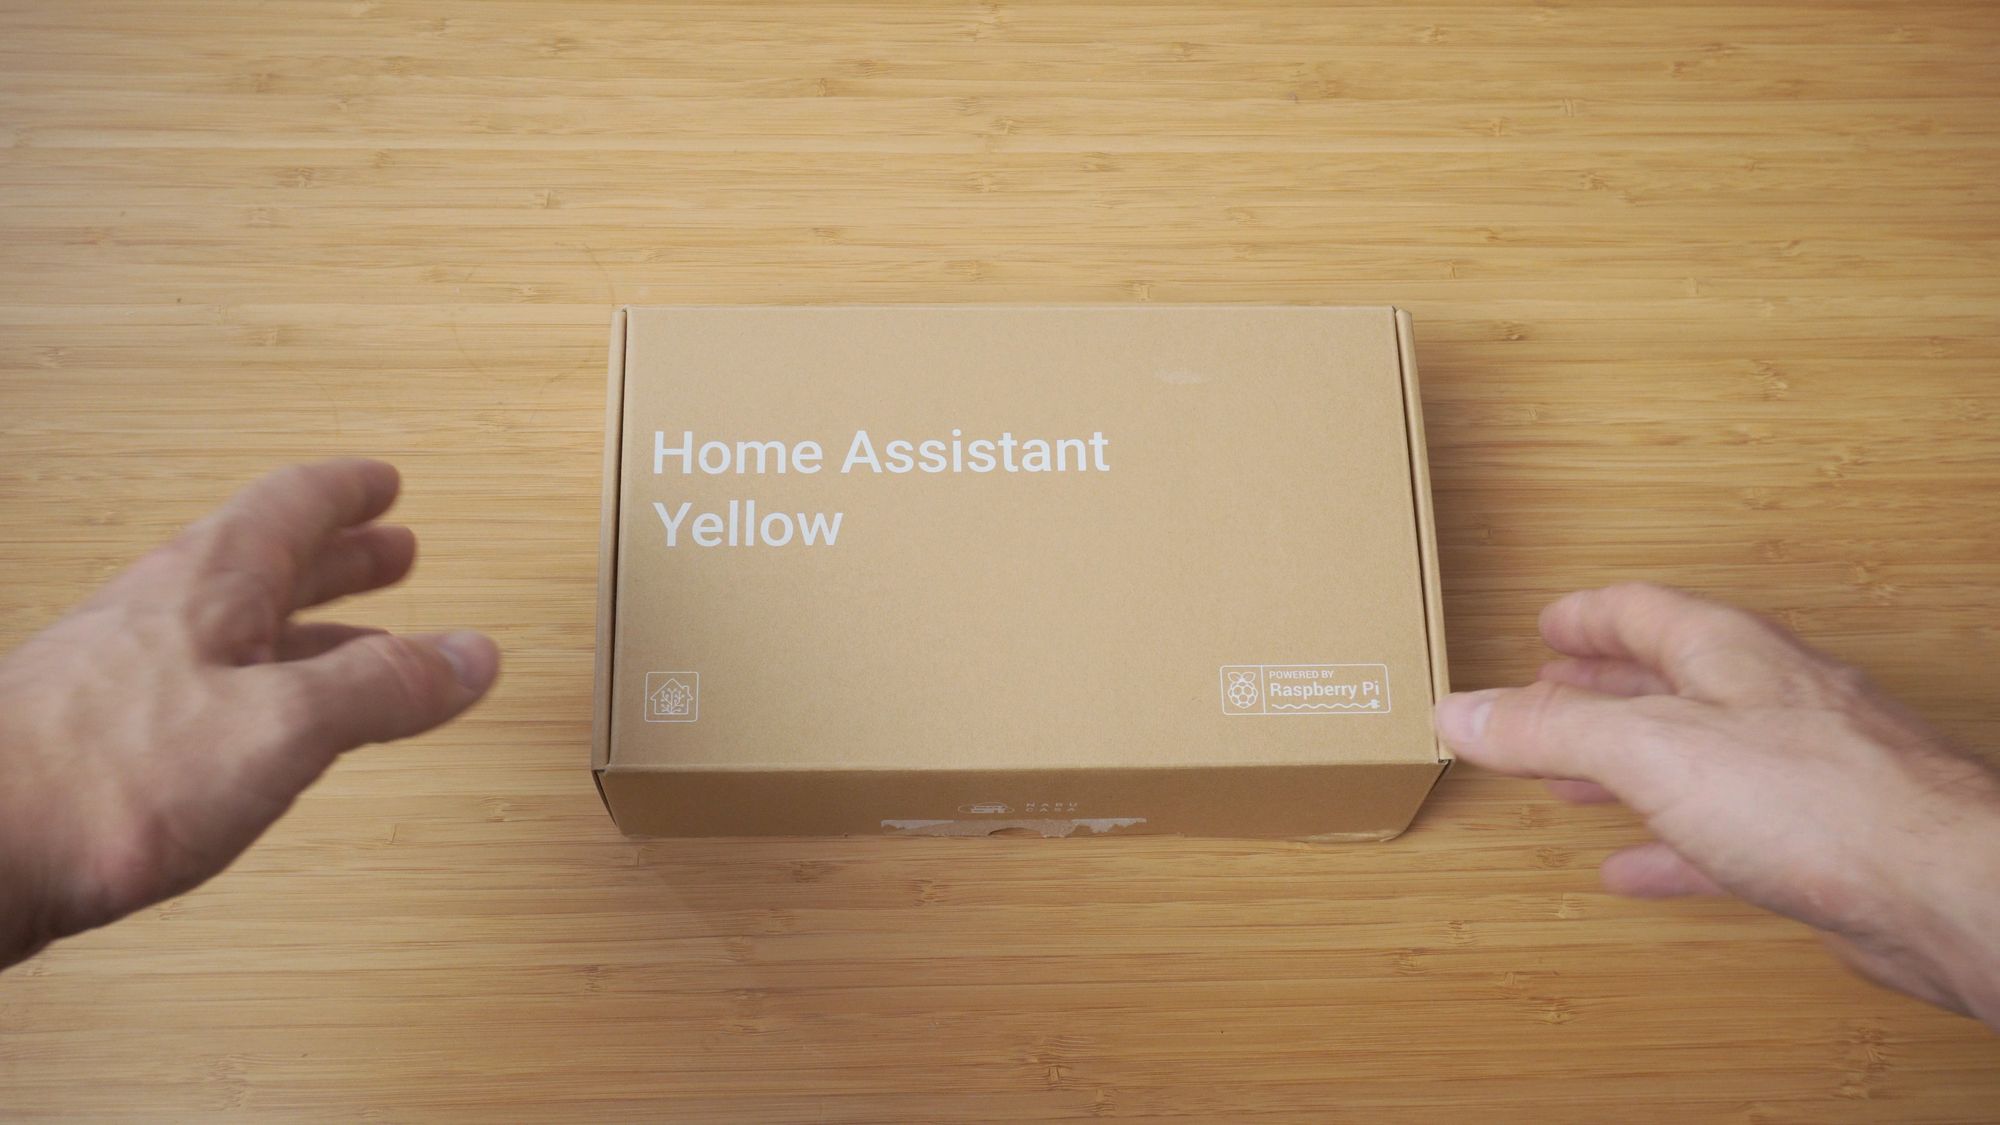
Unboxing
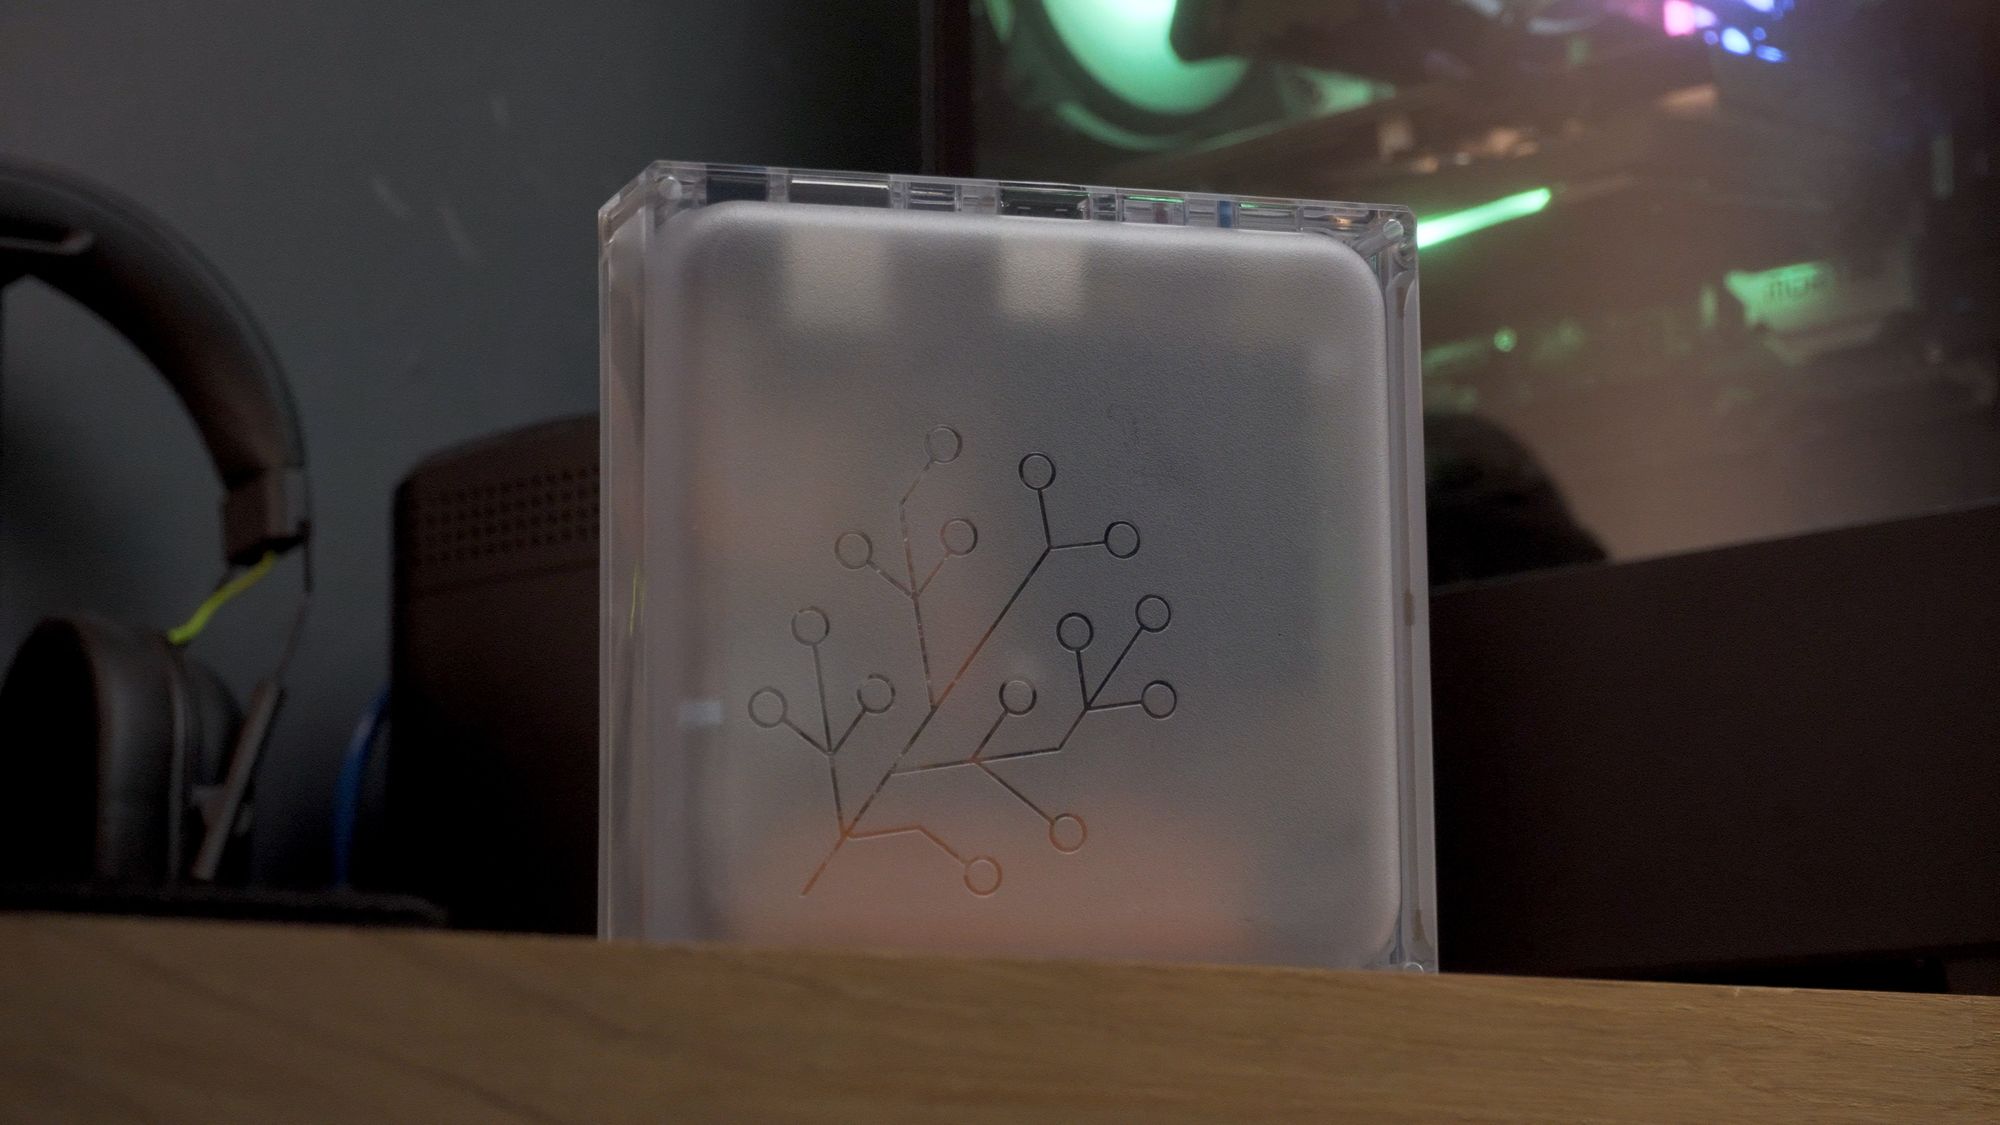
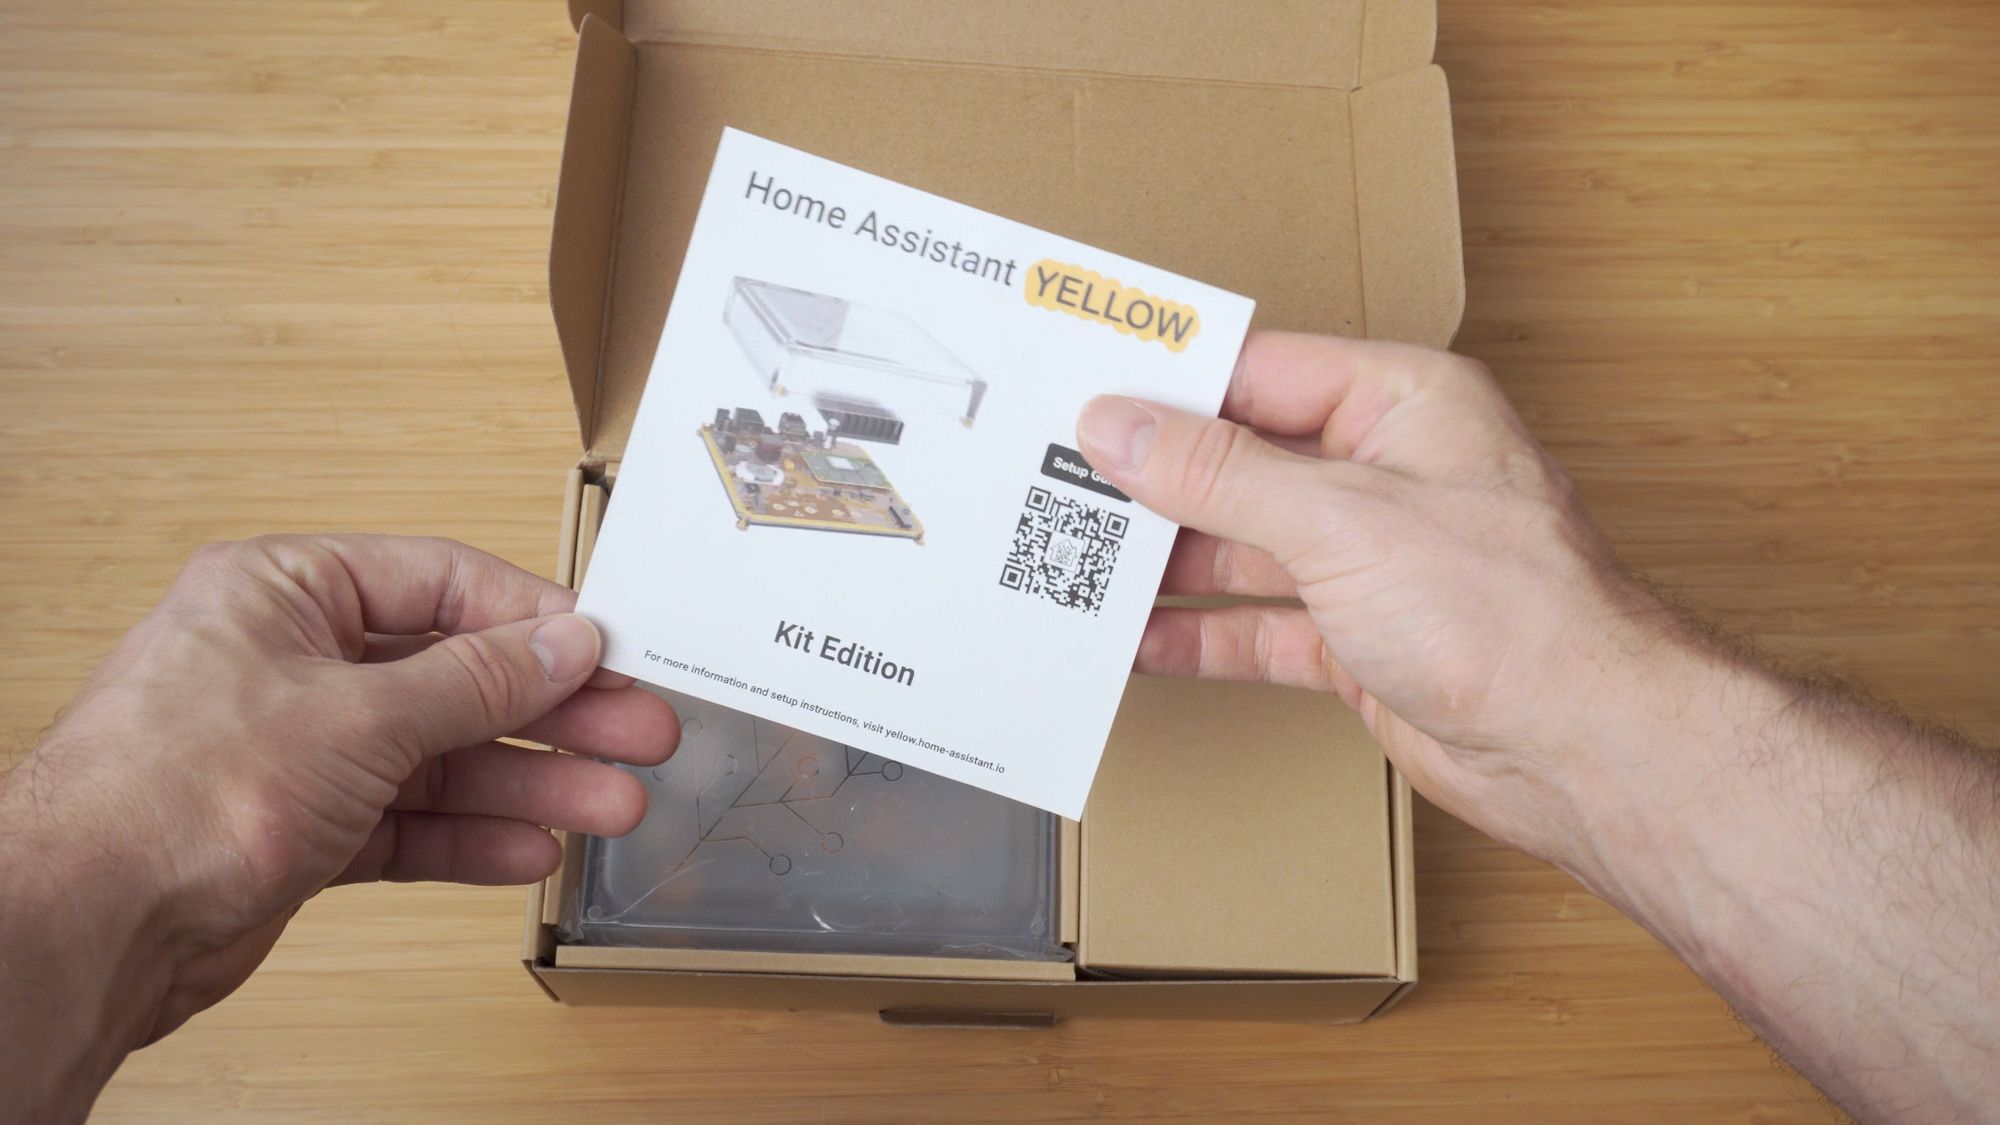
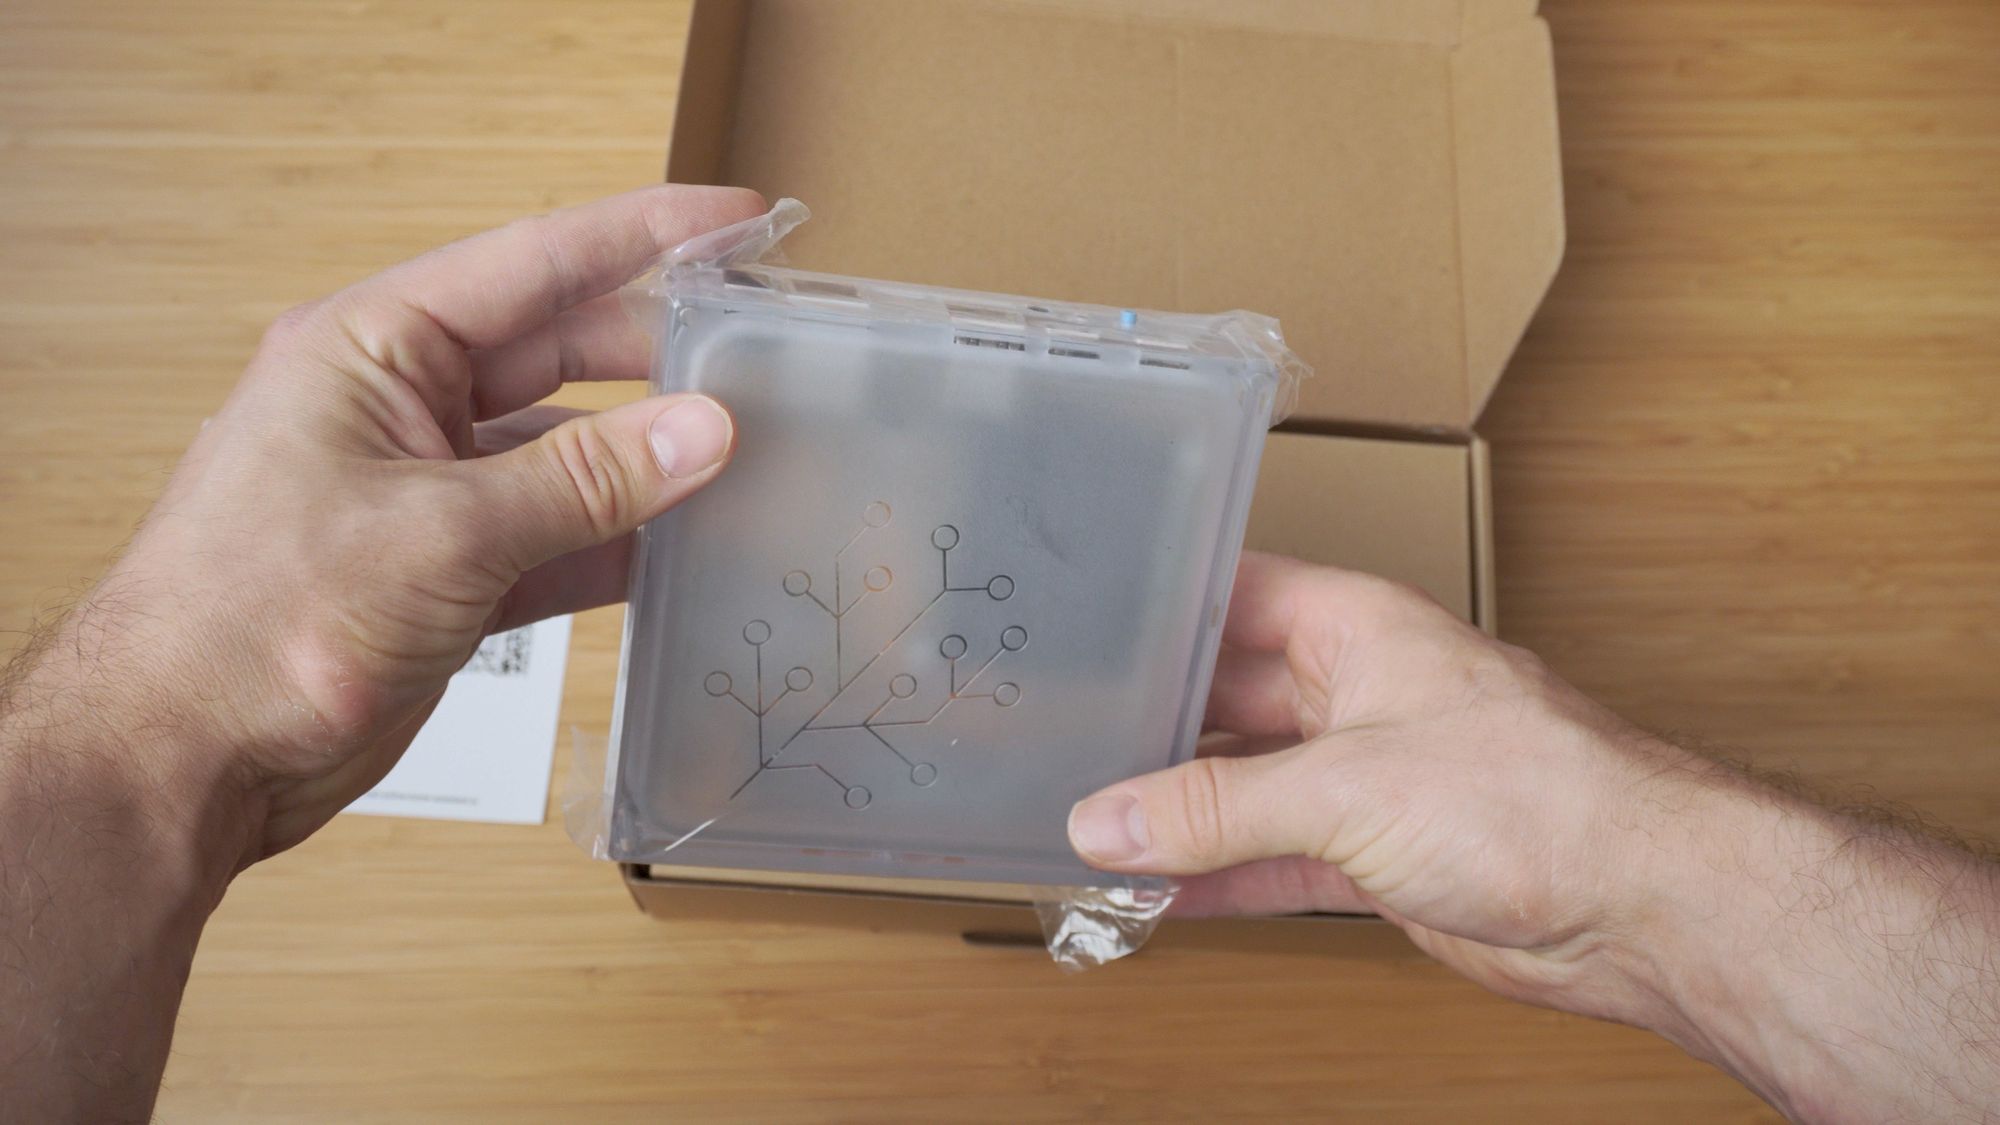
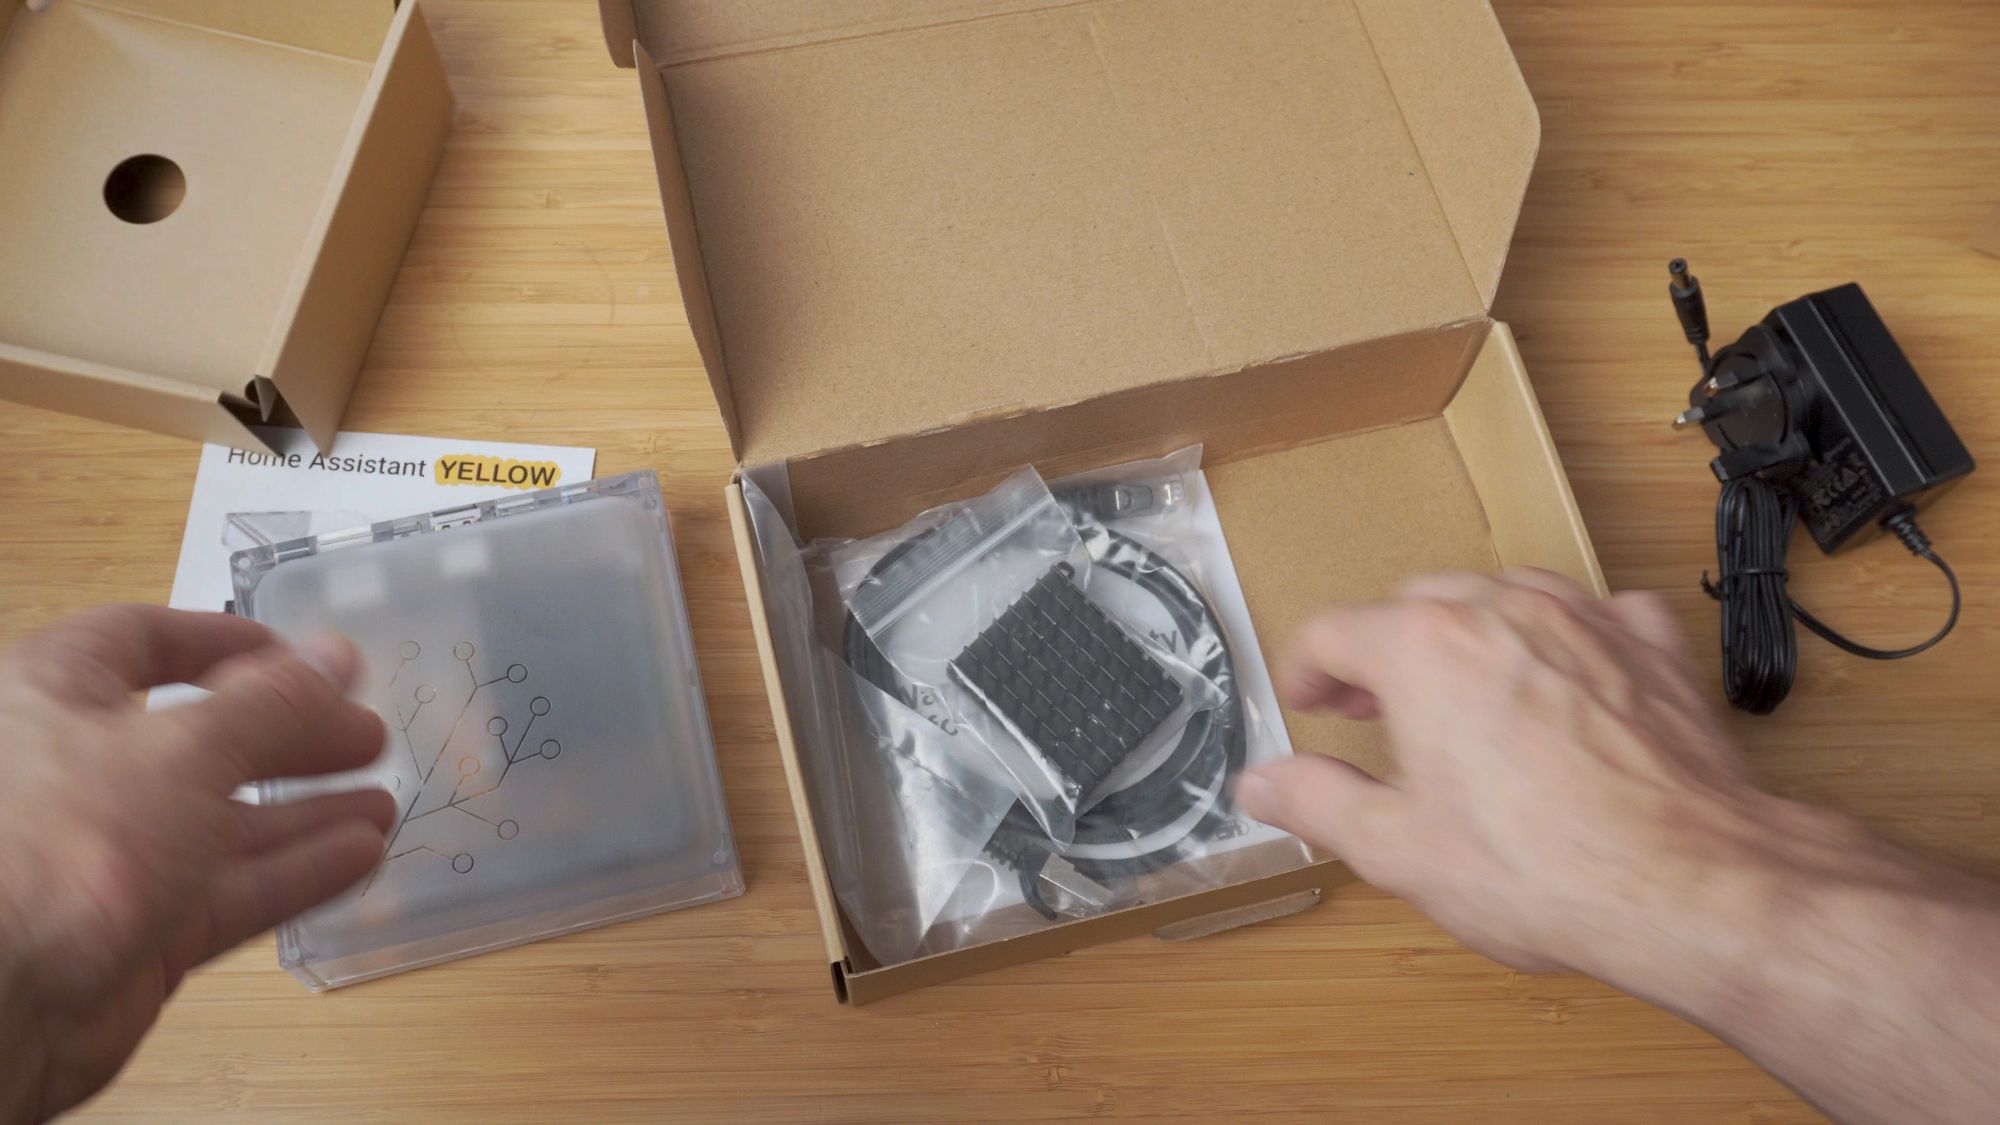
When you open your Home Assistant Yellow box, you will immediately be presented with a welcome card with a link to some instructions. Underneath is your brand new Yellow with its wonderful, frosted enclosure with the Home Assistant logo on top.
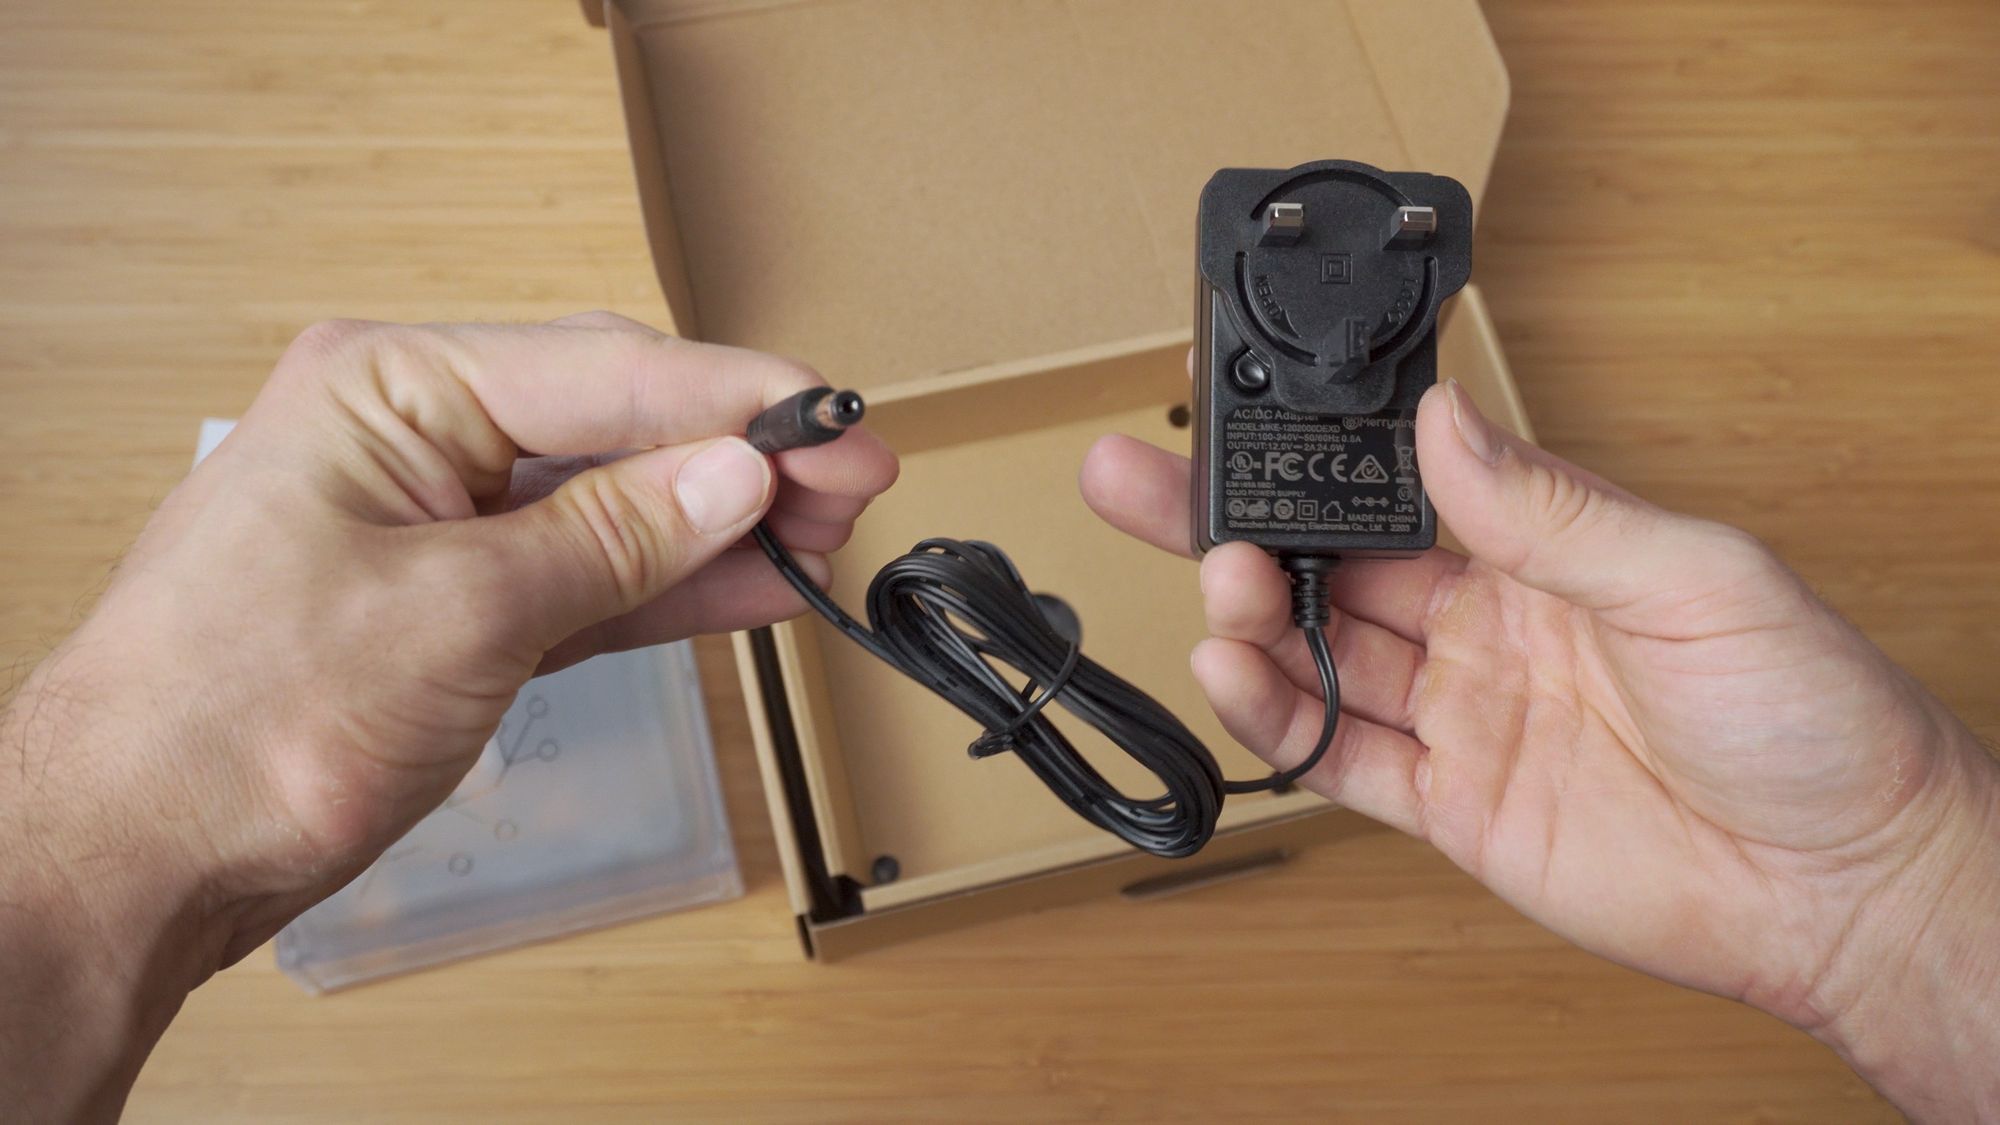
Then, depending on which version you ordered, you may or may not have another box to the right which contains your power supply.
Underneath the Yellow itself, you may also find some extras like a network cable and heatsink, again this is depending on which version you ordered.
If you bought the standard Home Assistant Yellow, then you will have the included power supply and your Raspberry Pi should already be installed inside the case with the heatsink ready to go! If you have one of the kit variants, either the Power over Ethernet or power supply kit, then we will need to install our own Raspberry Pi which I will show you how to do.
Yellow IO
On the outside of the Yellow, starting from the left hand side, we have 2 buttons, a blue and a red one - the blue one does not yet currently do anything, but the red version is for factory resetting which we will go over how to use that later in case you run into trouble.
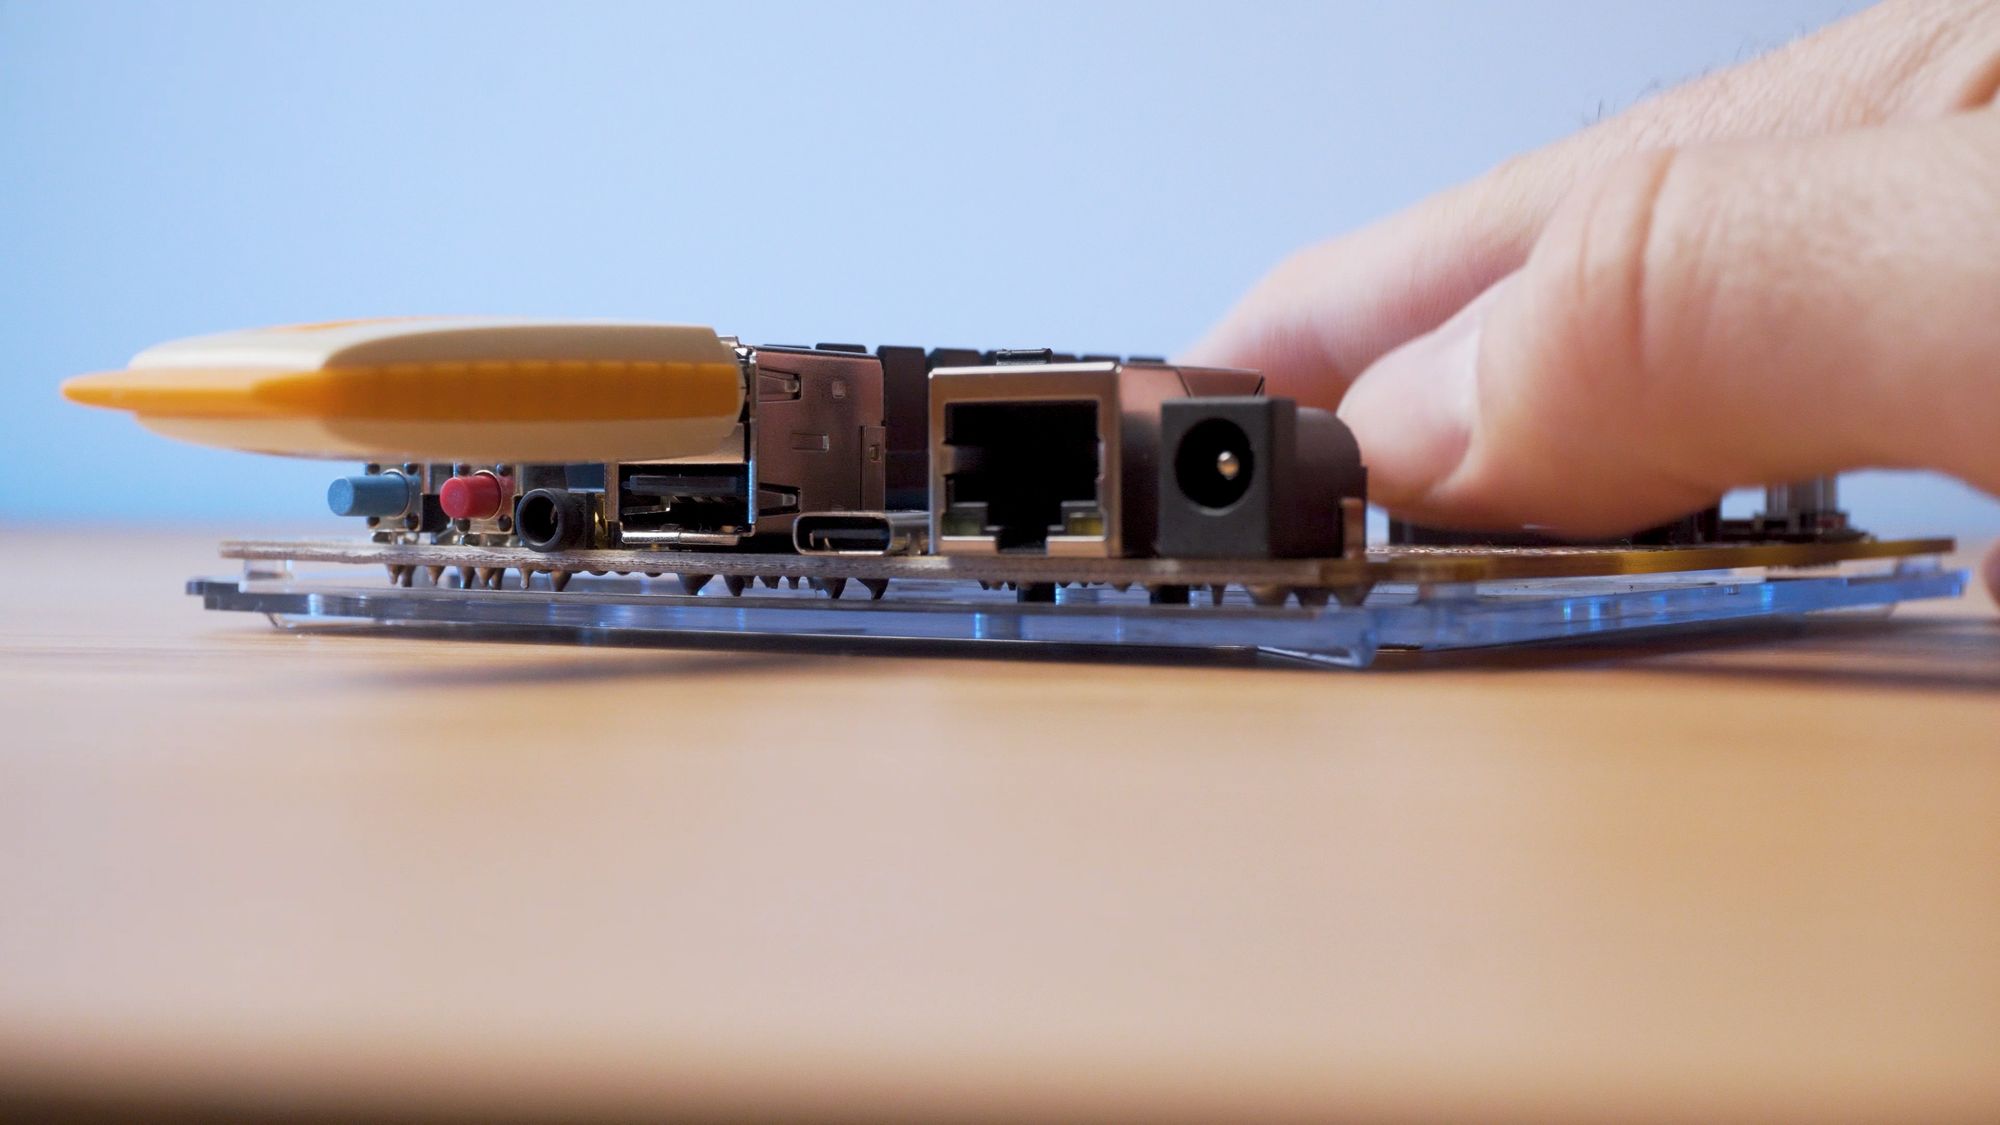
Next we have a 3.5mm jack, this allows you to connect an external speaker for audio or music playback. Note that it does not support microphones and is lined out only. Then we have 2 USB 2.0 ports, used for an external dongle such as Z-Wave or Bluetooth, or can also be used for flashing the OS too. The USB-C port is next to that, which can be used as a serial monitor to view the compute module 4 as it boots up or as OS recovery.
Finally, we have the ethernet port and power jack - if you ordered the PoE kit then power will be delivered to the ethernet port from your network switch, and if you ordered the standard Yellow or power supply kit, then you will be using the barrel jack connector with a 12v 2amp power supply.

Note that if you have the PoE version, you can connect both the network port and the barrel jack safely and only power will be drawn through the barrel jack connector.
Inside The Yellow
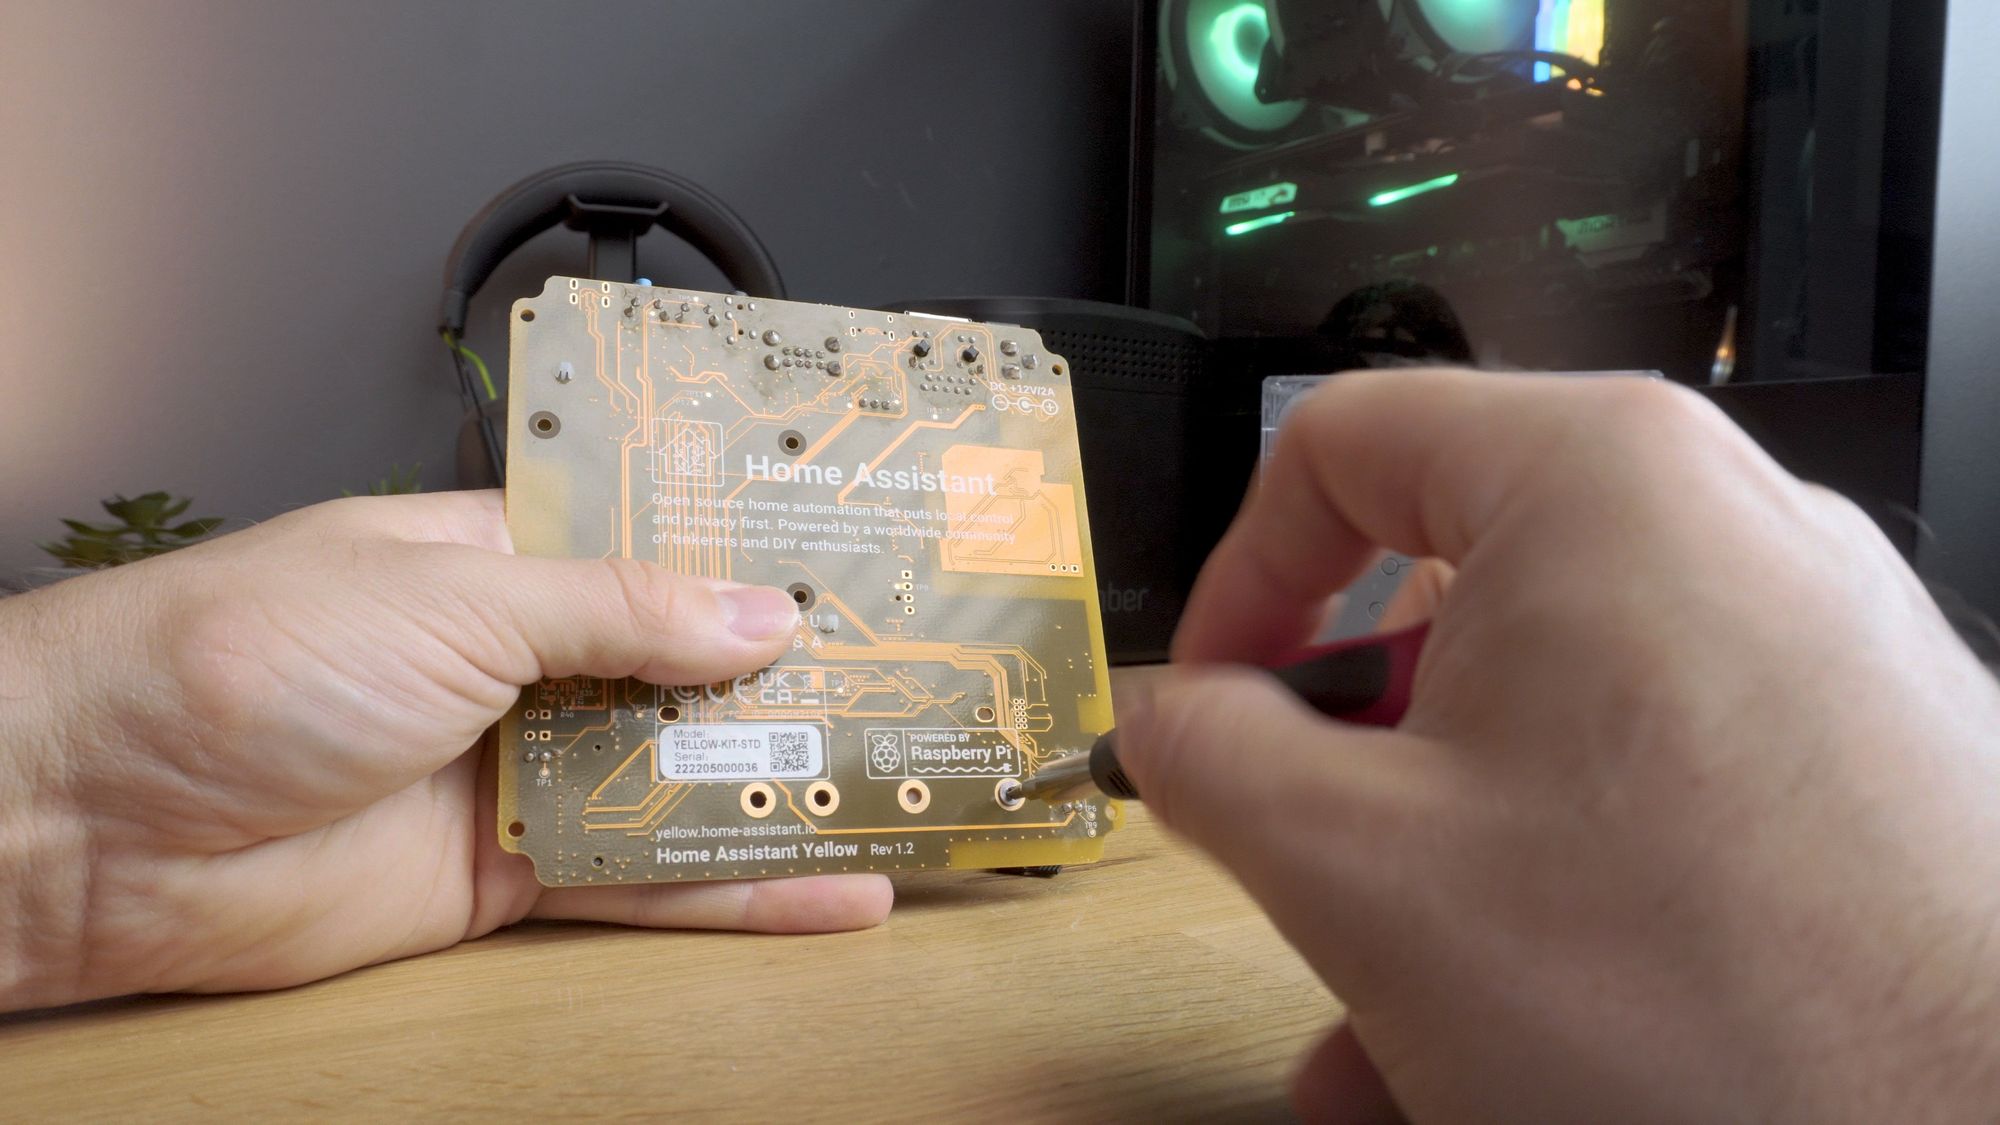
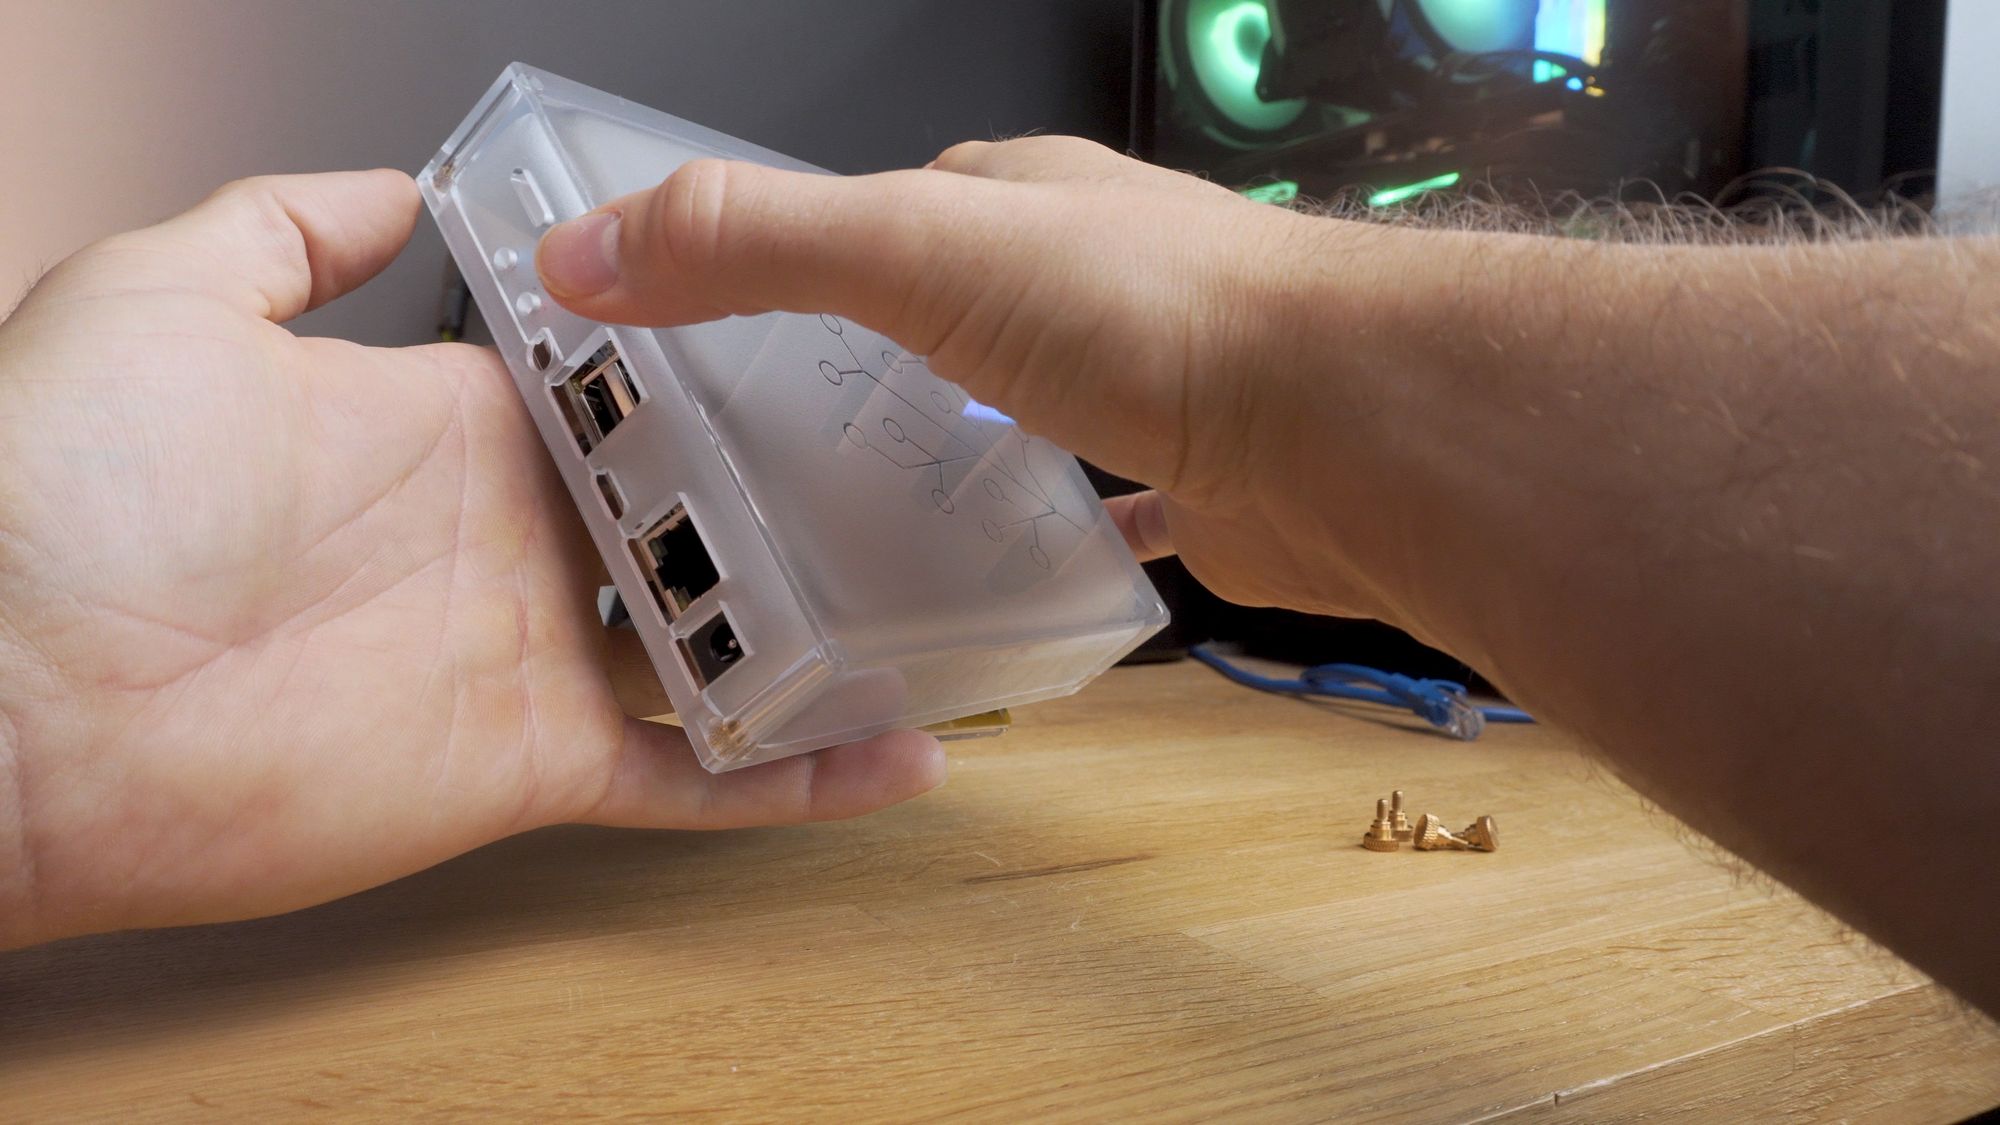
You'll see that underneath the Yellow are 4 threaded thumb screws which act as feet for the case and also secure the top to the bottom. So, you'll need to remove these and then you can then pull the base unit away to reveal your Home Assistant Yellow!

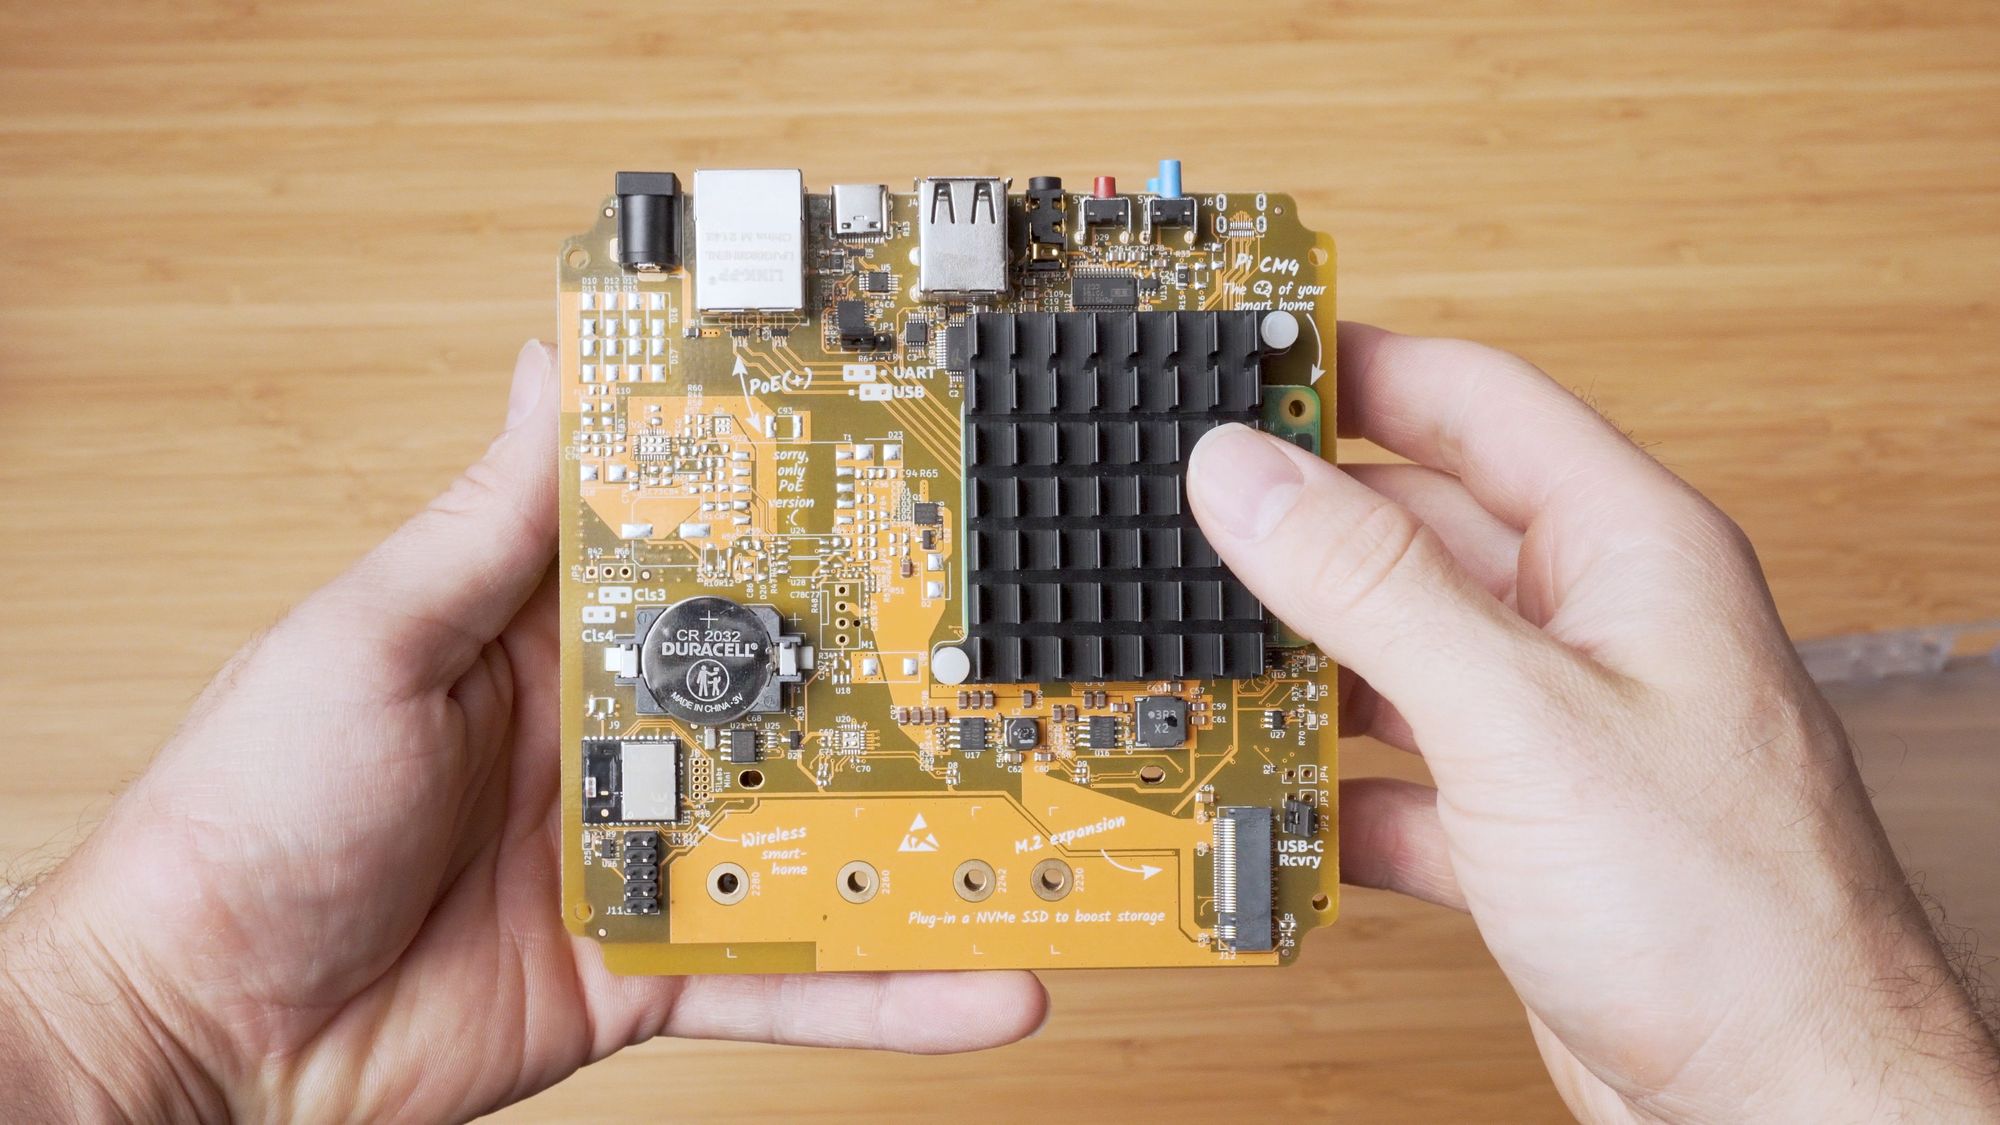
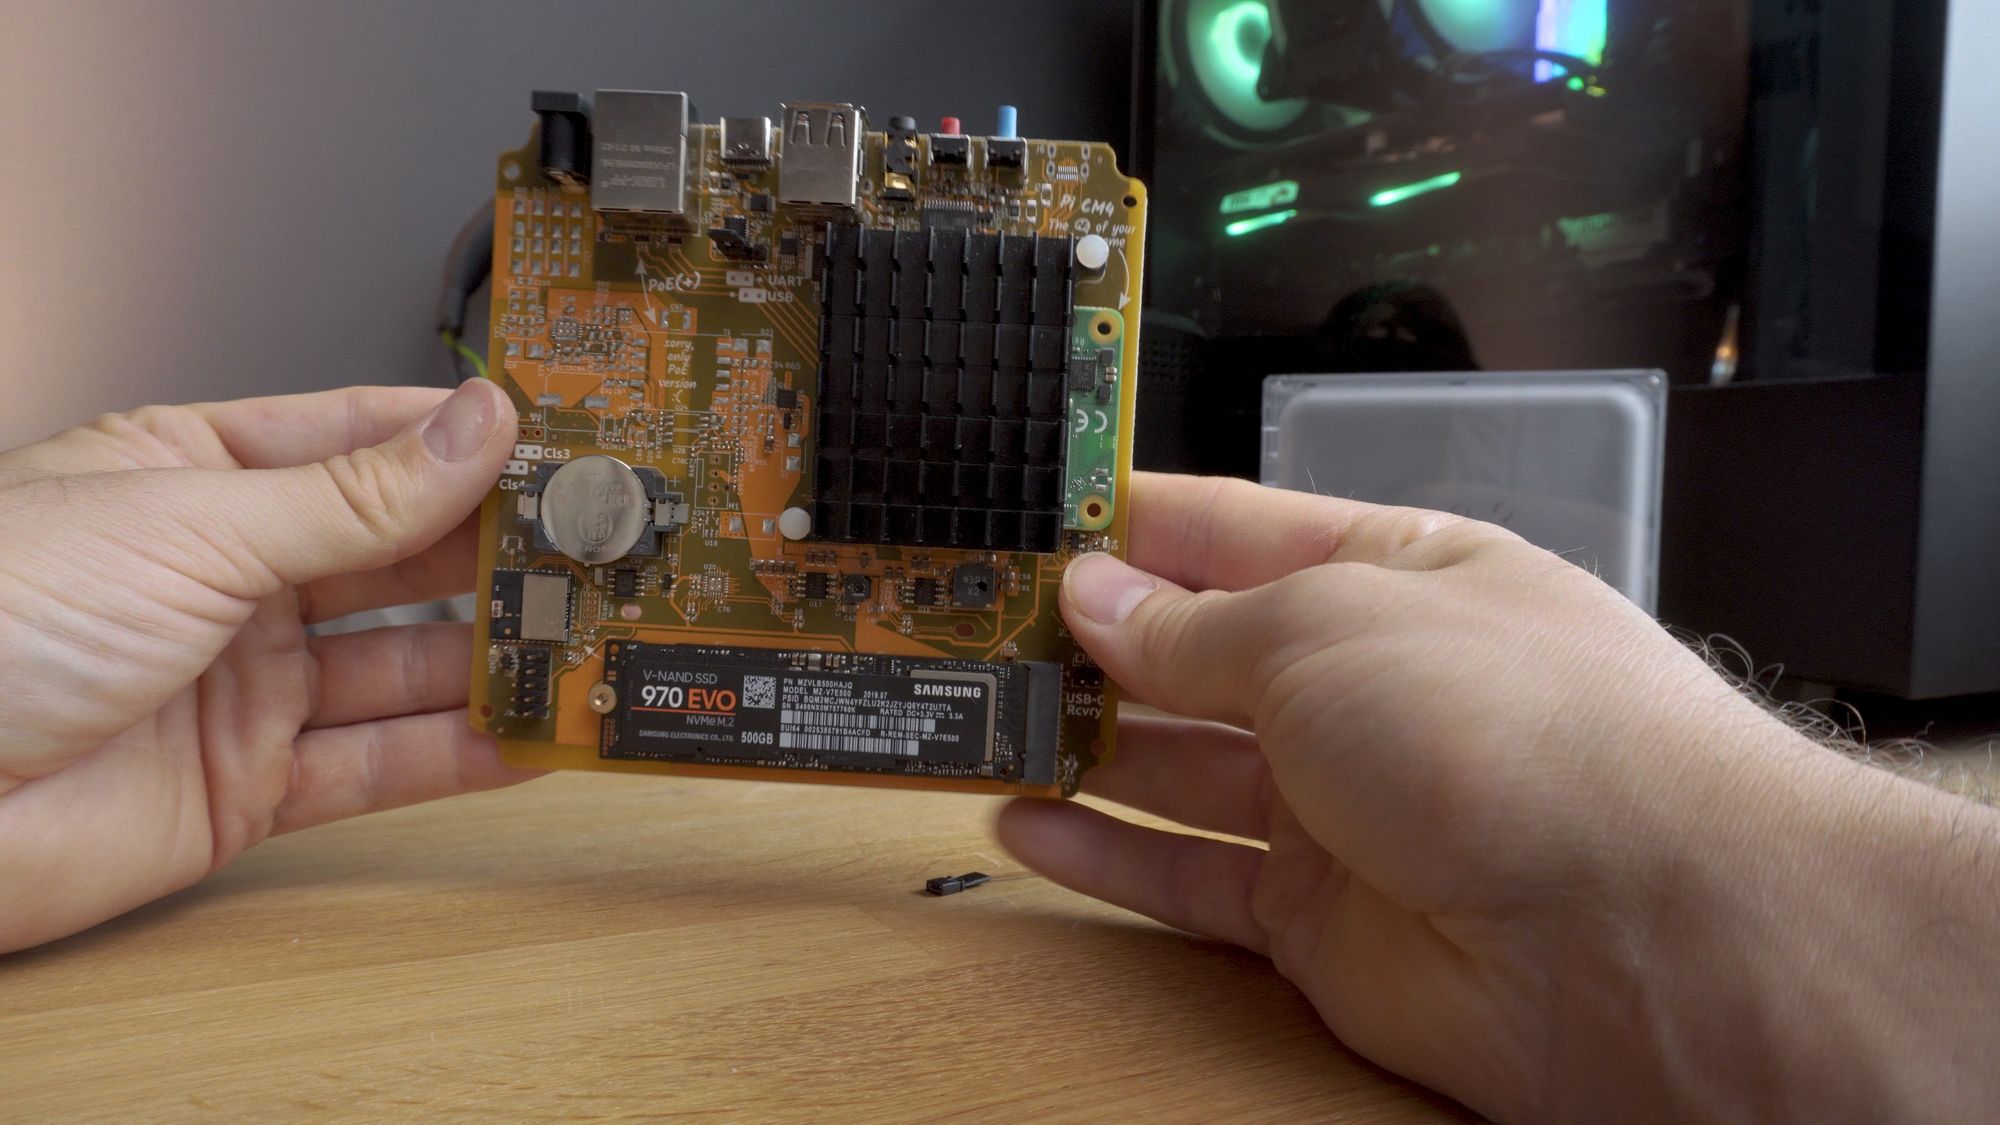
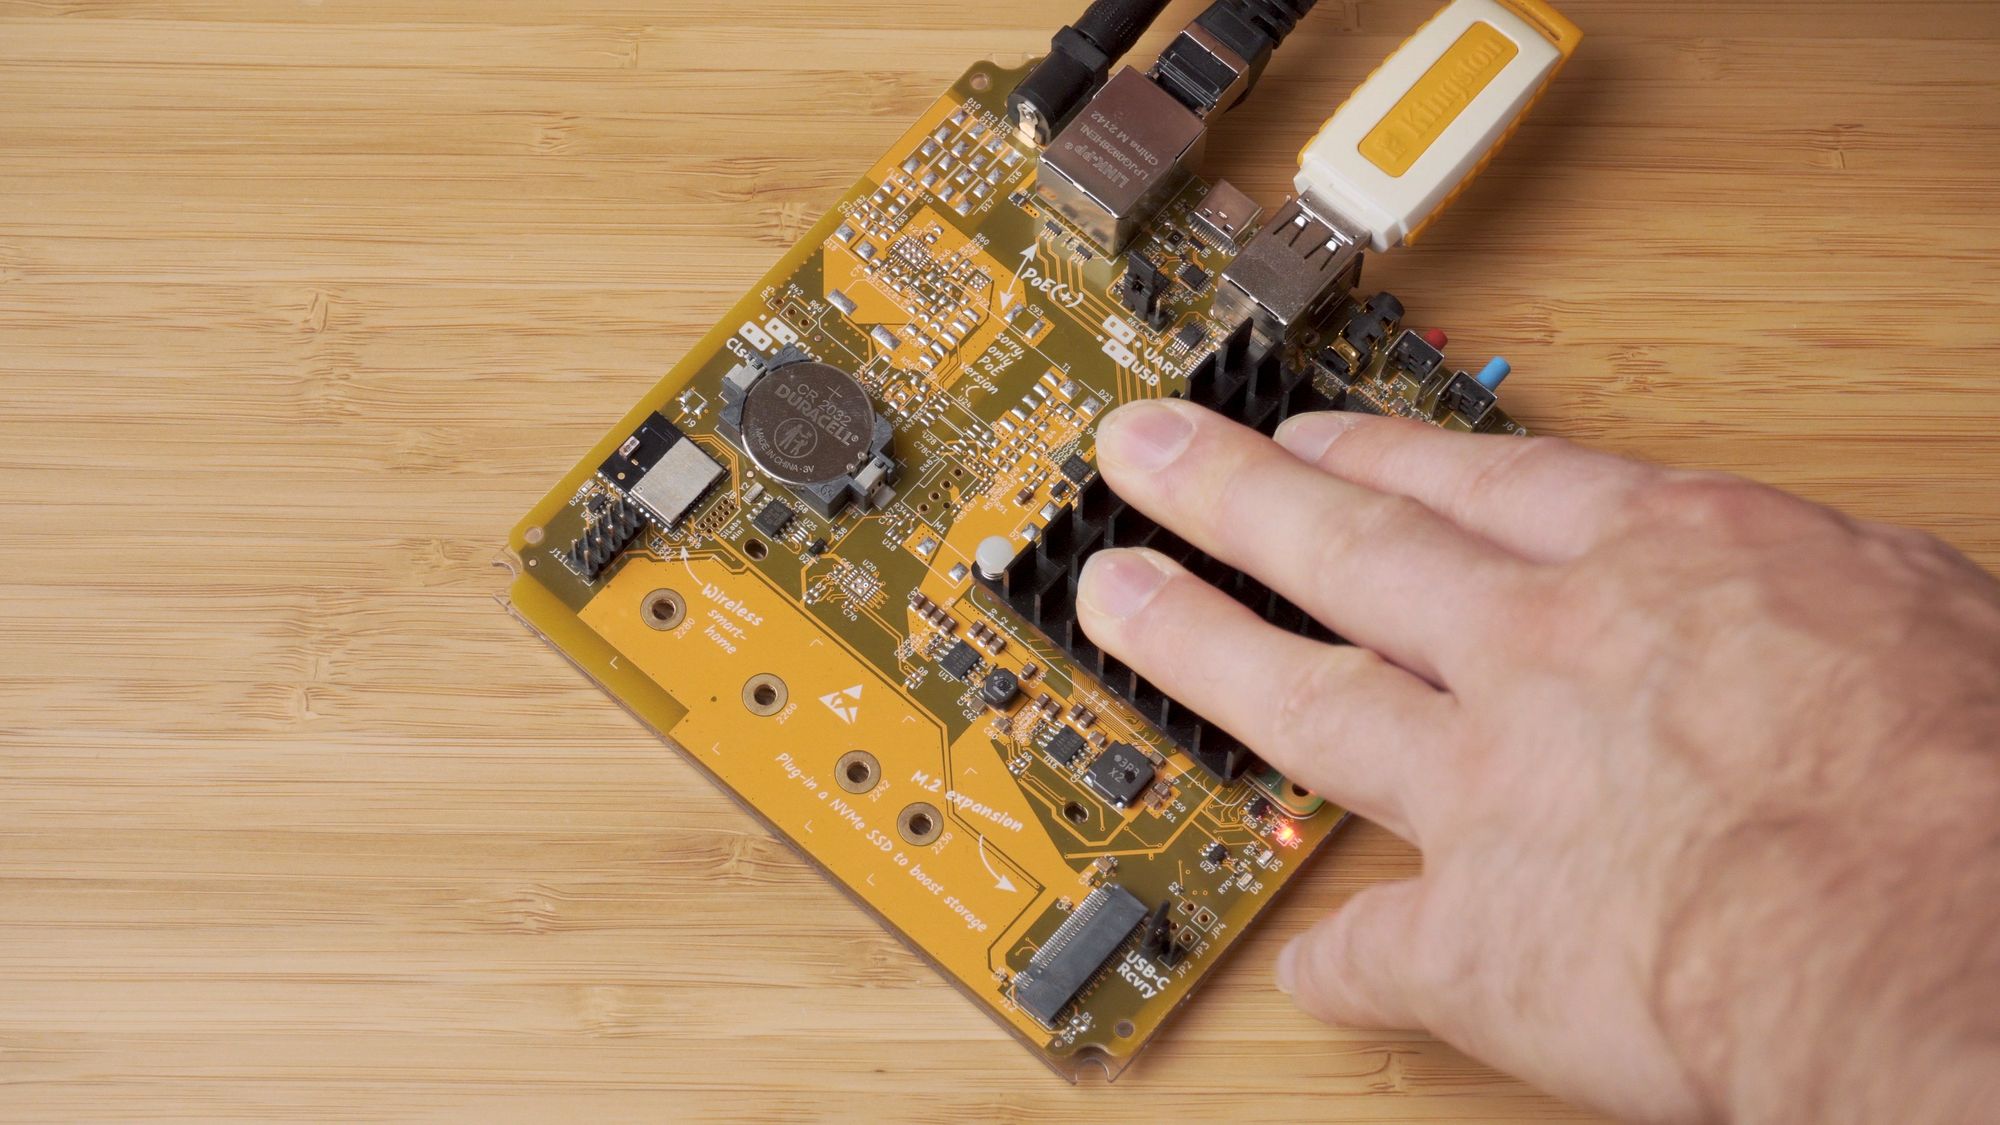
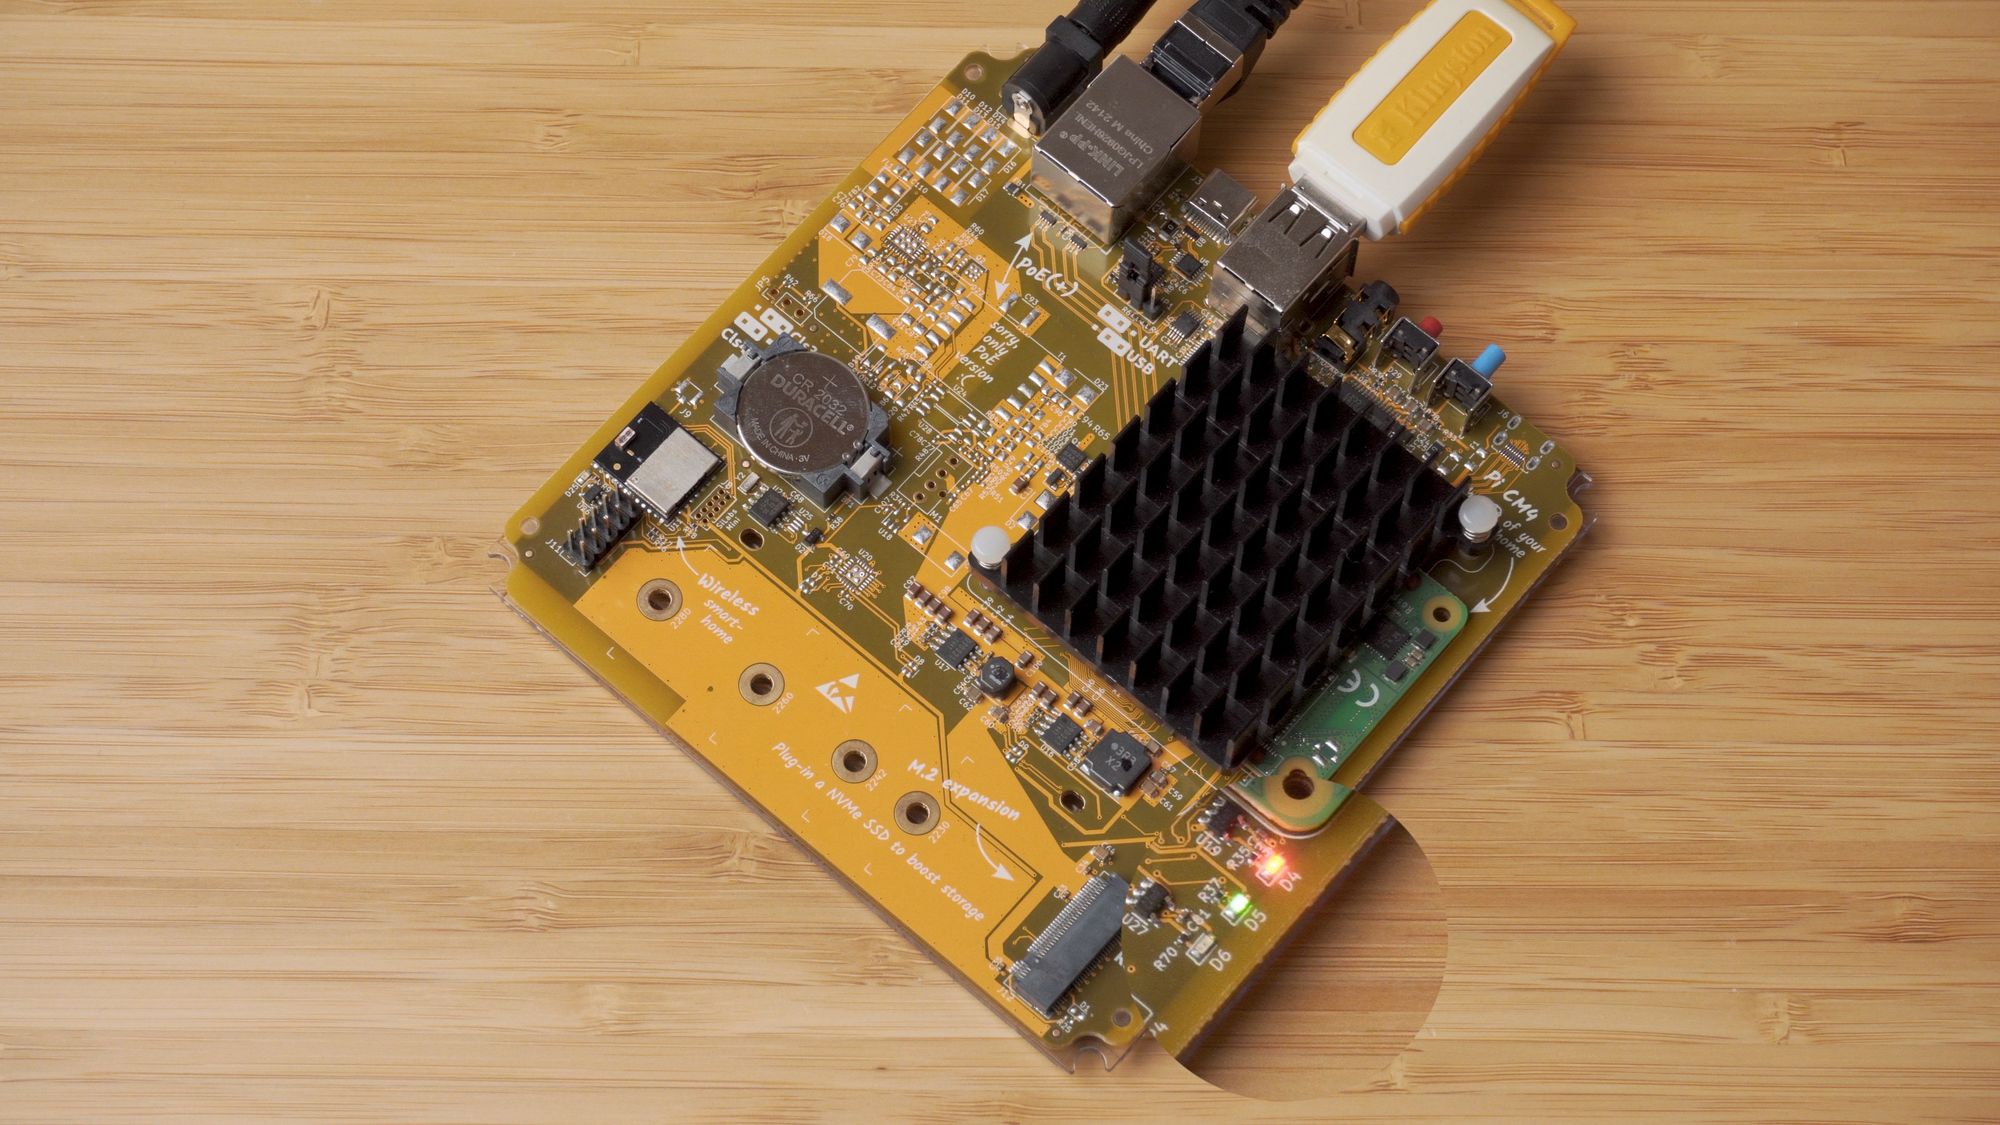
The first thing you will probably notice when you open it up, is either a large black heatsink and underneath that, your Compute Module 4:
Or a large empty space when your Compute Module 4 goes:
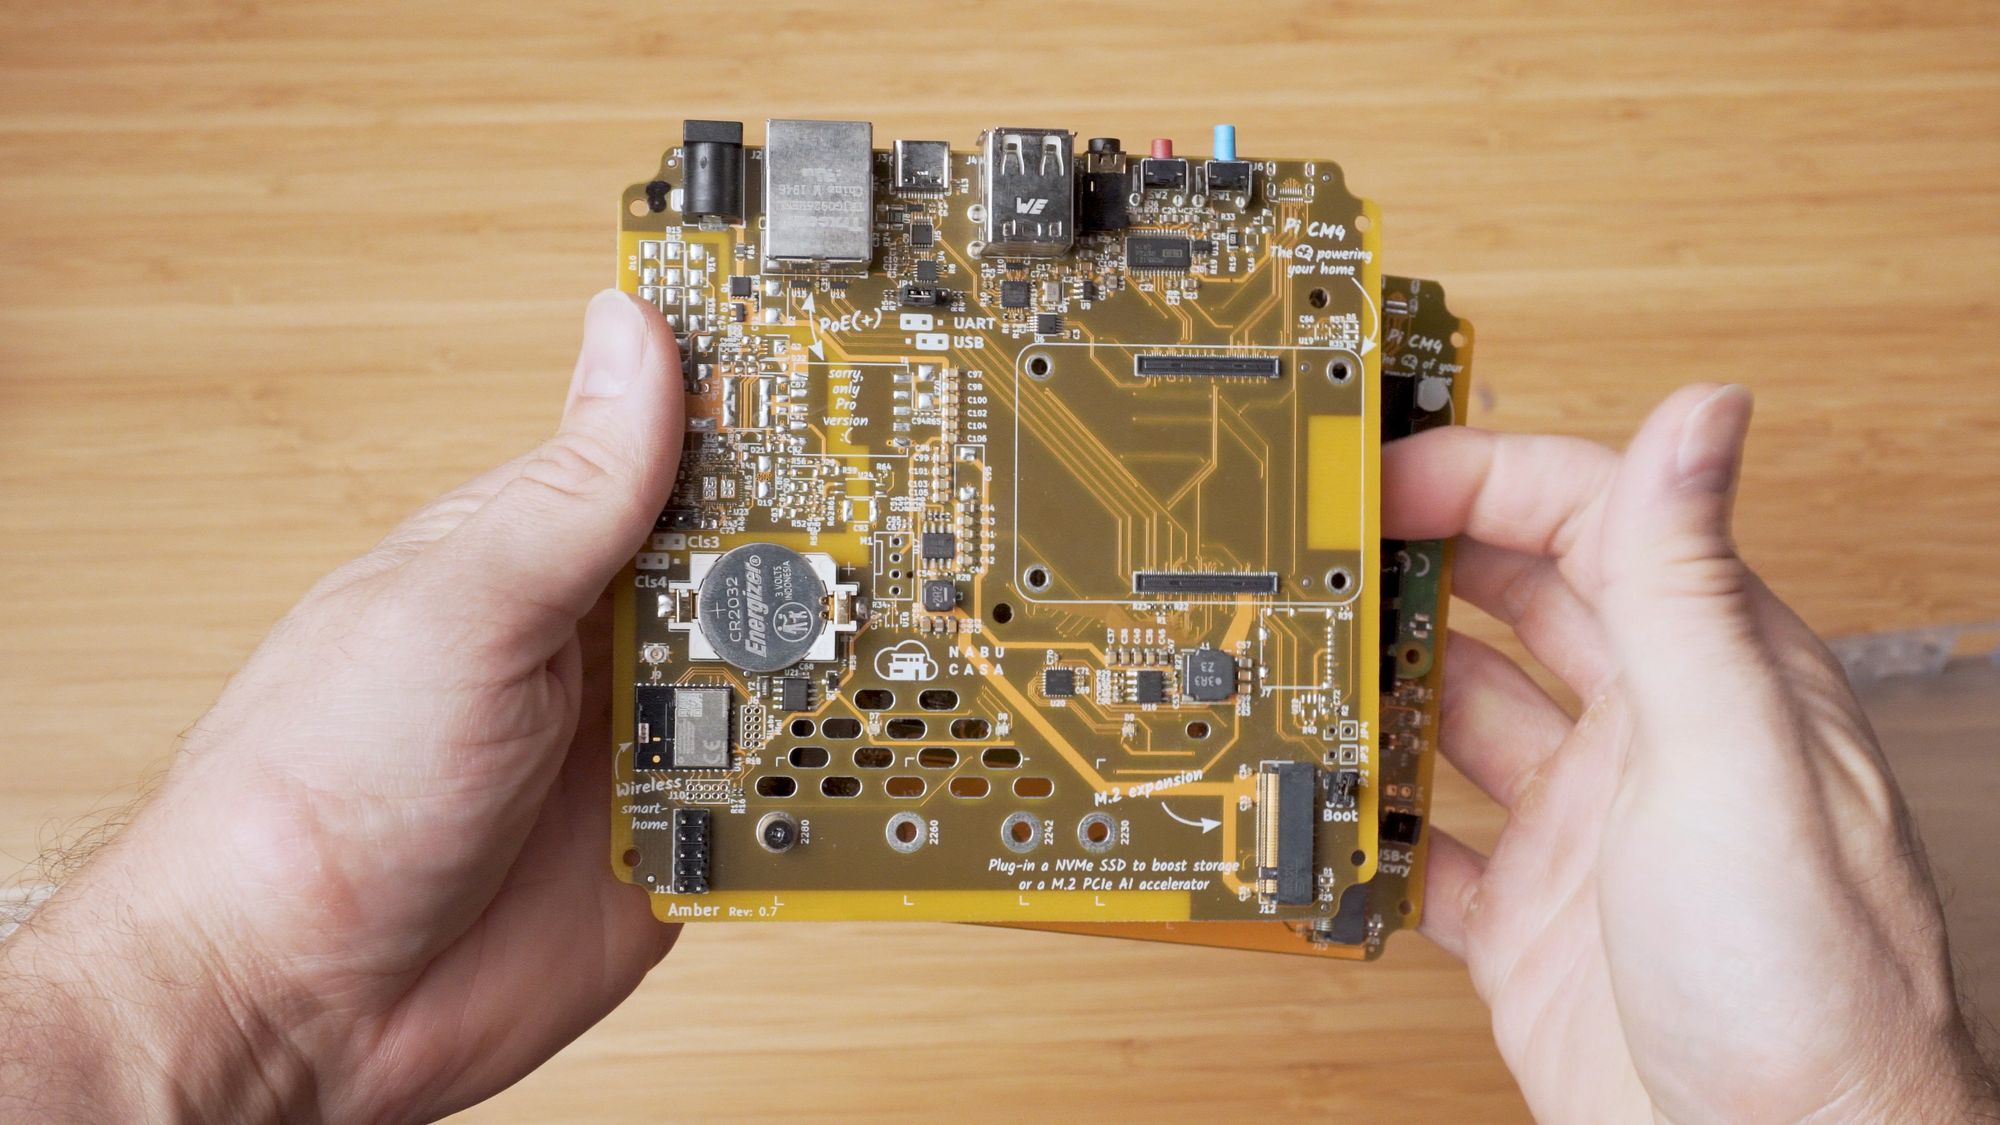
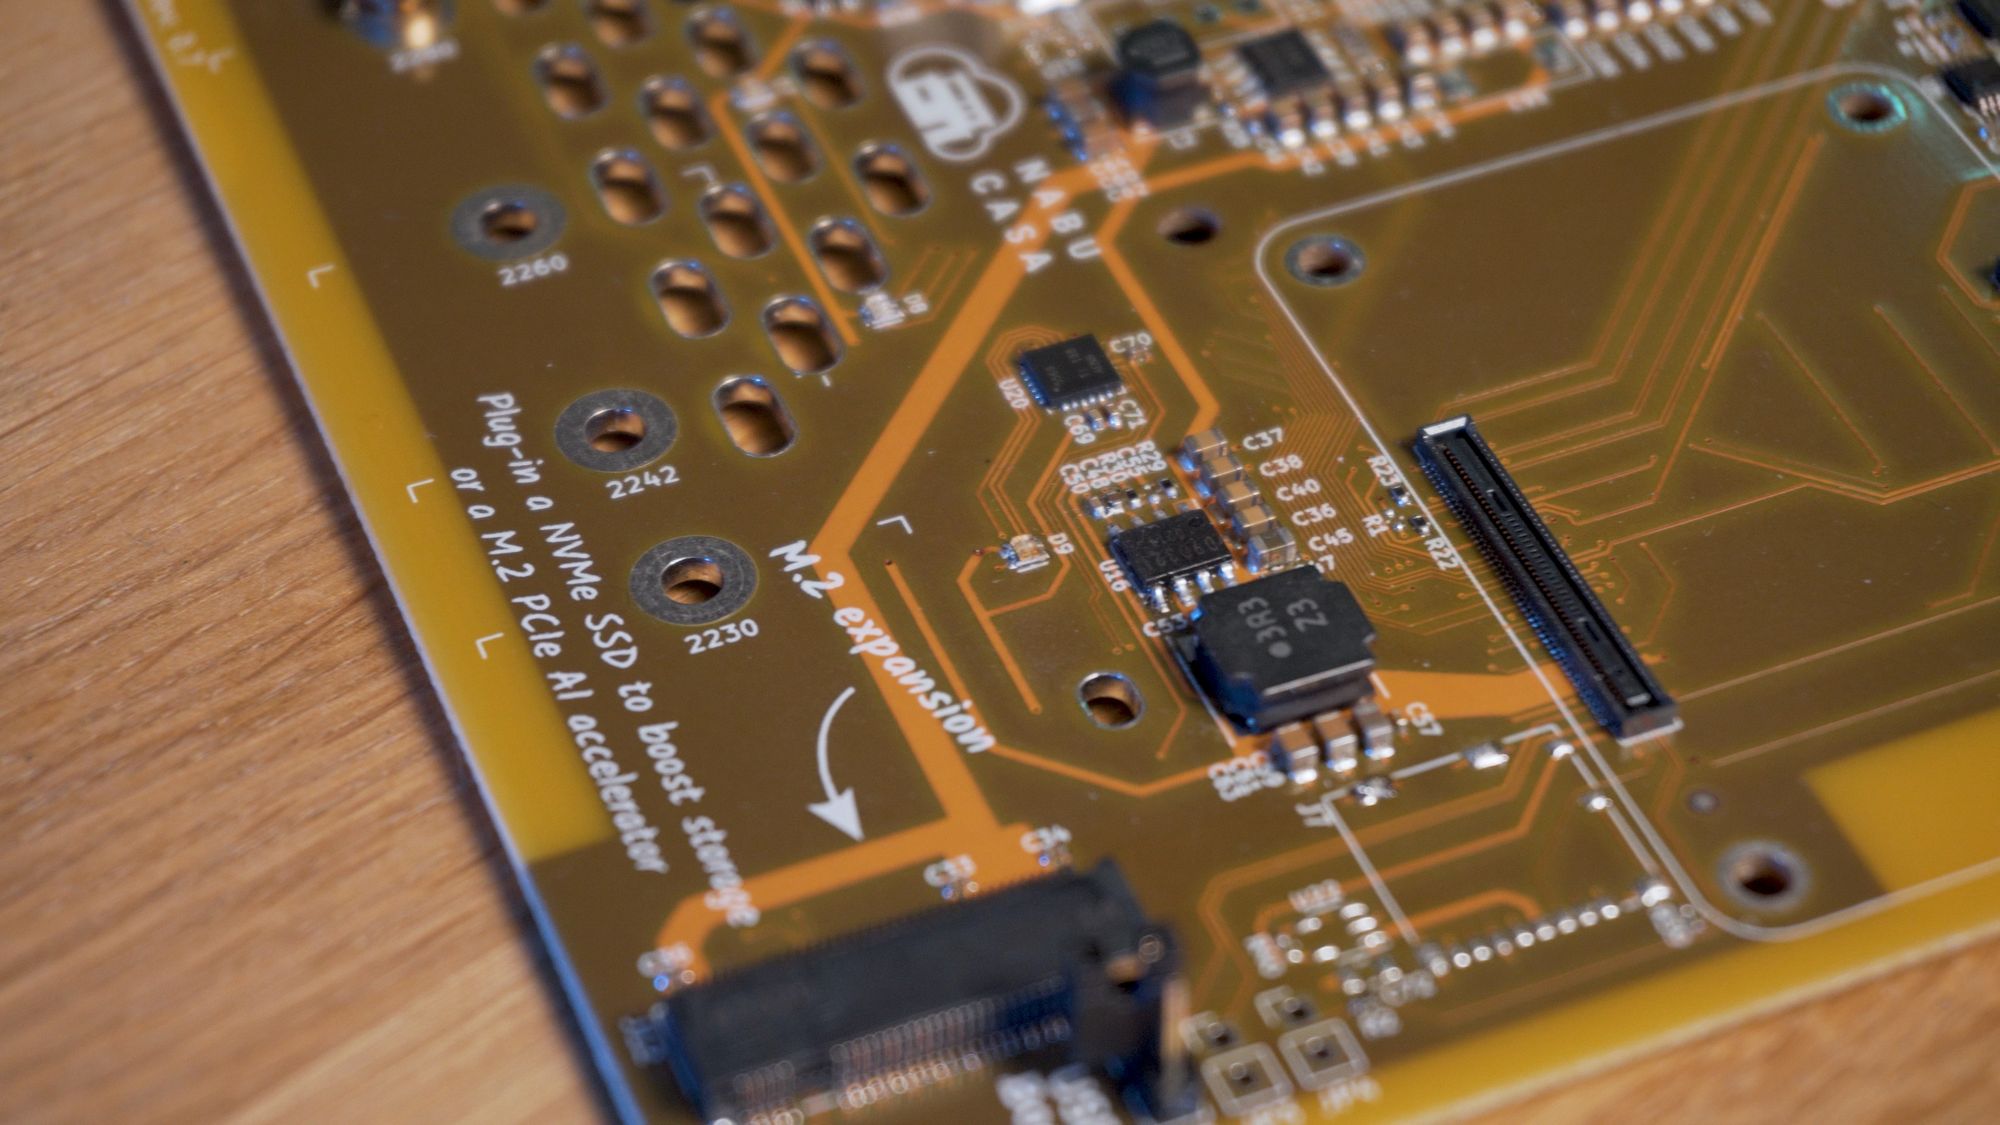
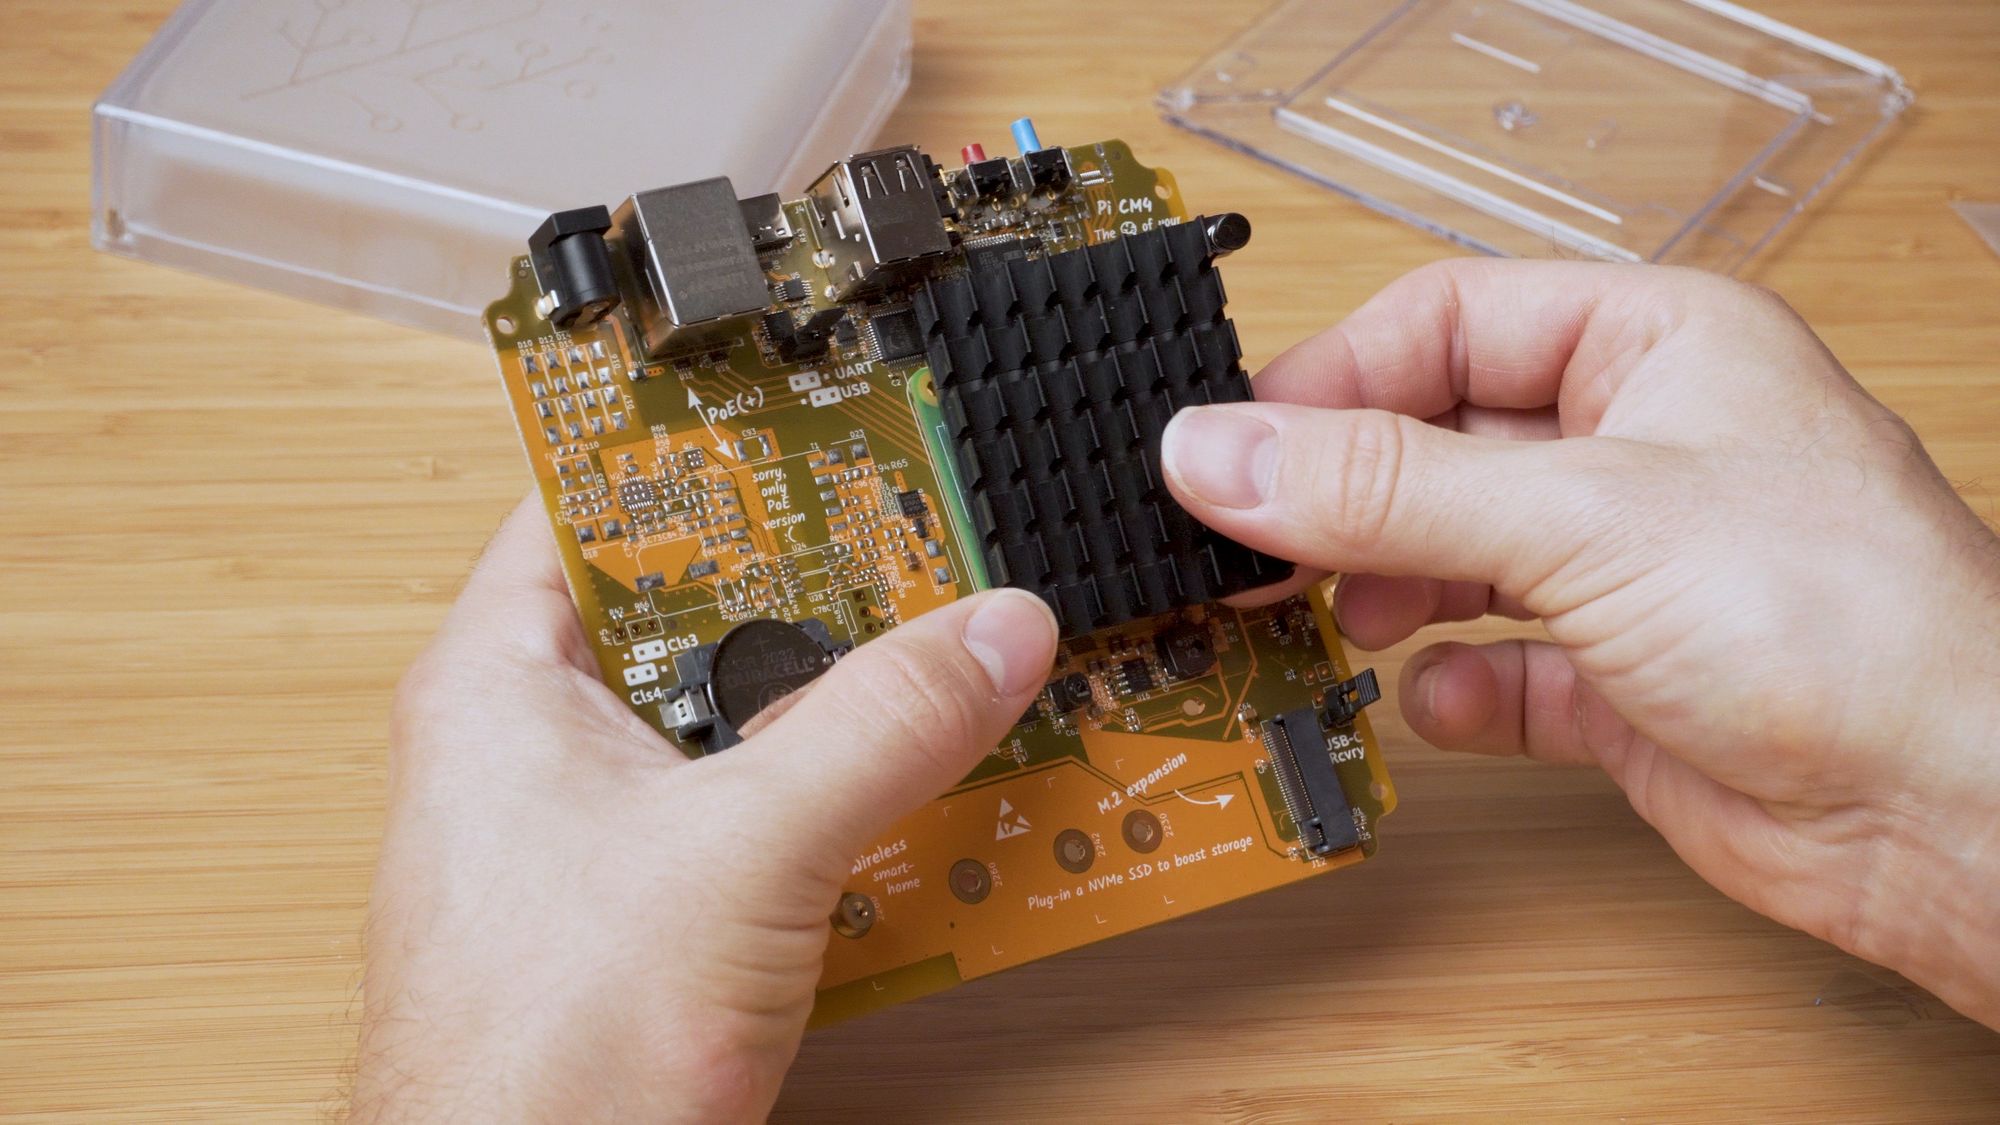
This is the brains of your Yellow and where we will install Home Assistant onto for that powerful, local Smart Home control. Down at the bottom, we have our M.2 slot, which can be used for expandable storage, or depending on the compute module you have, is the main storage for the system. Then over on the left hand bottom corner, we have our ZigBee module - the ZigBee module is already connected and installed so you don’t need to do anything there, but it's just nice to know where it is!
Installing The Compute Module & Heatsink
Now we've checked all that out, let’s go ahead and get to actually installing and firing the Yellow up!
If you have the standard Home Assistant Yellow, then your Raspberry Pi Compute Module 4 and heatsink are already installed so you can skip this part, unless, of course, you want to see how it goes together for future reference.
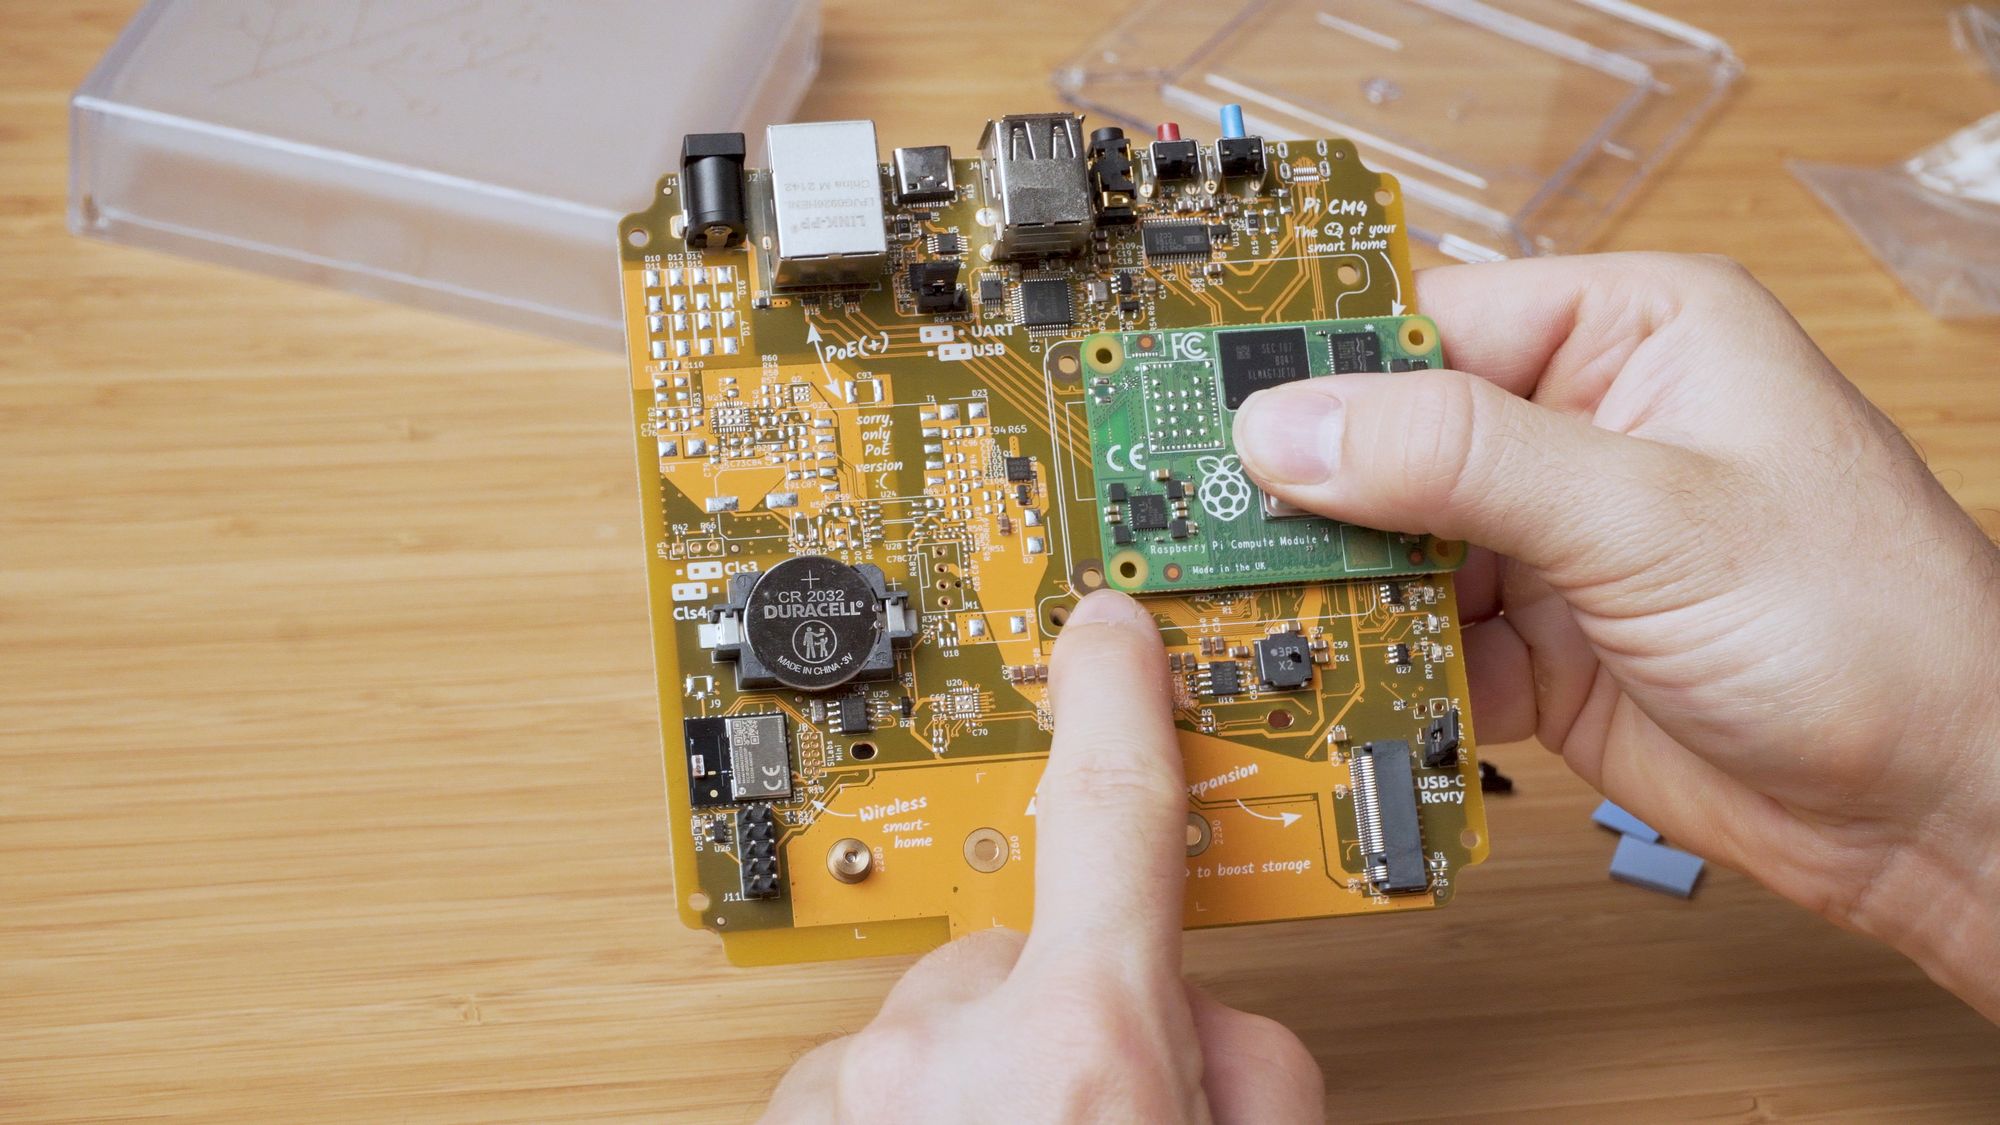
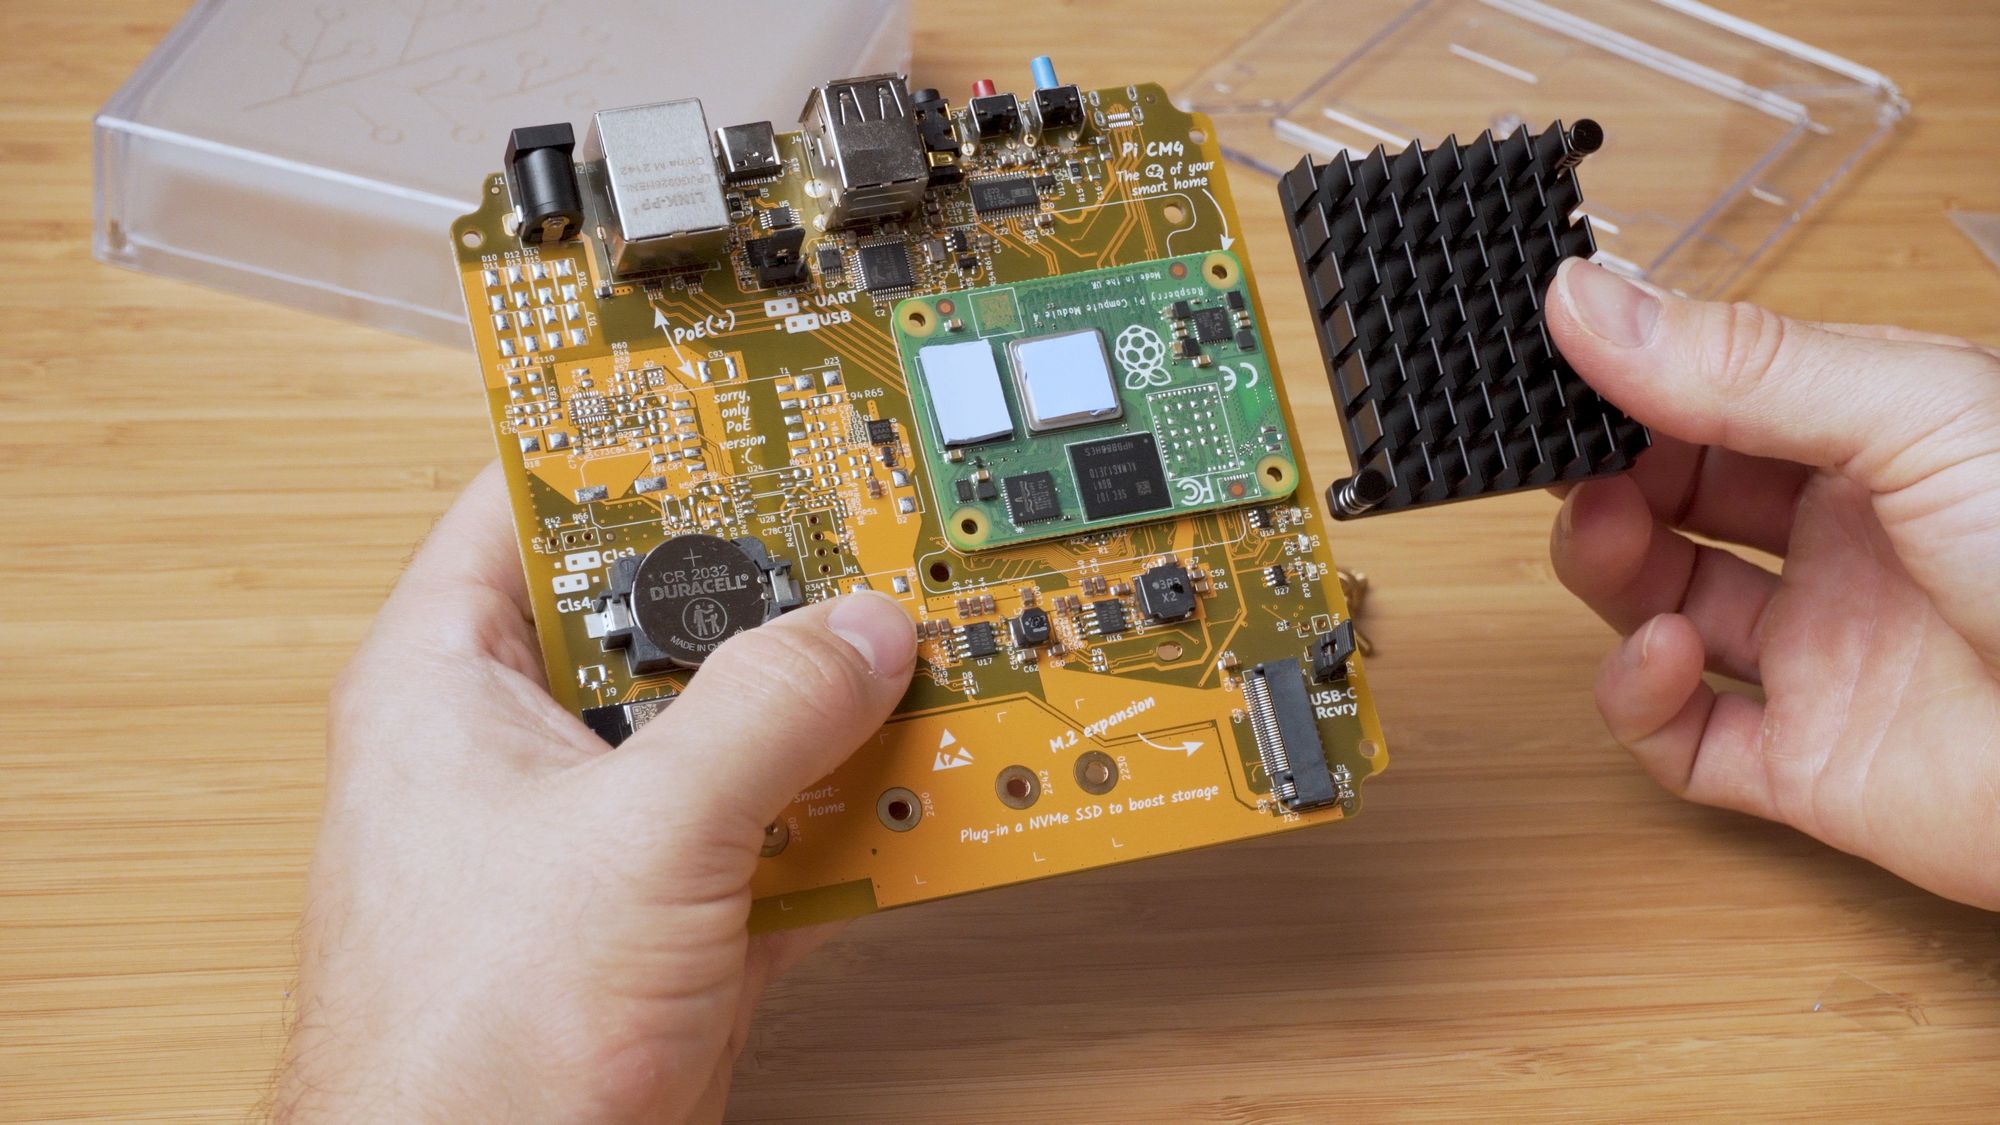
If you have one of the kit variants, then grab your Compute Module 4 and locate the black connectors on the underside - these pop into the connectors on the Yellow PCB - so go ahead and line those up, using the white outline on the board to orientate it correctly.
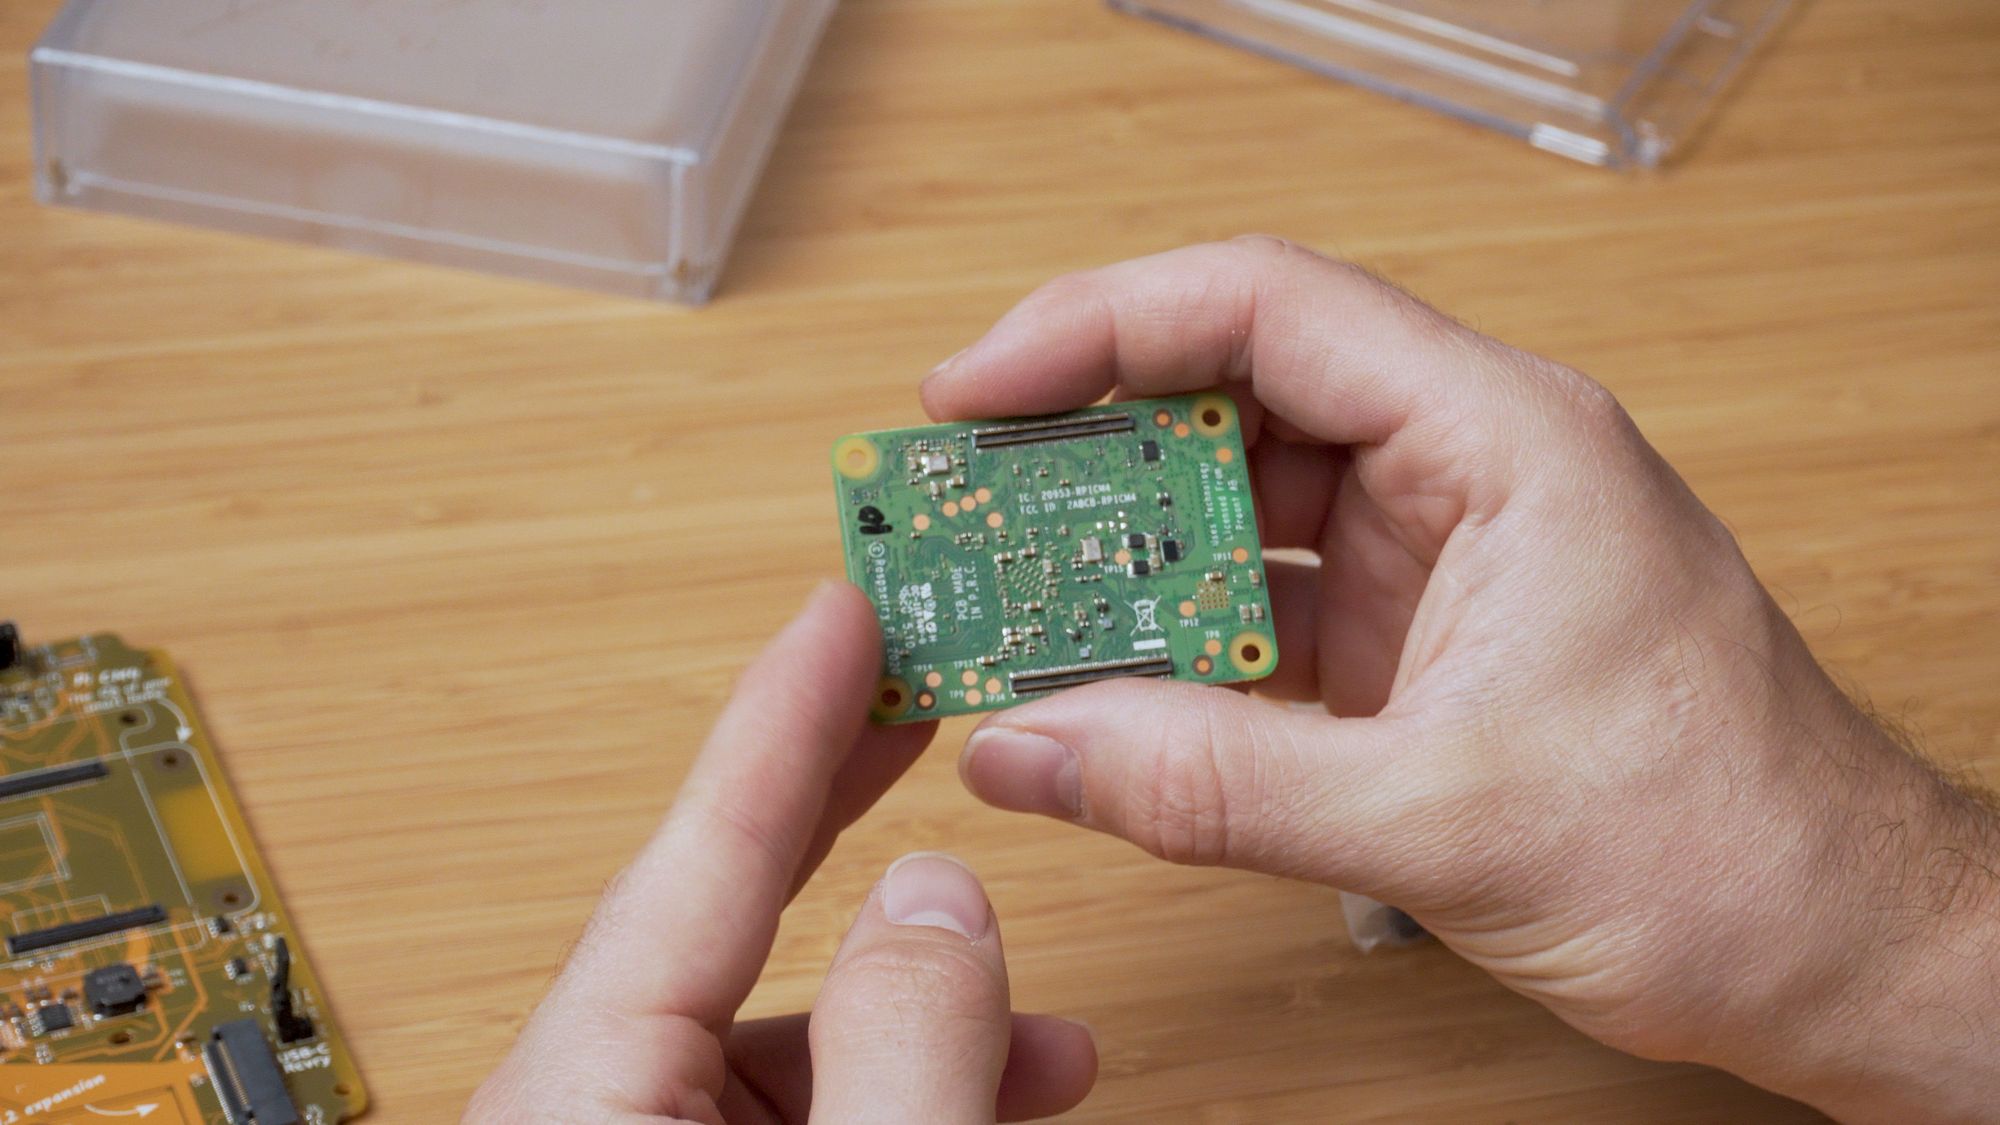
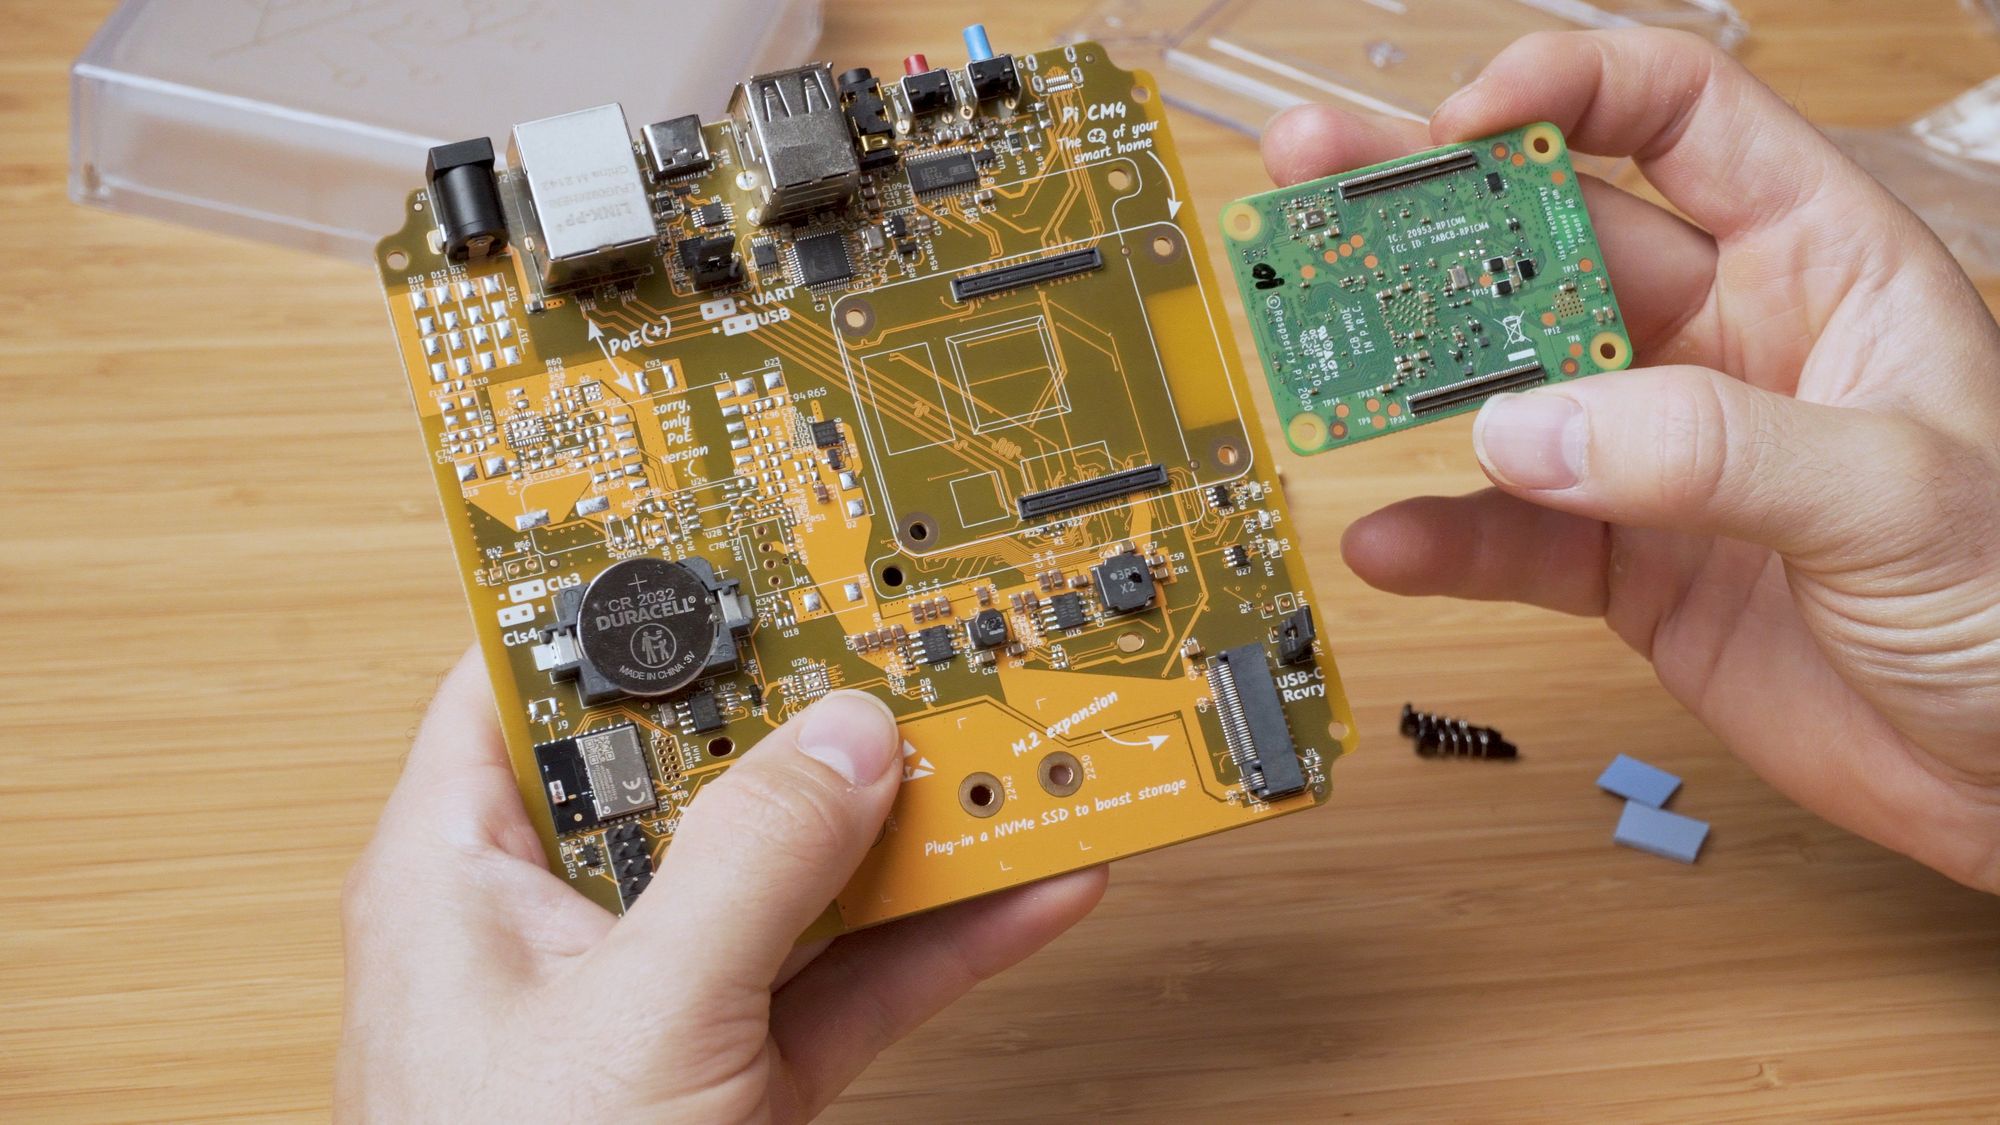

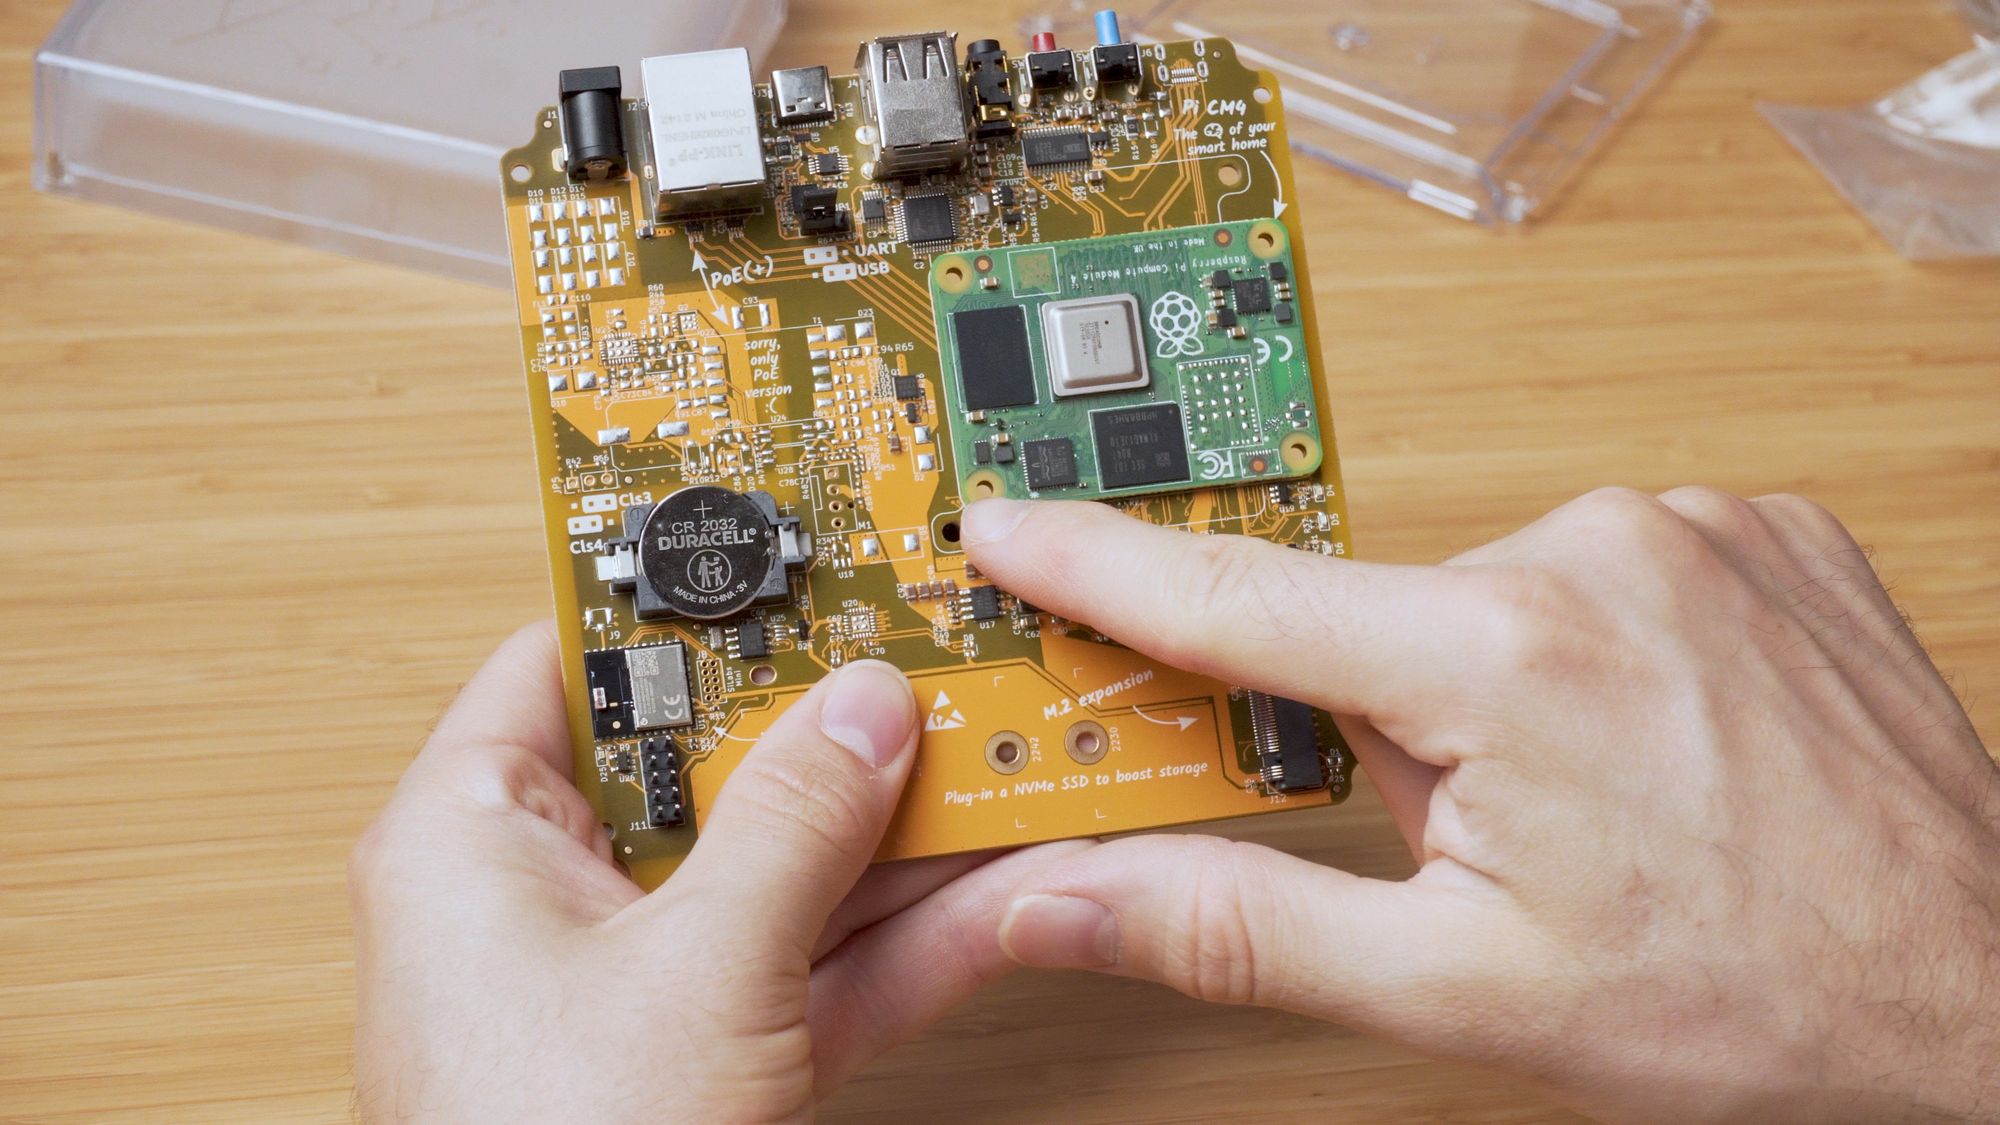
Don’t worry, the board really only fits in one way and you should be able to verify that the holes in each of the 4 corners of the Compute Module line up with the holes on the Yellow.
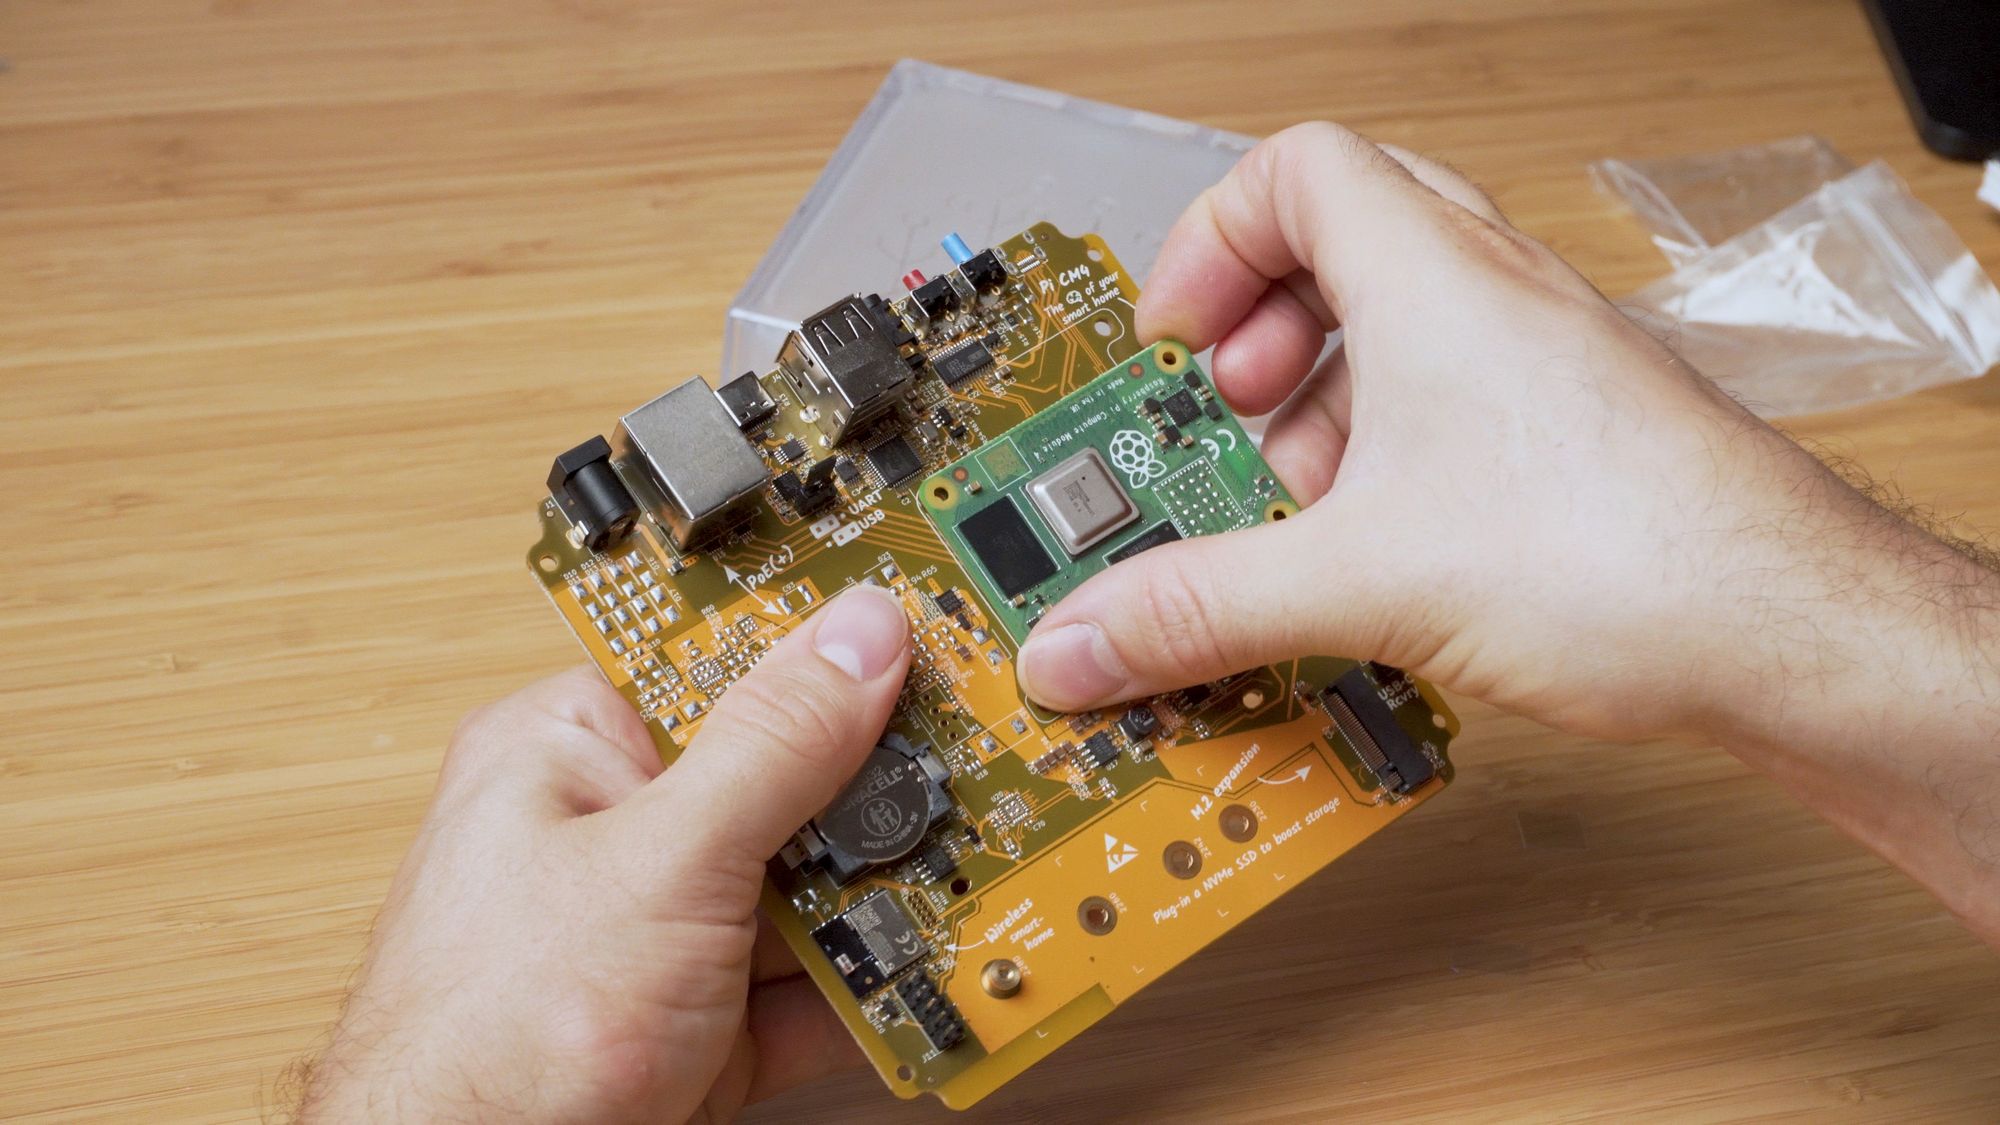
Once in the correct position, give it a light to medium push down and you will feel it click into place. If you want to remove it for any reason in the future, then a pull under one of the edges is all that’s required.
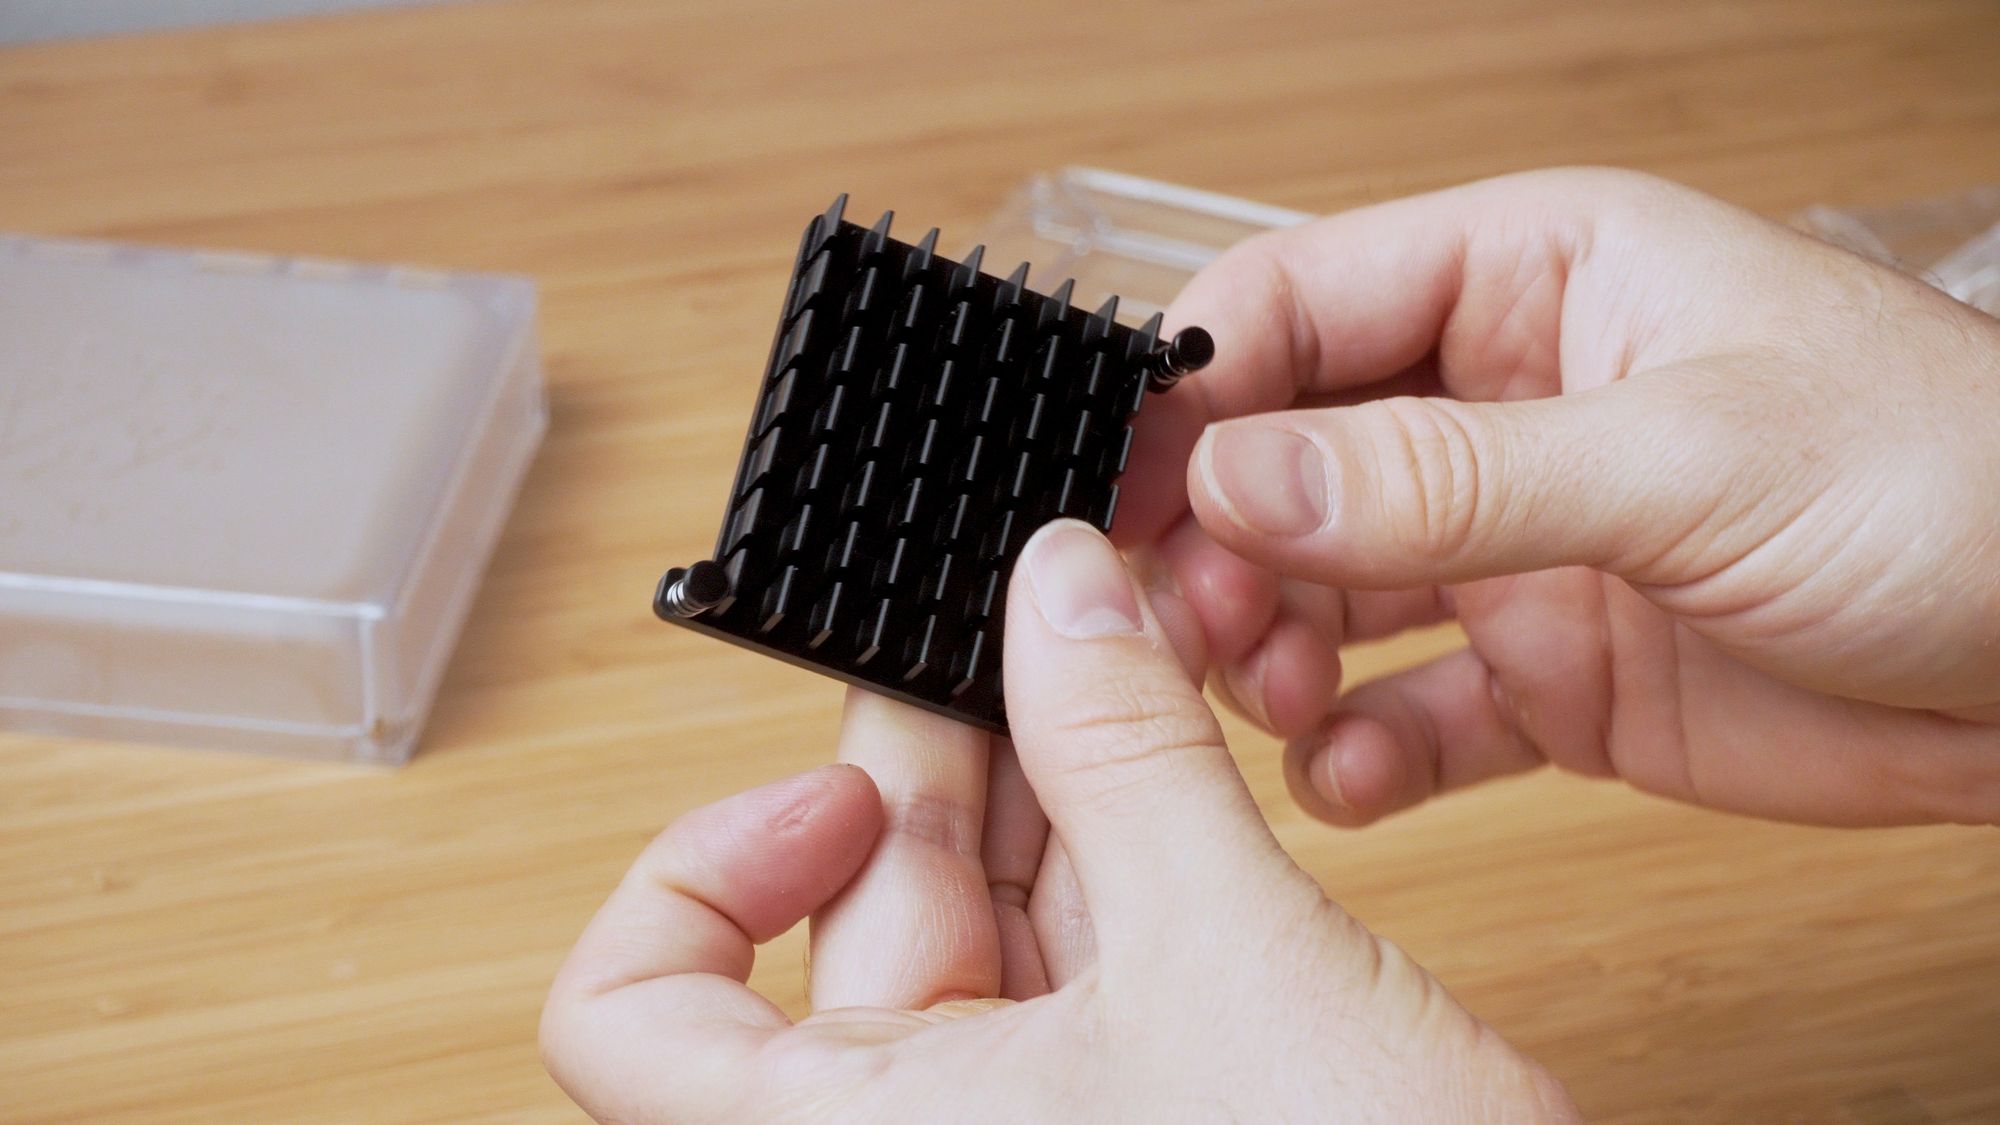
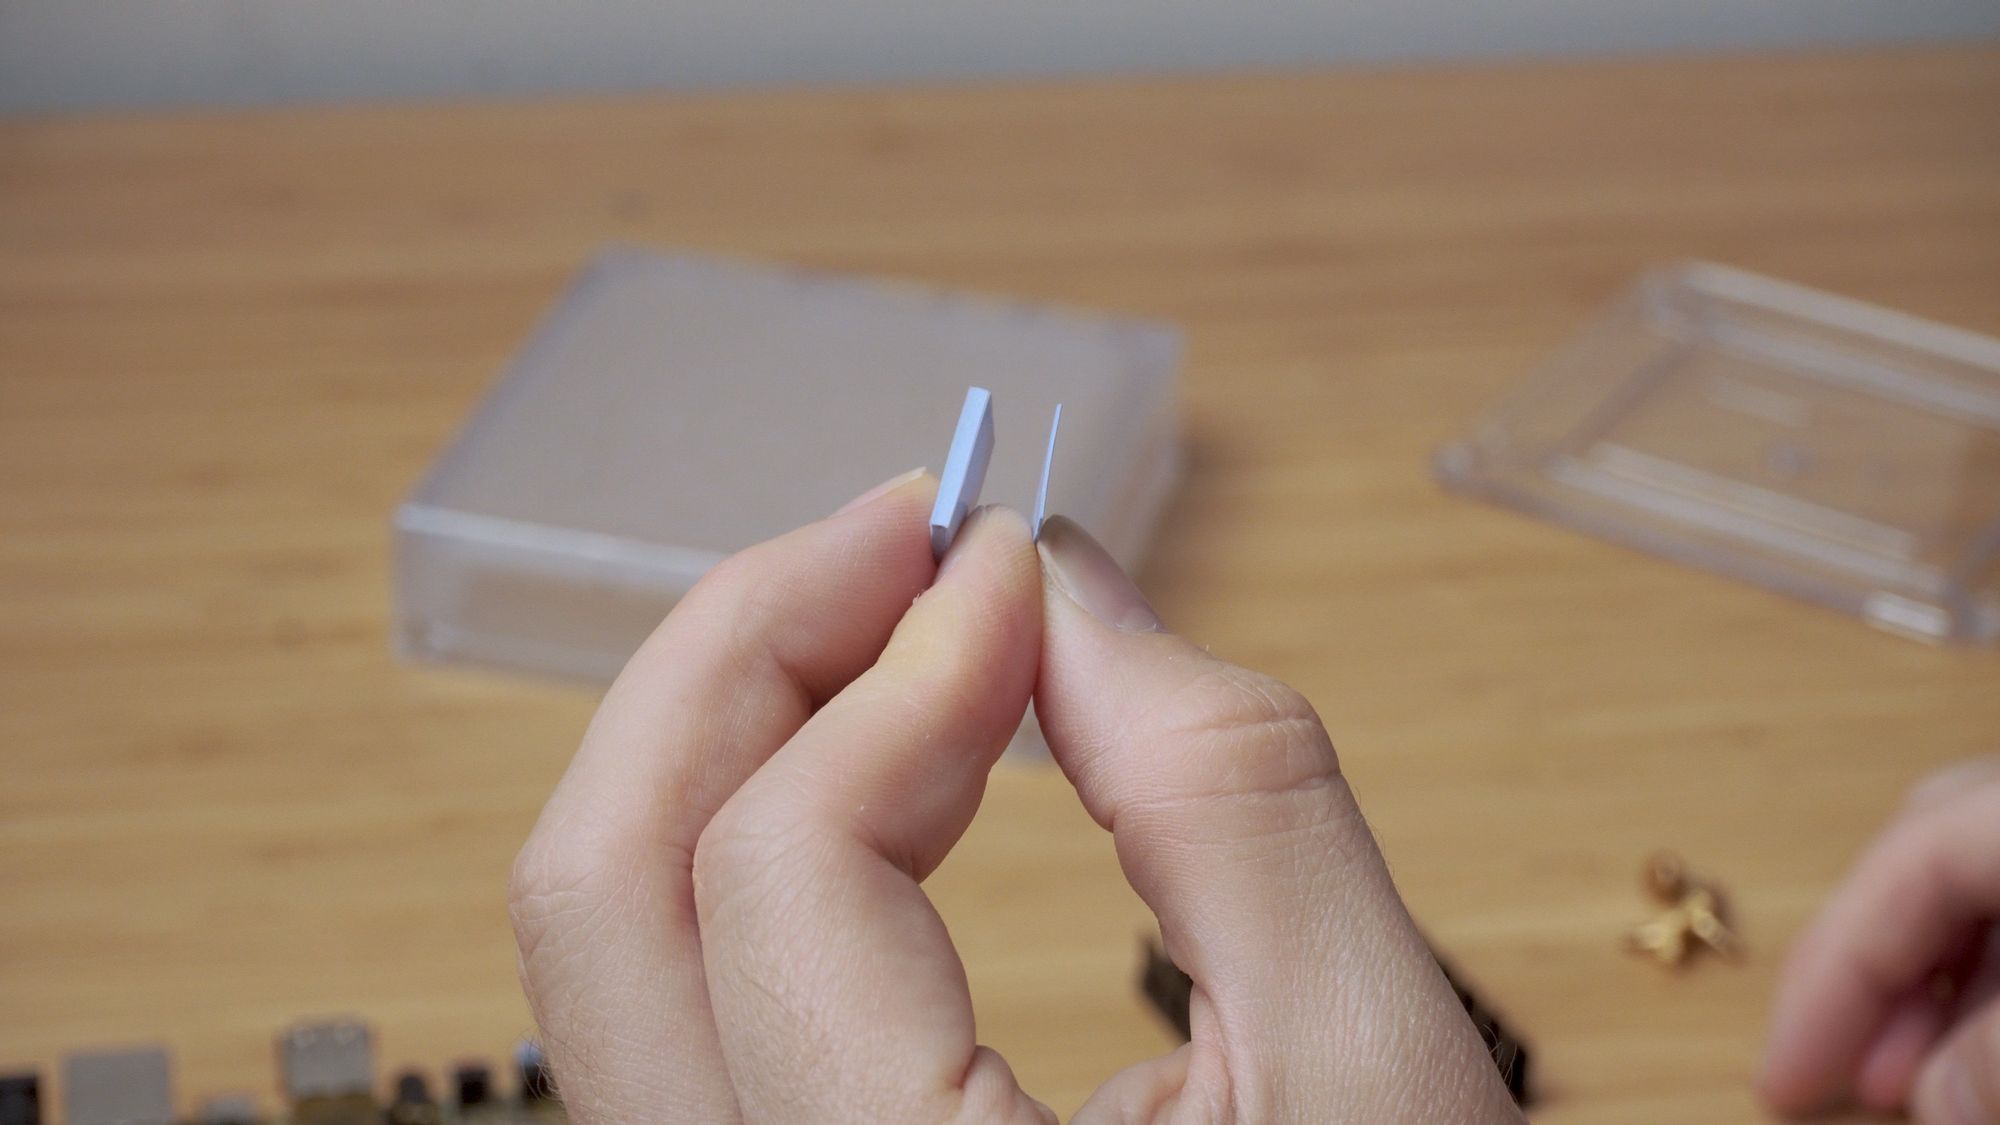
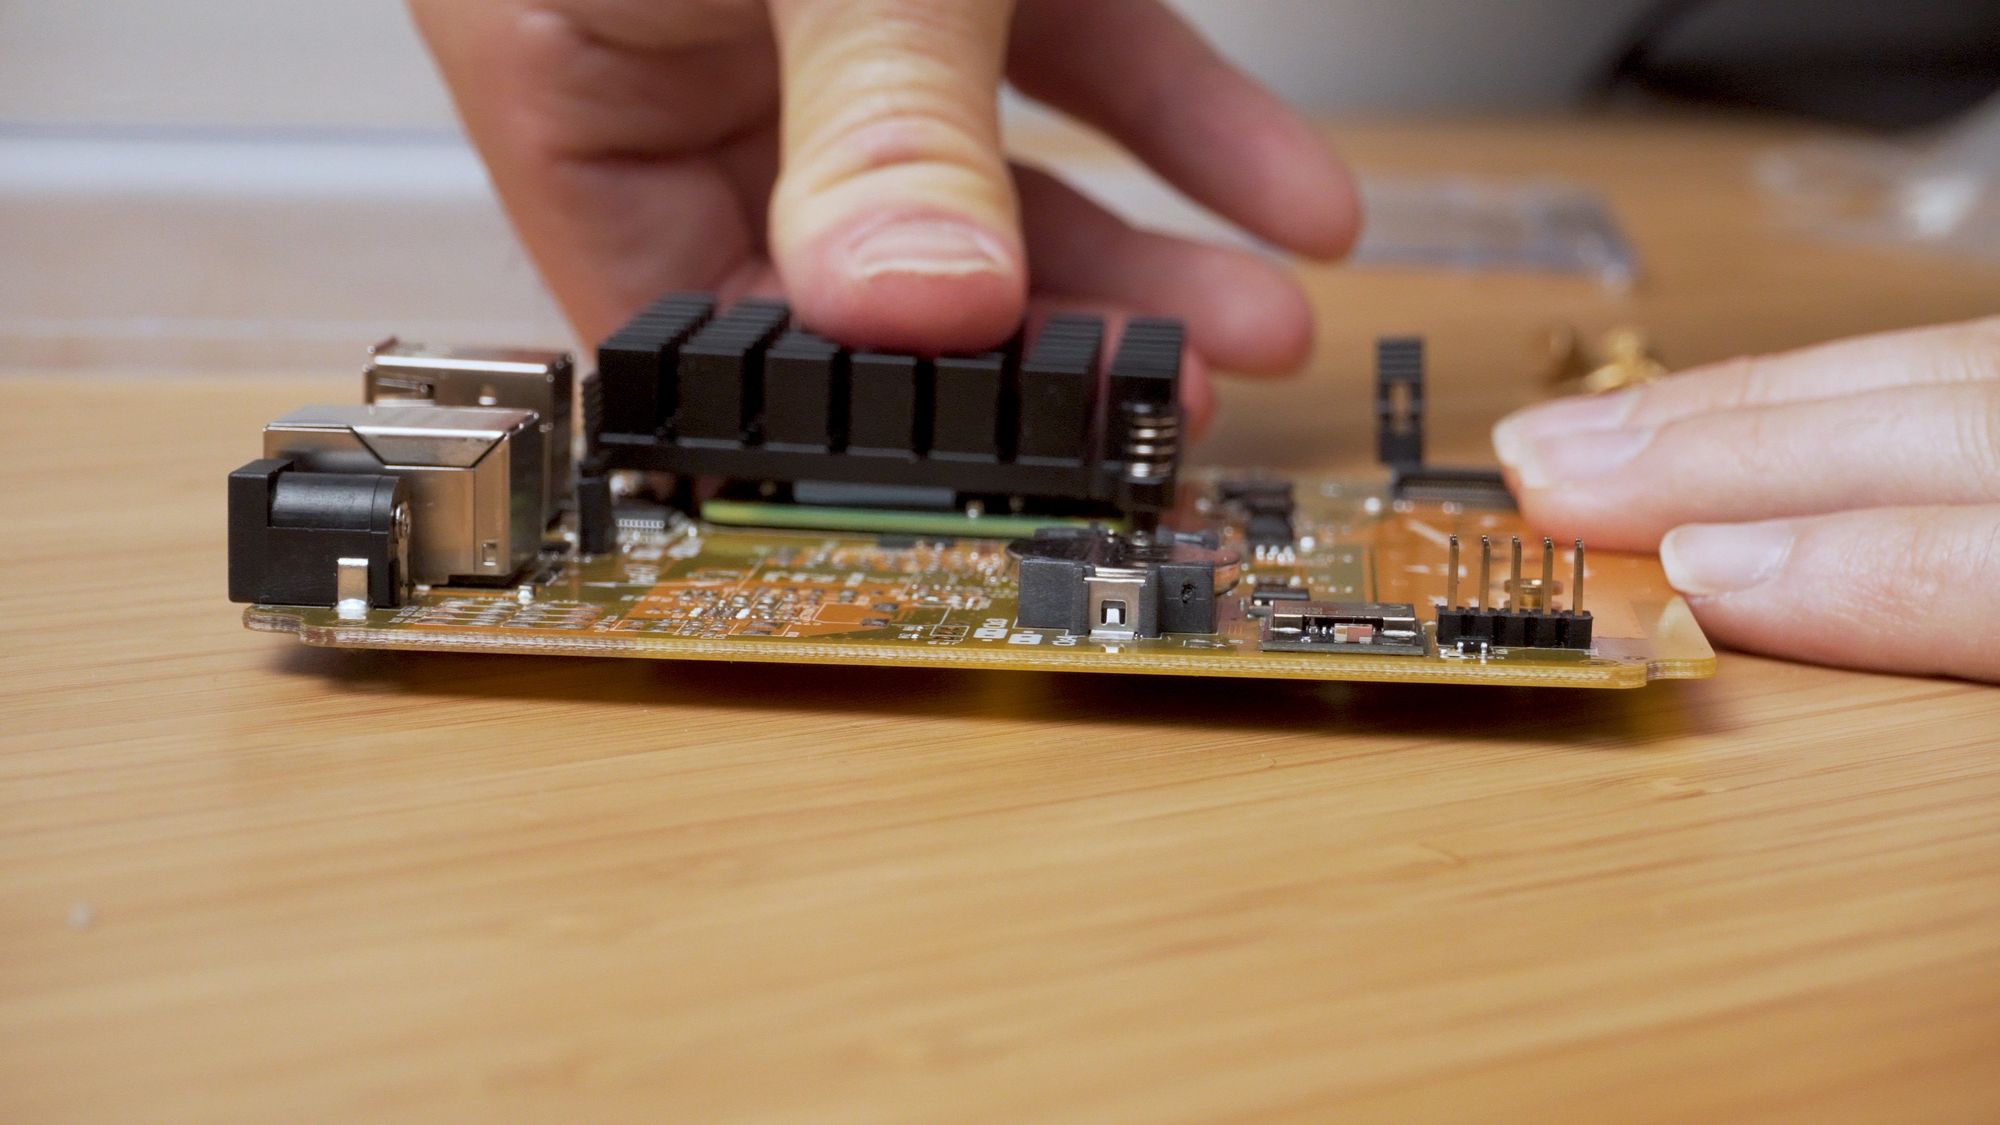
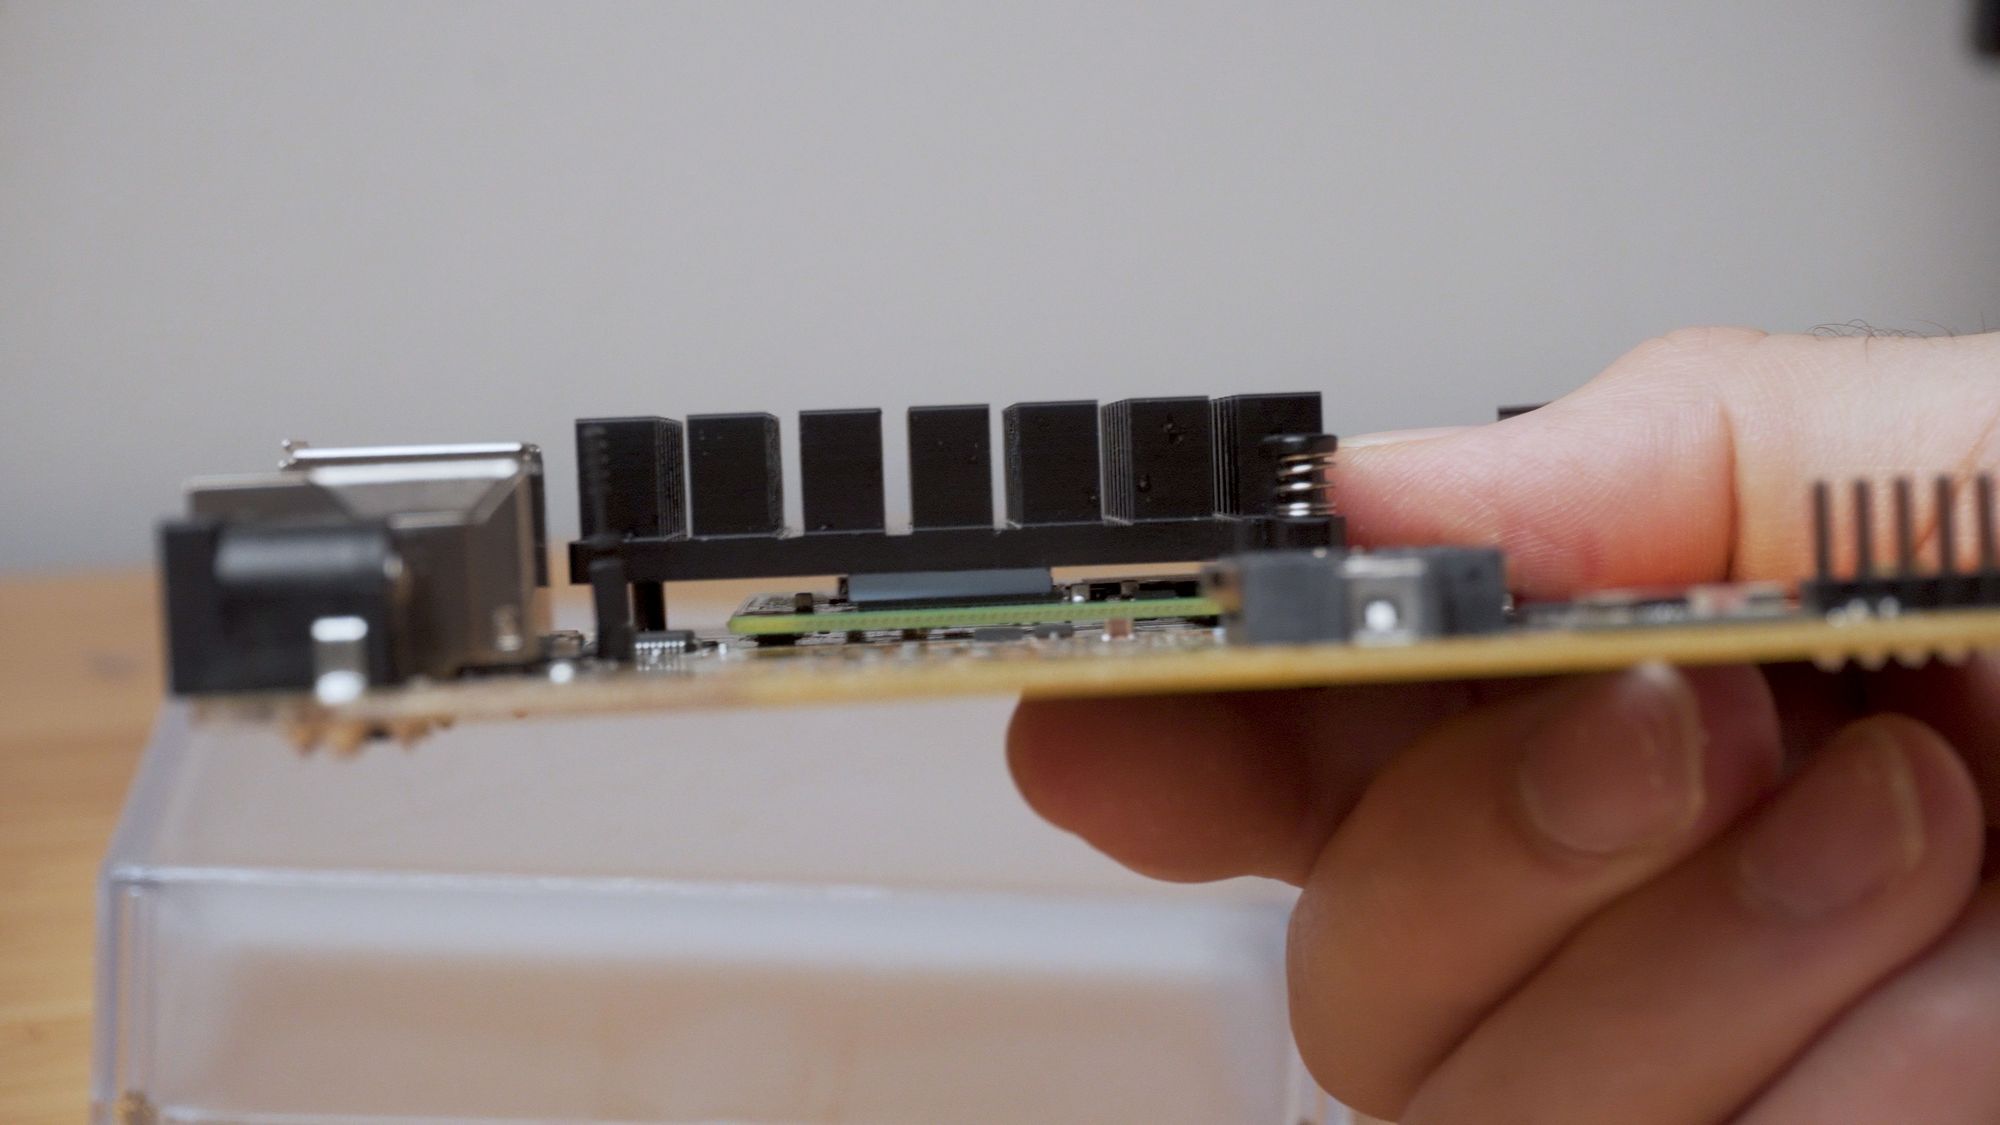
Now that your Compute Module 4 is installed, we need to prepare and install the heatsink. So, grab the heatsink from the box, as well as the 2 spring clips and 2 thermal pads, push the spring clips through the top of the heatsink first, and then peel off the plastic and apply the thermal pads to the CPU and memory modules.
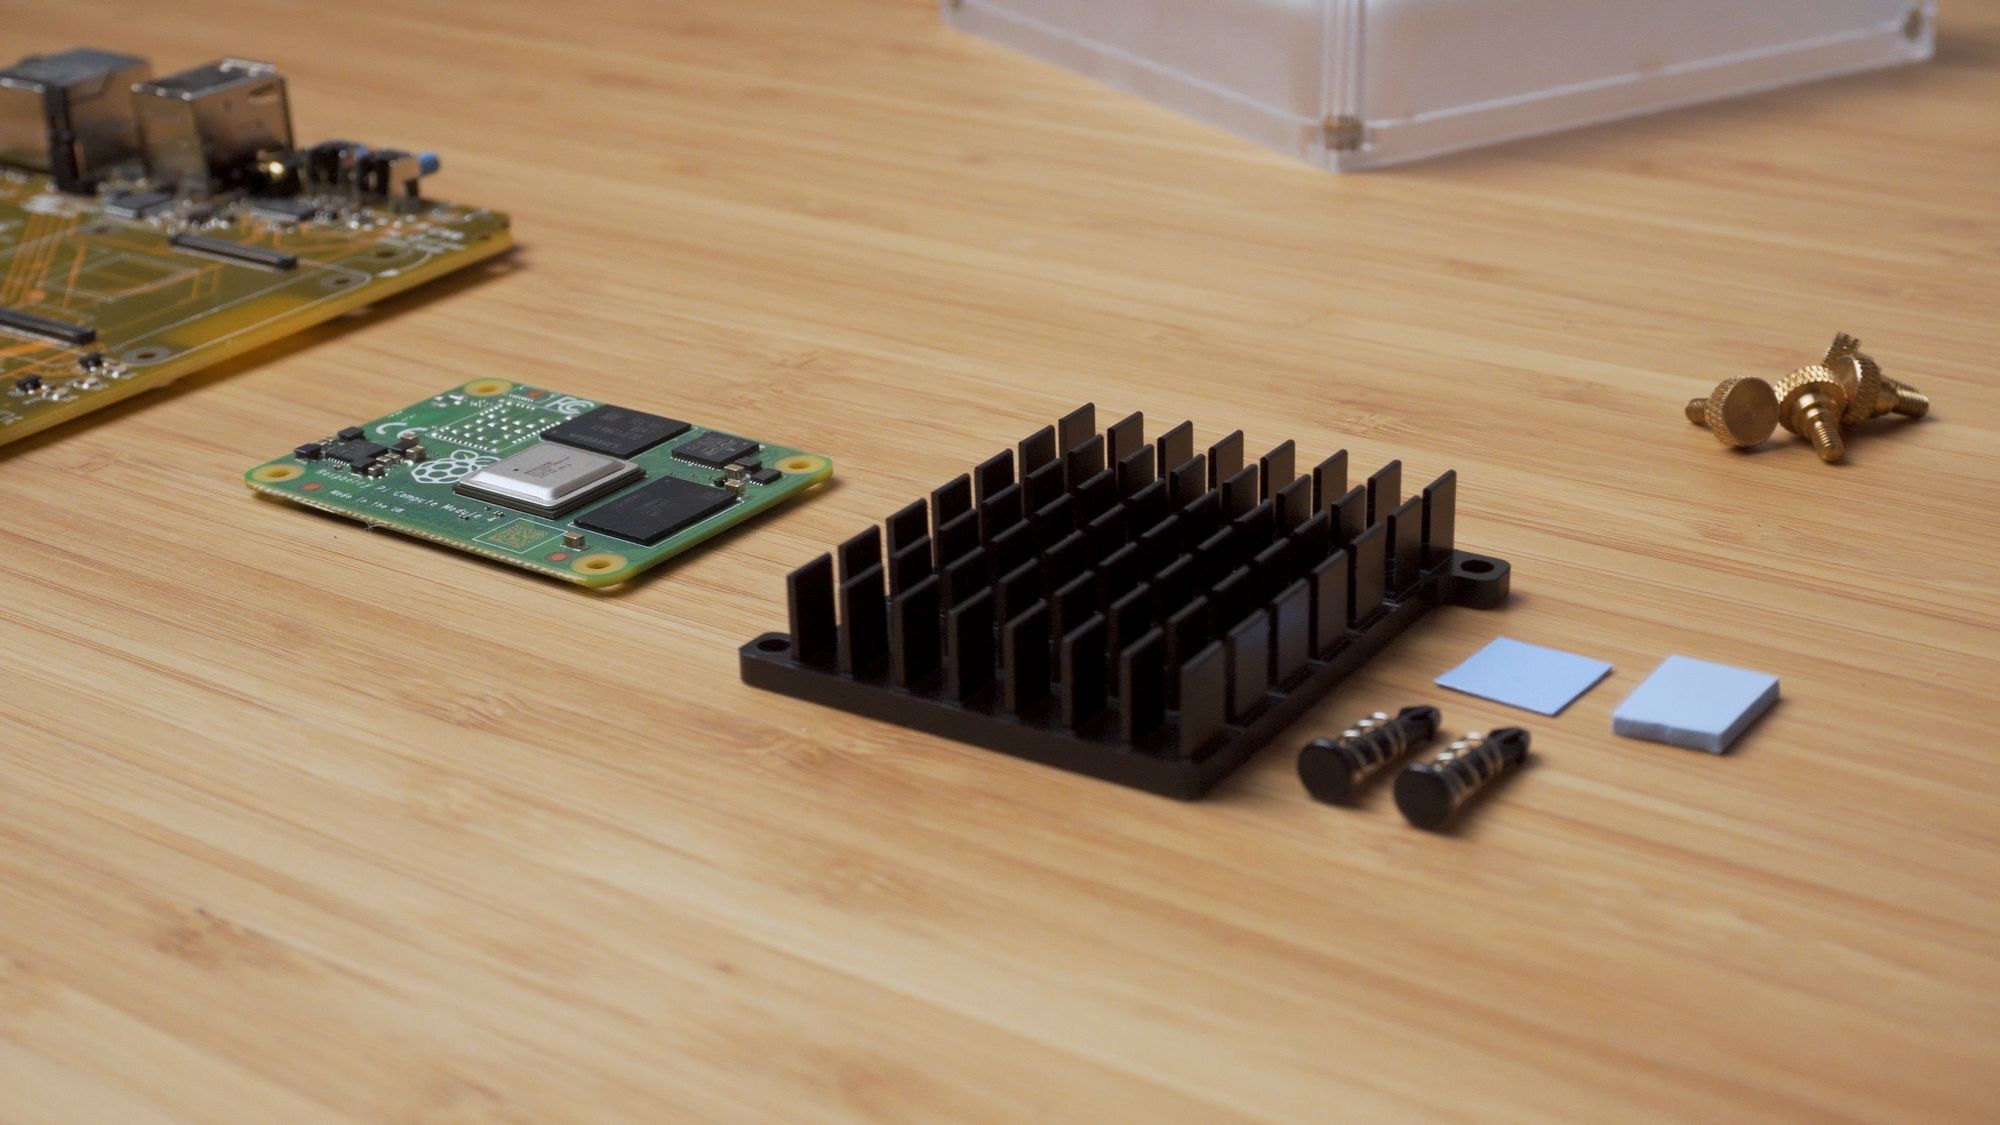
Note, the thicker of the two thermal pads goes on the memory module, and the thinner thermal pad goes on our CPU:

Then line up the heatsink with the outline and holes on the Yellow's PCB, and push the clips through the hole till it snaps in place. Apply some pressure for 30 seconds to allow the thermal pads to stick properly to the heatsink.
Installing an SSD
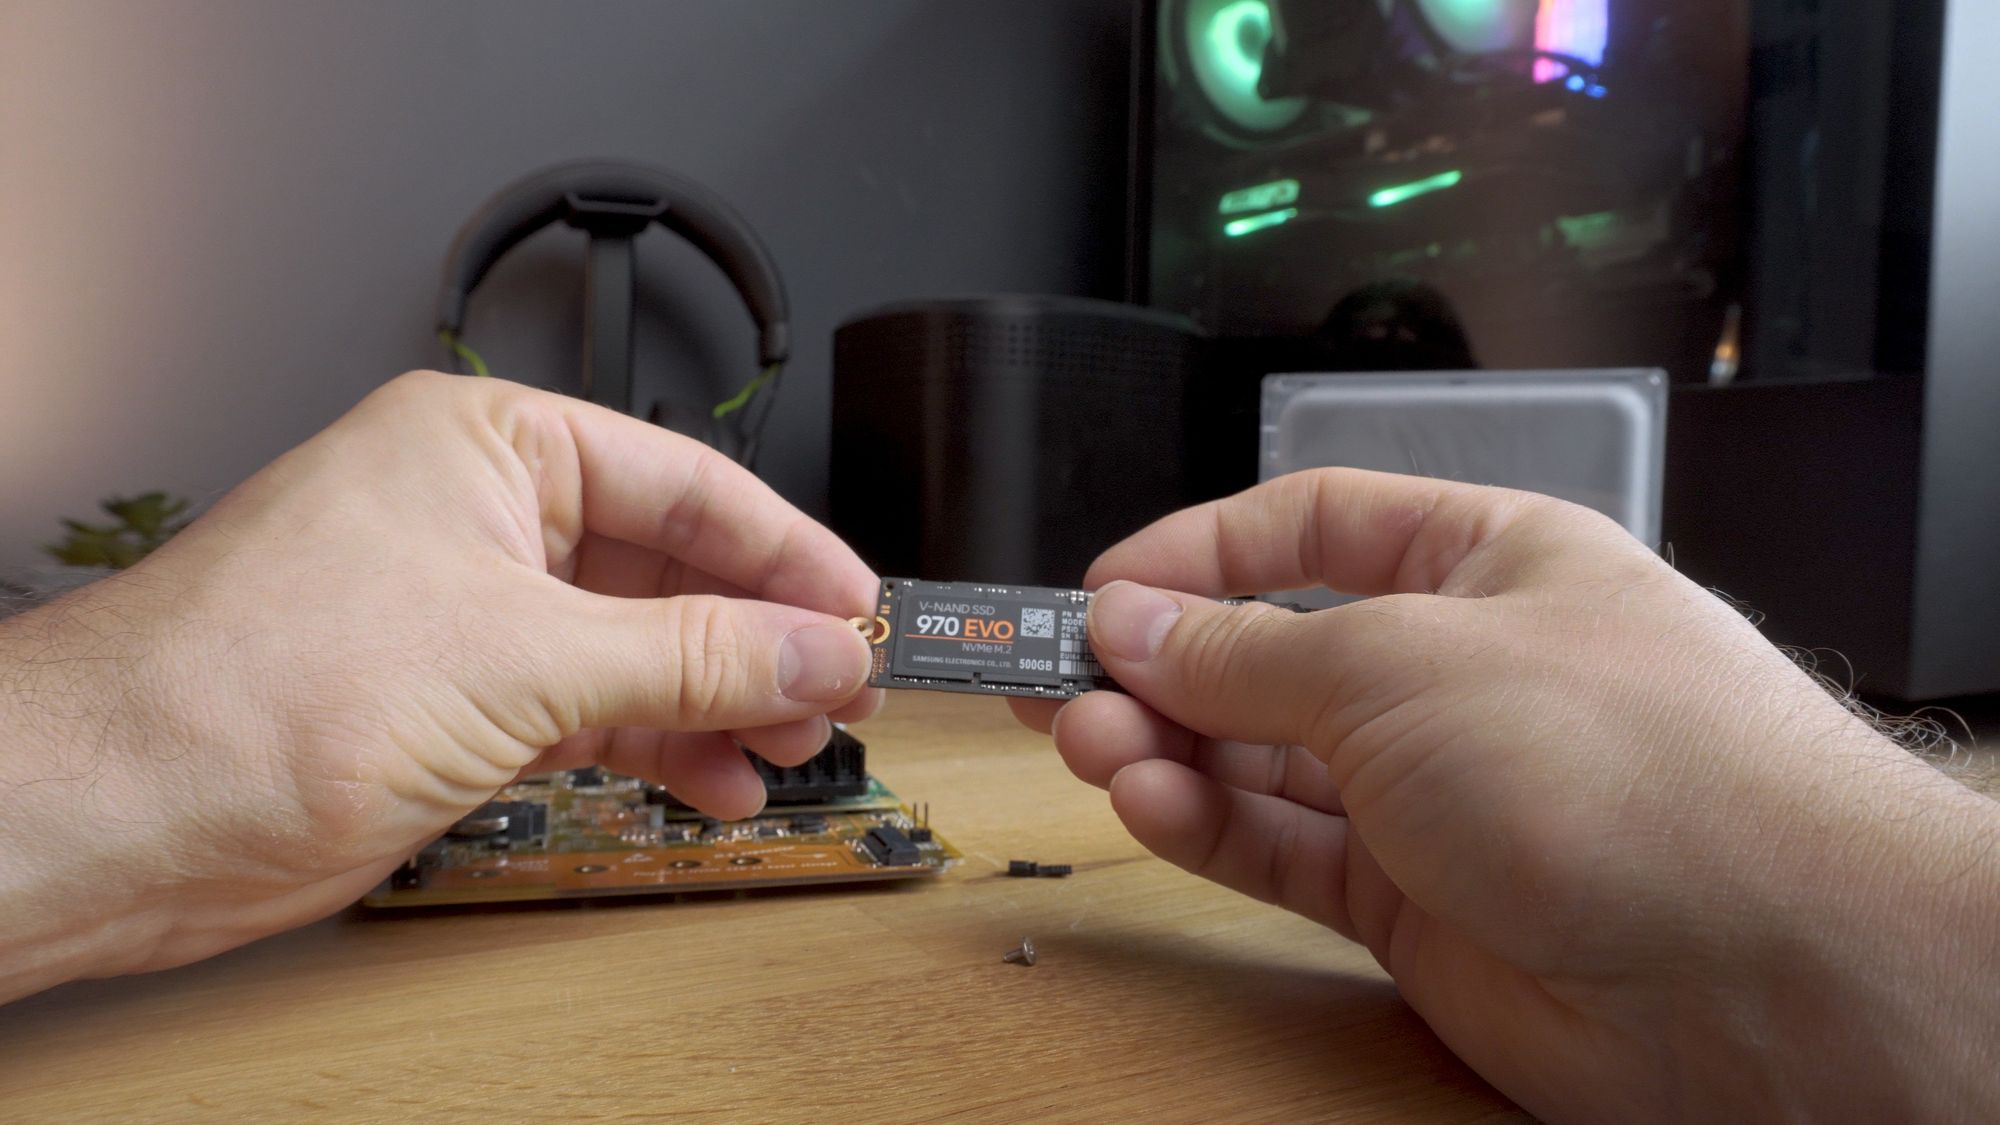
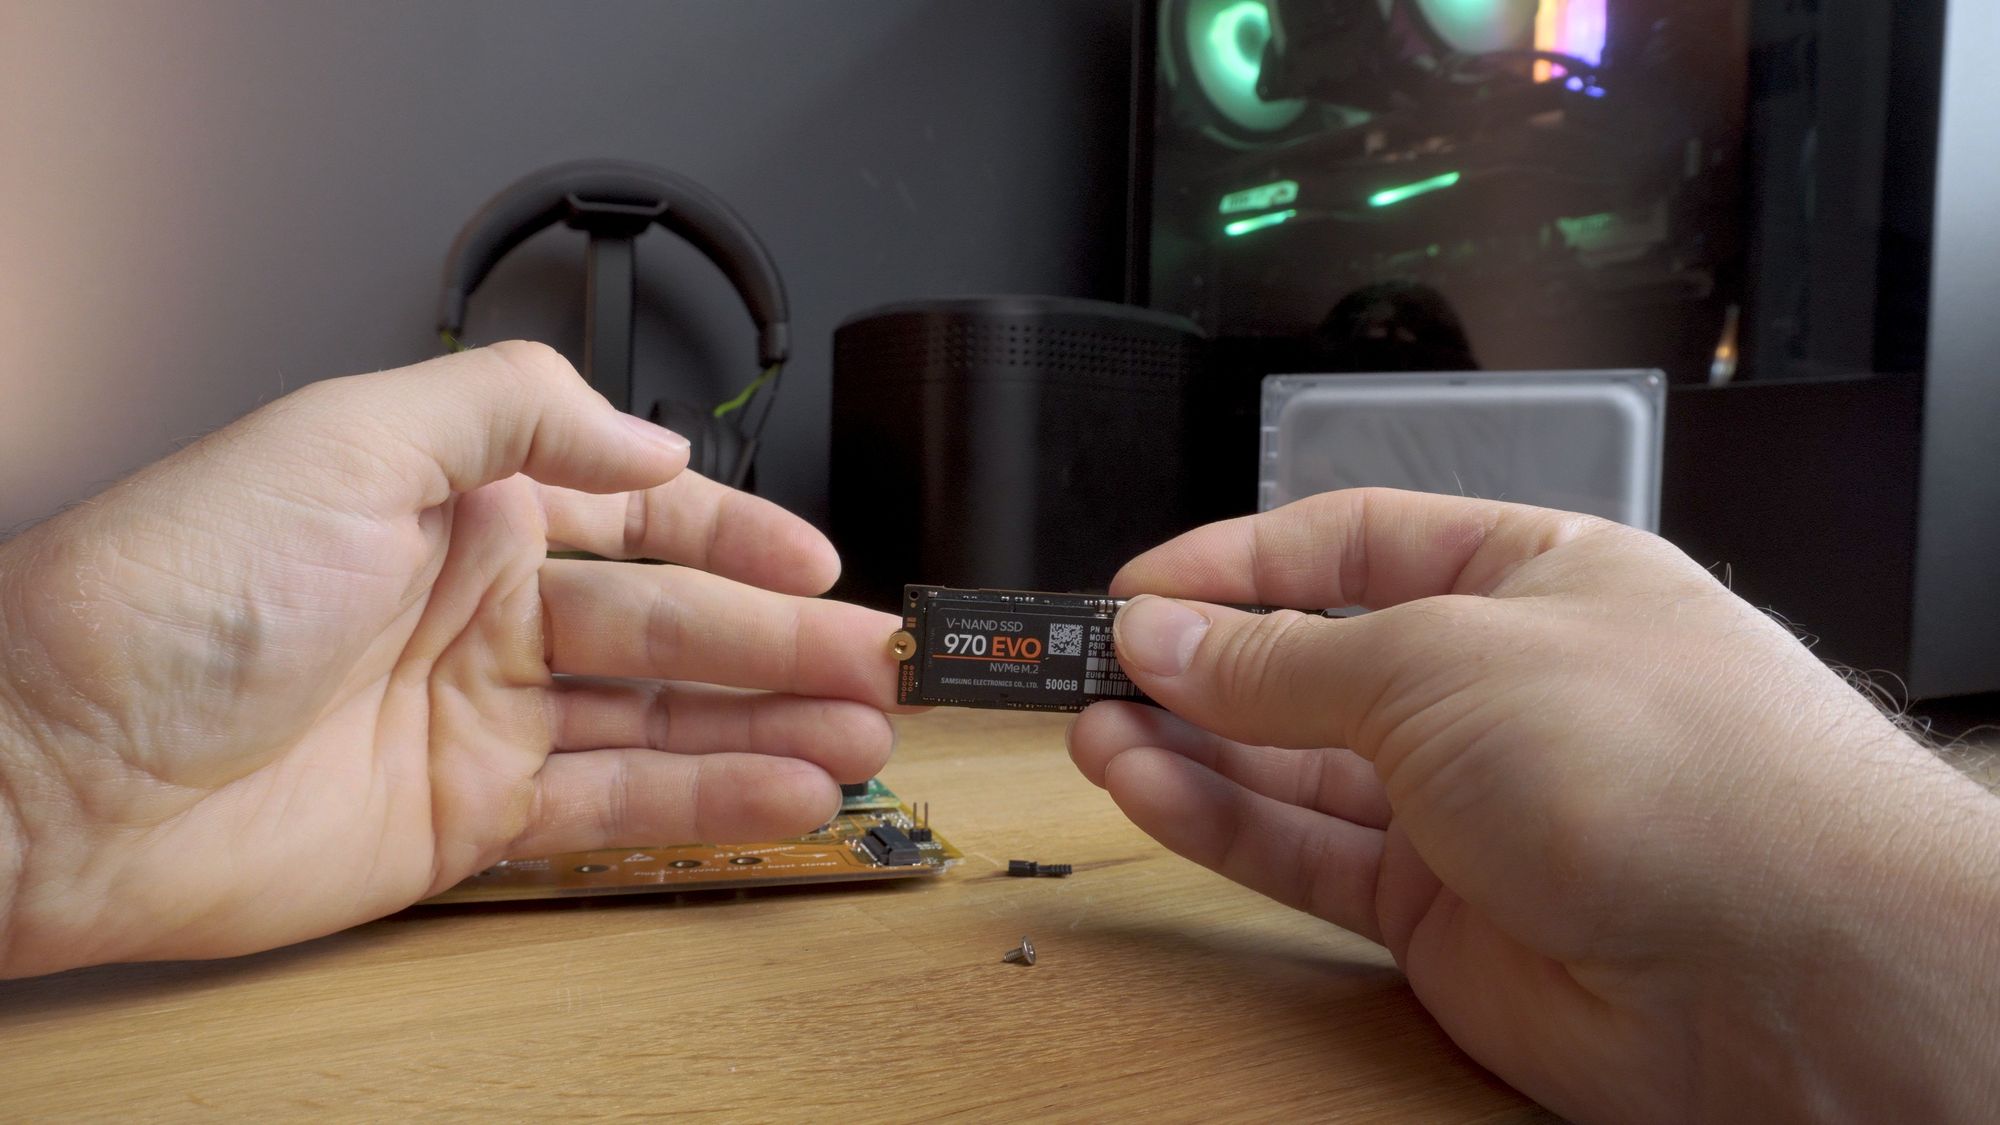
Now we can install our optional storage, so there are a few different configurations you could go for here. If you have the standard Yellow, then your Compute Module has 2GB’s of RAM and 16GB’s of on-board eMMC storage, so you can either install an m.2 NVME SSD for extra storage, or you can leave it blank and just use the eMMC storage. The extra storage can be used as a data disk which will store things like music, video or CCTV recordings.
If you bought one of the Yellow kits and are using your own Compute Module, then the same advice above applies, unless you bought a Compute Module Lite which has no on-board storage, in which case you must install an SSD in the slot so we can install Home Assistant: you won’t be able to run Home Assistant without an SSD.
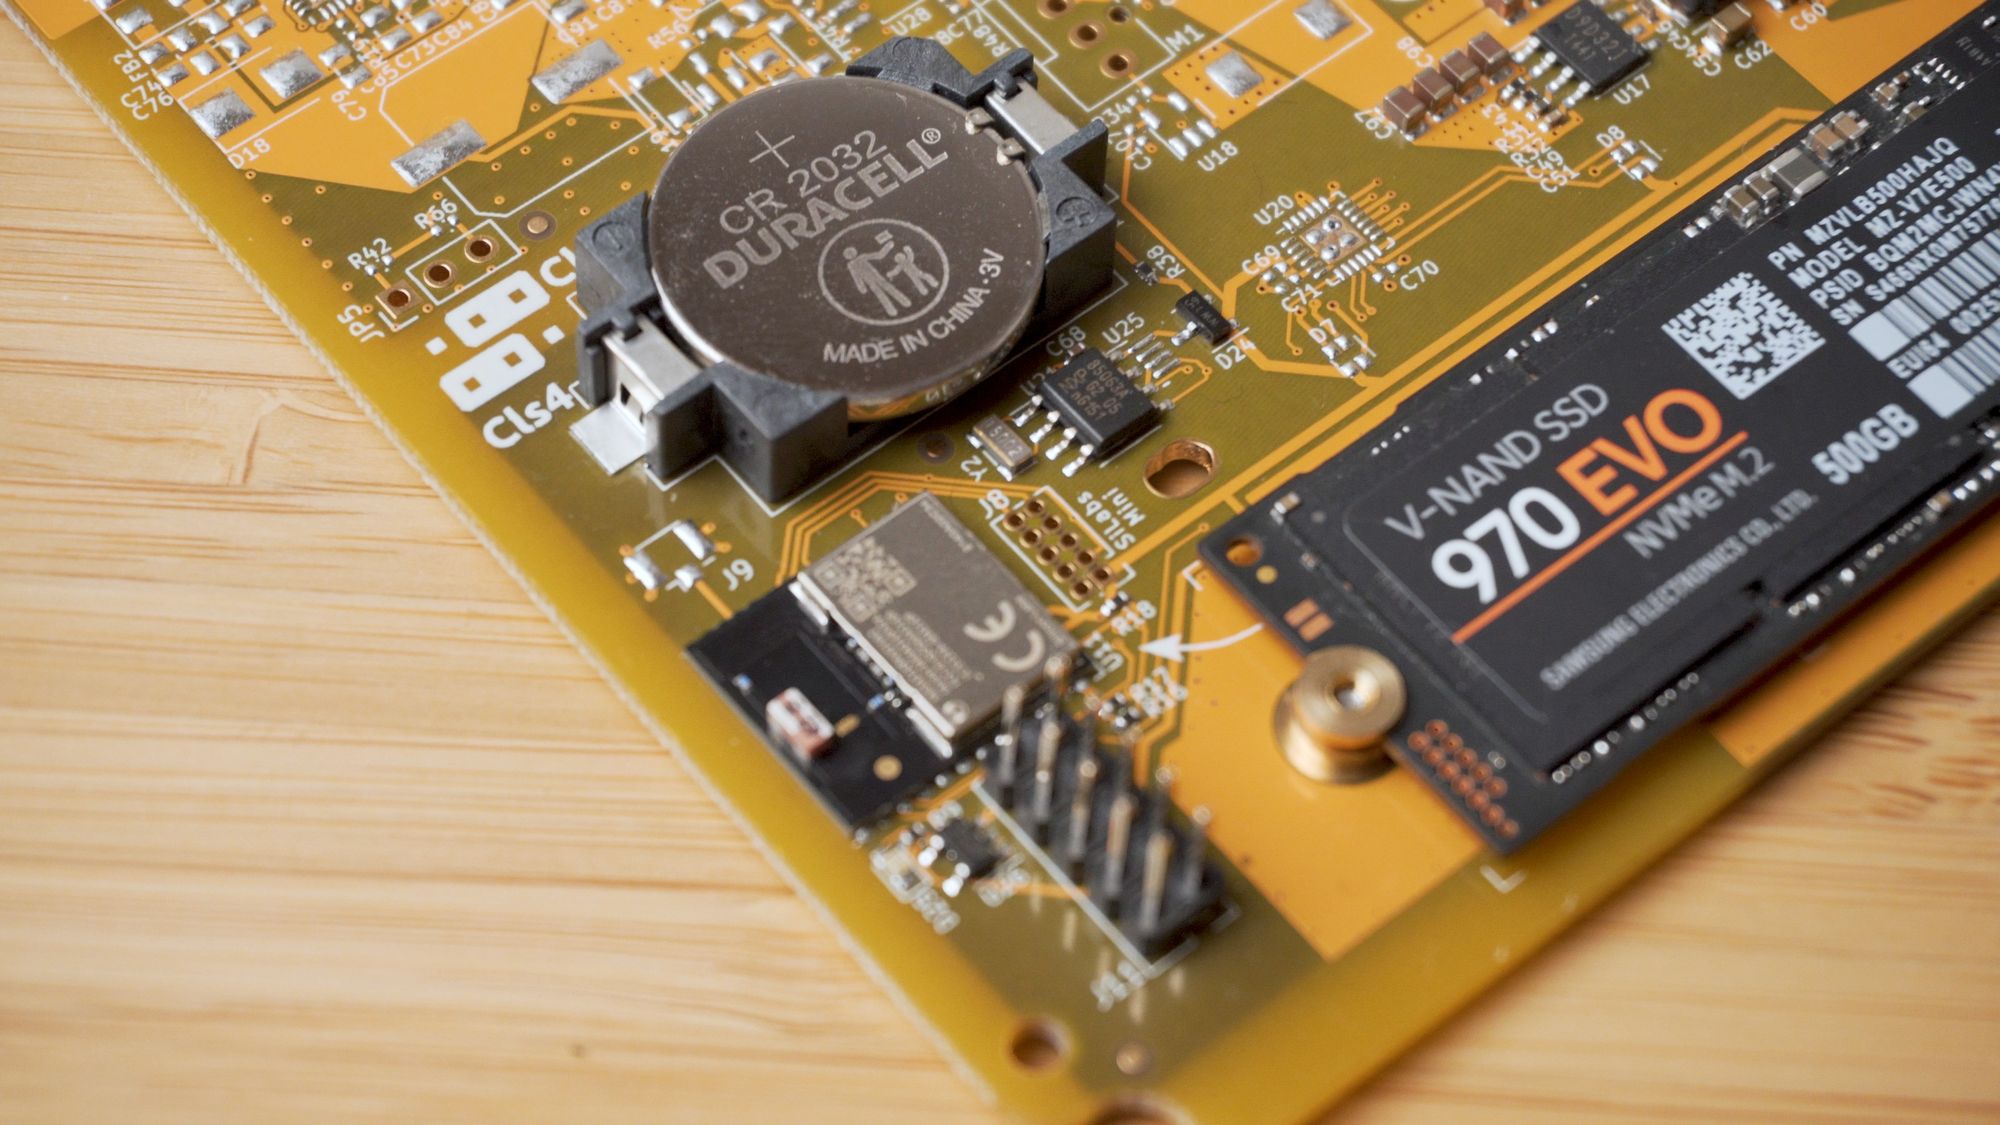
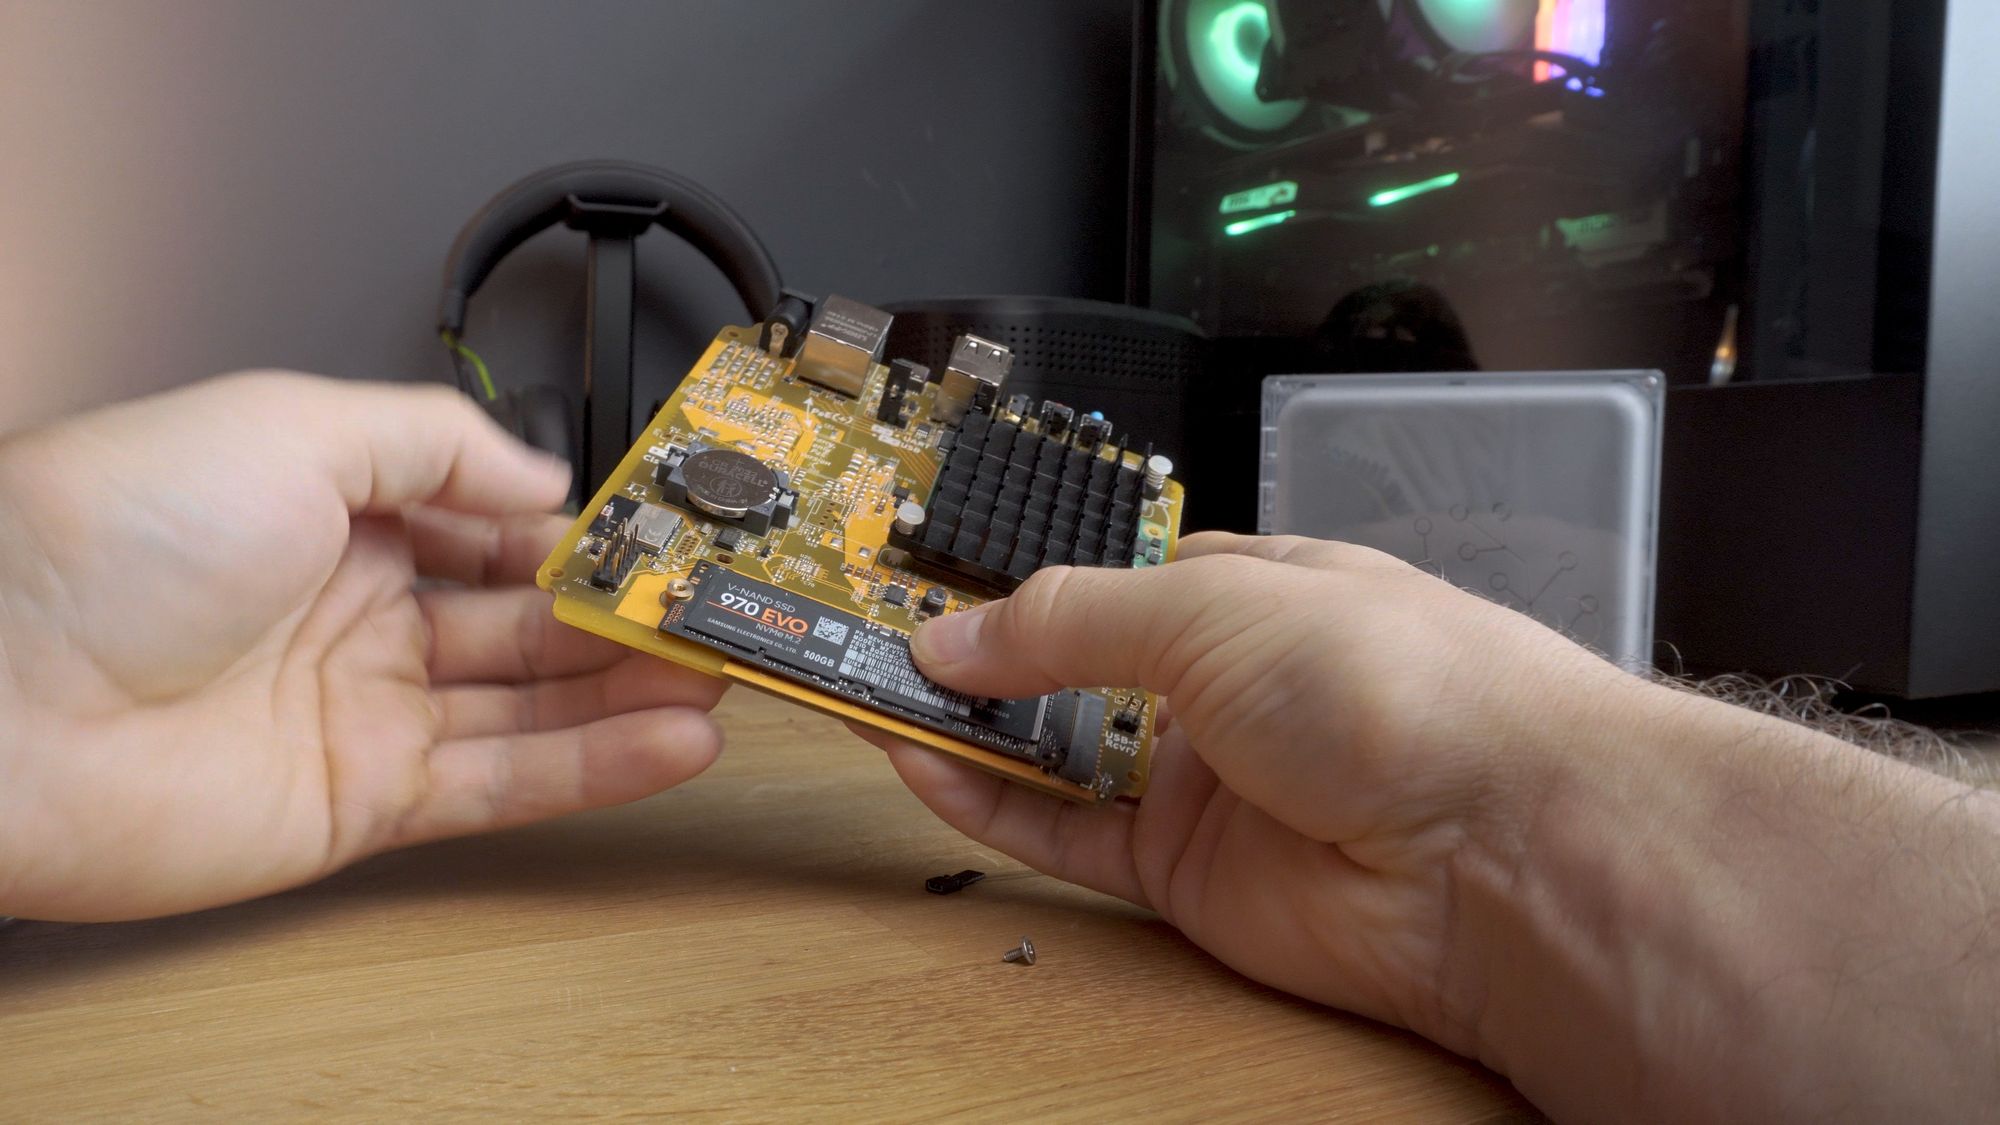
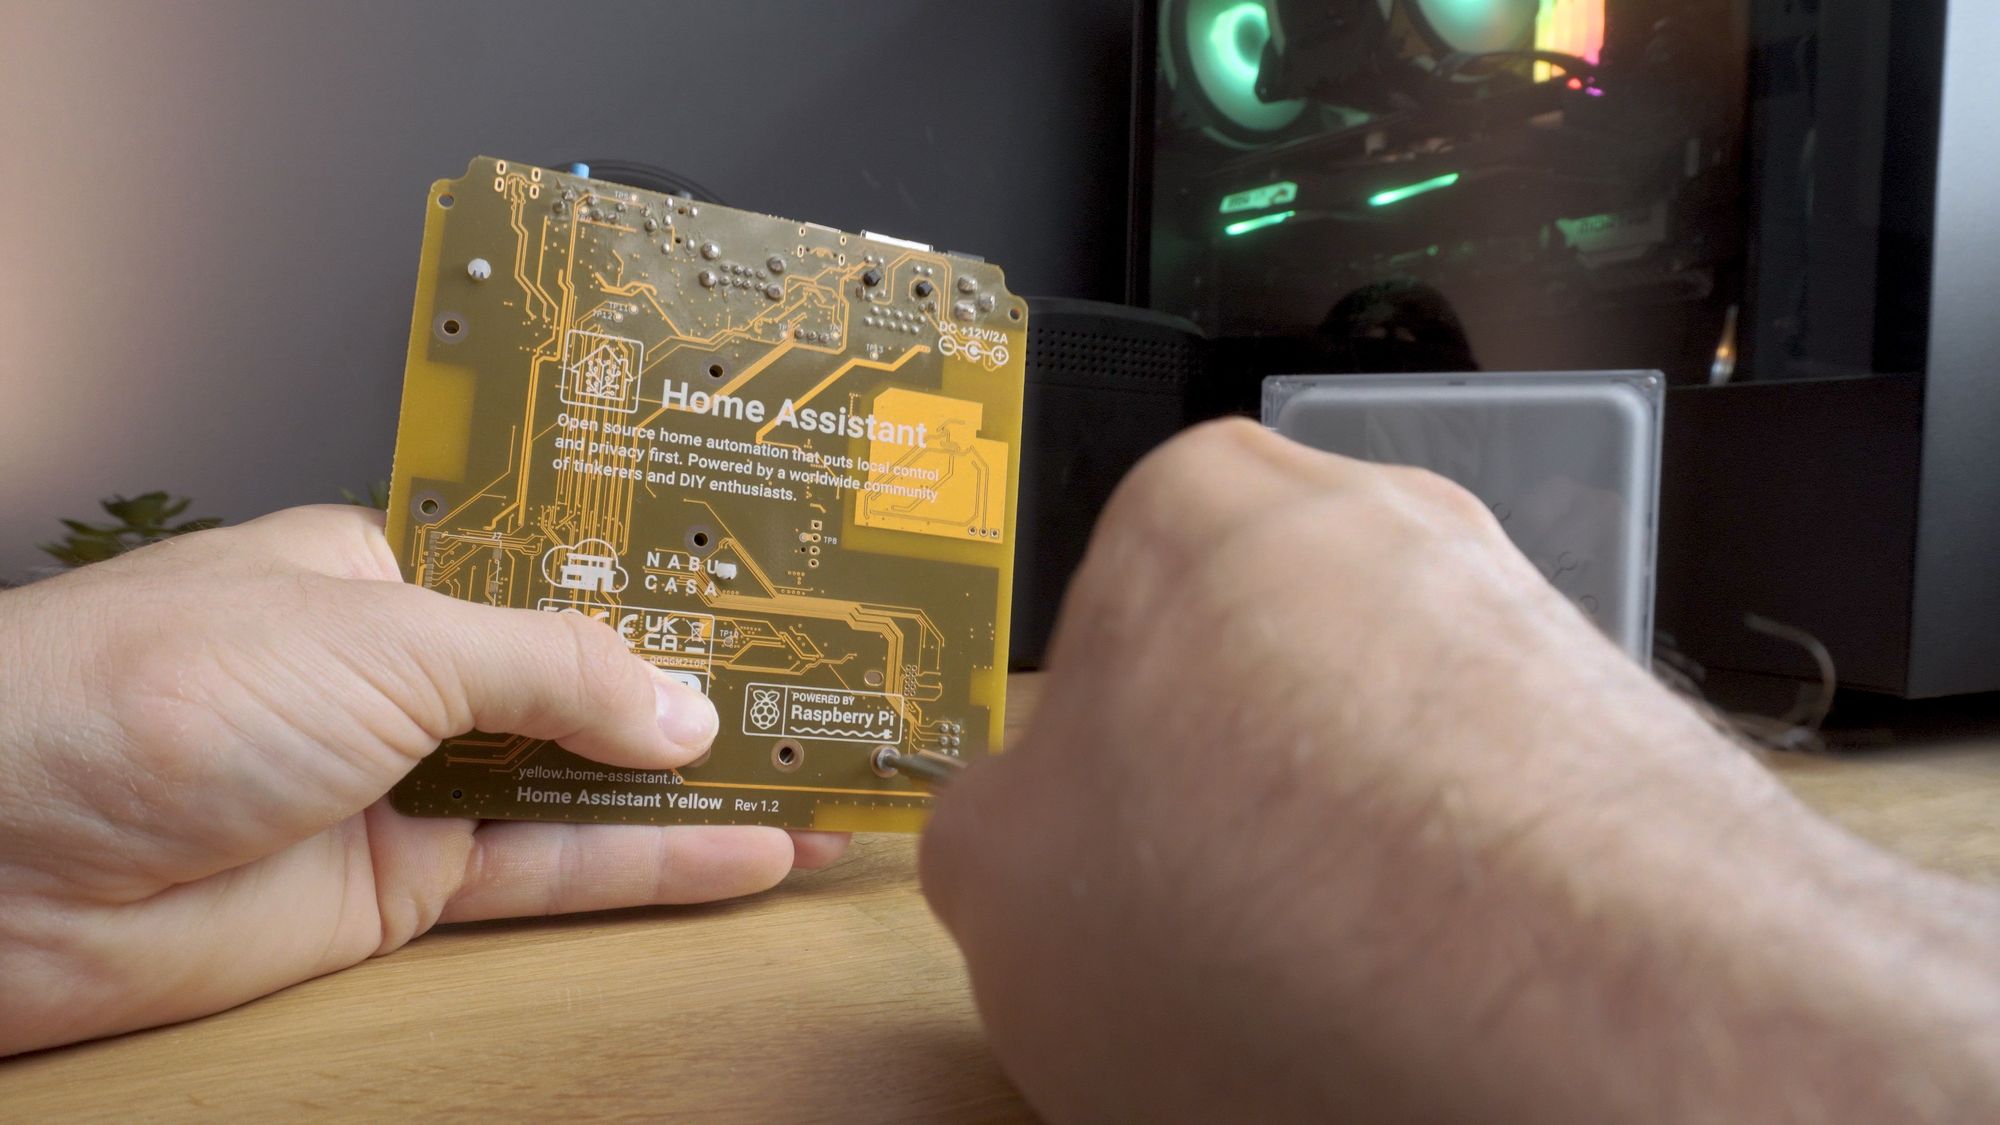
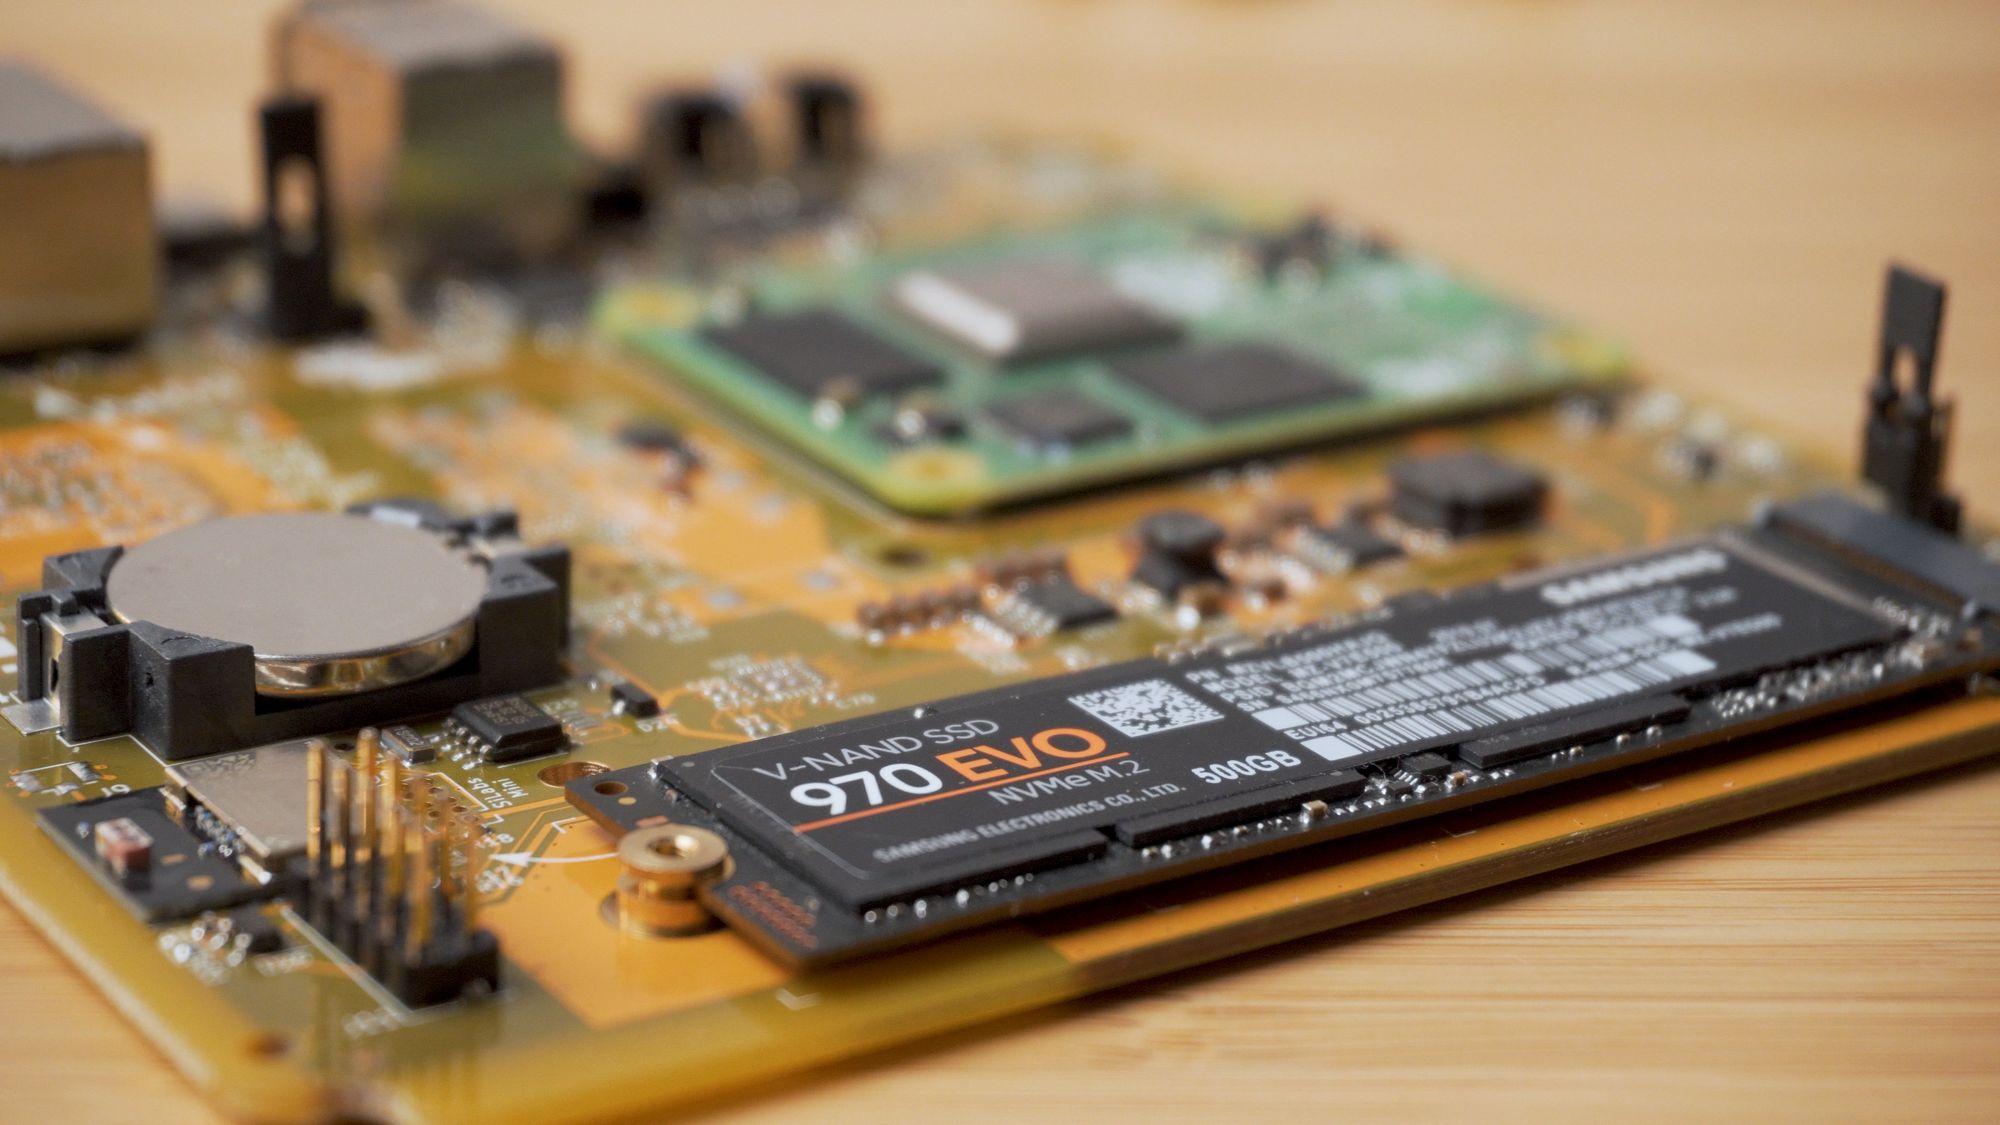
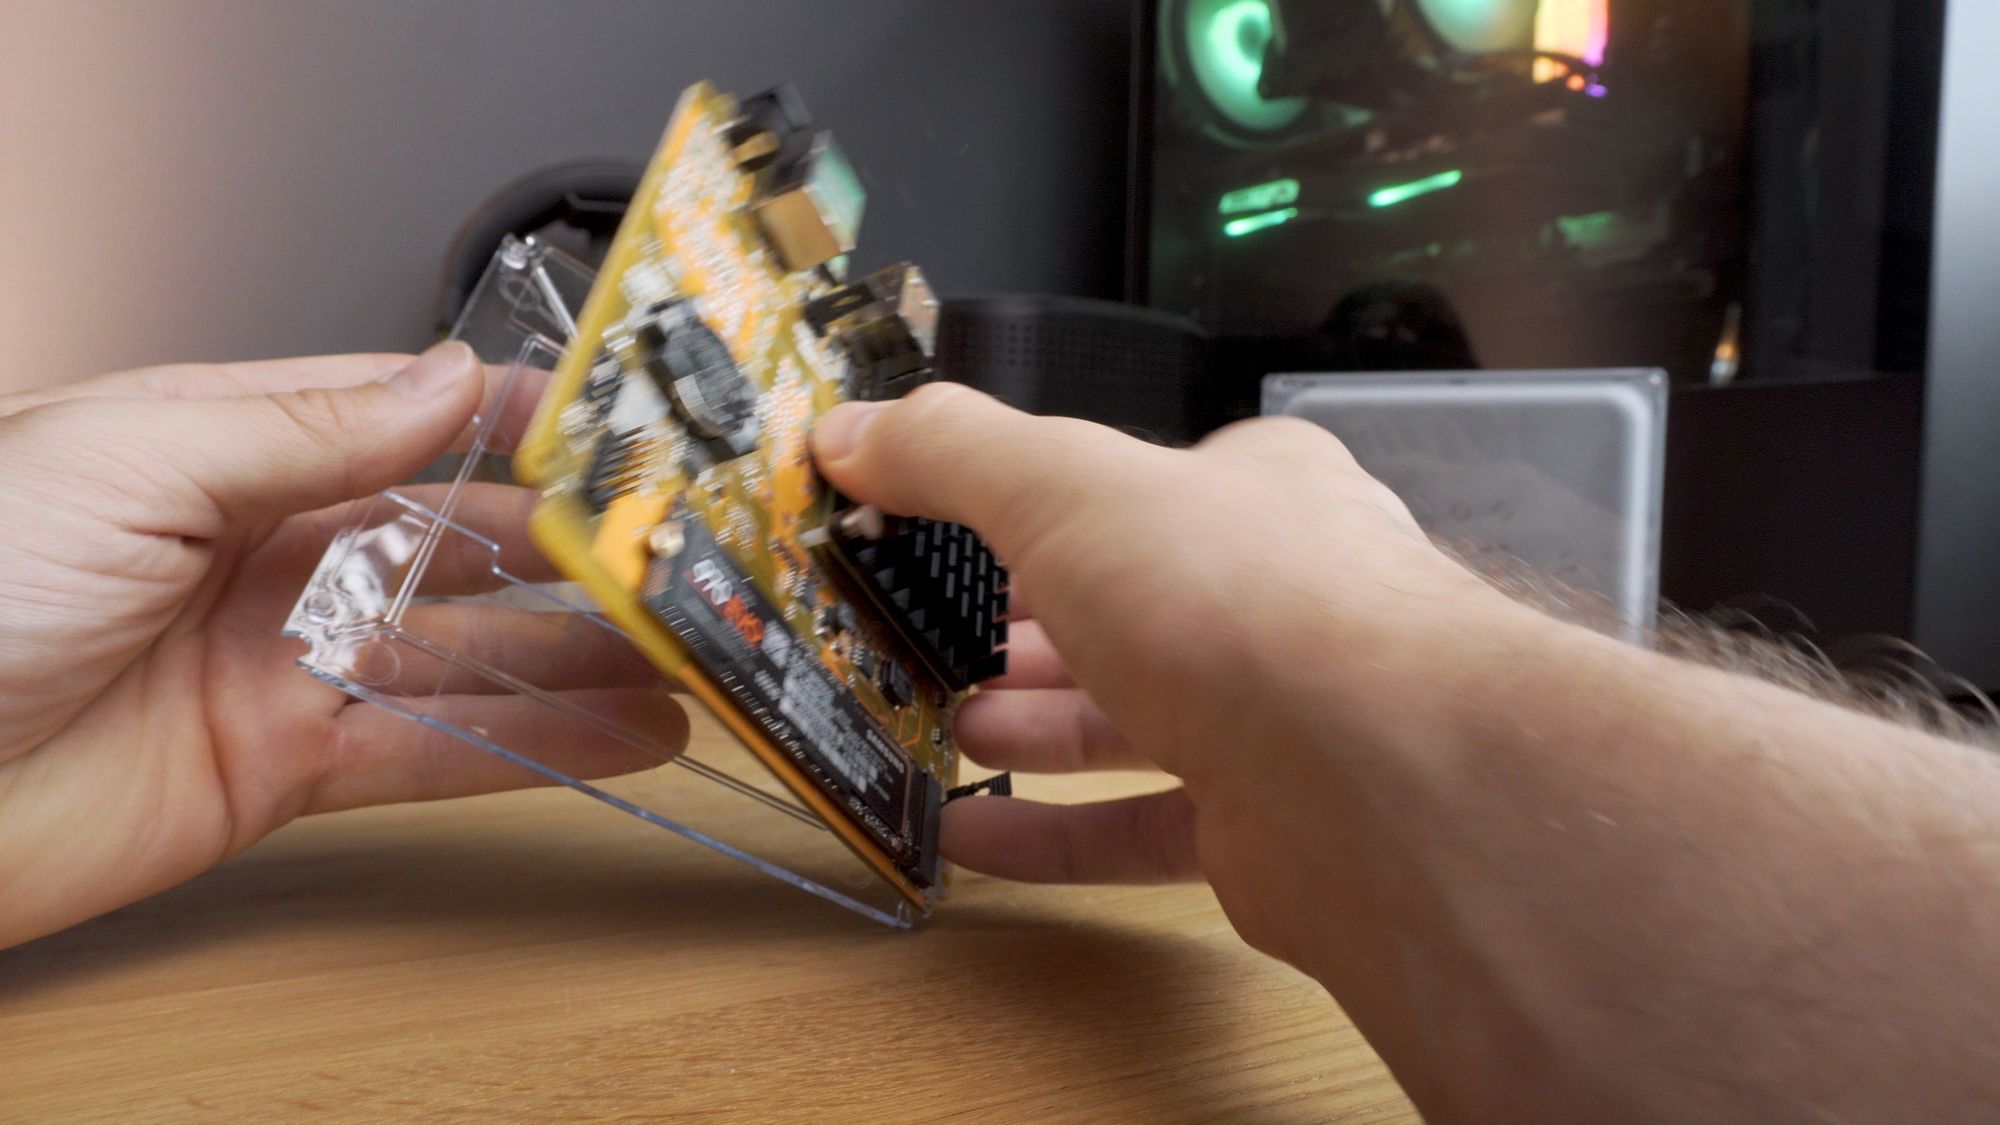
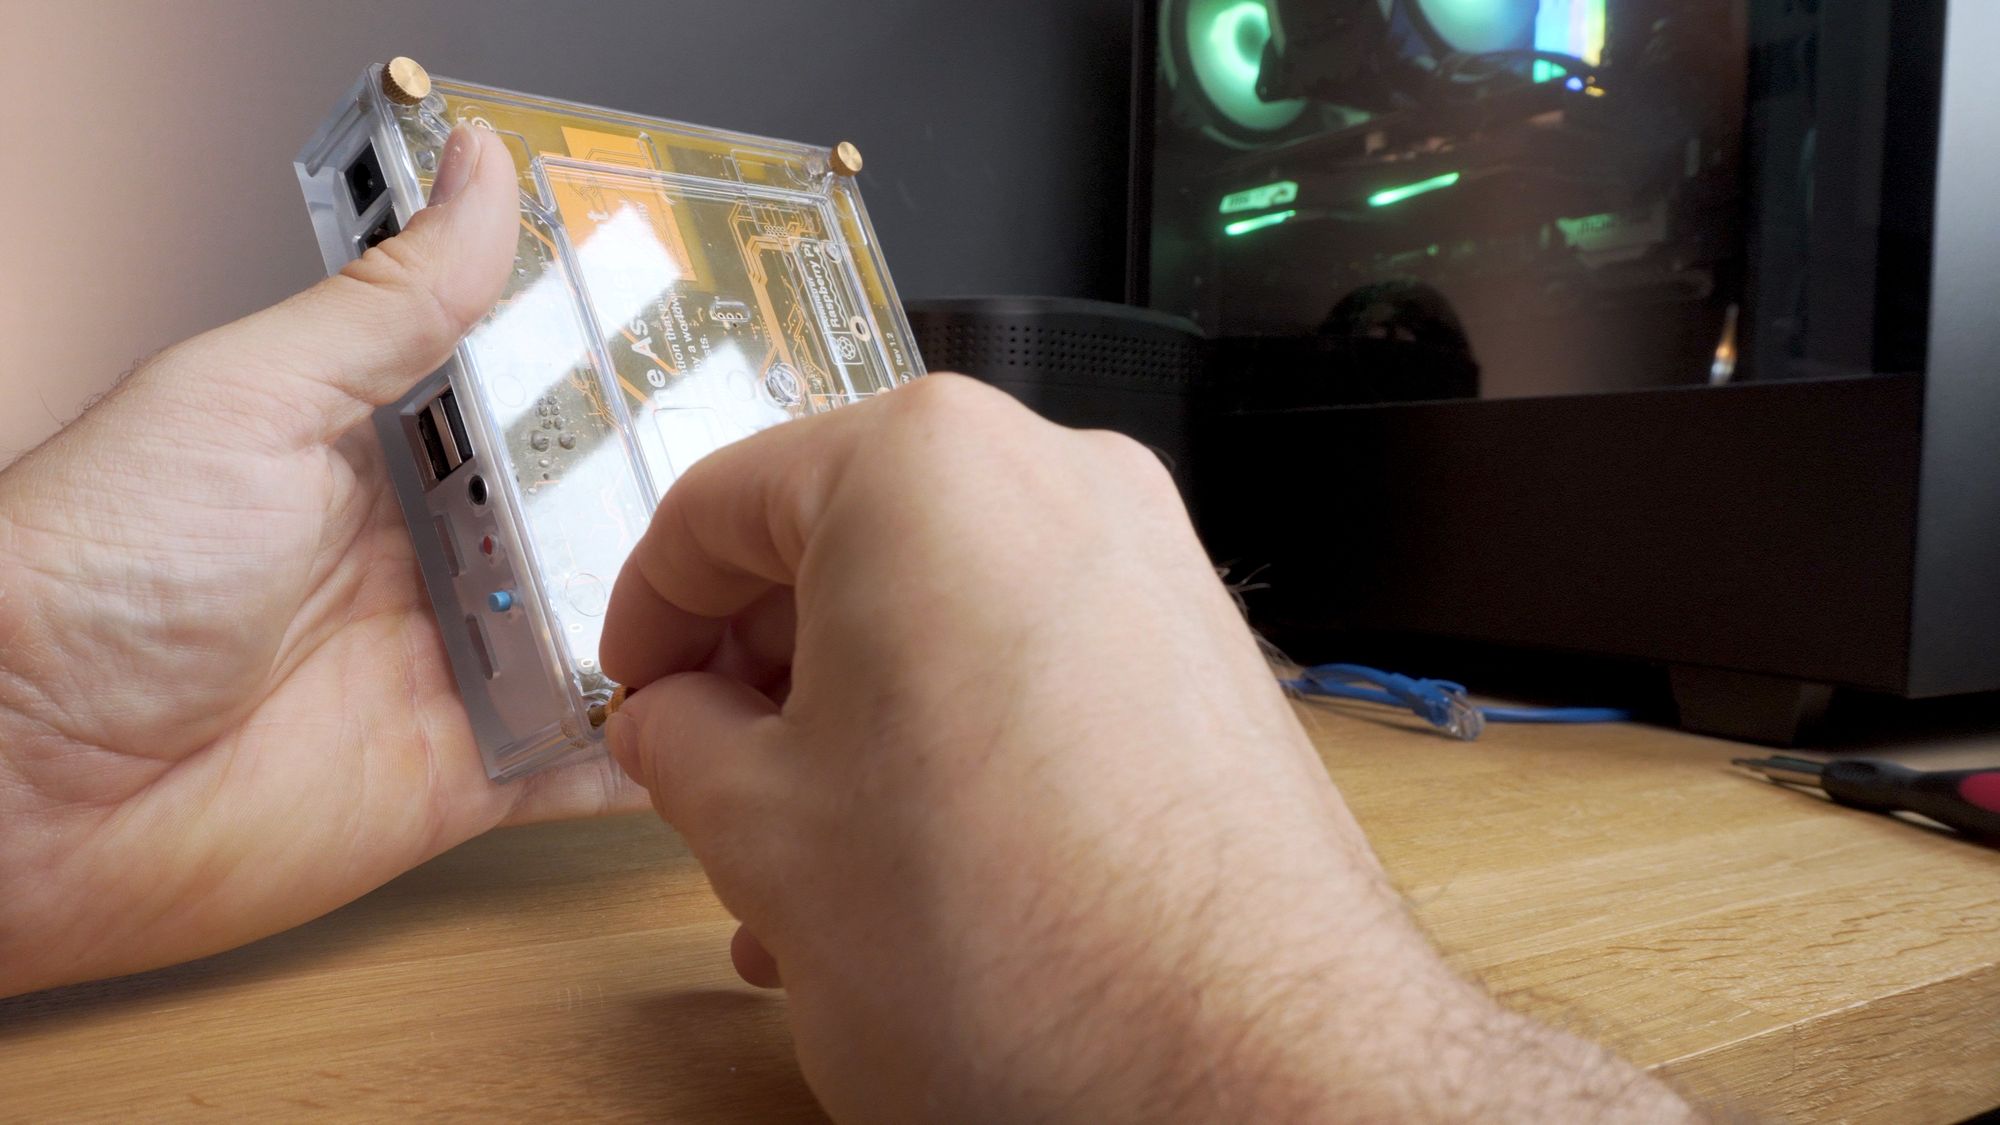
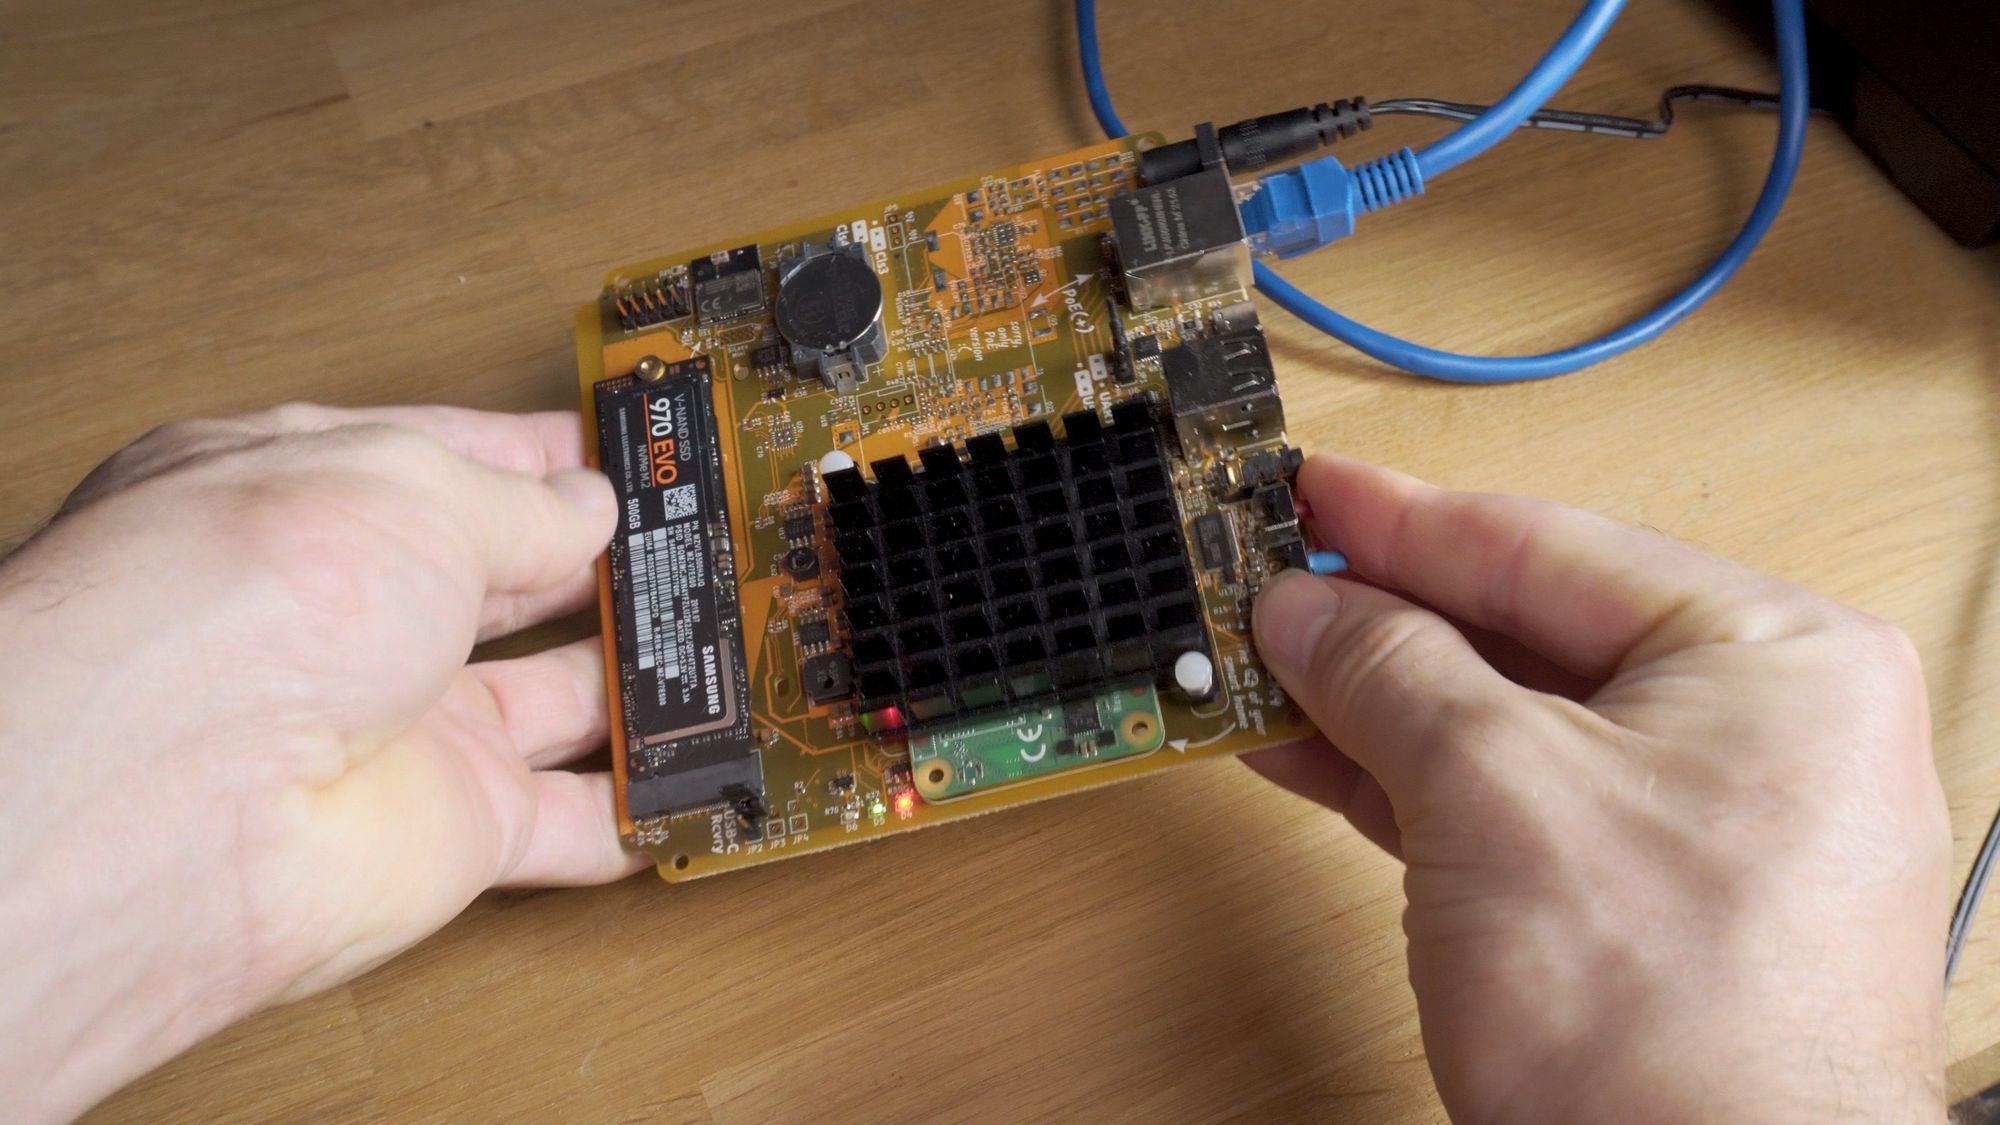
To install your SSD, locate the single screw on the back side of the Yellow’s PCB and remove it, making sure not to drop the gold eyelet on the front of the board. Insert this eyelet into the designated space at the end of your SSD and then insert the SSD into the slot at roughly a 30 degree angle and lower all the way down into position, then re-insert the screw into the back of the PCB to secure it.

If you have one of the kit variants, we are now ready to install Home Assistant! If you have the standard Home Assistant Yellow, then Home Assistant OS has already been pre-installed and you can skip ahead to the first boot section if you want too!
Installing Home Assistant OS
To install Home Assistant, we first need a USB stick that we can use to flash our fresh but empty Compute Module temporarily. So, insert your USB stick to a computer and then we are going to use Raspberry Pi Imager to flash our USB stick.
Once on the landing page, select download for Windows, MacOS or Linux, then run the RPi Imager installer.

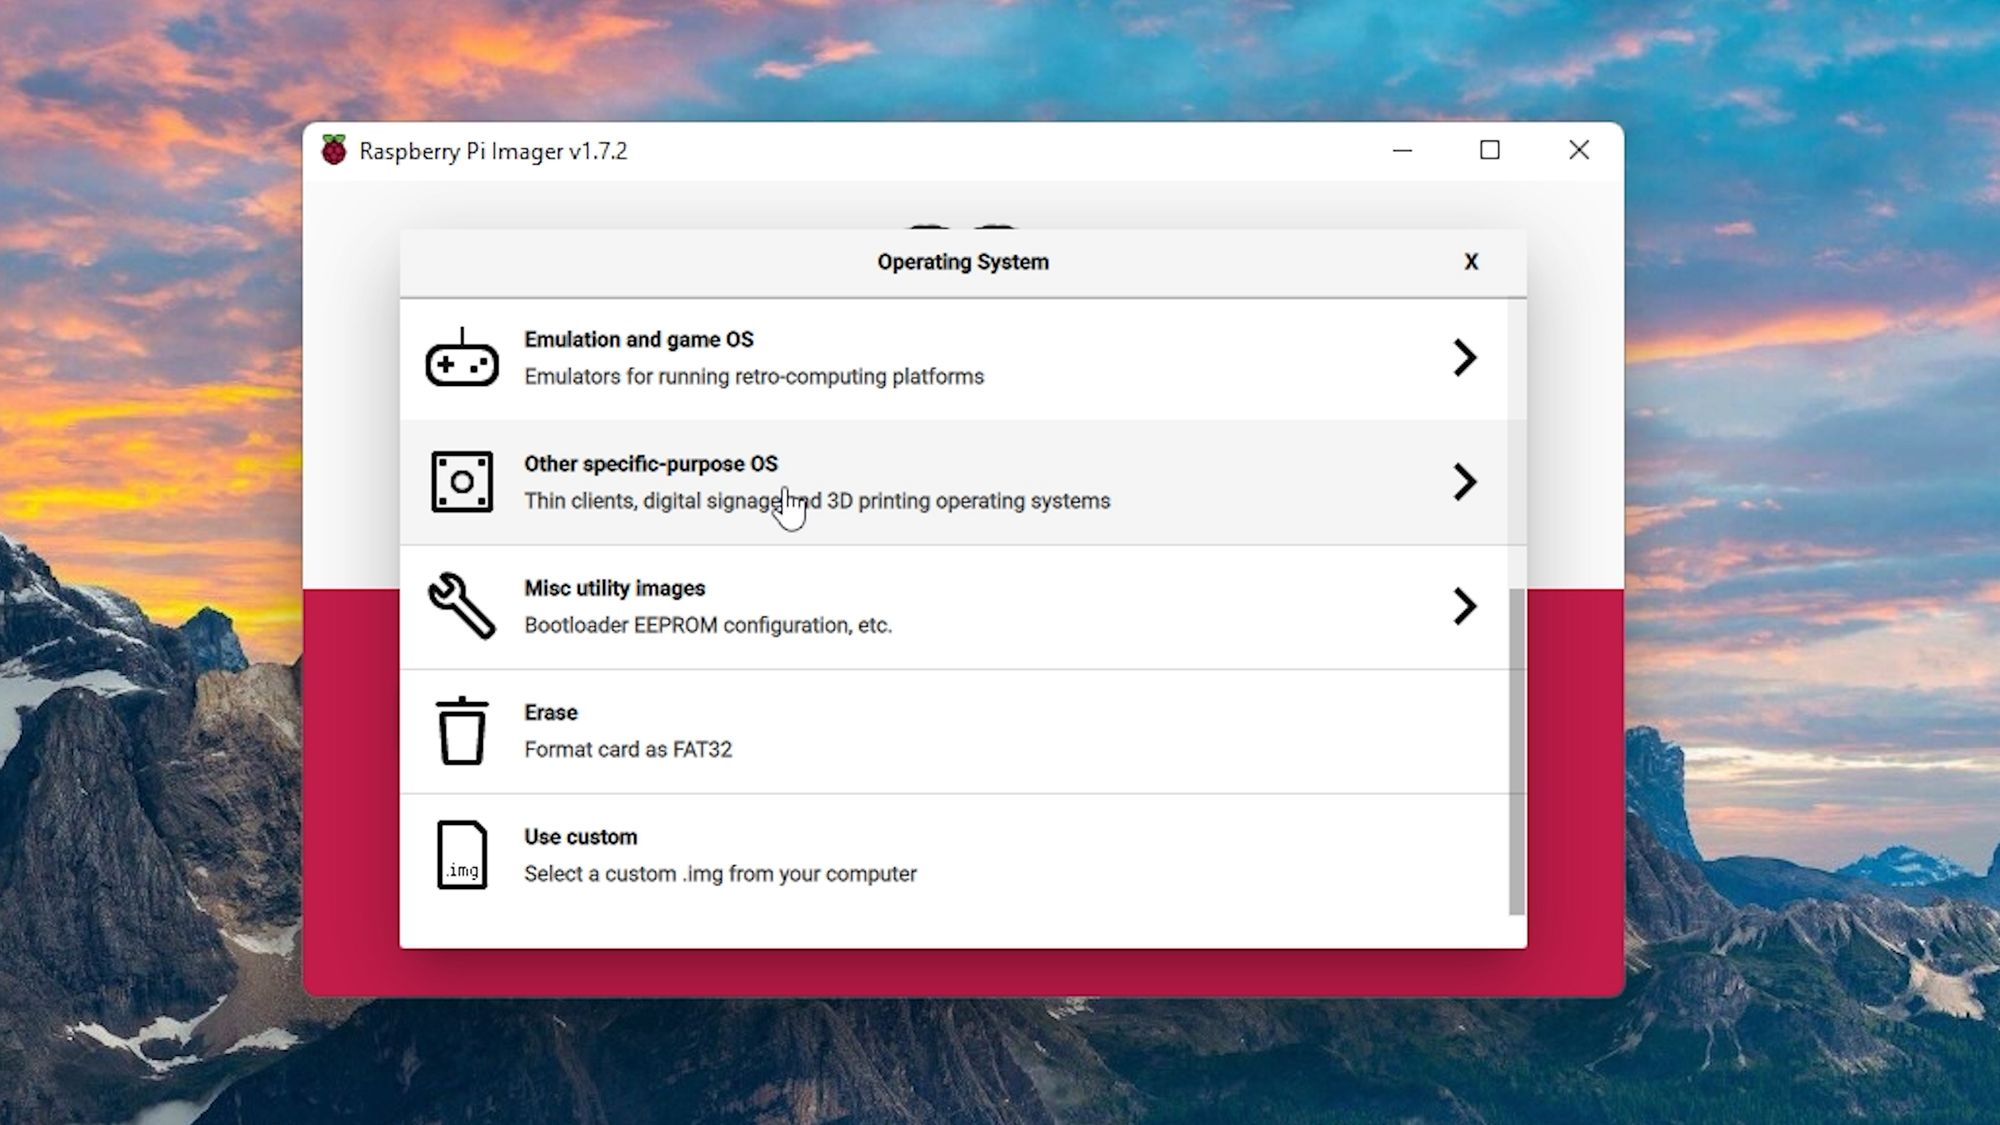
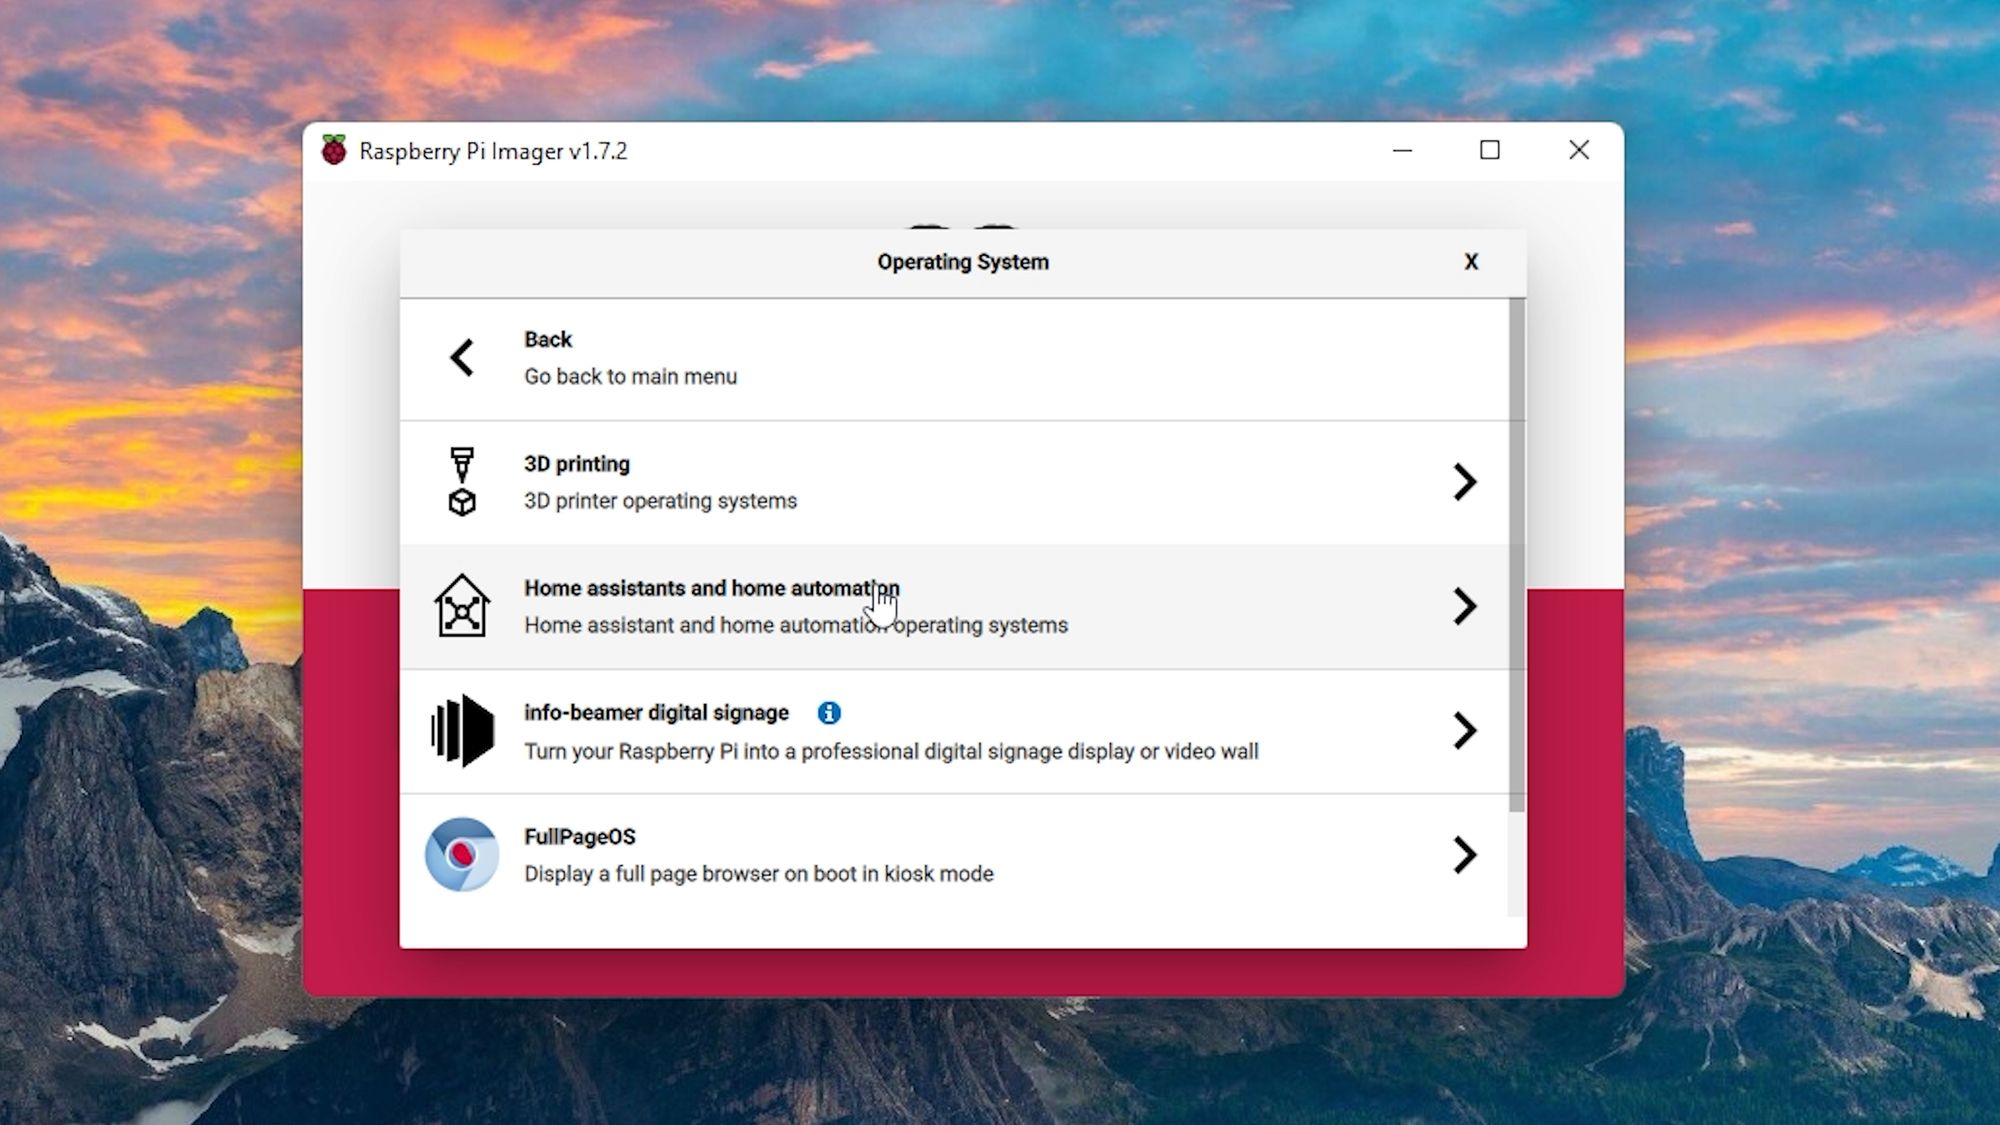
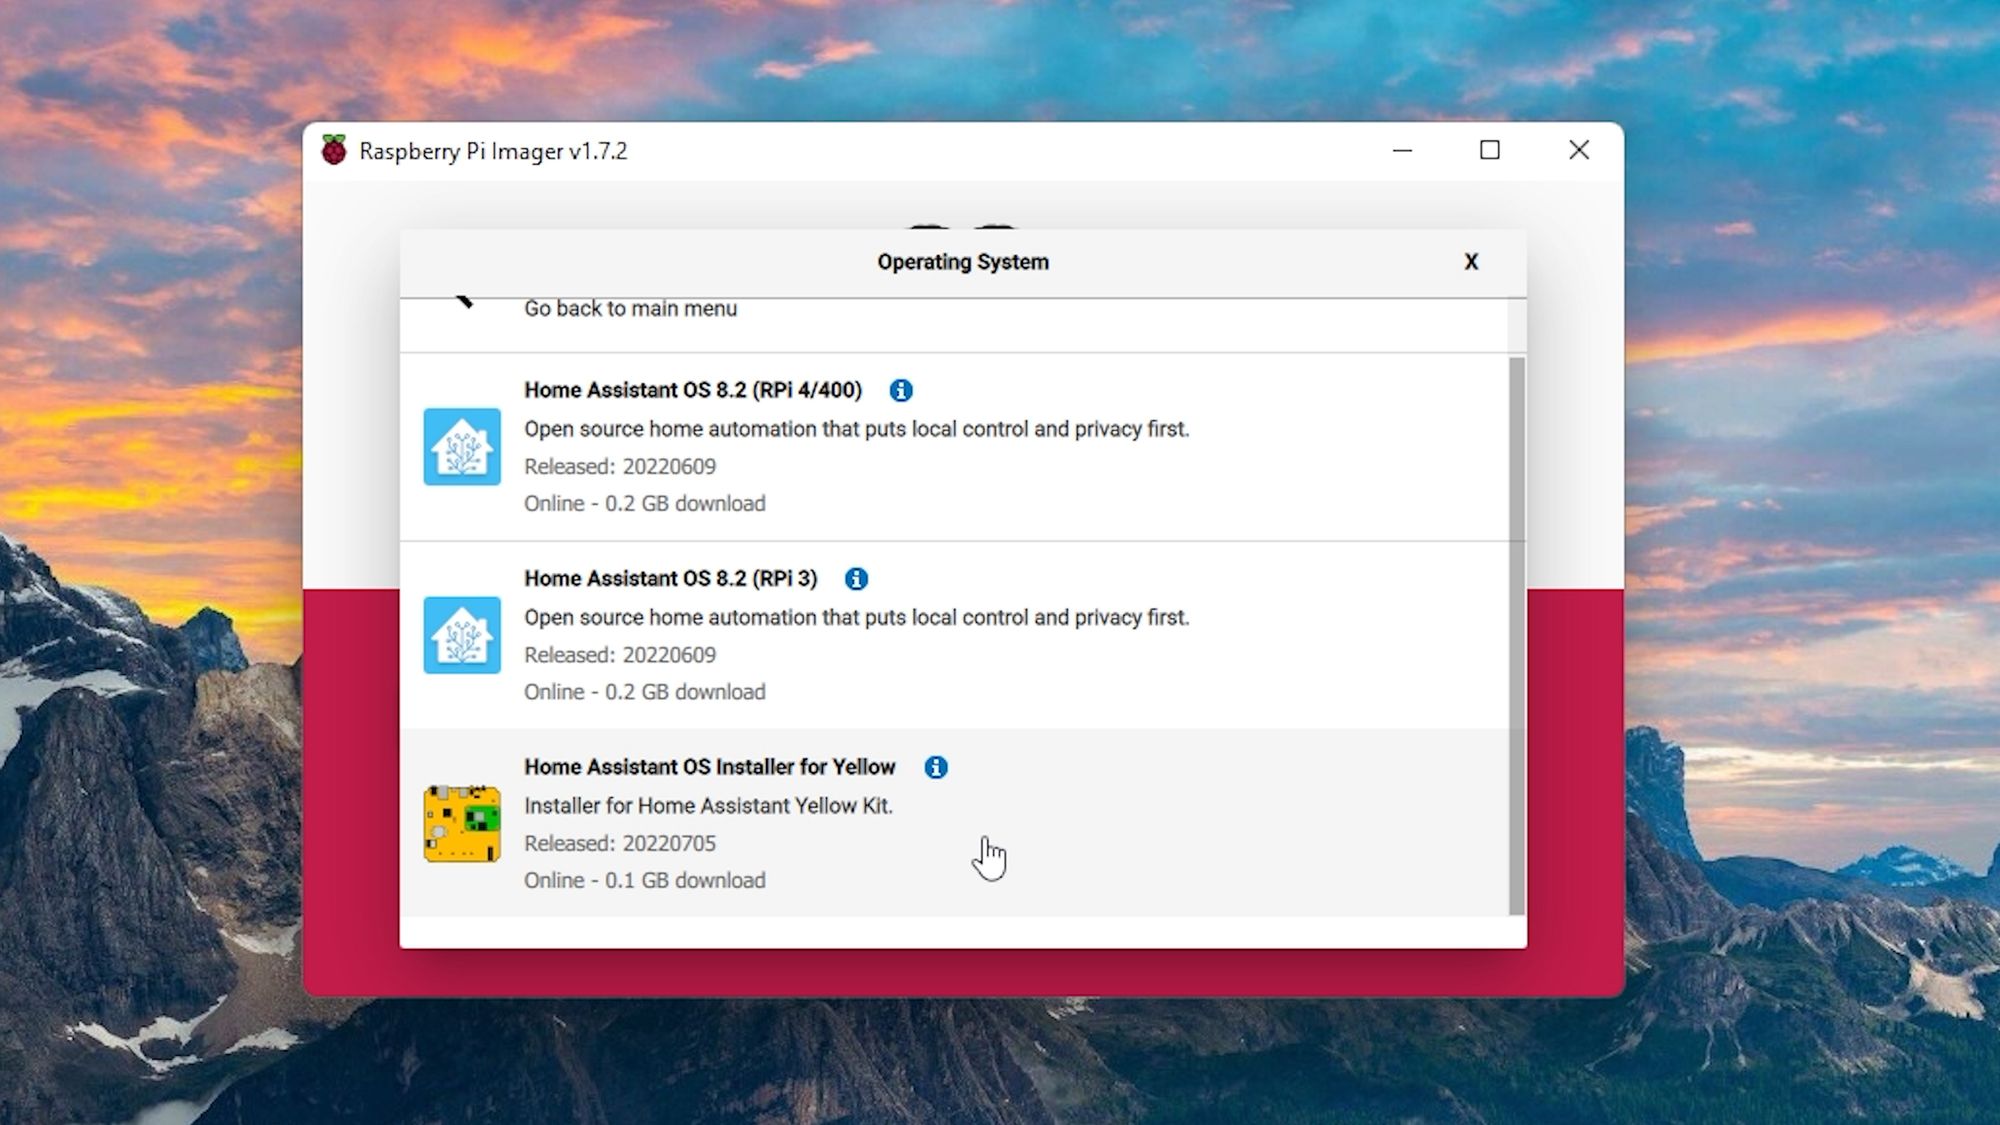
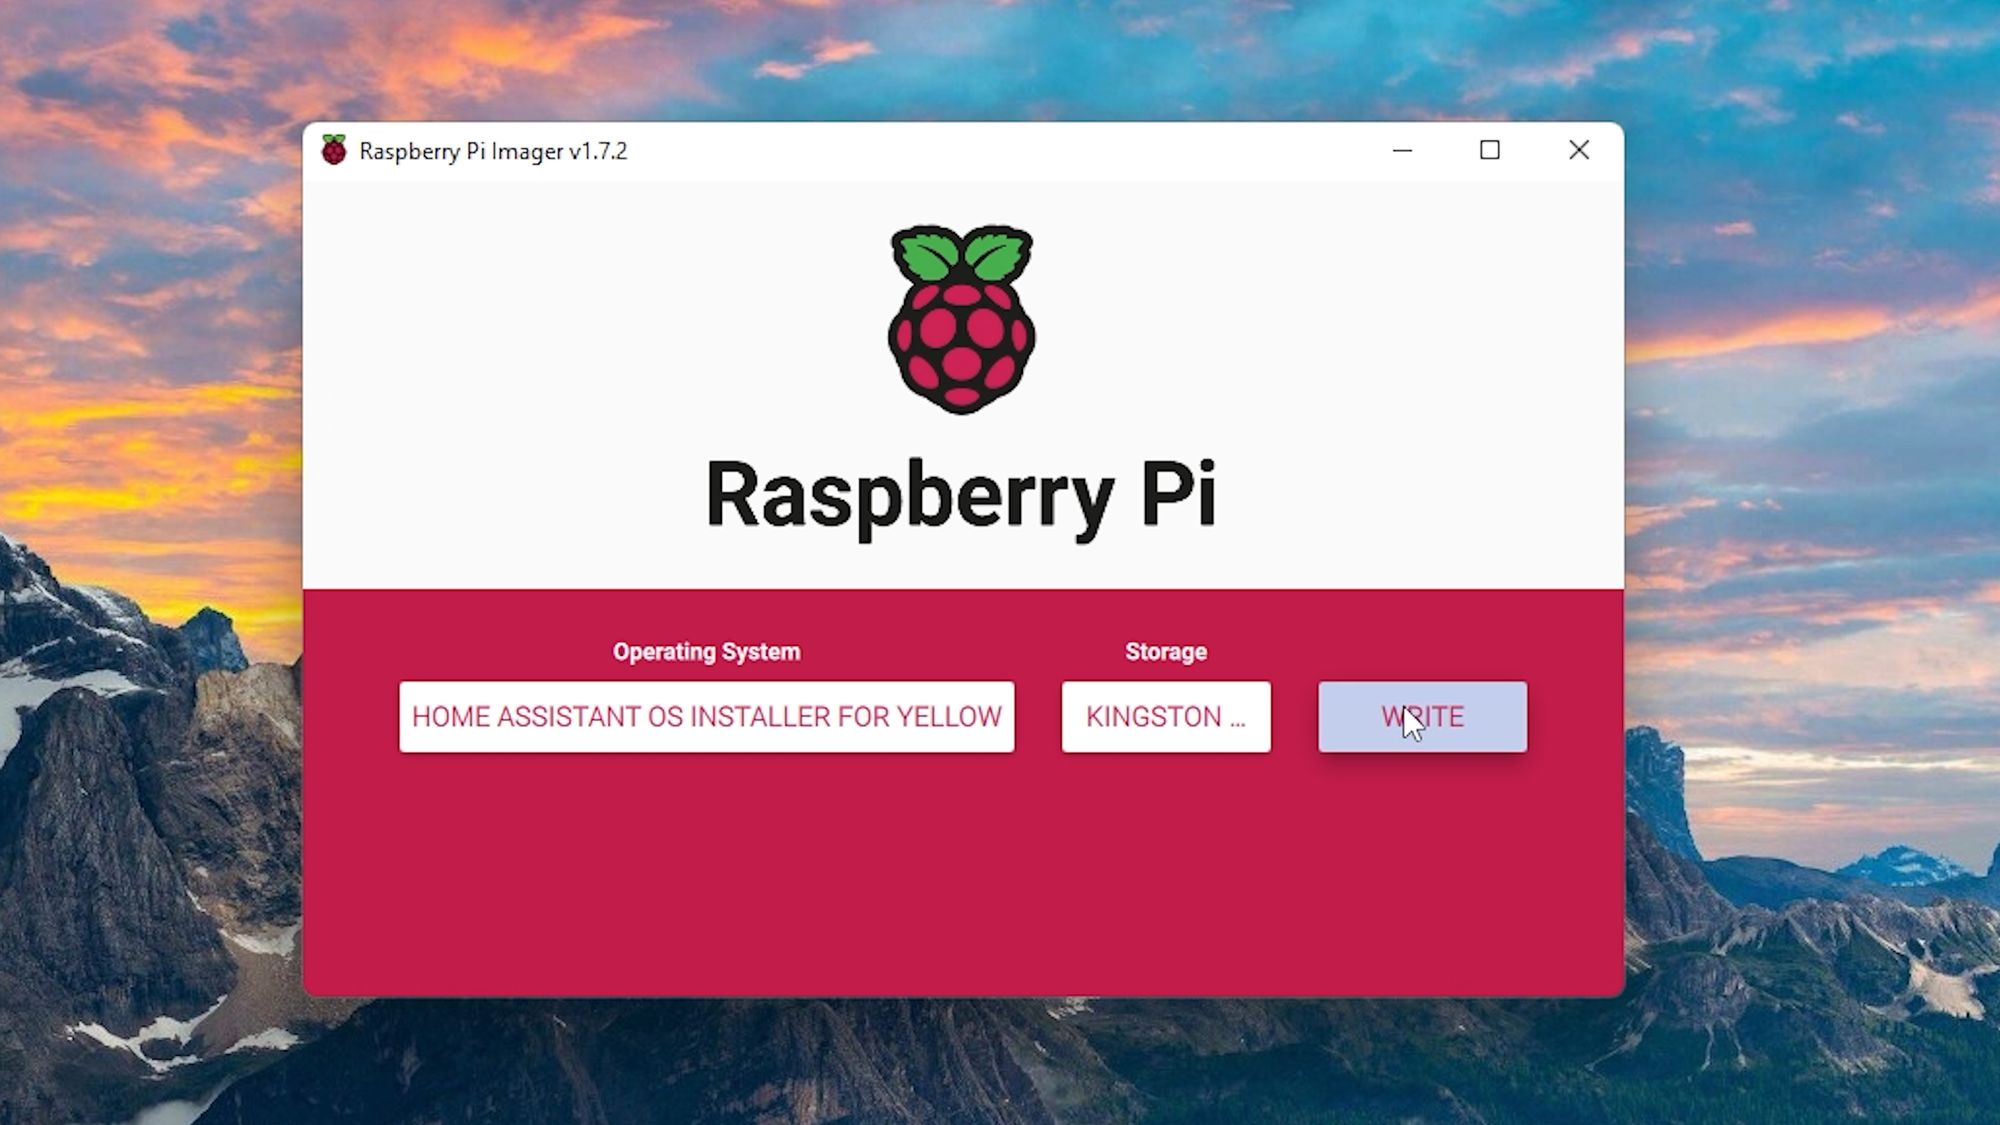
Once installed, click on the choose OS section and scroll down to the other specific purpose OS’s. Then select Home Assistant and home automation menu and then Home Assistant. Finally, scroll down and select the Home Assistant OS installer for Yellow.
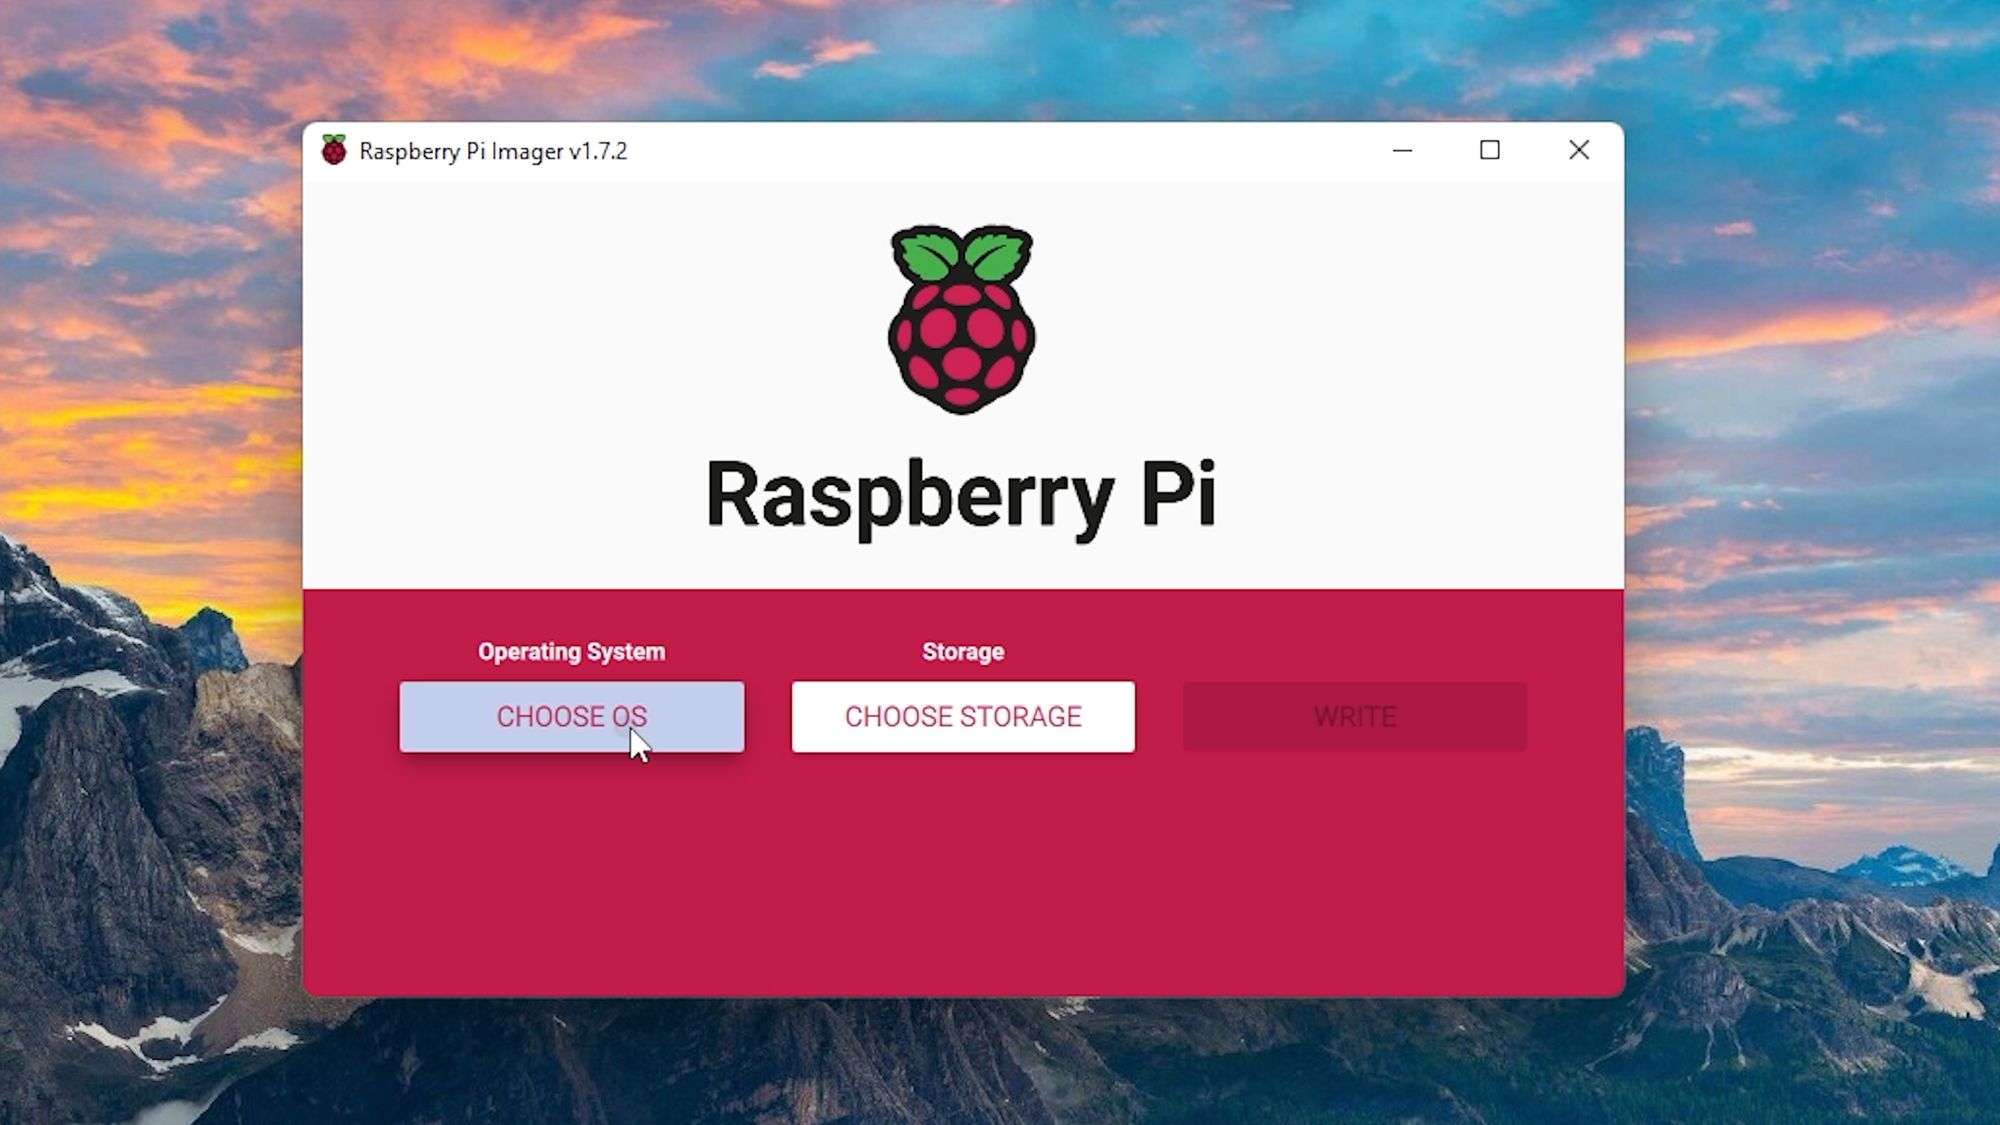
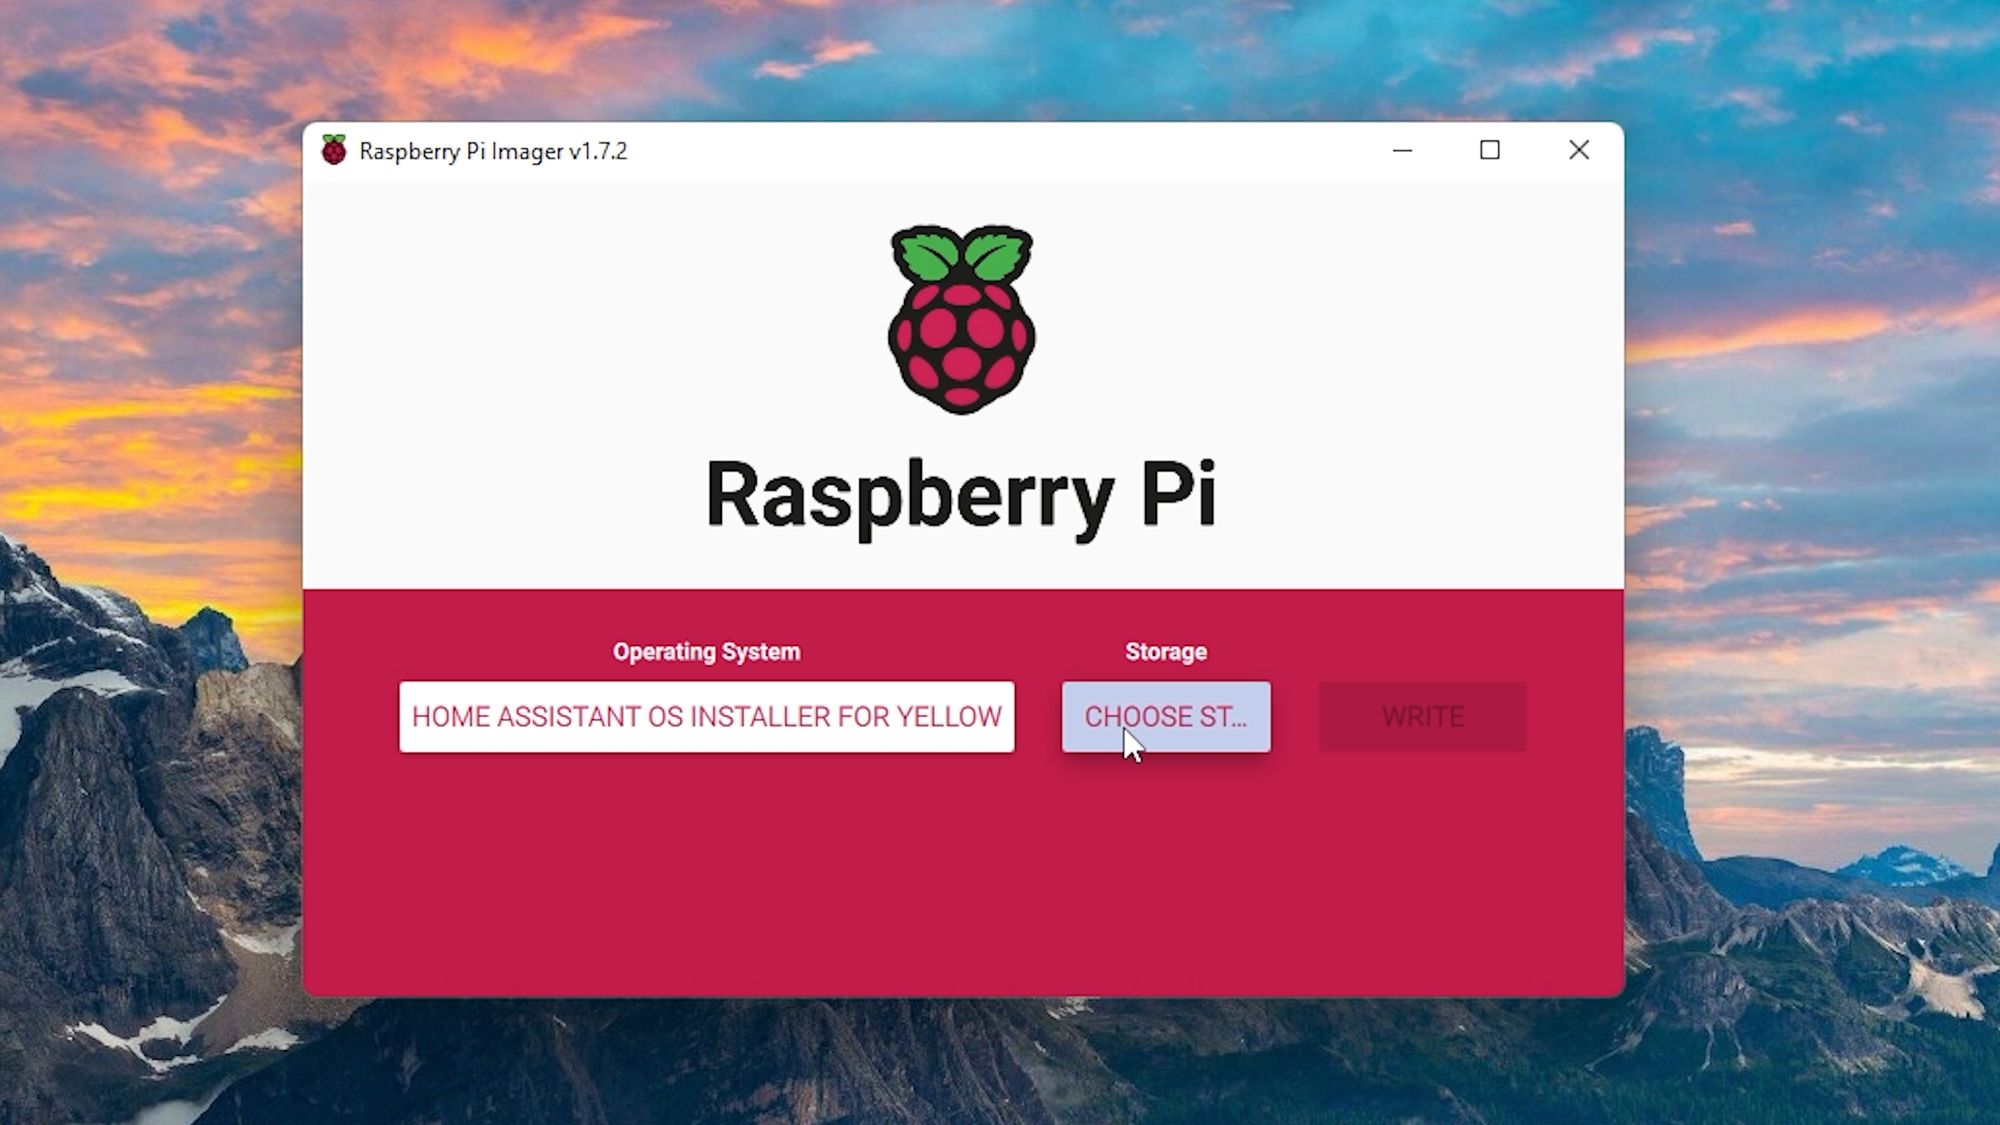
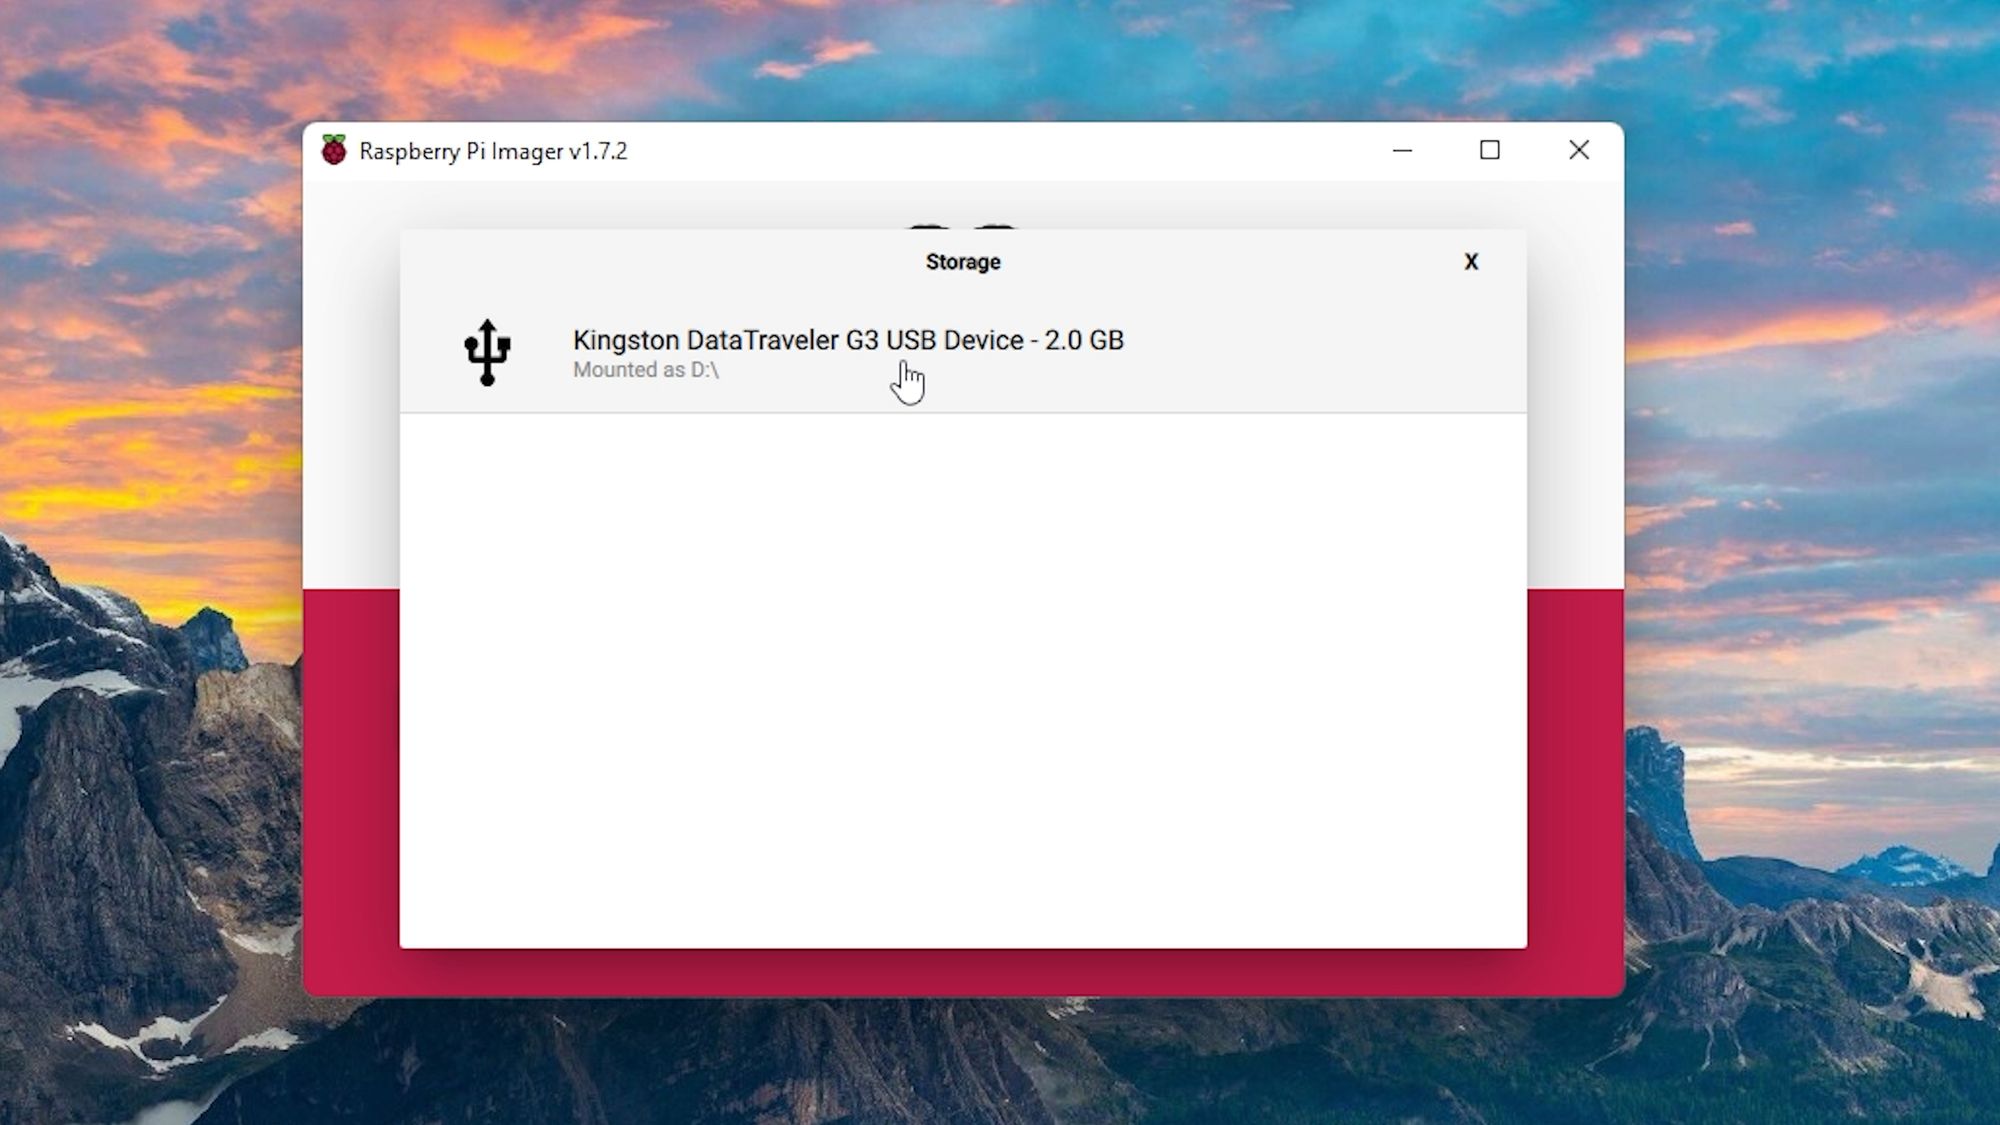
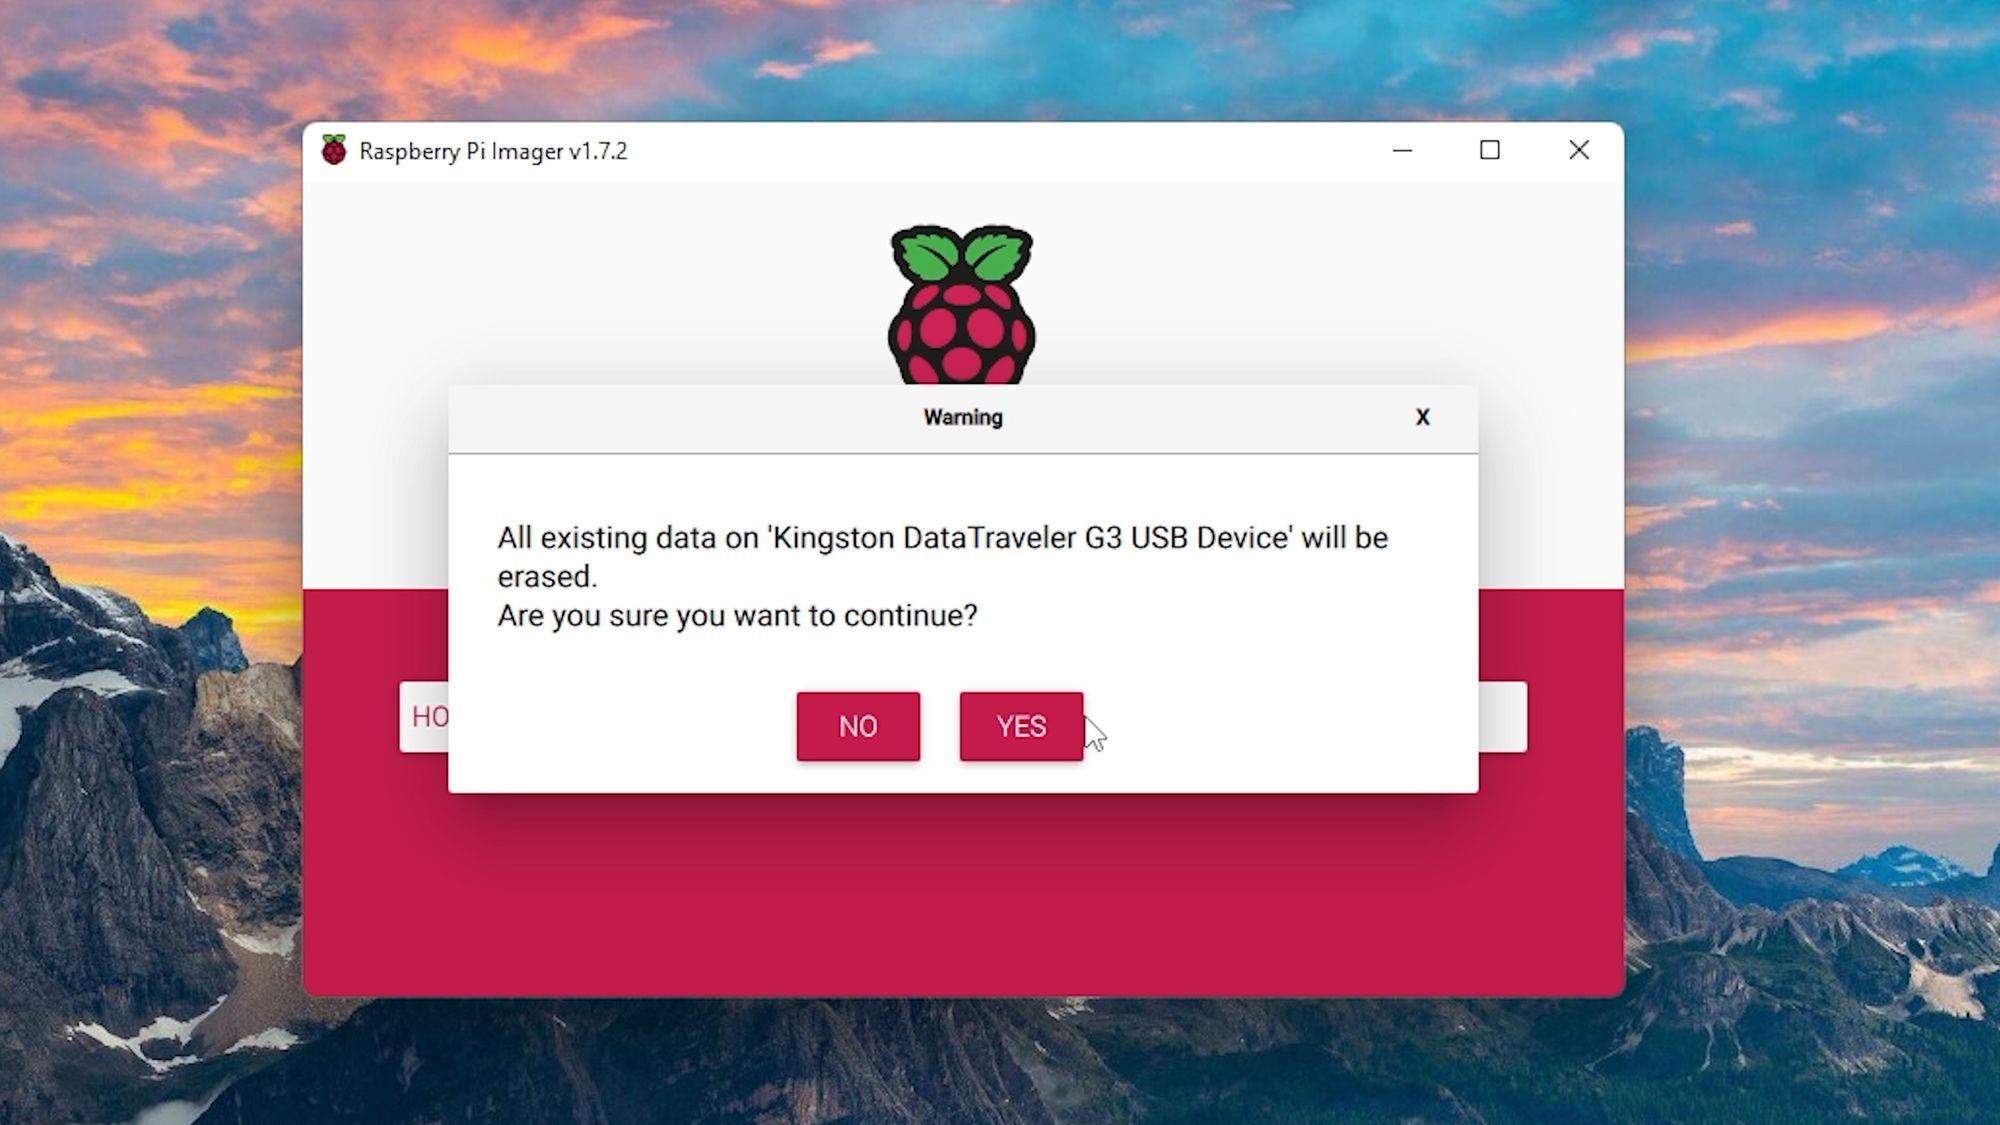
Then click on the choose storage button and select your USB stick, make sure to select the correct one as the USB stick will be erased. Then, when you're ready, hit the Write button to start flashing, and it will begin - the flash image is very small and it only takes a few seconds to complete.
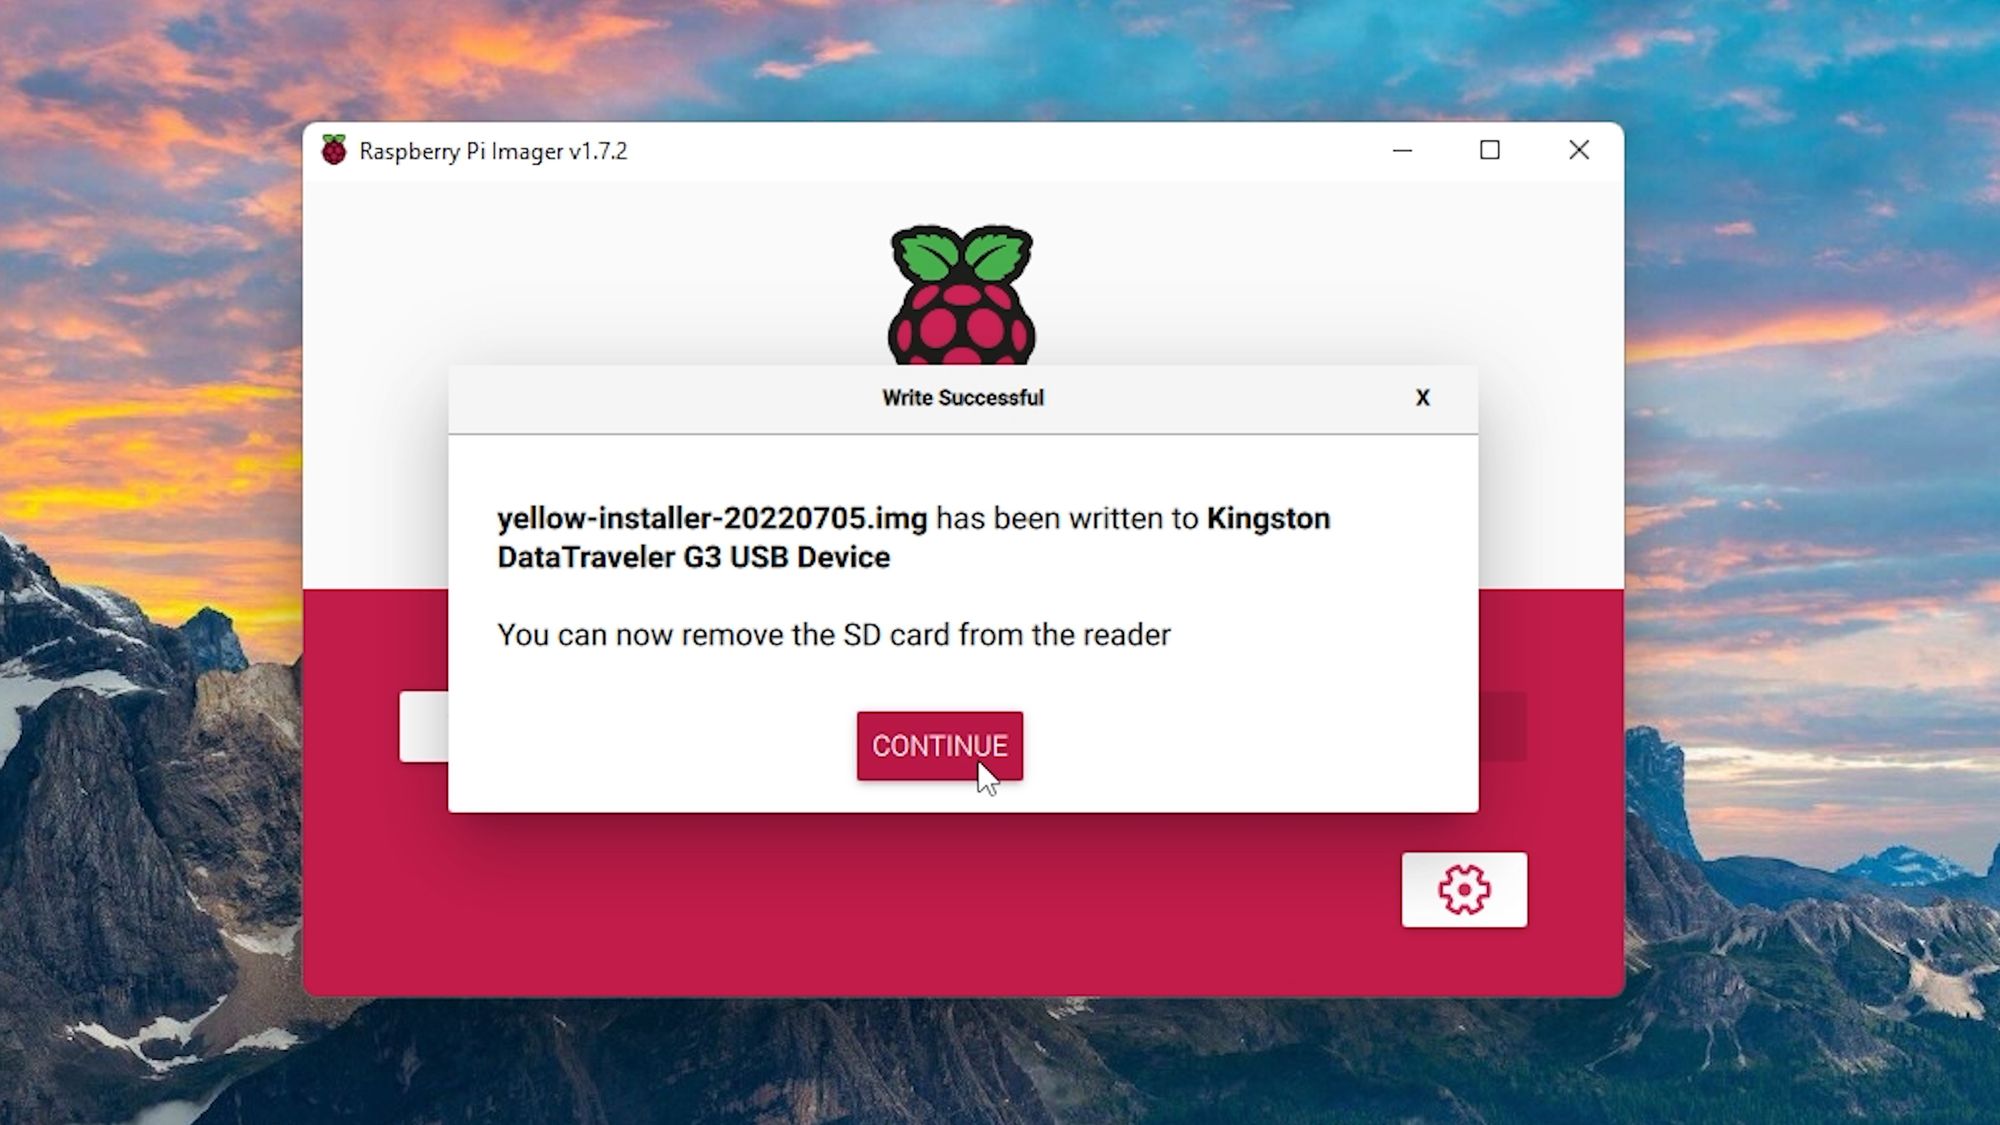
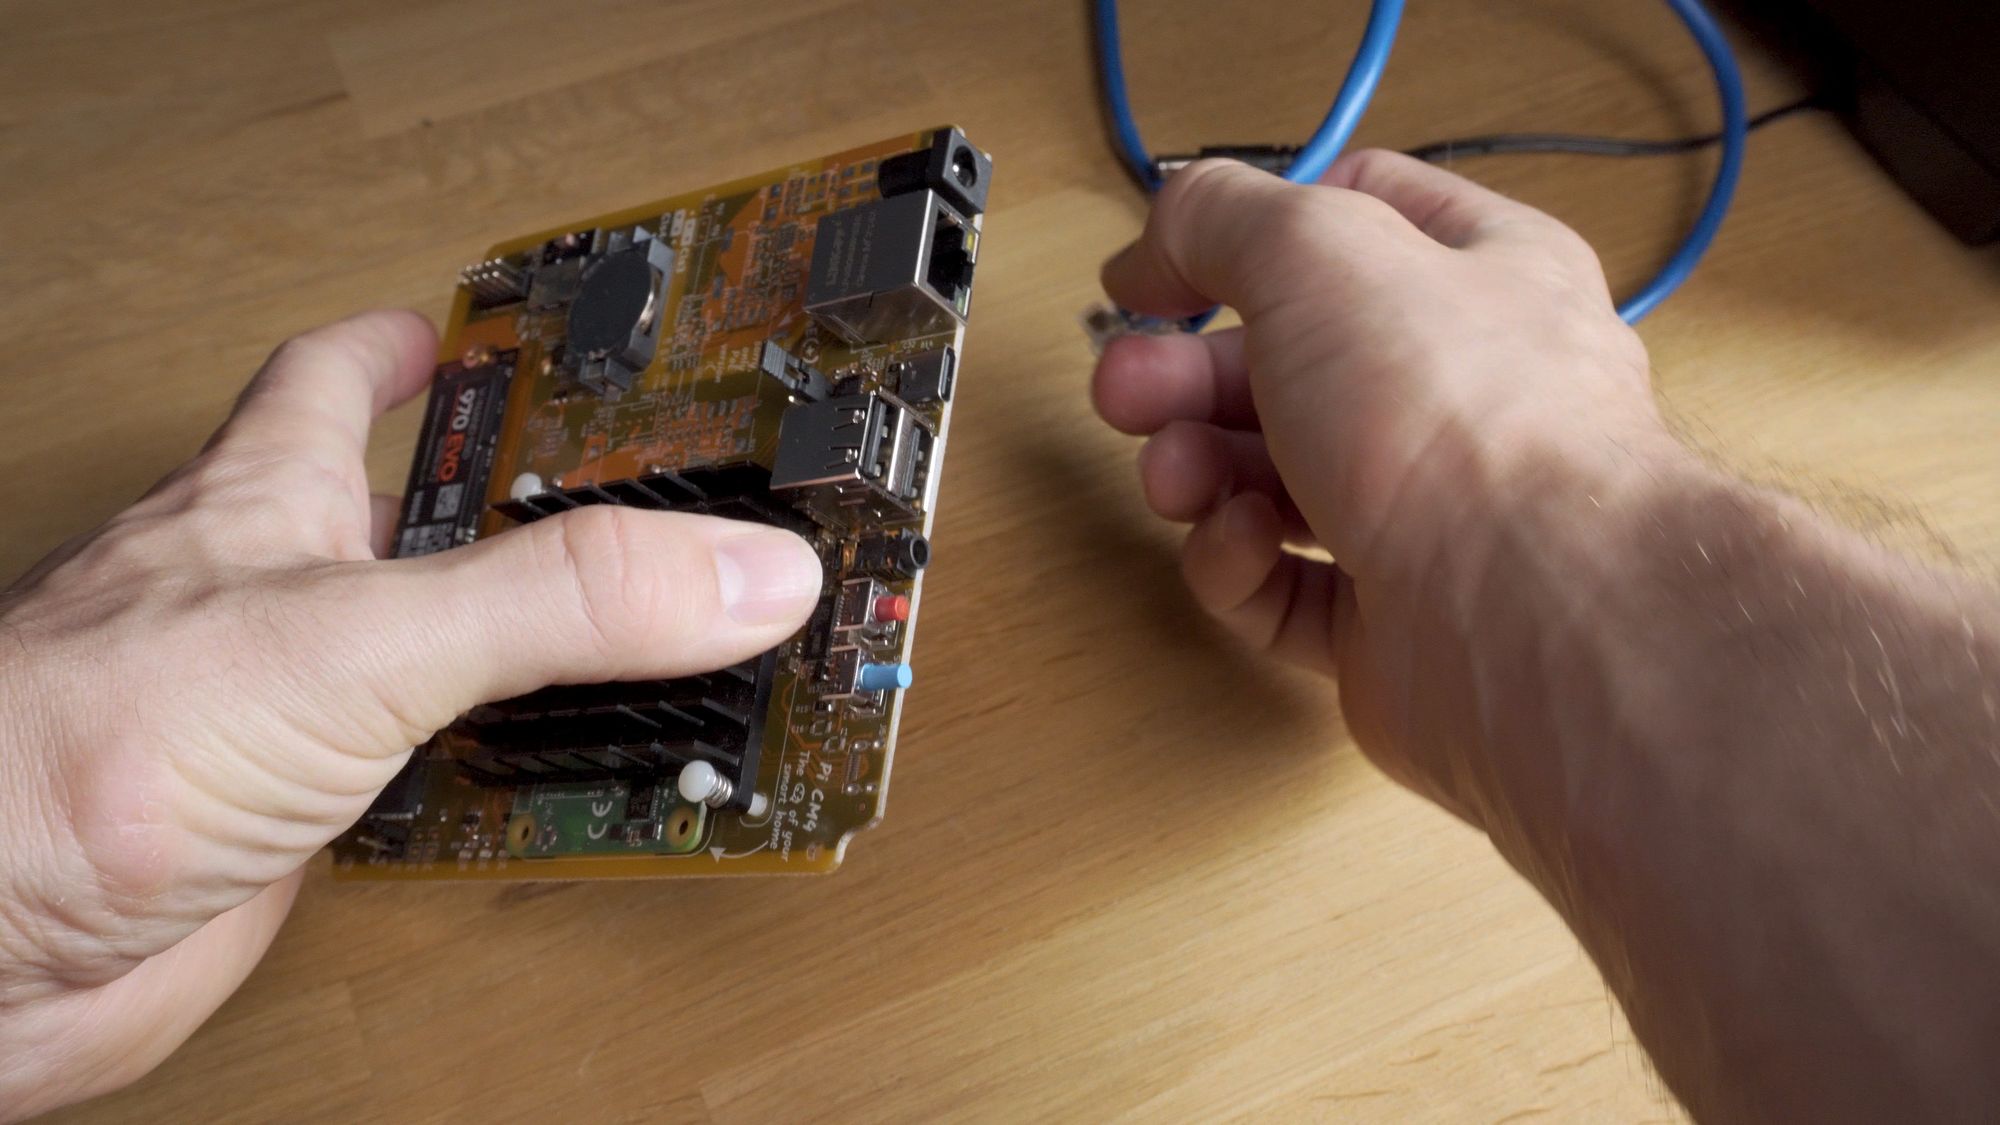
Once finished, unplug the USB stick and plug it into one of the USB ports on the Home Assistant Yellow. Next, you're going to want to connect the ethernet cable from the Yellow to your router. This is important as we need internet connectivity to download the latest version of Home Assistant onto the compute module. Finally, plug in power to the Yellow, note that if you're using PoE then power would already have been supplied when you connected the network cable.

When the Yellow powers on, the indicator lights will turn solid red and green for 10-15 seconds, and then should change to a slow flashing amber light with a rapidly flashing green light - if that happens then everything is working correctly and the Yellow is downloading the latest version of Home Assistant.

If the light stays solid red and green, then something has gone wrong and you’ll need to try the process again either through power cycling or re-flashing the USB.
Once complete, the green and amber light will go completely off at which point Home Assistant is now installed! You can now remove the power, remove the USB stick and then plug power back in, and now we are ready for the first boot!

The First Boot
We are ready to fire up the Yellow properly for the first time! But before we do that, we first need to reinsert the Yellow back into its enclosure (if you took things apart, of course). Simply line the bottom and top pieces of the case back up, and re-insert the 4 thumbscrews.

For the first boot, you're going to want to make sure and once again have the ethernet cable plugged in so that Home Assistant is connected to your local network. Then, plug in your power supply into the back, and the Yellow will boot up - you will see all 3 indicator lights flashing away too, indicating that power is connected and things are working.
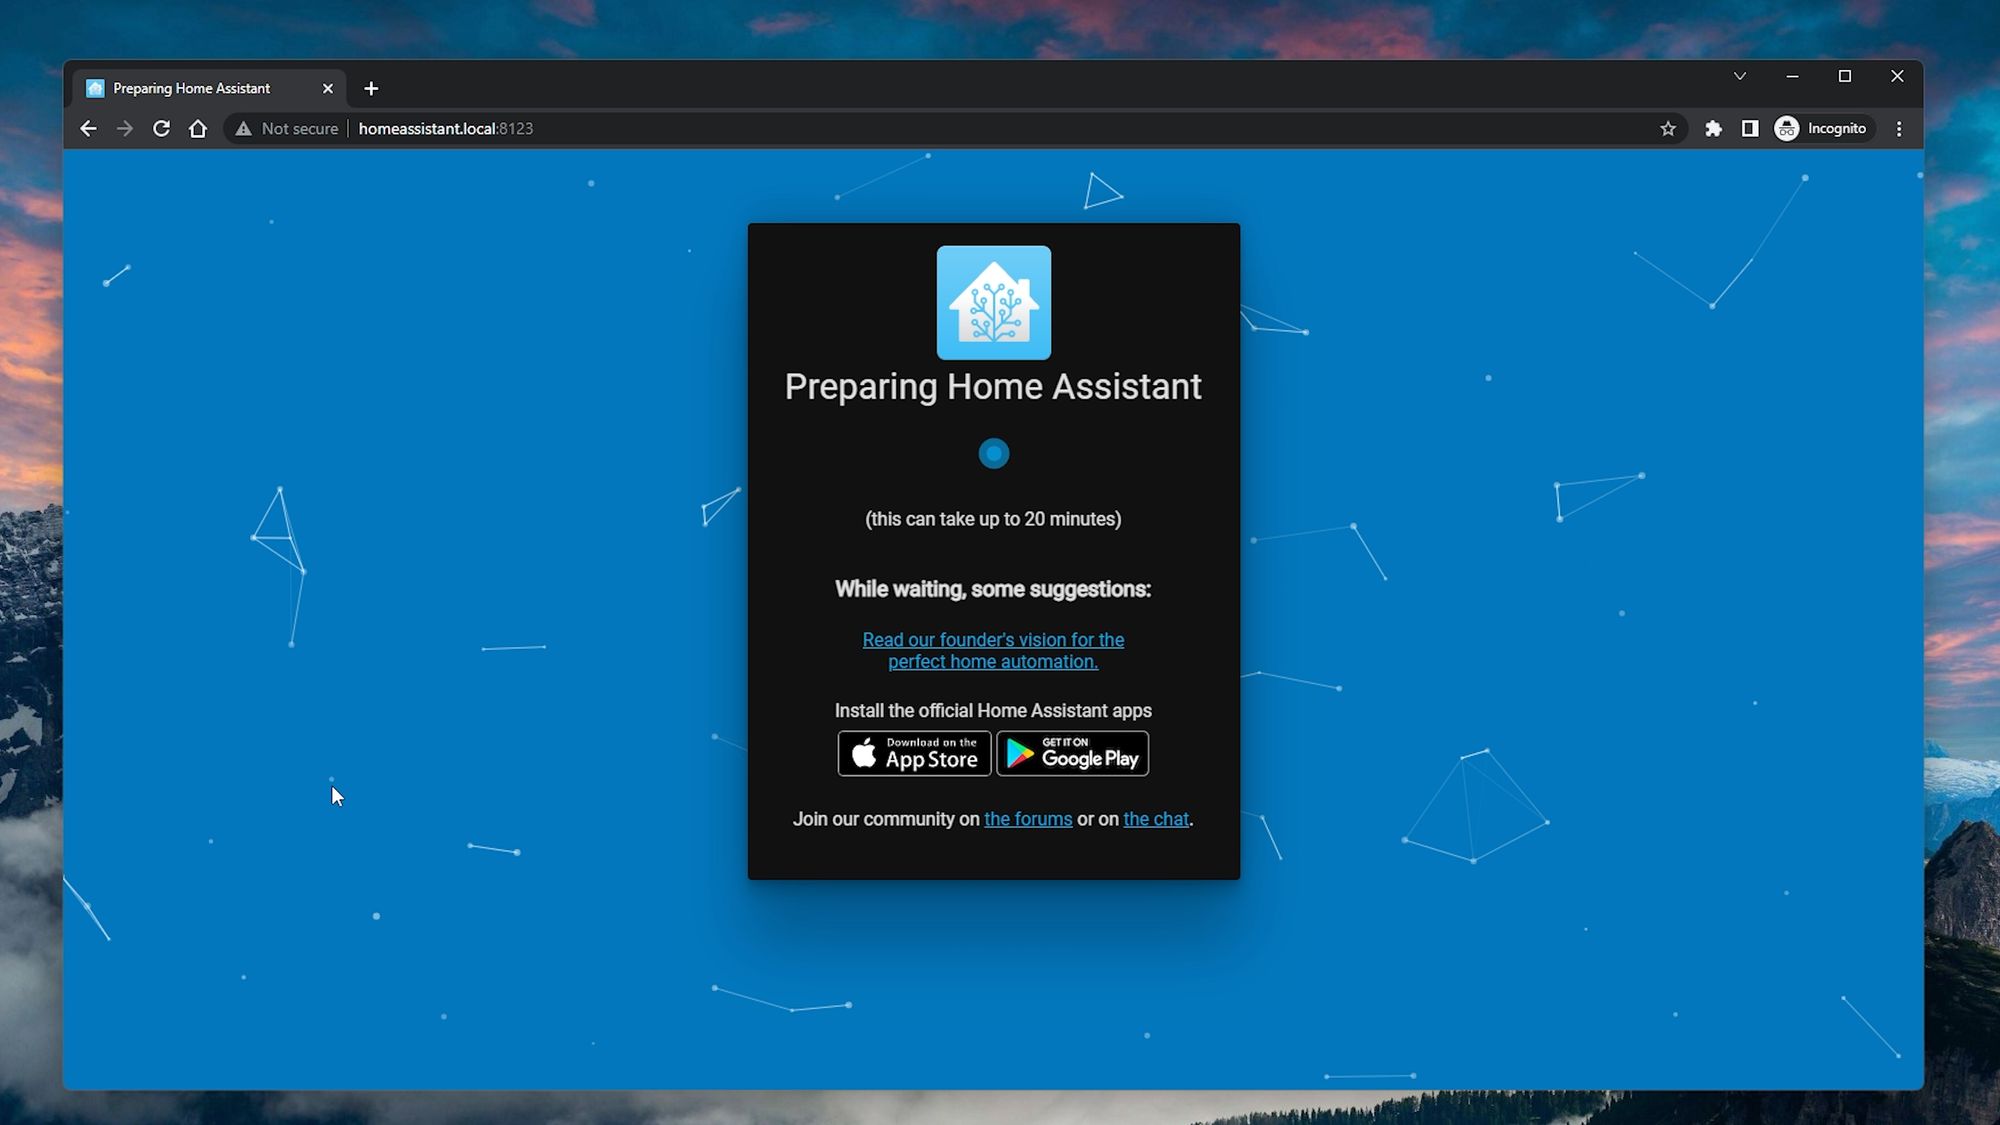
Give your Yellow a few minutes to start up, then head to a web browser and enter http://homeassistant.local:8123 and you should be greeted by the Home Assistant setup page:
If you aren't, then you will need to check your router's web page to find the IP address of the Yellow, or use a free app like Fing to scan for all of the IP addresses on your network. Then you can enter http:// followed by your IP address and then port 8123 to access the Home Assistant setup page.
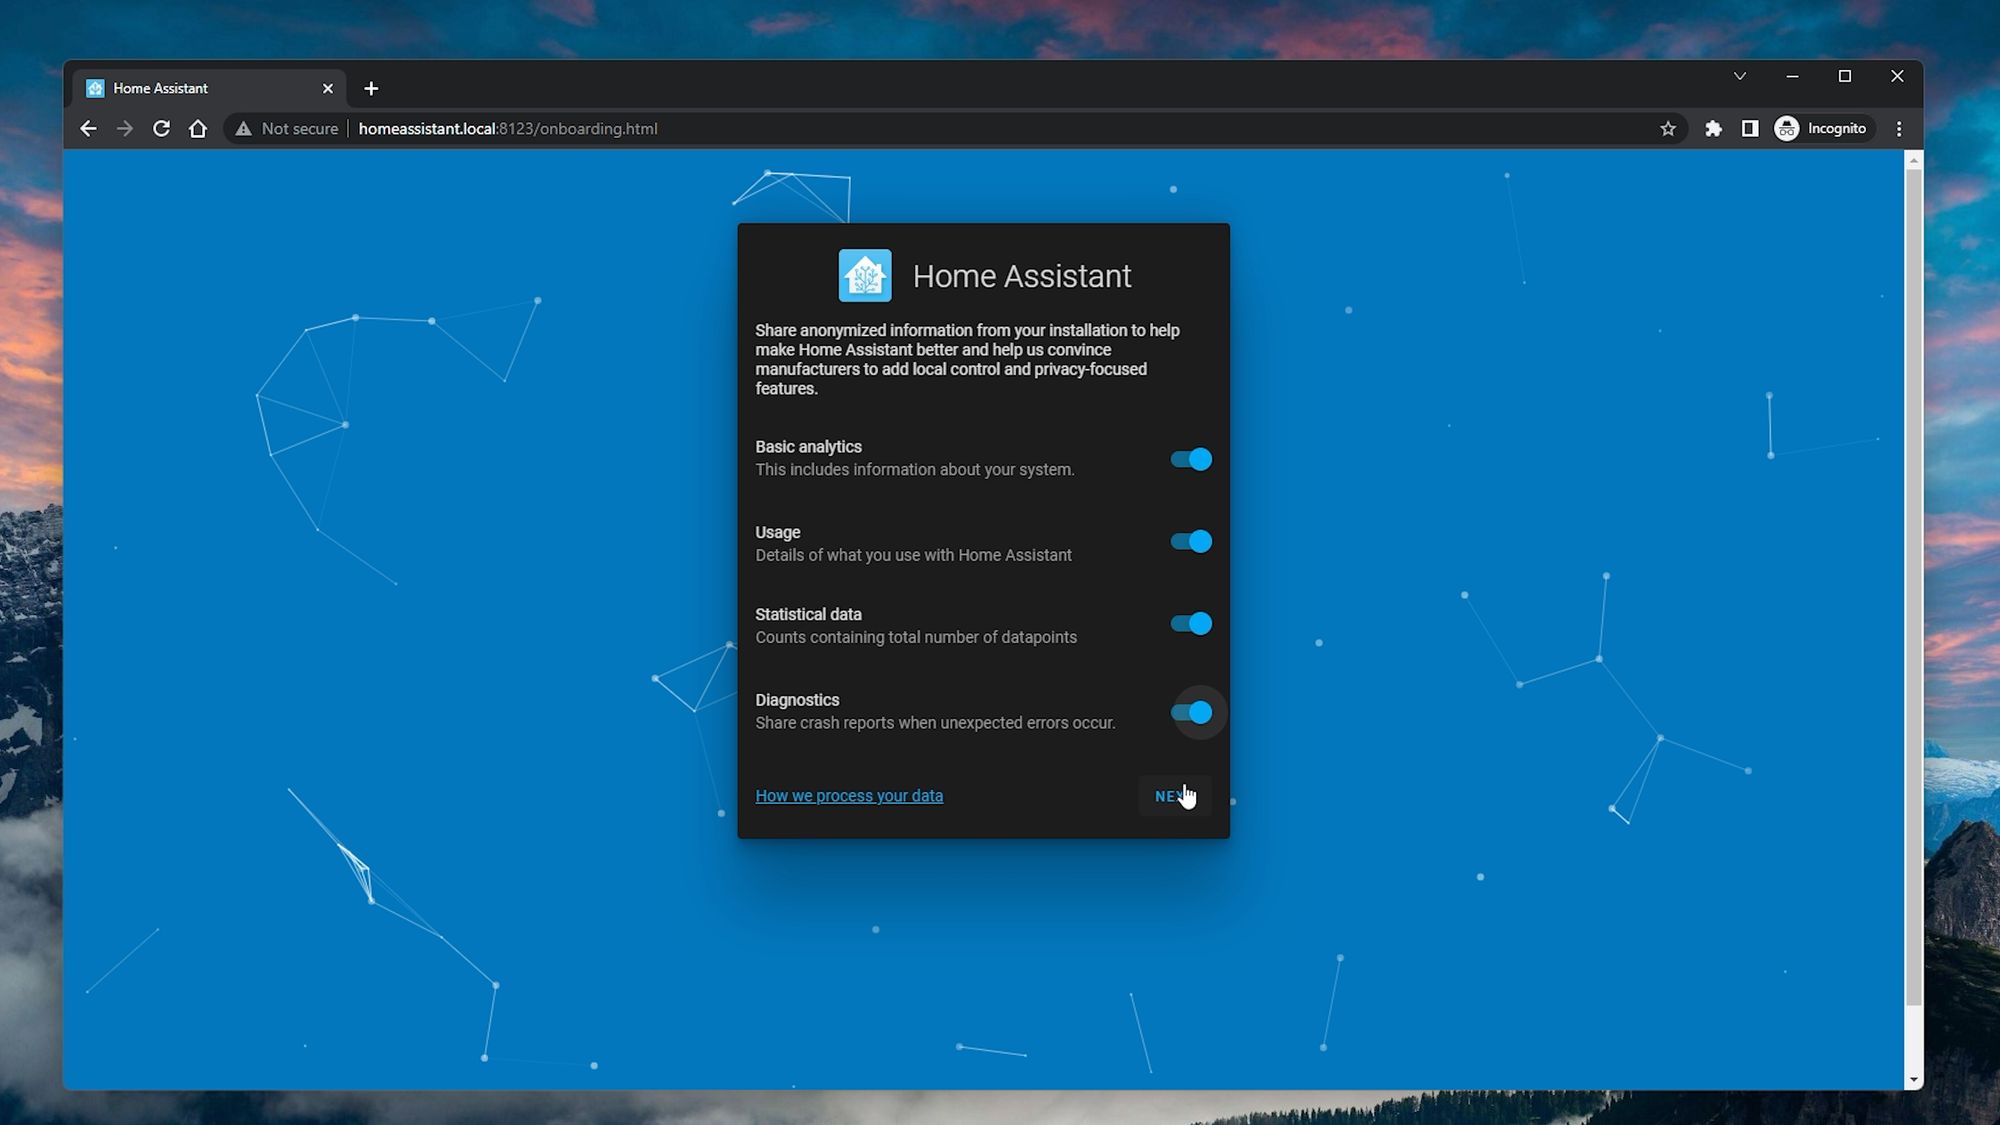
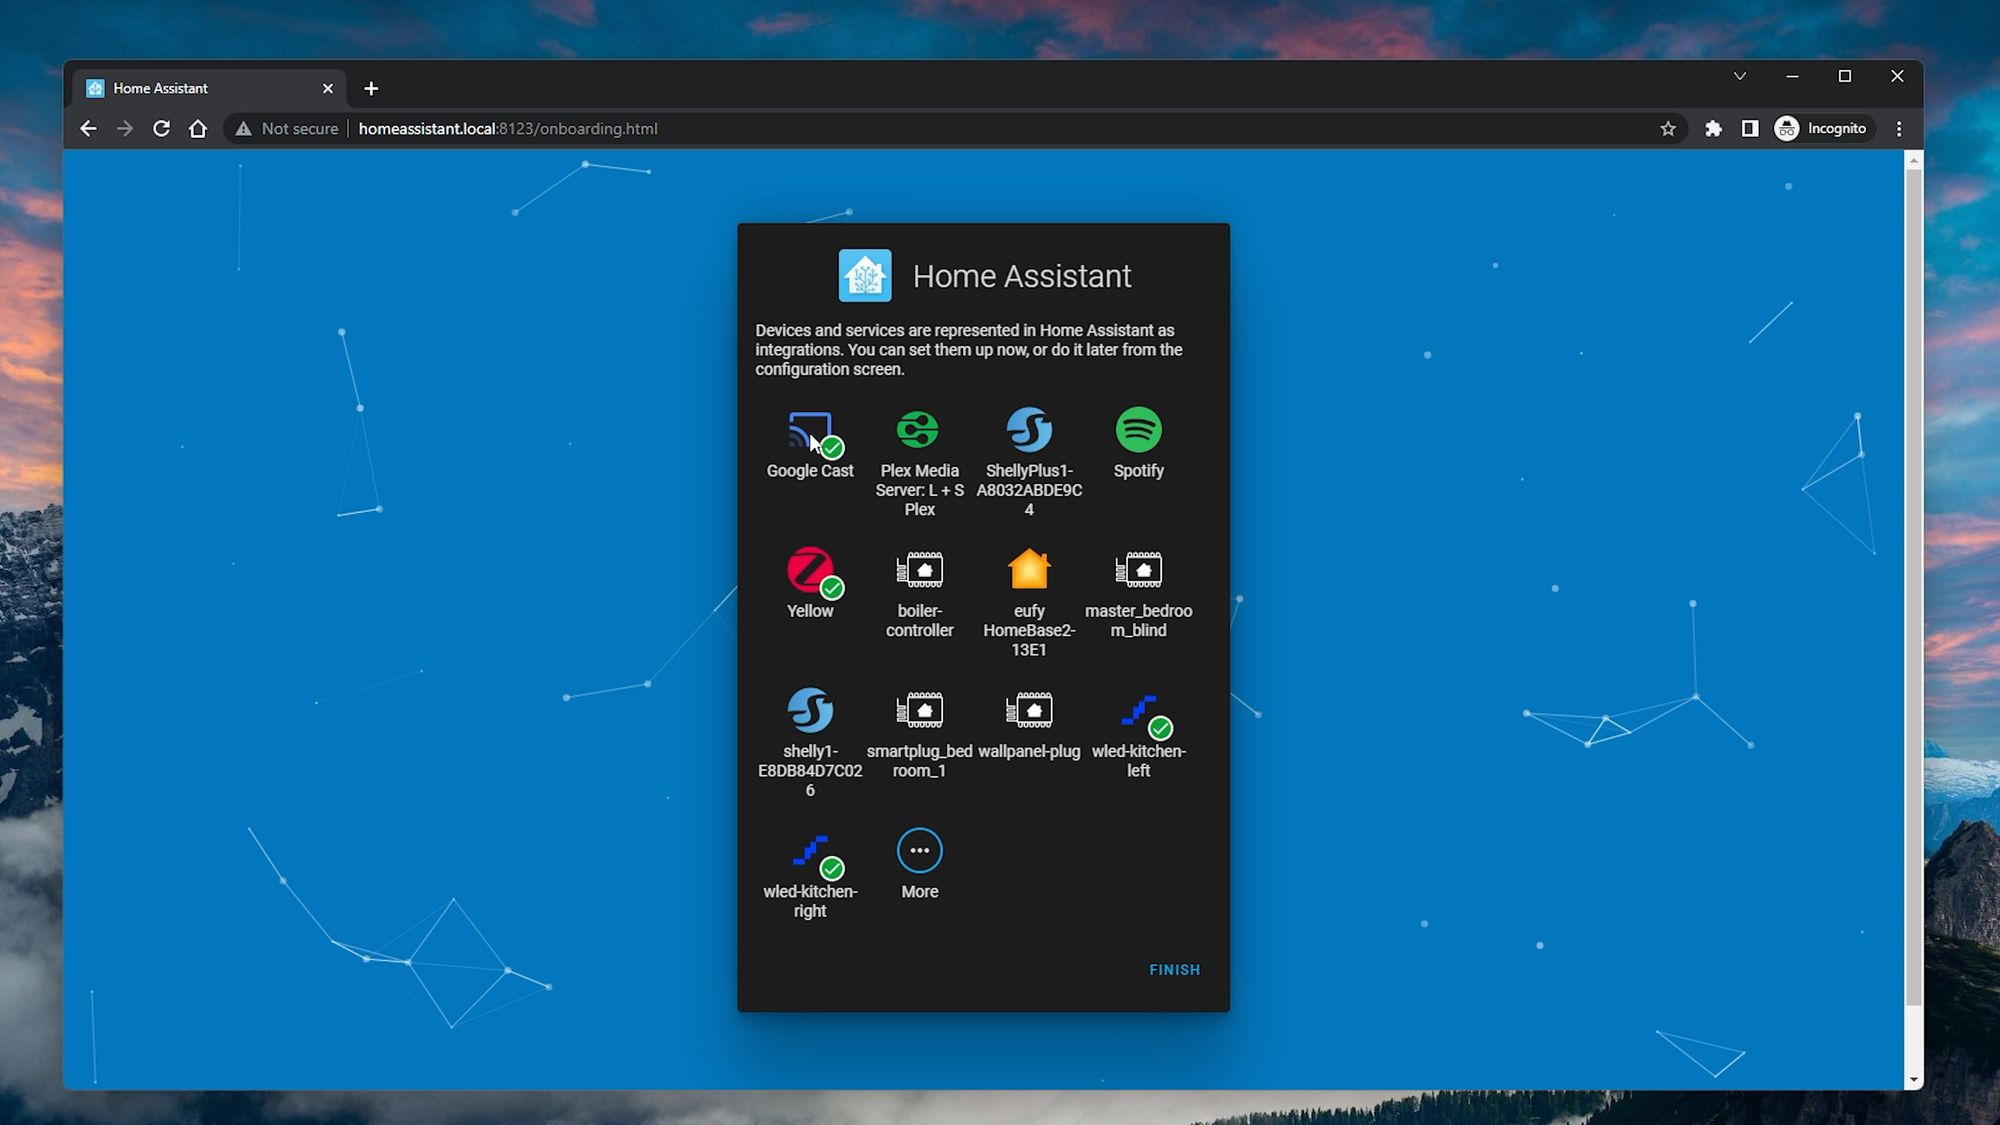
If this is your first Home Assistant install, then welcome to the world of Home Assistant! You are good to go and complete the short setup process - including entering your name, location and adding any auto discovered smart devices you may have on your network. You can then opt in or out to analytics - totally up to you but it does help out the project - and then you will land at your dashboard where you can get started automating your house! We have tons of content on various different topics to help you get started, I would recommend checking out my beginners tips for things to do after you’ve installed Home Assistant for the first time.

If you are coming from a previous Home Assistant install, lets go ahead and do the migration from your old setup! At the setup page, I would recommend going through and entering some temporary information, I wouldn’t spend much time here as it’s going to get over written by our backup so just quickly fly through it.
Migrating From A Previous Installation/Second Boot
At this point, I had a whole process written and planned out for doing a ZigBee backup and restore, and this would have allowed you to migrate your ZigBee devices without repairing, in some but not all circumstances.
I’ve done ZigBee backups and restores many times before, it is usually a fairly painless process and works very well, but for some reason I couldn’t get the restore to take on the Yellow and it just times out. So, unfortunately, the only way to proceed is to re-pair your devices with the Yellow after setup. Home Assistant Yellow does, however, automatically detect and configure ZHA for you so ZigBee works out of the box and you don’t have to do anything.
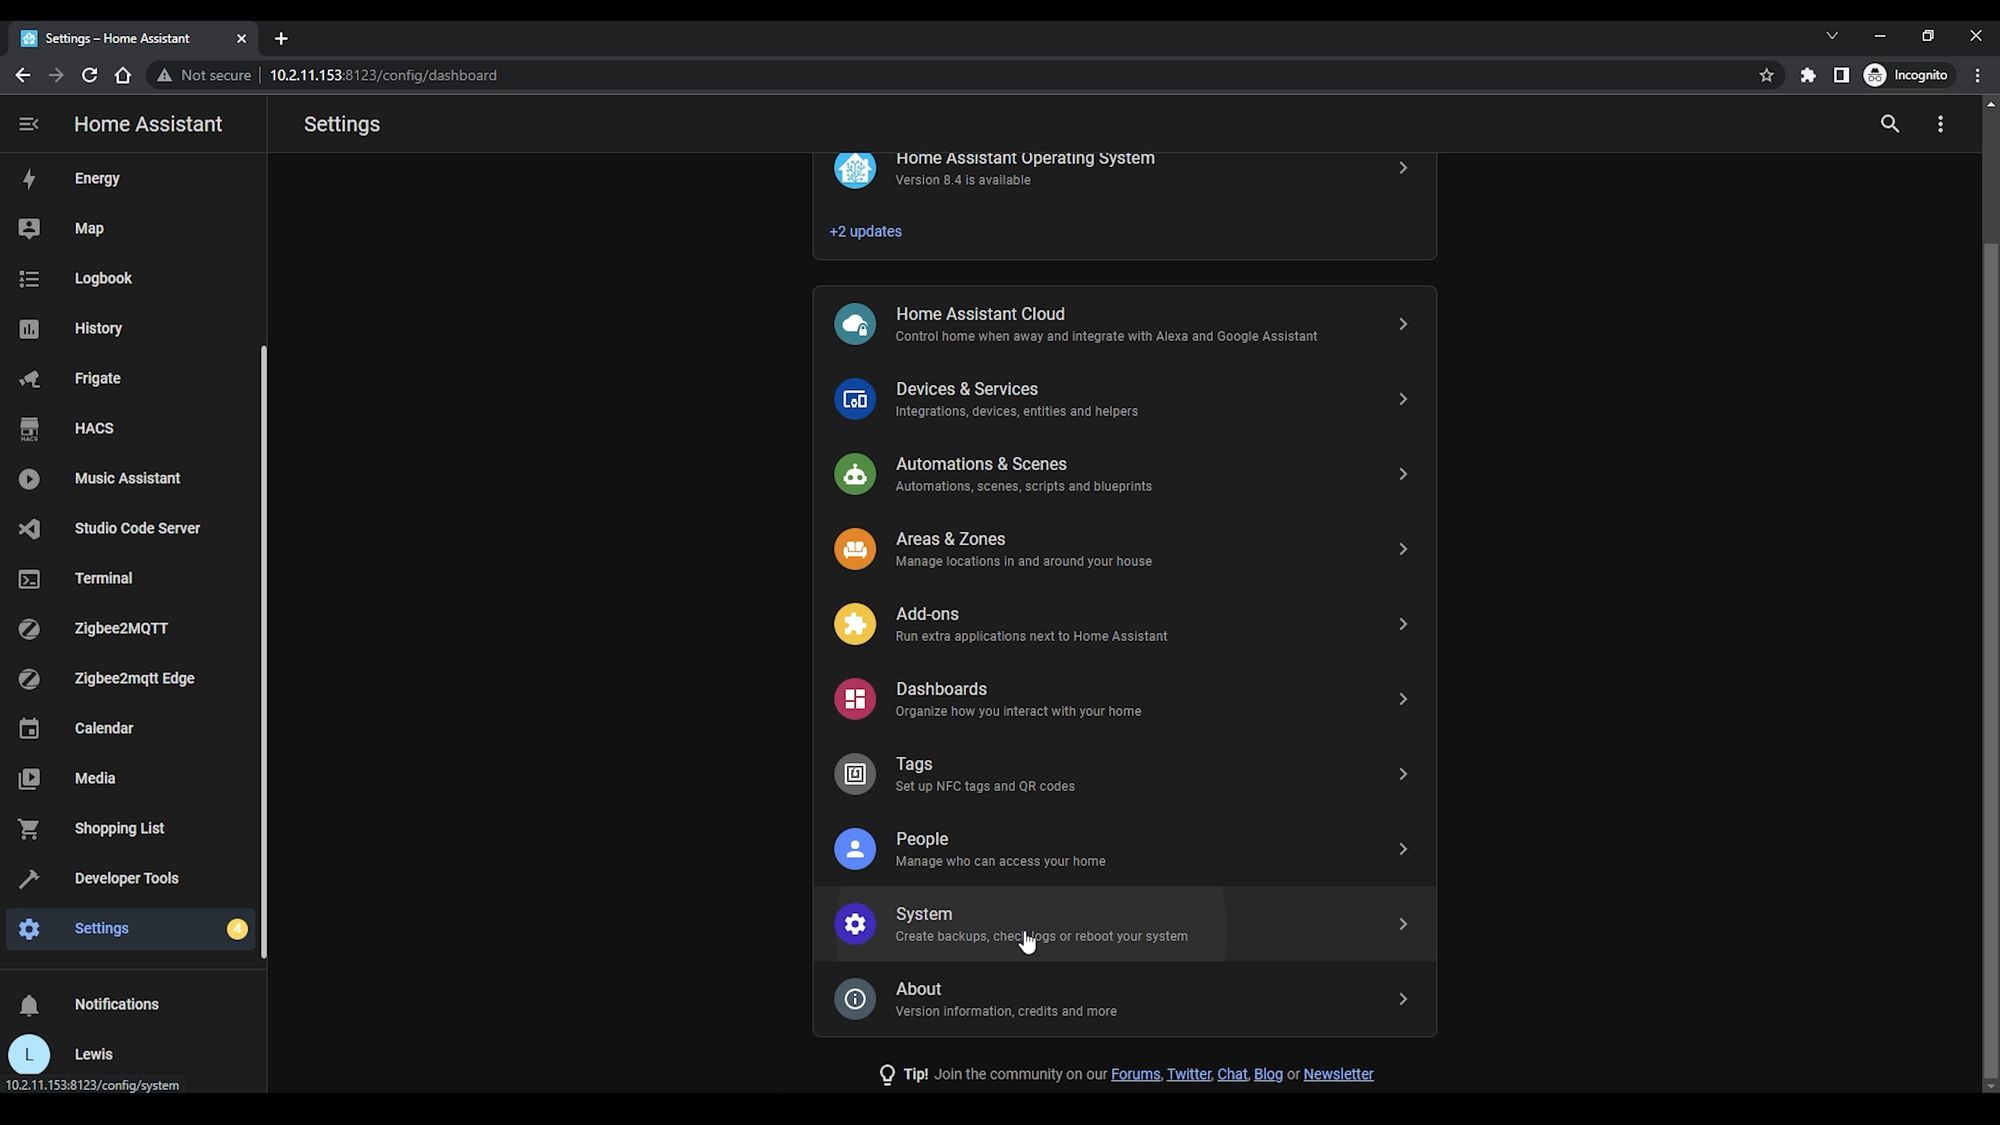
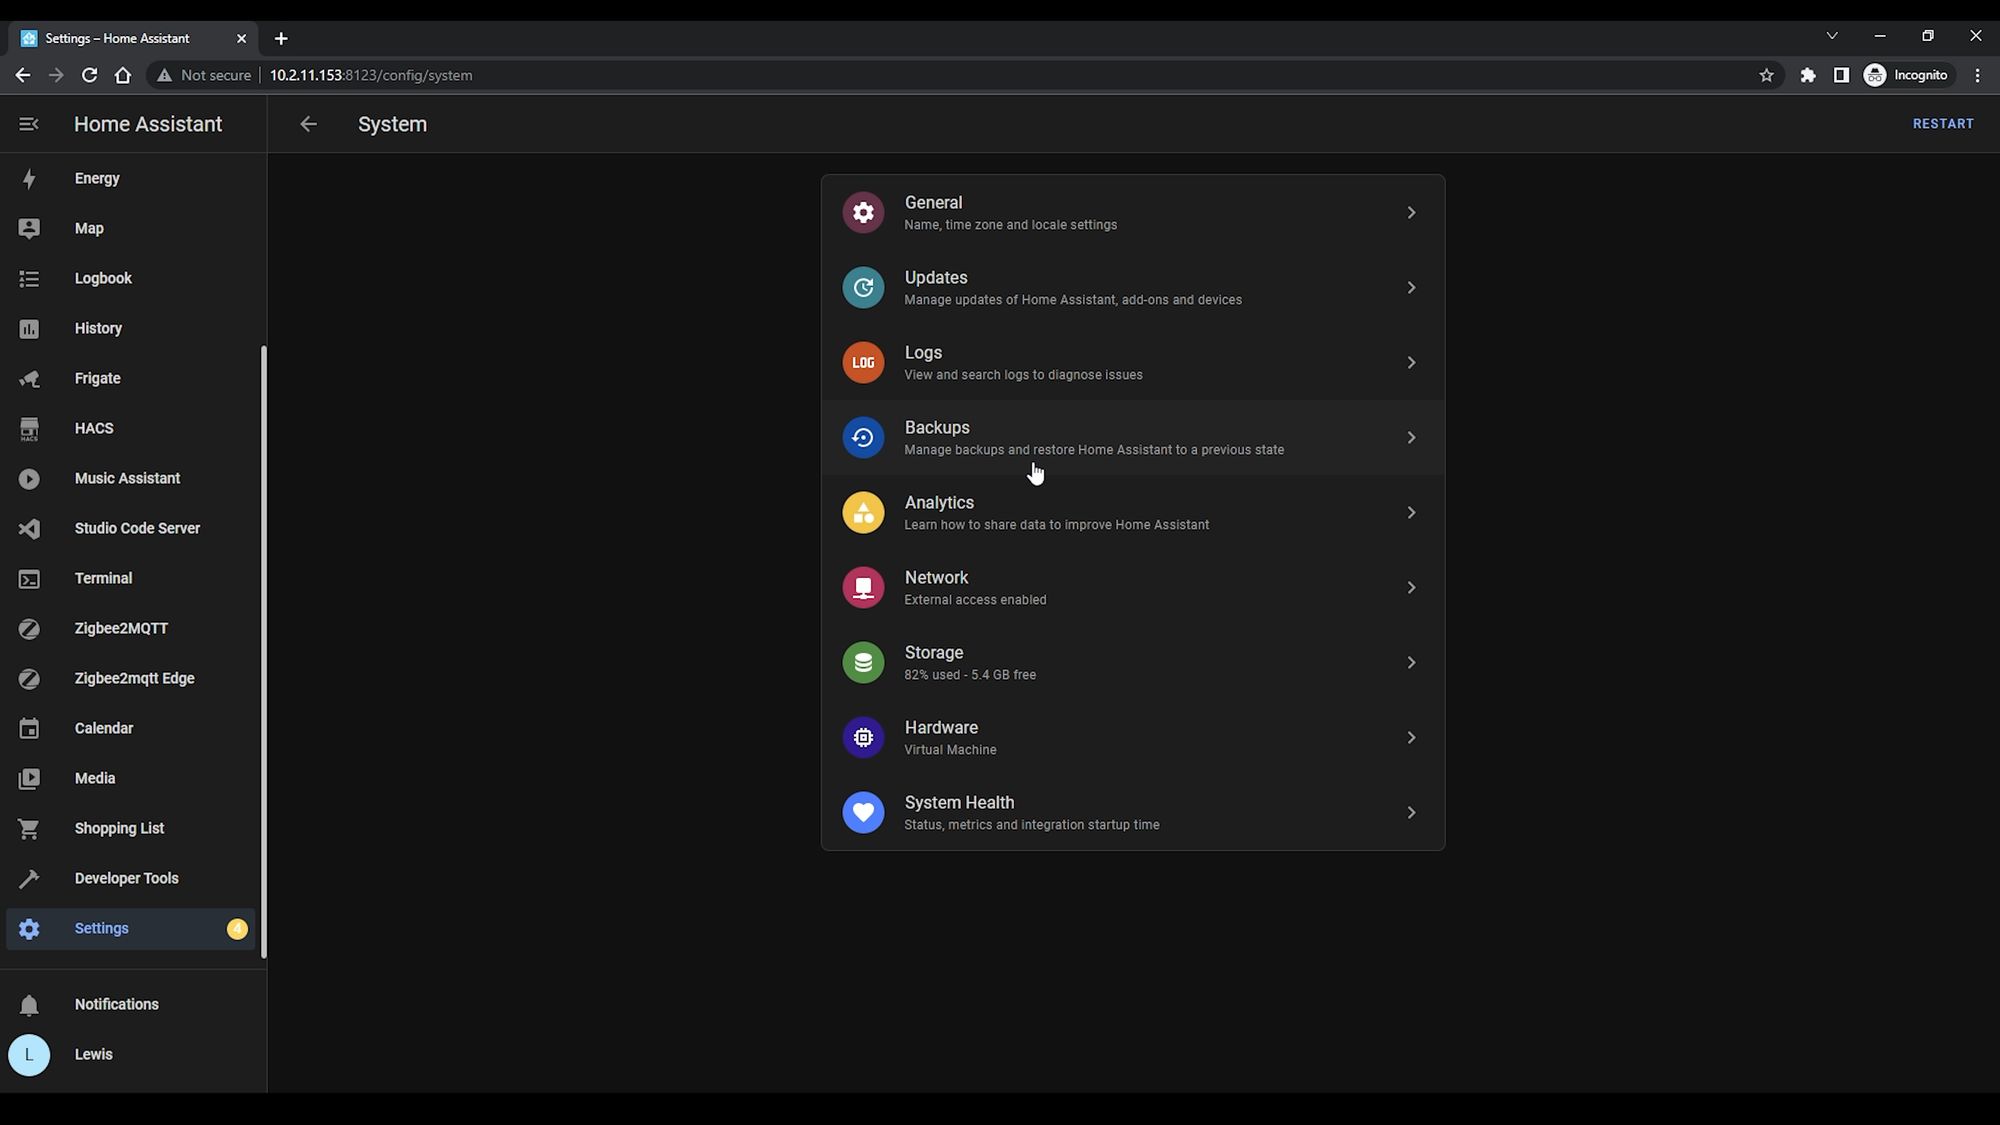
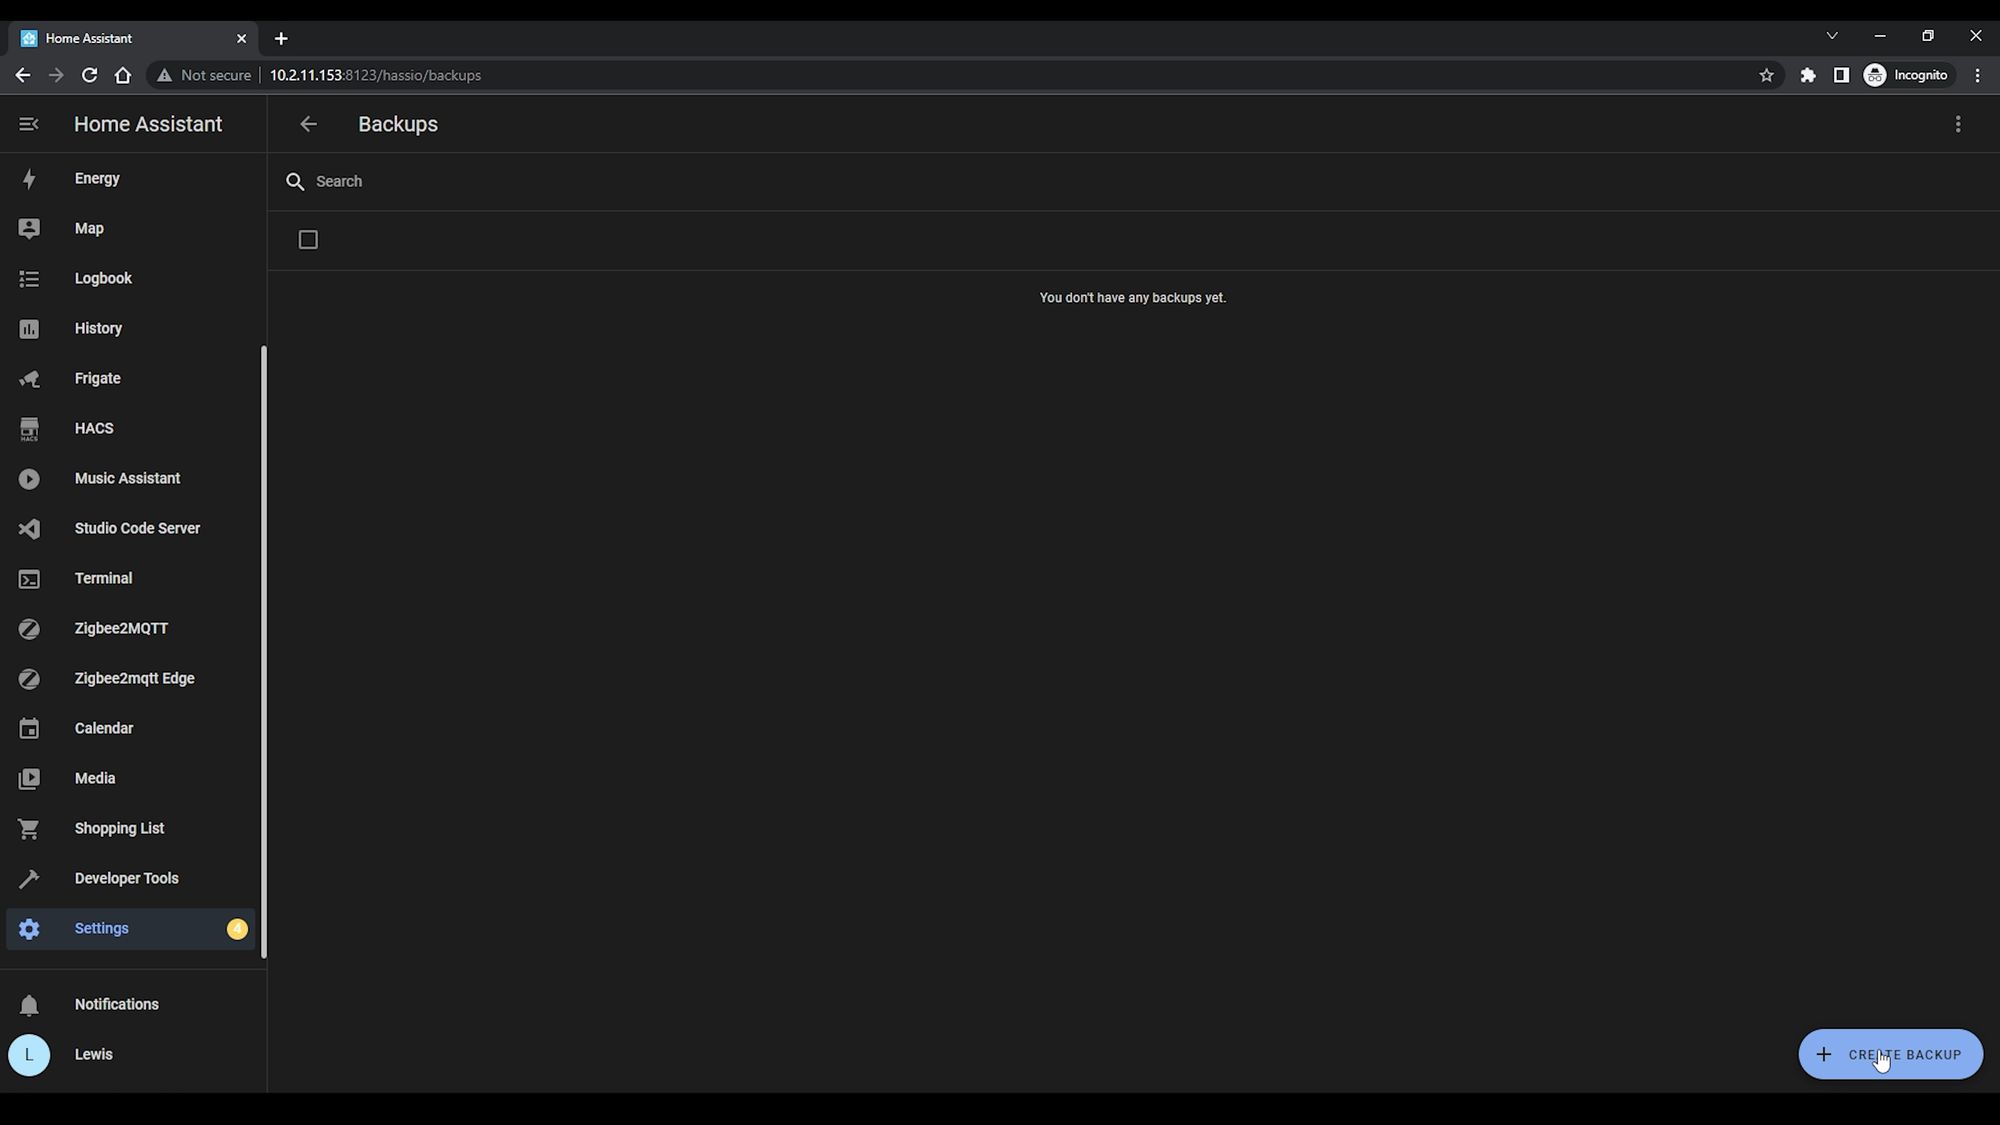
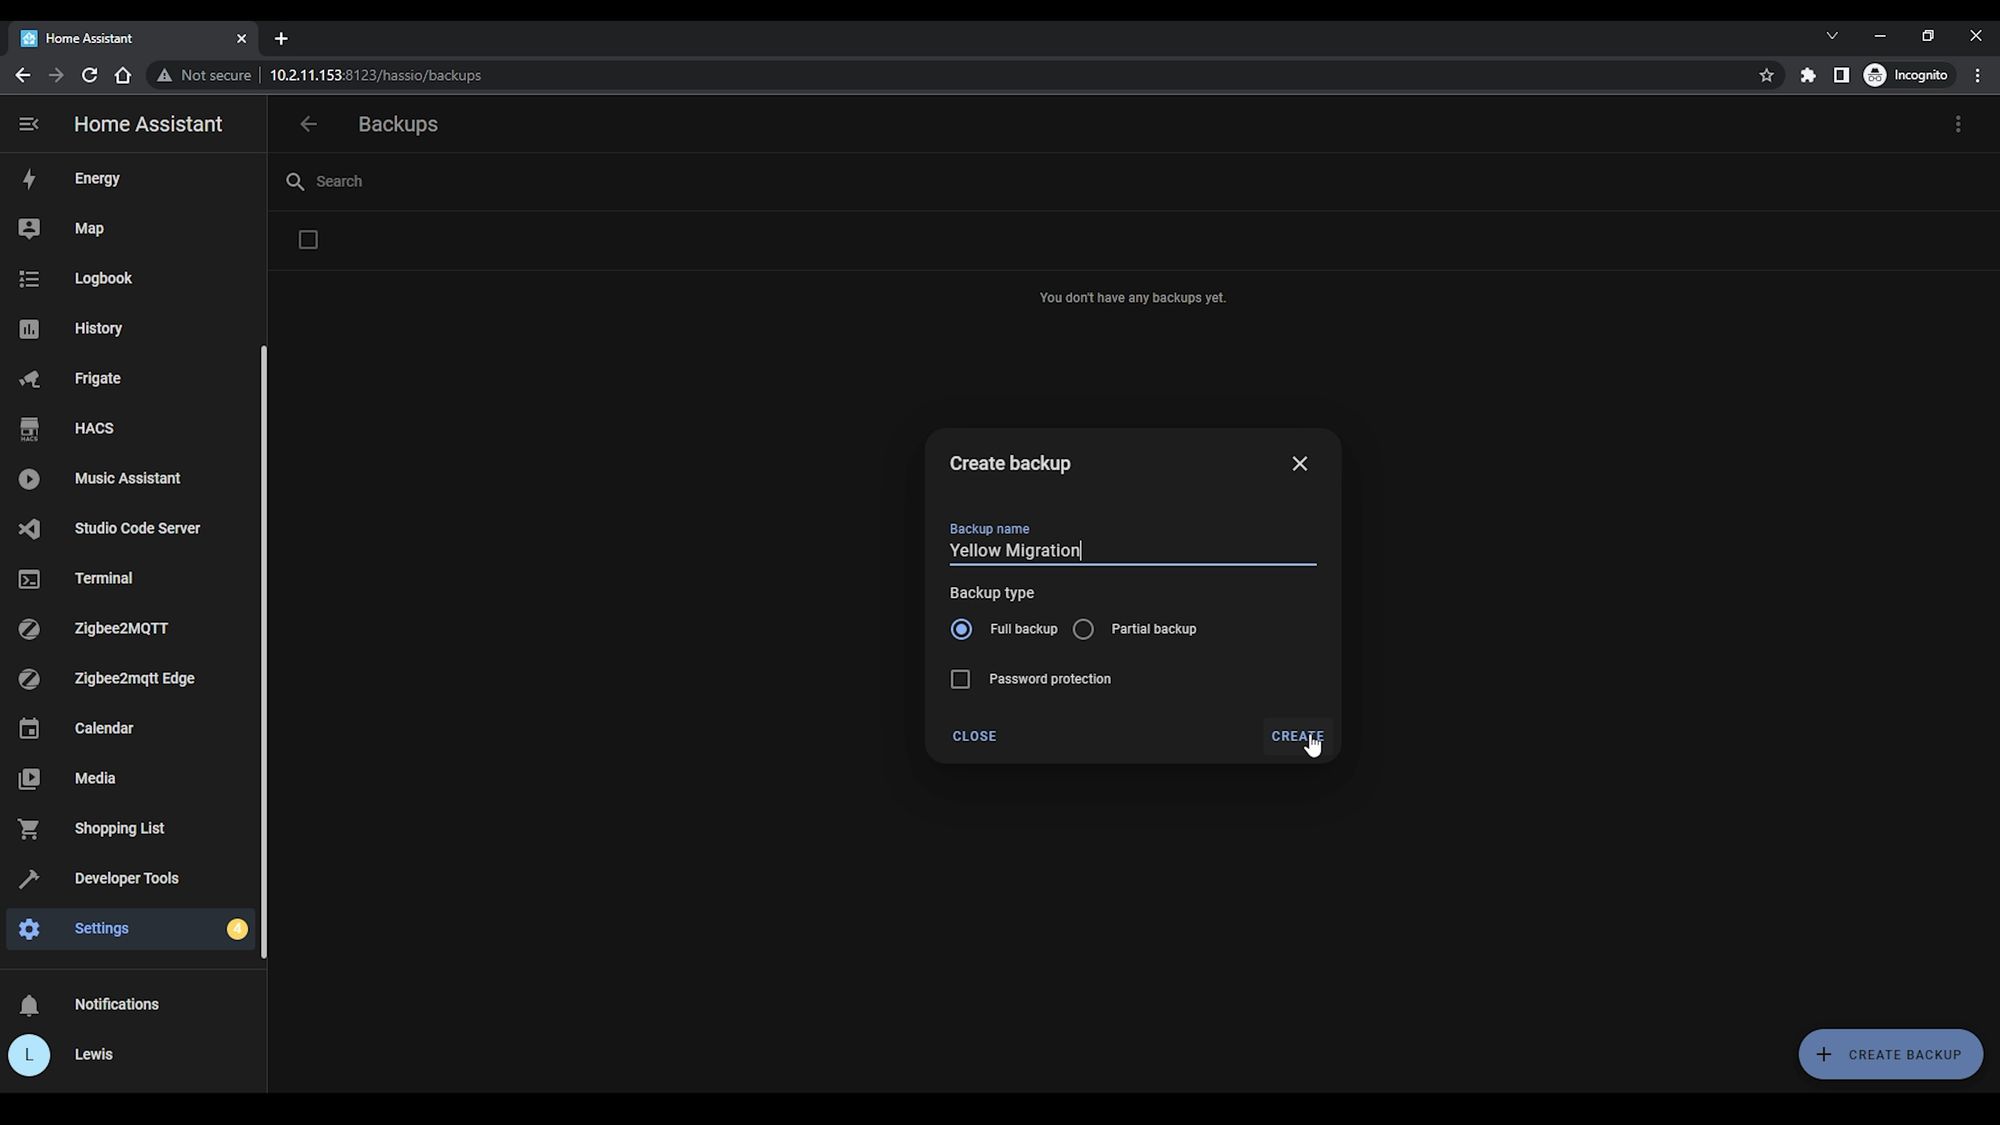
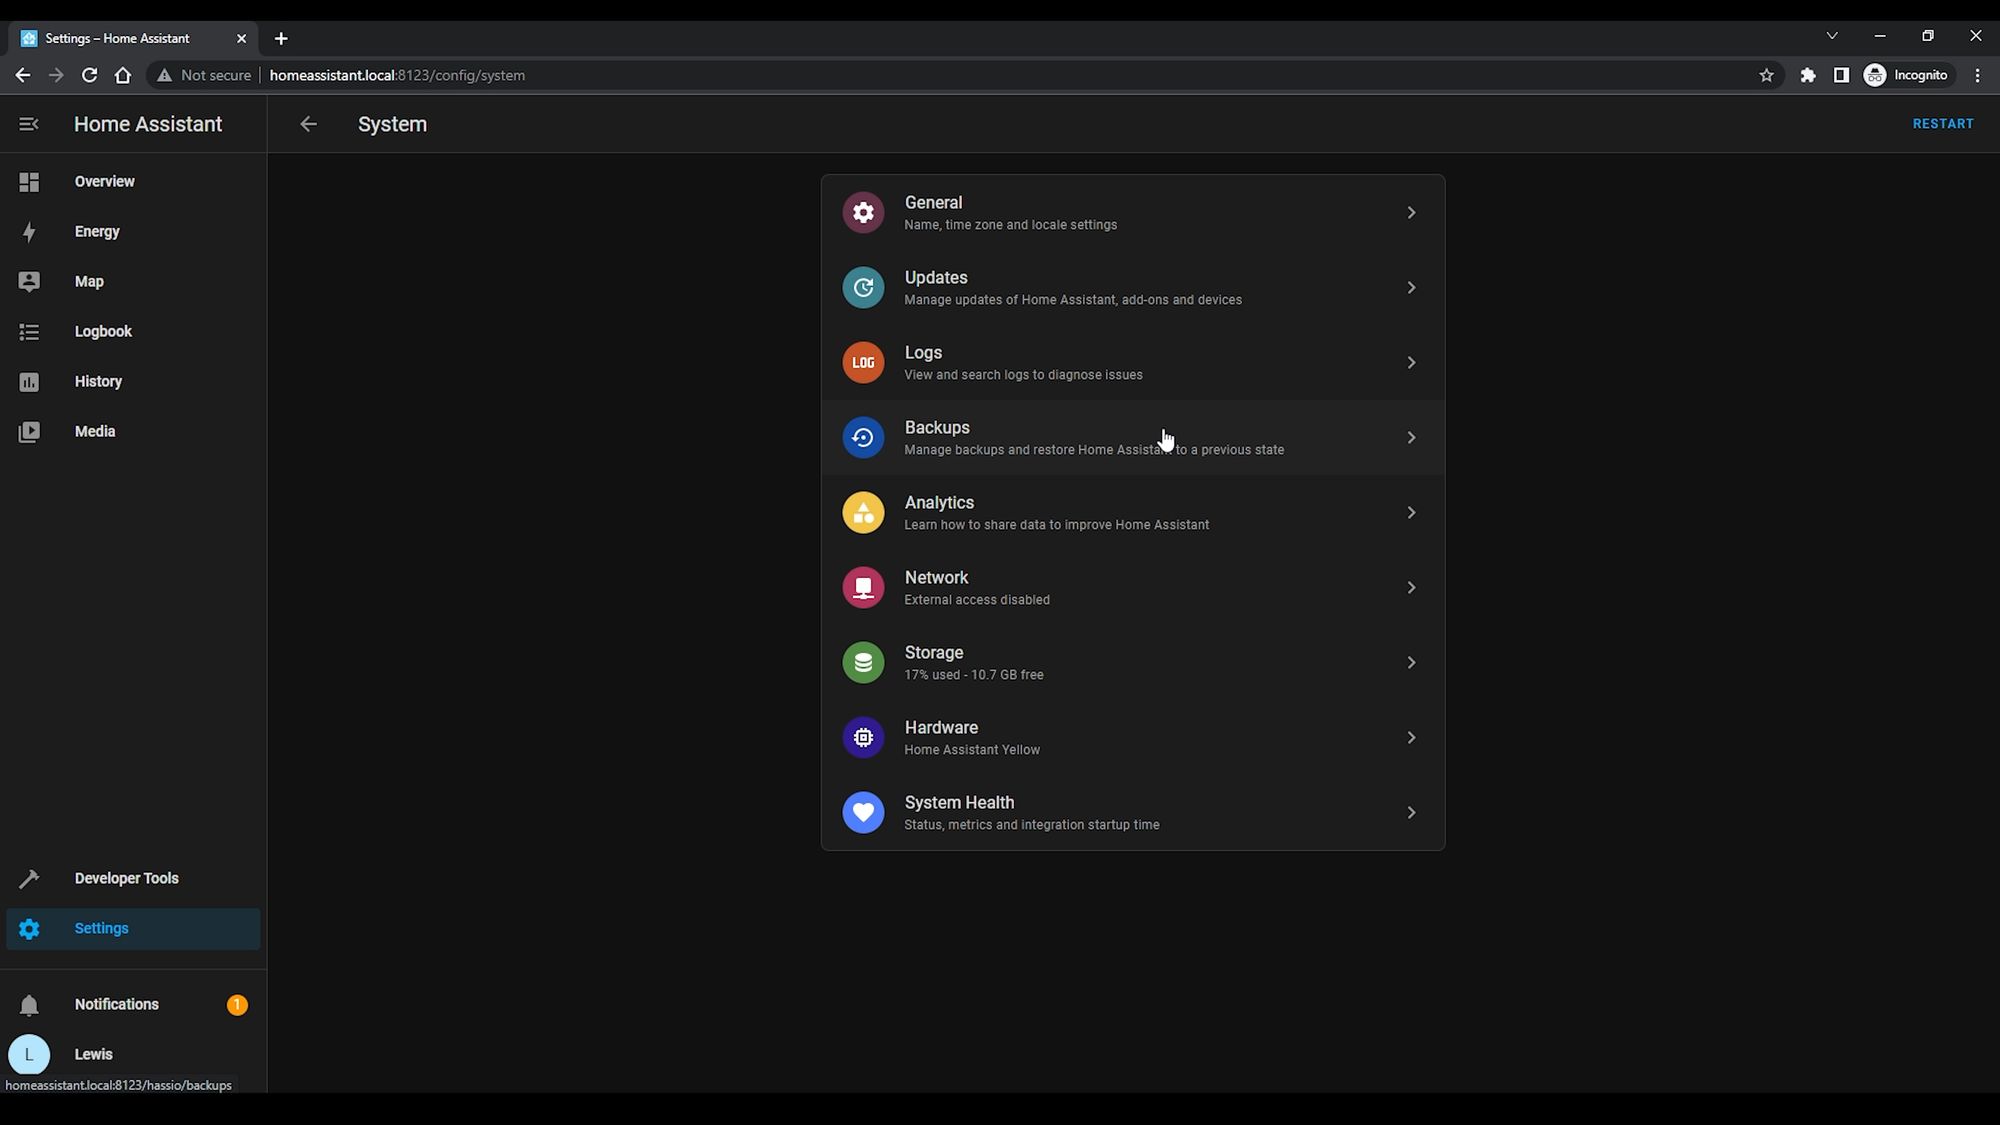
What we can do though, is do the main Home Assistant backup. So, login to your original Home Assistant install and go to Settings, System and then Backups. In the bottom right hand corner, click create backup. Give your backup a name and then select full backup and hit create backup to start the backup process.
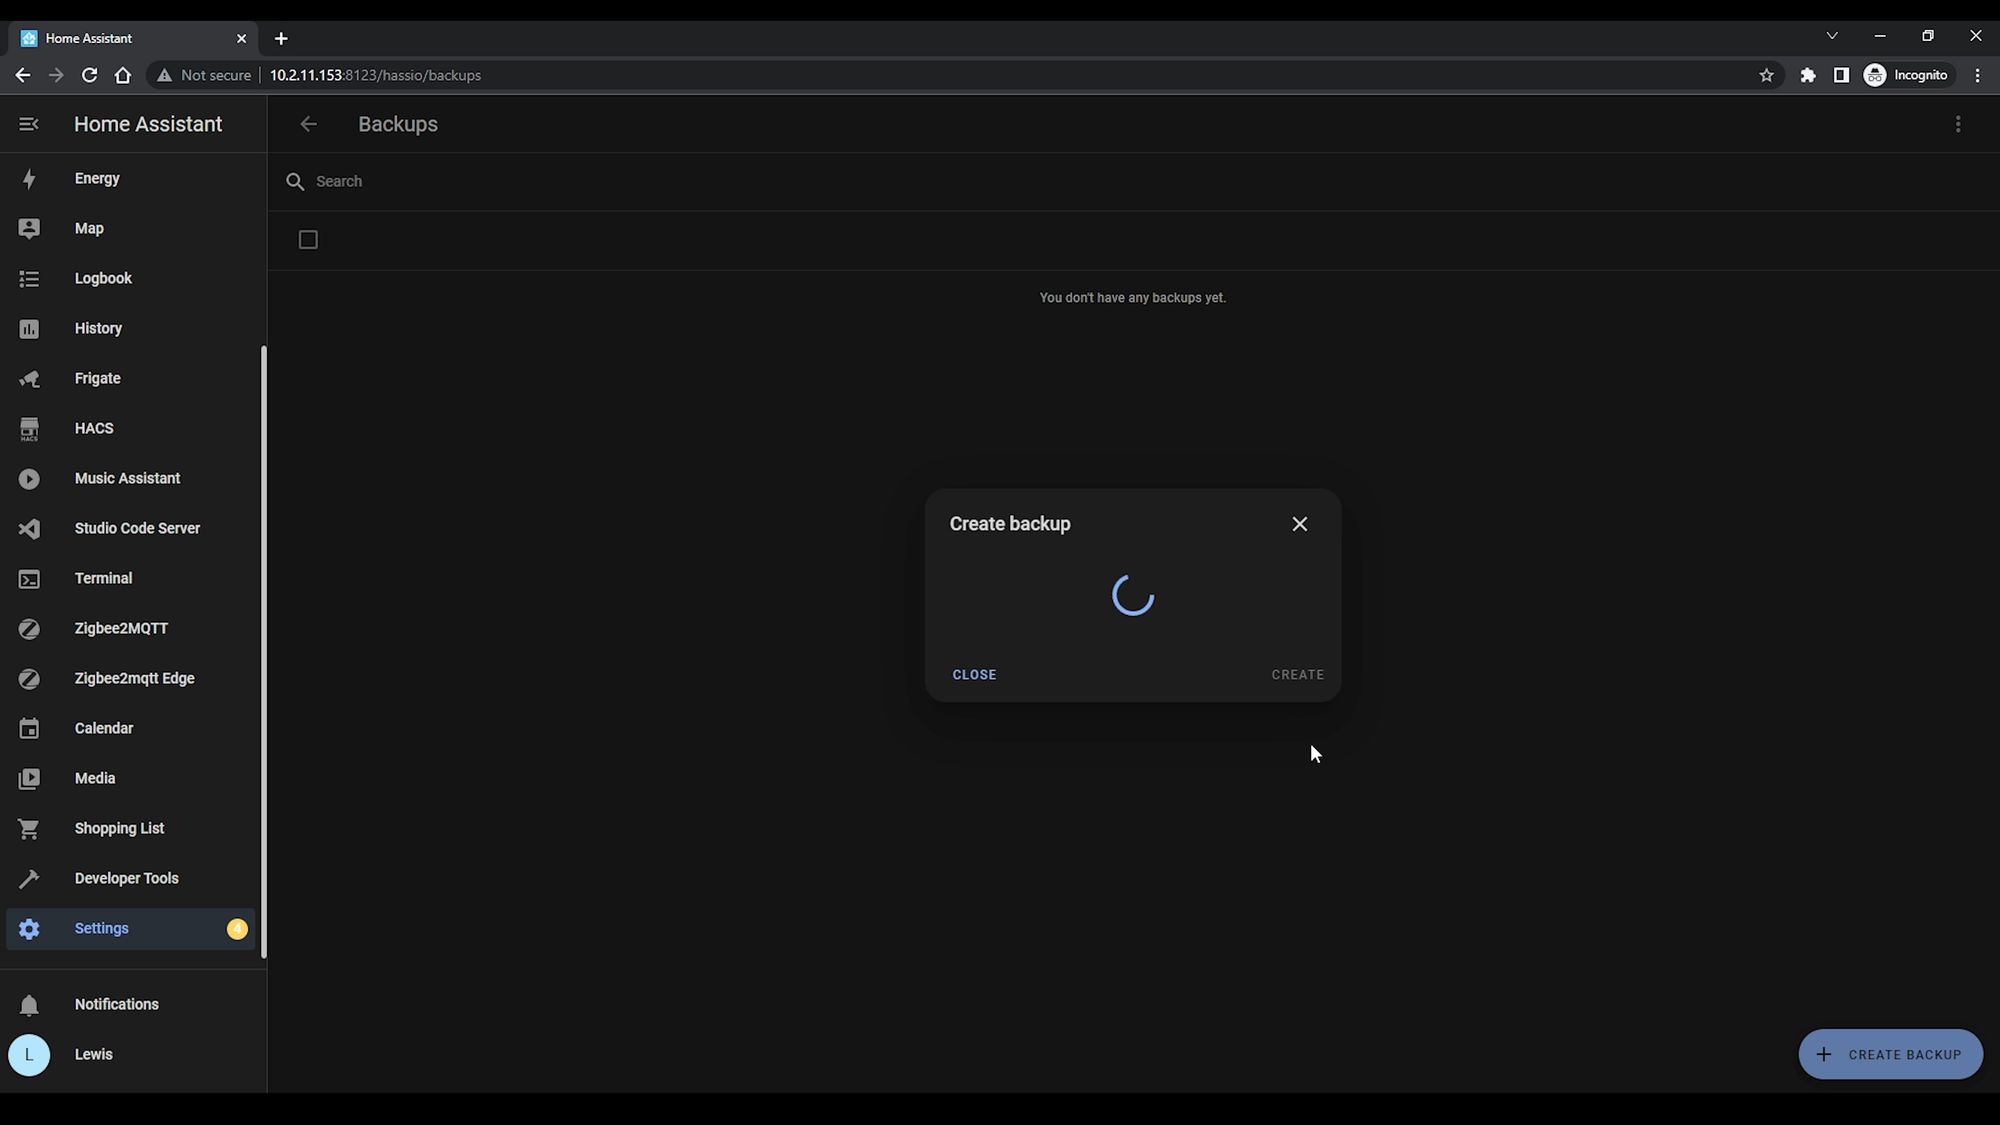
It’s worth mentioning that if you are using MariaDB for your recorder database, you may want to stop the add-on temporarily before you do the backup so that it restores without a hitch.
The backup can take quite a while - upwards of 20-30 minutes maybe depending on your hardware and install size, so be patient and wait for that to complete.
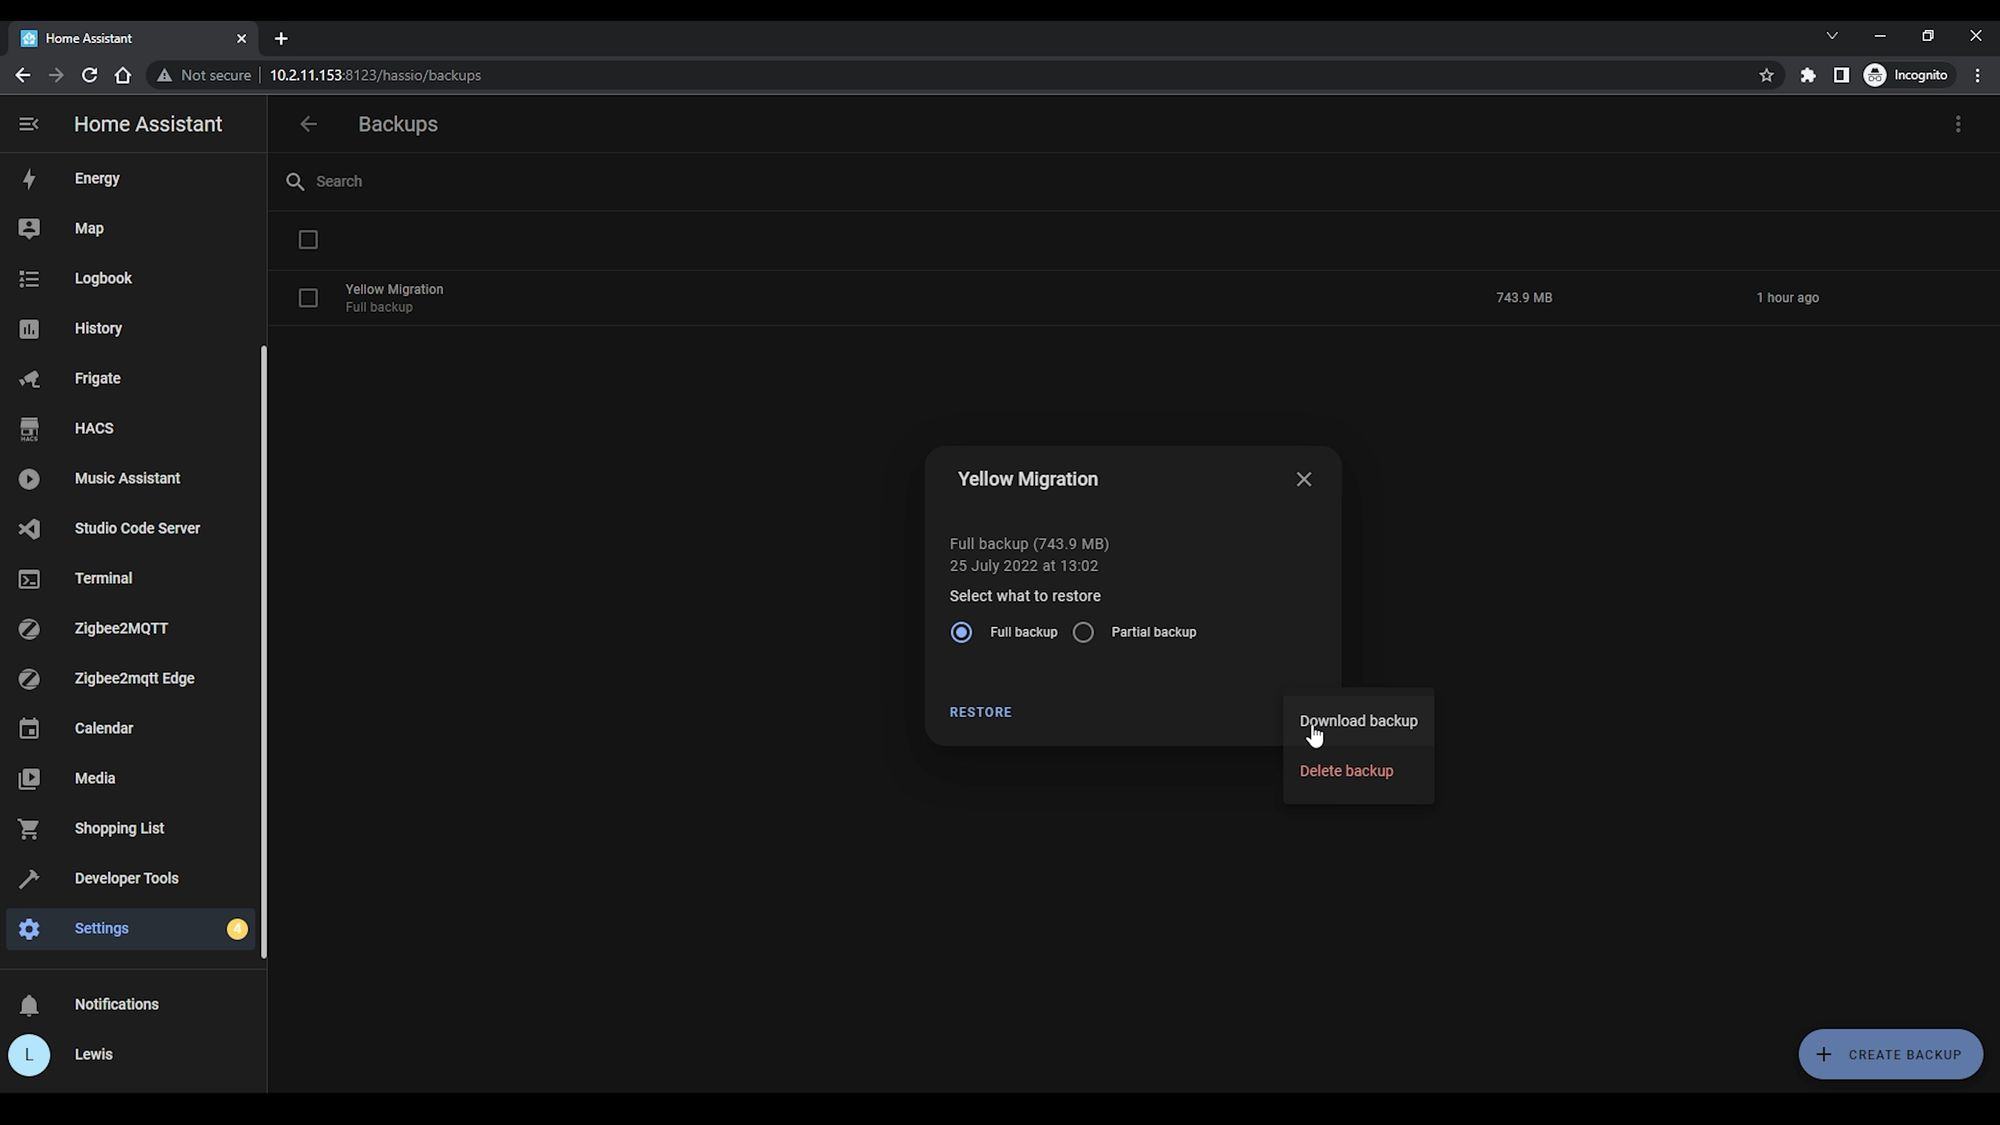
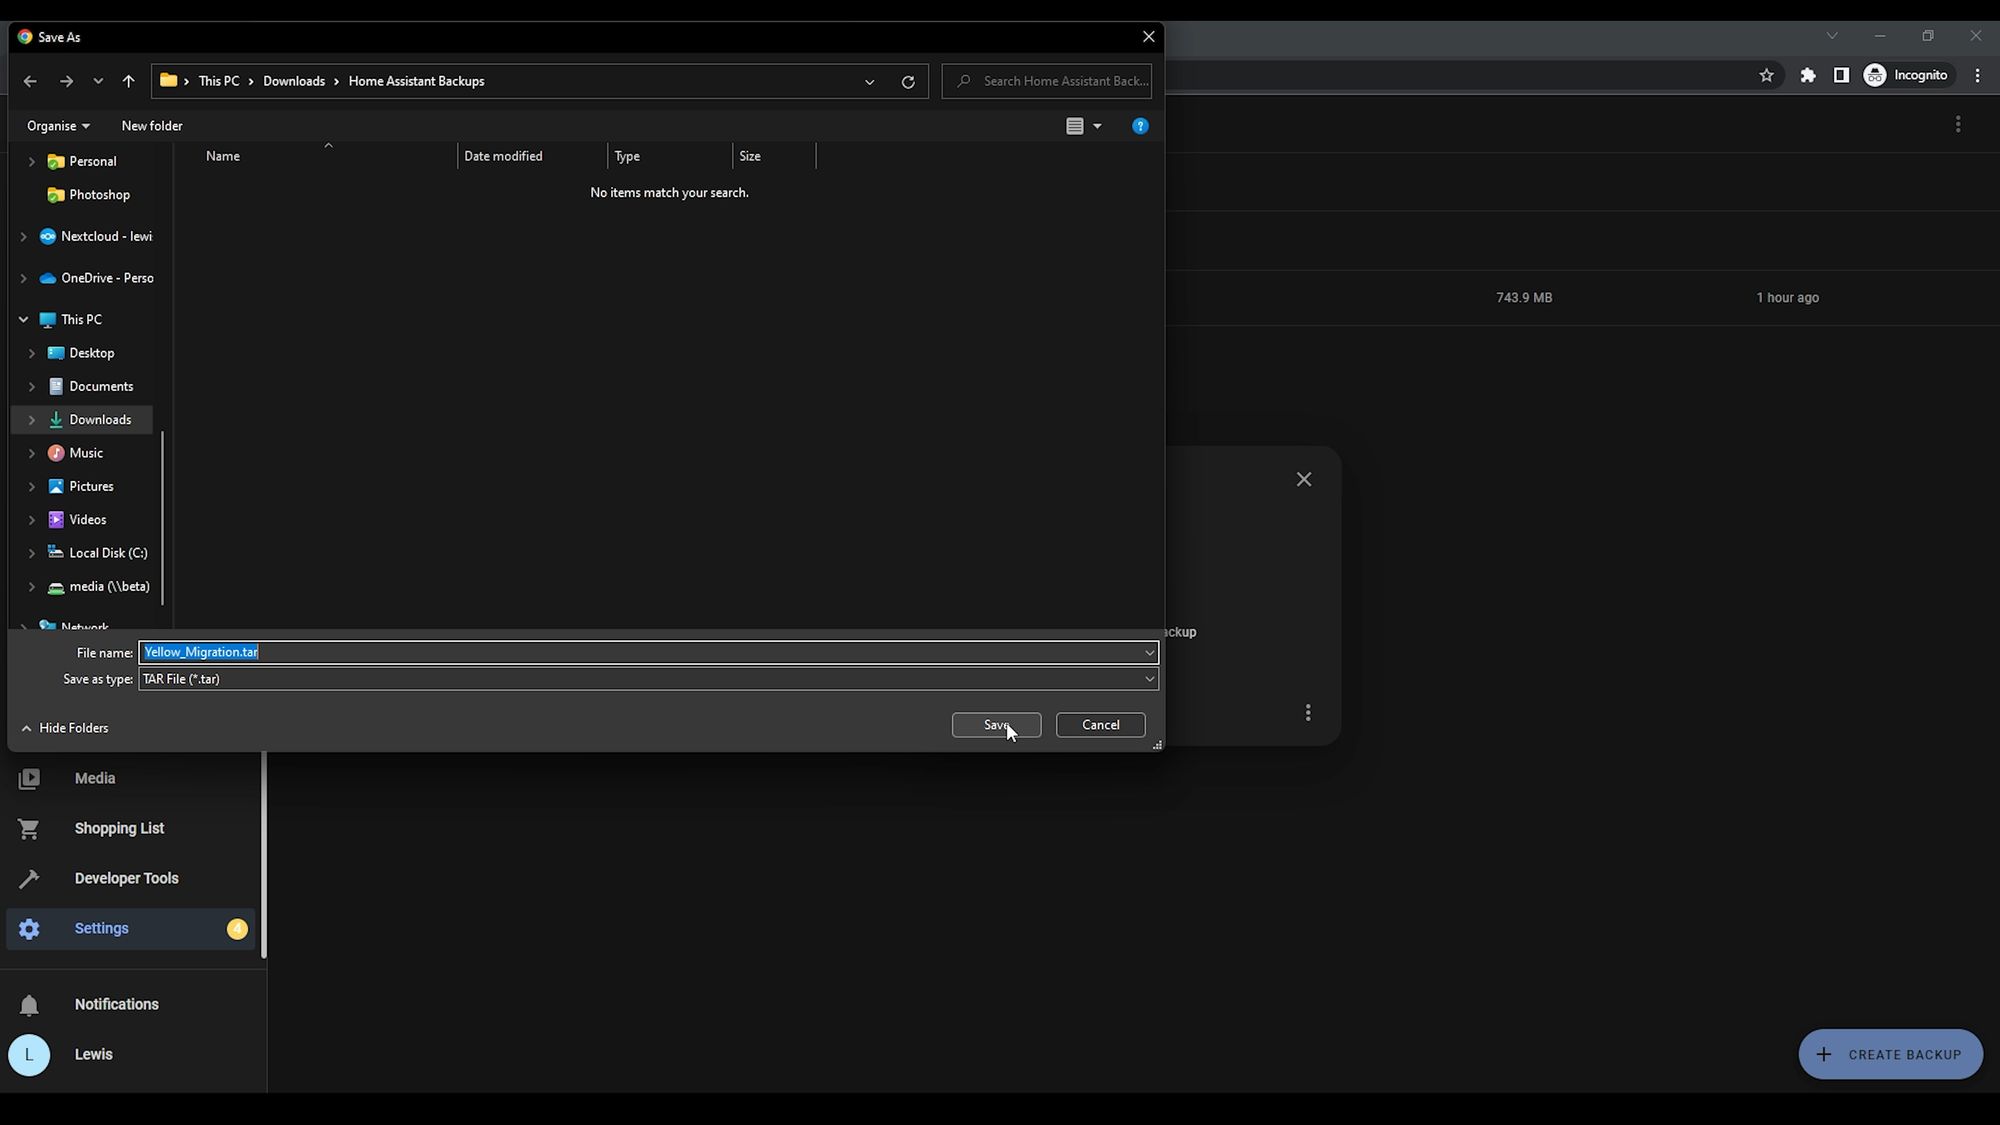
Then select the backup you took and then select download - save this to your computer so we can restore it on our new install.
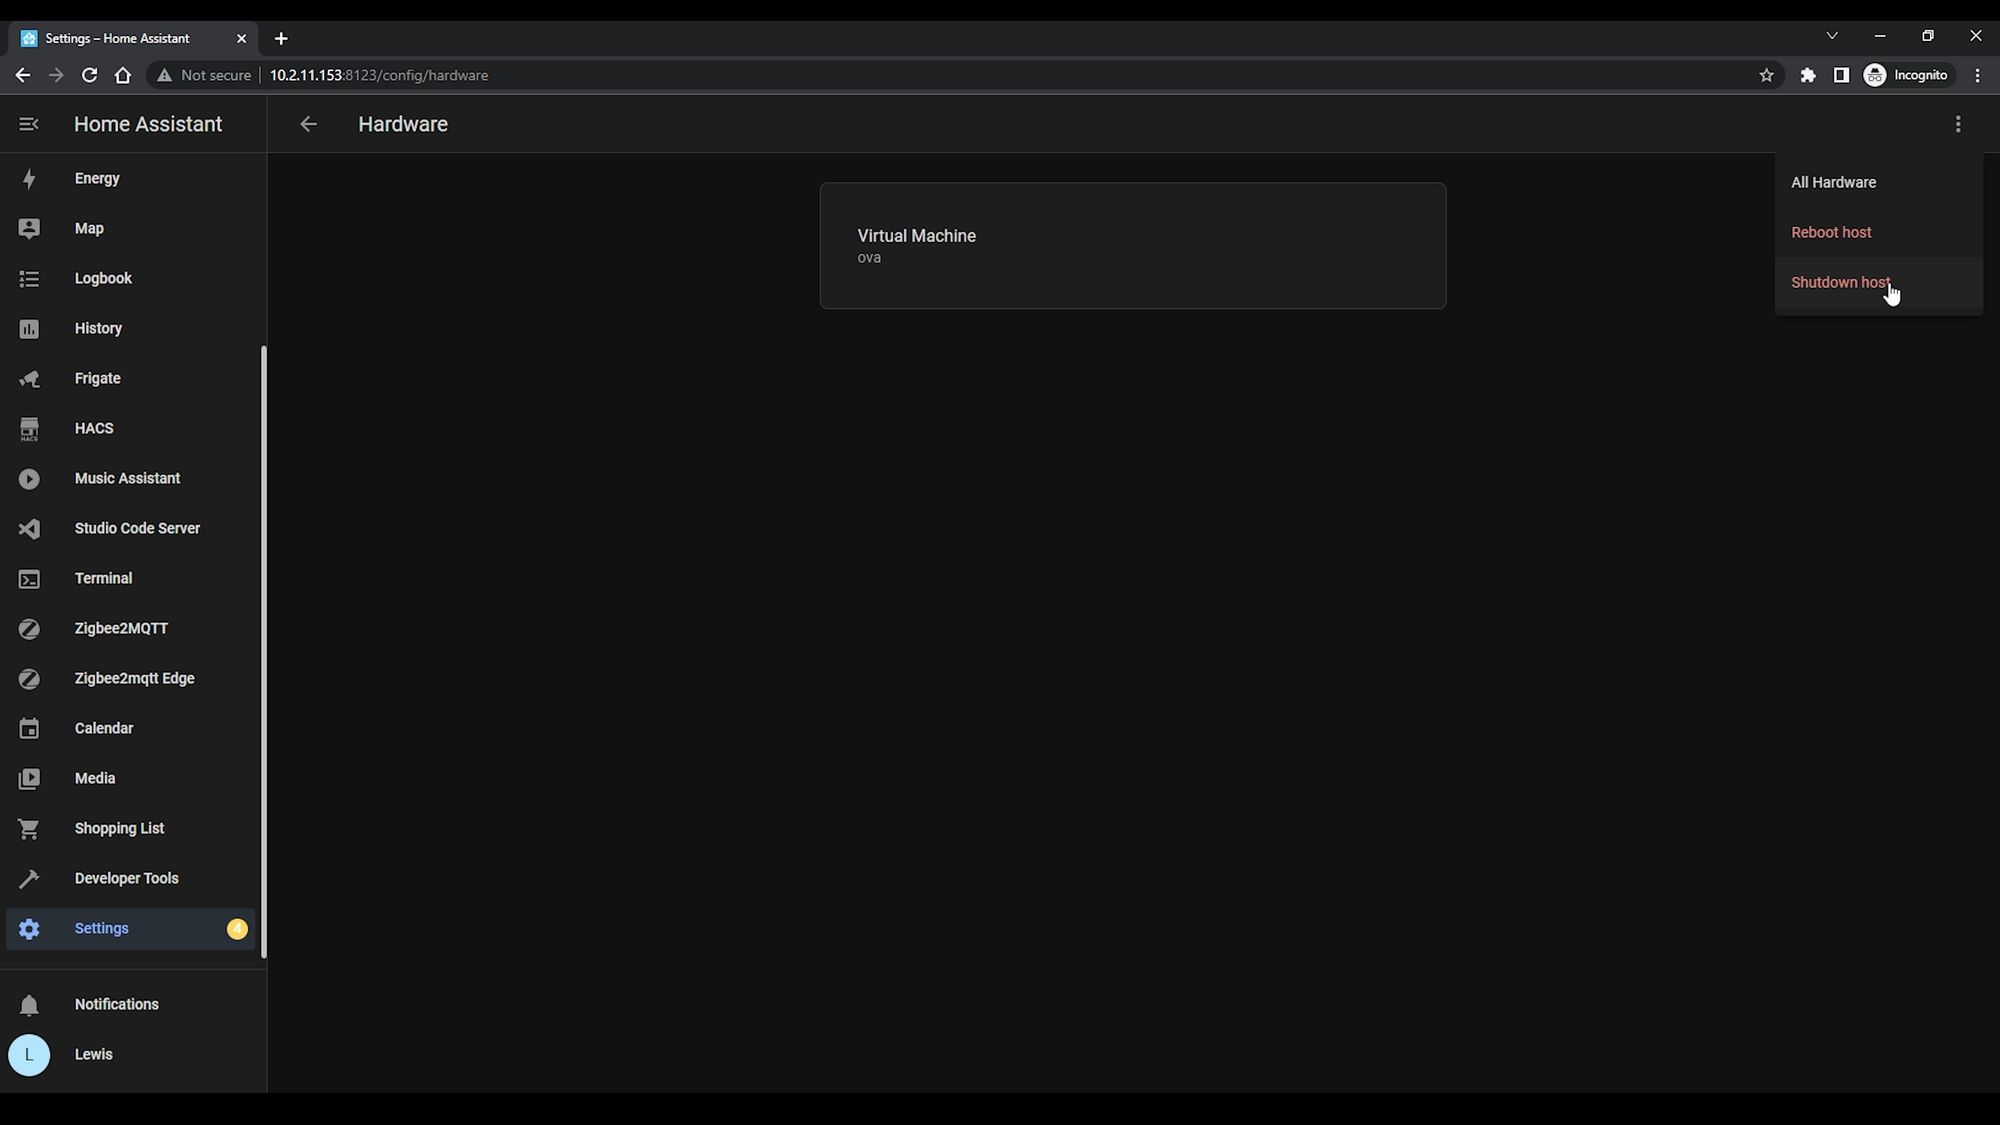
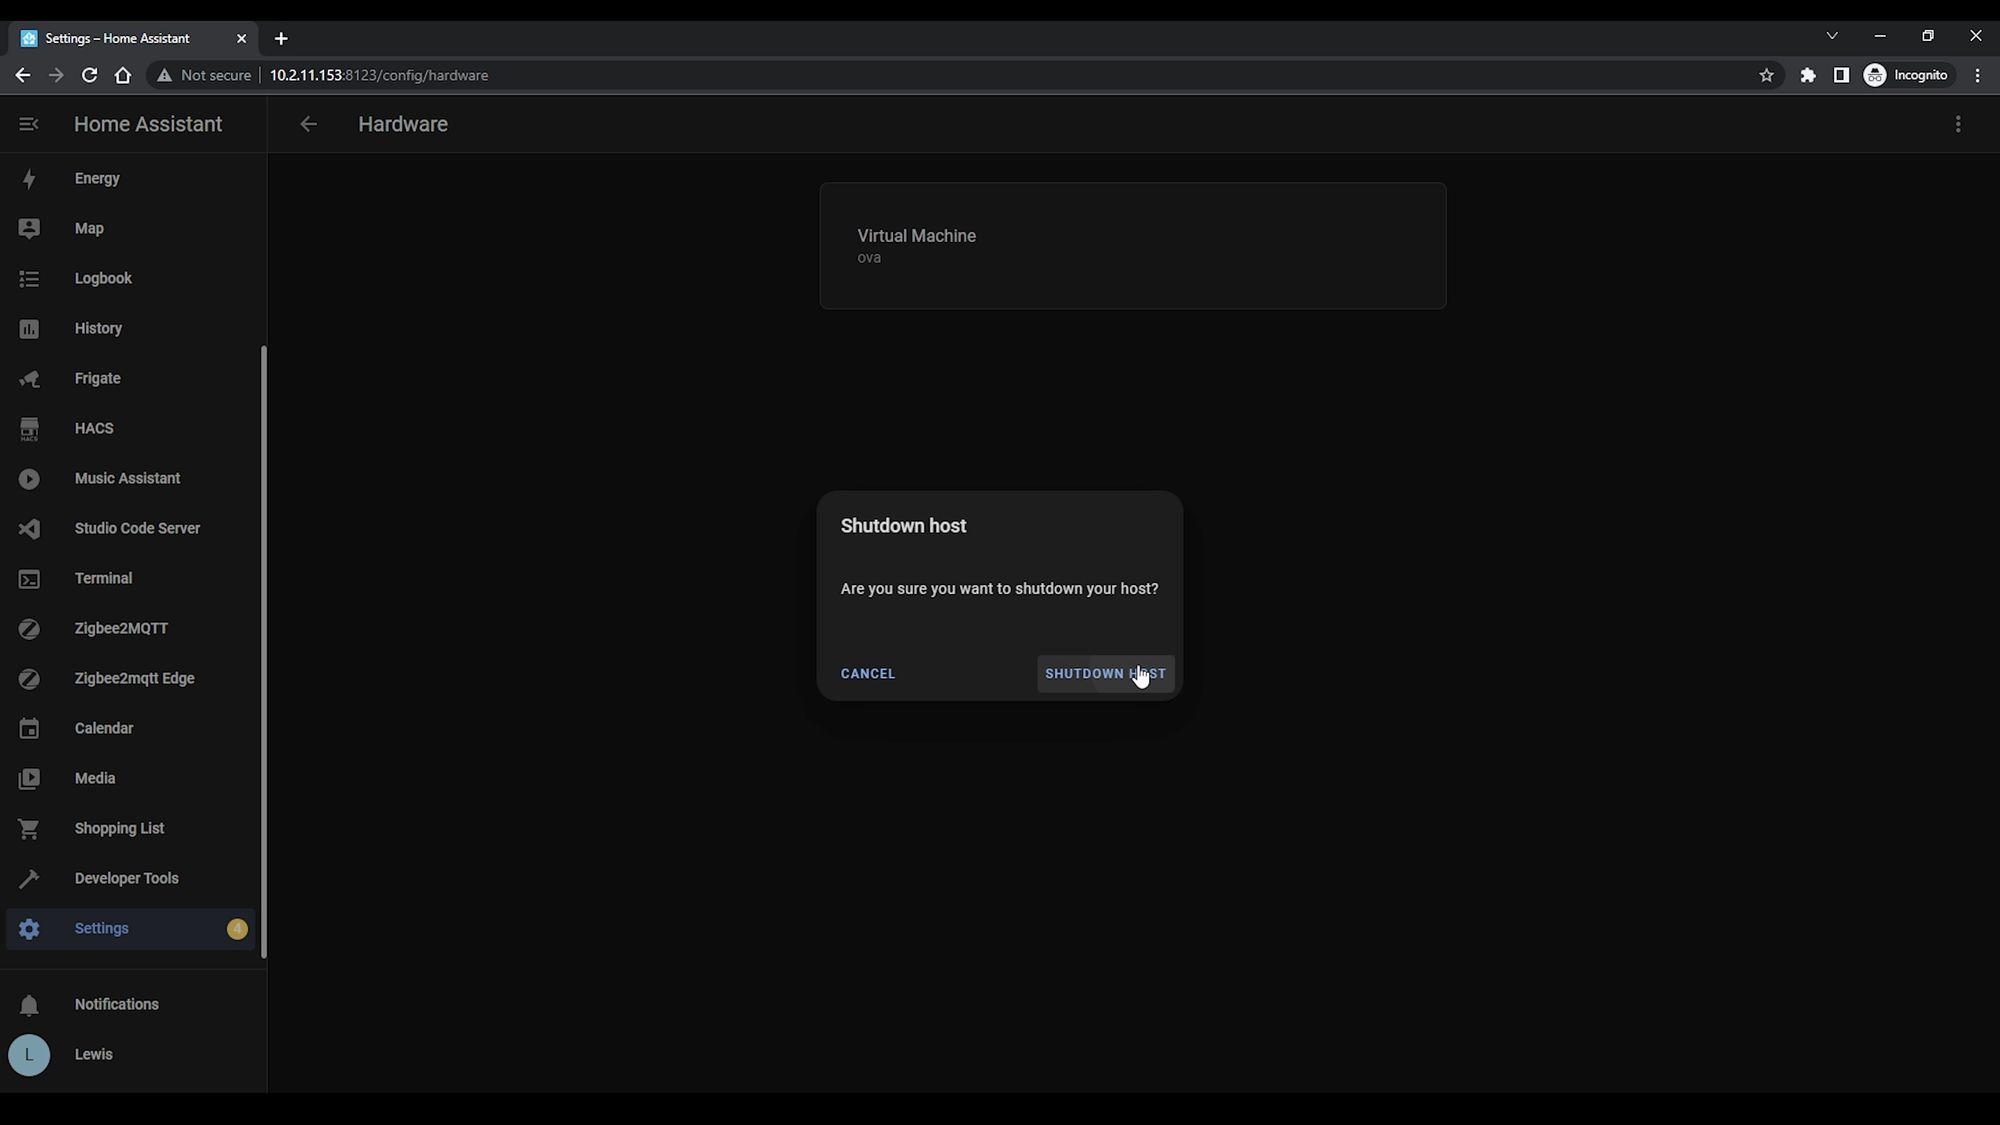
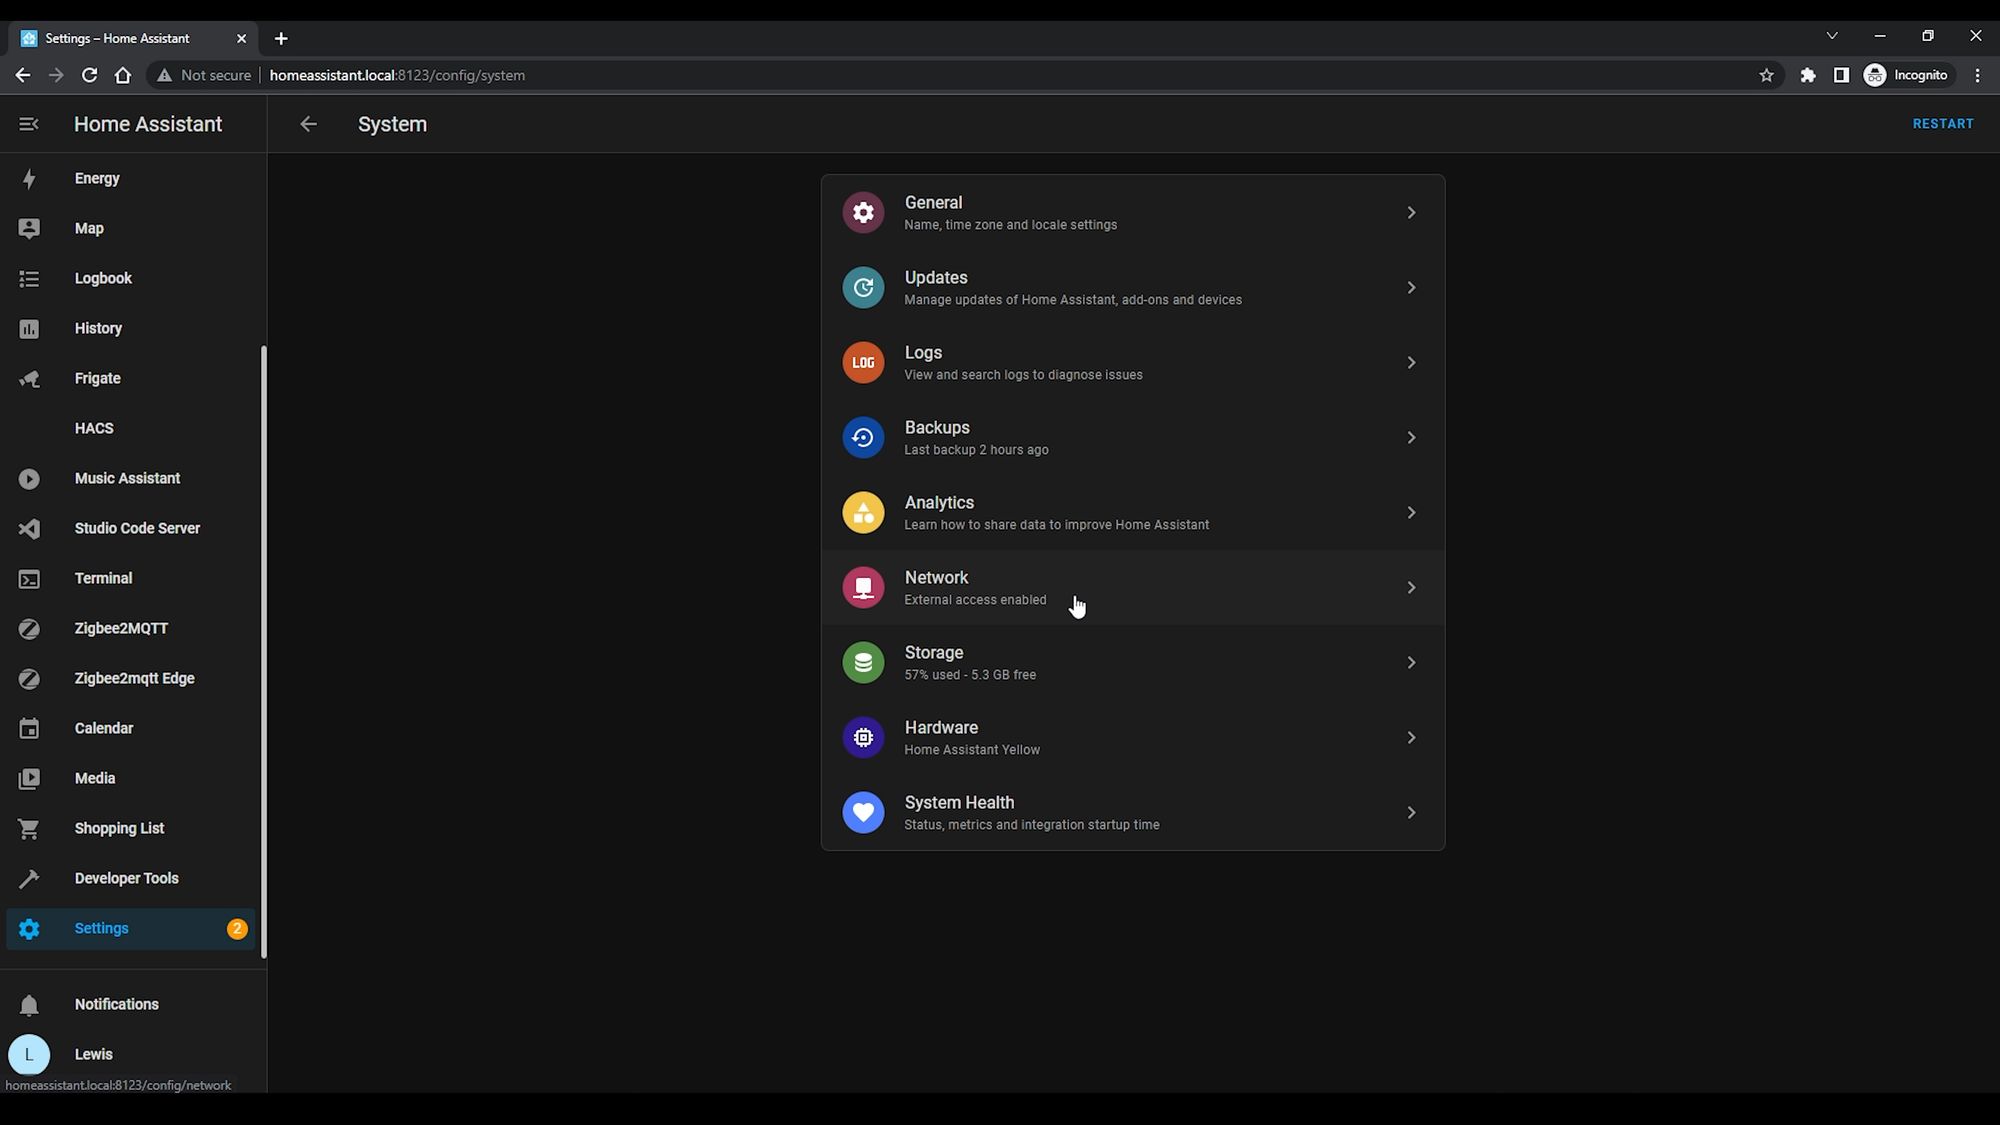
With the backup files safe and downloaded, head over to Settings, System and then Hardware. Click the three dots in the top right hand corner and select shutdown host - we need to shutdown our old install so that the new install can take its place and use its IP address. It’s important not to have two devices with the same IP address on your network, so that’s why we are shutting this one down.
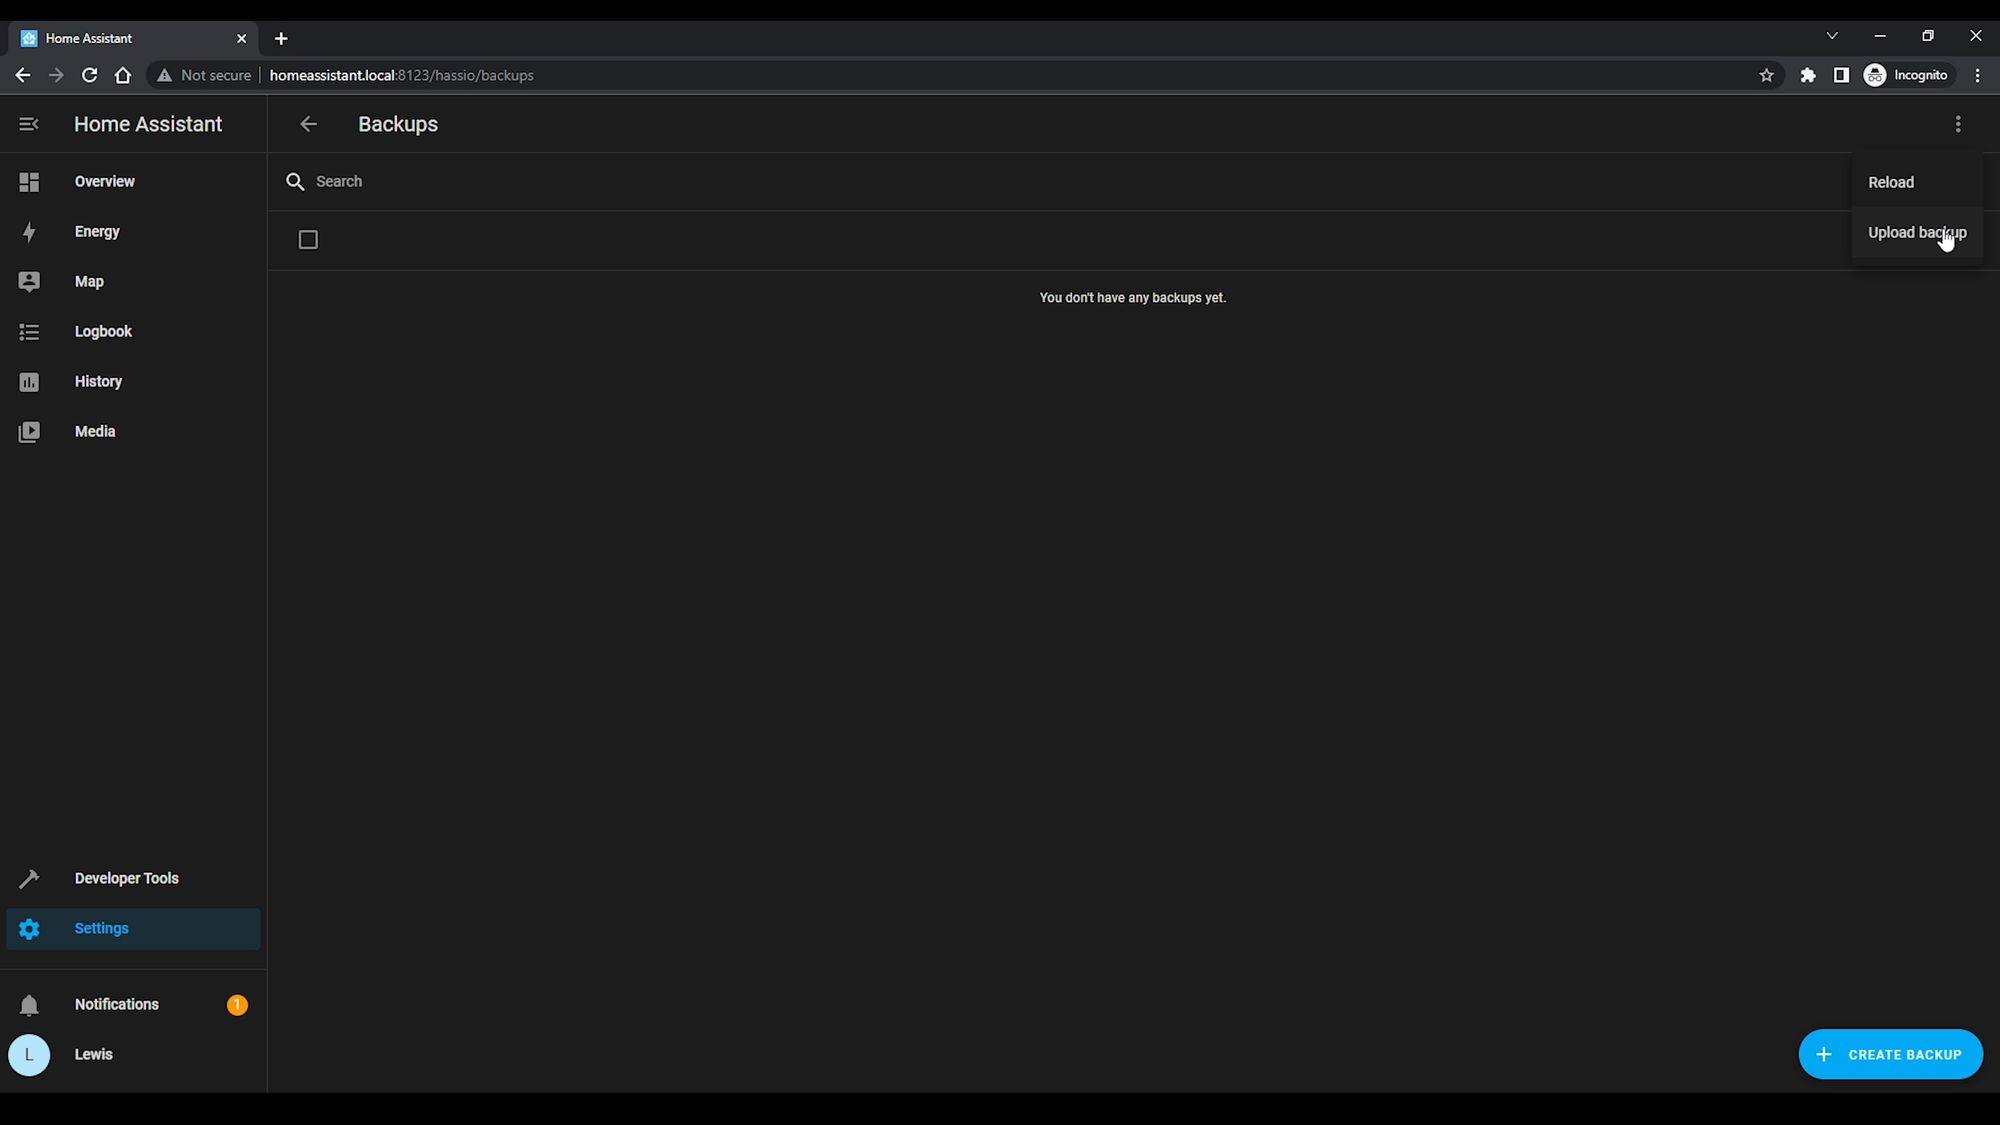
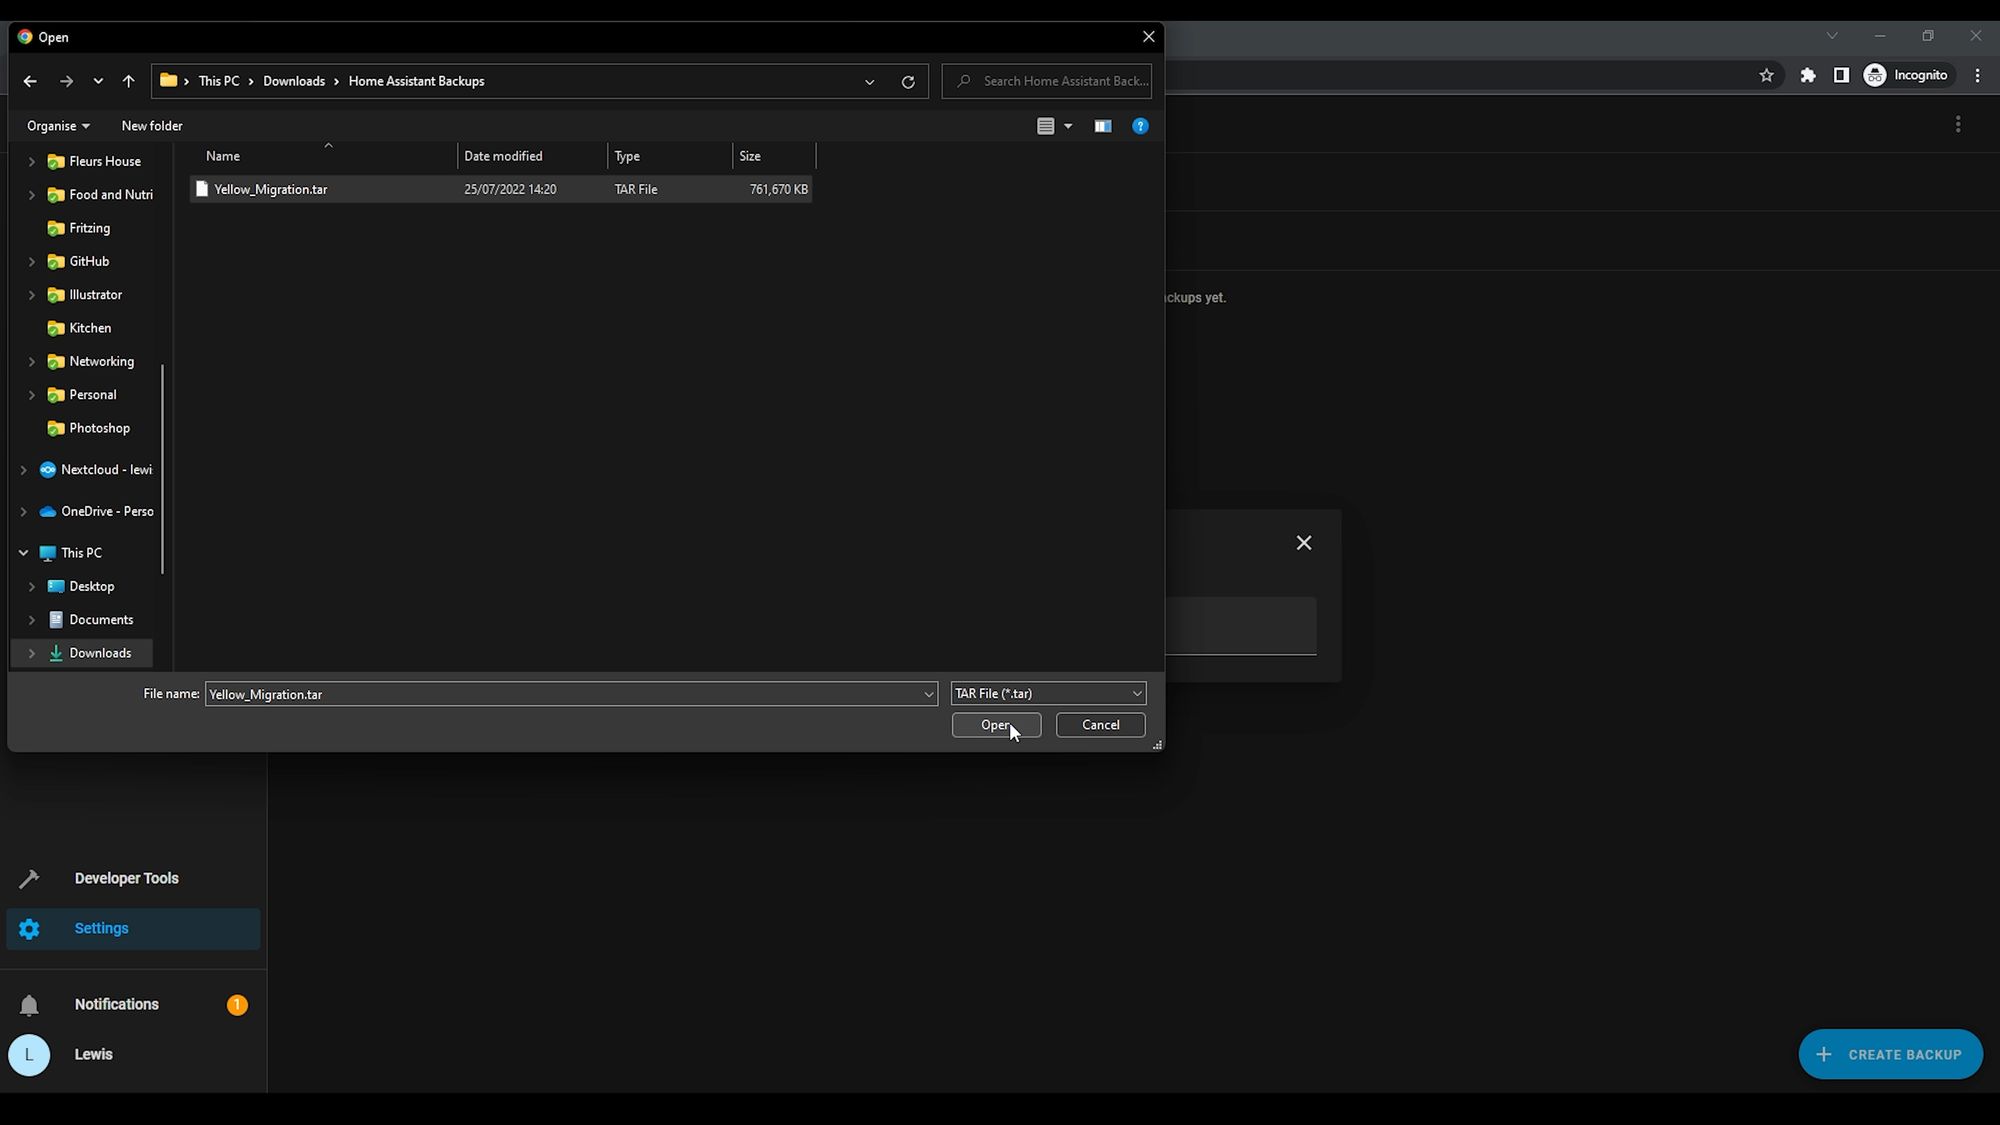
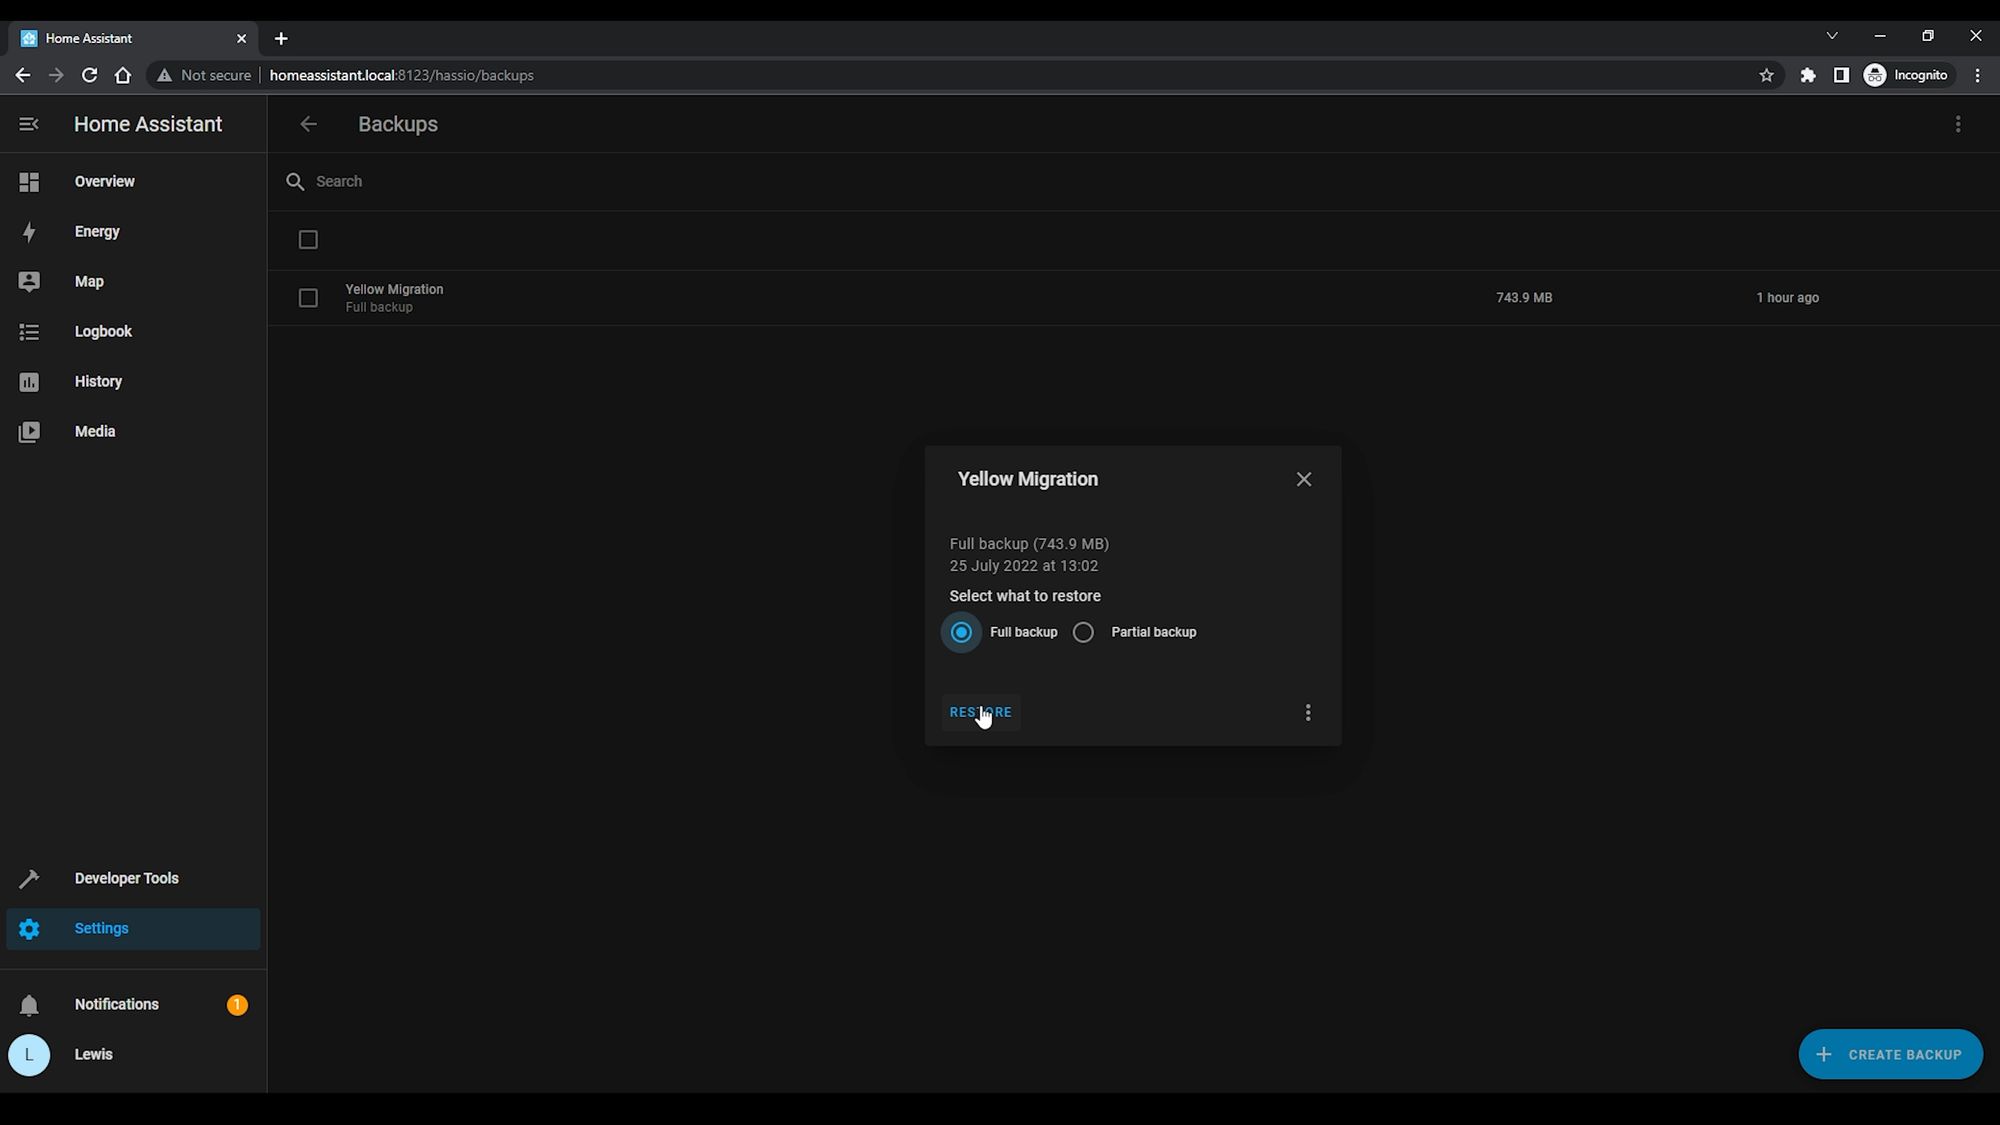
We are getting really close! Now, we can finally restore our backup - on your new Home Assistant Yellow, head to Settings, System Backups and then in the top right hand corner, click upload backup and select the full Home Assistant backup you took earlier and let that upload. Then select the uploaded backup from the list and hit restore and the restore will begin - this process can again take quite a long time depending how big your setup was originally, it wouldn’t be uncommon for it to take 30 minutes or more so just be patient.

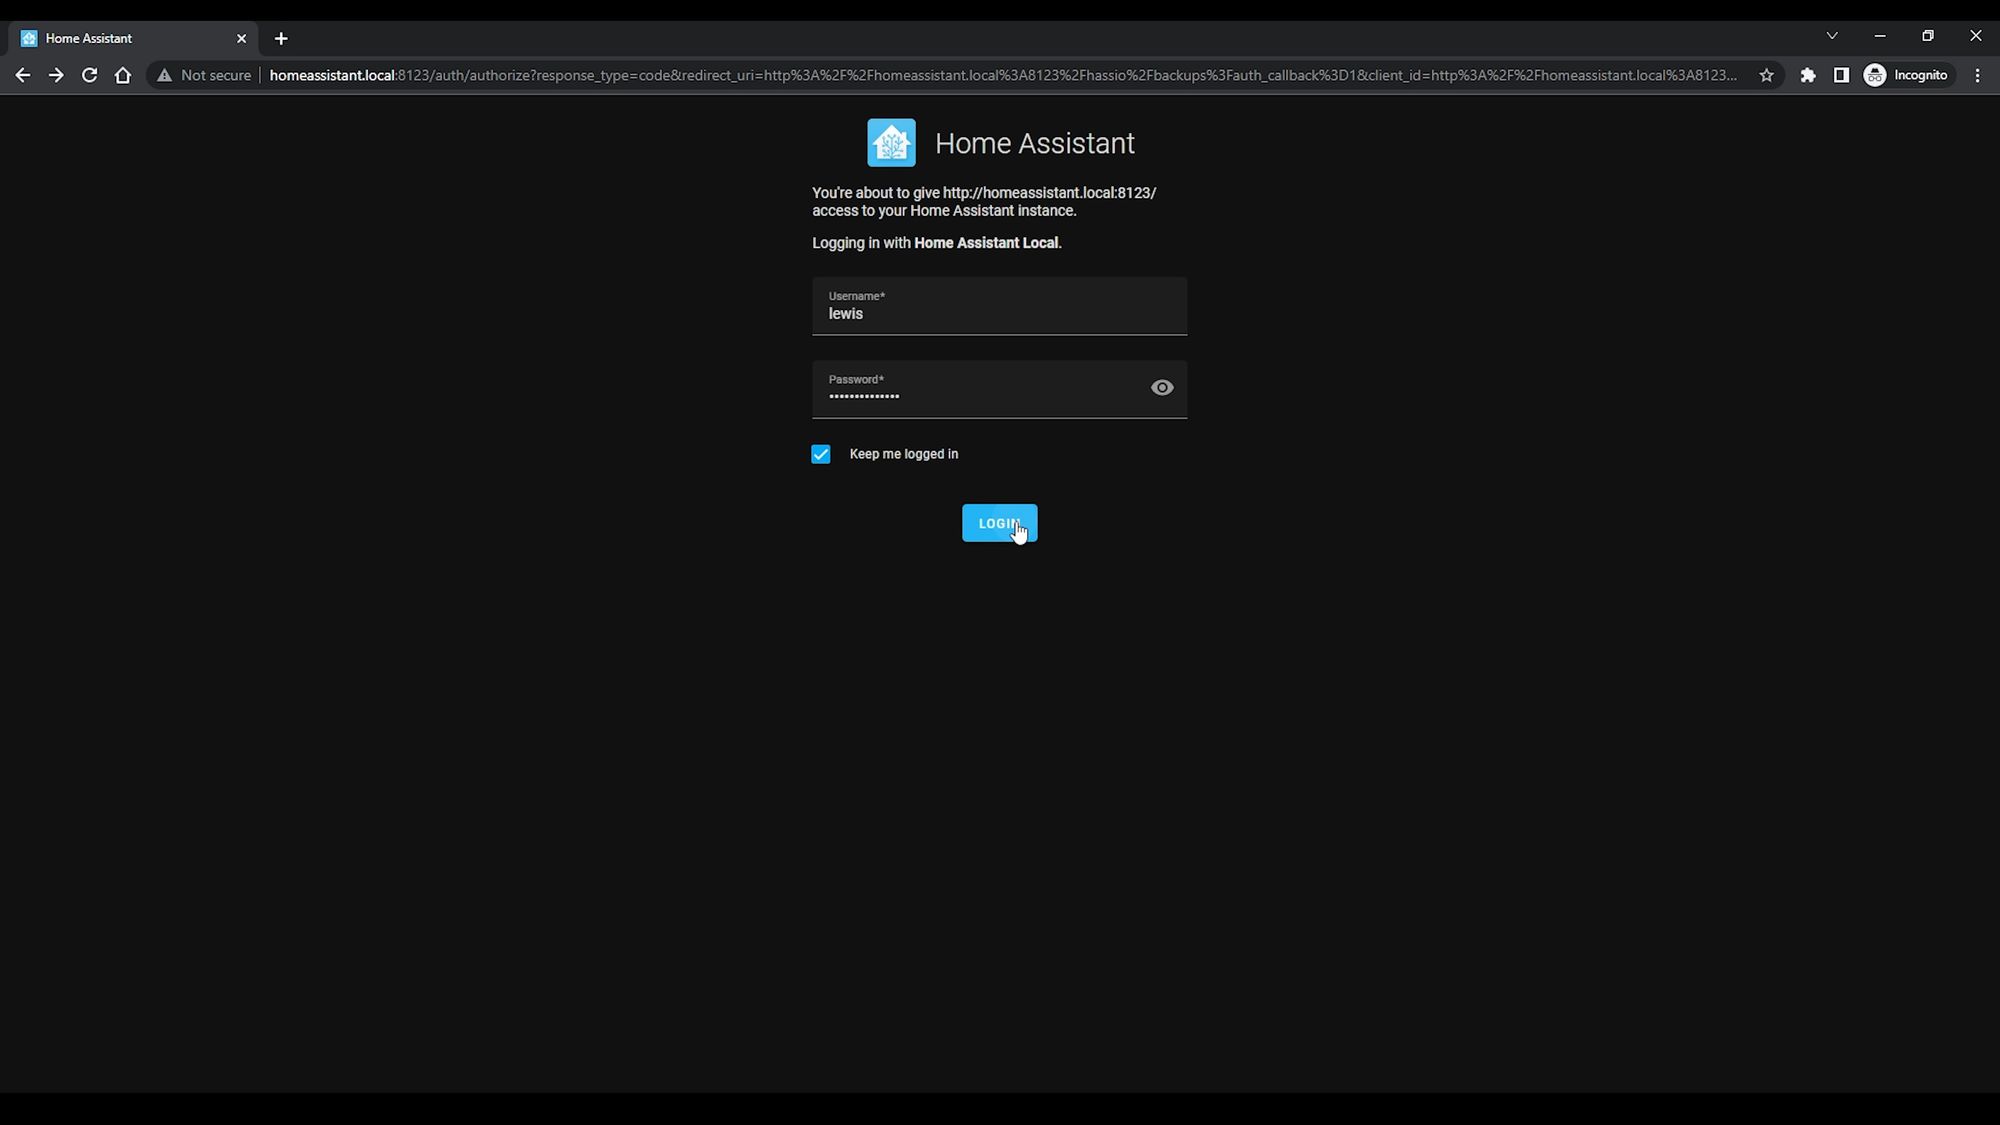
When it's complete, you should land back at the Home Assistant login page, at which point you should be able to enter the credentials from your original setup - this indicates that the restore worked!
By the way, do be aware that when you click restore, you will lose connection which is normal, but remember that you are on http right now and your old install might have had https enabled, so if your hitting the refresh button and nothing has happened, remember that you might need to switch to https to see the login page again, that’s a top tip that catches many people out!
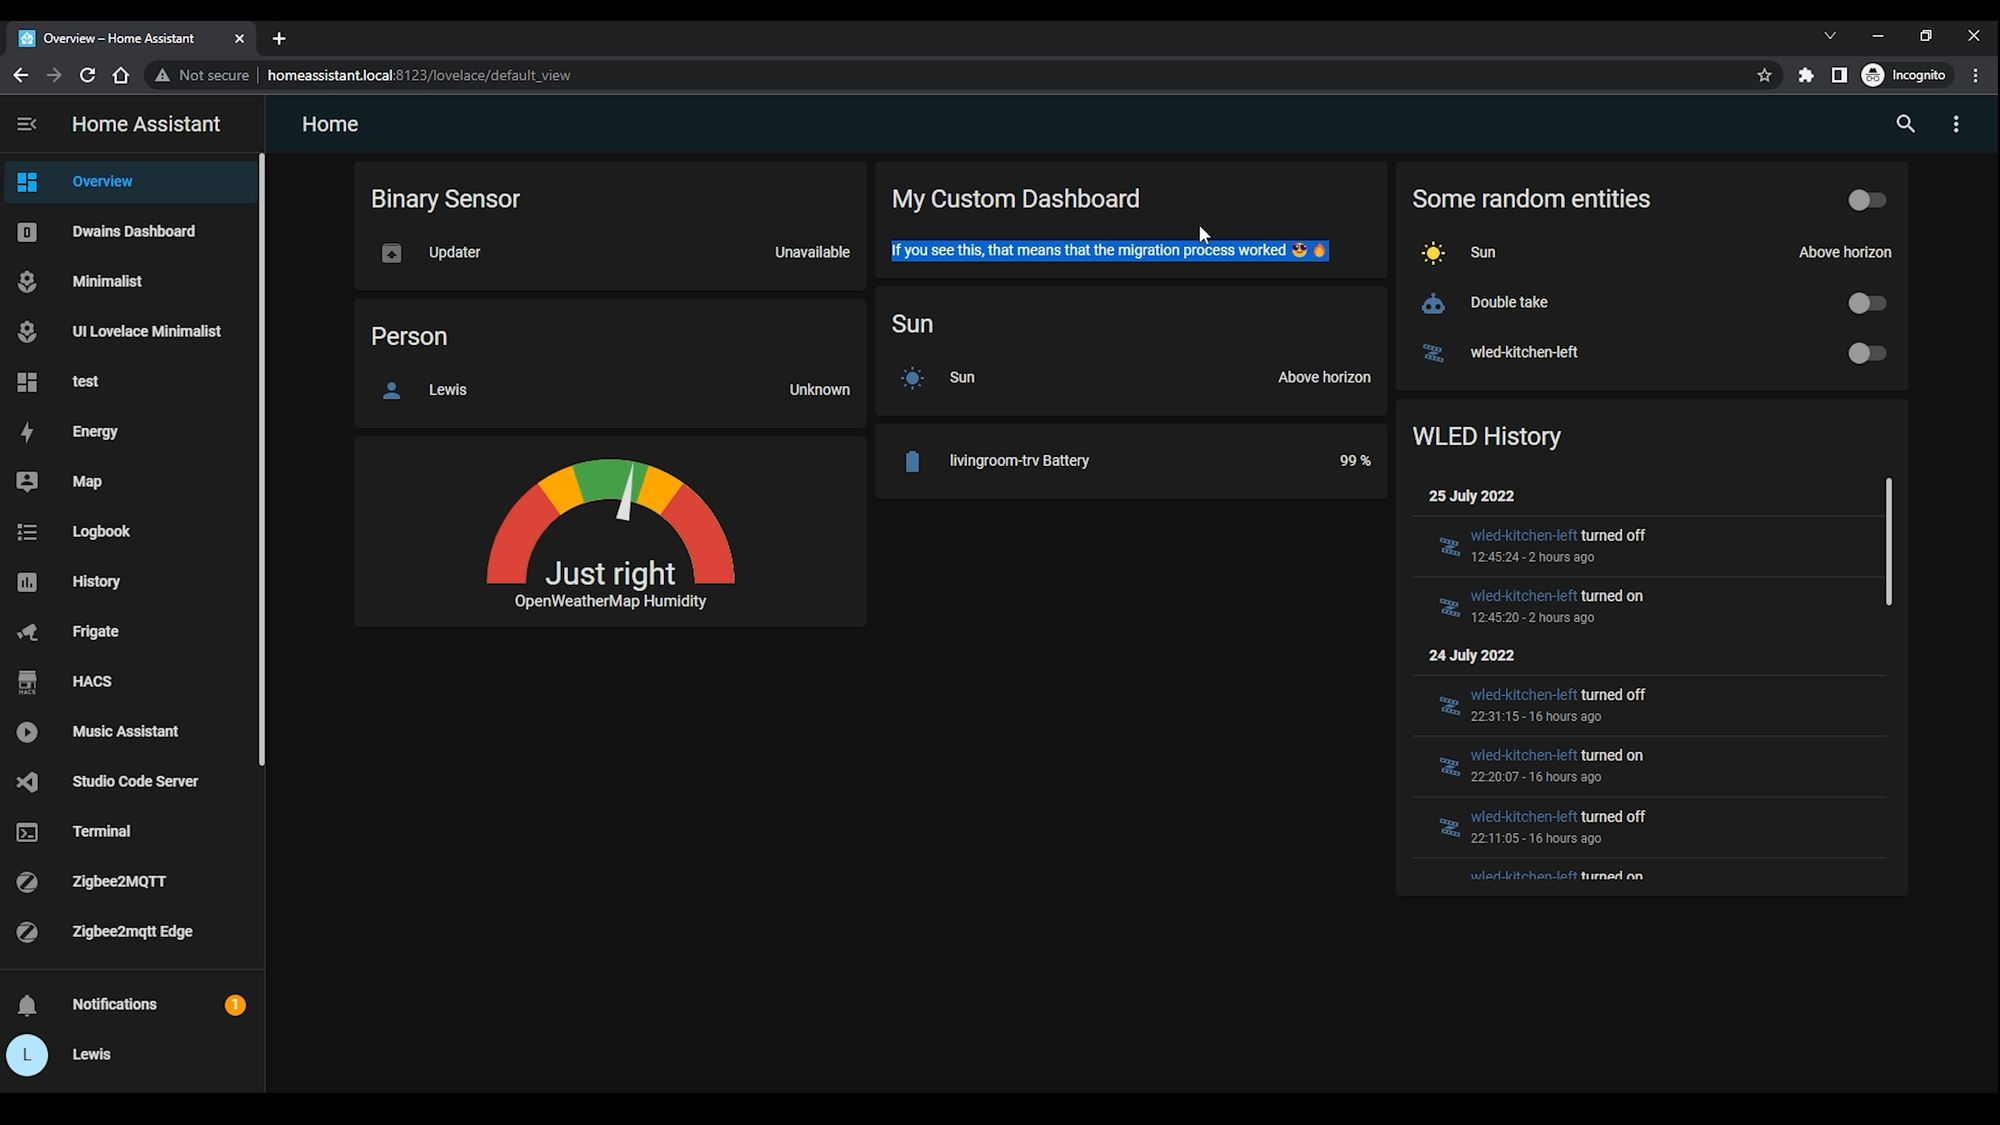
Once logged back in, confirm you are seeing all of your integrations from your previous install and everything is as you would expect.
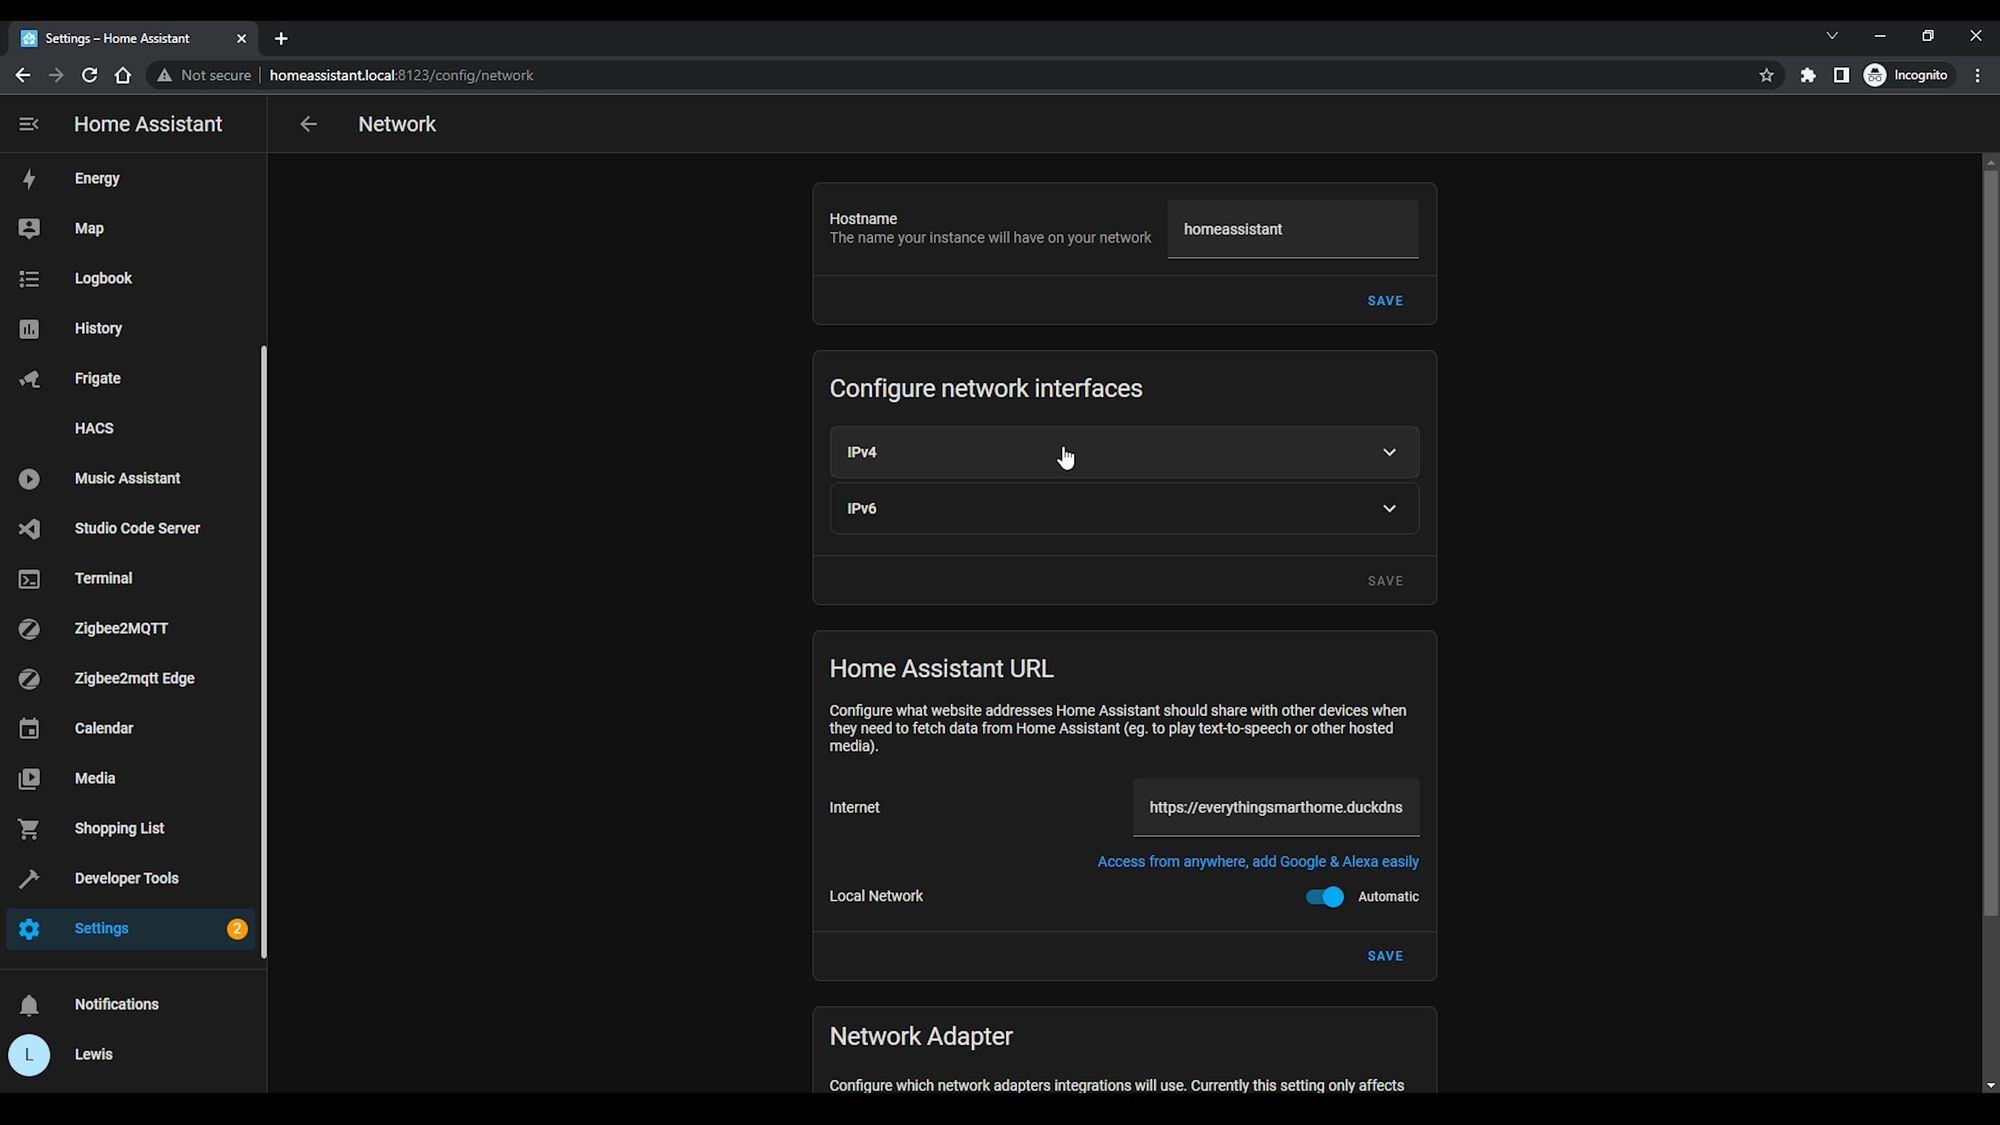
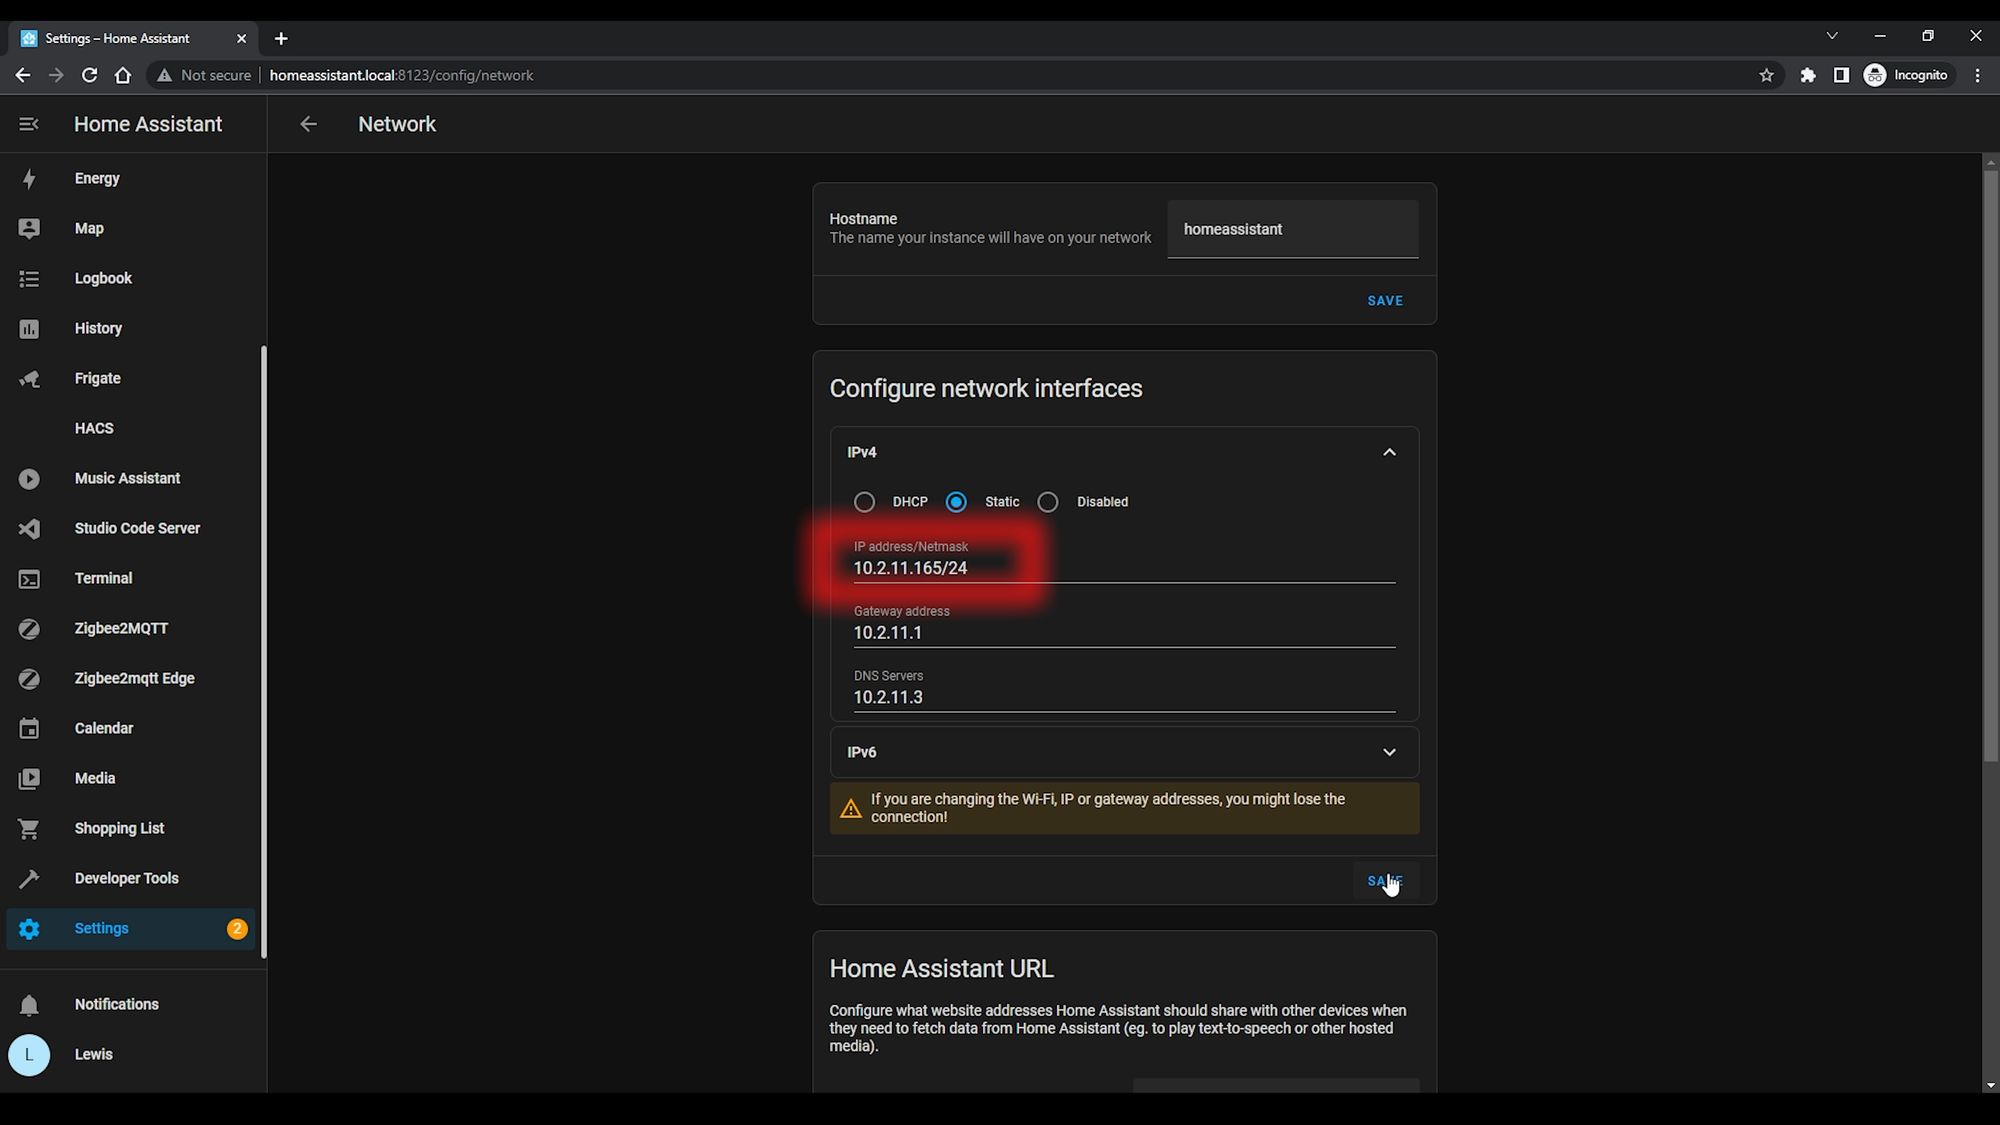
The final thing I will suggest is to head over to Settings, System, Network, IPv4 and then change your IP address to be the same as your previous install. The reason for this is that some integrations may be dependant on an IP address rather than a hostname, so changing the IP address here to take over from your previous install will save you having to go around and fix any of those problems. You can do this with either a static IP or a DHCP reservation depending on how you setup the previous install.

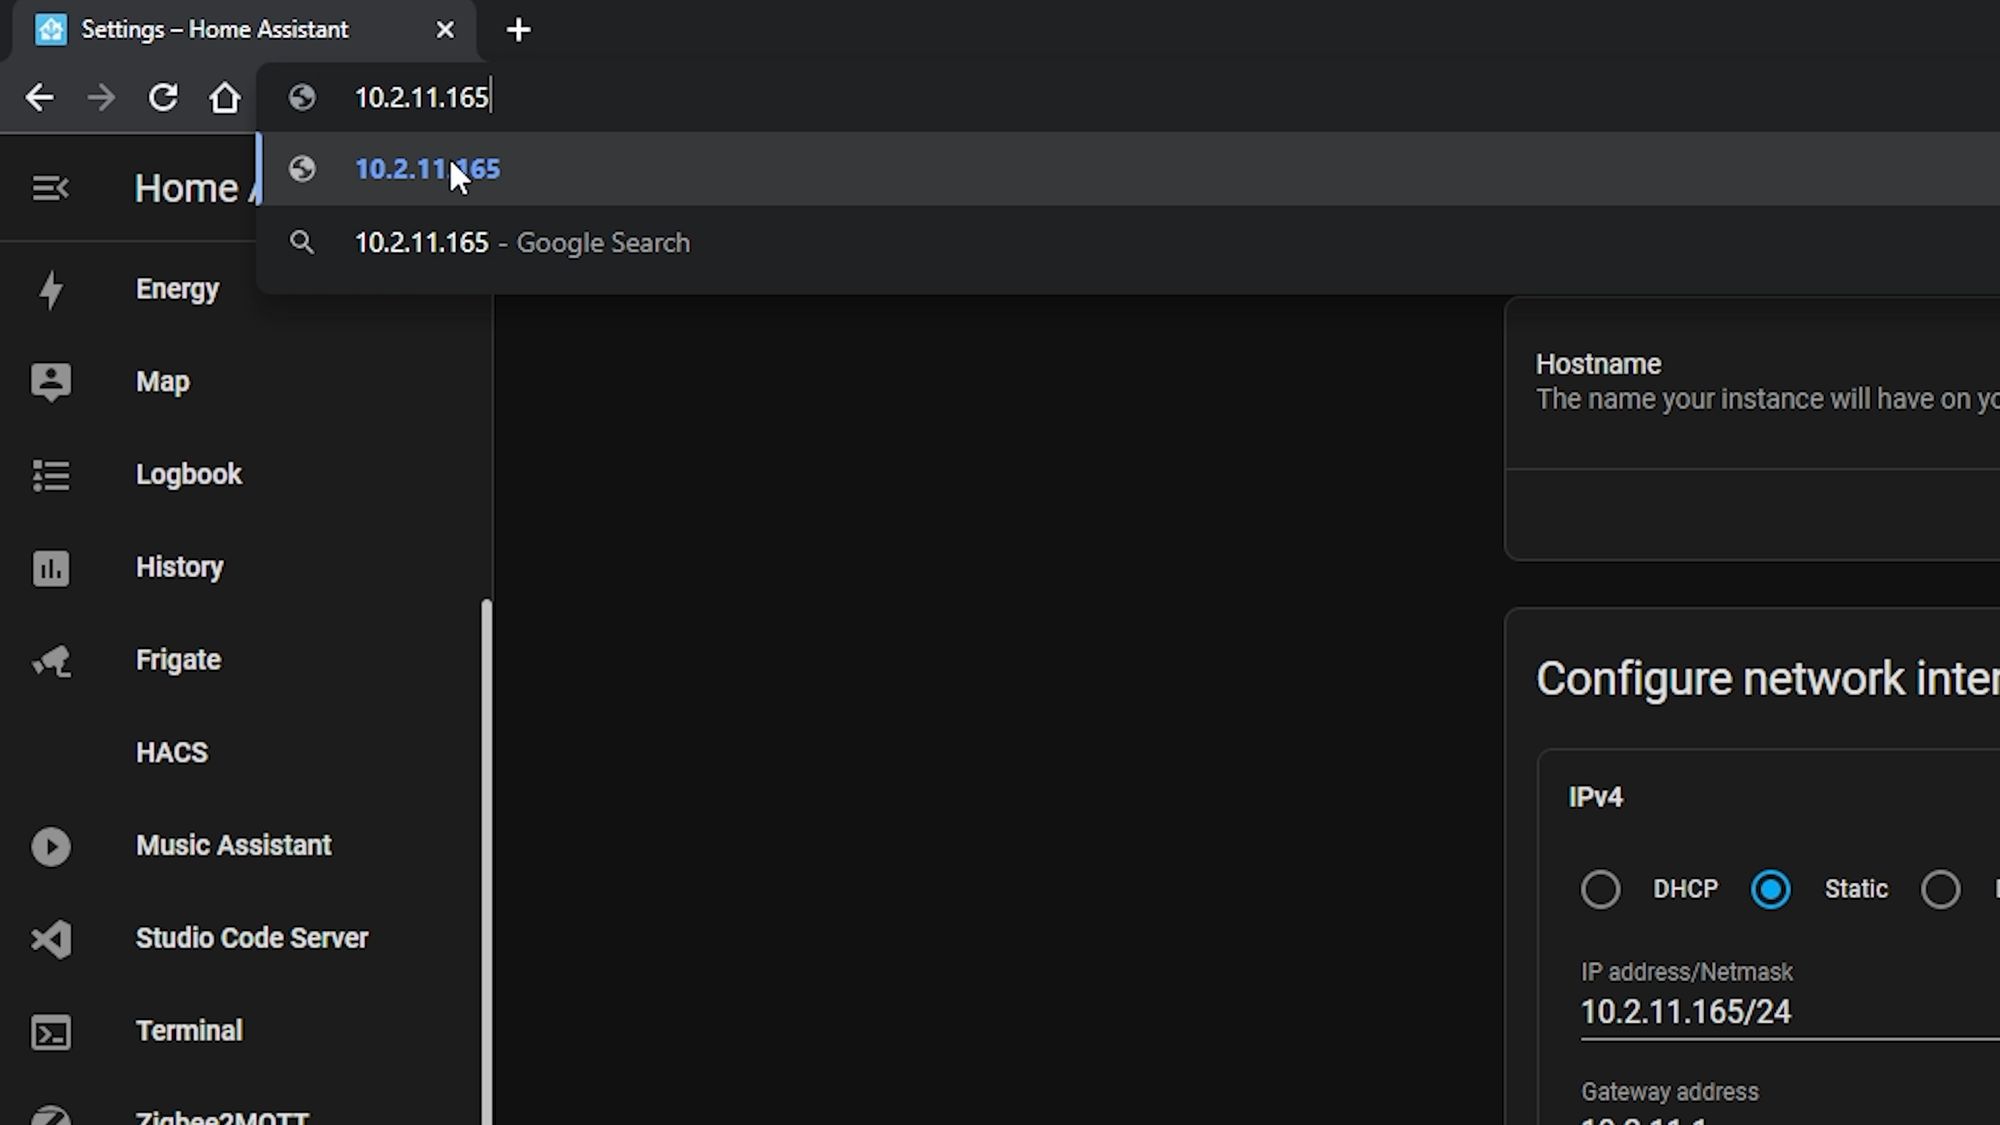
Once you have changed this IP address, reboot once again, make sure to change the URL you are using to the updated IP address if need be, log back in and you should now be good to go!
Have a quick check of the logs to make sure there are no strange errors that weren’t there before and you can now enjoy using your brand new Home Assistant Yellow!
Activating Secondary SSD
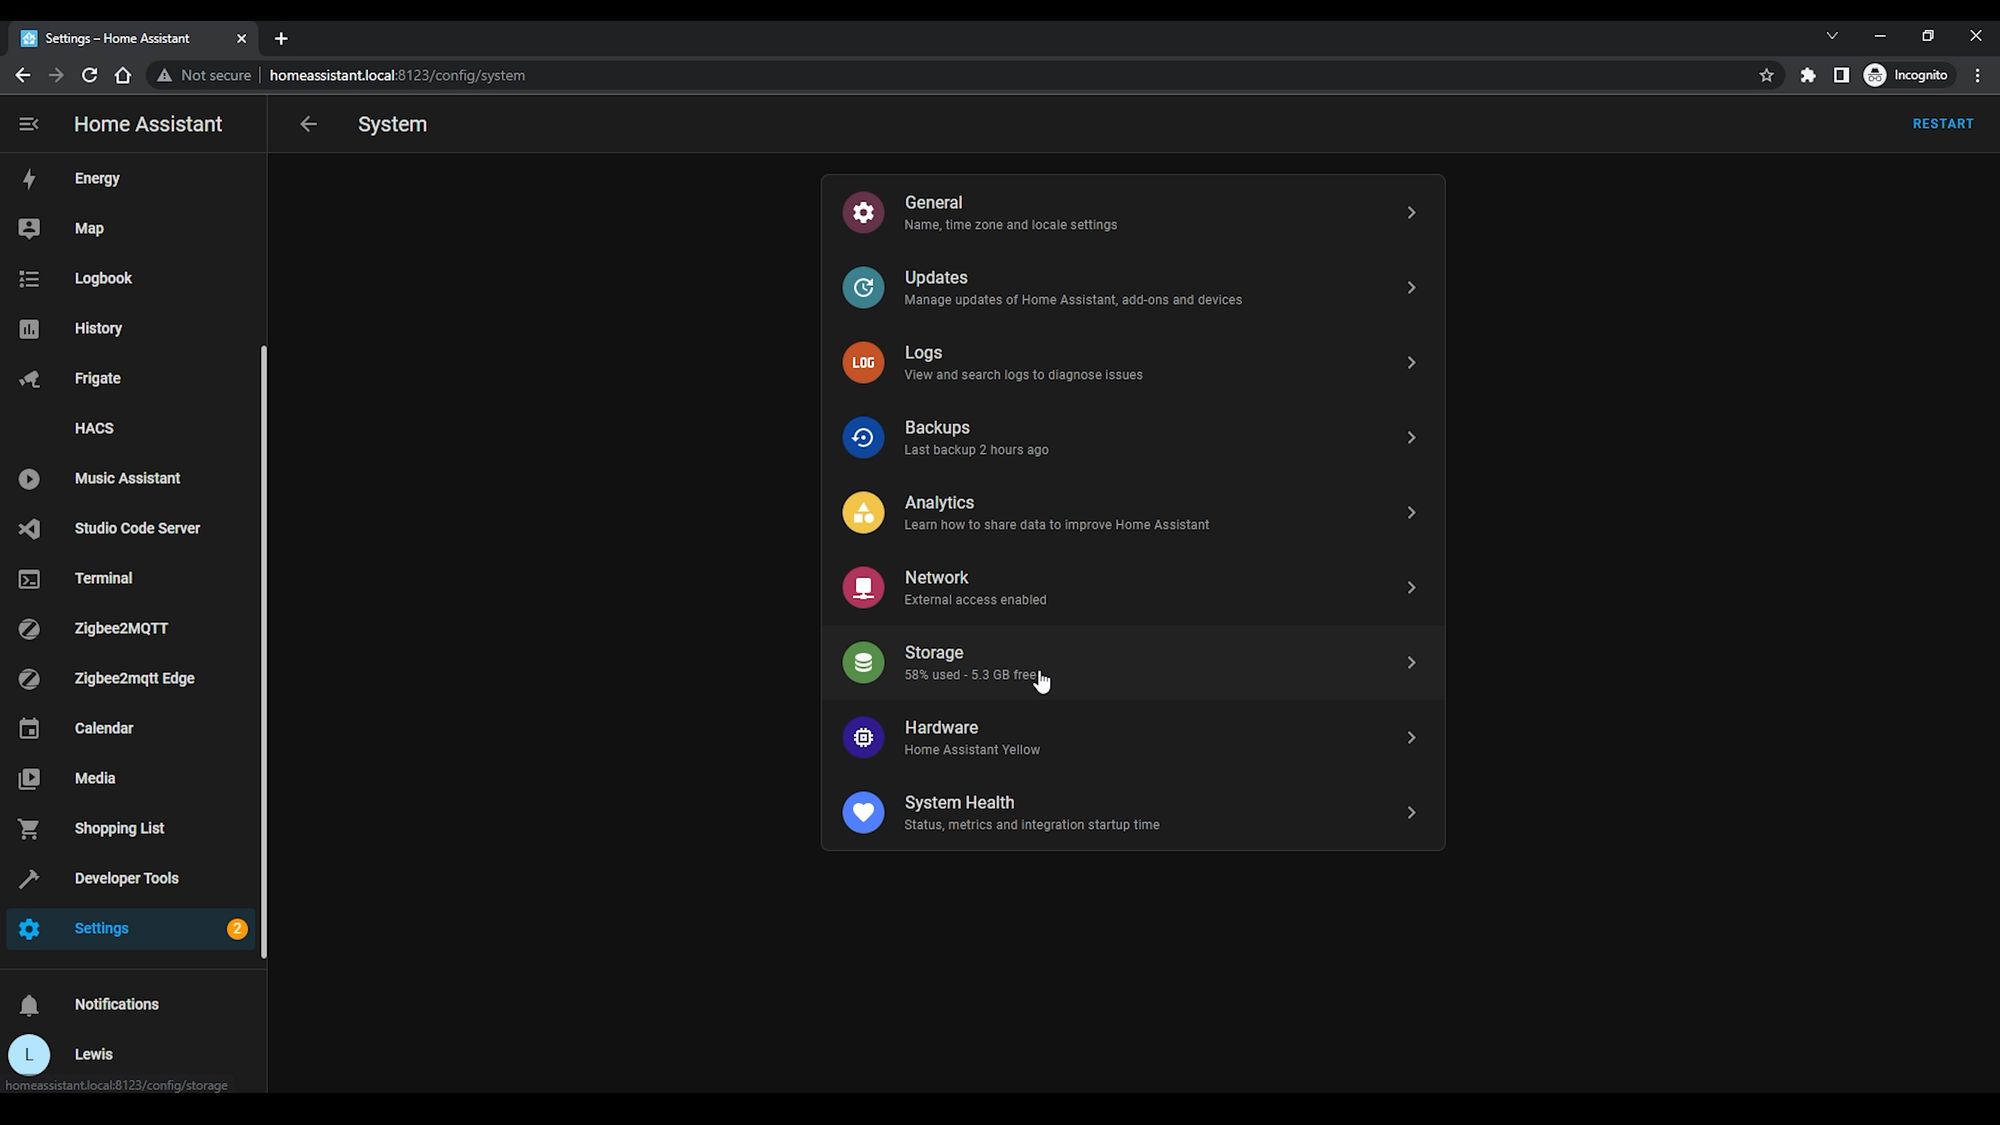
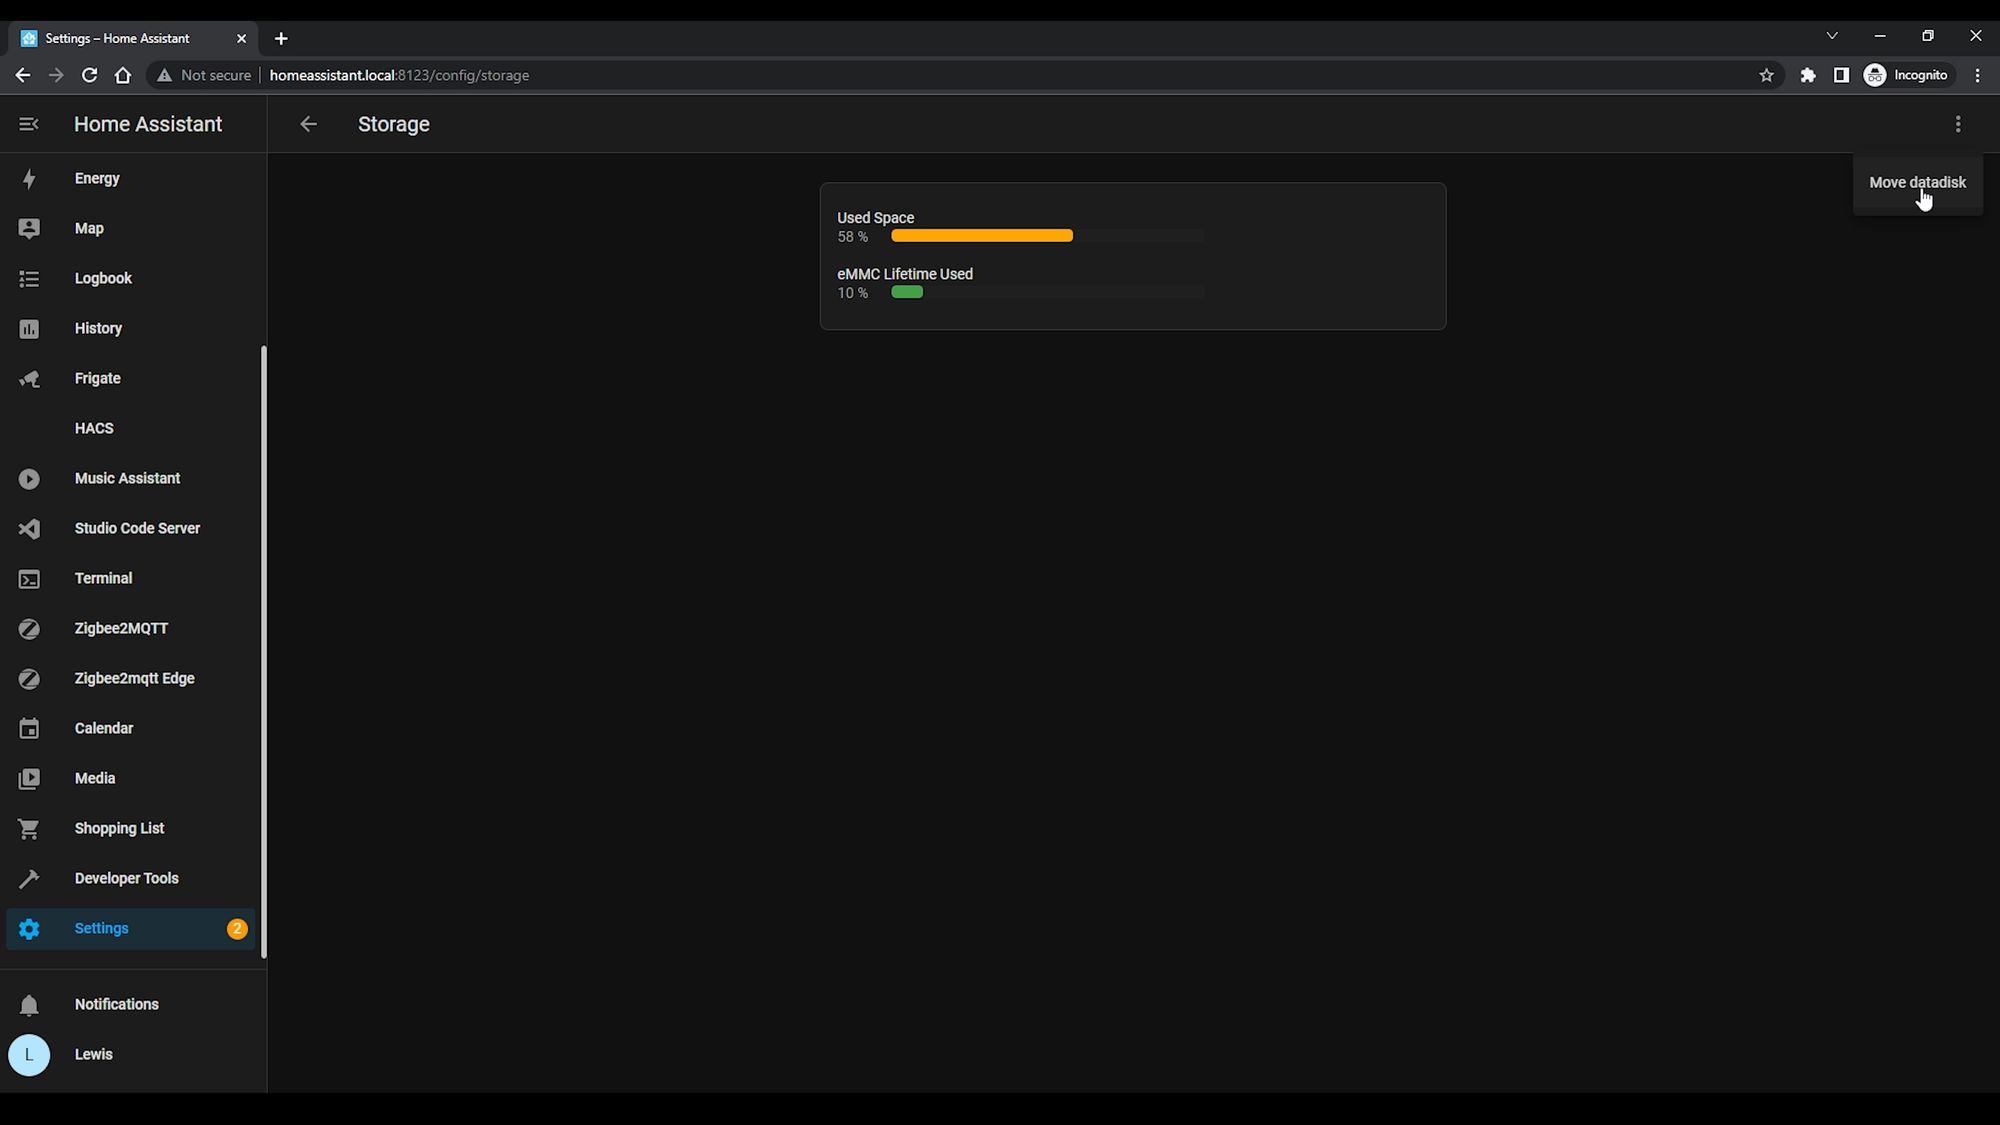
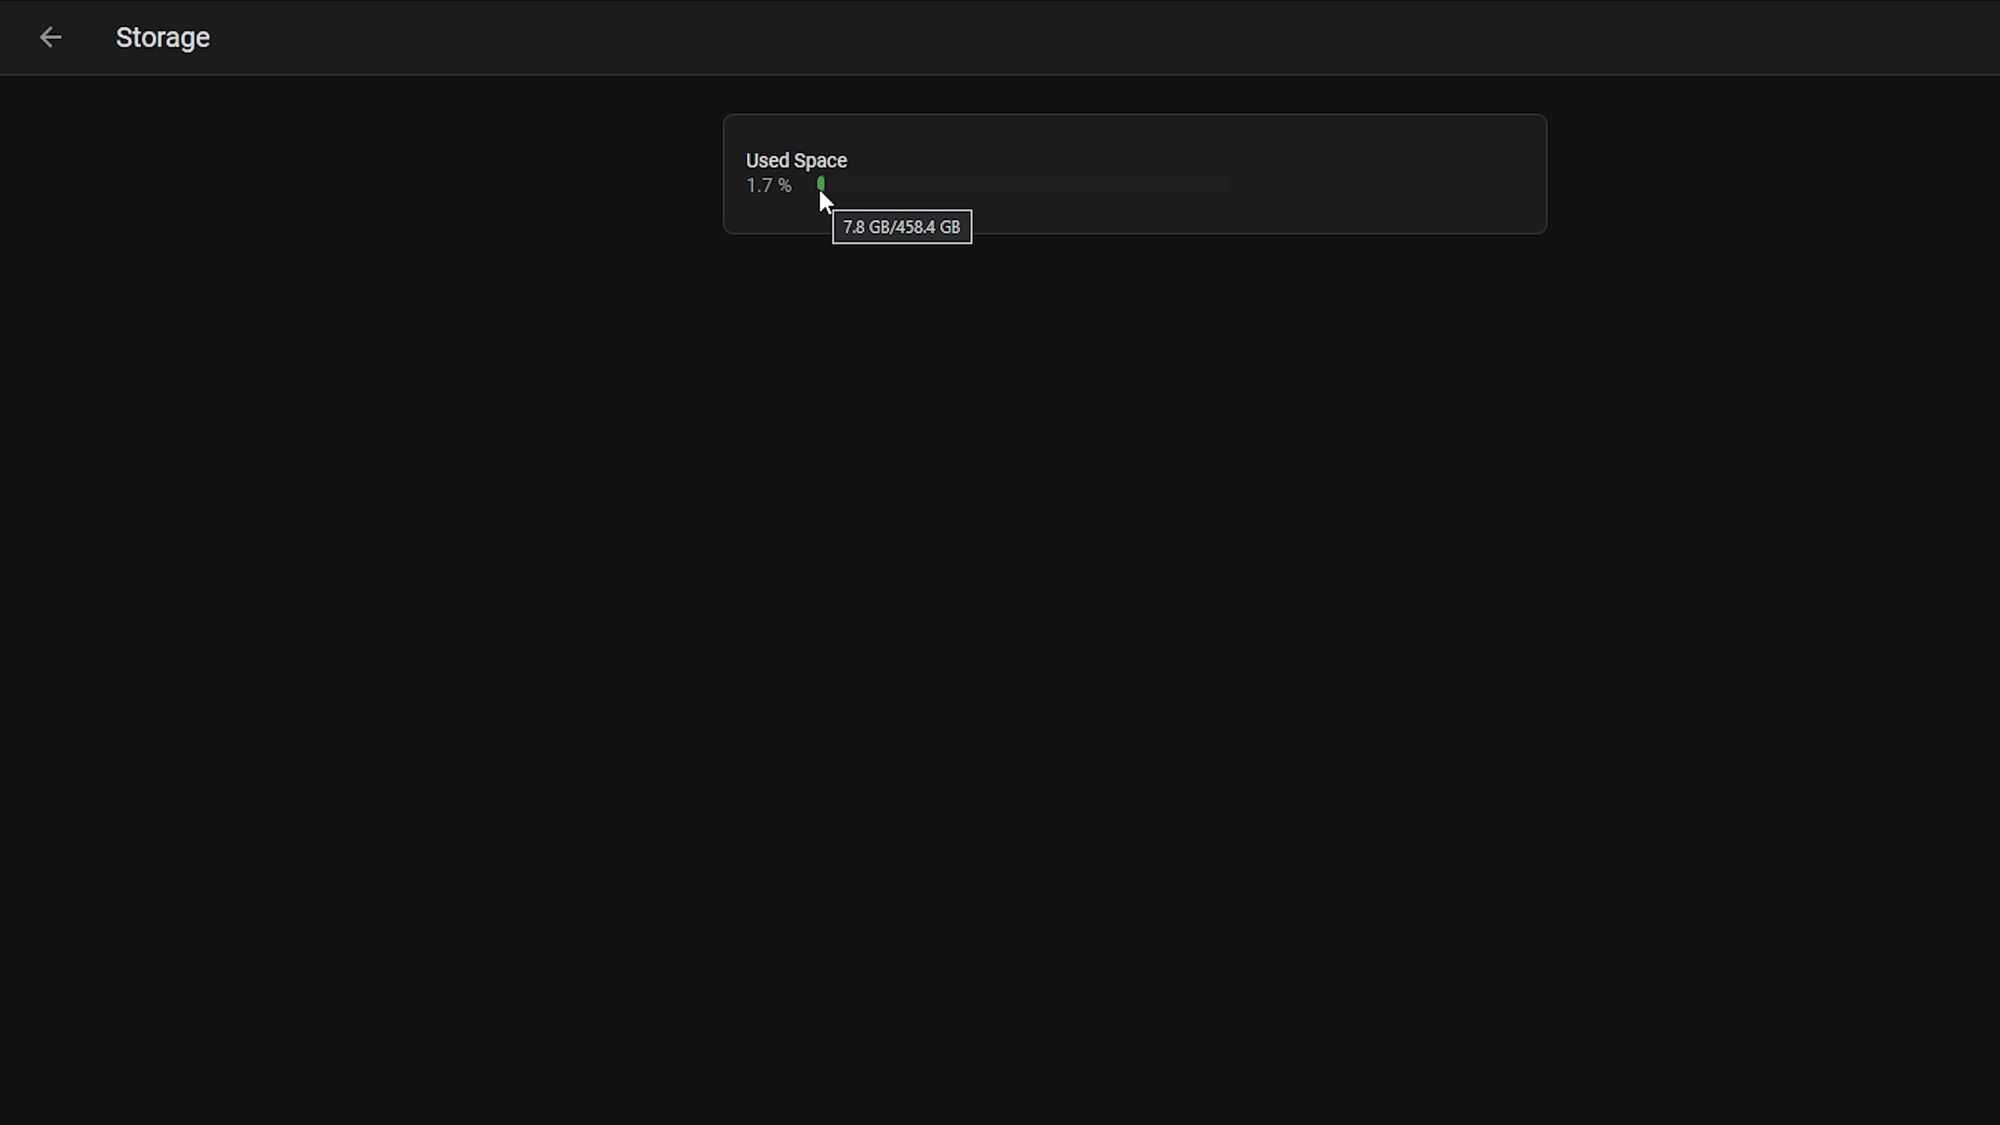
If you plugged in a secondary SSD for even more storage, the way to activate this secondary storage is to go to Settings, System Storage and then select the three dots in the top right hand corner and select move datadisk. From the drop down select your NVME drive and press move.

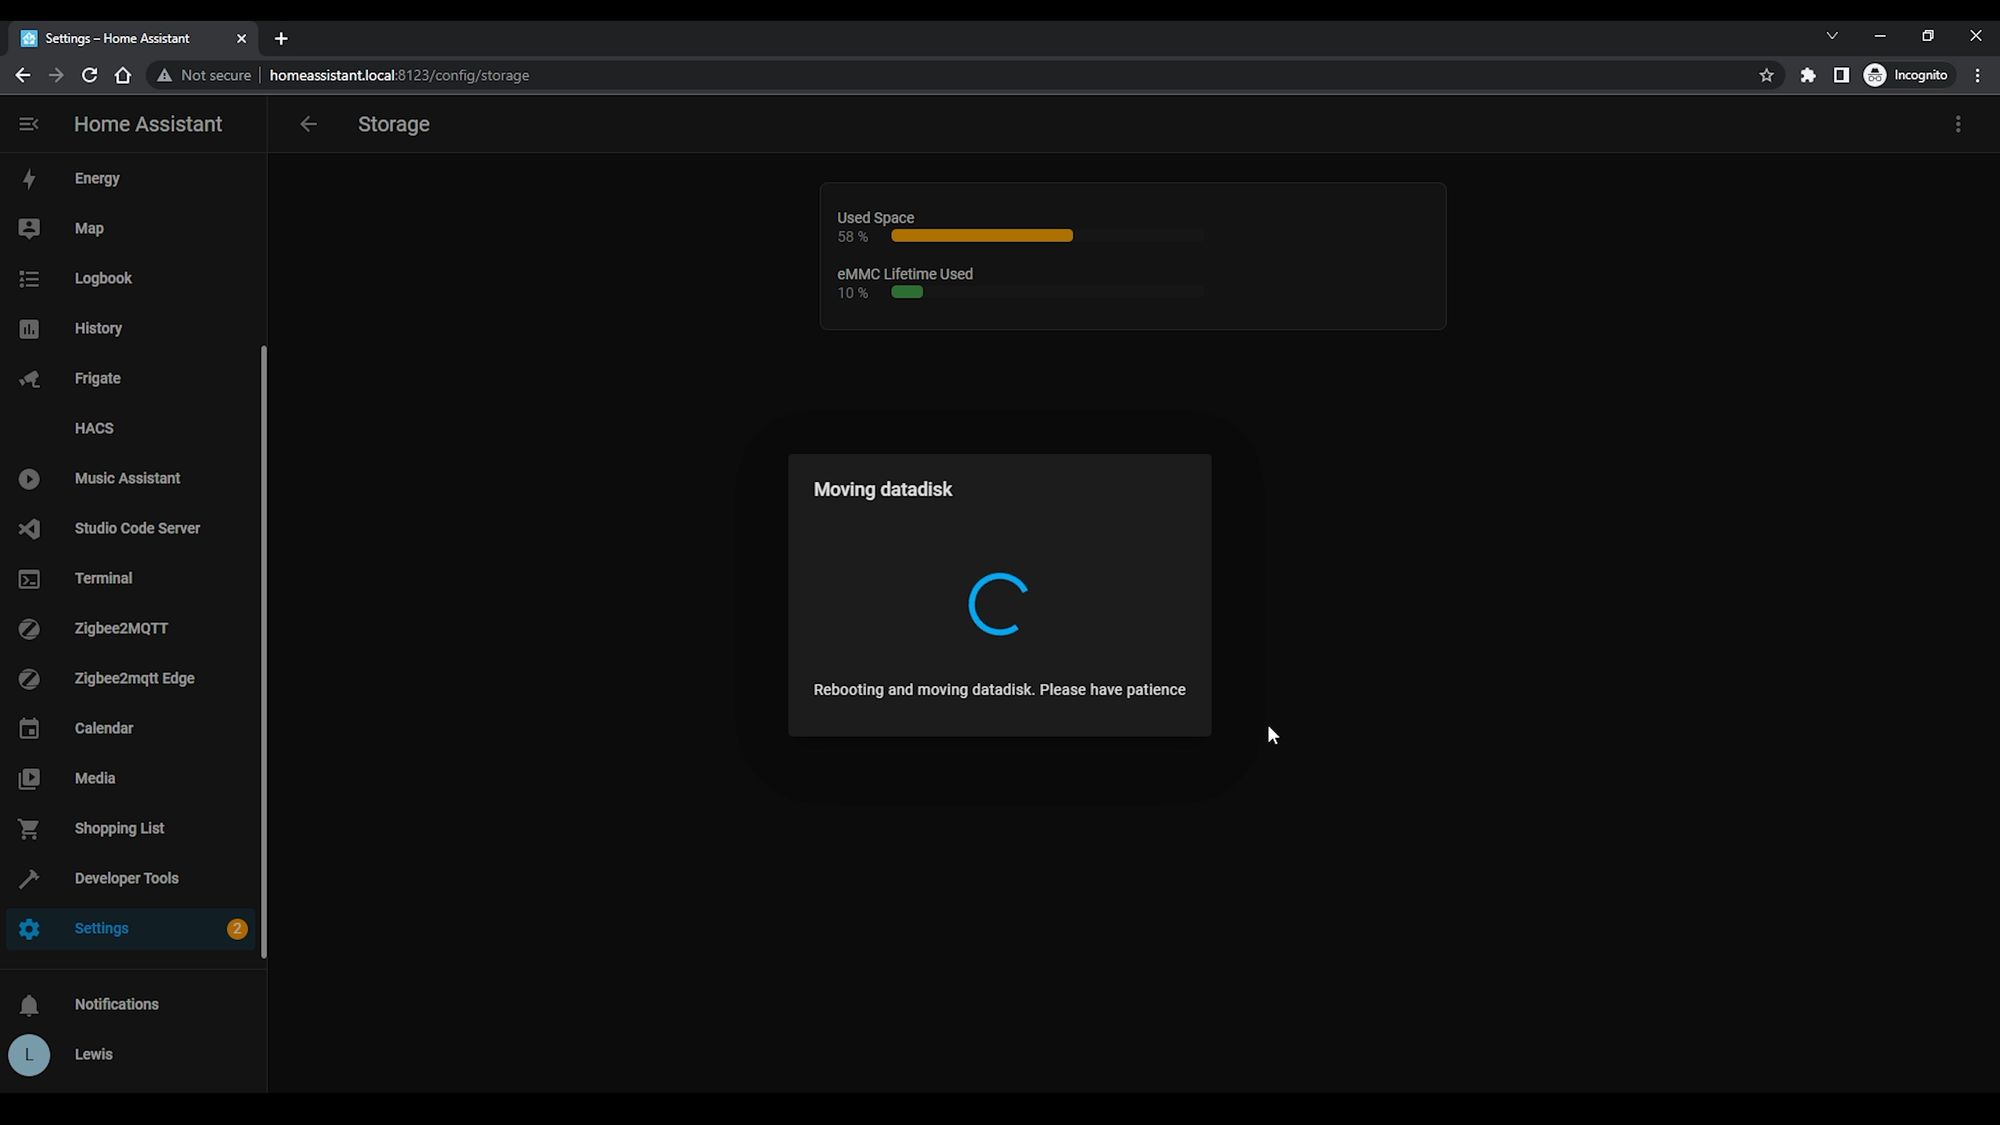
This will move many parts of Home Assistant to the data disk and can take a few minutes to complete. Home Assistant will also restart for that to take effect as well, so don’t remove power while this is happening.
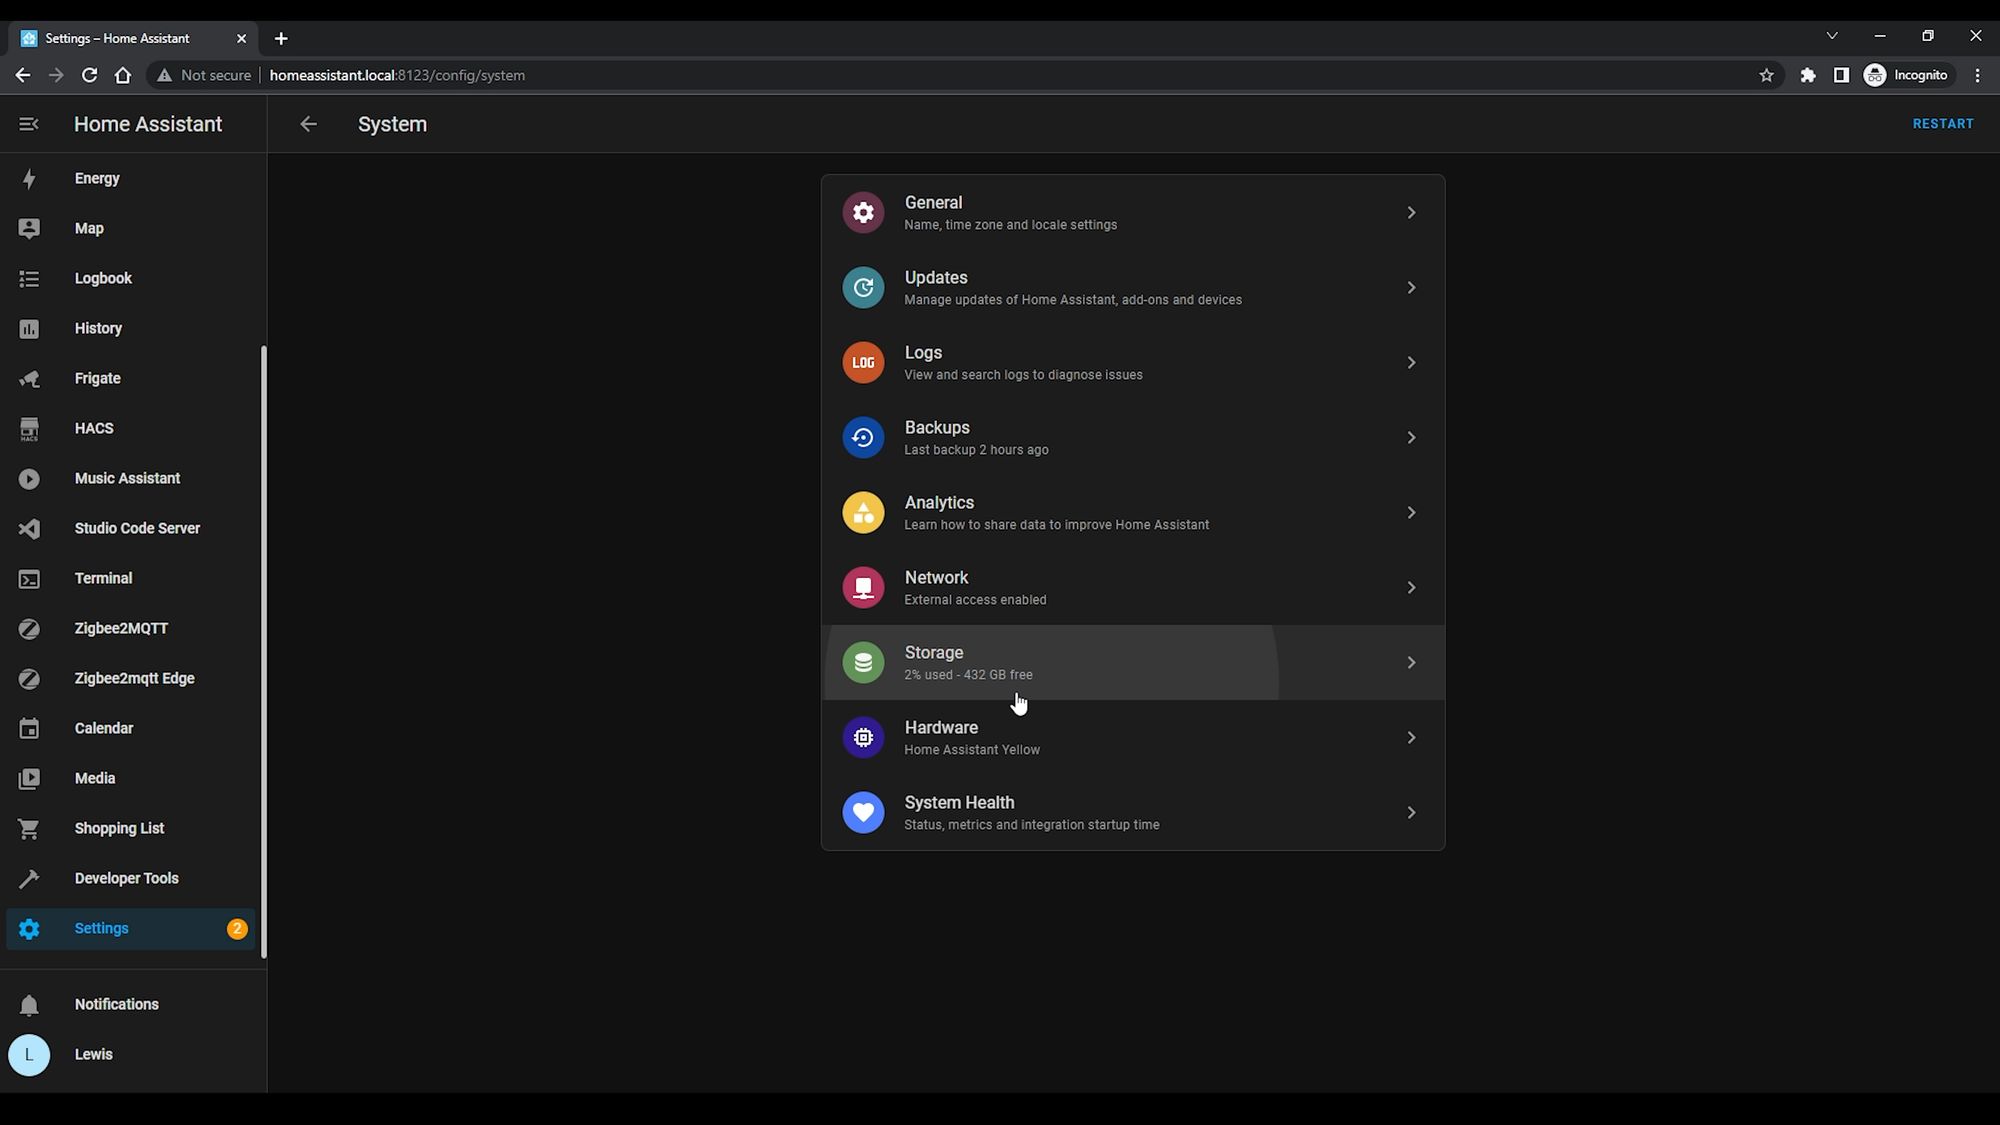
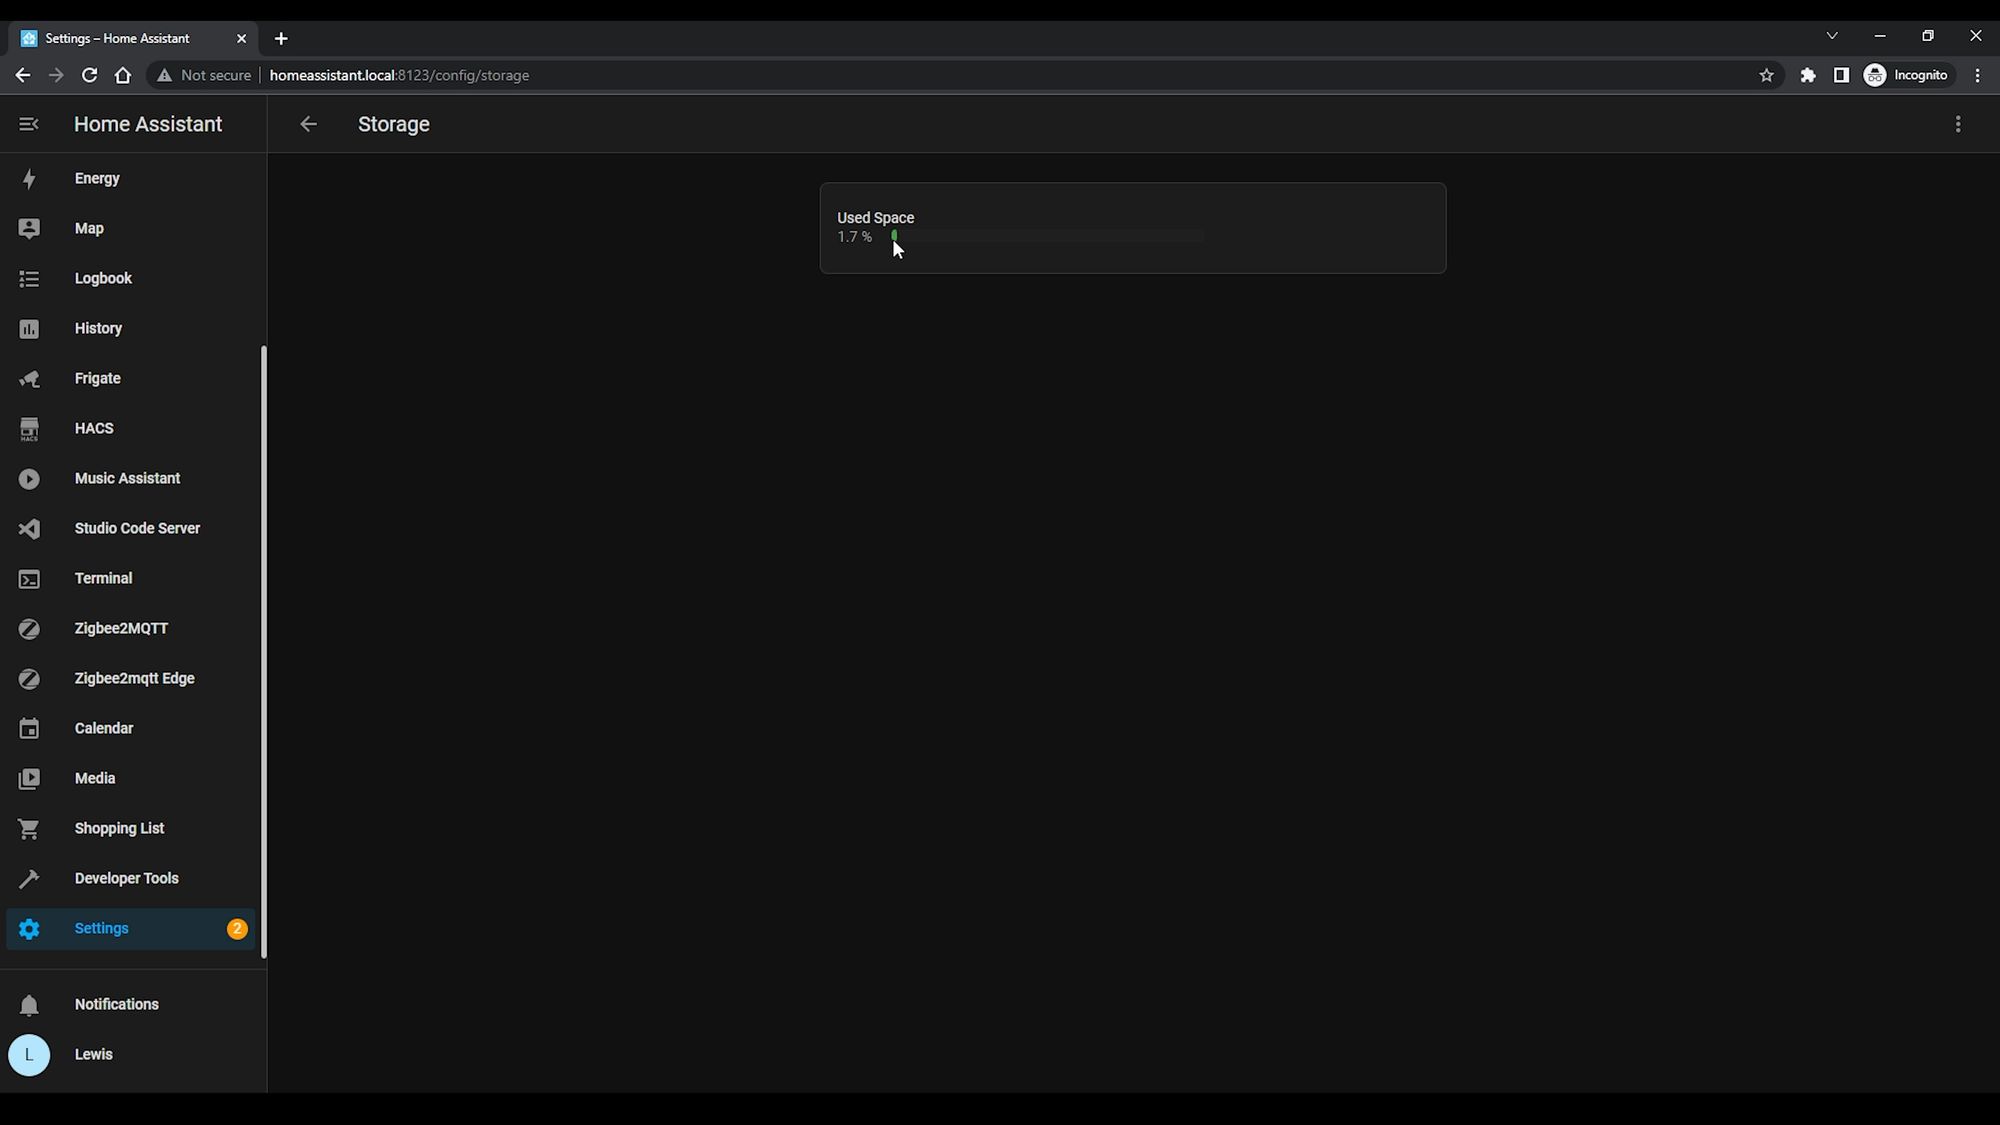
You can check the migration was successful by heading back to Settings, System, Storage and then looking at the used space indicator which should be the same size as the SSD you installed. Now you have some large and fast storage to go along with your new Yellow, nice!
Factory Reset
The final thing I wanted to quickly go over is recovery. So what do we do if everything goes completely wrong and we can’t access our new Yellow and you want to factory reset it? It’s not as easy as plugging in a display and issuing a few commands, since the Yellow has no display - I mean it does, but it's not as straightforward as plugging in a HDMI cable.
The way to factory reset the Yellow is to remove all power completely. Then, making sure that the network cable is plugged in, press and hold the red button on the back and then plug your power supply back in. Continue to hold the power button down for a good 10 seconds and then release.

After a few minutes you’ll notice the Yellow LED doing a double flashing pattern while the green LED rapidly blinks, you should then be able to access the "preparing Home Assistant" screen from your browser, and at this point this means the Yellow is downloading the latest version of Home Assistant and should be good to go, ready to setup a fresh!
Final Words
There we go! That is everything you need to know about getting started with the Home Assistant Yellow and I think we covered absolutely everything we could to get you up and running. Hopefully you are ready to get automating with Home Assistant Yellow and have fun doing so!