4 Automations For A Better Smart Home Alarm System!
Take your DIY smart home alarm to the next level with multi user support on keypads, a silent panic mode, a panic button & NFC control!


A few weeks ago, we covered how to set up a basic but very functional alarm system using Home Assistant where we covered how to install our alarm, the hardware required and then how to tie it all together to give you a really nice, locally controlled and privacy focused smart home alarm system.
Today, we are circling back to cover 4 more advanced things I like to do with my alarm system to take it up to the next level in terms of functionality and security - from multi user support on keypads, a silent panic mode, a panic button and quick NFC control... let’s get into it!
Video
Before We Get Into It...
We are going to be going use Alarmo which we are using as the basis for our alarm in Home Assistant which we installed and setup the basics for here, so if you have not yet downloaded & set up Alarmo then make sure to follow that article and then come back here to this one.
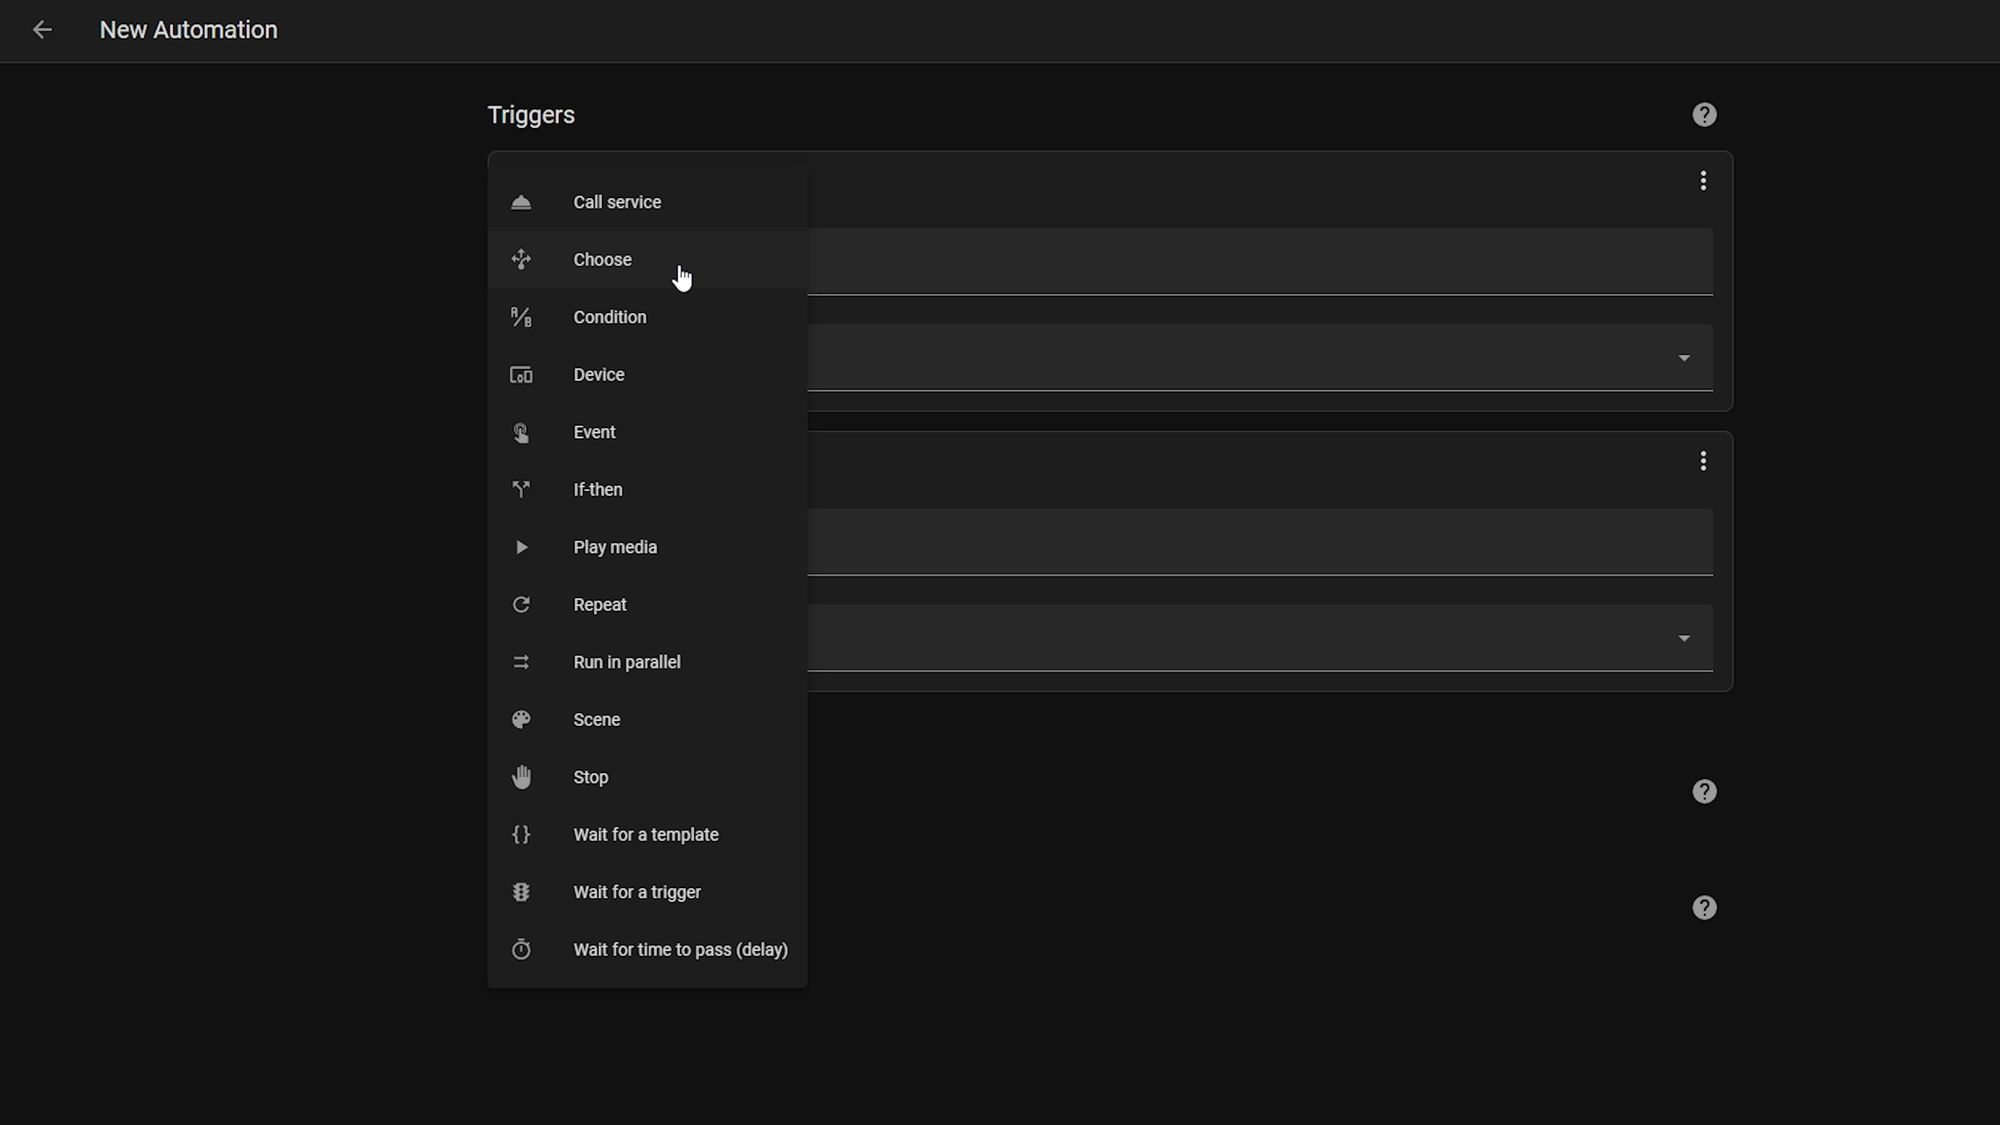
First Automation
Multi User Keypad Entry
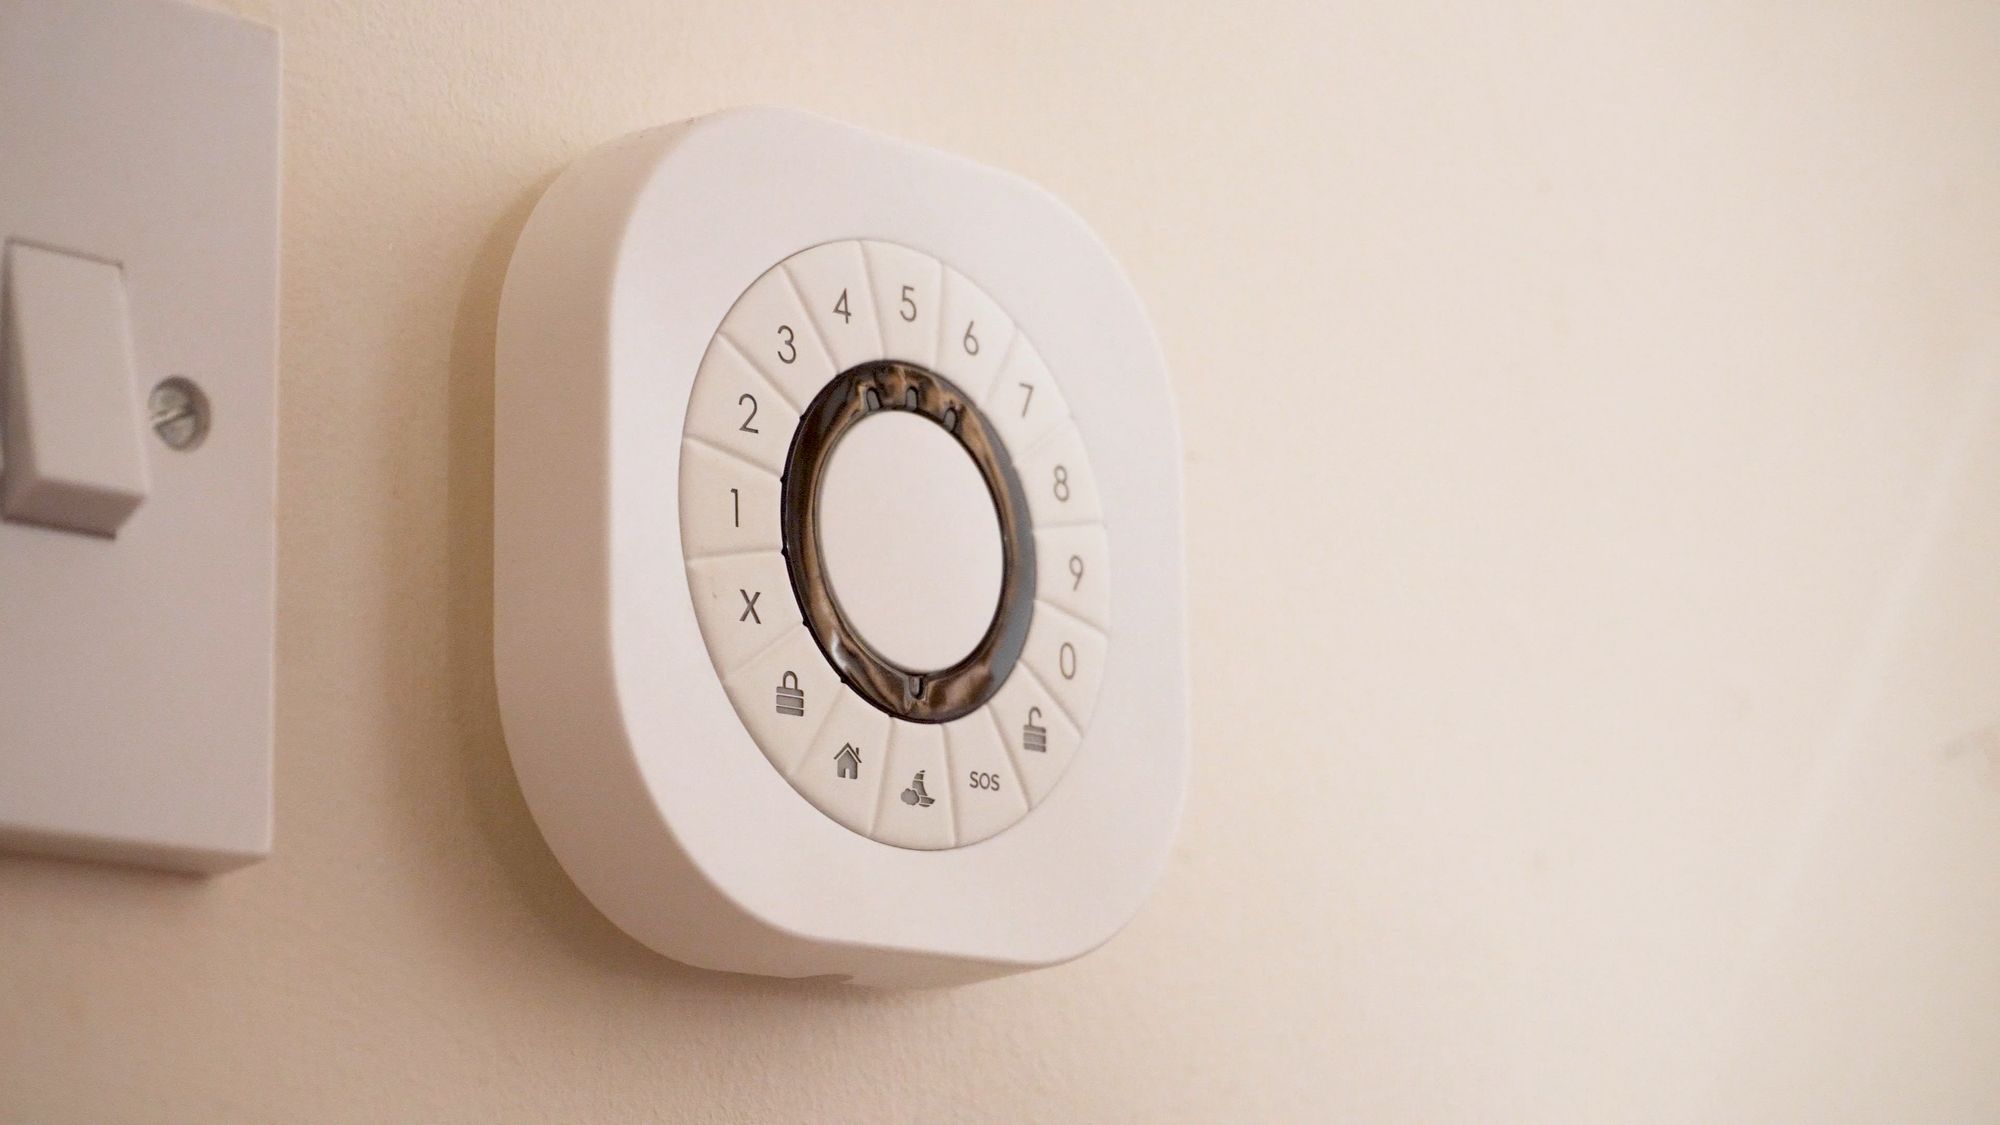
The first thing I'm going to go over is how to integrate a keypad with Alarmo. In the previous article I mentioned I use a Zigbee keypad to disarm the alarm when I come home, so when I walk in the door, the alarm starts the countdown and I punch in the code and it will disable.
However, there are two challenges with this: firstly Zigbee keypads will show up as their own alarm entity in Home Assistant meaning you’ll have to keep it in sync with the Alarmo entity and then secondly ZHA has support for keypad codes which is great, but this only works if you have one code that your entire household uses.
So, pretty much, if you want to have a code for each person so you know who disabled it or you want to do fancy things like a panic code, then we need to find an alternative way...which is what I have done here.
The basic premise for the second problem is that essentially we will just create an automation where we listen to the Zigbee event data from the keypad, collect the code that was entered and then send that to Alarmo via a disarm action. Alarmo will then either disarm the alarm if the code matches a code it recognises or do absolutely nothing if it doesn't.
Now it’s worth mentioning that I am using a Zigbee keypad for this, which I know is quite expensive, but if you can integrate another keypad using Z-Wave or Bluetooth and you can read the codes in Home Assistant somehow, you should be able to follow a similar idea. For some reason, there appears to be a real shortage of Zigbee keypads at the moment with not many out there, but any keypad you can read the codes from should work.
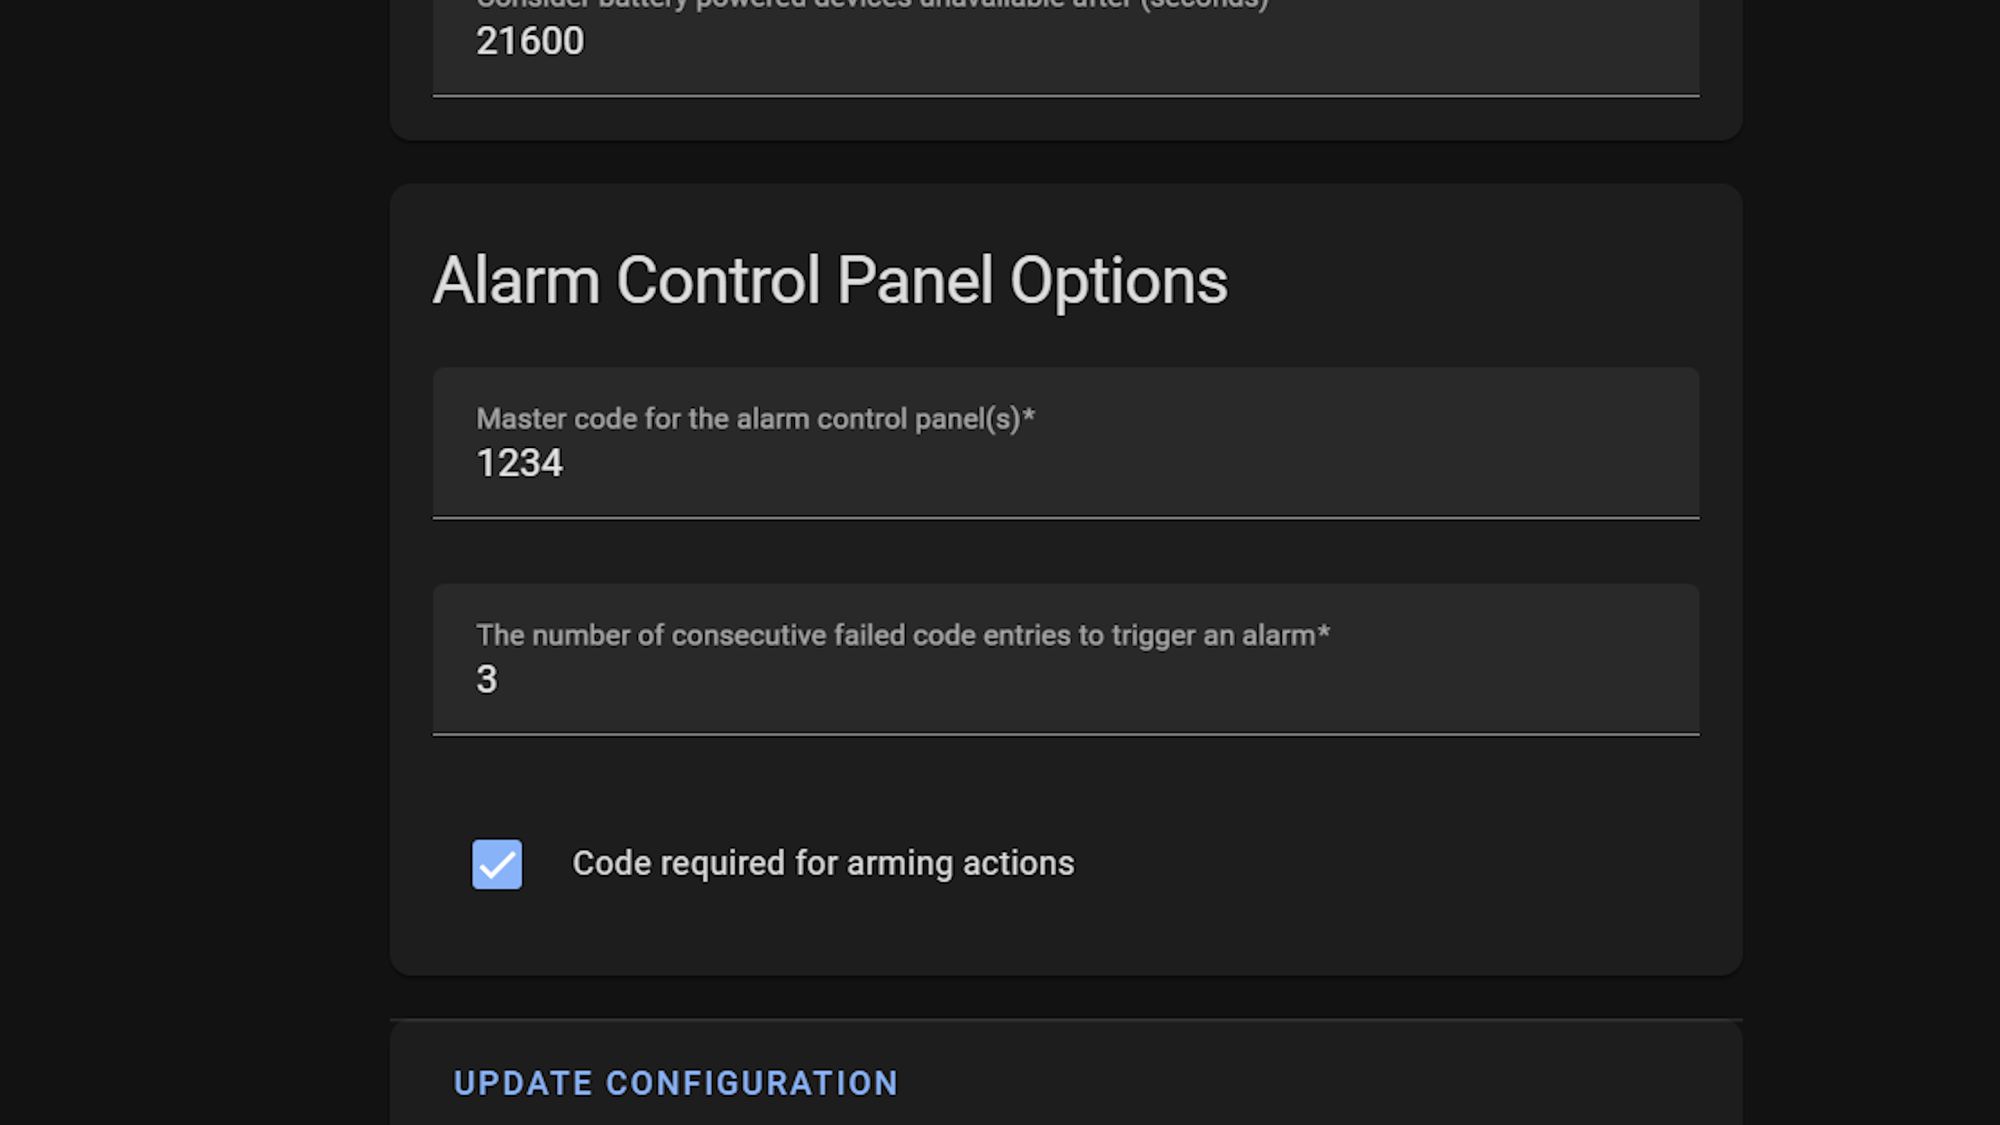
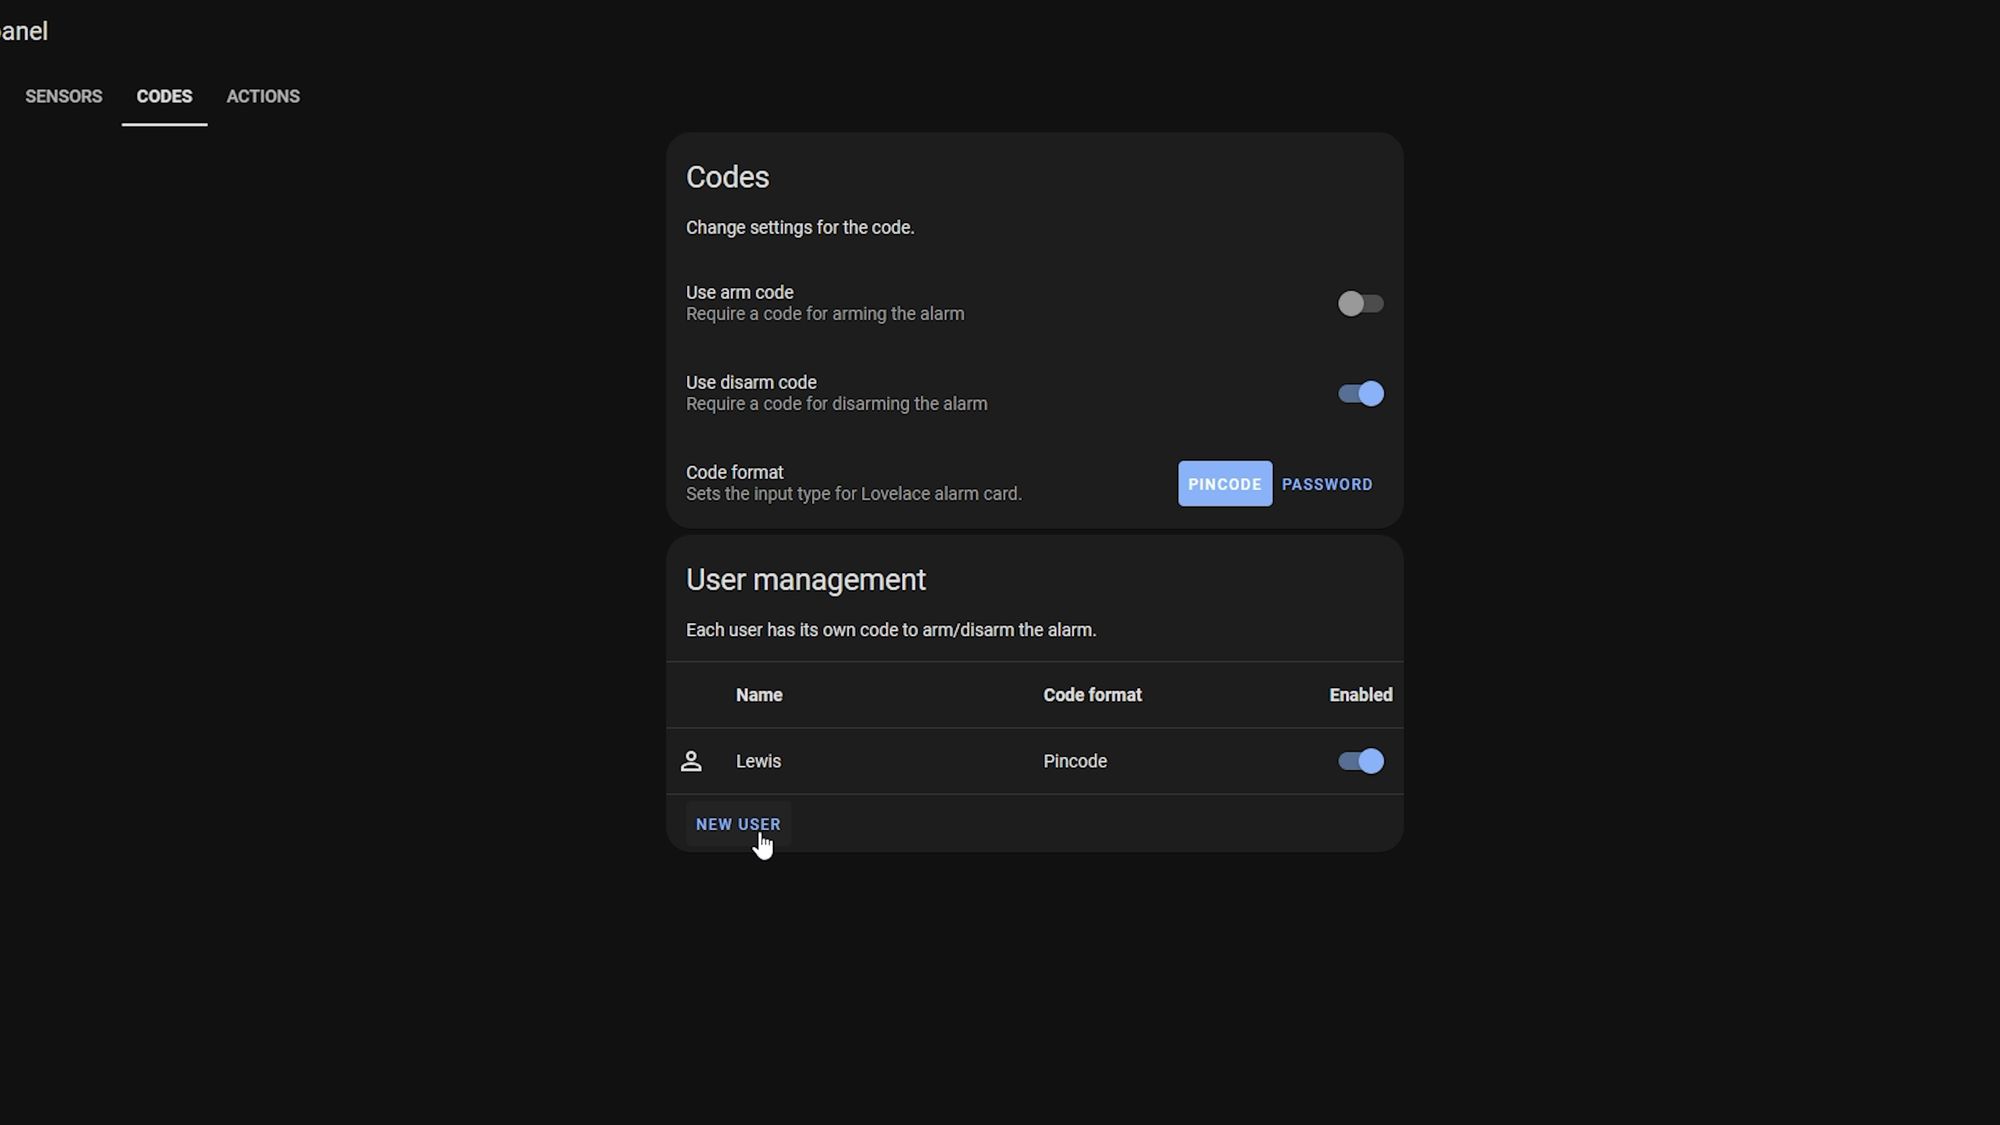
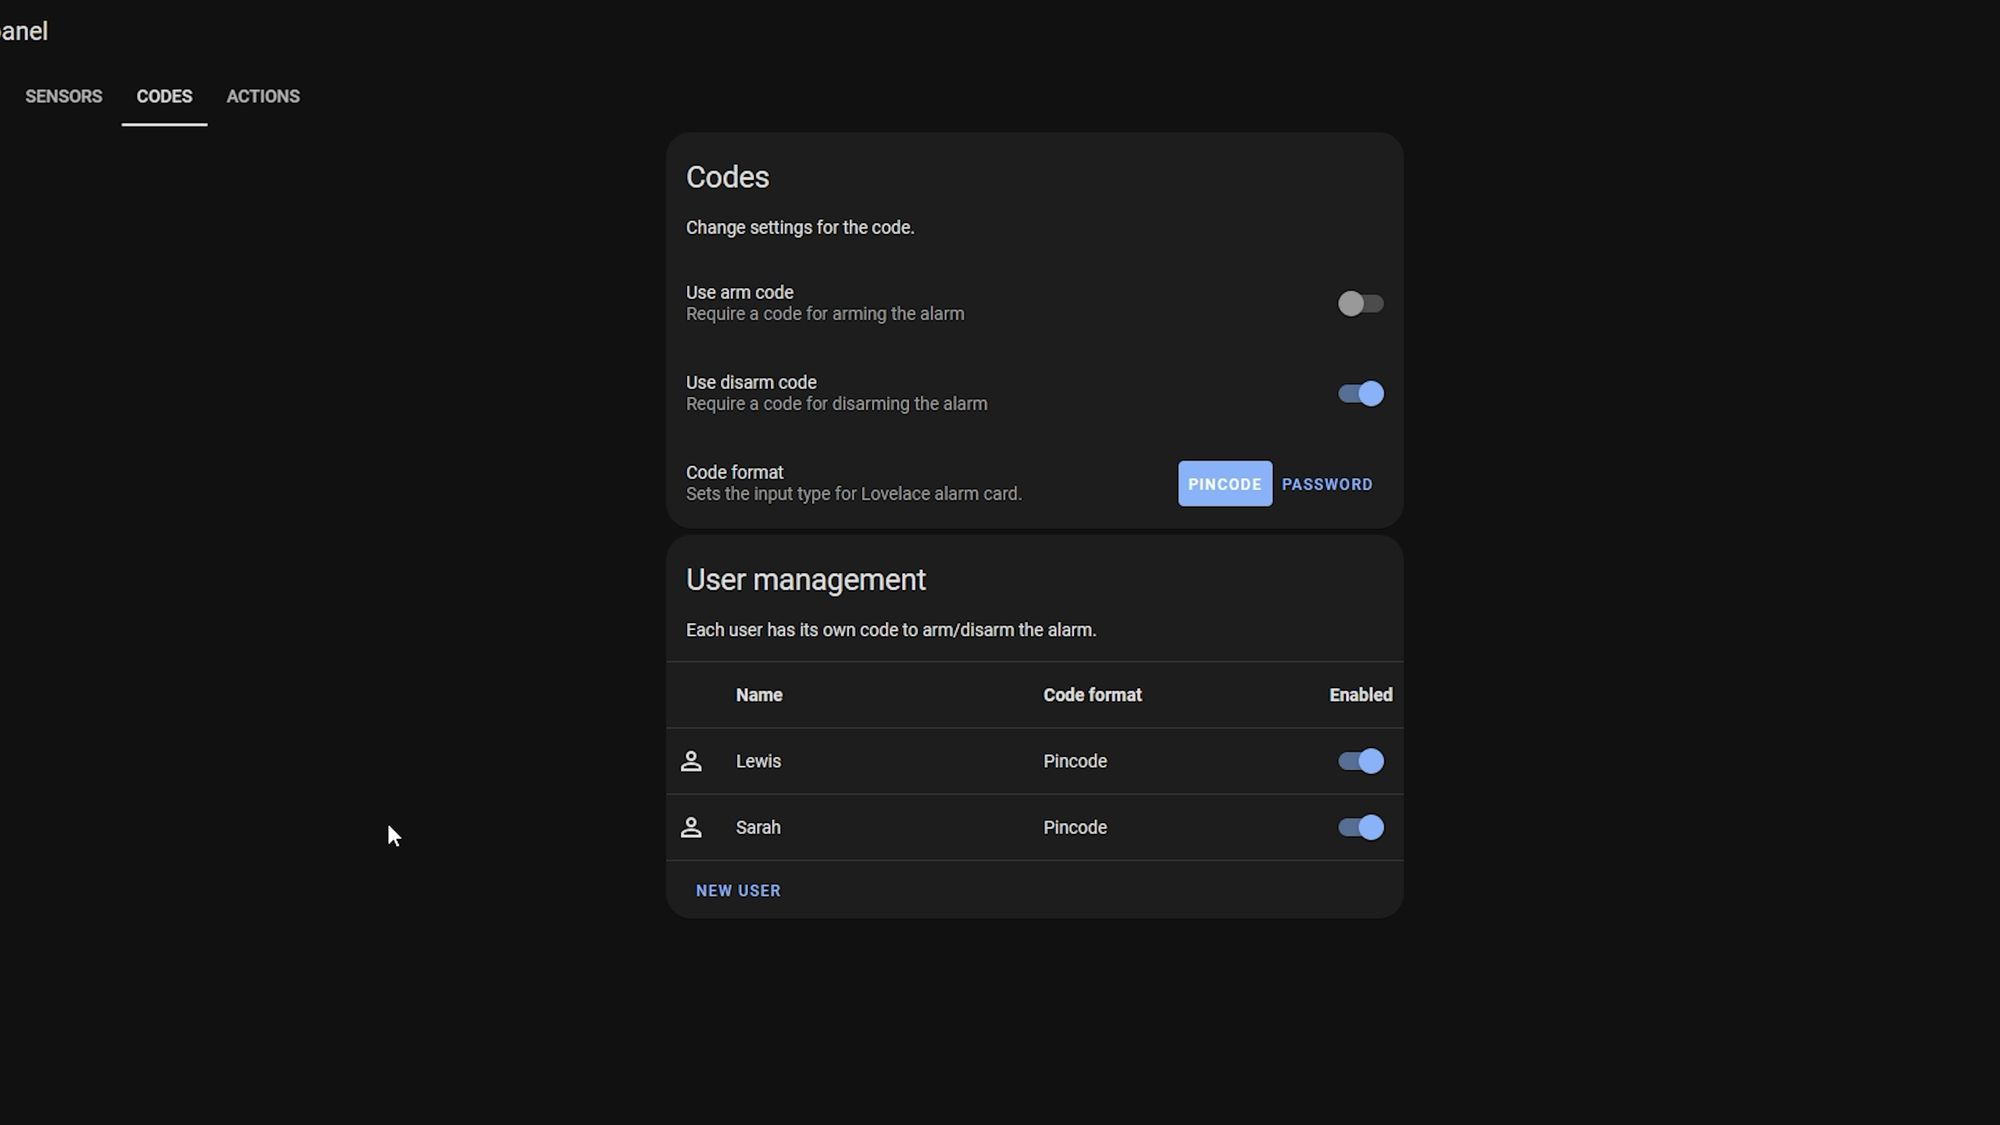
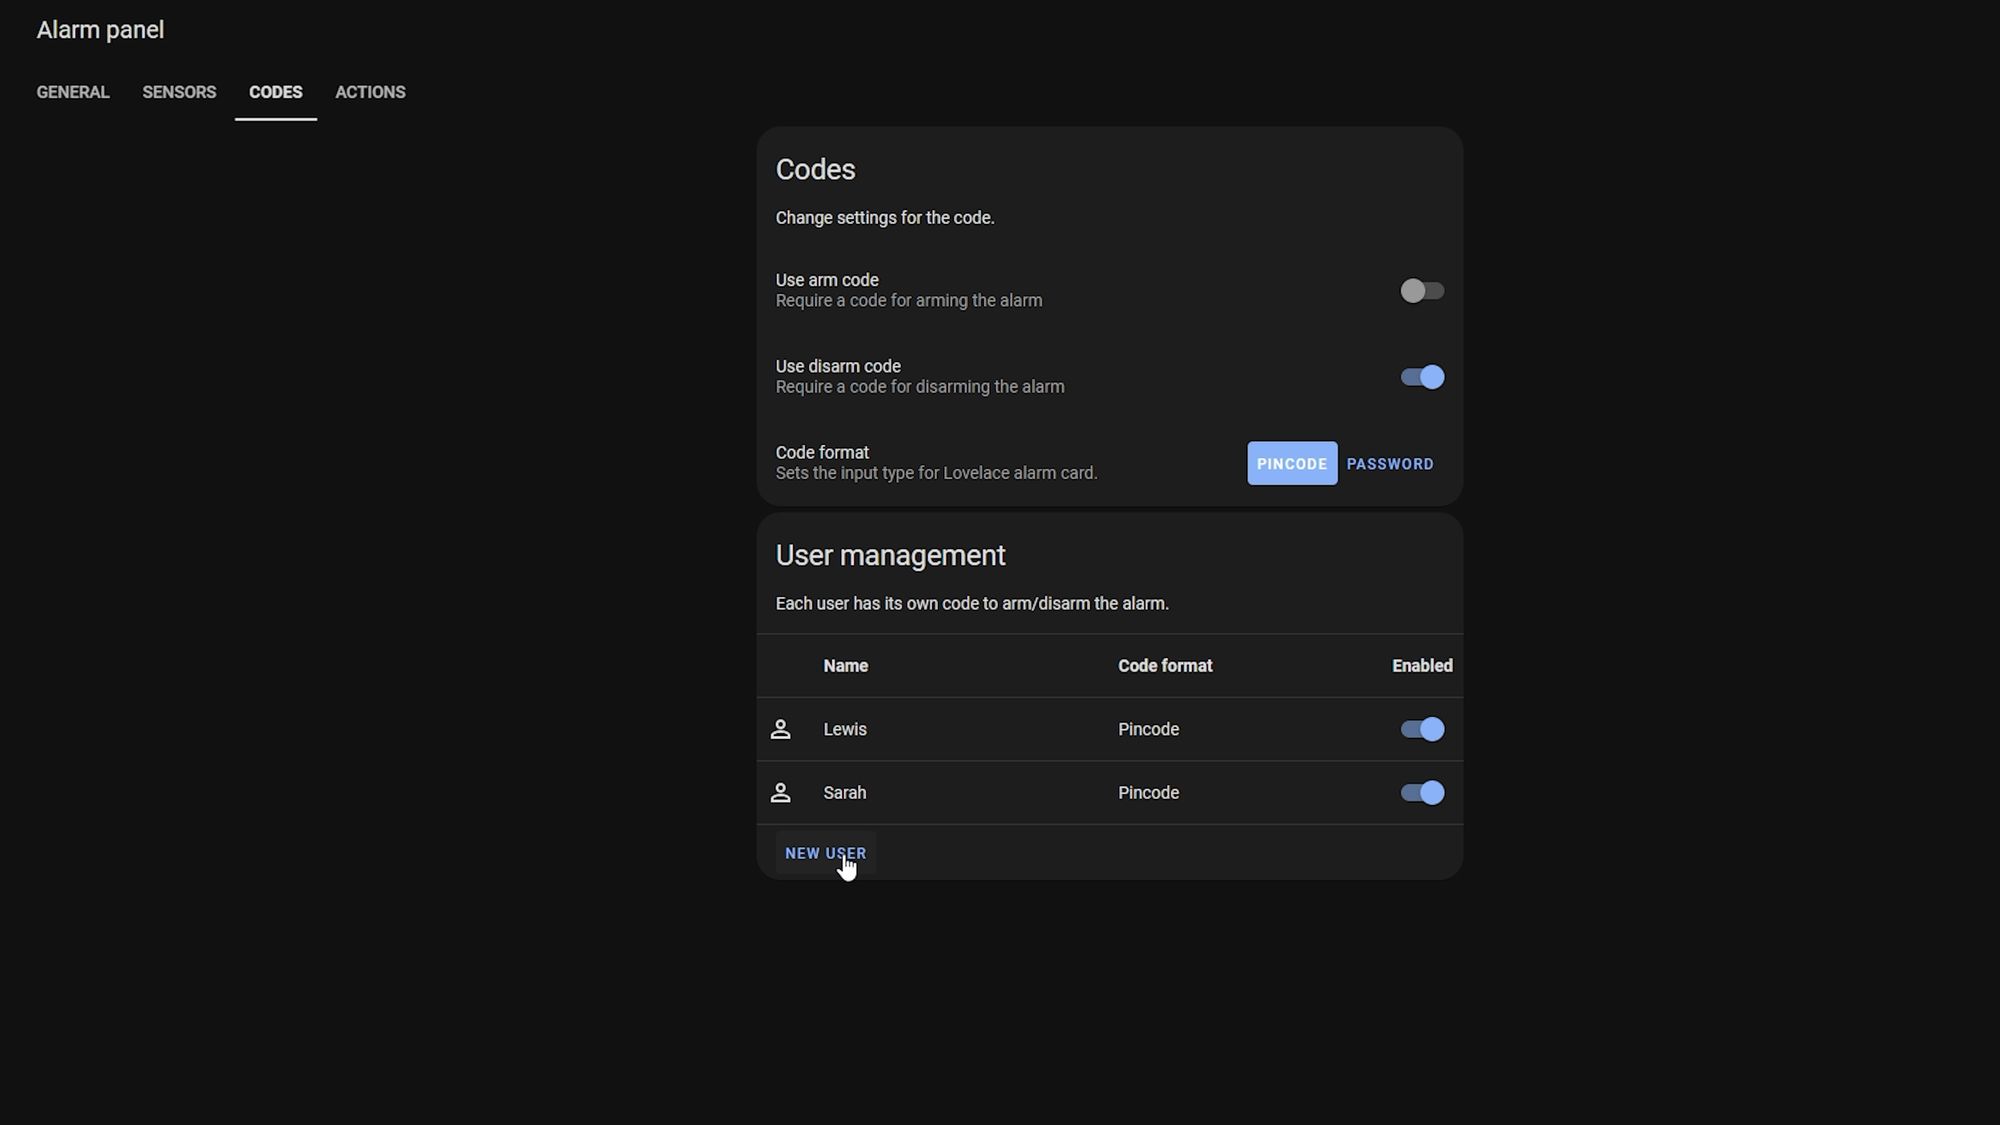
First, head over into Alarmo and set up a disarm code for each person you have in your house - these will need to be a different and unique code for each person for this to work.
Once you have your codes set up, head over to developer tools and then event data, and I am going to enter "zha_event" in the listen box and start listening for those events.
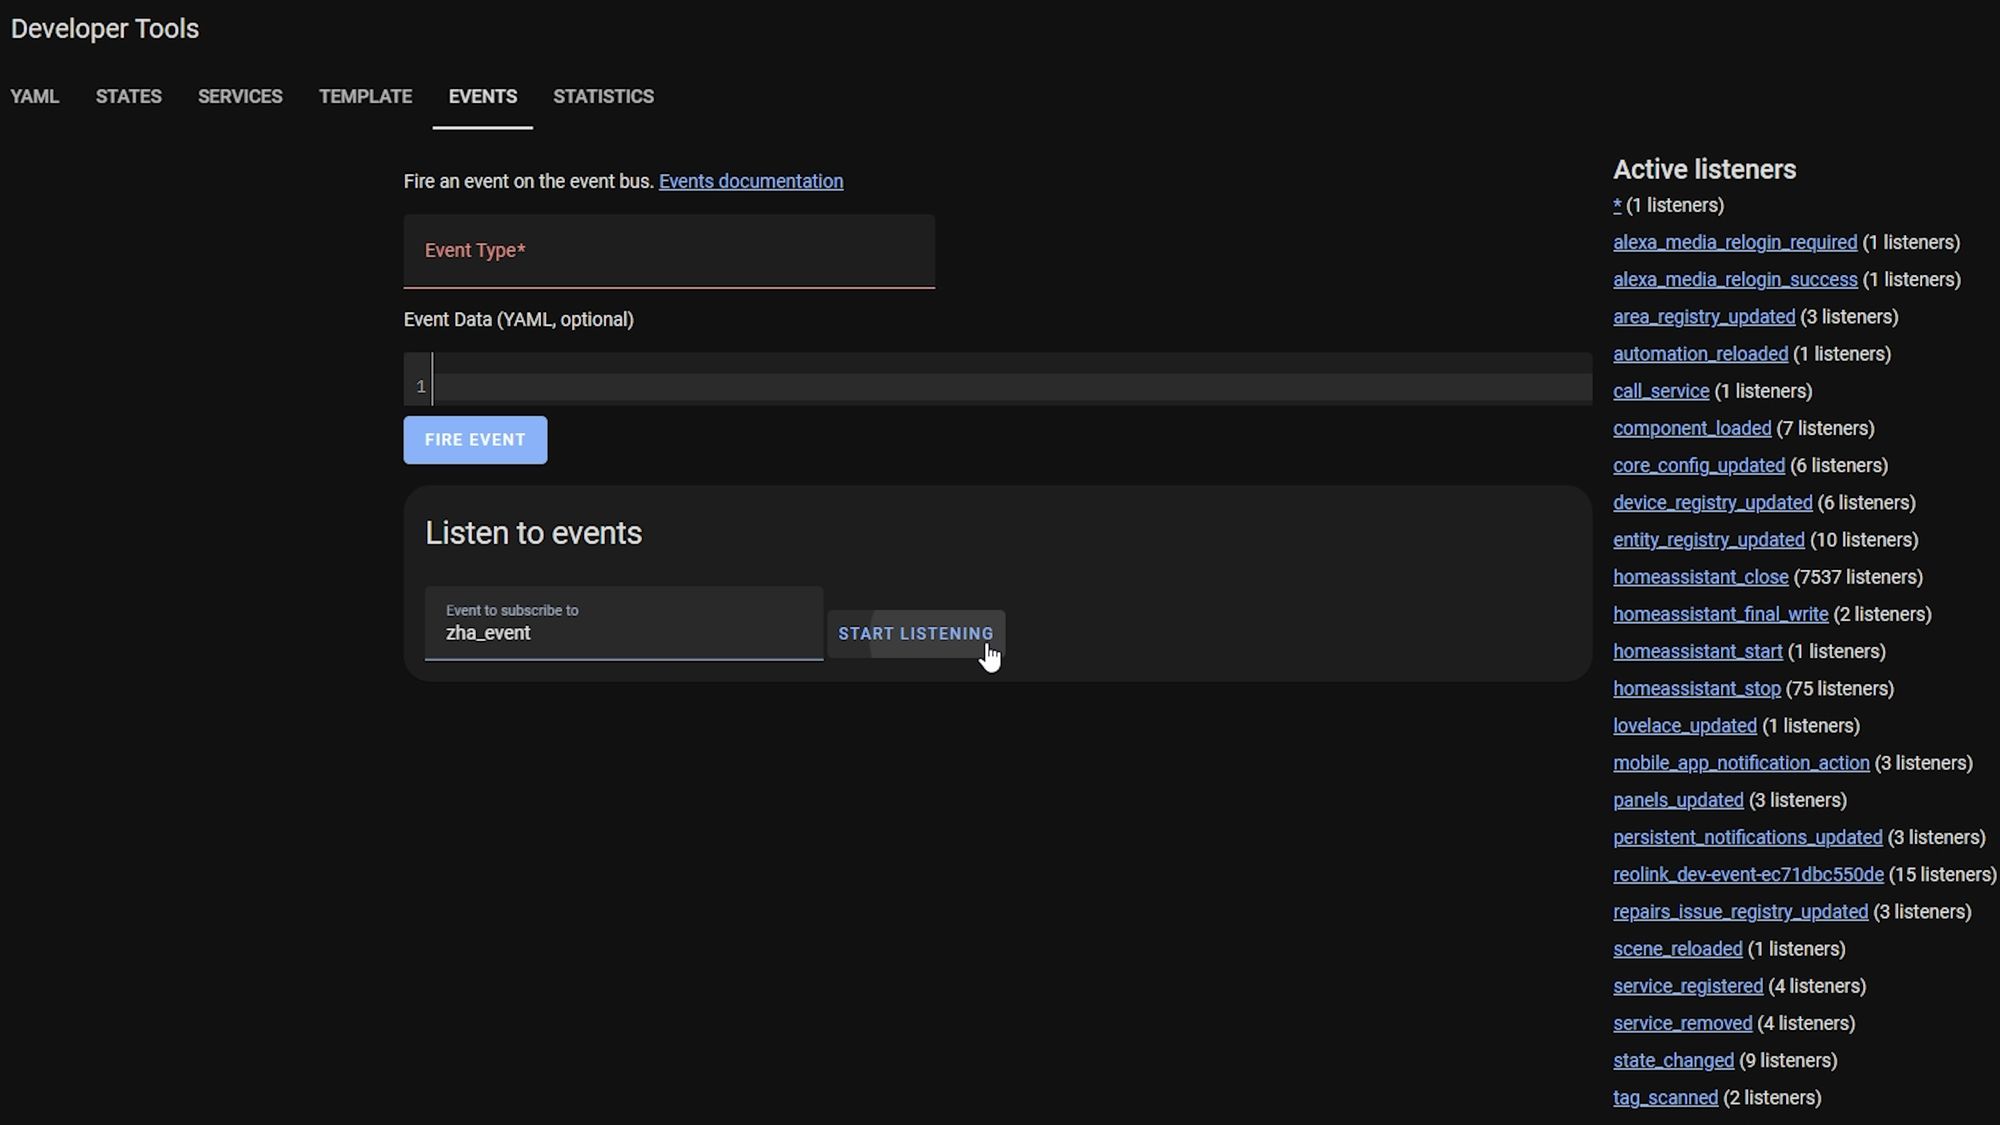
If I enter a code on my keypad and hit the disarm button, that we get an event come through that contains a bunch of information. You are going to want to copy the command and arguments section of this event only as shown.
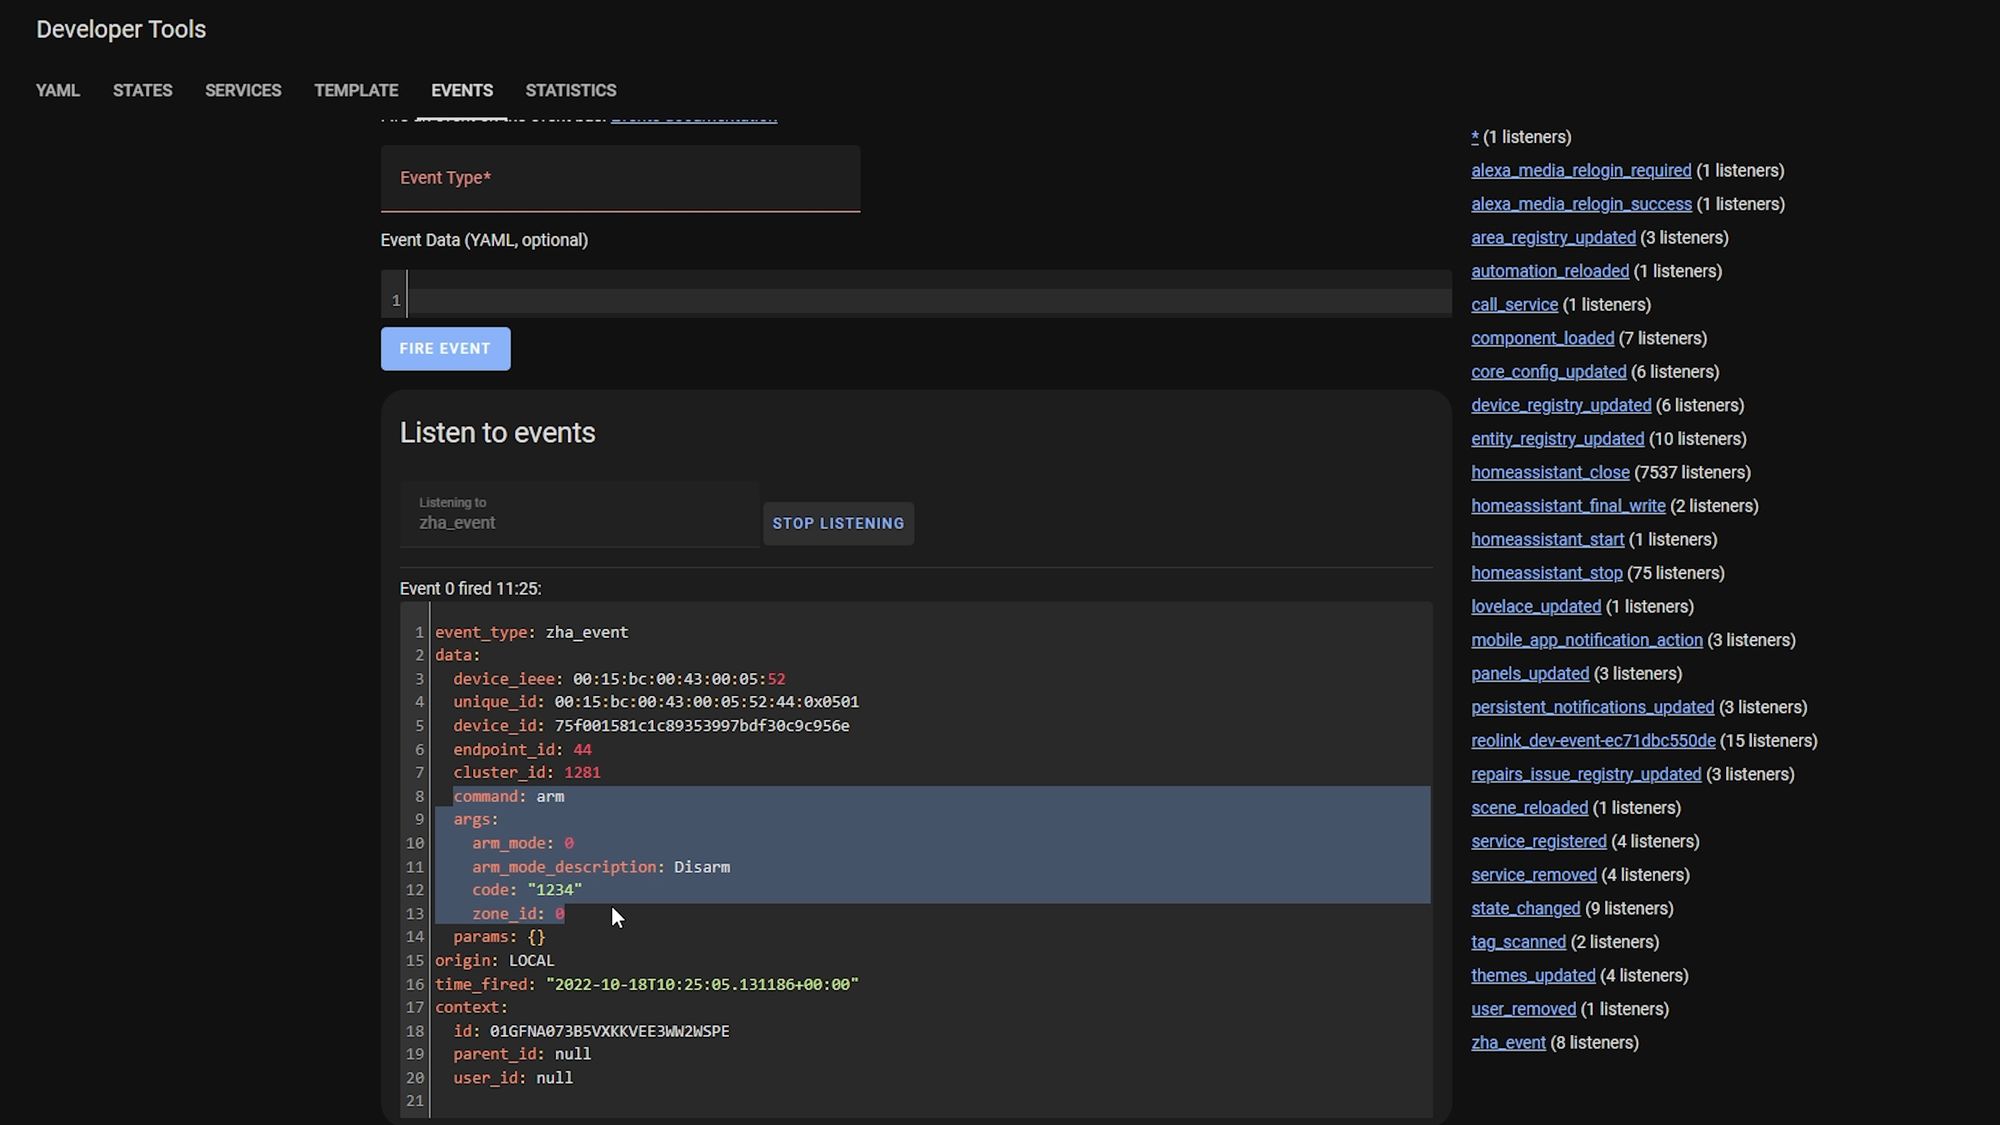
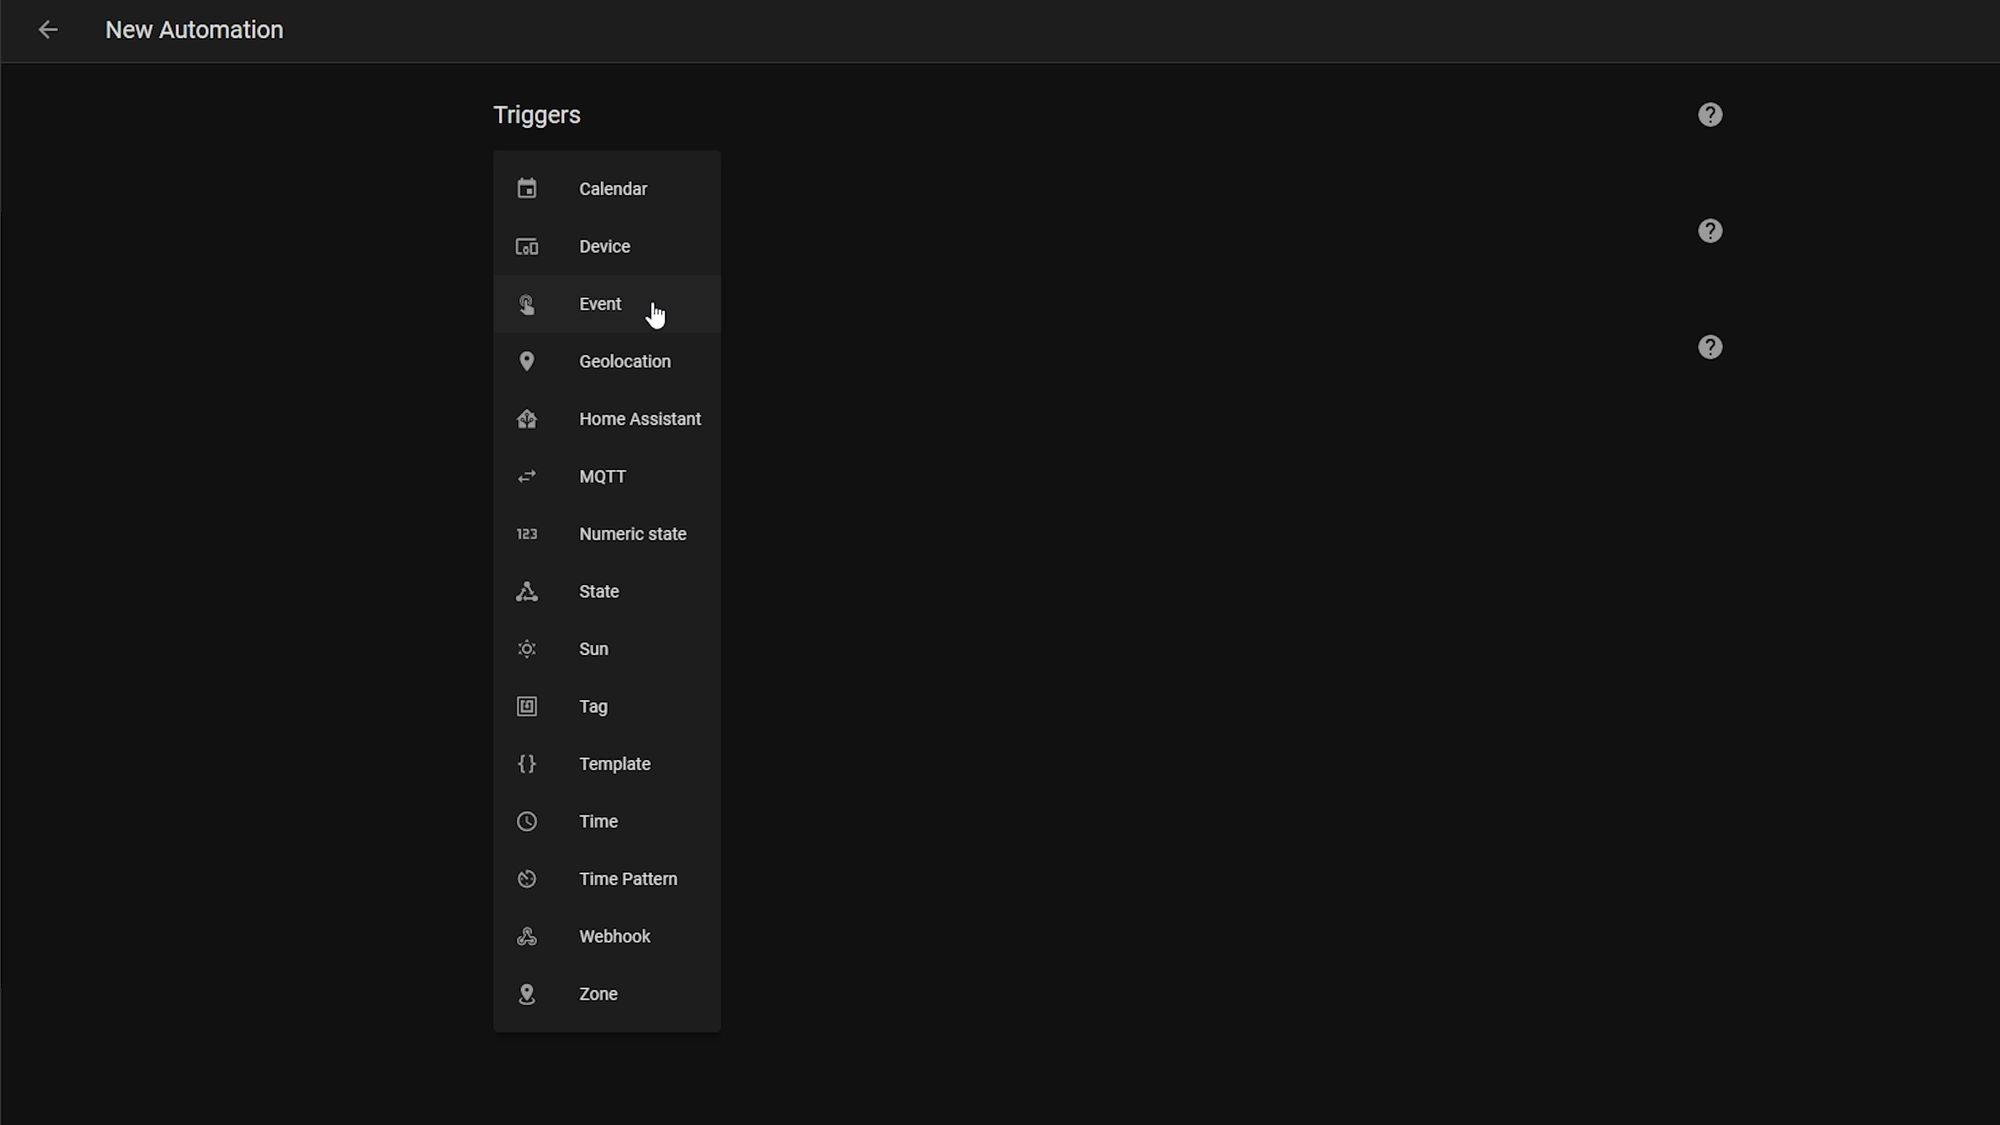
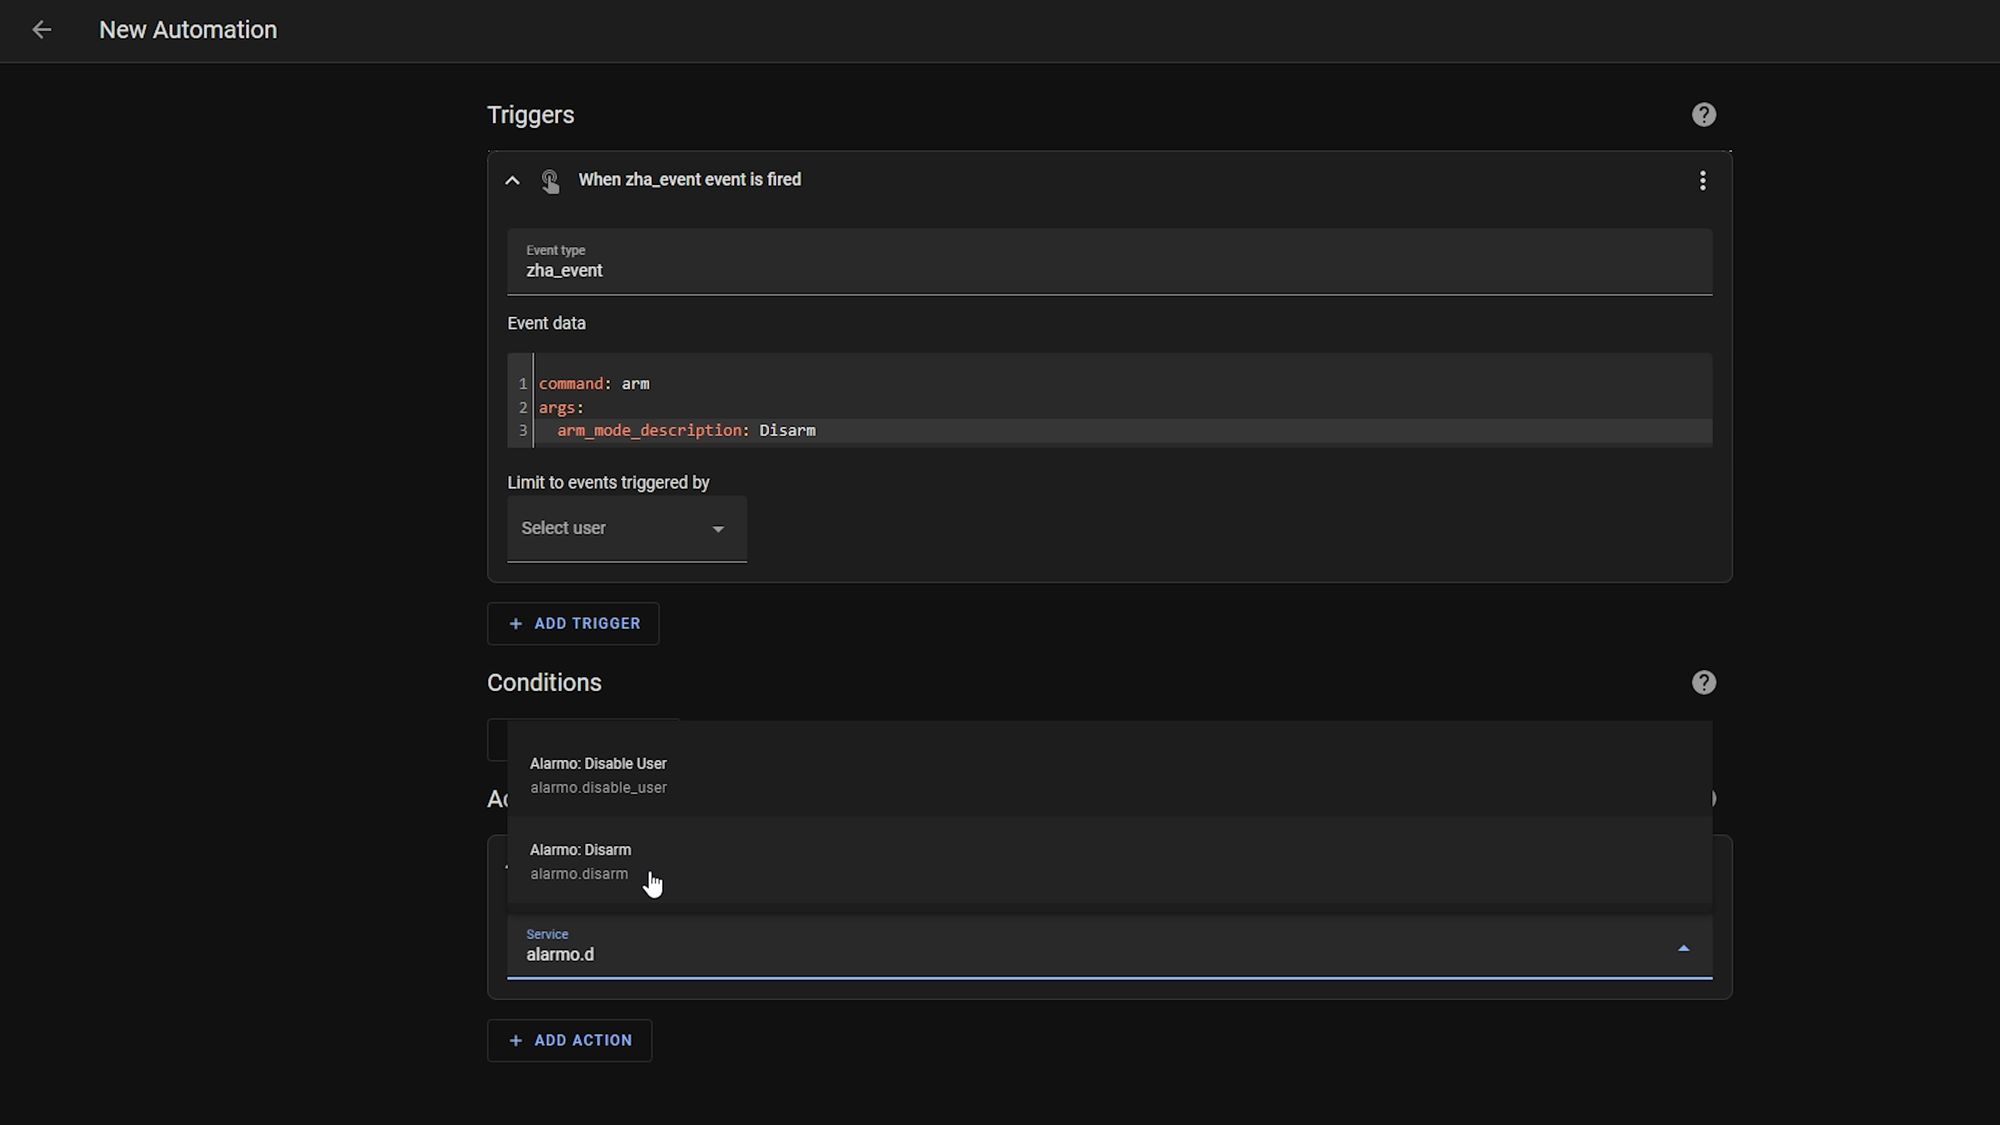
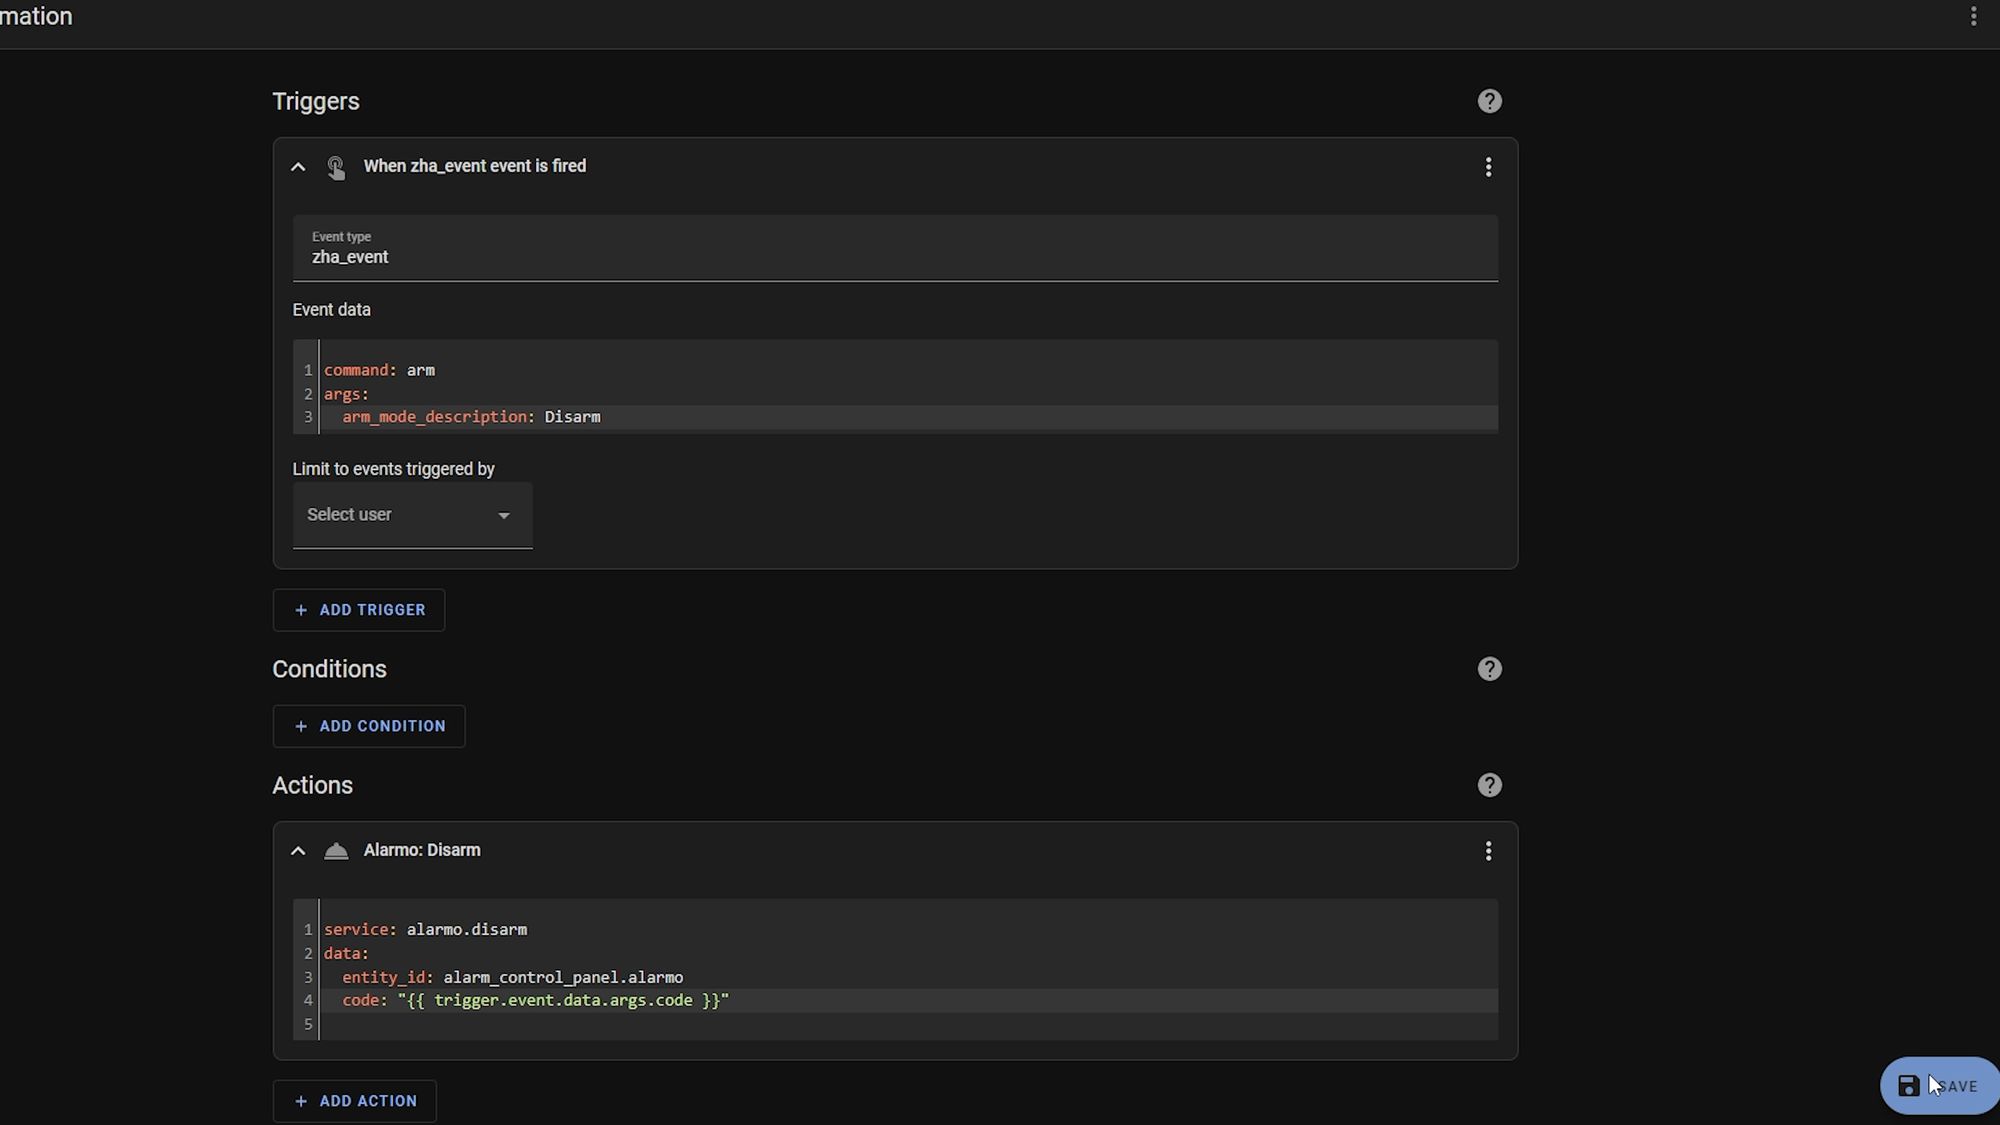
Now, go to settings, automations and create a new automation. Then as the trigger, select event as the type, and enter "zha_event" in the event type box. In the event_data box, paste in the event data we captured above. We need to get rid of the extra information we don’t need here, so remove the arm mode, code and zone_id from the box, making sure to clean up your indentation if required.
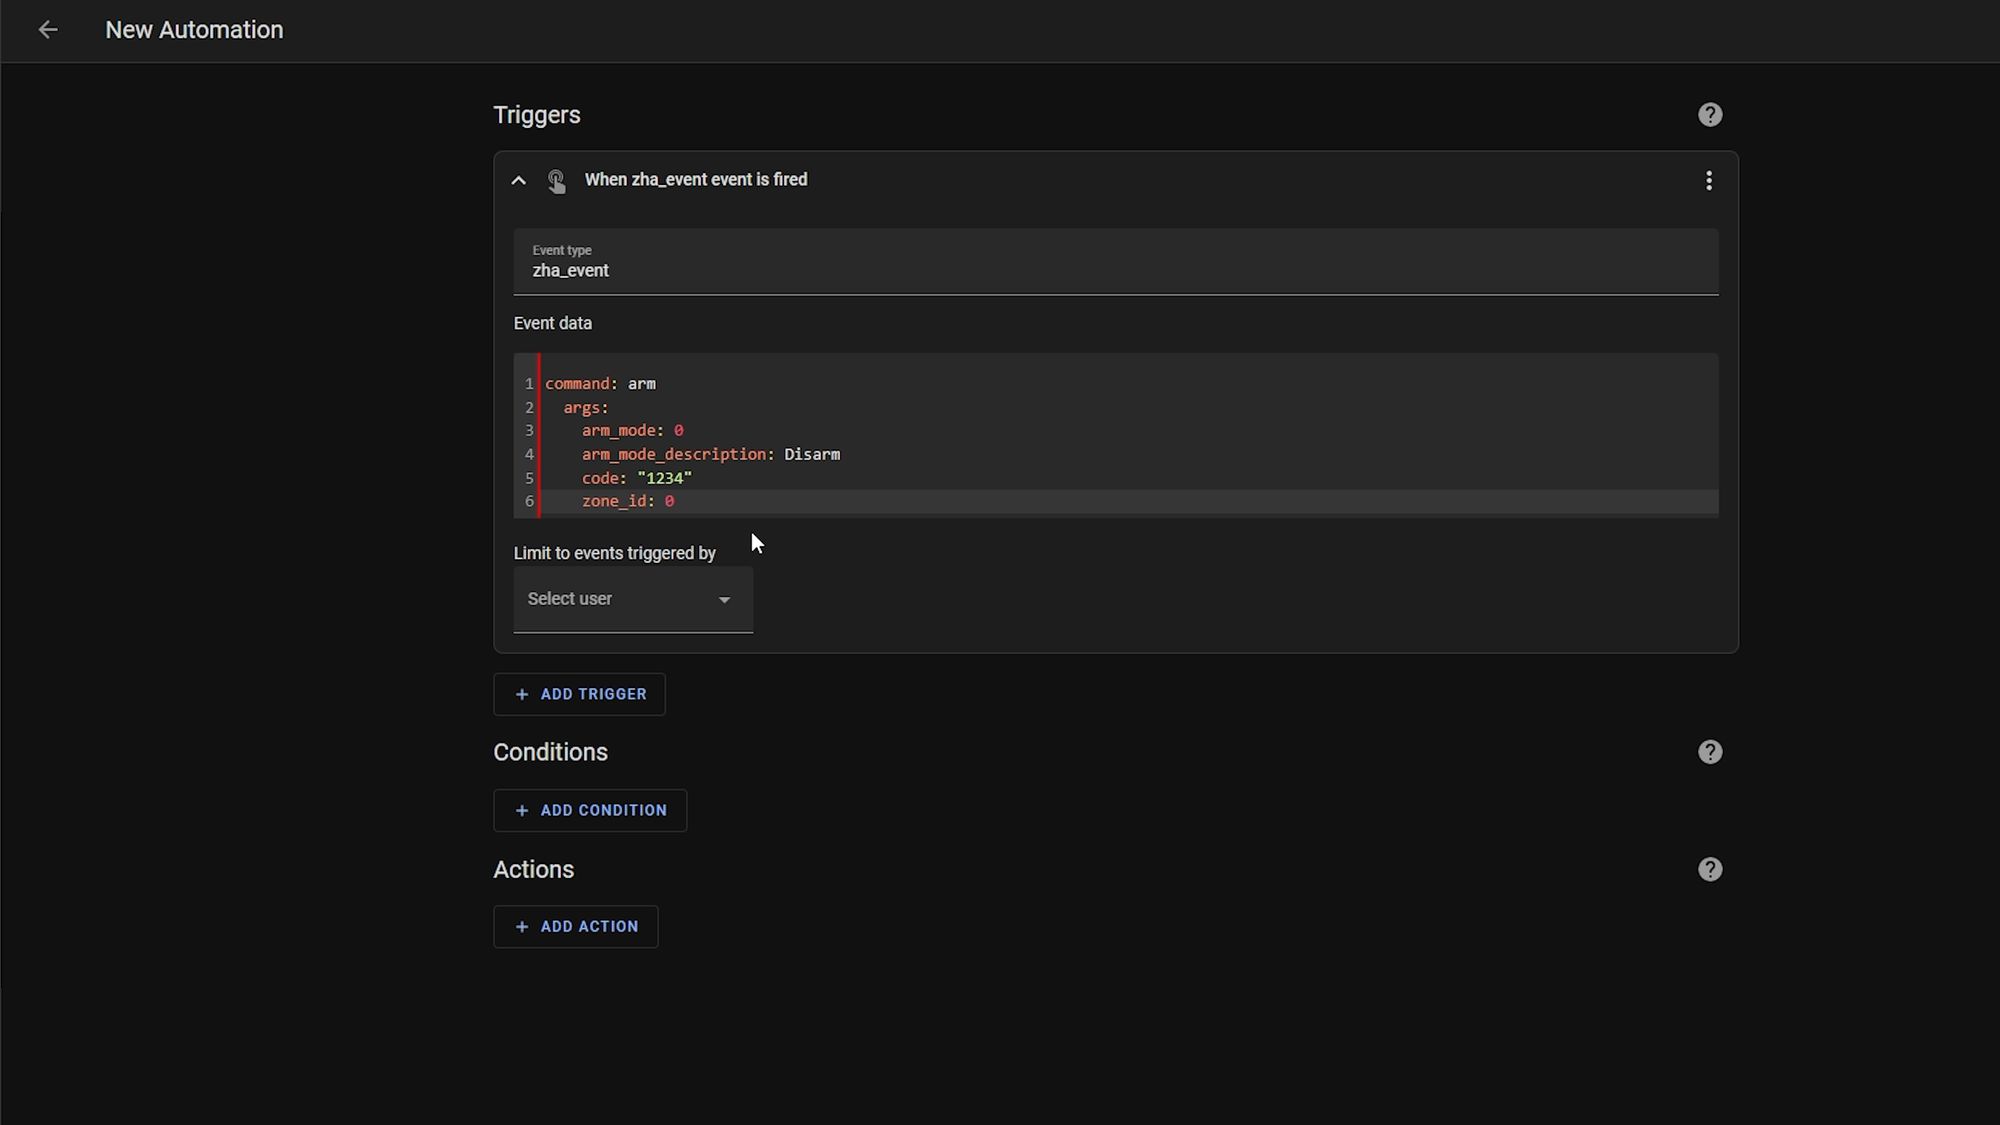
You may also be wondering why we are removing the code here since we probably want to use it - the reason is if we leave the code in here, that will make the automation only run on that one specific code but we want Alarmo to decide if the code is correct or not, so therefore, by doing it this way, the automation will always run regardless of the code entered.
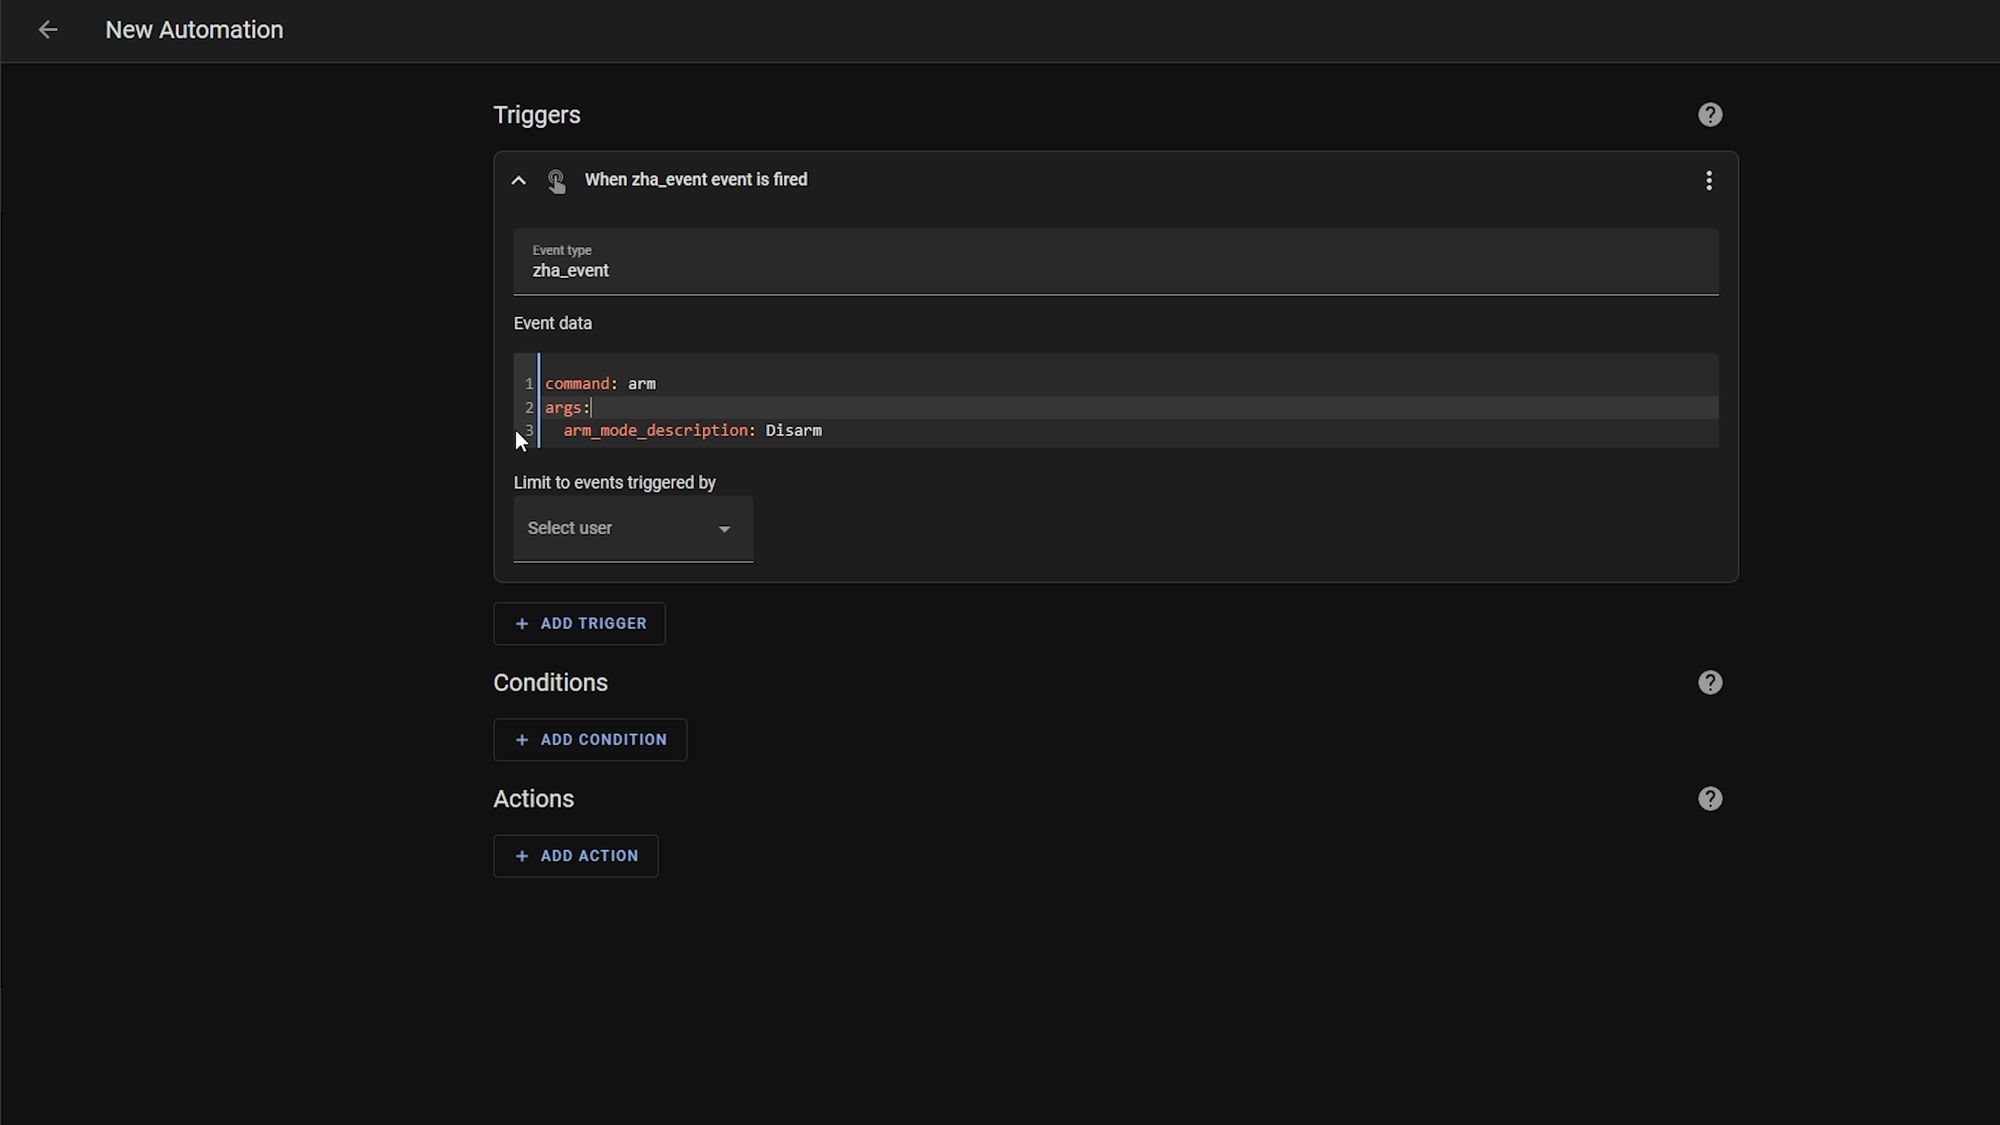
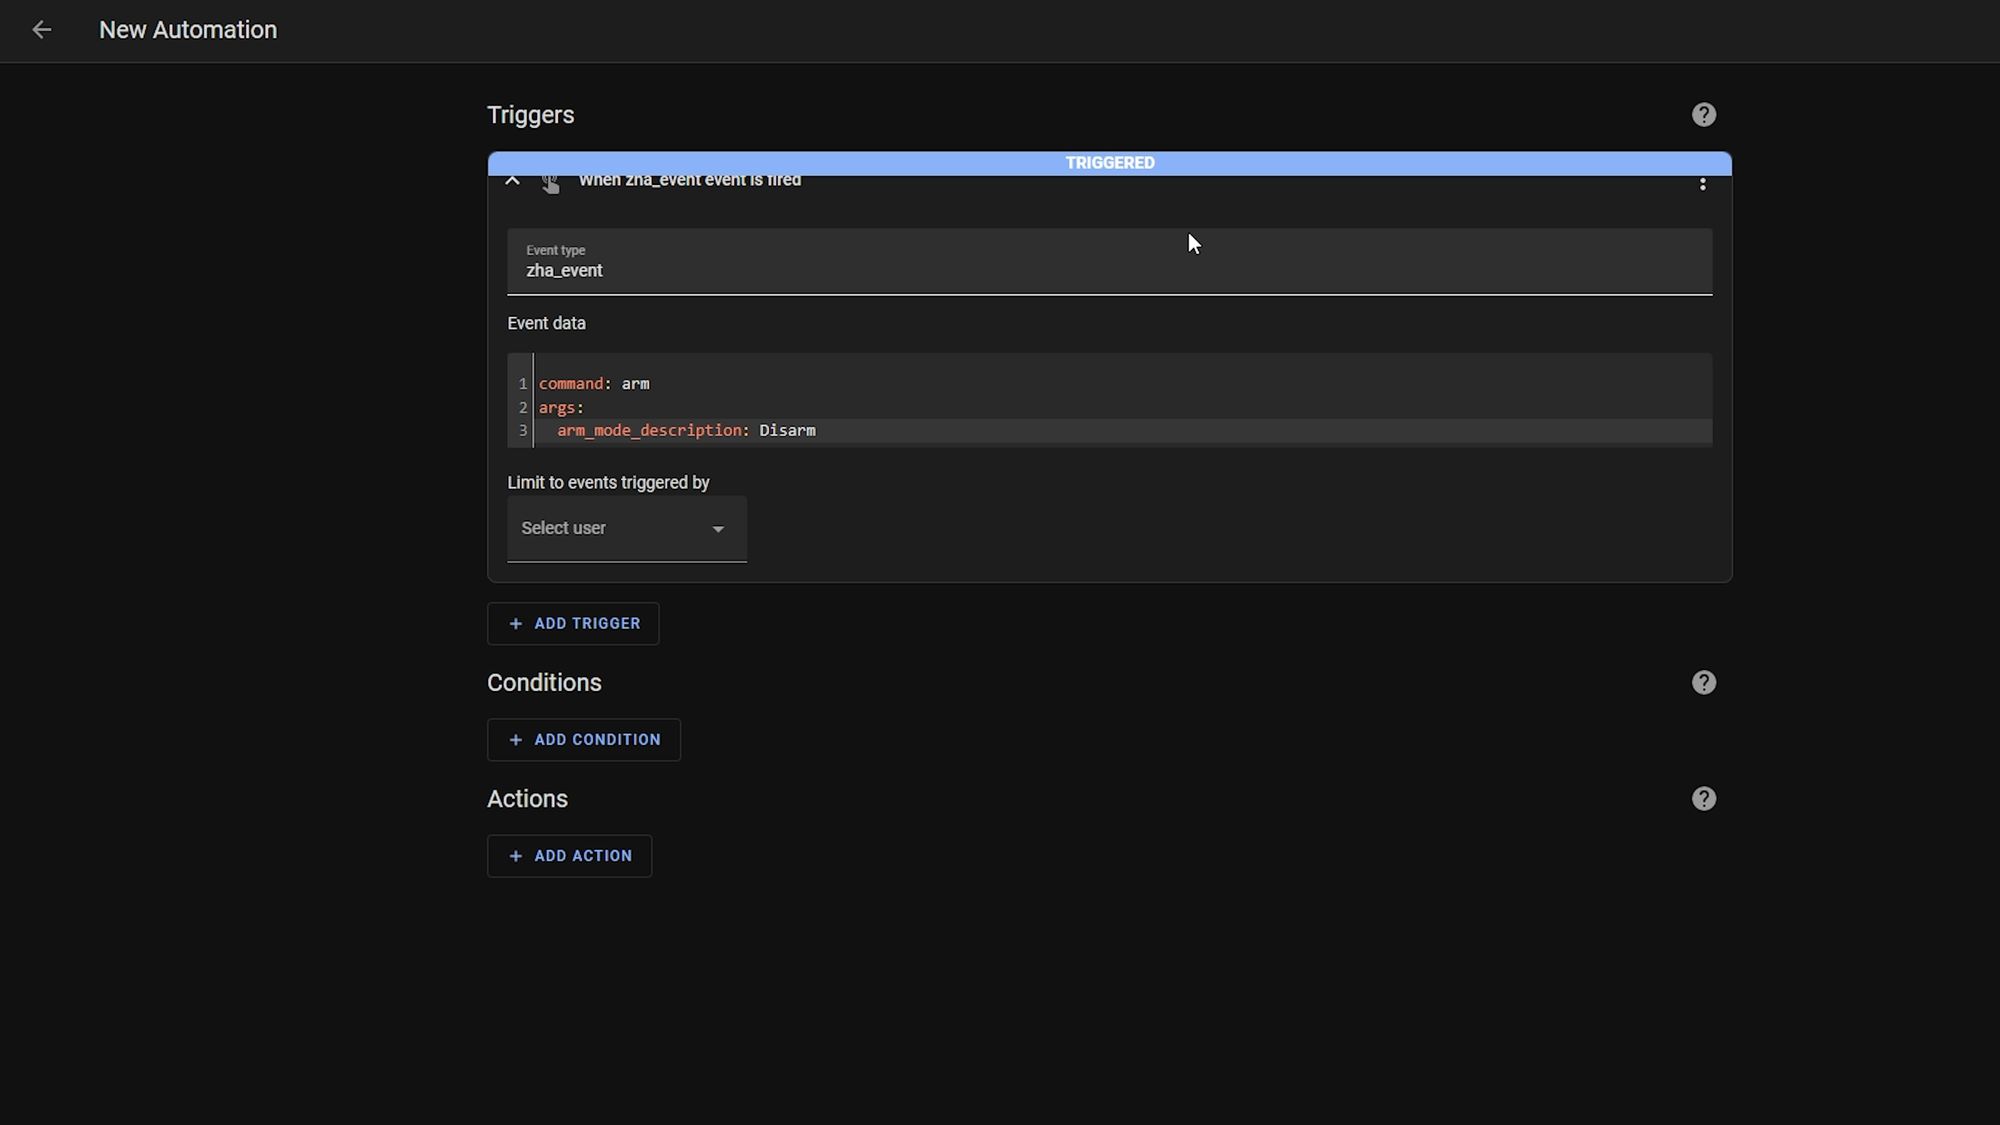
All you should have left is the command, and arm_mode_description in your event data. You can test if this is correct by going ahead and entering a code into your key pad and pressing disarm - you should then see the little blue message appear to tell you the automation was triggered.
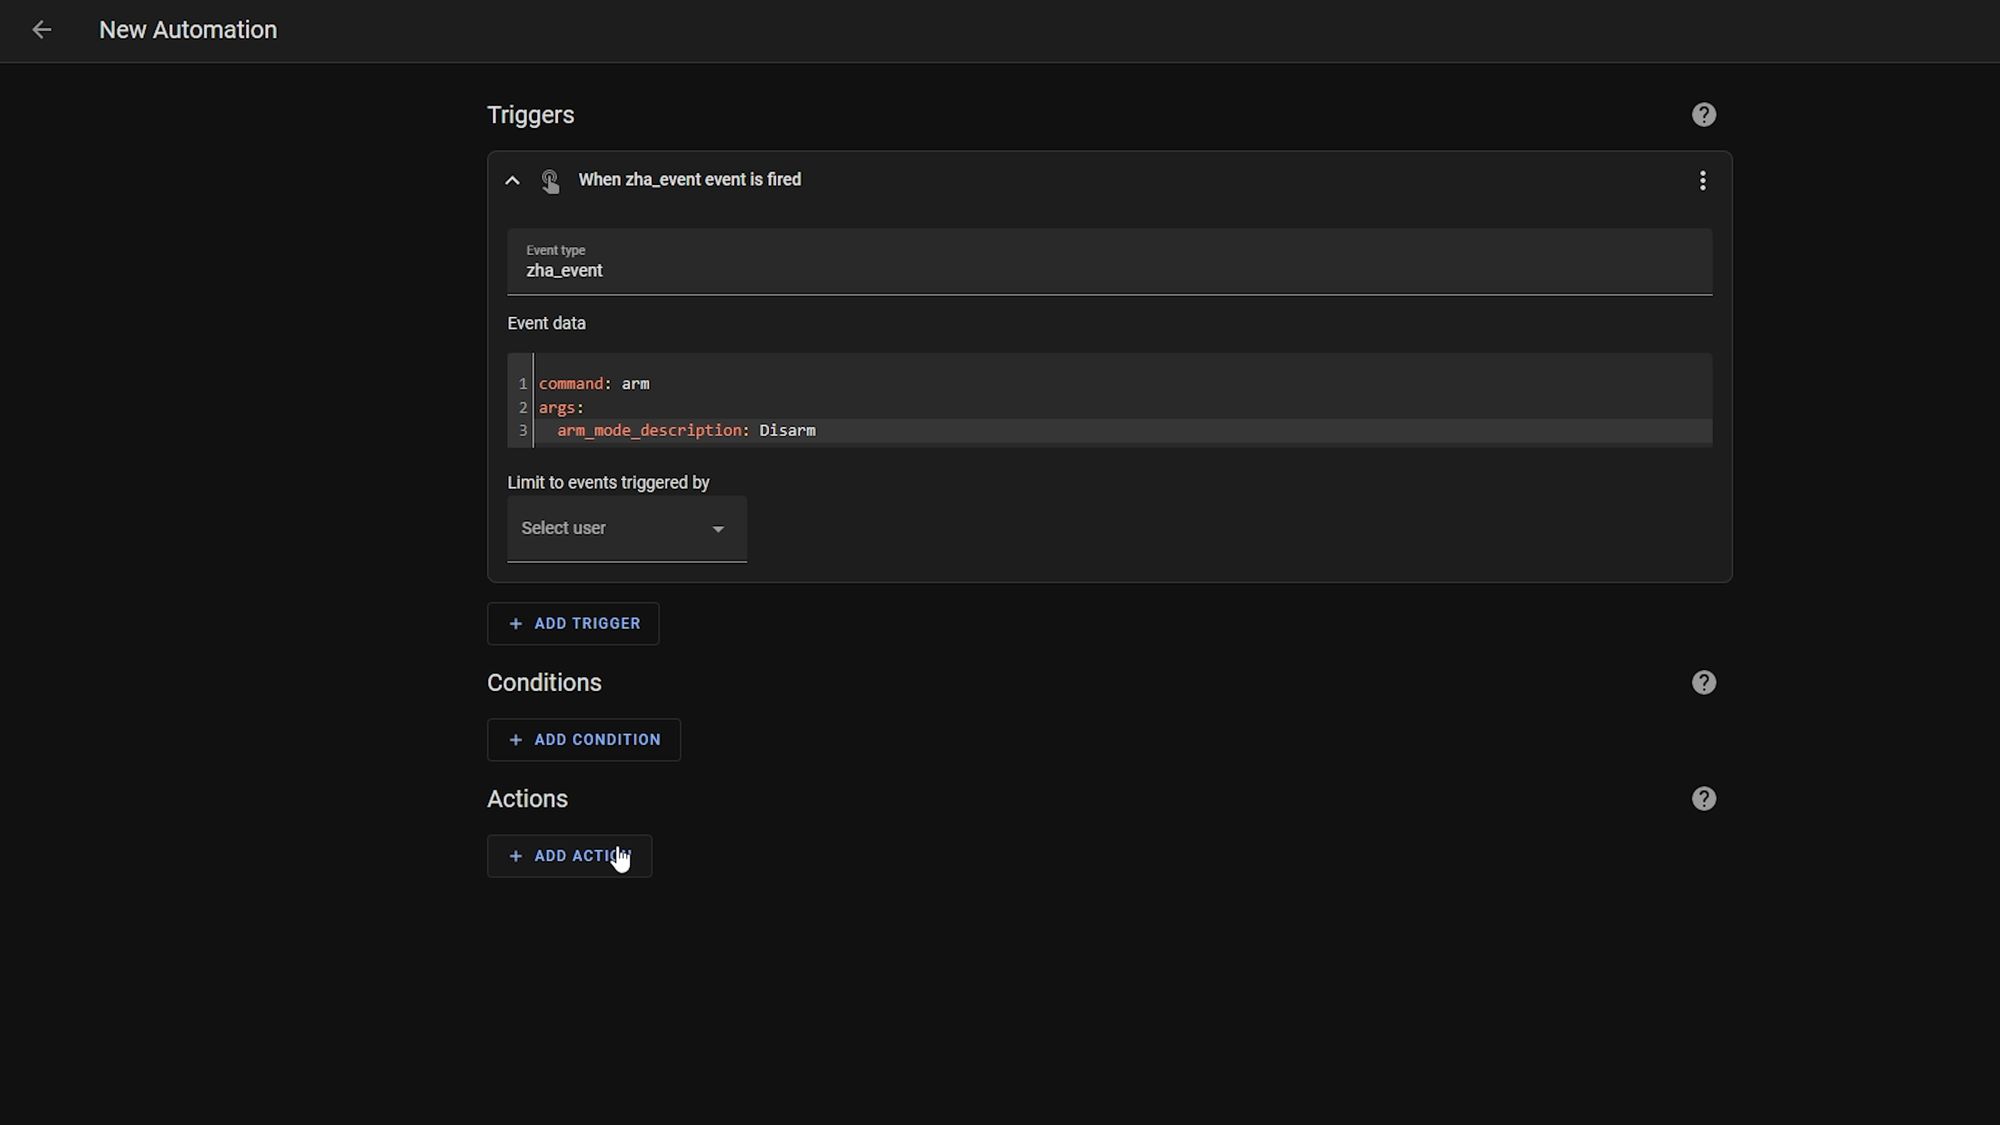
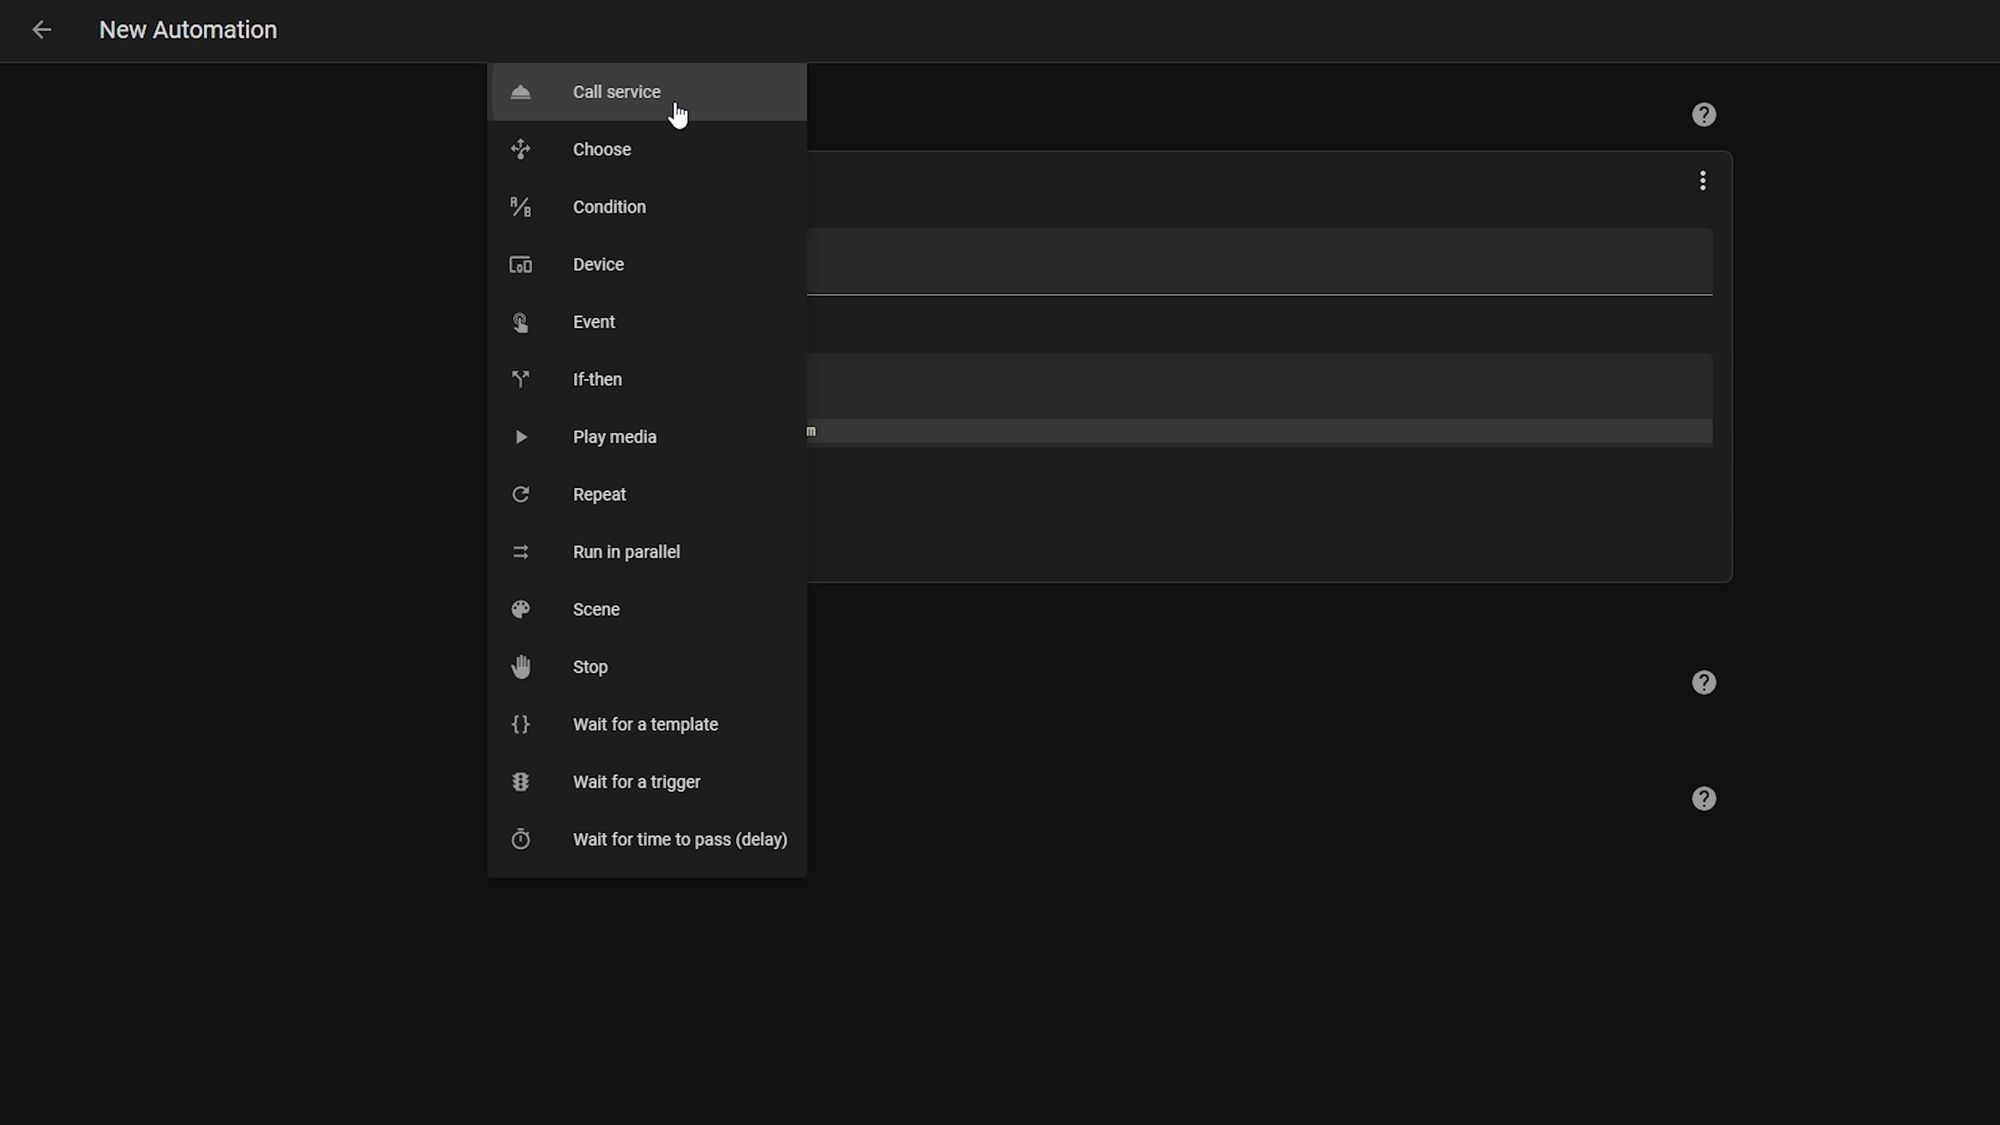
Next, under the action section, we are going to select call service from the dropdown and then select the Alarmo disarm service. As the entity, select your Alarmo entity and then at this point we need to switch over to YAML only since what we are about to enter is not supported in the UI, so go ahead and click the three dots and change to YAML mode.
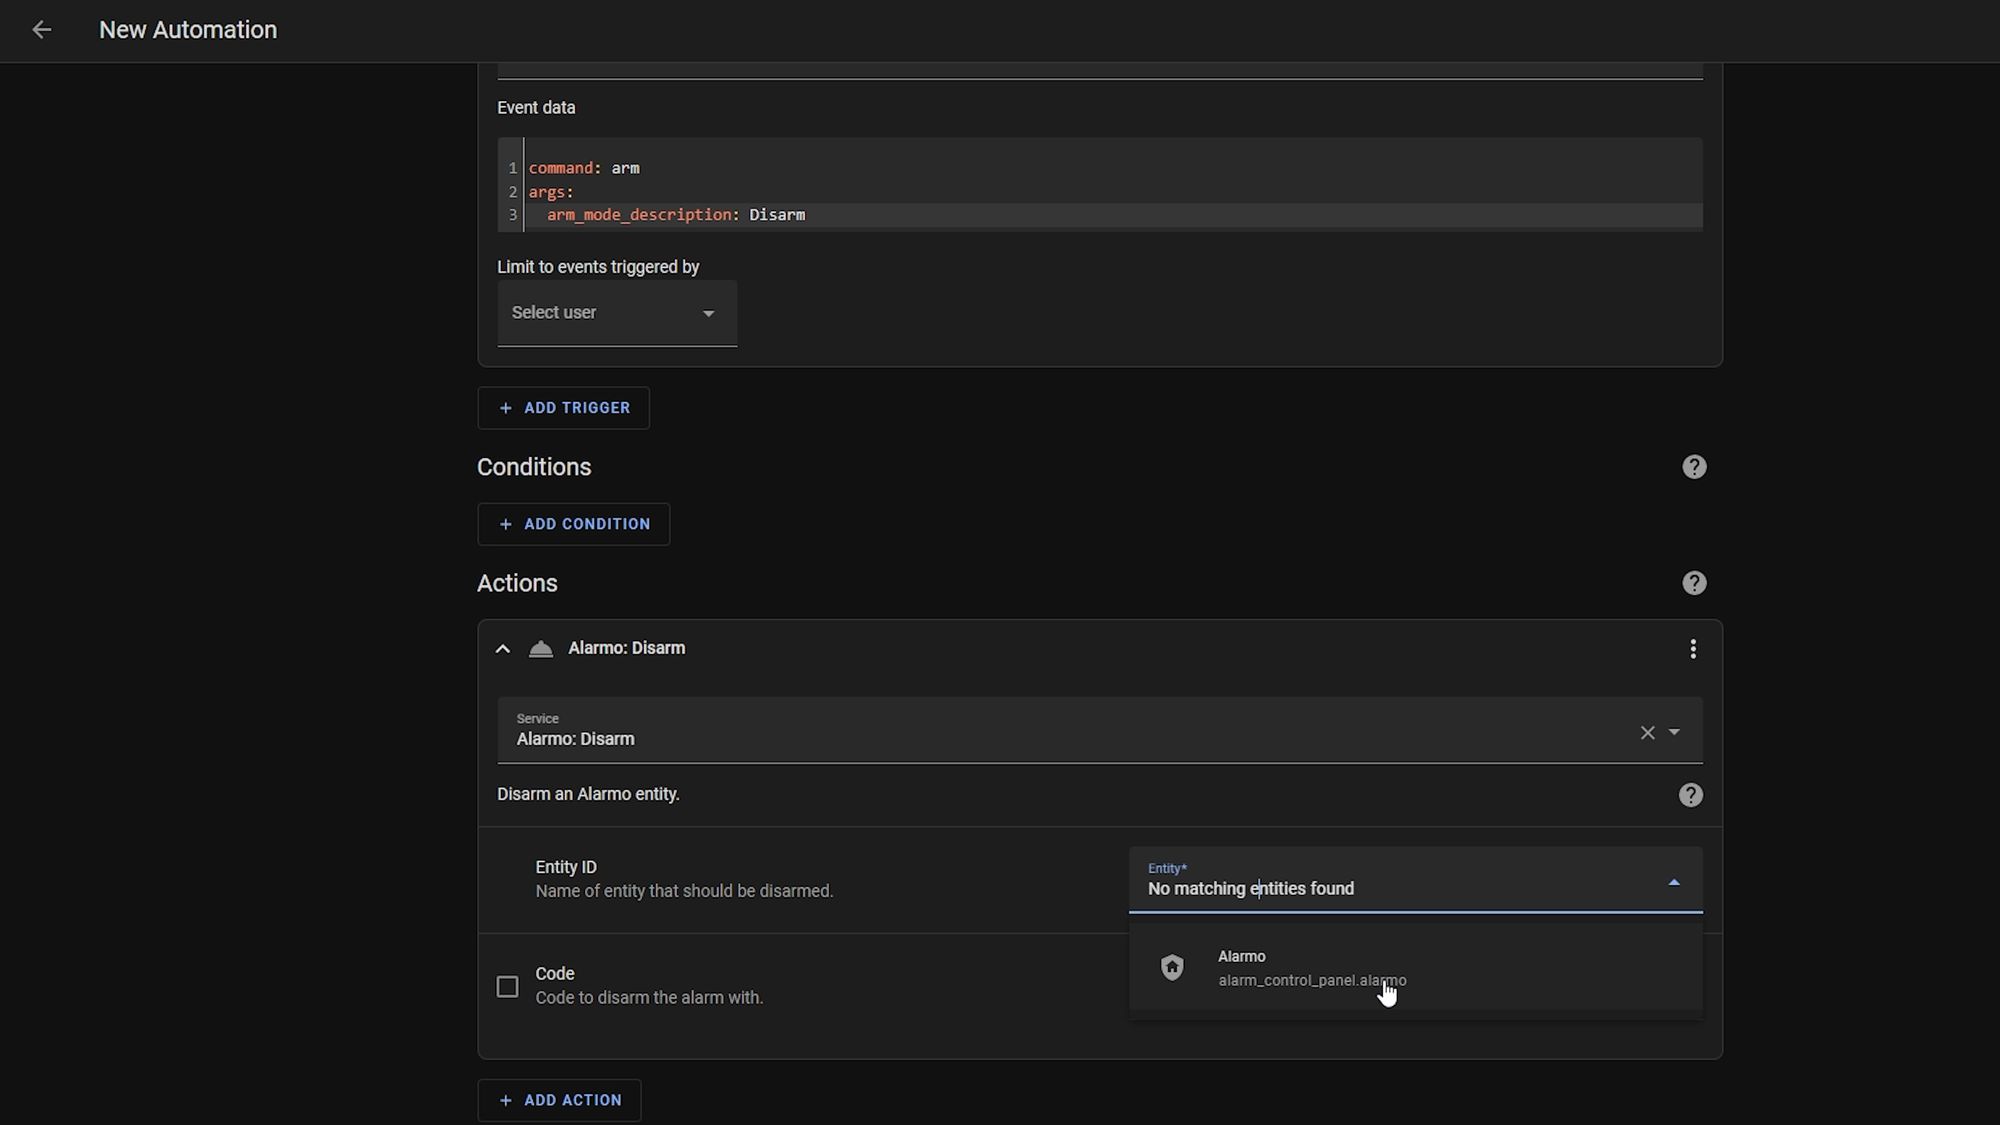
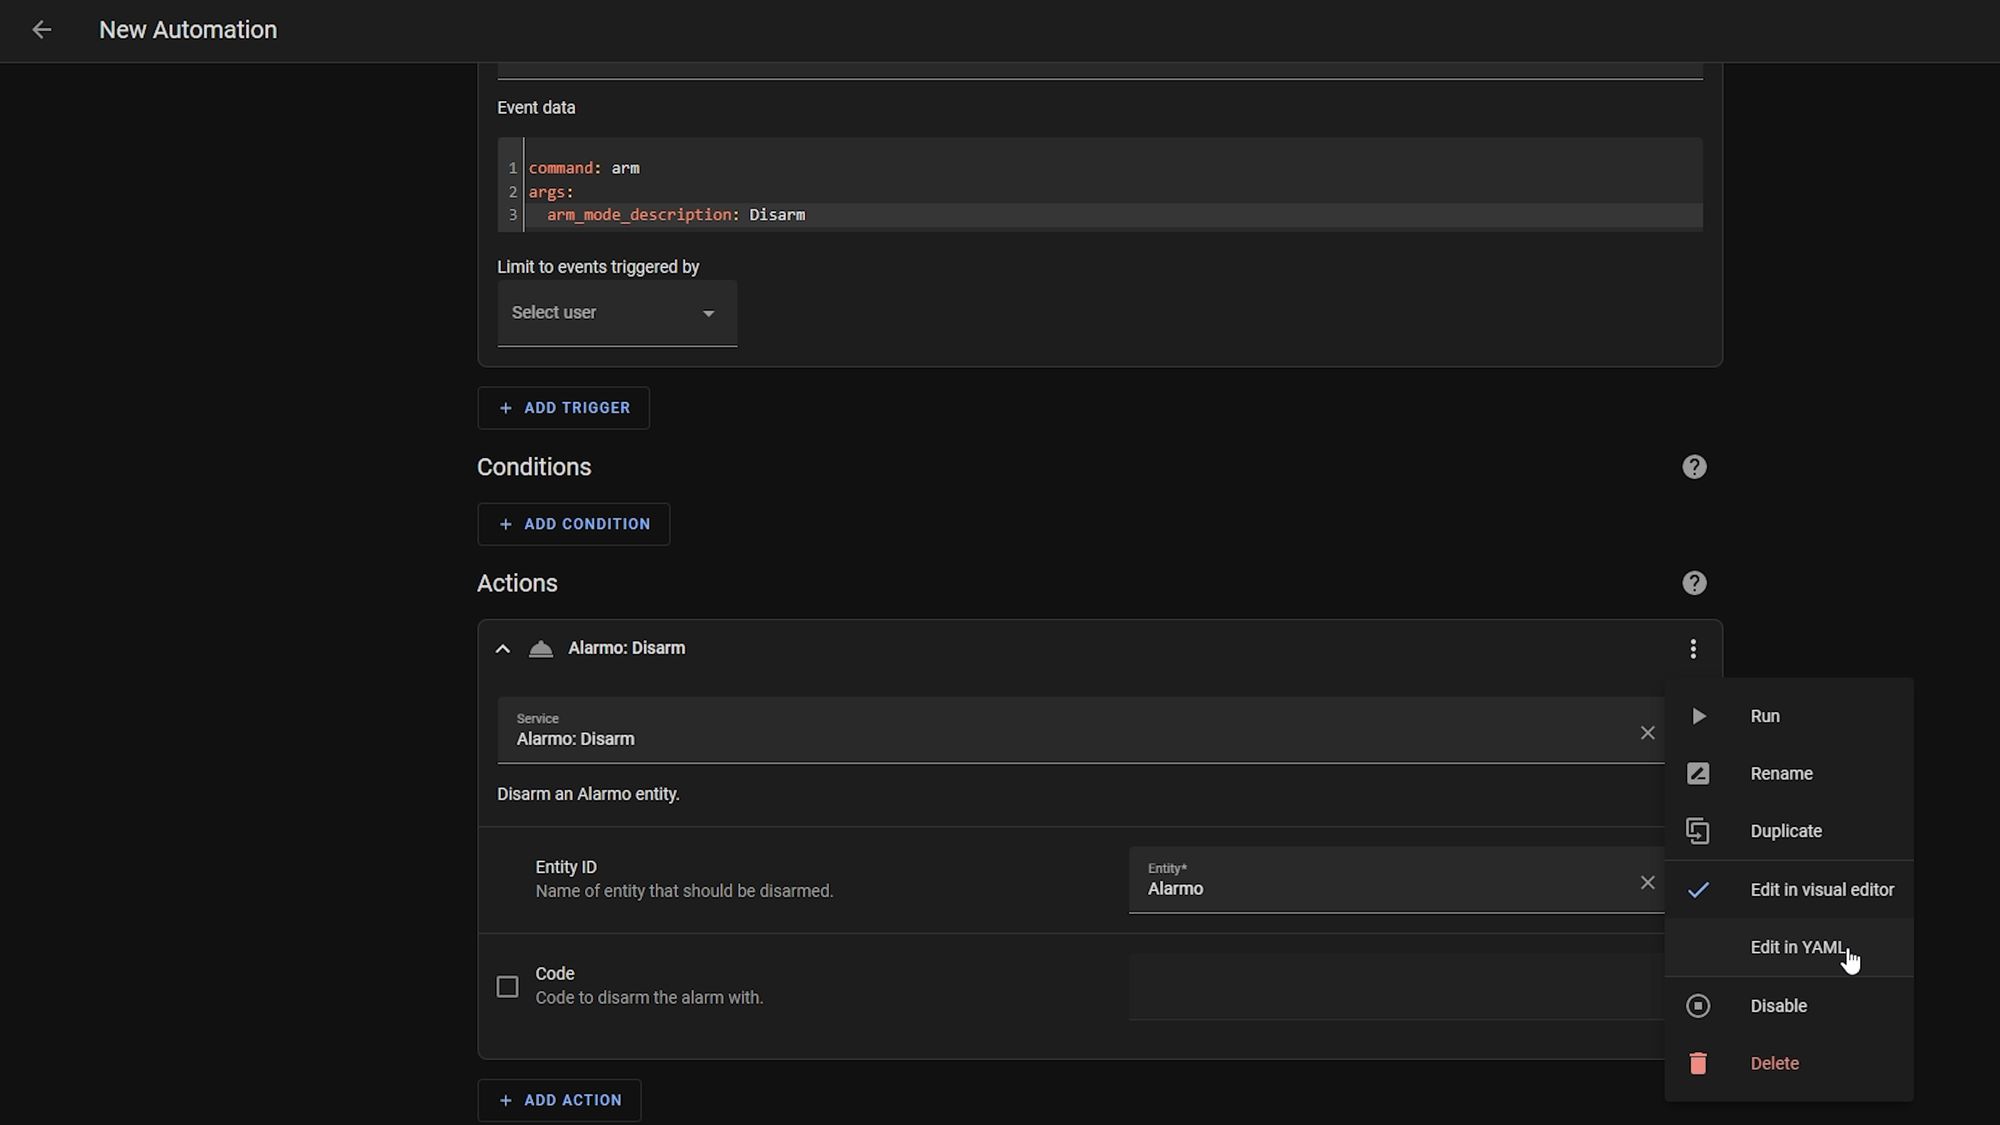
On the next line under entity id, add code followed by a colon (code:) and then enter the following template:
"{{ trigger.event.data.args.code }}"What this little bit of magic does is basically takes the code that was entered in the keypad and captured in the event data then passes it into the service for Alarmo. This actually took a surprisingly long time to figure out this little bit as I didn’t really see it documented anywhere but it's pretty straightforward once you have it.
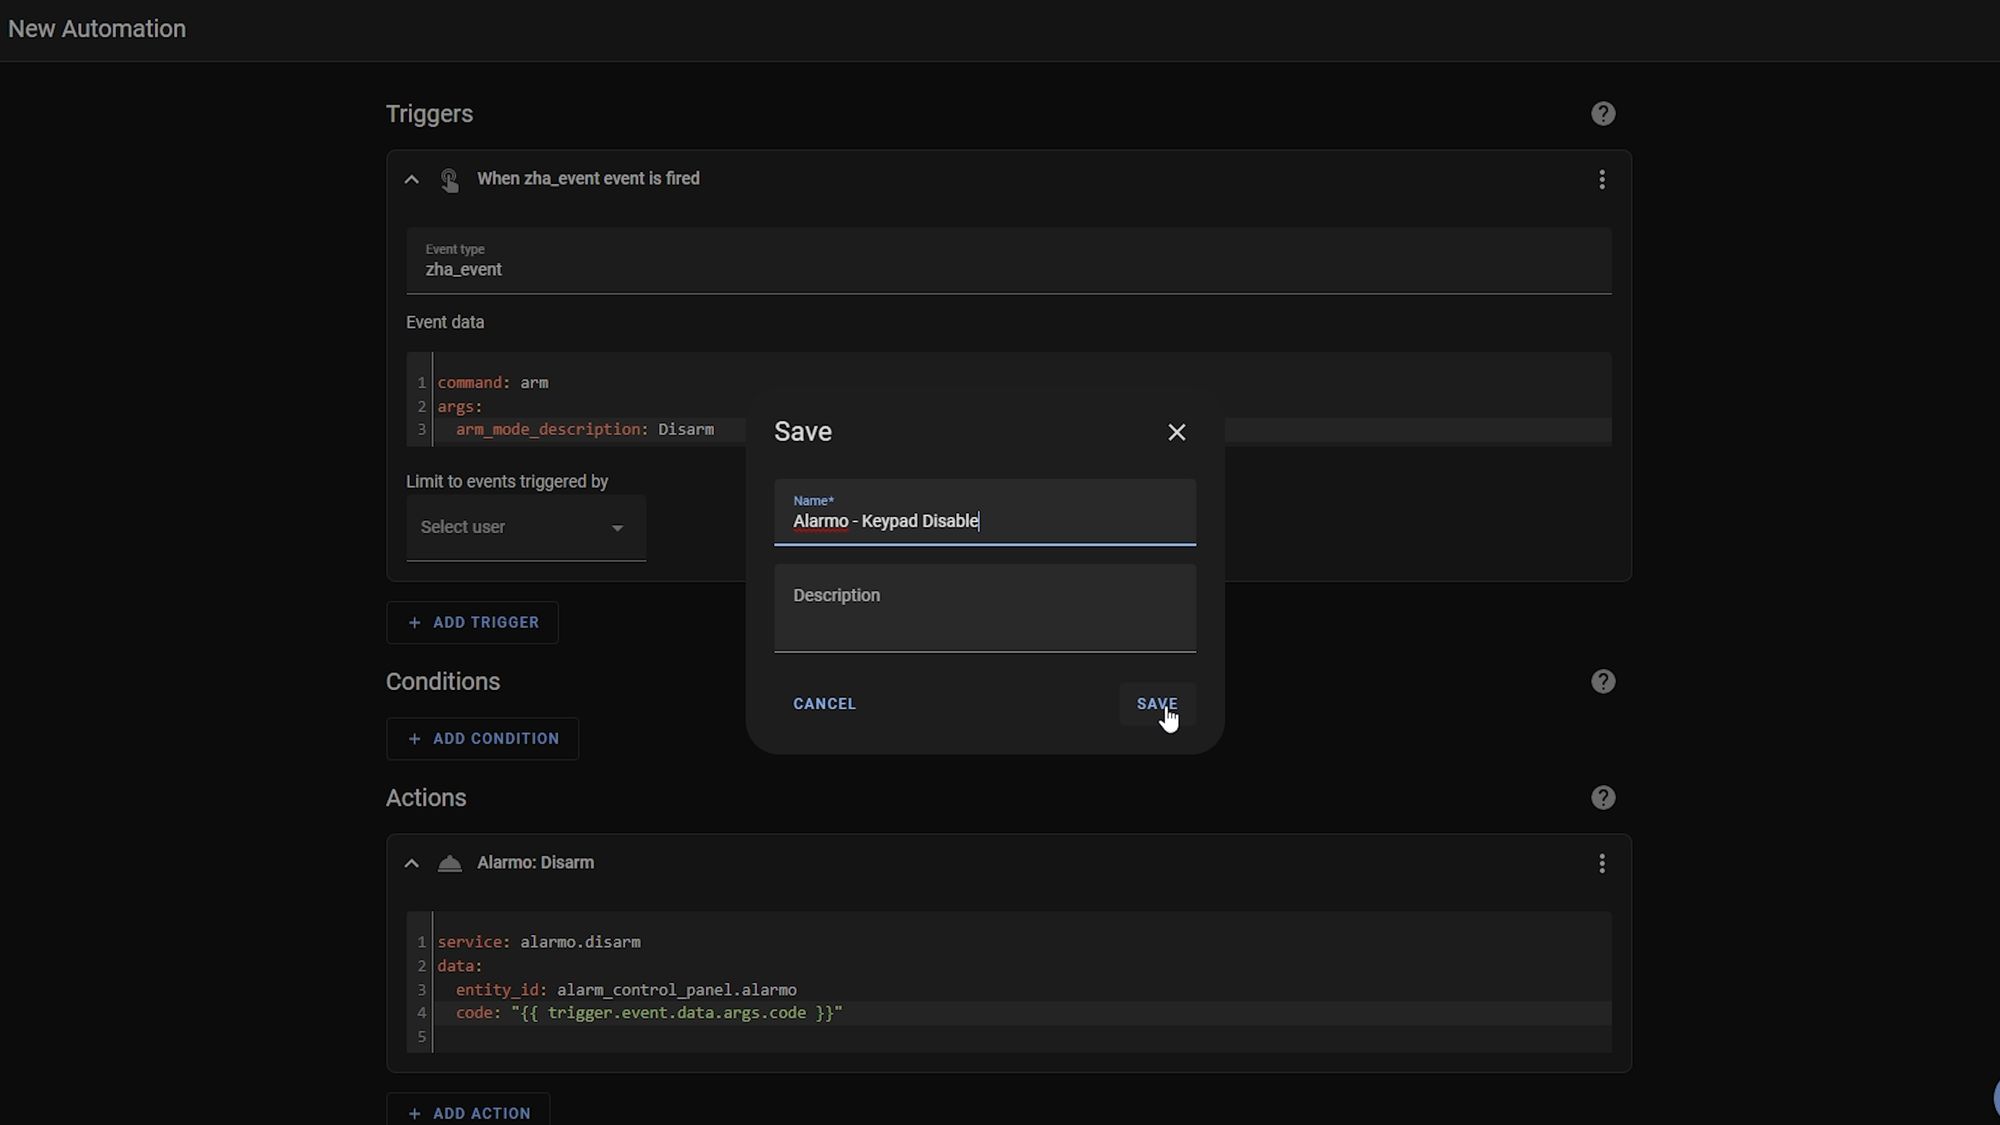
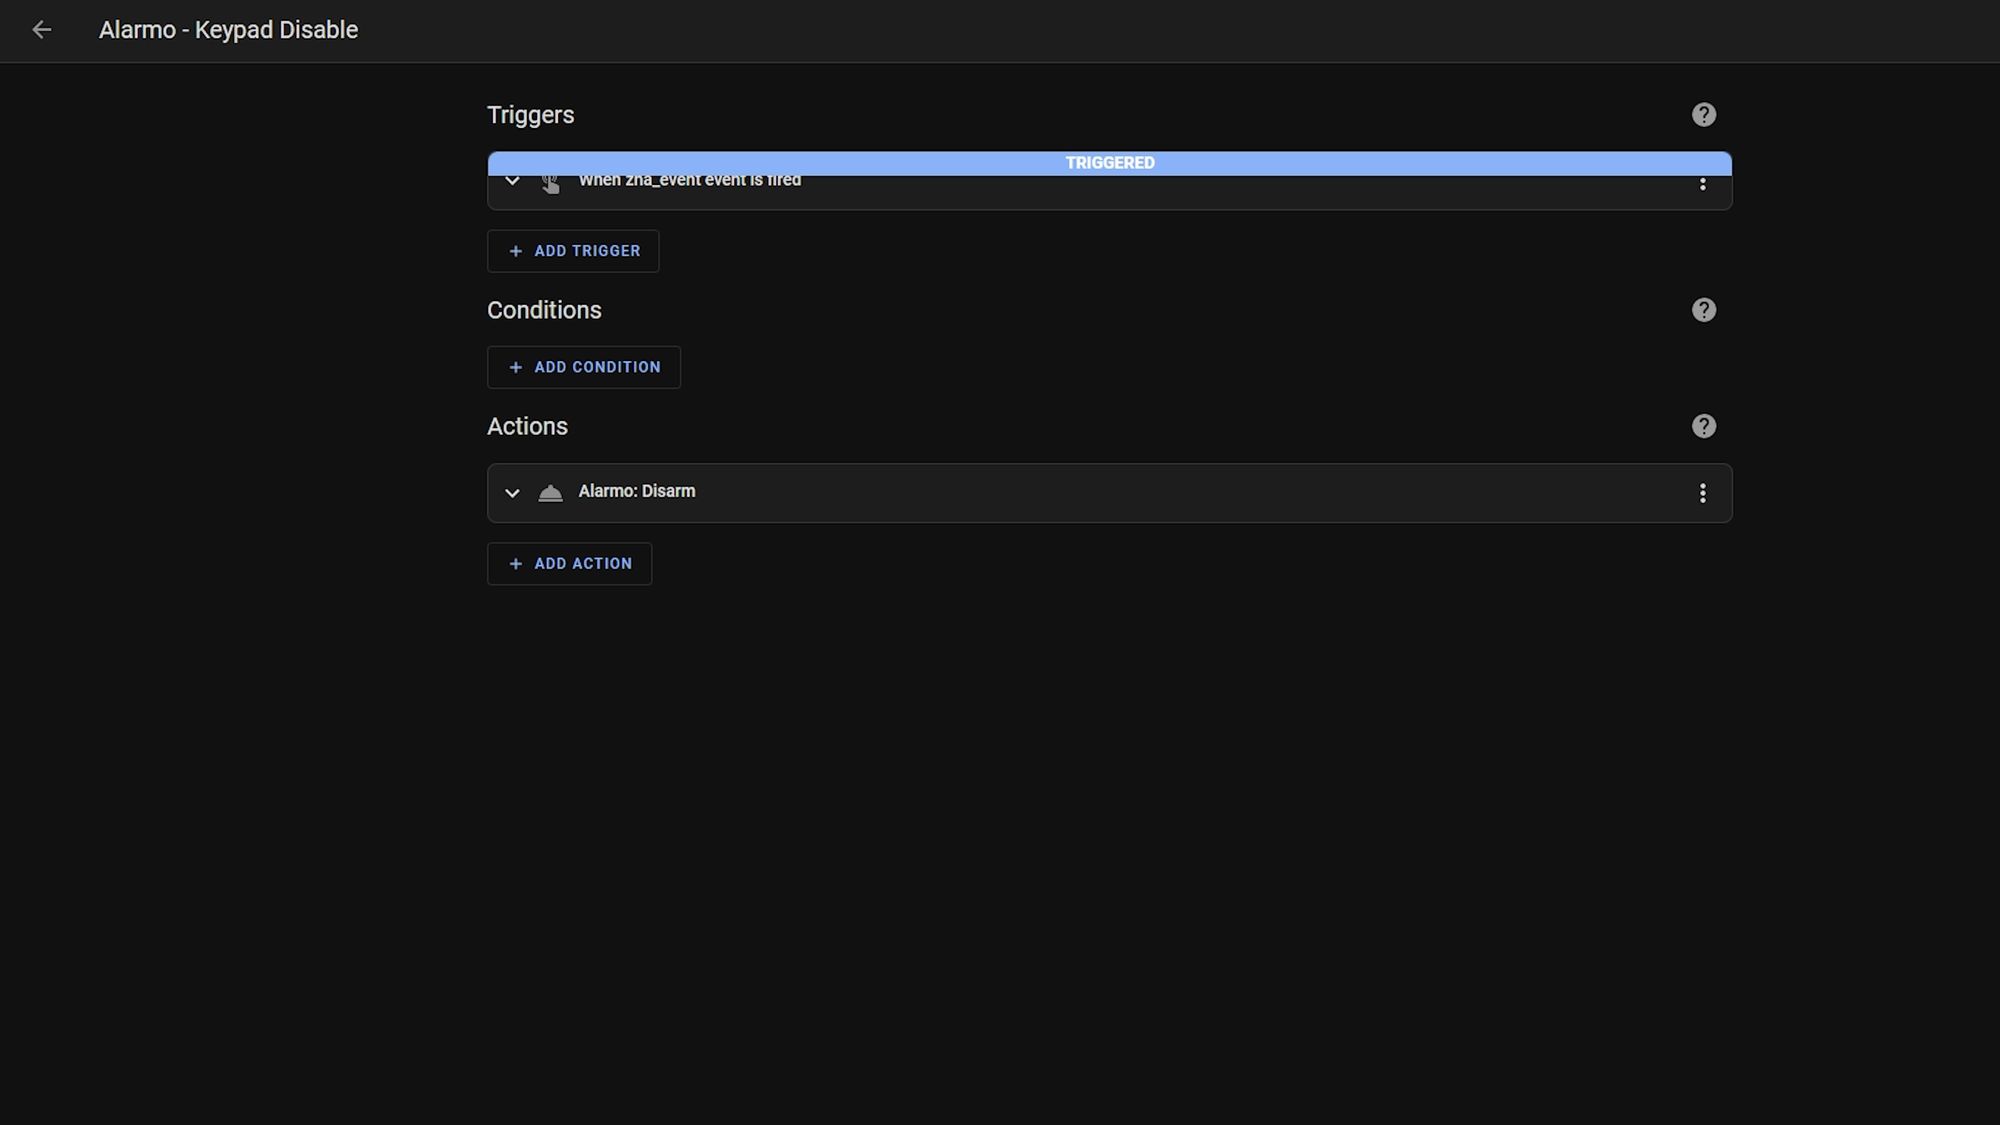
Make sure indentation is once again set correctly, hit save and that’s actually all there is to the keypad automation - figuring out that template is the real key that you need - so once saved go ahead and set your alarm and then try to disable it with the keypad and verify everything works as intended.
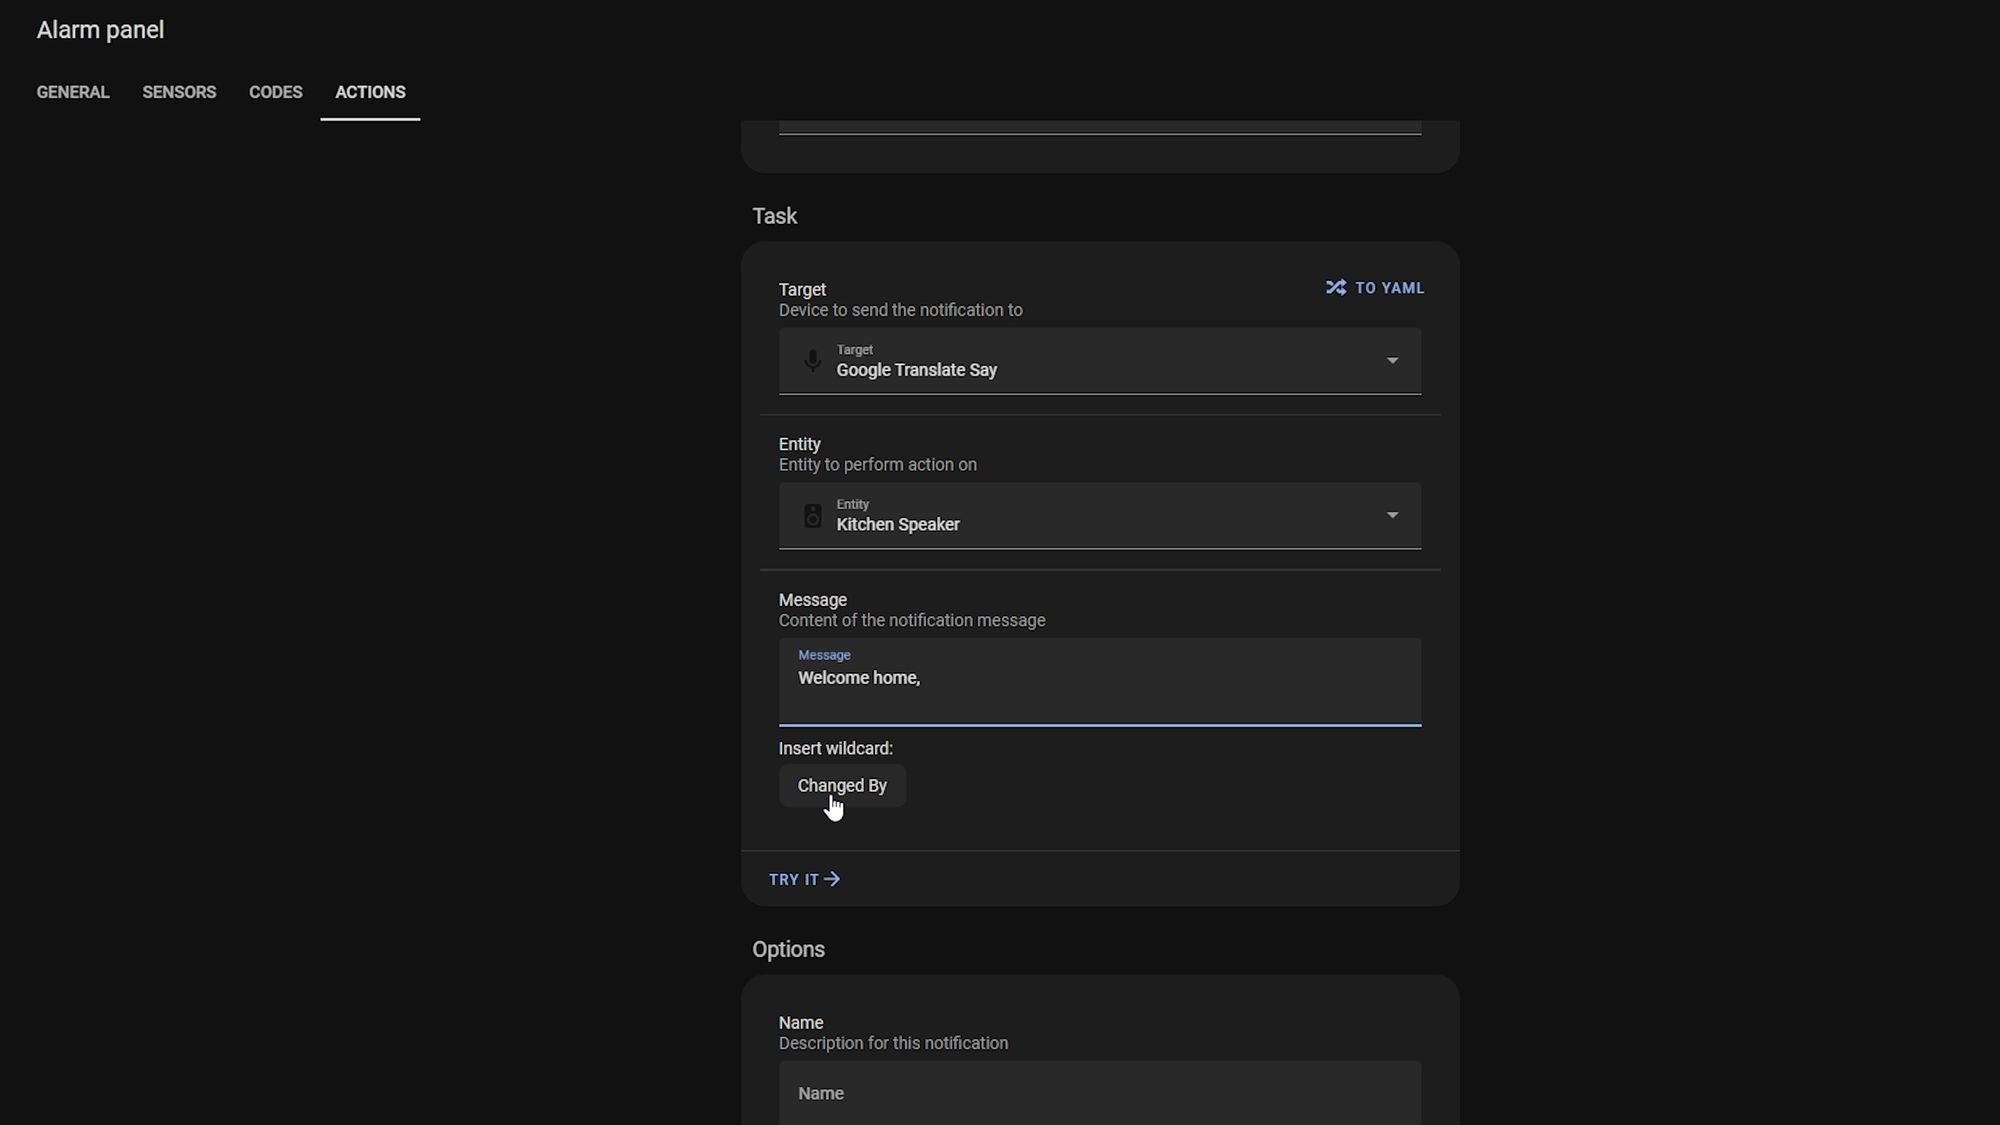
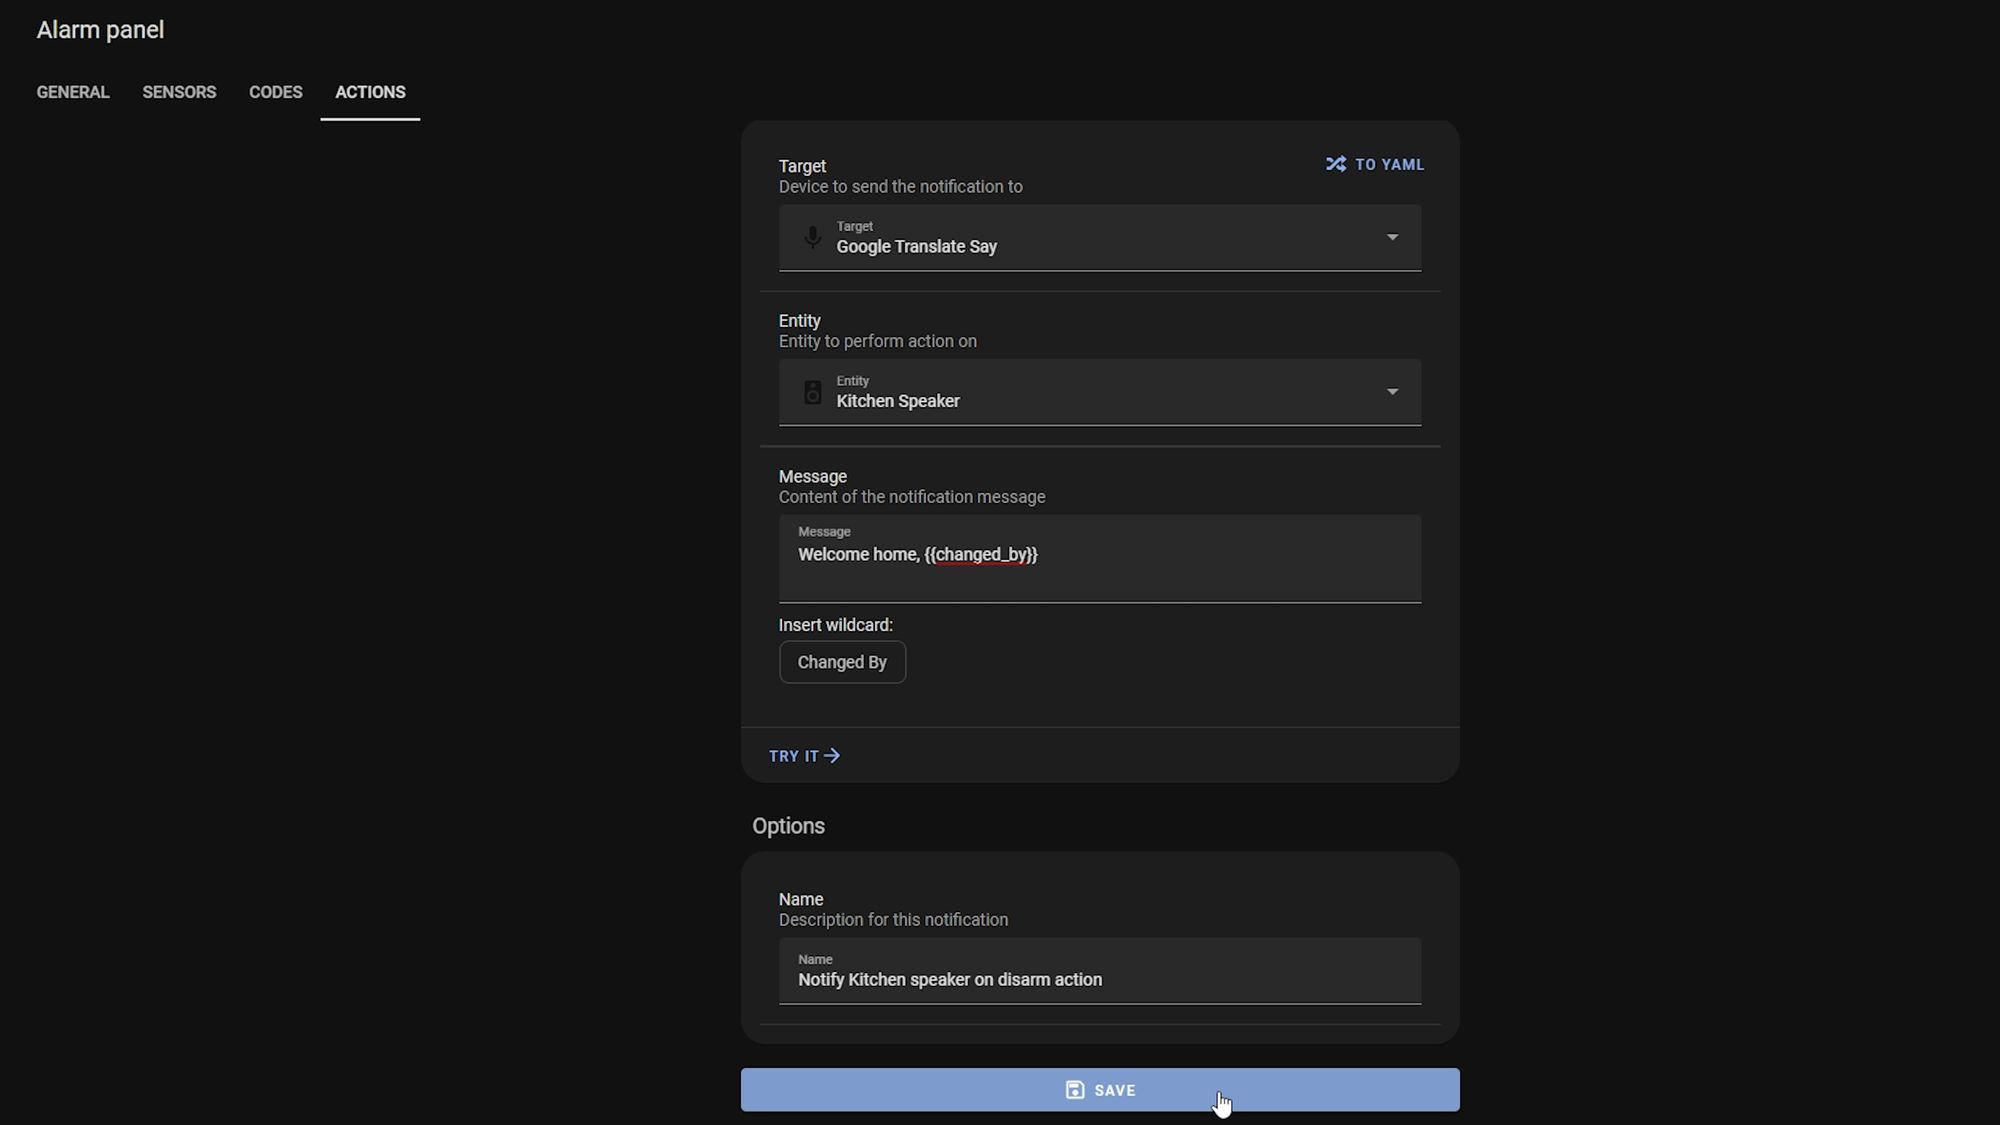
You can then head over to the Alarmo panel and then to actions, and add a new notification. I like to add a text to speak notification on the house speakers to announce who disabled the alarm with a custom greeting. Select alarm is disarmed as the event, then select the text to speak service as the target and select a speaker you want to play the message on - if you want to play it on multiple speakers then you will want to create a group first.
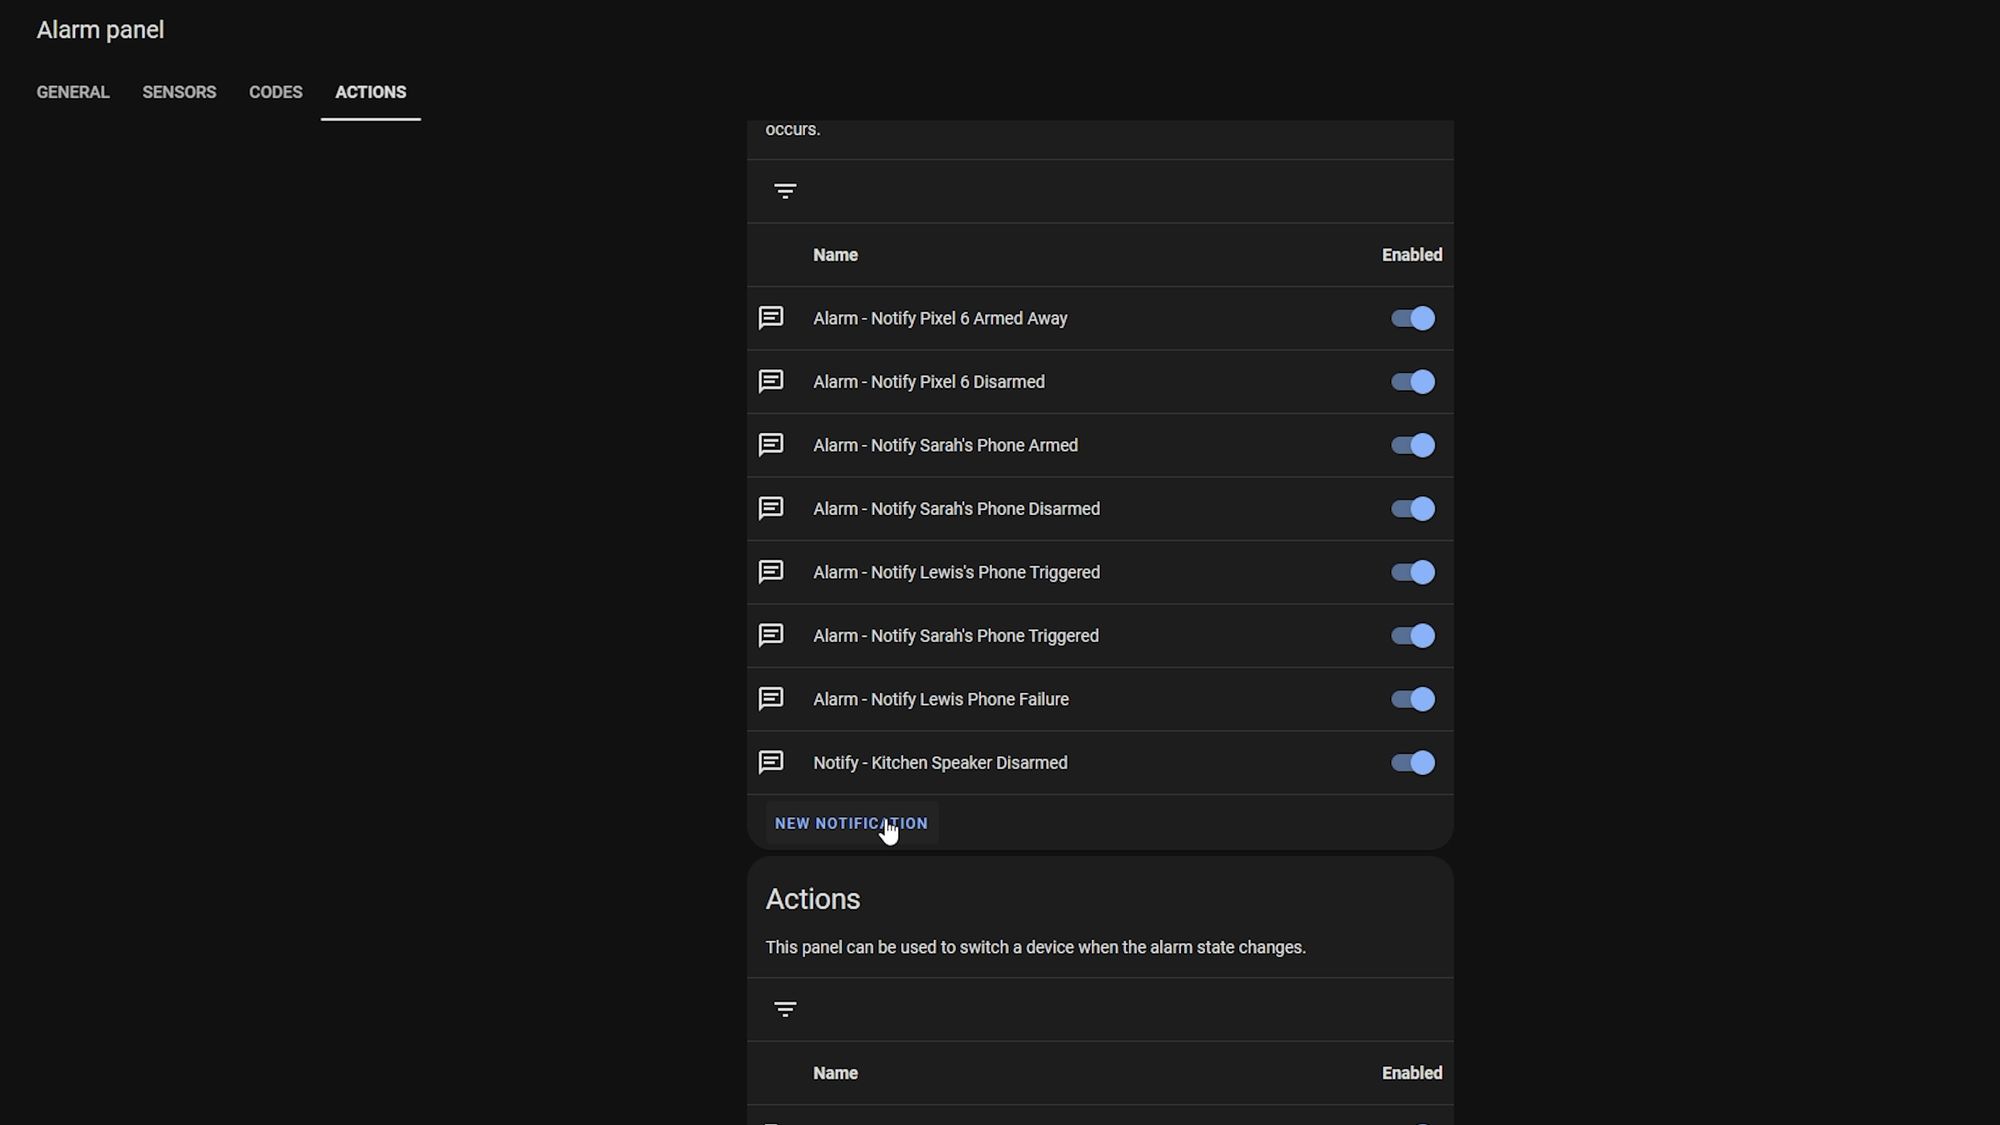
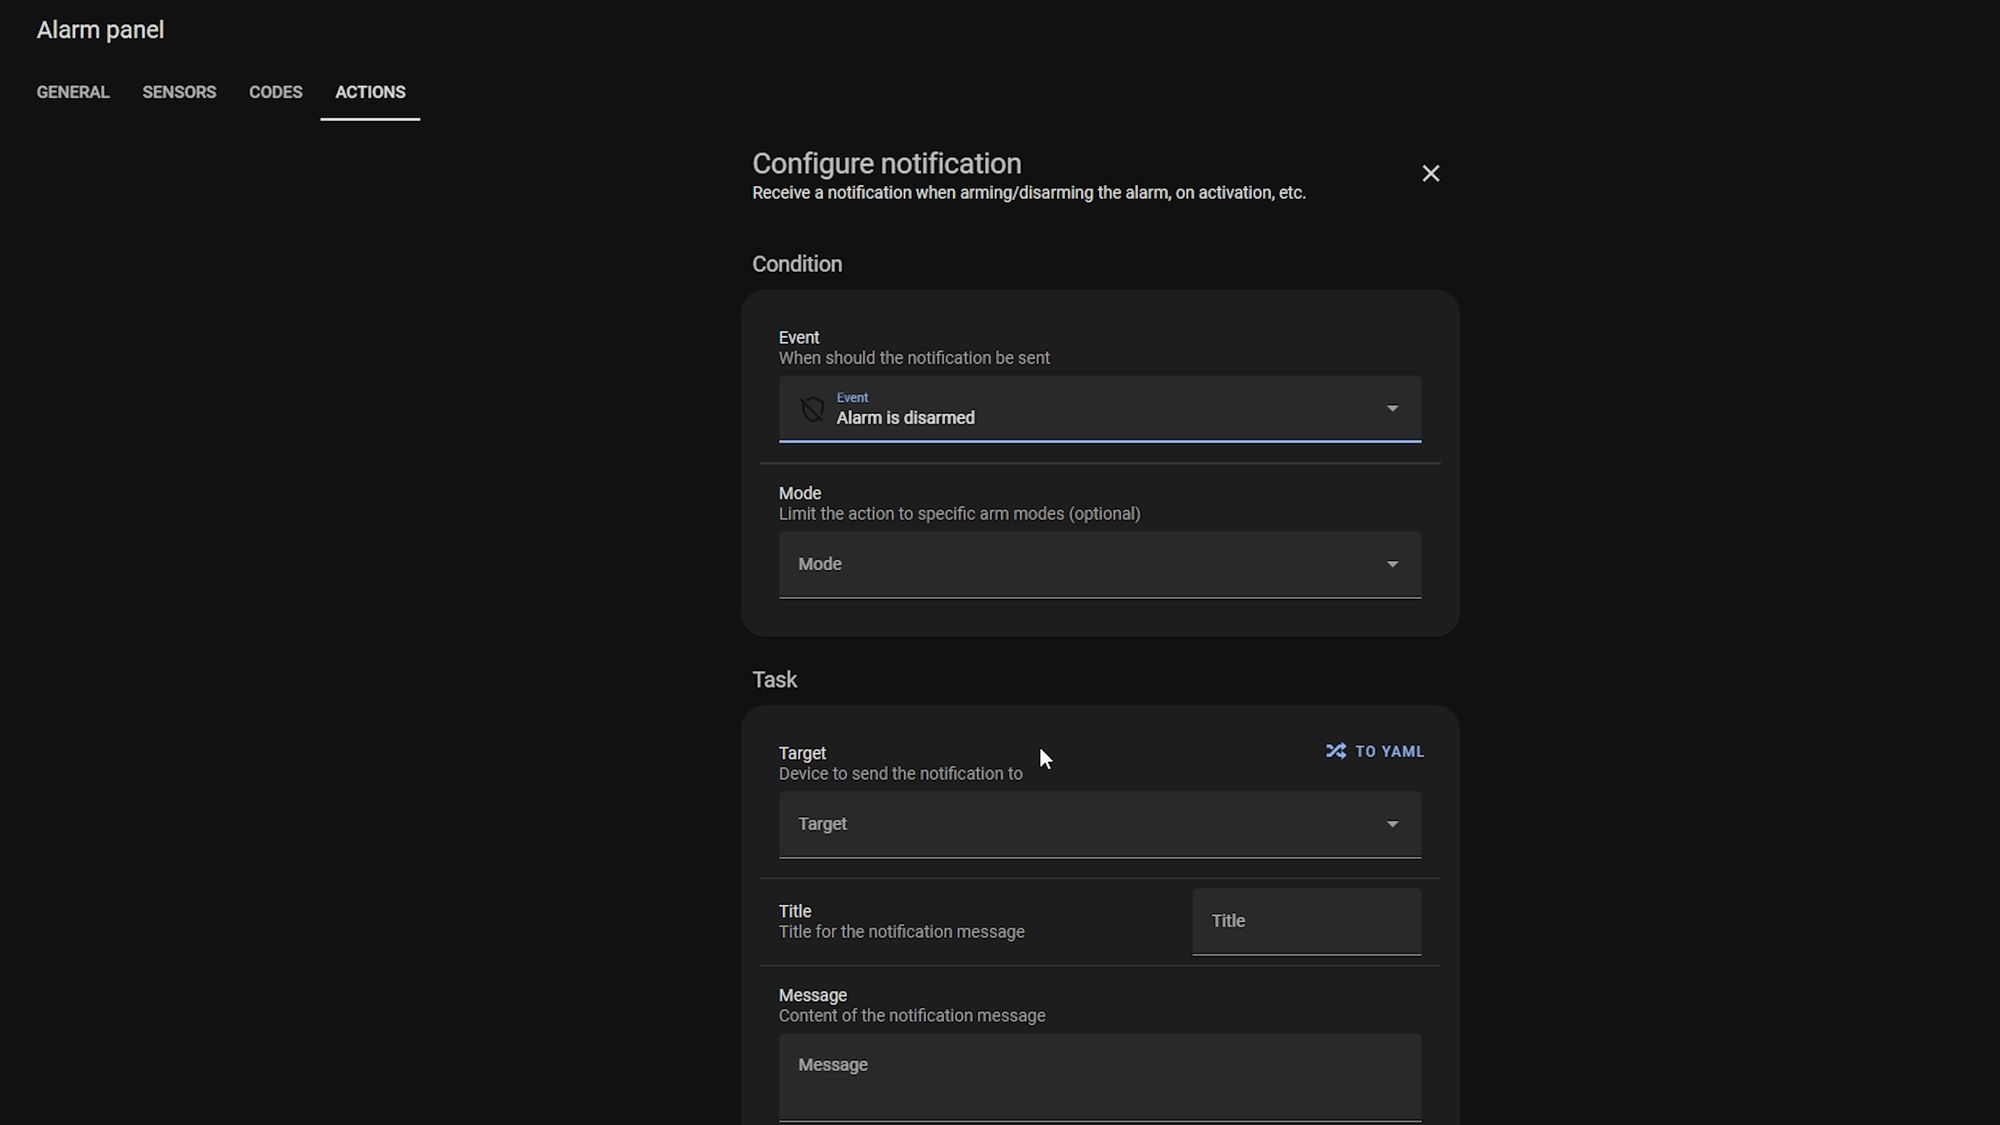
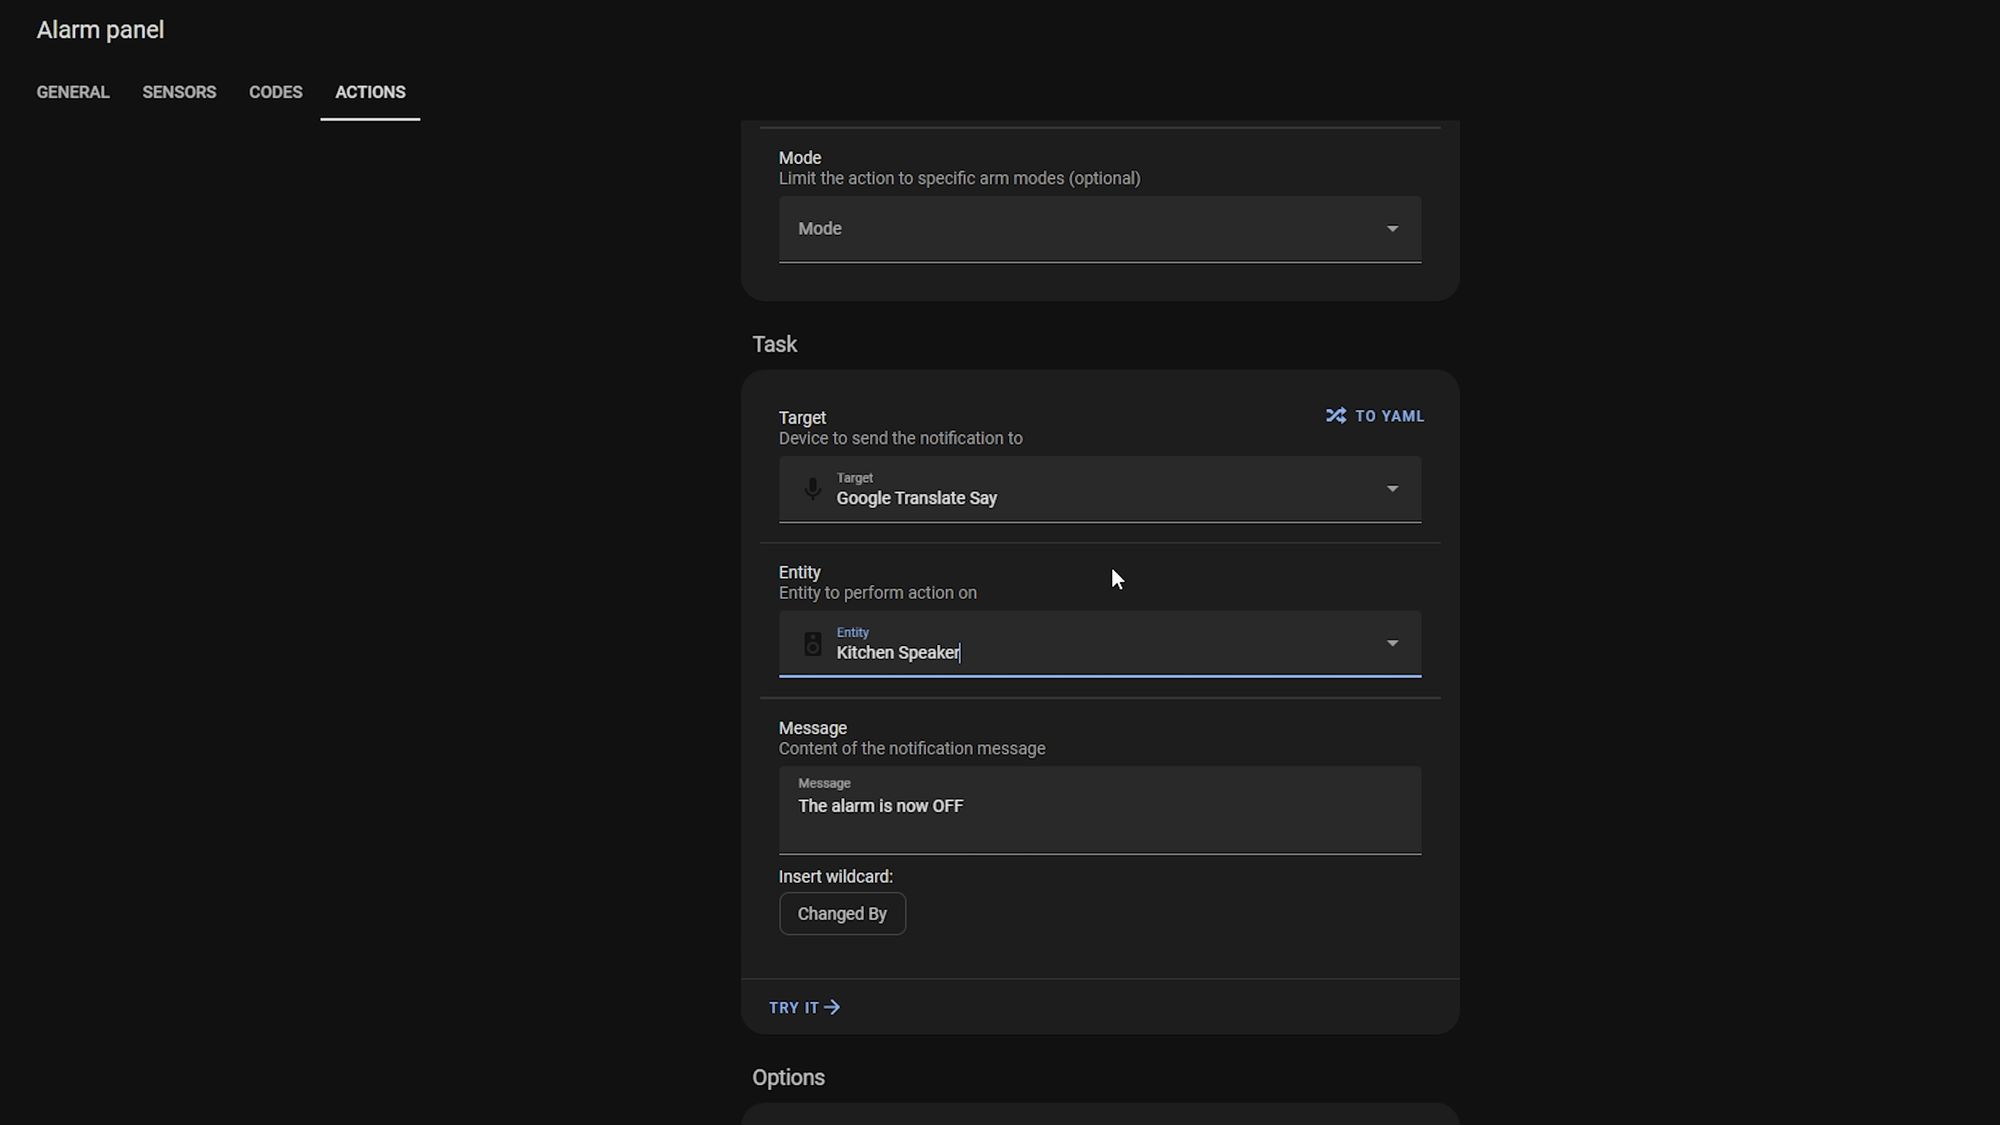
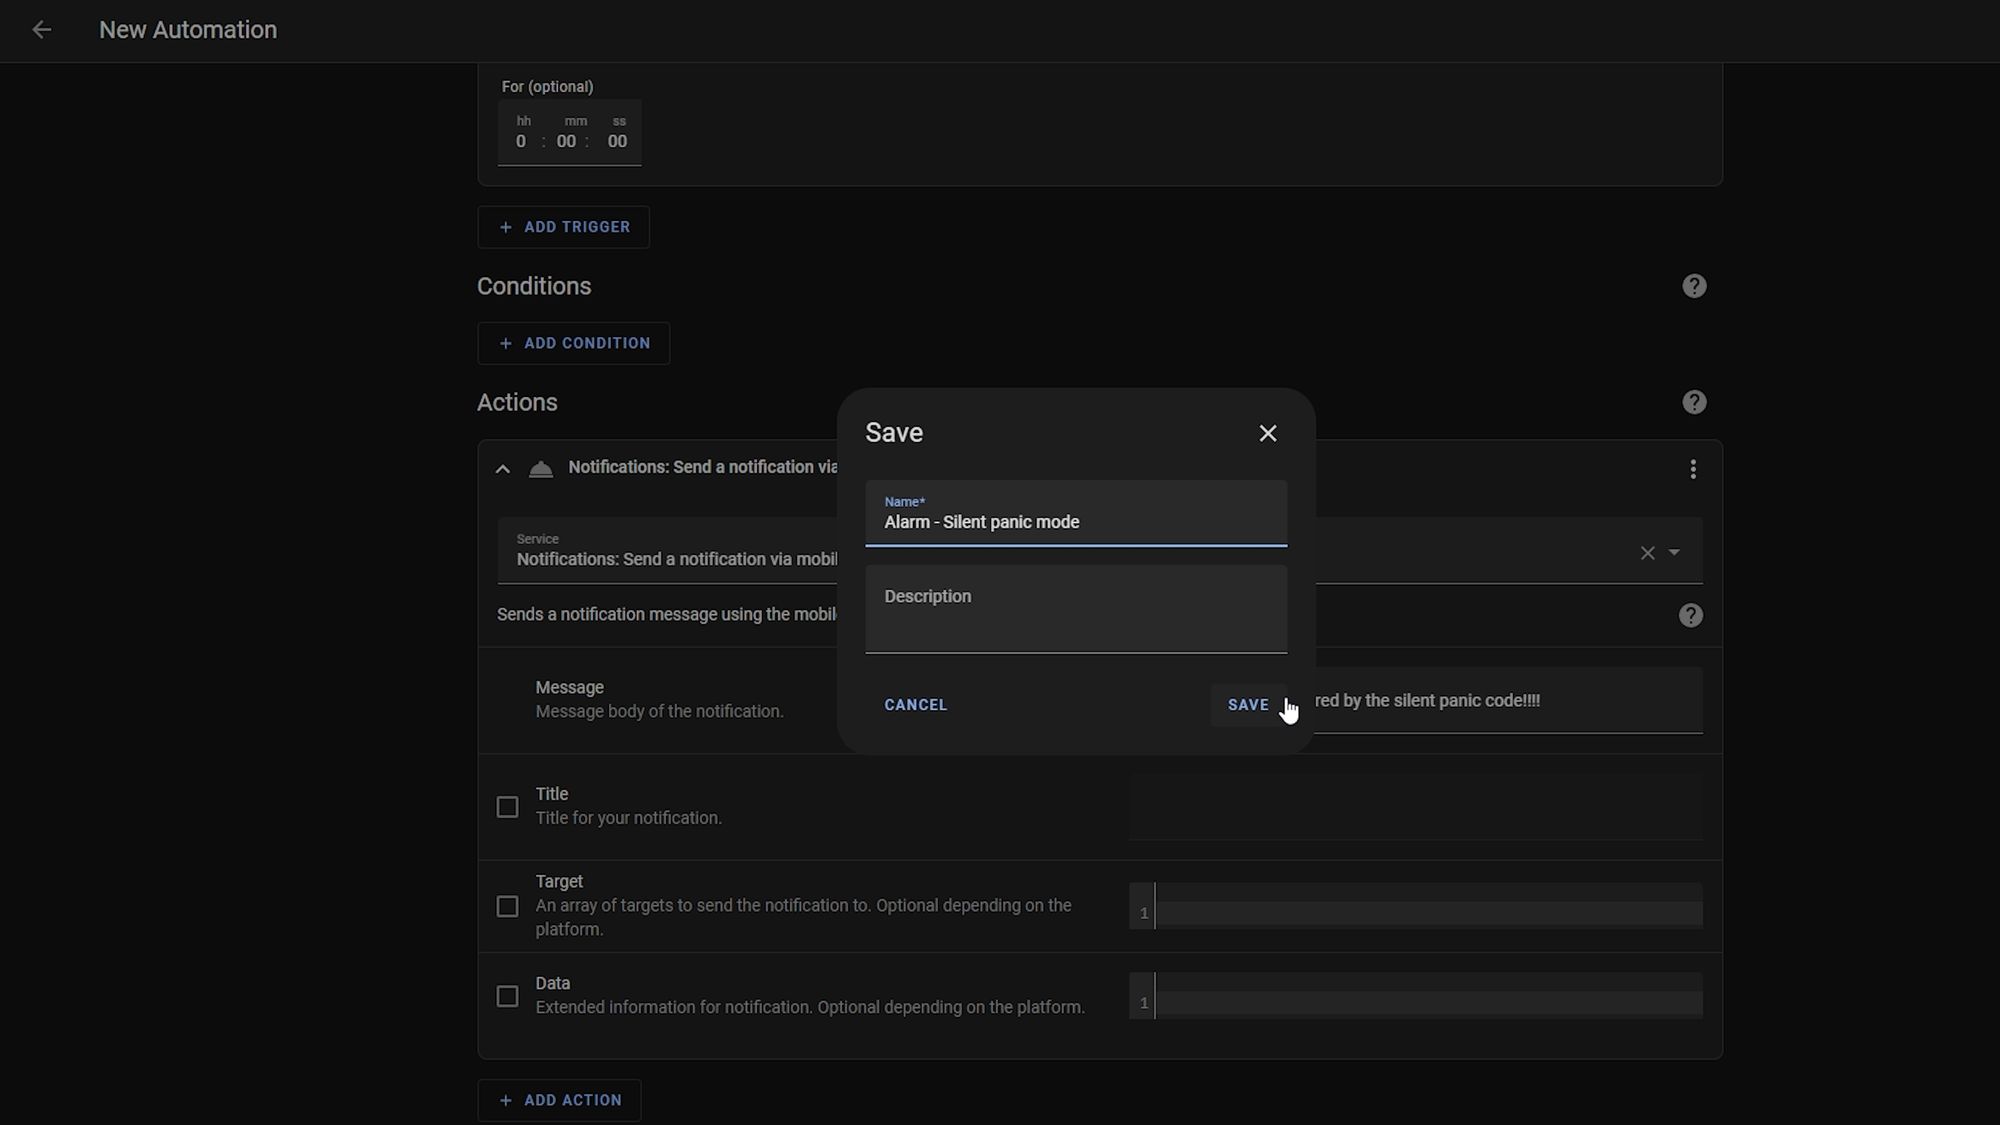
Finally enter the message you want to have spoken, using the changed by wildcard at the bottom to speak the name of the person who disabled it. Then give the notification a name and you are now done!
Second Automation
Silent Panic Alarm
The second automation I wanted to go over is a panic/silent alarm: picture a scenario where you are forced to disable the alarm, so you enter a specific code into the keypad which will seem like it disabled the alarm on the surface, but in the background it will automatically trigger a separate routine and then maybe send silent notifications to other family members to let them know someone is in trouble or something similar.
The steps we have taken so far in our first automation actually have set us up nicely for this since we have done the leg work already. It is also worth mentioning that this will work whether you are using a physical keypad like the one I have or you are using the Alarmo keypad on a tablet or mobile dashboard.
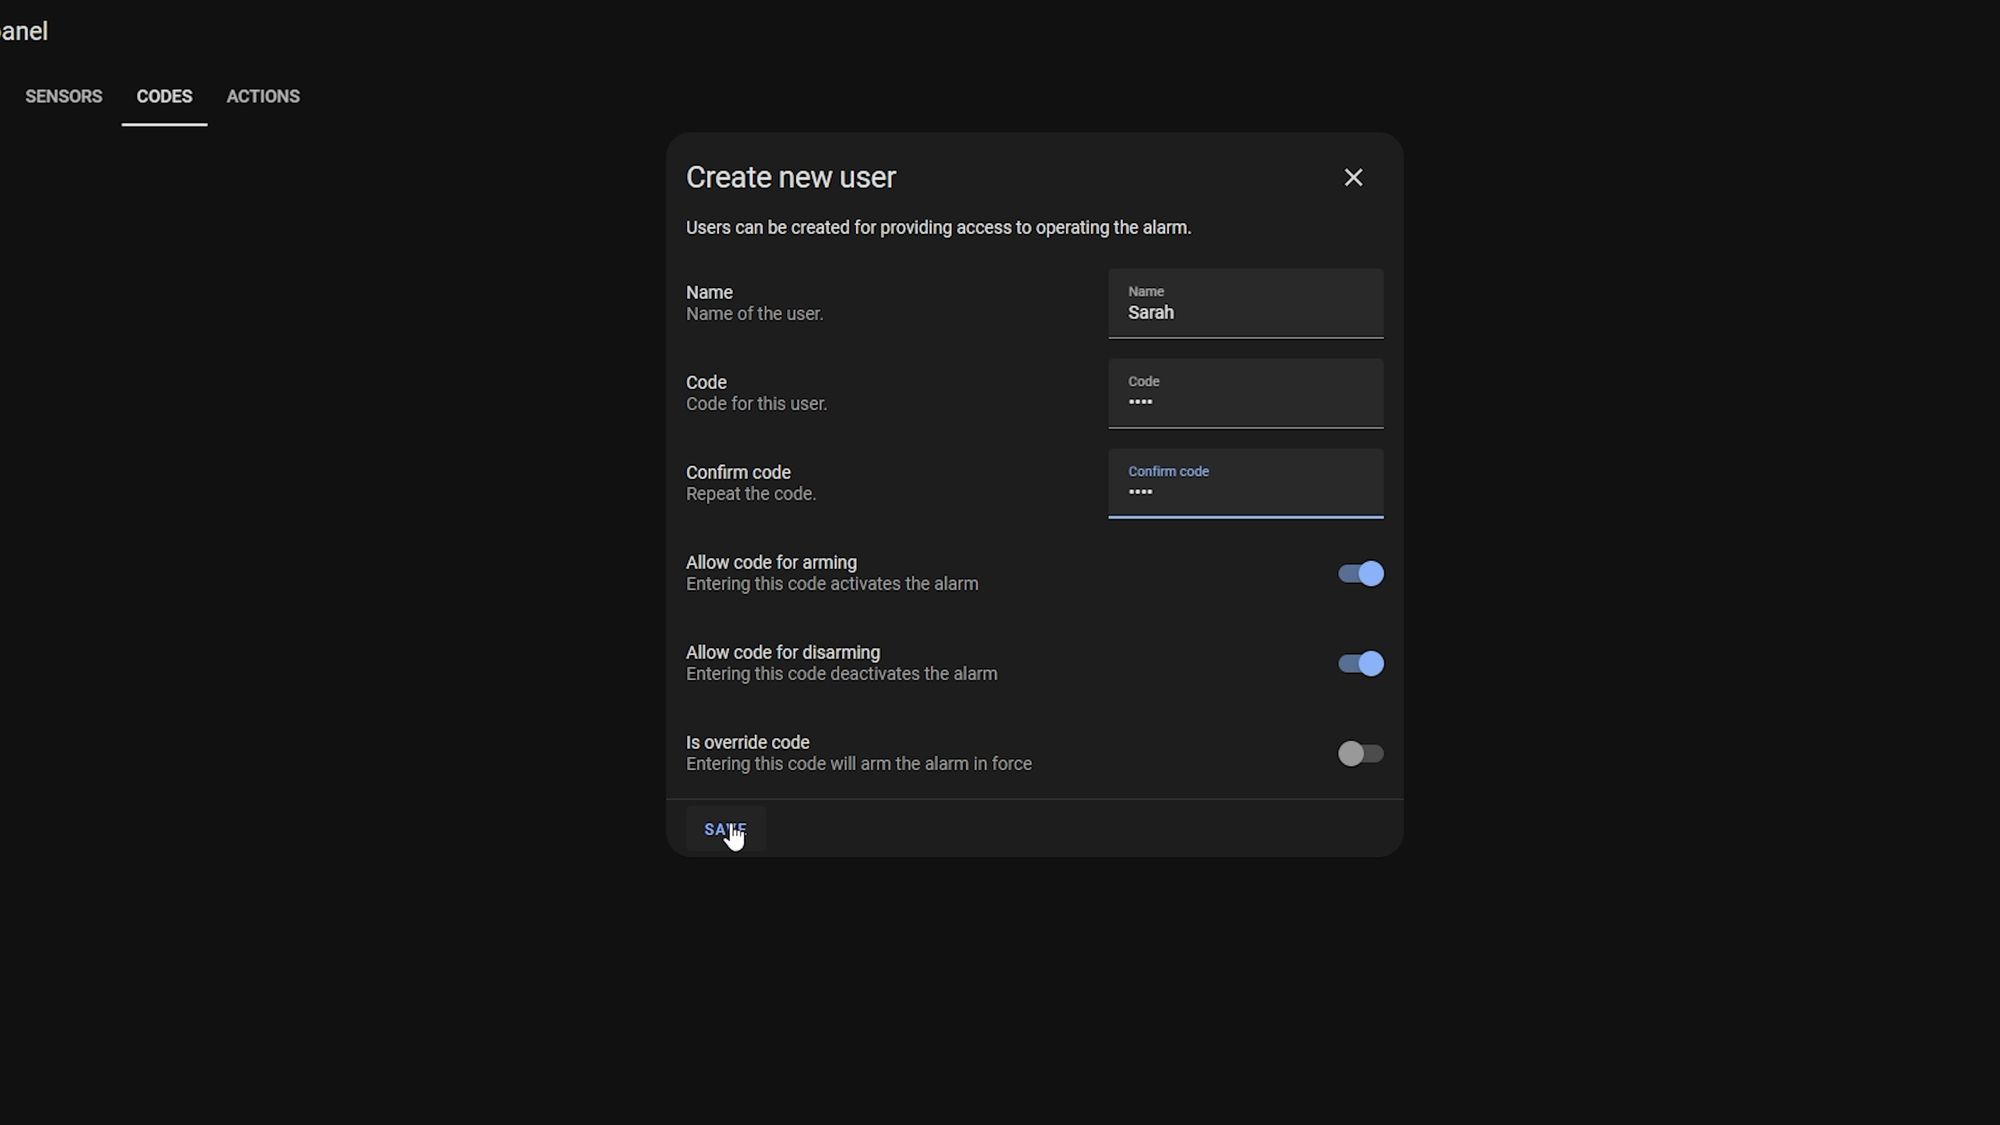
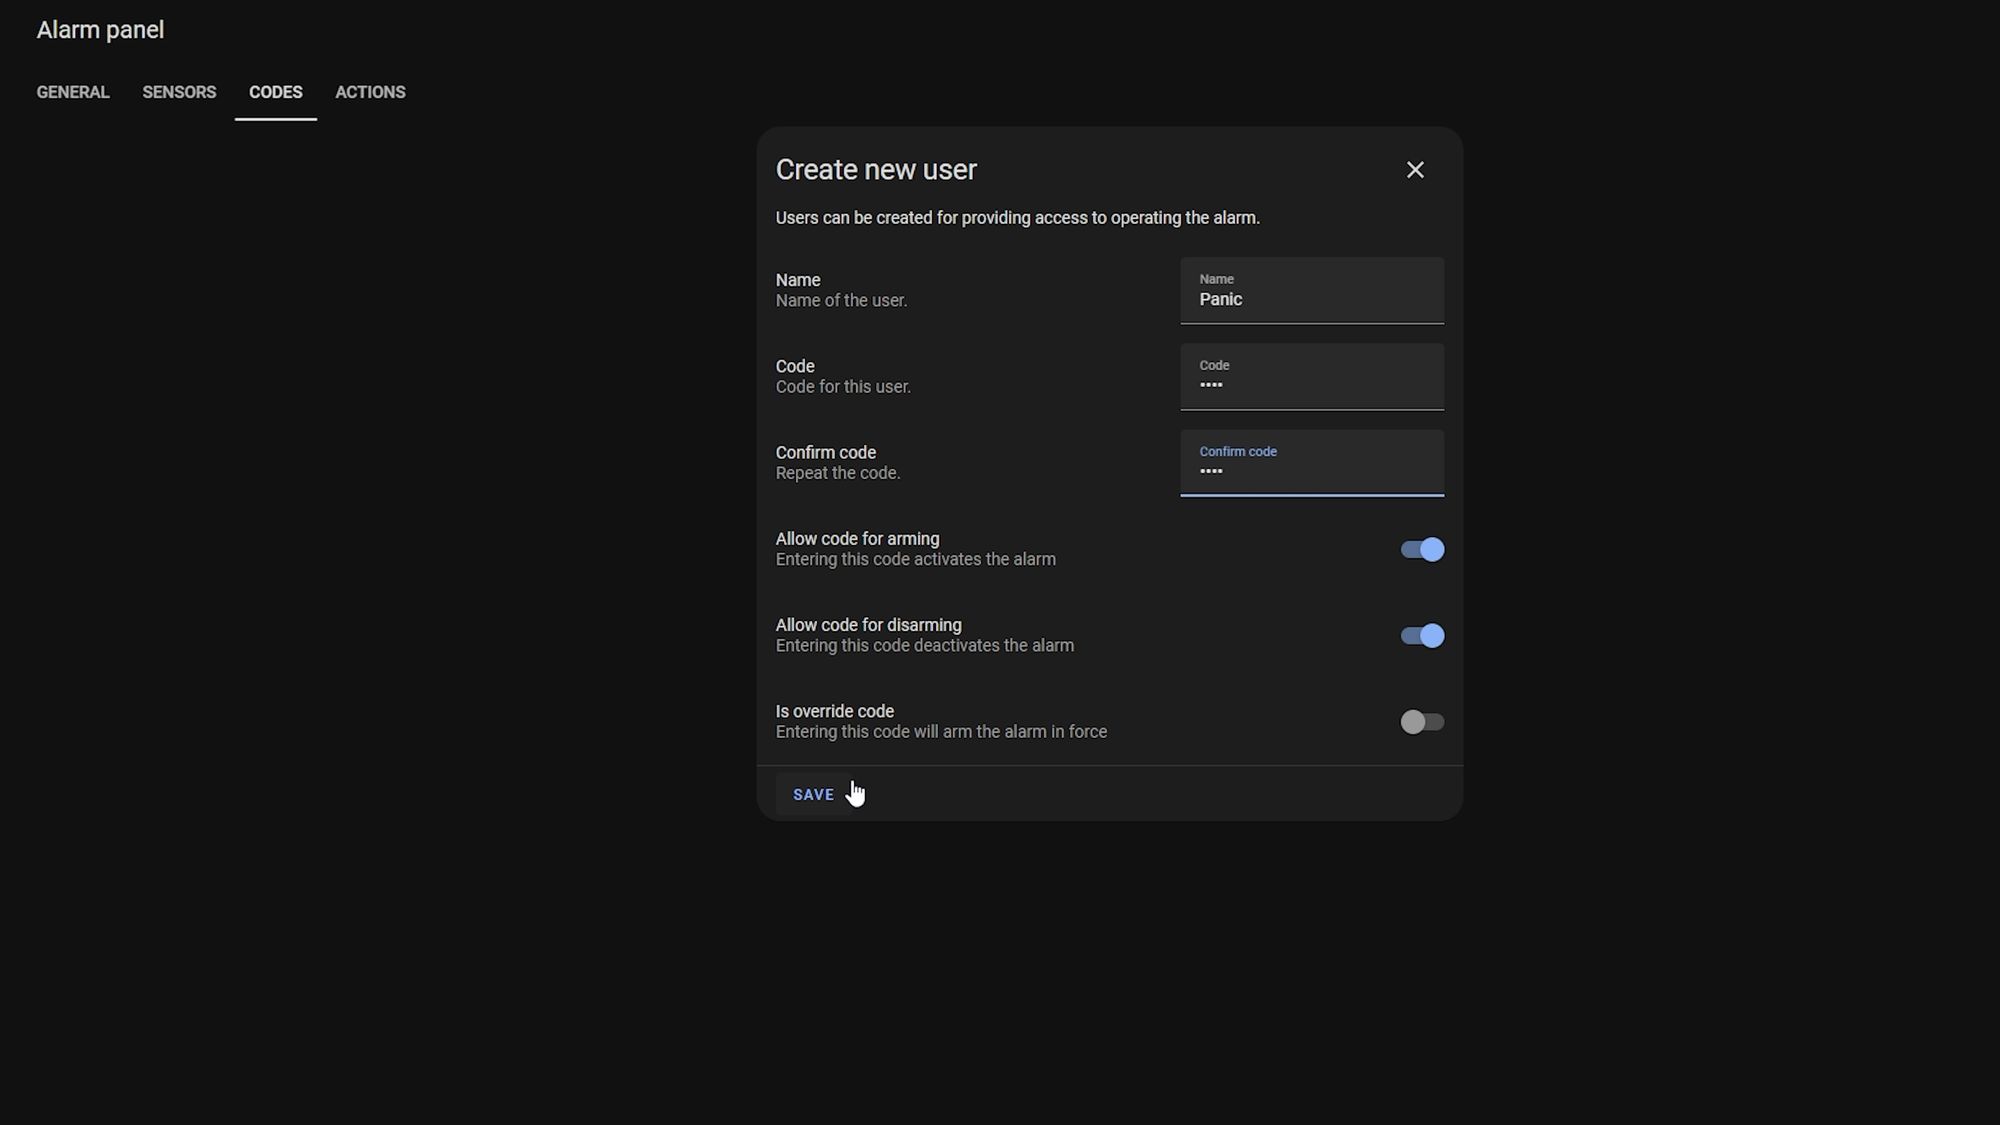
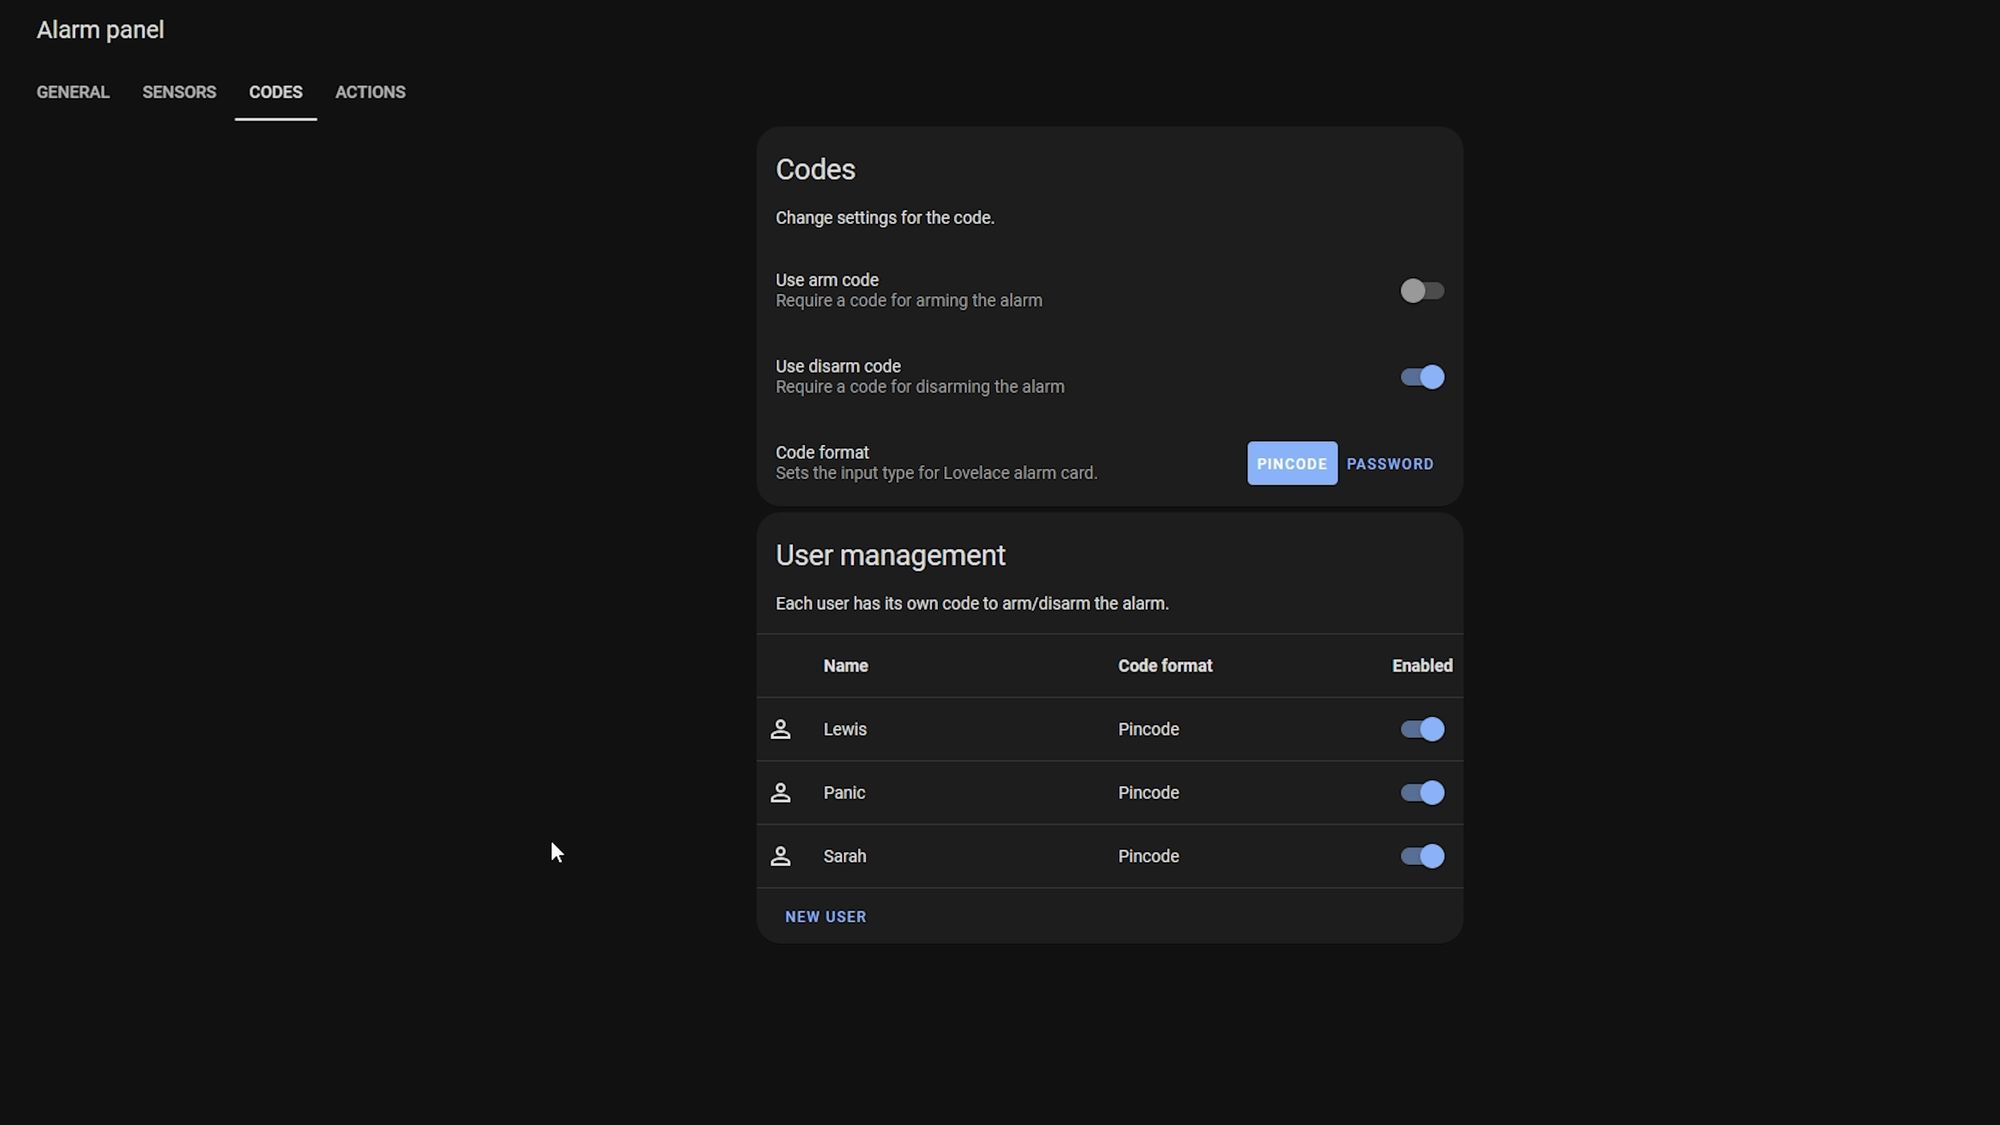
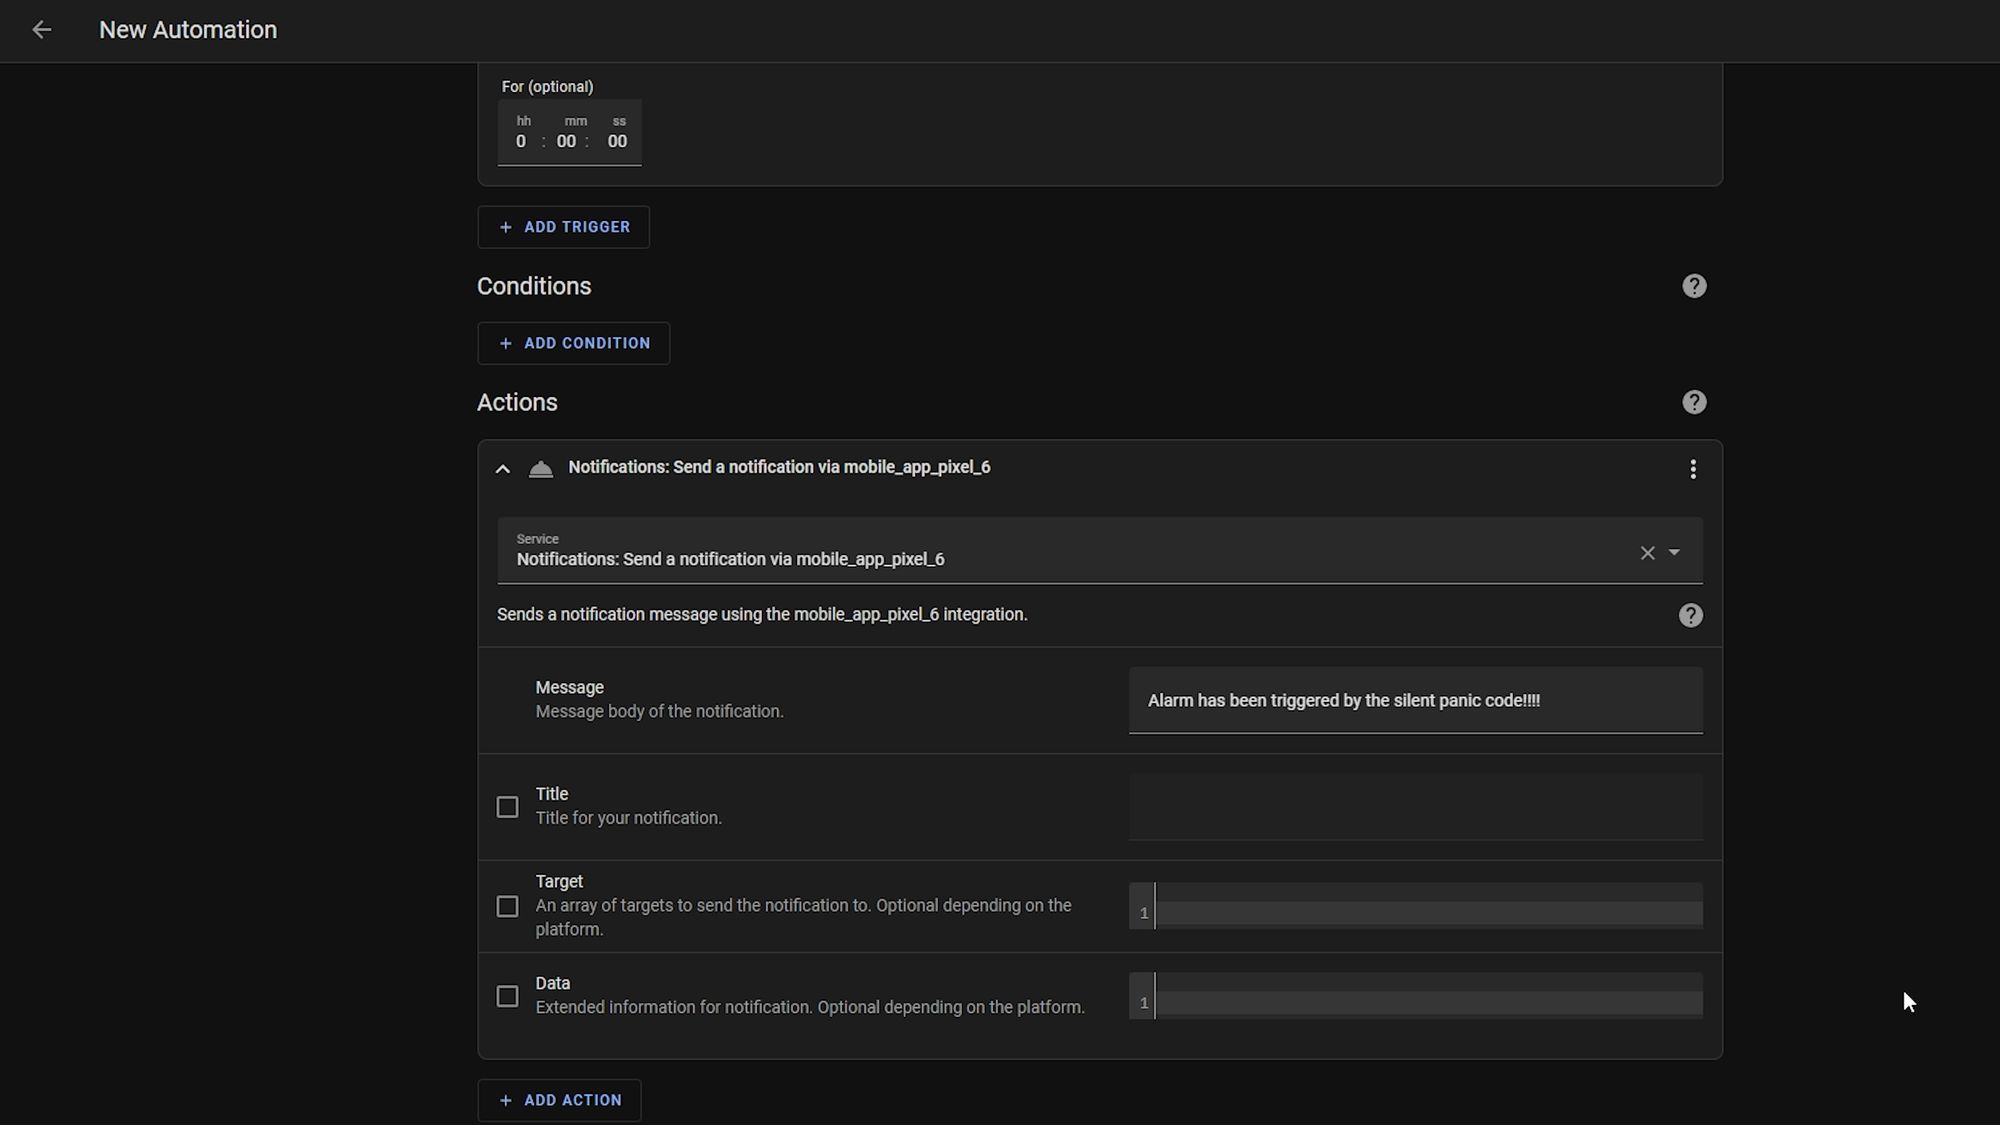
Simply head over to Alarmo, create a new user with a new code and give this one a different name - you can use Panic here which is what I’m going to do just for this demo but you may want to use a fake name or alias instead because you don’t want your speaker to suddenly read out the word panic which I’m guessing would probably tip them off, so just something to be aware off.
Once you have created your panic user, we are going to go to developer tools and find the Alarmo entity.
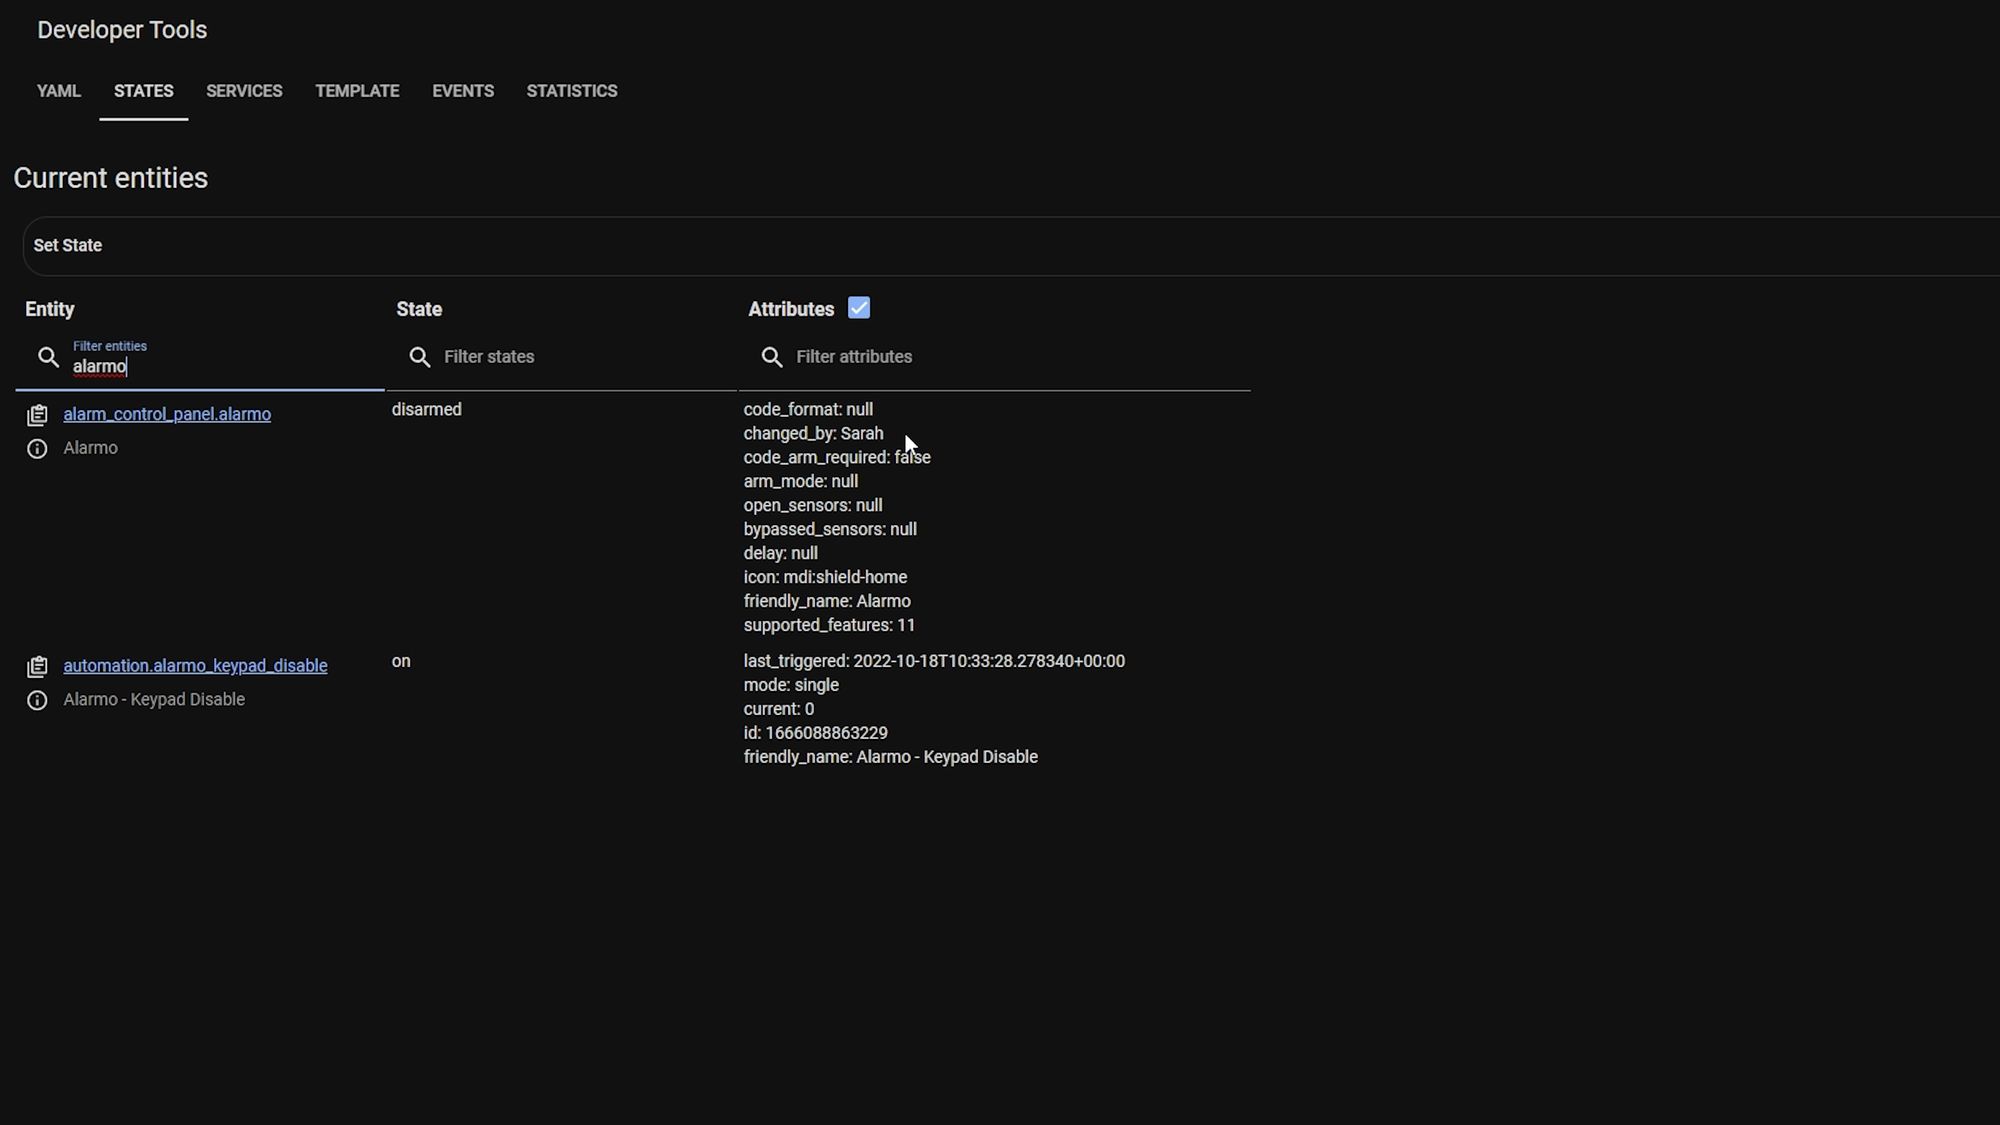
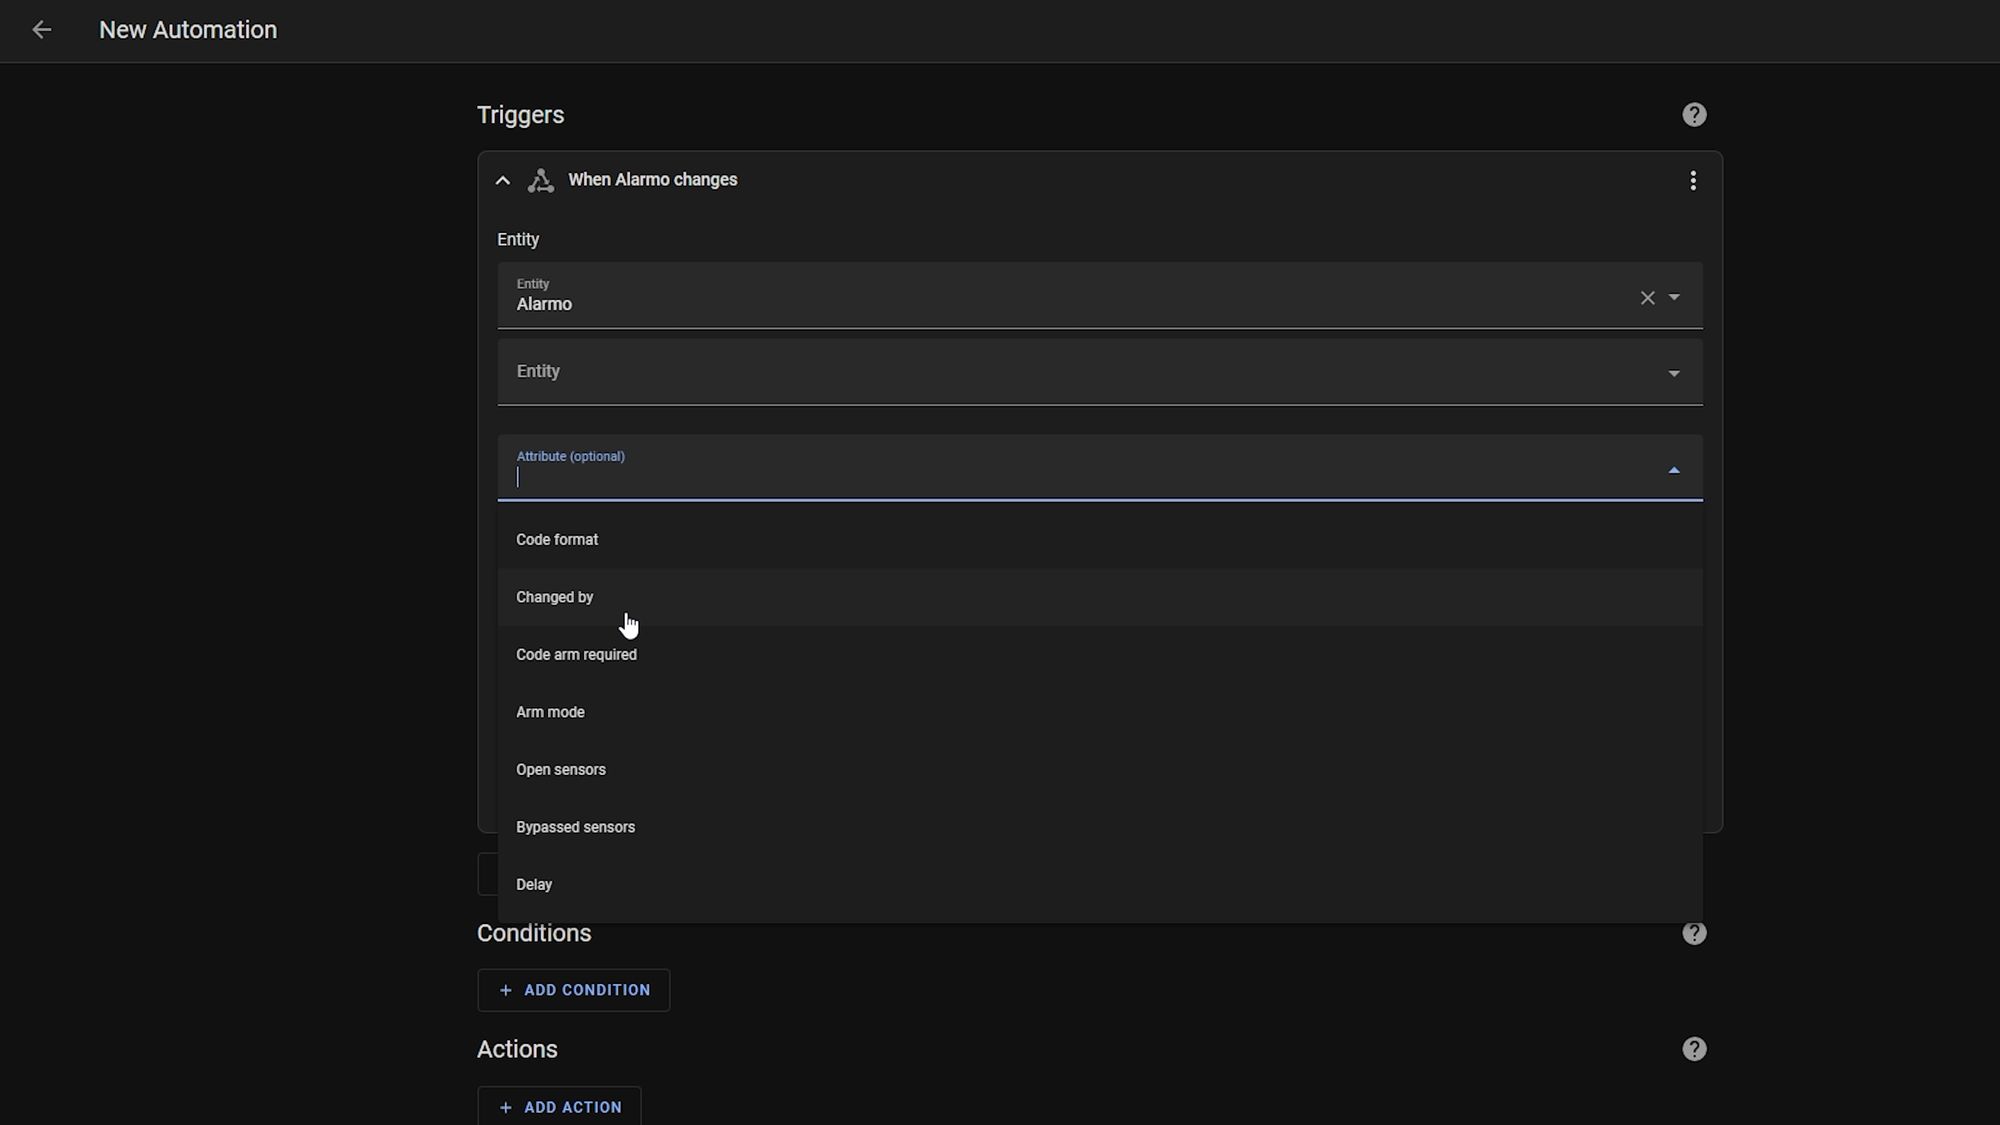
If you now set the alarm and then disable it with your keypad, you will see in the attribute column that there is a value called “Changed by” - this is perfect for what we need as we can set up an automation that looks for our panic user in this field.
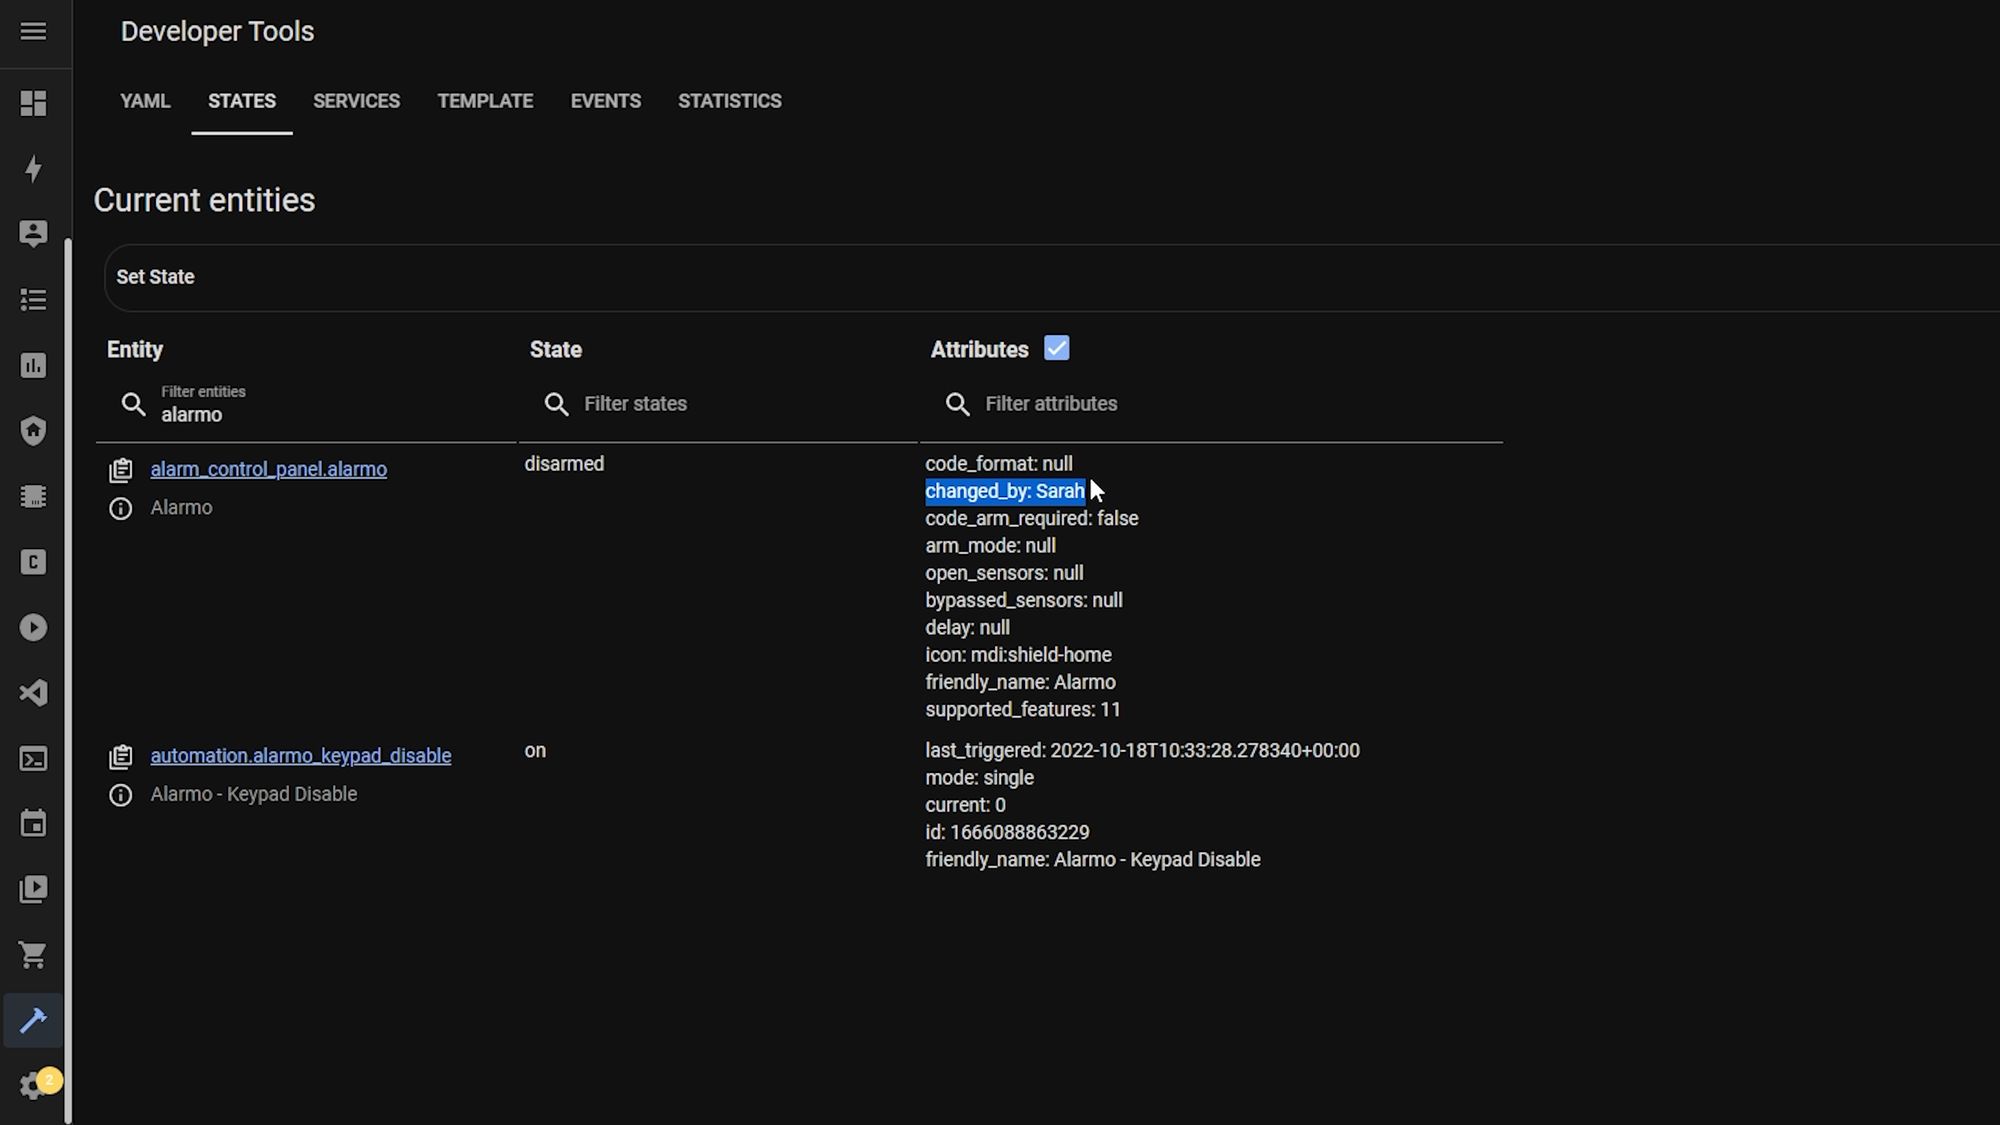
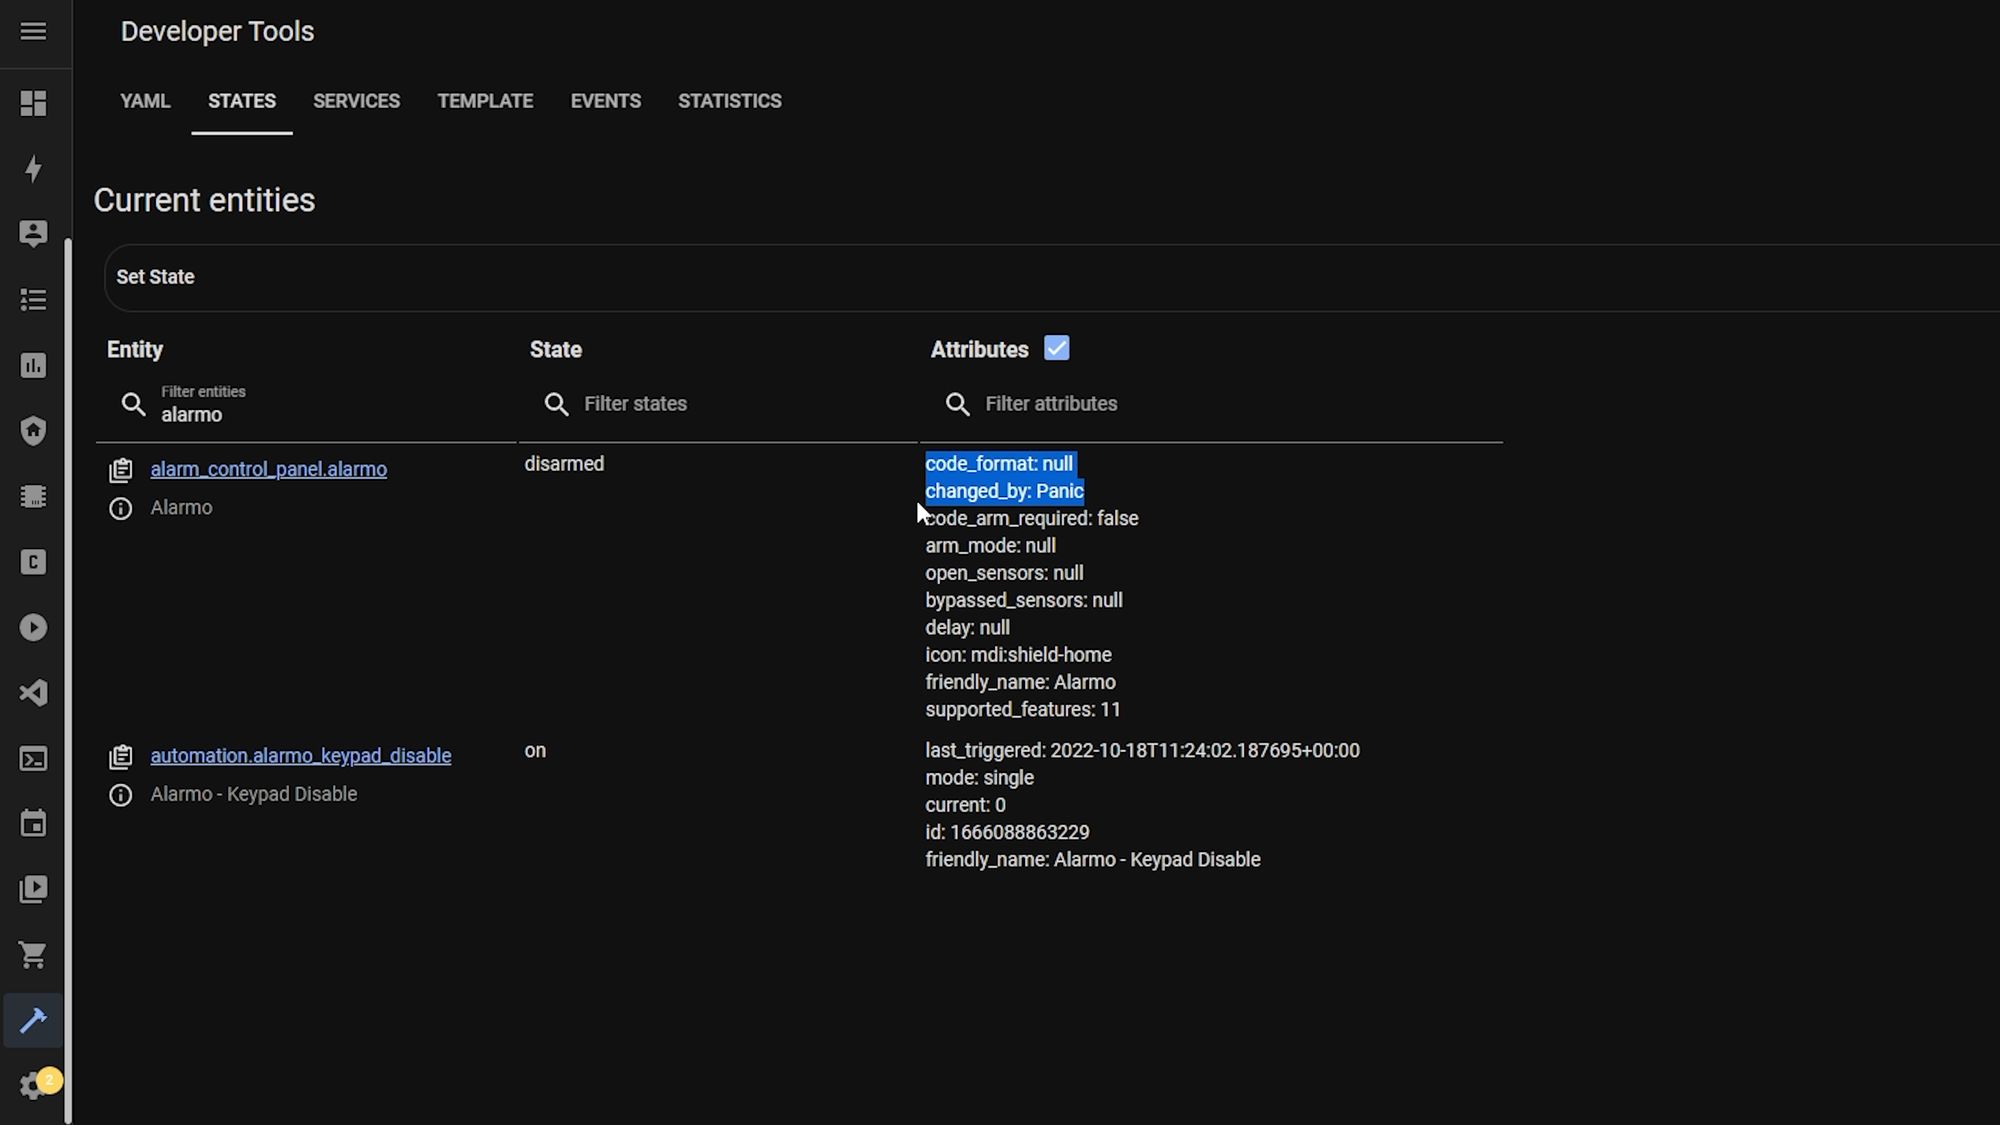
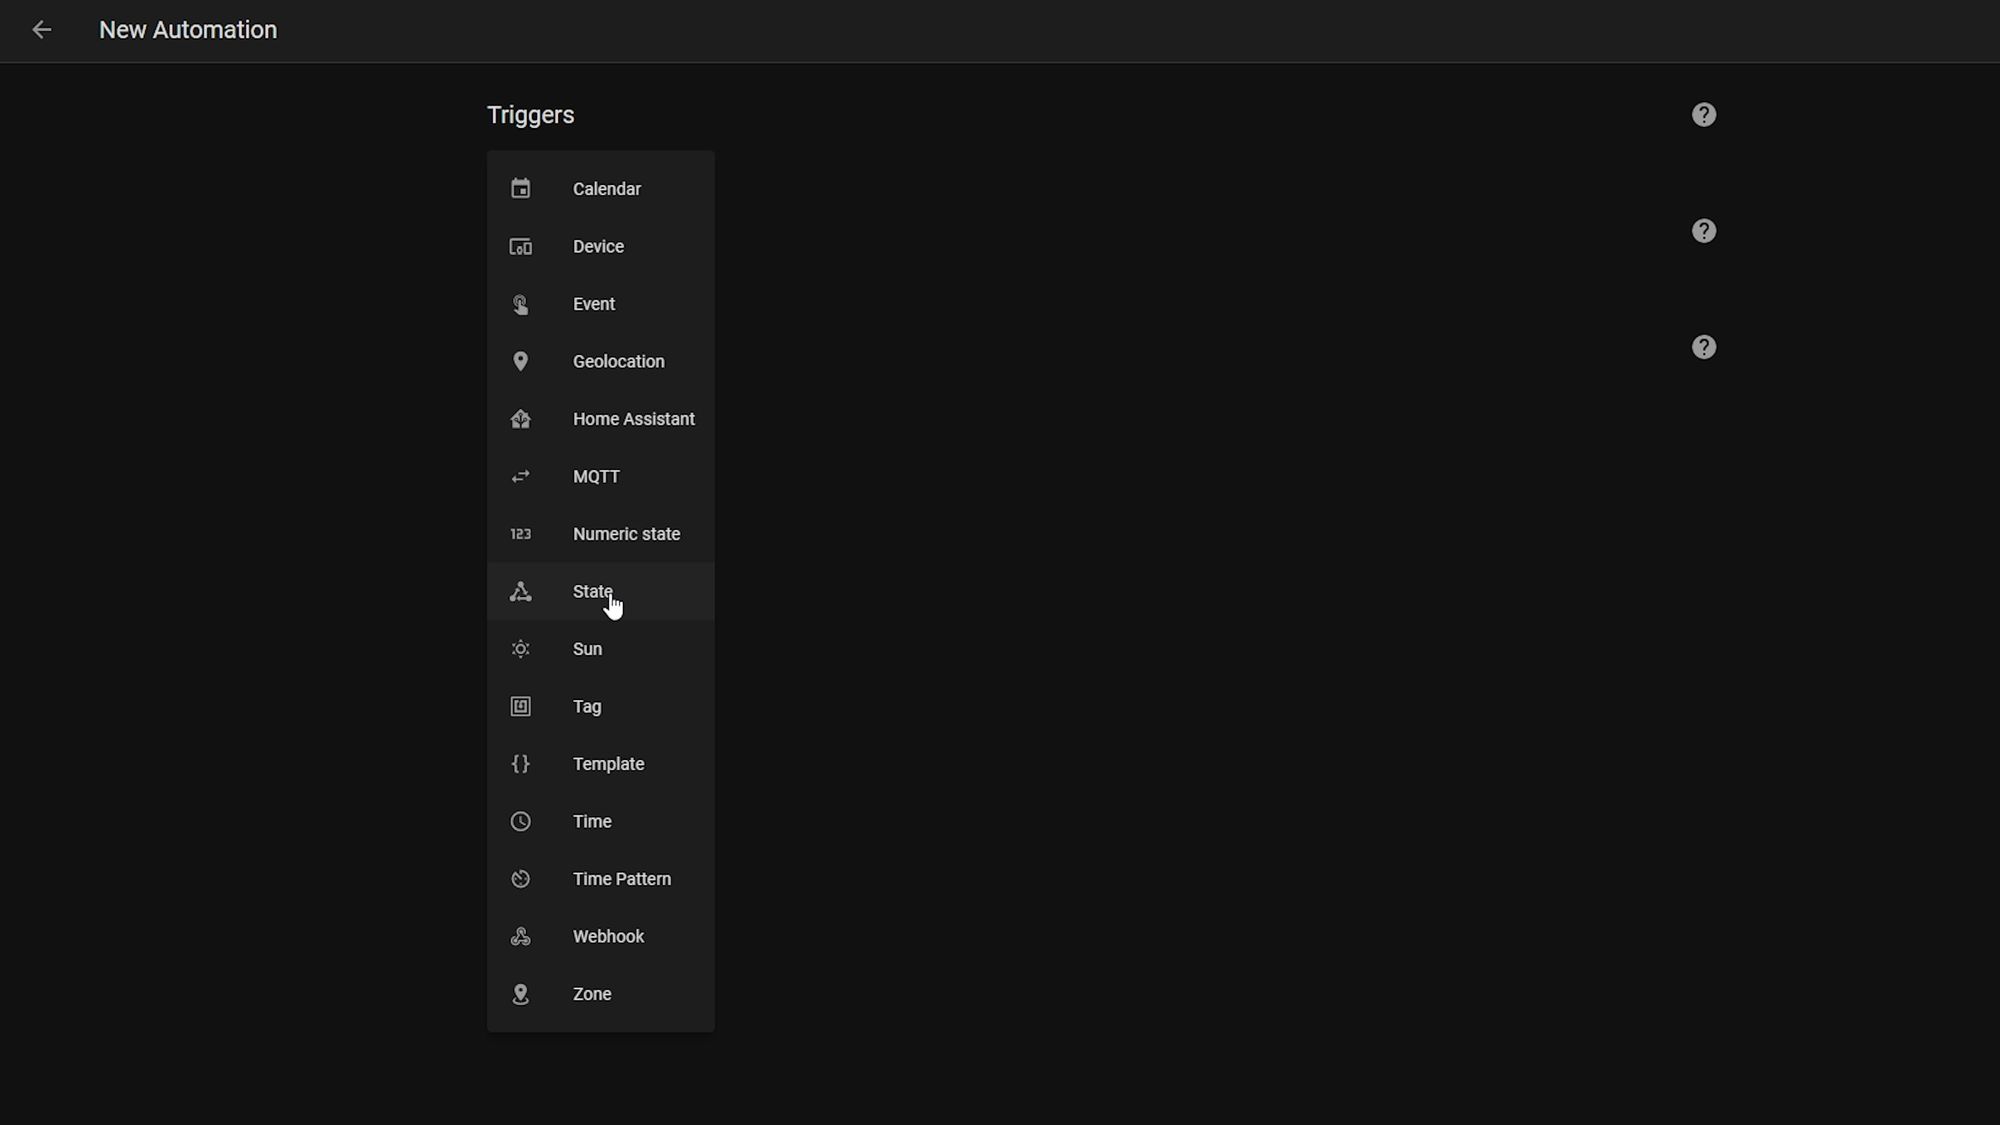
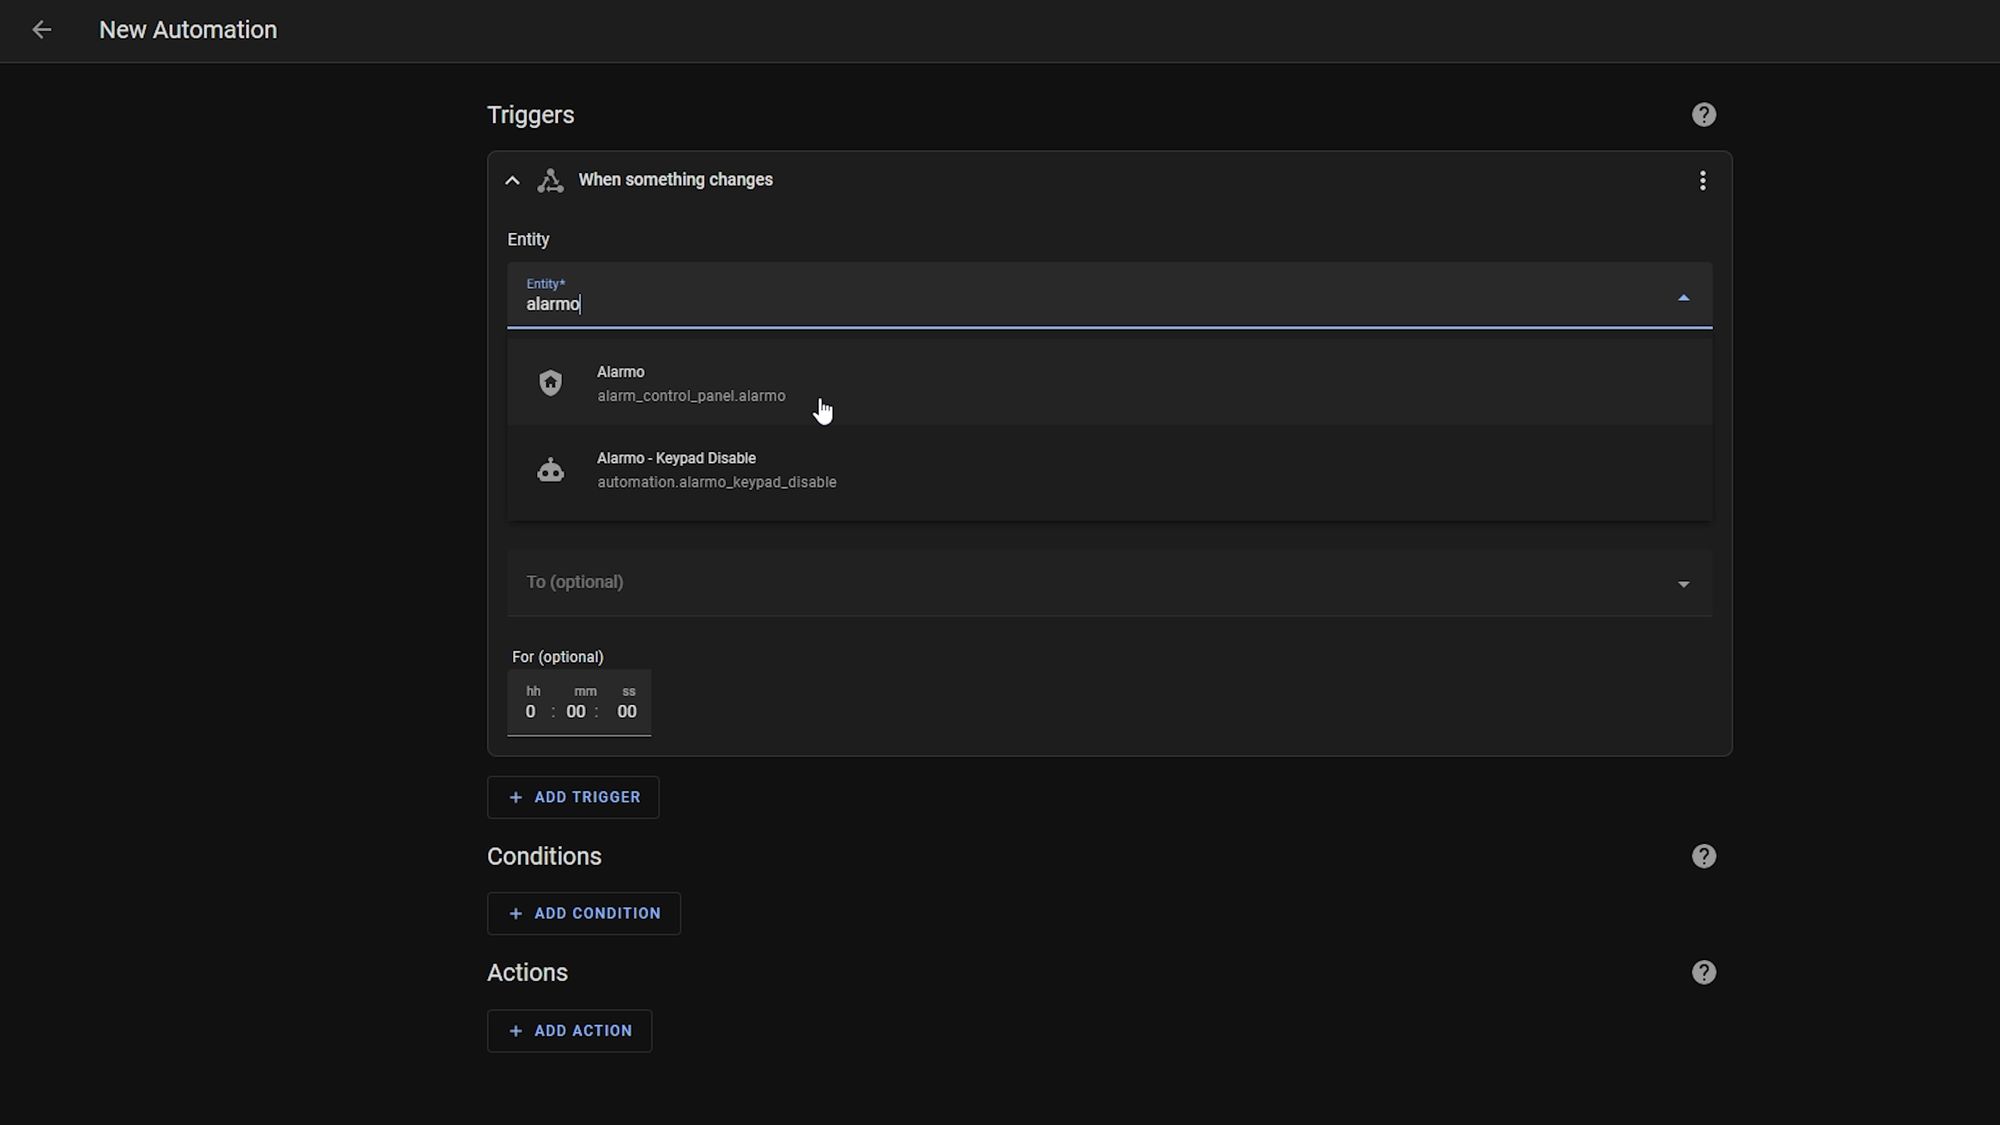
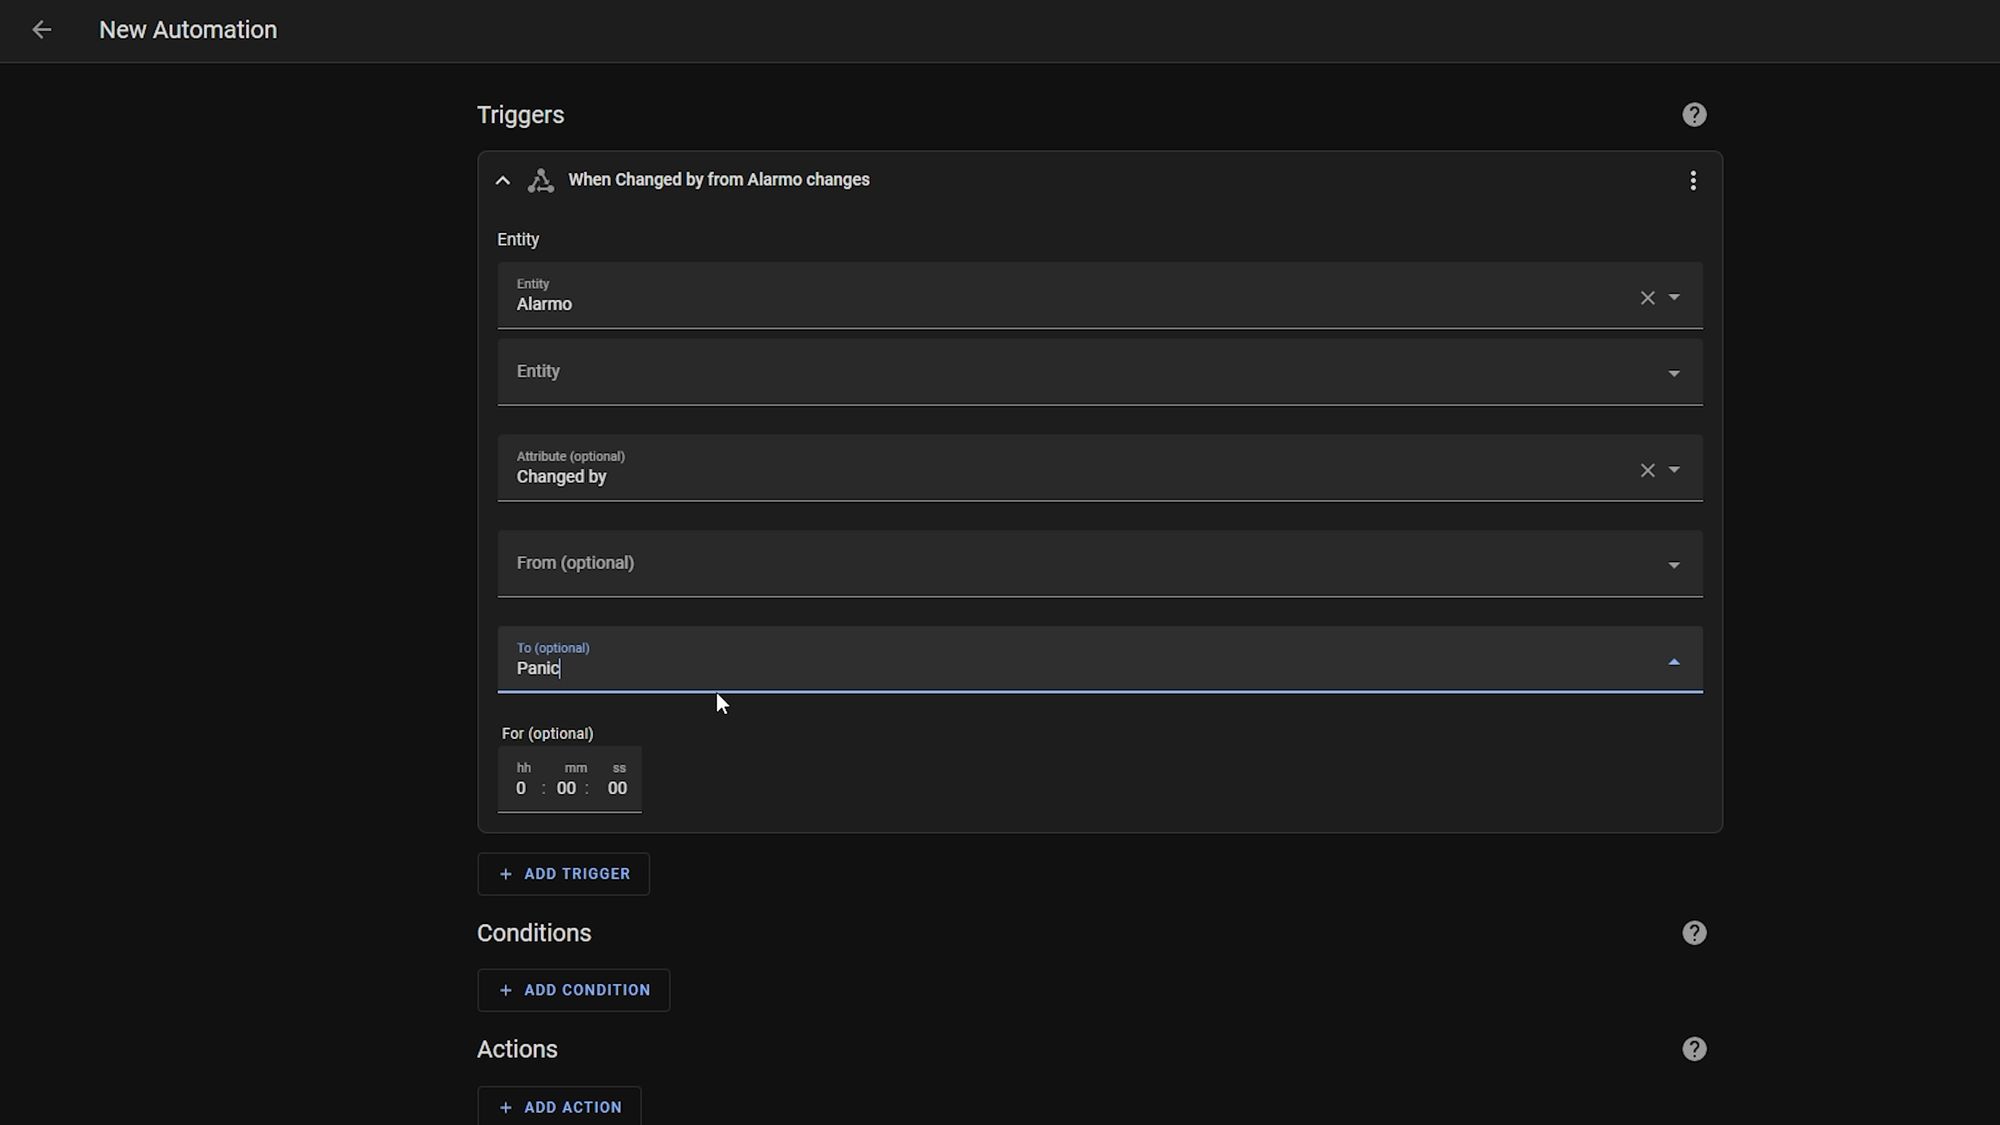
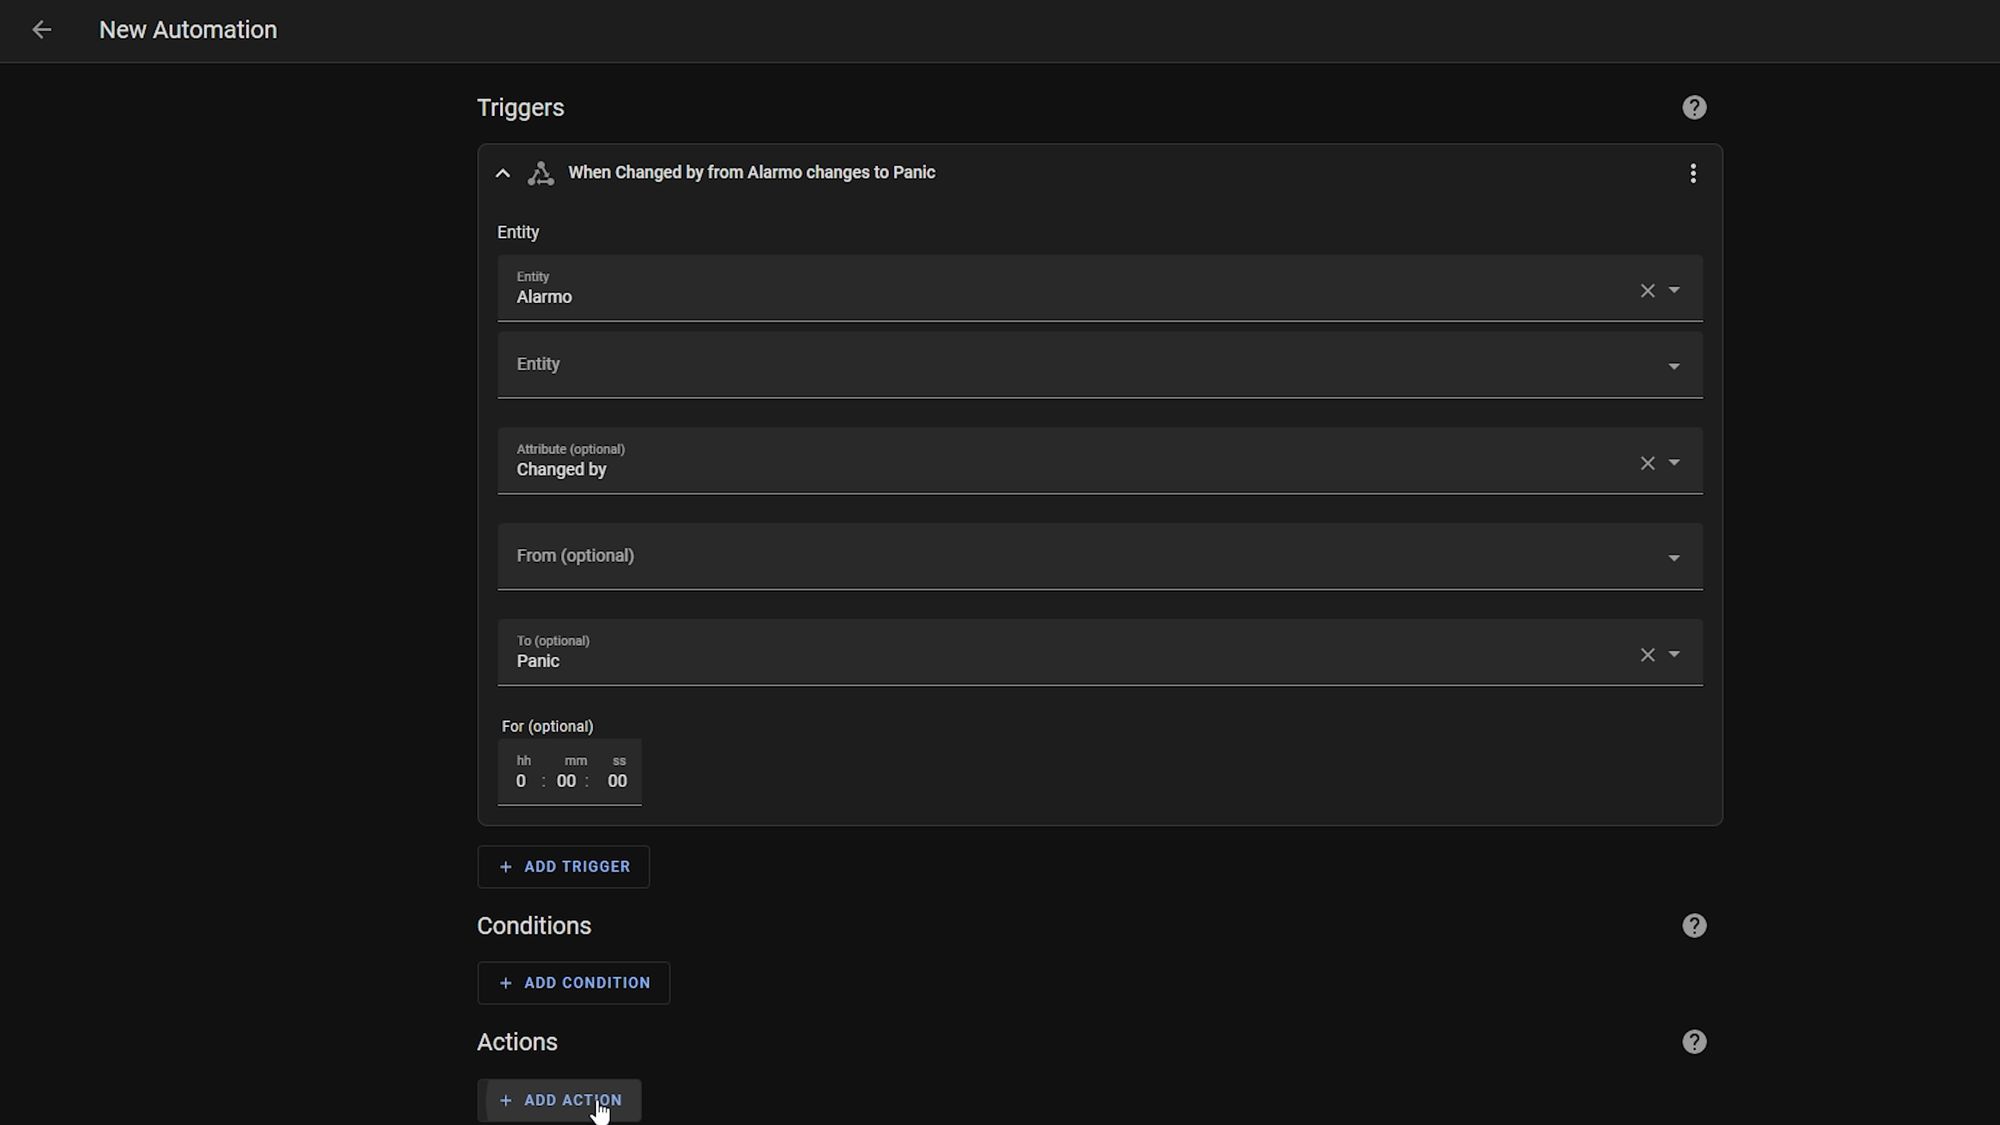
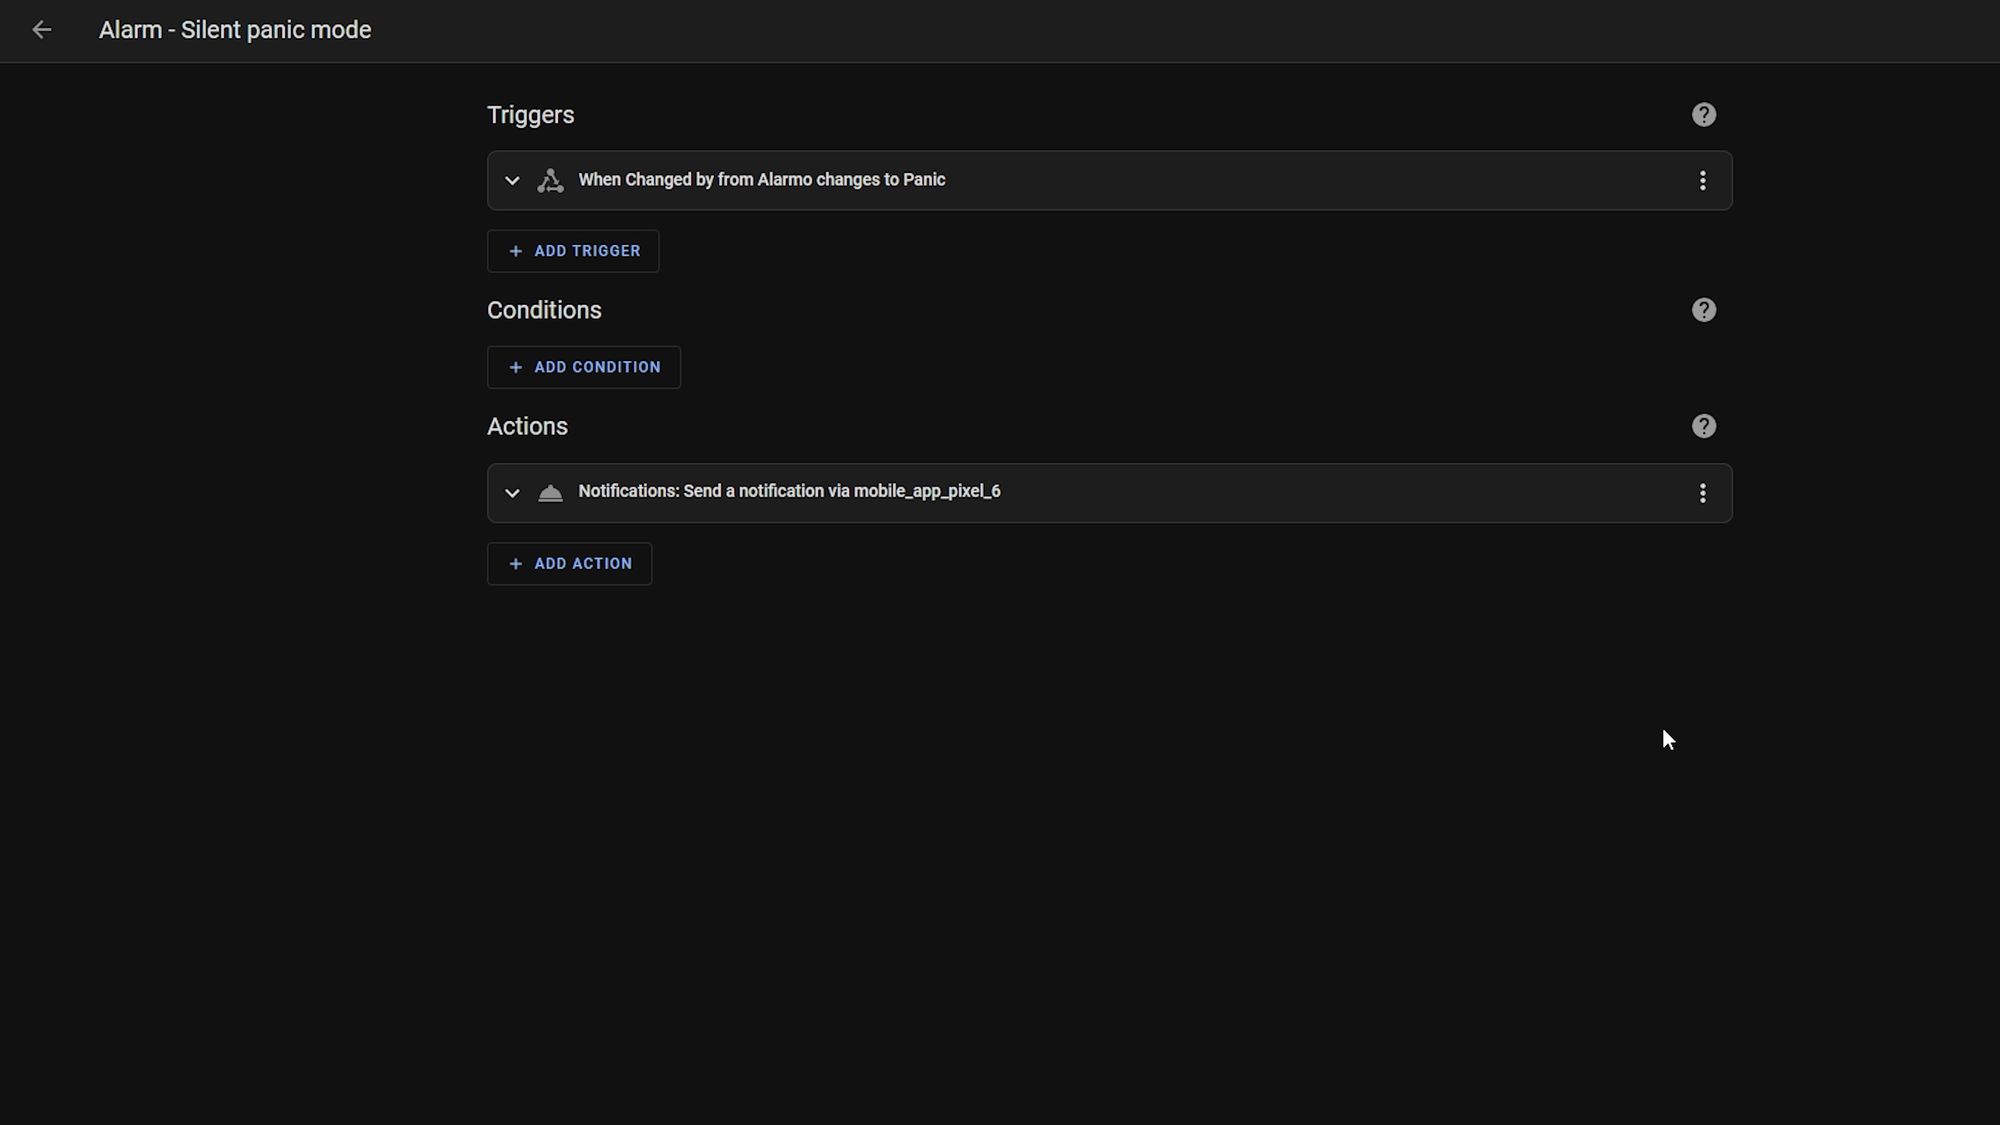
Head to settings, automations and create a new automation. From the trigger drop down, select state as the type, then select Alarmo as your entity. Select "changed by" from the attribute box, and in the to box enter the name of your user exactly as it appeared before in developer tools, making sure to get the case correct.
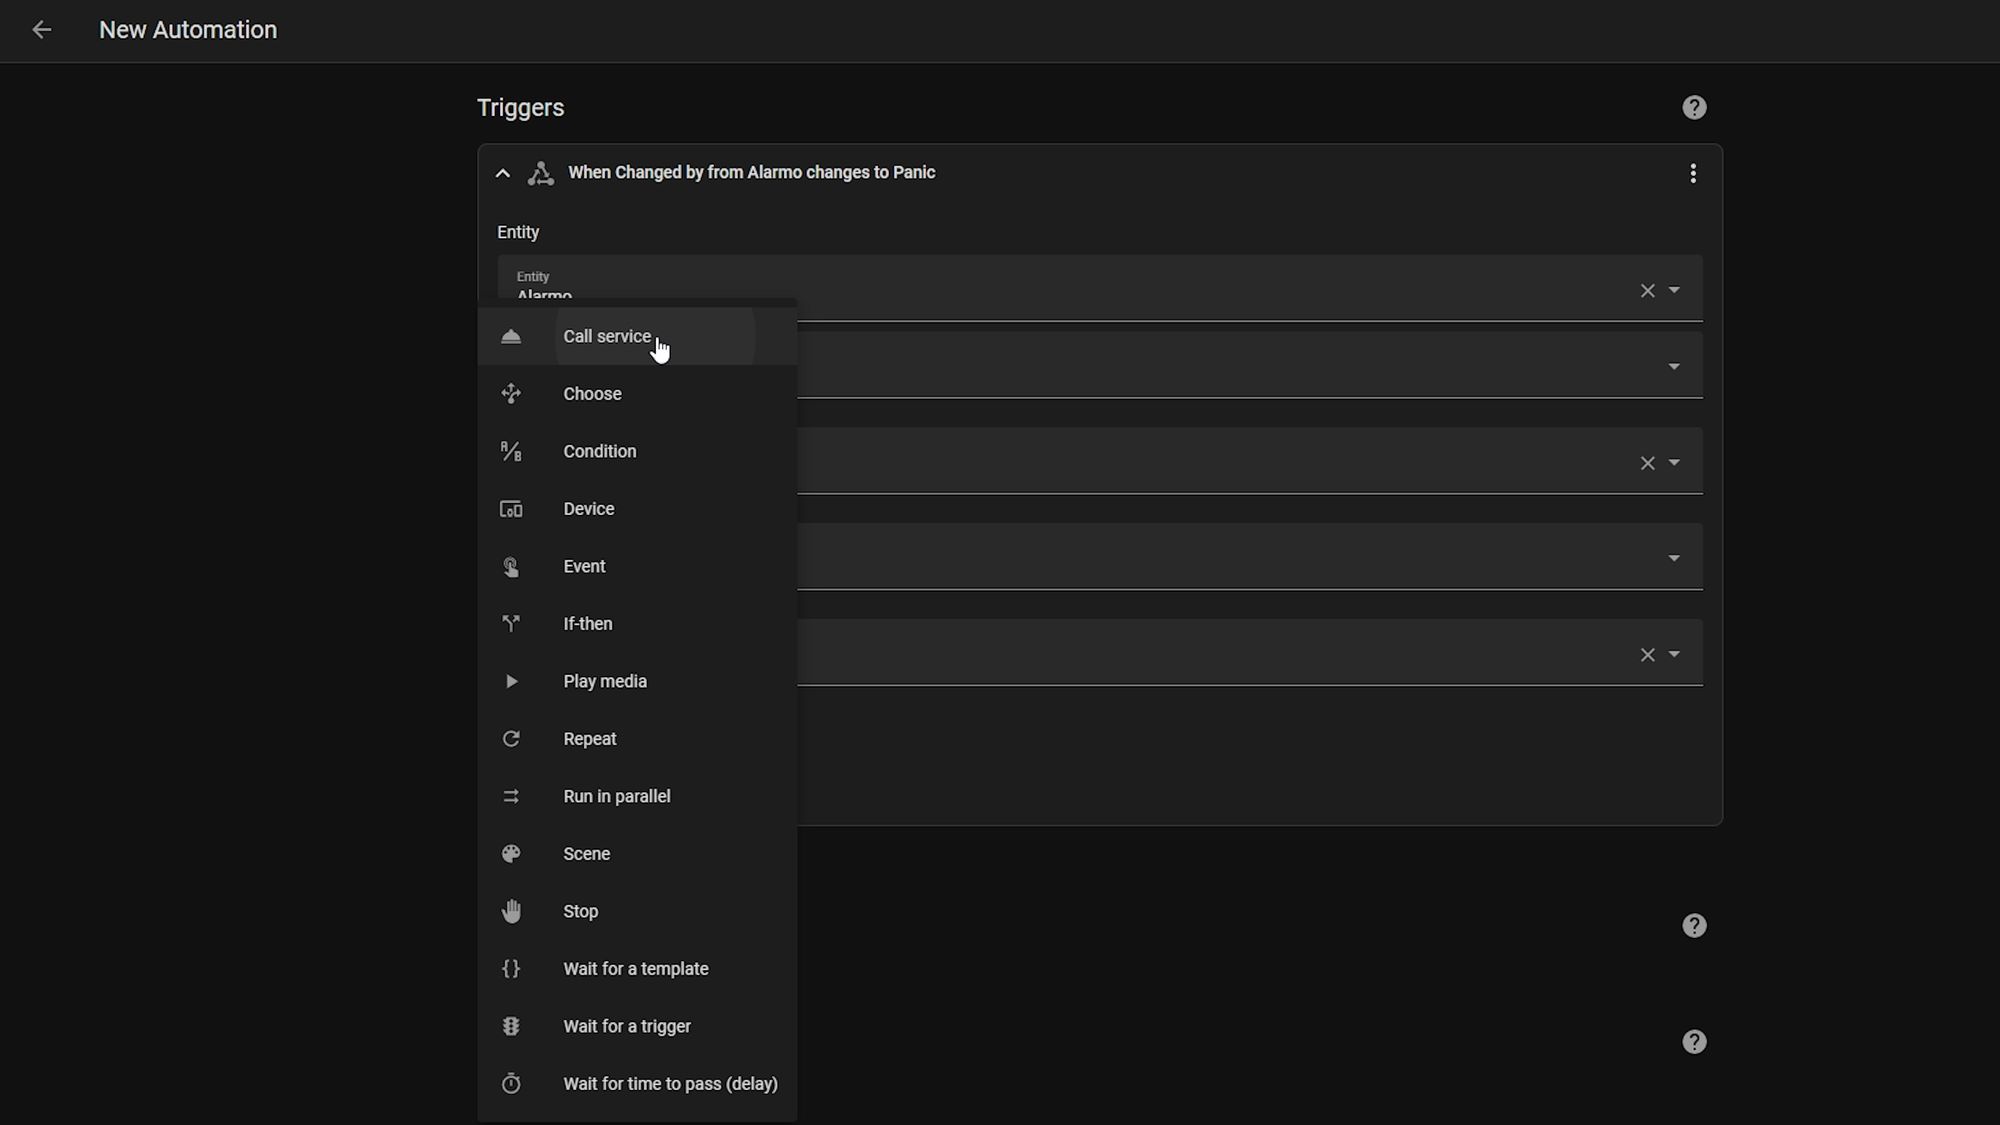
Then all we need to do is enter an action depending on what we want it to do. I’m just going to go ahead and send a basic notification here, but feel free to enter whatever you would like to in the actions - could be sending a notification to an external party through email or a text service or something similar.
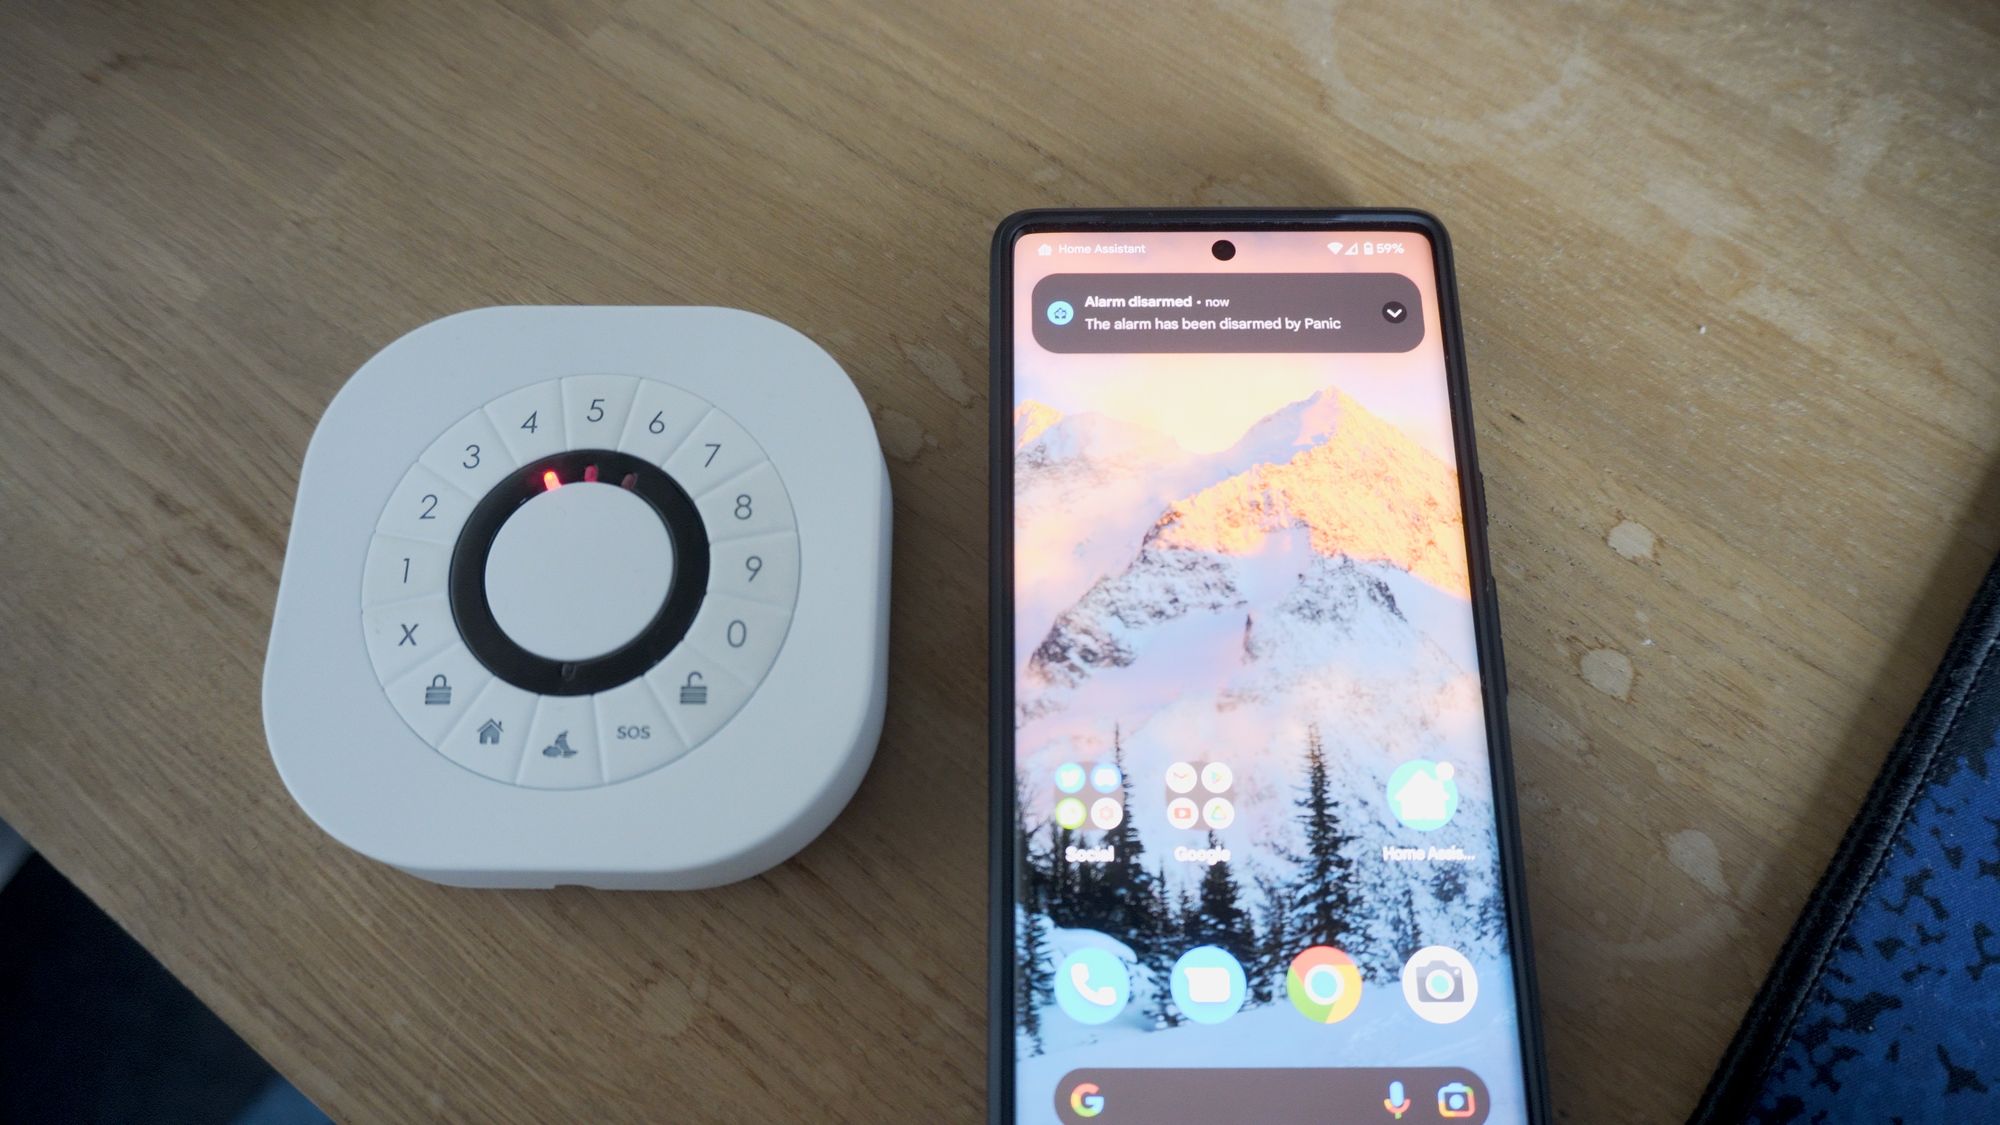
Now if you set your alarm then enter your panic code into the keypad, you should see that the alarm disables on the surface and then all your panic actions will immediately kick in.

Third Automation
Panic Button
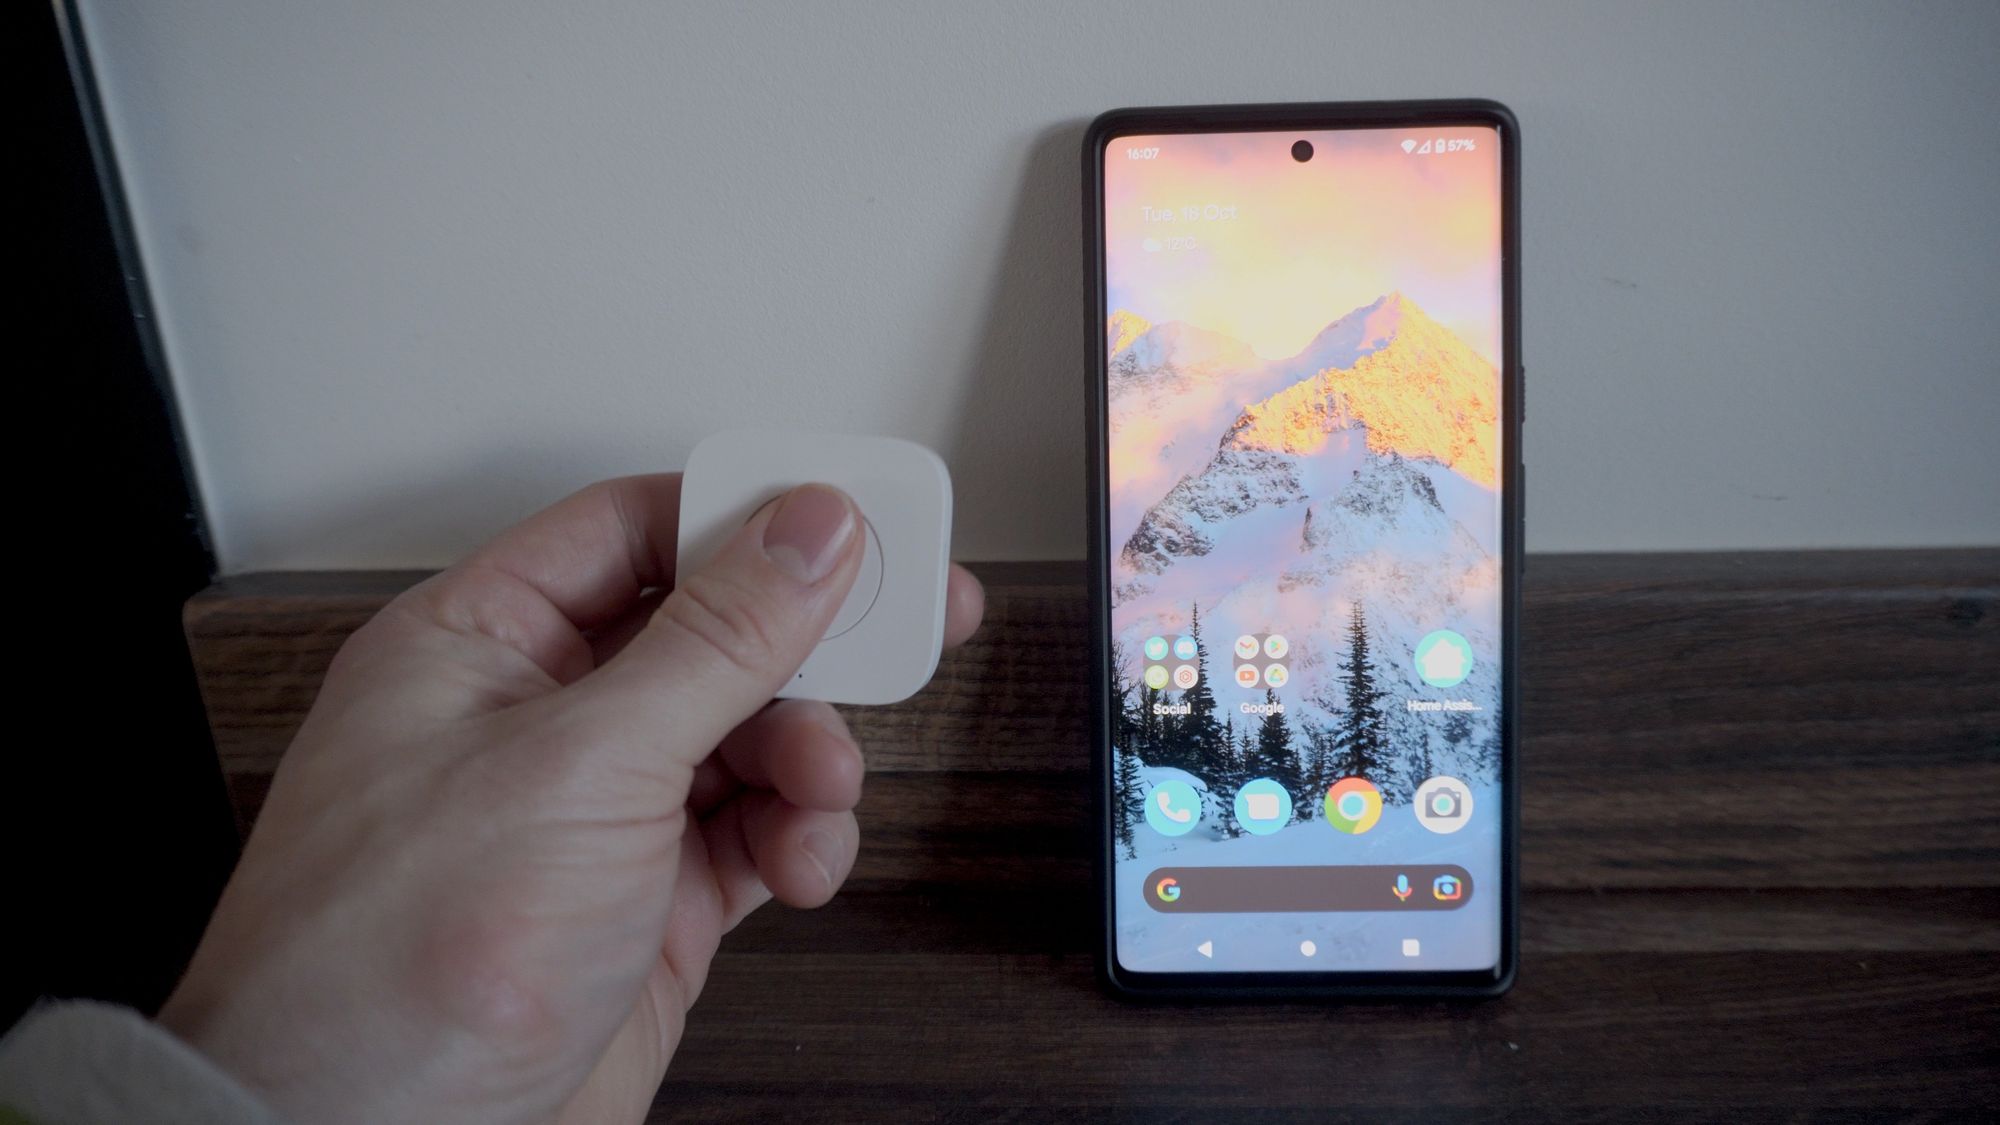
The third thing I wanted to show you is how to create a simple panic button or buttons that you could have strategically placed throughout your house using something like the Aqara Wireless Mini Switch, which has a single, double, and hold action, or a single double triple and quad button press depending on the version.

Now, since this remote may be used for other functions like controlling light switches, I like to set up a bit more of a fail safe, just to make sure that it is definitely intentional anytime it gets triggered.
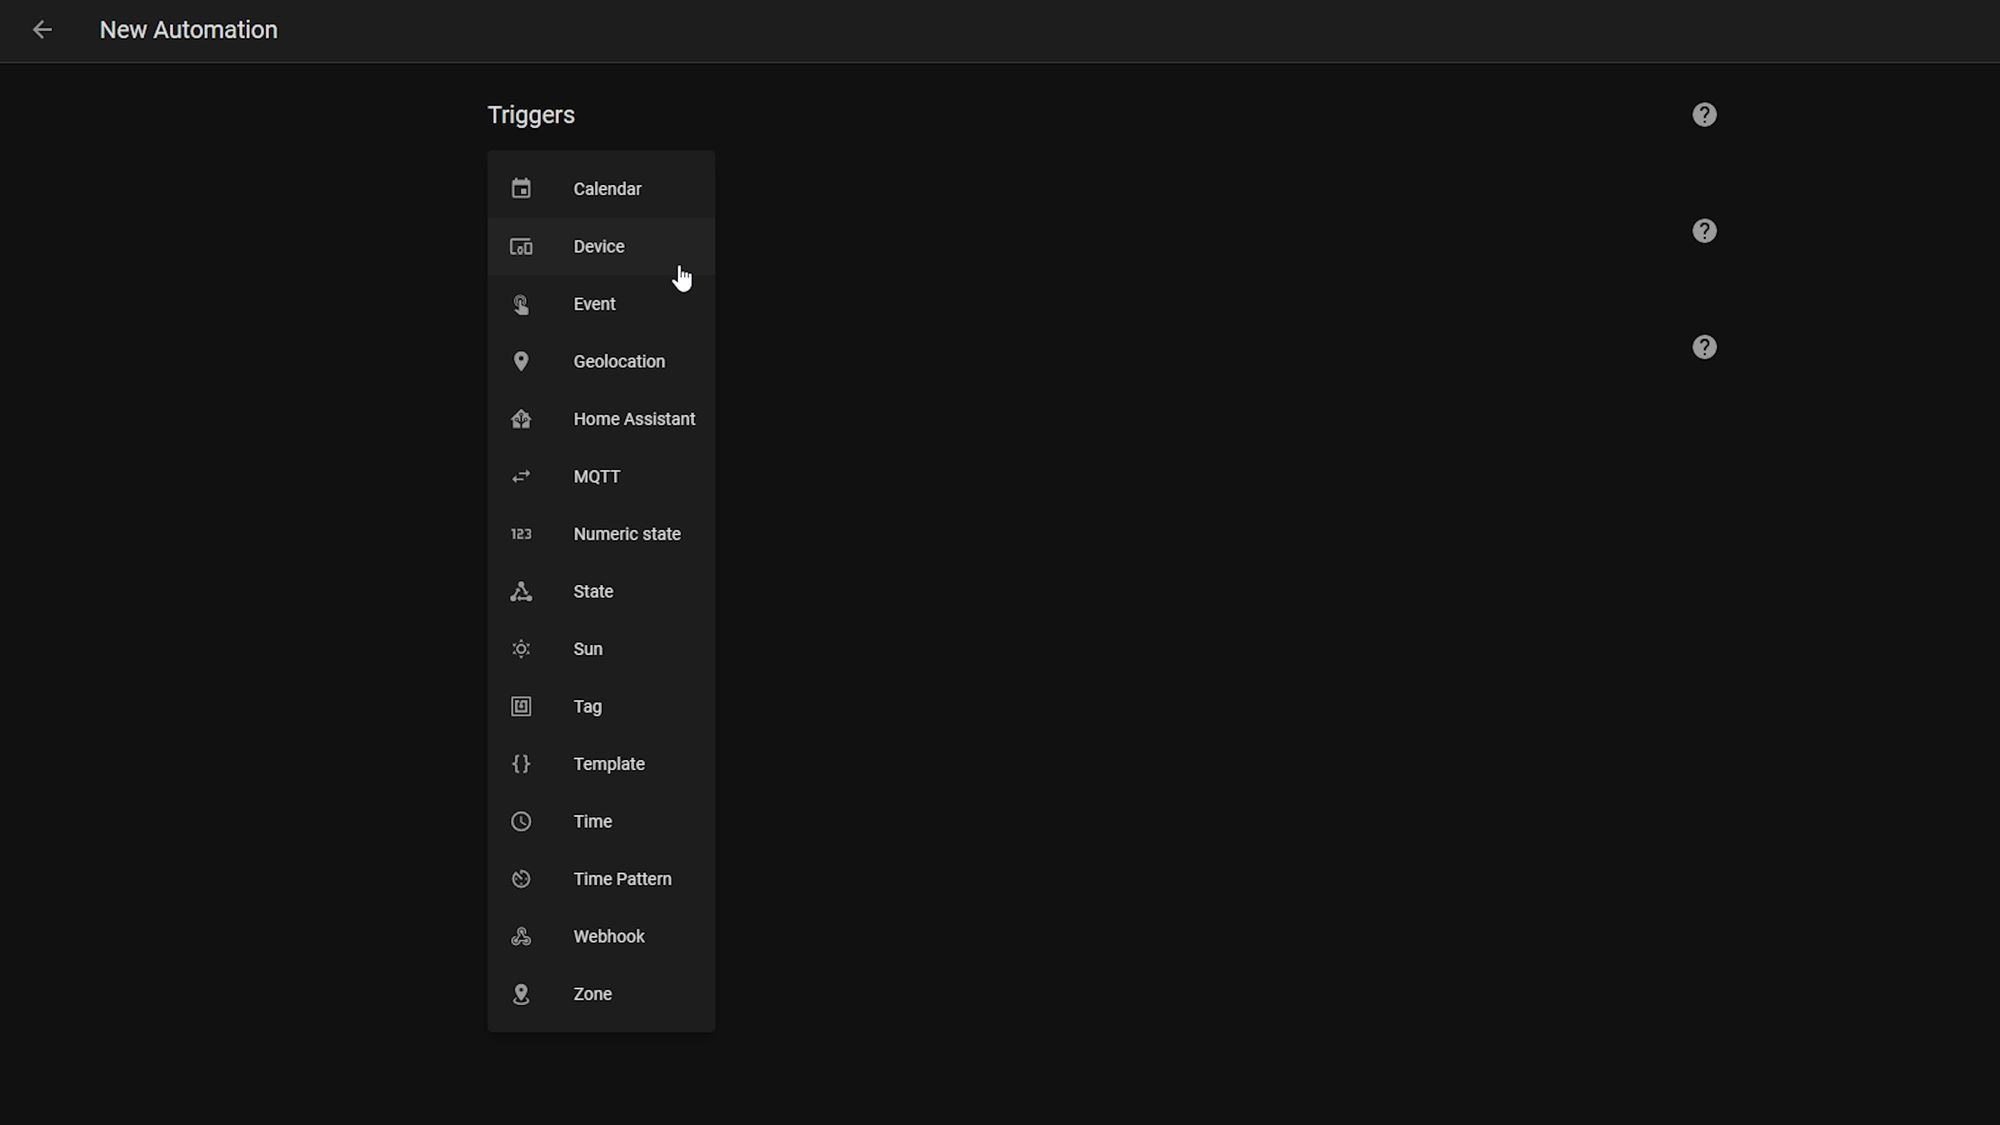
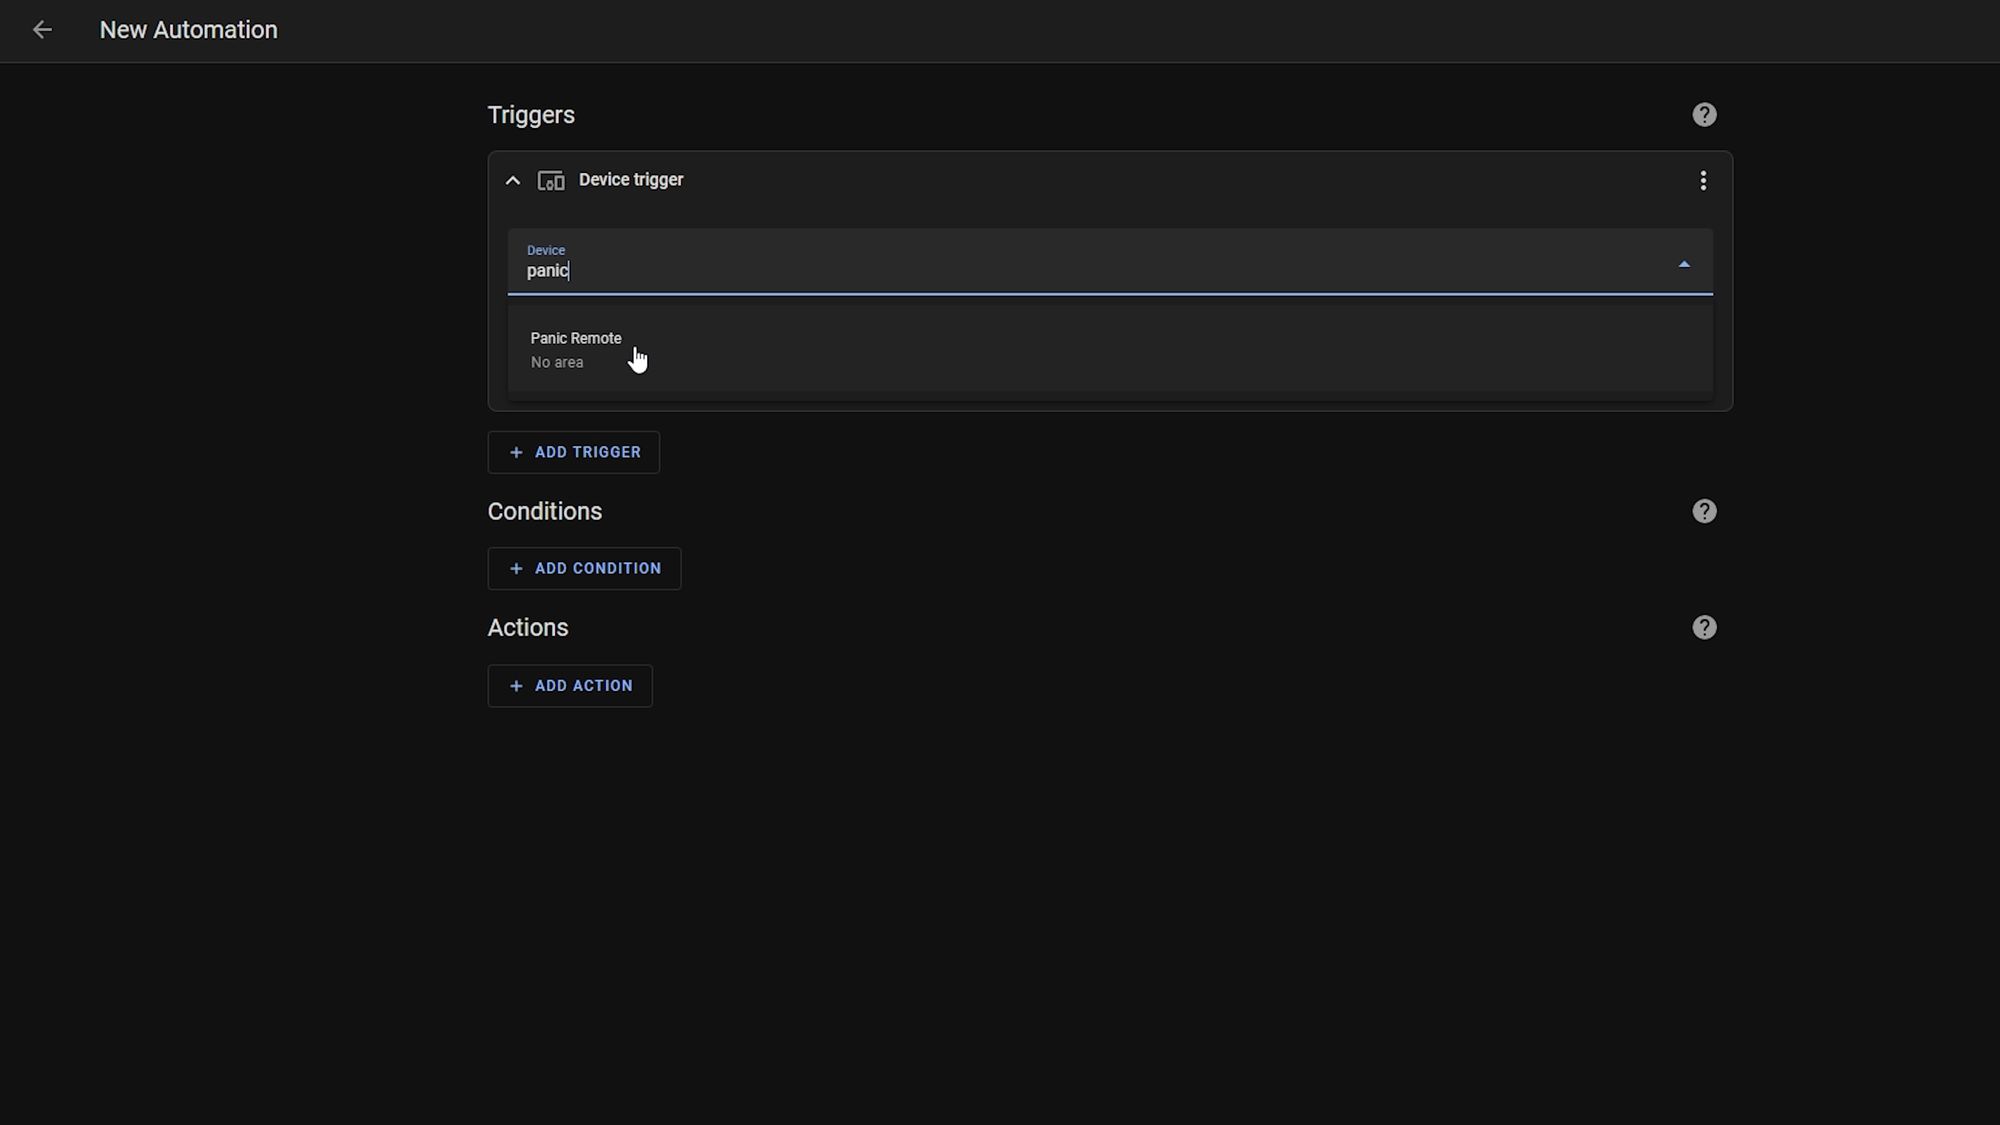
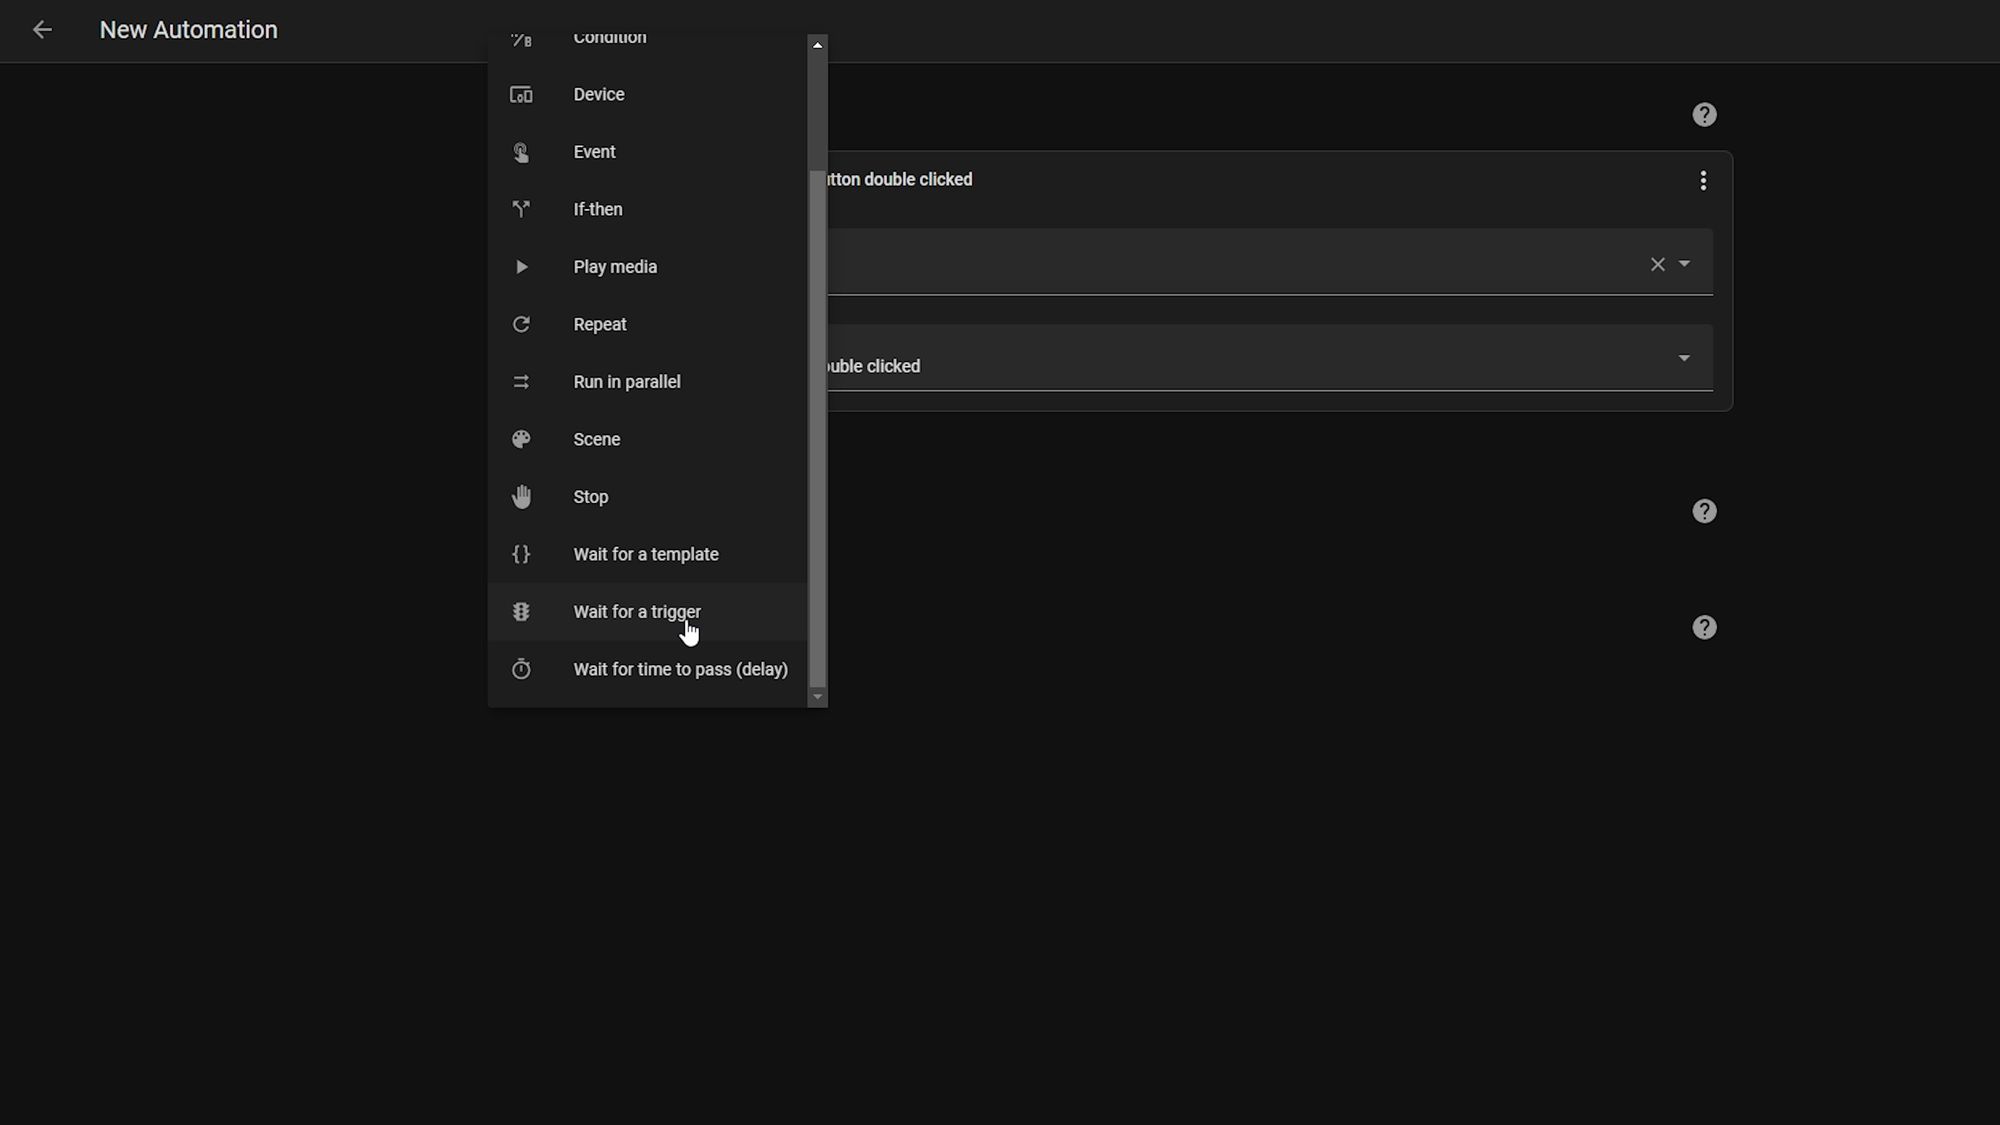
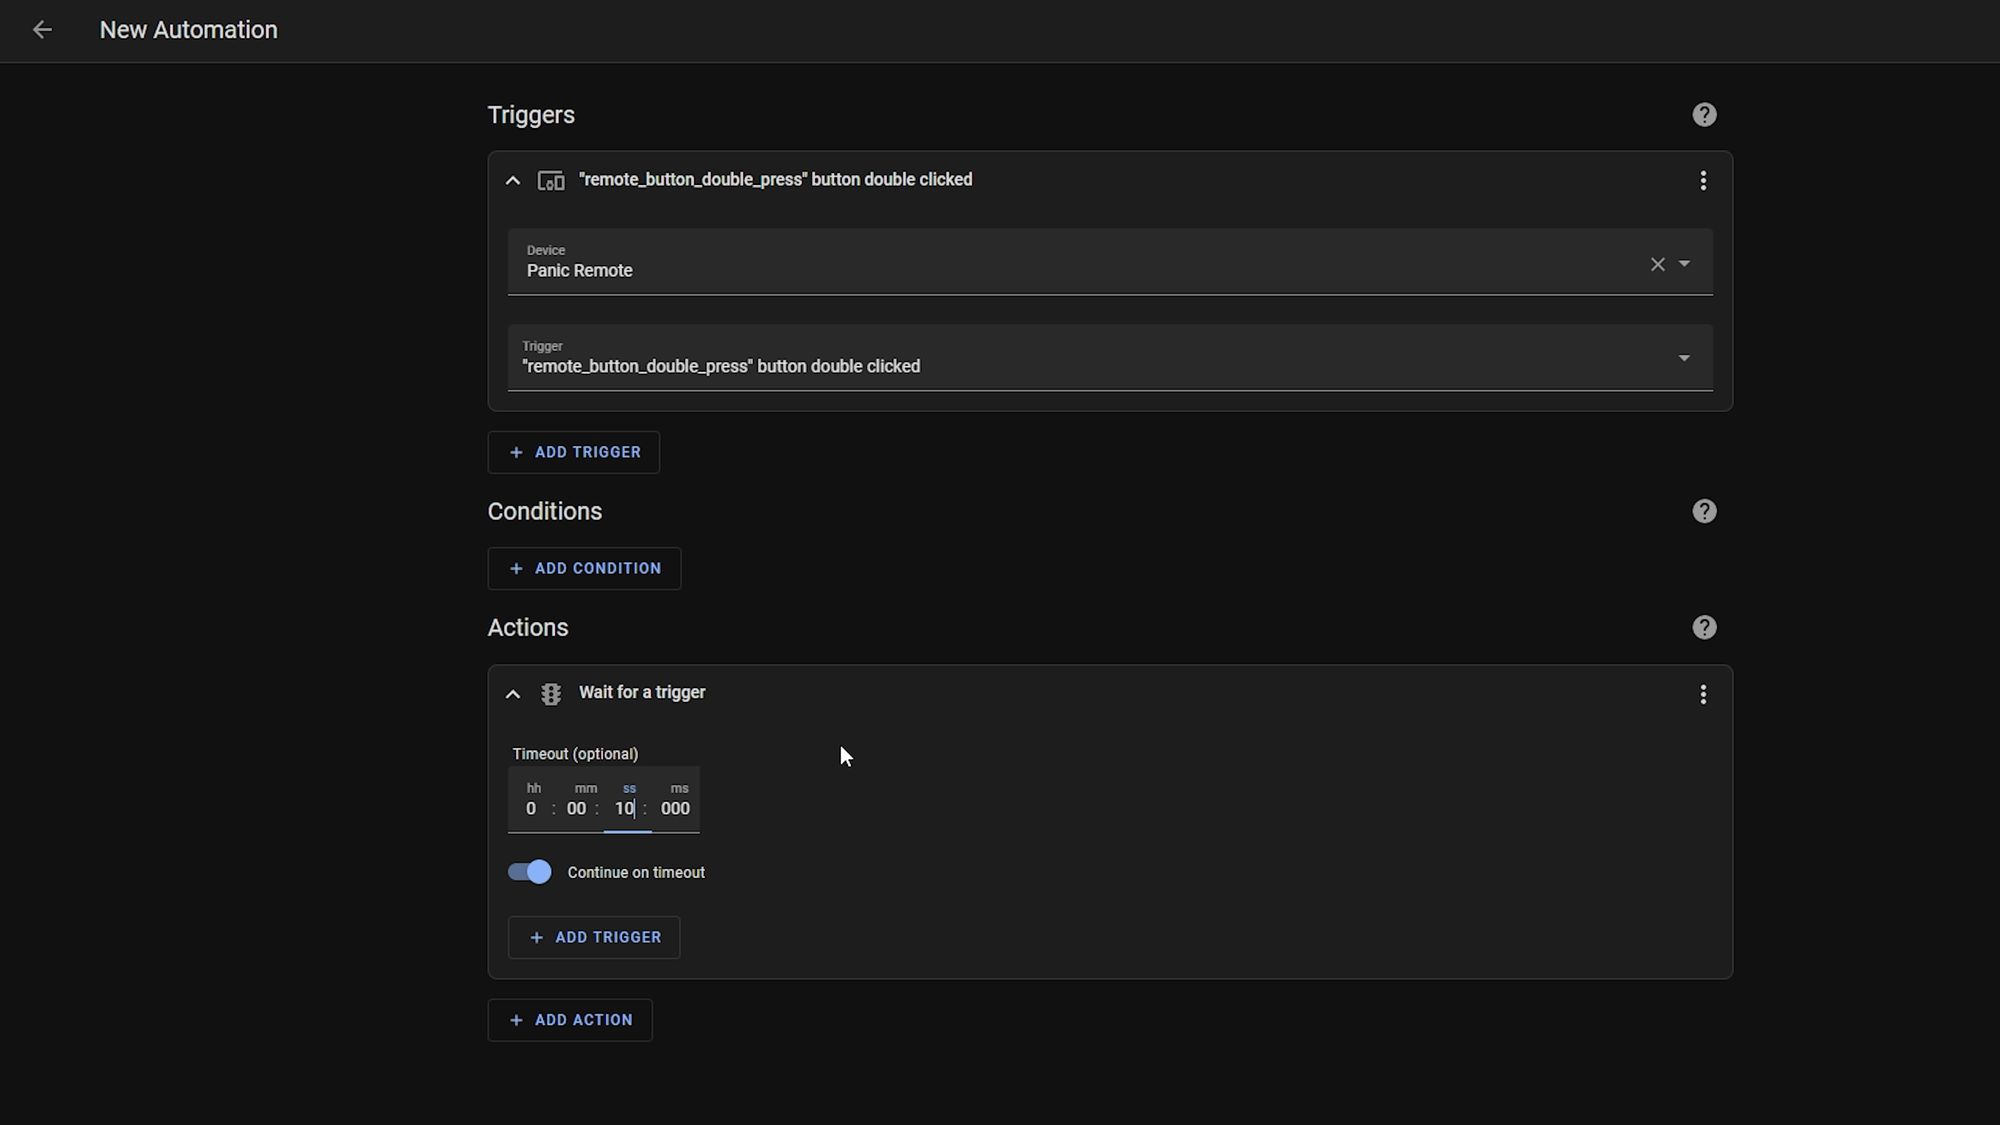
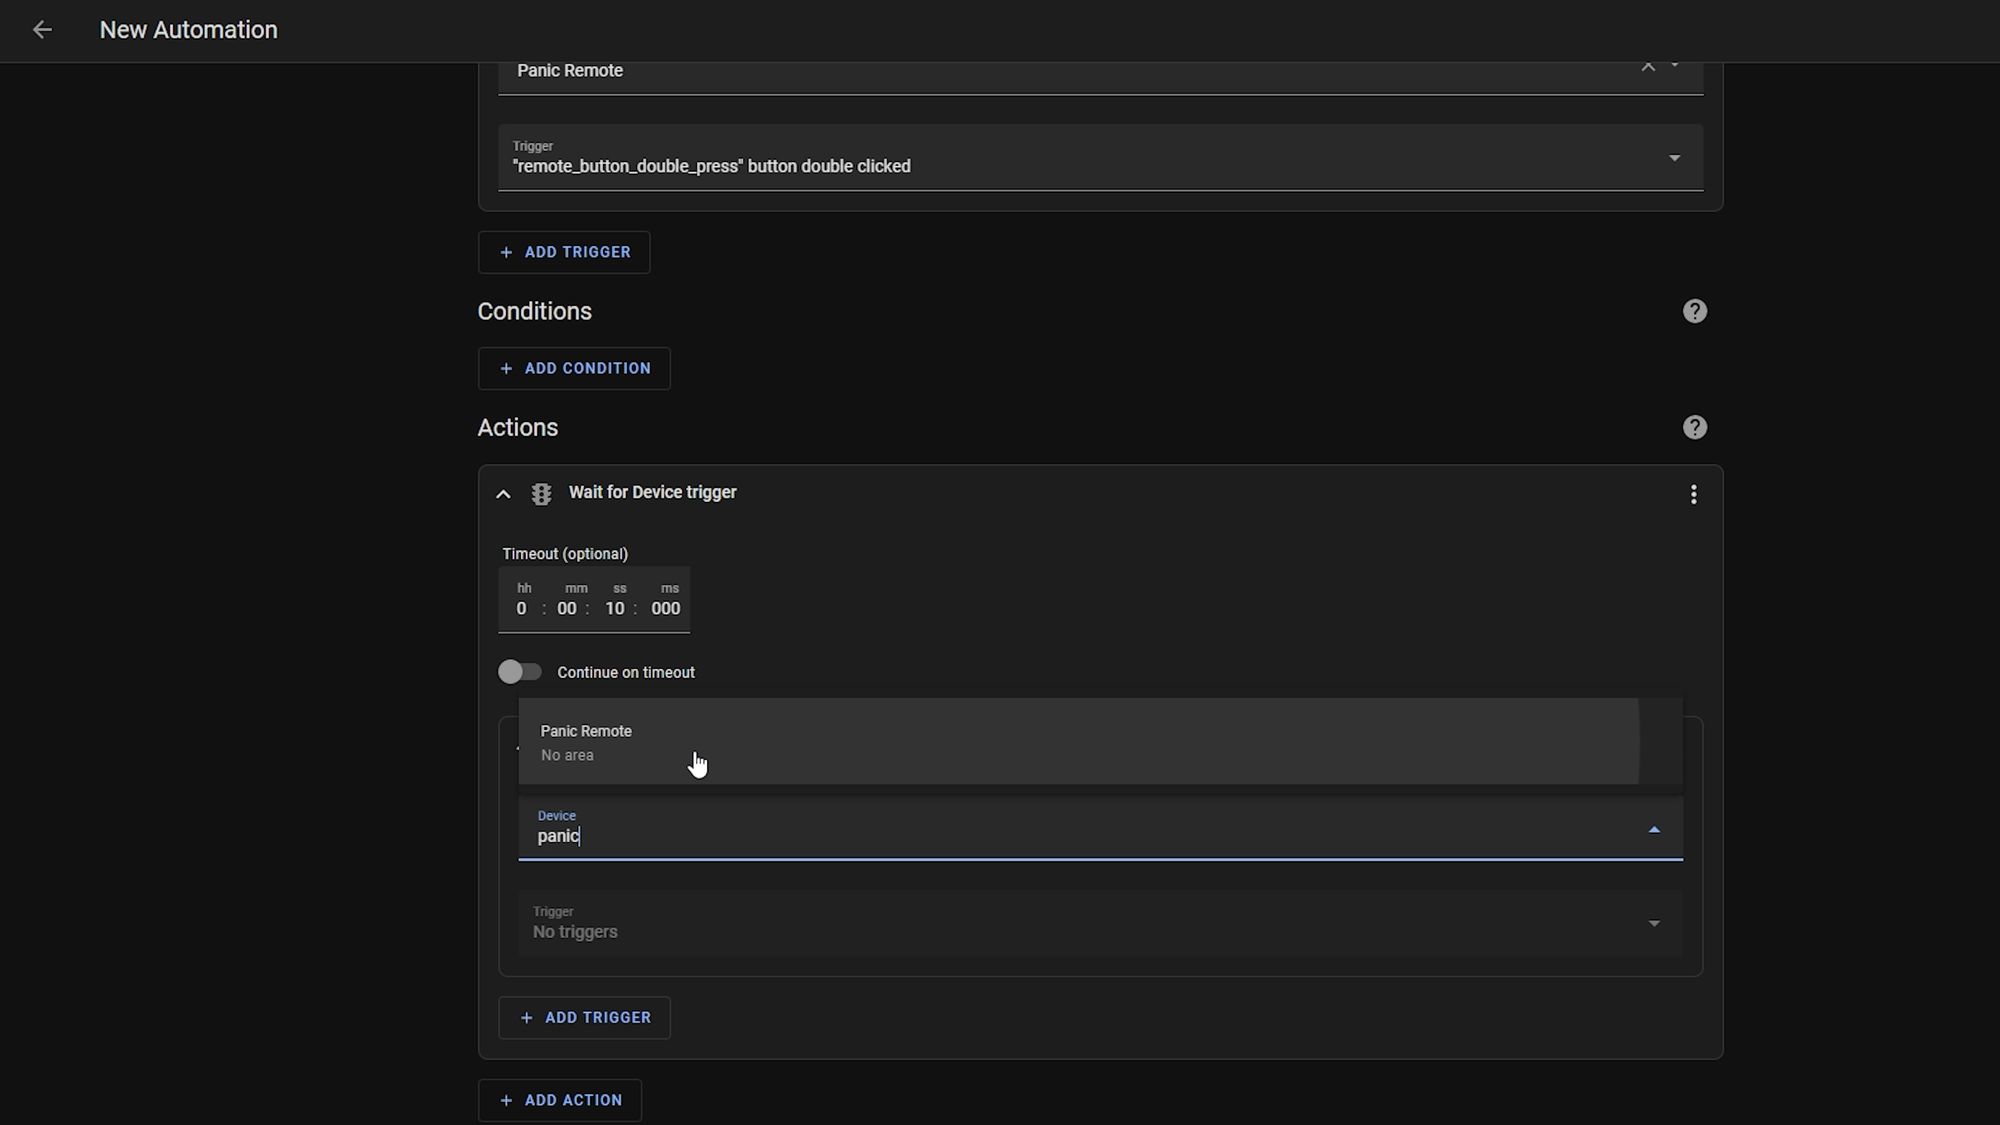
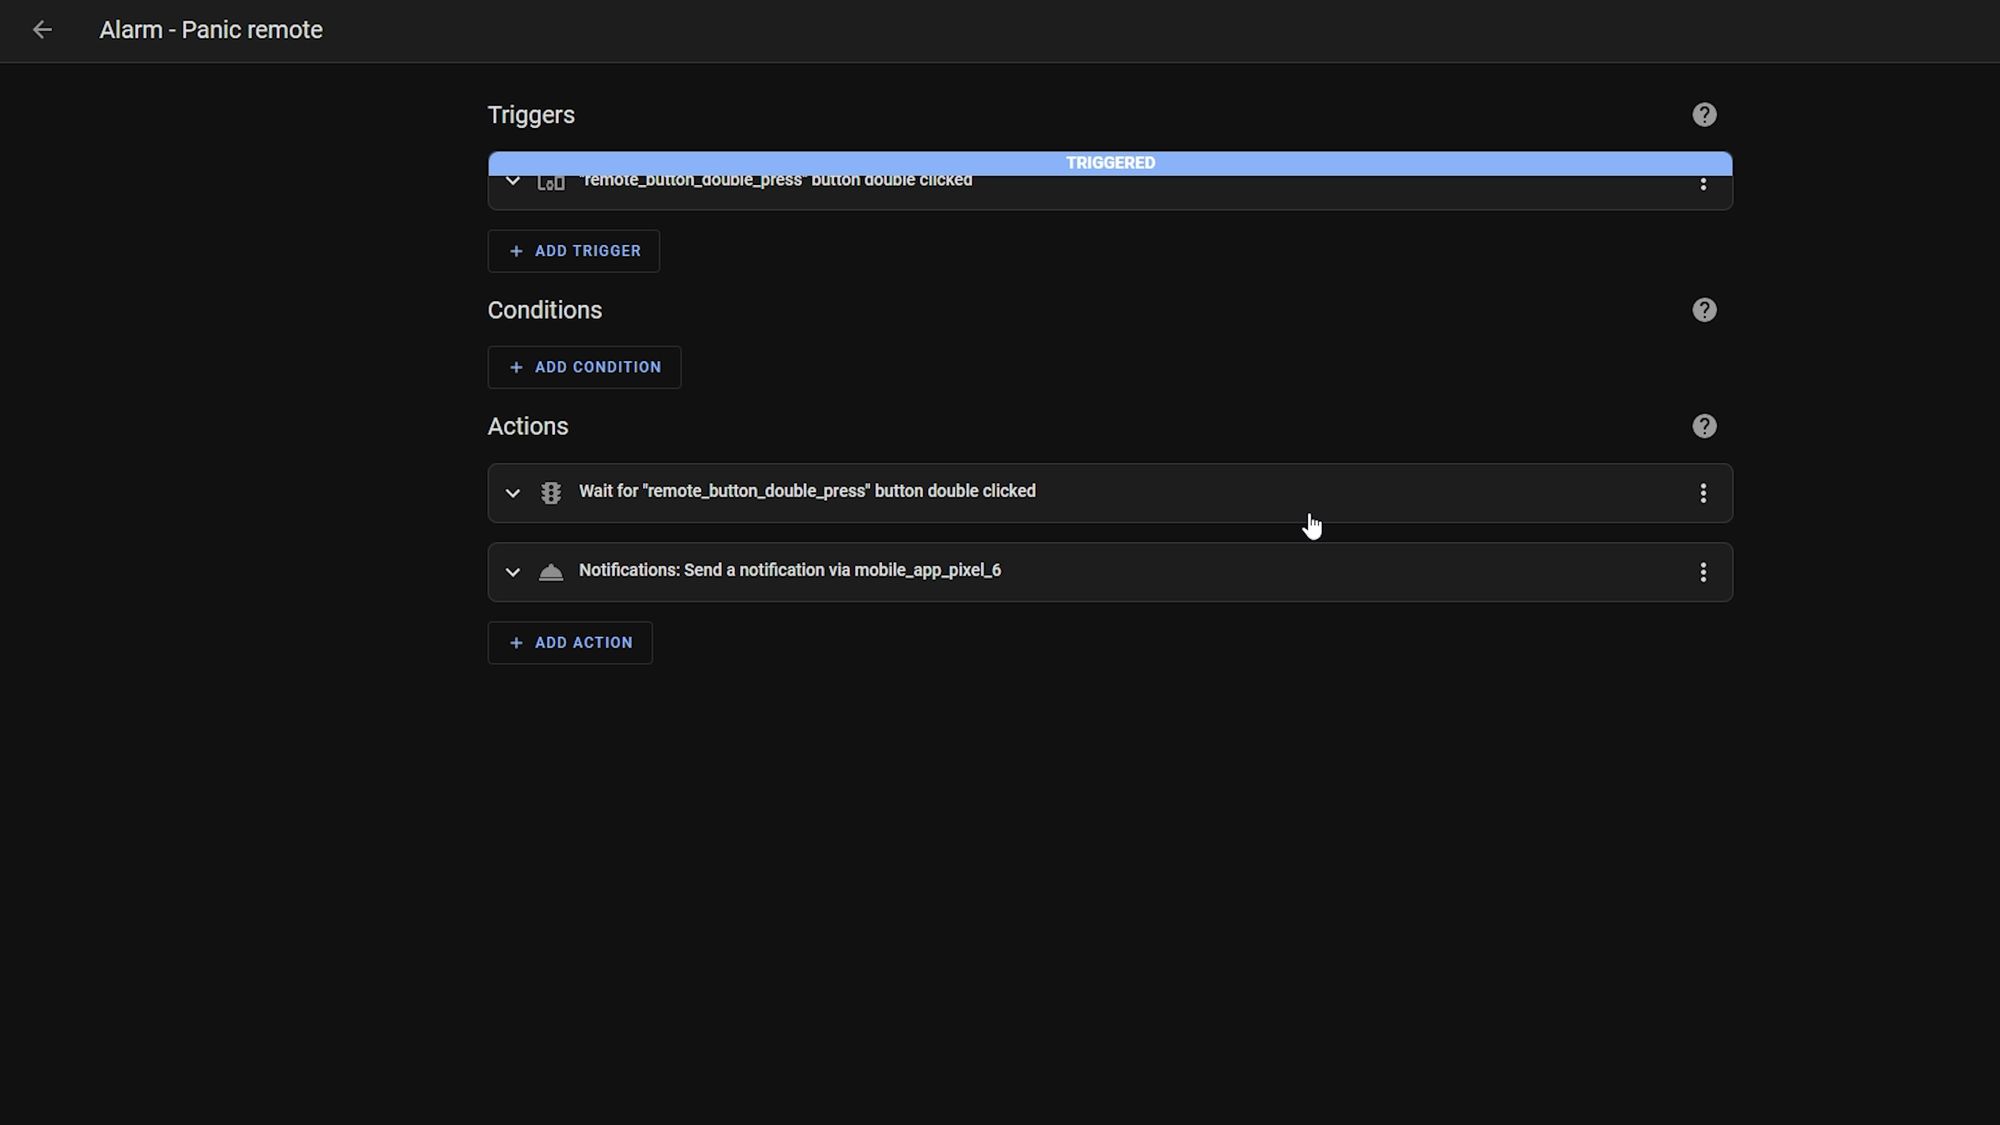
Firstly, head over to automations and create a new automation. For the trigger this time, we are going to select device from the drop down and then select our panic remote. Then select the action you want from the list and, in my case, it is a double press.
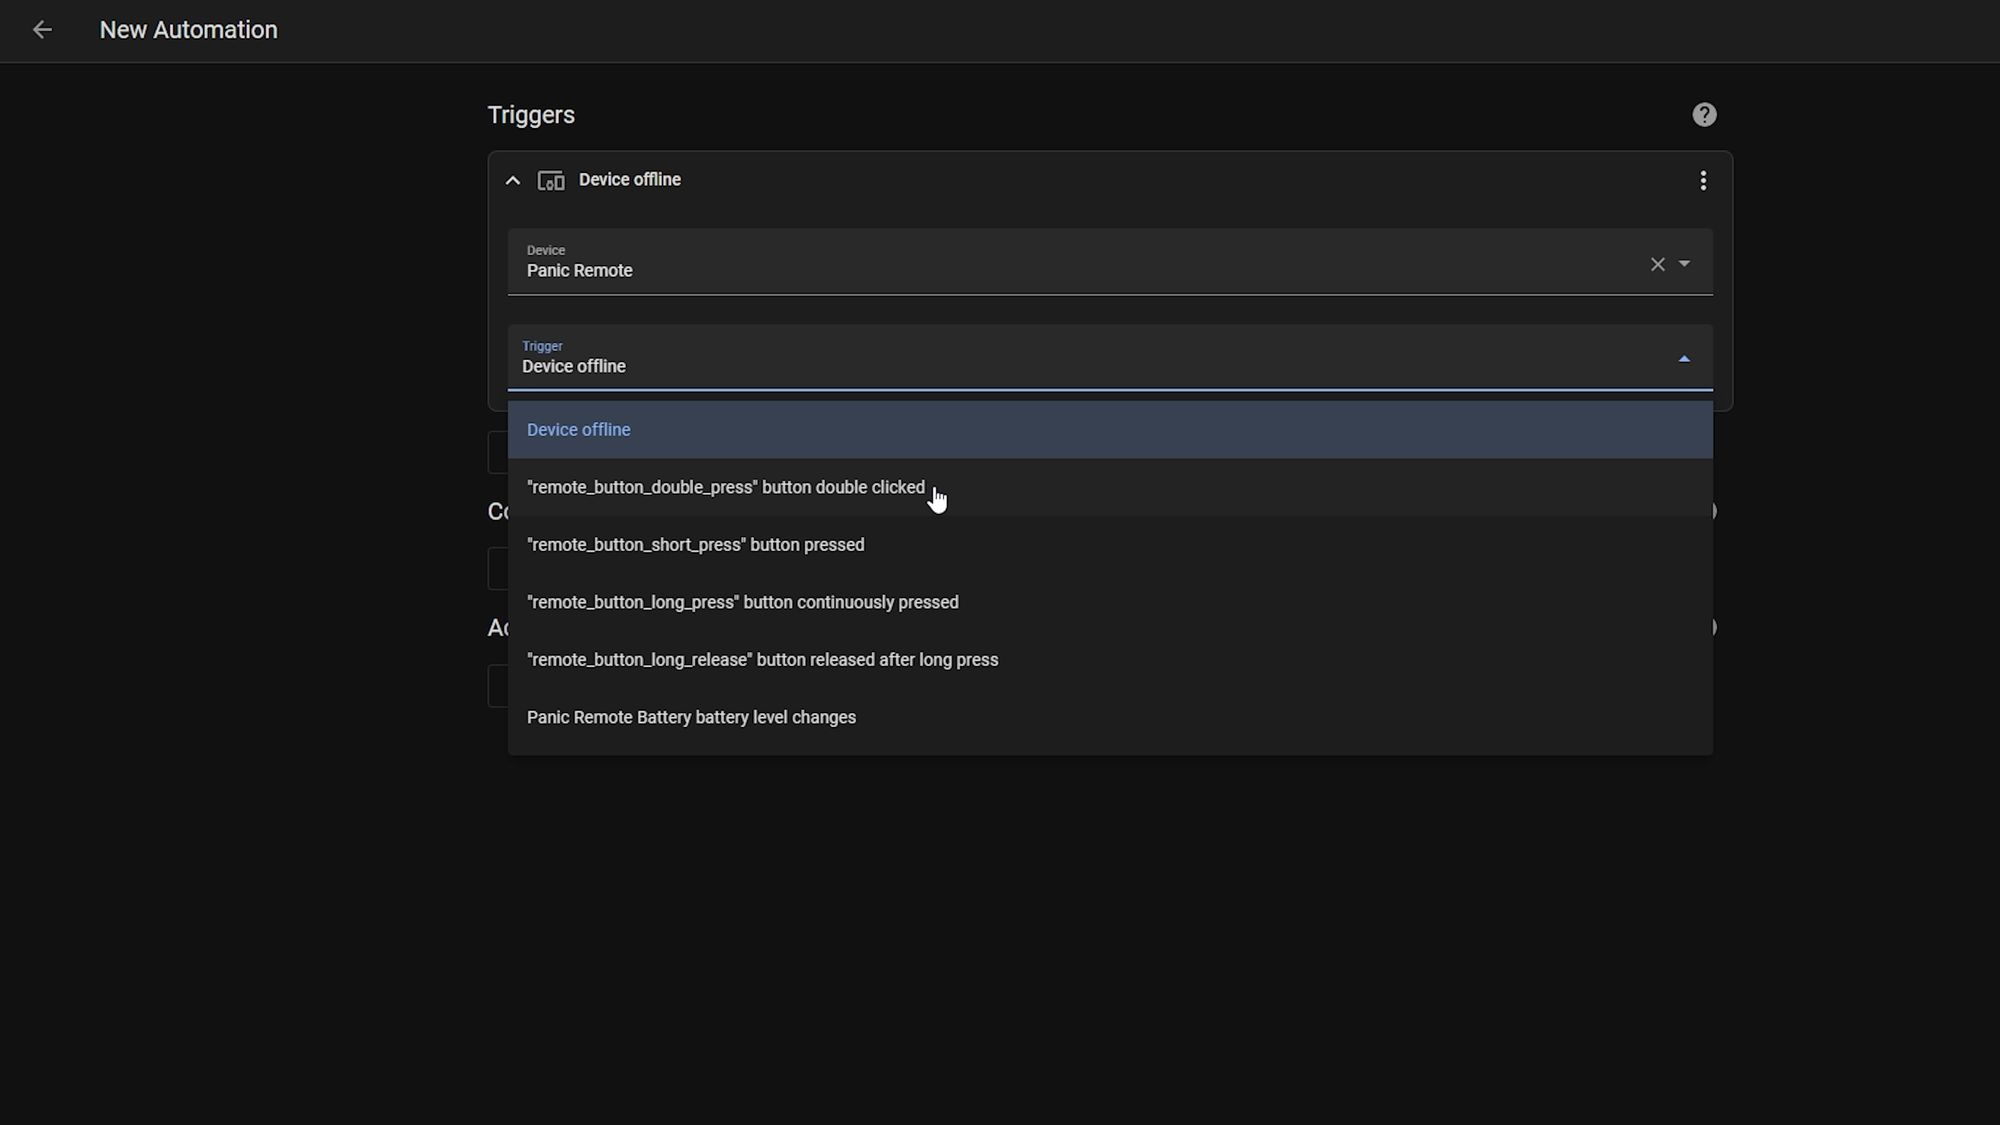
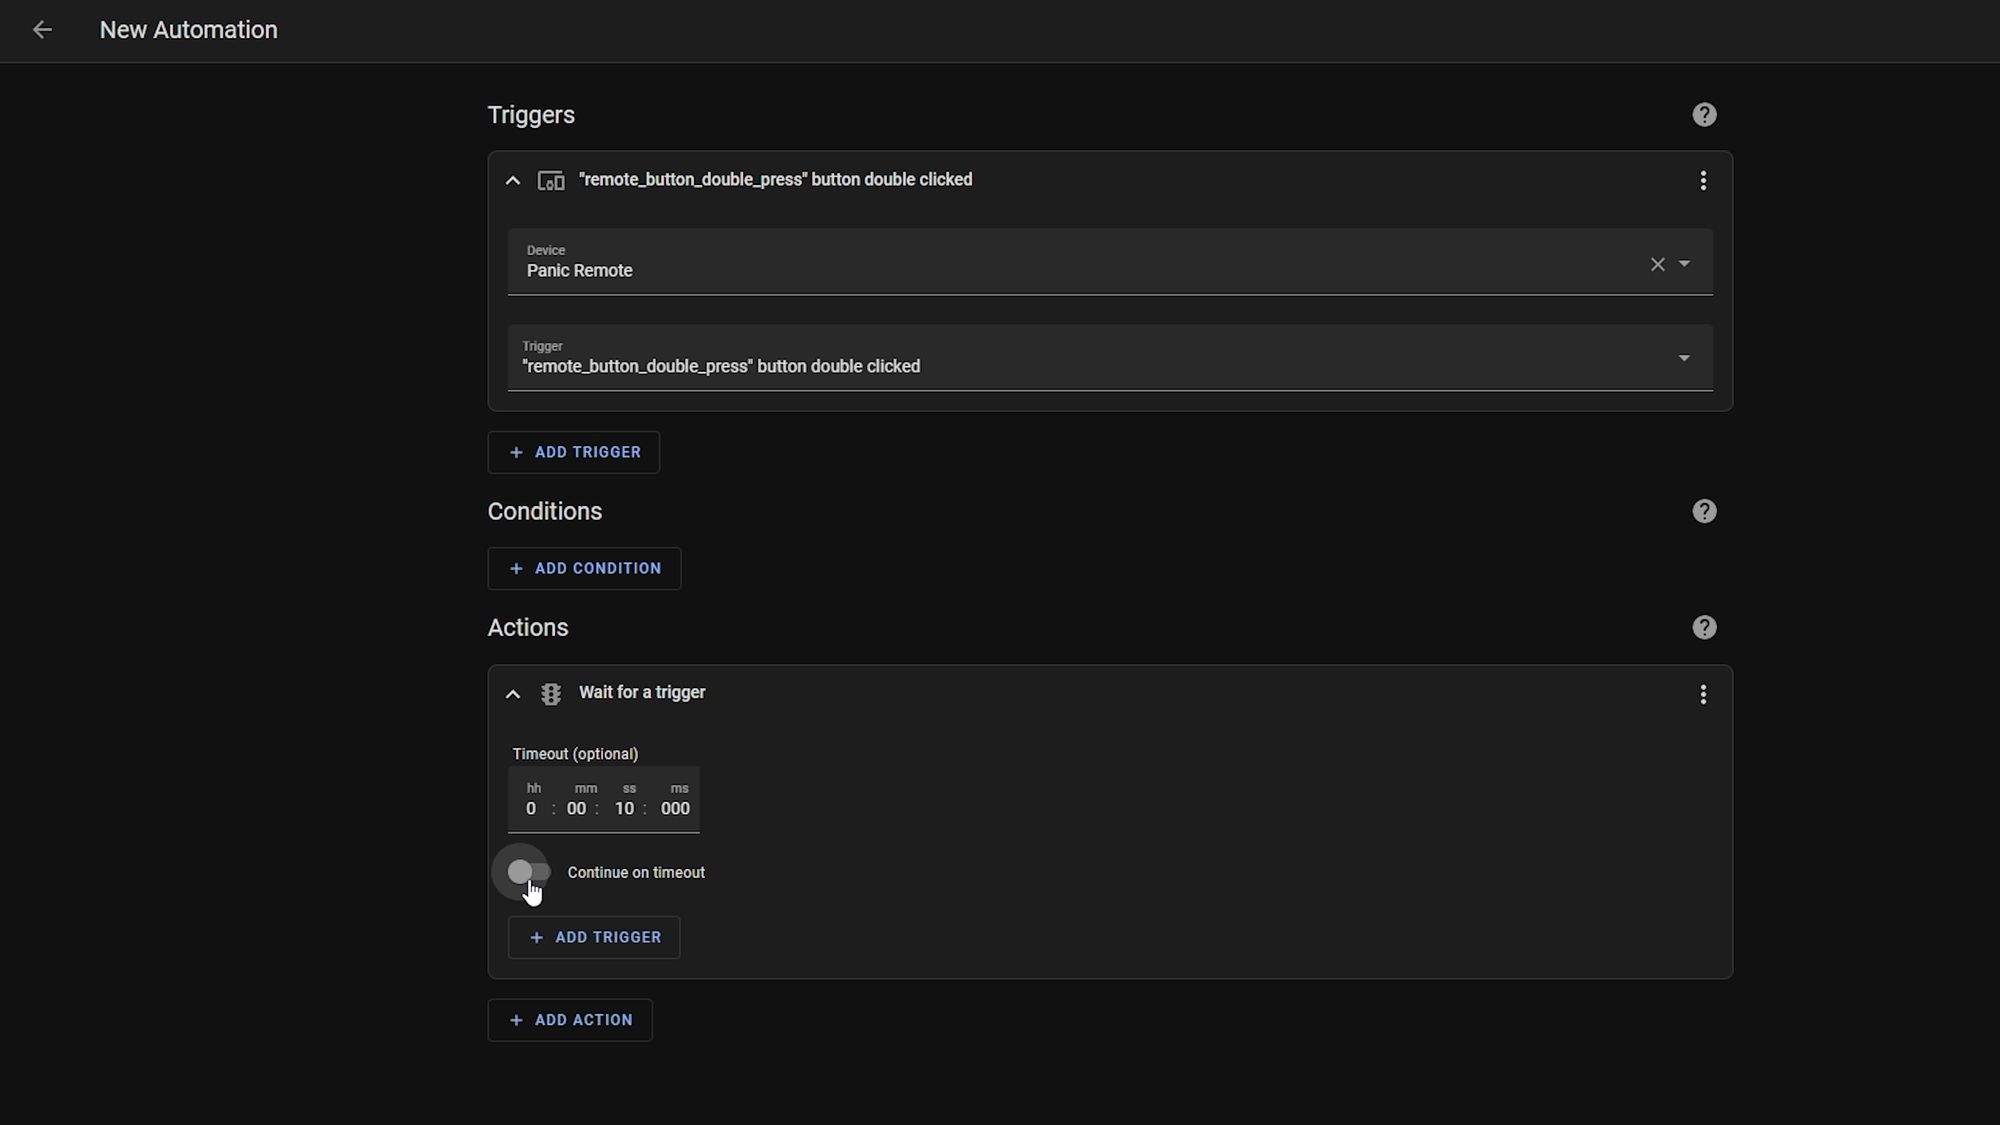
Then in the action section, we are going to select a wait for trigger. Enter 10 seconds in the timeout and make sure to disable the continue on timeout option, as we do not want this action to run if the double press is only hit once. Hit the trigger button once again and select device, choose the panic remote and then select the action and, again, I’m going to select double press.
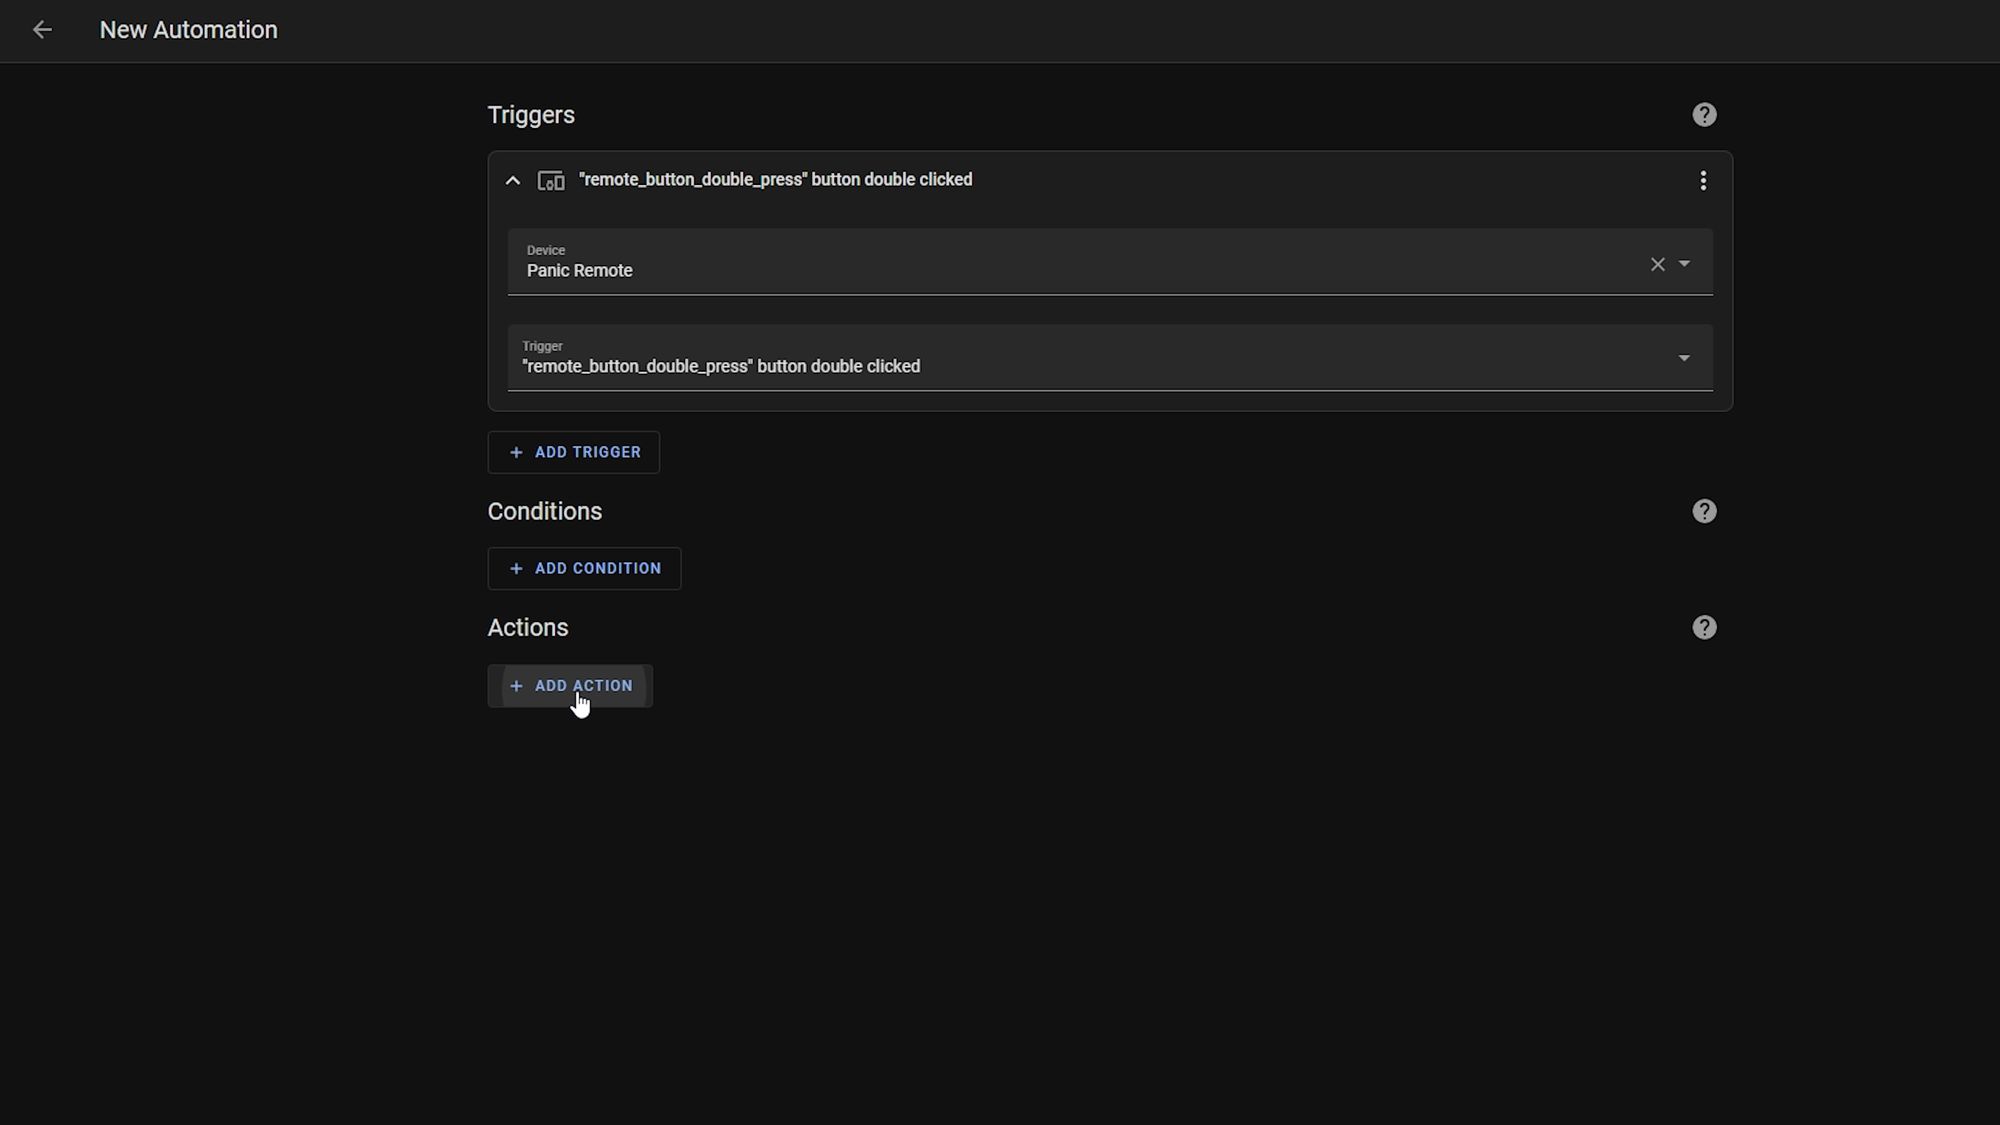
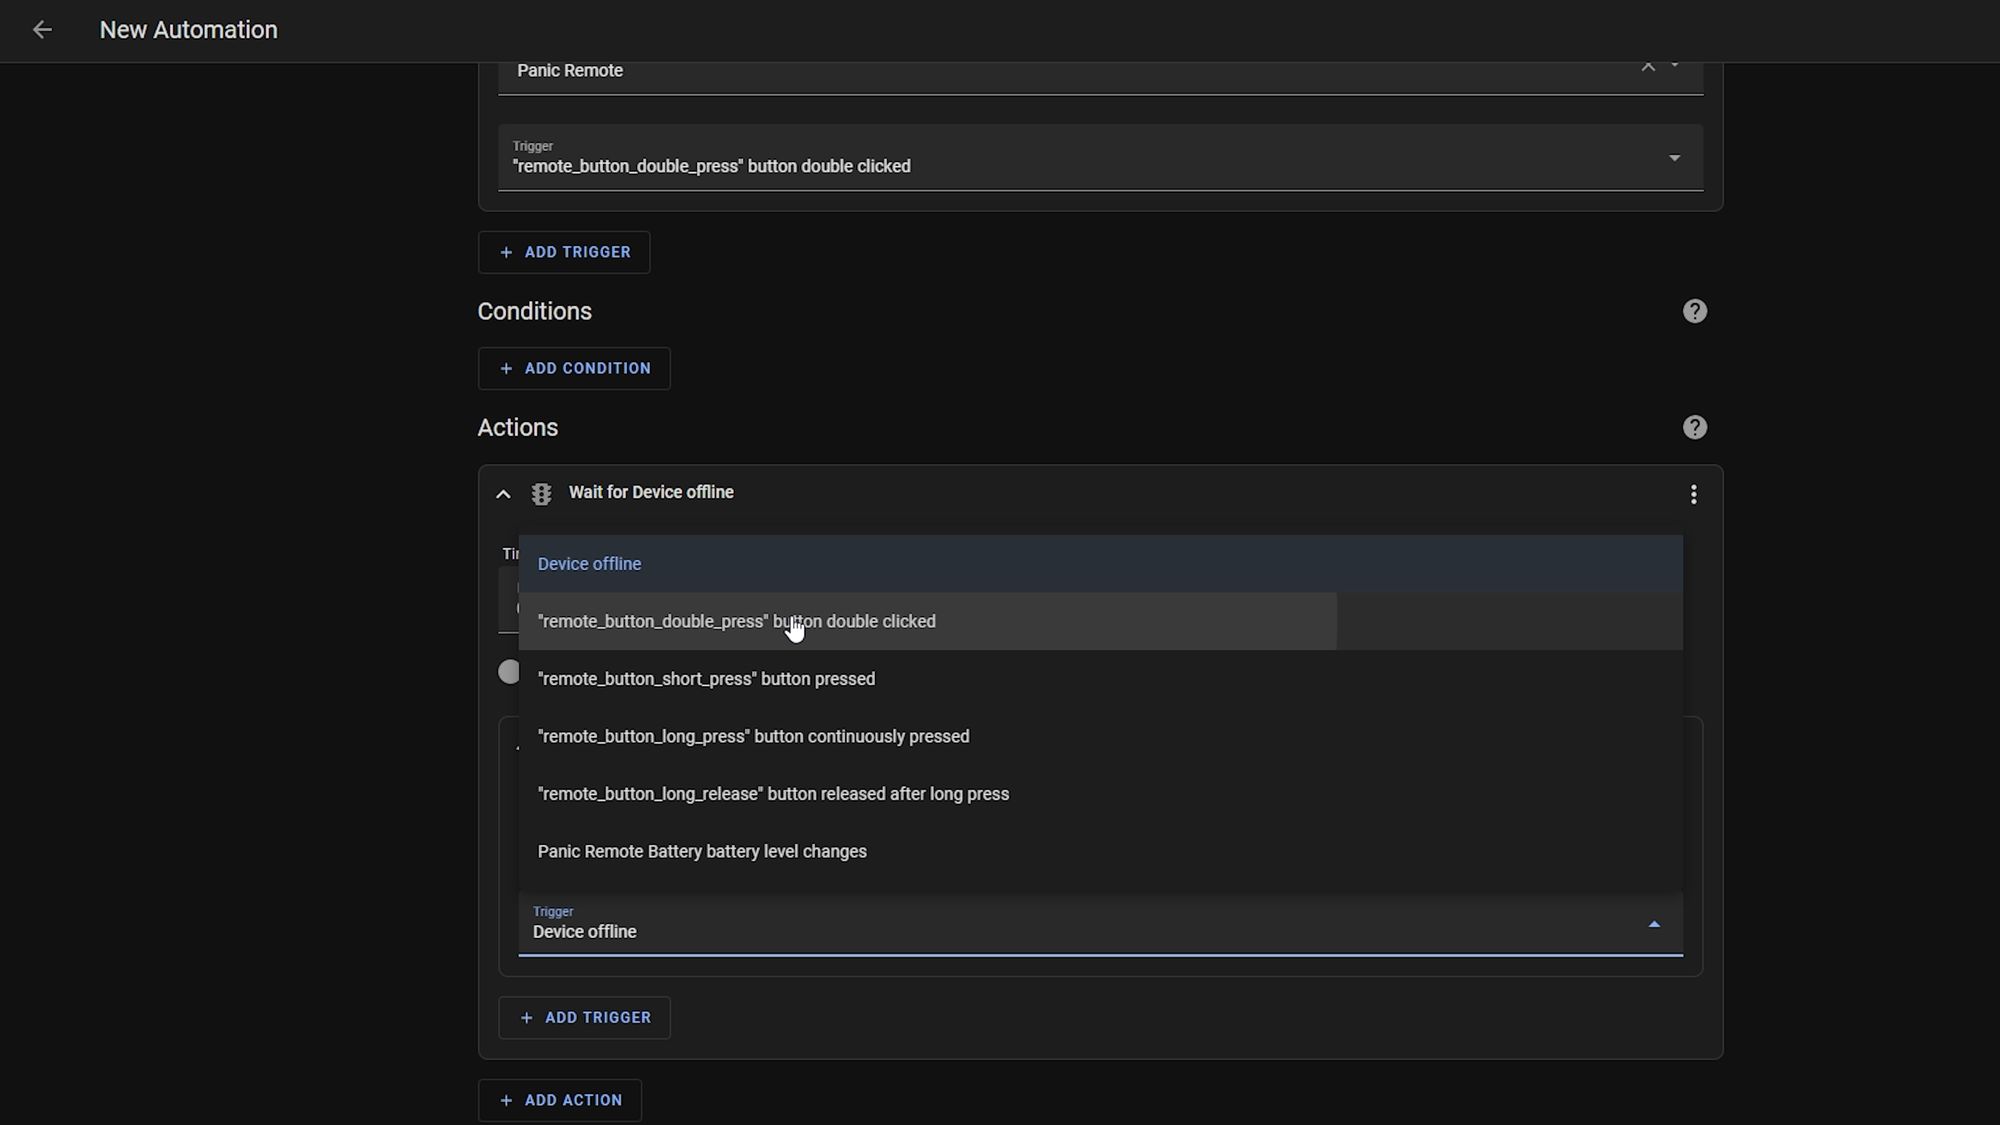
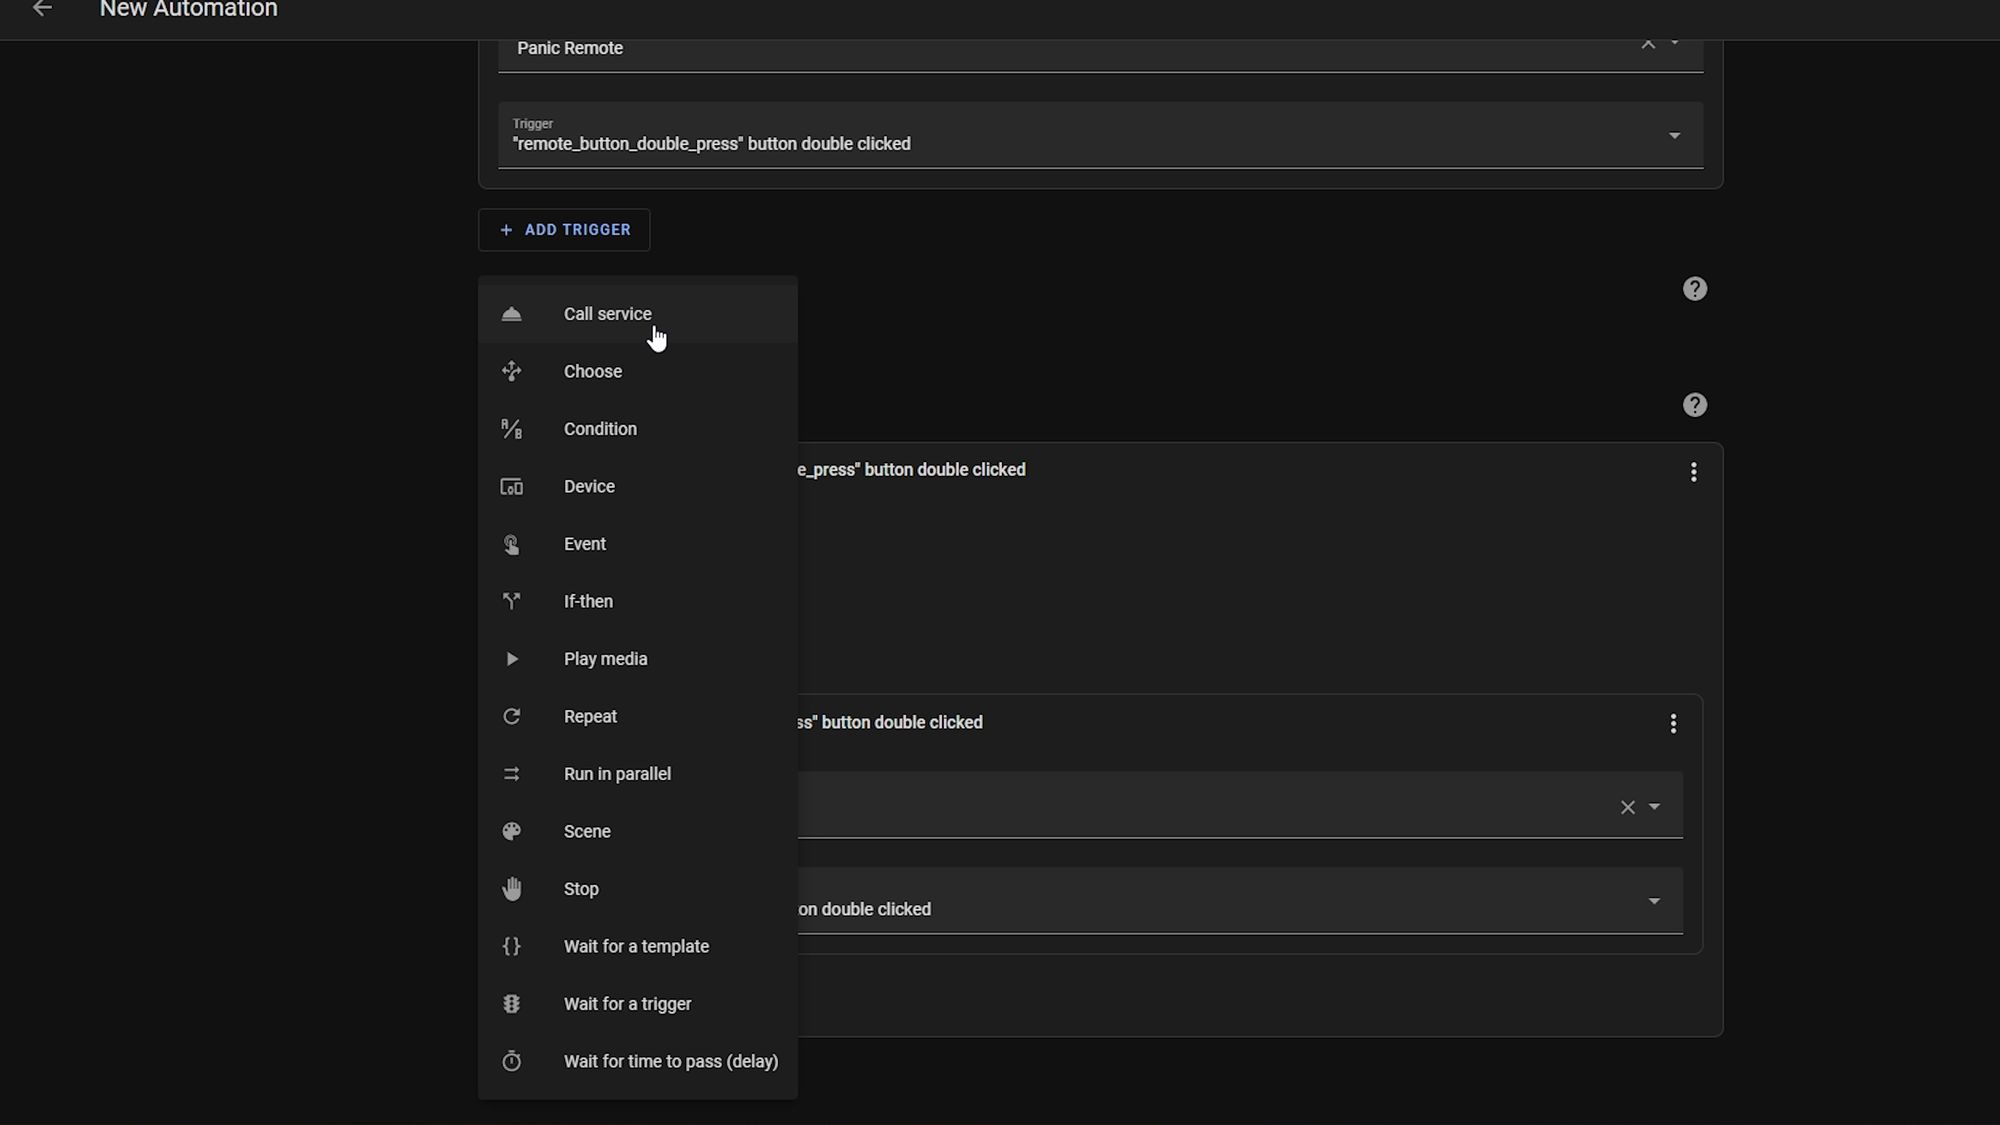
Go ahead and enter the sequence of events you want to occur when the panic mode is run - again, I’m just using a notification for this example but you can go ahead and enter whatever you would like.
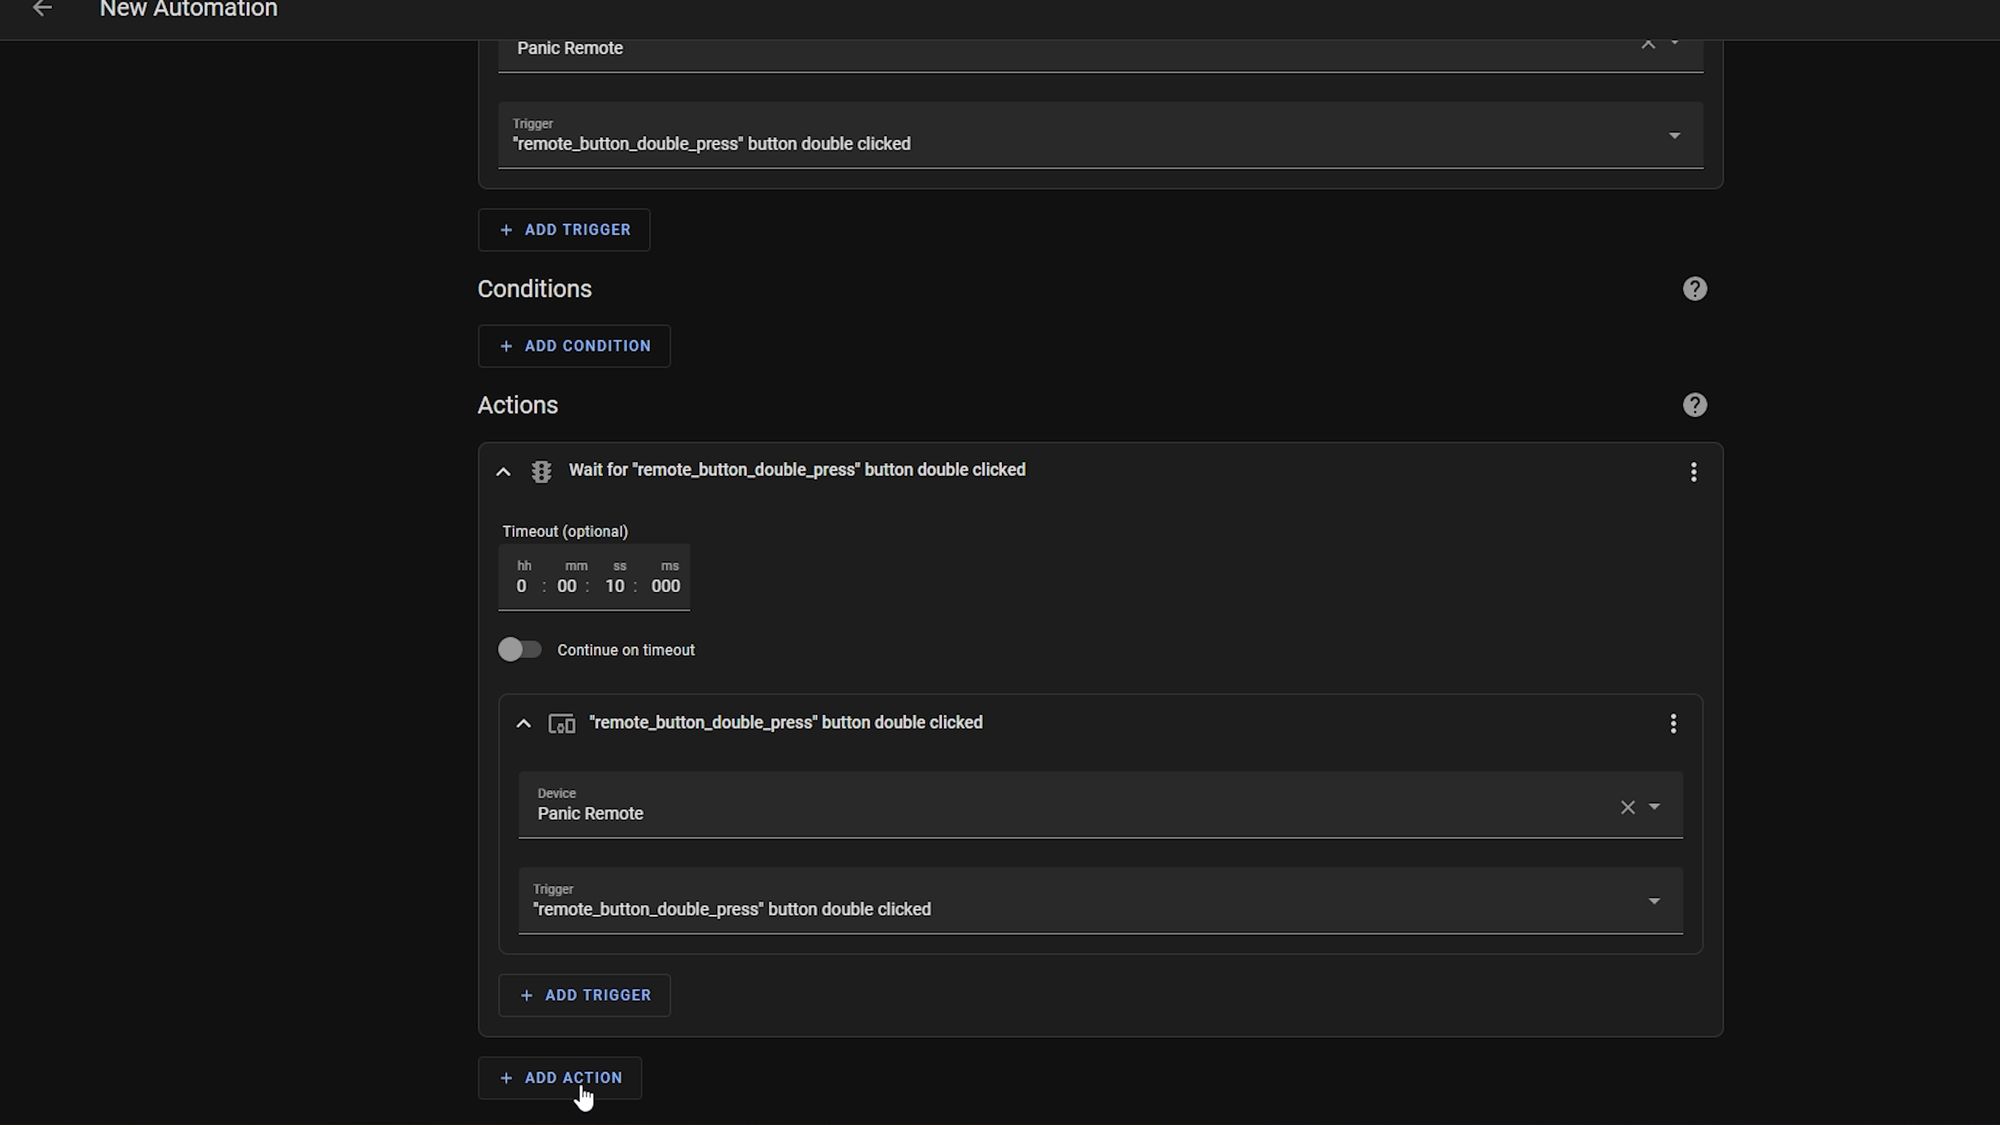
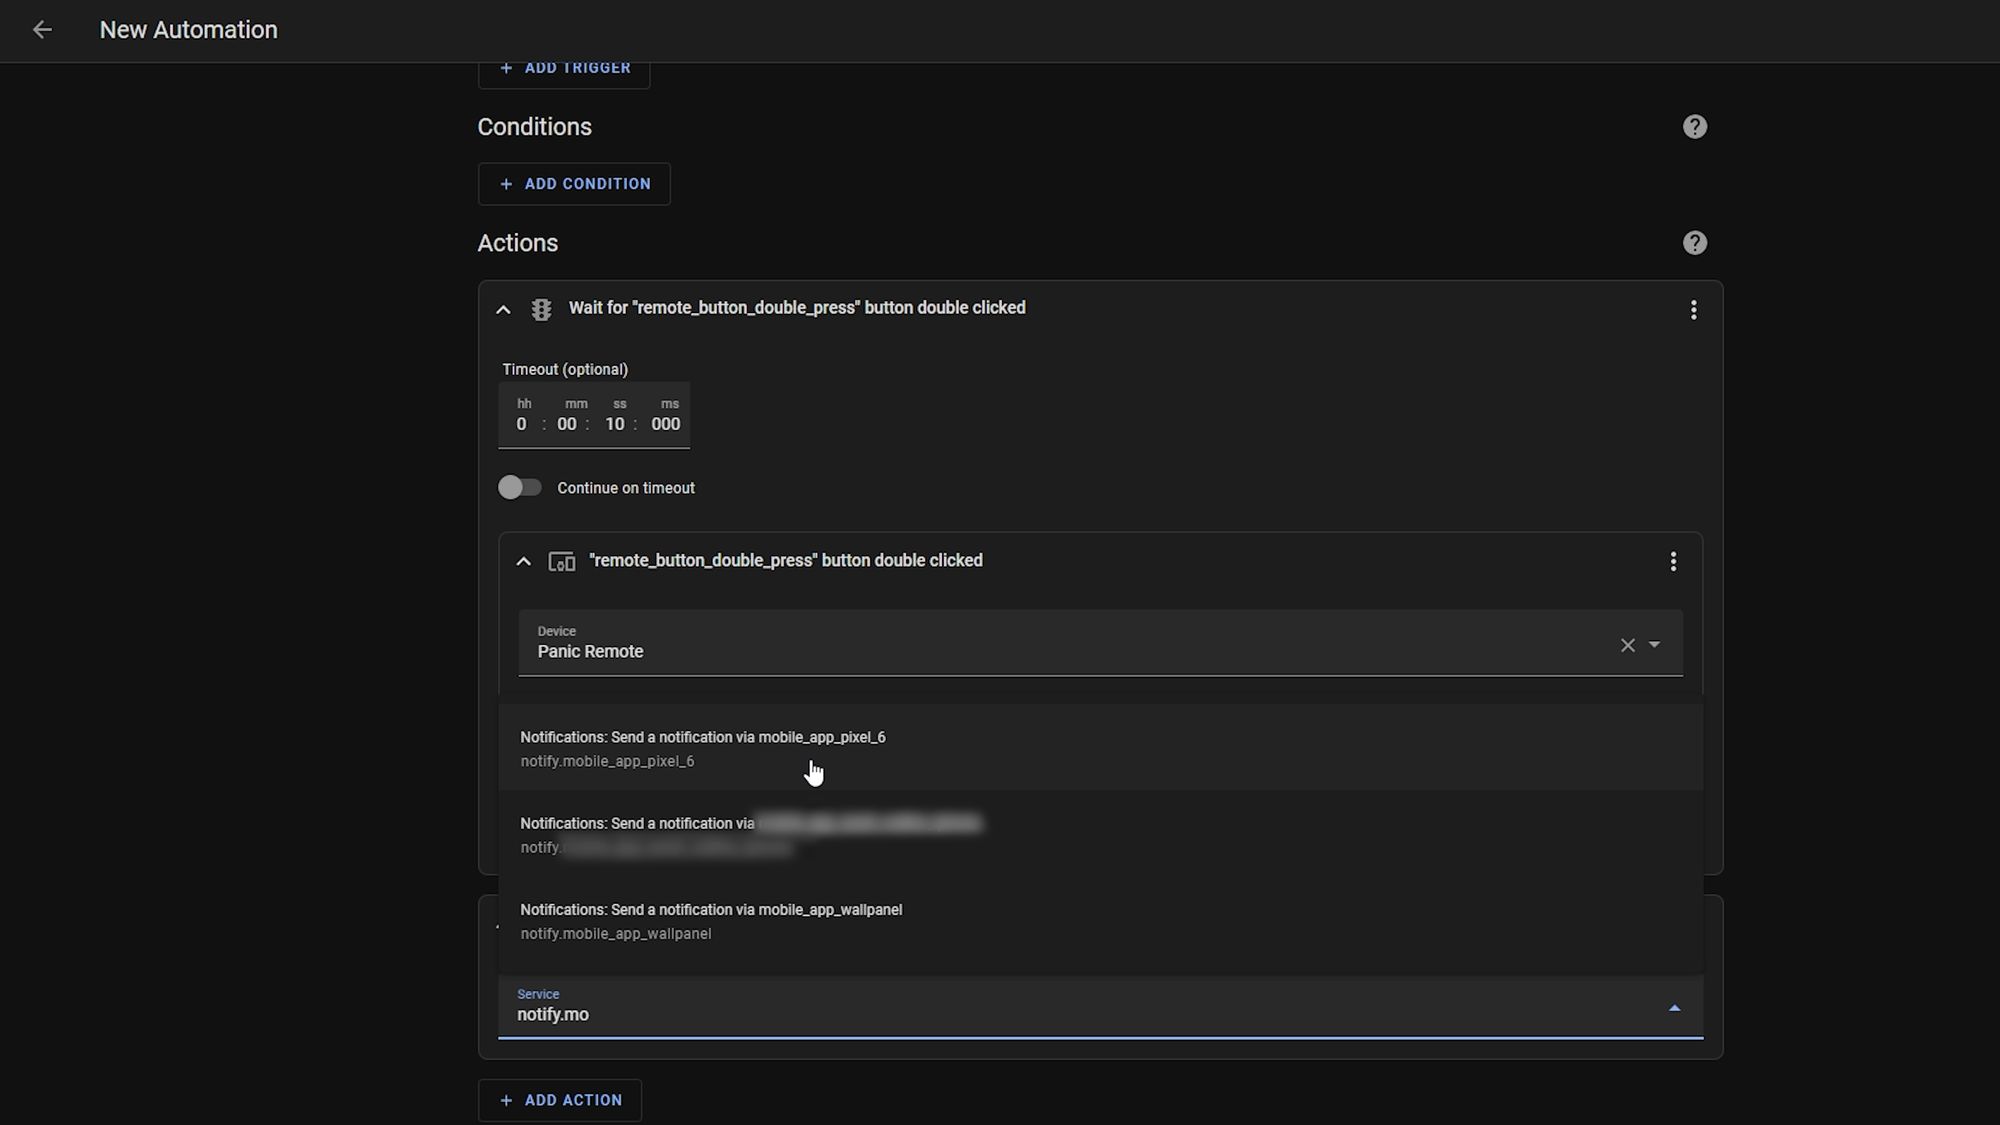

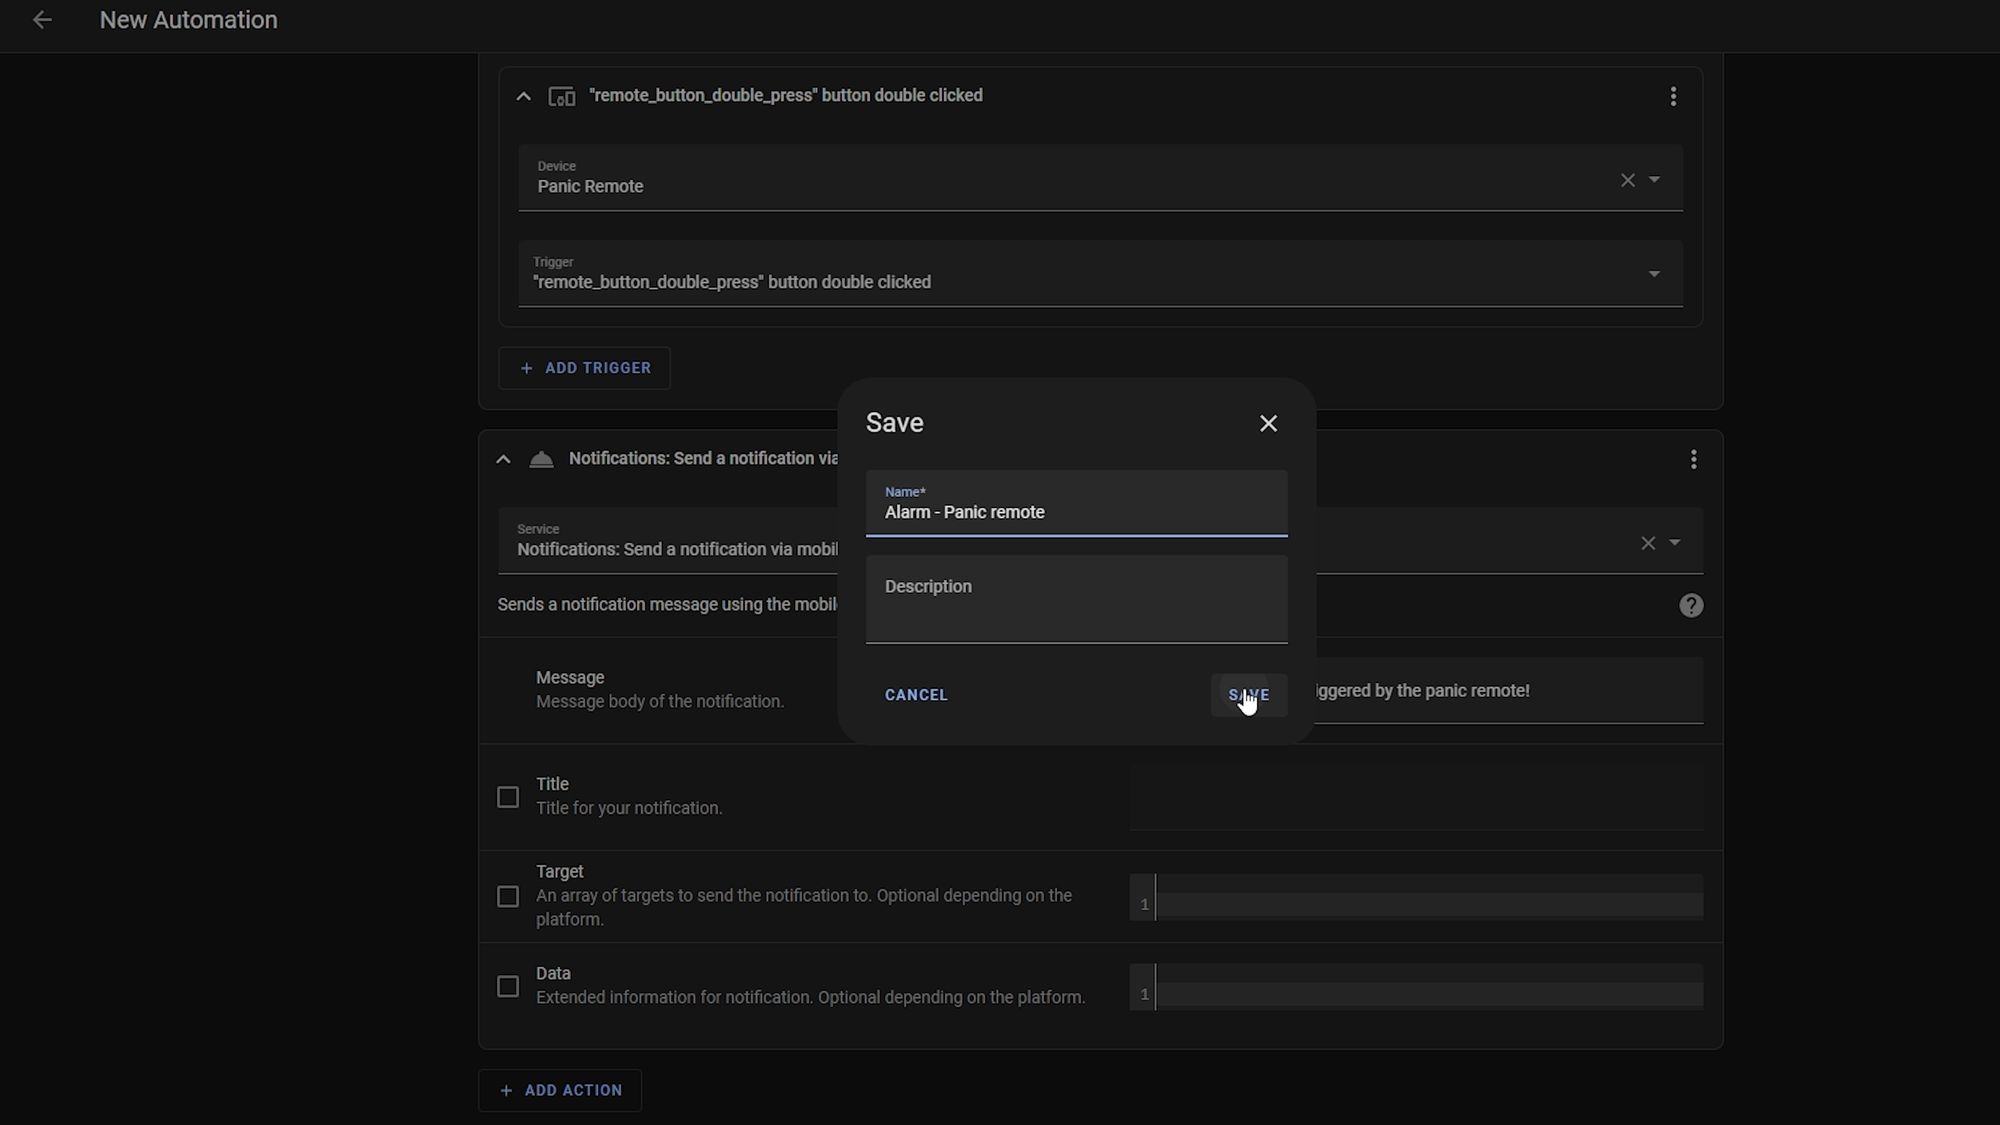
What this does is run the automation anytime a double press is hit on the remote but it’s then going to wait for a second double press before actually running the automation. Therefore, to effectively trigger the panic mode, you double press, wait one second and then double press again before it will run properly. The timeout means you have 10 seconds to do the second double press, and if you don’t, the automation won’t do anything else.


This means that in theory it should never be accidentally triggered and you should be certain you actually want to trigger the panic mode. You can, of course, add another wait for trigger to be extra sure, as well as reduce the time if you want to.
Fourth Automation
NFC Tags For Entry & Exit
The final thing I wanted to go over was how to use NFC tags to disarm and arm your alarm. NFC tags are tiny little discs or keyrings that you can scan with your phone and have different things happen.
They are great because they don’t have any batteries and are super small so you basically just program them, put them wherever you want and forget about them. For example, you may want to have one by your front door for disarming when you come home and then maybe one in your car for arming the alarm when you leave for the day.


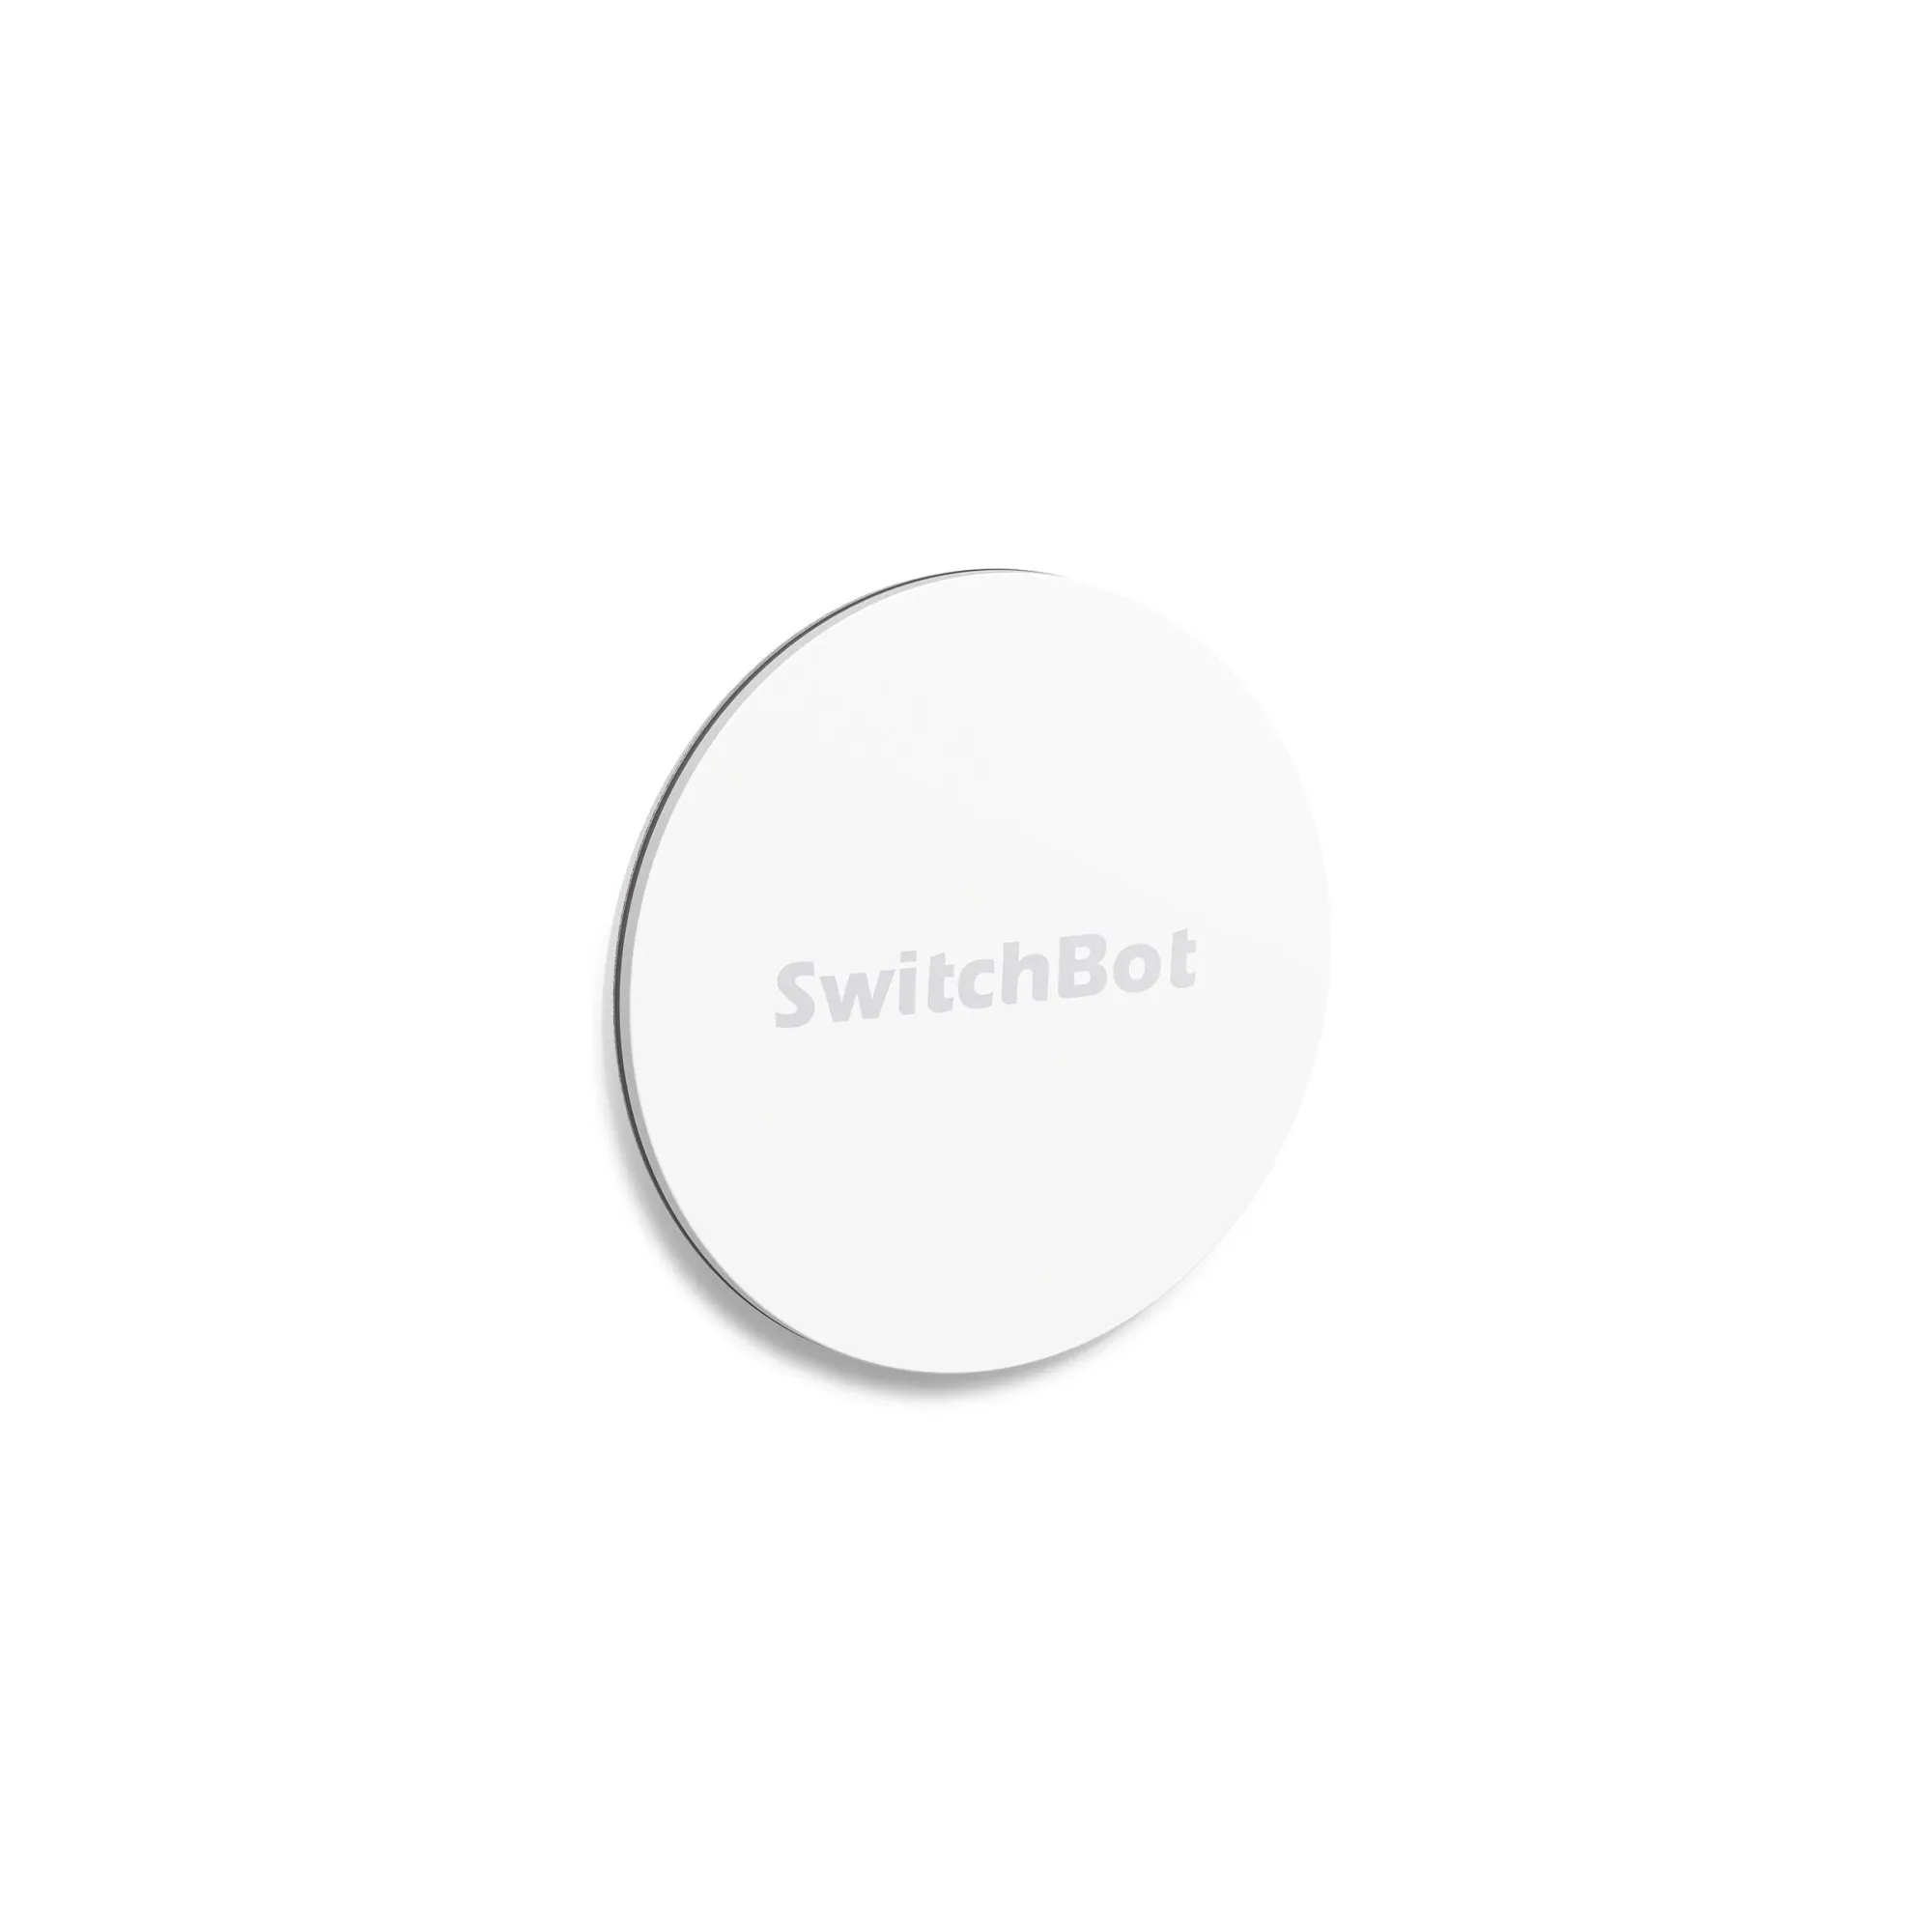
You will obviously need to have NFC tags for this to work, but they are quite inexpensive - SwitchBot has a pack of 3 (£5.99) or a pack of 9 (£15.99) to choose from. They are also available on Amazon but only in a pack of 3.
I personally prefer SwitchBot's as they work well with Home Assistant and are super slim and small, but you can use any that are compatible with your phone.
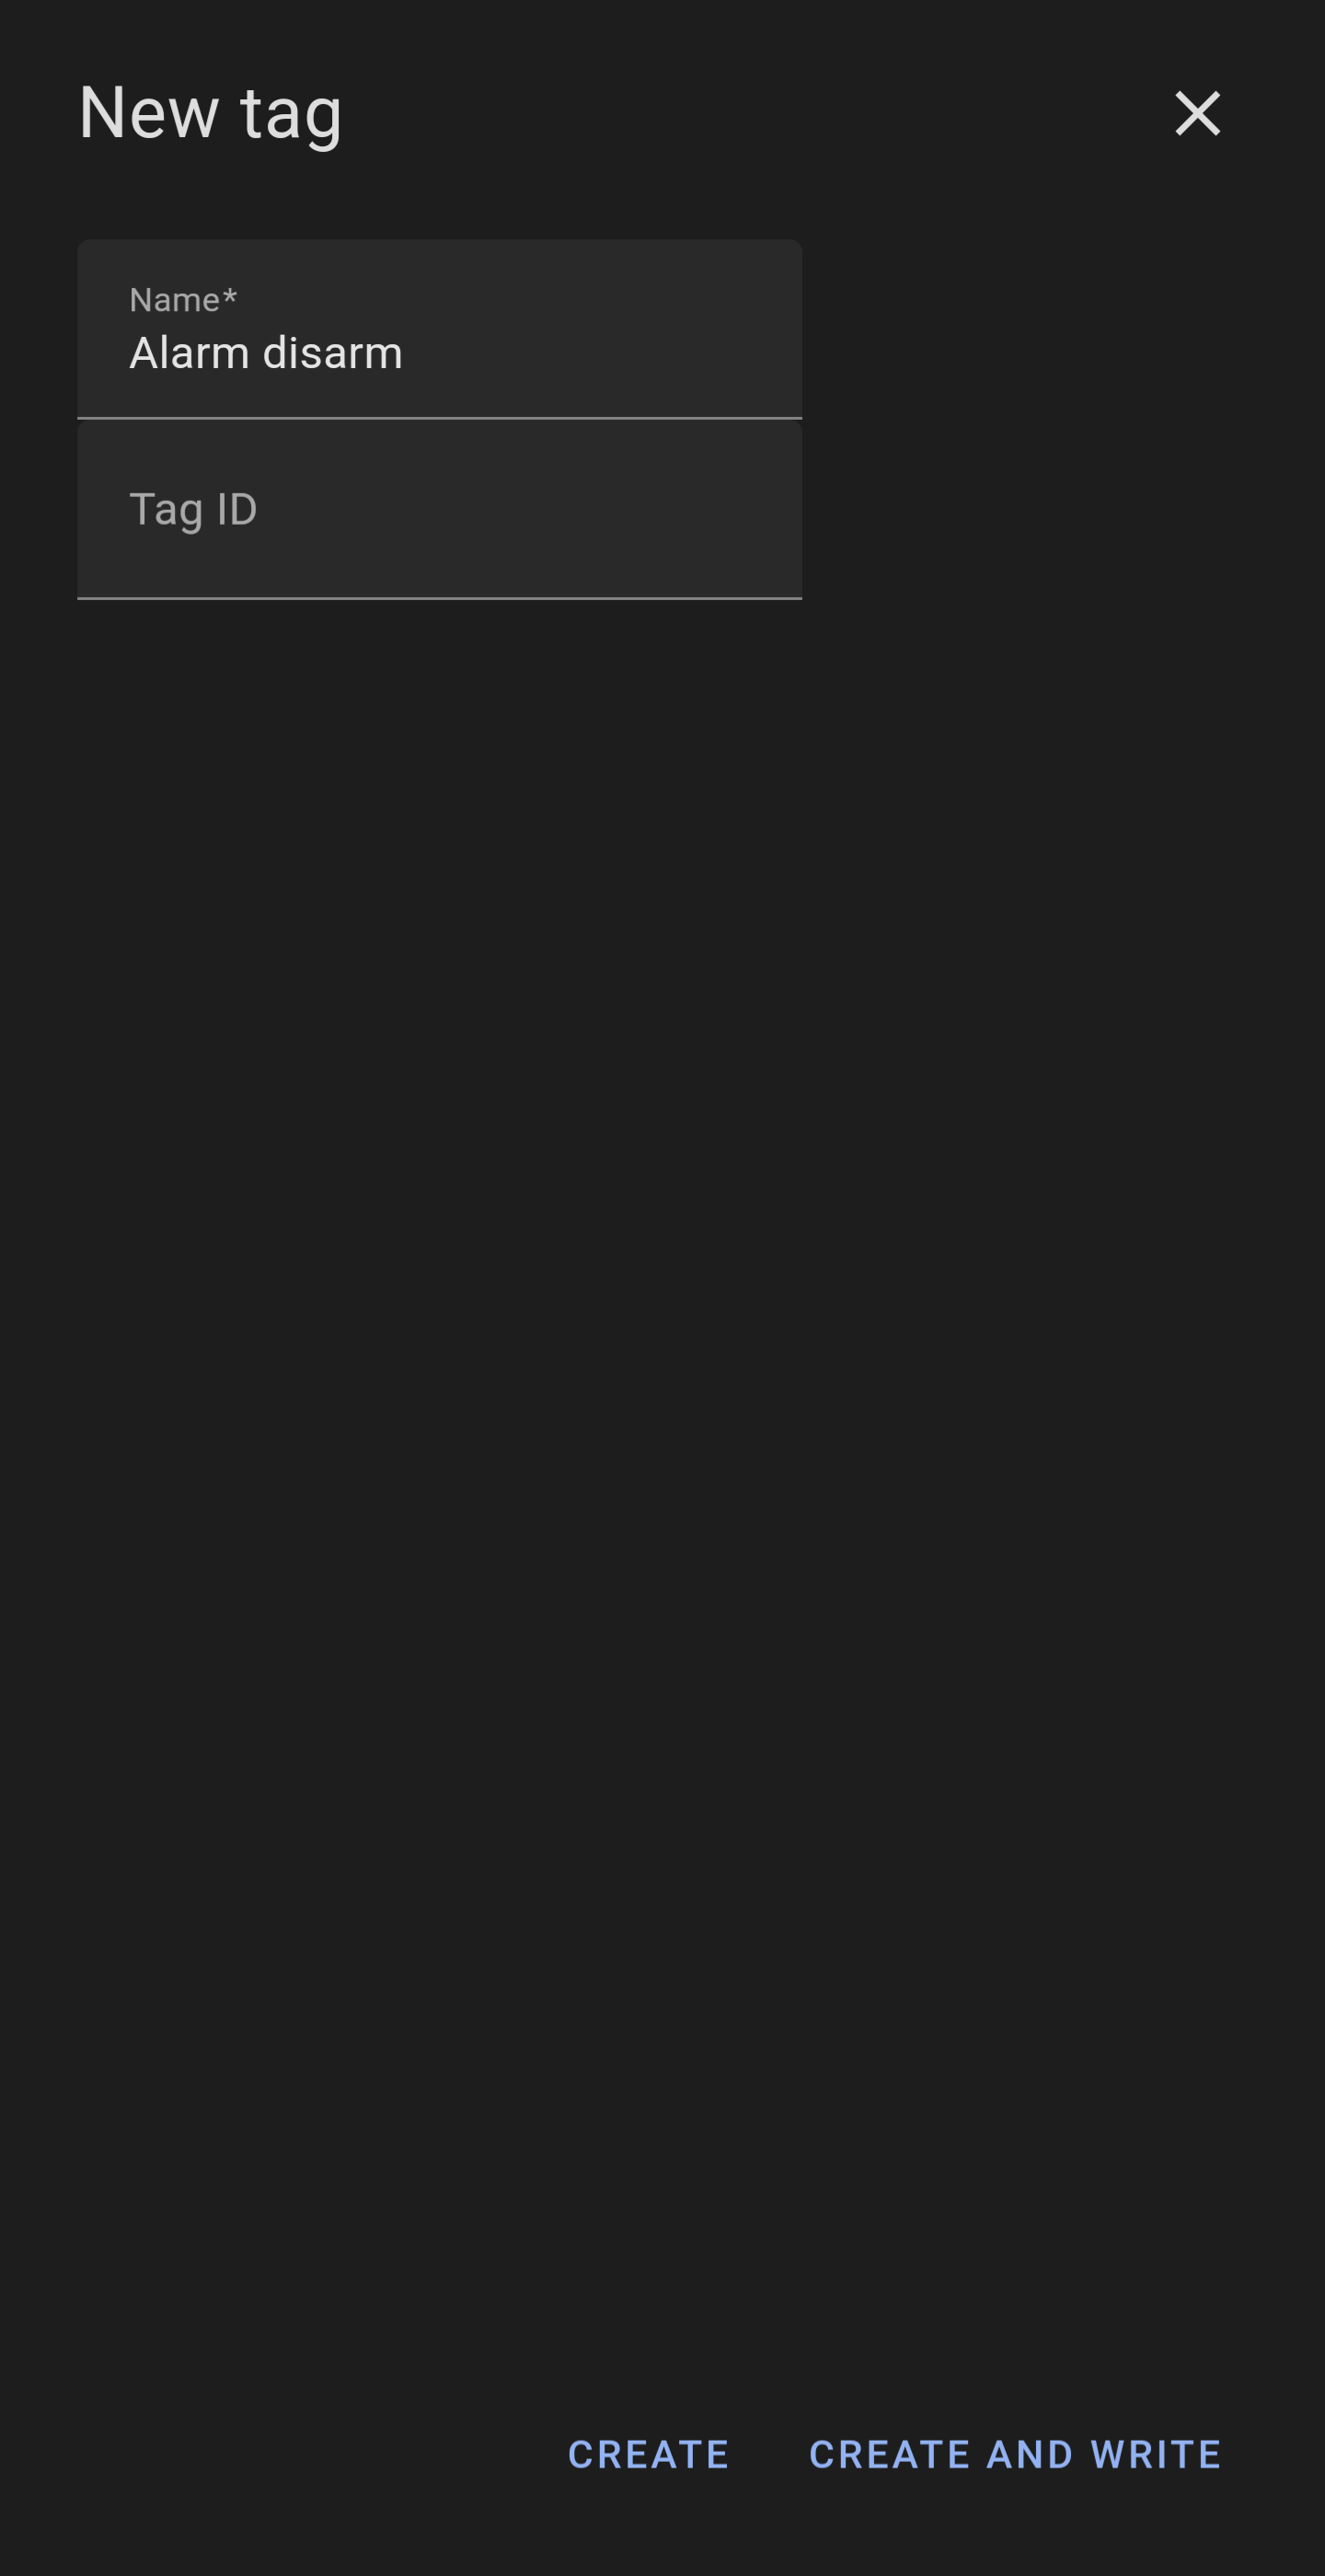
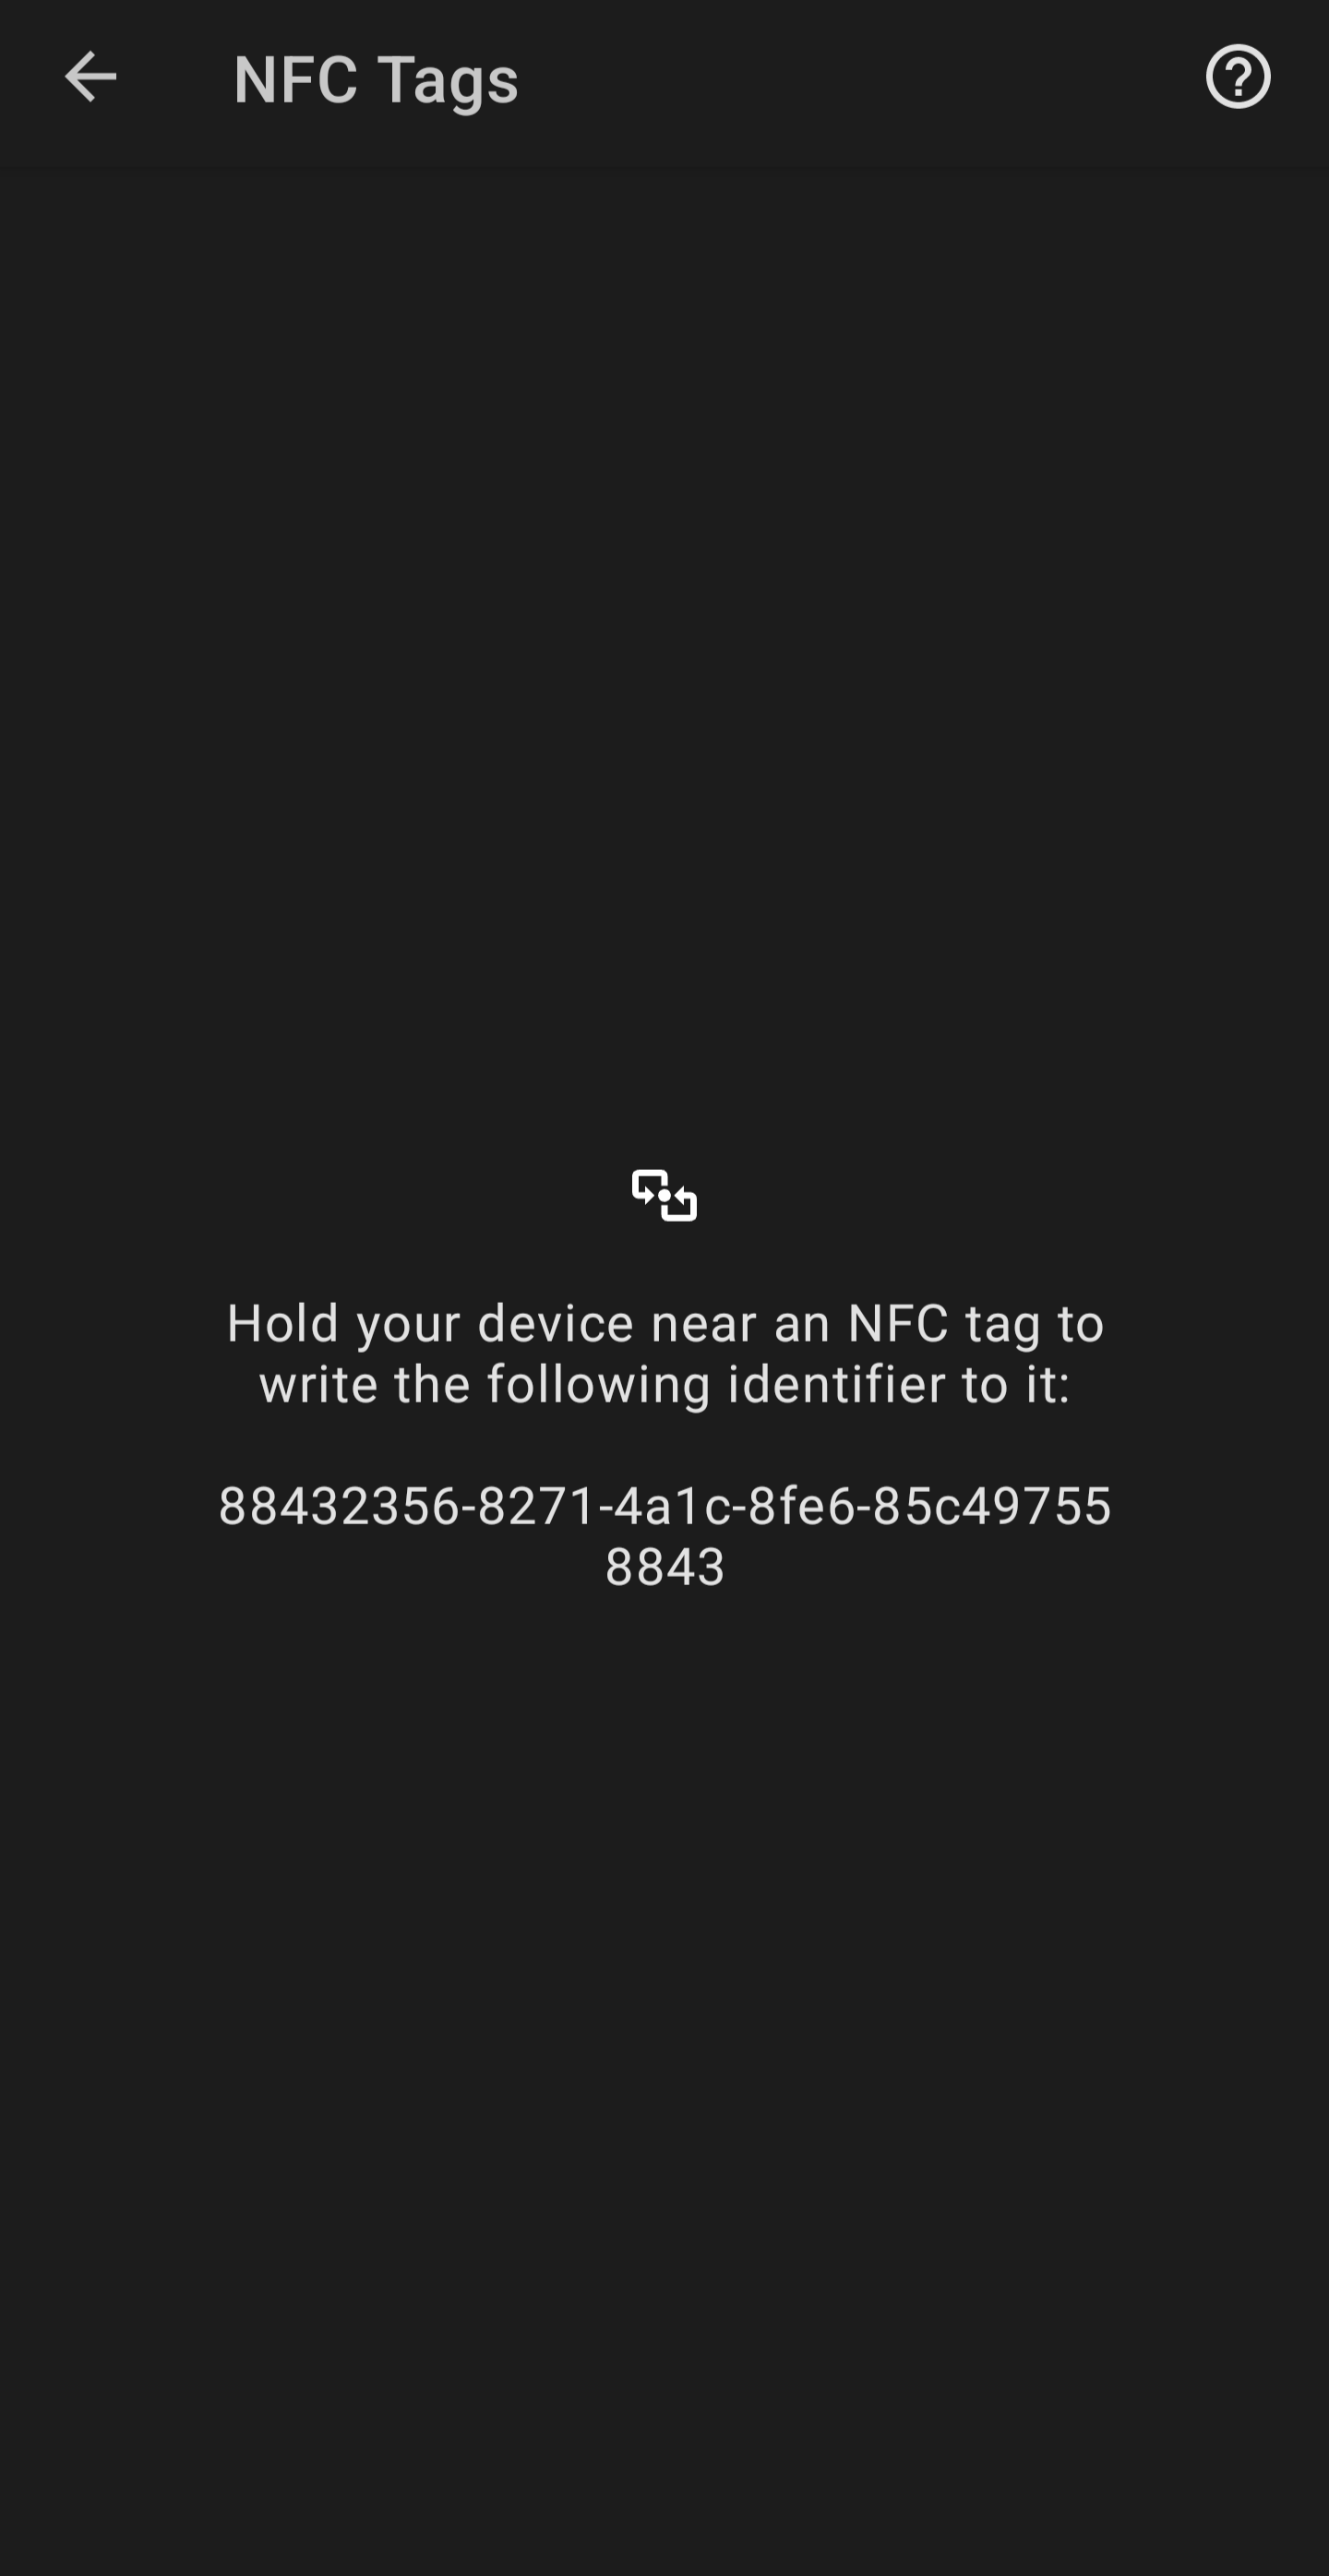
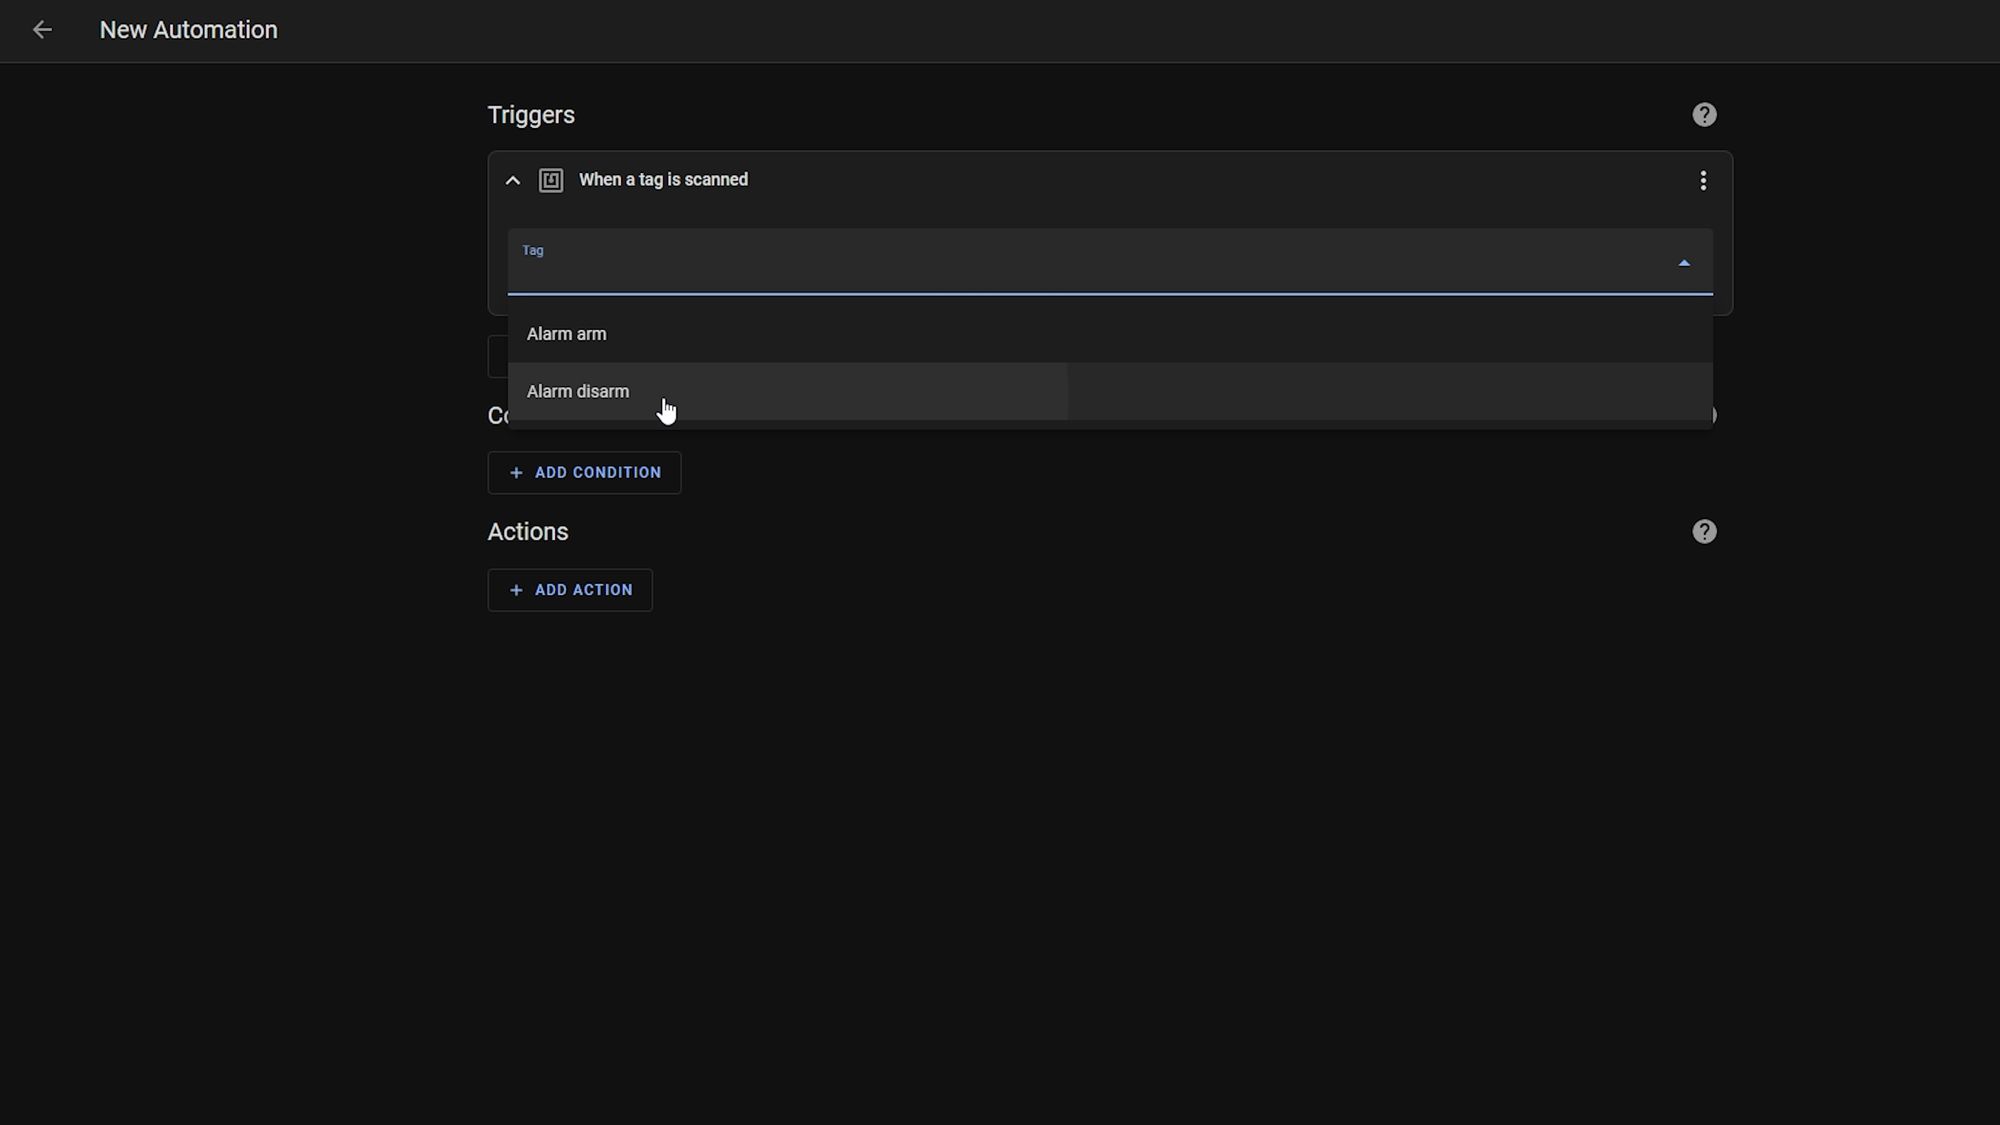
Once you have your tags, open up the Home Assistant companion app, head over to settings, click tags and hit the add tag button. Give your first tag a name like disarm alarm, and then repeat and add a second tag for arm alarm.
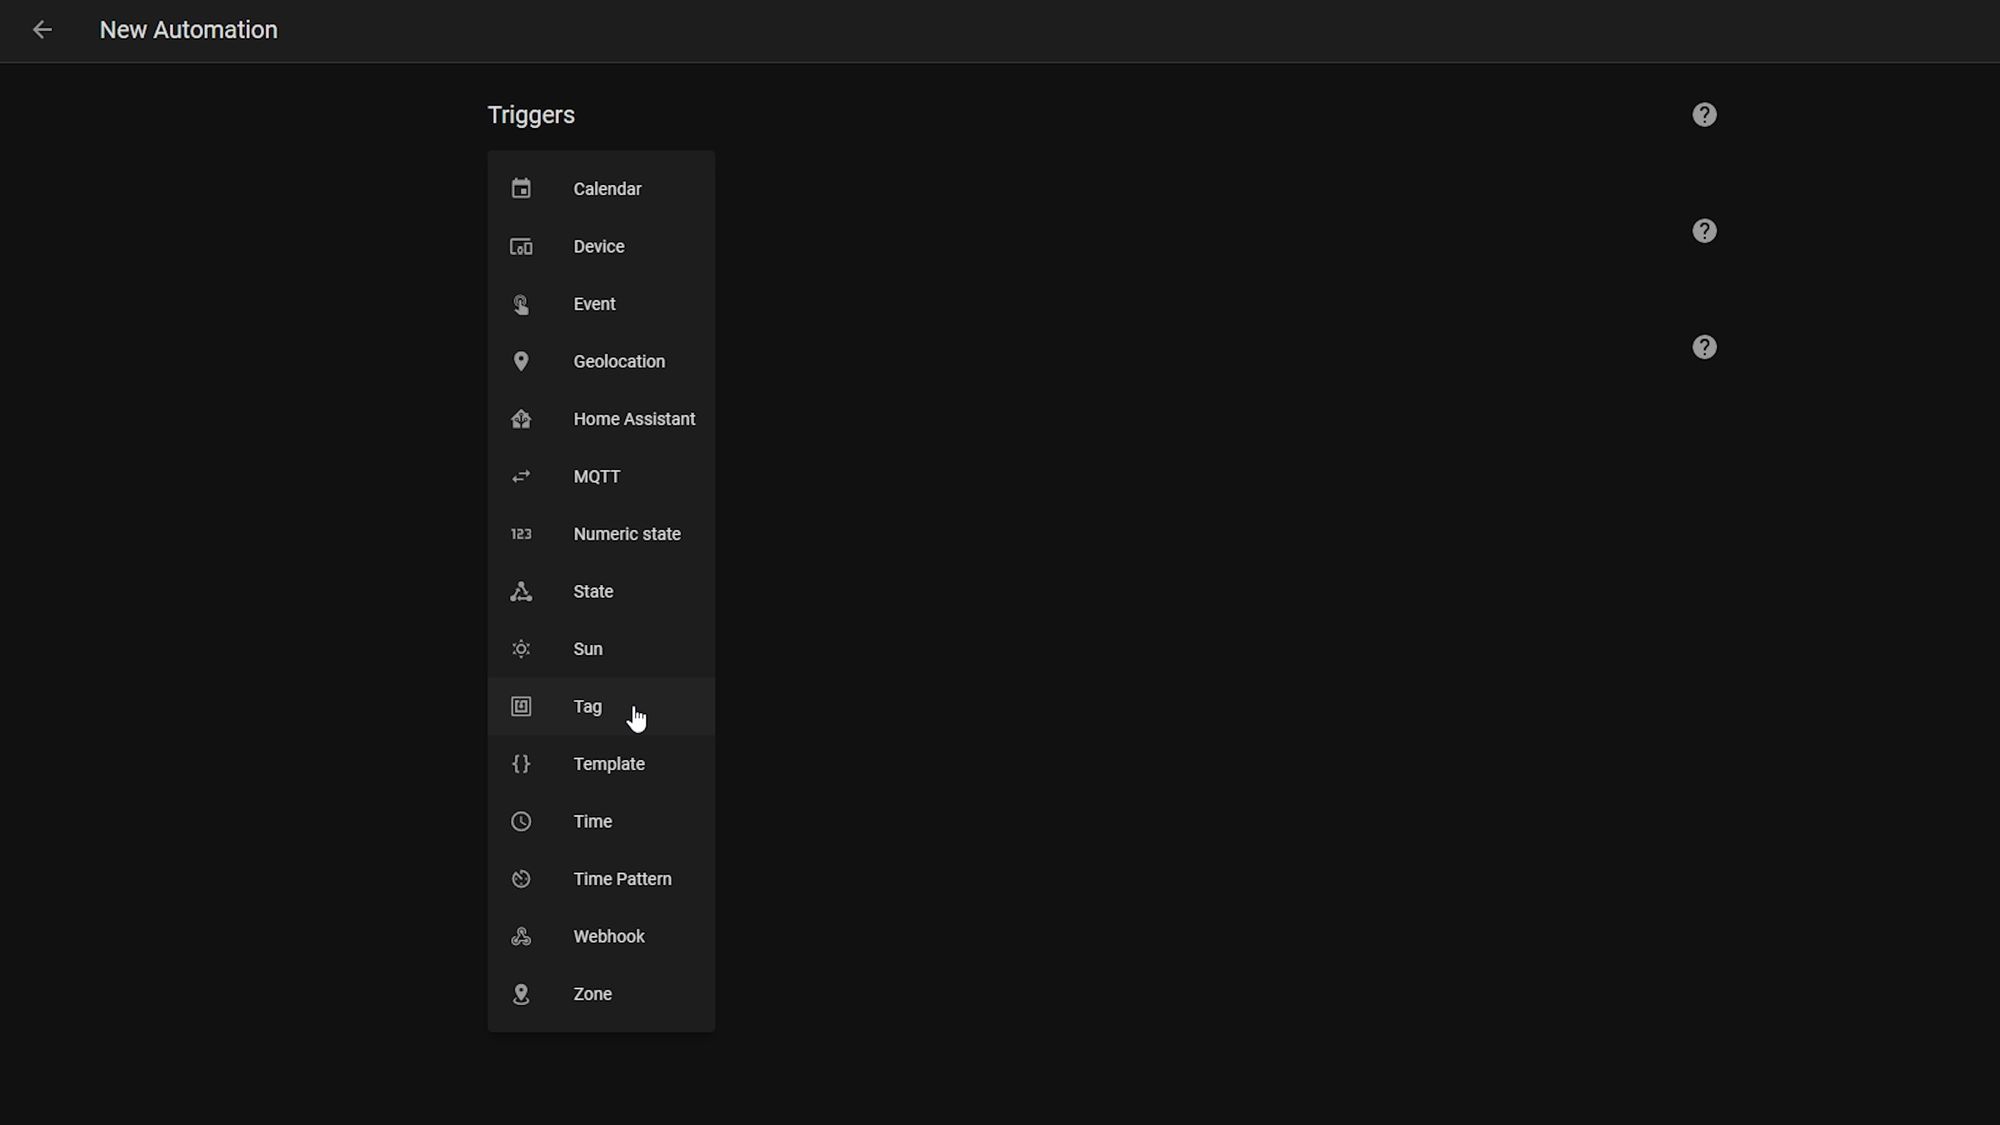
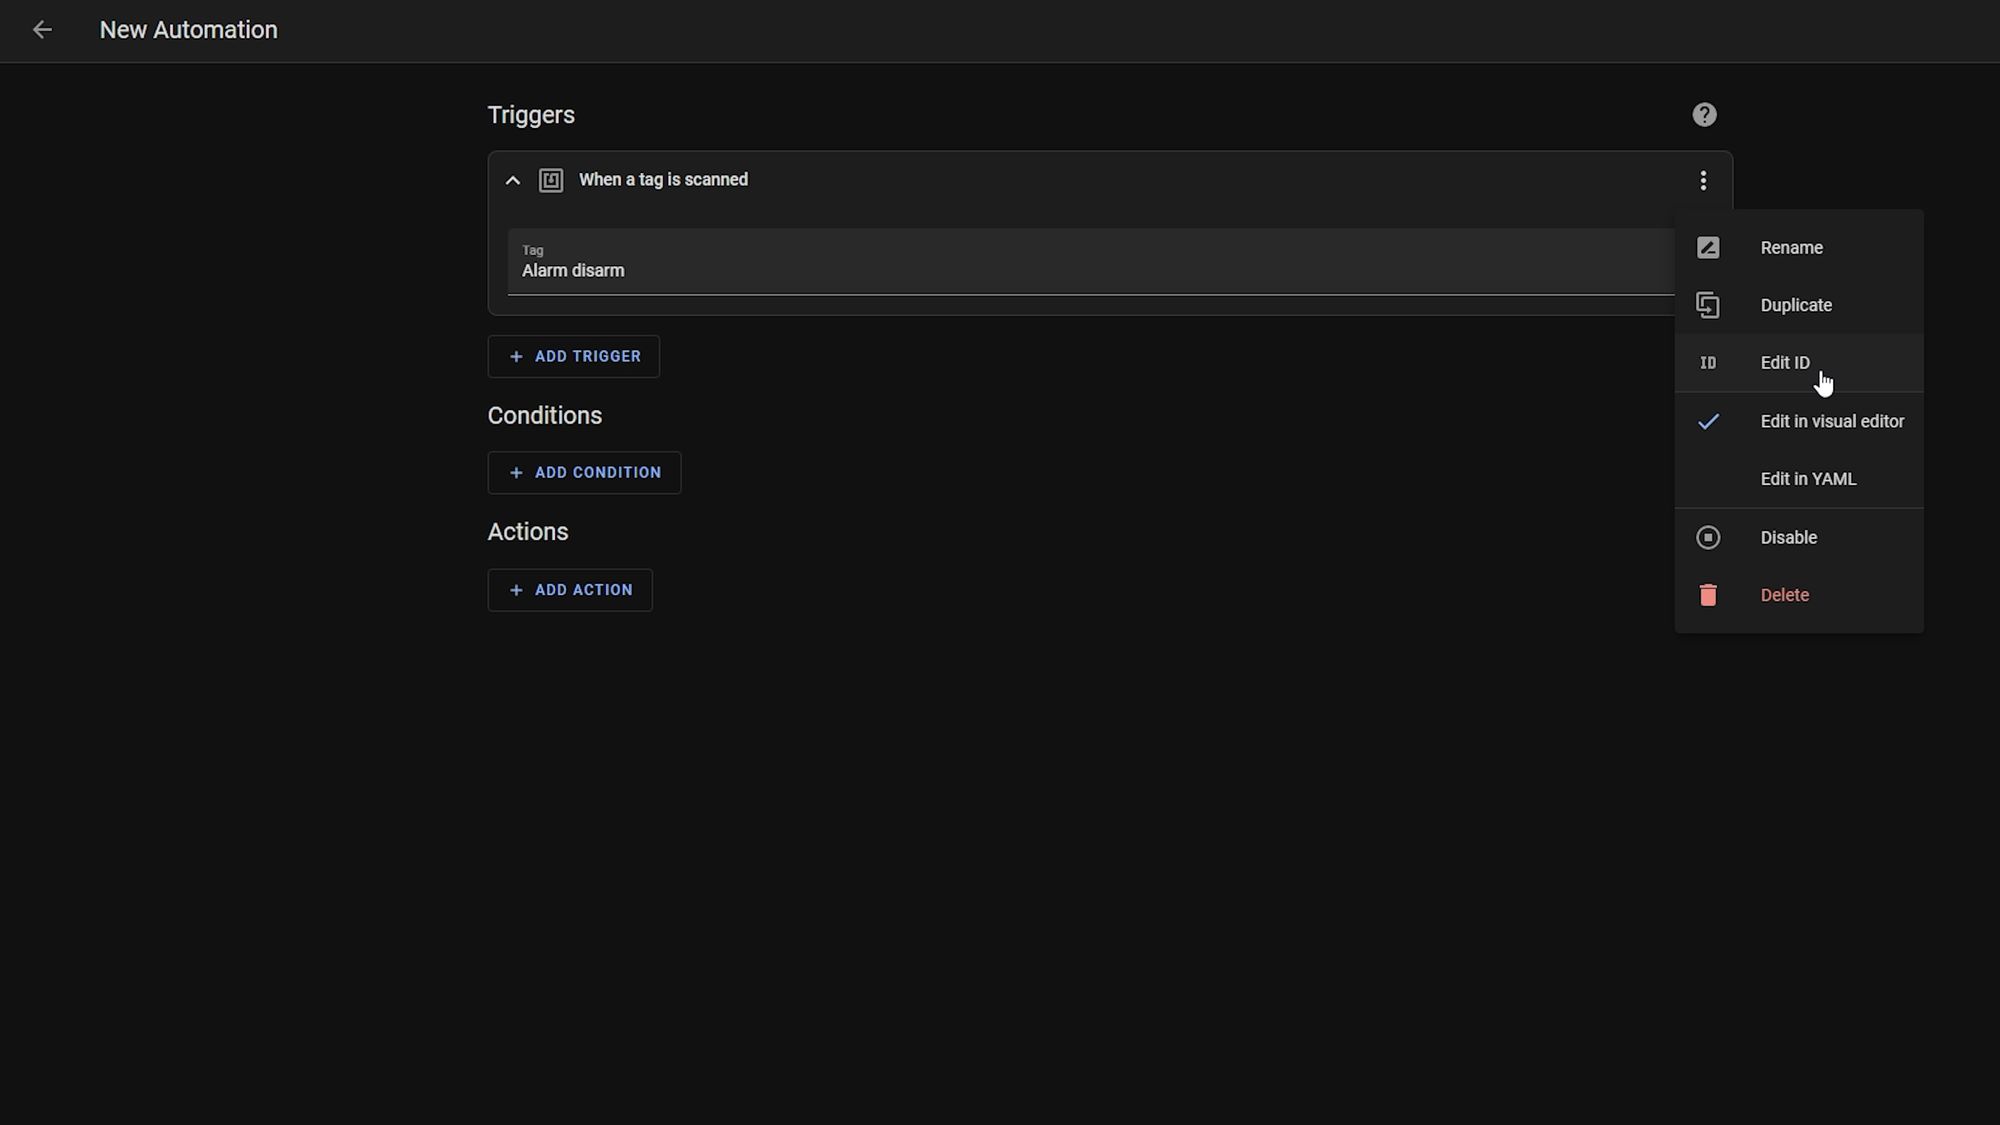
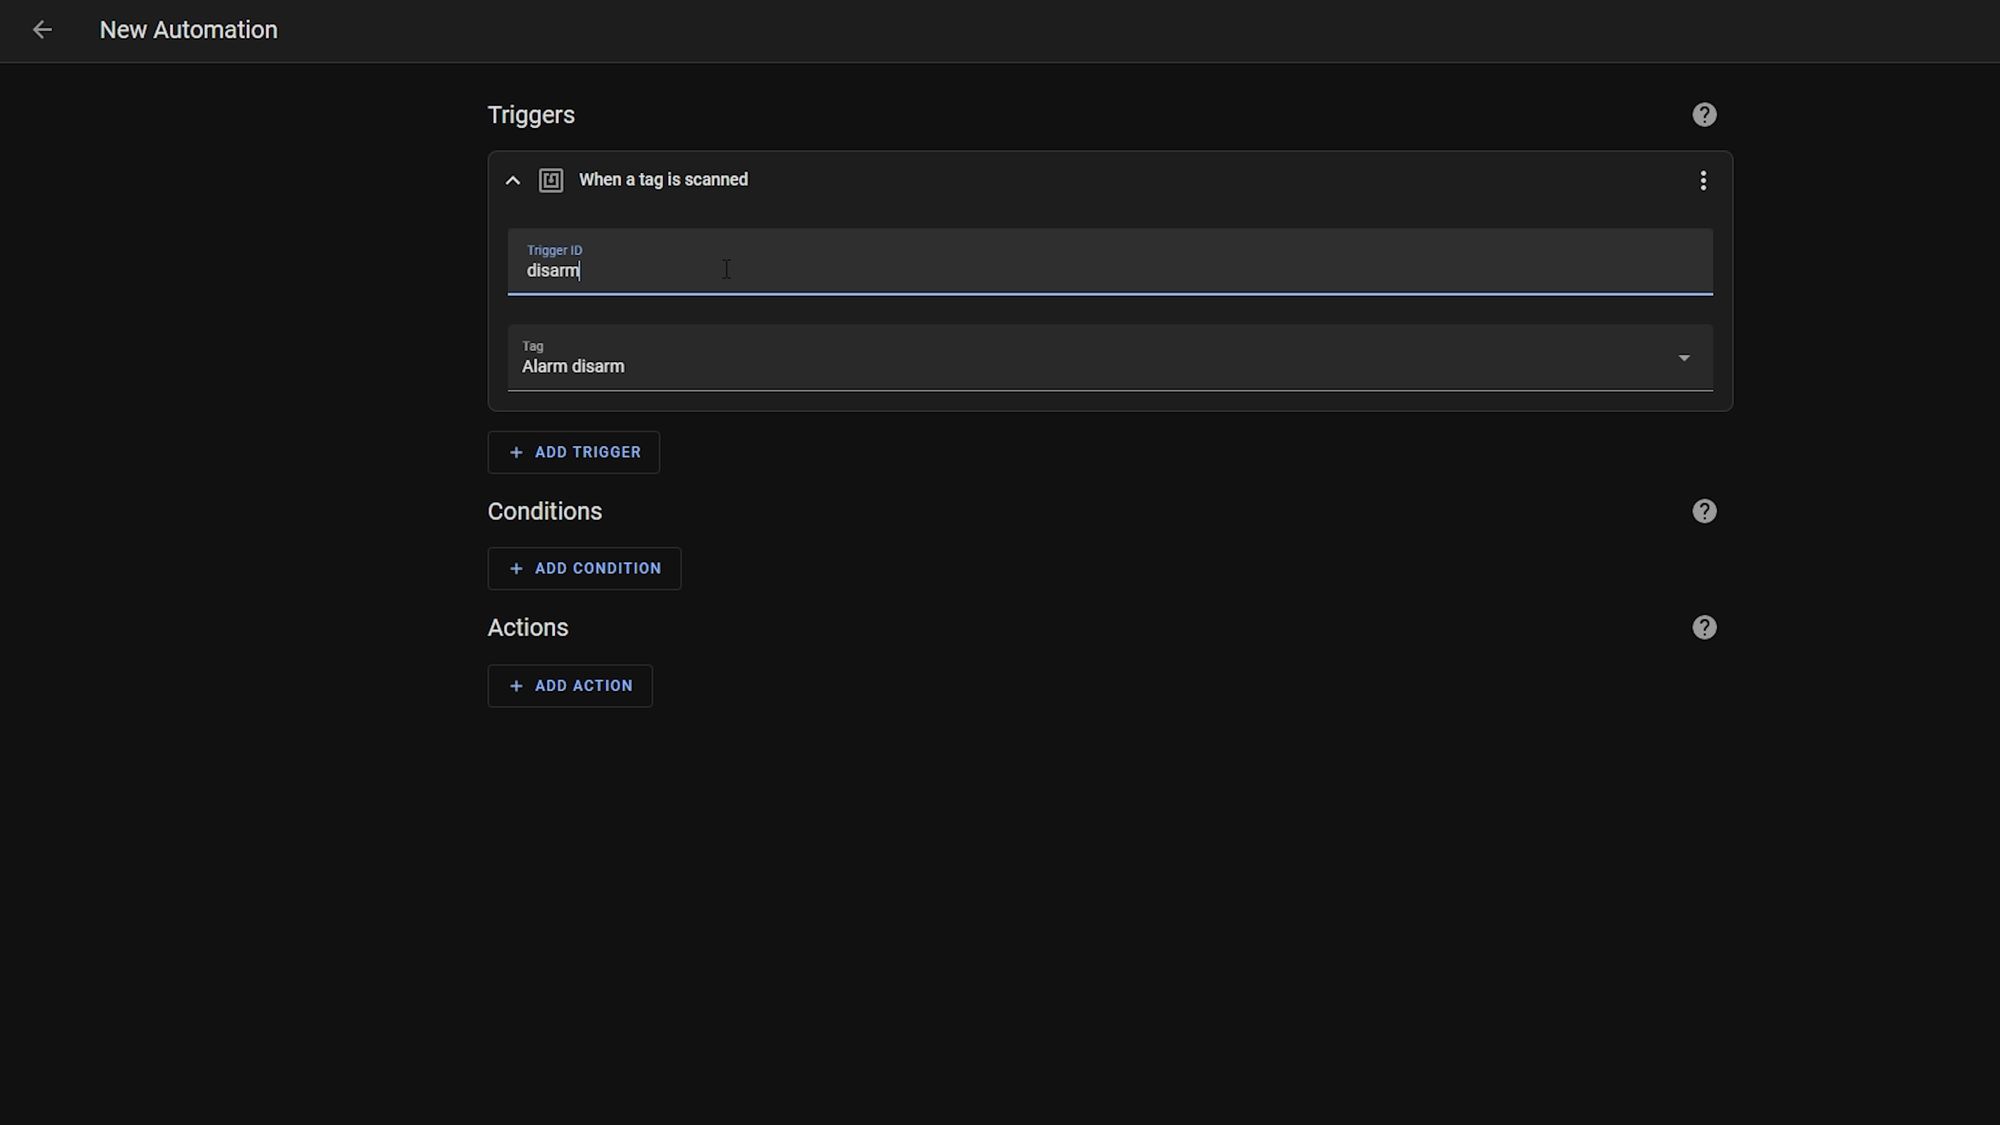
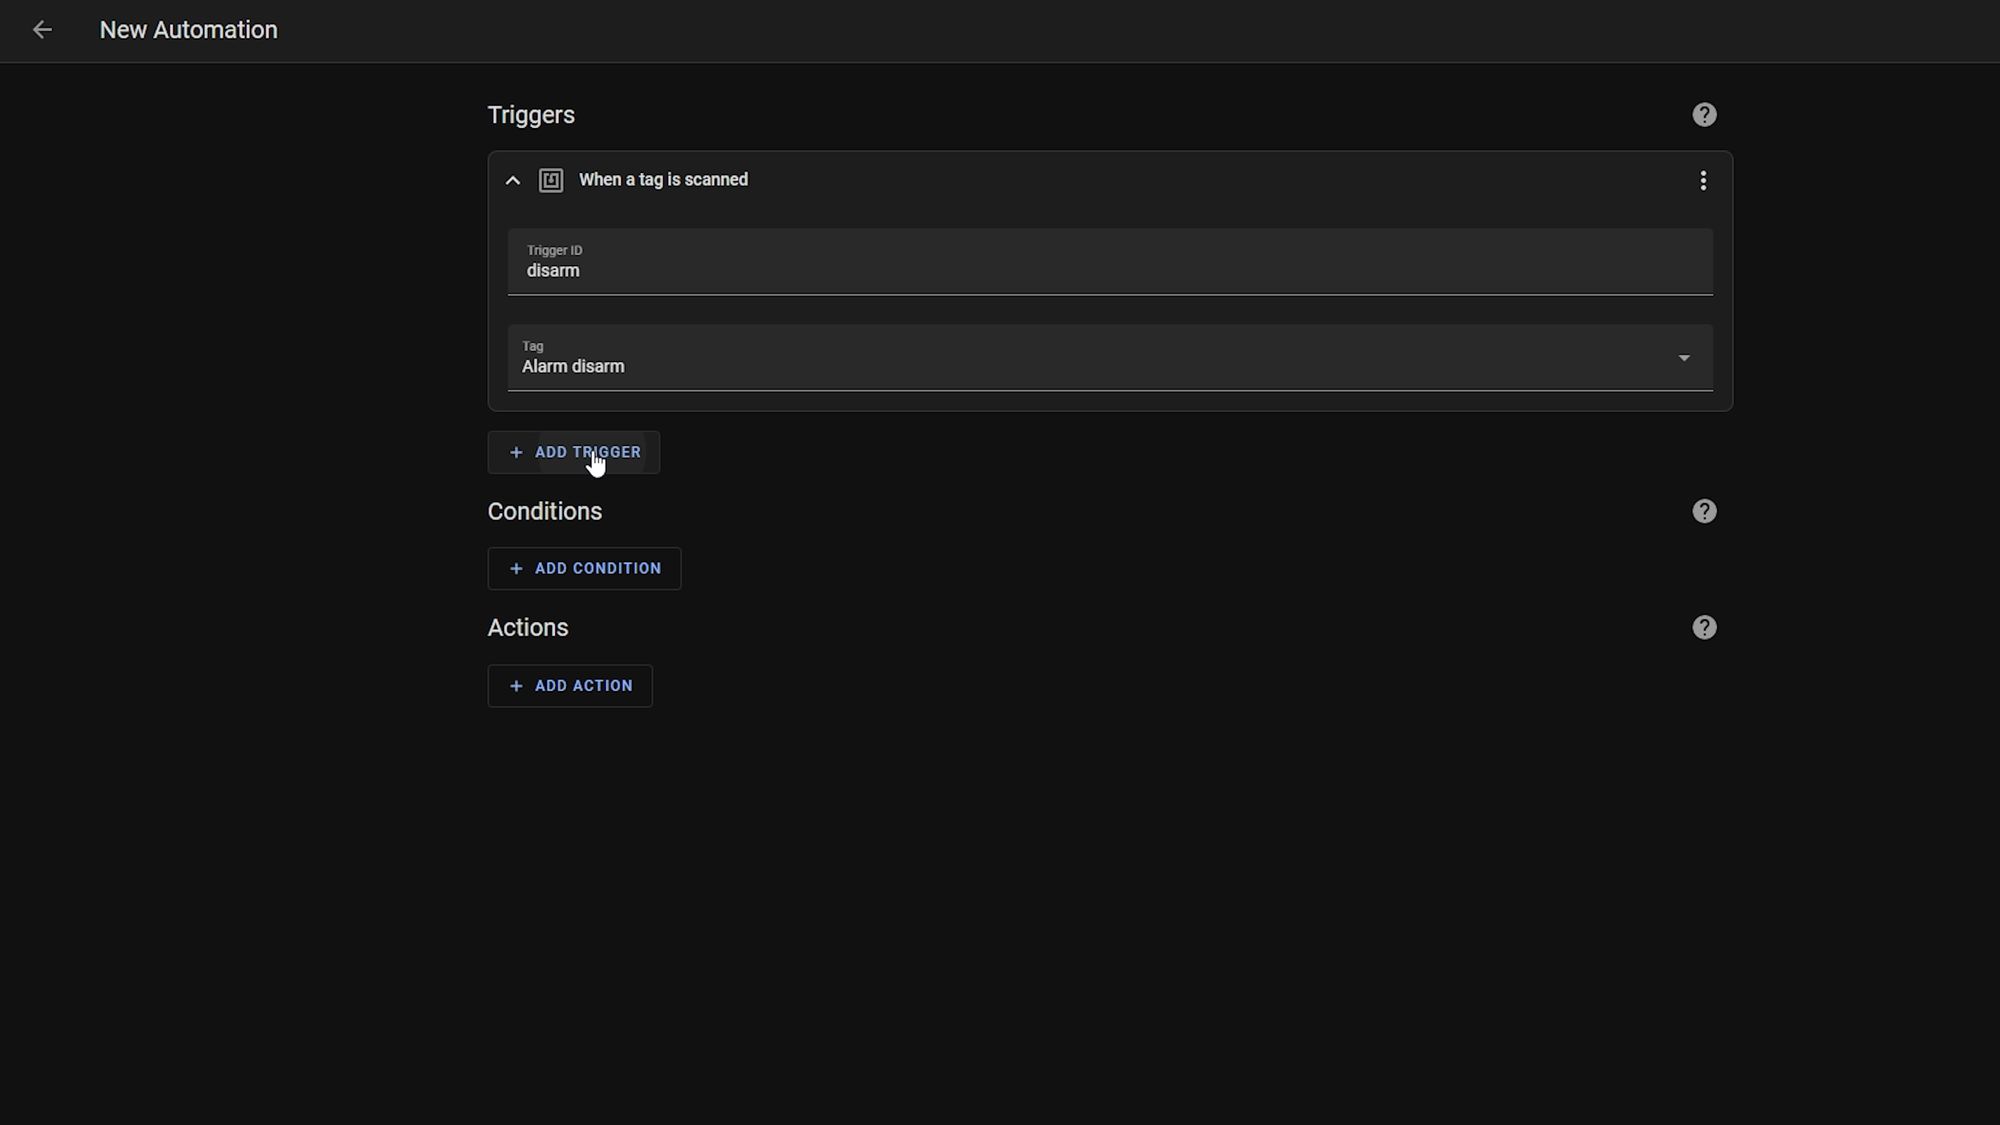
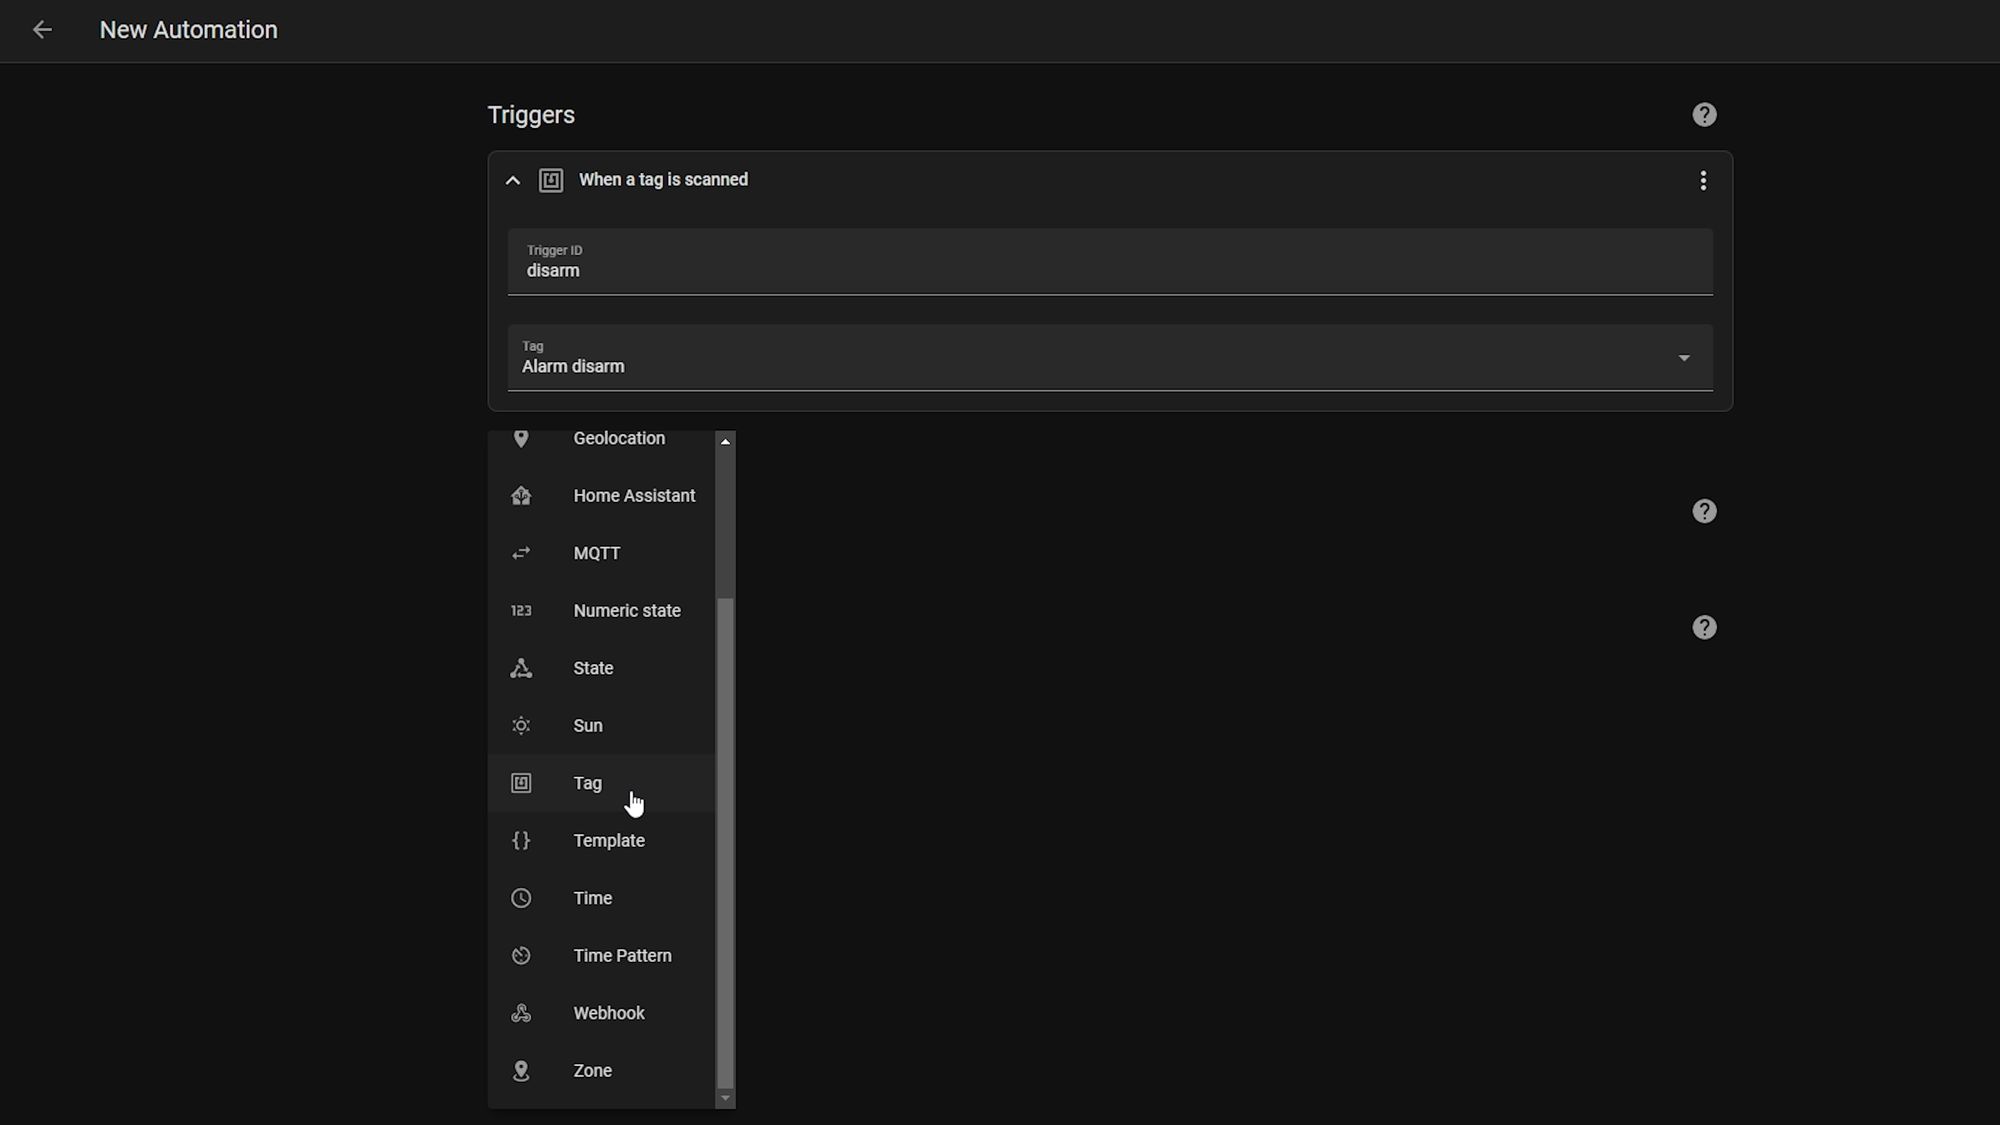
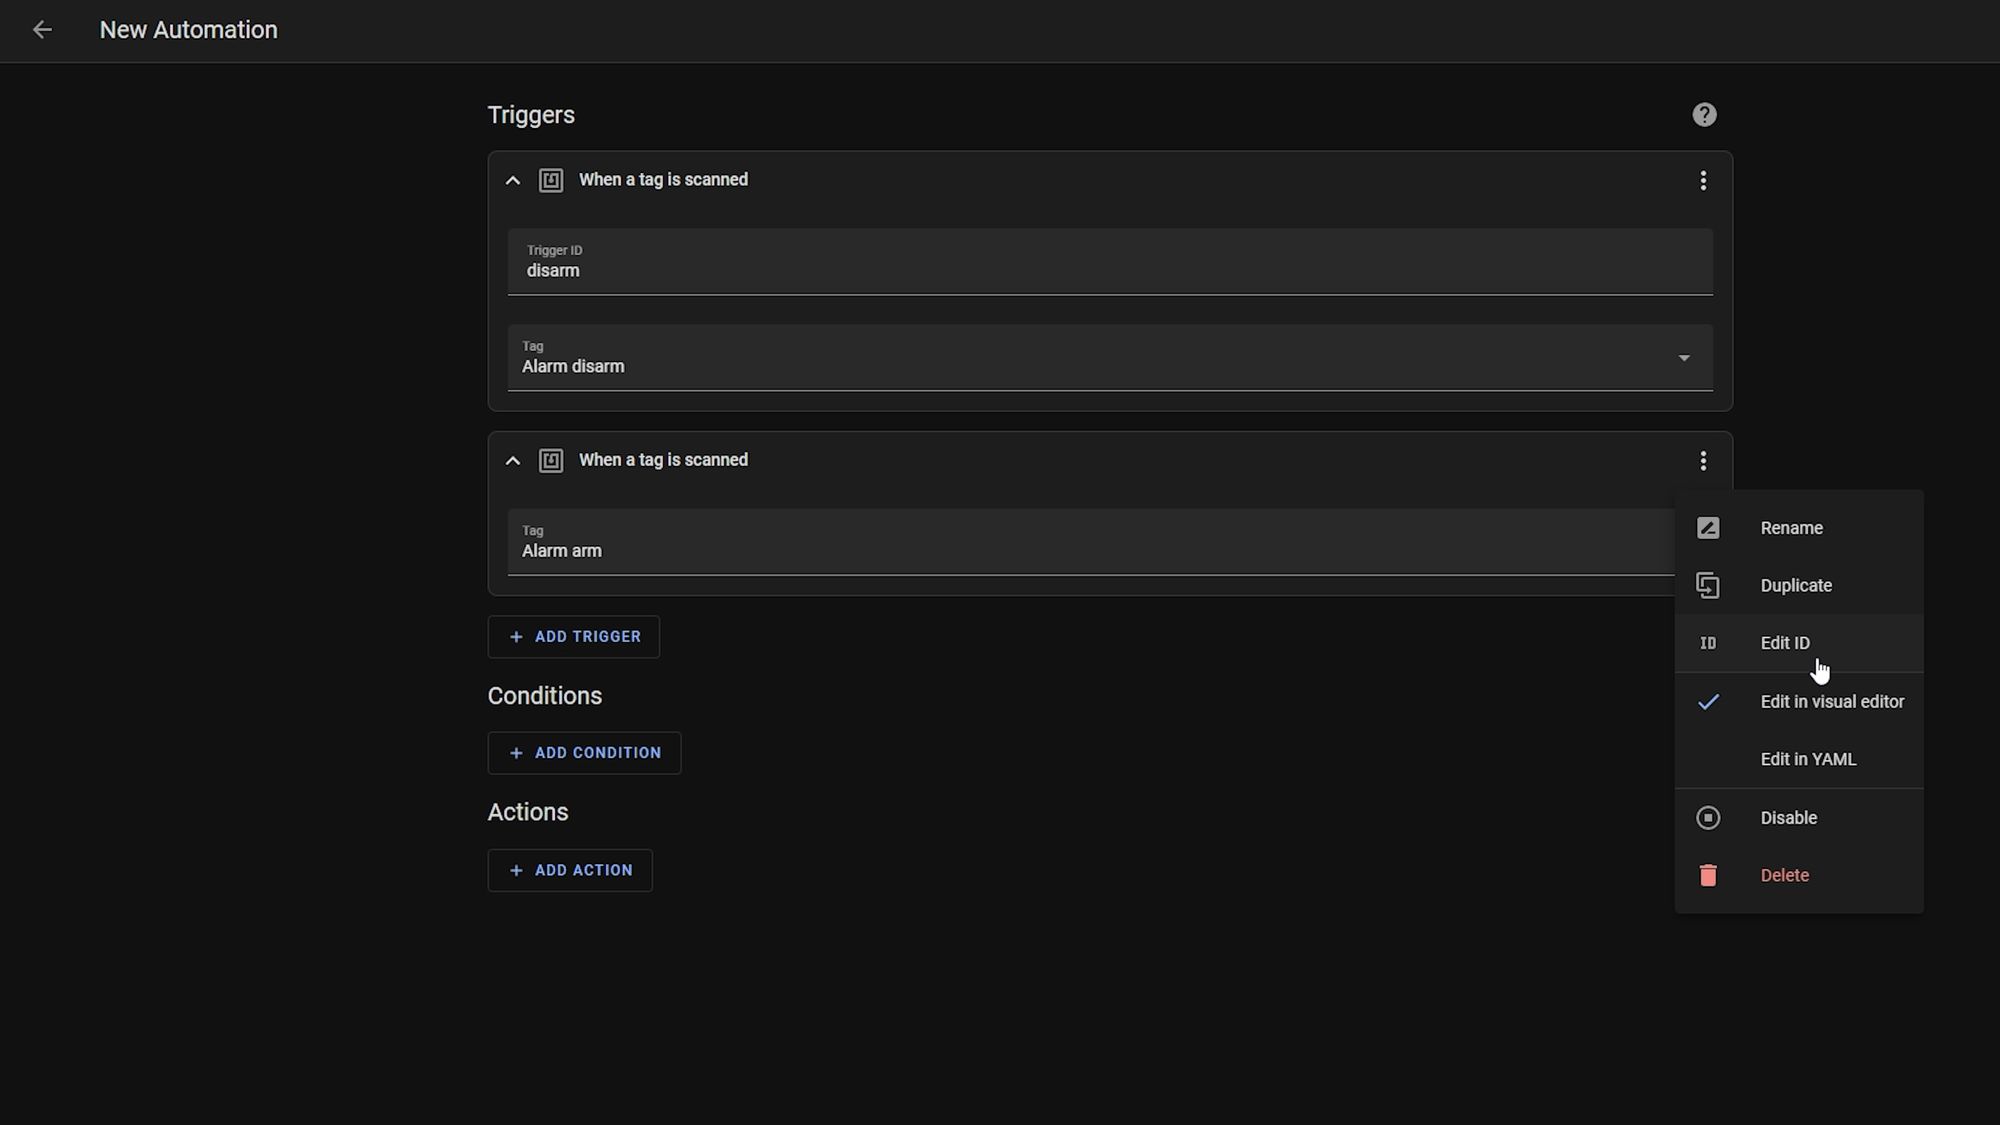
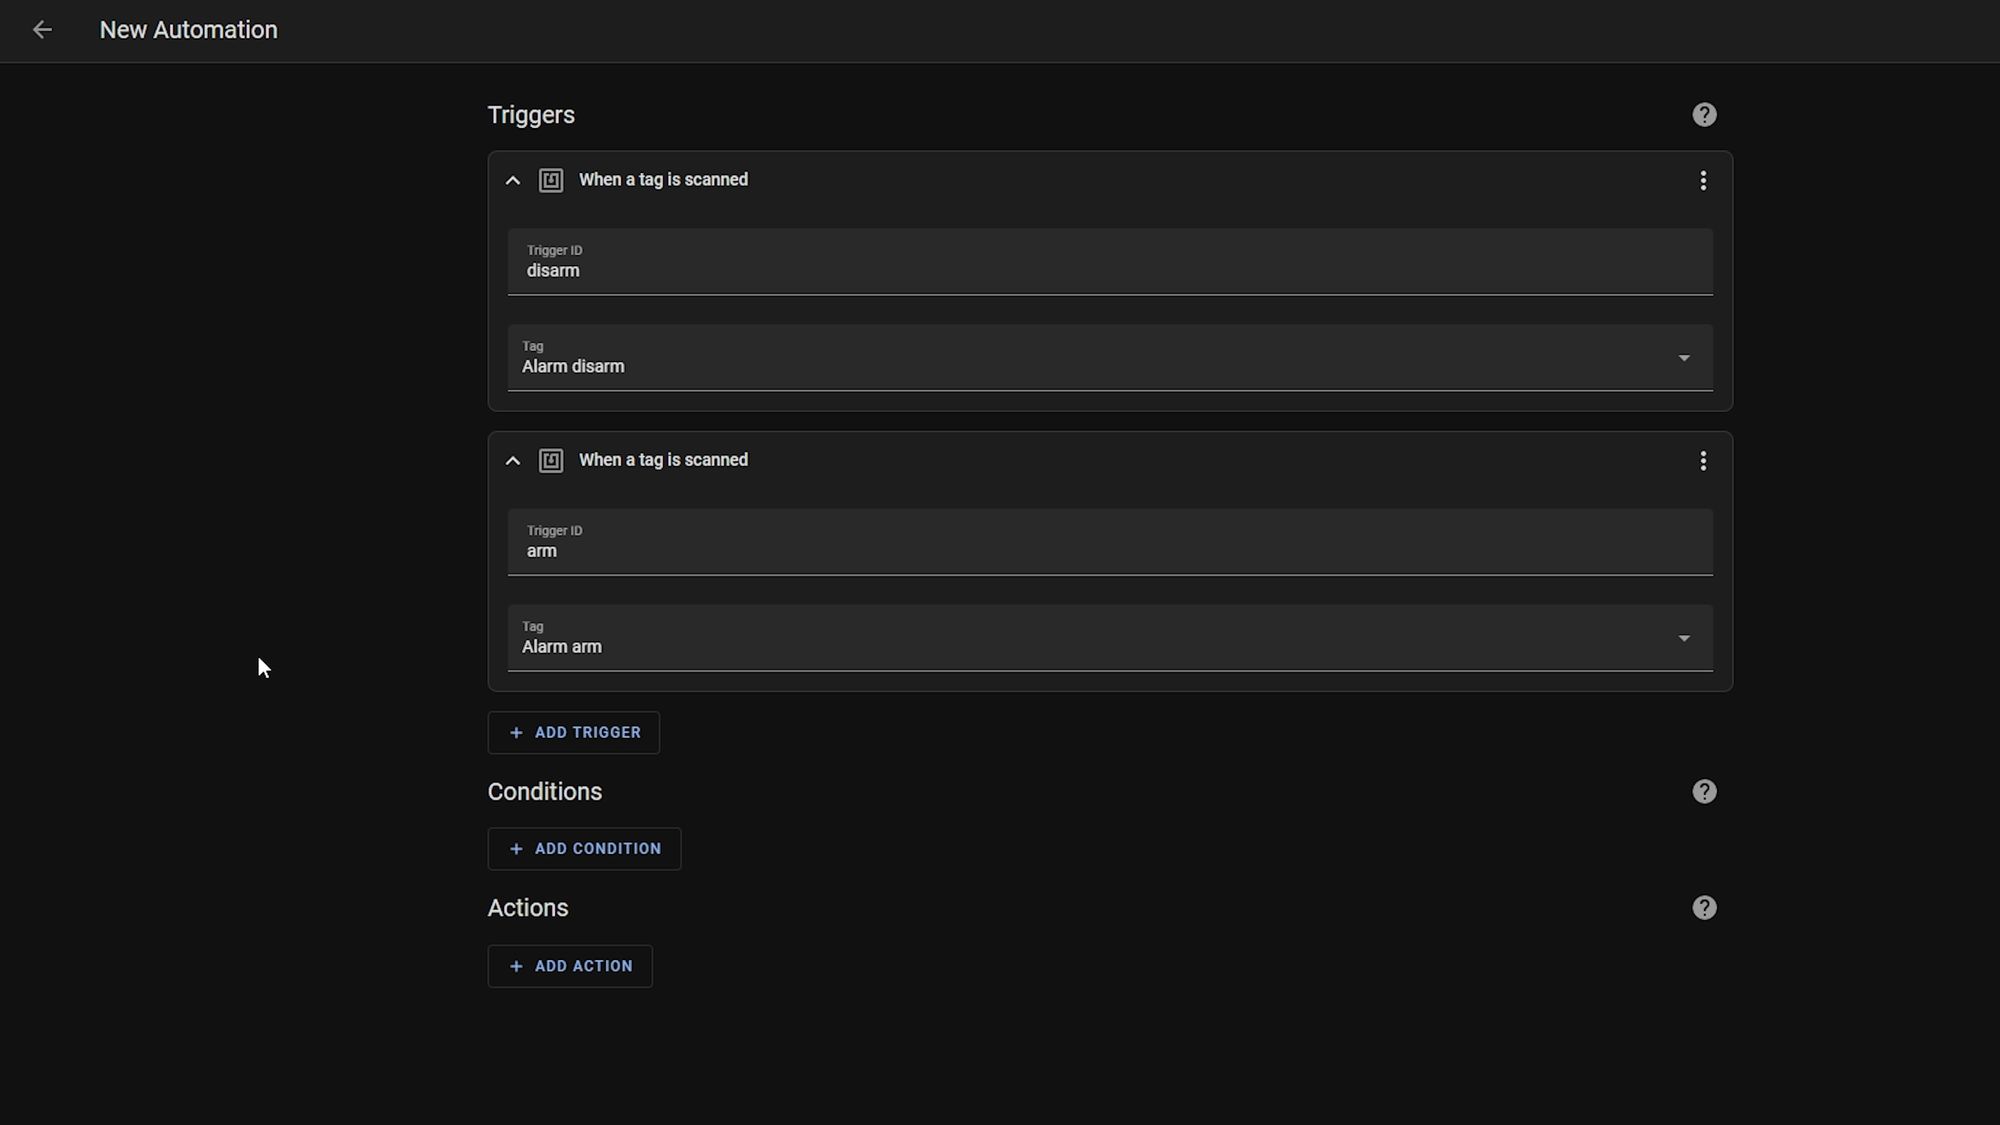
Next head over to settings, automations and create a new automation. We are going to combine both tags into one automation, so add a trigger and this time from the drop down, select the tag option. Select the disarm tag from the drop down, and hit the three dots in the corner and choose edit ID. Give your trigger a unique ID which we will then use later.
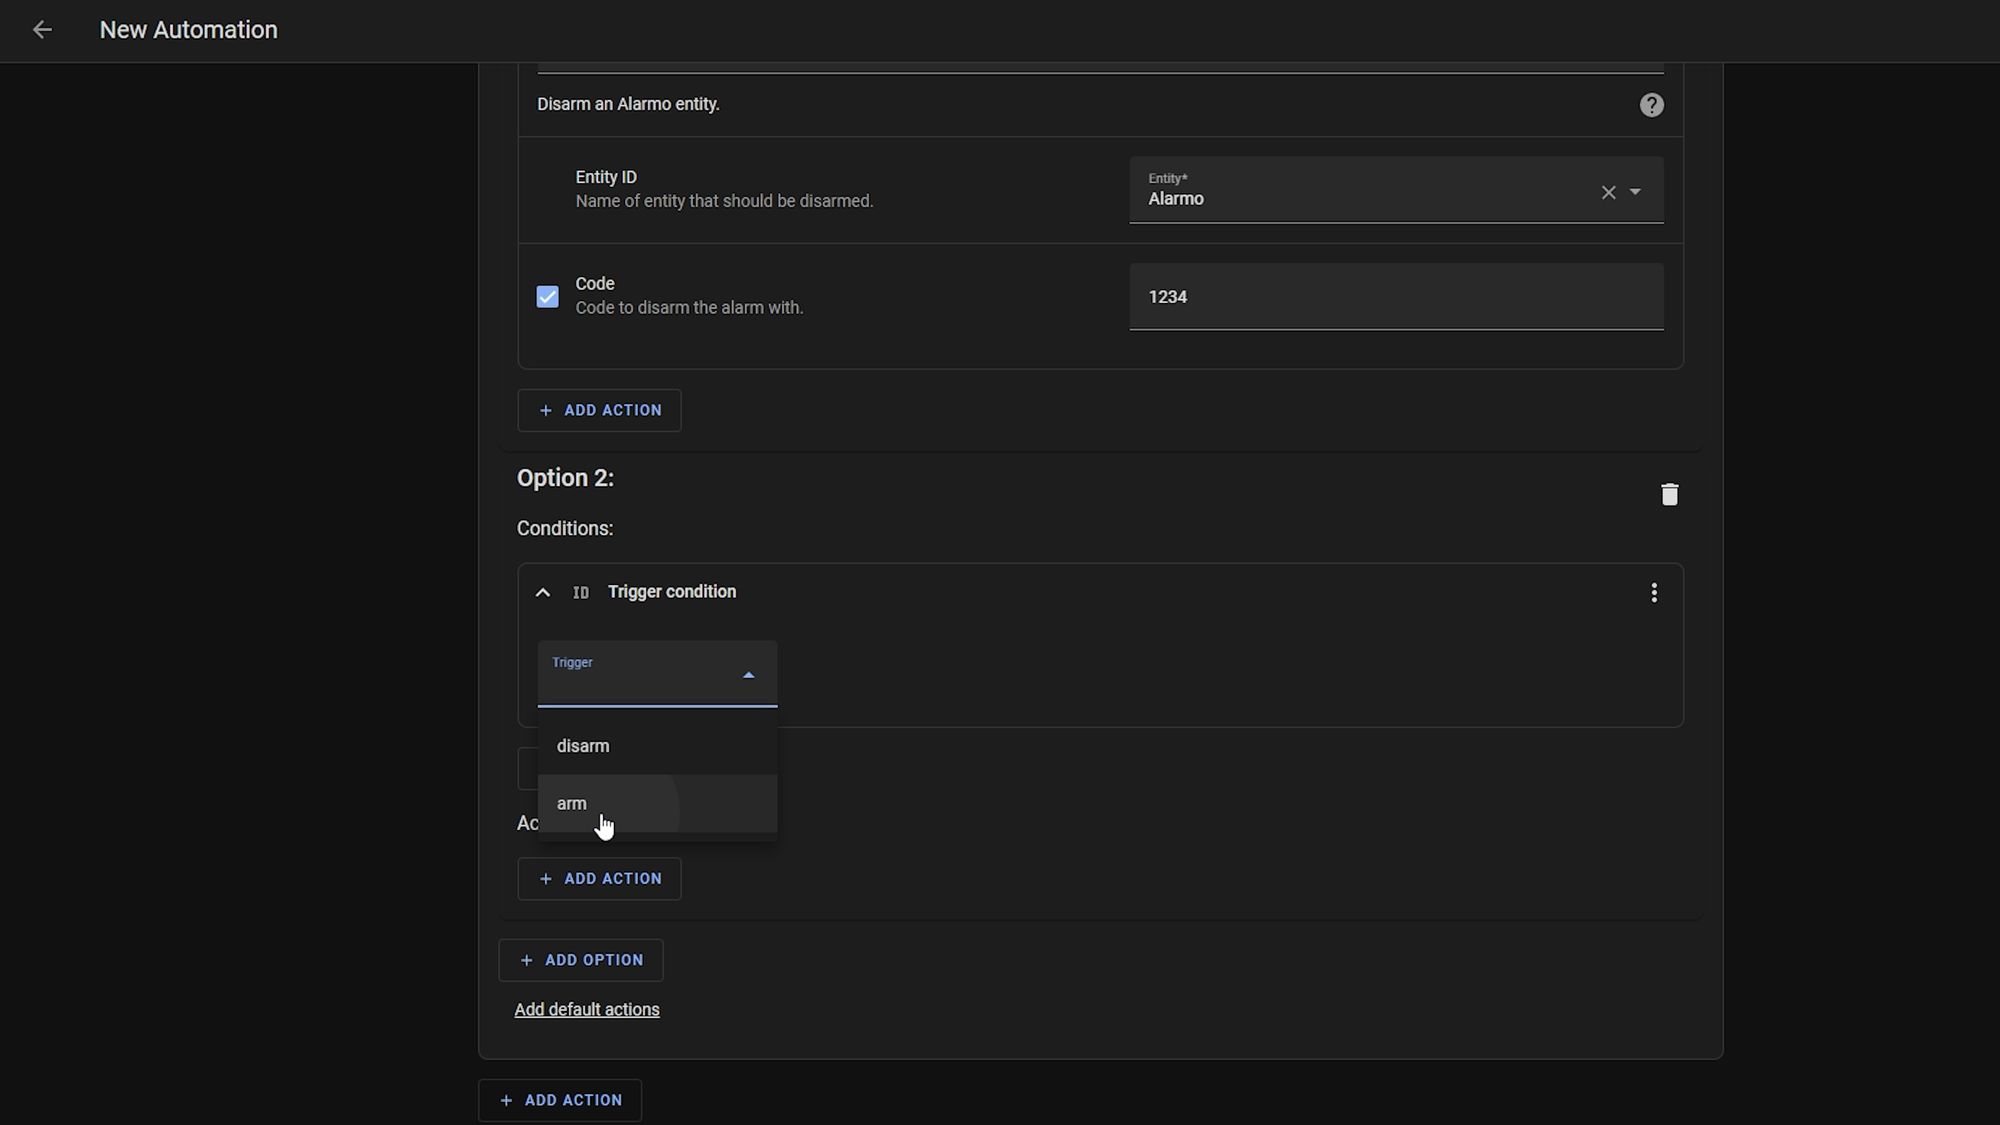
Then add another trigger and this time add your arm tag instead, again adding a unique ID for that trigger.
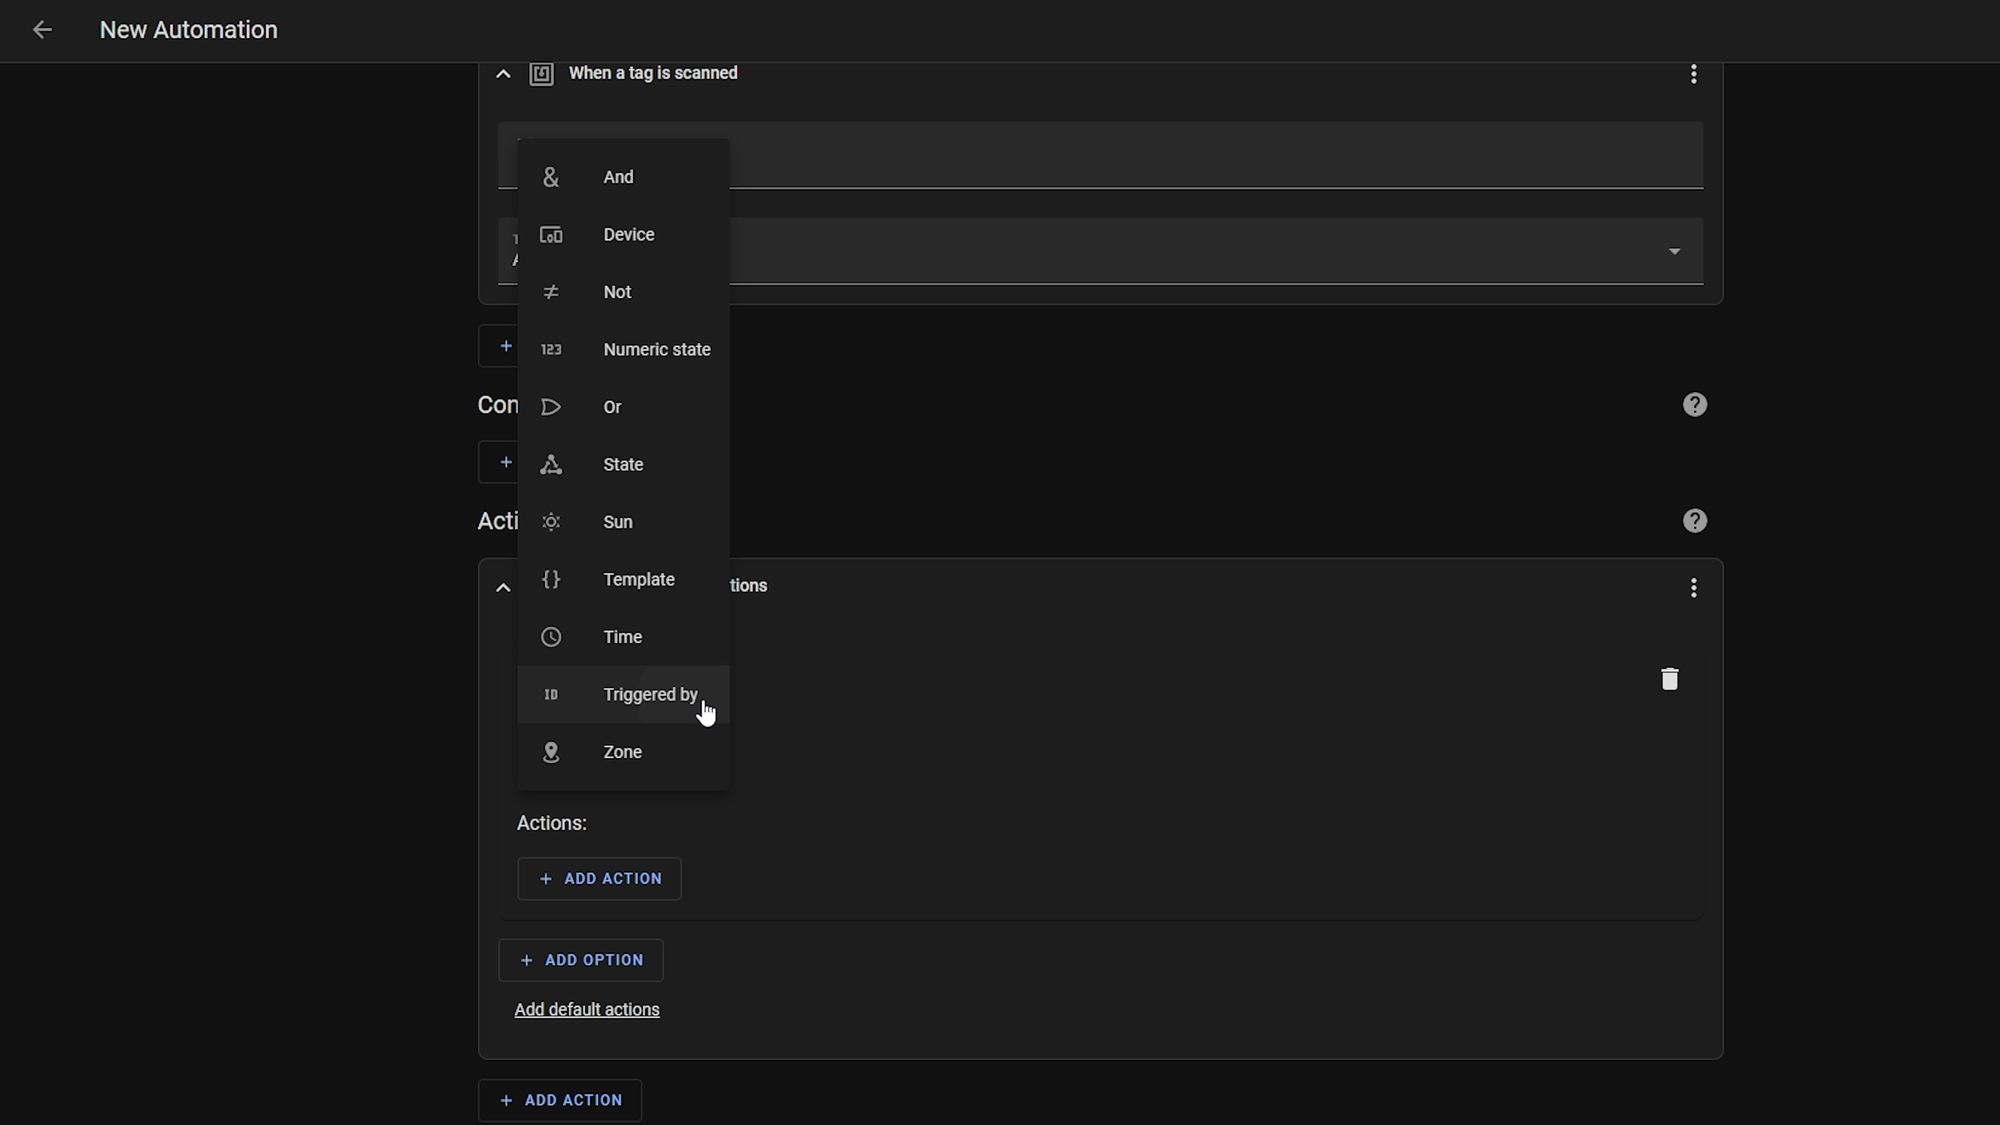
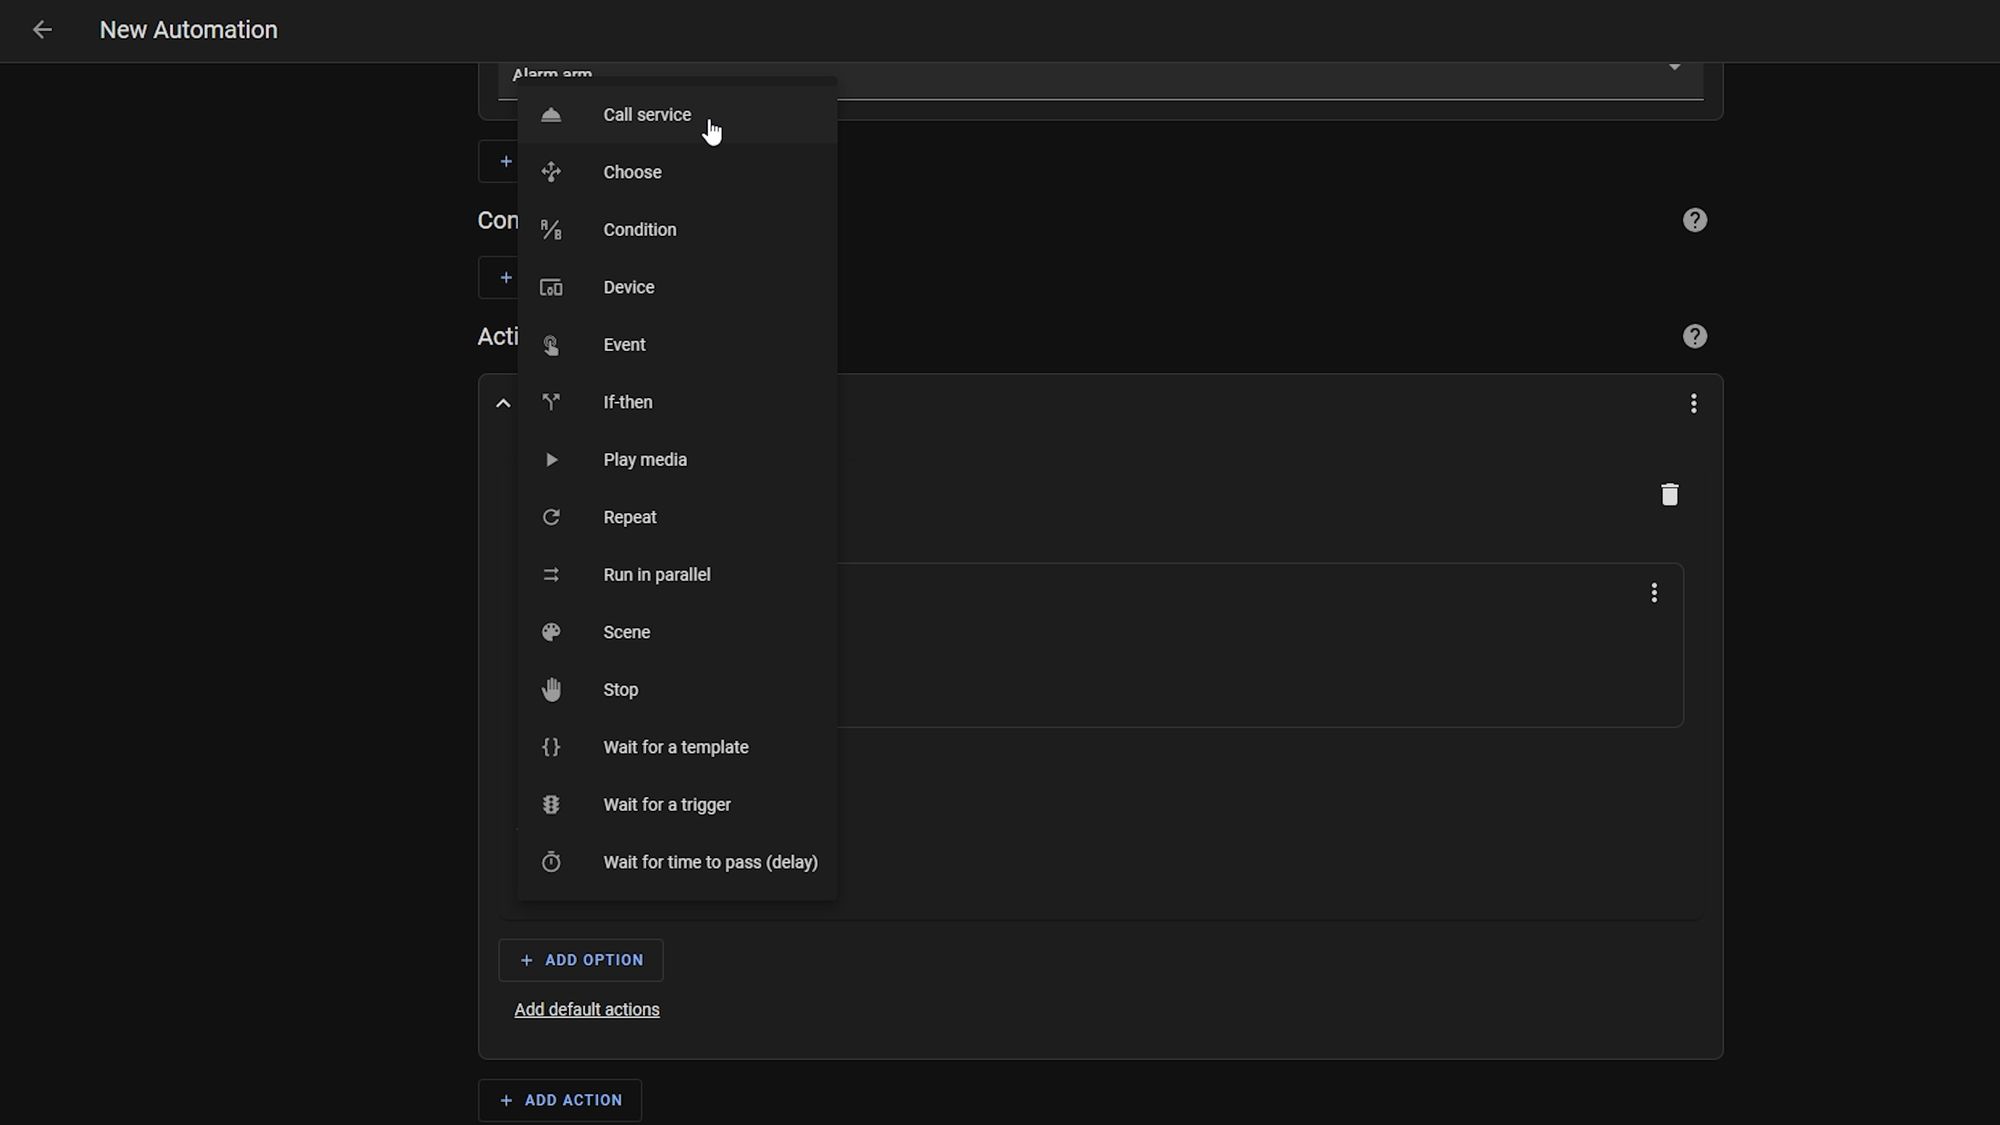
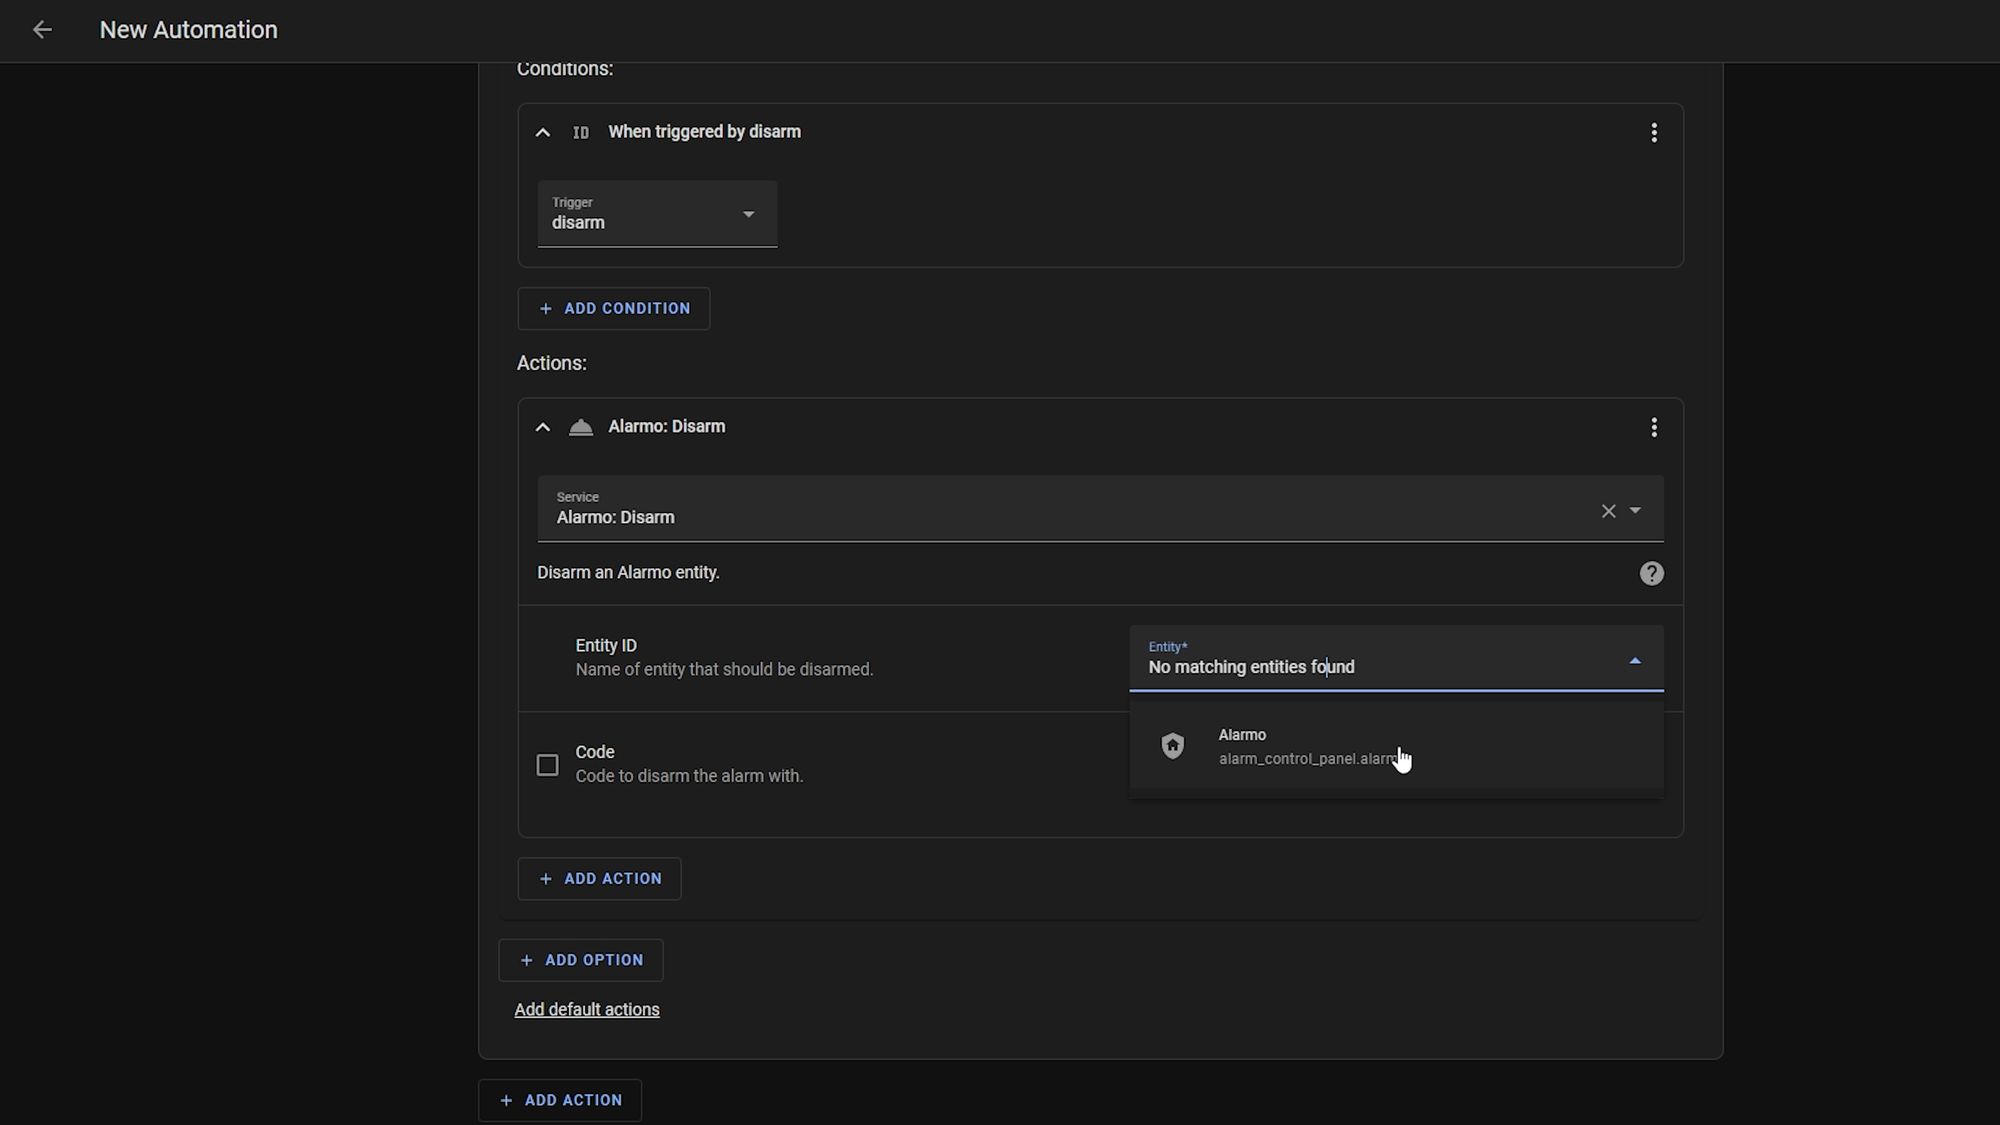
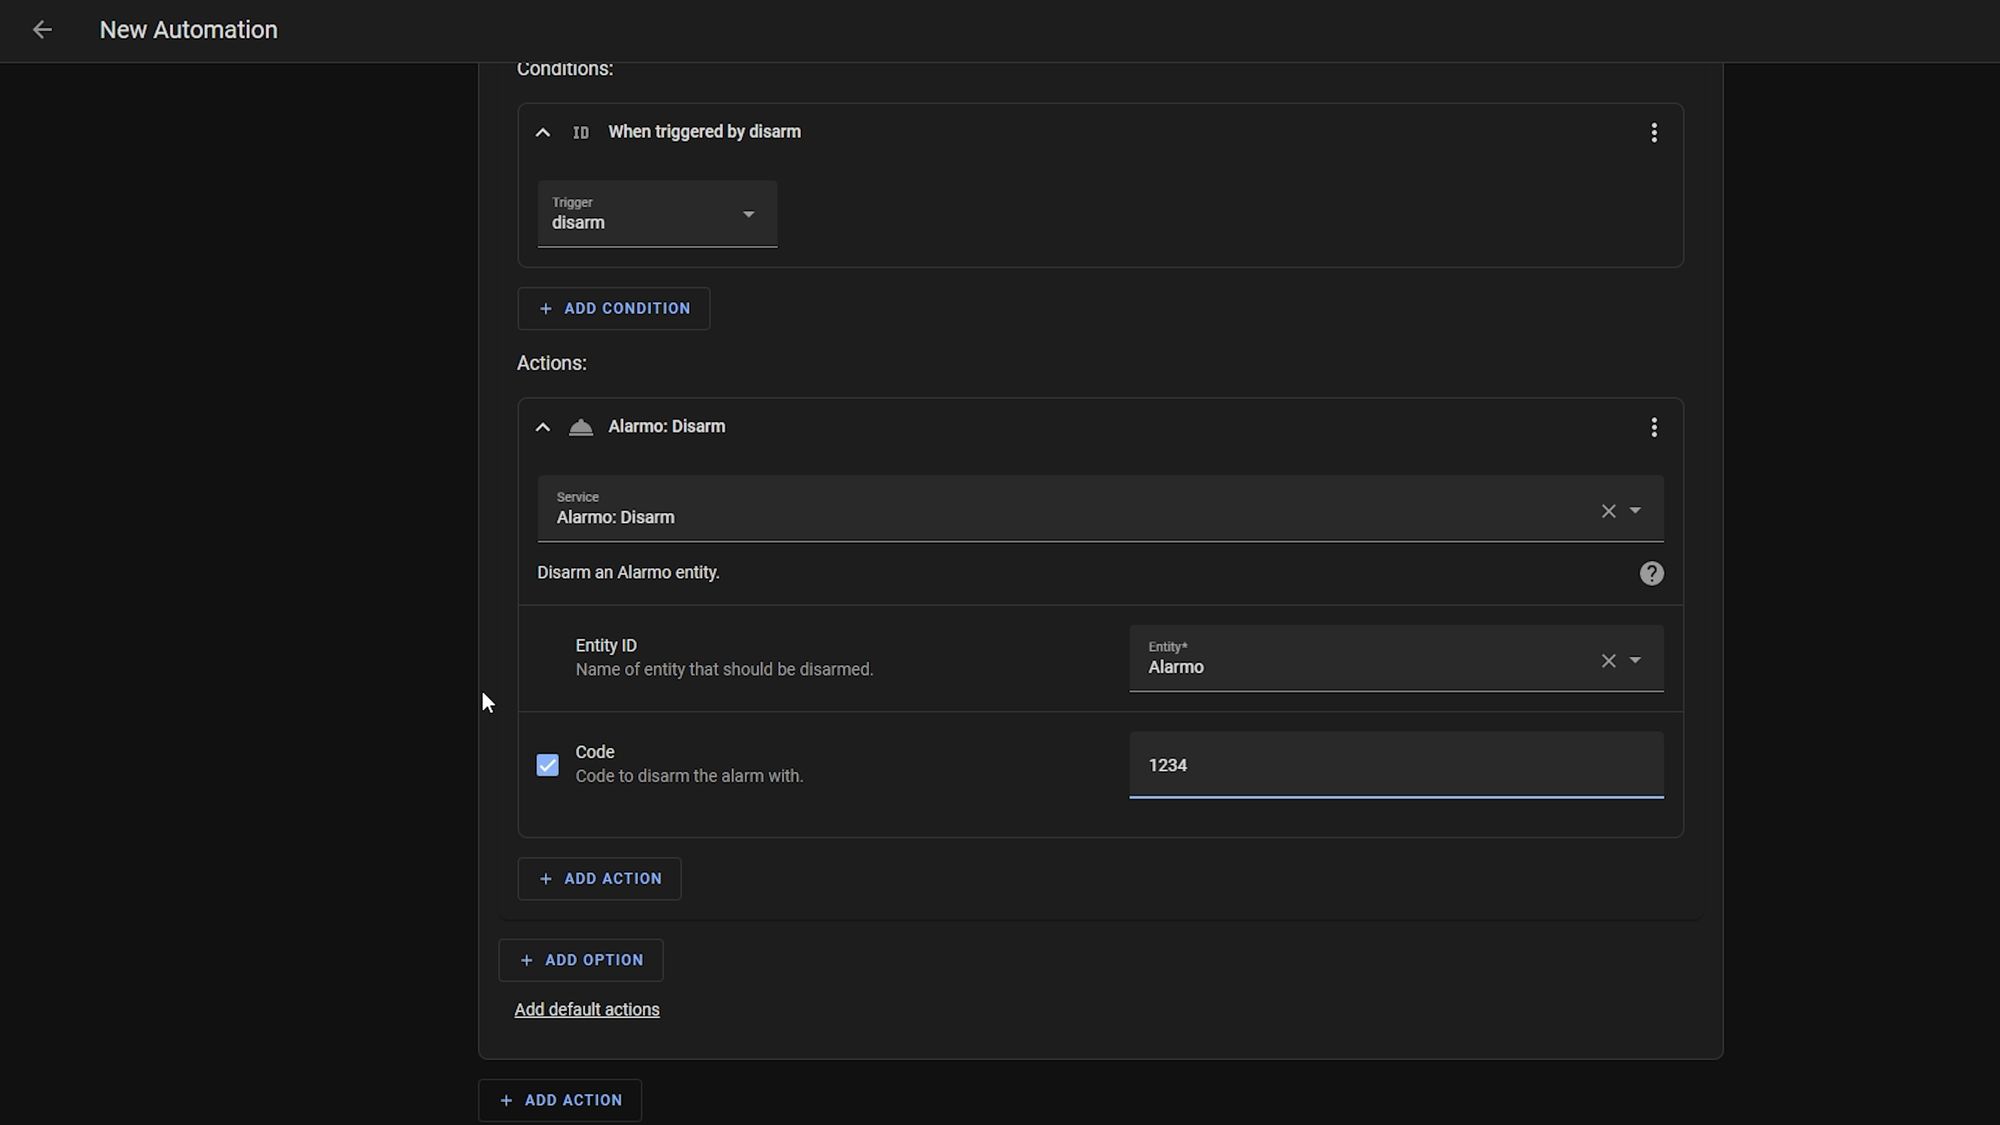
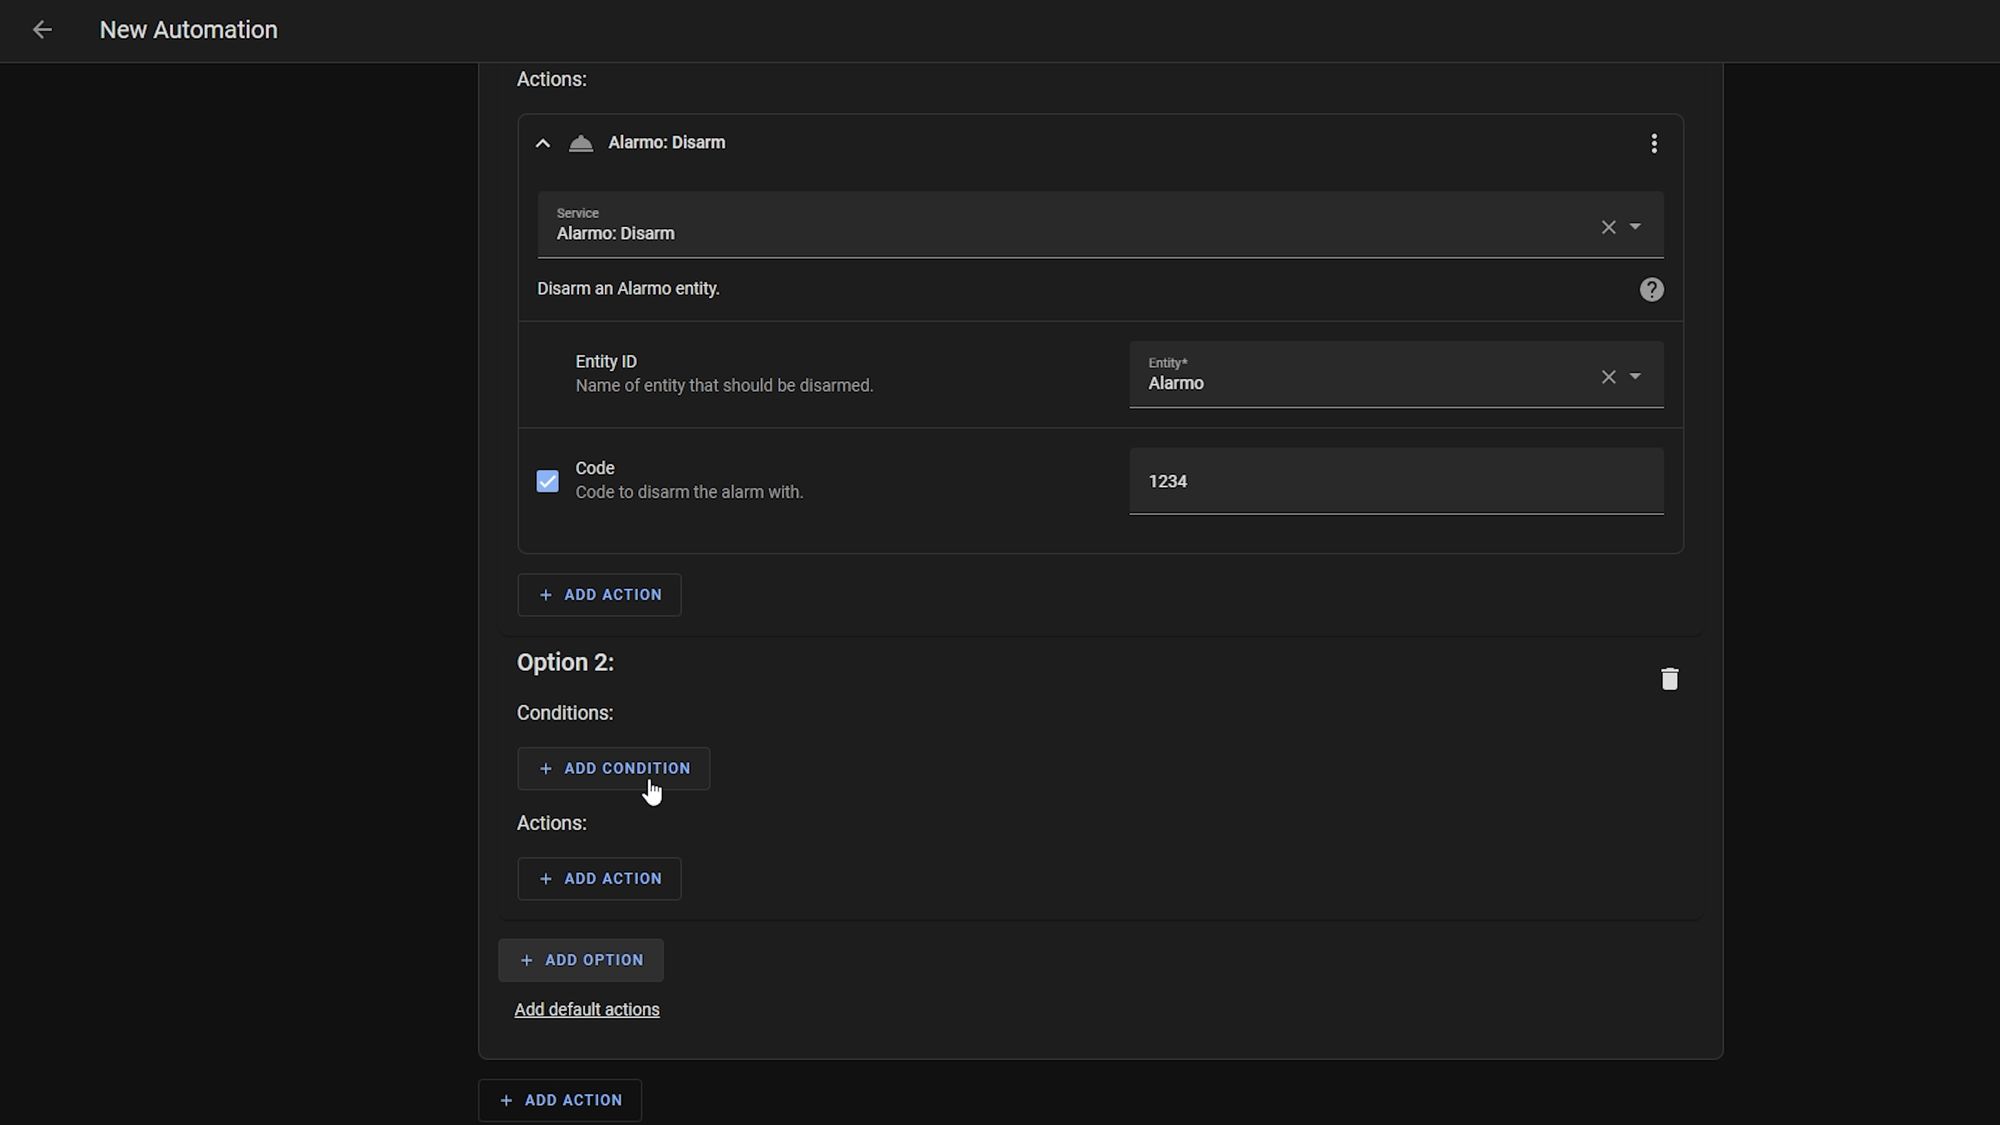
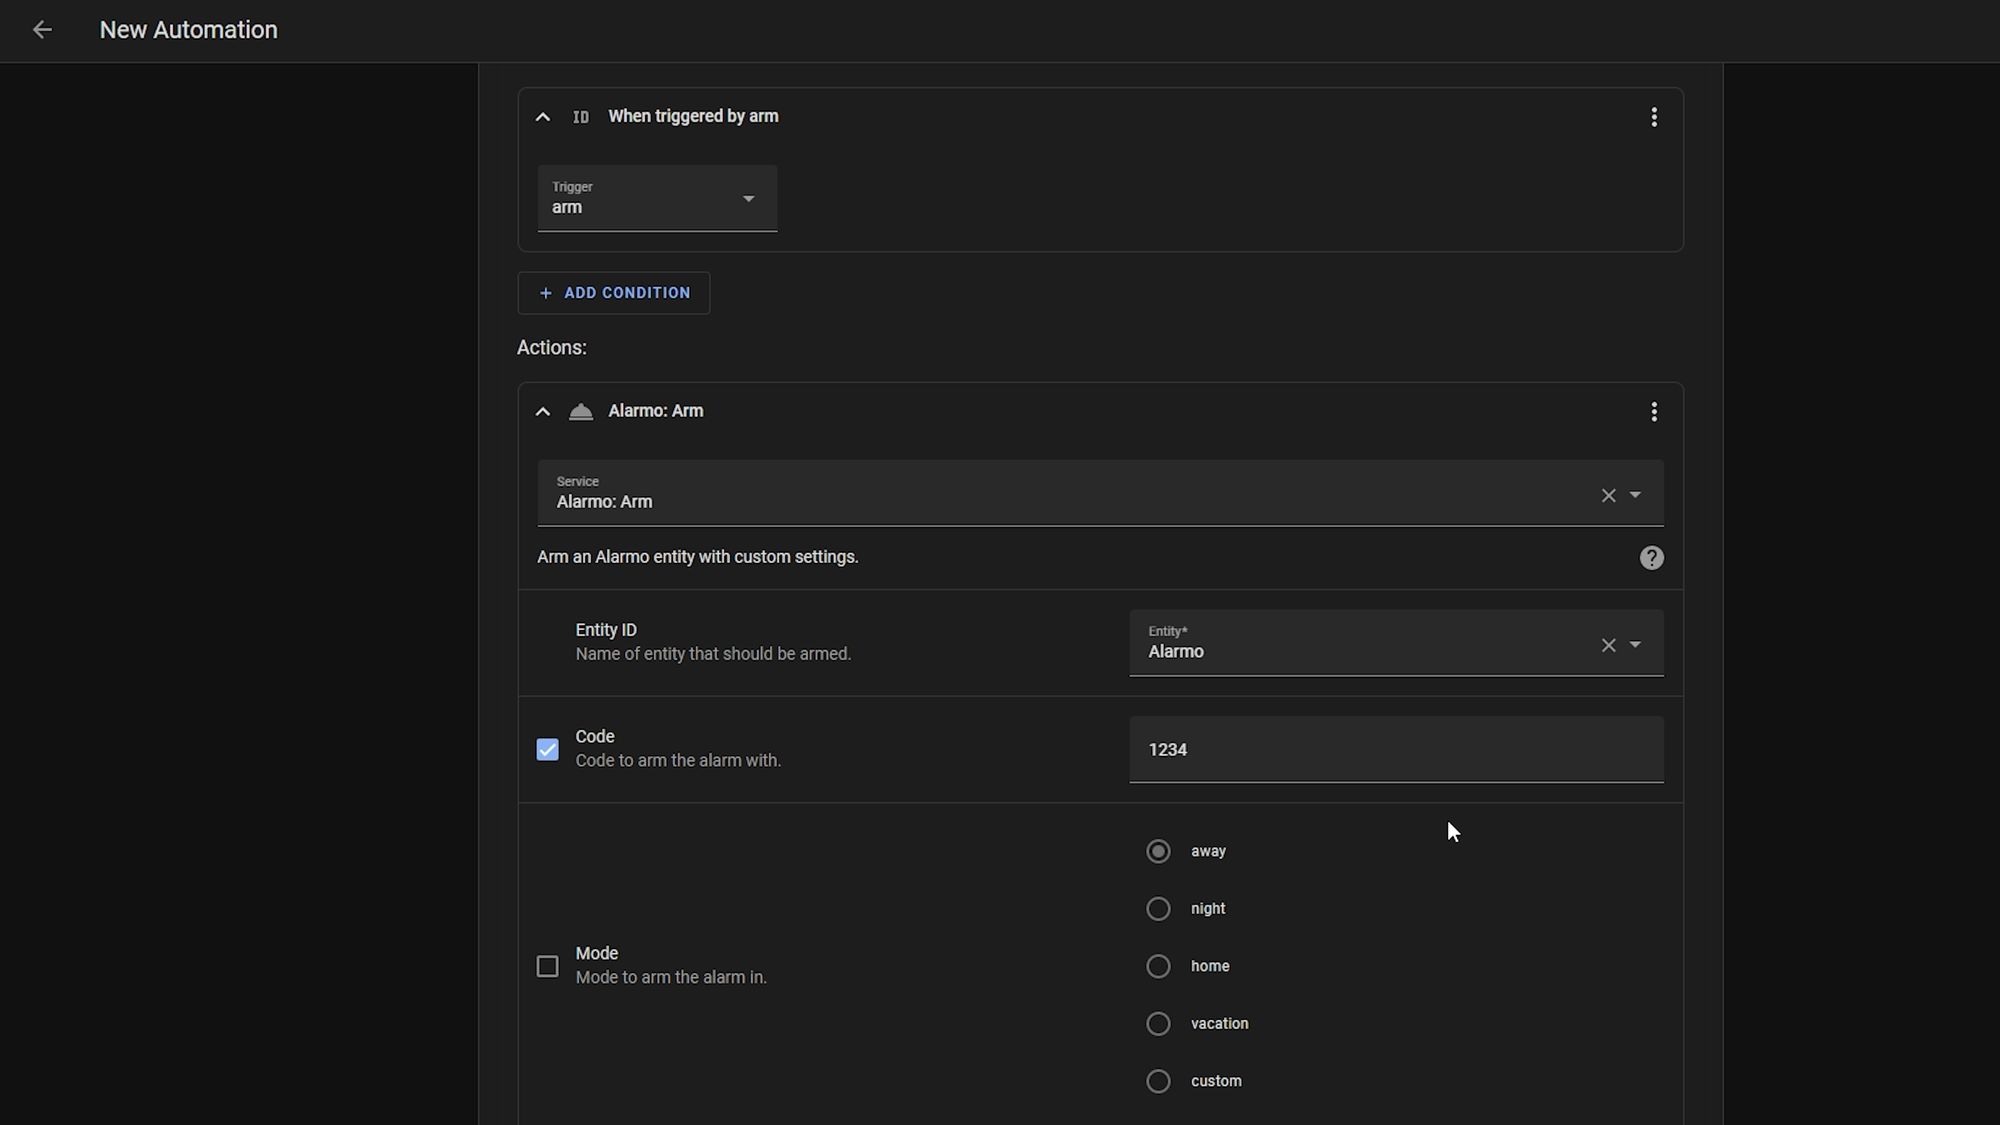
Then in the actions, select choose as the type from the dropdown. For option 1, add a condition and select triggered by. Select disarm as the trigger, and then for the action, select call service and select the Alarmo disarm service. Select alarmo as the entity id, and then enter your disarm code if you are required to enter a code to disarm - you may consider setting up a separate user and pin code just for NFC tags if you want to.
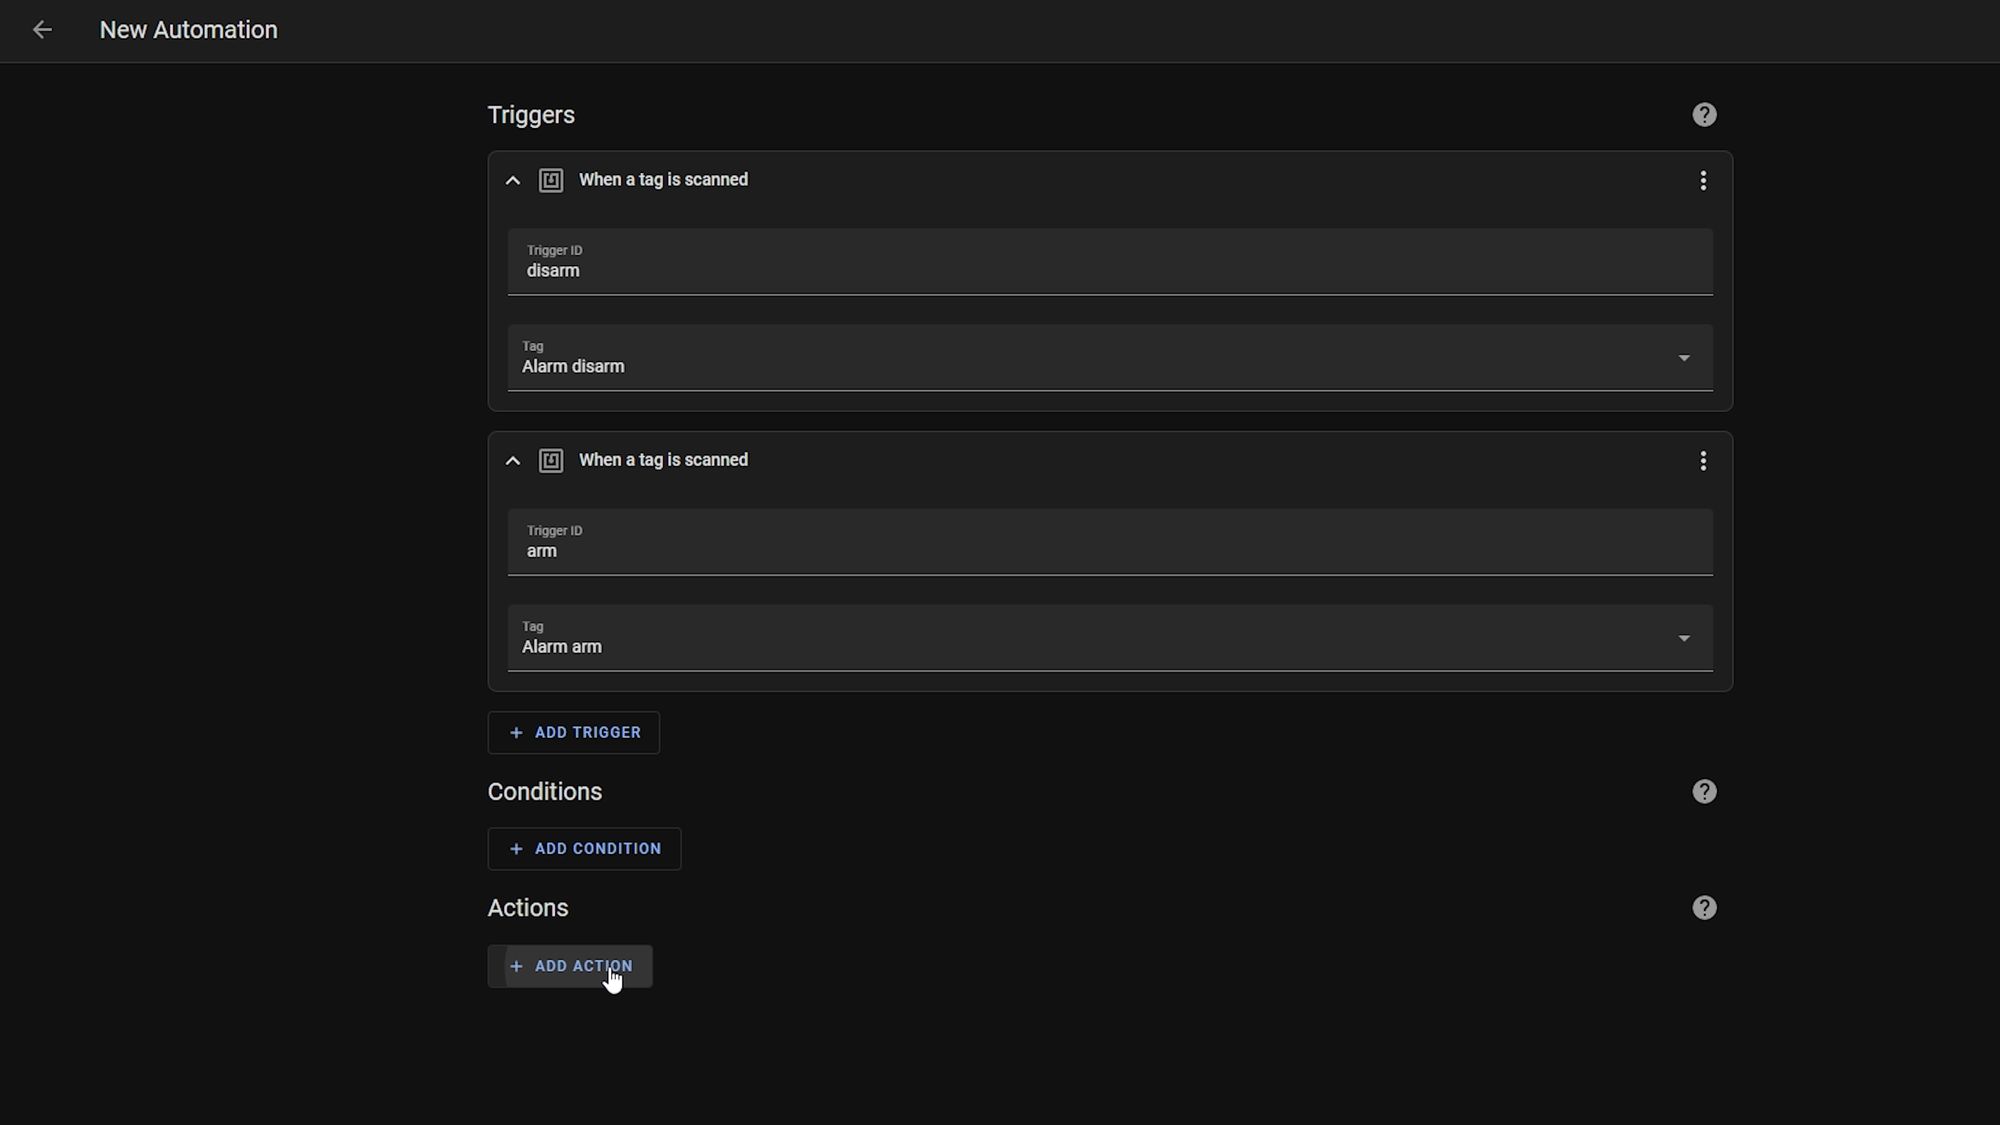
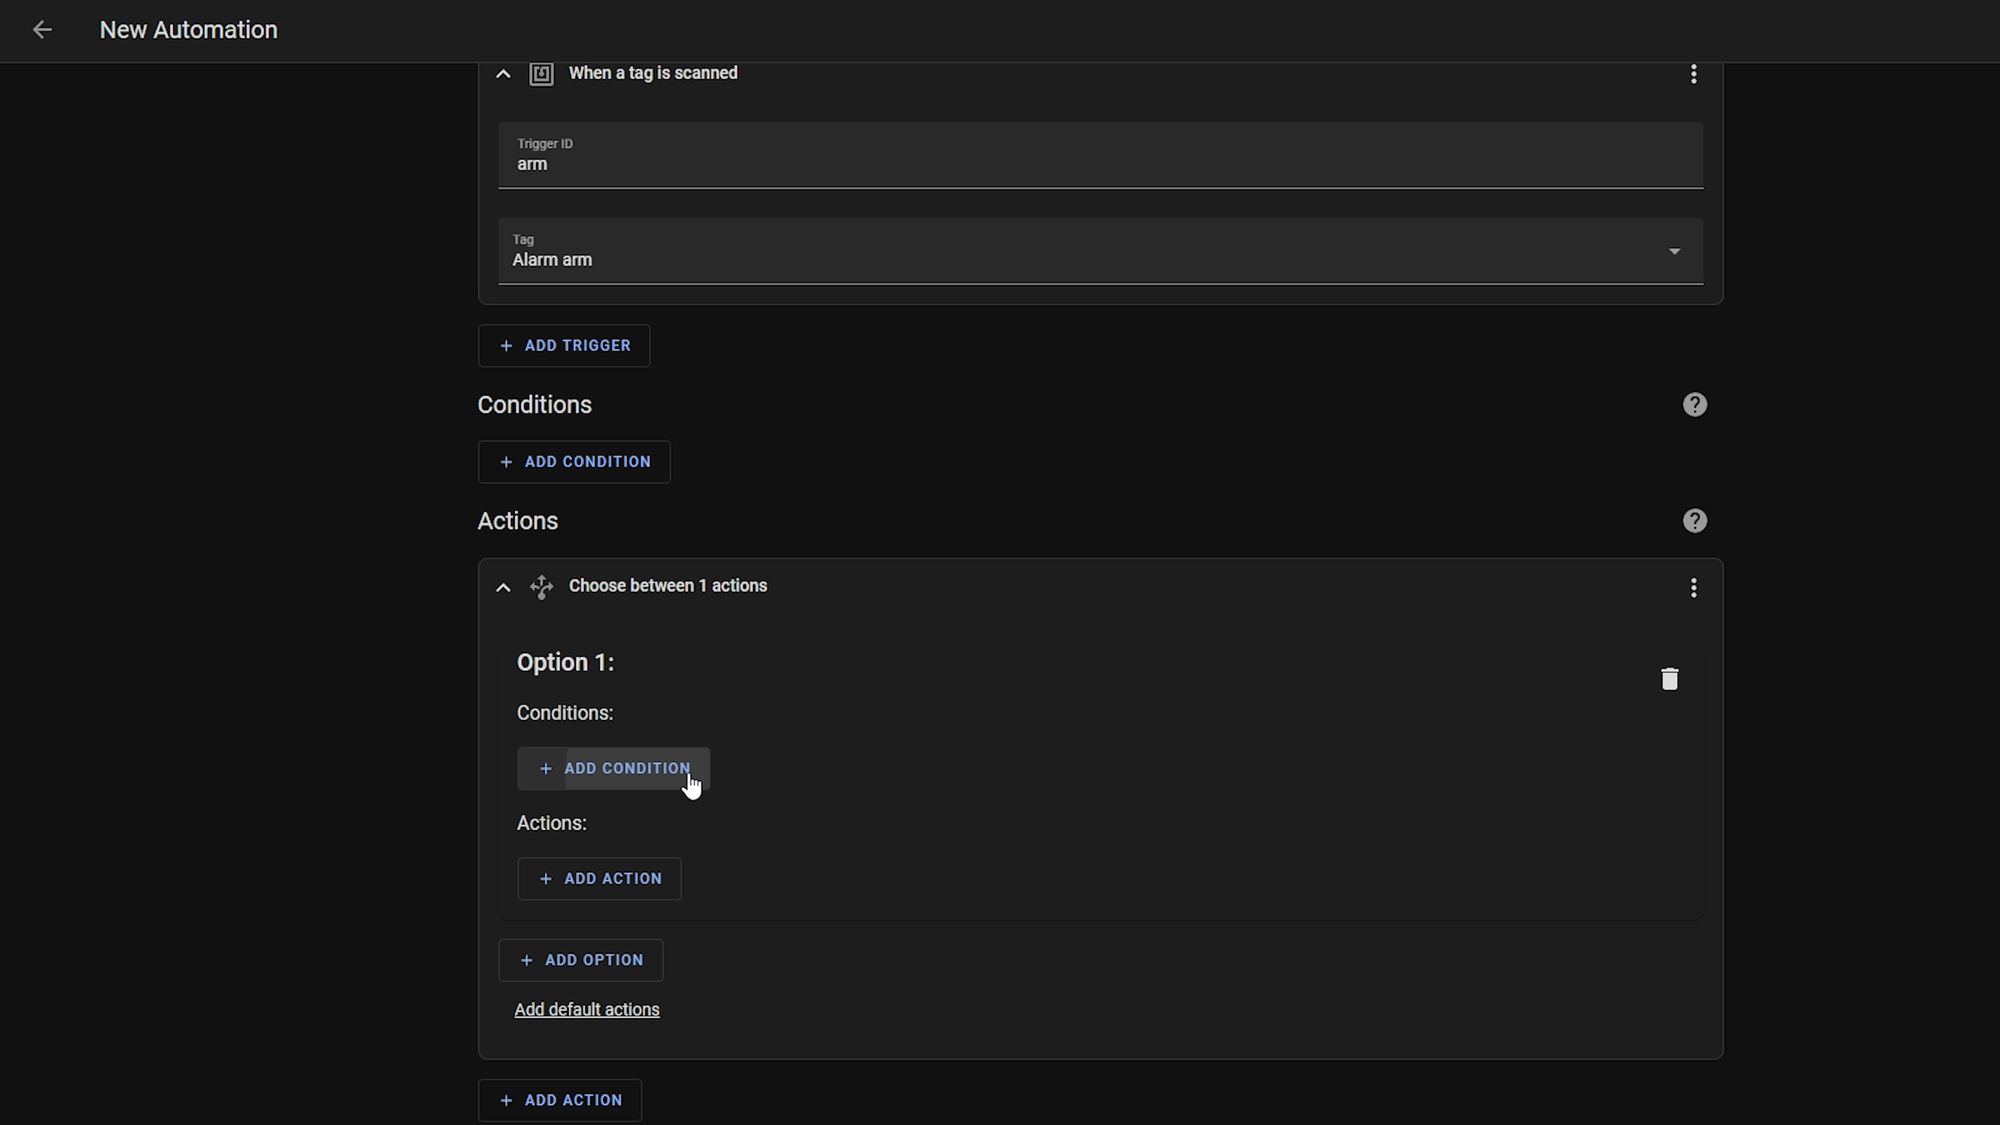
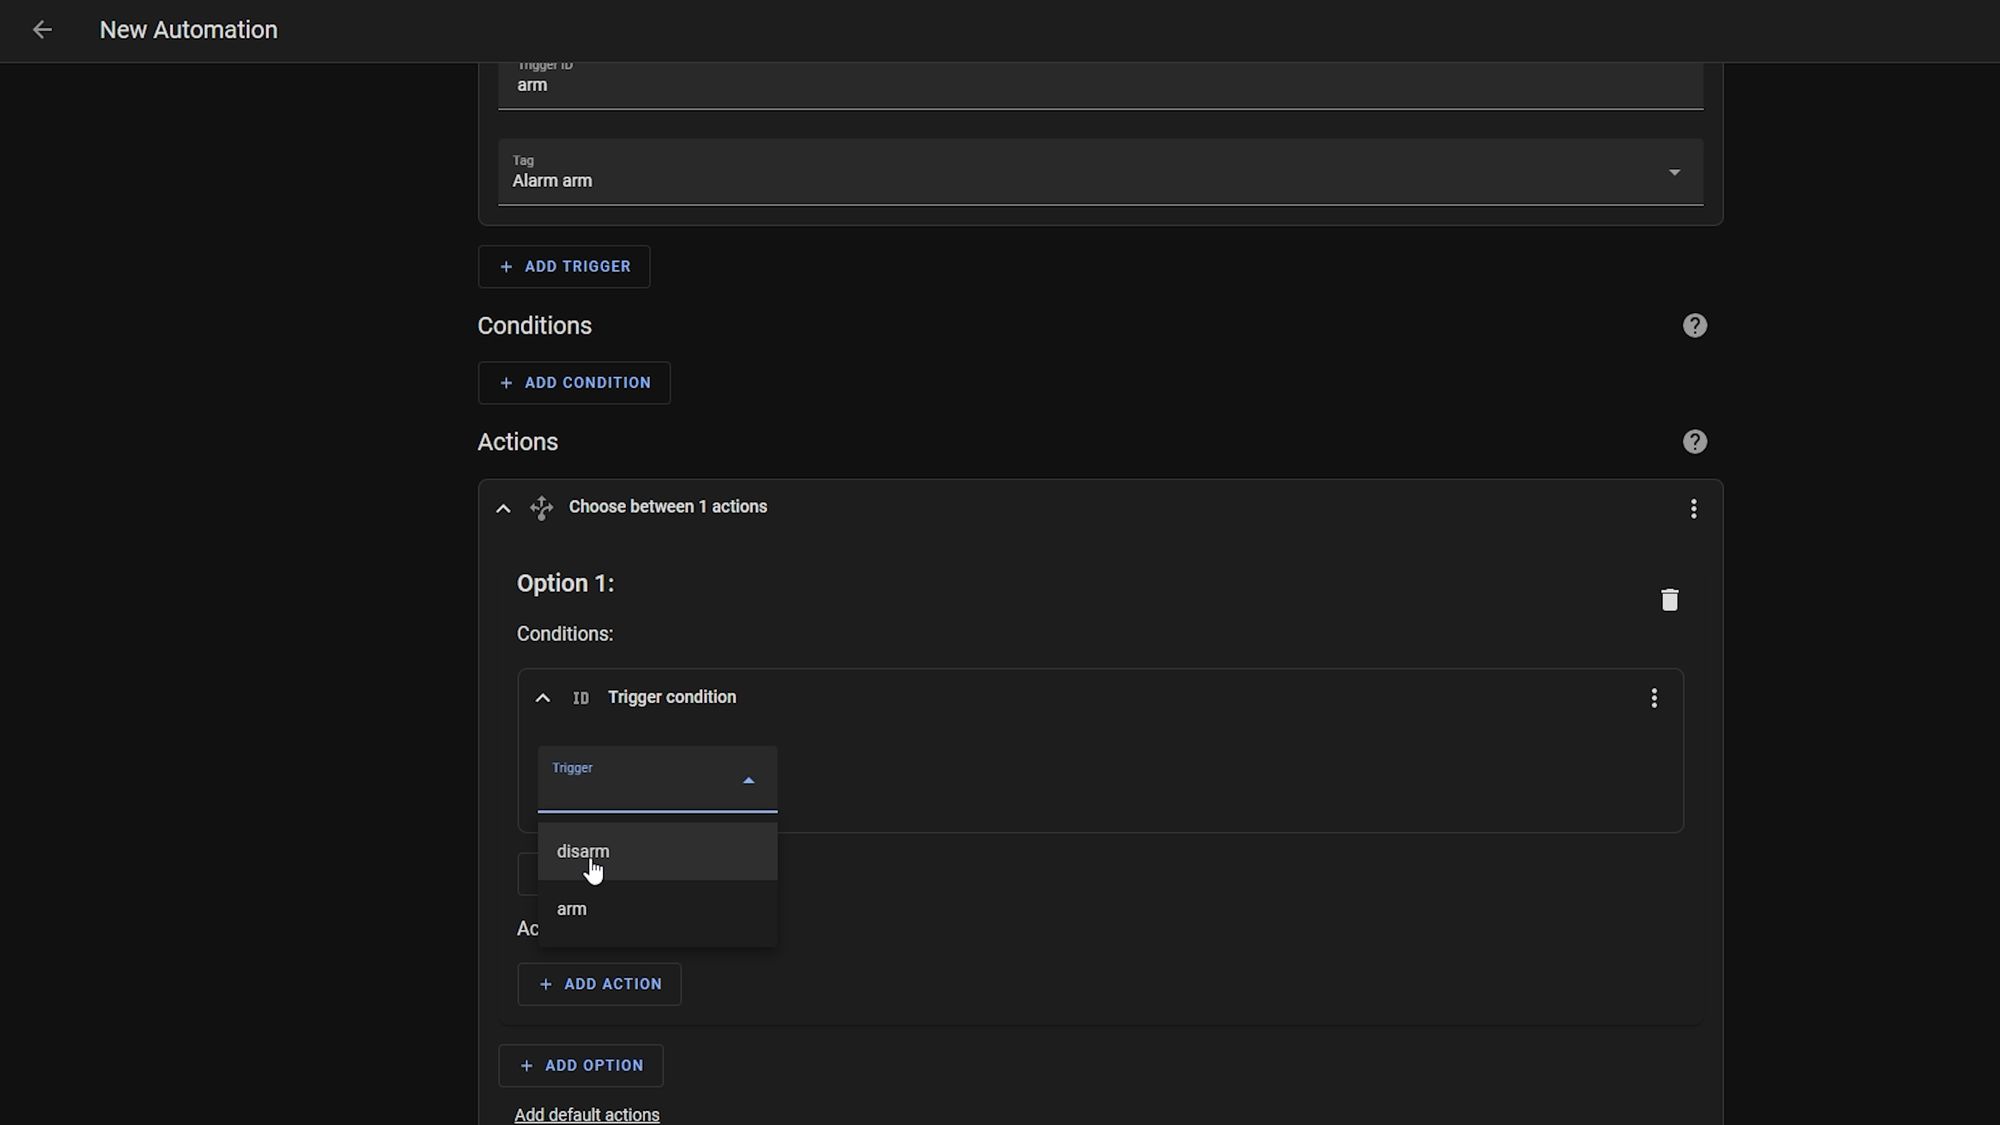
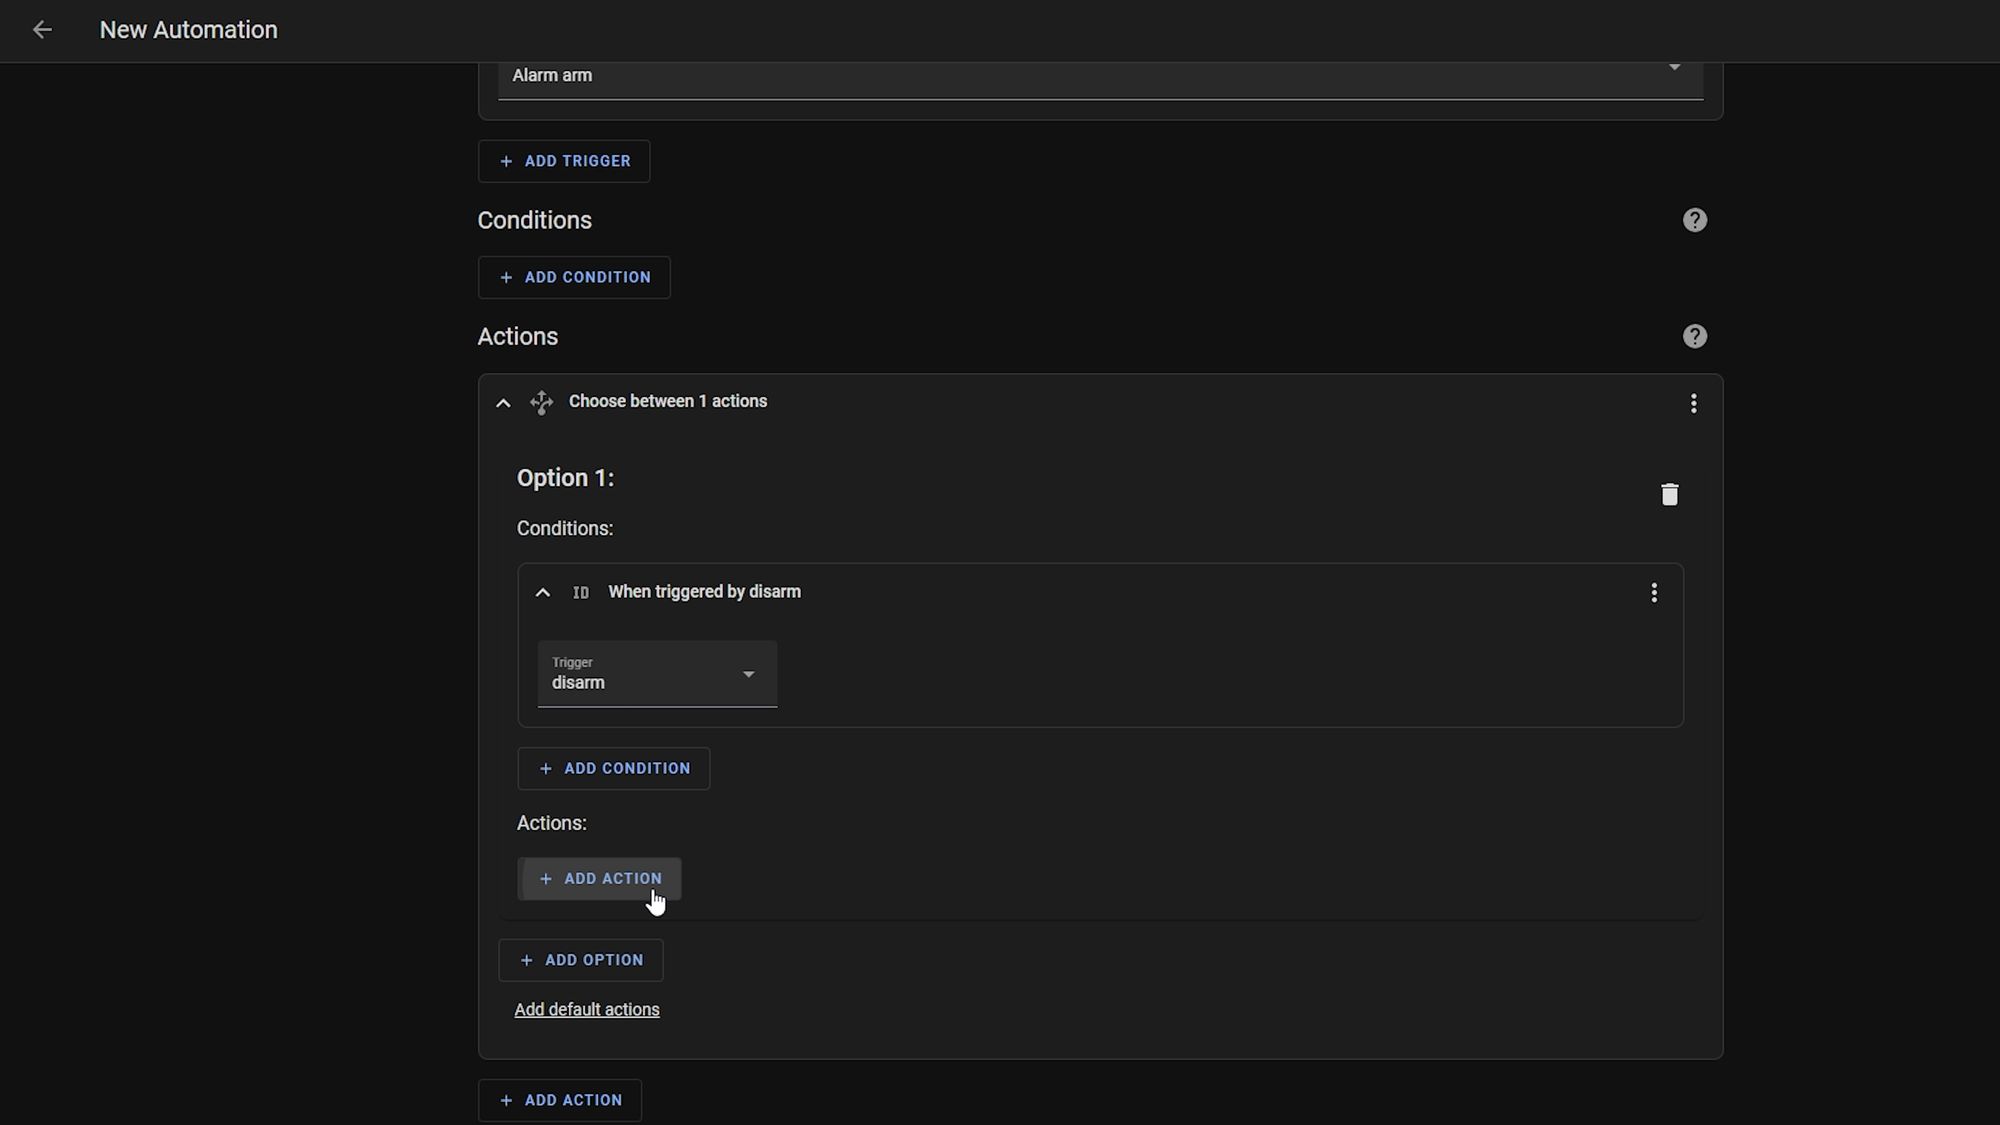

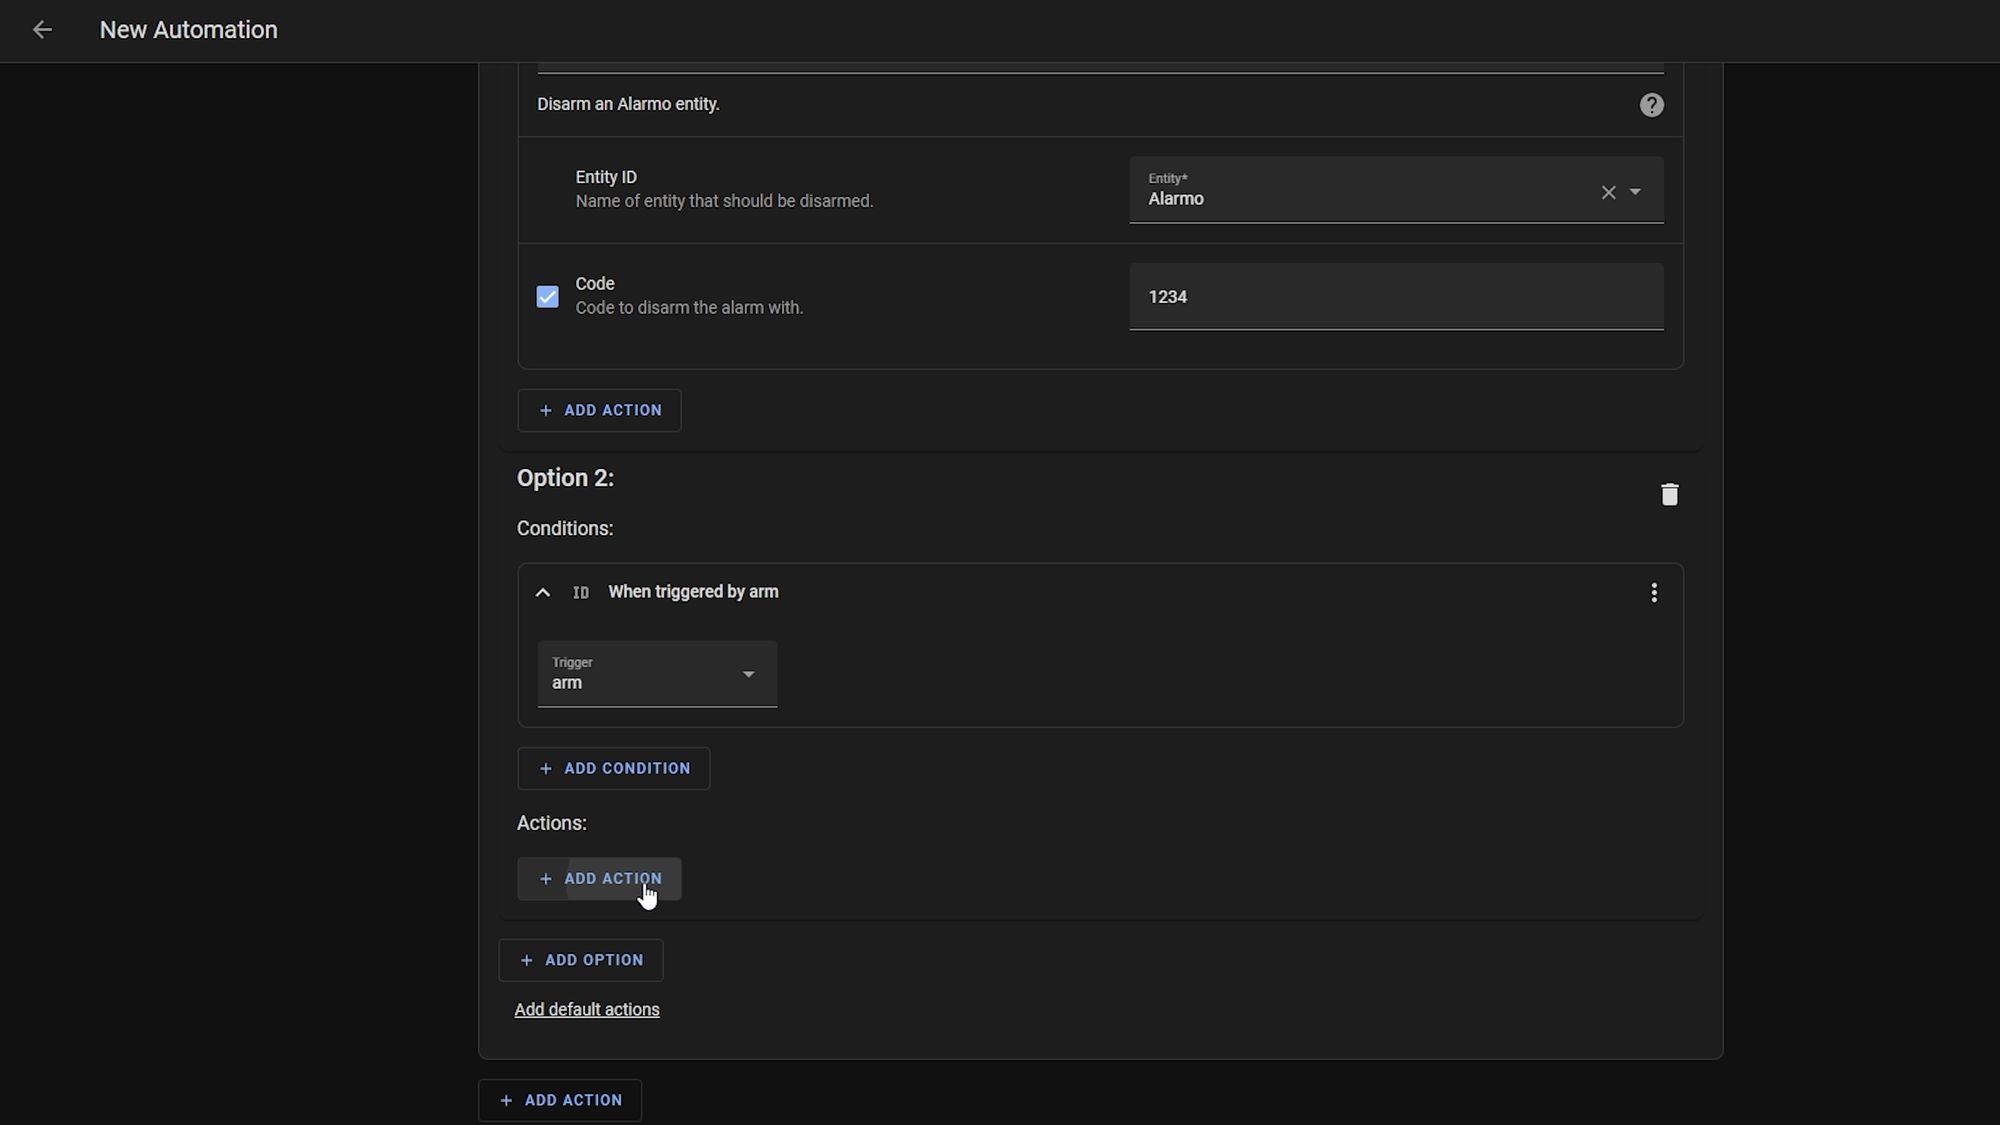
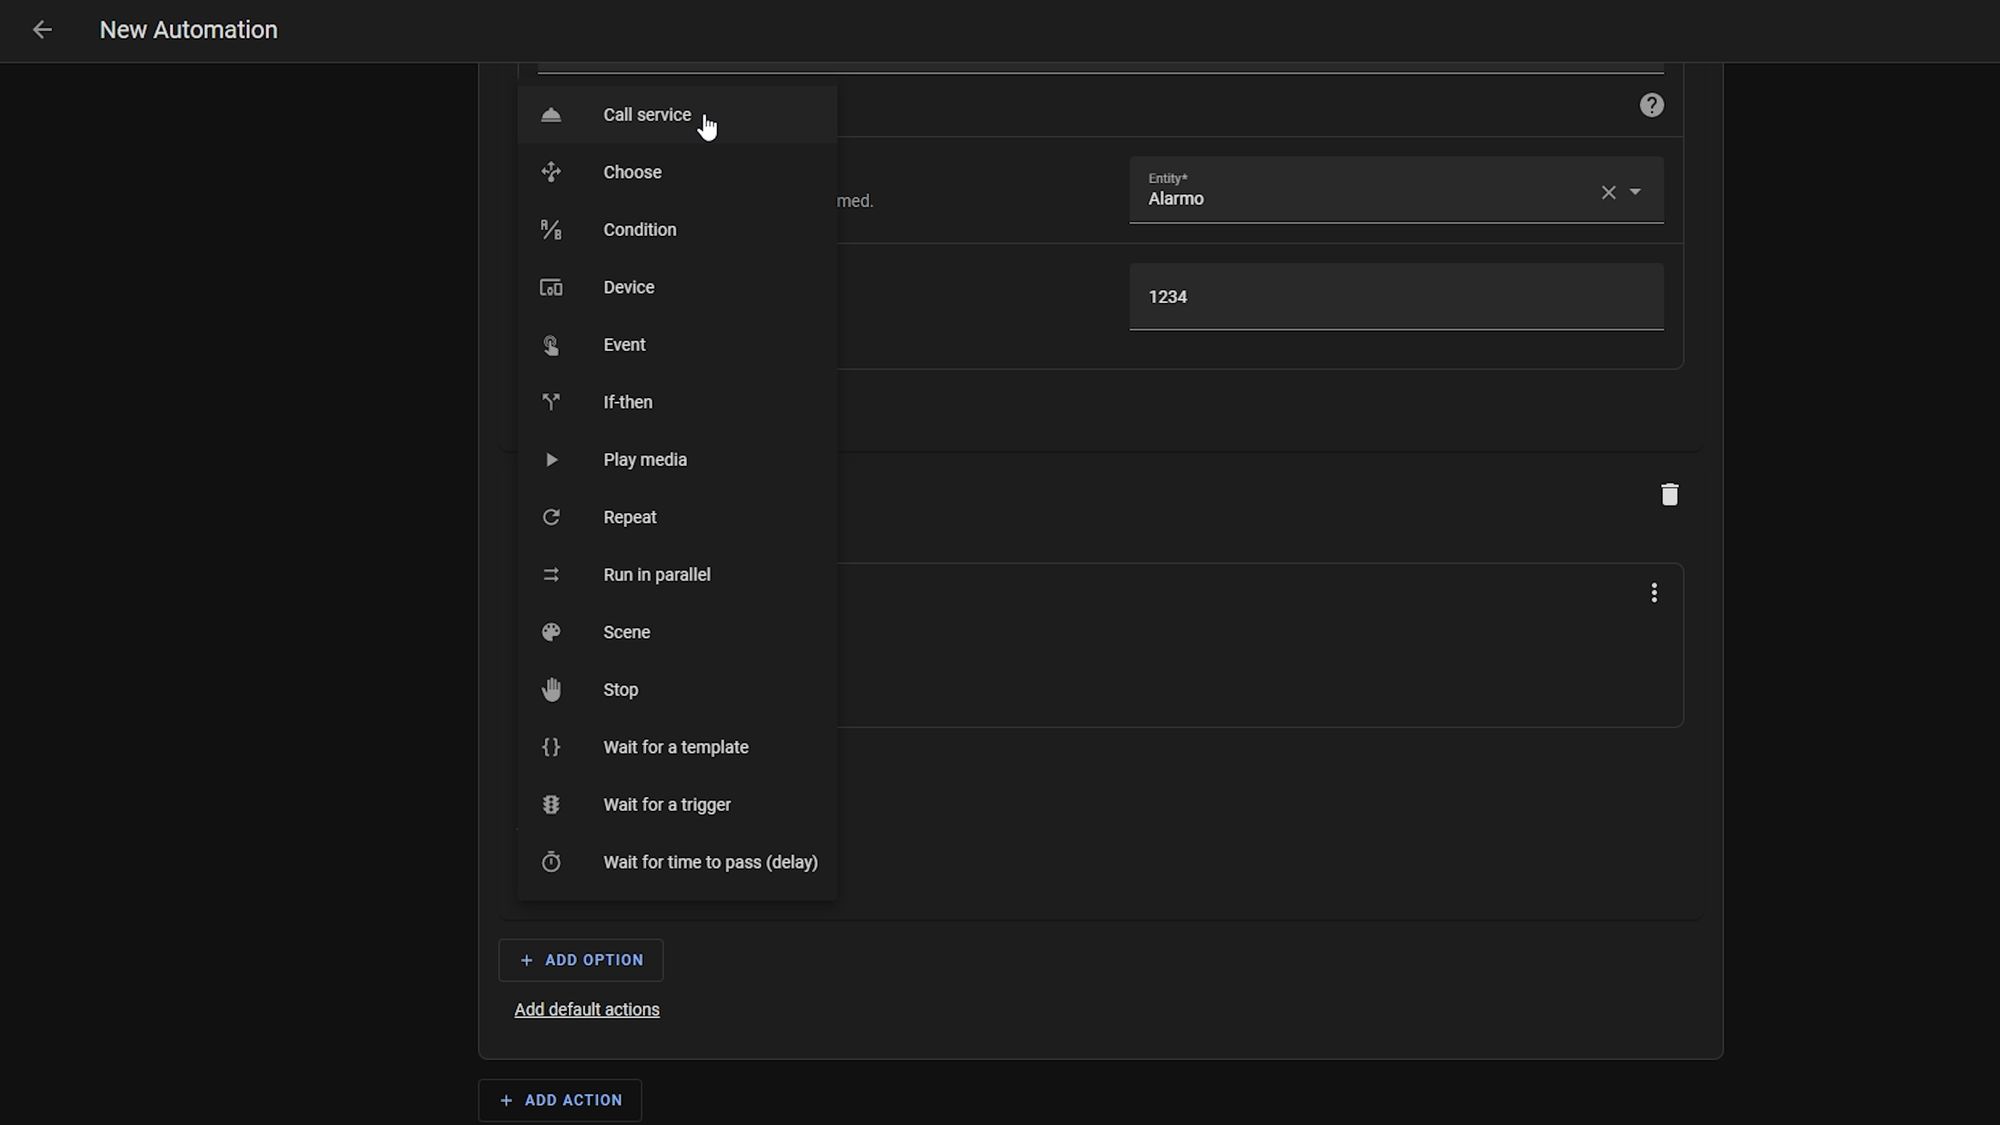
Then for the second option we pretty much do the exact same, except this time we add a triggered by condition and we select arm as the trigger ID, and for the action we select the Alarmo arm action. Select Alarmo as the entity id, enter a code if required and hit save.
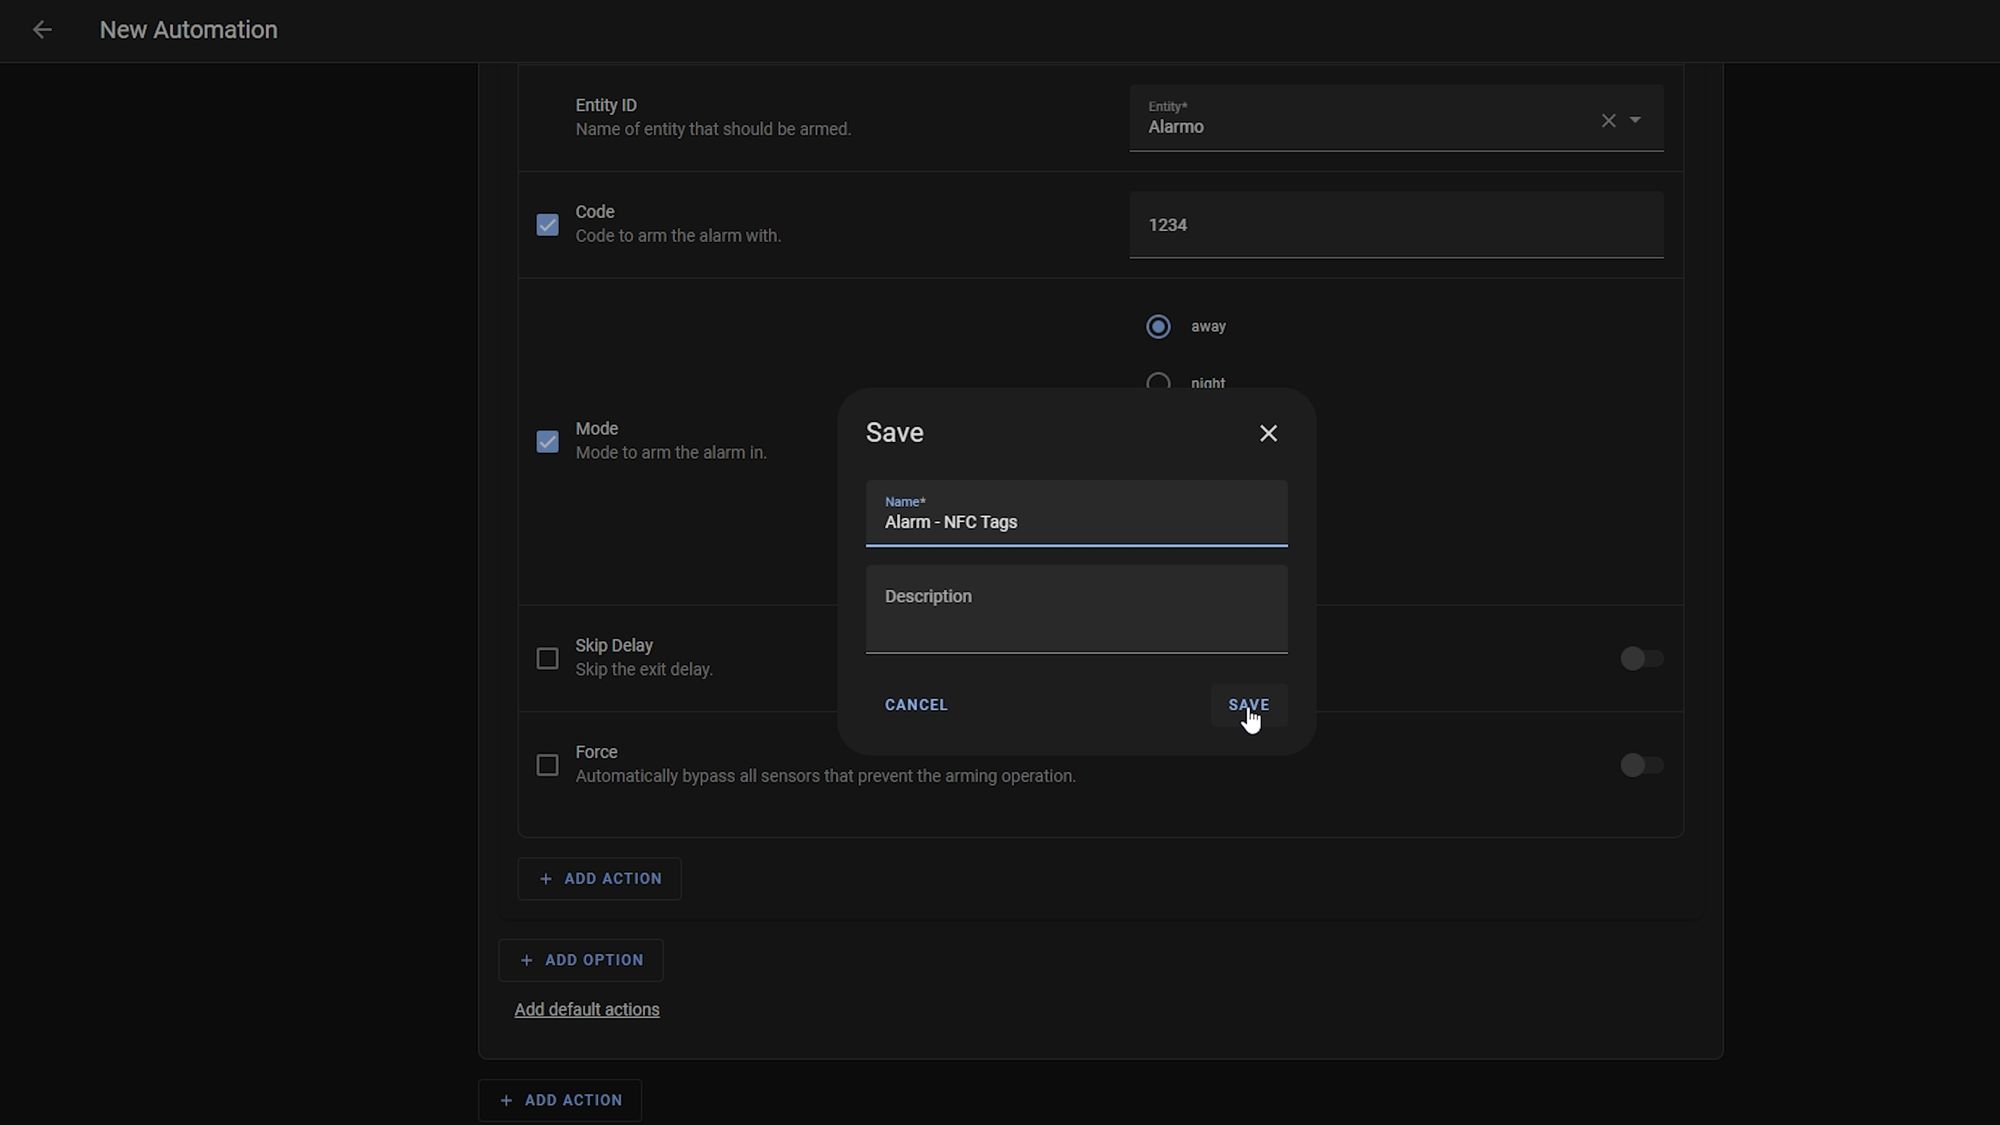
Now you can test out scanning both NFC tags and make sure the alarm sets and disarms as expected and that's you done!
That's It!
There we go, that is 4 advanced automations you can create to take your DIY alarm system to the next level! With multi user support for keypads, a silent panic alarm, a panic button and finally arm and disarm actions with cheap NFC tags - these are pretty much all of the things I do with my own alarm system and now you can hopefully implement these into your alarm system too. There are probably quite a few I haven't even thought of yet but I do hope you found this useful!
Until next time...